

ShakyCraftsman
-
Posts
351 -
Joined
-
Last visited
Content Type
Profiles
Forums
Events
Gallery
Posts posted by ShakyCraftsman
-
-
Dark orange frame, wheel centers. Gray/blue engine and gunmetal/black transmission. Orange with black stripes.
Ron G
-
-
Hey all
I did a little more work on the Superliner.
 I got the frame primed with flat black.
this view shows the front air lines.
hey Force, this view shows the air line guards I made to protect the lines runnig along the rear ends. This was the best I could come up with.
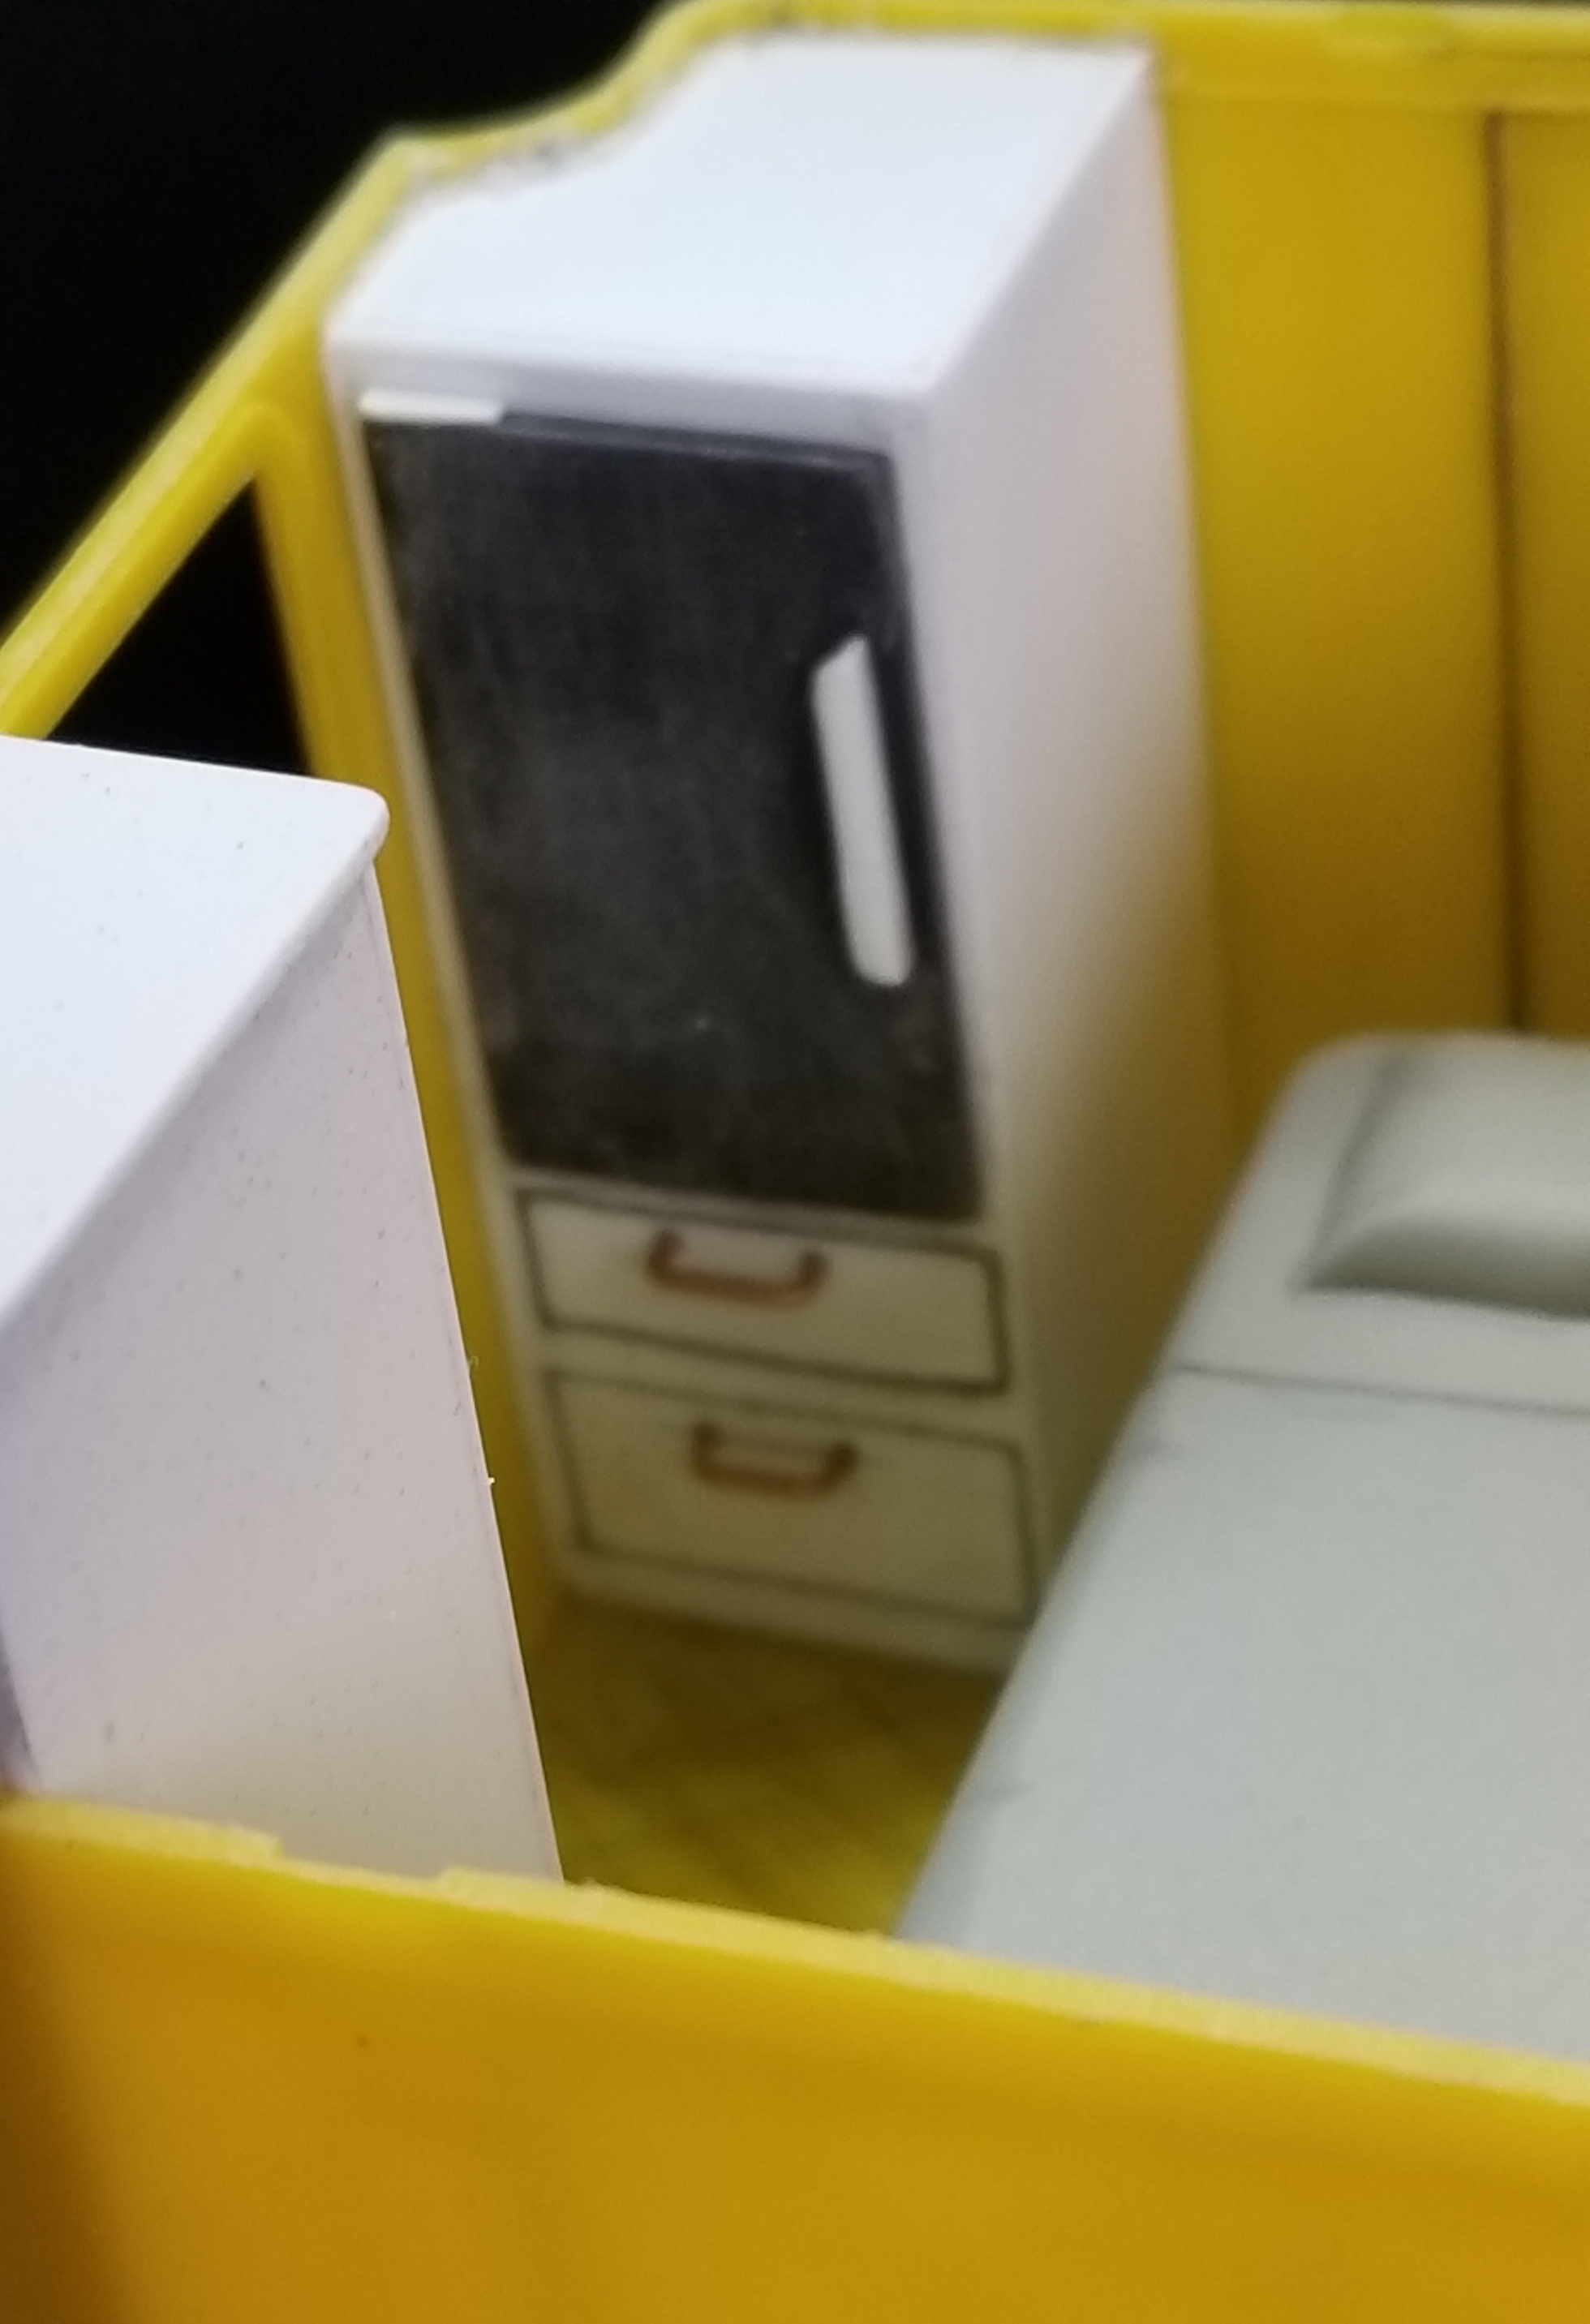
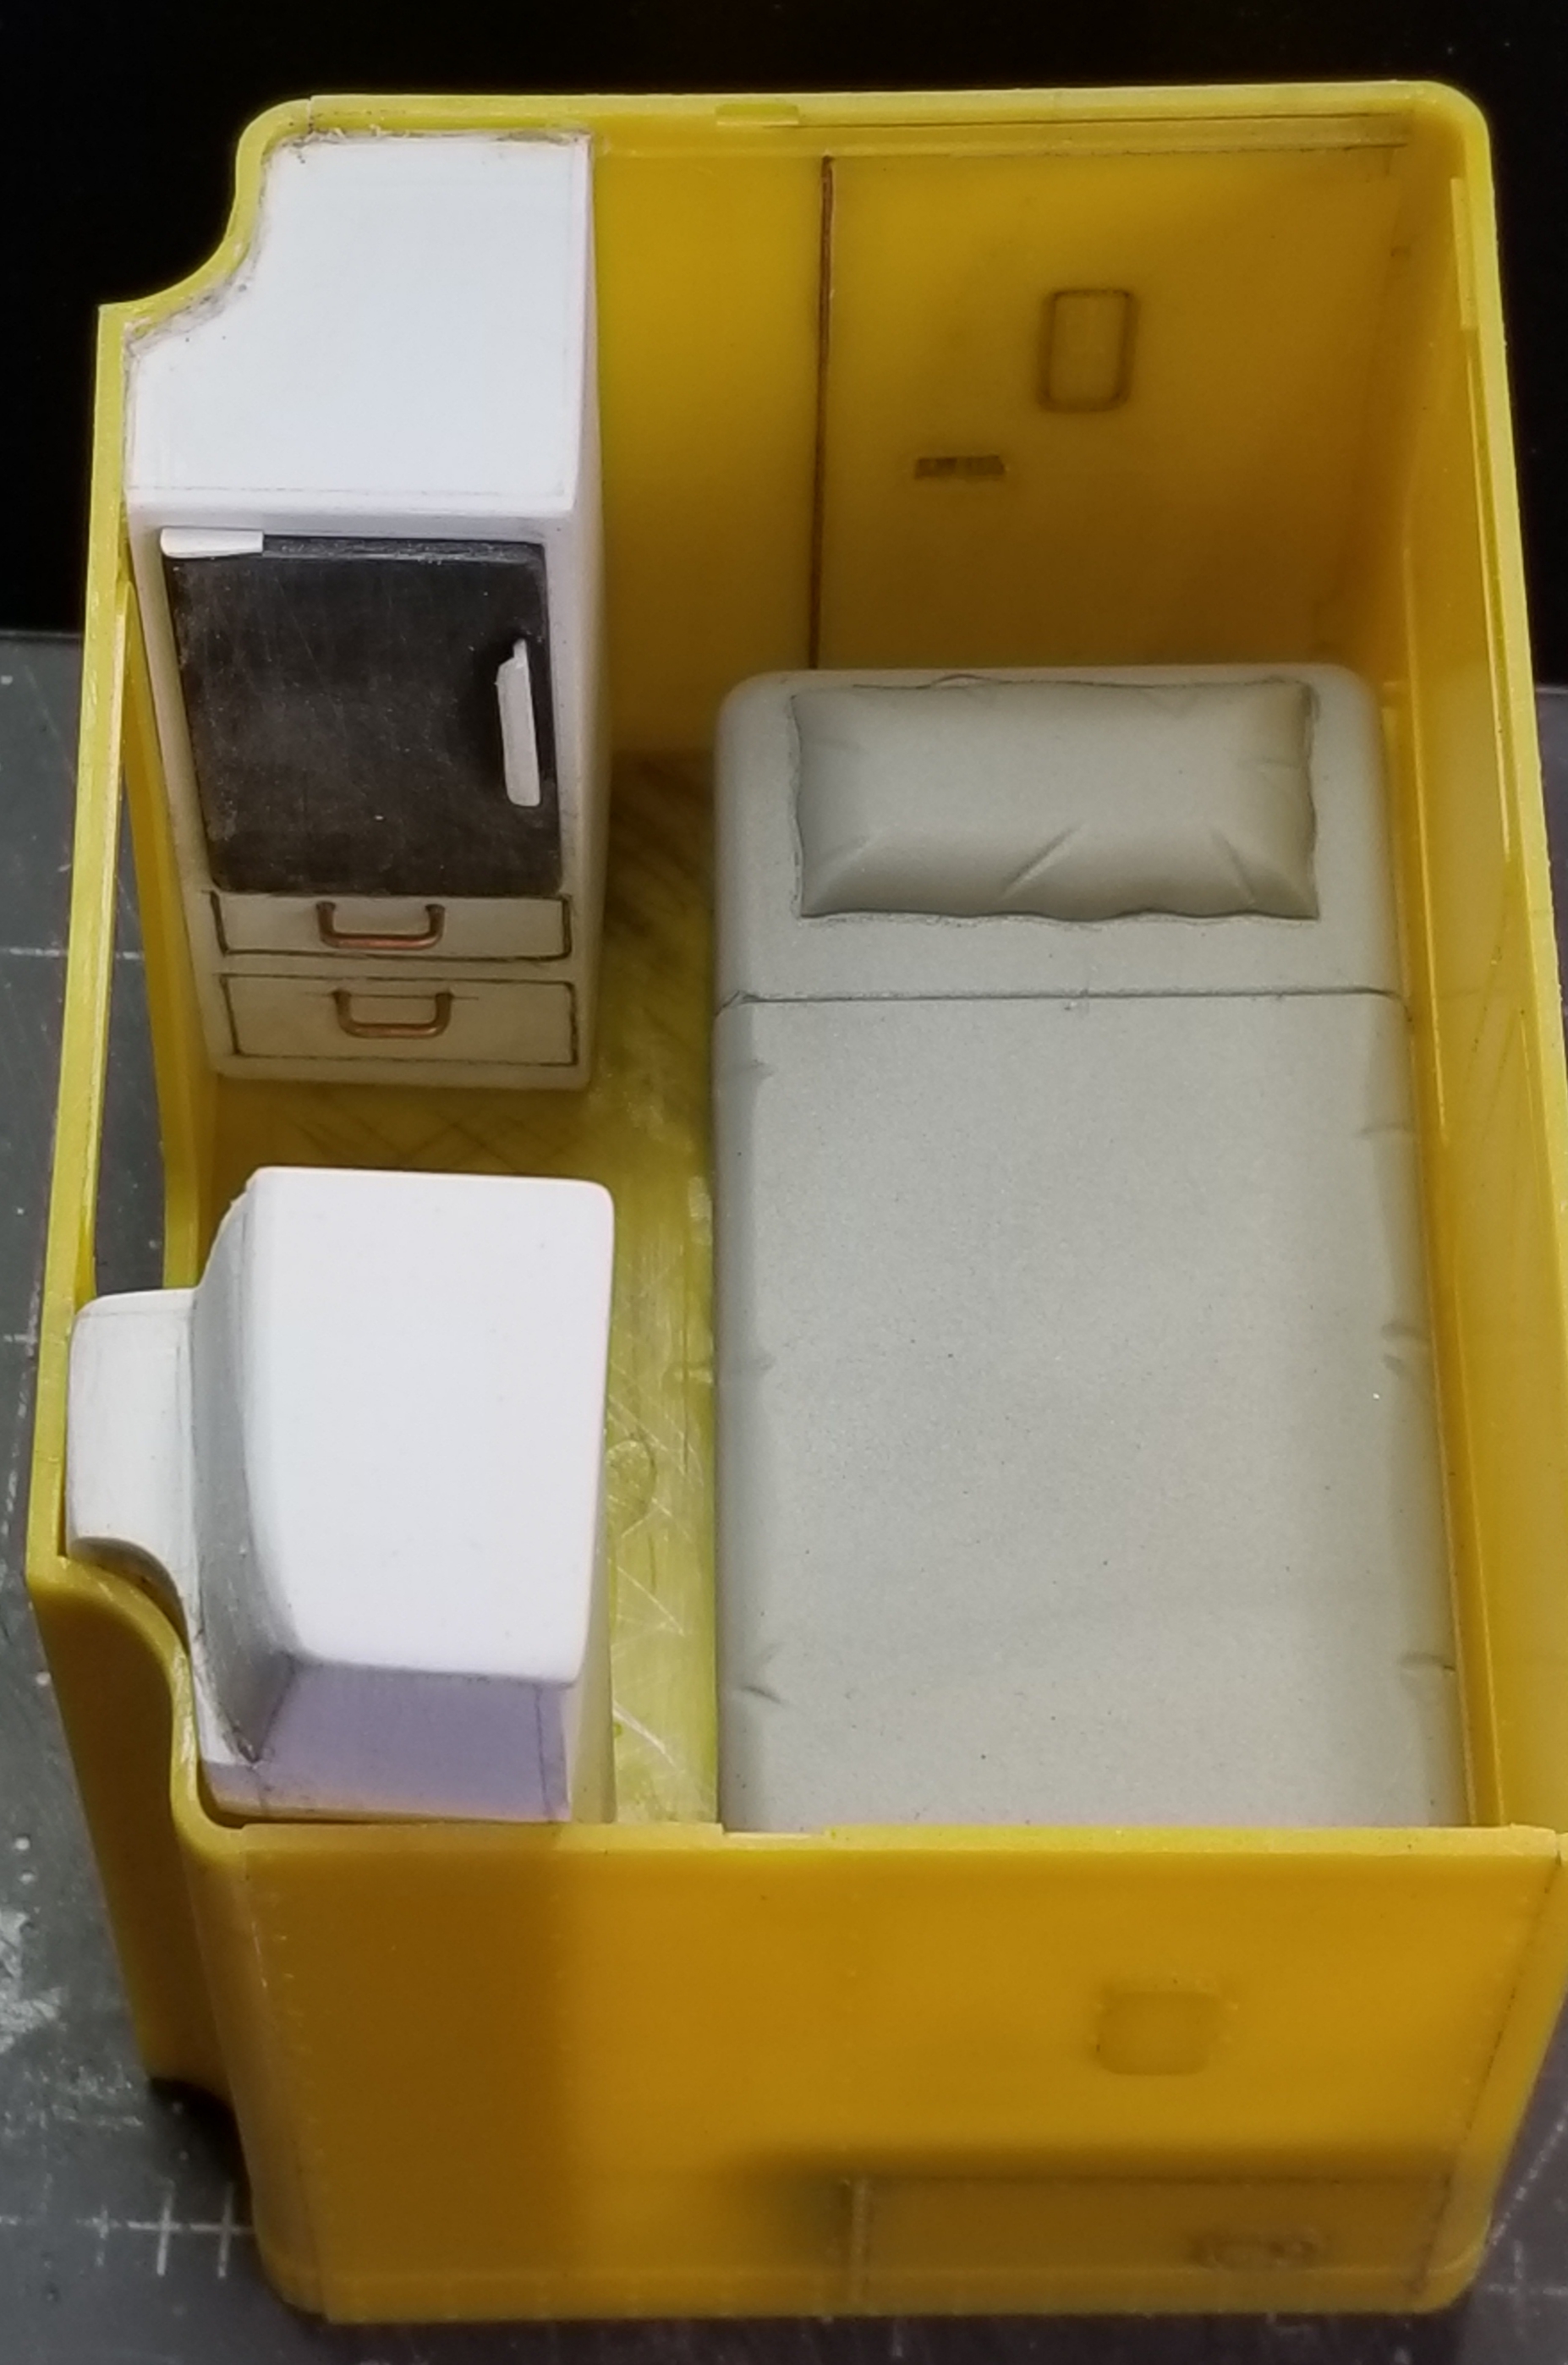
this view shows the refrigerator and two drawers I added opposite of the closet.
another view of the refrigerator cabinet.
view from the top.
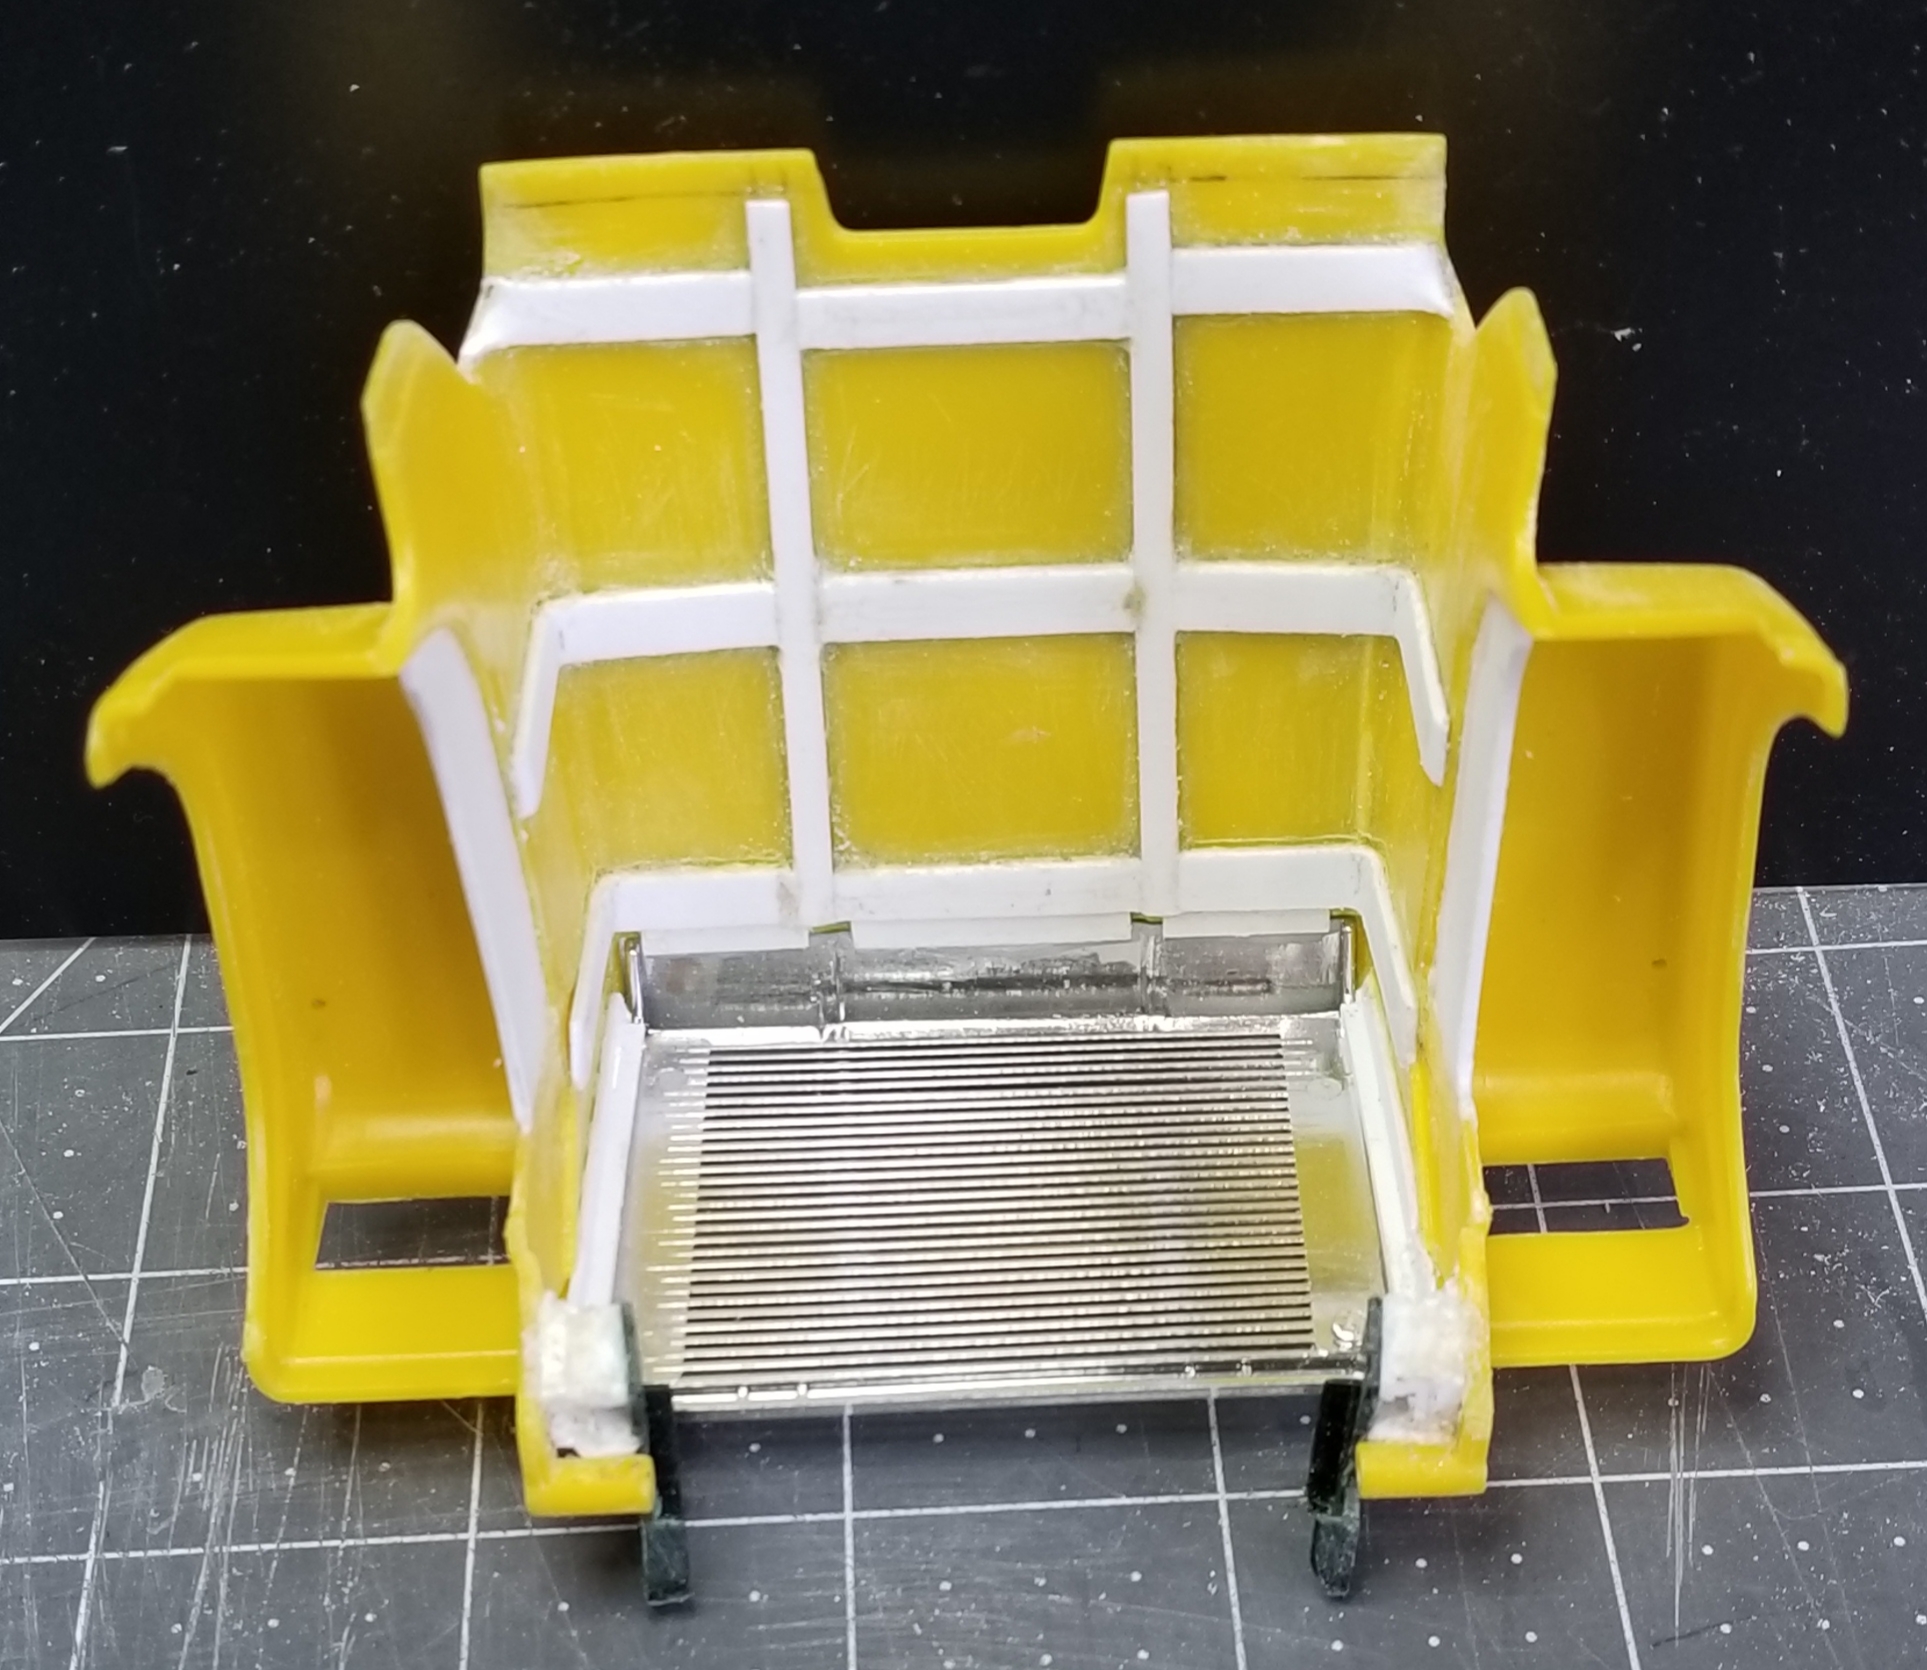
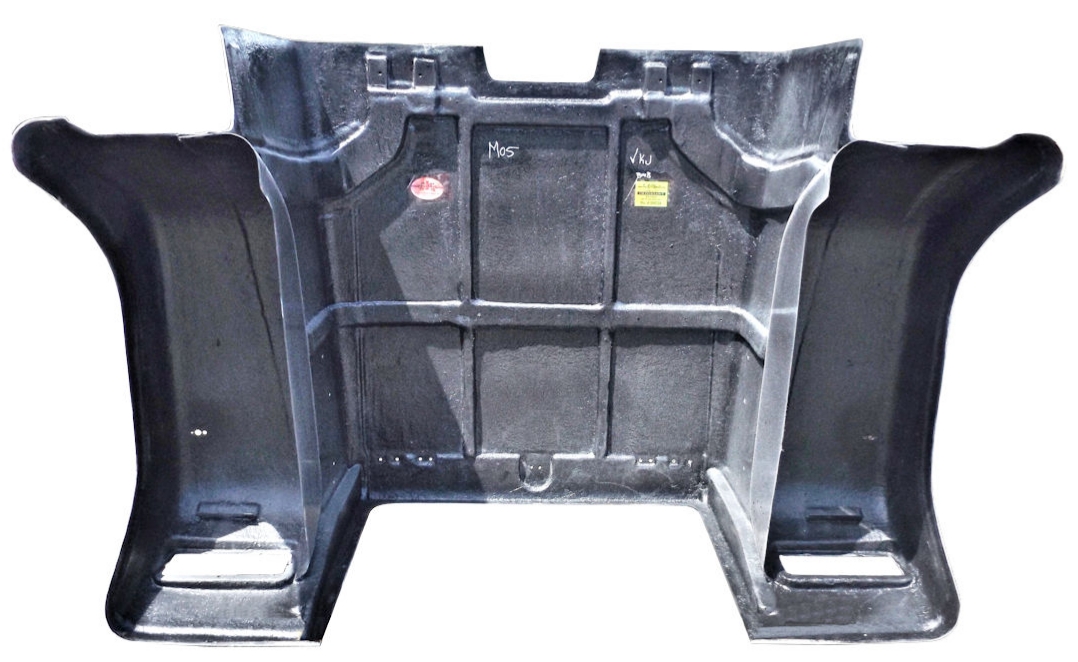
I added reinforcements to the hood.
this view shows the hood that I copied.
I got the frame primed with flat black.
this view shows the front air lines.
hey Force, this view shows the air line guards I made to protect the lines runnig along the rear ends. This was the best I could come up with.
this view shows the refrigerator and two drawers I added opposite of the closet.
another view of the refrigerator cabinet.
view from the top.
I added reinforcements to the hood.
this view shows the hood that I copied.
Ron G l
-
-
5 hours ago, Force said:
Nice progress.
One thing tho', I don't think your routing of the brake lines for the rear brakes is so good going under the axles, above and behind yes but not under where they could easily snag on something, I would let them go inside the frame rail and go down to the brake chambers from there.Hey Force
I thought of that right after I finished them, I will look into rerouting them.
Ron G
-
-
-
Hey guys
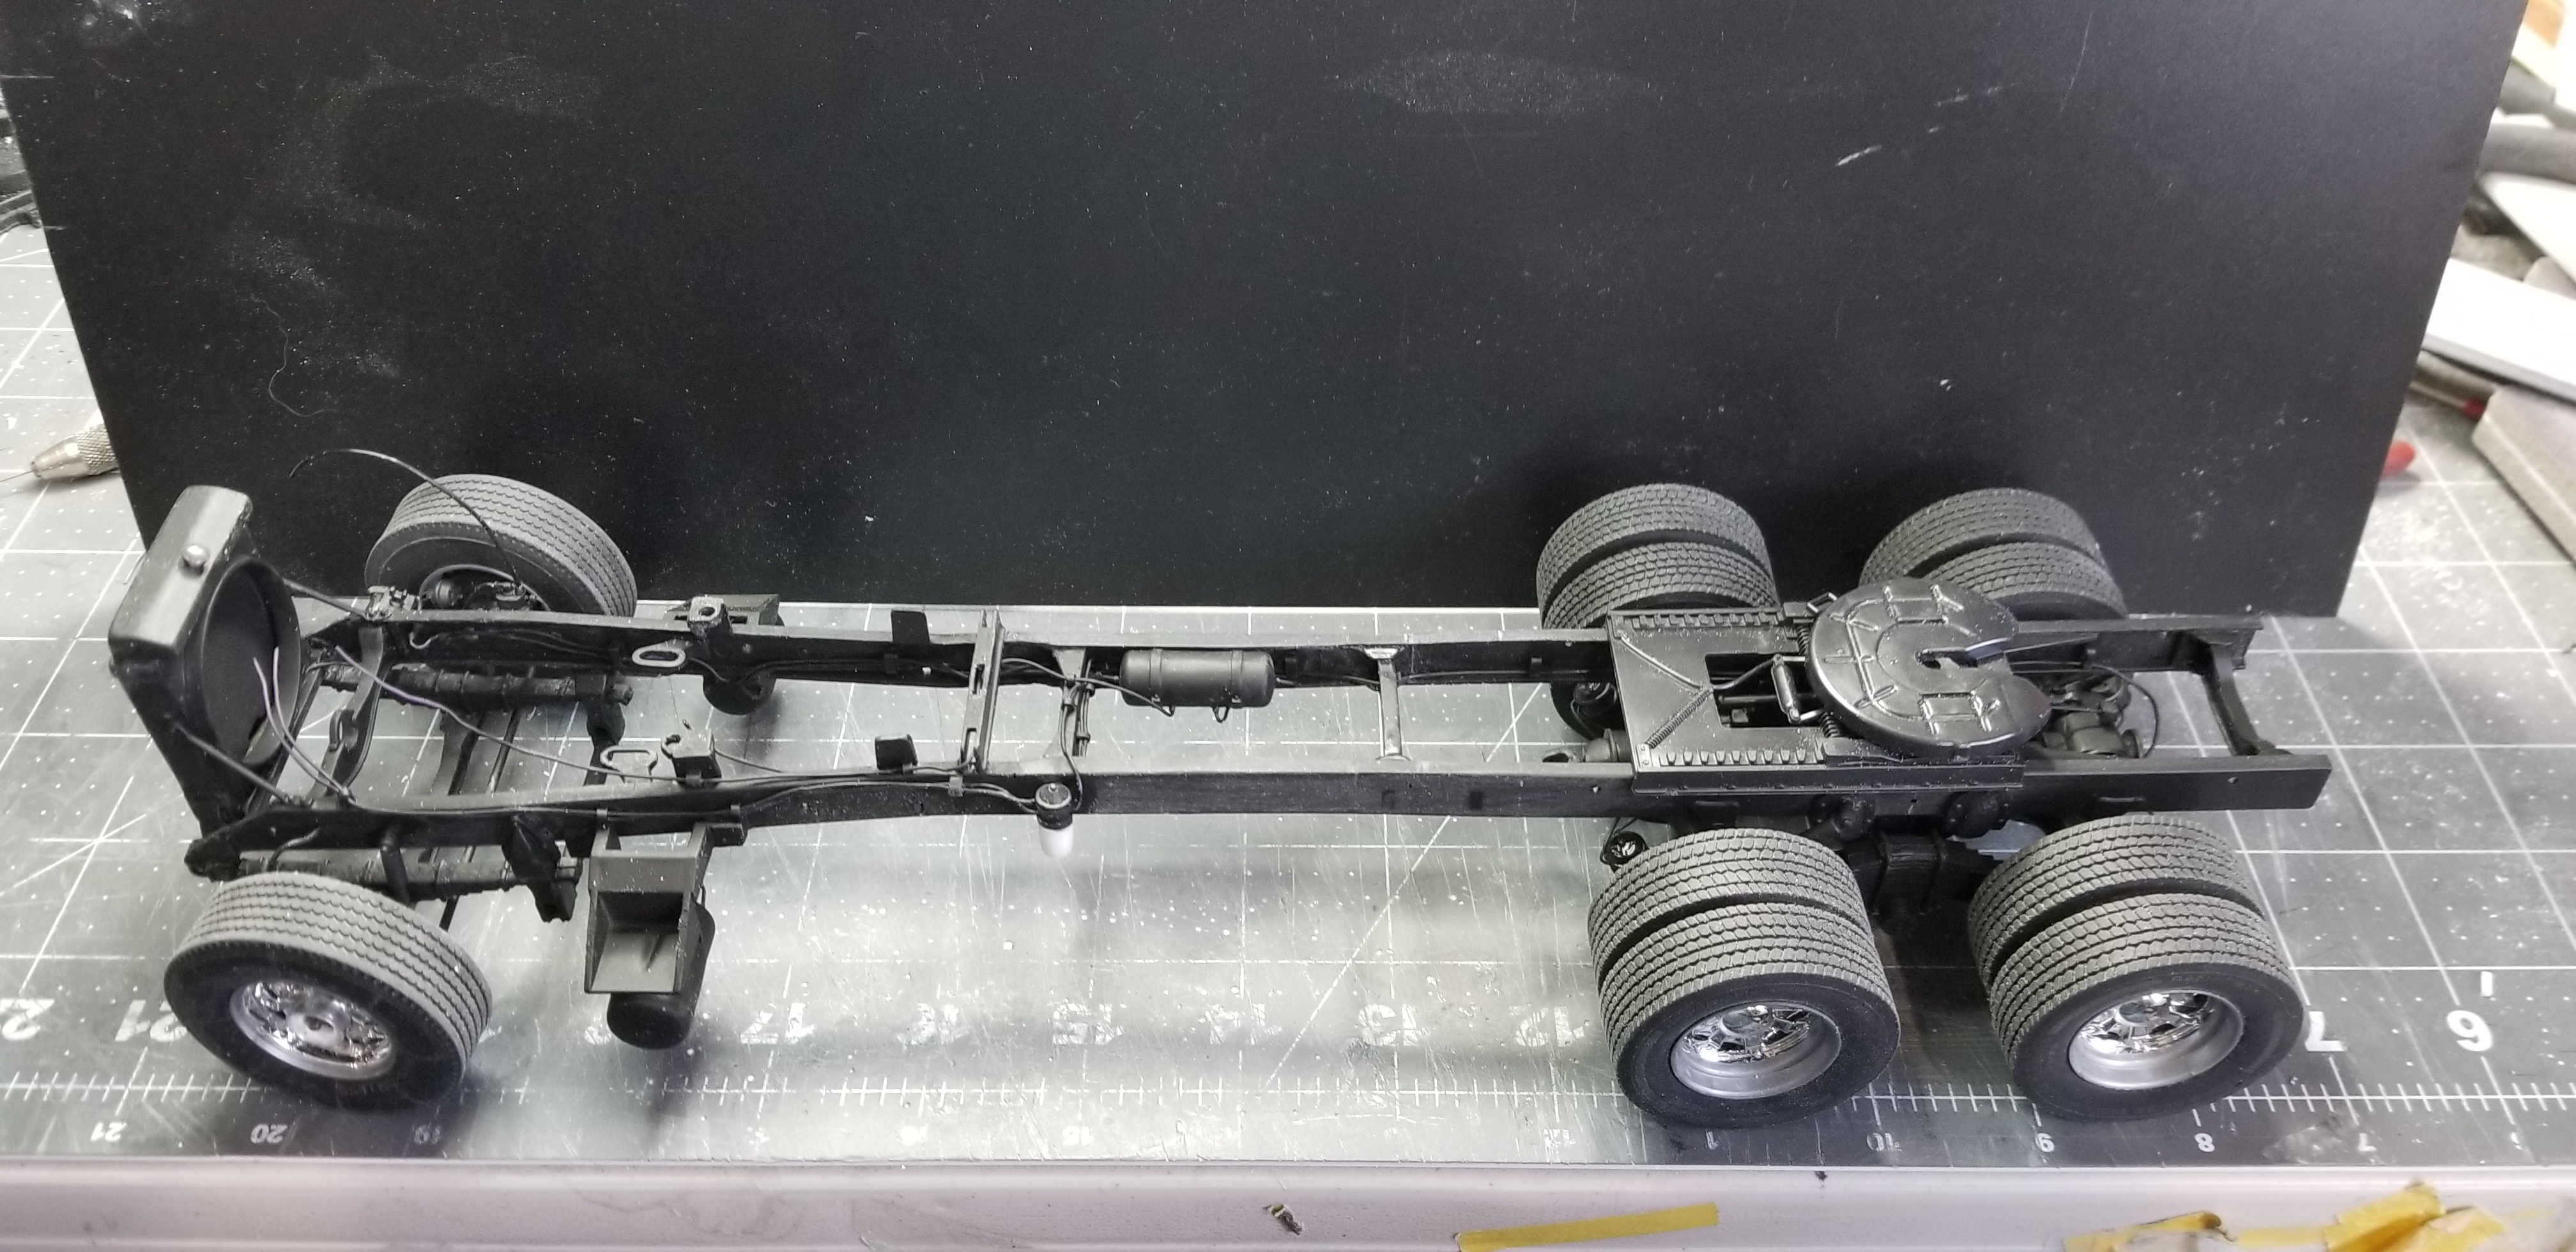
I did some more work on the Superliner II. I added a third air tank (supply tank). I think I have all of the air lines, at least for the rear done. I still need to plumb the front brakes.
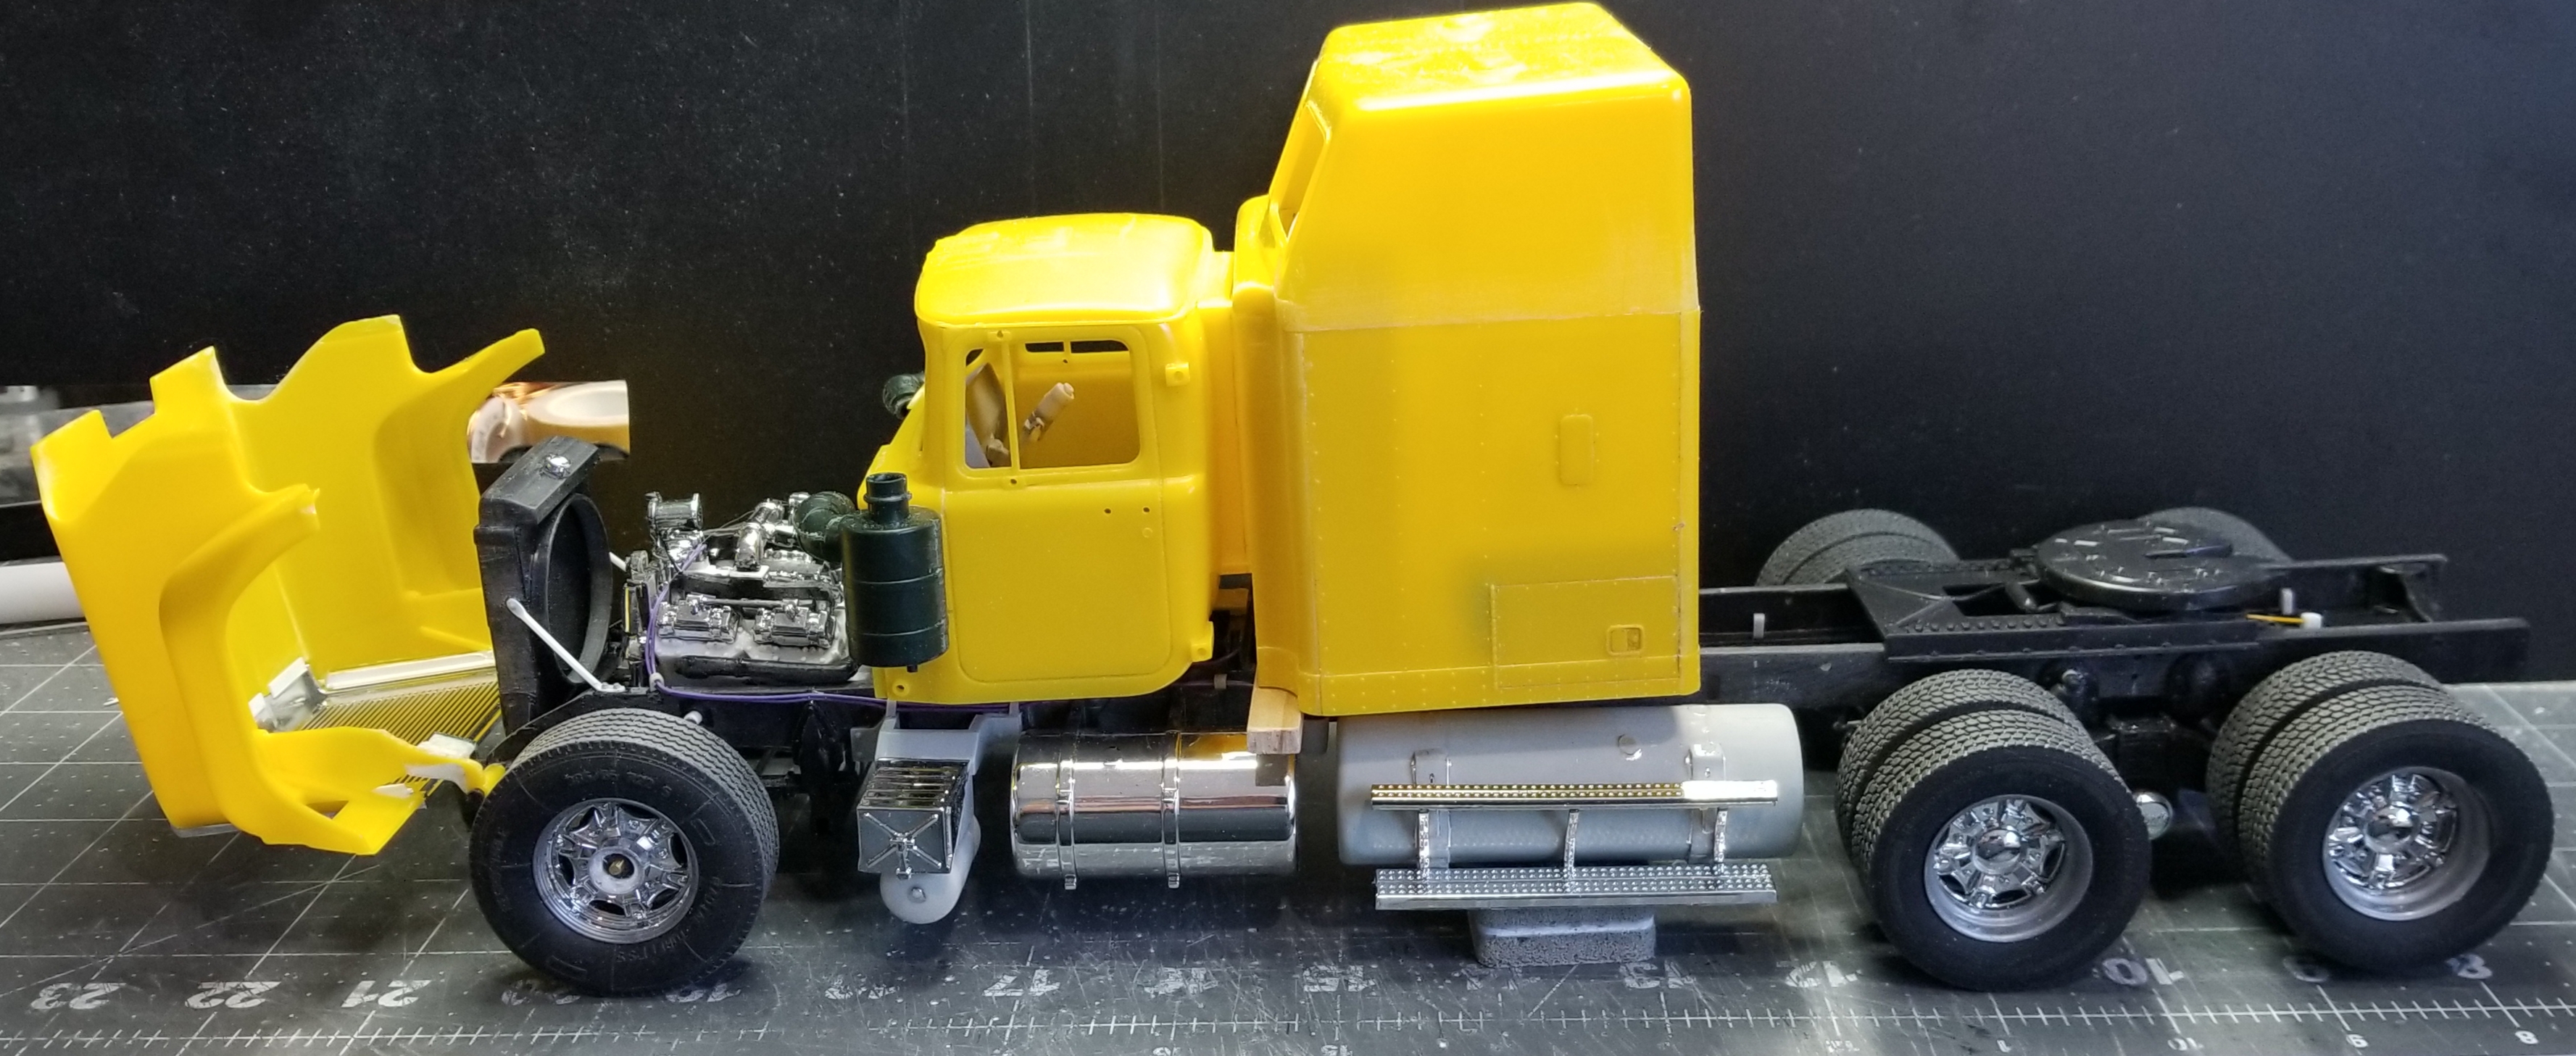
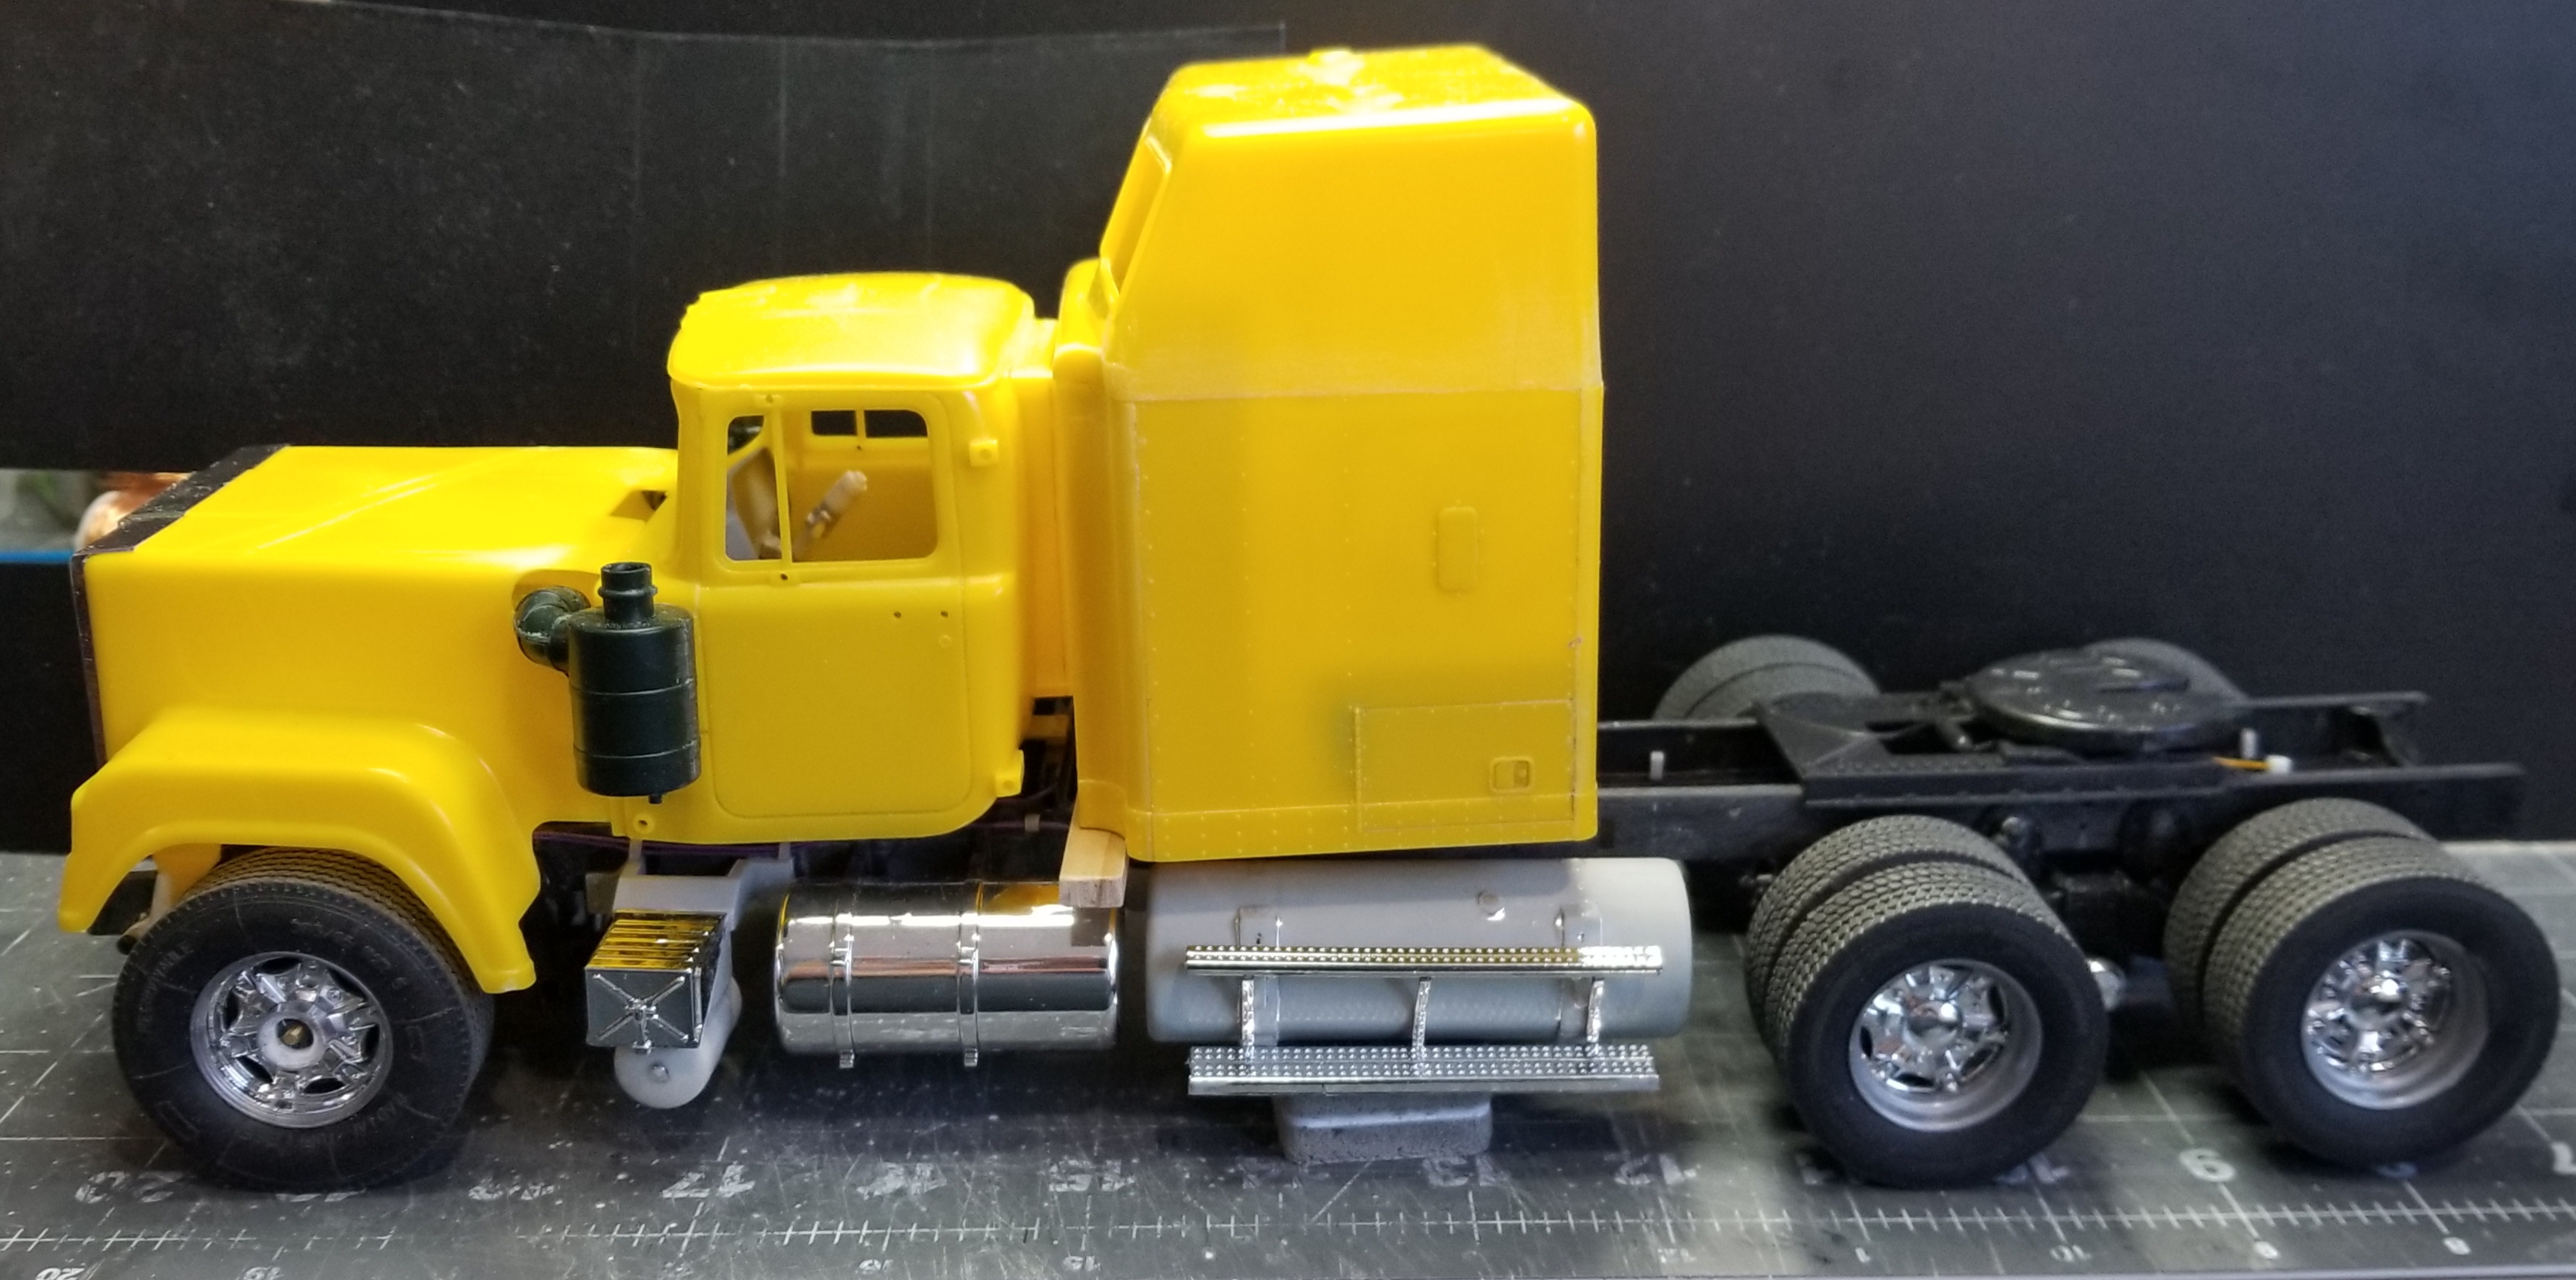
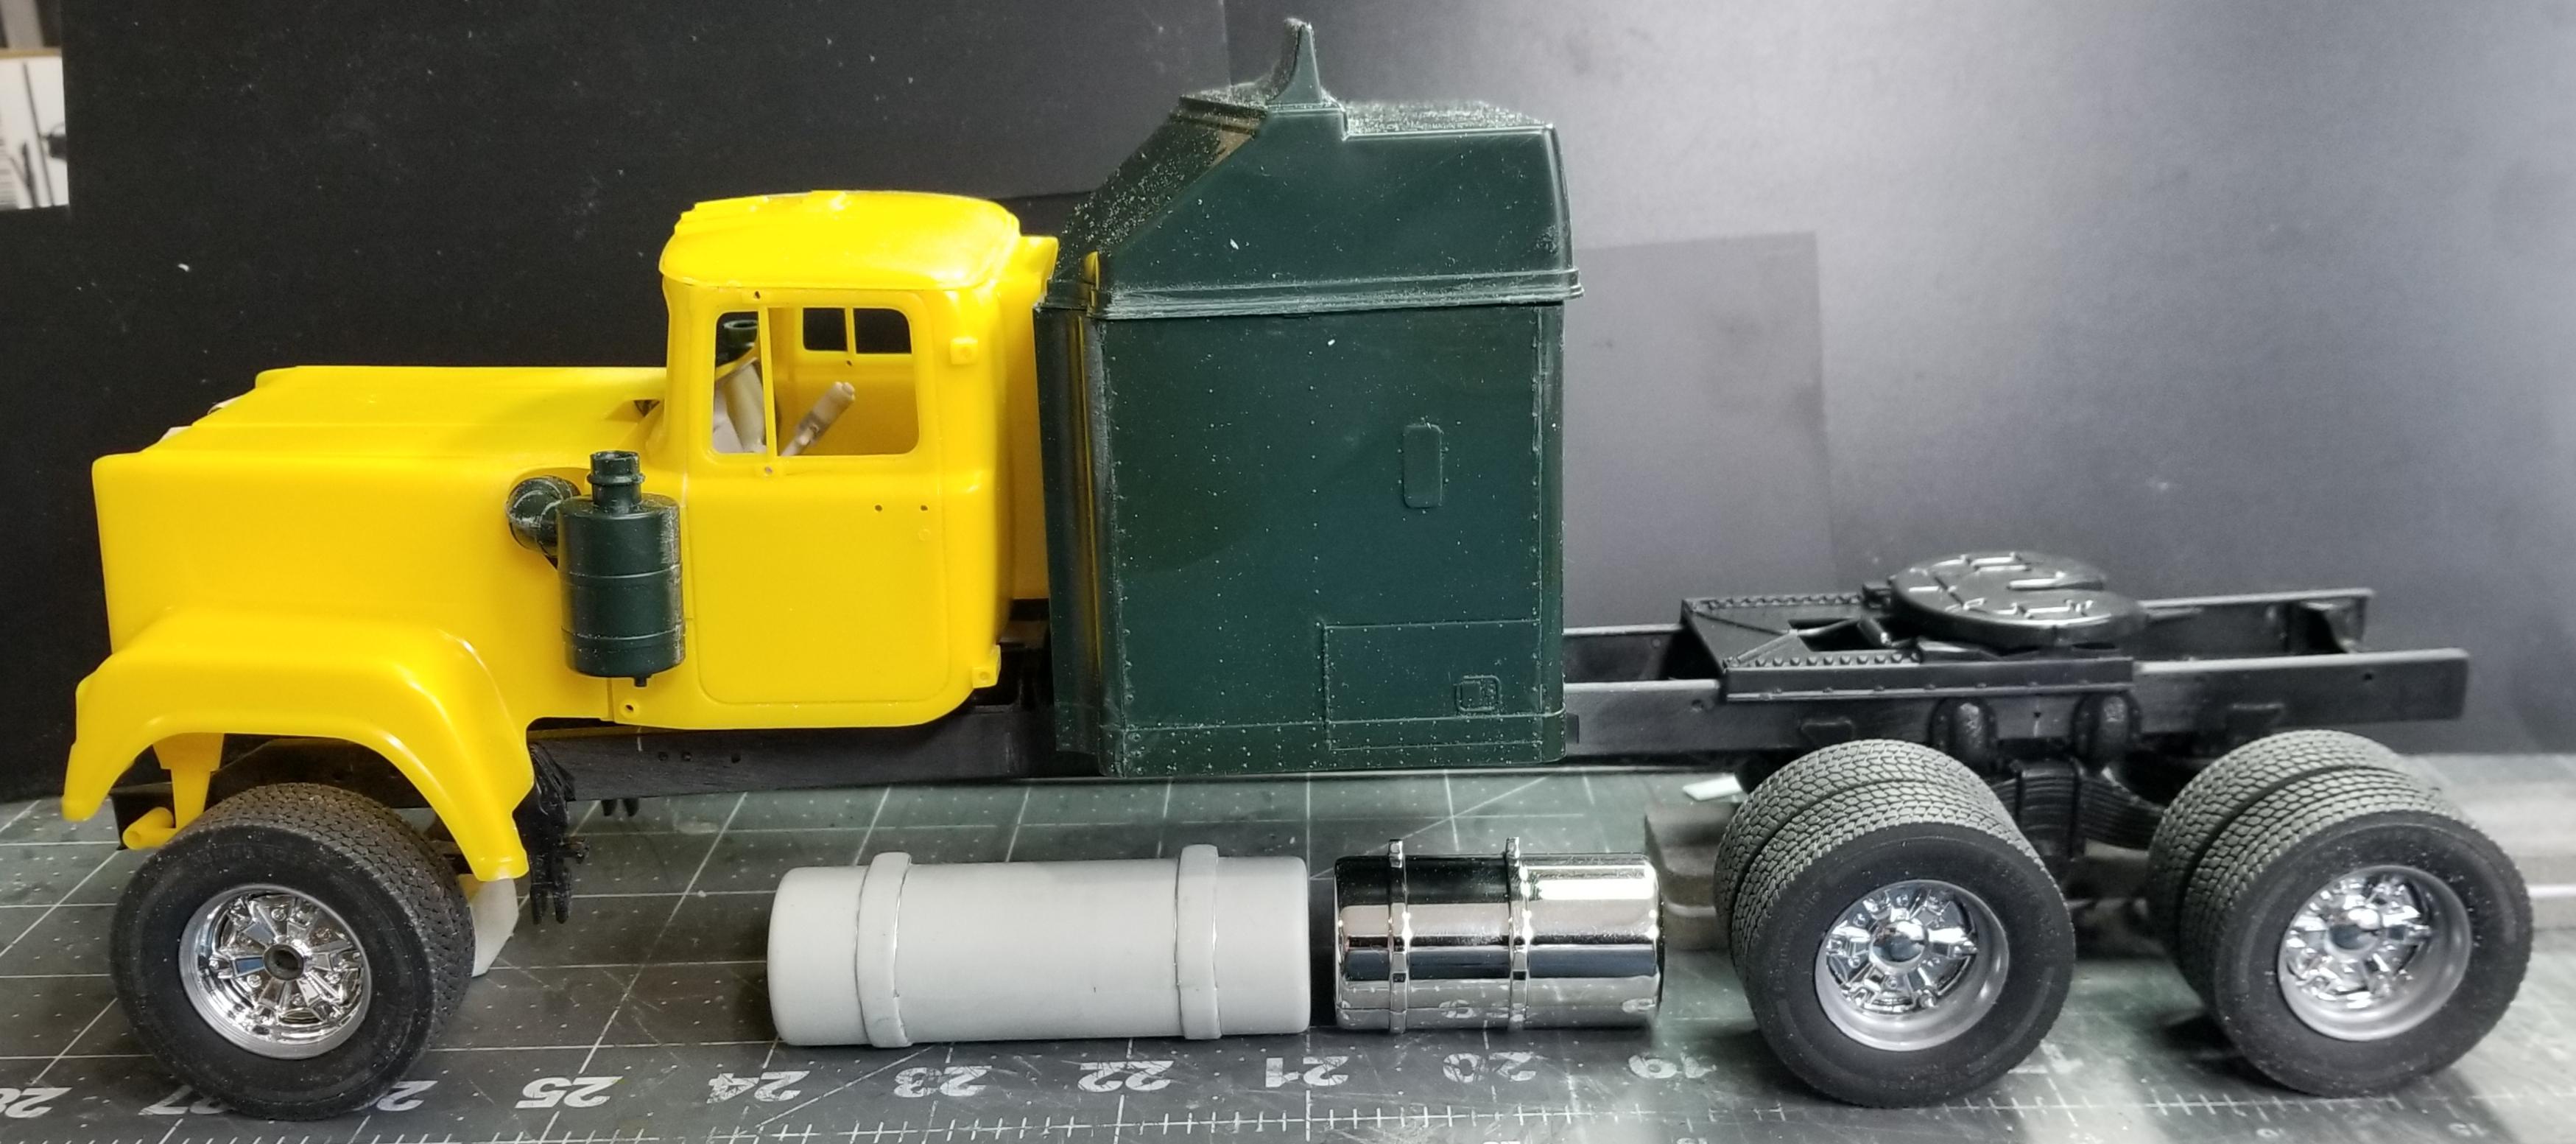
this view shows the whole thing temporarily together.
same view, but with the hood closed. I think I'm going to remake all of the fuel tanks, these are to small of diameter there like 20", yuckk! Going to make them 25.0" diameter, out of some PVC pipe.
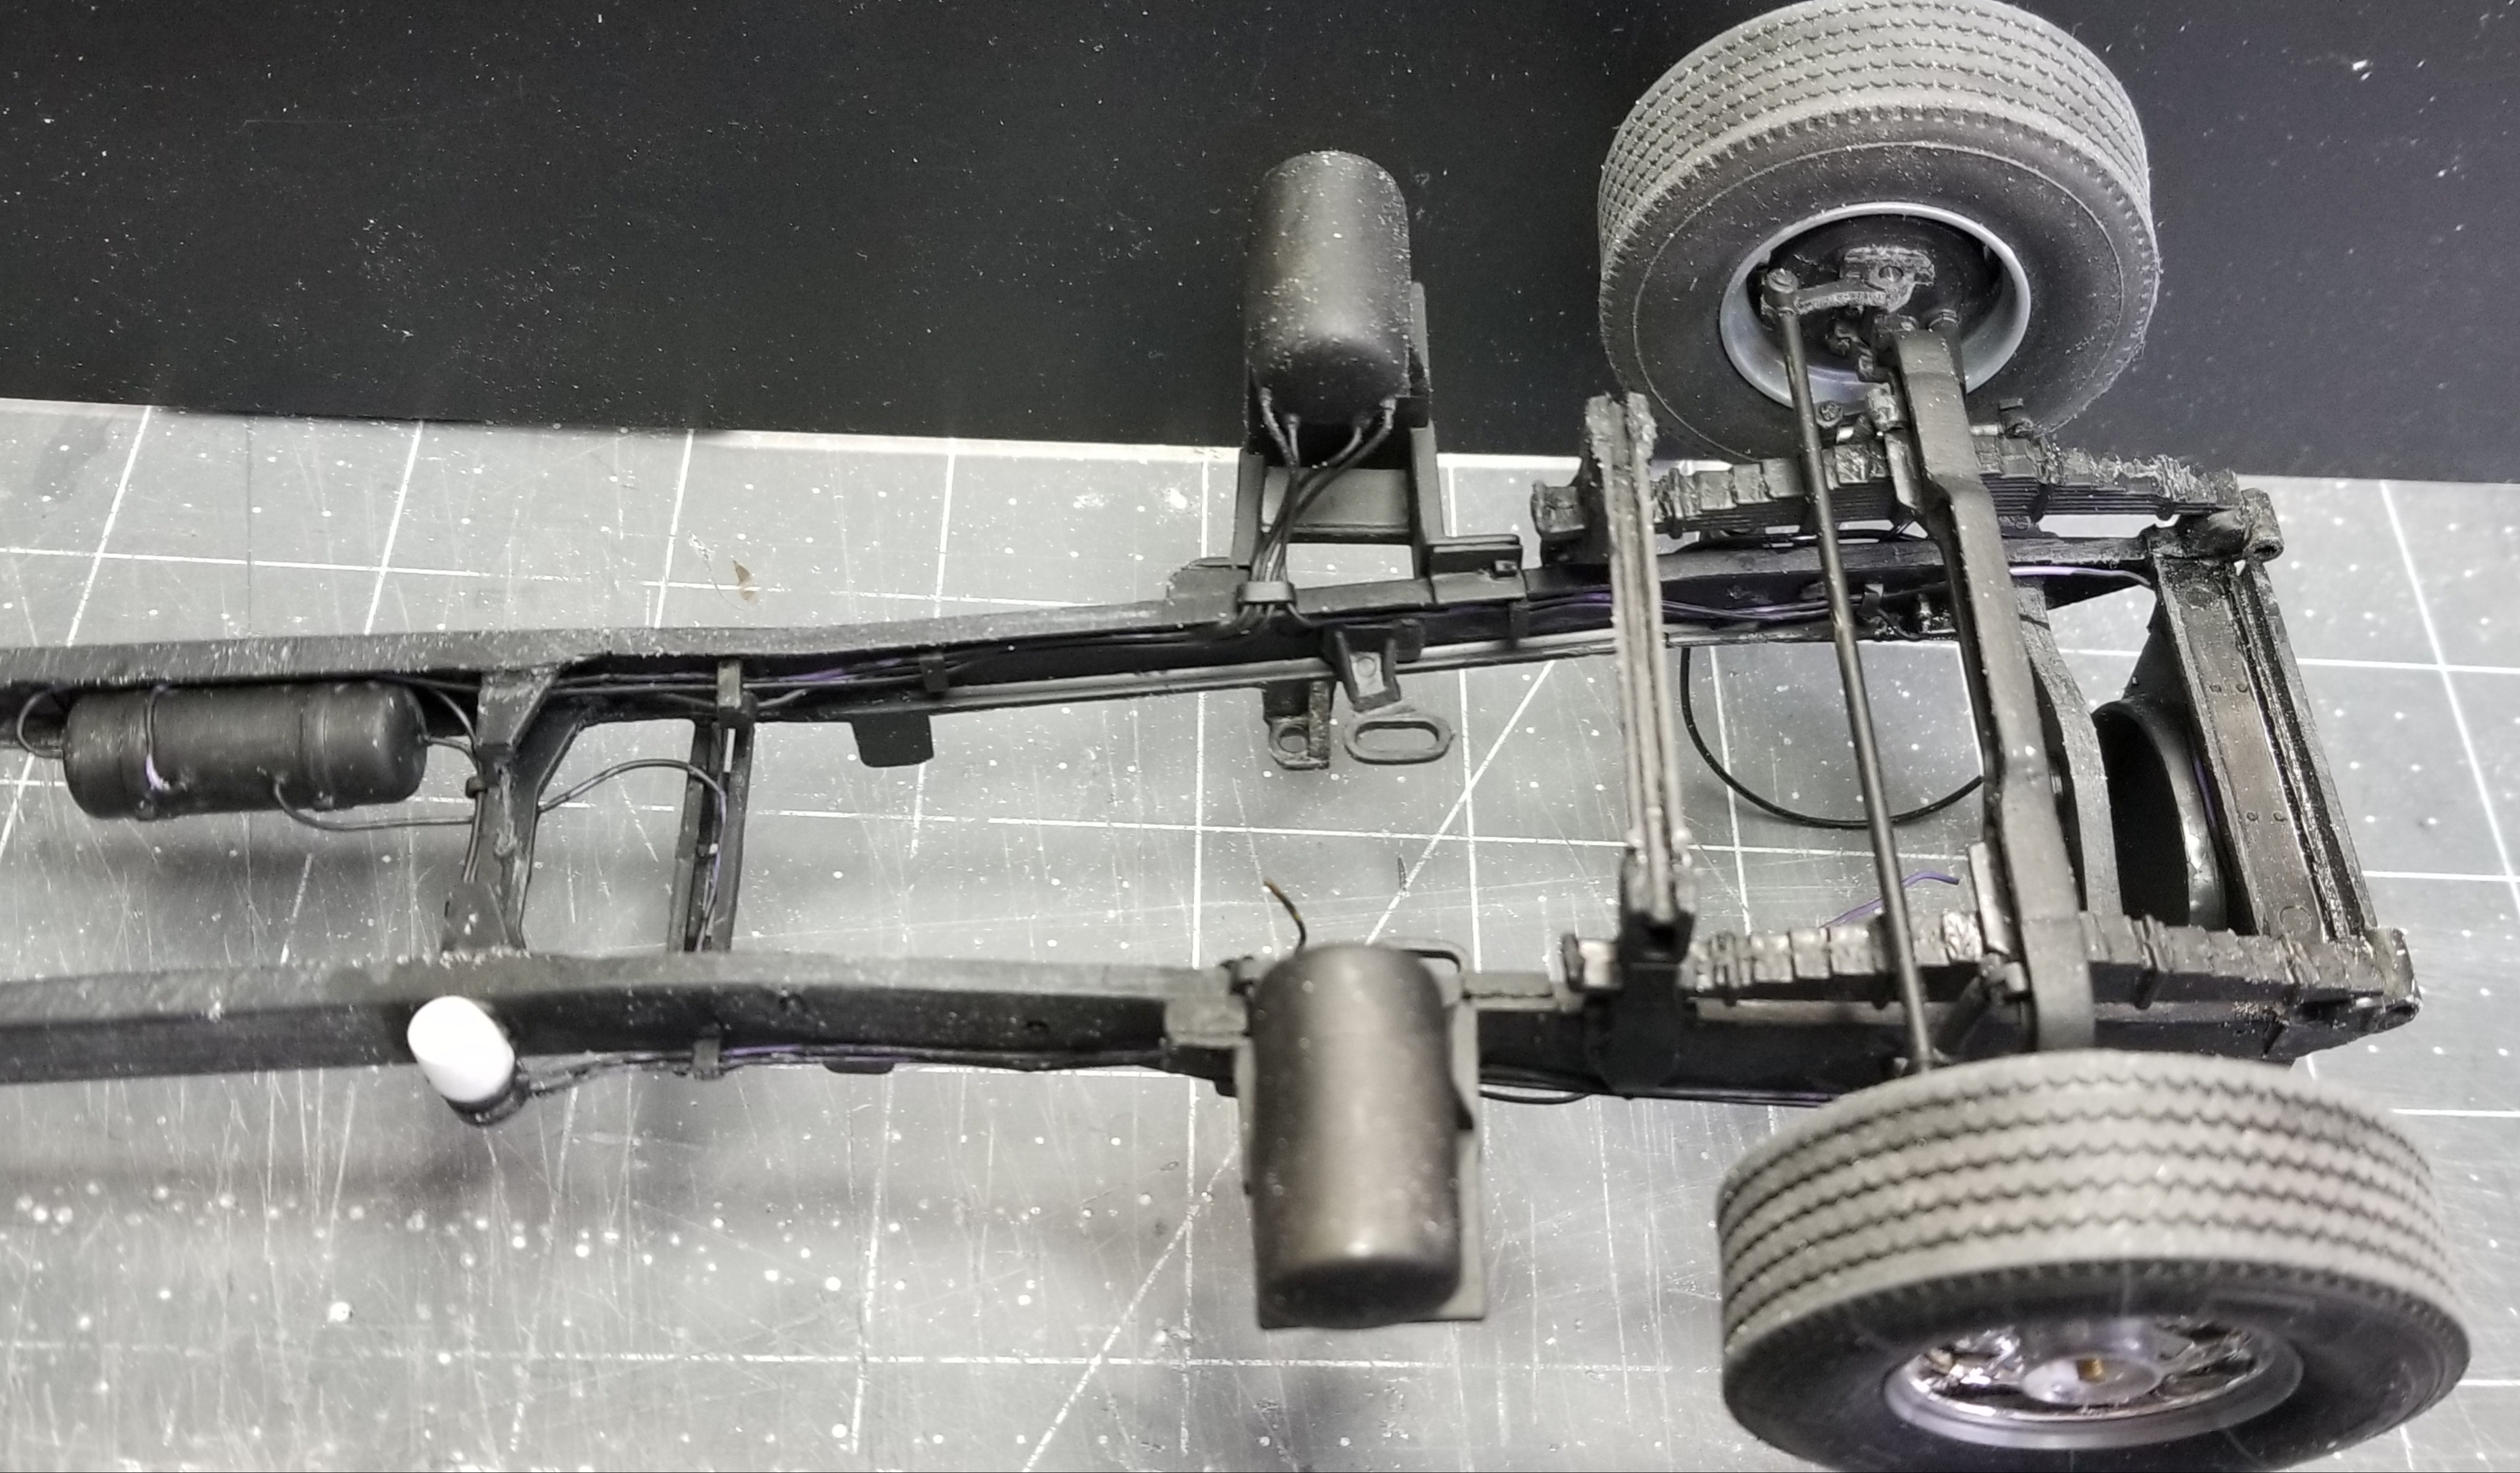
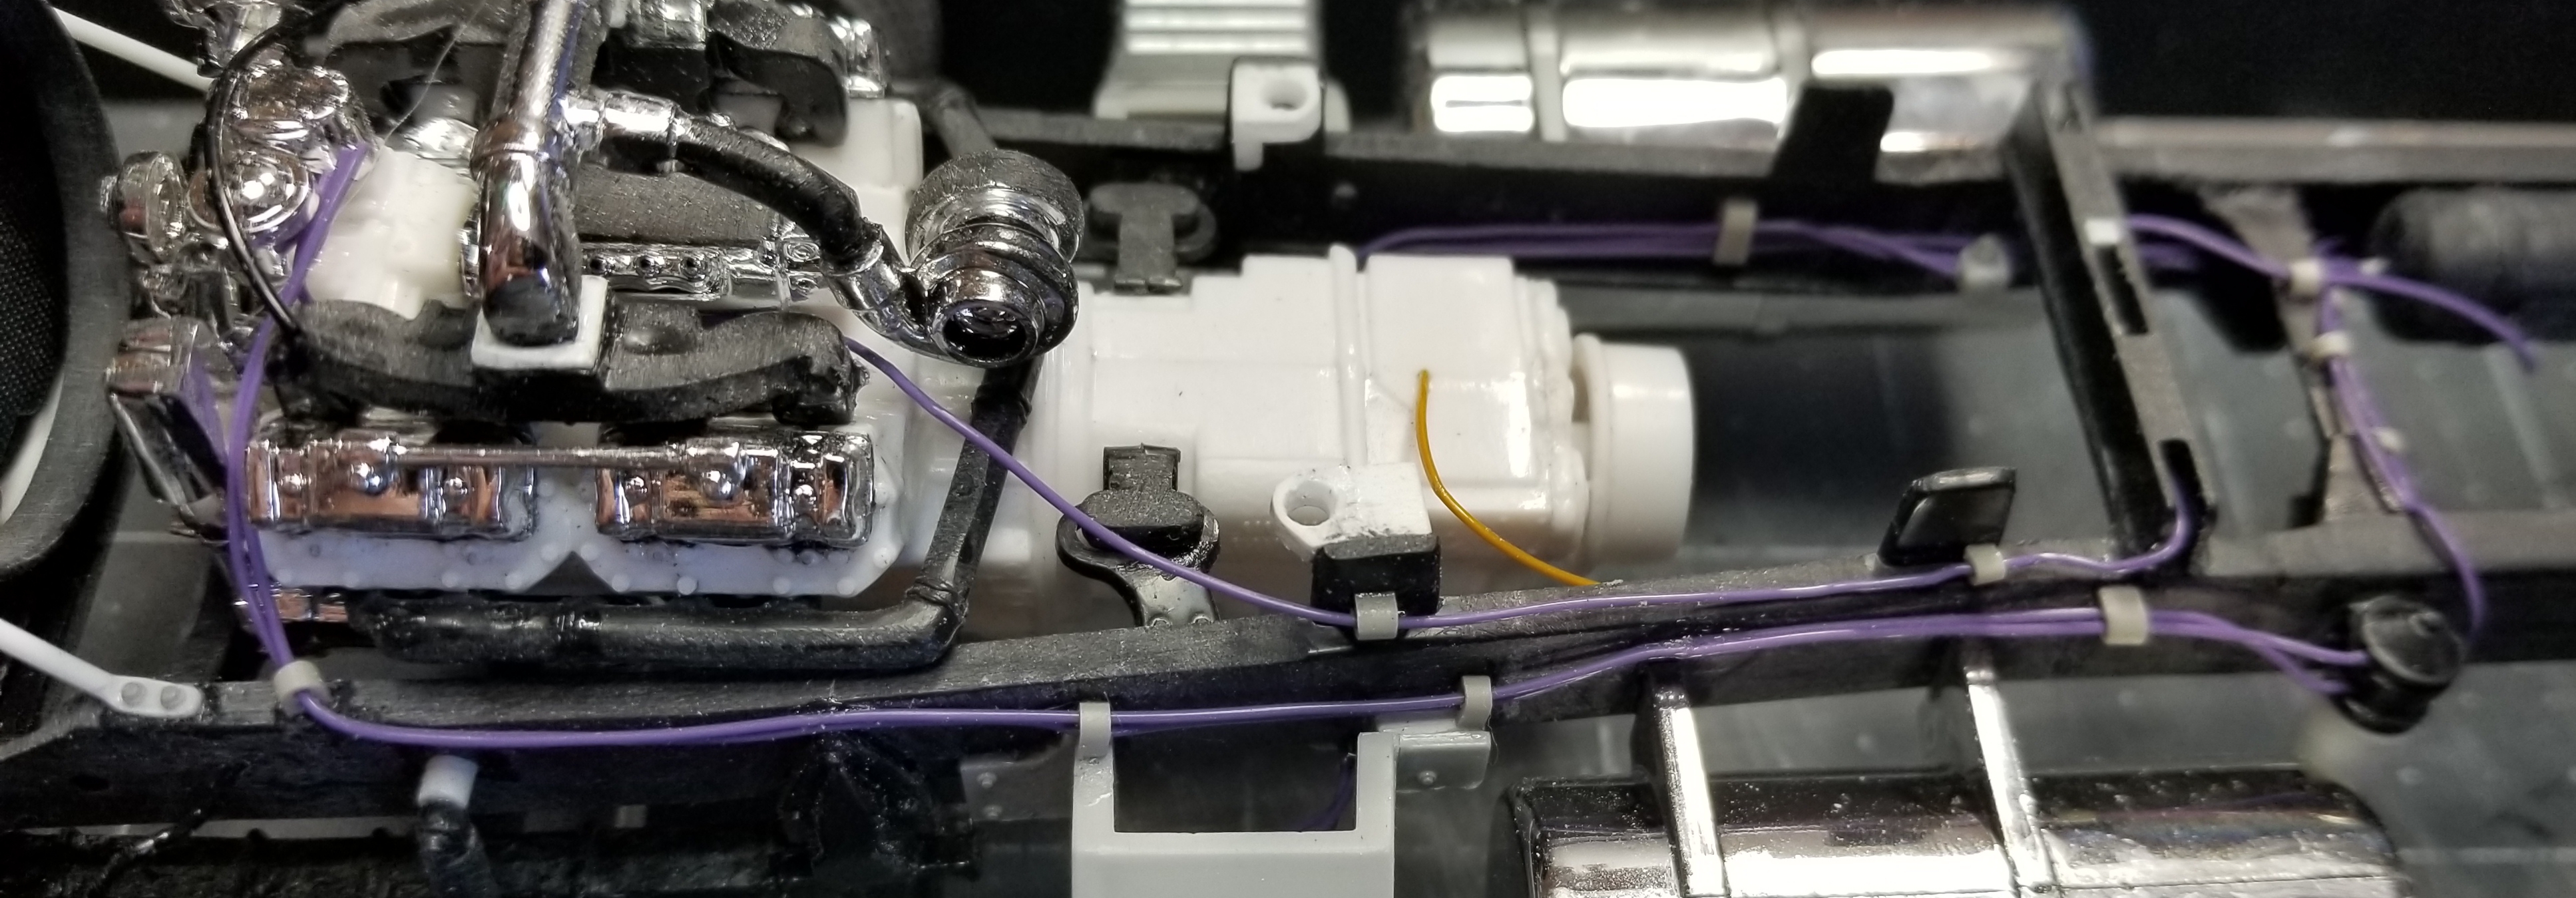
this view shows the air lines running from the supply tank to the air dryer then to the air compressor. Also the yellow line is for the rear end air shifters. This will eventually go to the floor and up to the shifter.
this view shows the supply tank and lines.
this view shows the air dryer and lines.
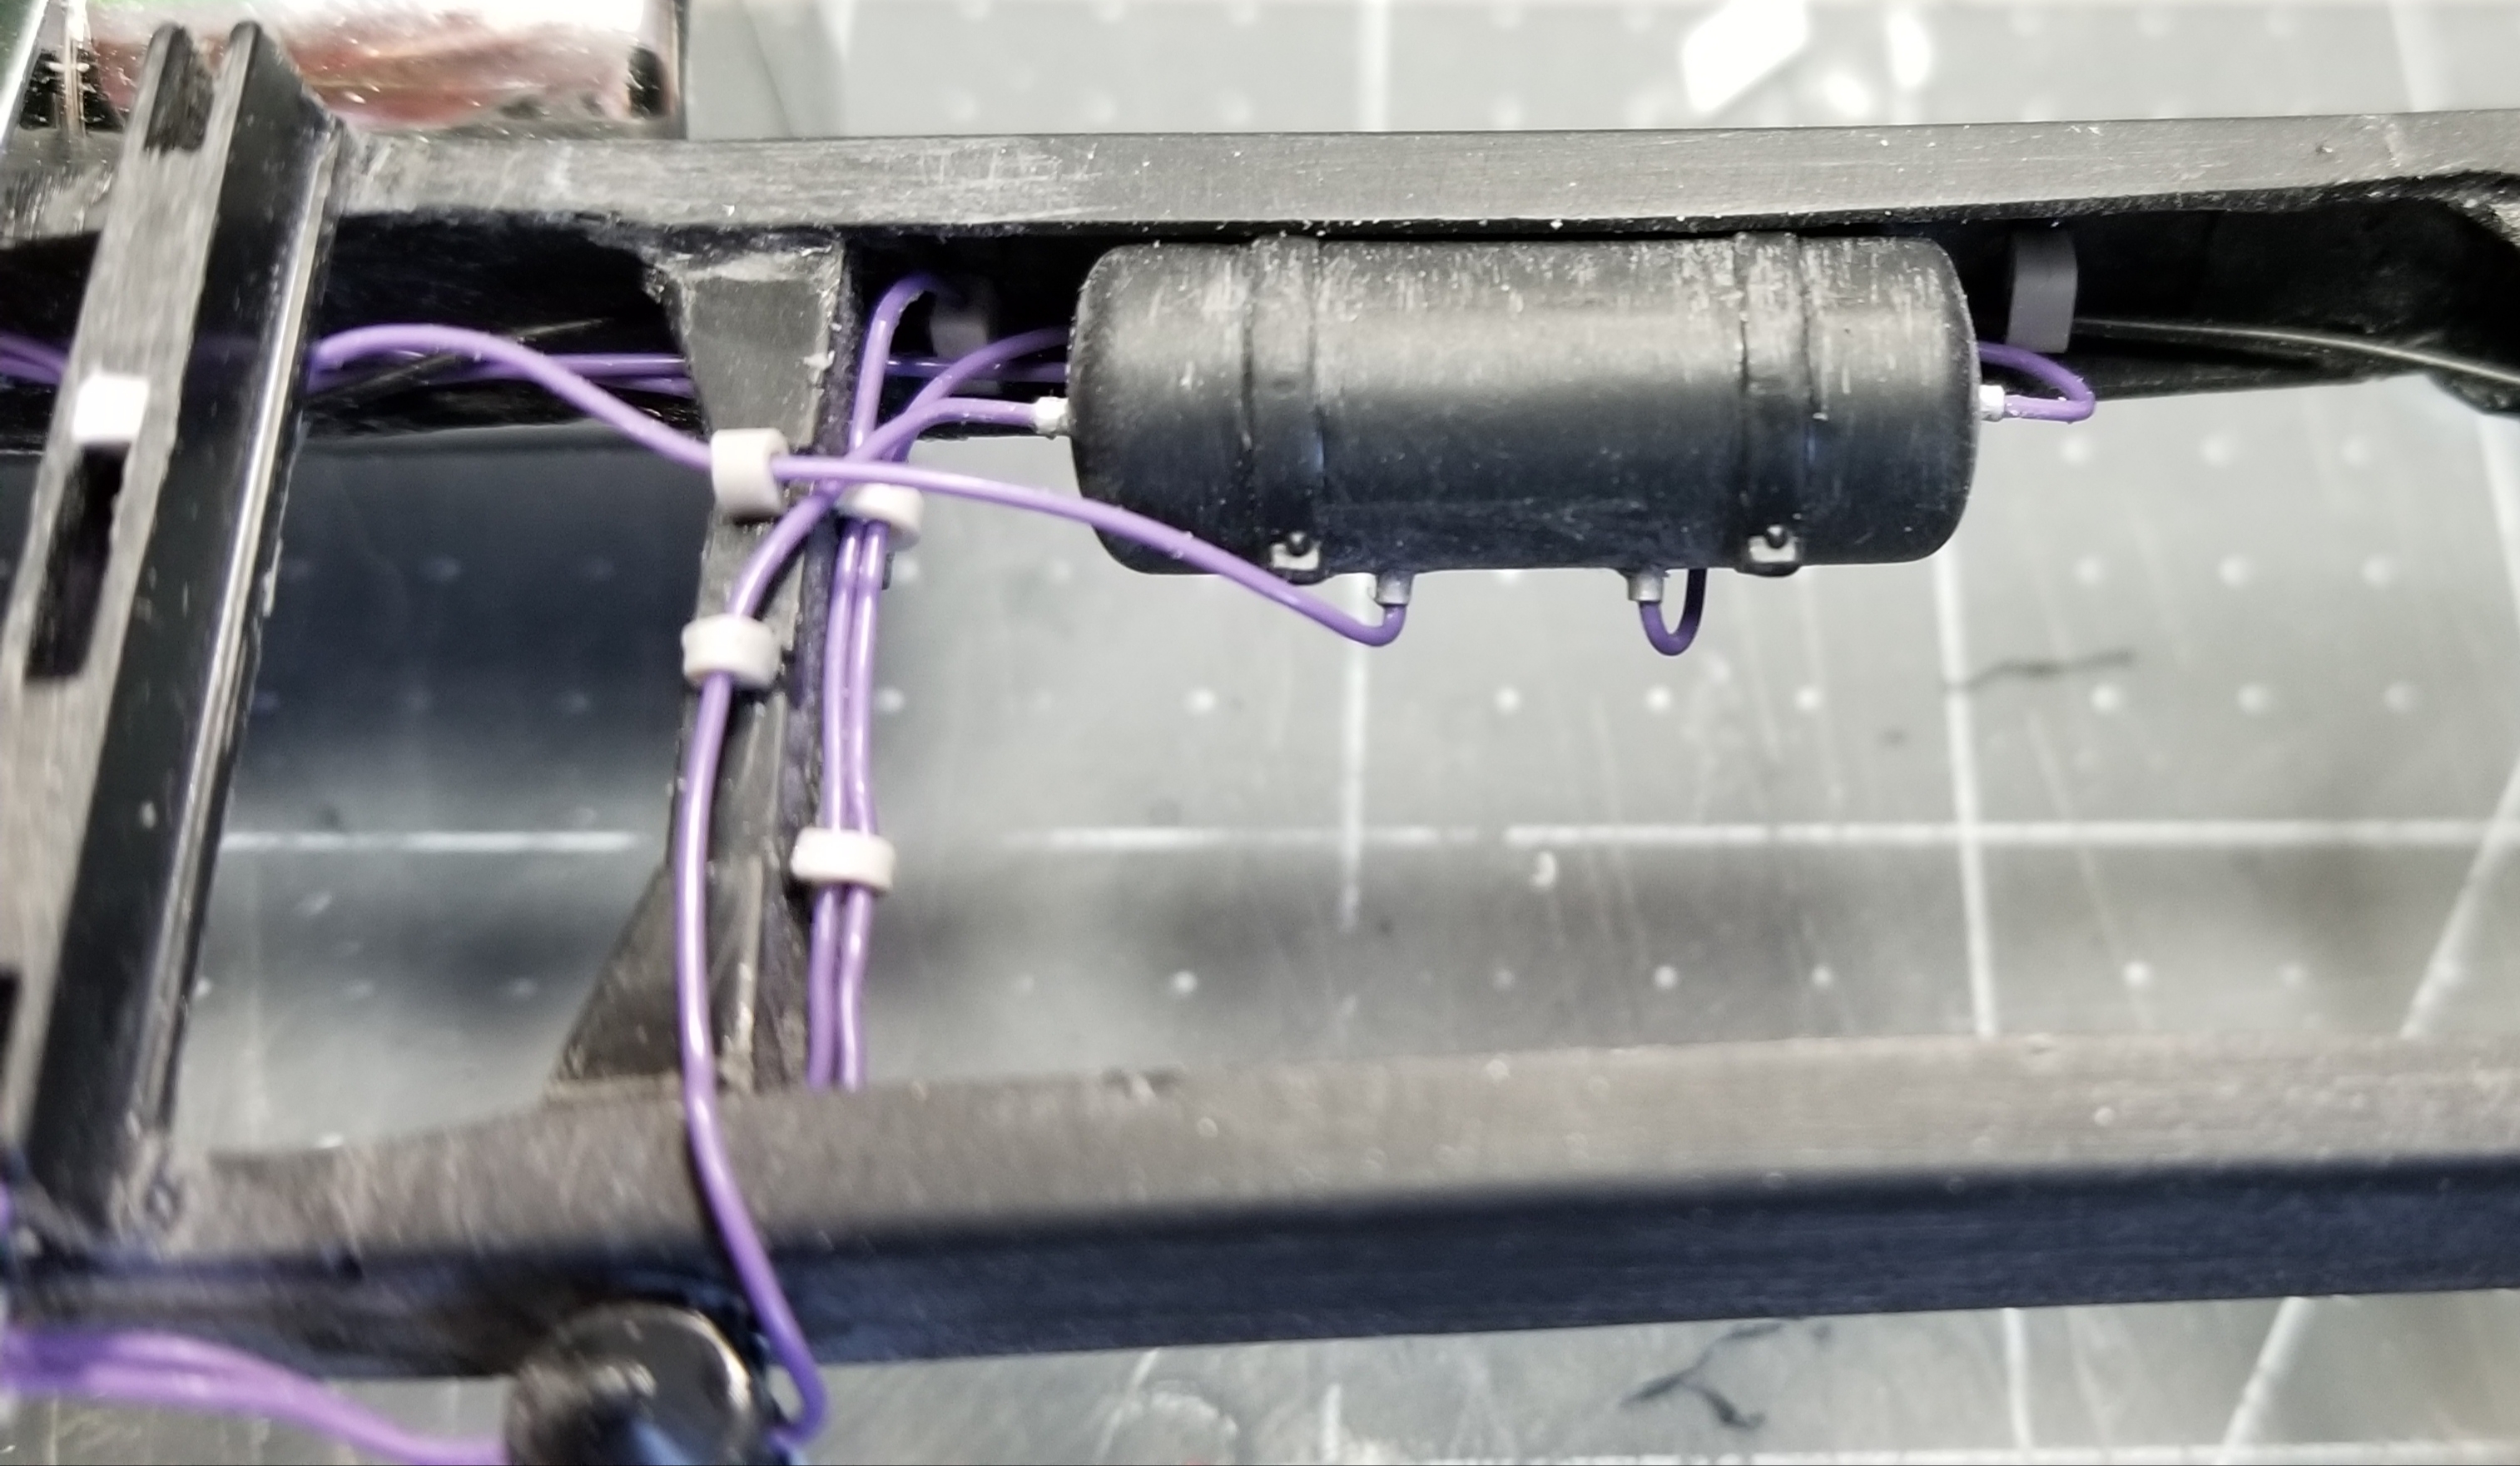
this view shows some of the air lines and primary air tank. You can see the bottom of the air dryer by the fuel tank.
this view shows the secondary air tank and air lines. To the left is the supply tank.
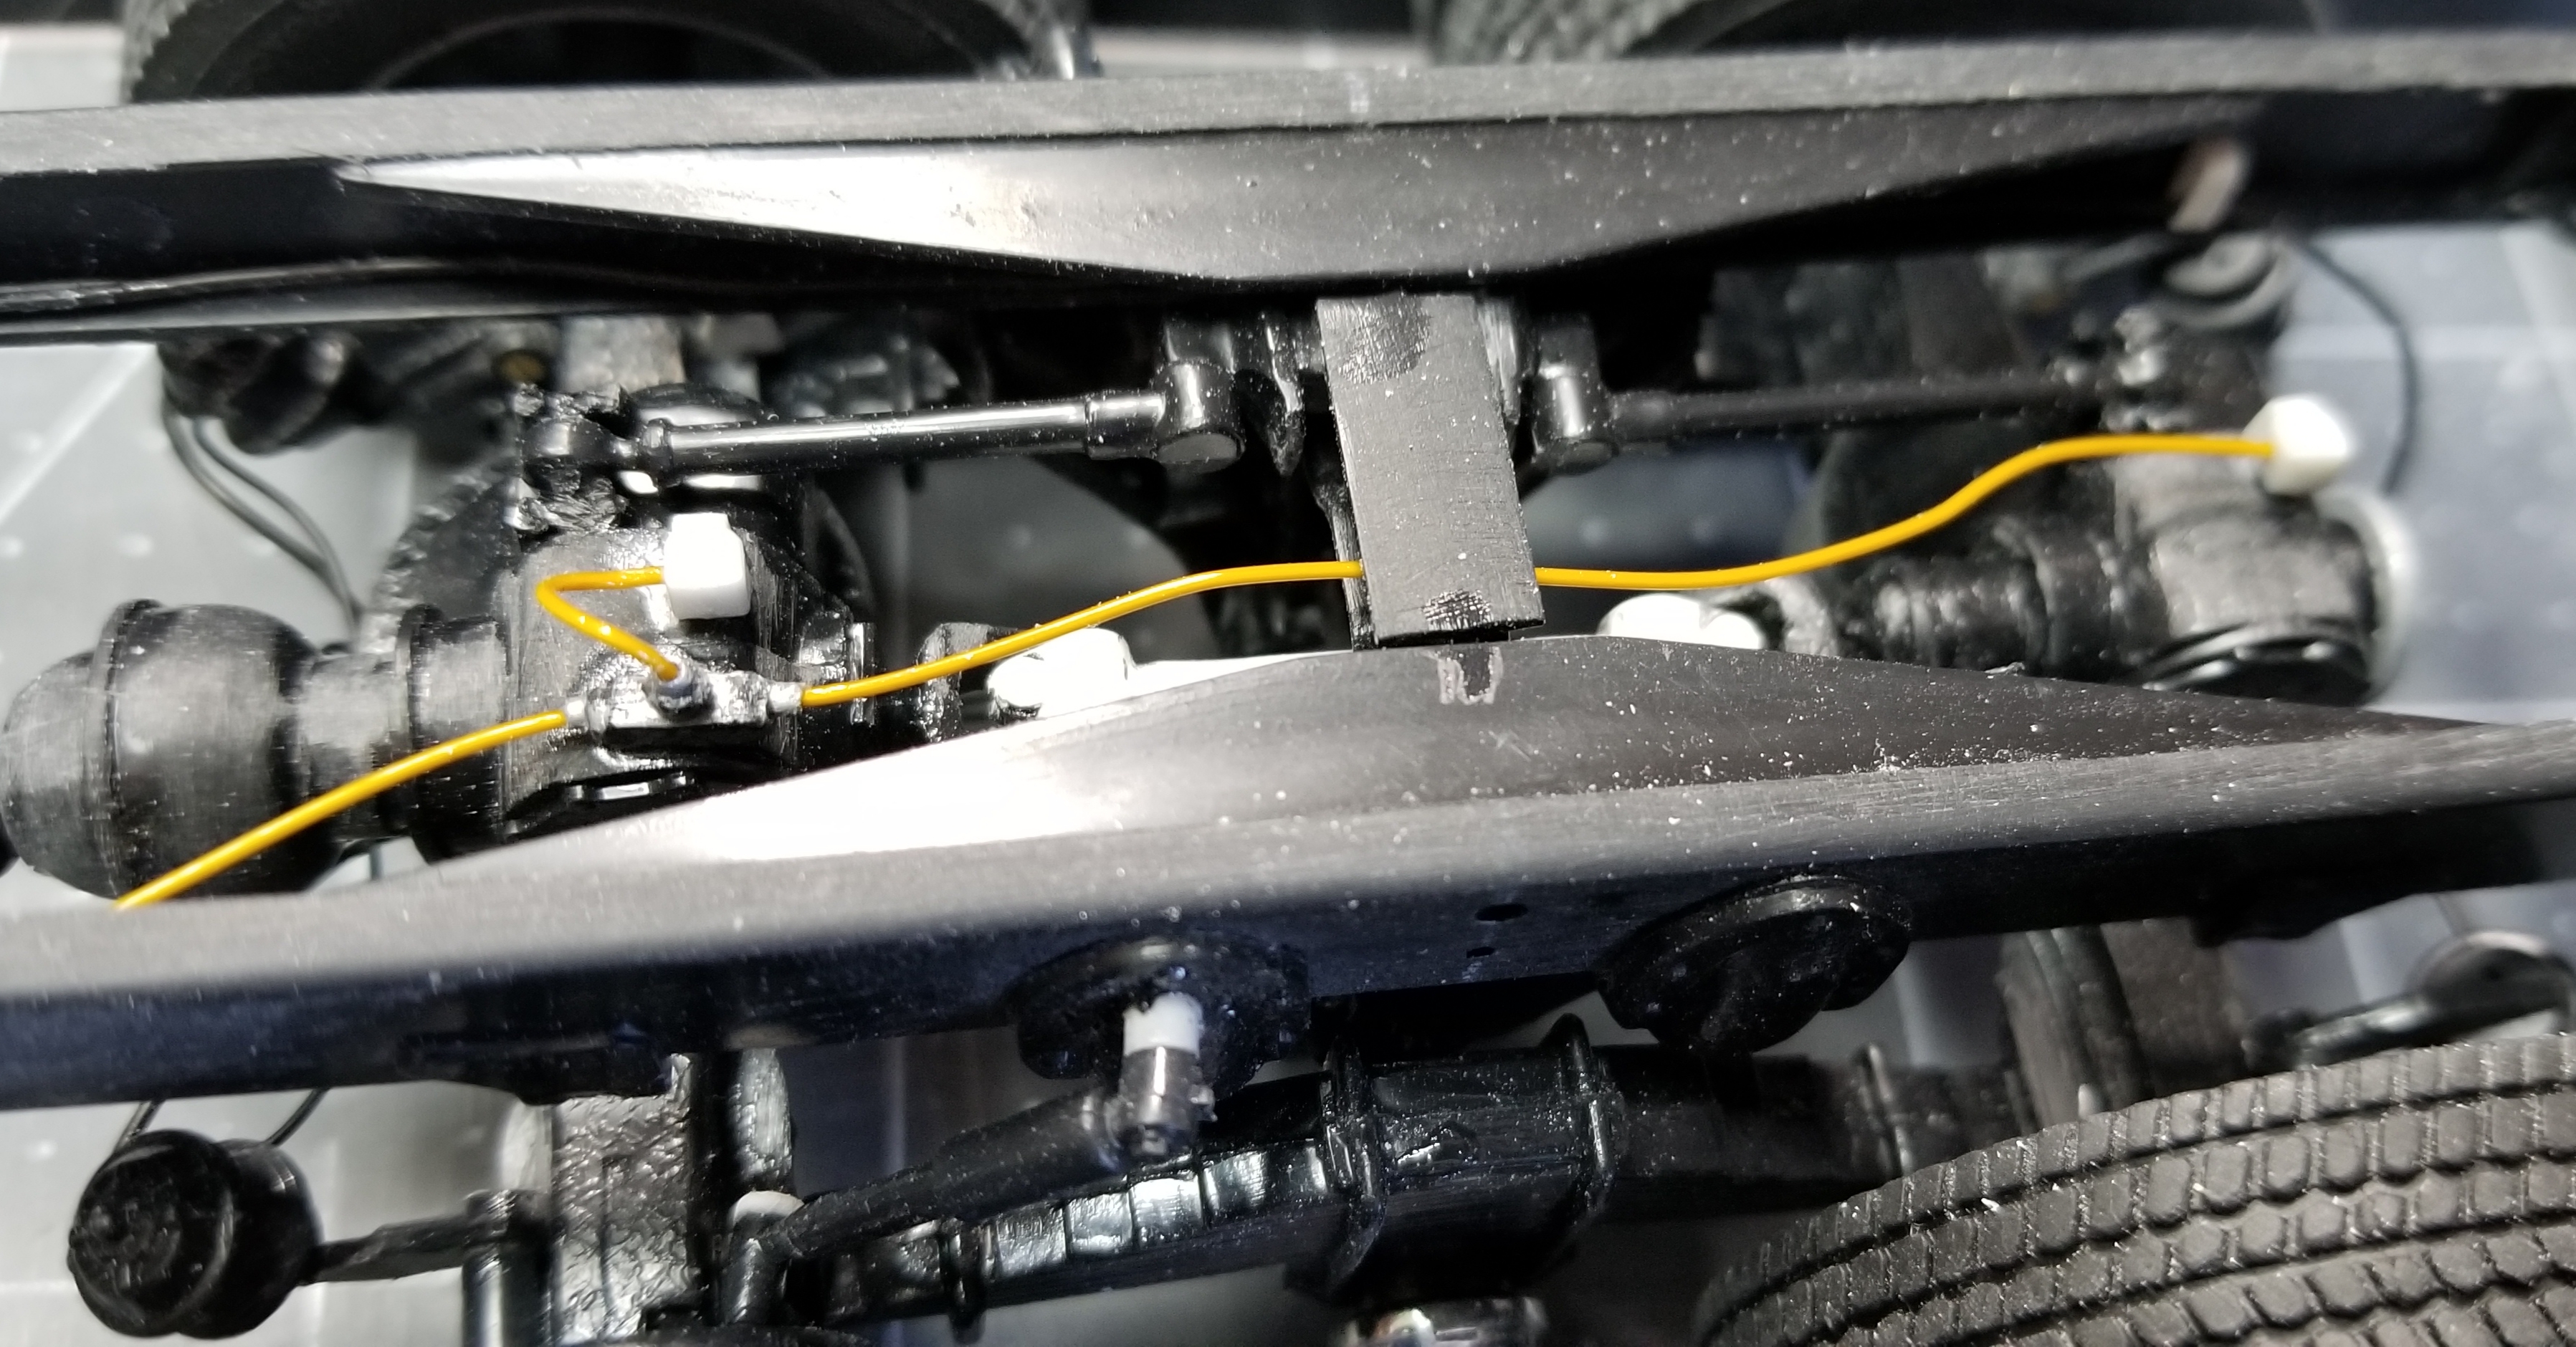
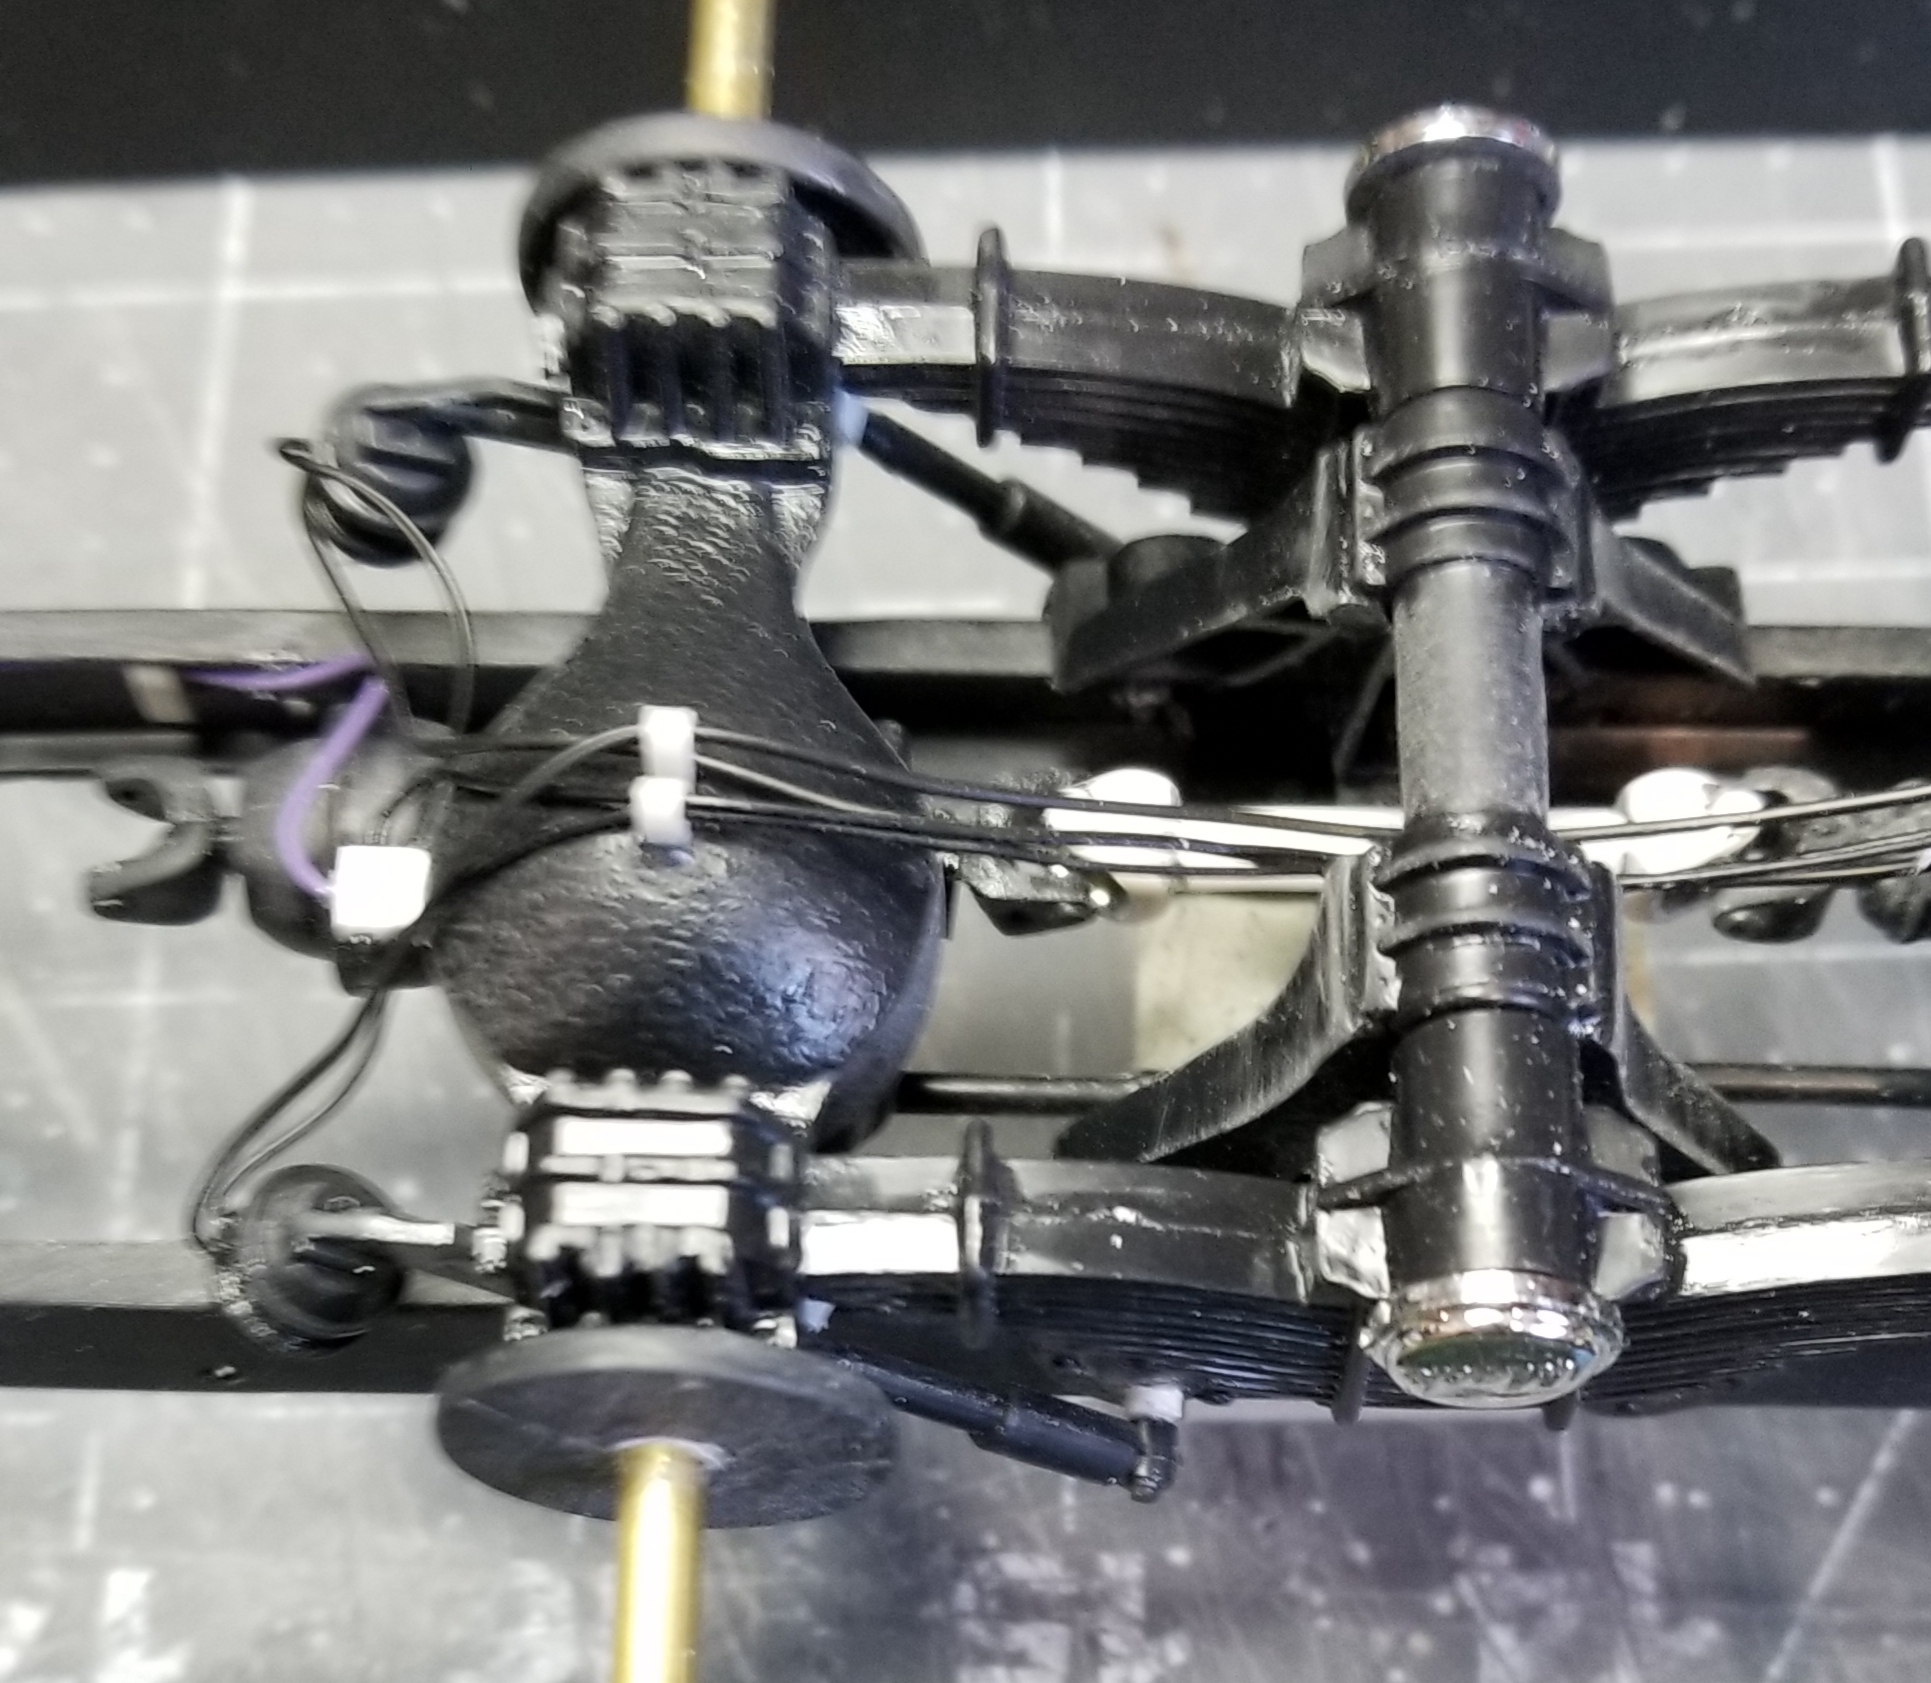
this view shows the air shift lines to the two rear axles.
I also added some bolts to the radiator supports. I also added a line from the power steering reservoir to the power steering pump on the engine. Well that's it for now be back with more updates soon.
Don't forget to leave some comments, please.
Ron G
-
2 hours ago, Vettegasser said:
This is really coming along nice Like the tip for hooking air lines to frame
Hey Vettegasser
Thanks, I believe the grey sleeve is from an old phone cord. I just stripped it back a little then pulled the wires out, then you take razer blade and slice off as many as you need. I have enough to last me 2 life times...lol
Ron G
-
Hey guys
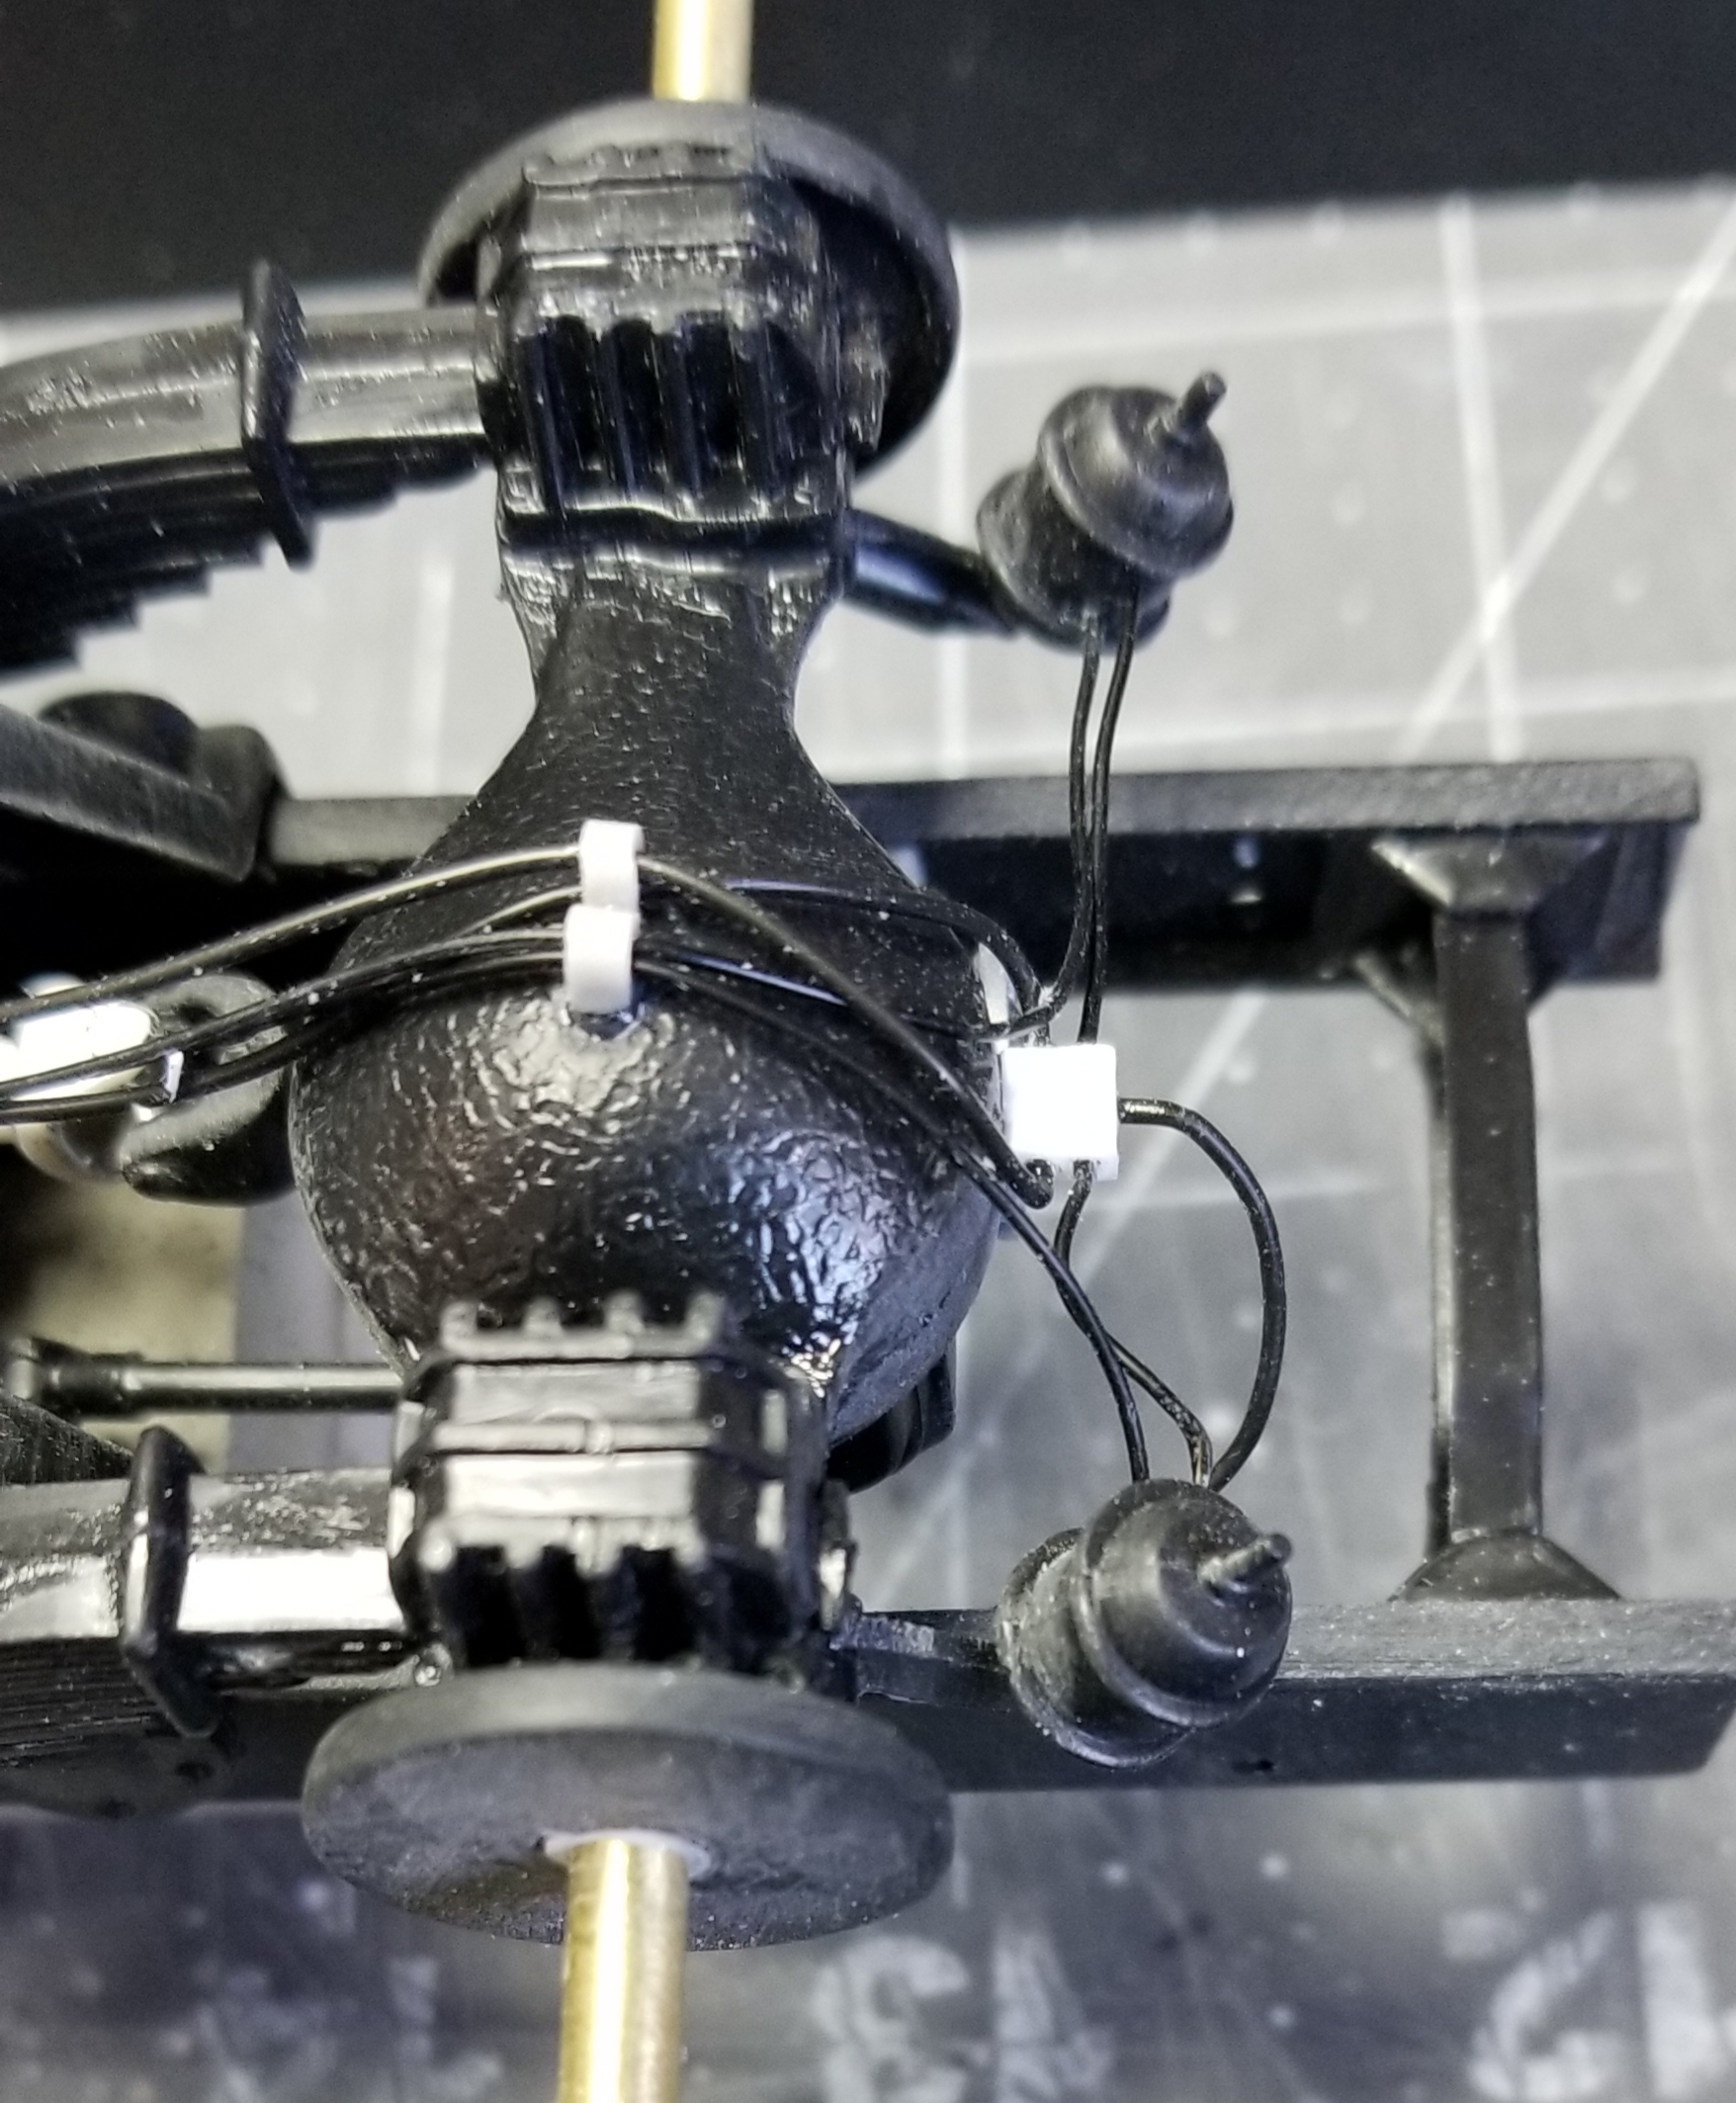
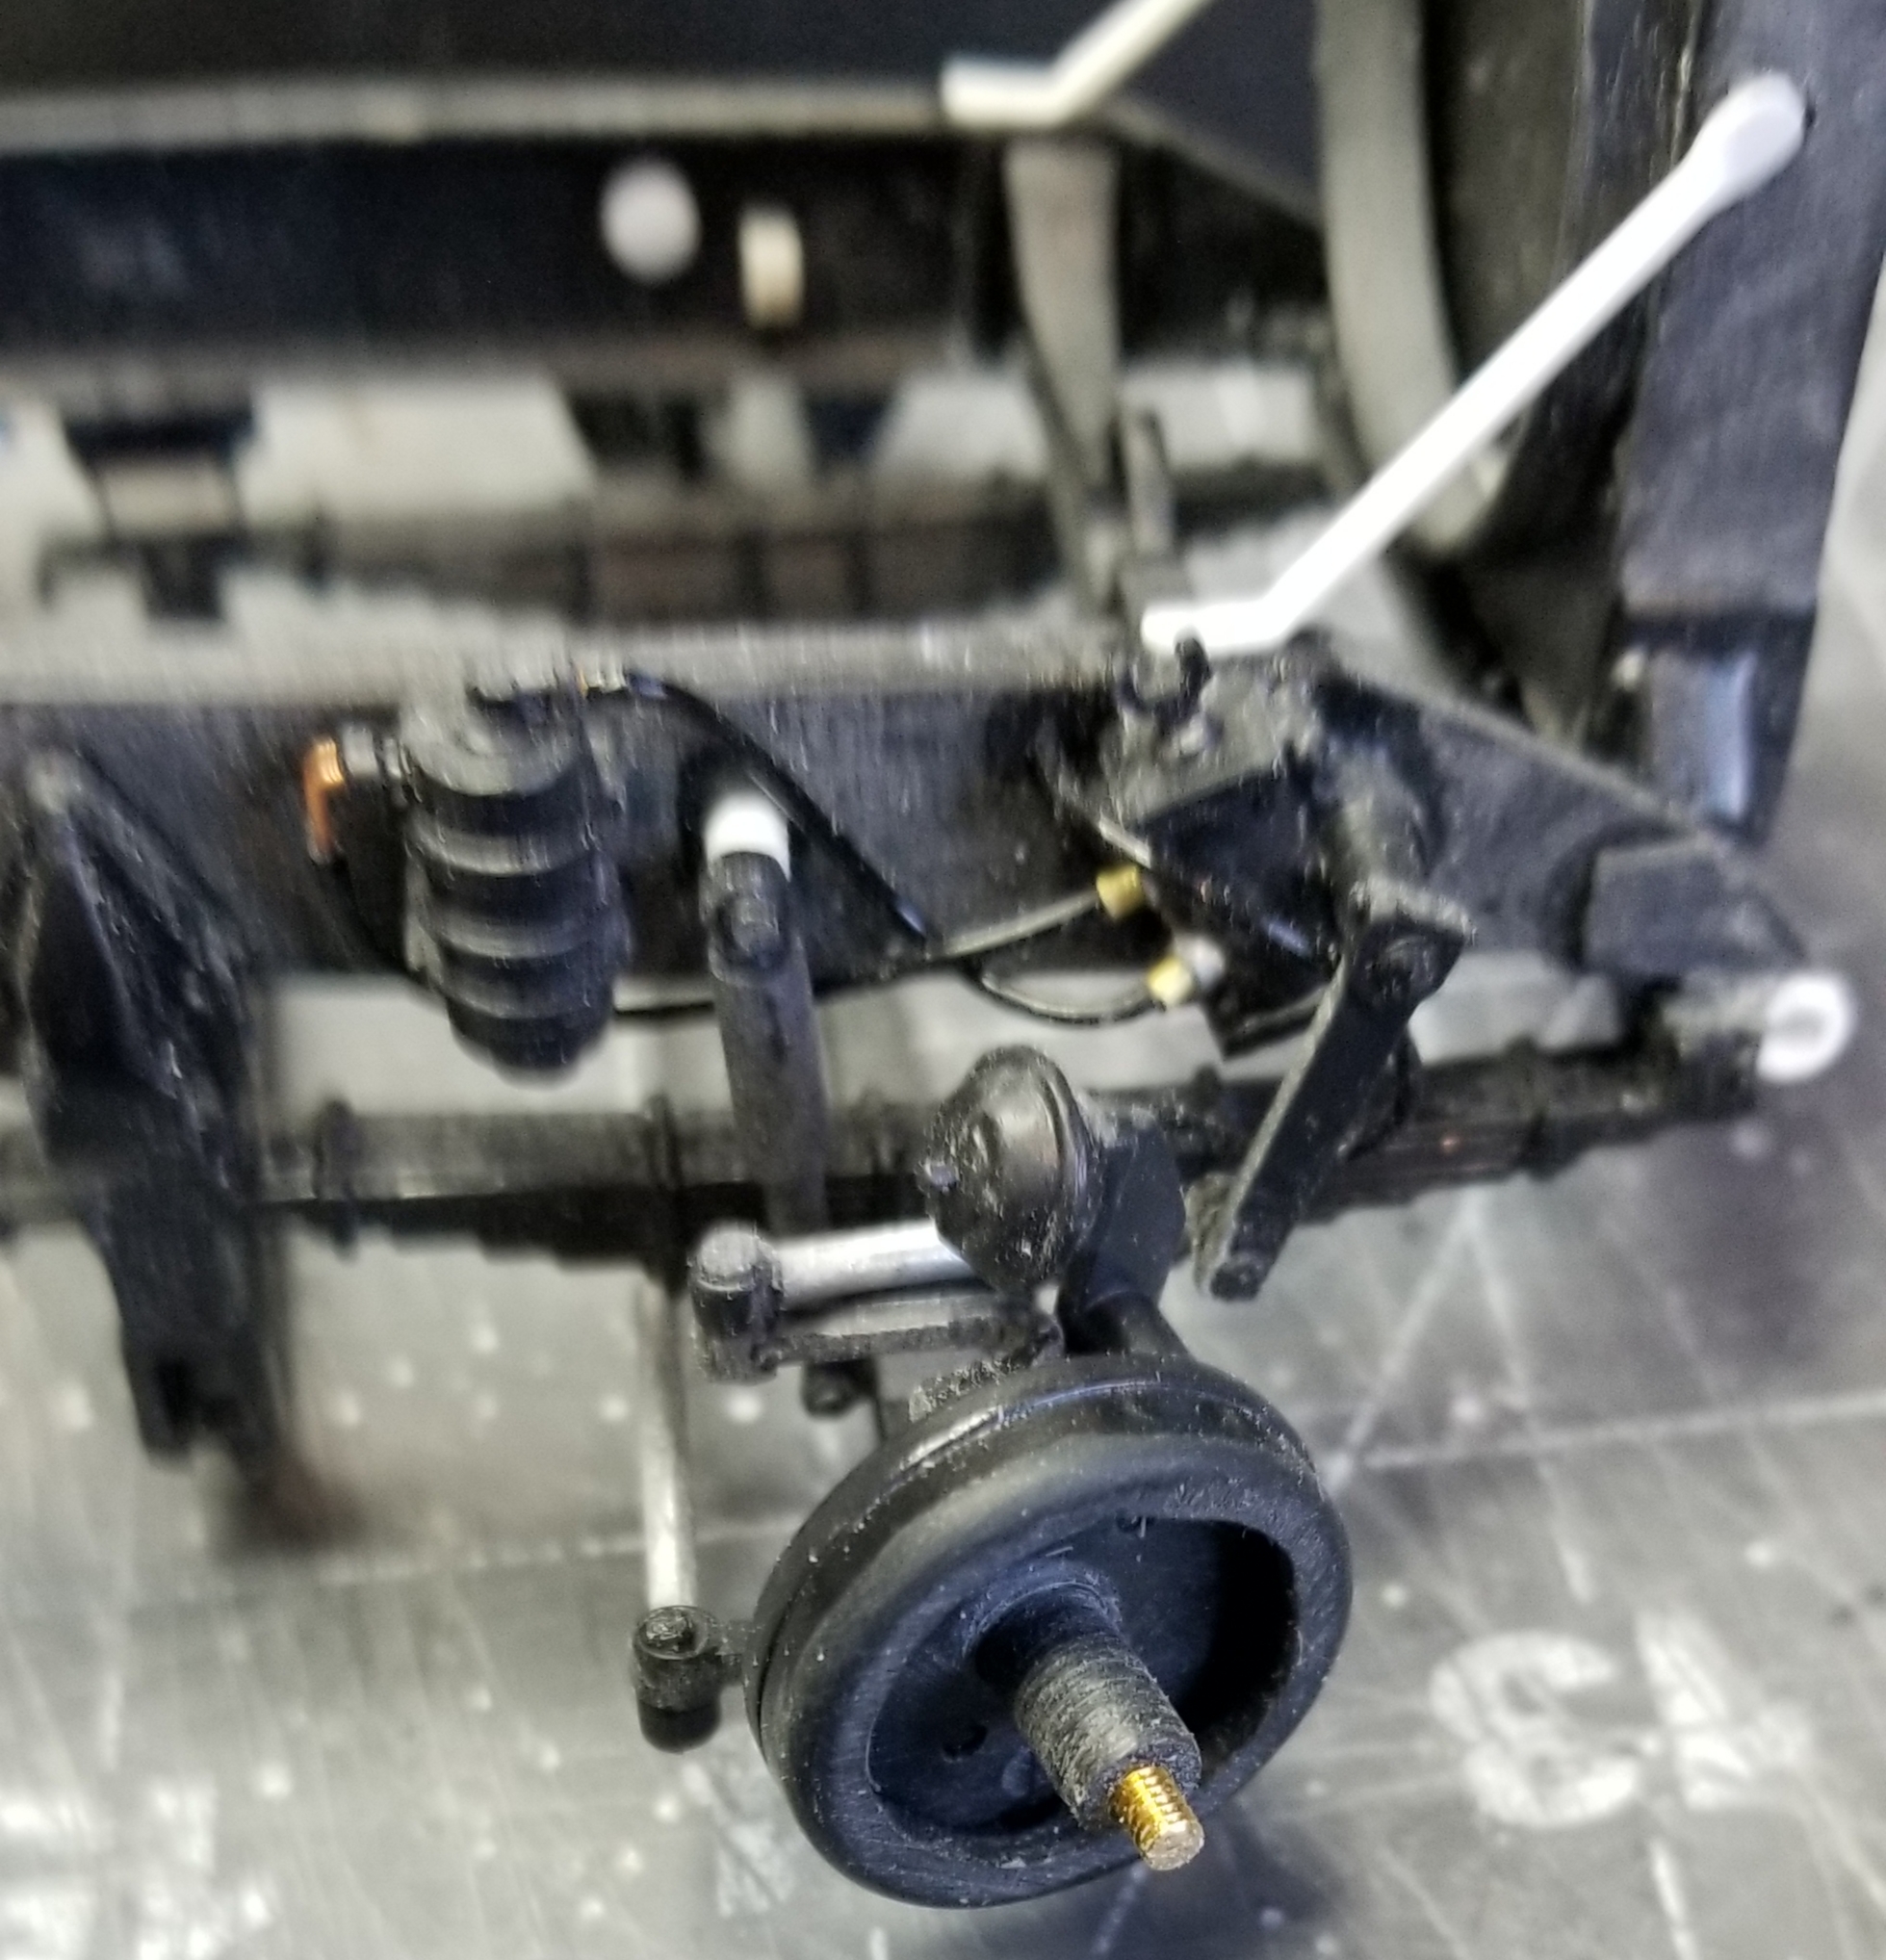
Did some more work on the Superliner II. I started doing all the plumbing, air lines, power steering lines, fuel lines, etc. This is a real pain in the a$$! It's almost getting to the point I can't see this small detail, even with readers and opti-visor! But I'm plugging along...lol
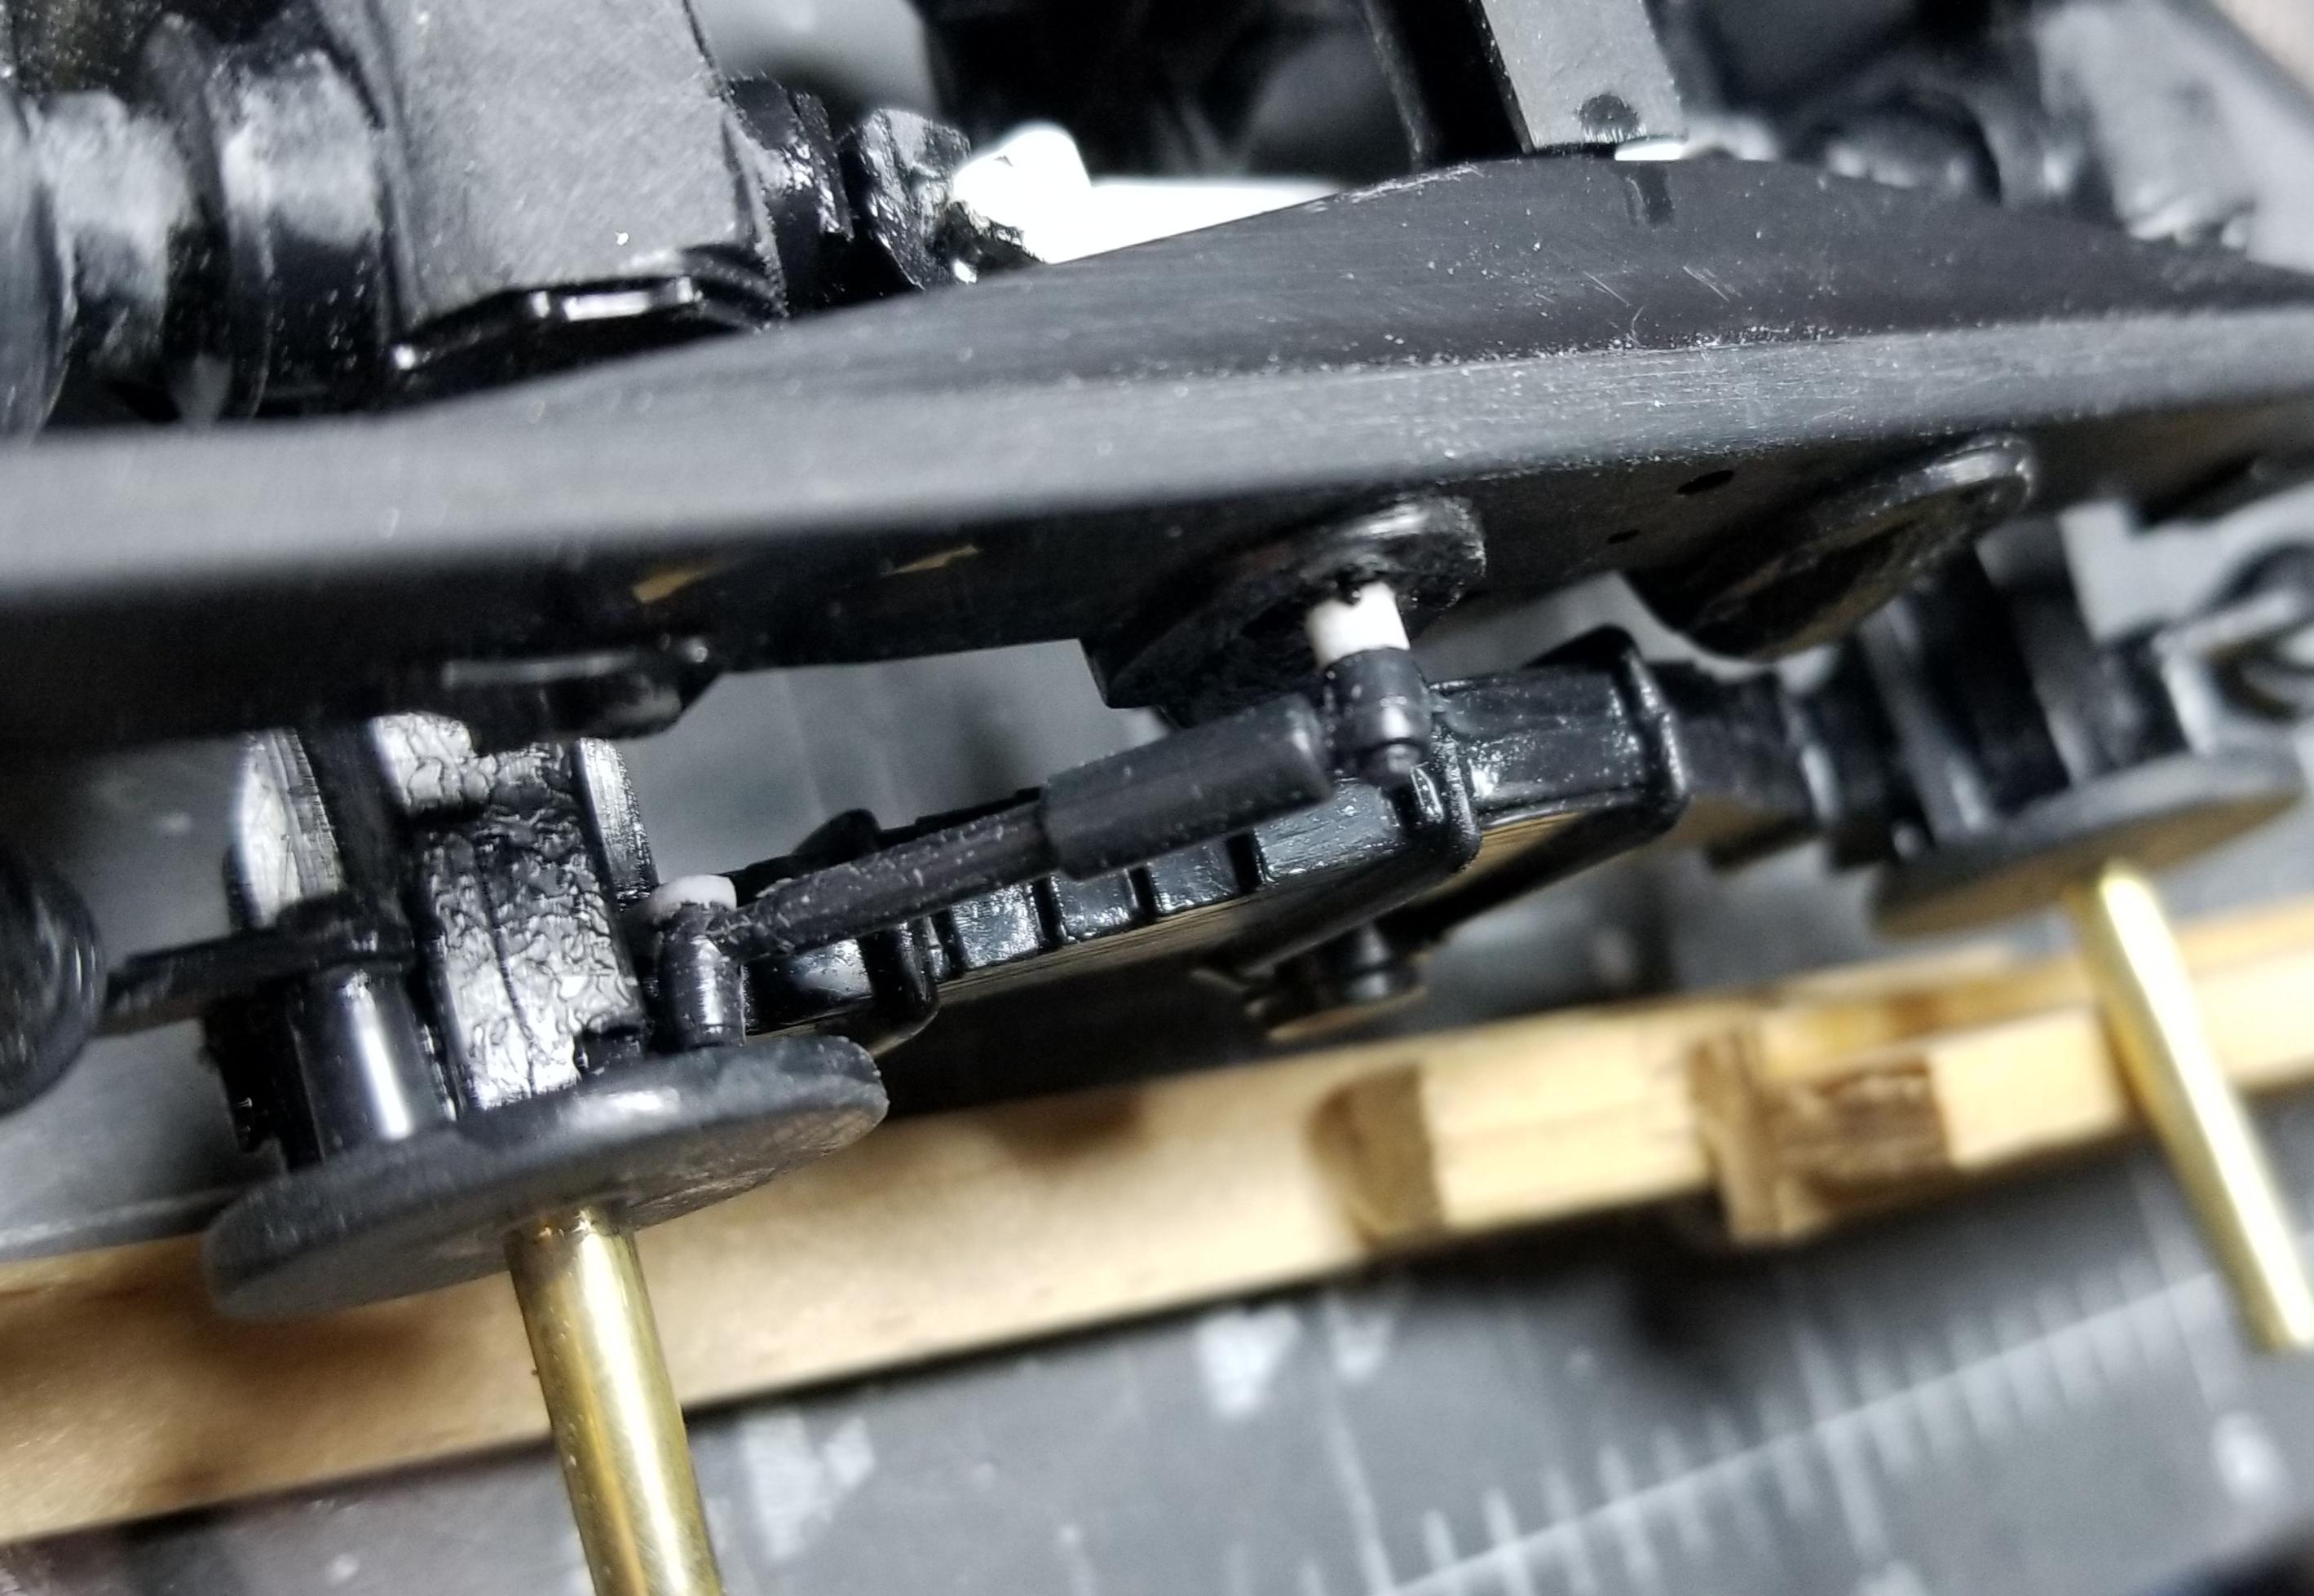
this view shows the rear brake chambers.
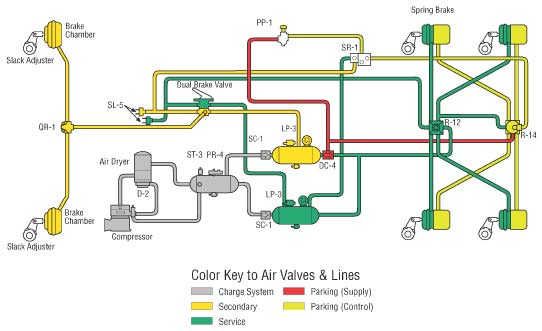
this view shows the diagram I'm using to plumb the Mack.
this view shows the front brake chambers.
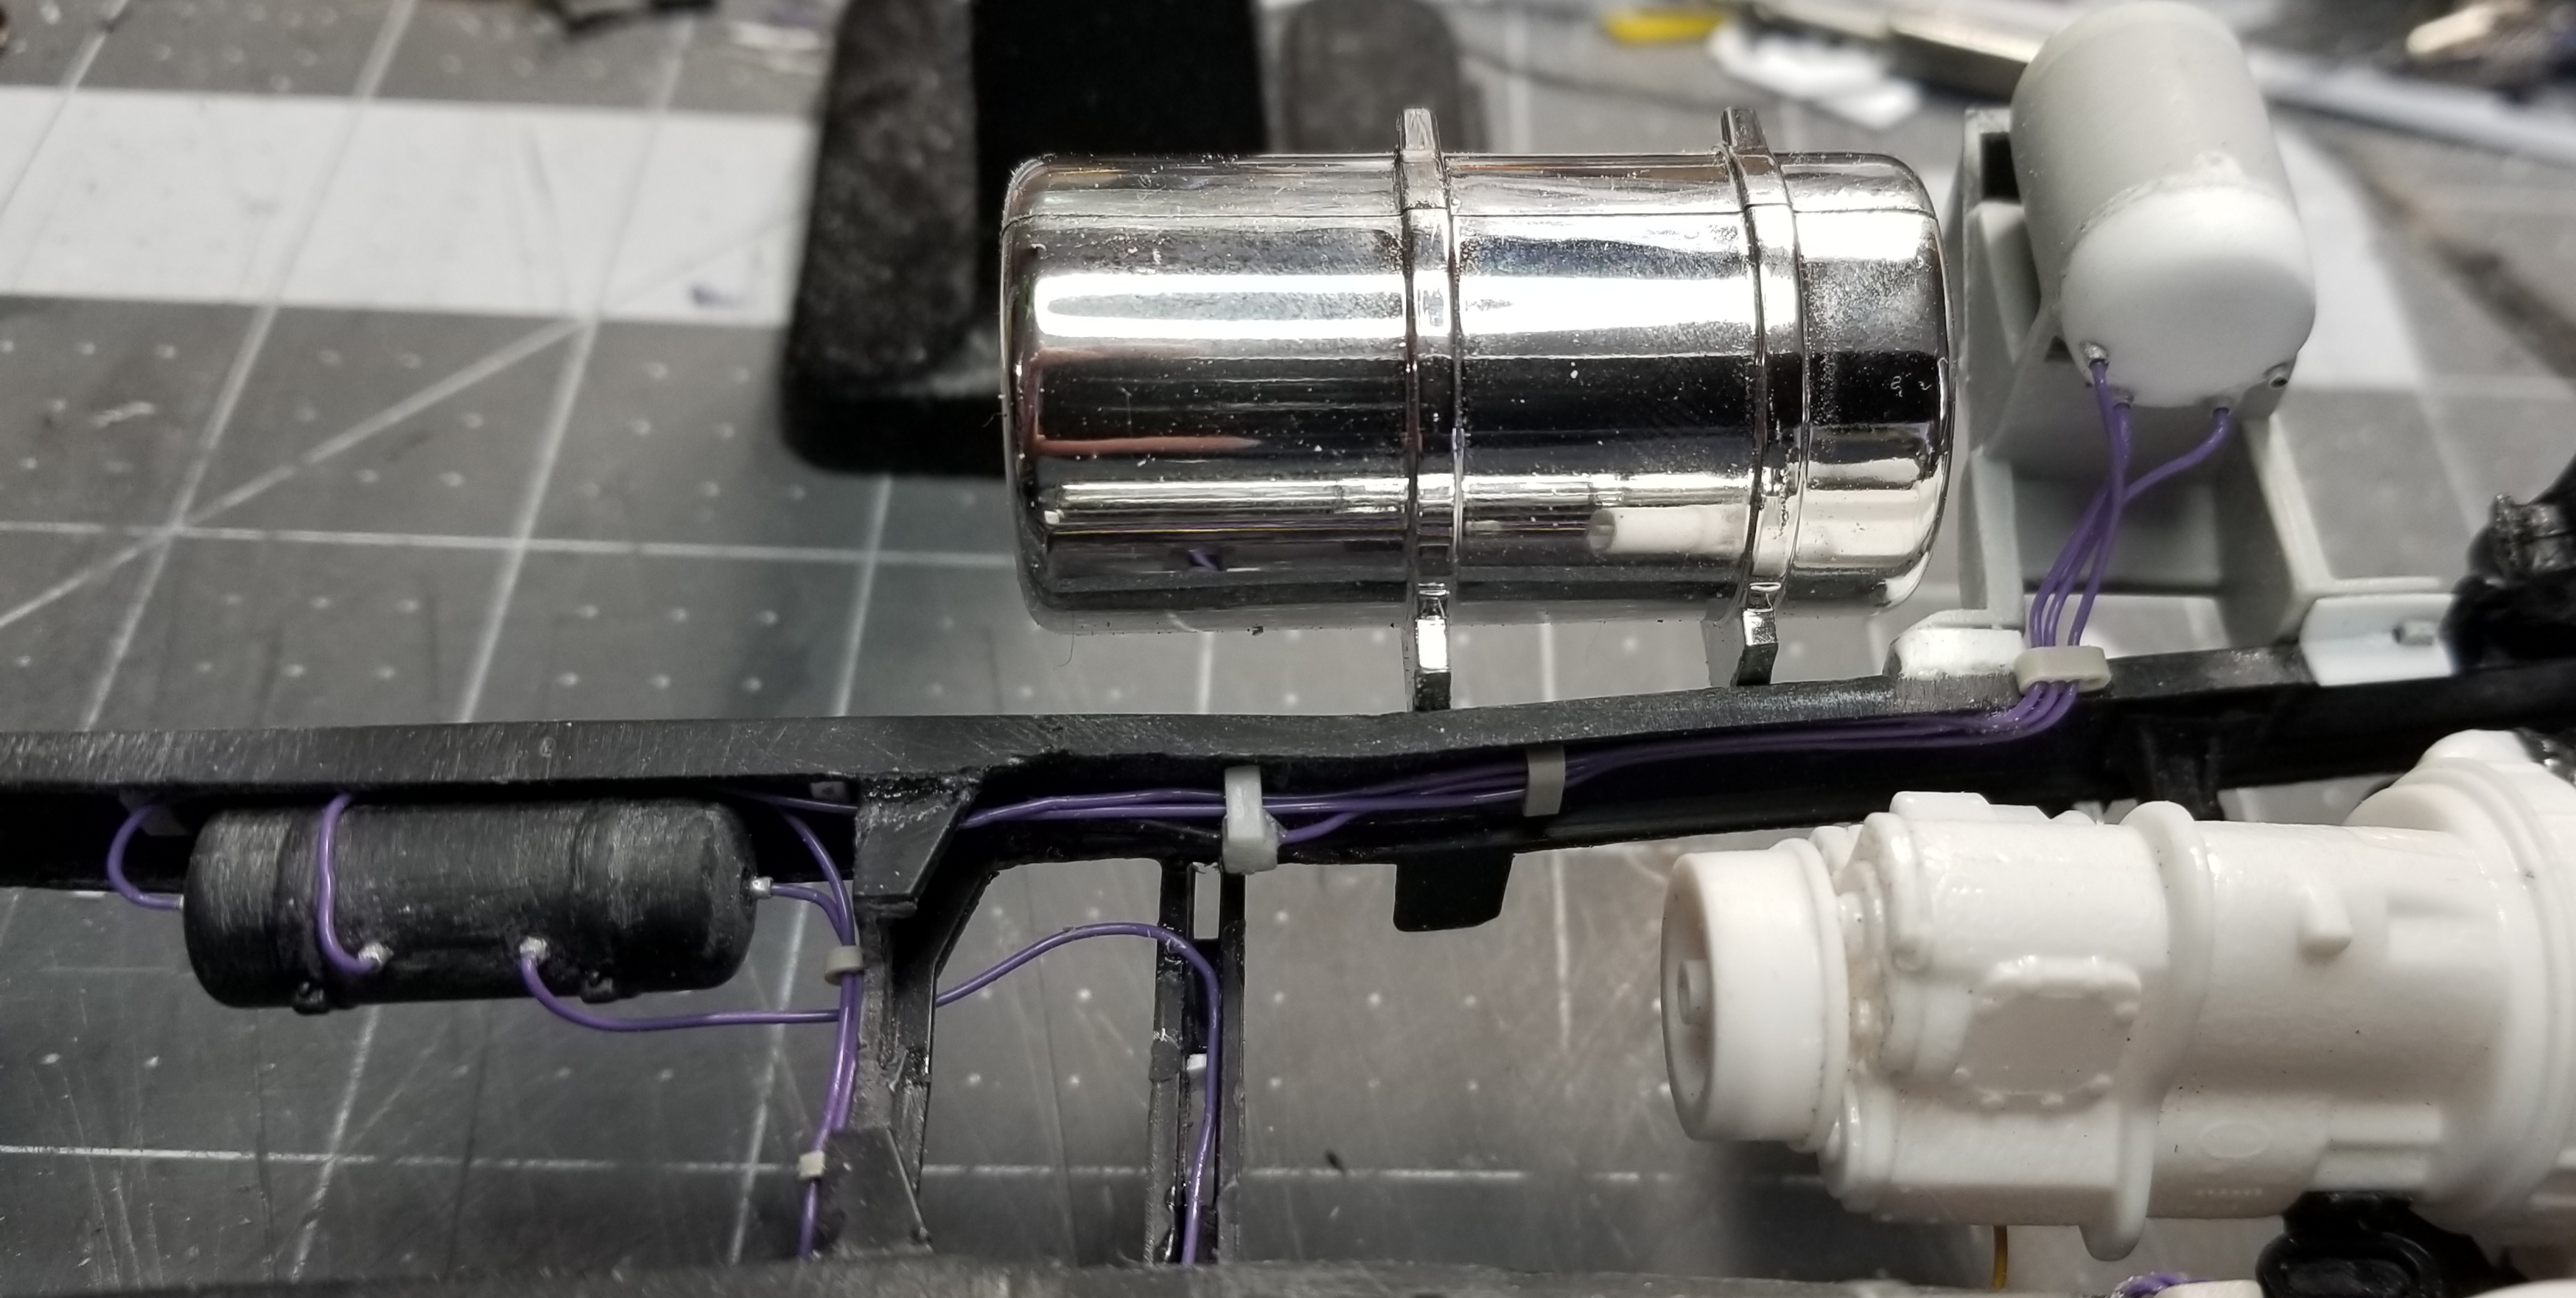
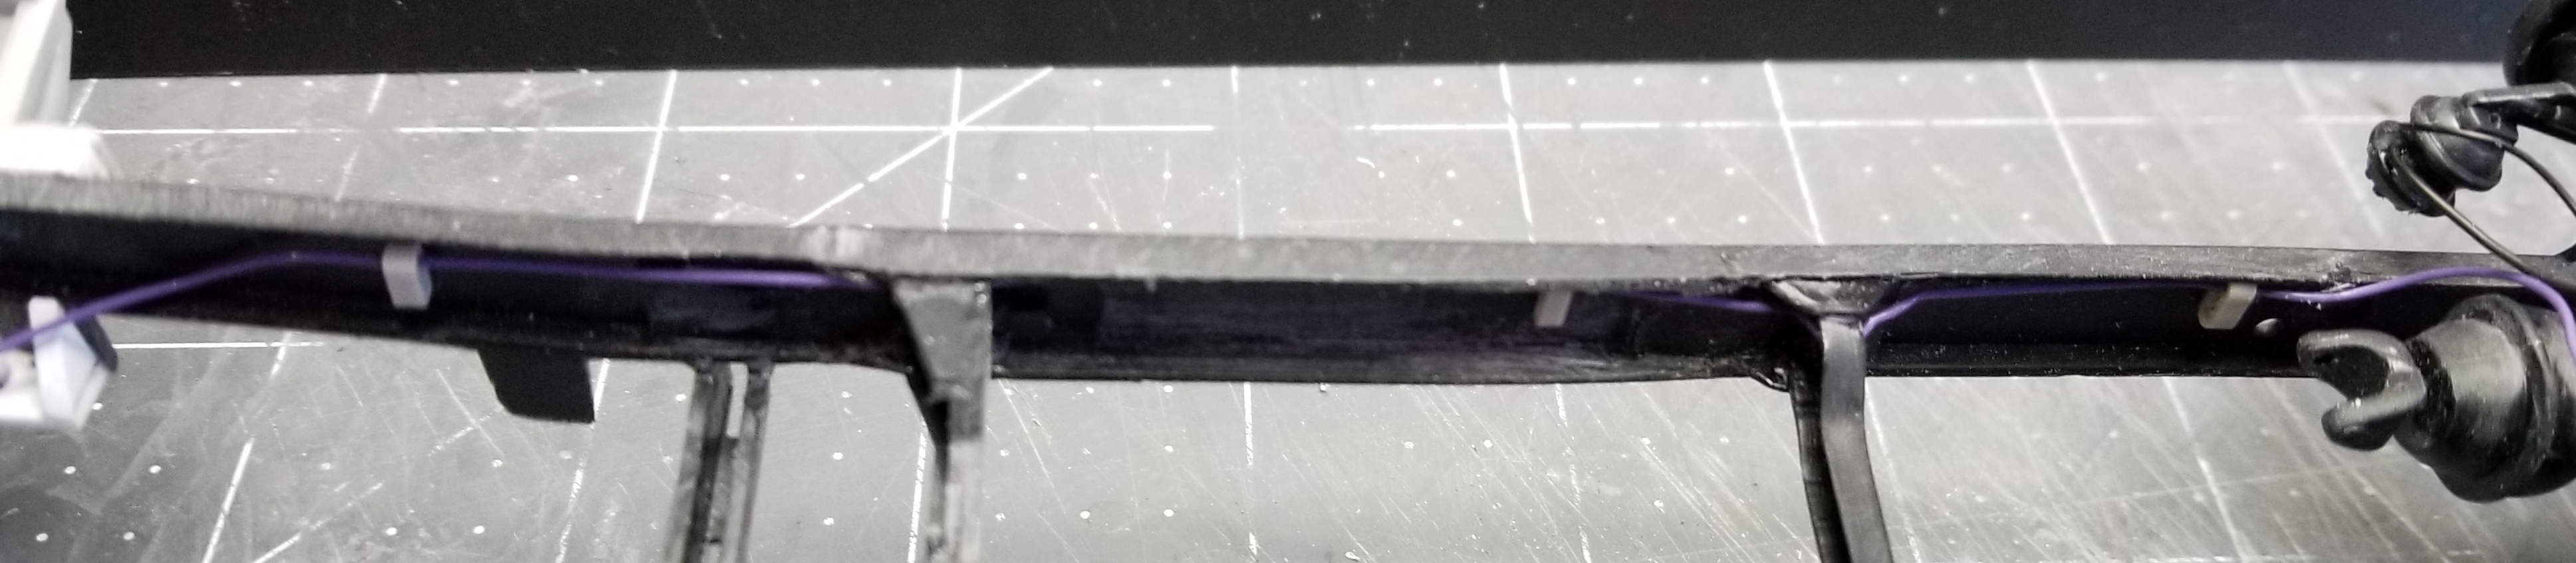
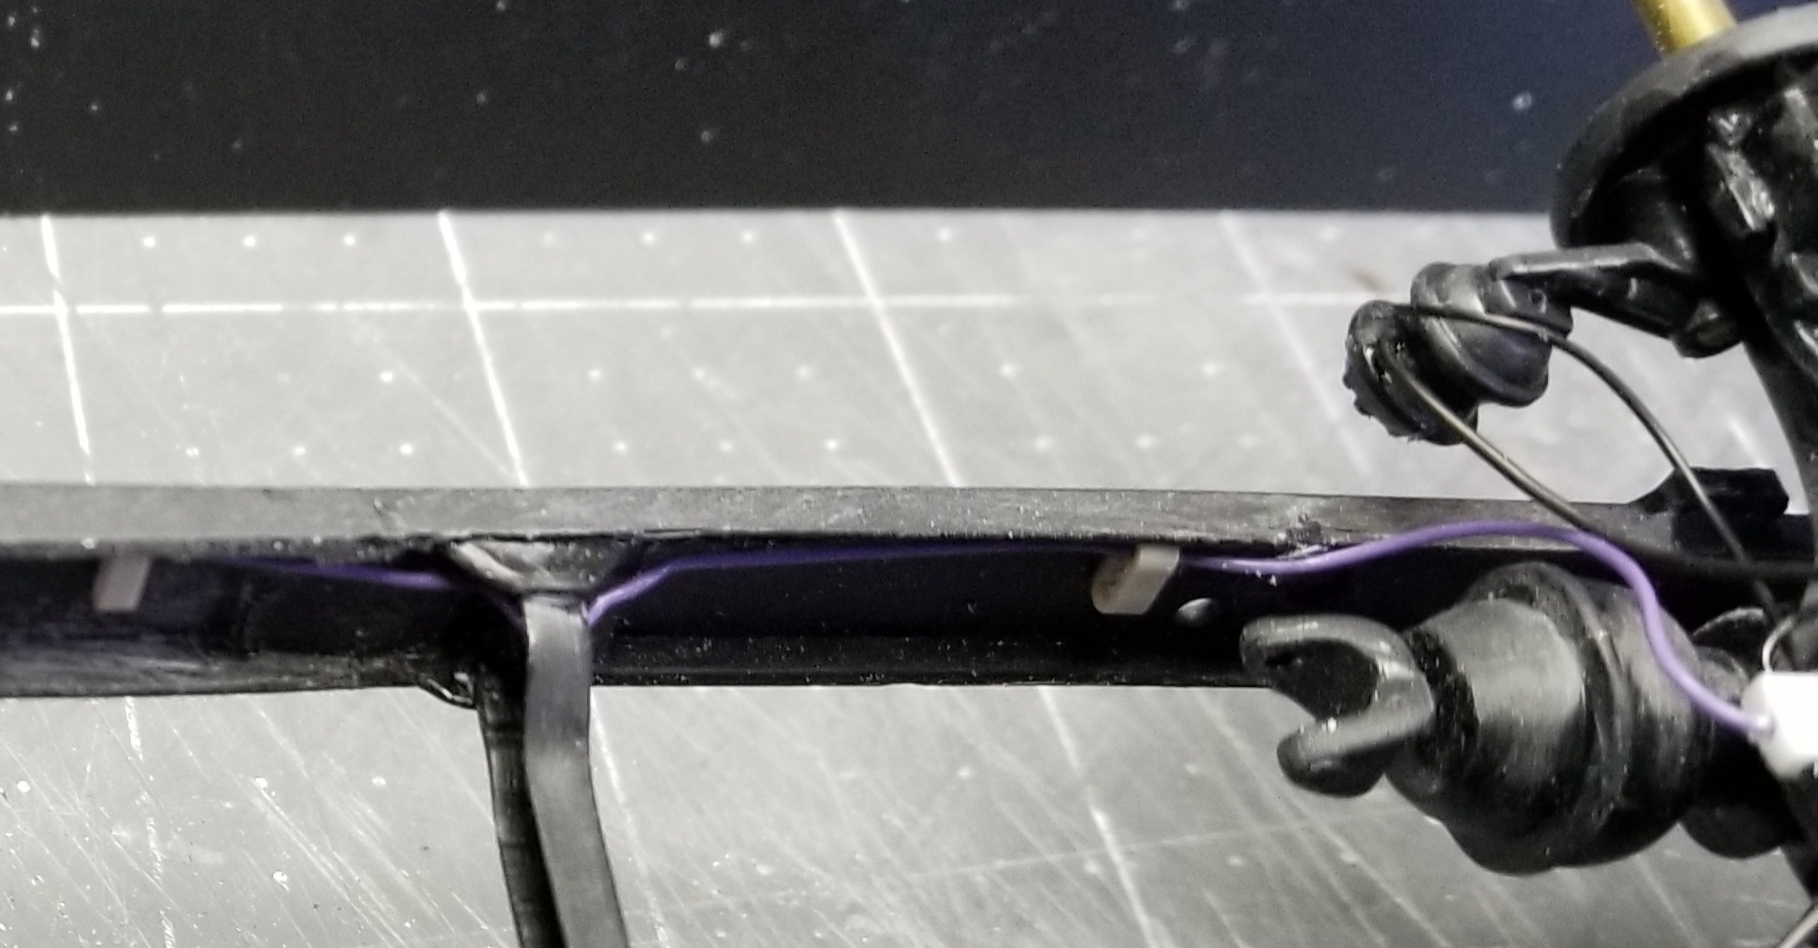
this view shows the air lines running along the frame rails. Little hard to see. closer view of the air lines at the rear.
this view shows the air lines at the front and the LH primary air tank. I scratch built the rear area of the tank, it came as a open hole in the kit..dahh!
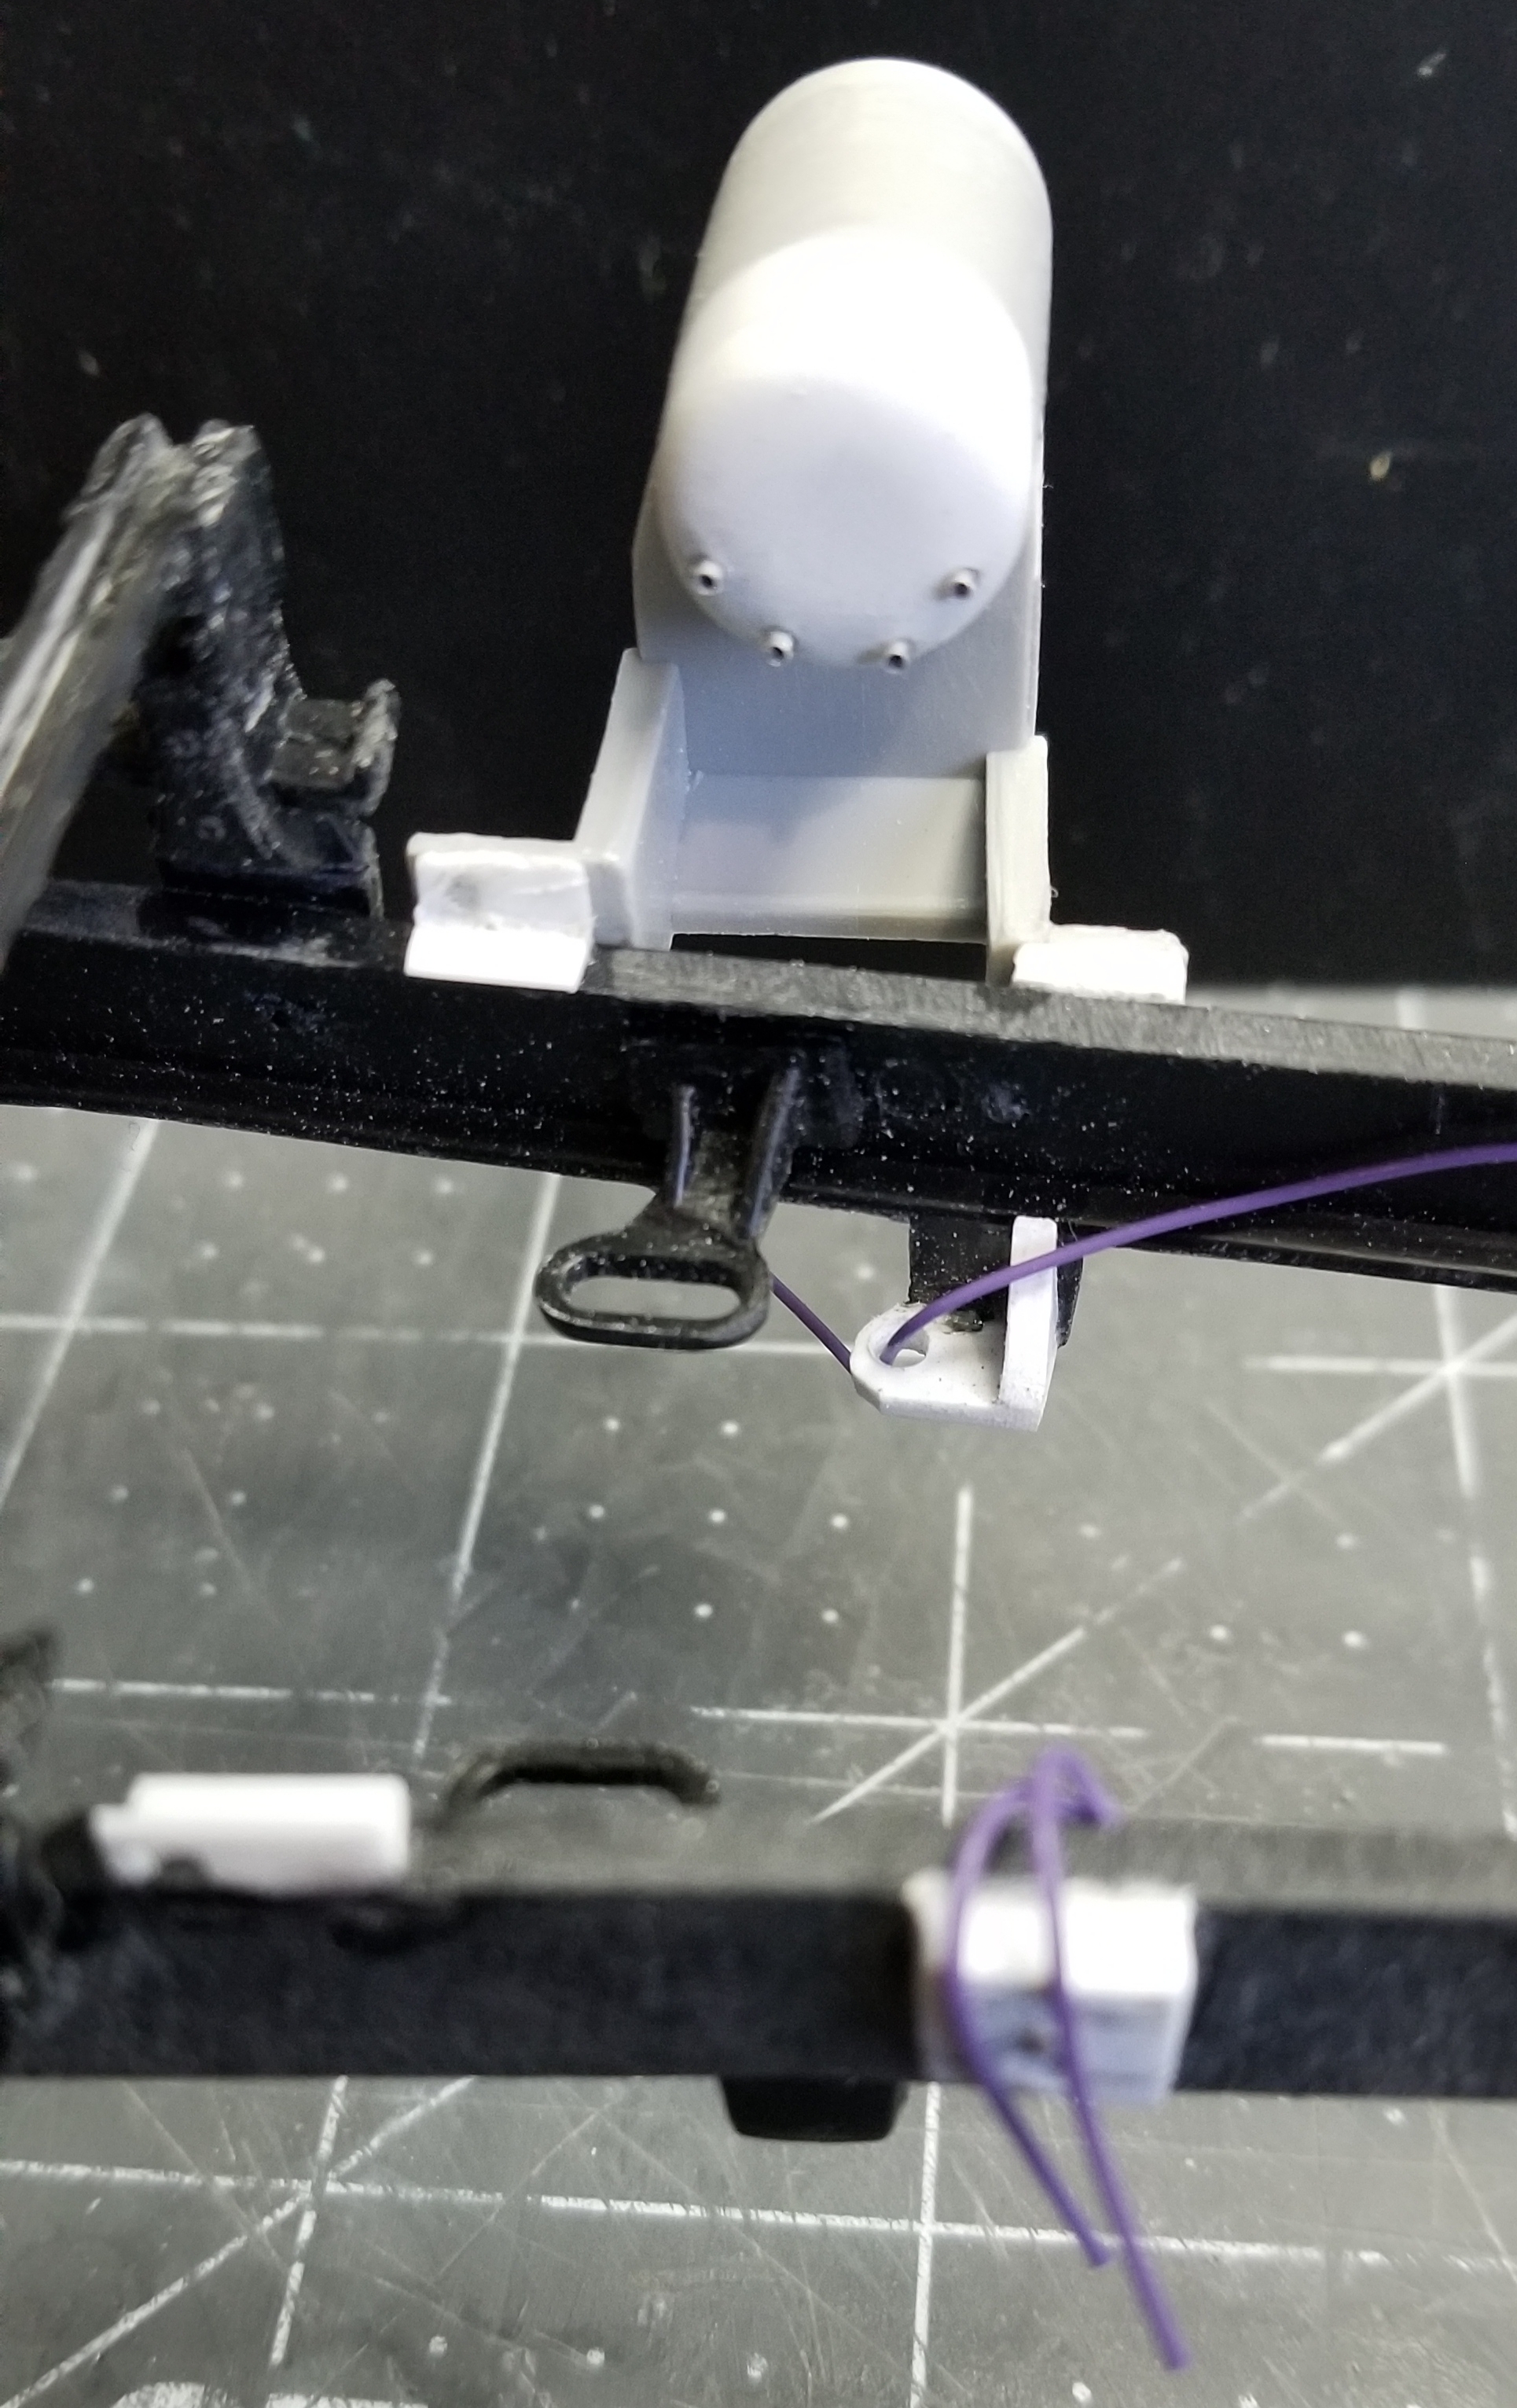
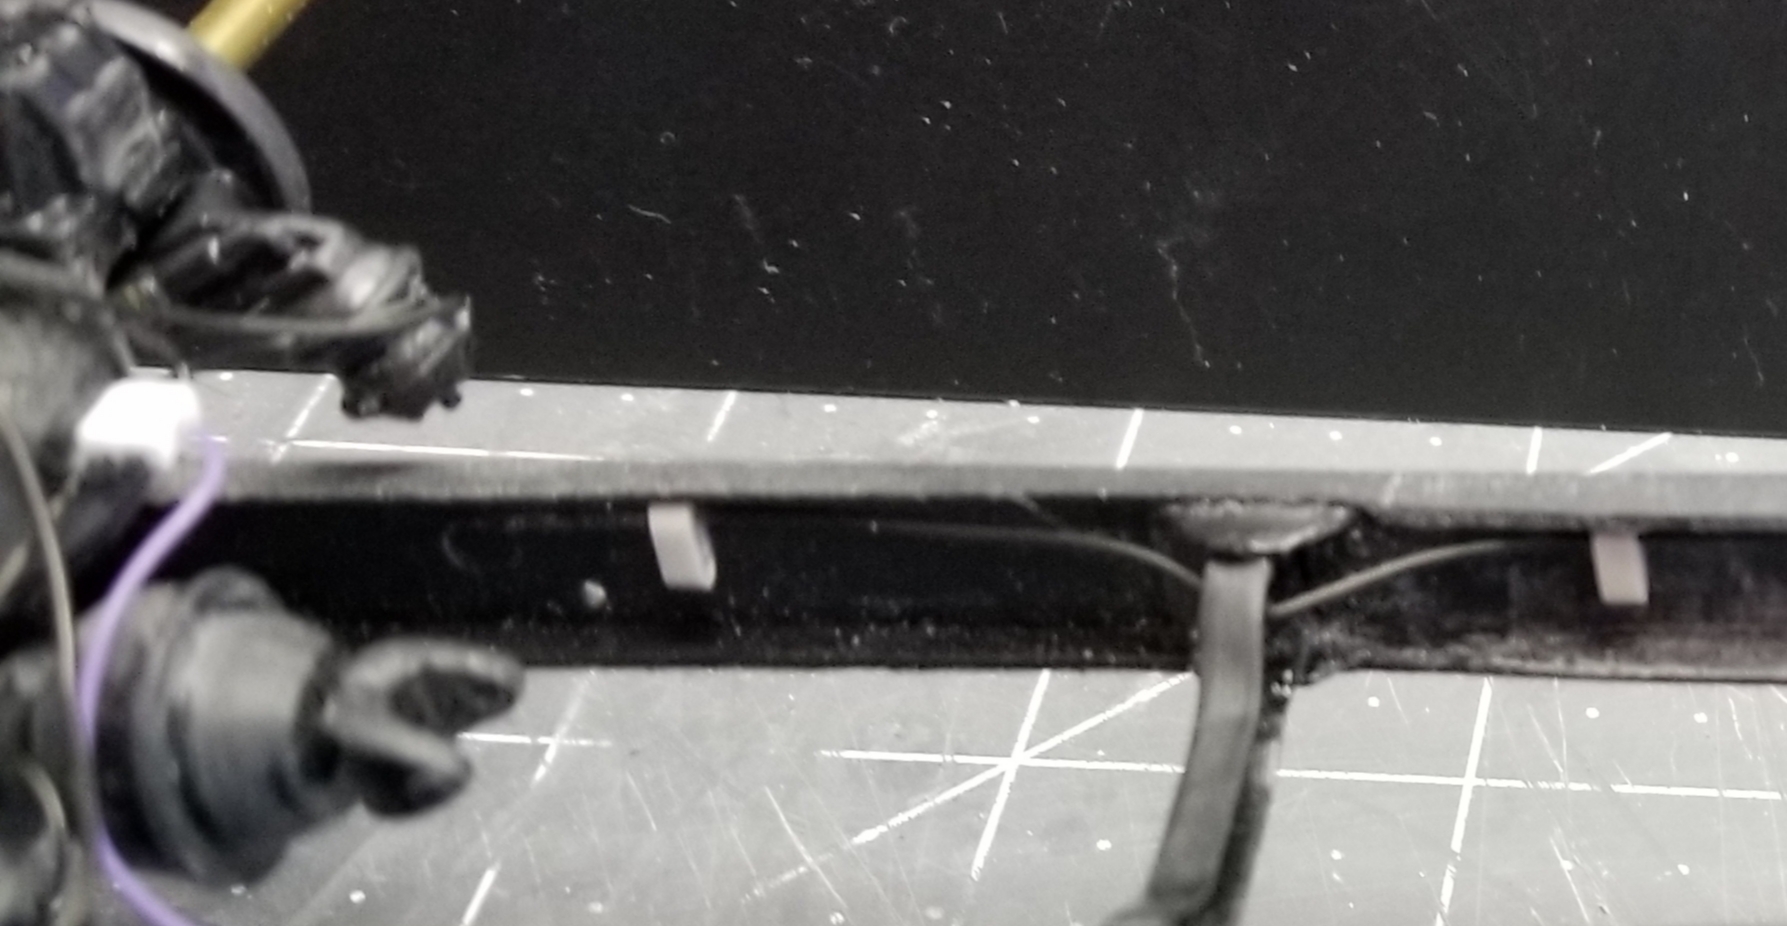
this view shows the air lines running along the other frame rail.
this view shows some of the scratch built air fittings and lines.
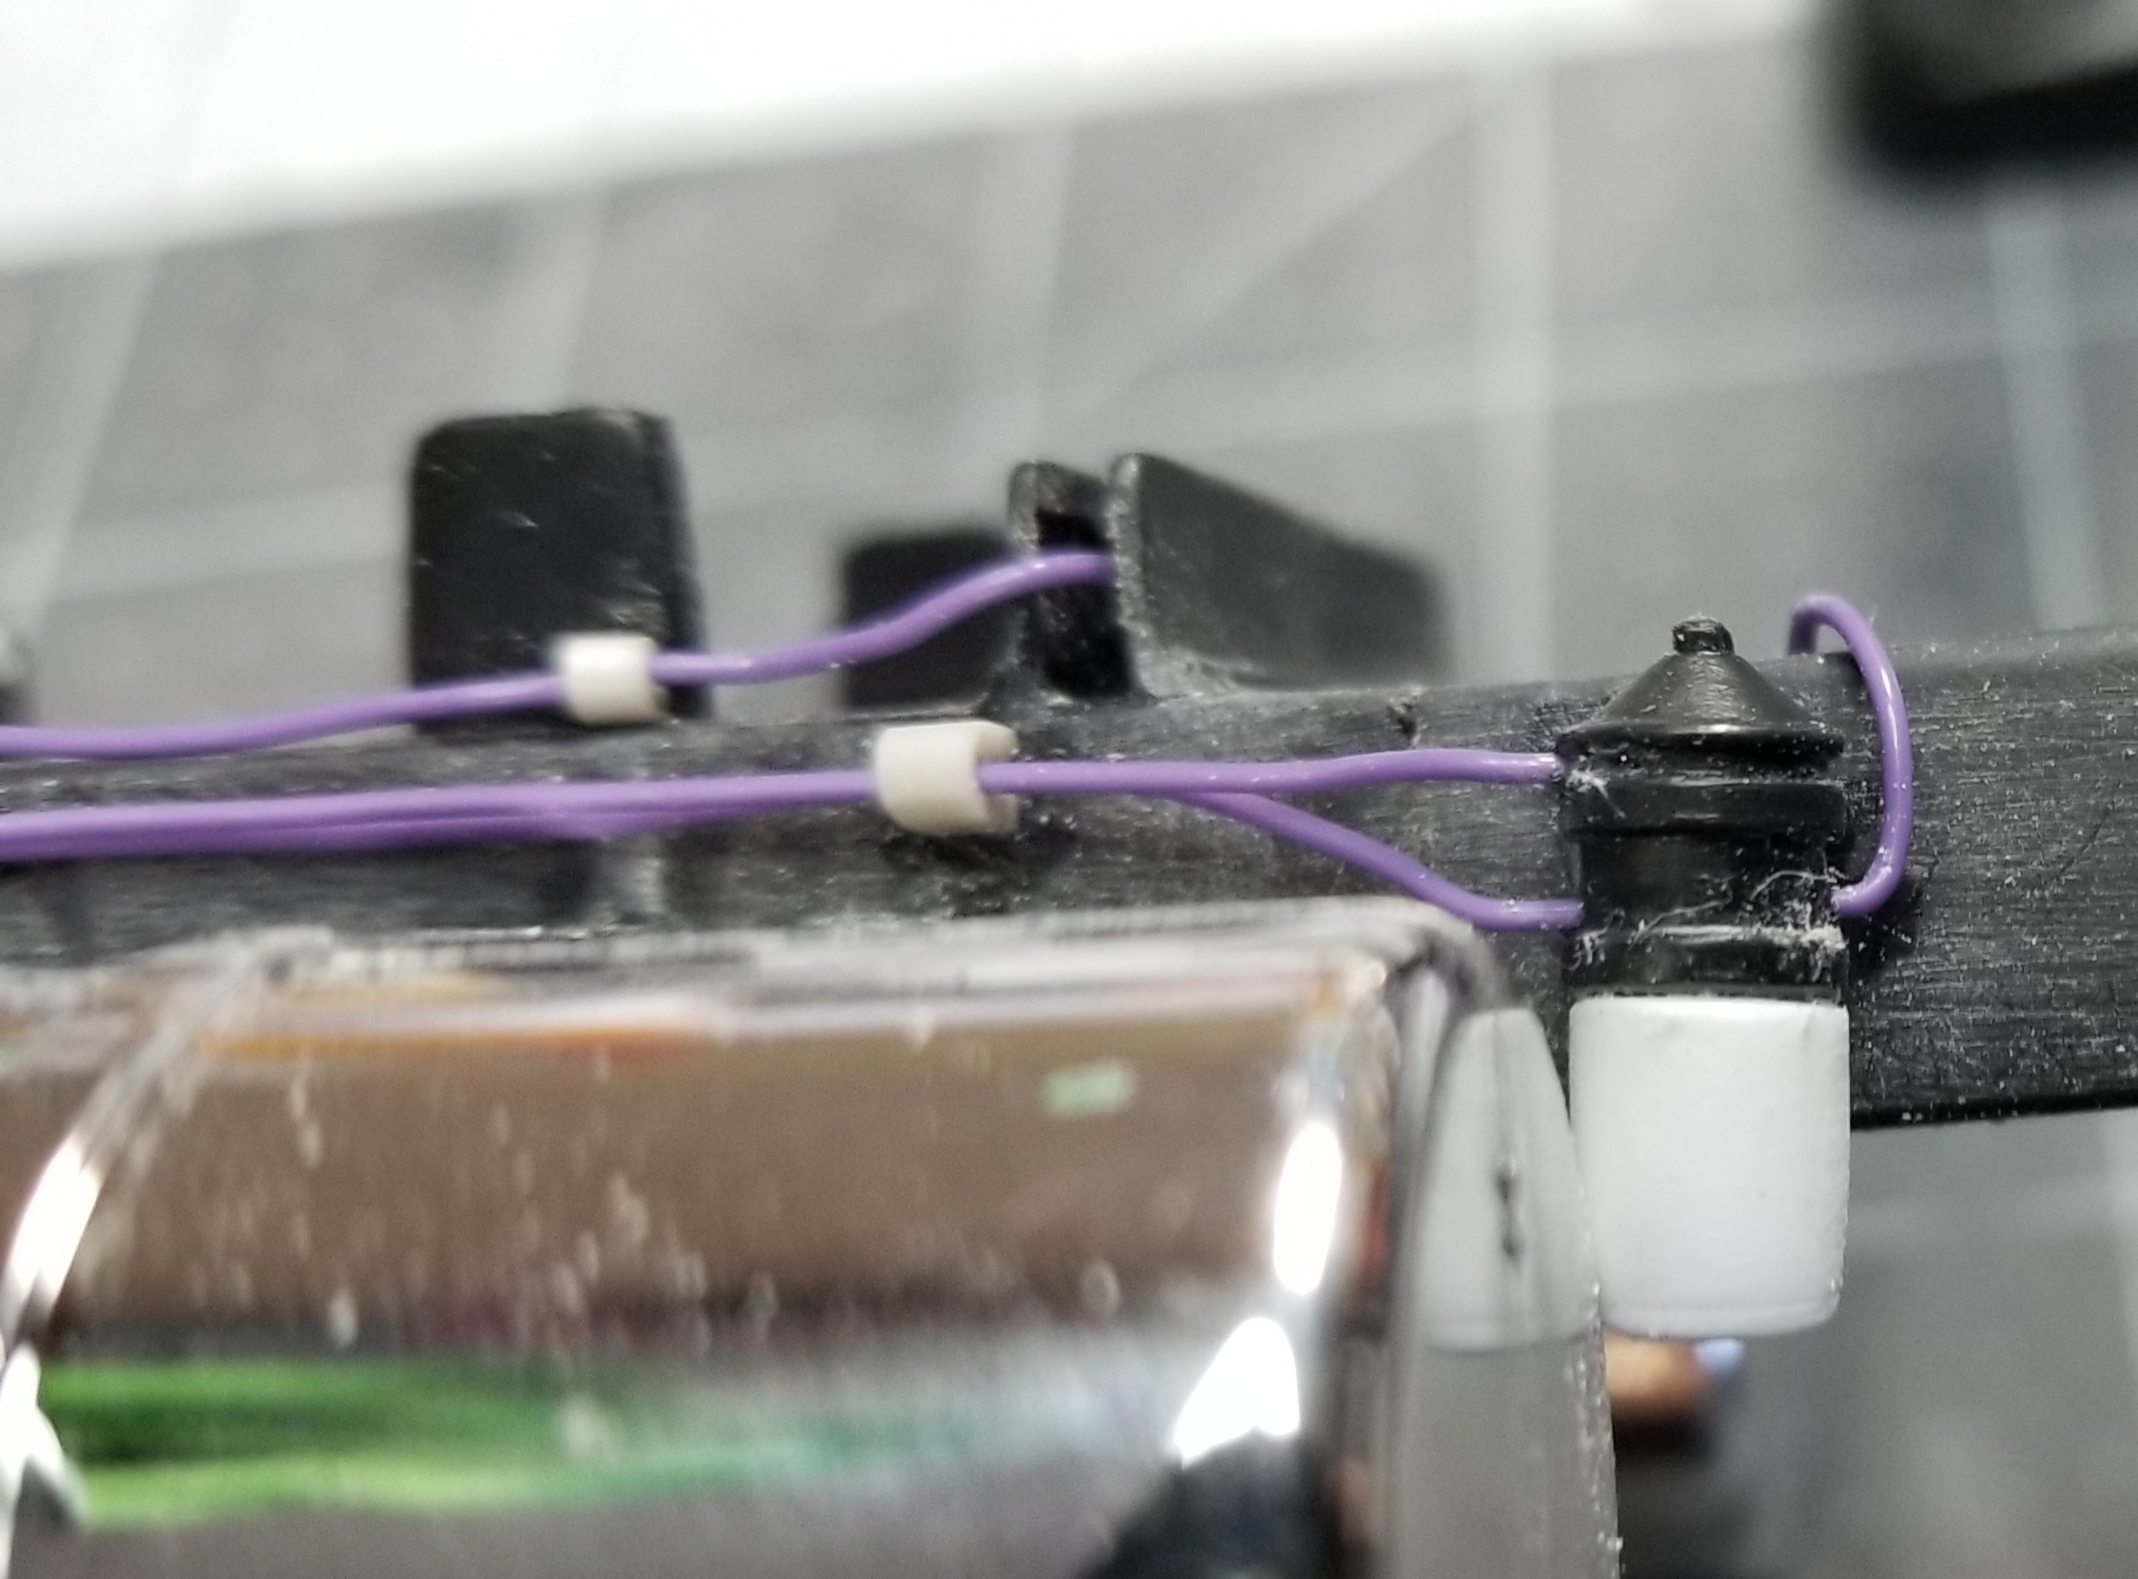
this view shows the air lines and the small wire looms I made.
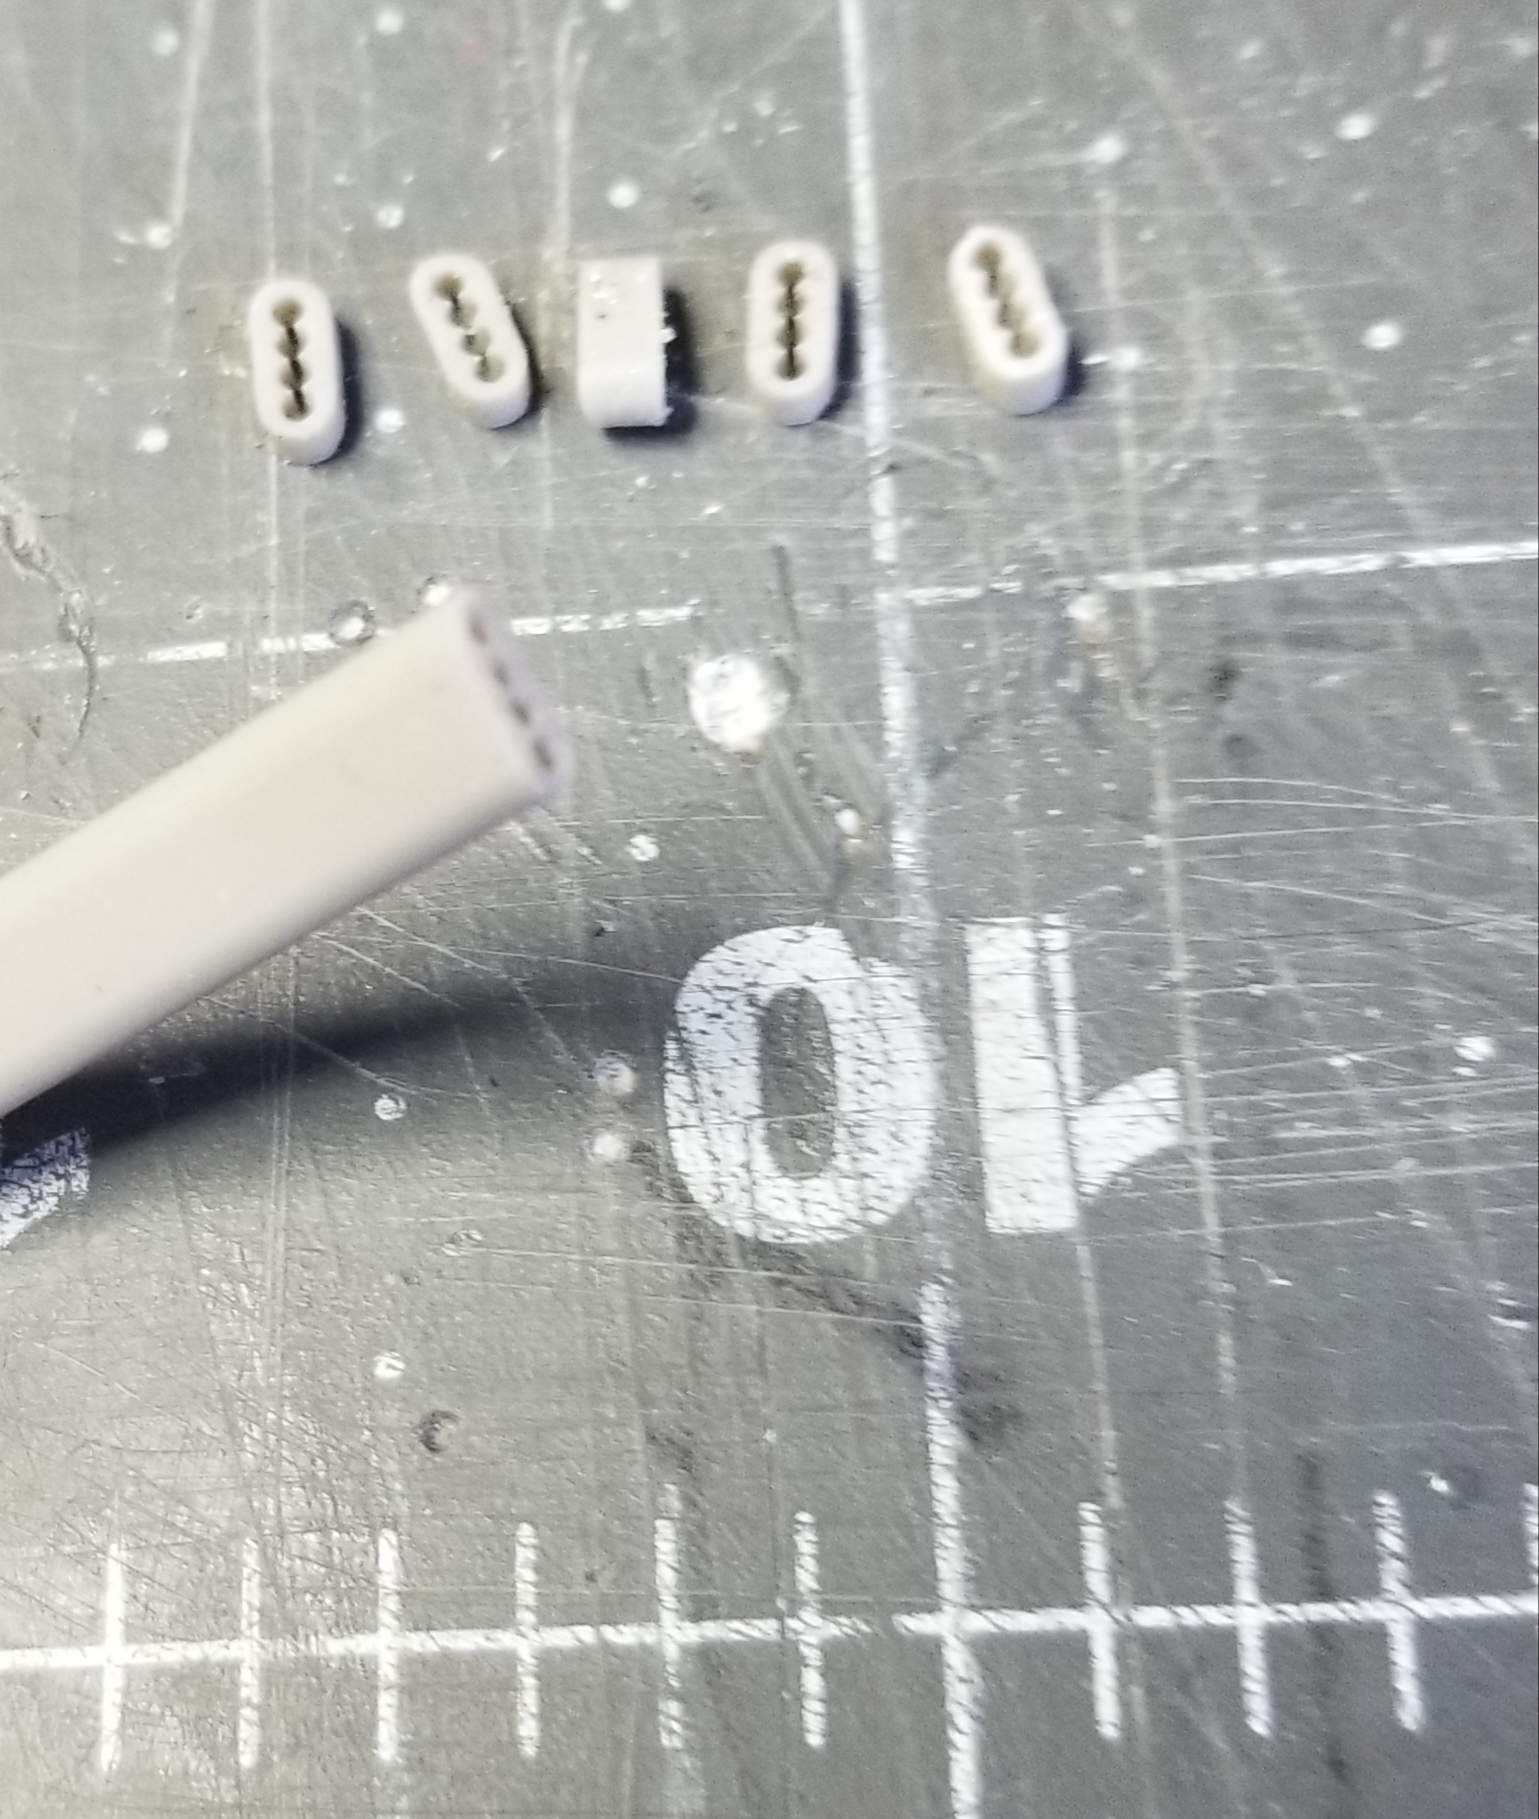
this view shows the wire/line looms I made from a piece of 4 wire insulation cut to size.
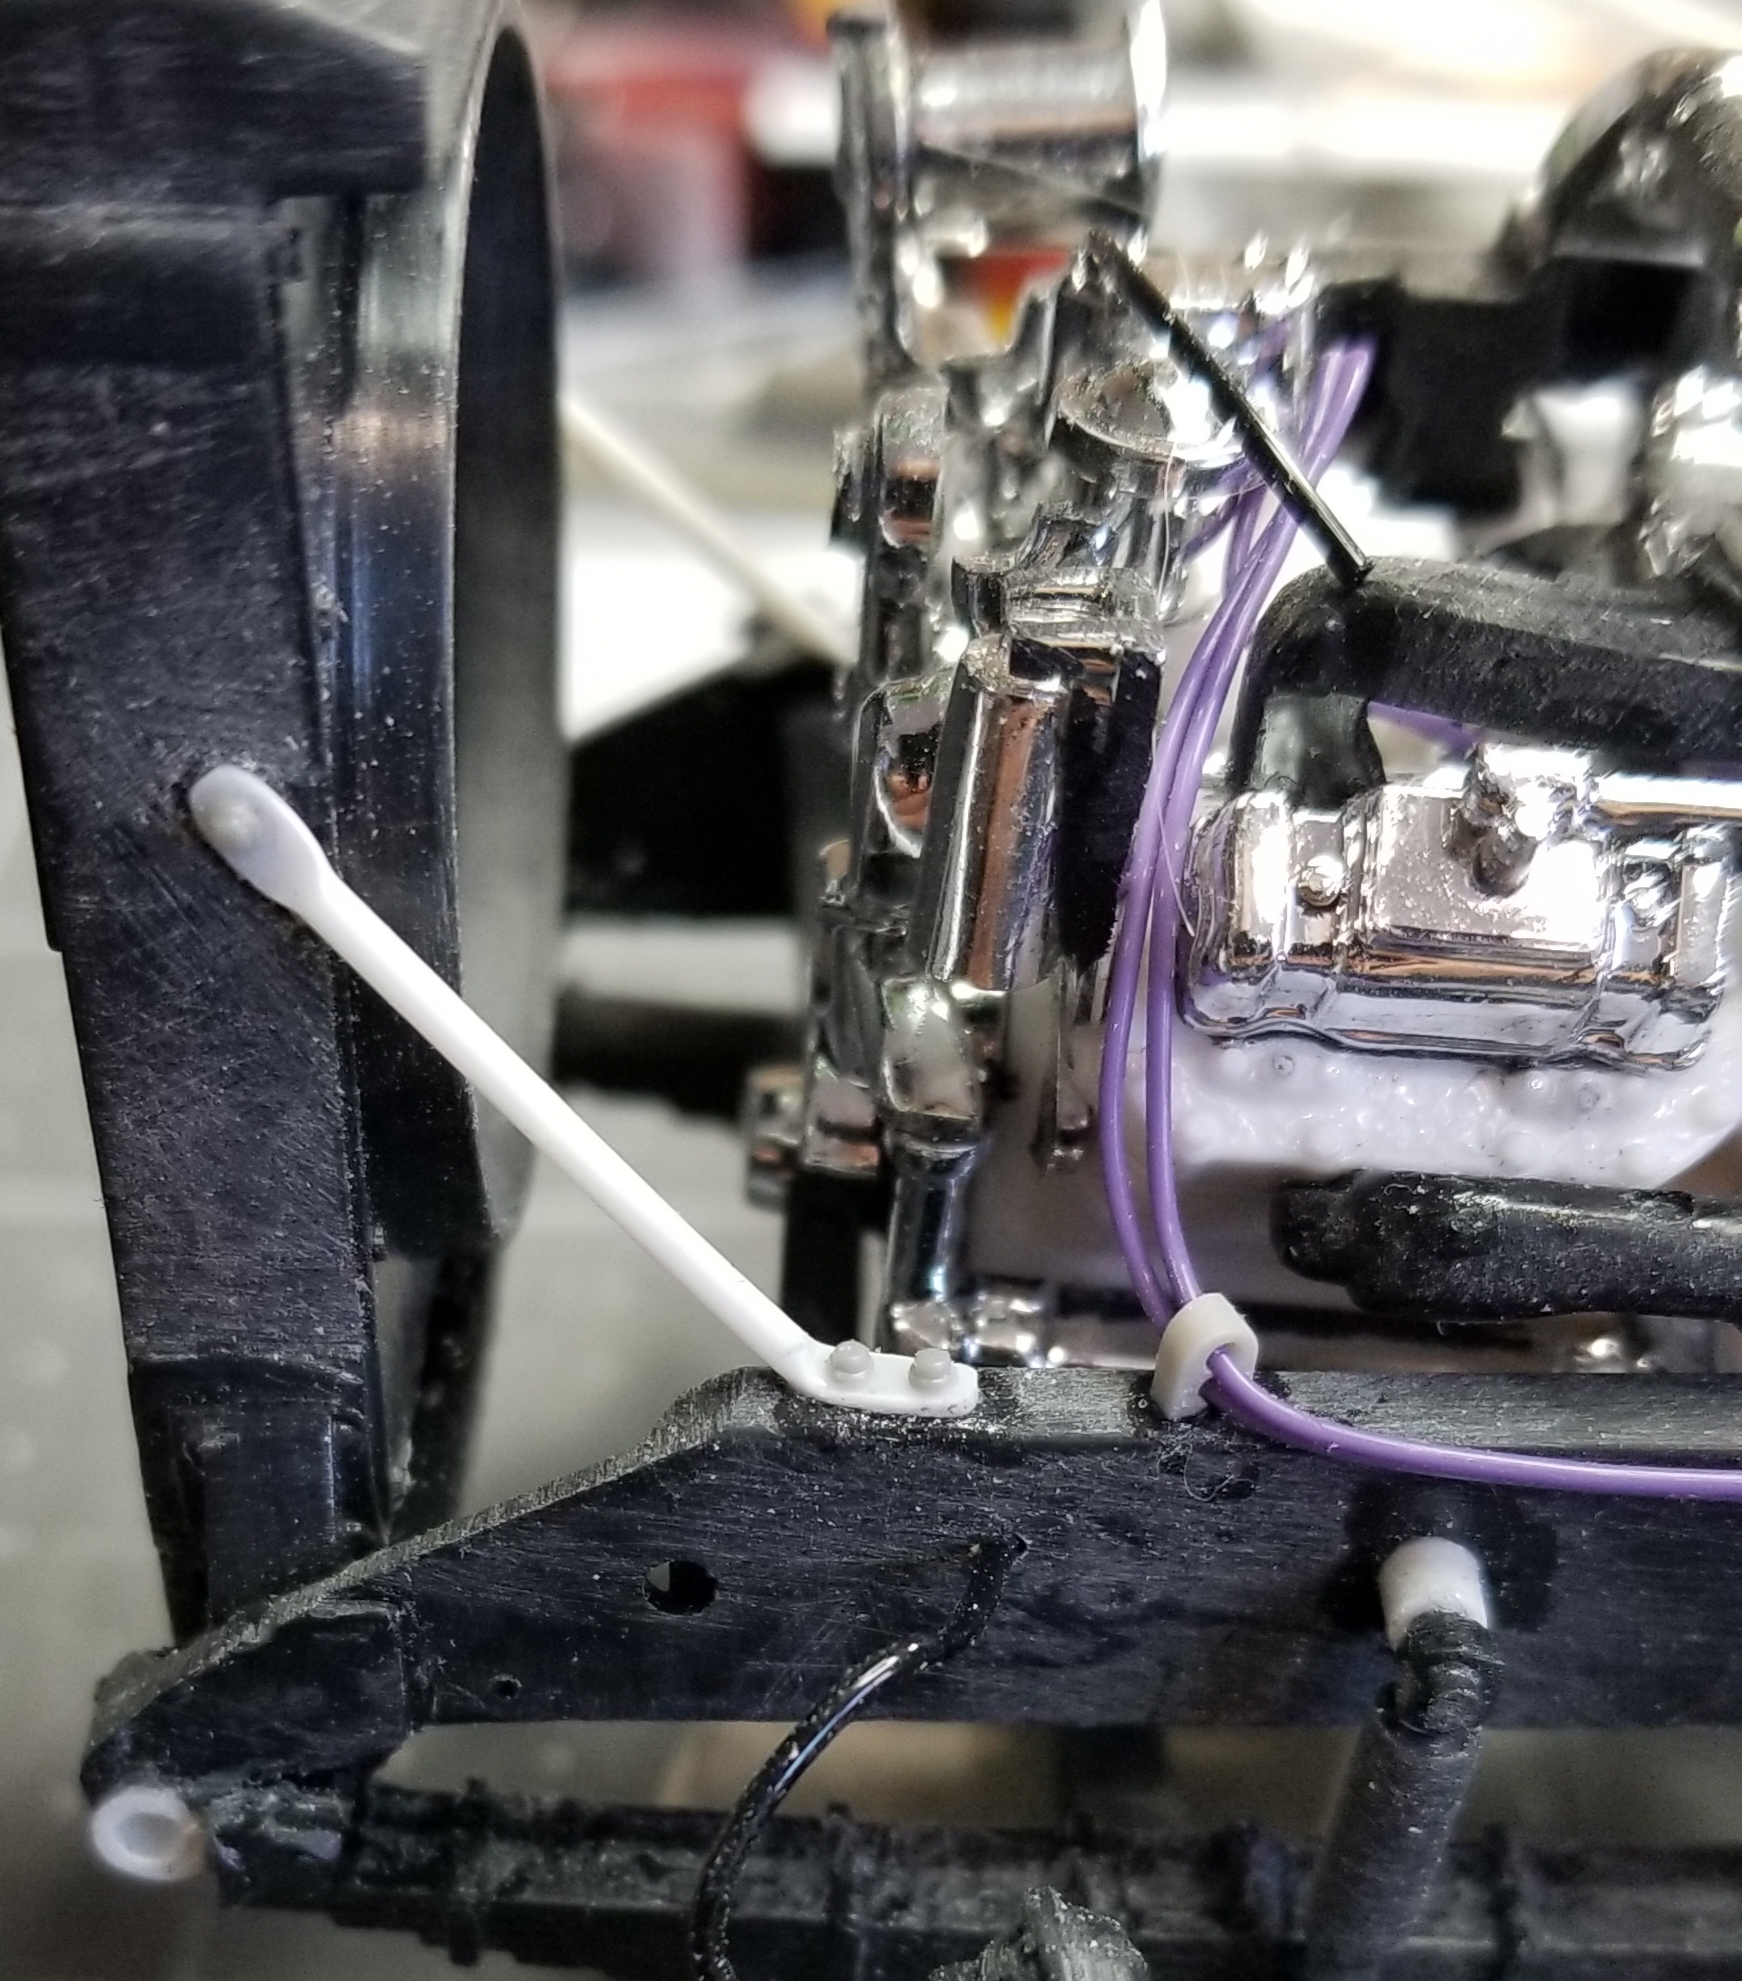
this view shows the front brake chambers and air lines. Also the power steering lines.
this view shows the radiator braces I scratch built from plasti rod. Well that's it for now be back with more updates soon.
closer view of the air lines at the rear.
this view shows the air lines at the front and the LH primary air tank. I scratch built the rear area of the tank, it came as a open hole in the kit..dahh!
this view shows the air lines running along the other frame rail.
this view shows some of the scratch built air fittings and lines.
this view shows the air lines and the small wire looms I made.
this view shows the wire/line looms I made from a piece of 4 wire insulation cut to size.
this view shows the front brake chambers and air lines. Also the power steering lines.
this view shows the radiator braces I scratch built from plasti rod. Well that's it for now be back with more updates soon.
Come on guys, leave some comments. I would really like to know what you guys think.
Ron G
-
Hey all
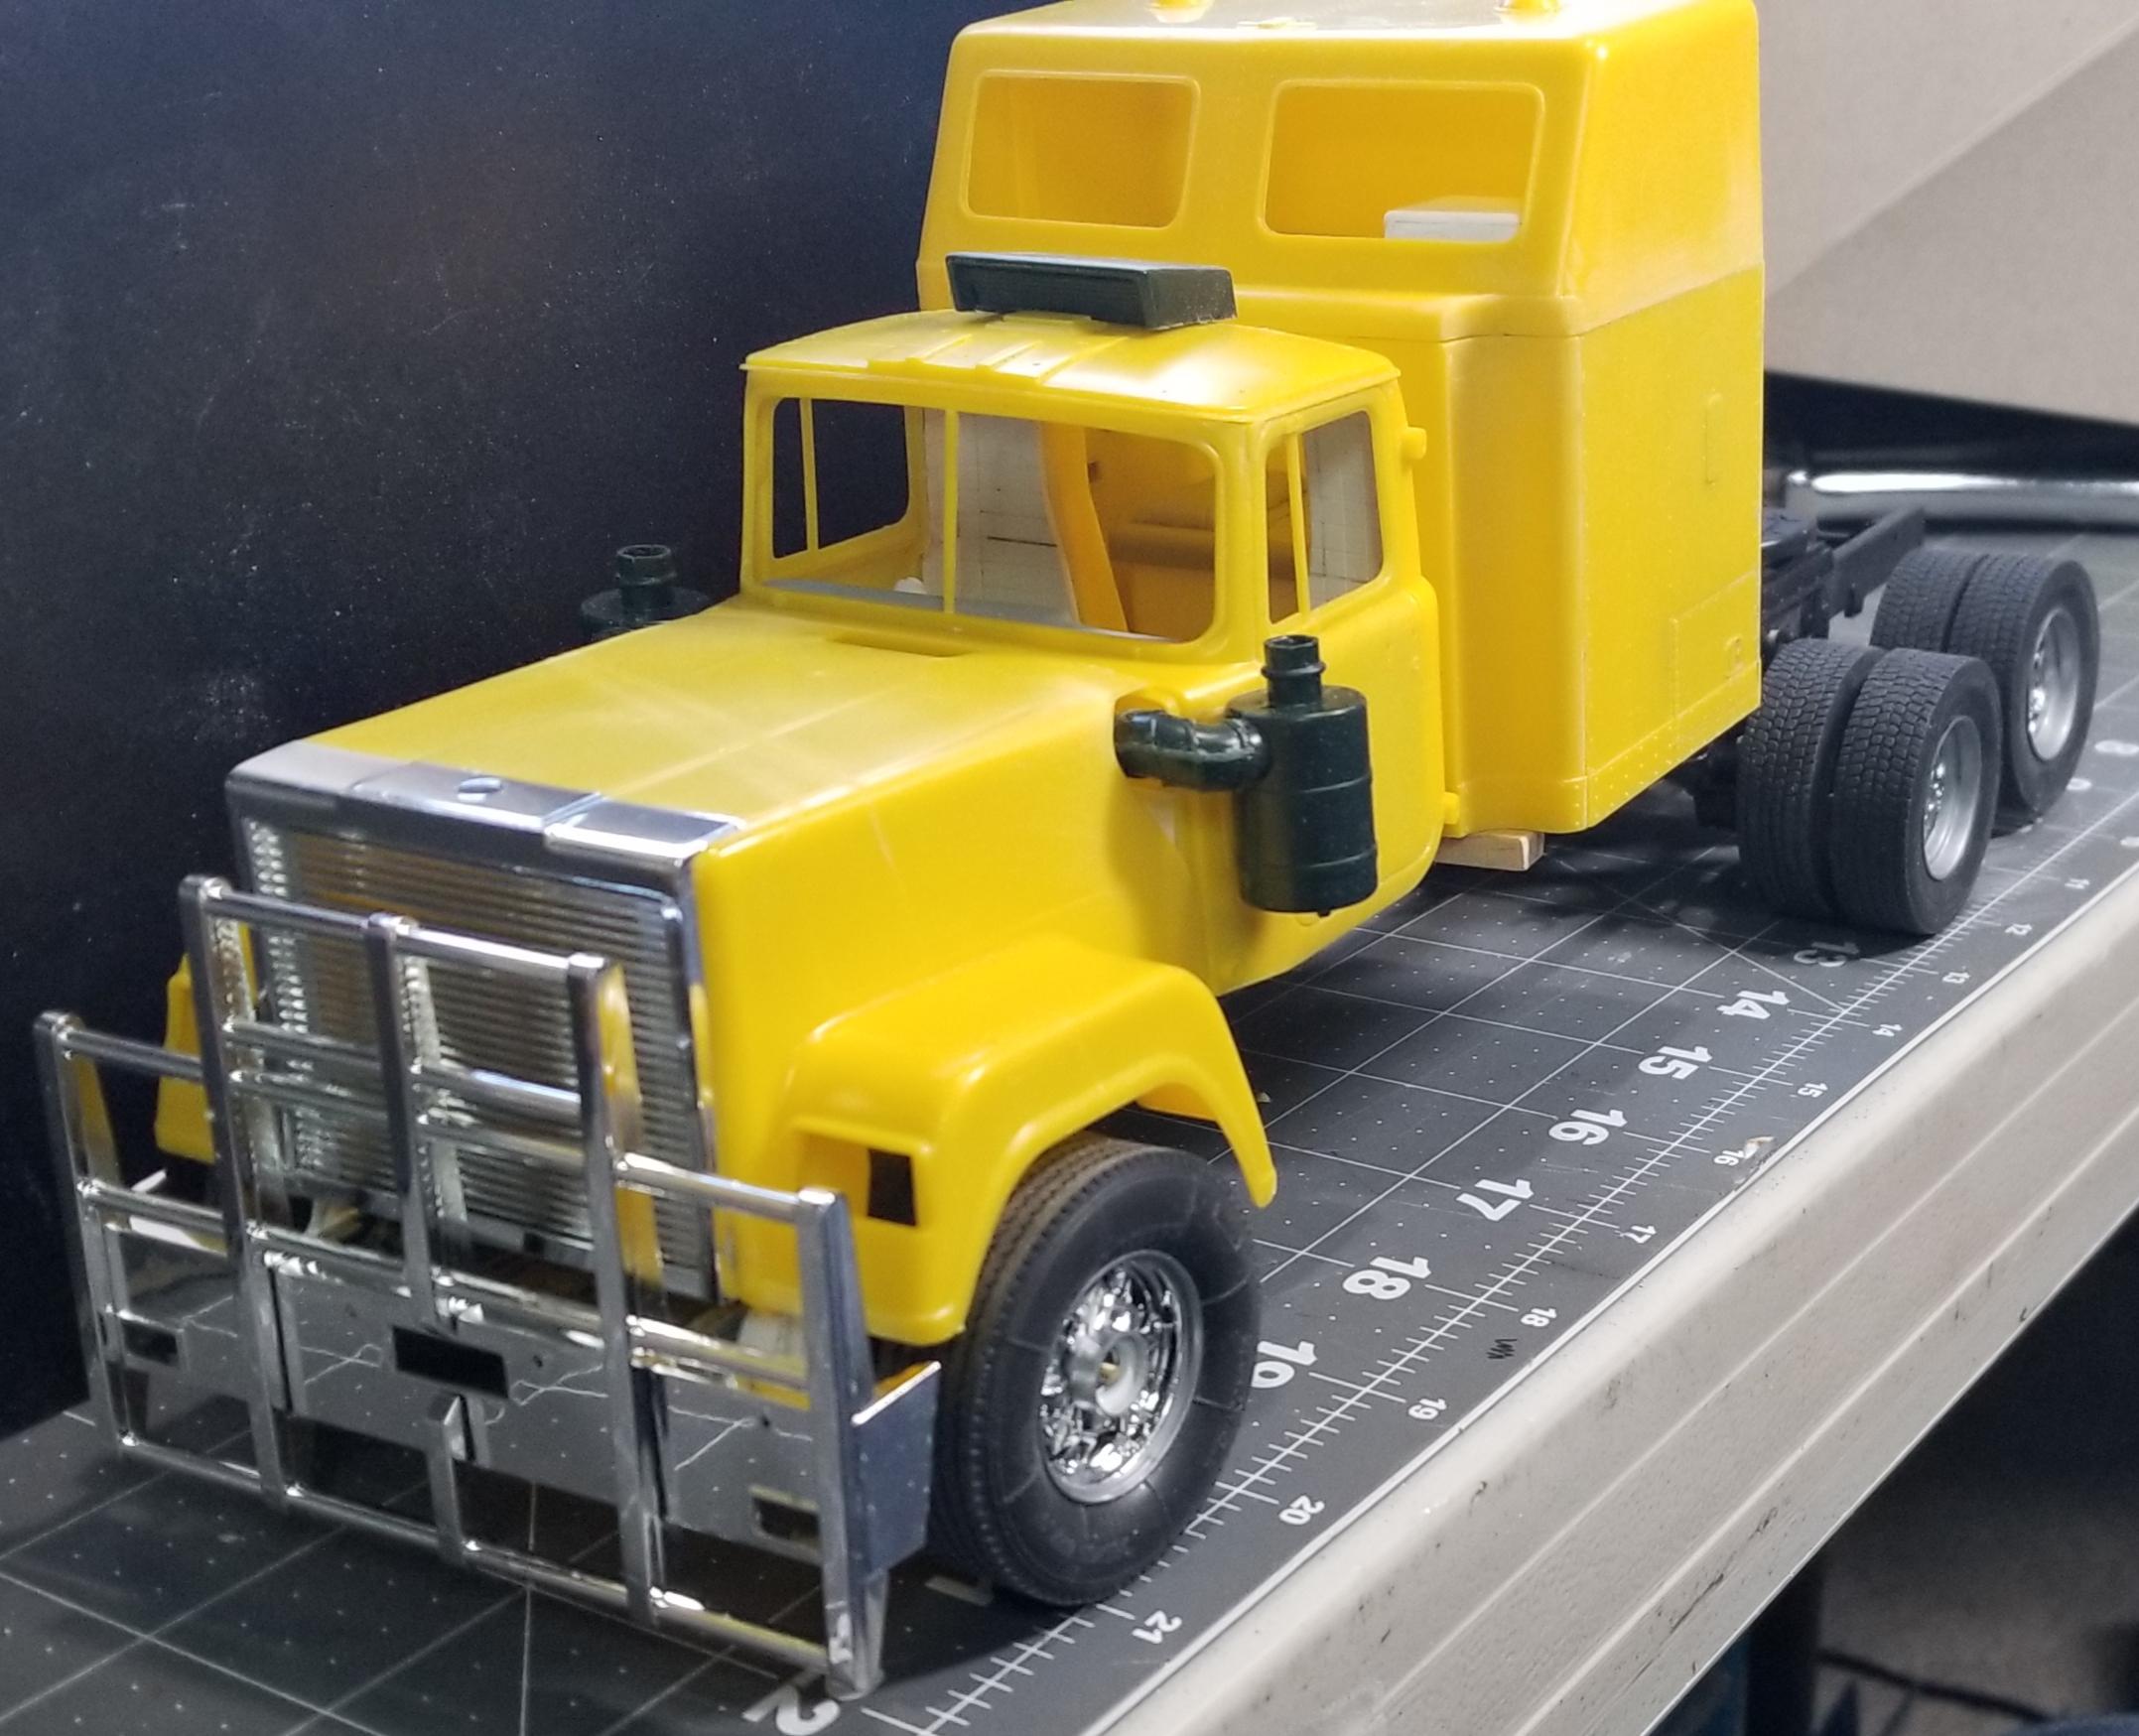
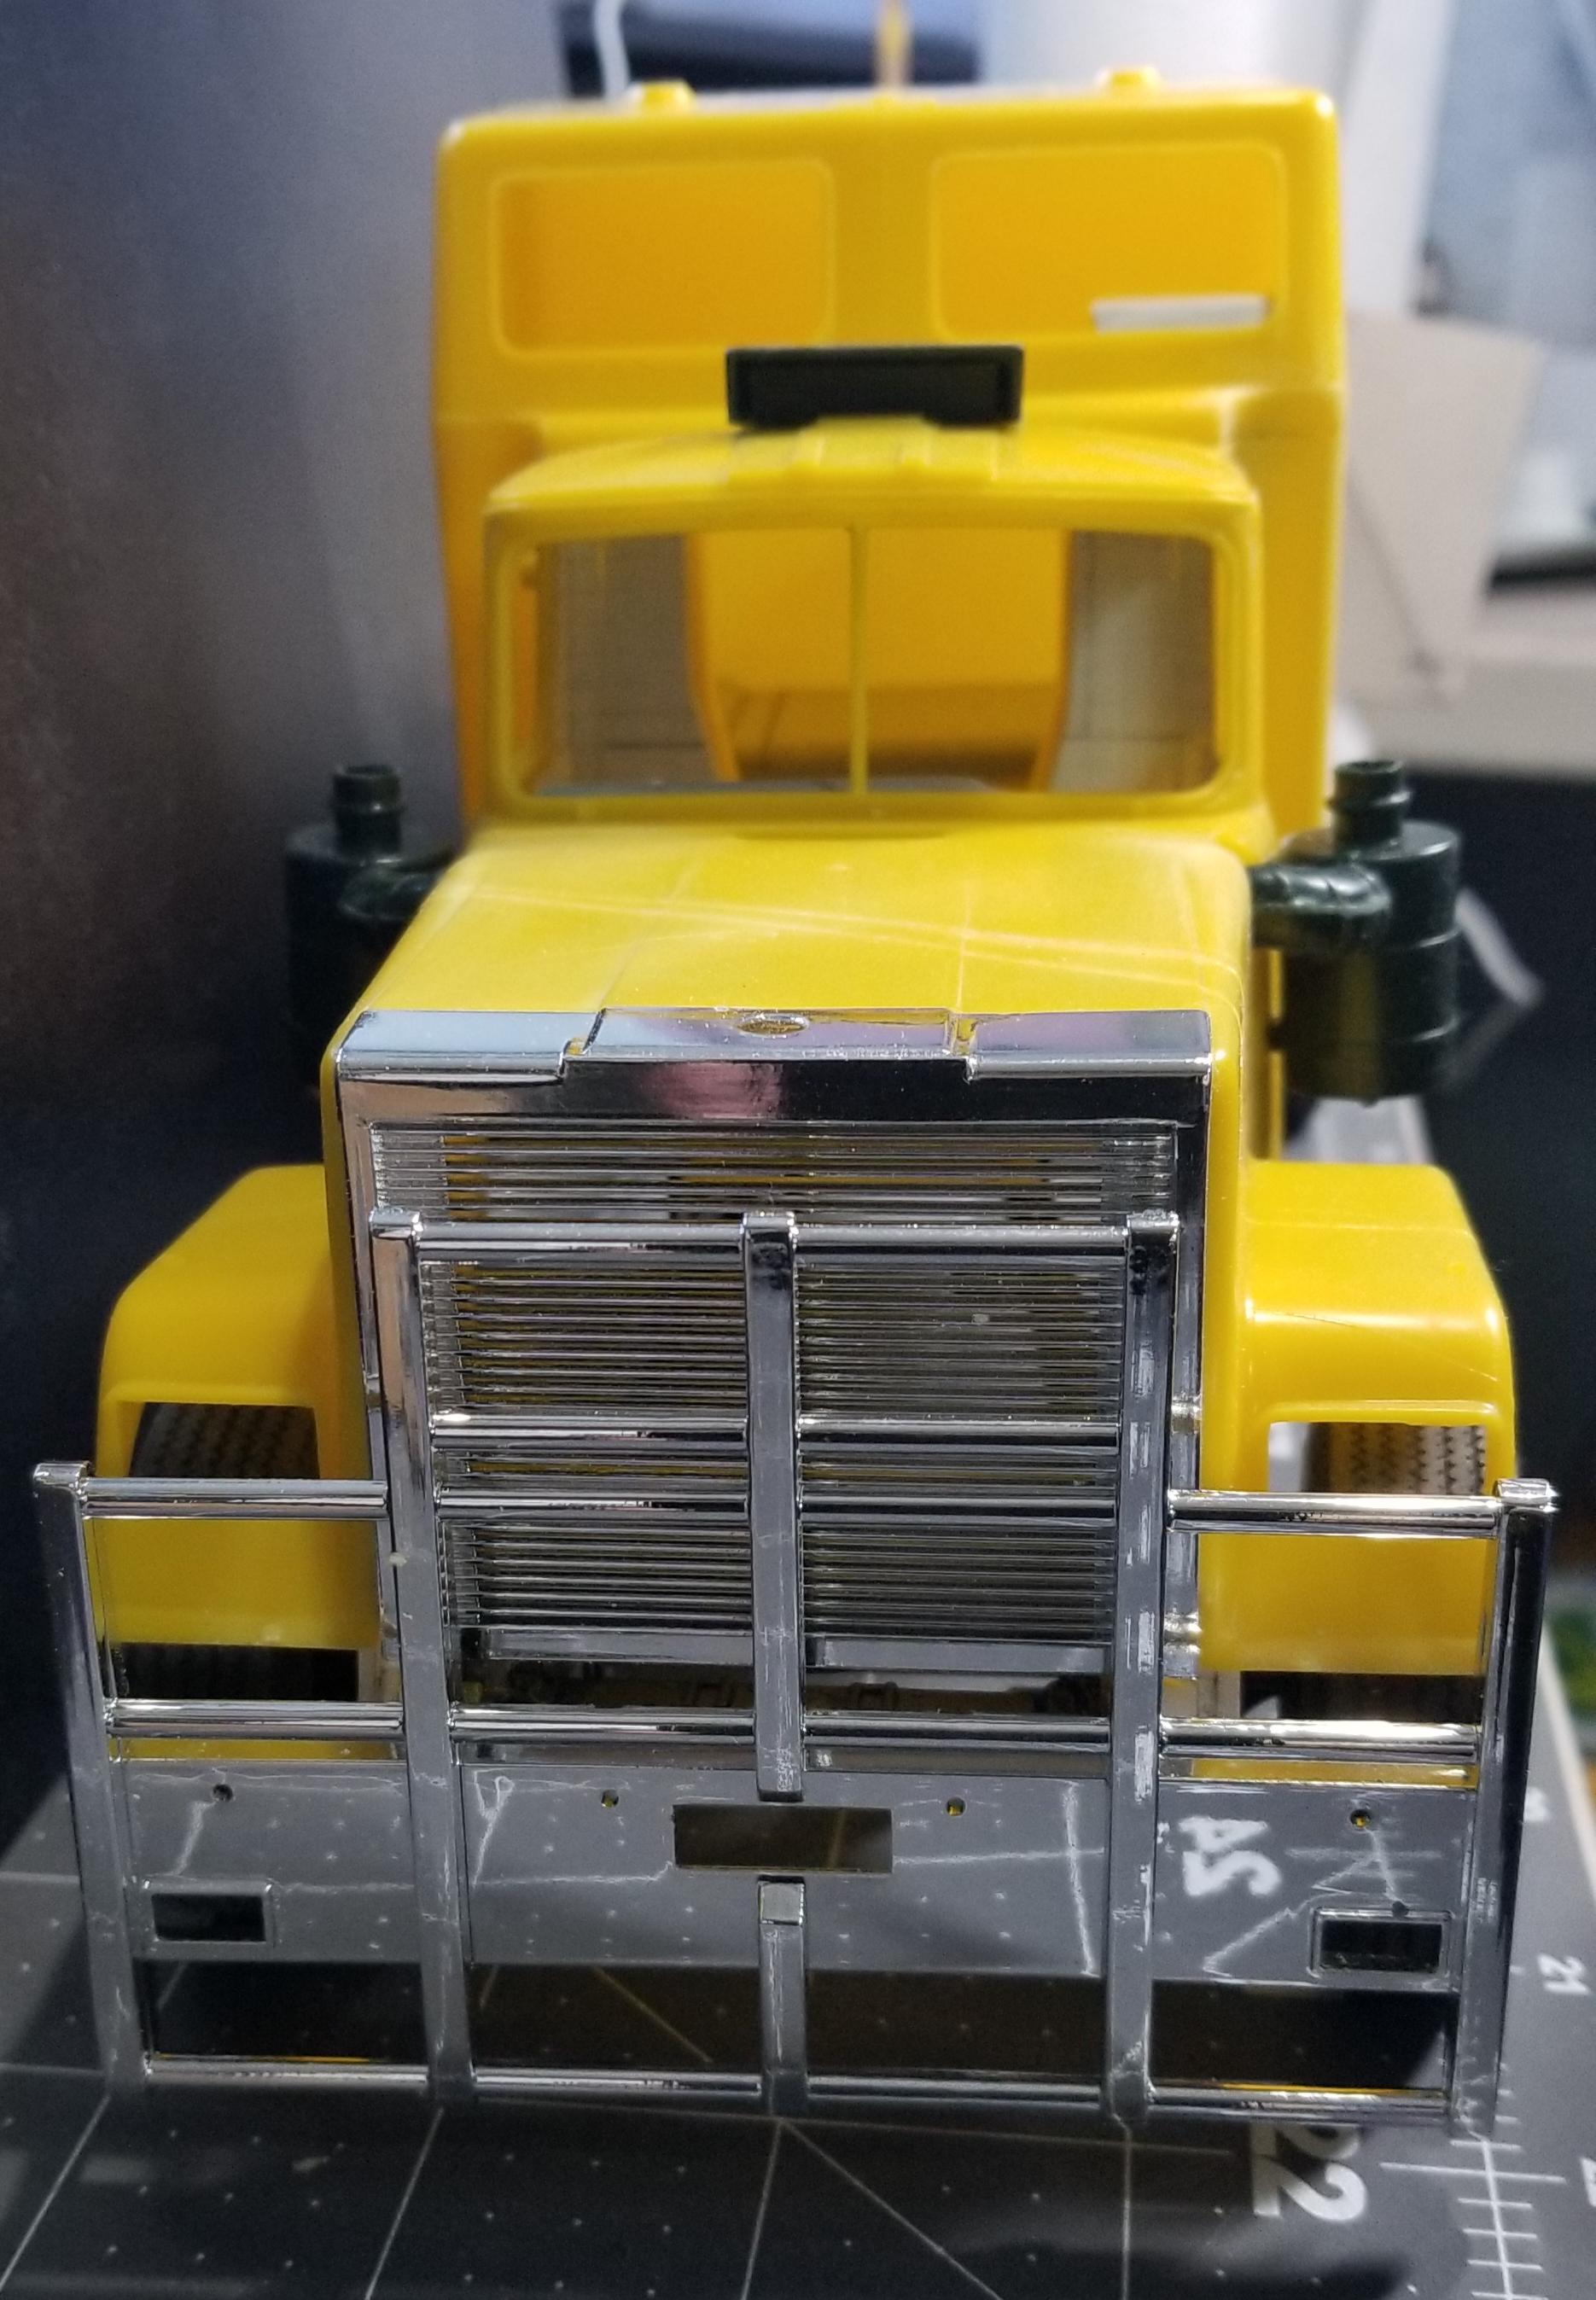
Small update. I have the hood pivots mounted to the frame. I also temporarily mounted the bull bar (Roo bar).
here's a overall of the truck.
this view shows the Roo bar temporarily mounted to the bumper.
closer view from the front of the Roo bar.
this view shows the hood in the up position.
I think this is my final version of the mural for the back of the sleeper.
Please, leave comments so I know what you guys think.
Ron G
-
Hey all
I kinda redid the mural for the back of the sleeper. What do you think?
I tried to make him look a little more like "UnderDog", except as a bulldog.
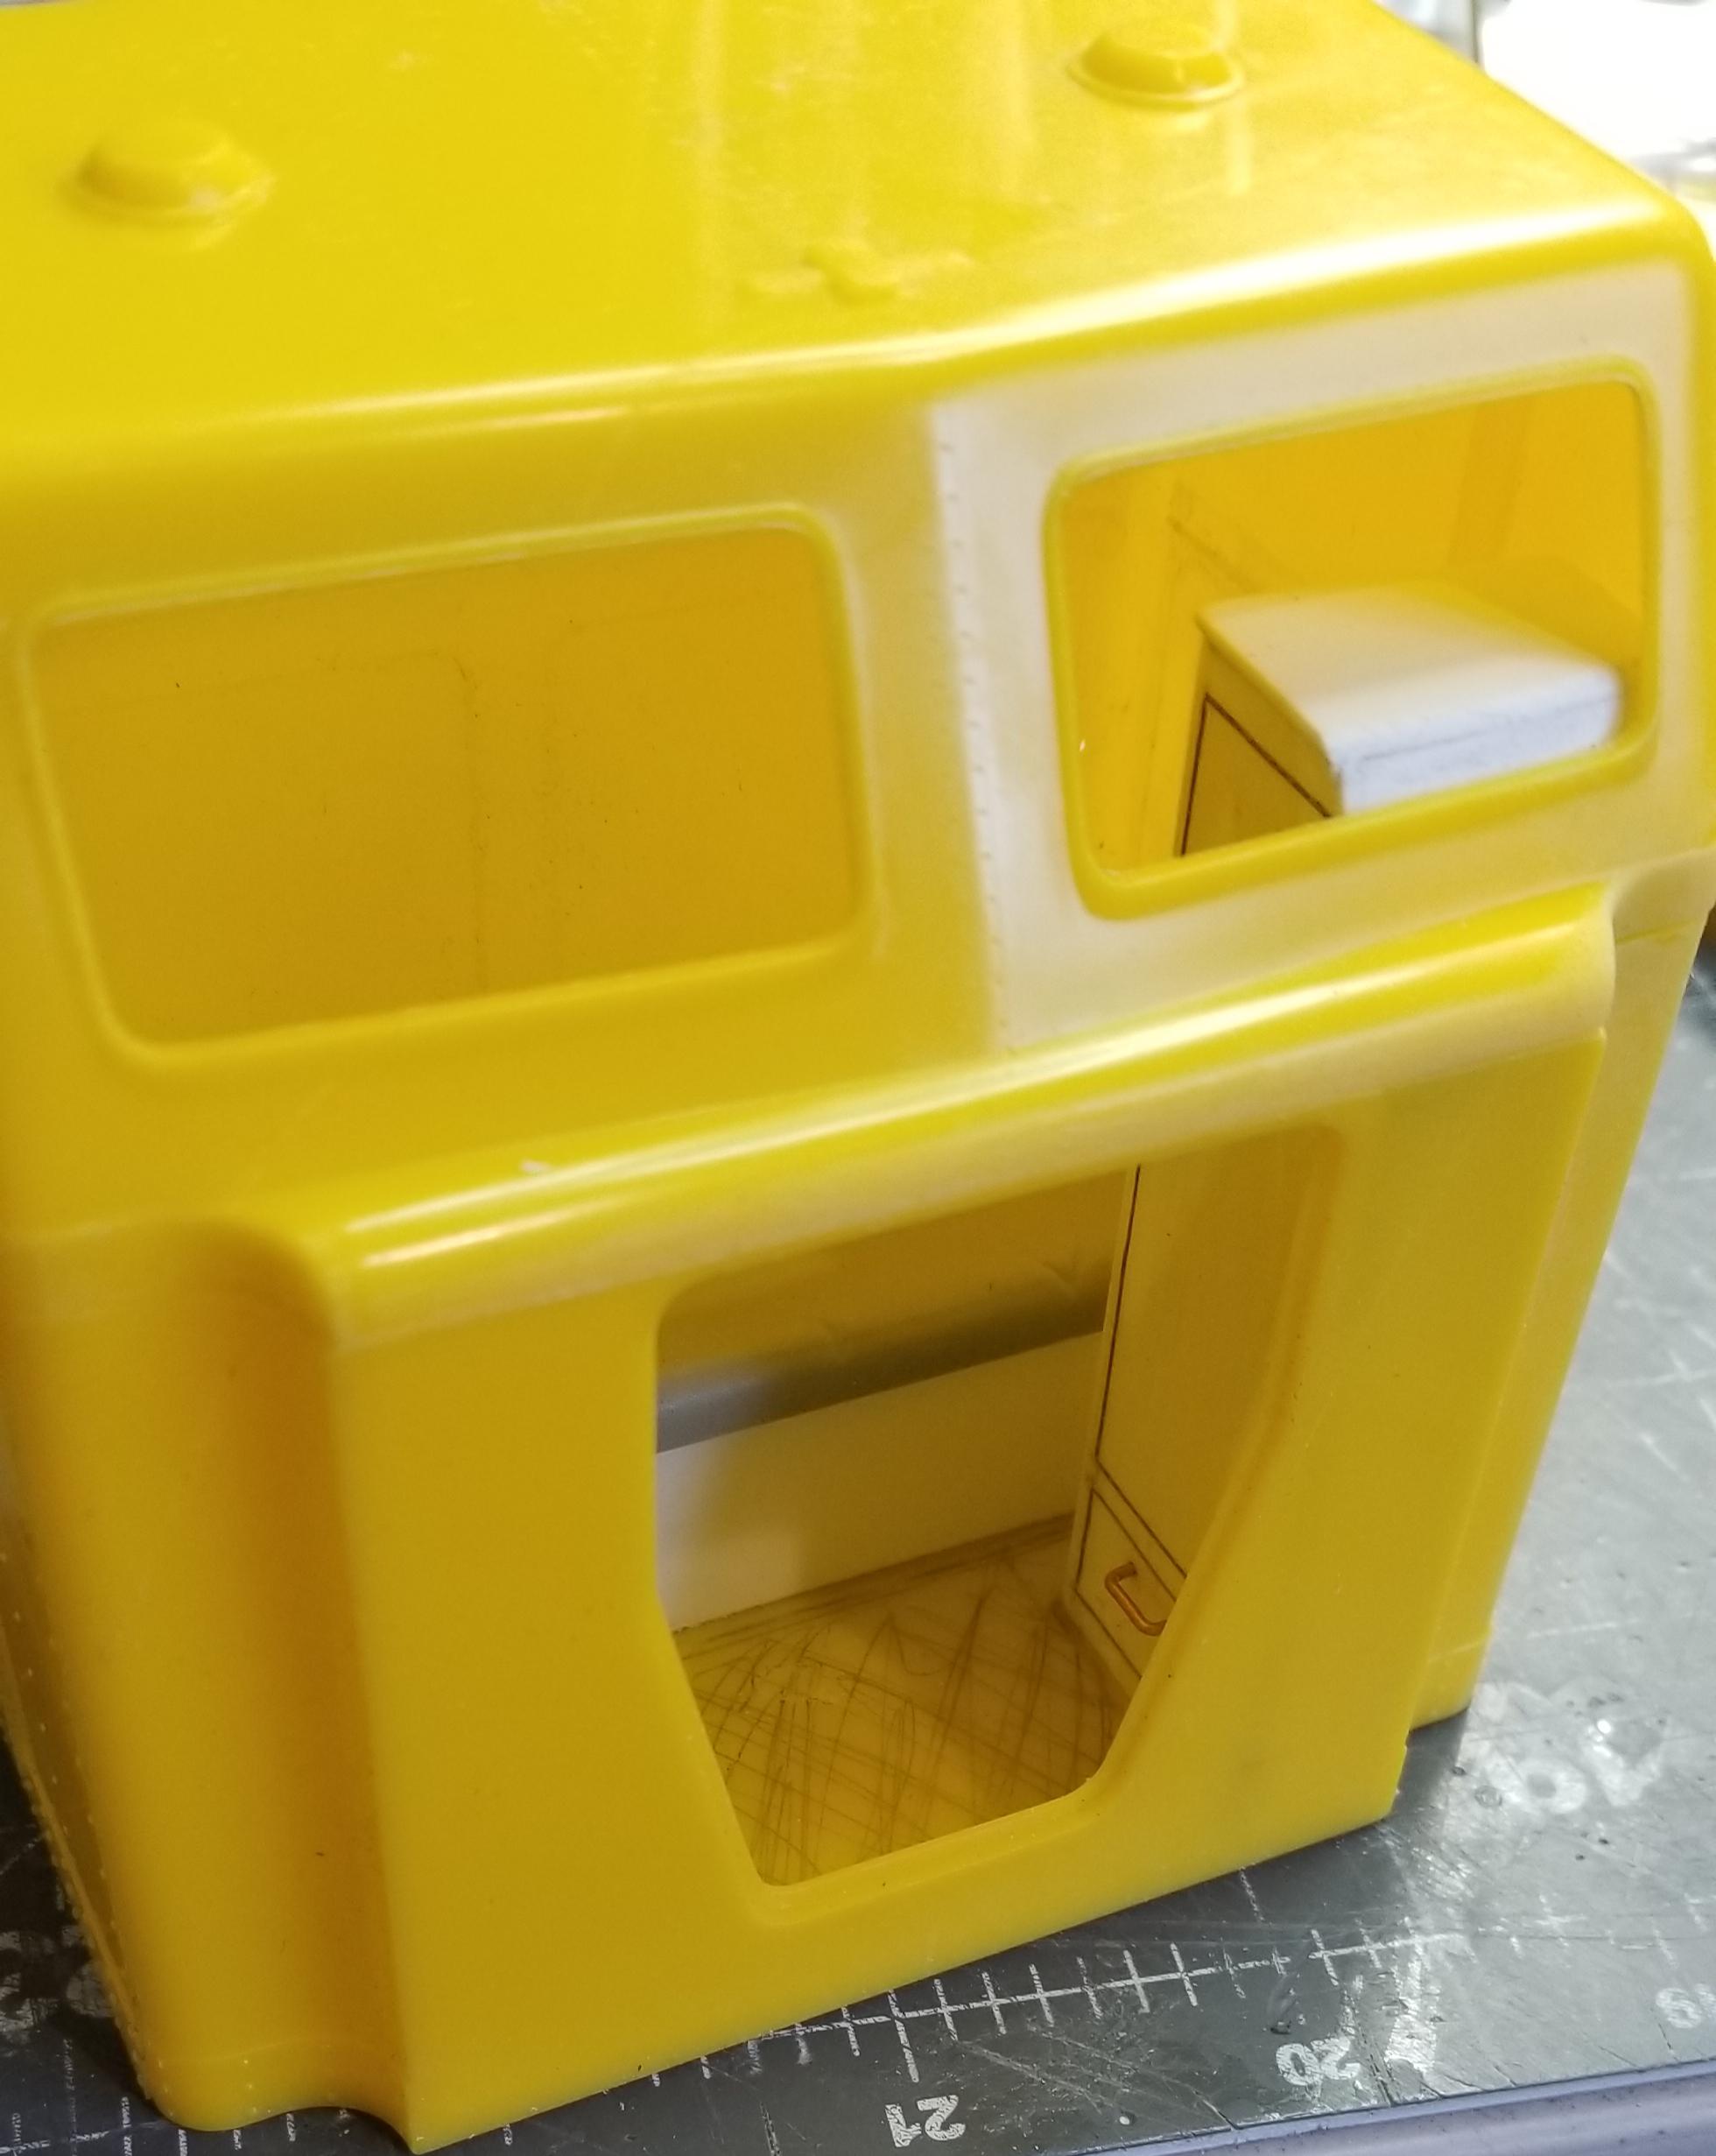
I did some work on the sleeper. I made a close closet with a lower drawer out of some 0.04 plastic sheet. I also made a lower support for the bed.
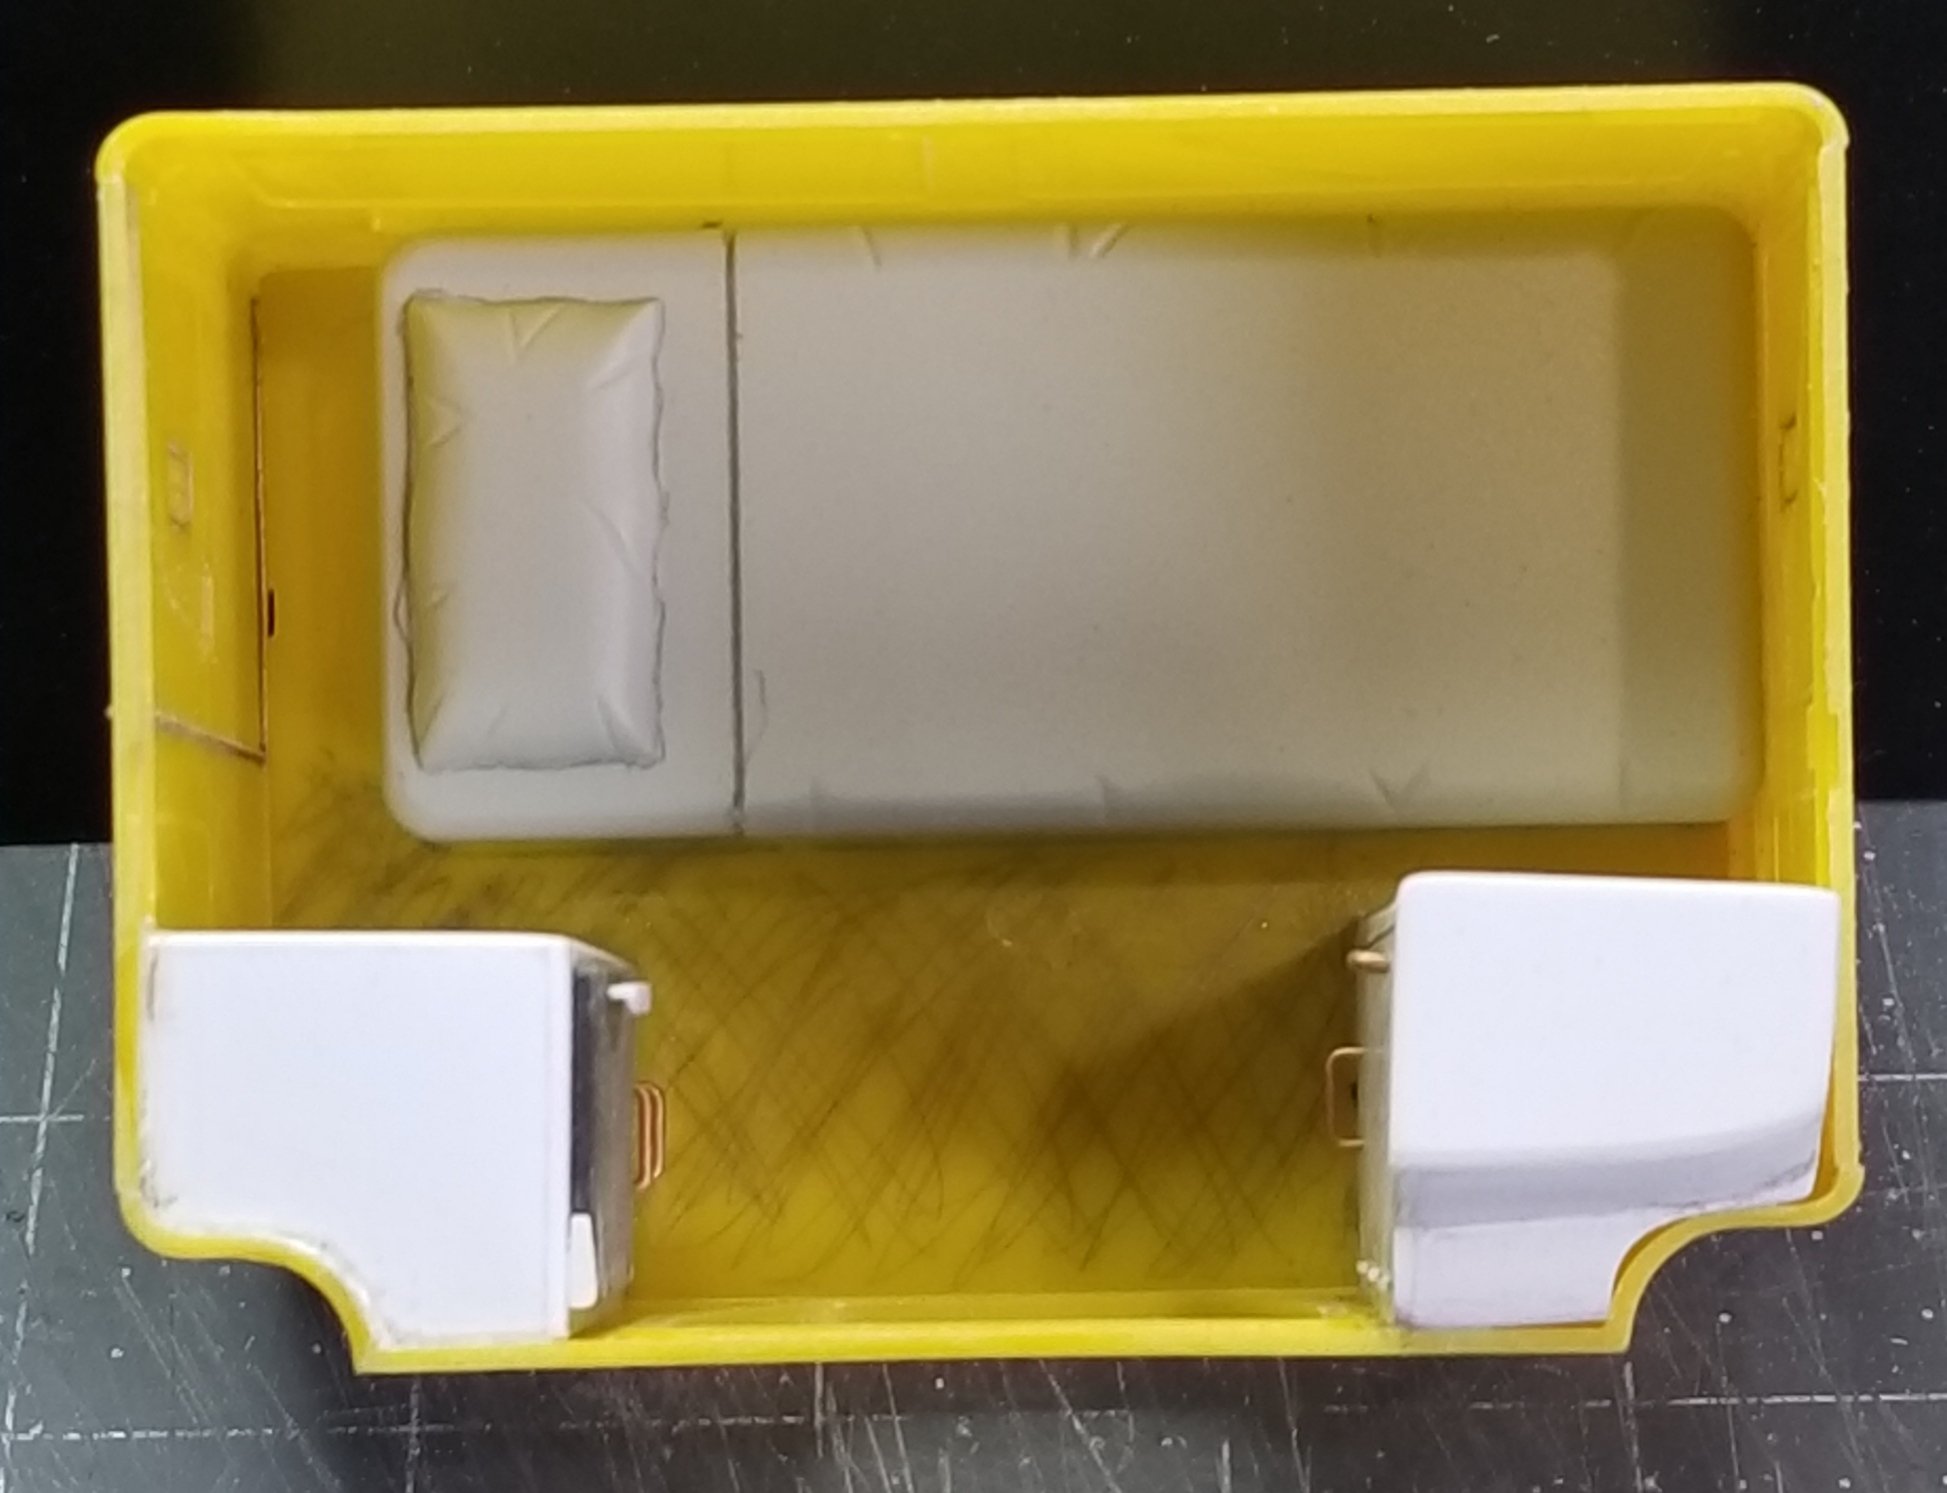
this view shows the bed and the closet.
this top down view shows the bed and the closet. There will be a refrigerator and cabinet on the opposite side.
view looking through the sleeper at the closet and bed.
Ron G
-
Hey all
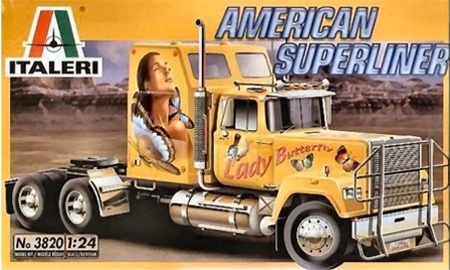
I purchased this kit from Italeri and I'm waiting for it to get here from Italy, it takes for ever because of Covid.
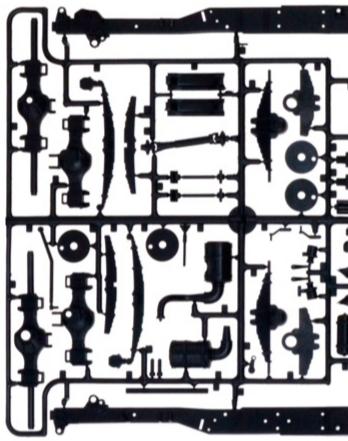
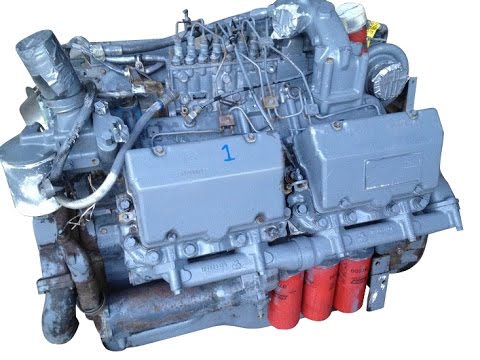
this is the kit I'm using to get the engine from.
this view shows the sprue with the engine parts on it, yupp it's a E9 Mack!
closer view of the engine parts. I'll have to fix the oil pan, the Superliner II had the oil pan sump in the rear.
this view shows the frame and suspension parts.
closer view of the suspension parts they are a kind of Camelback suspension.
this view shows the shock absorbers that I added to the front axle to help with rebound. I also had to modify the rear axles in order to get the Italeri wheels to fit. I had to narrow them some too.
top view of the shock absorber and how it mounts. Well that's it for now be back with more updates soon. Please let me know what you think.
Ron G
-
26 minutes ago, Kromolly said:
That's coming along nicely. Is the engine coming from the MPC DM800 kit?
Hey Kromolly
No actually its just in there to represent the E9 that will be going in it. I will be getting the engine from the 1/24 Italeri Renault 360 kit, they came with Mack engines. Makes sense since they owned Mack at the time.
Ron G
-
Hey all
I did some work on the Mack Superliner cab interior. I took the left hand drive dash from the Western Star and cut it up to fit in the Mack. Yeah I know it's not prototypical but it's what I had to work with. It's not as wide and way deeper then the original dash for the Mack, but after some plastic magic...lol it fits great.
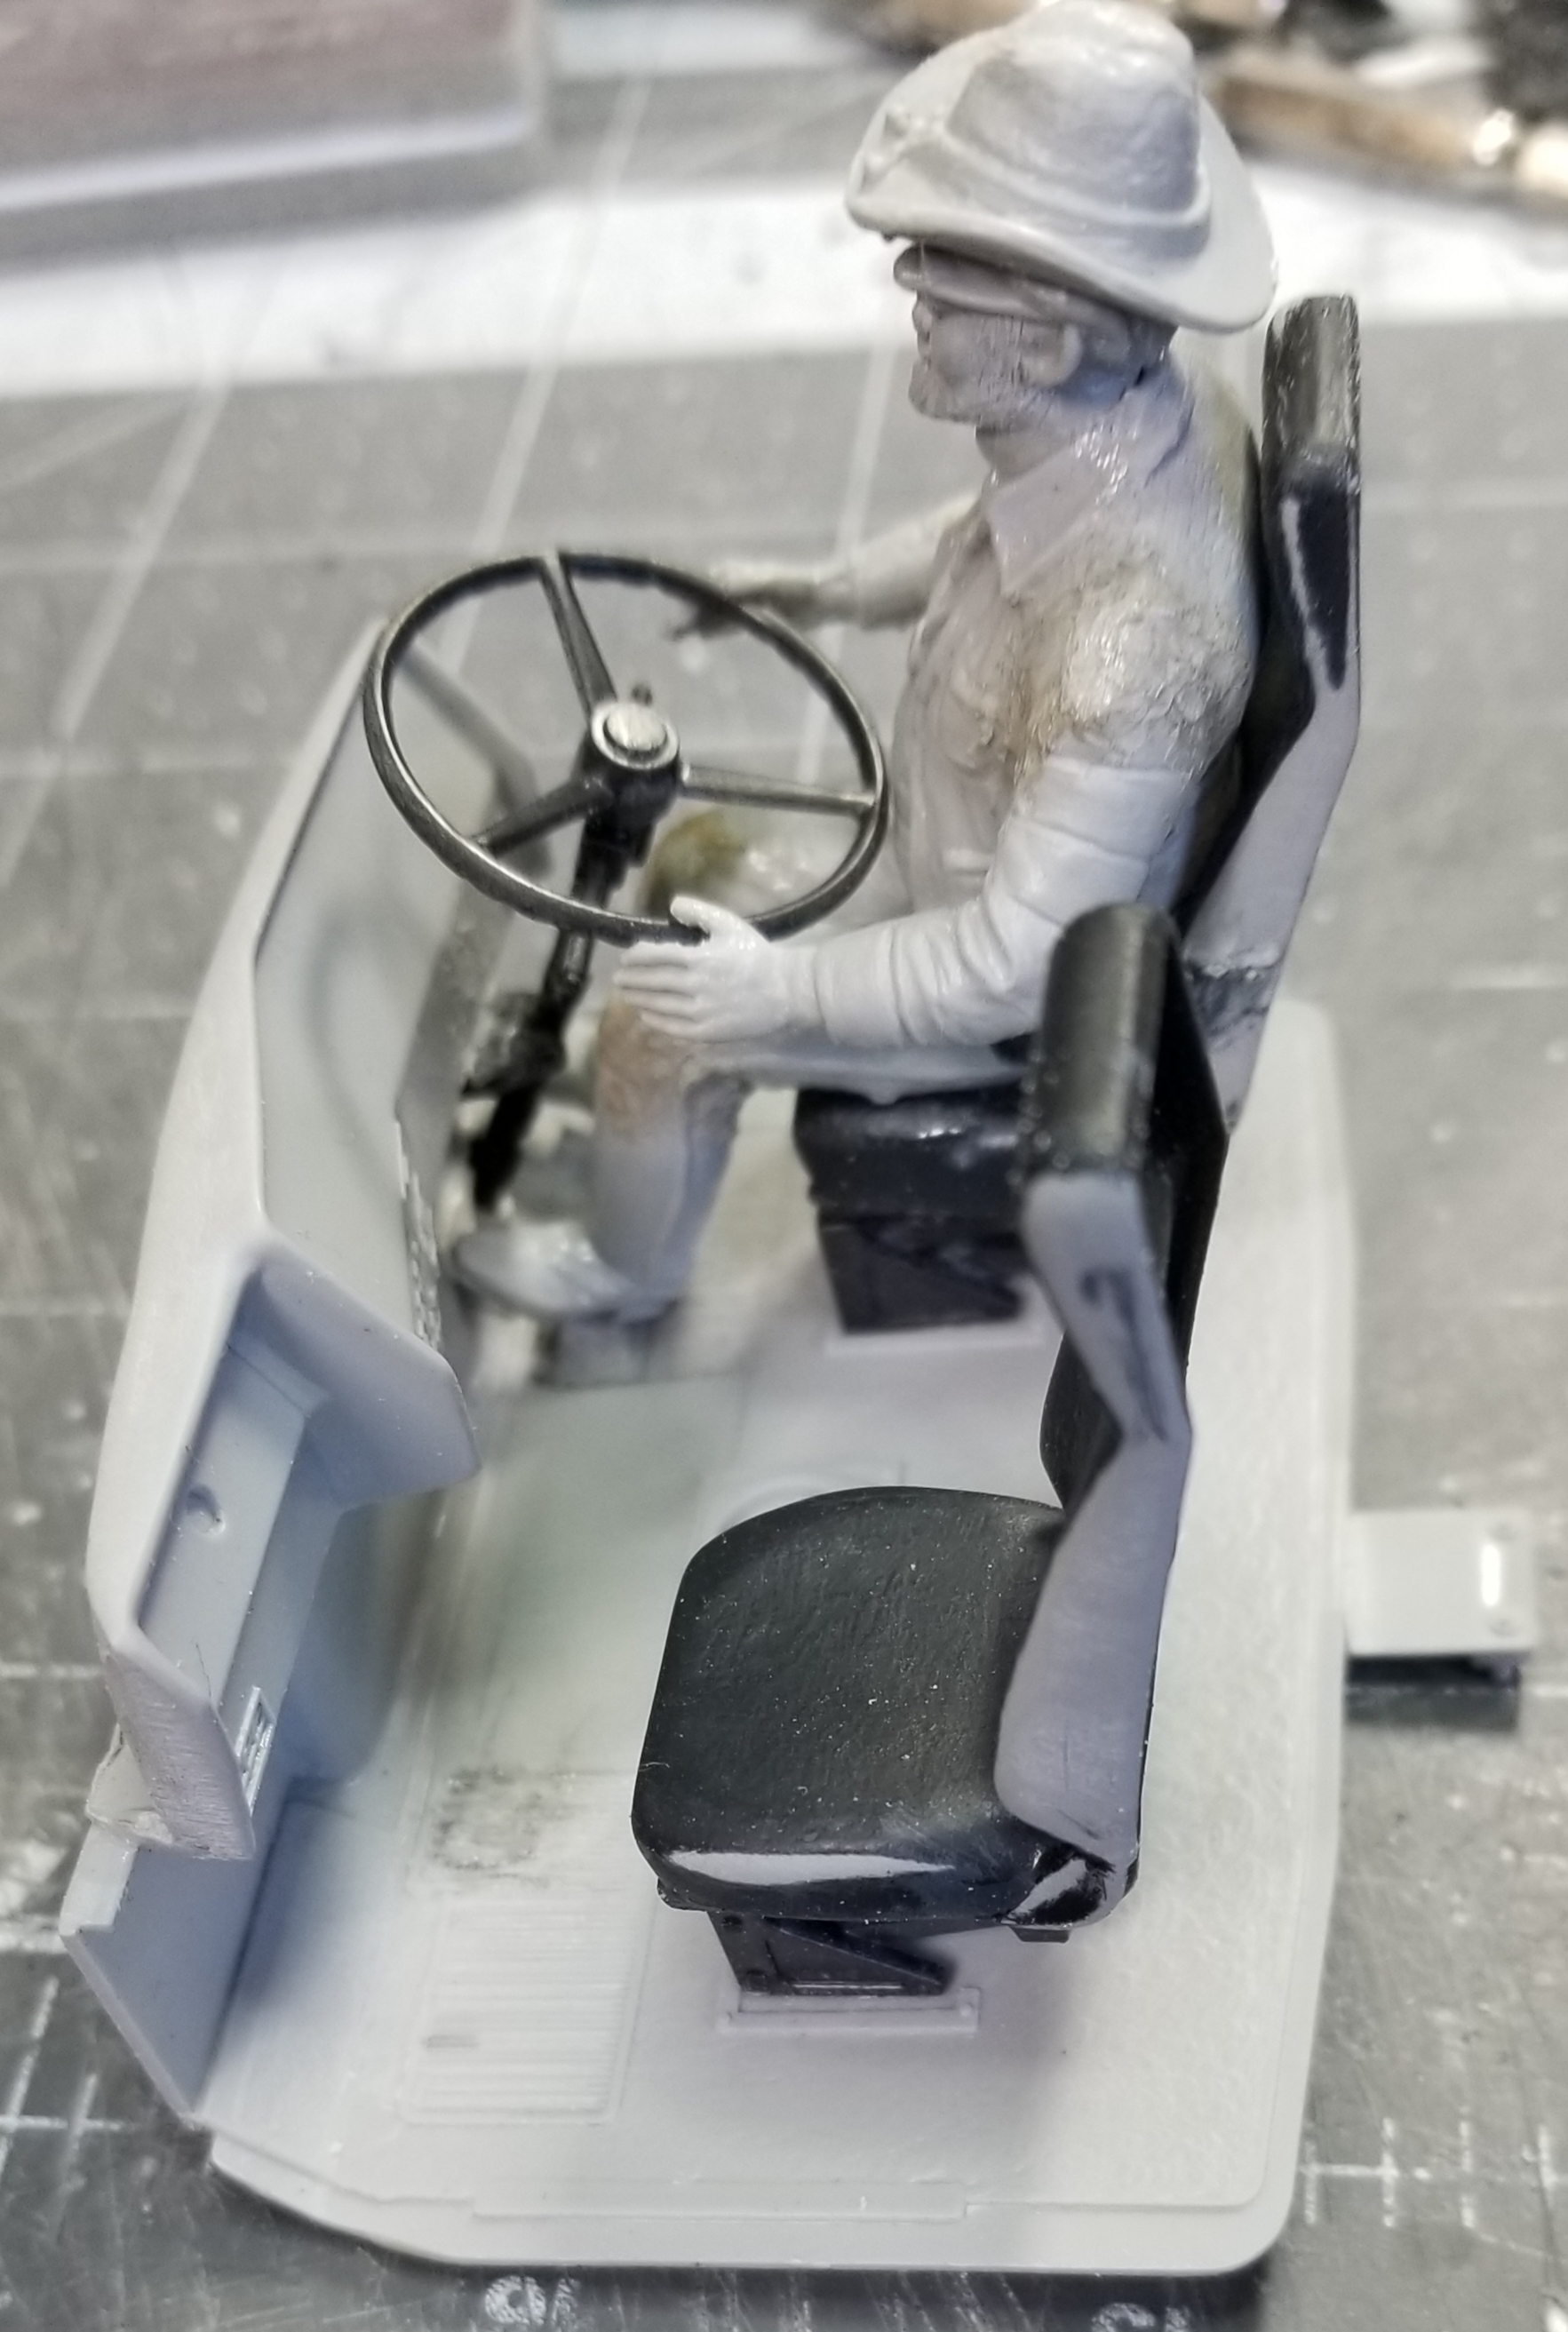
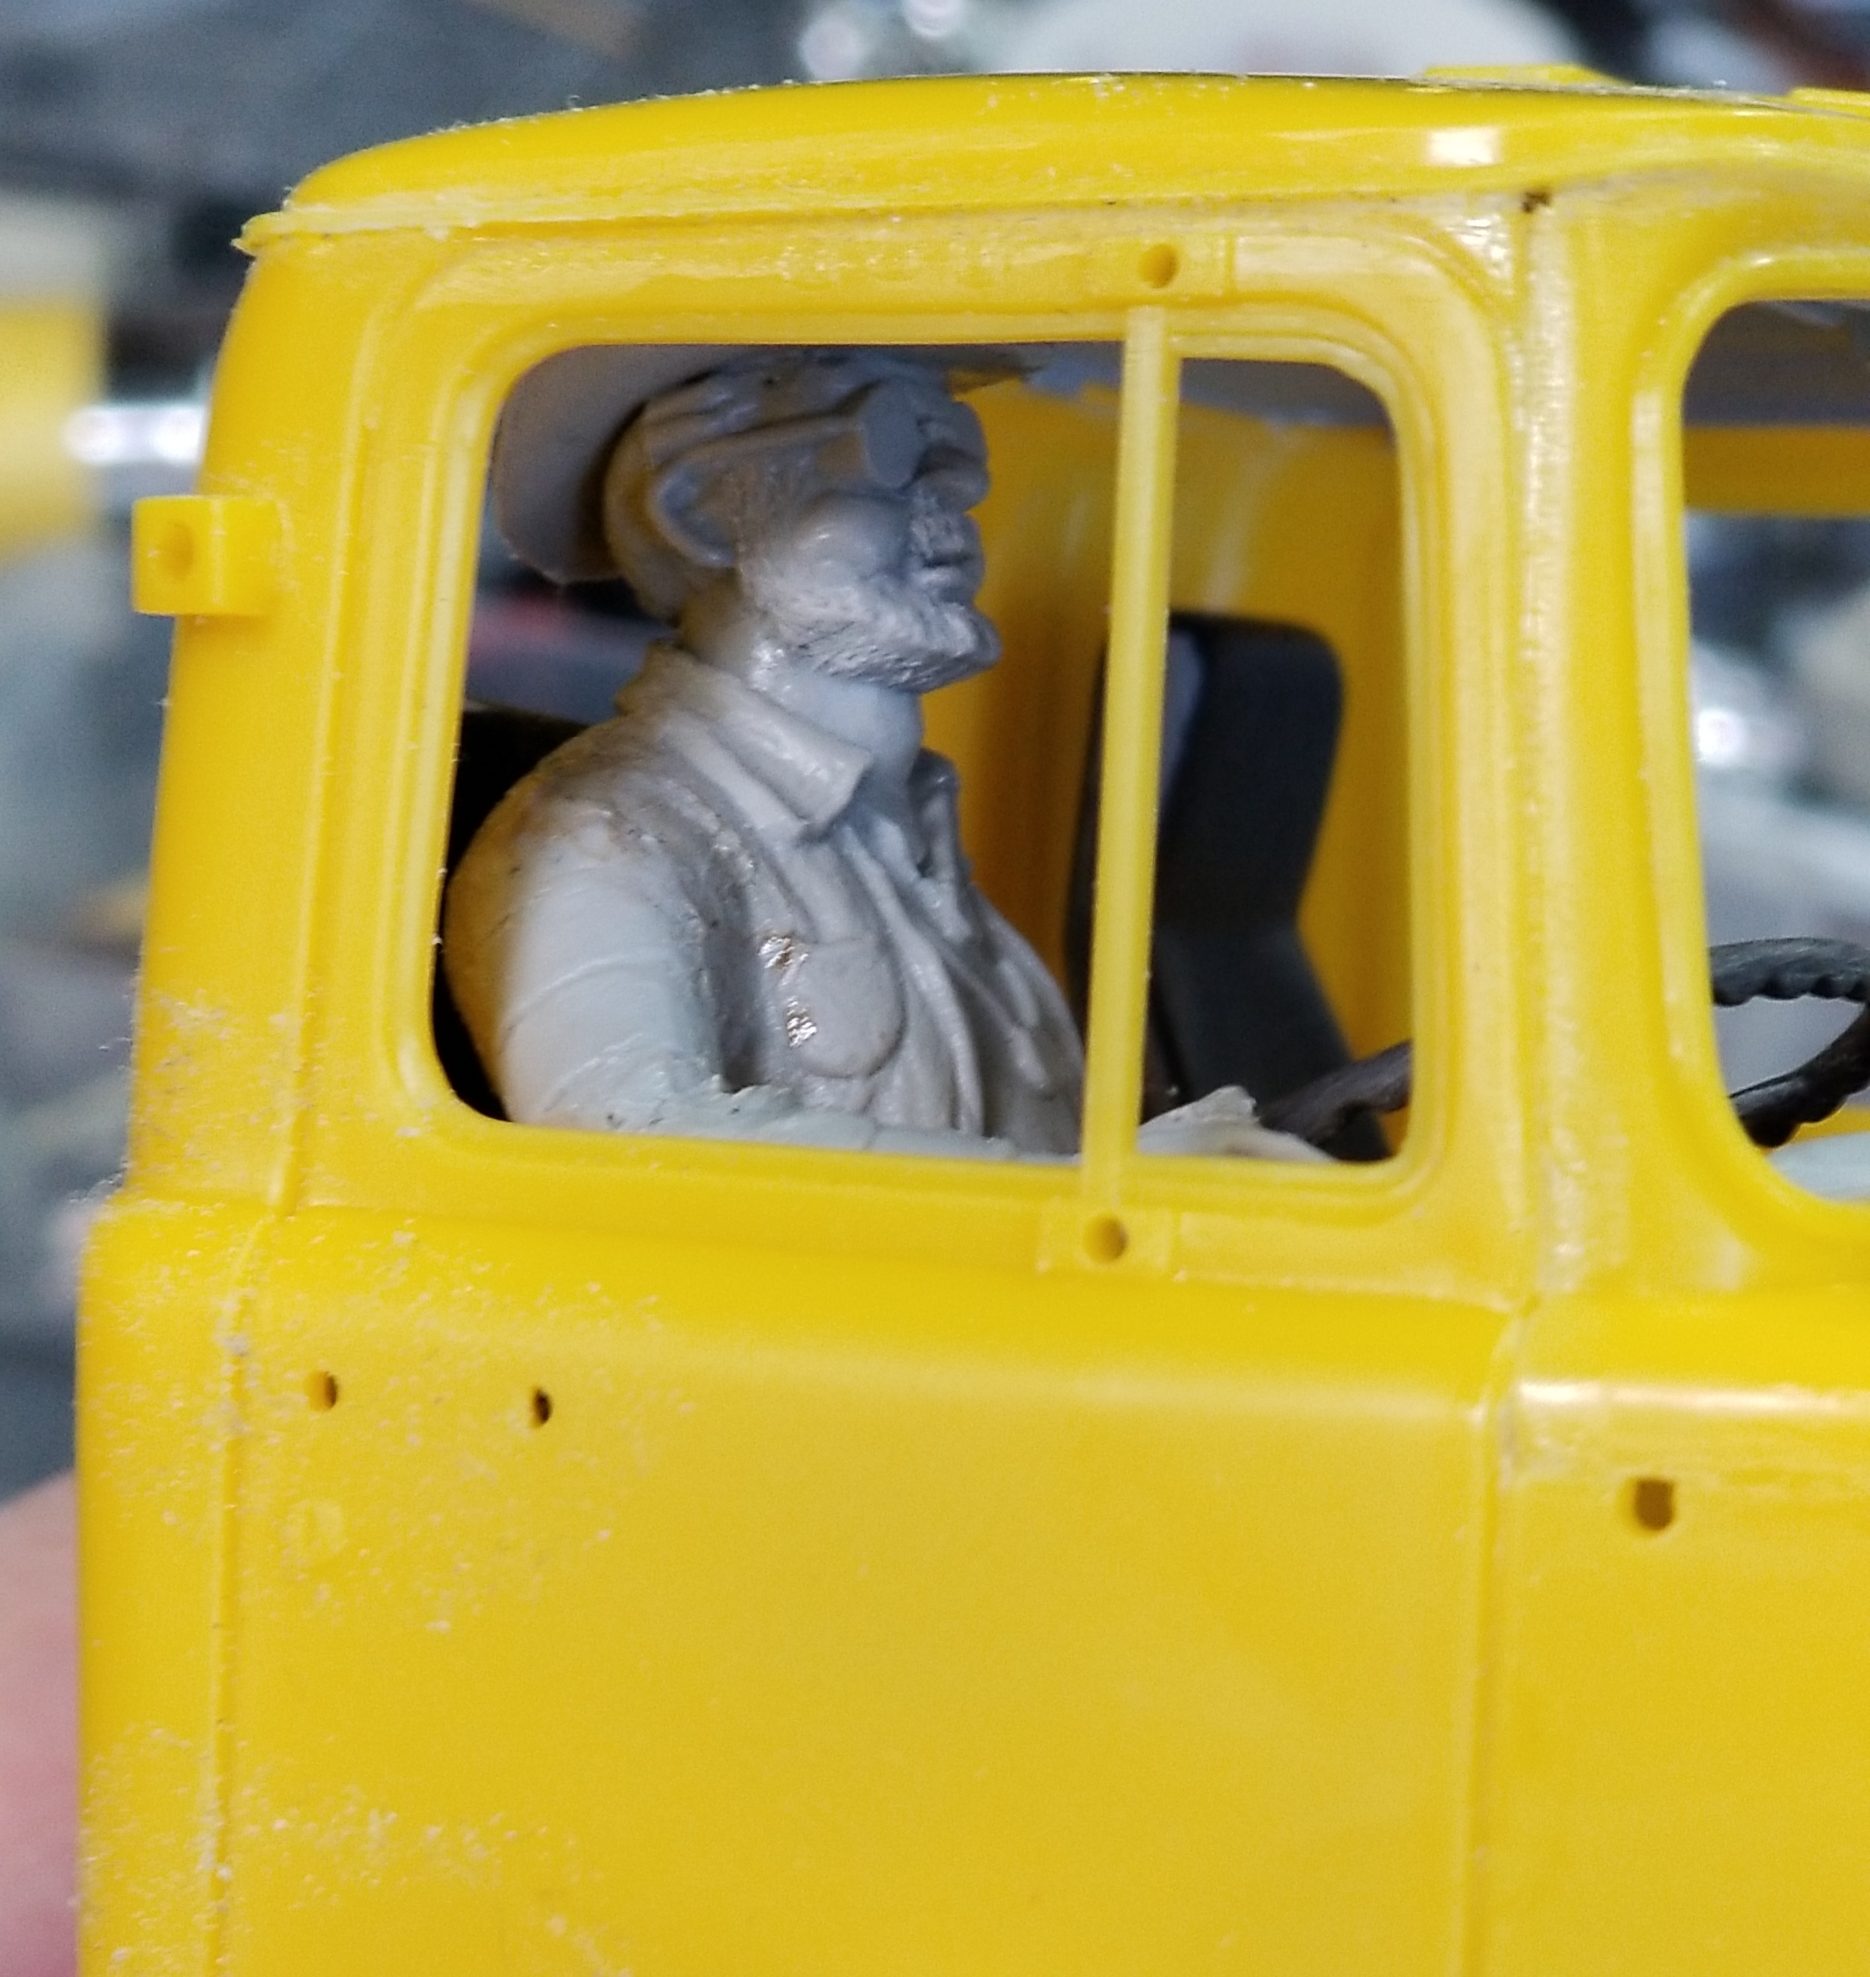
this view shows the Mack interior with the driver figure that I kit bashed together. I also removed the arm rests from the two seats snd added them to the driver's seat in the down position, the passenger will not have them. This was not easily done, I had to cut the boots off of one set of legs in order to add them to the seated set of legs, after I removed the feet with the sandals off of those. I put the torso with the cowboy hat onto these, then I added the arms from the seated figure to the final figure. After this I had to use a soldering iron to heat the arms and legs to bend them into position...wheh!
") this view shows the driver figure in the driving position.
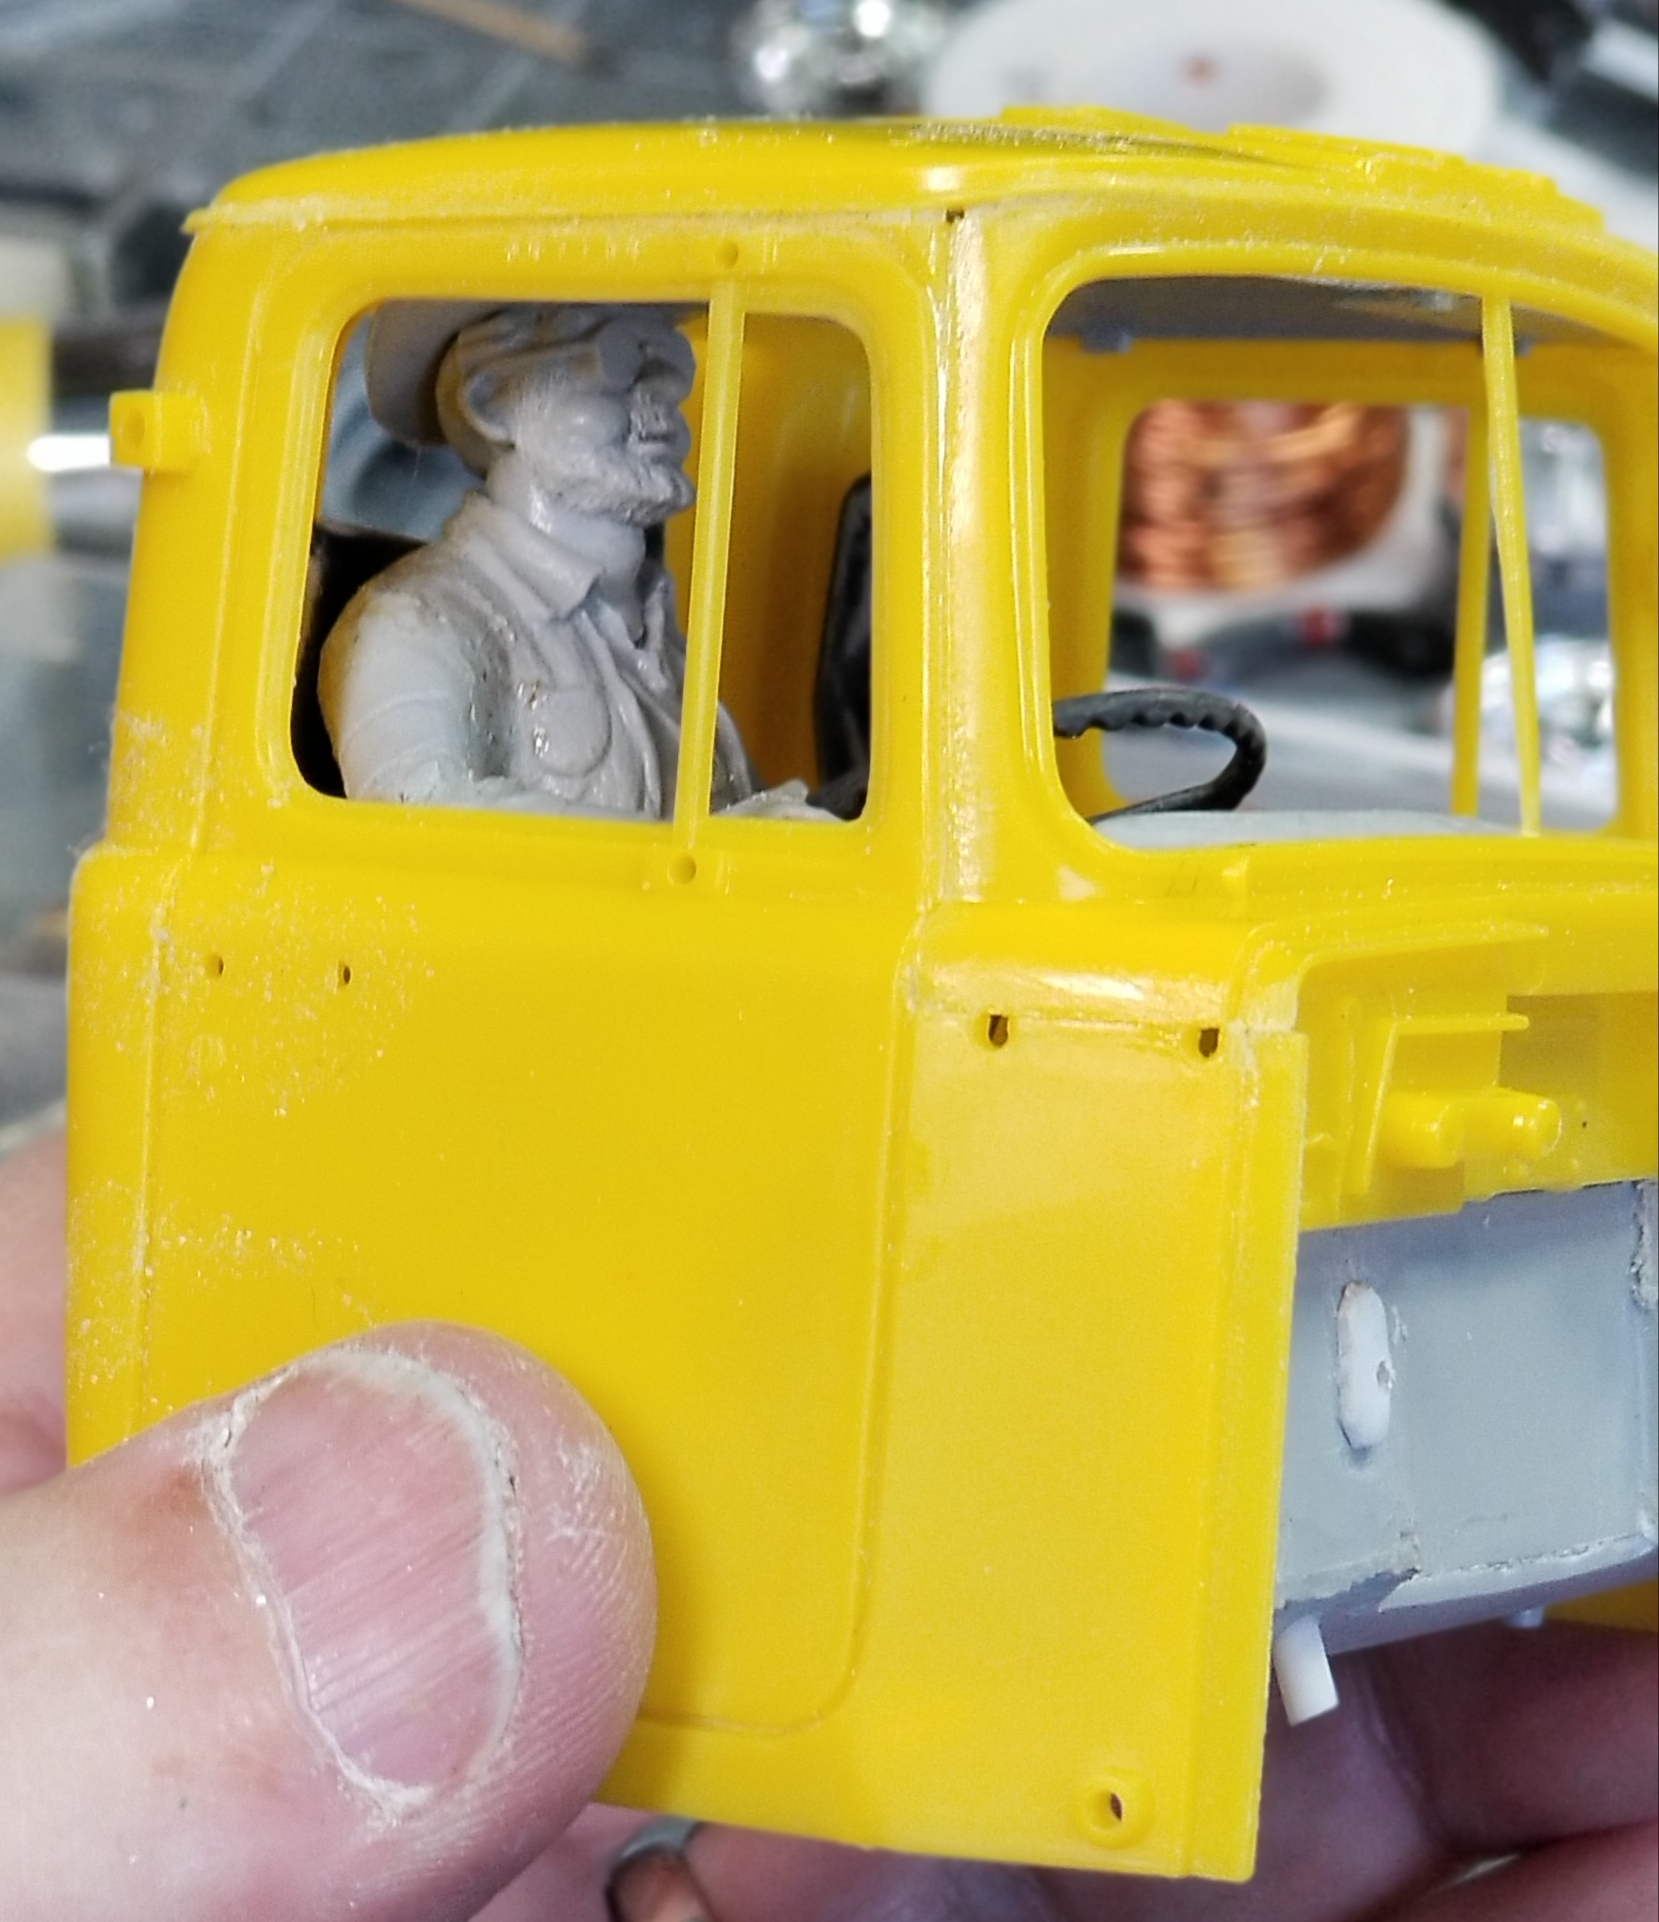
closer view of the driver. He actually looks a little like me...lol
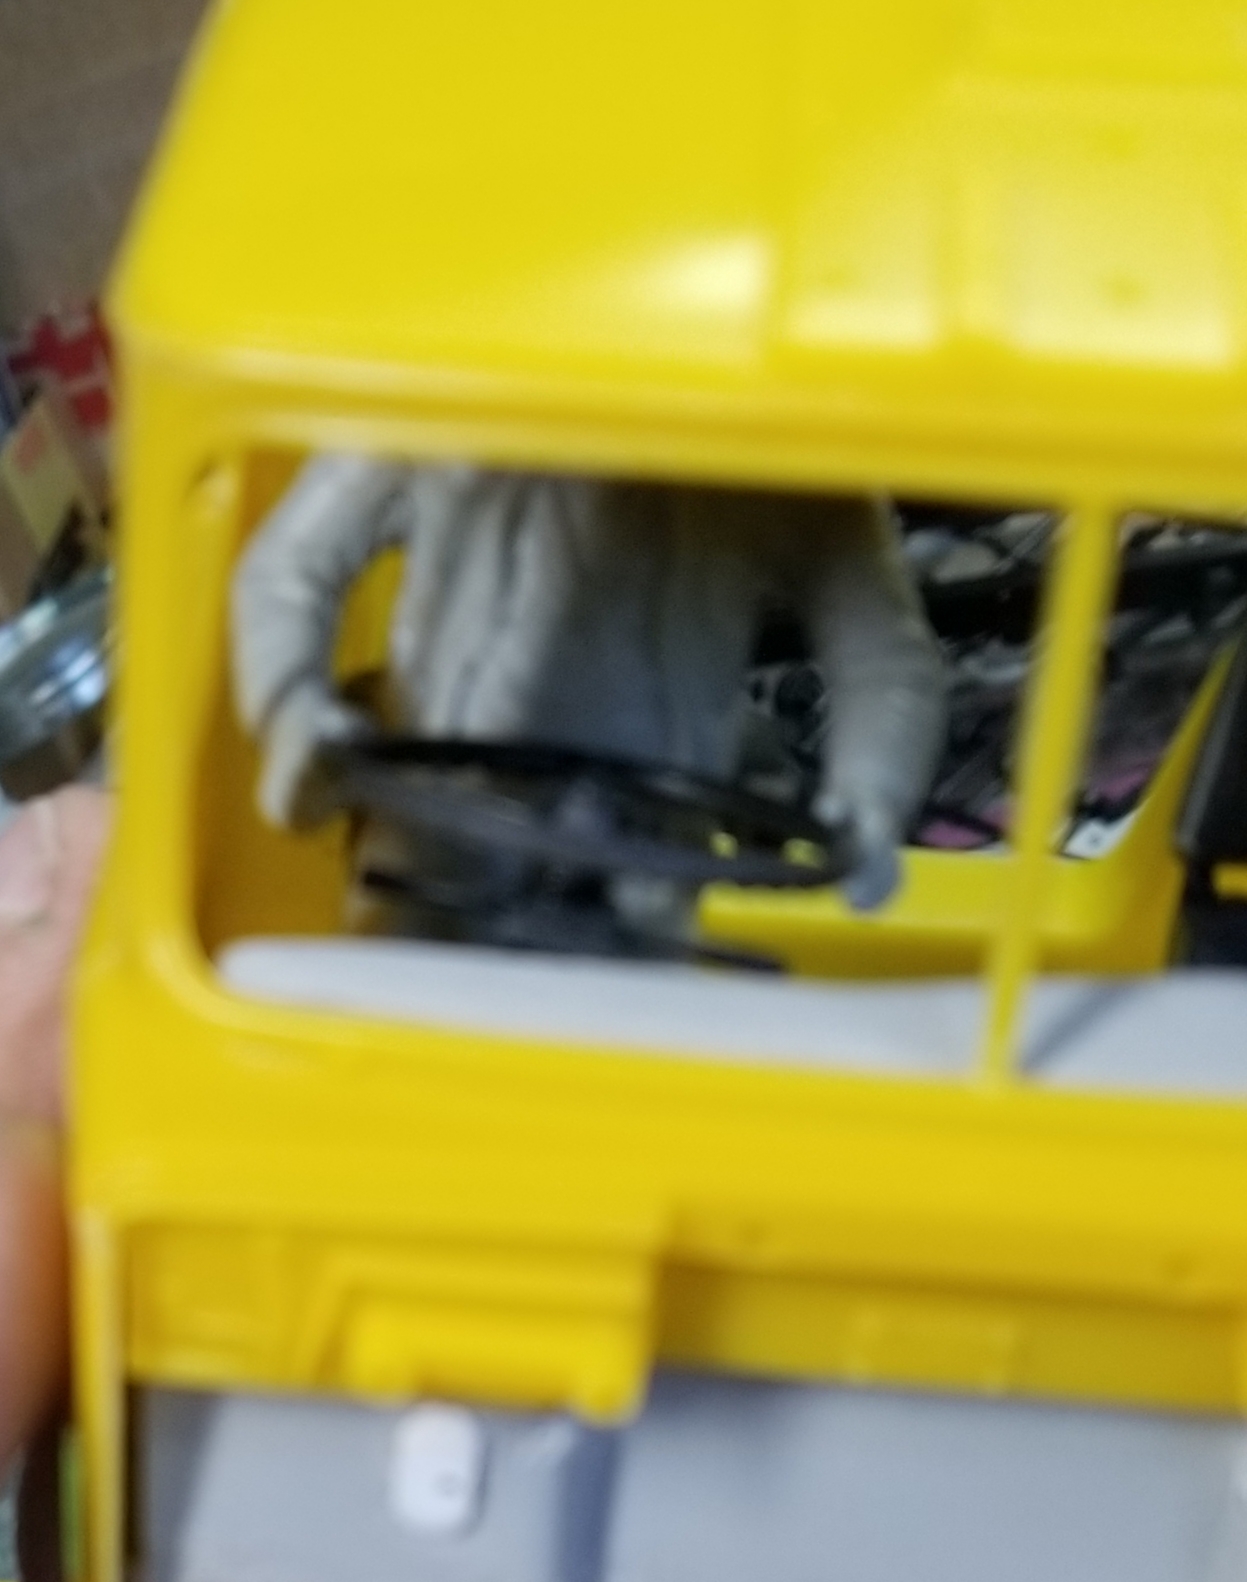
this view shows that his hands are on the steering wheel. Since I took this picture I've switched out the steering wheel for a smaller diameter two spoke one.
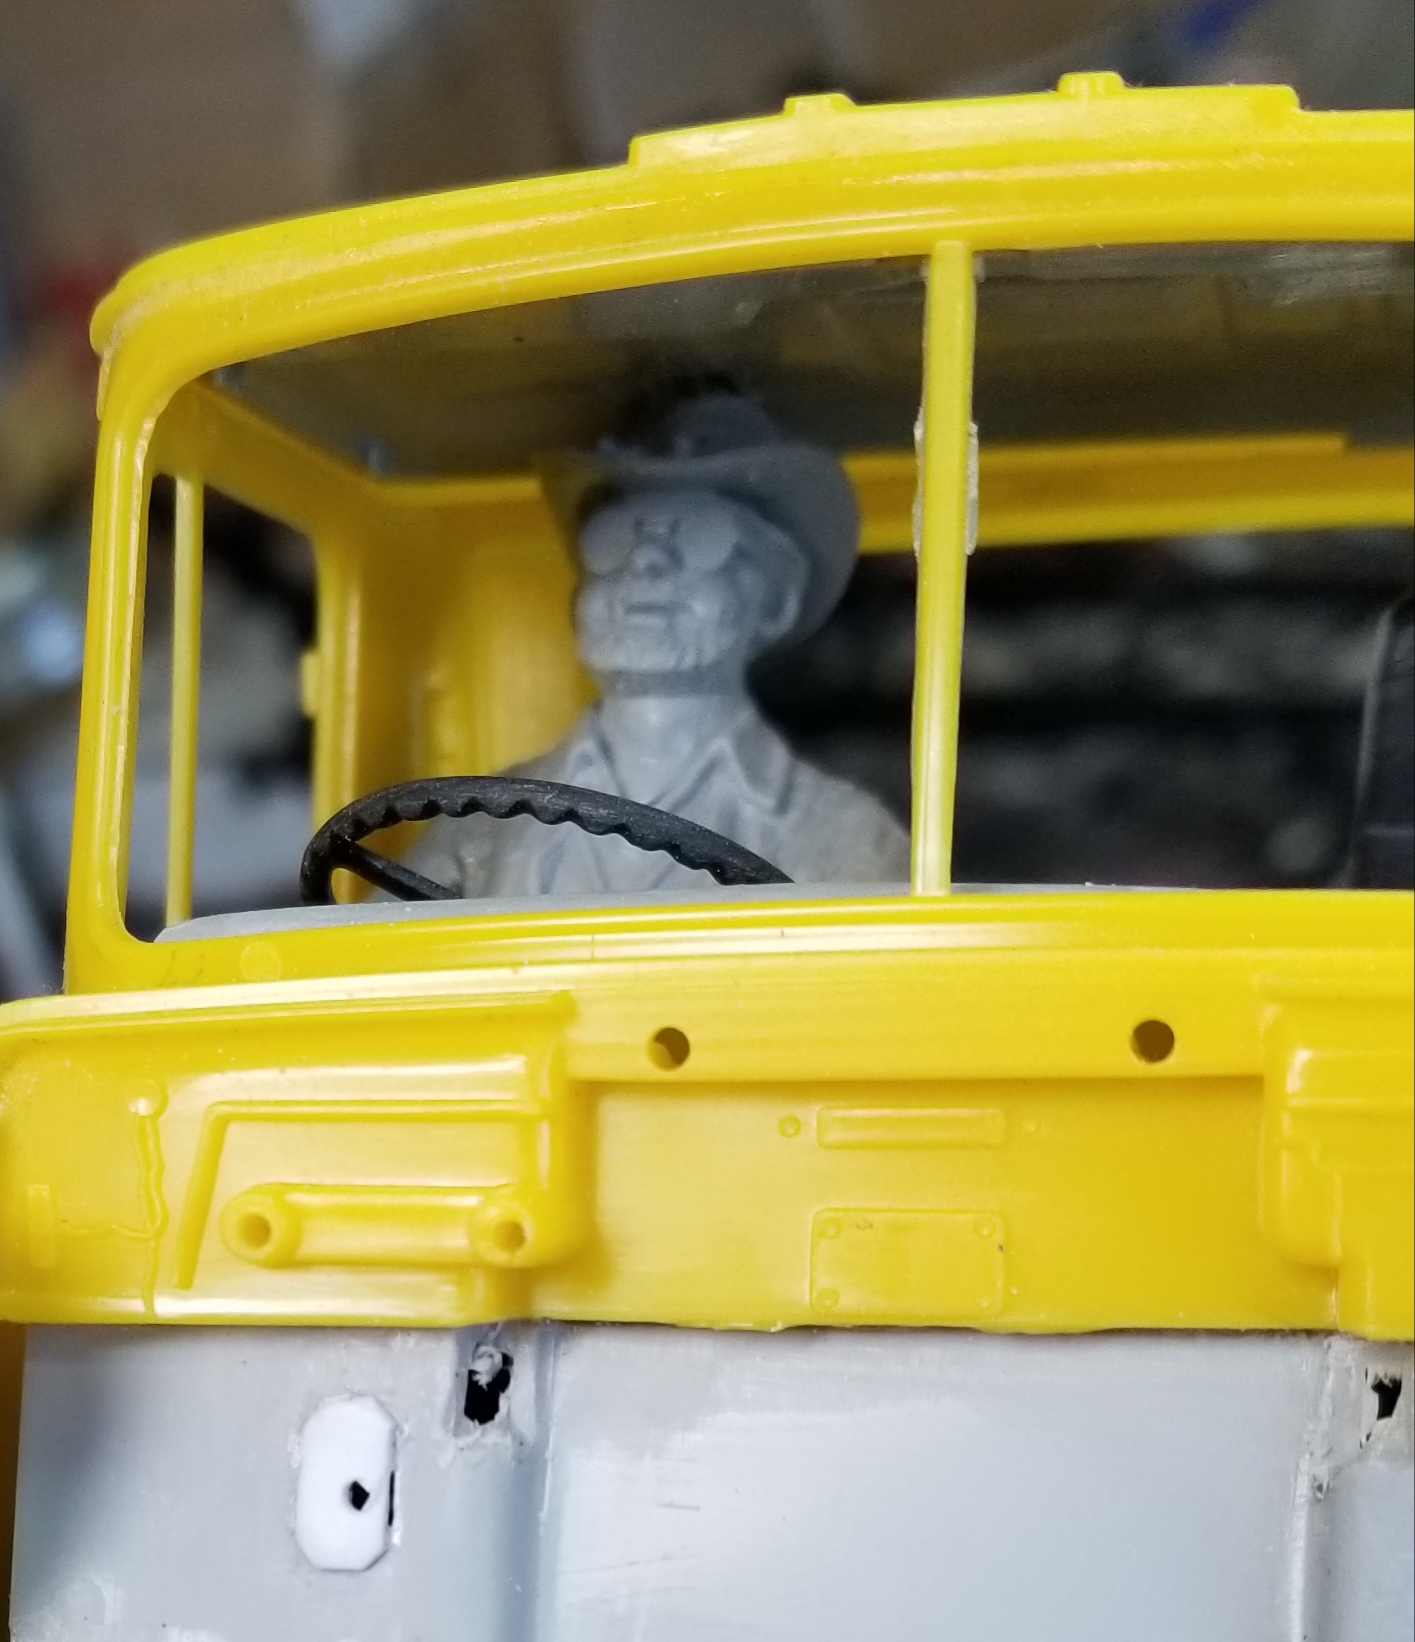
this view shows that he just barely fits in the cab. I had to lower the seat mechanism and make a depression in the roof interior panel to make this work.
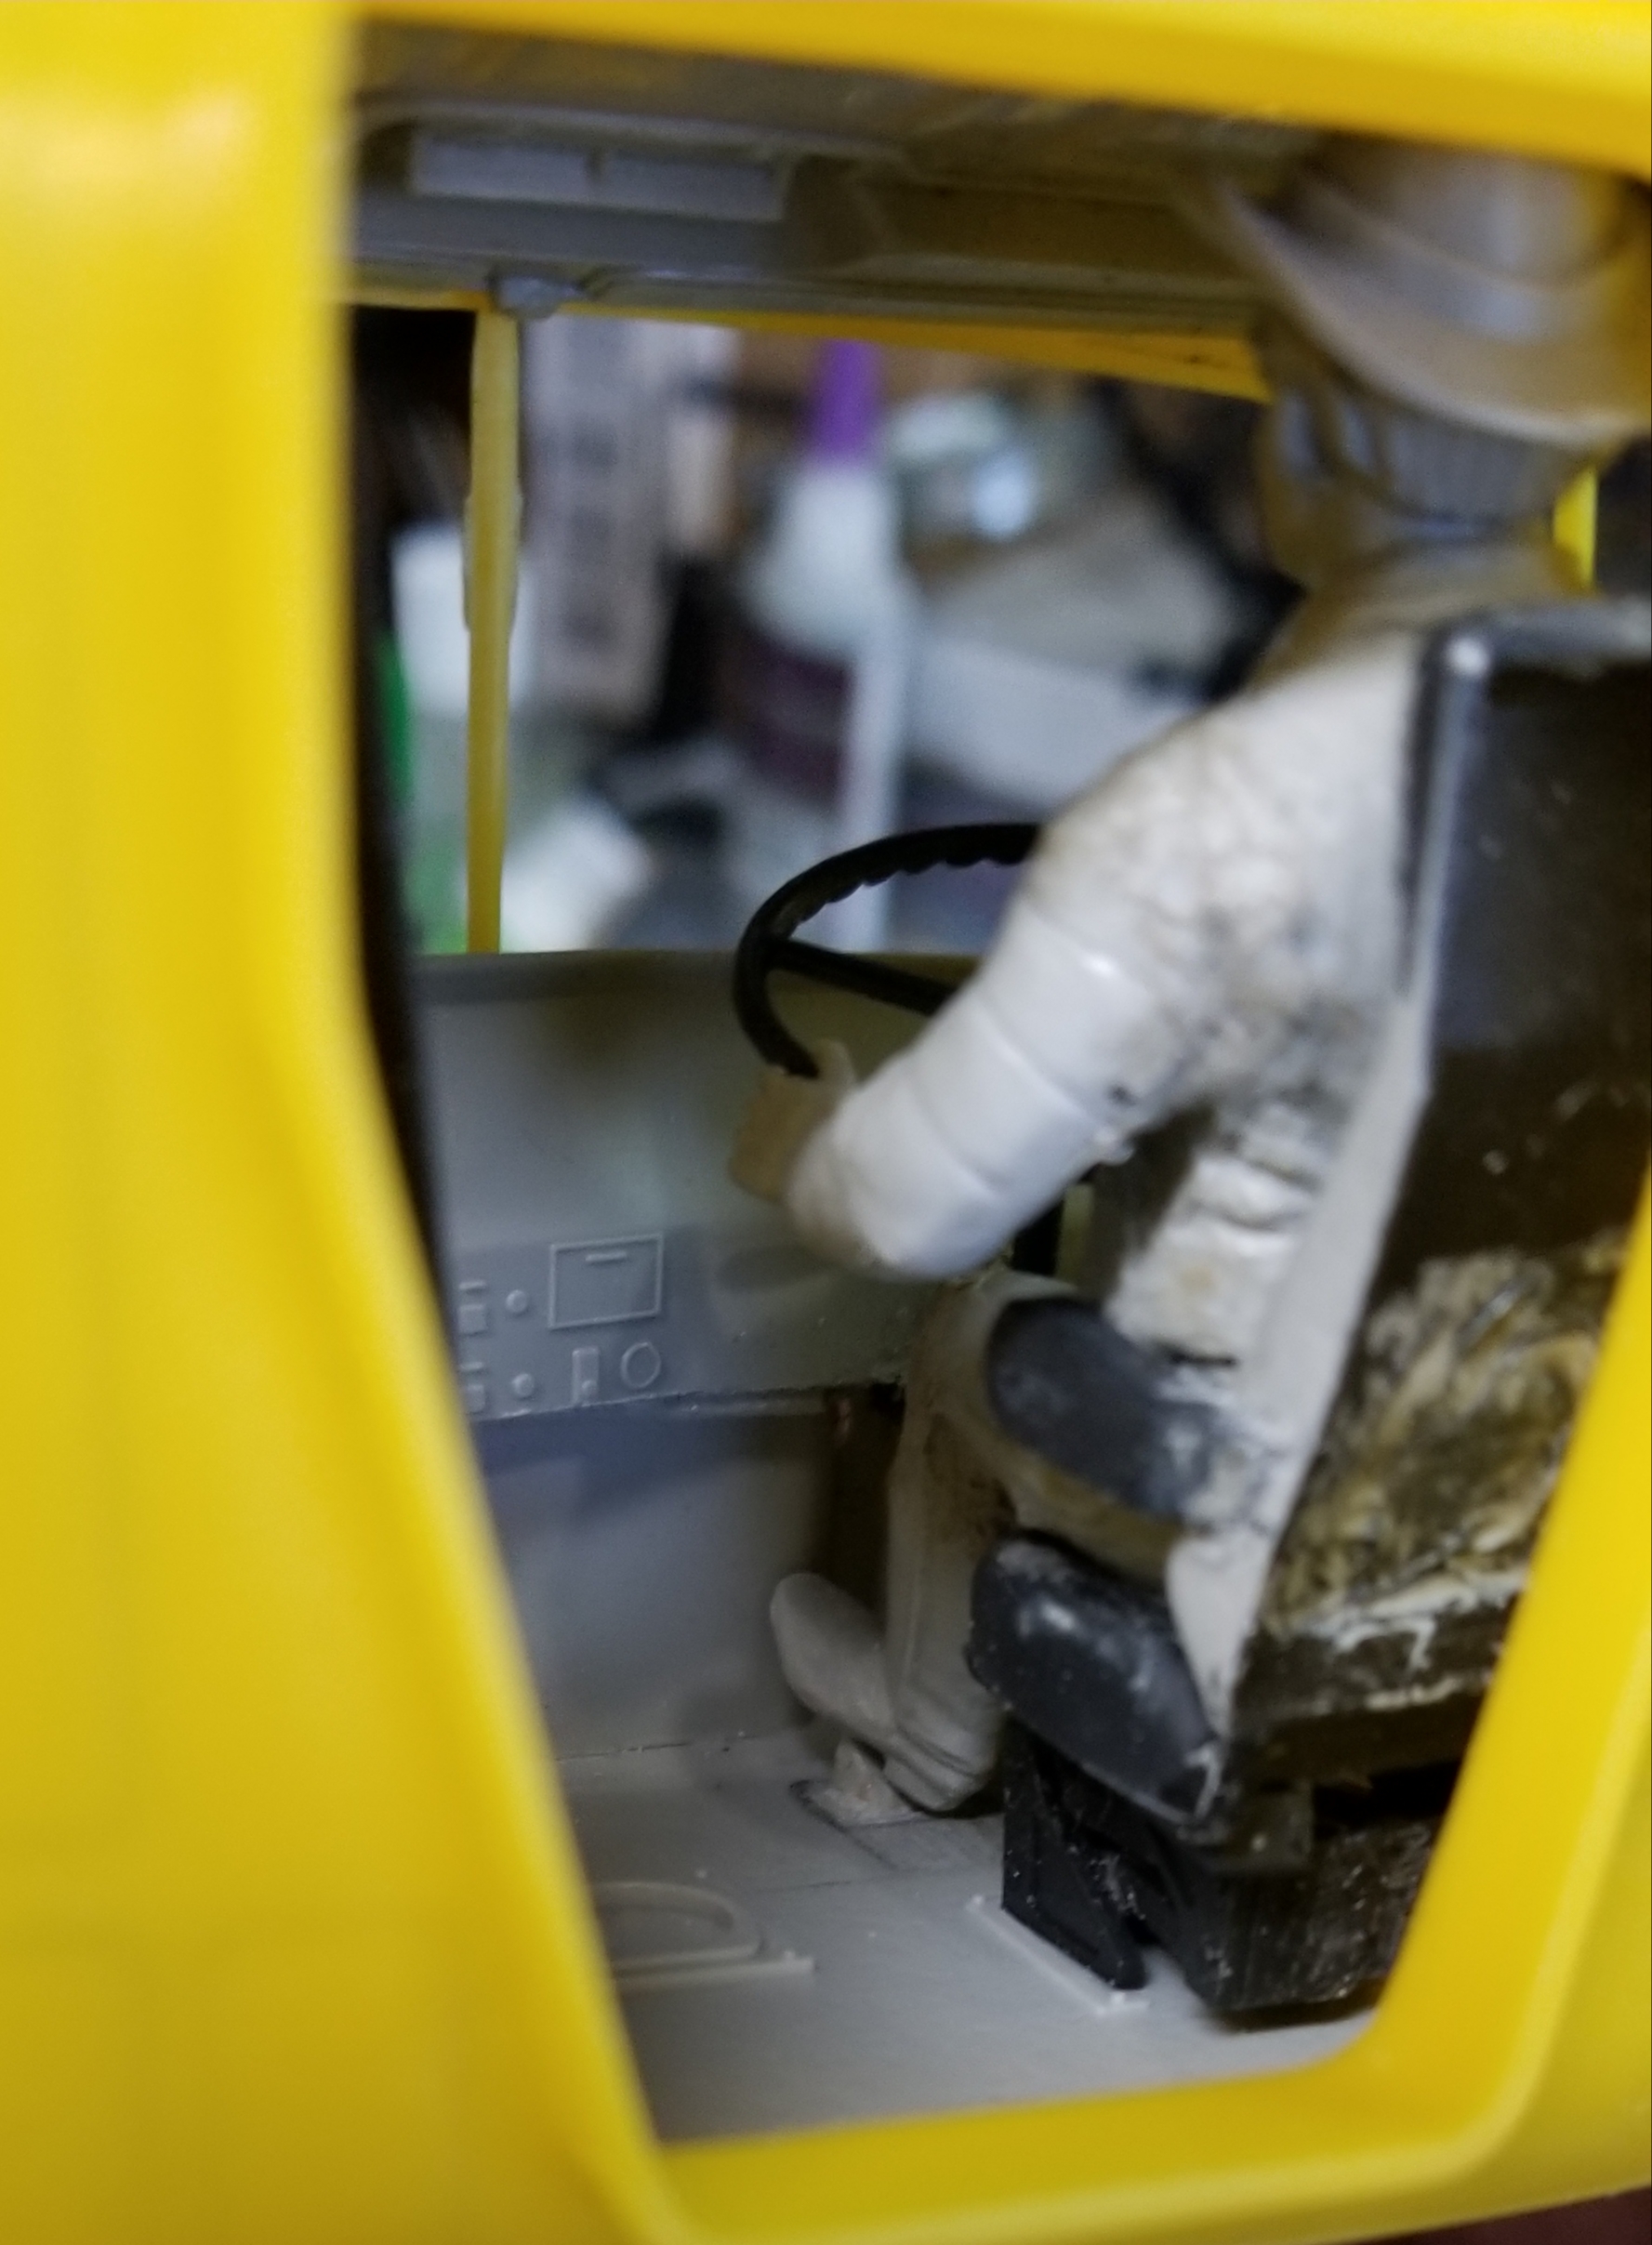
this view from the rear shows that his foot sits on the clutch pedal.
this view shows that his right foot sits on the brake snd fuel pedals.
this view shows the driver figure in the driving position.
closer view of the driver. He actually looks a little like me...lol
this view shows that his hands are on the steering wheel. Since I took this picture I've switched out the steering wheel for a smaller diameter two spoke one.
this view shows that he just barely fits in the cab. I had to lower the seat mechanism and make a depression in the roof interior panel to make this work.
this view from the rear shows that his foot sits on the clutch pedal.
this view shows that his right foot sits on the brake snd fuel pedals.
I got this kit to use for modifying the Superliner II's frame into a correct Mack frame. As most of you know the Italeri Mack Superliner kit isn't really a Mack, almost, it does resemble one but it is not accurate.
First the frame, suspension, interior peices and even the engine (Cummins NTC-400), although you could get a Cummins in a Mack are from there Freightliner kits. This causes the cab to be out of proportions, to wide, in order to fit there Freightliner interior floor dimensions.
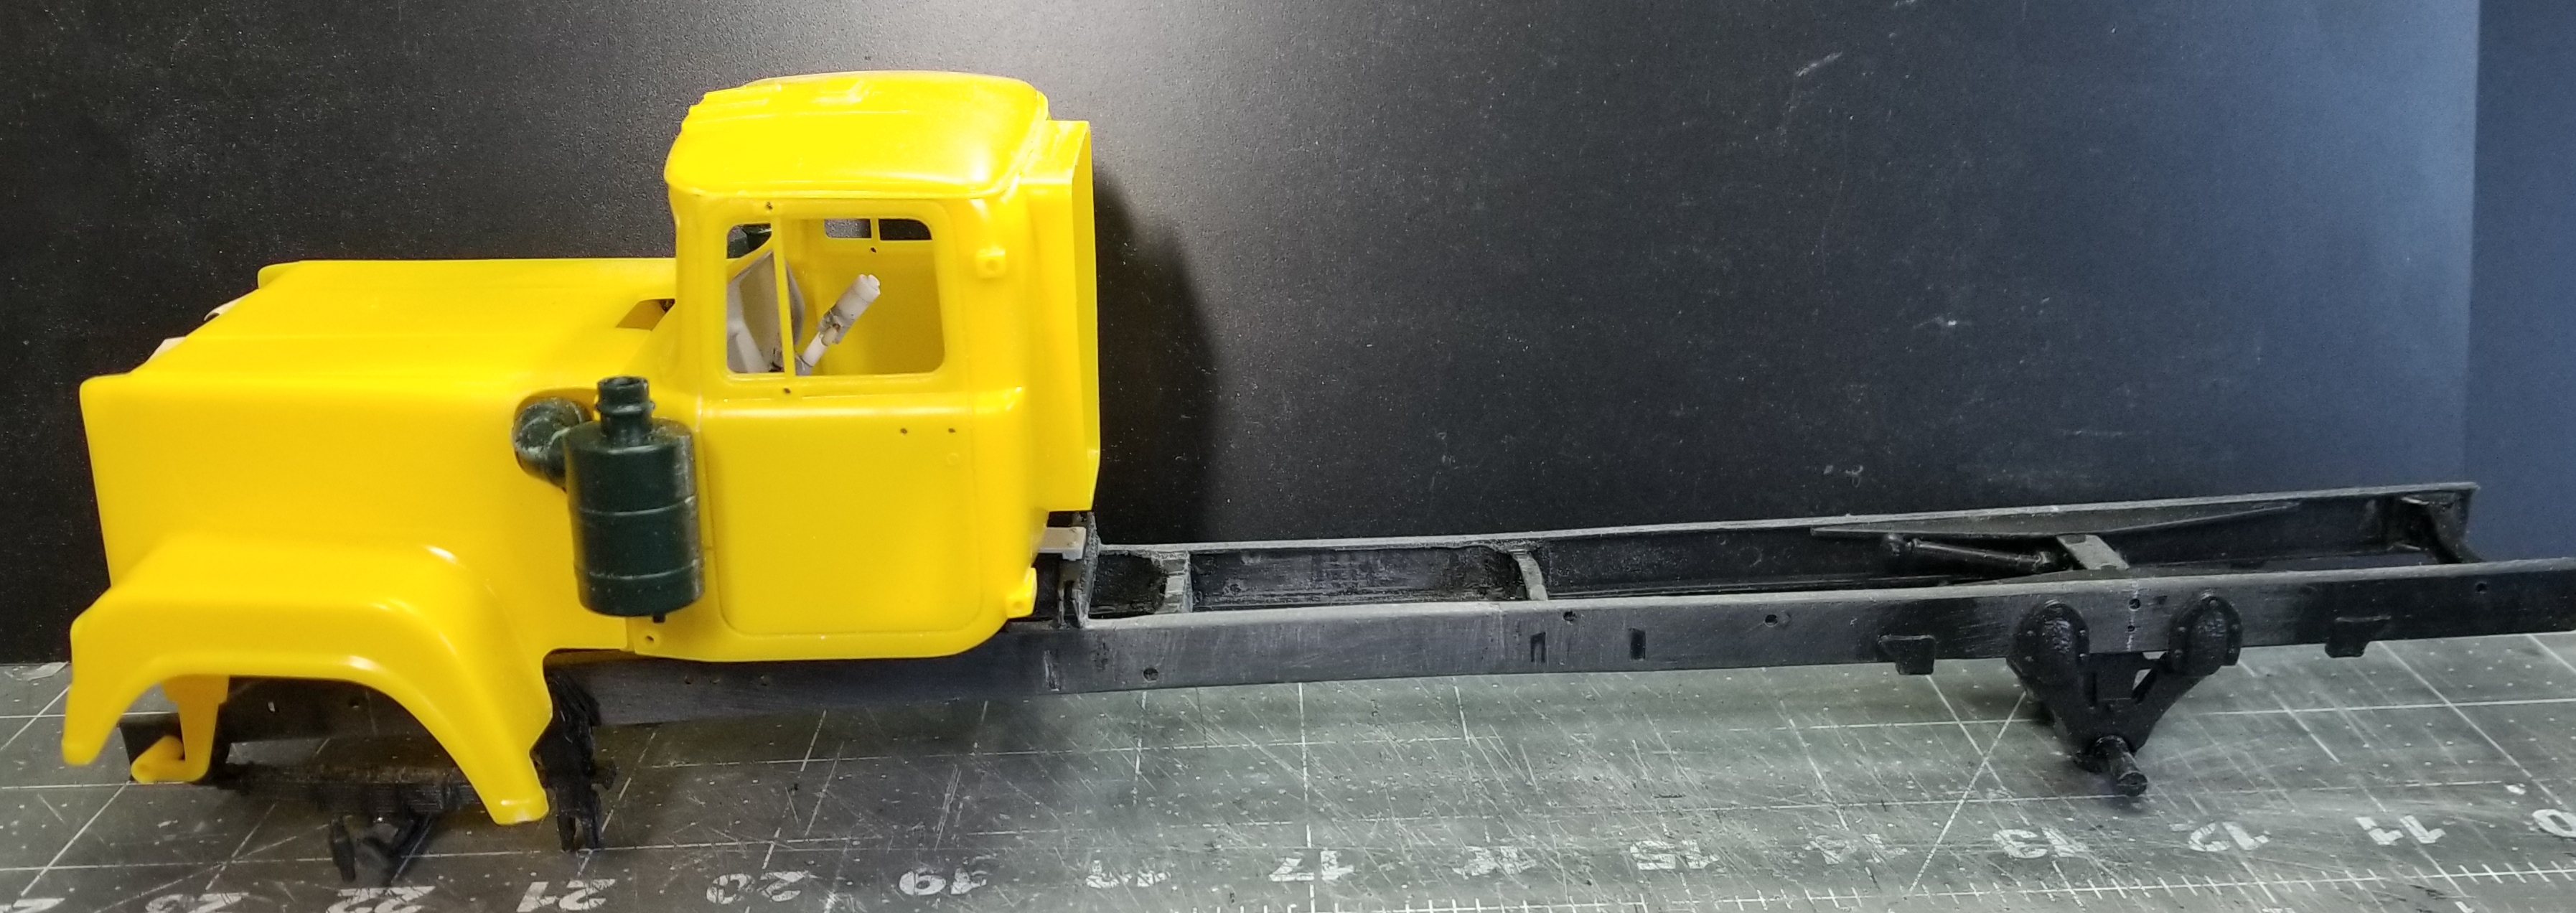
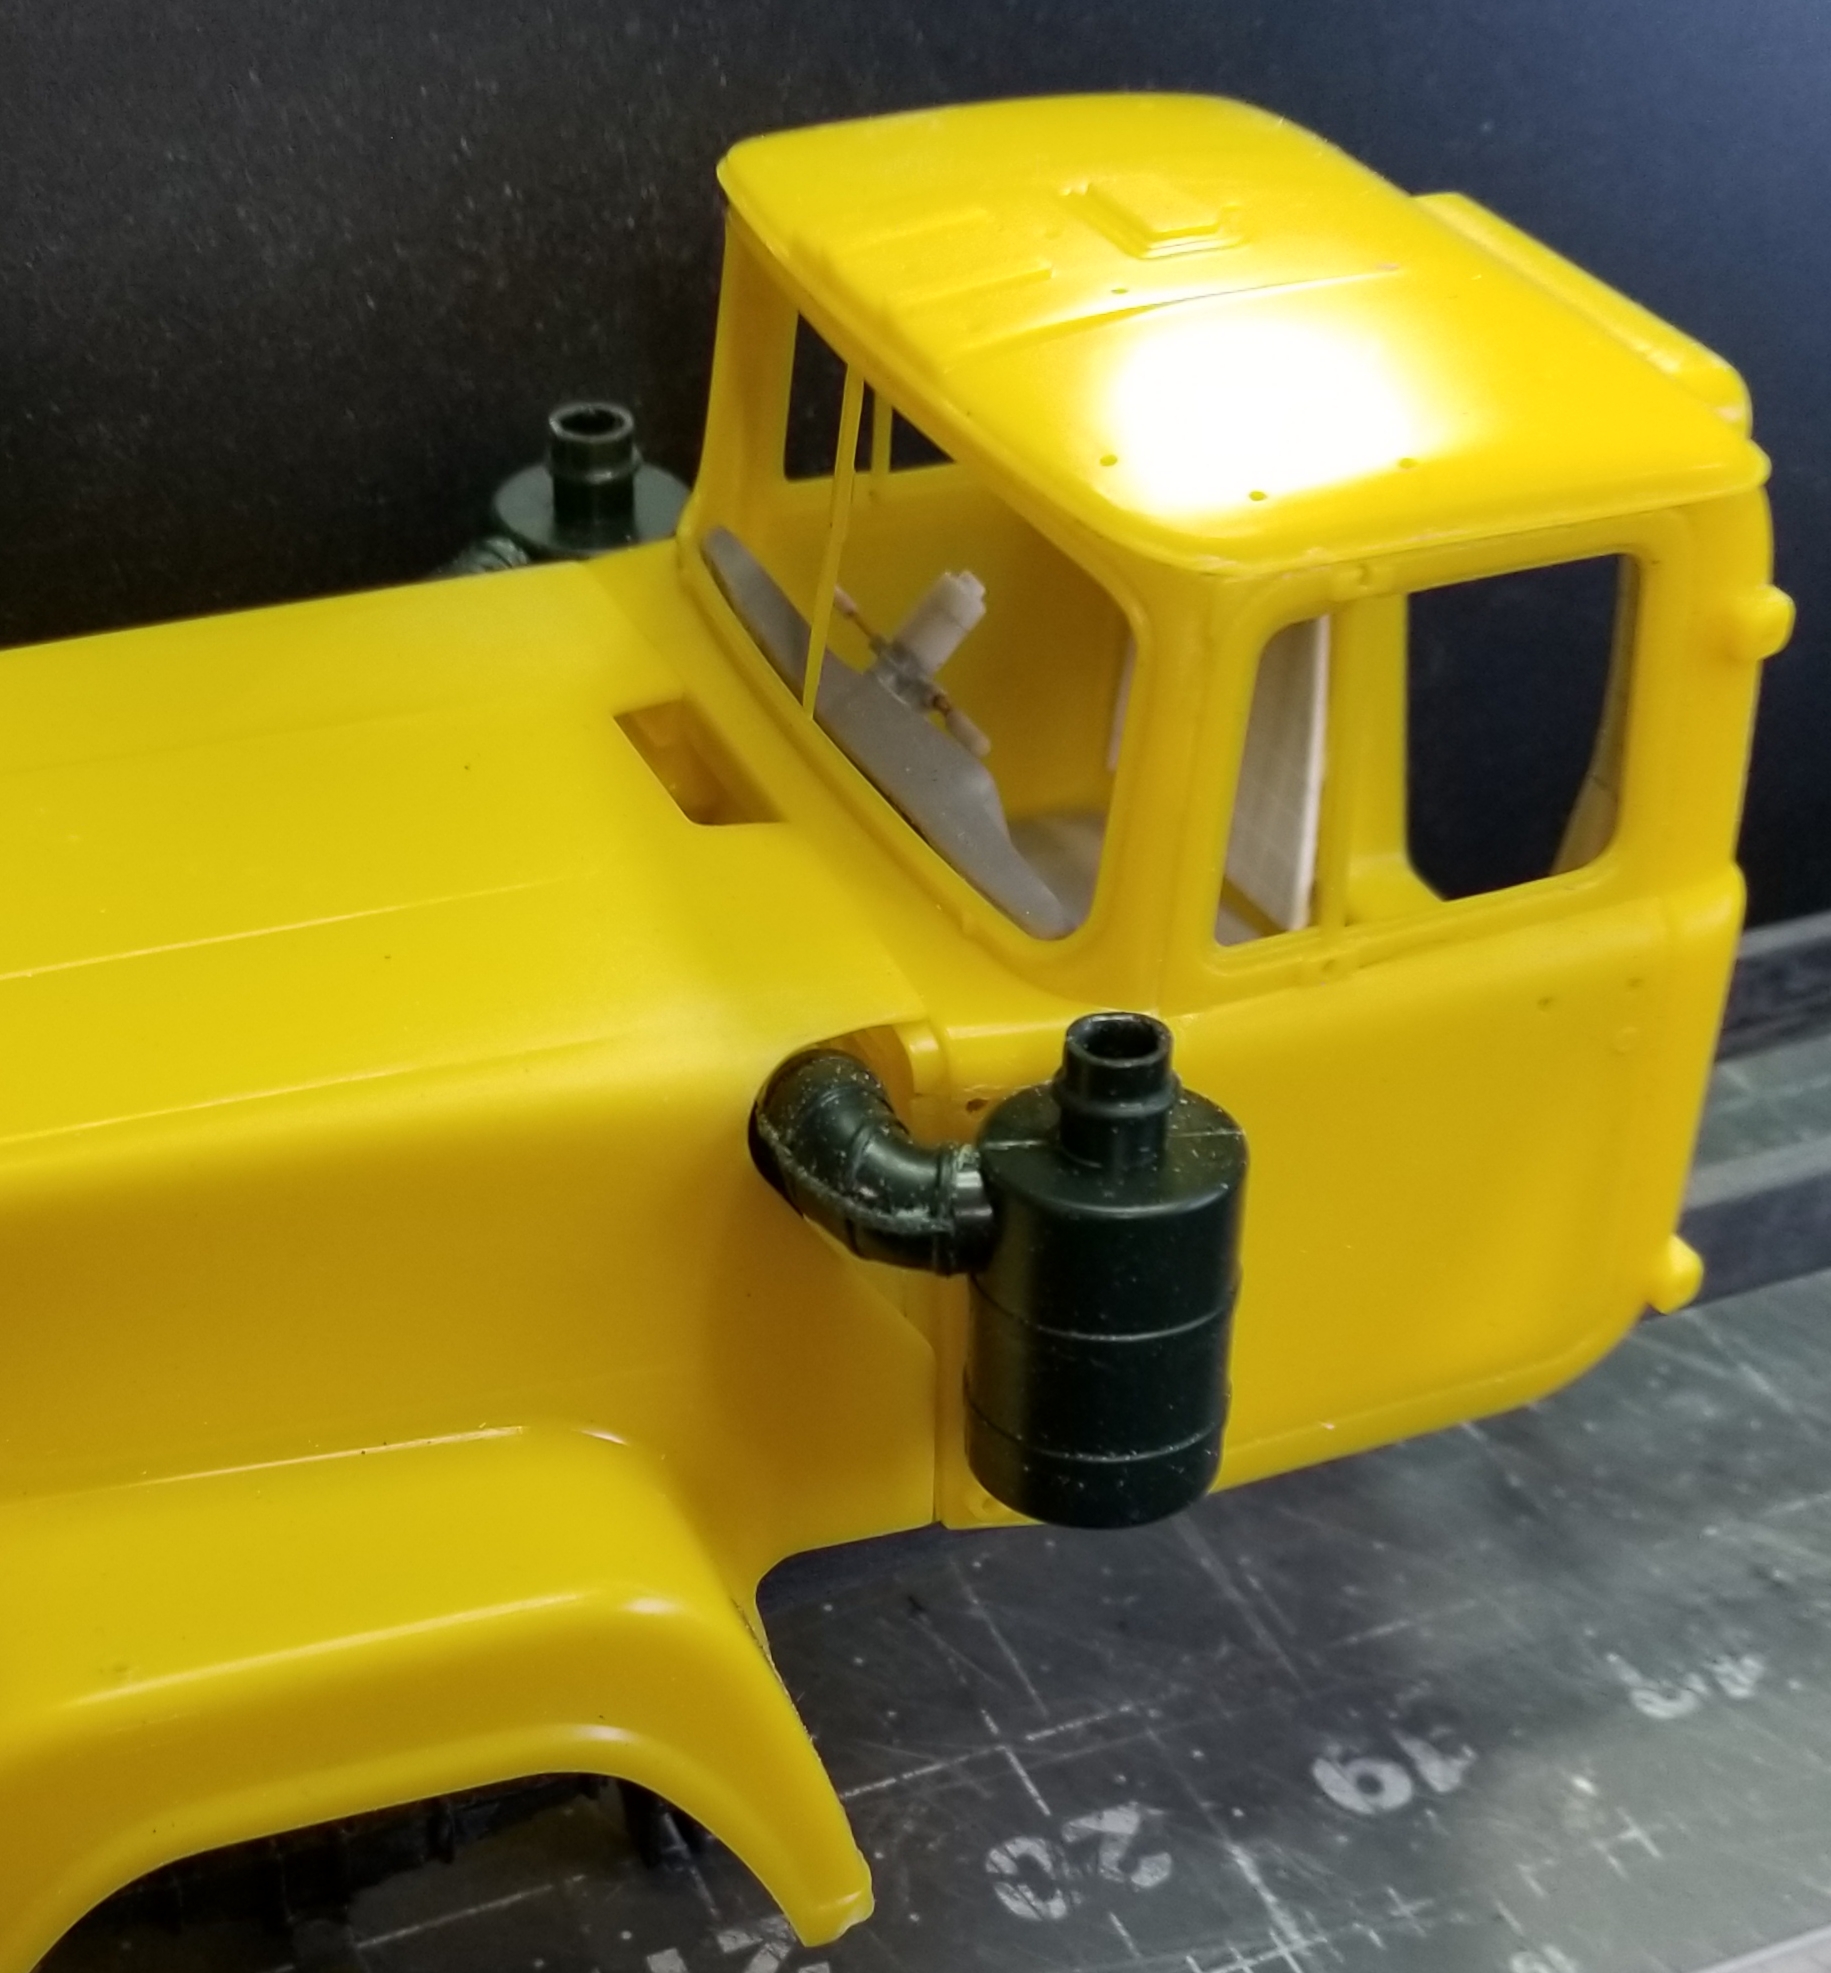
I'm not going to narrow my cab, like a few others on here have done. Since I'm making mine a Australian truck it will have the large external air cleaners with the raised snorkels, common to Australian trucks. I believe that this will mask the fact that the cab is to wide, to a degree.
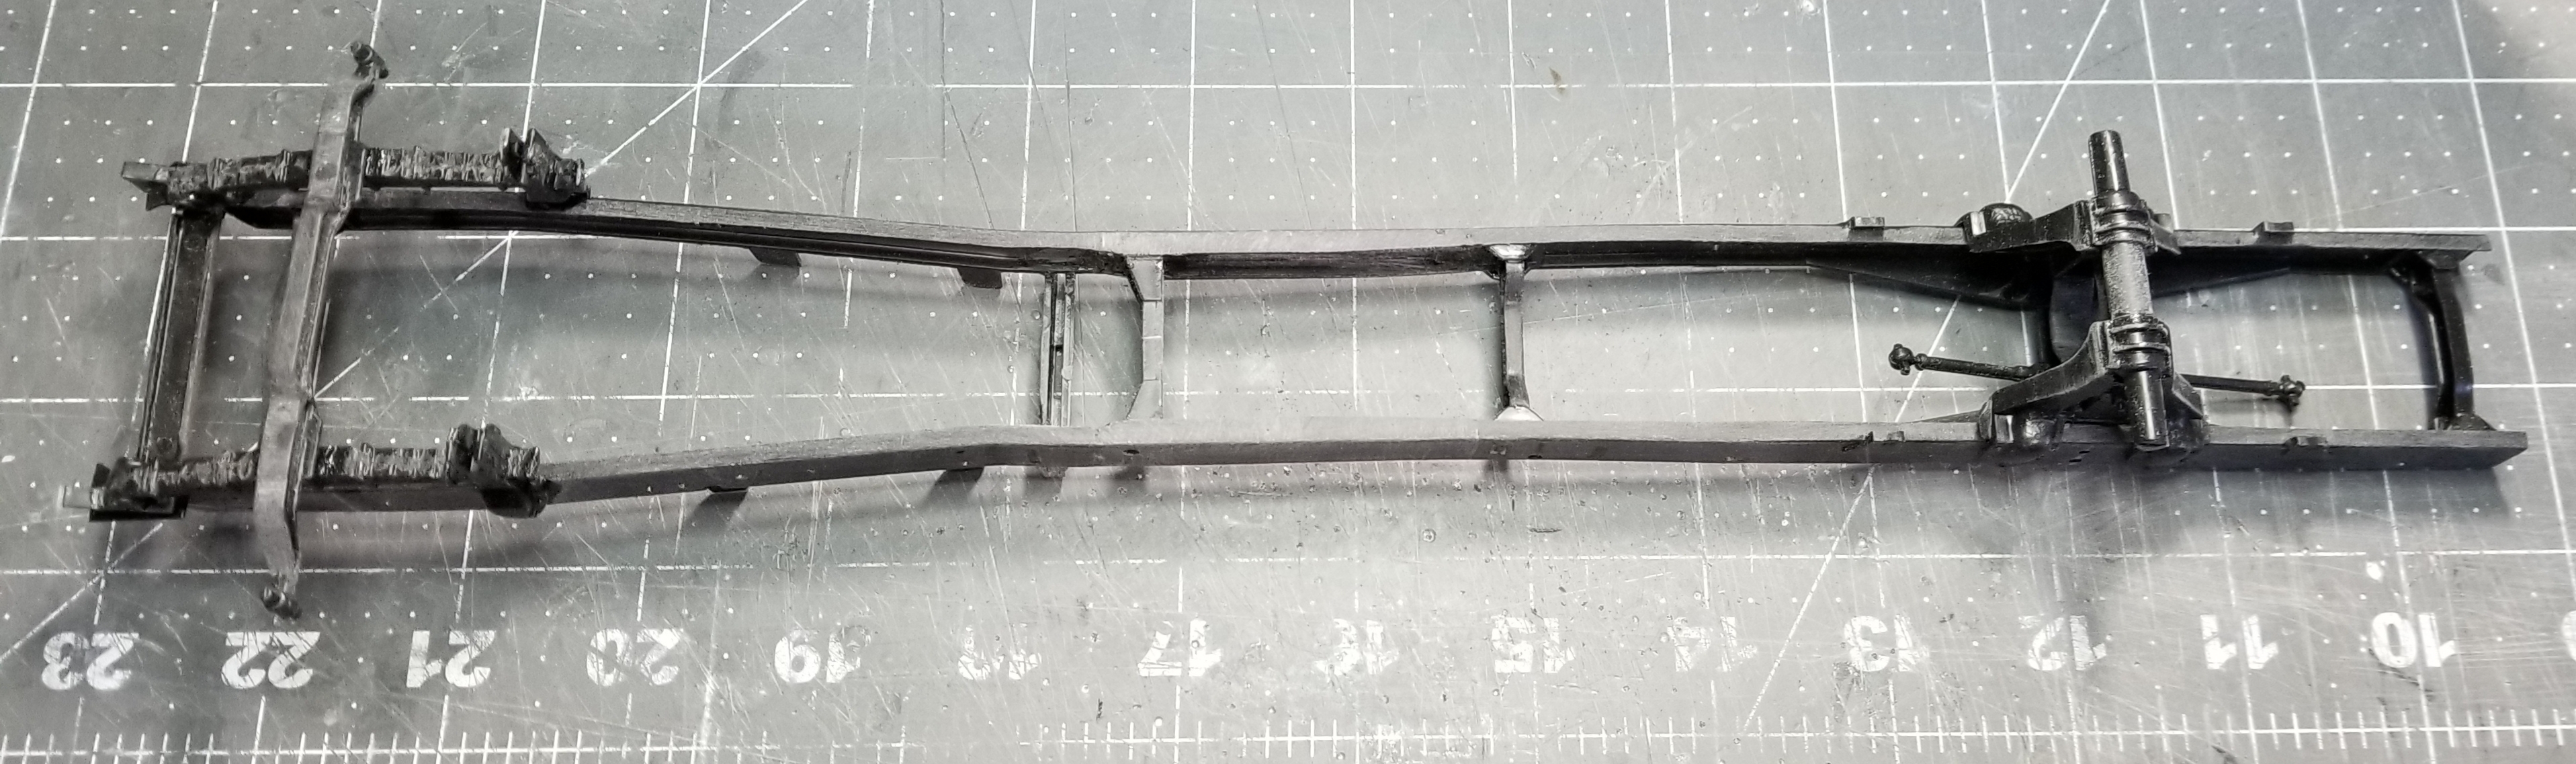
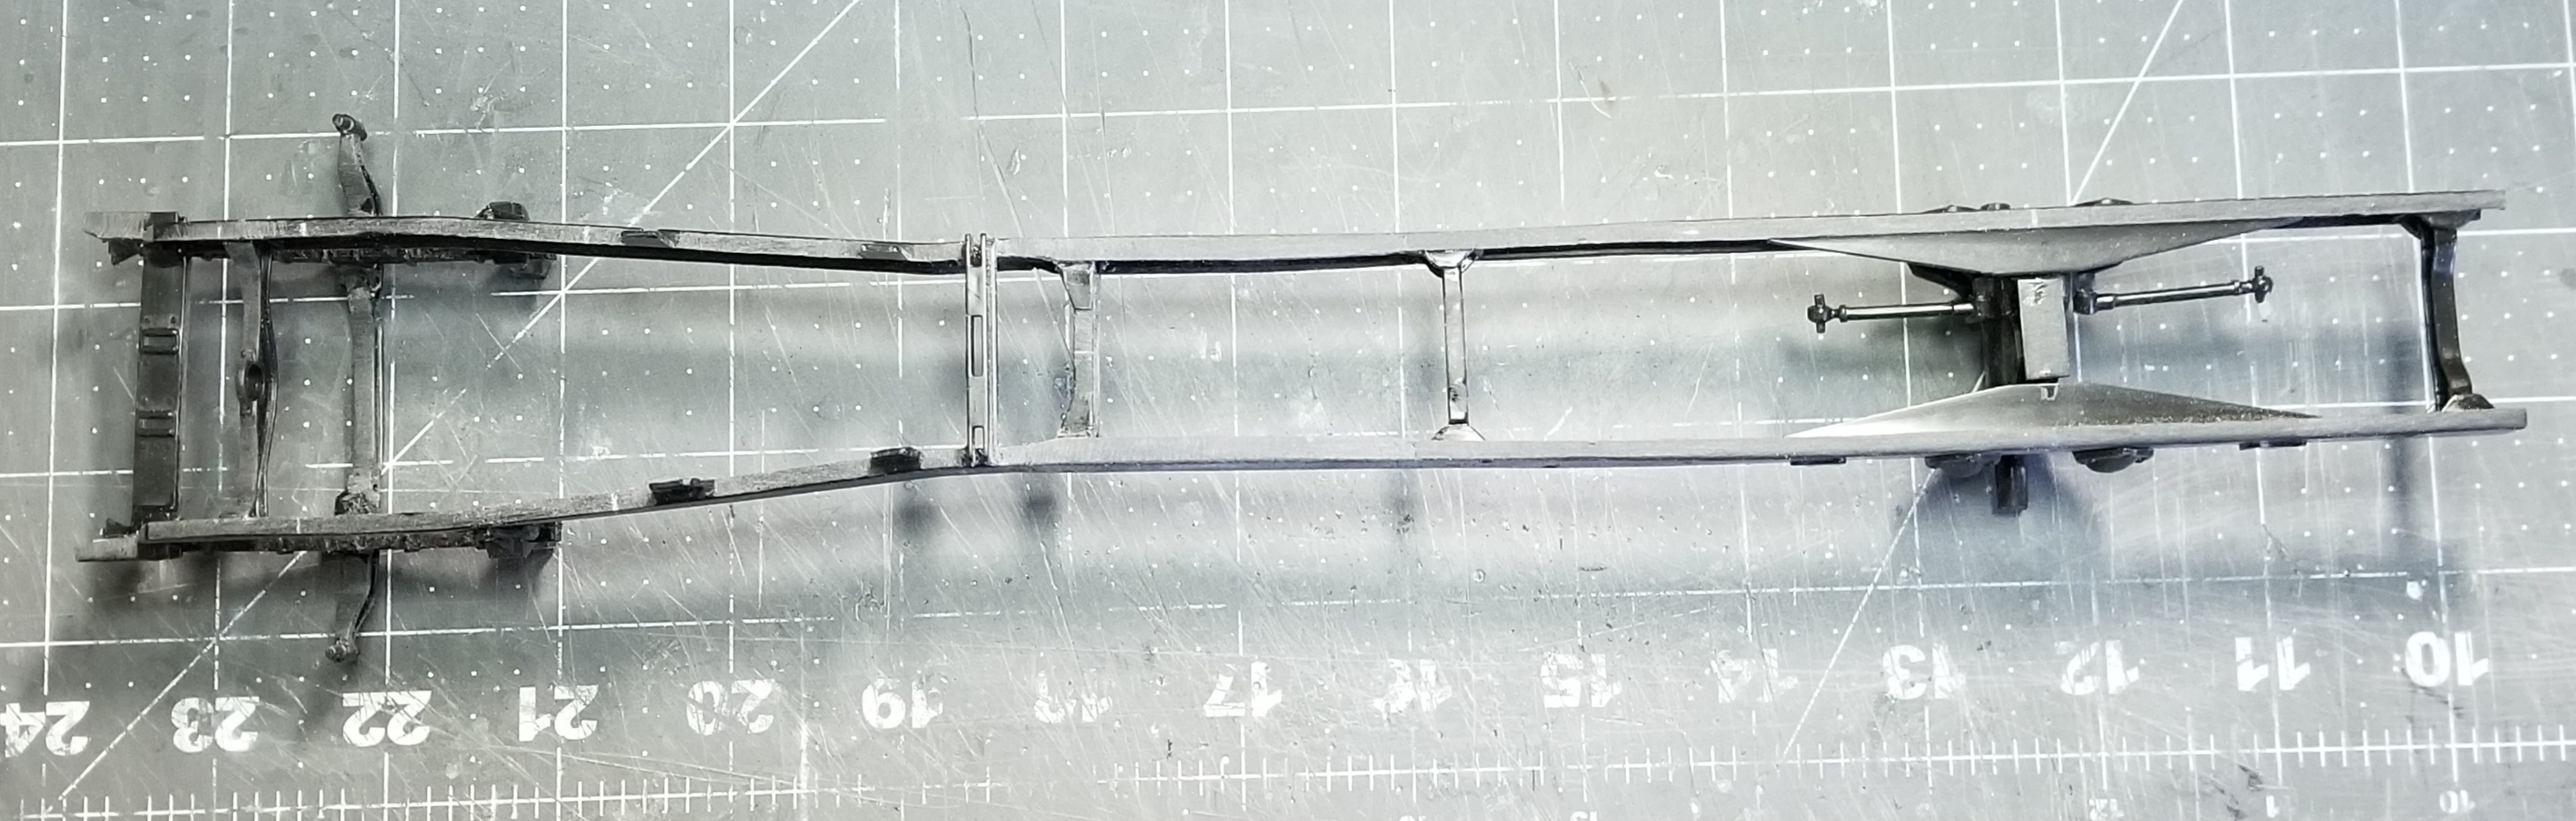
this top view shows the frame and suspension from the AMT Mack DM800 kit. I cut it just a little rear of were the frame narrows at the rear behind the cab and spliced in a section from the Superliners kit frame to give me a 230.0" W.B.
this view of the bottom of the frame shows the front and rear suspensions.
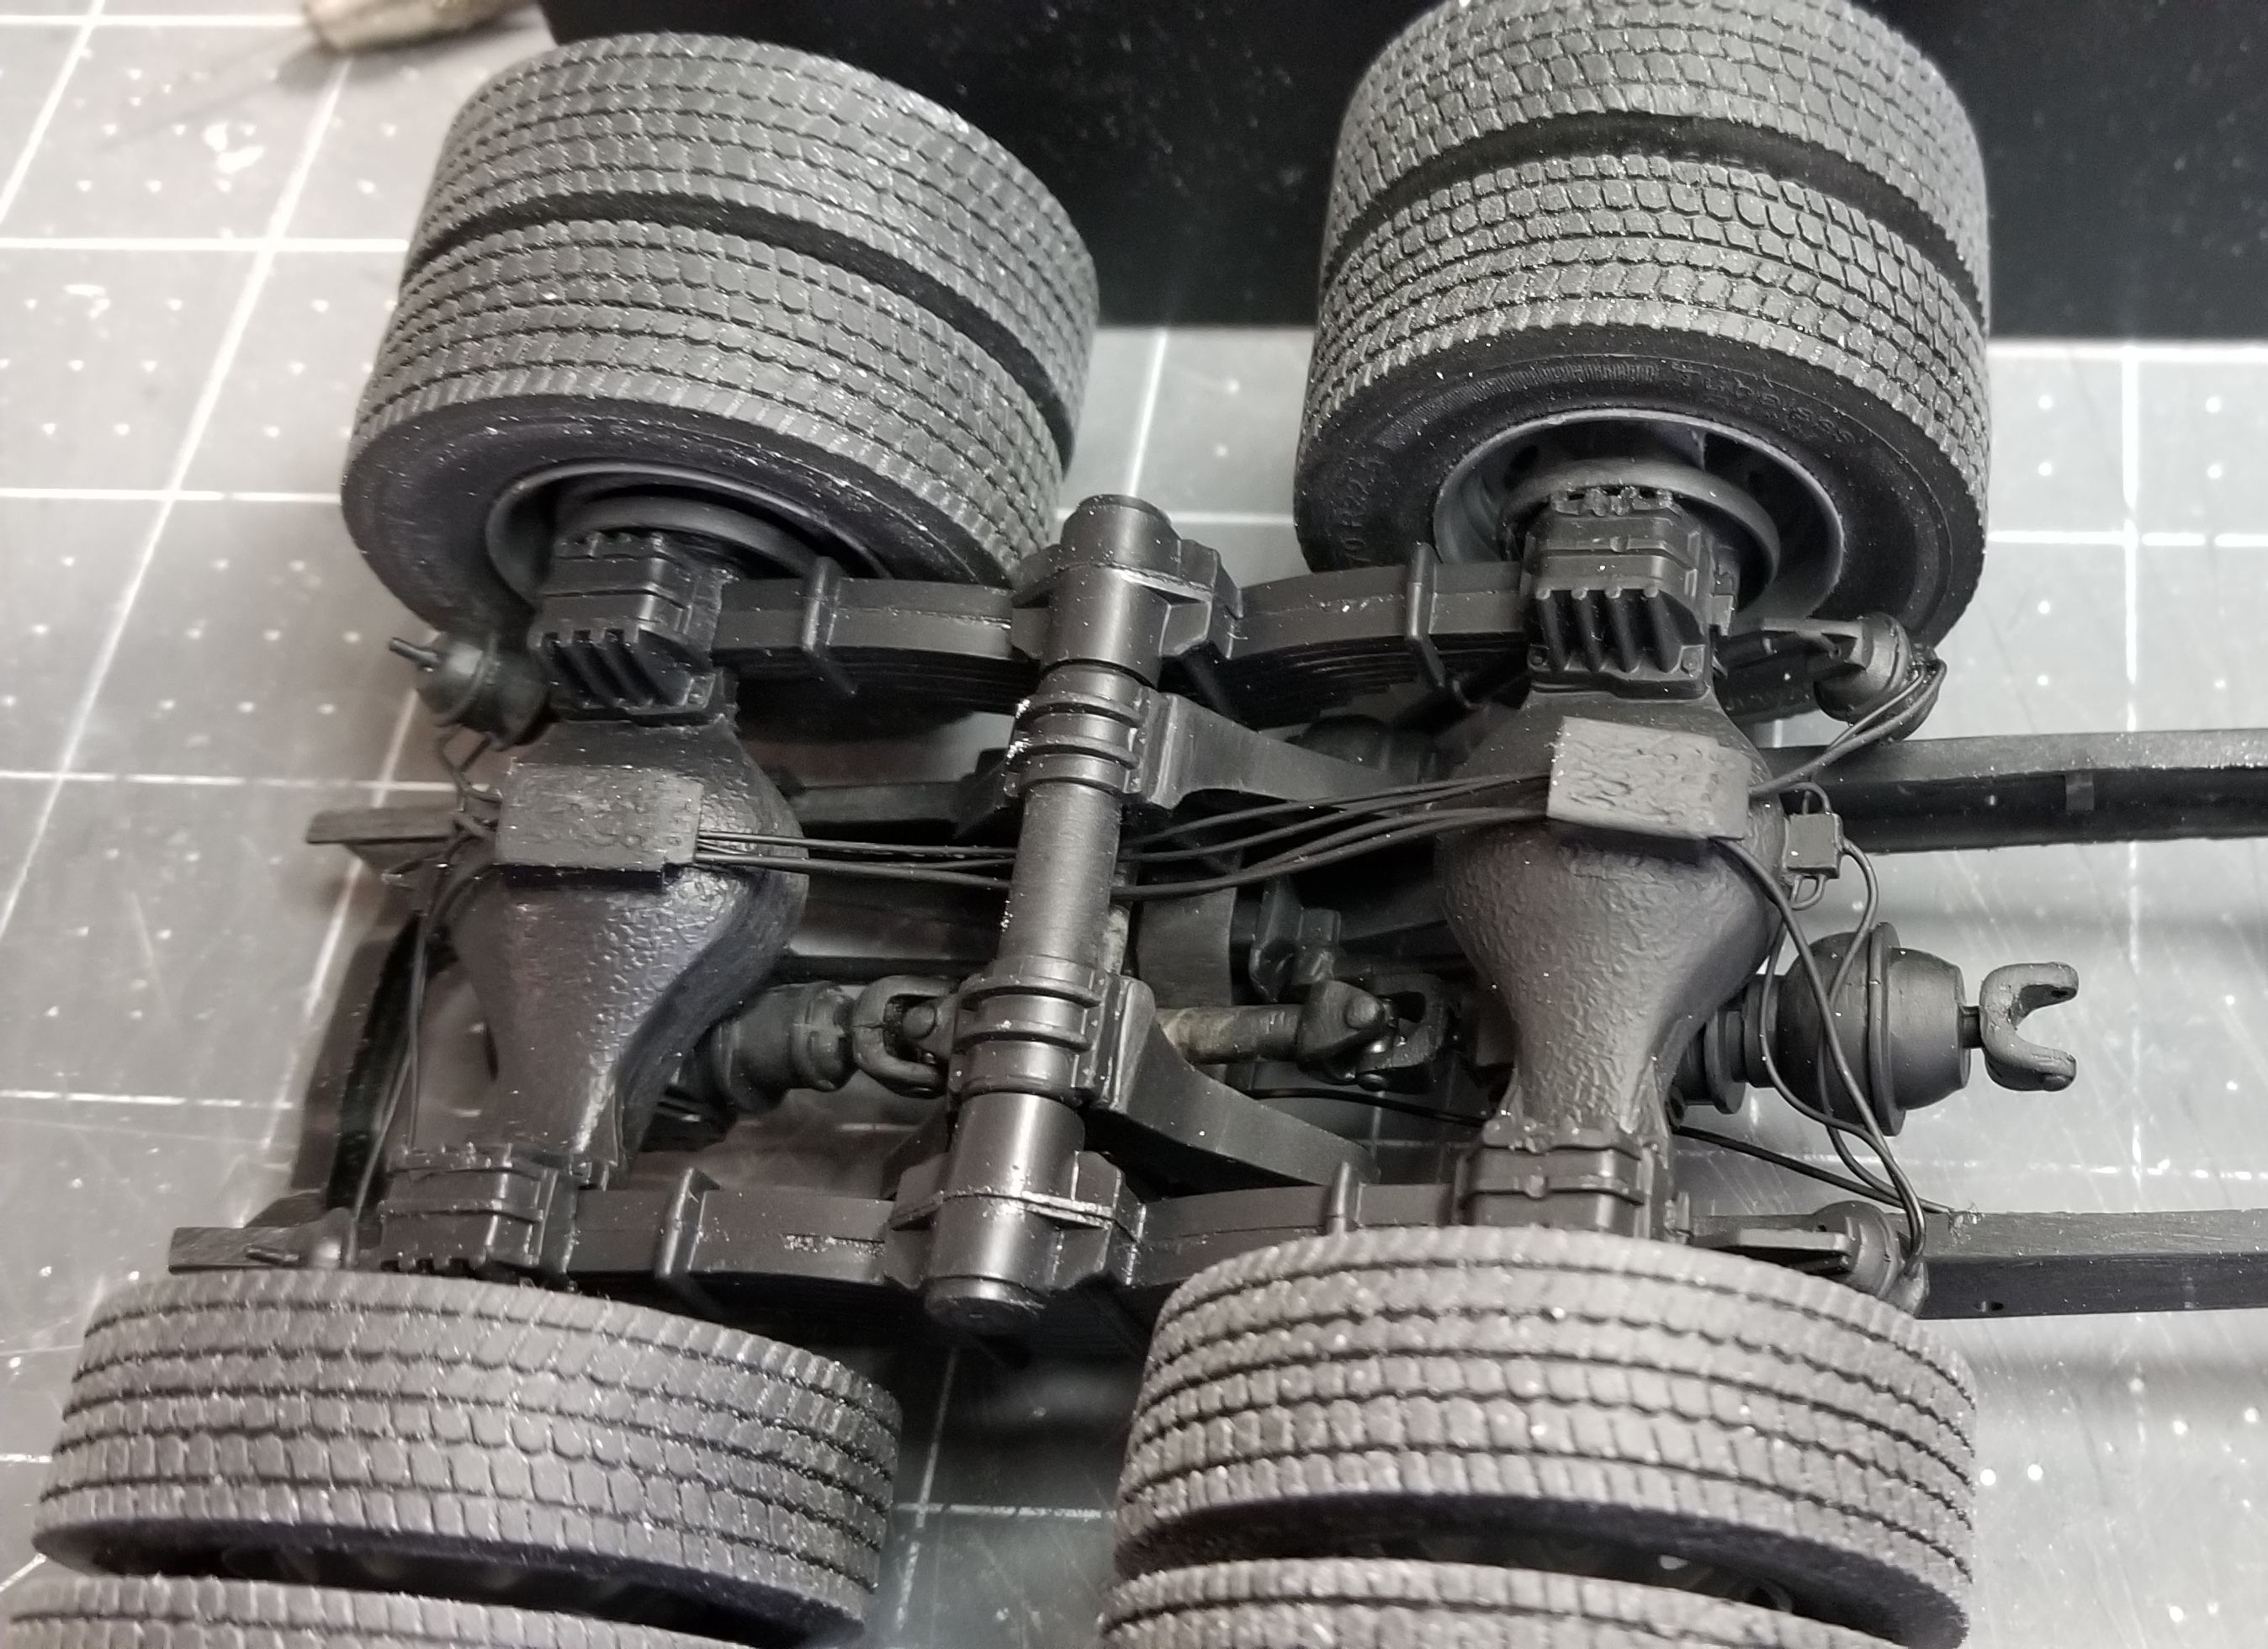
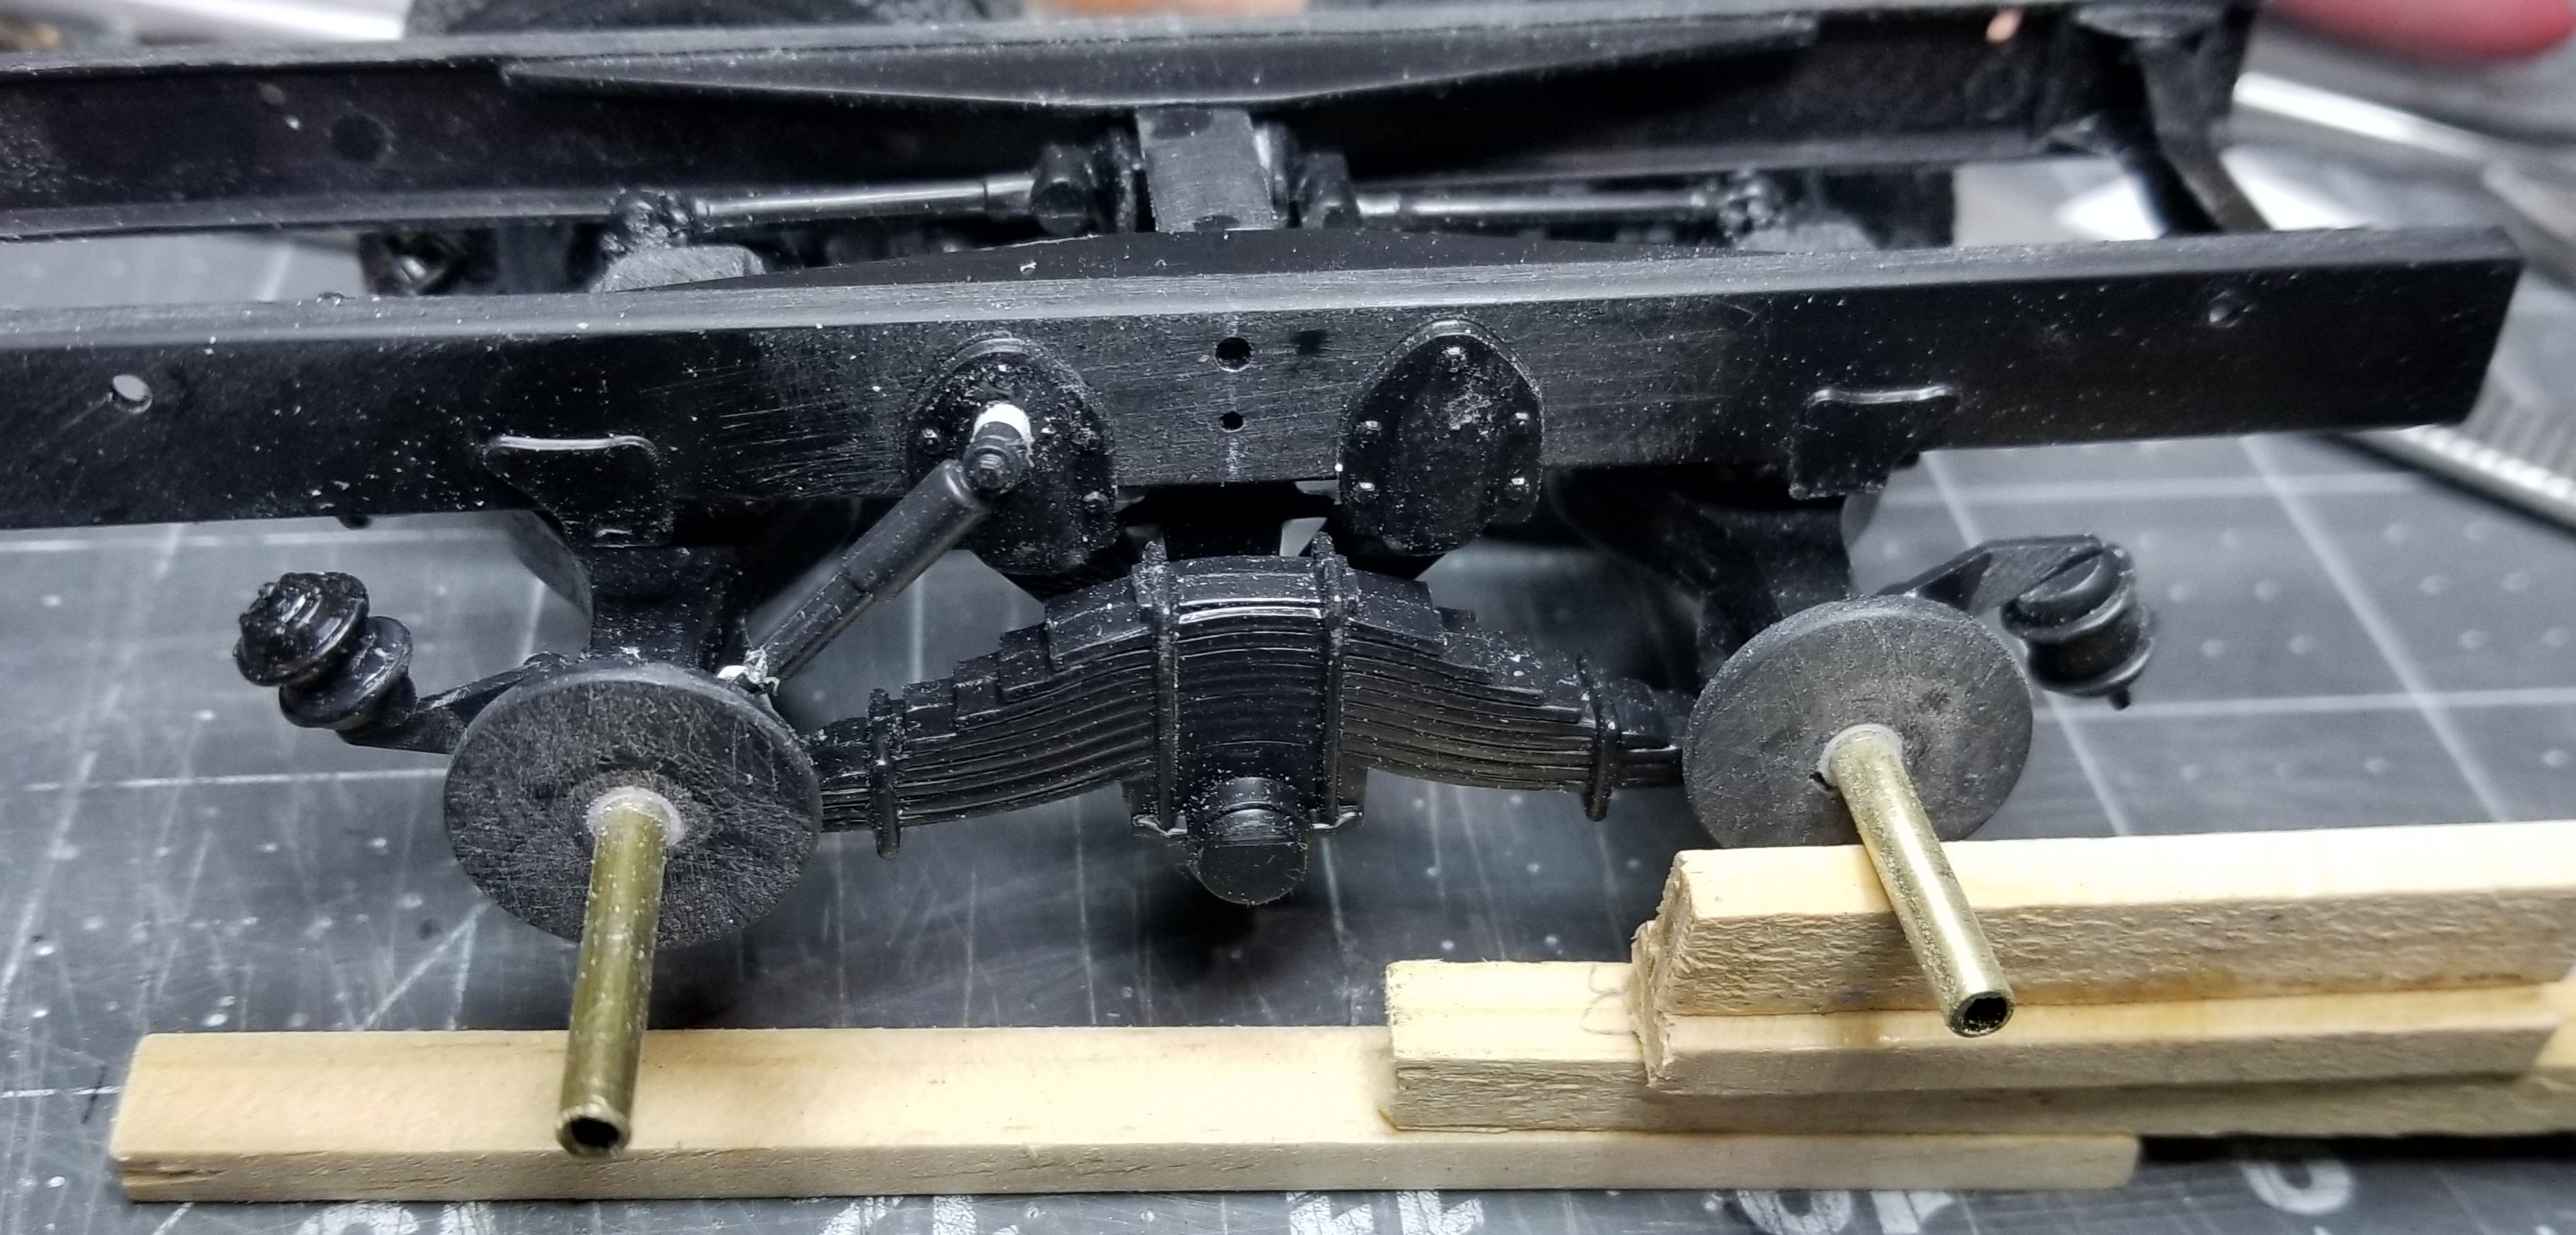
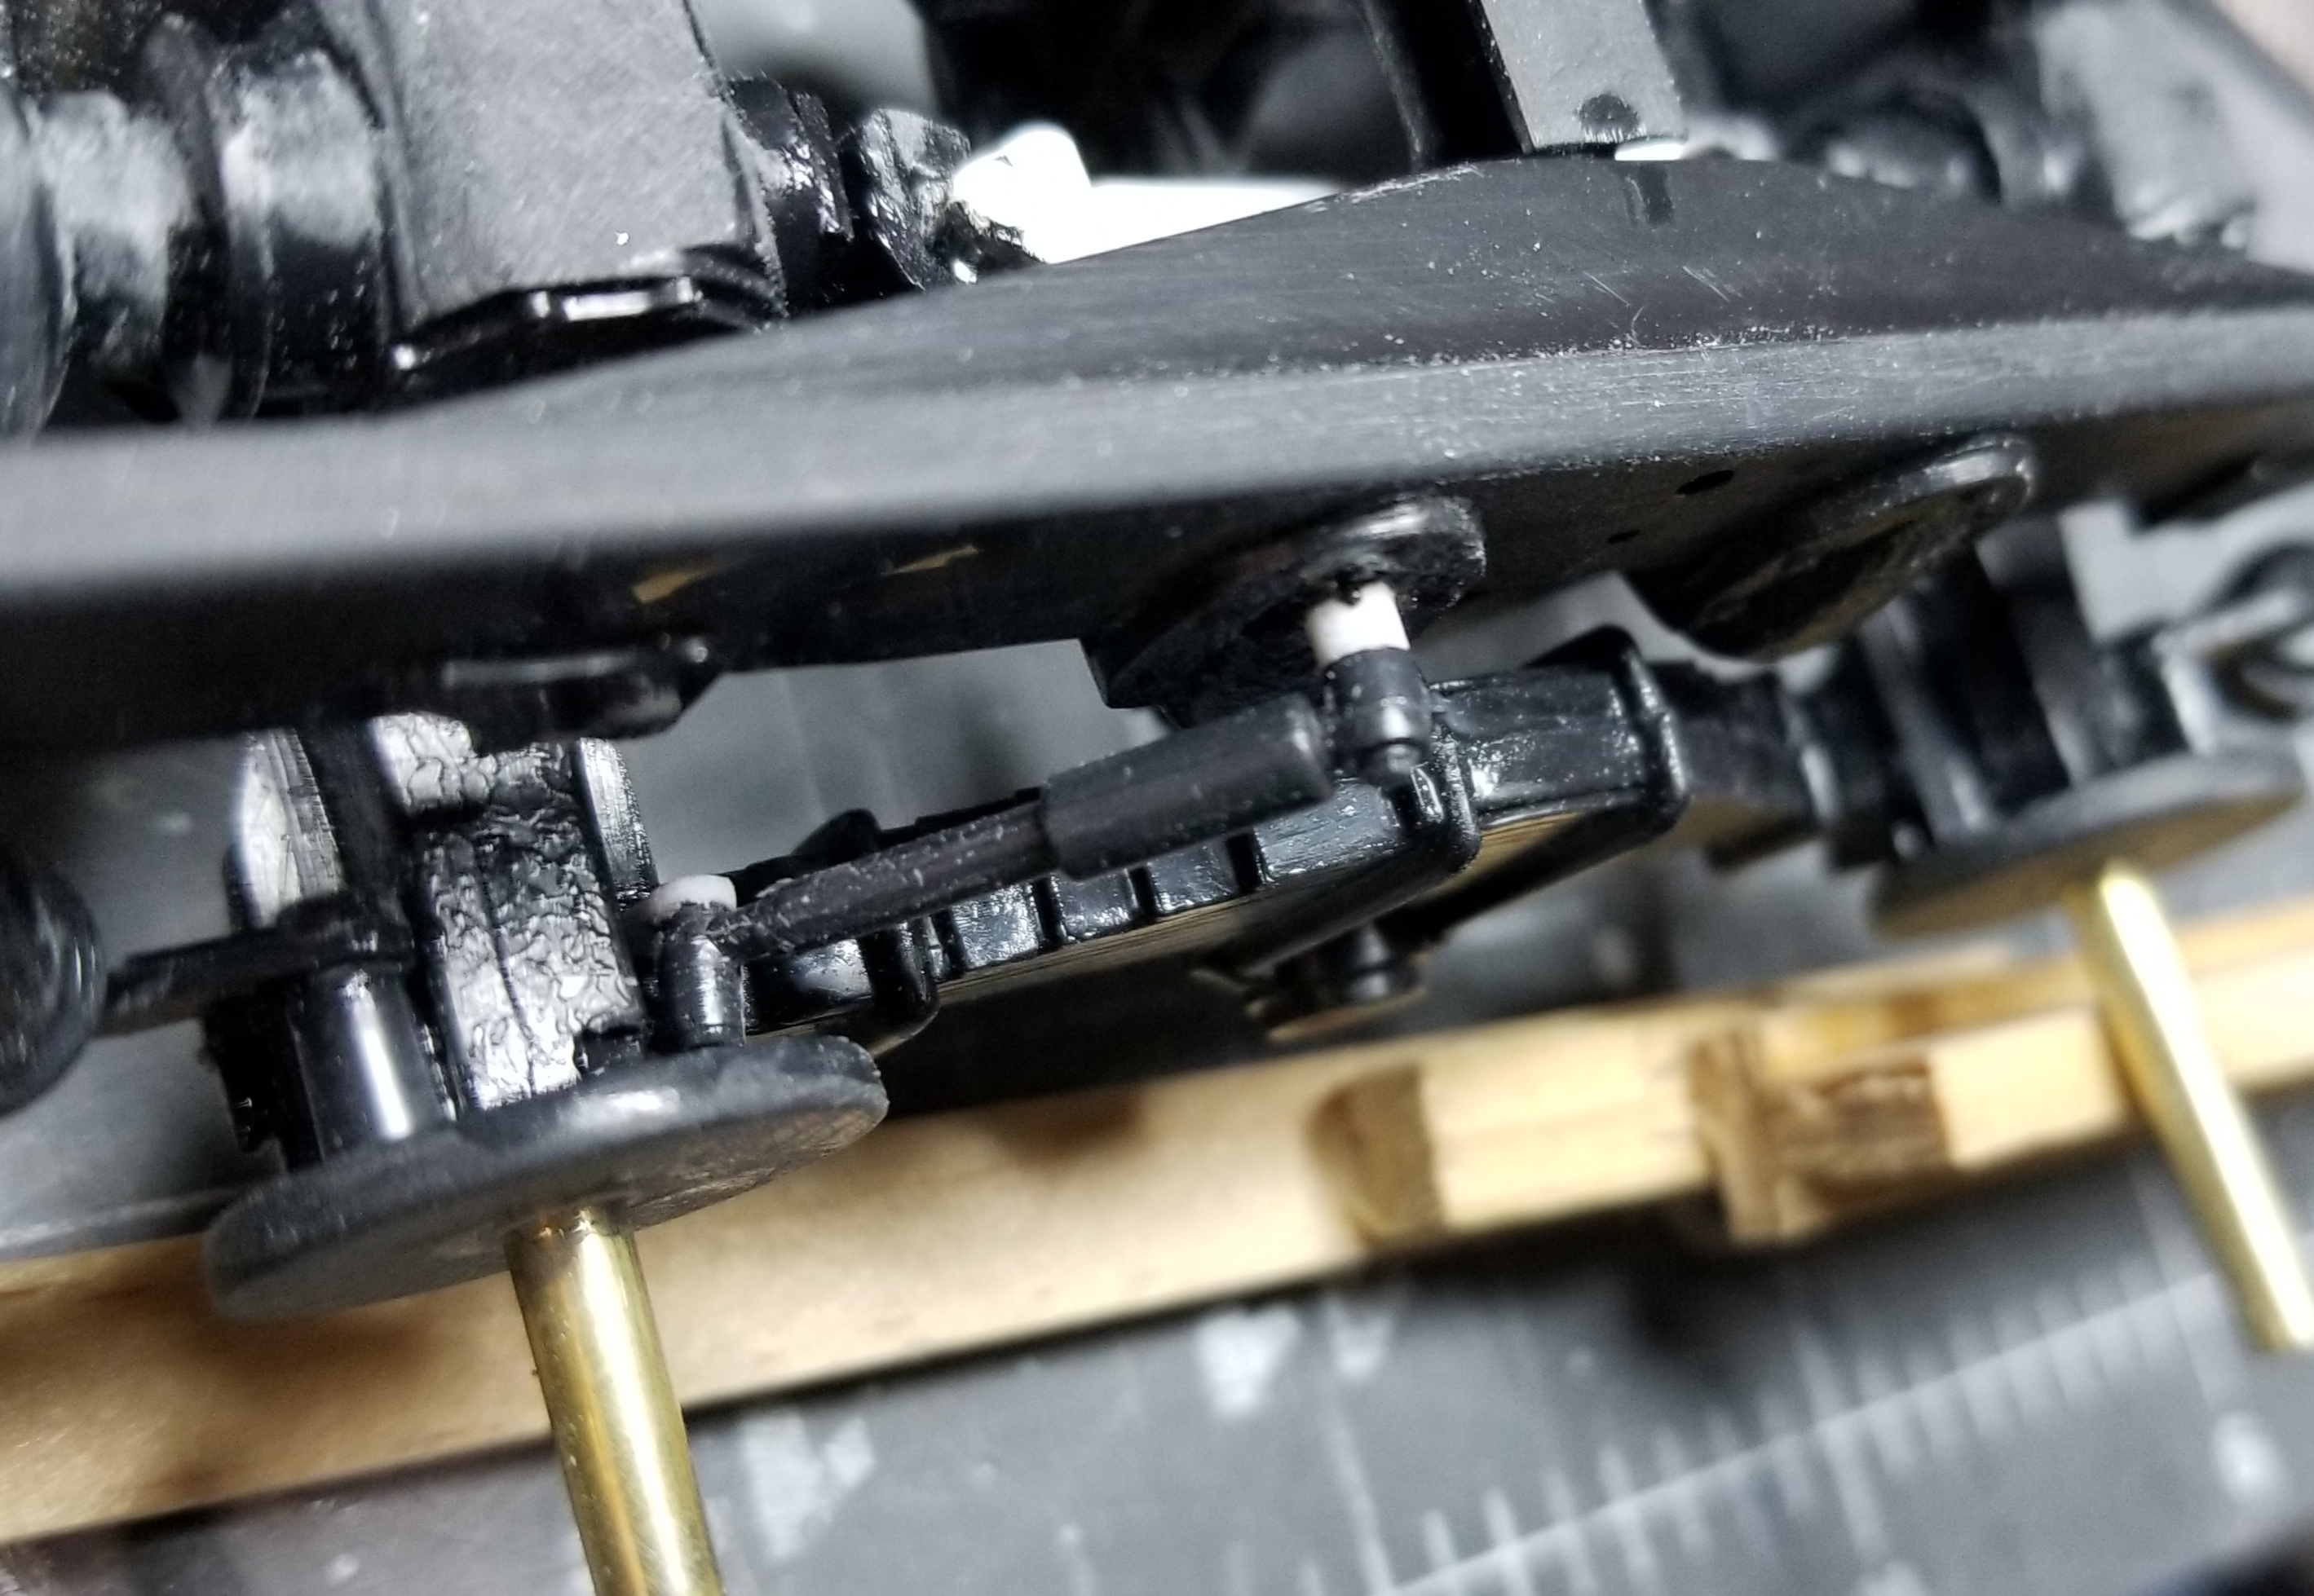
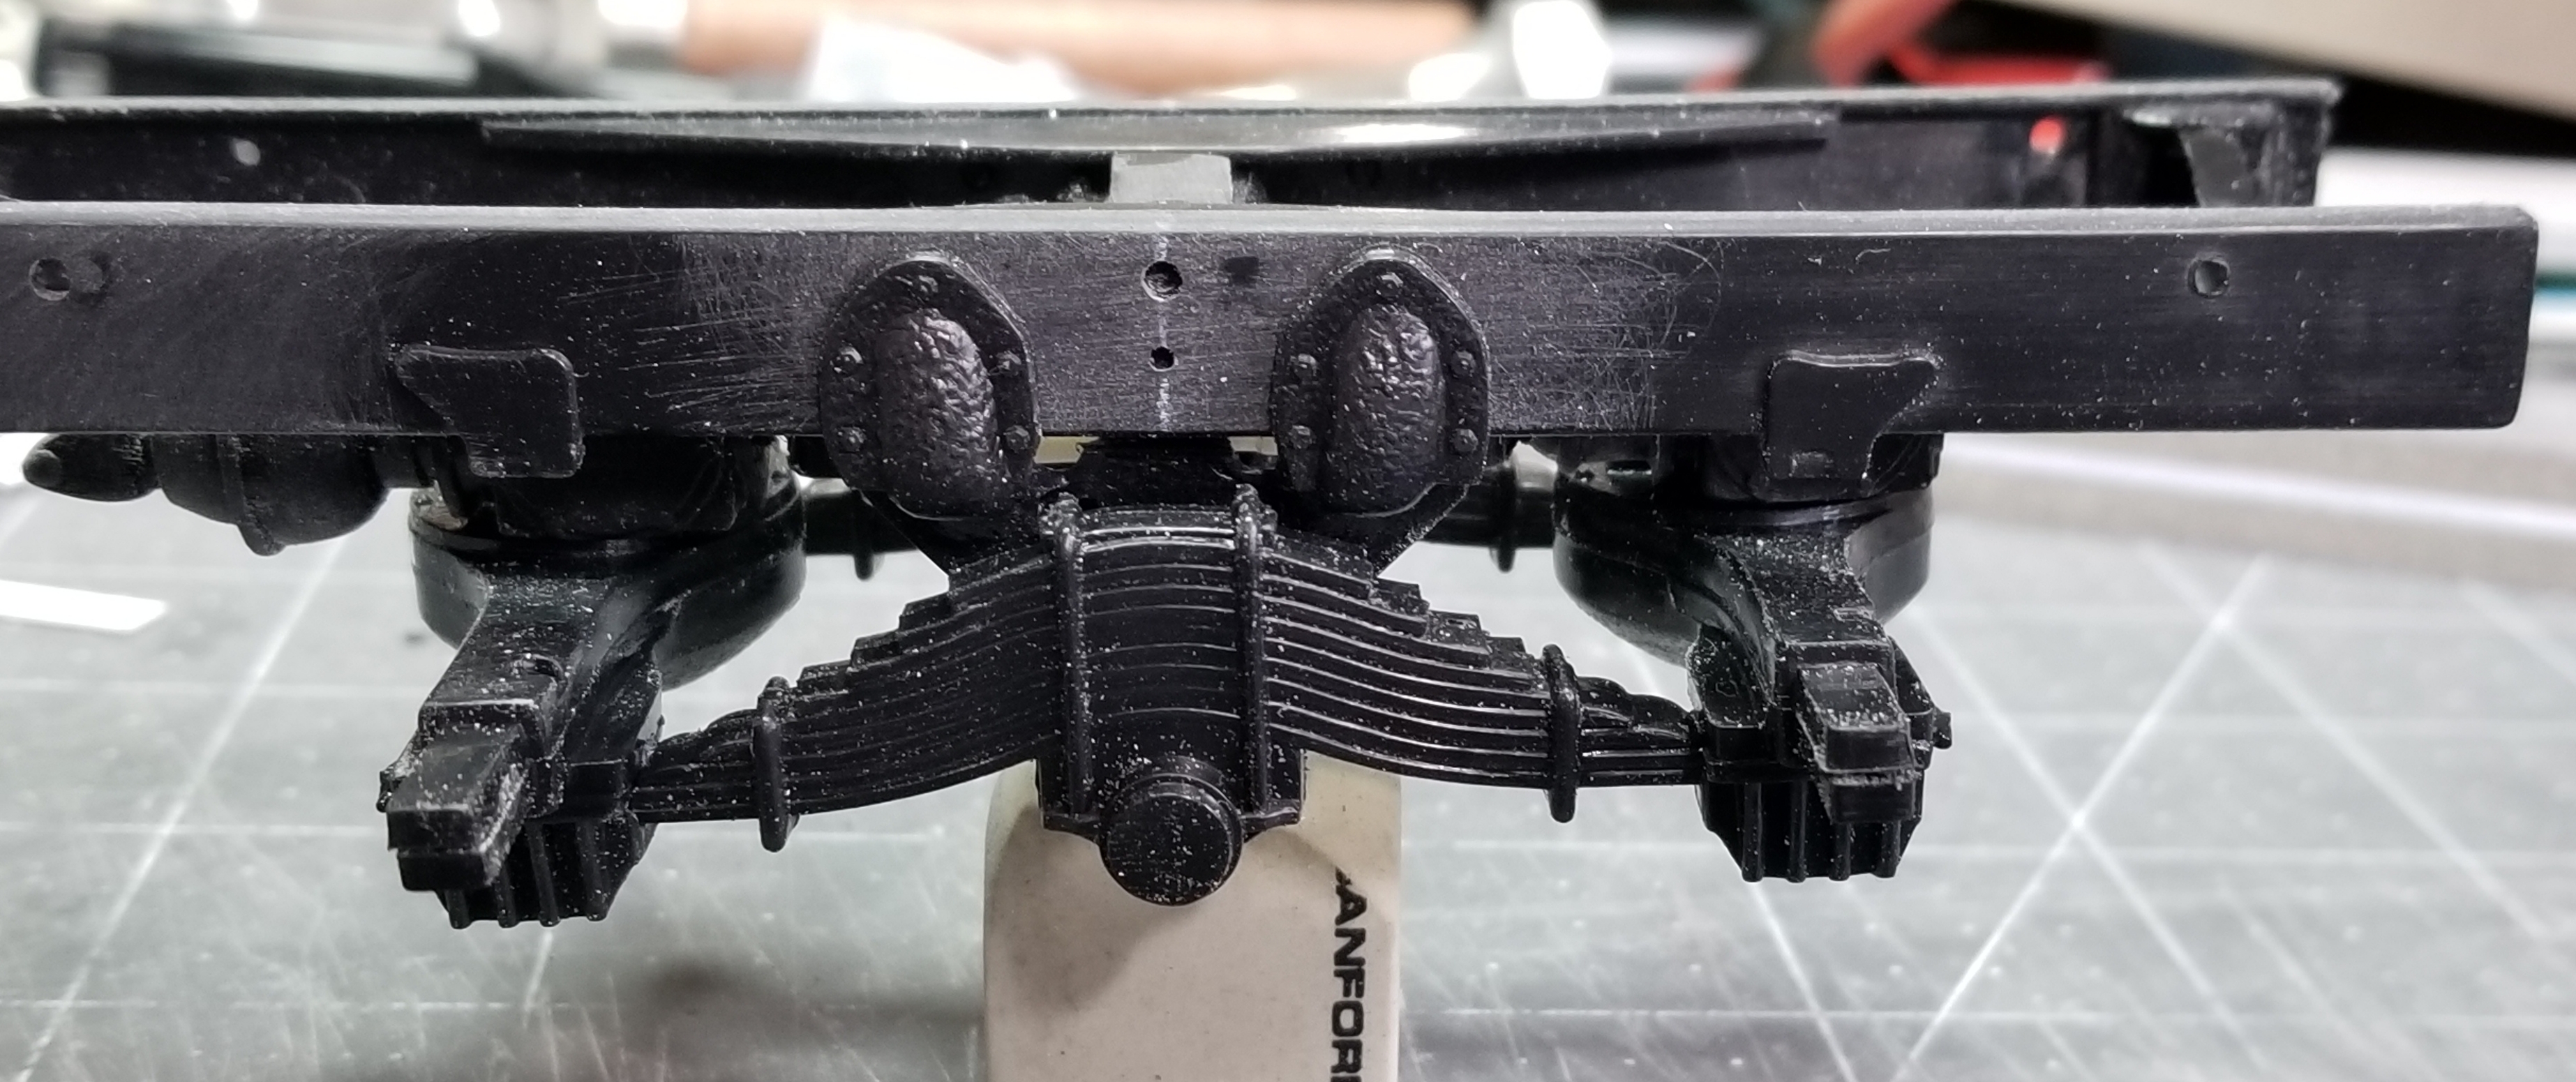
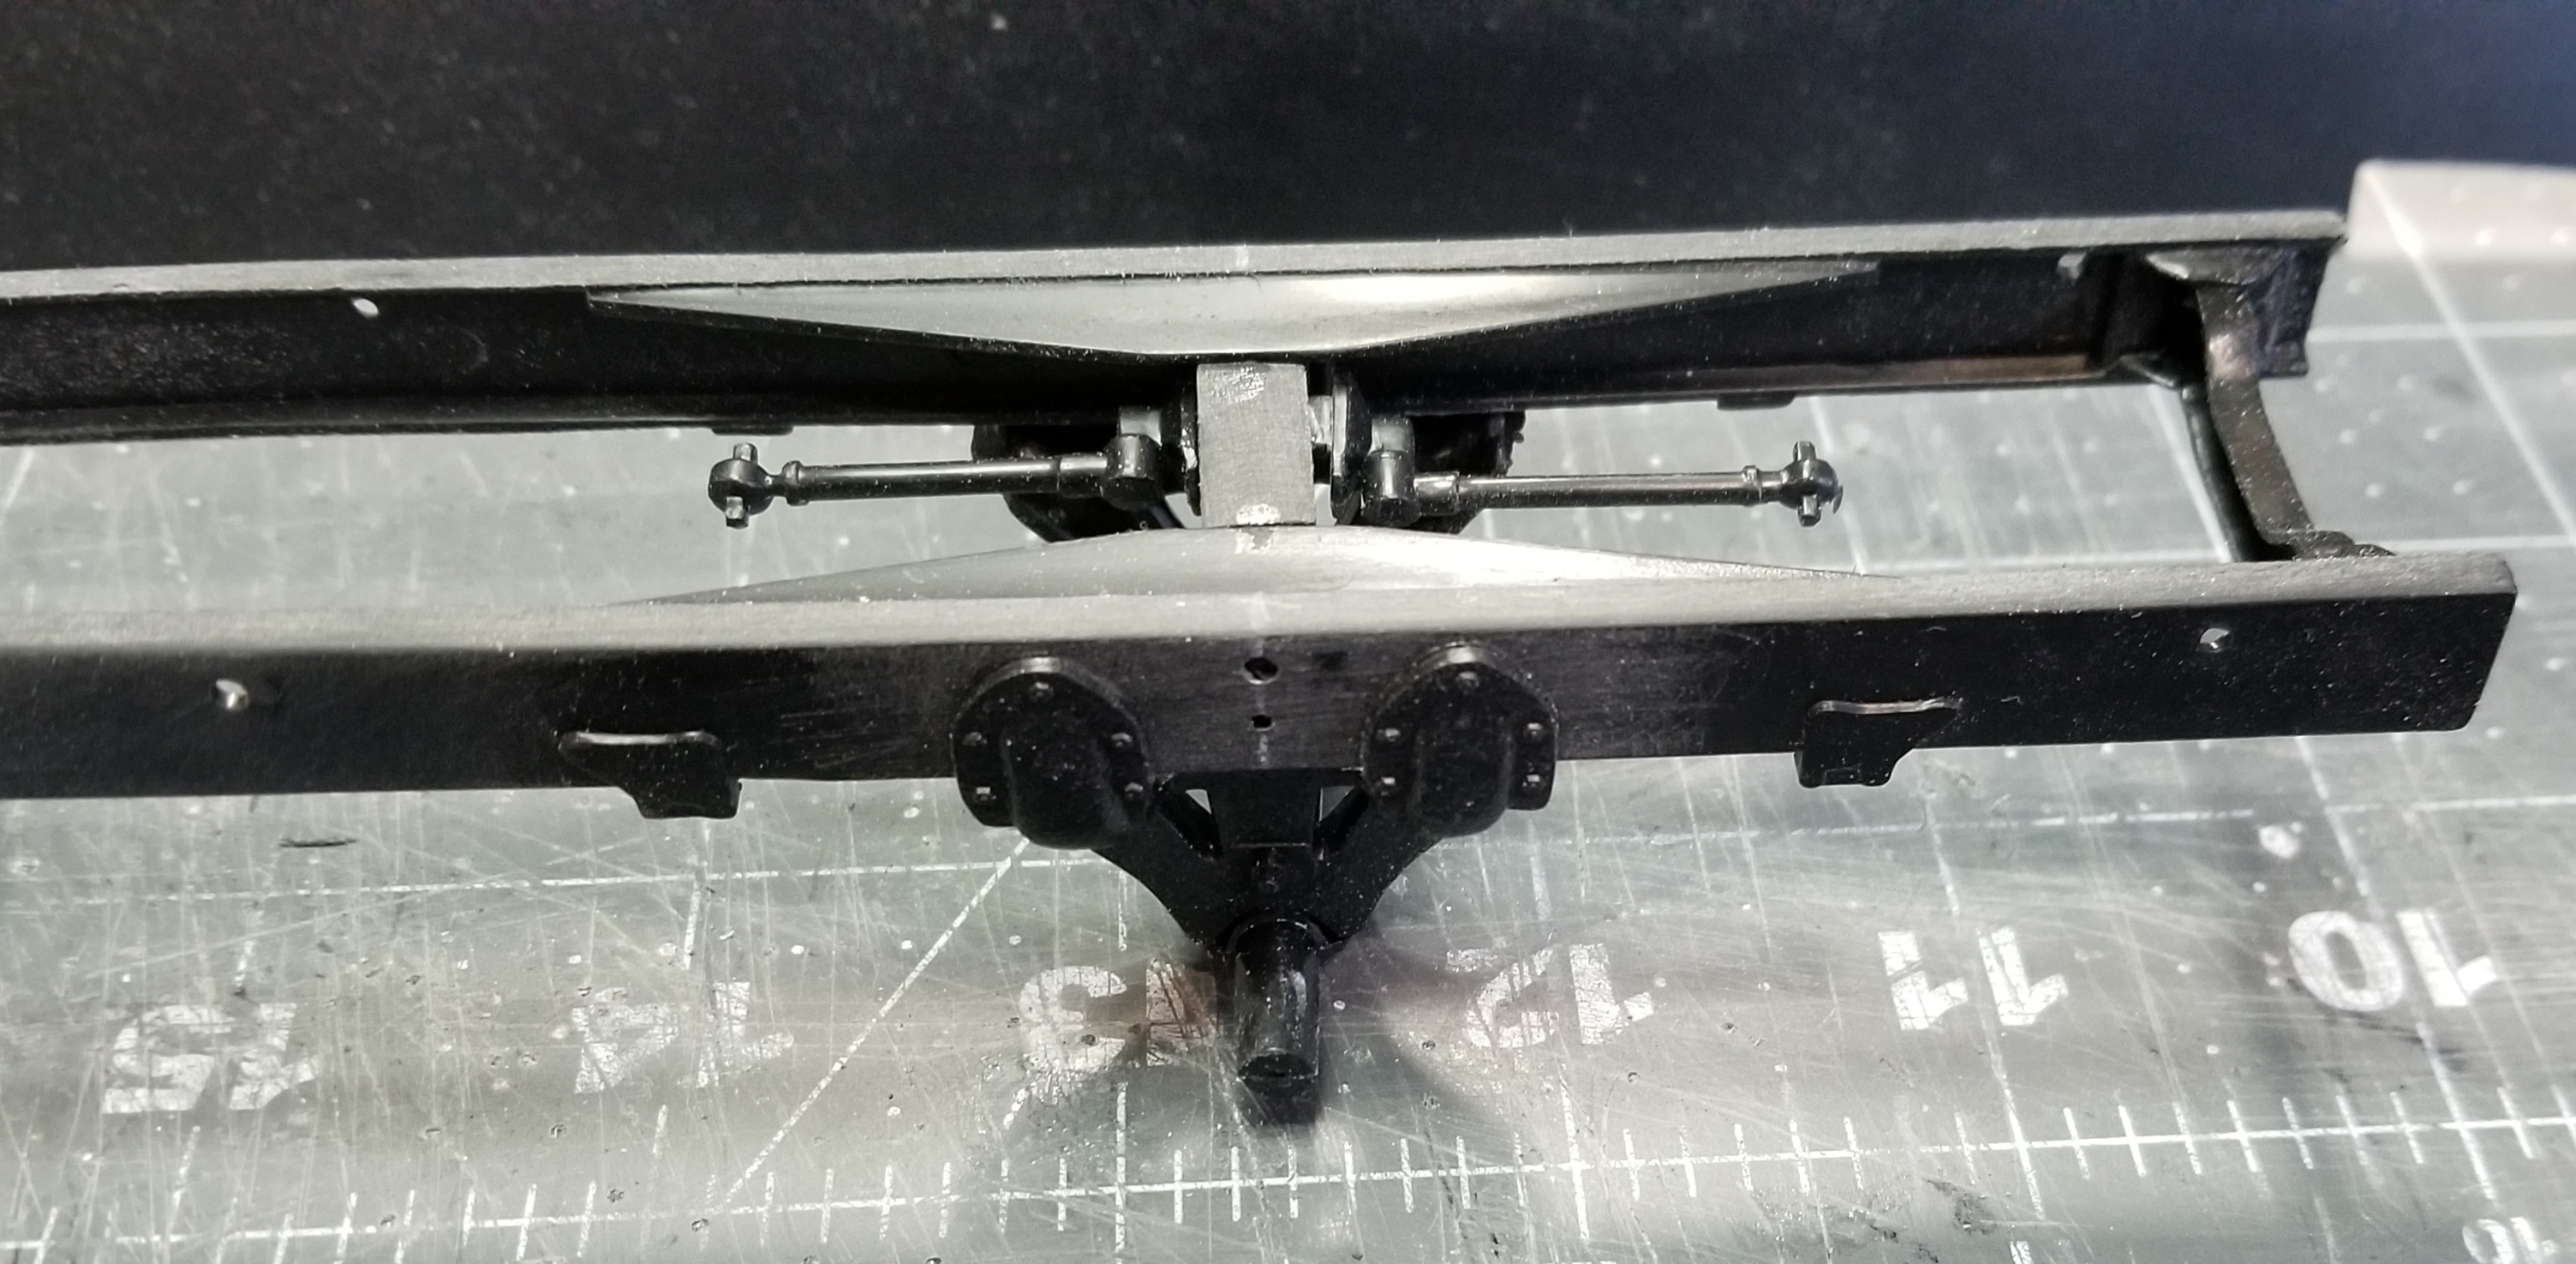
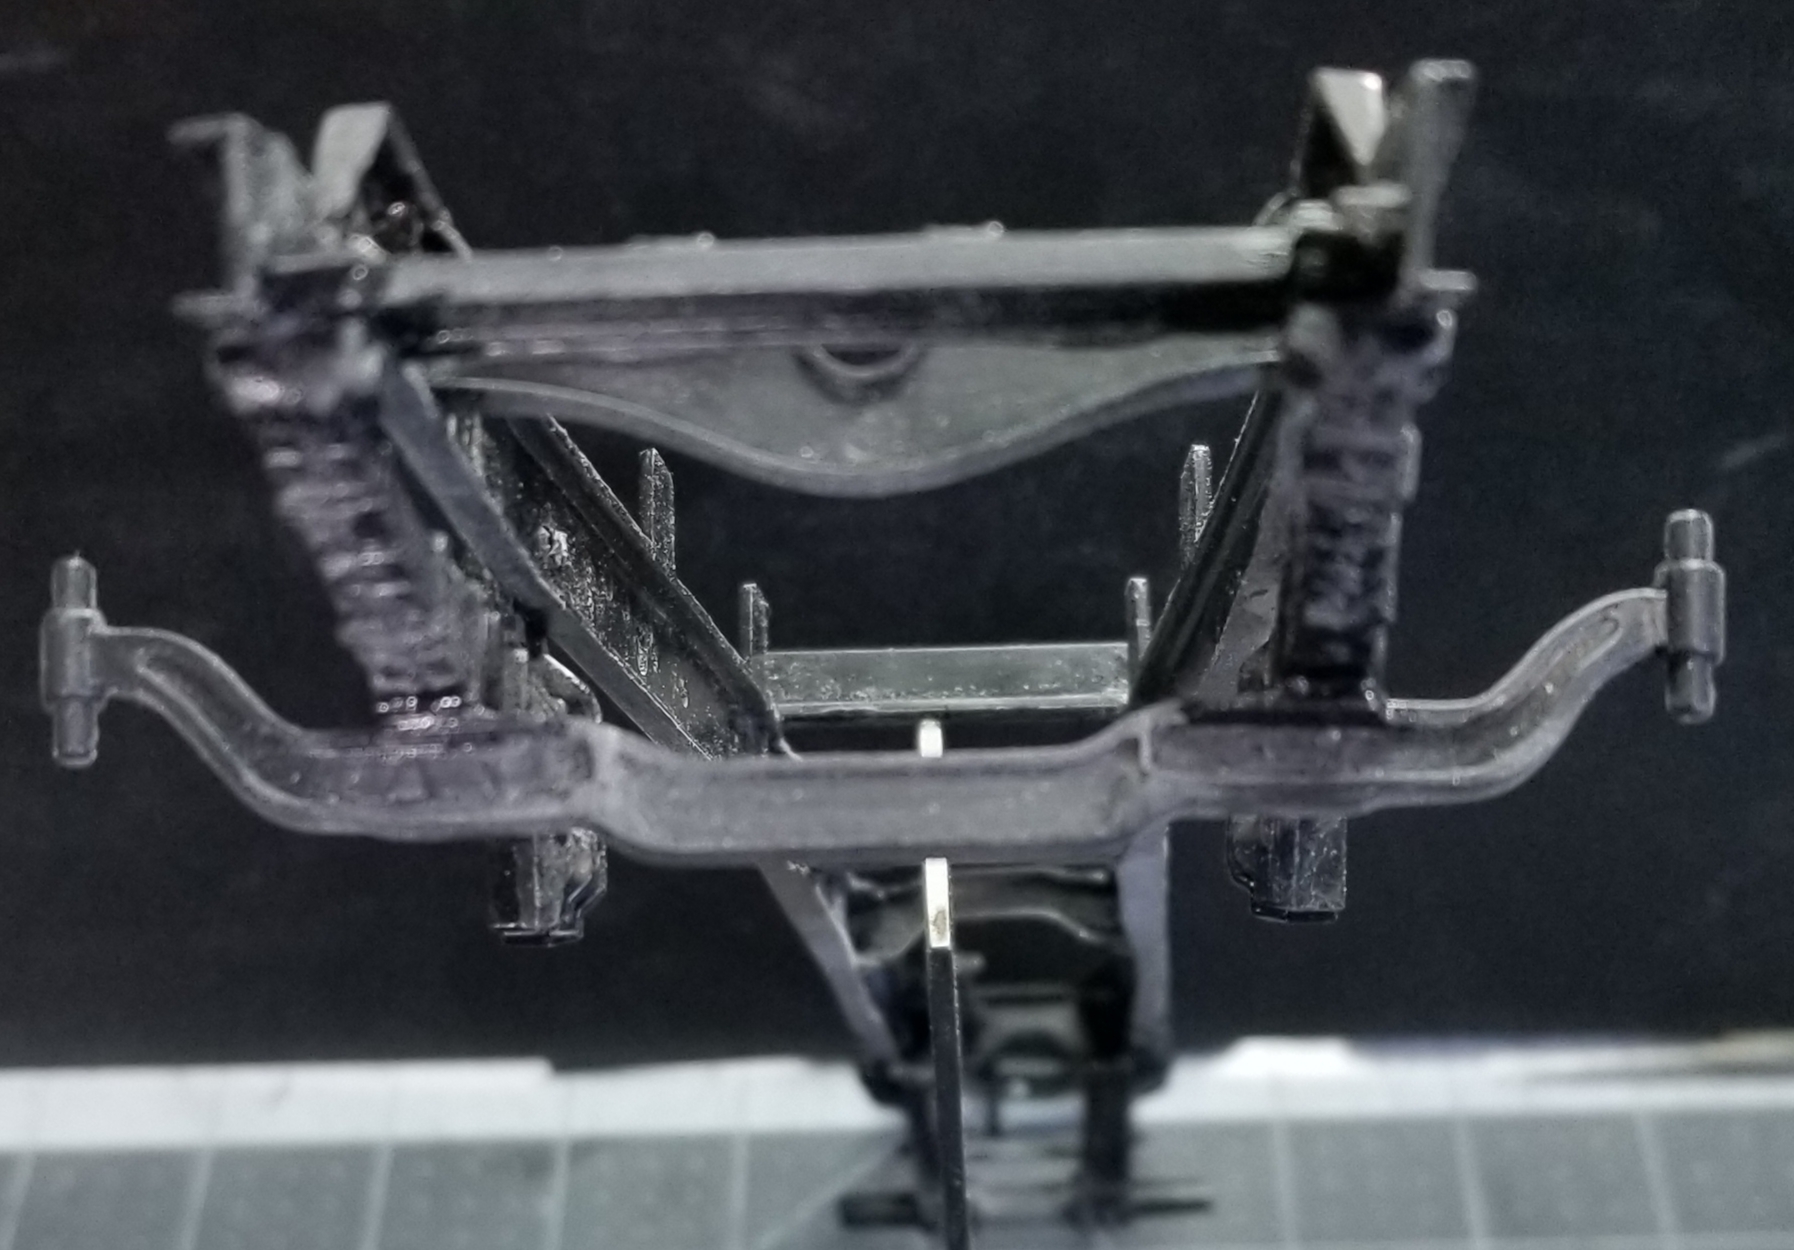
this view shows the rear Camelback suspension pivot bracket and the rods that attach to the front and rear drive axles.
this view shows the front suspension. I had to kind of narrow this to fit the front axle that I made from part of the Superliner front axle and from the DM800 front axle.
this view shows the front axle that I kit bashed into a Mack front axle I widened it a scale 4". I think it came out ok.
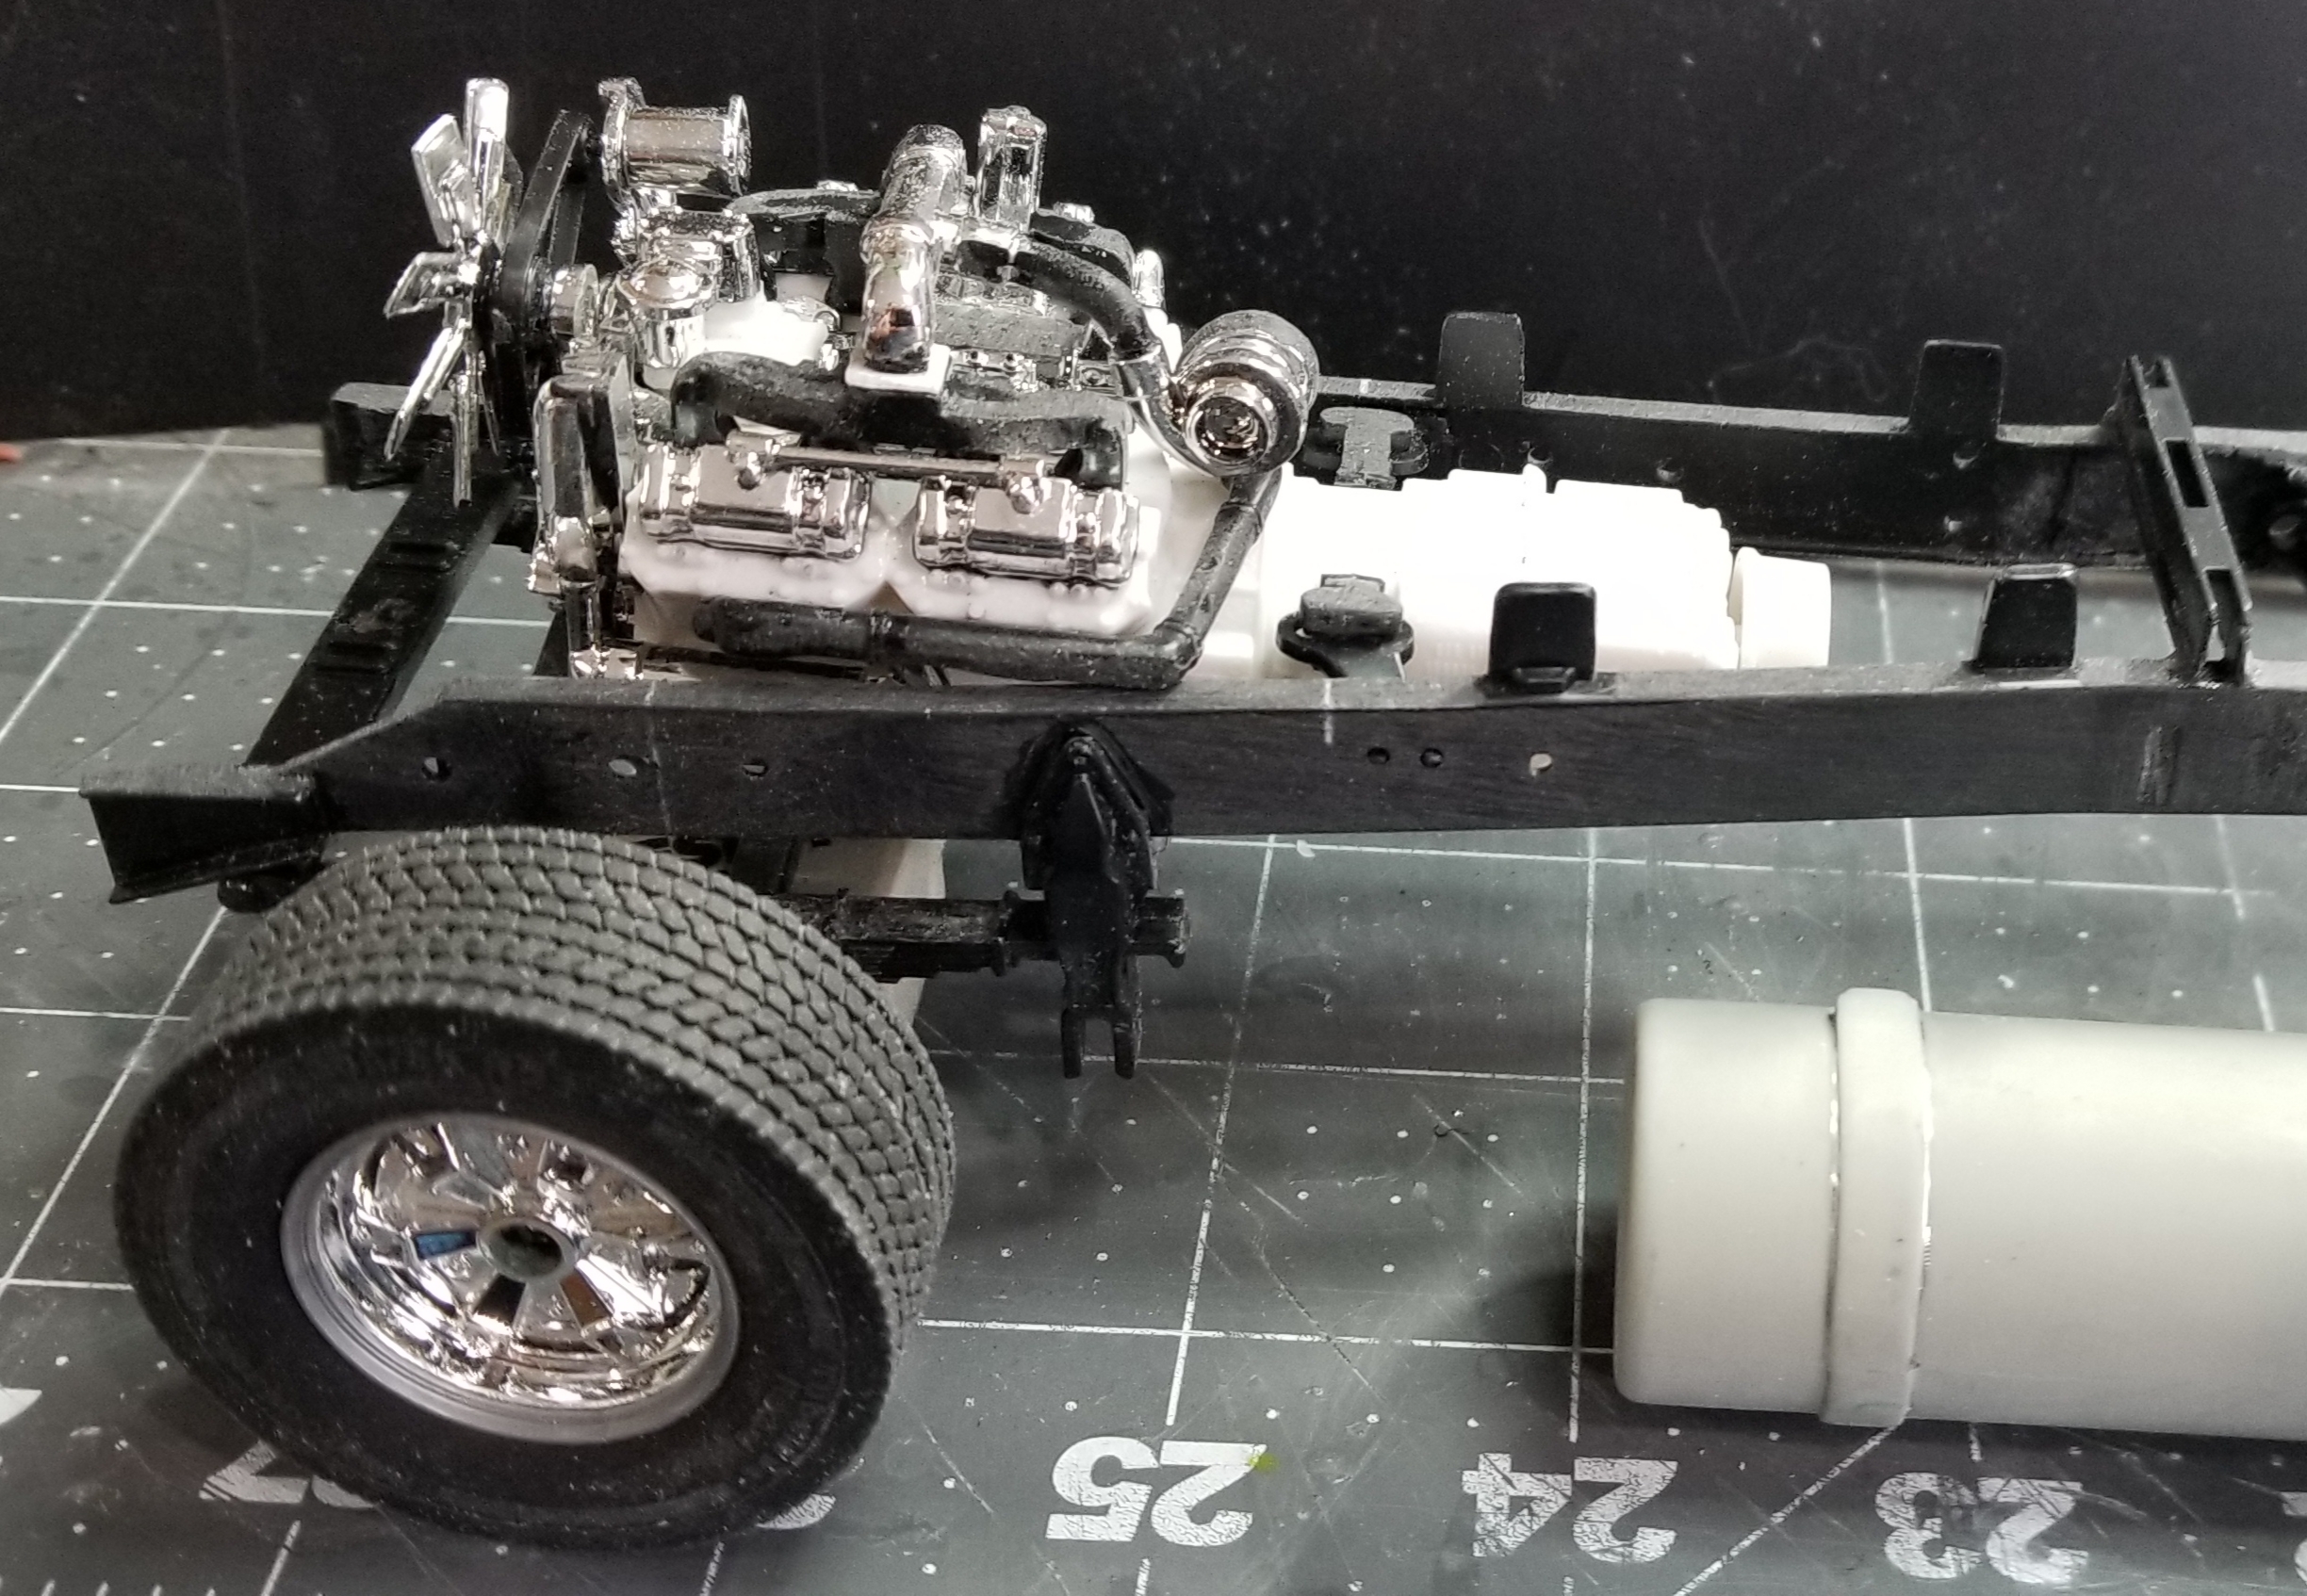
this view shows the DM800 kits ENDT-865 Maxidyne engine. It's just in there for a representation of the Mack E9 that will be going in this build.
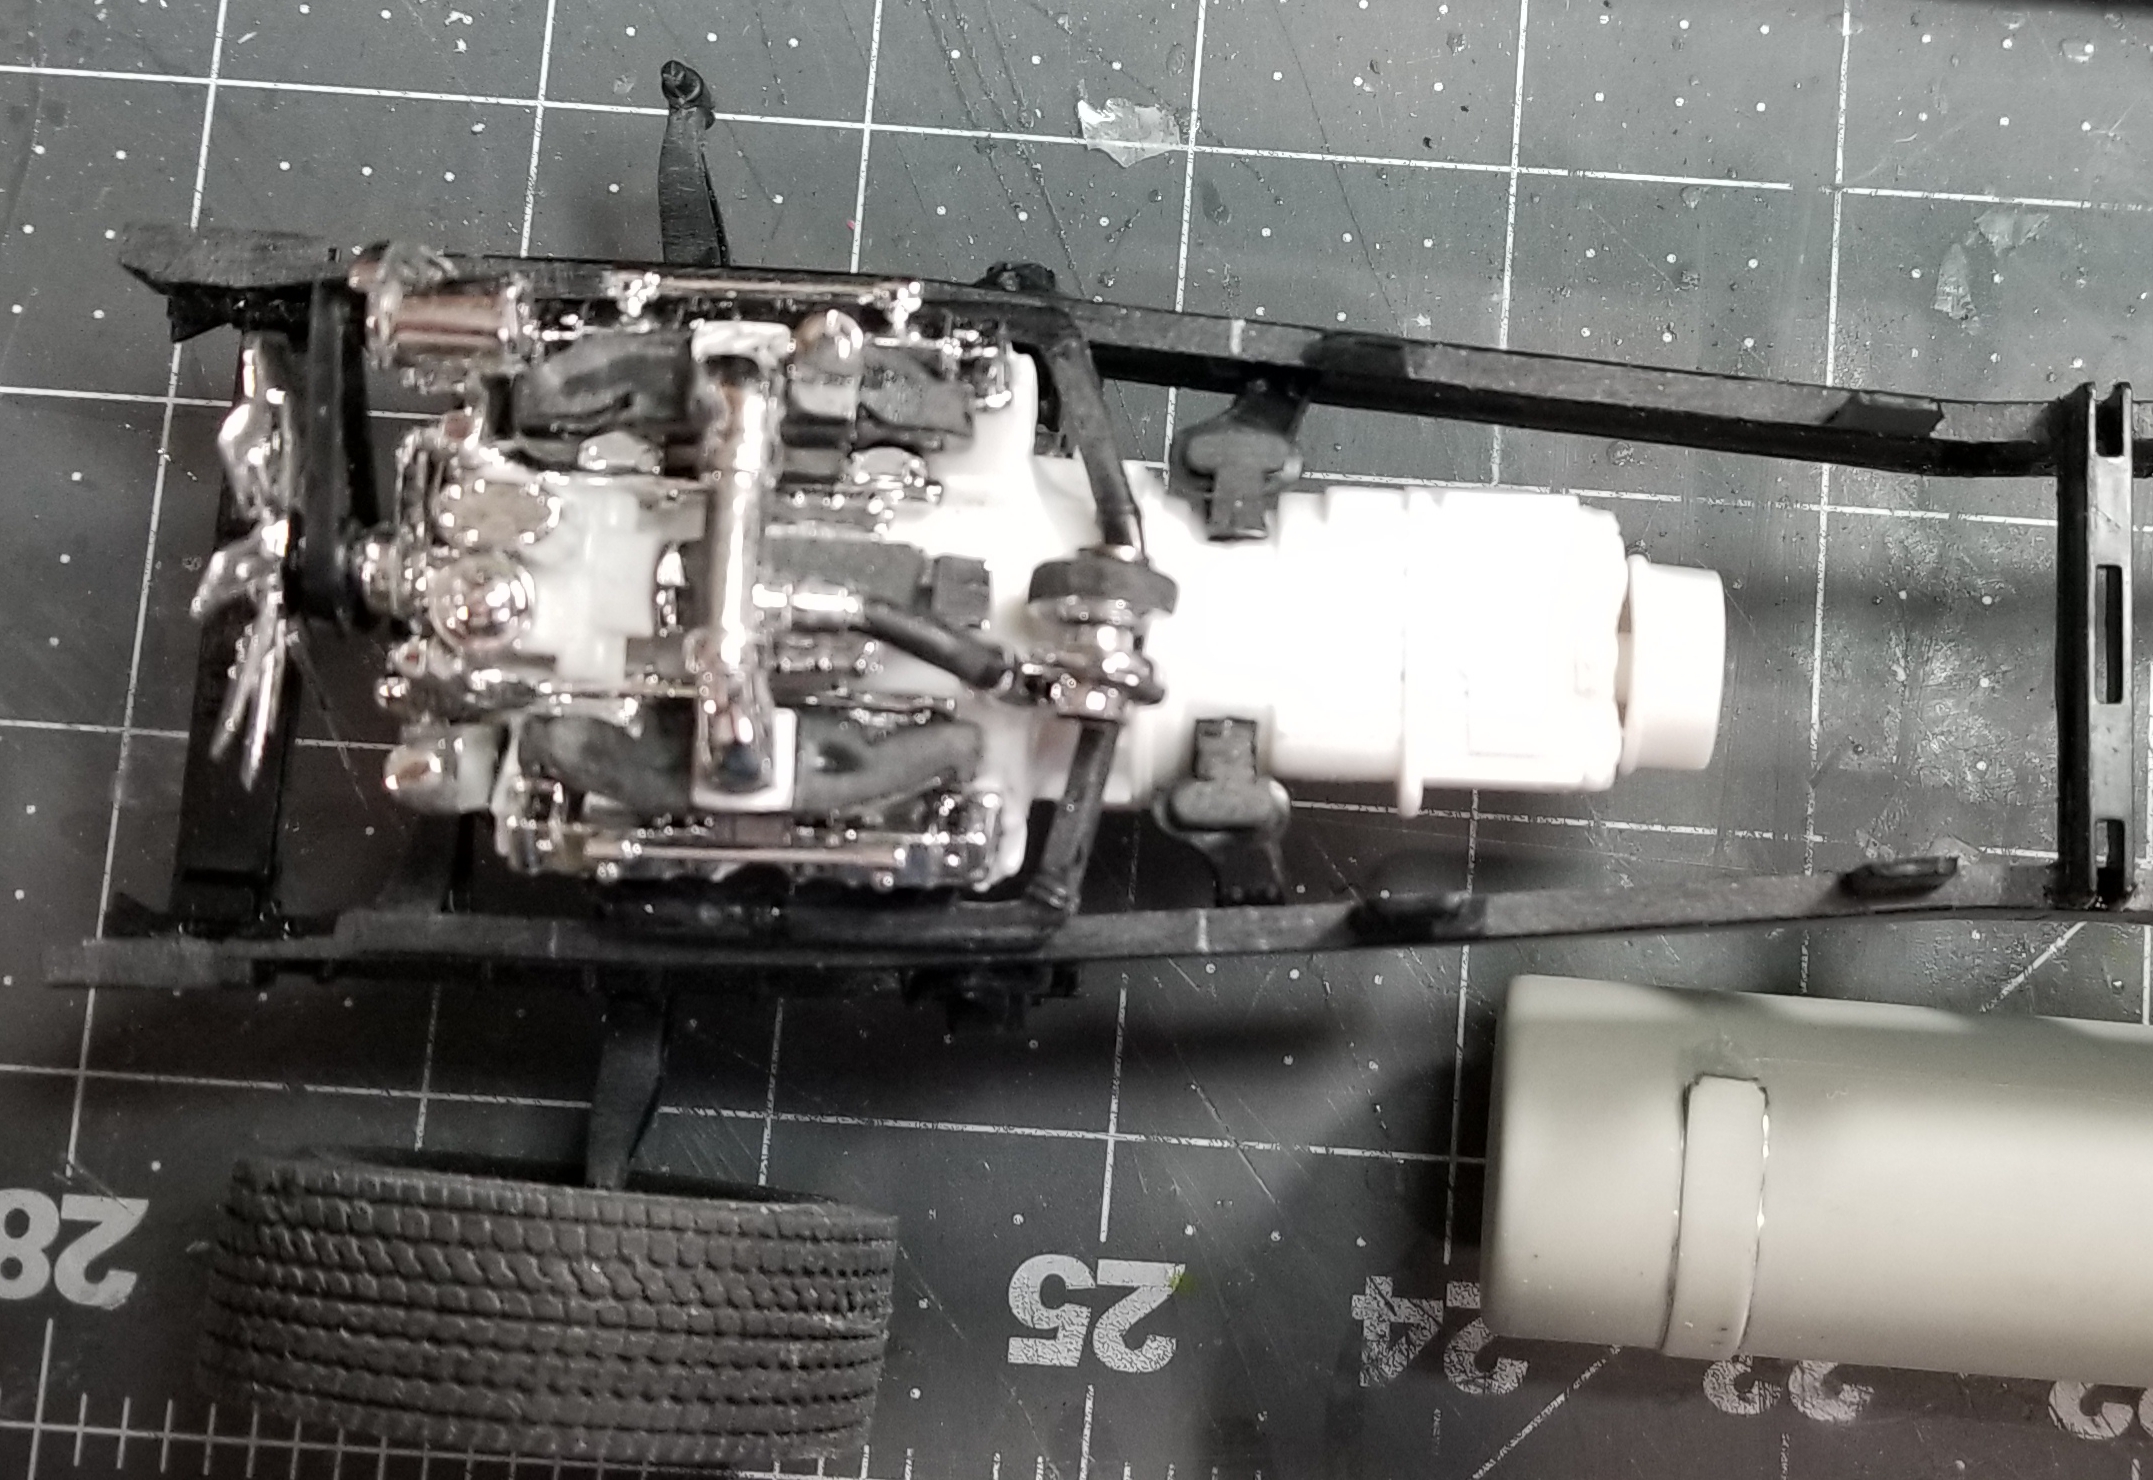
top view of the Maxidyne engine sitting in the frame. I plane on using the moter/trans mounts from this on the E9.
top view of the rear camelback suspension installed in the frame.
view of the rear suspension from the side.
this view shows what the truck will eventually look like all together.
this view shows the cab/hood sitting on the frame. I still have to make the pivot points for tge hood, and the bumper/bullbar mount (Roo bar to you Aussie's)
this view shows the modifications I made to the hood to fit the large Aussie air cleaners.
this view is of the Mack ENDT-865.
Ron G
-
Hey all
I posted some of this in another post but didn't get much response so I decided to give it it's own post.
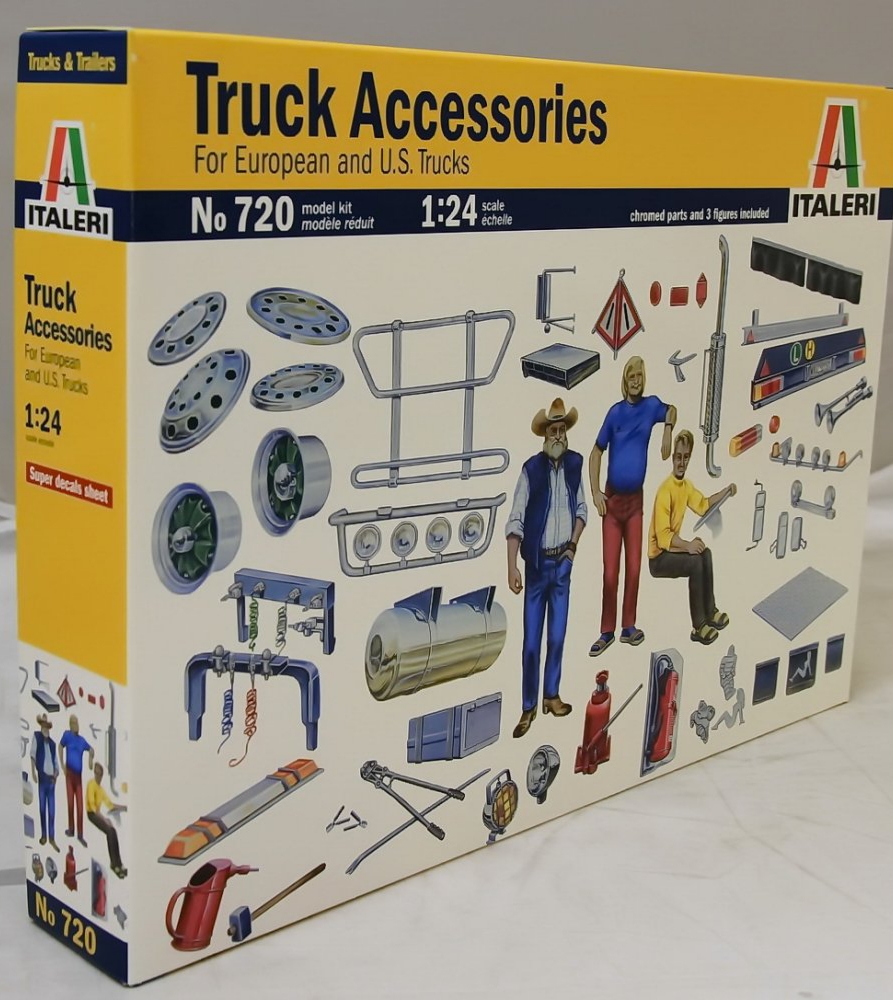
I bought a 1/24 Italeri Mack Superliner kit and the 1/24 truck accessories kit. The Aussie parts from the 1/24 Italeri Western Star (that I already have) will be going on this.
this is the basic kit, there will be alot of changes made to it to make it into a Aussie road train hauler!
this view shows the truck accessories kit. I purchased this to get the rear Mack 6 spoke wheels for the Mack Superliner, I had to customize them to make them work.
this view shows the Mack E9 that I'm adding to the Mack. I I bought a bunch of stuff from Auslowe model trucks, shh!!!...don't tell the wife, I don't want to be the next Bobbet!...lol I also got a 13/18 speed Mack transmission to go with it.
This is the mural I'm going to be hand painting on the back of the sleeper. I'm not sure about the name, I have to think about it.
this is the 1/24 Italeri kit I'm getting all of the Australian parts from.
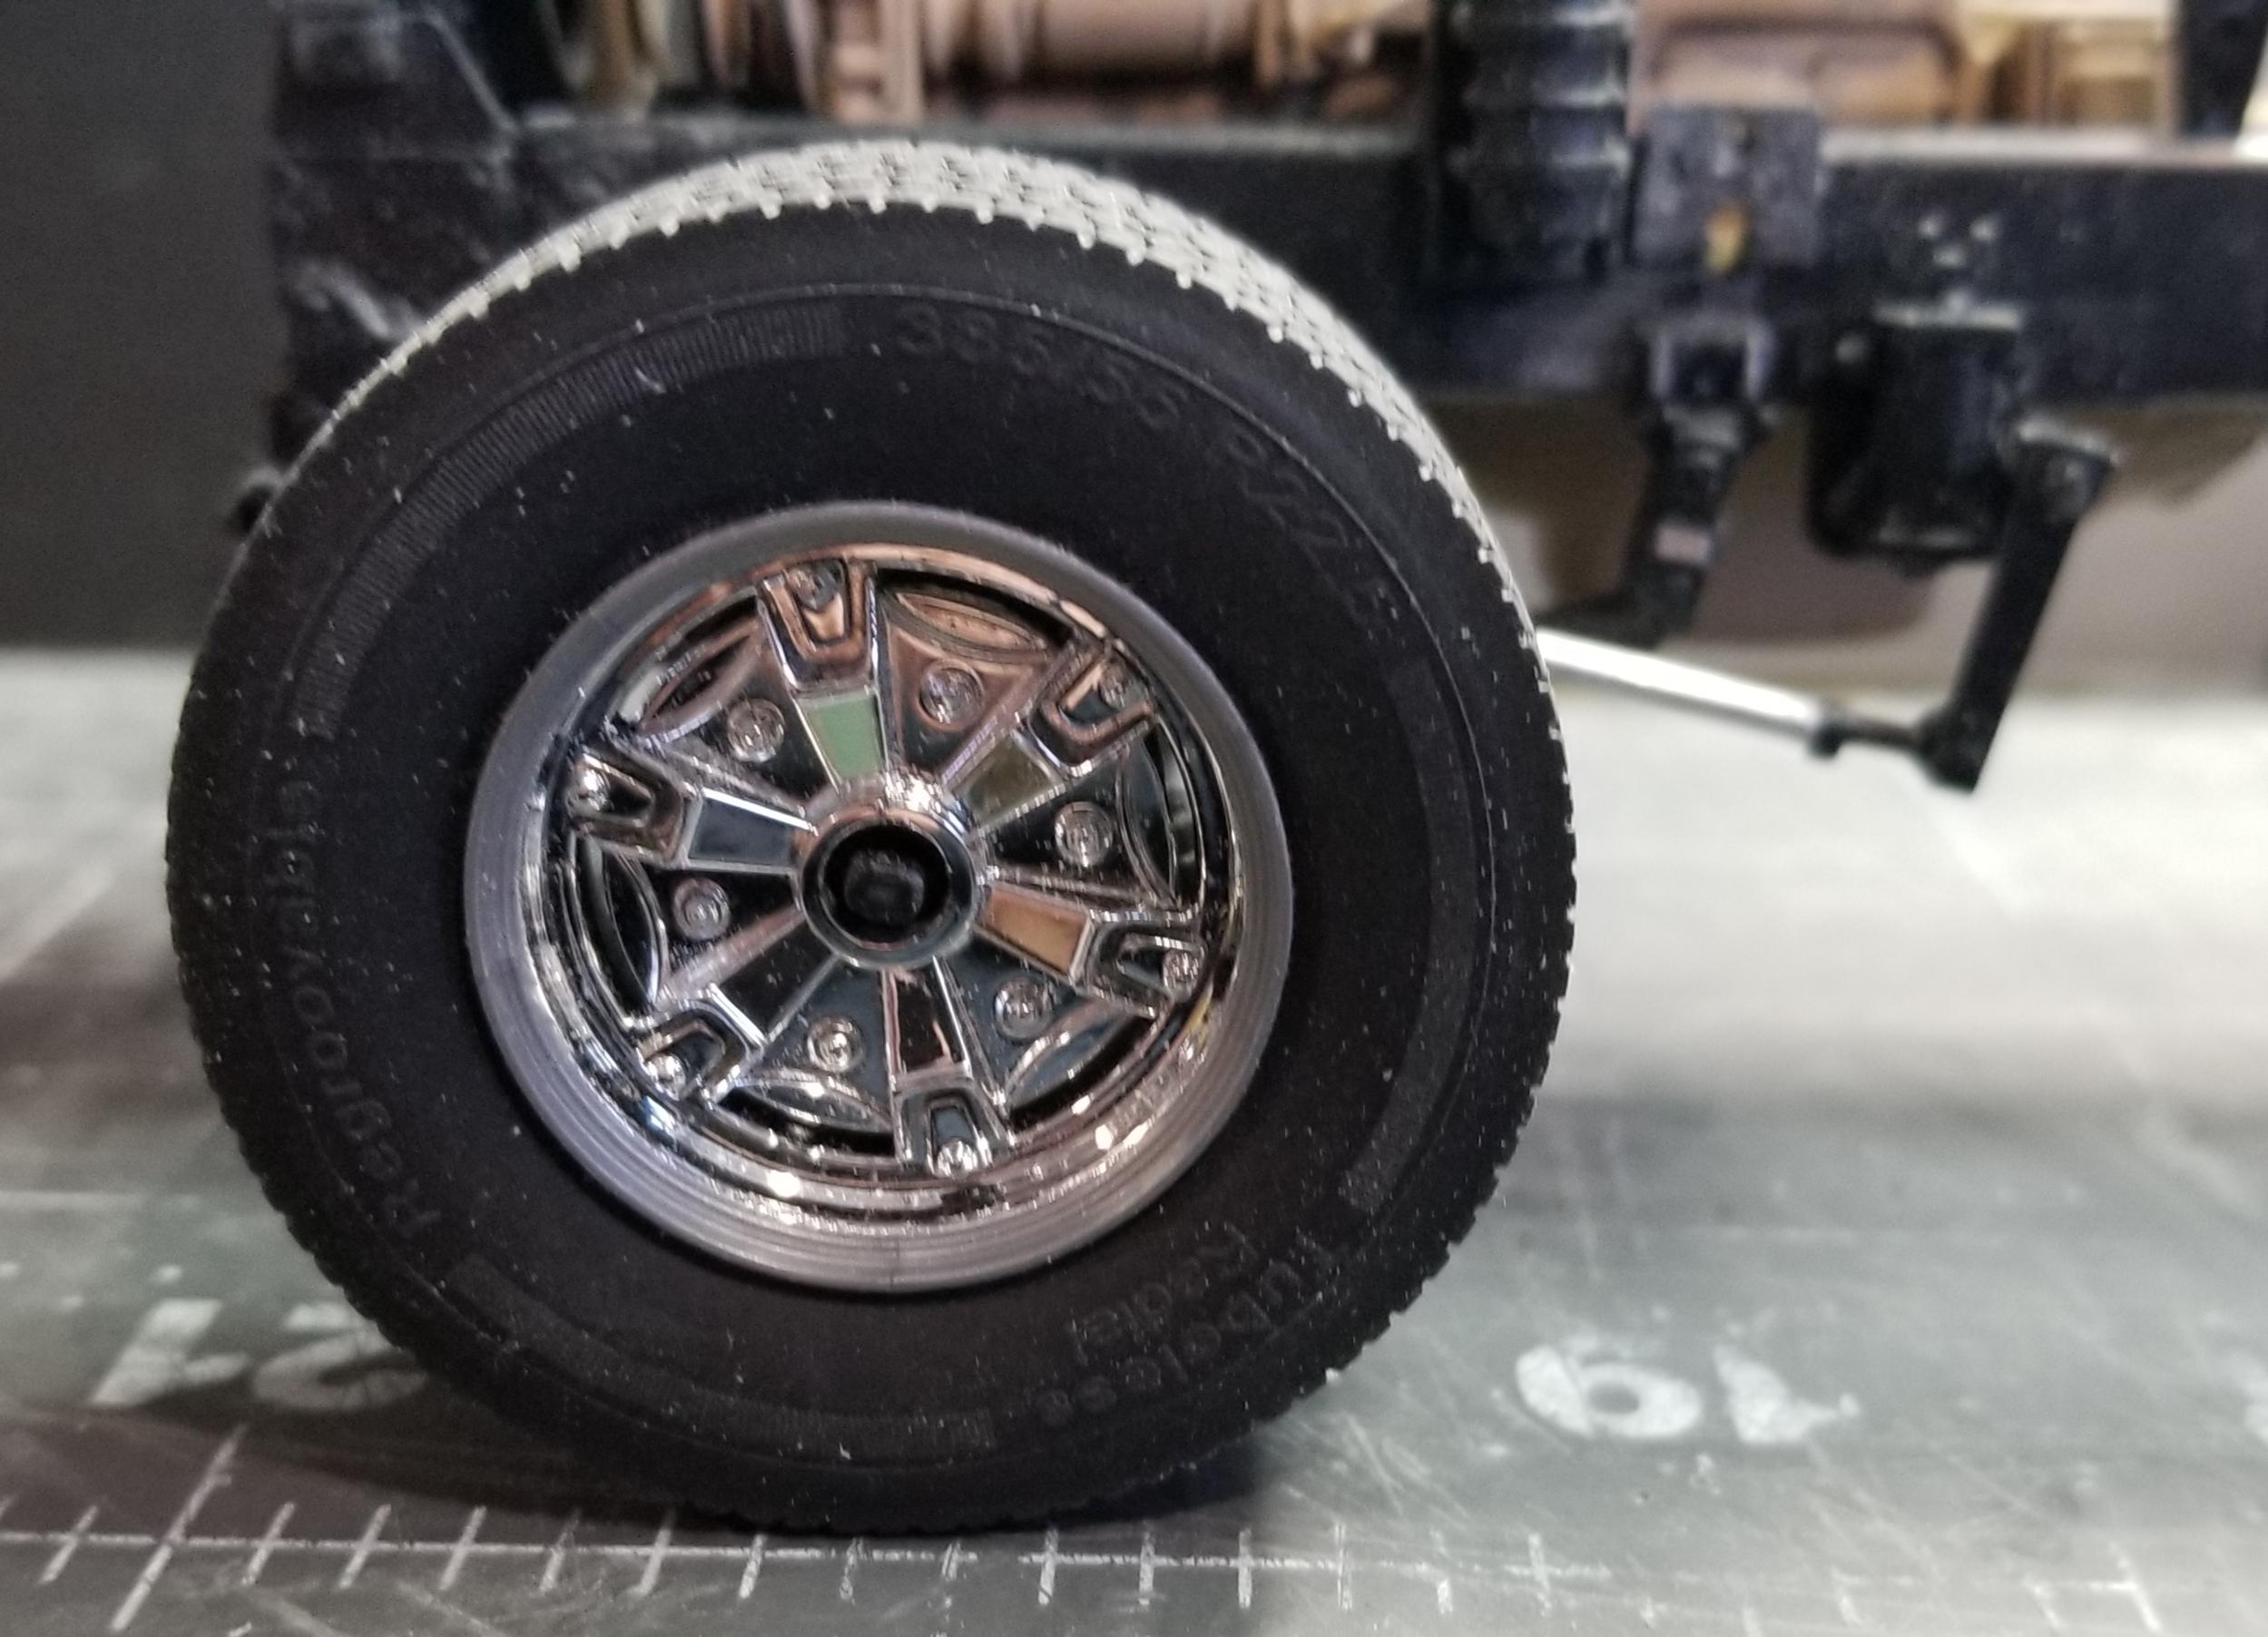
this view shows the front 385/65 R22.5 tires that I got from the 1/24 Italeri European wheels and tyres kit. I modified the Mack wheels from the Australian truck kit. I had to widen them to get the tires to fit.
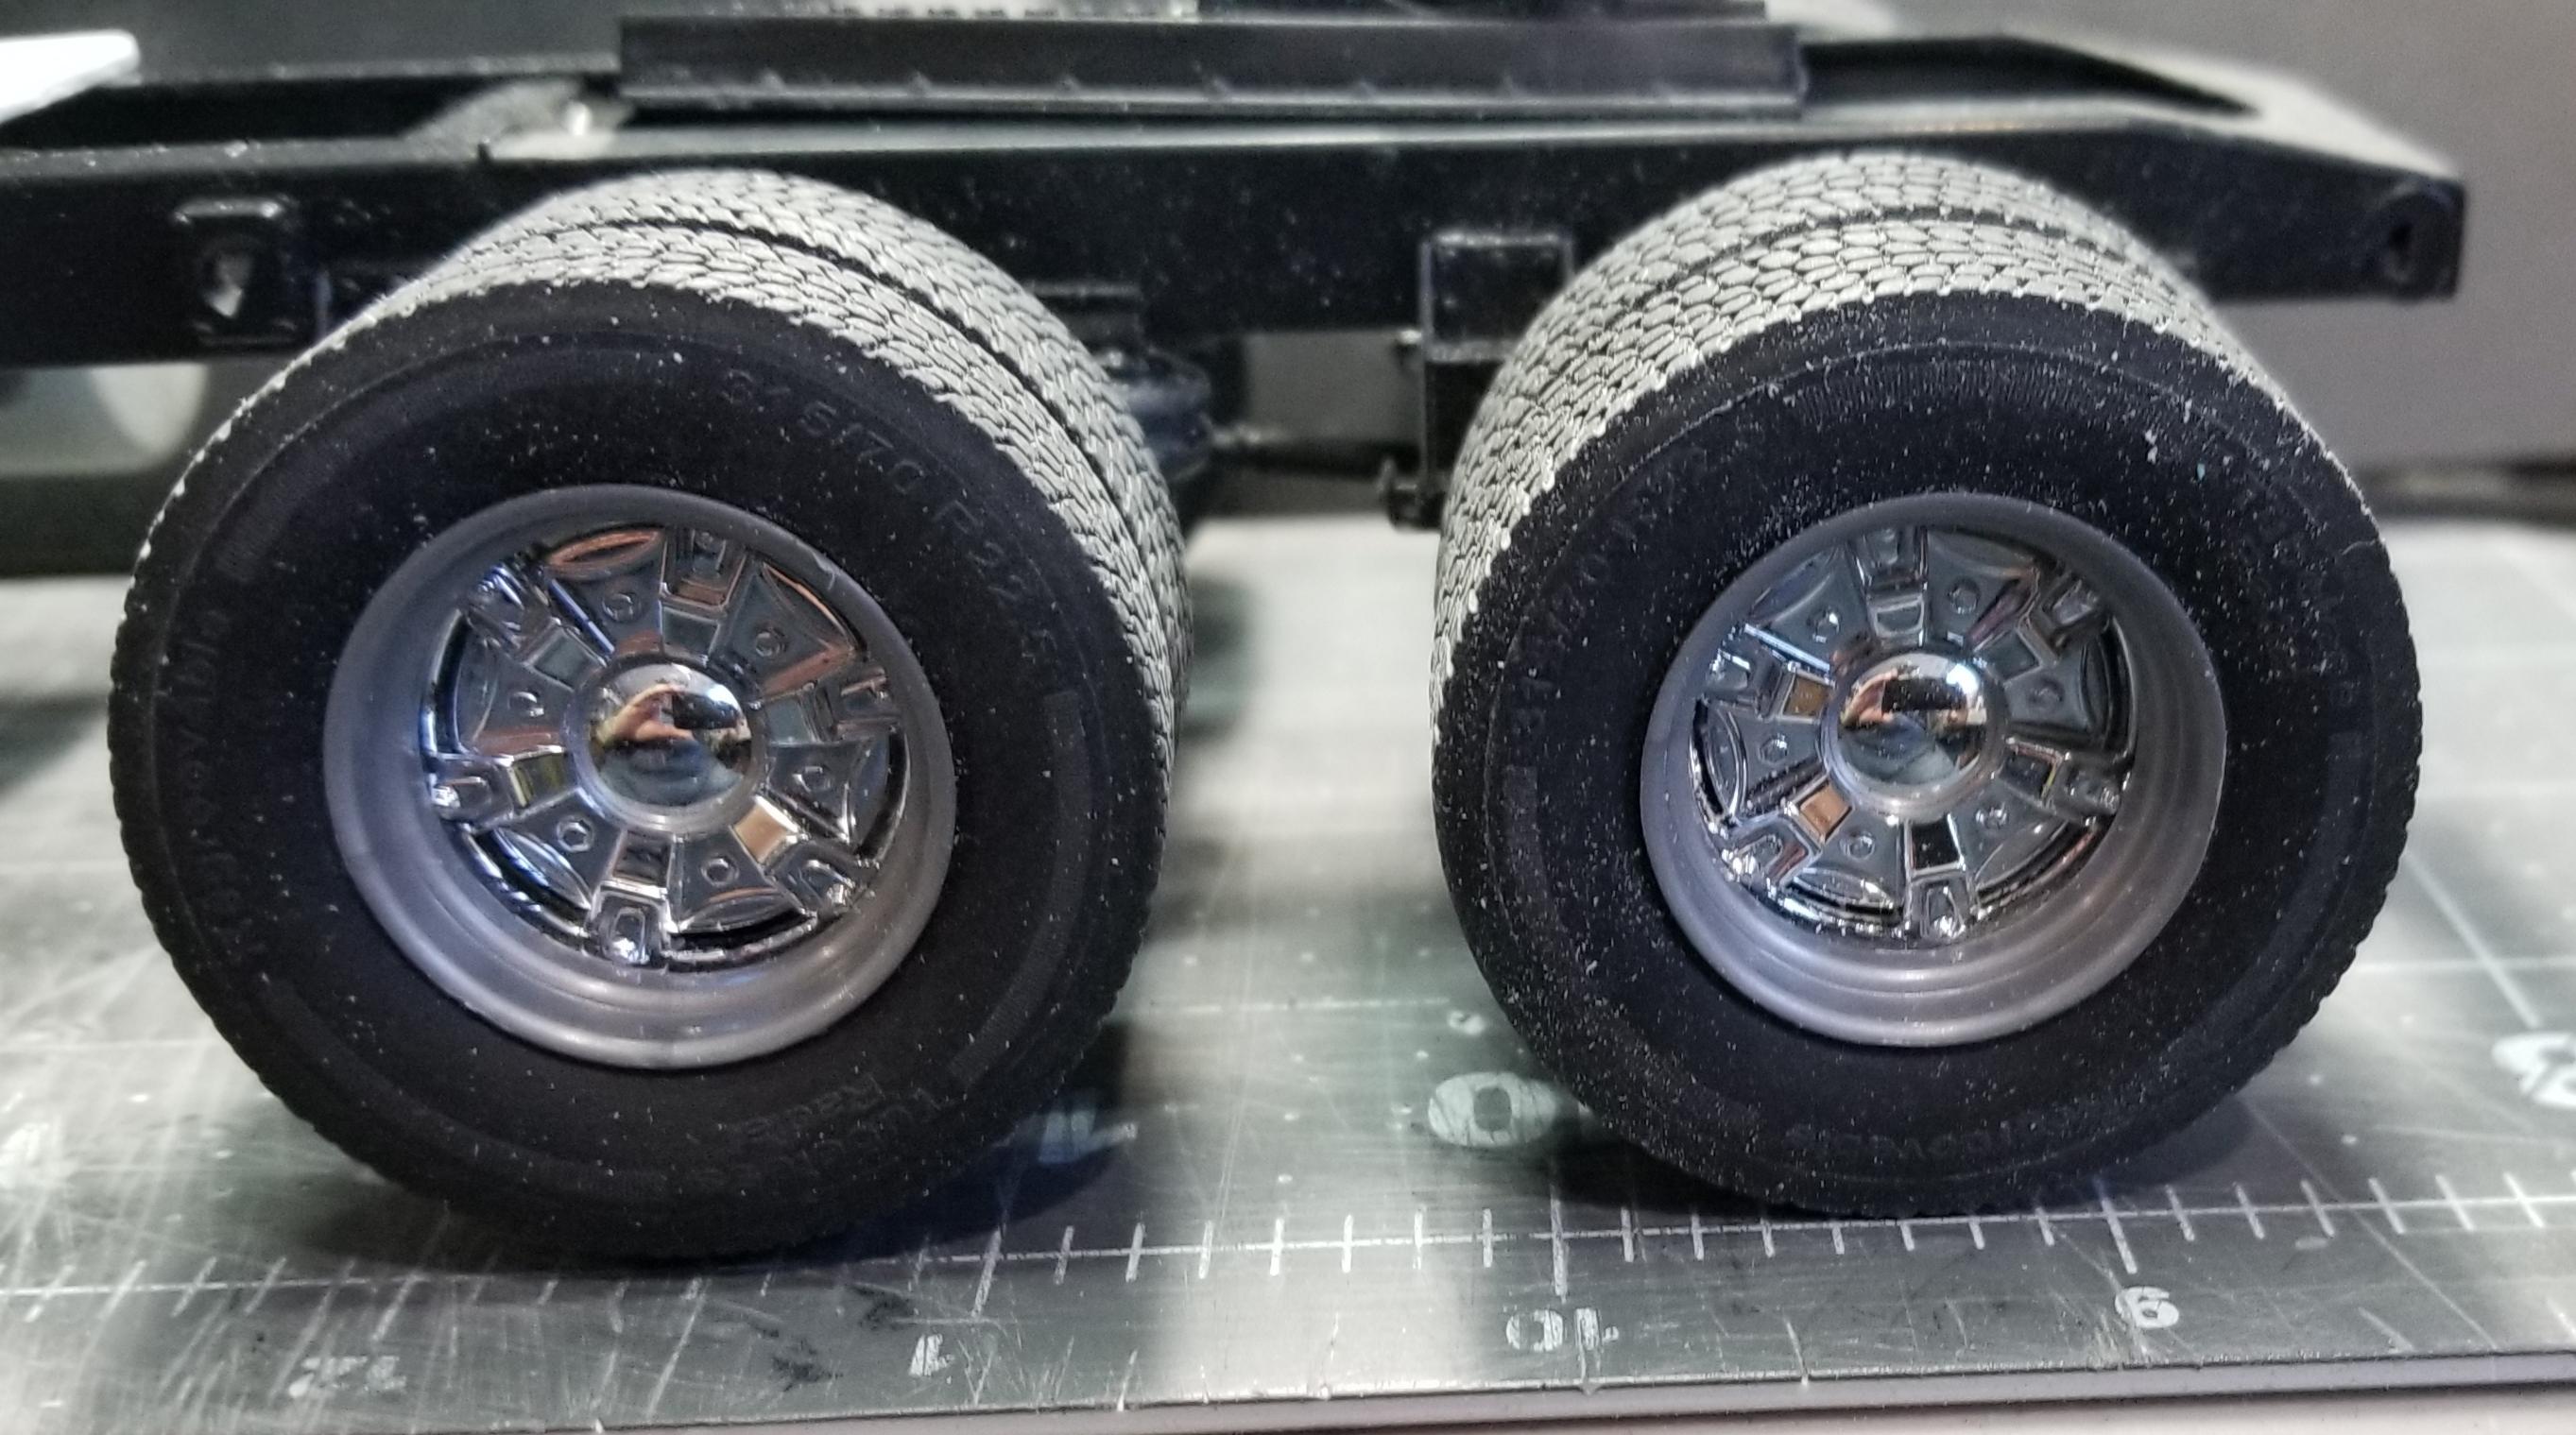
this view shows the wheels and tires (315/70 R22.5) from the 1/24 European wheels and tyres kit. I had to add a extra inner wheel half ring to the outside of the Mack rear wheel to widen it and get these tires to fit.
Ron G
-
Hey all
I found a picture on the internet of a Mack camelback suspension with a shock going from the front axle at an angle rearward to the front mounting bracket. It looked like this, so I copied it.
this view shows the front shock and how it attaches to the axle and frame.
this view from the top shows a little better how the shock mounts.
Ron G
-
Hey all
Did some more work on the Superliner. I have the engine that came in the MPC Mack DM800 put together. It's a Maxidyne ENDT-865 V8. They were, from what I understand a pretty good engine. Thay were the predecessor to the Mack E9 V8. It has a 5 or 6 speed transmission, I'm not really sure.
this view shows the cab & hood along with the sleeper, fuel tanks and the wheels/tires that will go on this build.
this view shows a top view of the Mack camelback suspension & Mack drive axles.
side view of the Camelback suspension.
this view shows the Mack ENDT-865 from the MPC DM800 kit. Its about the same size as the E9 so I'm using it for fit purposes.
top down view of the ENDT-865.
this is a picture of the real thing. It's painted in Mack gold. Well that's it for now be back soon.
Ron G
-
Wild build man, wild!!!!!🤪
-
Hey all
I got a MPC 1/25 Mack DM800 for some parts to use on my Aussie Mack Superliner build. I spliced the front and rear sections of the DM800 frame with a section out of the Italeri 1/24 Mack Superliner frame to make a proper Superliner Ii frame that's a 232" W.B. I modified the front axle from the Superliner kit along with a piece from the DM800 front axle and got a 4" (scale) wider drop center Mack axle, kind of. It's not perfect but it's good enough for me. Here are some pictures.
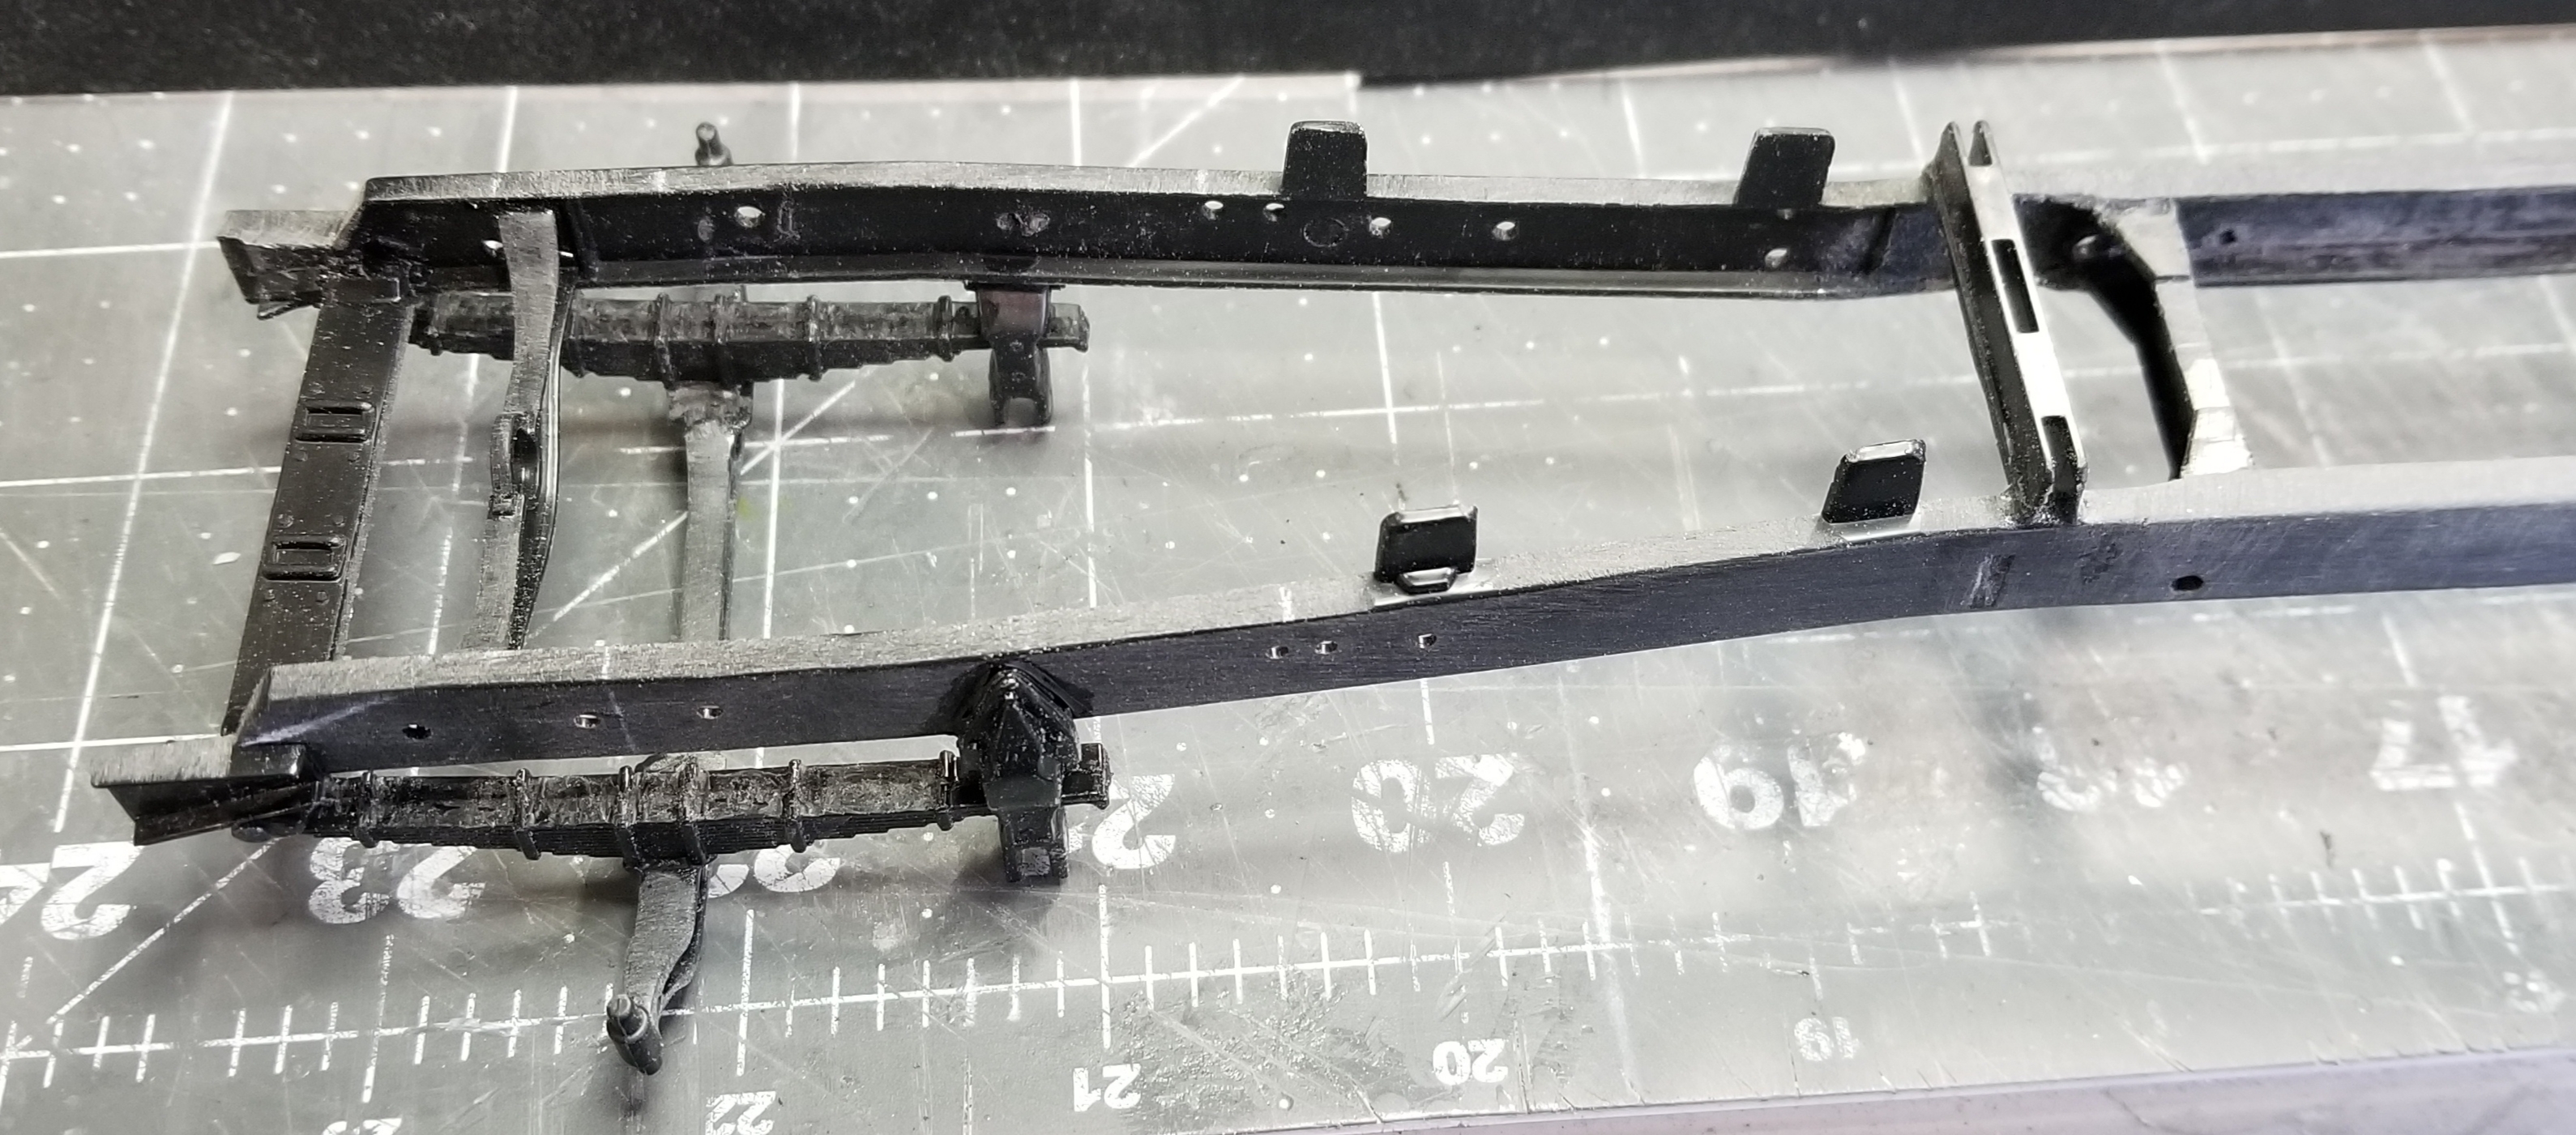
this view shows the top of the completed frame.
this view is of the bottom of the frame.
close up view of the front of the frame and front suspension.
close up view of the rear of the frame and the support pivot bracket for the camel back rear suspension
this view shows the modified front axle. I had to modify the DM800 front springs to get them in the correct position for a Superliner II frame.
this view shows the cab and hood sitting on the frame.
this view shows the modifications I had to make to the hood to fit the external Aussie air cleaners. They are from the Western Star Australian truck kit by Italeri. Well that's it for now be back soon with more updates.
Ron G
-
Great looking Mack! Mr. Mopar-D. I have one coming in the mail, but mine is going to help build my Aussie Mack Superliner.
Ron G
-
Now that's a proper road train hauler Mate! Great idea for using the Mack E9 V8 from the Renault ( I'm using one in my Superliner build) I see some Auslowe parts in there, nice I hope mine turns out as nice.
Ron G
-
Hey Jurgen
Nice, a Michigan gravel train, sweet
Ron G
-
Hey Hessel
Now all you need is 3 to 4 side dump trailers and you would have one sweet road train
Ron G


1/24 Italeri Mack Superliner II Australian road train hauler
in WIP: Model Trucks: Big Rigs and Heavy Equipment
Posted
The Renault 360 that I ordered from Italeri finally showed up yesterday so I got started with assembling the Mack E9. This is a European version and a lot of stuff had to be changed to make this correct to what I'm modeling.
Ok, here we go. I have the E9 together. I had to do some modifications to it to make it more like a actual E9, not a European version.
Ron G