Harpo
-
Posts
217 -
Joined
-
Last visited
Content Type
Profiles
Forums
Events
Gallery
Everything posted by Harpo
-

How about a Bonneville/dry lakes category?
Harpo replied to W Humble's topic in General Automotive Talk (Trucks and Cars)
I really like LSR cars (see post above), but on reconsideration I agree with Bill. I would like to see a Community Build though! -
How about a Bonneville/dry lakes category?
Harpo replied to W Humble's topic in General Automotive Talk (Trucks and Cars)
I love LSR cars, I've got one done ("QuickSilver" - Pirahna-based retro LSR Car) and one under construction (Another LSR Fantasy Car: Caddy Cat?). But upon reconsideration, a separate section wouldn't be well populated. I'd rather keep them in "Model Cars". -
My PMC has arrived!

-
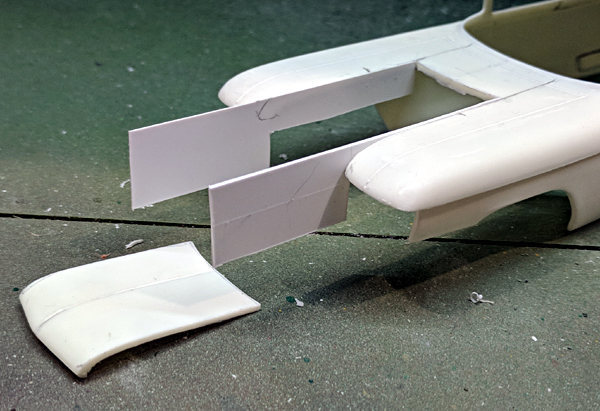
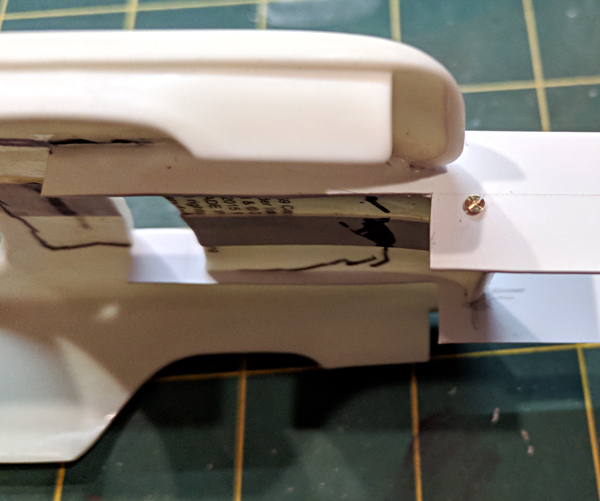
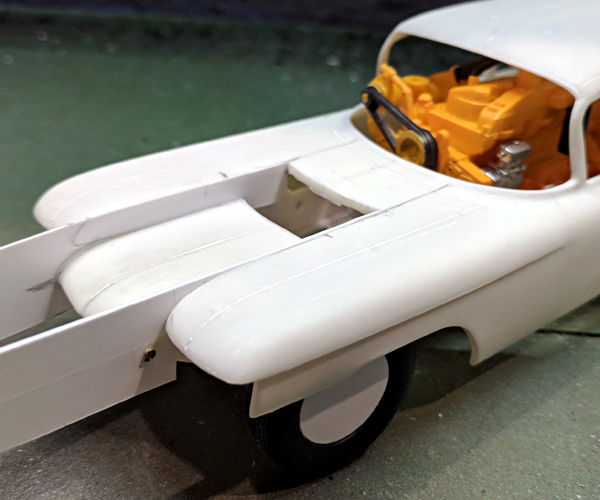
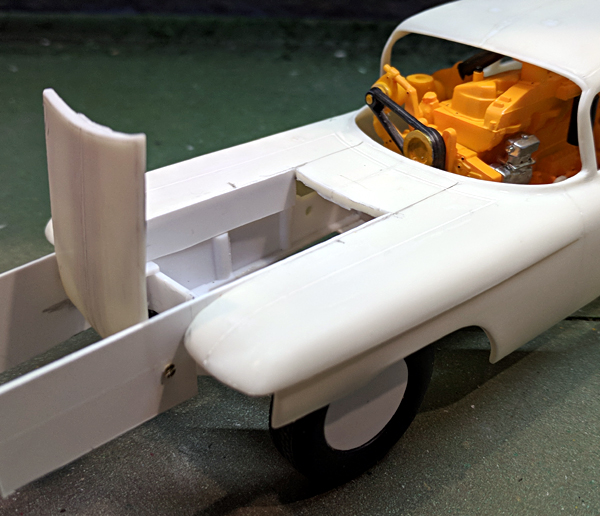
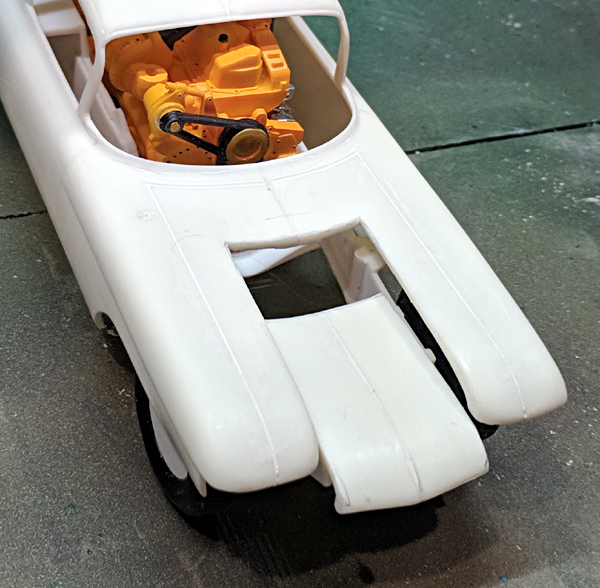
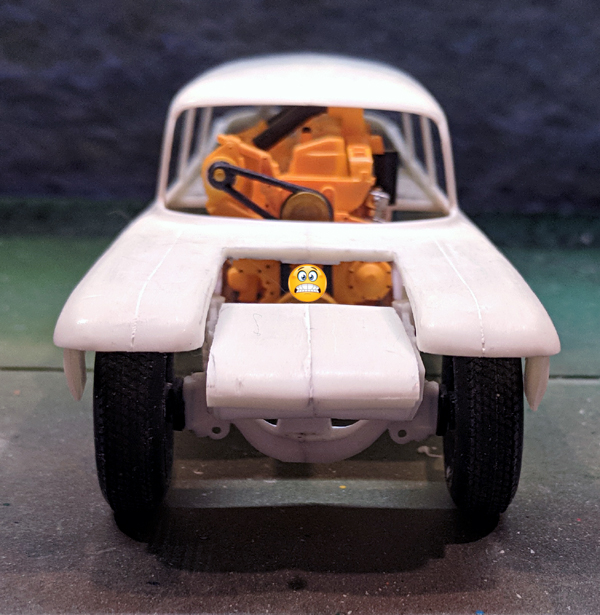
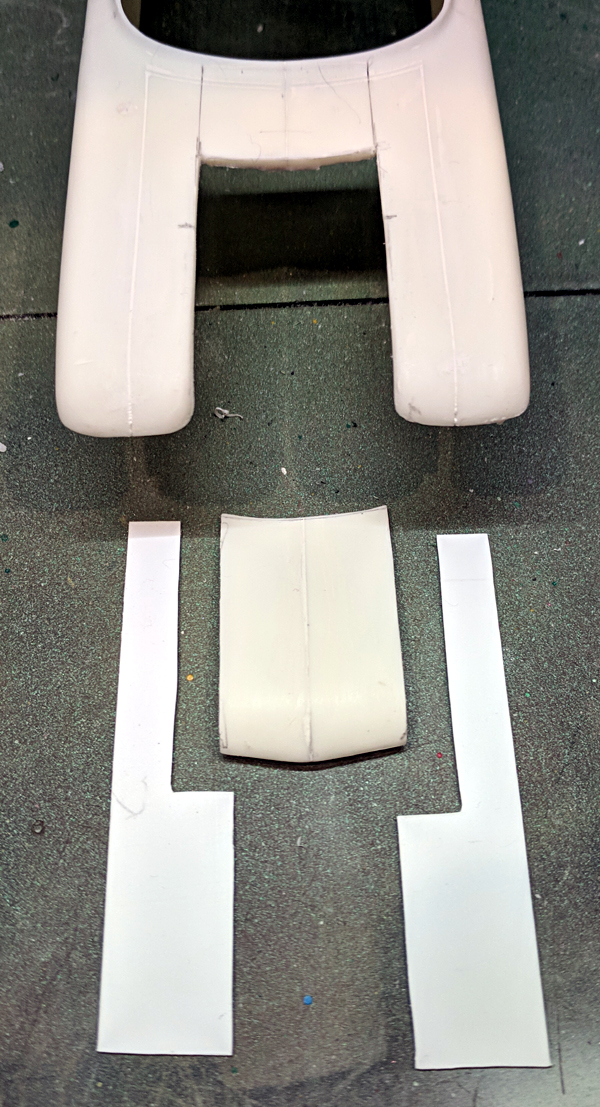
It's time to accommodate the driver of this contraption, so I began by cutting the hatch where the brave/stupid guy will climb in (and hopefully out): Here's a view looking in from the front, with a typical driver's face added for perspective: Sheet styrene cut for hatch mounting: Sheets glued in place: Hatch and mounts drilled for hinge point: Hatch installed, open: And closed. Windshield will slant from back edge of hatch to front edge of opening in hood, with same angle as main windshield. I'm not sure what the front styling will be yet, I'm making this up as I go along!
-
I'm pretty sure the Willys Jeepster was only available in rear wheel drive, no 4x4.
-
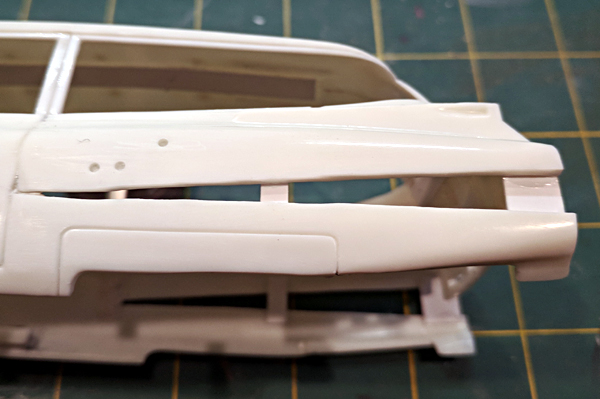
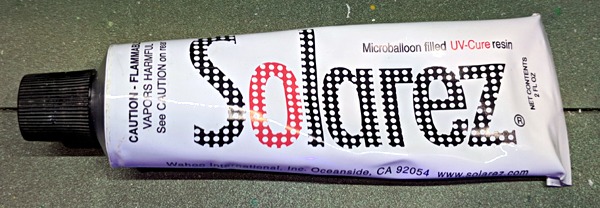
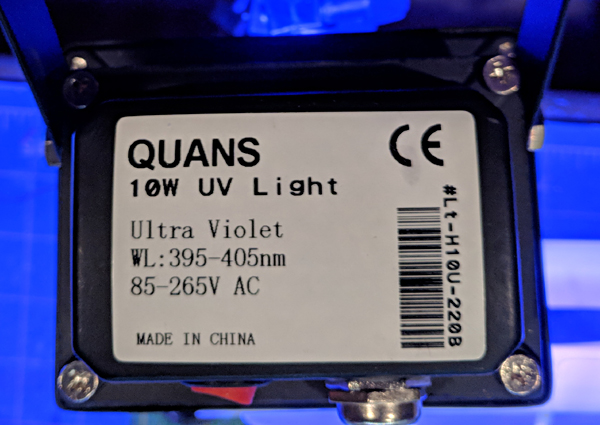
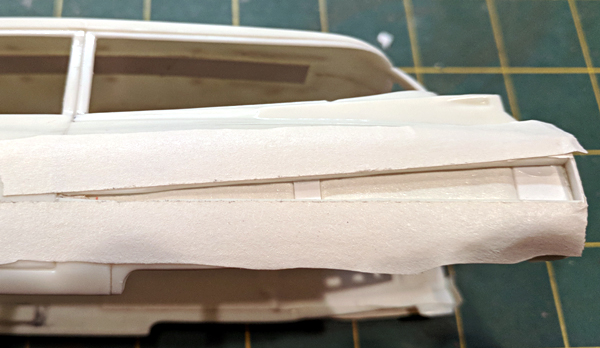
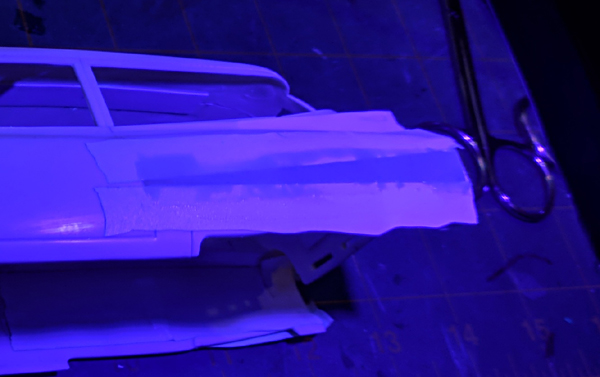
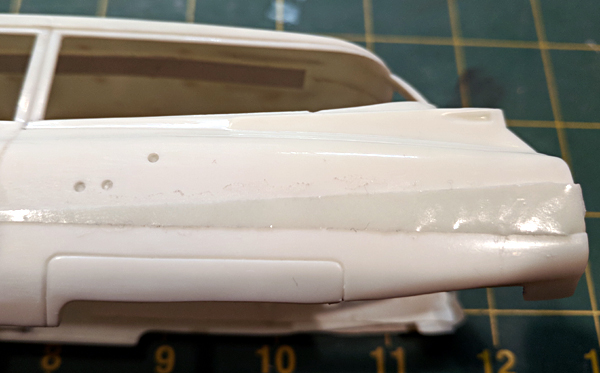
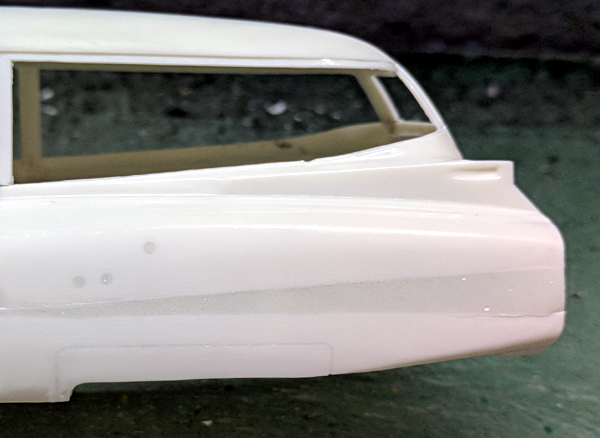
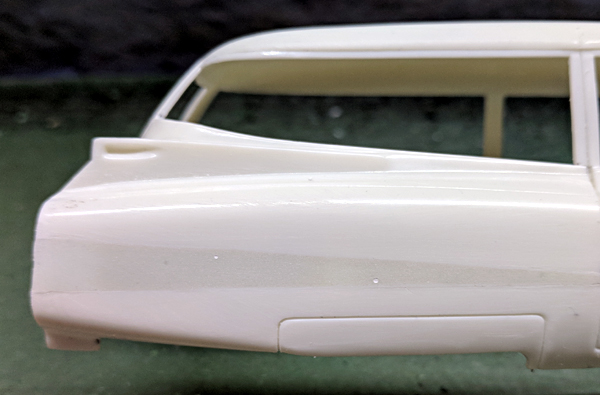
I needed a way to fill the gaps created by the fin shift: Not wanting to form styrene sheet and end up needing too much putty, I decided to try this. It's a UV cure micro-balloon filled epoxy, intended for surfboard repair: It's available on Amazon, I ended up ordering a kit containing both this product and it's companion, a straight UV cure epoxy with no filler. Here's a link. This stuff is single part, no mixing, and activated by exposure to UV light. I already had a 10w UV light that I use for night races on my slot car track: The lower fin sections are rather loose, so I reinforced with sheet styrene on the back... ...then masked the back with artist's tape to create a form for the epoxy. I also masked the front edges of the gap in hopes of minimizing the mess and making sure the fill was deep enough: Pour in the filler, and here's what you get: Five minutes of UV light... ... and the clear filler turns white: Remove the masking, and there you are - overfilled. Ooops. But after much filing and sanding, the result is very good: Note also that I went back and filled the three holes and the fender skirt seam. This stuff is very effective for this, just dab it in carefully with a blunt pick, light it up, then trim and sand. I did better on the other side, not so much overfill there: I think this is an effective product for this use, but I'm not proficient with it yet. Viscosity is the issue; it tends to dome up and leave things overfilled. It also has a slight solvent effect which will mar exposed surfaces. This was the reason I masked the outside too, so I could draw a squeegee across the fill without spreading the excess over the quarter panel. Another approach might be to skip the squeegee, carefully under-fill, then apply a light coat of conventional putty. The instructions say that the maximum depth is 1/4" for proper curing. Even at the ~1/8" thickness I used here, it was necessary to re-expose all surfaces to light both front and back after unmasking. This eliminated the slight stickiness that was particularly noticeable on the back. For filling seams, small imperfections, and door lines, this stuff is near ideal. Just scrap the line with the point of a knife, run a line of epoxy in with a blunt pick, and light it up. It trims easily with a knife, sands well, and sticks tight.
-
I'm in. Is a 1931 Rolls Royce Phantom okay? If so, #31.
-
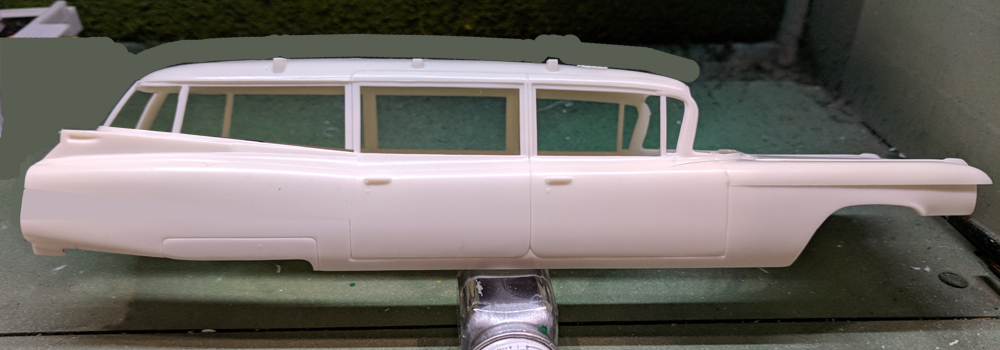
Fin section is tacked in place. The front vertical edge of the section was cut to mate with the body and bring the section forward for better fit with the roof posts. Also started some shaving/filling work. No putty used yet, just styrene and hot knife.
-
Being a big Rambler fan, this car has been on my lust list since the day it came out. Looking good!
-
Many thanks to all for the kind words! Cutting went very smooth, though rather slow since I used a micro saw instead of the hot knife. Here's the hack job: Trial fitting still wasn't getting things as low as I wanted them, so I ended up narrowing the subframe to reduce rear track a bit: Now everything fits, and we're down on the ground where we should be!
-
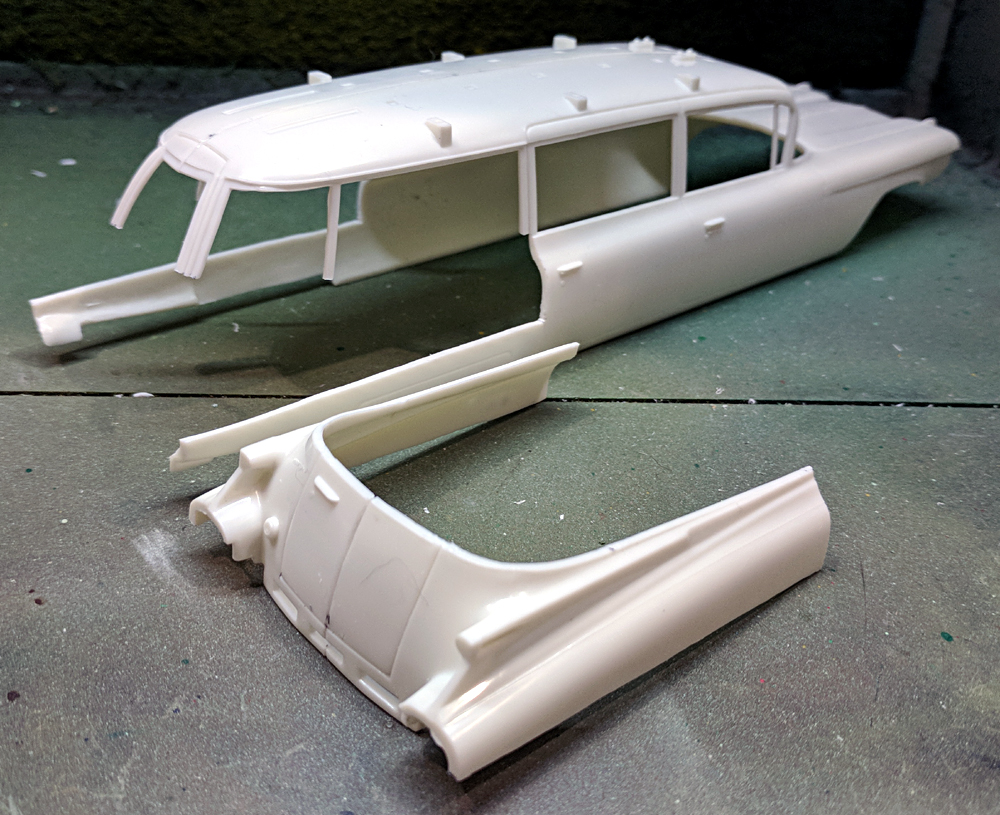
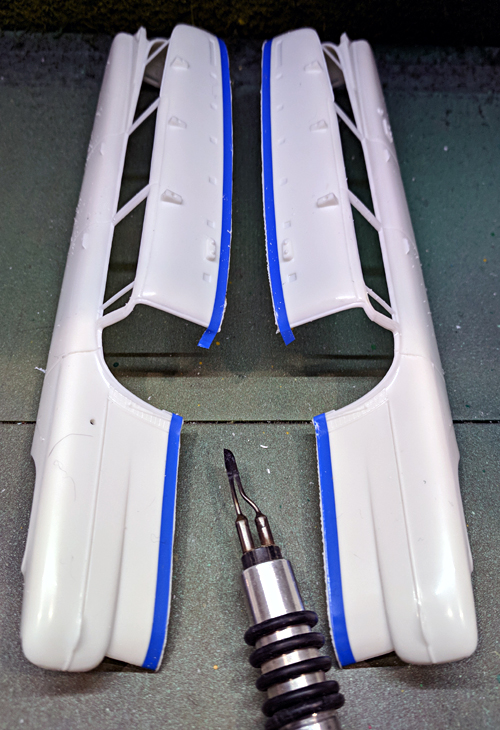
The body is spliced... ...but we have a problem. It's too narrow for the rear wheels: I was sort of prepared for this. I had decided I wanted to take at least 18" out of the total width to get the look I wanted, and I wasn't sure everything would fit. One of those "I'll cross that bridge when I come to it" moments. I REALLY want to maintain those sexy fins, and after staring at it for a while I came up with a possible solution. Why not slice off the top half of the fins, and just rotate them up? Here's the tentative cut line: And here's the same view with that section rotated clockwise in Photoshop: I'll have to add a wedge-shaped filler panel to close the opening, but the look is good. This may get interesting though, 'cause I'm not sure I can cut and putty as well as I can Photoshop... I'm off to hack away, so my next installment will either be a triumph or an embarrassment.
-
Actually it won't fit yet, I need to get the body spliced so I can take exact measurements!
-
Hot knife makes it easy: Block sanded for trial fit, I'm really liking the looks from the back:
-
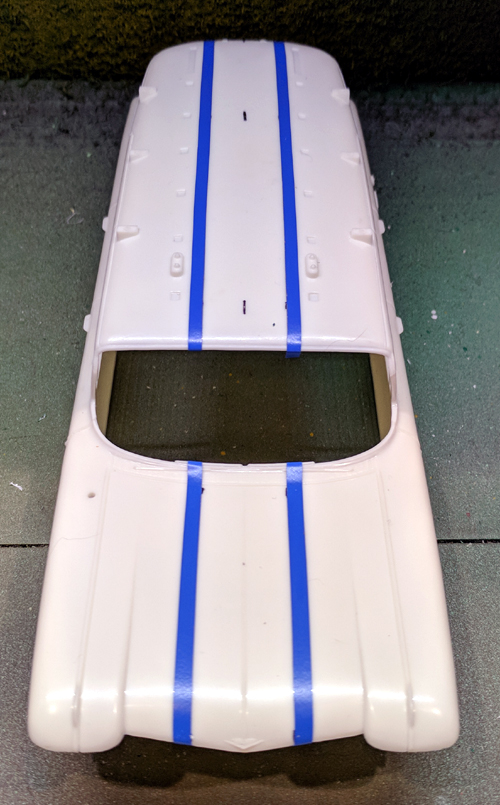
. I measured and marked first, then applied 3/4" artist tape within lines, added striping tape for cut lines, removed artist tape. Ready to cut!
-
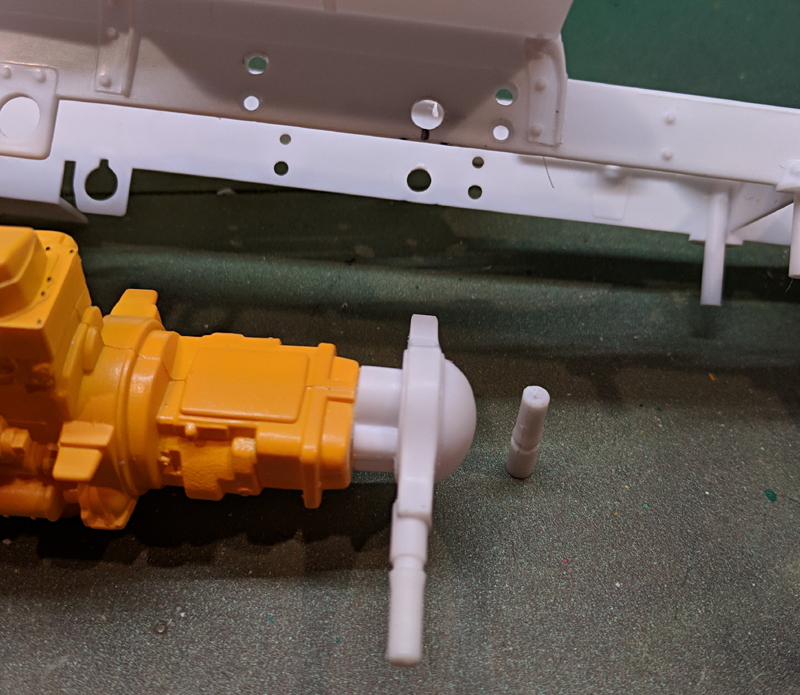
Front axle is narrowed W900 part, chassis is coming together. Lots of cleanup/reshaping to do!
-
Got the various bits ready, now to make them all fit! Lilly is not impressed, but that's how kittens are.
-
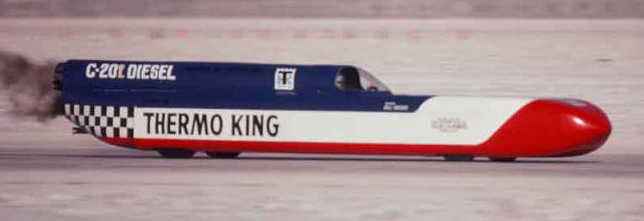
Good tips on the tires, Bill. I've tried sanding some down but I'm not very pleased with the results so far. Thanks much for looking Chris! Here's a site I found that seems to have some good info: FIA Land Speed Record Archives Since it was founded in 1904, I'm pretty sure this applies. Here's the standing in 1973 for the flying mile: Absolute Record: 8/25/1973, 235.756mph, Virgil Snyder, Thermo King Diesel Streamliner, Class A-II-10 (305-488ci) Class Record for A-III-13 (over 488ci): 4/29/1936, 158.870mph, G. Eyston, "The Flying Spray" My car falls under Class A-III-13, so the Class record would be a cinch. It's also quite likely this car could beat the absolute record for 1973. The endurance records also look quite possible, in fact the 100/500/1000 km/mi records that were set in 1936-37 by Eyston stand to this day! 1mi record, 1973 Thermo King Diesel Streamliner: 100/500/1000 km/mi records, 1936 G. Eyston AEC/Chrysler:
-
I think you're right, lol. I considered building a roll cage, but I have a feeling it would be rather useless in a 10 ton 300mph car. Perhaps an ejection seat?
-
Love your Mid-engine Mini, great weathering job! The two tanks are 15 gal each by my calculations, so they're actually rather minimal. I've considered adding more, since long distance runs were often done "back in the day". Nowadays we seem to concentrate on maximum speed, but for a long time 1/6/12/24 hour and 100/500/1000 mi/km endurance records were common. Here's one of my favorites, MG setting a record in Class F for a 12 hour run in 1956, 141.81mph. Fuel stops are allowed, but the car I'm building here would still need more than 30gal for a run like this!
-
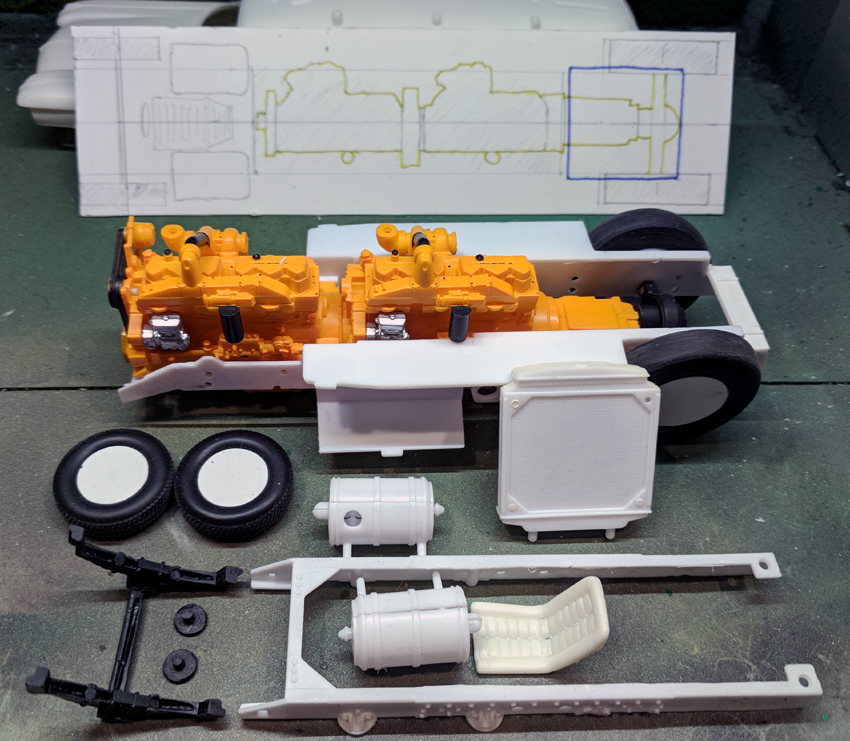
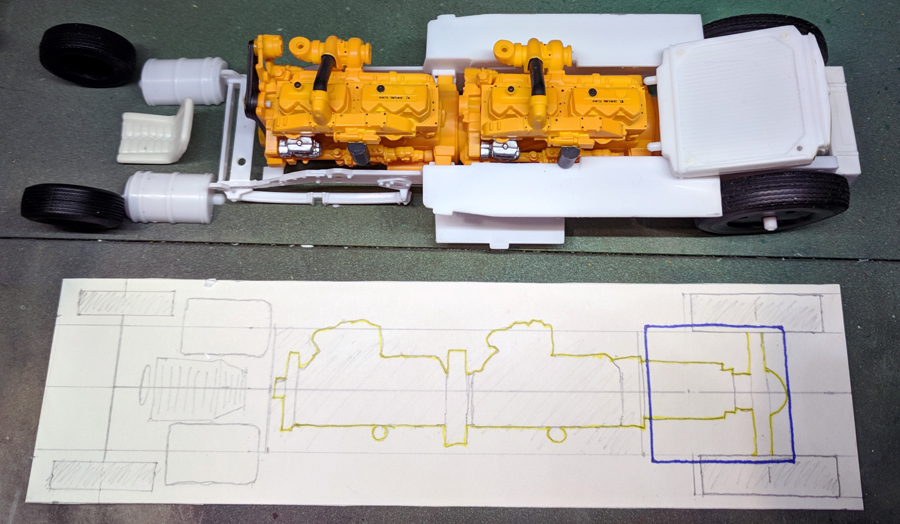
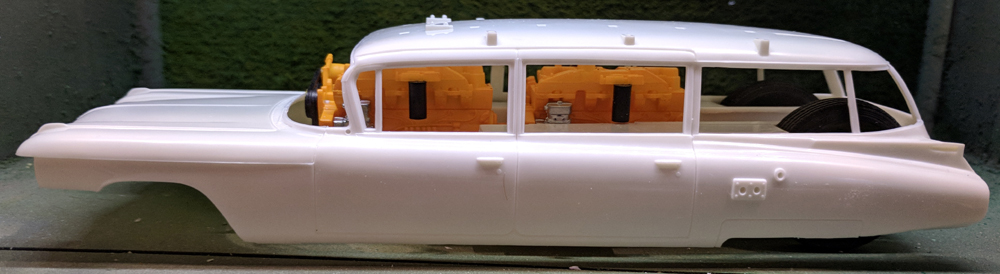
I've got the configuration pretty much sorted out. 188" wheelbase, seat and tanks up front, radiator (blue outline) angled under the greenhouse. I'll add ducting through to the radiator, the driver's compartment will will be at hood level and just have a small windshield to peer out and keep her straight. Next up is removing the existing front springs, extending the chassis, and fabricating the front axle.
-
Great information, thank you! I was counting on the weight being no problem, but good to see it clarified. I know the salt is soft sometimes, I do remember the Spirit of America taking an unscheduled dunking but as I recall that involved a brake failure. With all the components laid out, I find the body can easily be narrowed by 19", giving 23.6 sq ft of frontal area. There's even room to narrow the greenhouse an additional 25", bringing the total down to 19.3 sq ft, so it looks like I'm good there. I don't know how accurate it is, but I'm using this page for calculations: Horsepower & Aero Drag Calculator
-
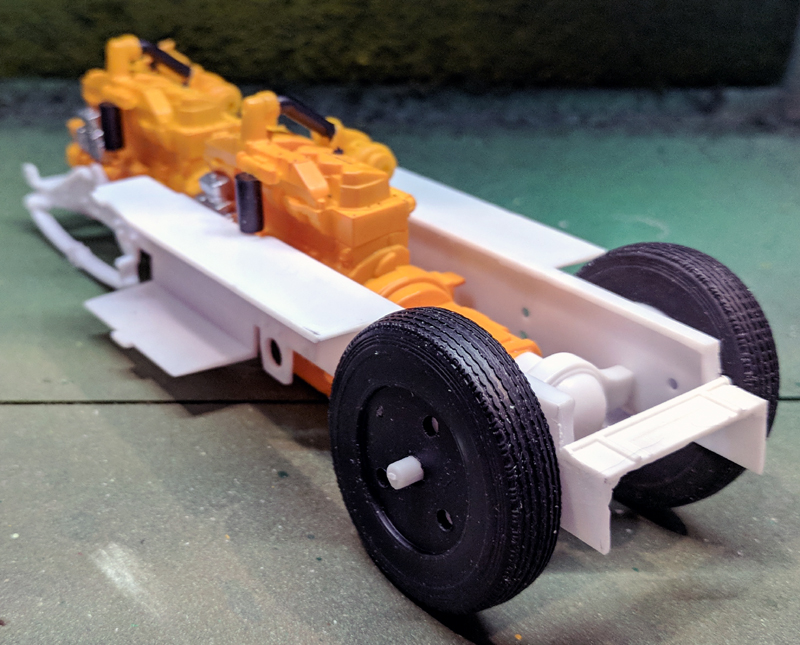
Rear end of the chassis is roughed in: Profile view with chassis in correct position: Test alignments to set wheelbase and see how much I can take out of the body width: Wheelbase will be 191", track is 55", body will be narrowed about 9". It would take some very special tires to handle the weight and speed, so I'm pretending they were available in 1973!
-
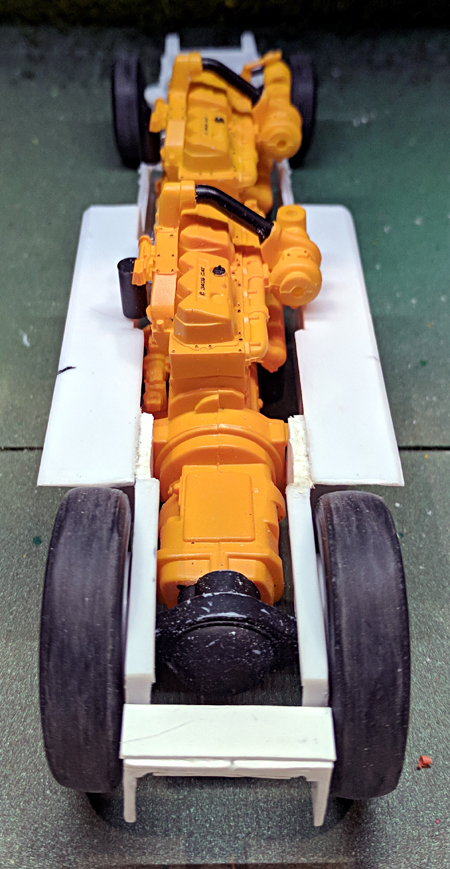
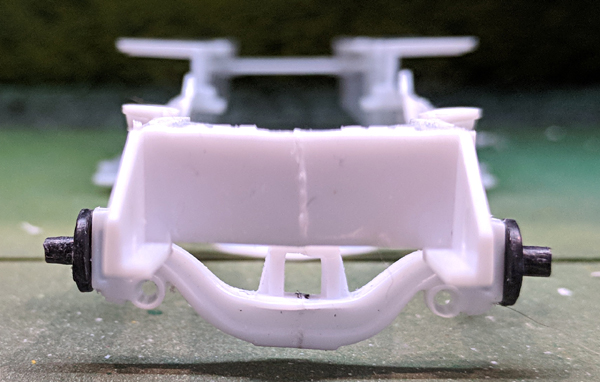
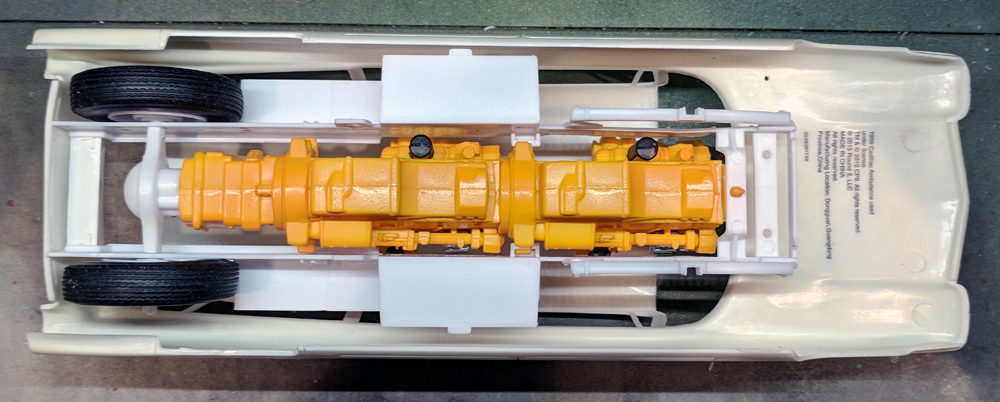
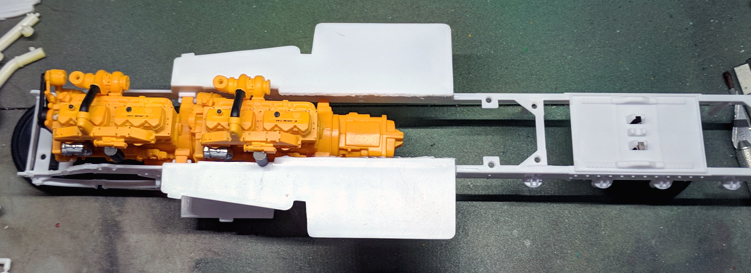
I like that! Thanks to all for the kind comments! Here's the rear end, shortened and narrowed, axles removed: Engines/trans/diff fitted to chassis, axle locations marked: Holes drilled in chassis and rear end, stub axles will make assembly easy after the rest of chassis construction/painting: We're assuming there's a very expensive set of 1:1 bevel gears inside that housing, along with locked axles. There will be no rear suspension, this seems to be standard for LSR cars of this era.
-
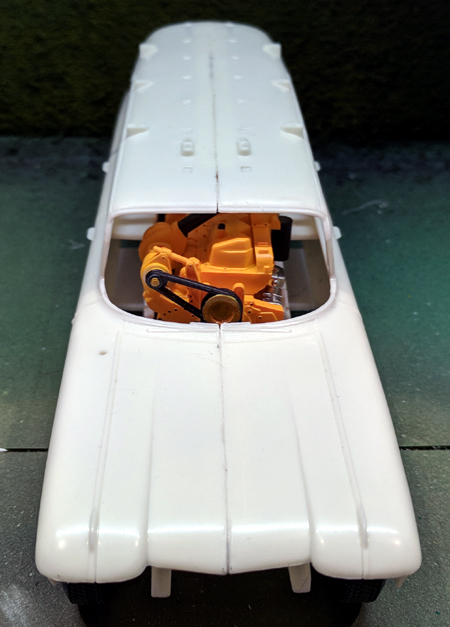
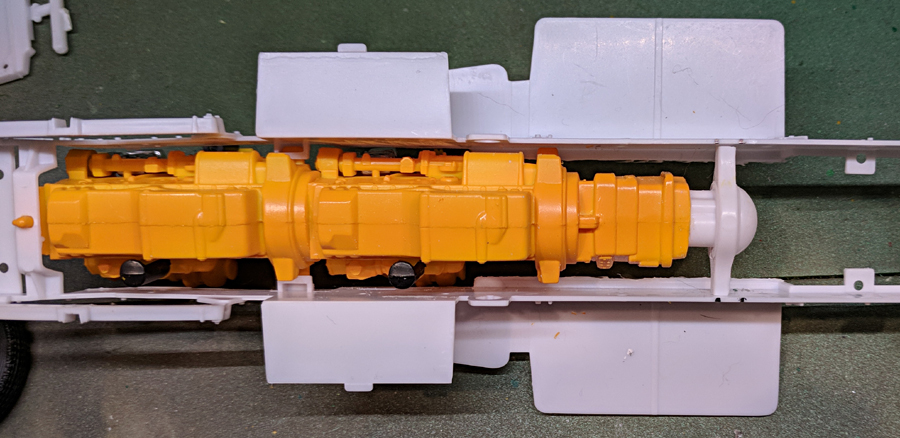
Needing some other parts, I got the Revell Kenworth W900 kit. This gives me the frame, wheels, tanks, and other necessary bits for this build. I'll keep the chassis/running gear as narrow as possible, and take a slice out of the body lengthwise to match. Radiators will be mounted at an angle beside engines (with appropriate ducts), driver will be up front between tanks. Here's the chassis under construction, it will be shortened at the back and extended in front. Should make for a wild ride, sitting between two fuel tanks with 8 tons worth of diesel engines behind you!
-
My estimate of frontal area was way off, after some measuring I think the least I can achieve is around 21 sq ft. Even if Cd could be reduced to .3, this would still only give a theoretical top speed of ~250mph... This might be enough for a diesel record in 1973, time for more research!