

David G.
-
Posts
9,663 -
Joined
-
Last visited
Content Type
Profiles
Forums
Events
Gallery
Posts posted by David G.
-
-
Well played sir!
David G.
-
Dang, that's pretty!
David G.
-
Hello Everybody!
I'm nearing the final stages of this build, just a couple more times at the bench and I should have it done.
In the meantime, here's another update.
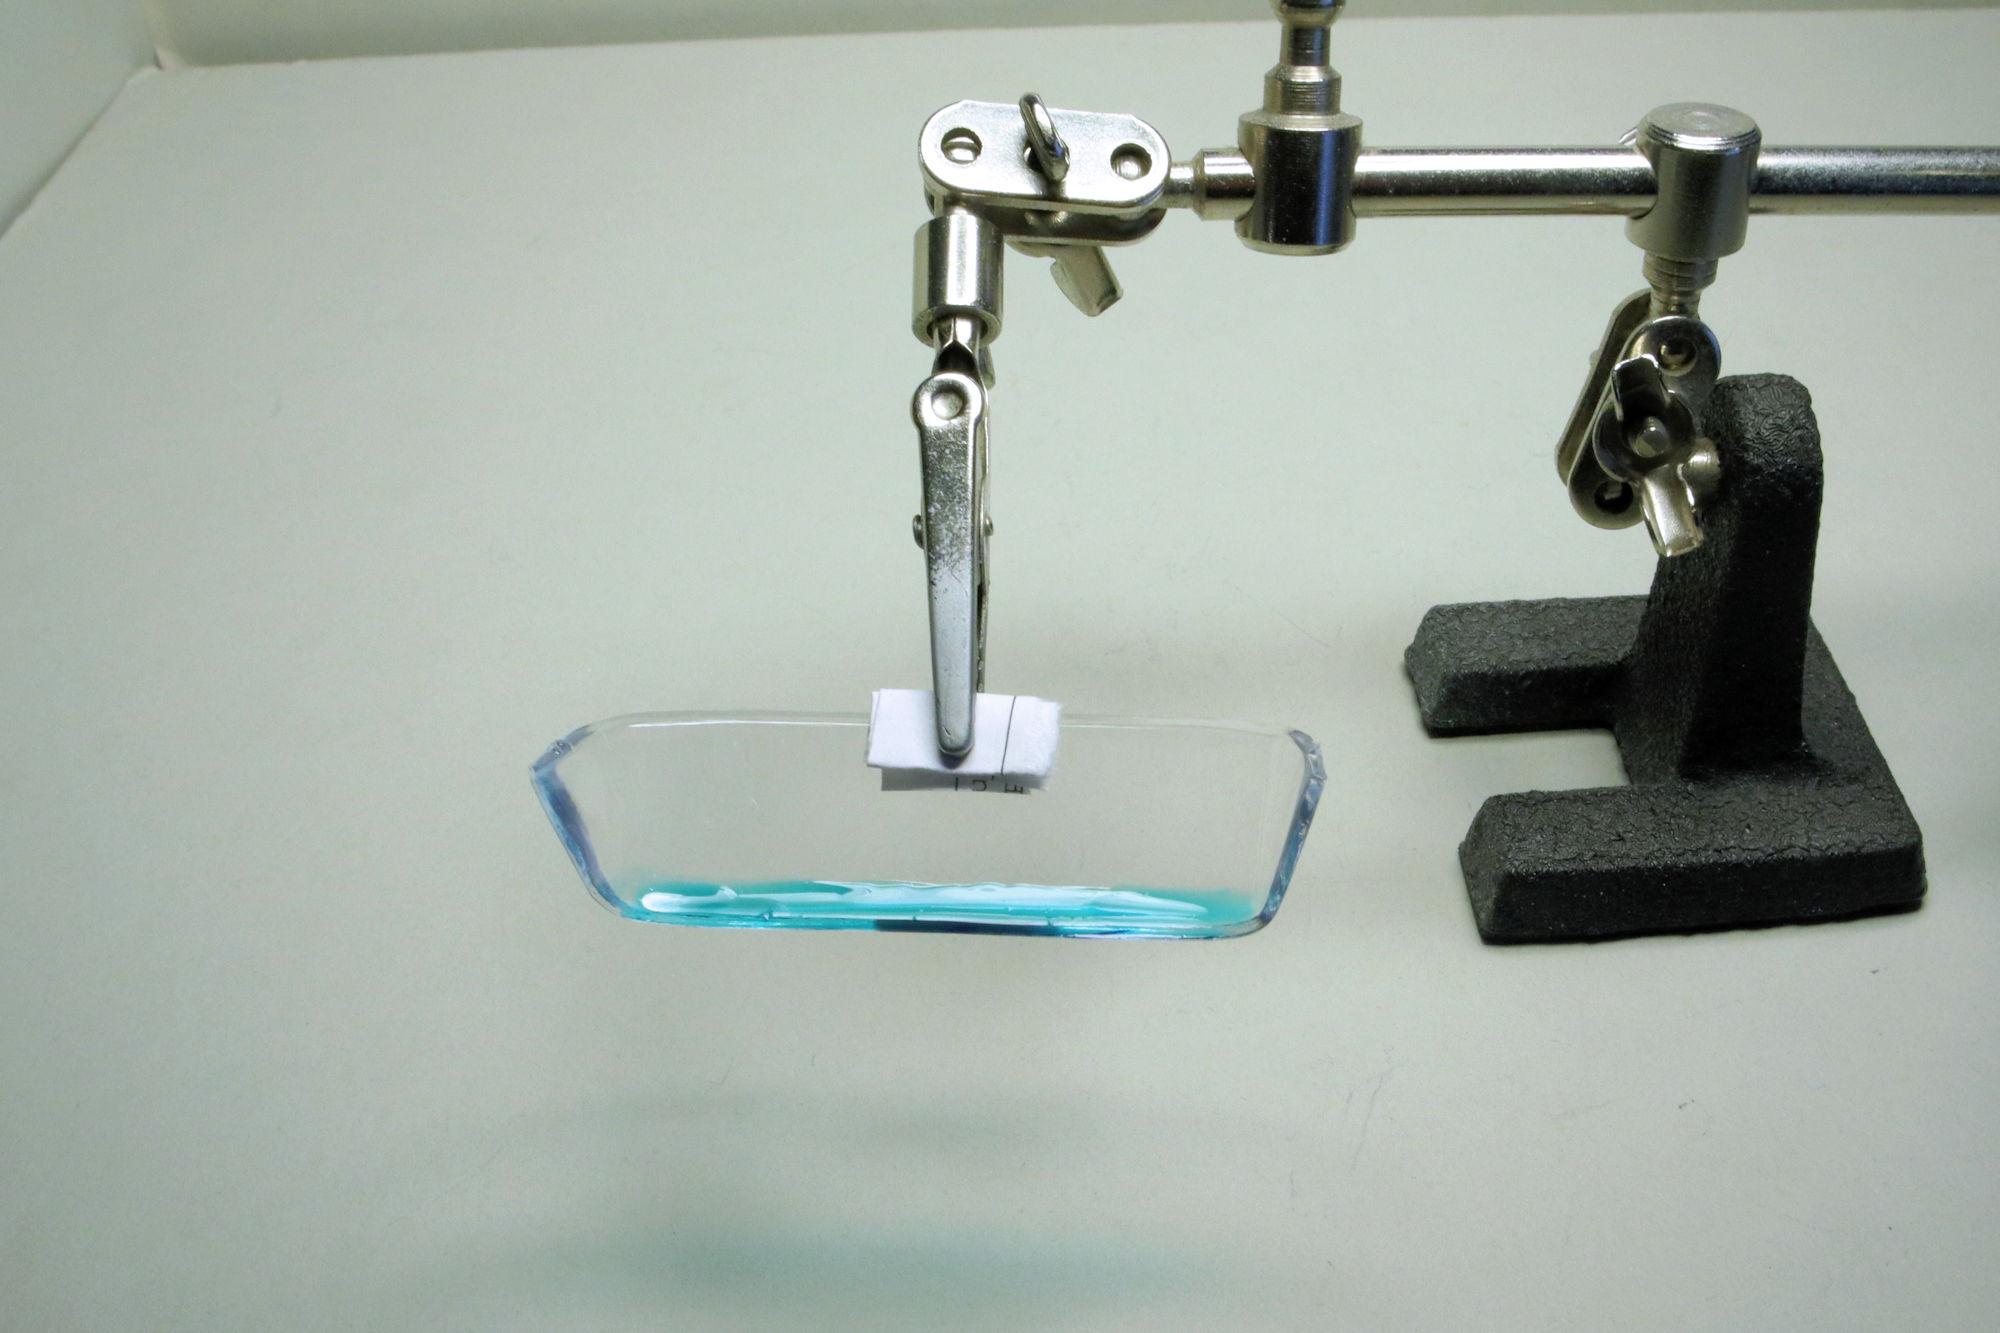
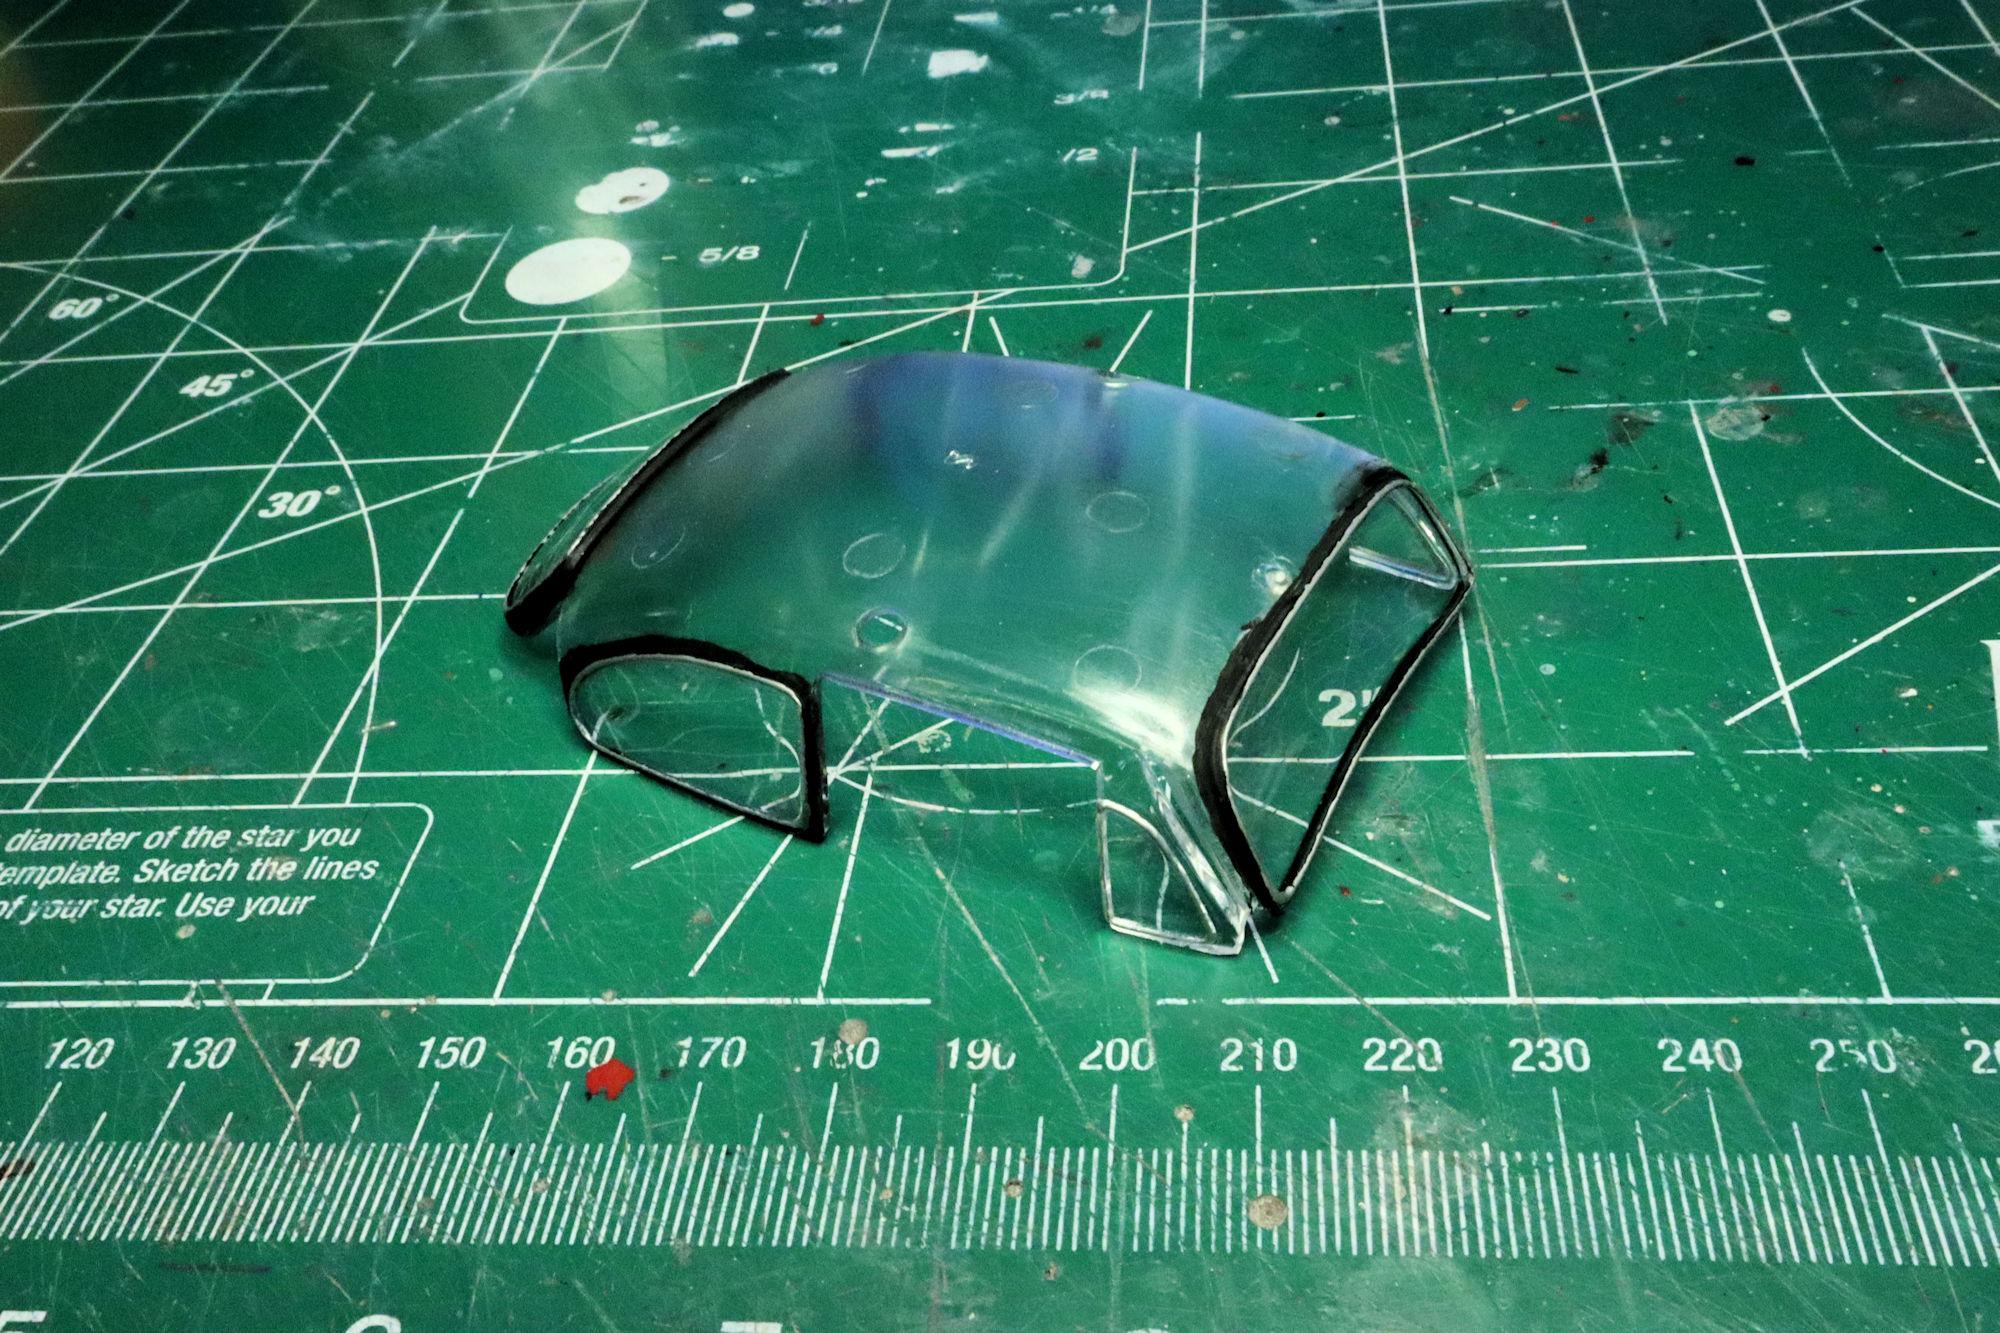
With most of the body tasks done it's time to move on to other things, like tinting the windshield. What I'm using for this is some Future acrylic which I've tinted with some blue food coloring. I brush it the mixture on and let it even itself out. The adjustable clamp device holds it at a good angle while the Future levels itself and cures.

I just need to work on getting the initial application a little more even- and graduated.
I think the end result achieved the desired effect. Except for that gap at the top of the windshield... maybe I should just leave well enough alone.
As always, thanks for taking the time to look and please feel free to post a comment.
David G.
-
 1
1
-
-
A great looking box art based build. The colors and decal work look great!
I'm currently building one of these myself, here's a link to the WIP thread if you're interested.
This kit has a number of different build options and it's great seeing some of those other options built.
Your version came out fabulously well!
David G.
-
The wheels, stance and details are all fabulous Ken!
I wasn't sure I agreed with your choice not to use the whitewall slicks but seeing the car with the blackwalls, I think you made the right call.
David G.
-
Hello Everybody!
I finally got around to getting my traditional display case shot done, so here it is!
I thank you all for your comments of encouragement, advice and support during the build and after.
You all helped more than you can imagine.
Thank you,
David G.
-
Hi David.
I see what you're saying about the luggage compartment space. Your plan to expand the area seems more of a compensation for a shortcoming of design than an alteration of the model.
Quite a nail-biter on the door pillar situation but your skill and persistence prevailed. Mr. Webb looks well and truly impressed with your abilities!
It looks like you've done some more work on the figure too, some washes maybe?
David G.
-
1 hour ago, Anglia105E said:
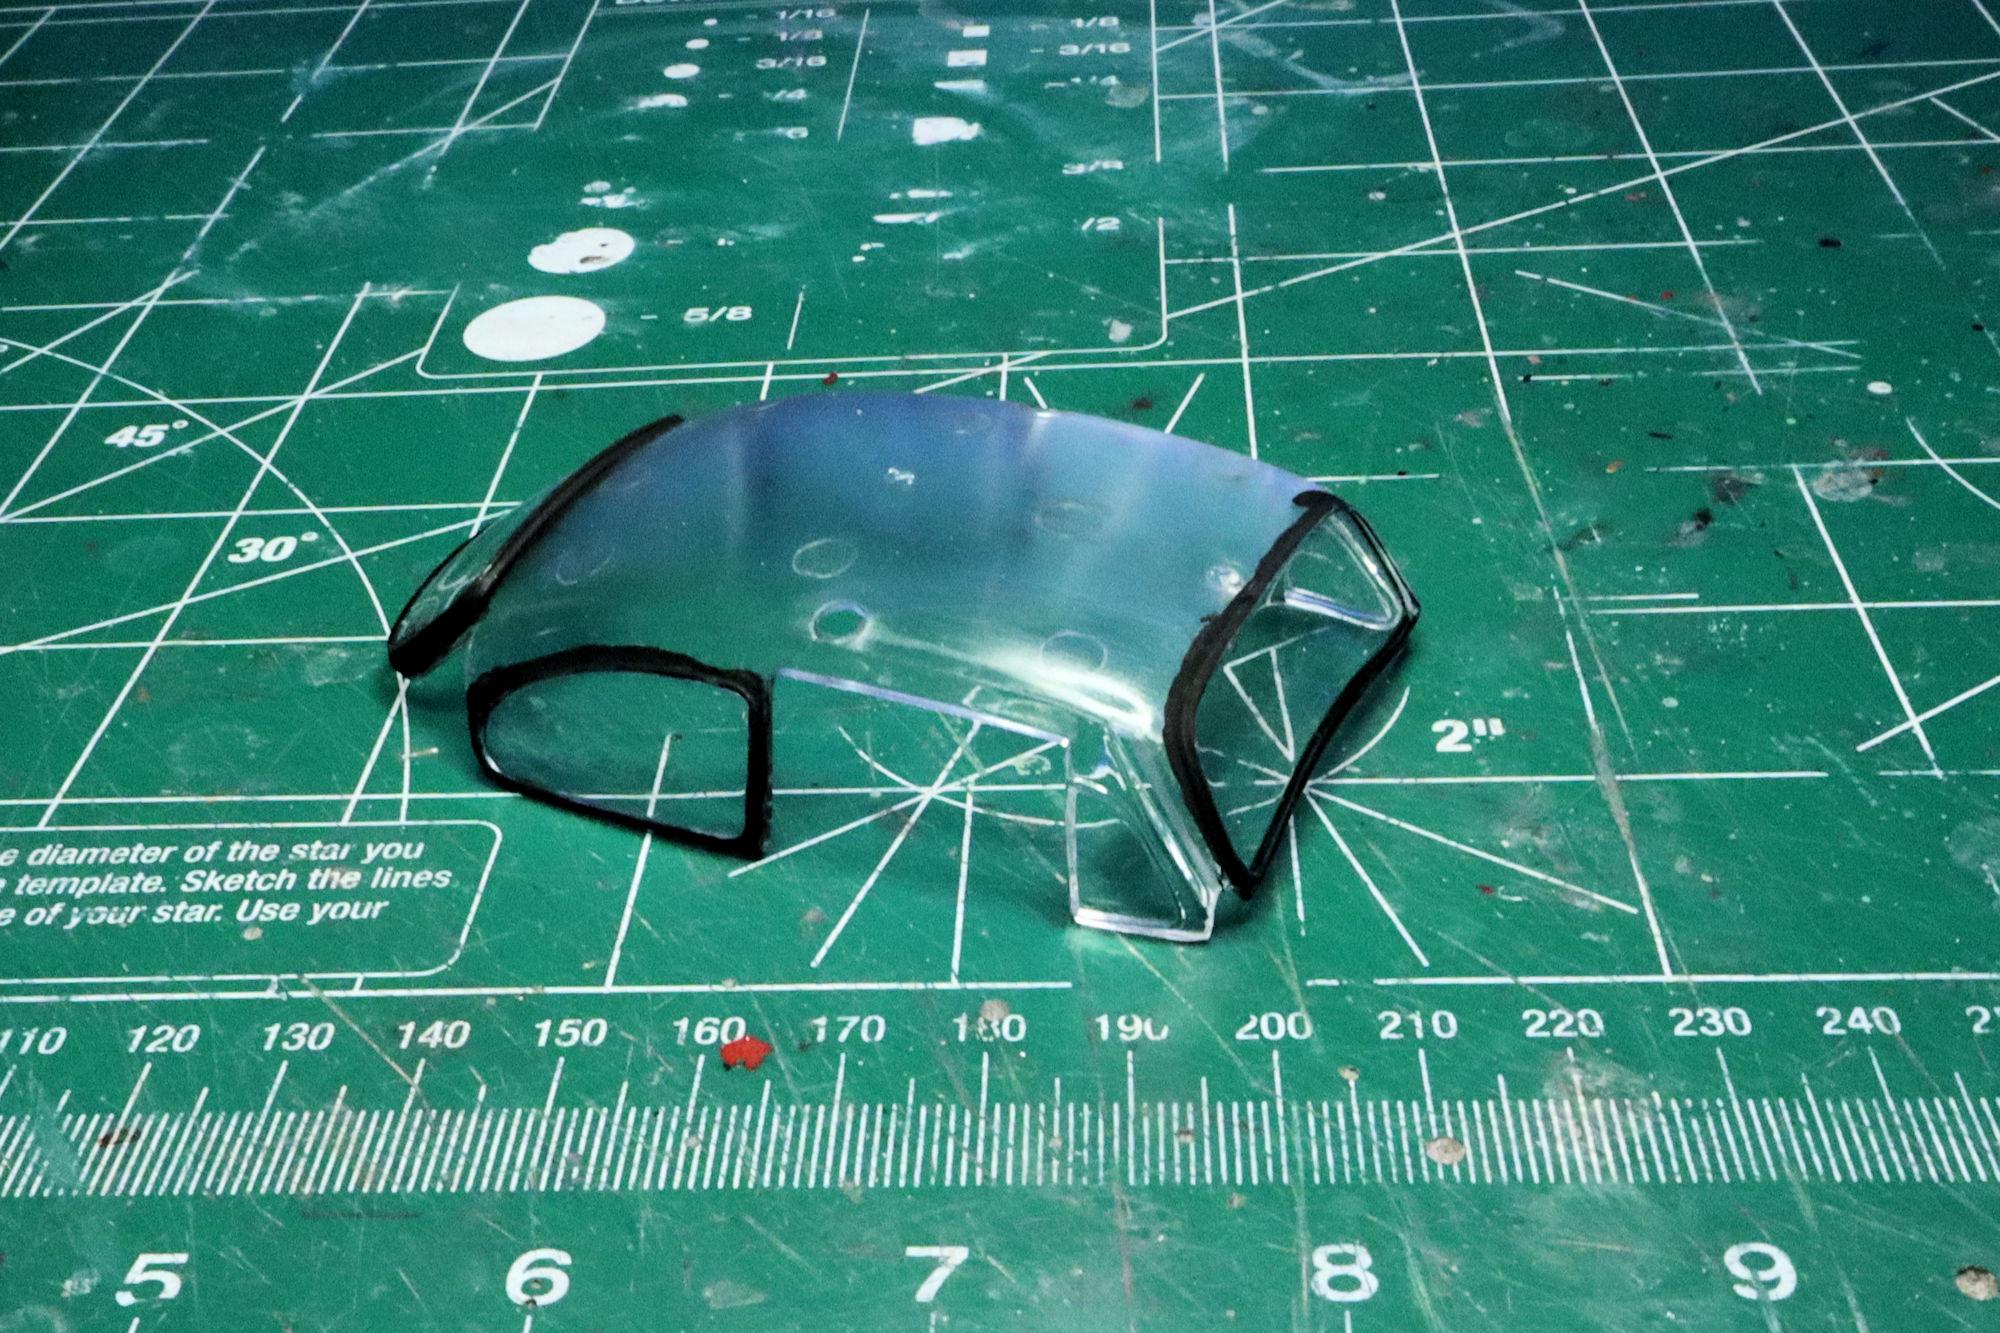
That technique with the chrome moulding set into the black rubber seal has worked really well David . . . The resulting effect has transformed the window glass, and the body shell as well . . .
David W.
I'm glad that it worked as well as it did. Thank you for taking the time to say so, I appreciate your comment.
David G.
-
21 hours ago, Bainford said:
Adding the silver to the black window gaskets really is a significant detail. Looking good.
Thank you Trevor, it's often the little things that can make the biggest difference.
19 hours ago, LennyB said:David, the windows looks great. I was thinking of doing something like that on the windshield of the '41 Plymouth but was not sure how to approach it. I think you found the answer, thanks.
Thanks Len. That'd be great if you can make use a technique like this on that Plymouth.
David G.
-
Hello Everybody!
In spite of some difficulties I've encountered, this is shaping up to be one of my quicker builds in a while.
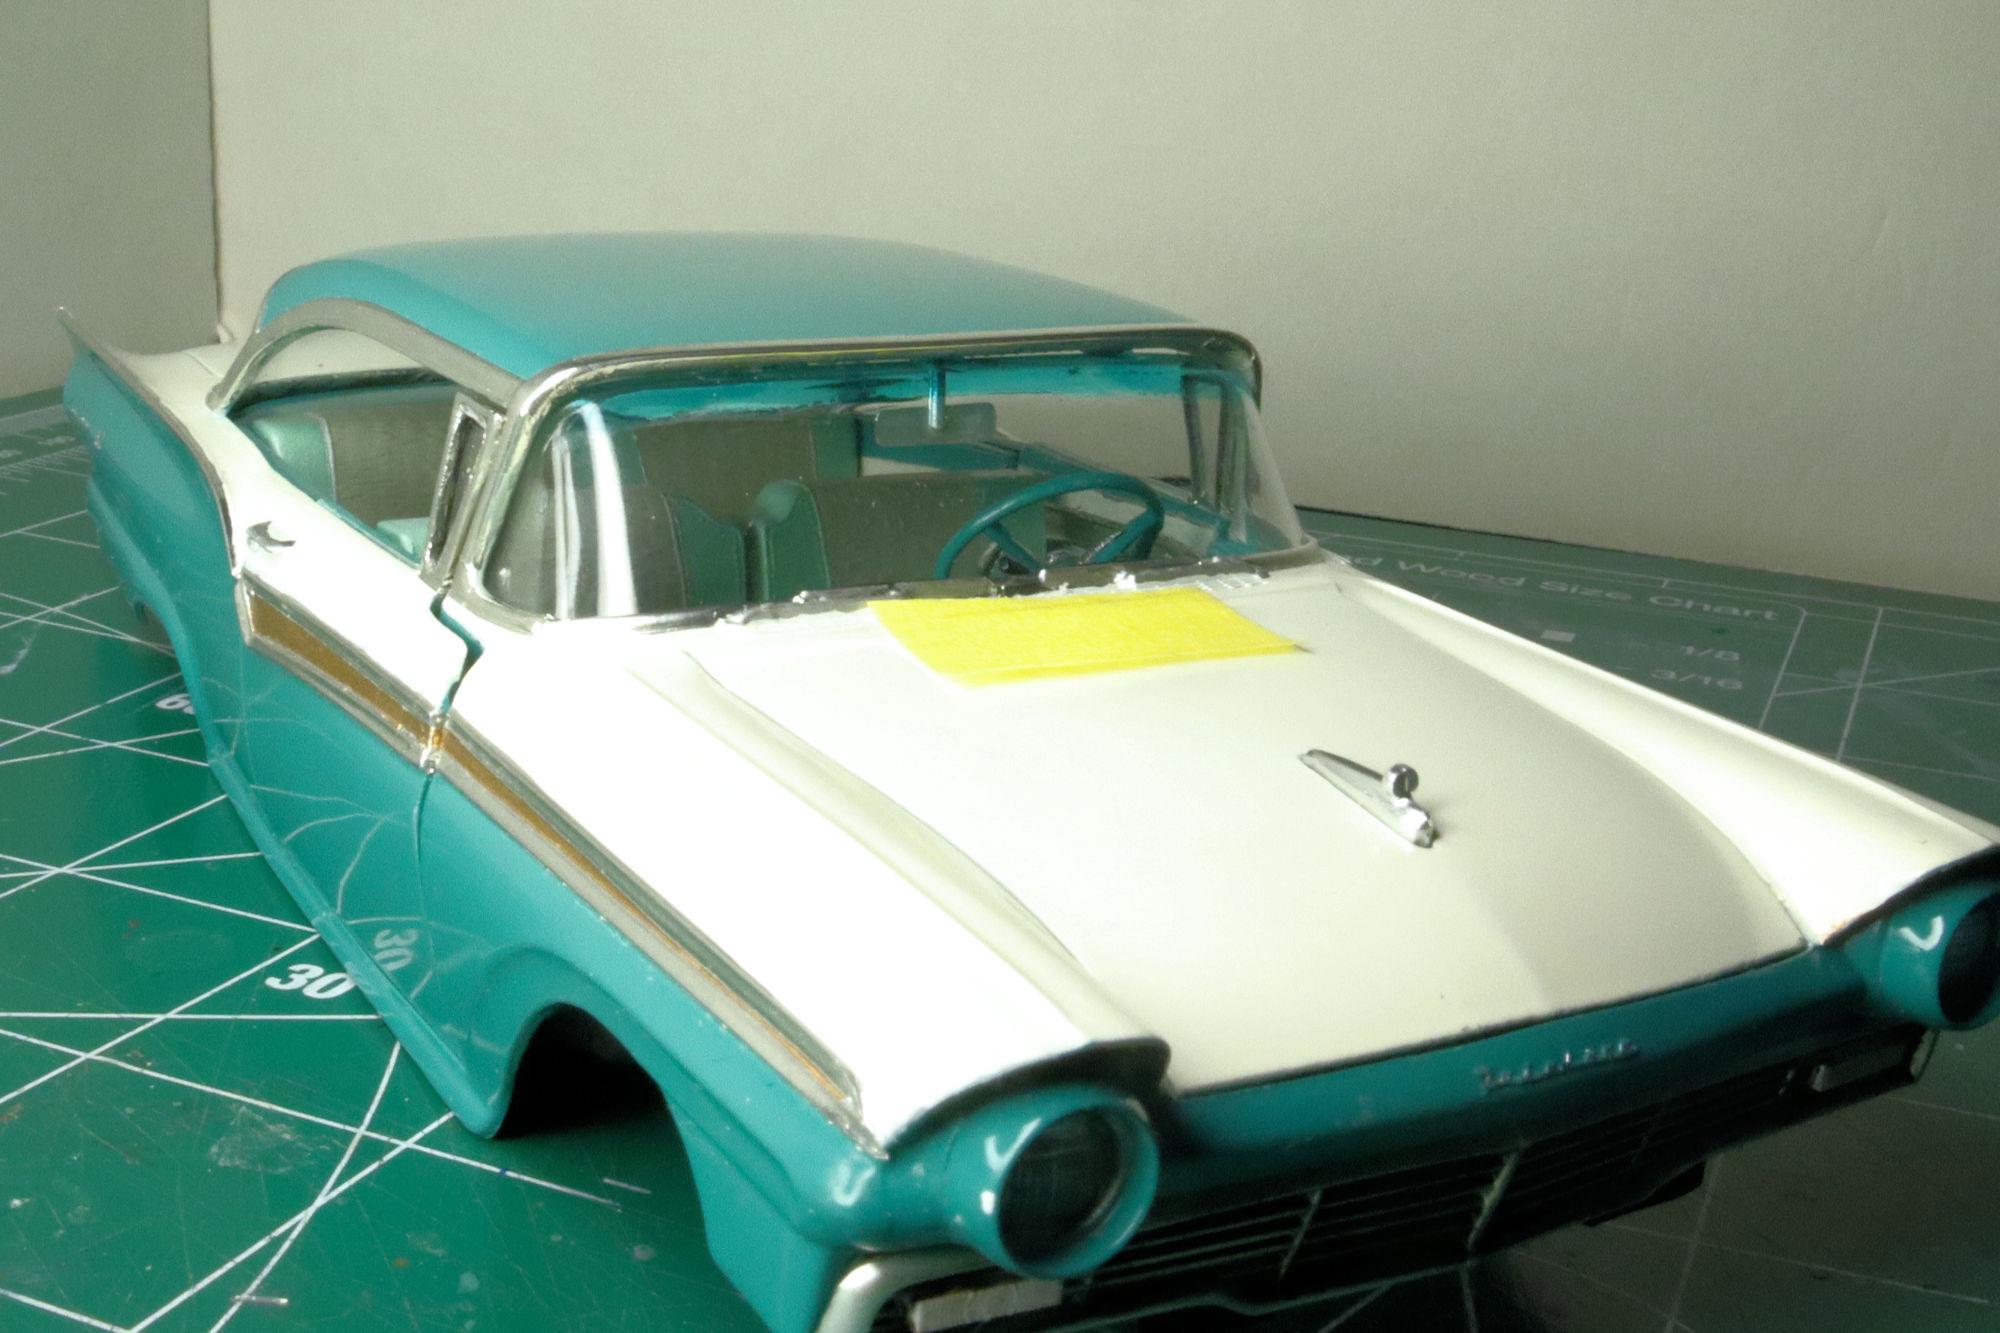
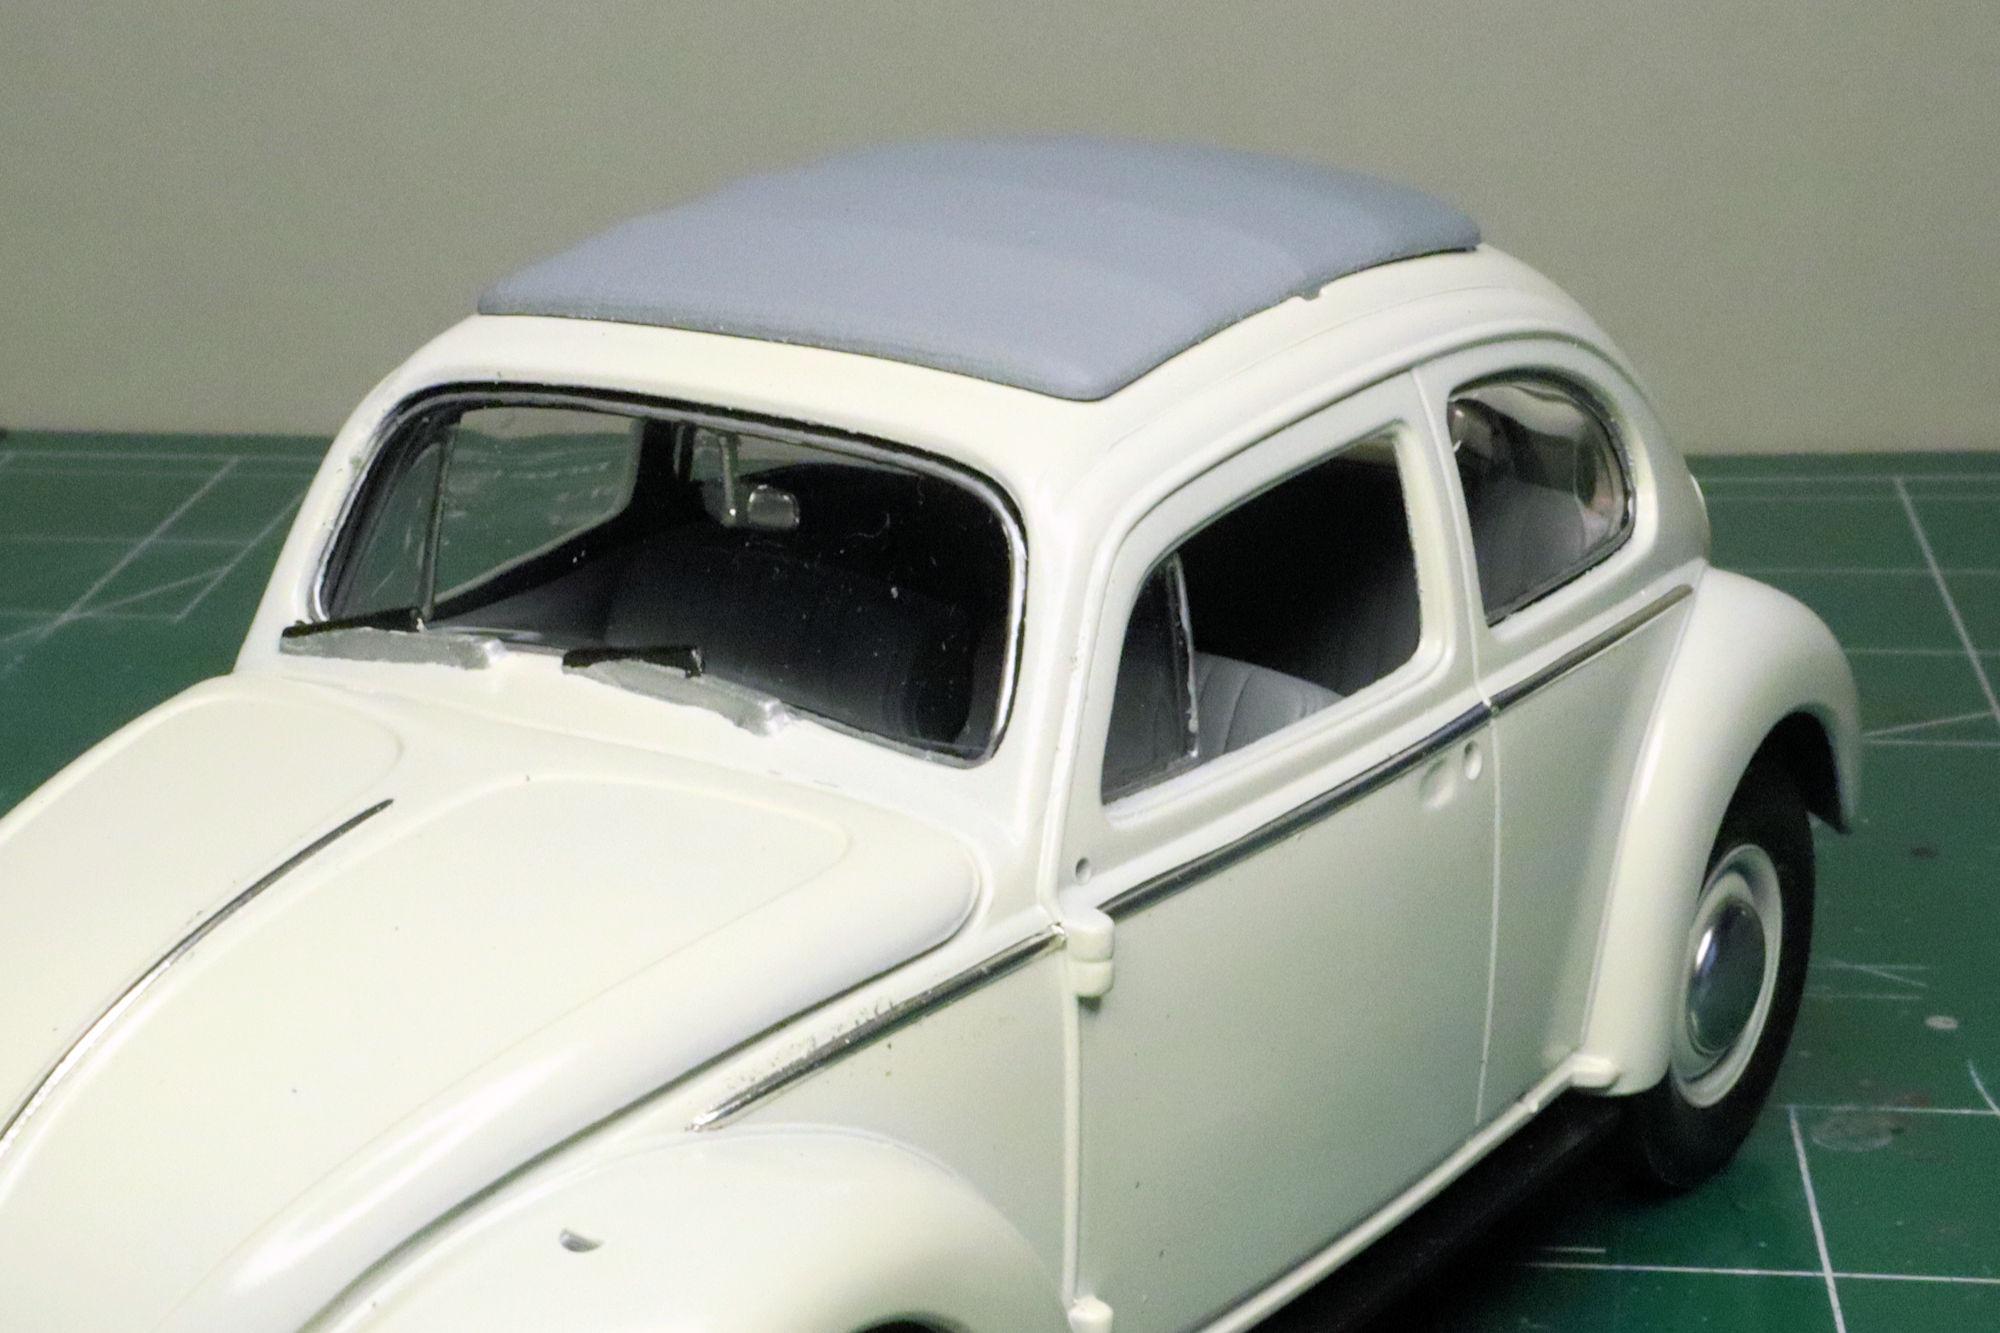
Herbie is a Volkswagen Type-1 Deluxe which is typical of the models exported to the United States where Herbie resides. One of the differences between Deluxe versions and standard European models is the inclusion of bright metal trim strips in the black rubber window gaskets. To replicate this feature I started by simulating the gaskets, brushing some flat black paint around the windows.
After some drying time and a little cleanup, I hit the raised bits around each window with a silver Sharpie.
I think it all worked out pretty well.
As always, thanks for taking the time to look and please feel free to comment if you so desire.
David G.
-
2
-
-
14 hours ago, milo1303s said:
Spreadsheets lol too funny !!!
I think you may be surprised to find out how many model builders actually use spreadsheets to track kits & parts & pieces.
An affinity for charts, graphs and statistics seems to go along with the model-builder mindset. For at least some of us anyway.
Yeah, it is kinda funny though.
Cheers,
David G.
-
22 hours ago, slusher said:
Beautiful foil work David,I could never foil one-off Fords I would have to paint it. Beautiful work David!
Thank you Carl. I've done chrome trim by painting, foiling and penning with Molotow. For me it's foil that's often the easiest, for now anyway. But it also depends on the application and practicality.
David G.
-
Beautiful outcome on the doors David!
I can certainly relate to the sense of relief you must have felt when all went according to plan.
Maybe I didn't read your post correctly but do you actually mean to cut a bit out of the luggage compartment to allow the suitcases to fit better? Would it not be easier to fabricate a new suitcase than alter the model?
David G.
-
Welcome back Rob!
I always enjoy following your builds and I'm sure that this one will be no exception.
David G.
-
1
-
-
Nice looking metal effects on the exhaust and underpans.
David G.
-
I recently acquired this kit at the most recent Desert Scale Classic swap meet and I'm planning to build it. My pre-build research turned up your WIP on the very same kit!
An excellent build Tim!
I hope you don't mind my using your photos as a resource.
Cheers,
David G.
-
22 hours ago, customline said:
Oh she's a beauty, Dave. And yeah, when the Garage Guy speaks, people listen 😶. I do.
I'm happy to hear of your BMF experience; I ordered up two of the 001s from them on your say-so. Can't wait to take it for a spin. They had some problems with their vendors, as I recall, some time ago and the "Ultra Bright" was not for anyone with patience like mine 🥴.
Thank you Jim.
That's great, I hope your BMF batch works as well for you as does this does for me.
21 hours ago, Nacho Z said:It has been an enjoyable Sunday morning. Piping hot coffee, fresh baked, just out of the oven, chocolate chip cookies and a nice 6 page read of a build thread on a gorgeous ‘57 Ford. Great work, David! I’m glad that I took the time to check out this thread.
Thank you John, I'm glad you enjoyed the thread and the build. I'm also happy to know that my work was a part of your pleasant Sunday morning.
Thanks for sharing that.
David G.
-
31 minutes ago, Anglia105E said:
Your compliments are well received here at the coachbuilders' . . . There was probably more work required for those door pillars / posts than I had anticipated, but I feel they have turned out quite well . . . I think the suitcases should be more interesting than simply an empty luggage compartment.
When you refer to Mr Webb's ' vanity plates ' did you mean ' registration number plates? ' . . . You were probably thinking of the vanity mirrors, which I shall be scratch building also . . .
David
Yes, I did mean number plates.
") We call them license plates, or just "plates" here in the States. The custom personalized ones are usually called "vanity plates".
We call them license plates, or just "plates" here in the States. The custom personalized ones are usually called "vanity plates".
"Brittan and America, two nations divided by a common language"

-George Bernard Shaw ( I believe)
...wait... In England mirrors are referred to as "plates"? 😮
-D-
-
23 hours ago, LennyB said:
Doing the inventory is a bit of a slippery slope as it brings back a lot of ideas and I have to refrain from diving into too many of them at once. Not sure if that is a good problem or a bad one.,😉
Yeah, that' my main concern Len.
Once I start to inventory, the complete kits are no problem. But the partial kits? The bagged kits?
The parts box?!
Arrrgh! How finely do I want to chop the onion?
23 hours ago, LennyB said:So I now have over a dozen Sterilite boxes with potential projects piling up around me.😀
Wha?...
Do you mean like these?
I keep meaning to pare that stack down a little ...but to do that I'd have to make an inventory to know what I have.
David G.
-
21 hours ago, ATHU said:
Looks absolutely amazing, well done David!!
Thank you very much Anders!
David G.
-
Hello Everybody!
As I mentioned earlier, my production department and photography department have caught up with each other. Which means for this project I have to build then shoot and edit before I can post the next update. The good news is that over the past couple of days, I was able to do just that.
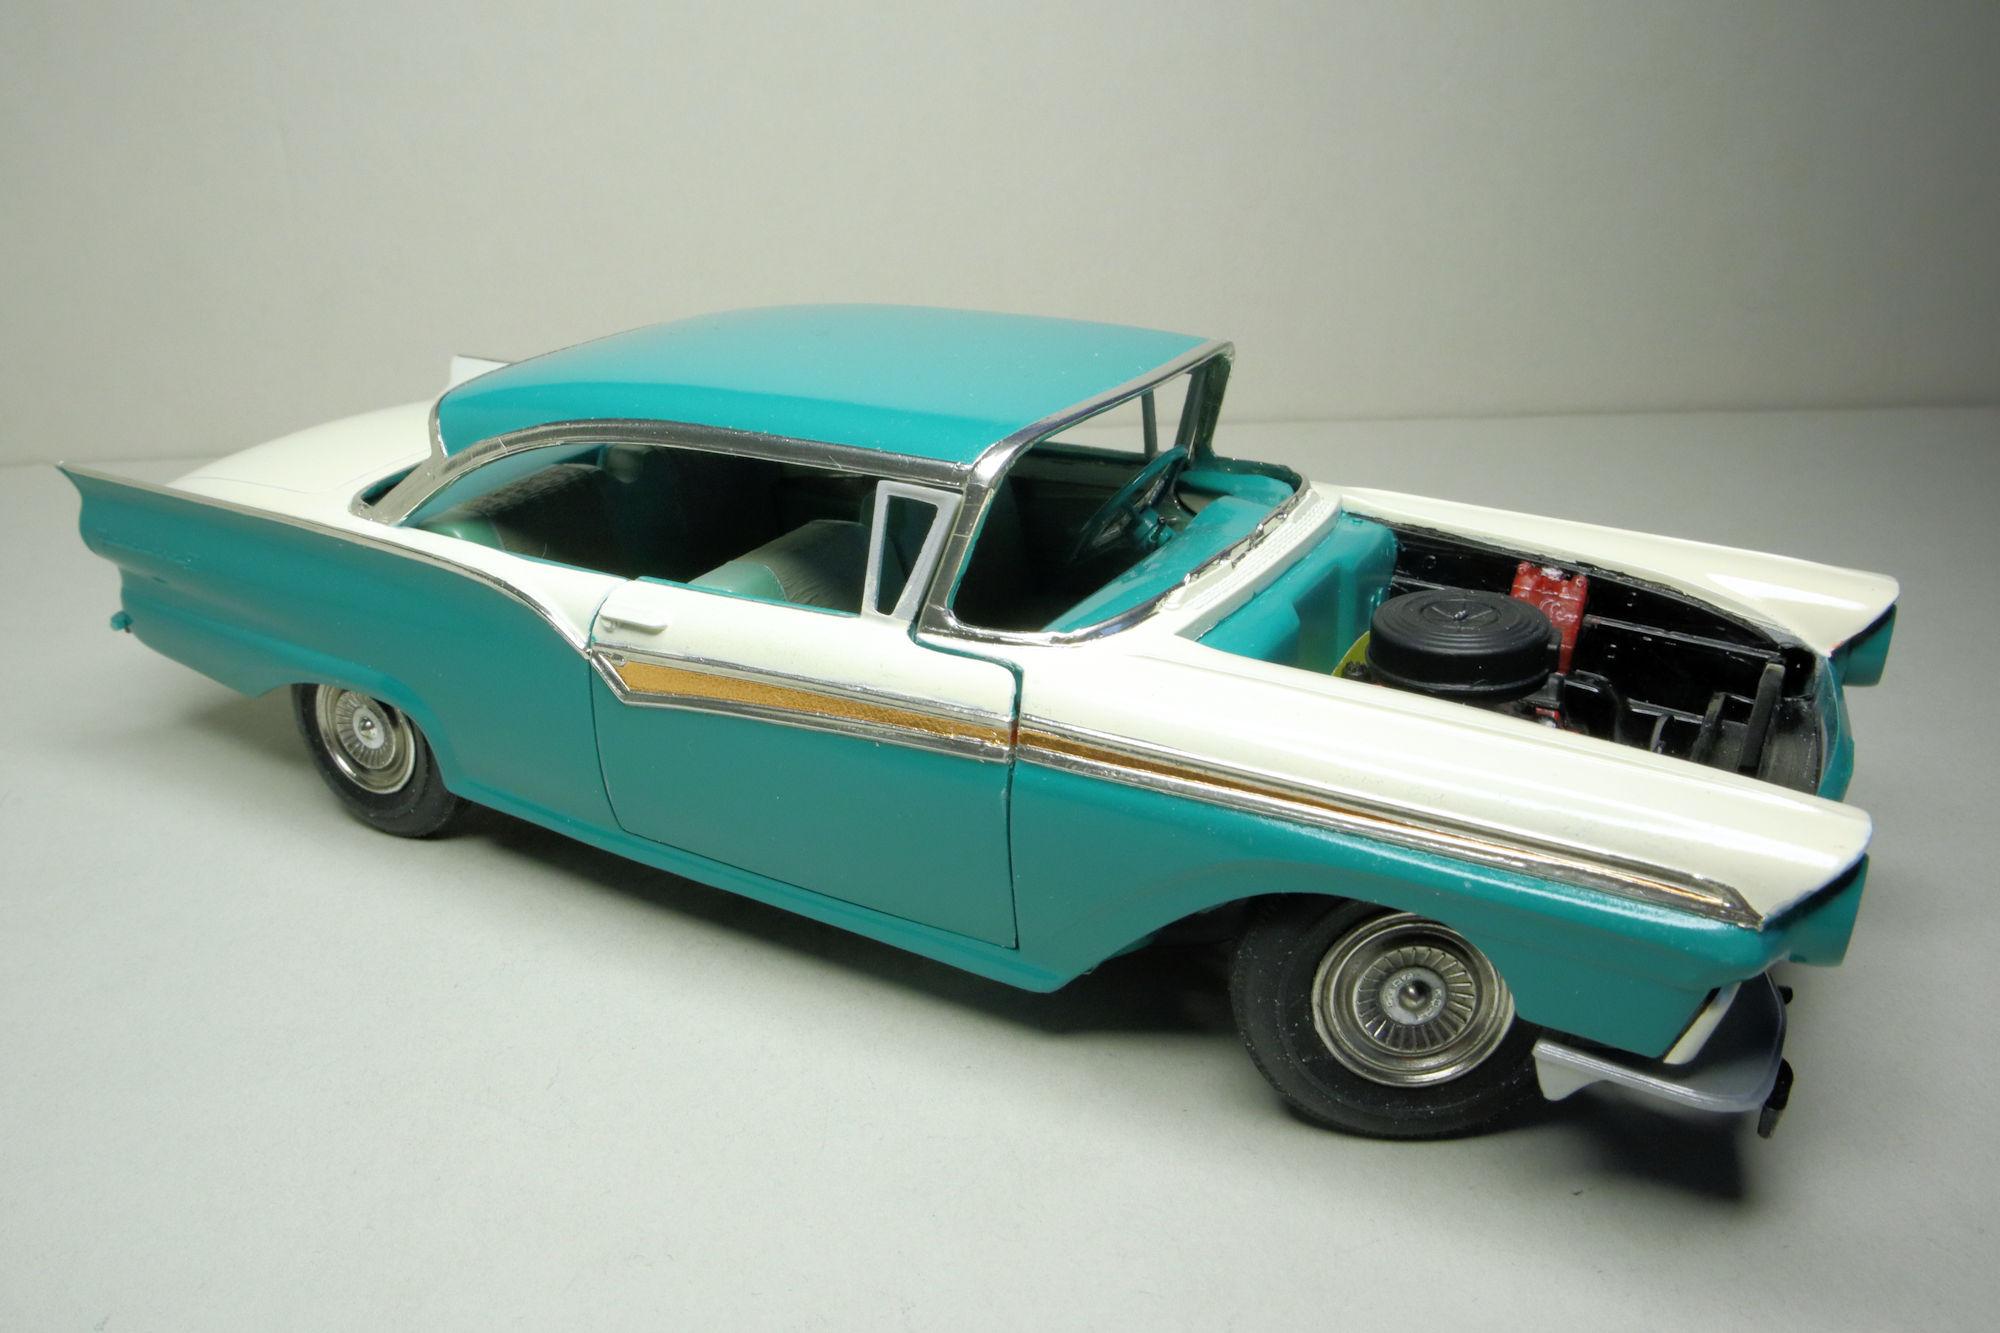
So here's the update.
It took two sessions but the foil is done! Well, all except for the vent windows on the doors. I'll get those when I finish up the doors right before they're permanently mounted.
I have to say that the most recent batch of BMF is their best yet. The batch I received in 2020 was just rubbish. The worst problem among the several that it had was the lack of a good adhesive. I ended up using diluted PVA to mount the foil to the surface. Which as one might imagine resulted in less than optimal foil deployment.
I'm glad to find that Bare Metal Foil Company's quality level is back and better than ever!
As always, thanks for taking the time to look and please feel free to comment.
David G.
-
5
-
-
9 hours ago, Bronzekeg said:
loving this build!!
Thanks Ken!
22 hours ago, Ace-Garageguy said:Progressing nicely...
")
Thank you Bill.
If it can earn a comment from you, it must be good! Thanks!
David G.
-
I find those door posts especially impressive David. The finish work looks great! I really like your idea to build a couple of suitcases.
Also, that's a charming little background story you've come up with to explain Mr. Webb's vanity plates.
David G.
-
The paint looks great Ken!
I also like your shop diorama.
David G.
-
1
-


‘53 Studebaker - Project "Stoo Short"
in Model Cars
Posted · Edited by David G.
typo
Hi Oliver, I followed your WIP thread for this build and watched as you pulled it all together so I understand some of the challenged it posed. I find your body sculpting skills impressive.
I think you captured the illustration quite well, excellent work!
David G.