

Jurva
-
Posts
229 -
Joined
-
Last visited
Content Type
Profiles
Forums
Events
Gallery
Posts posted by Jurva
-
-
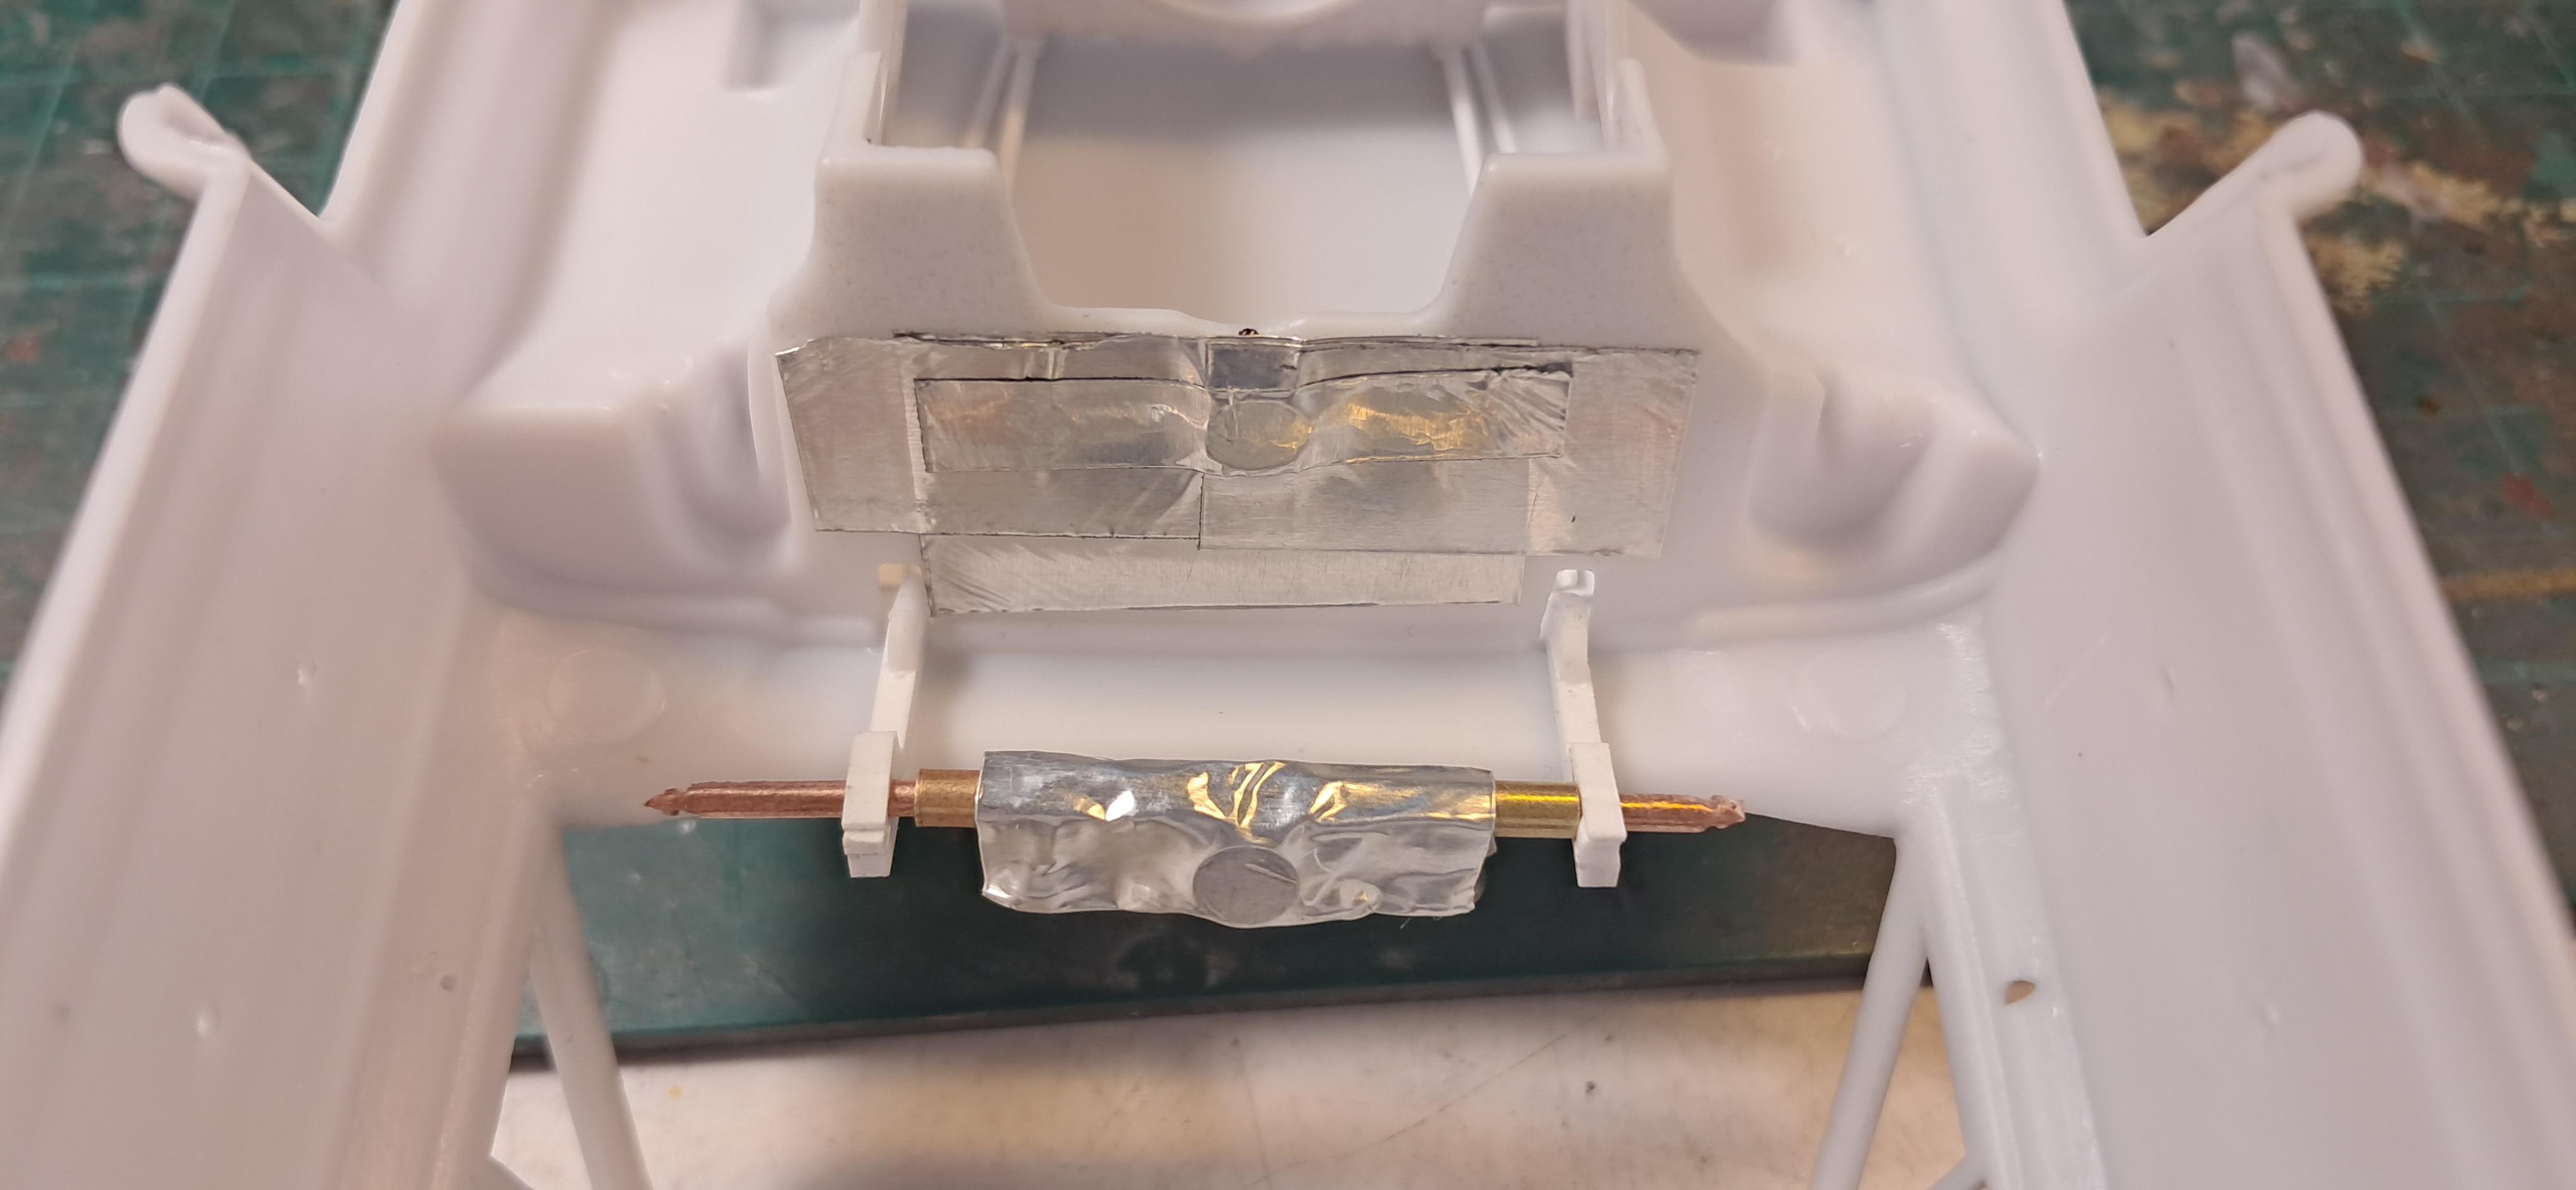
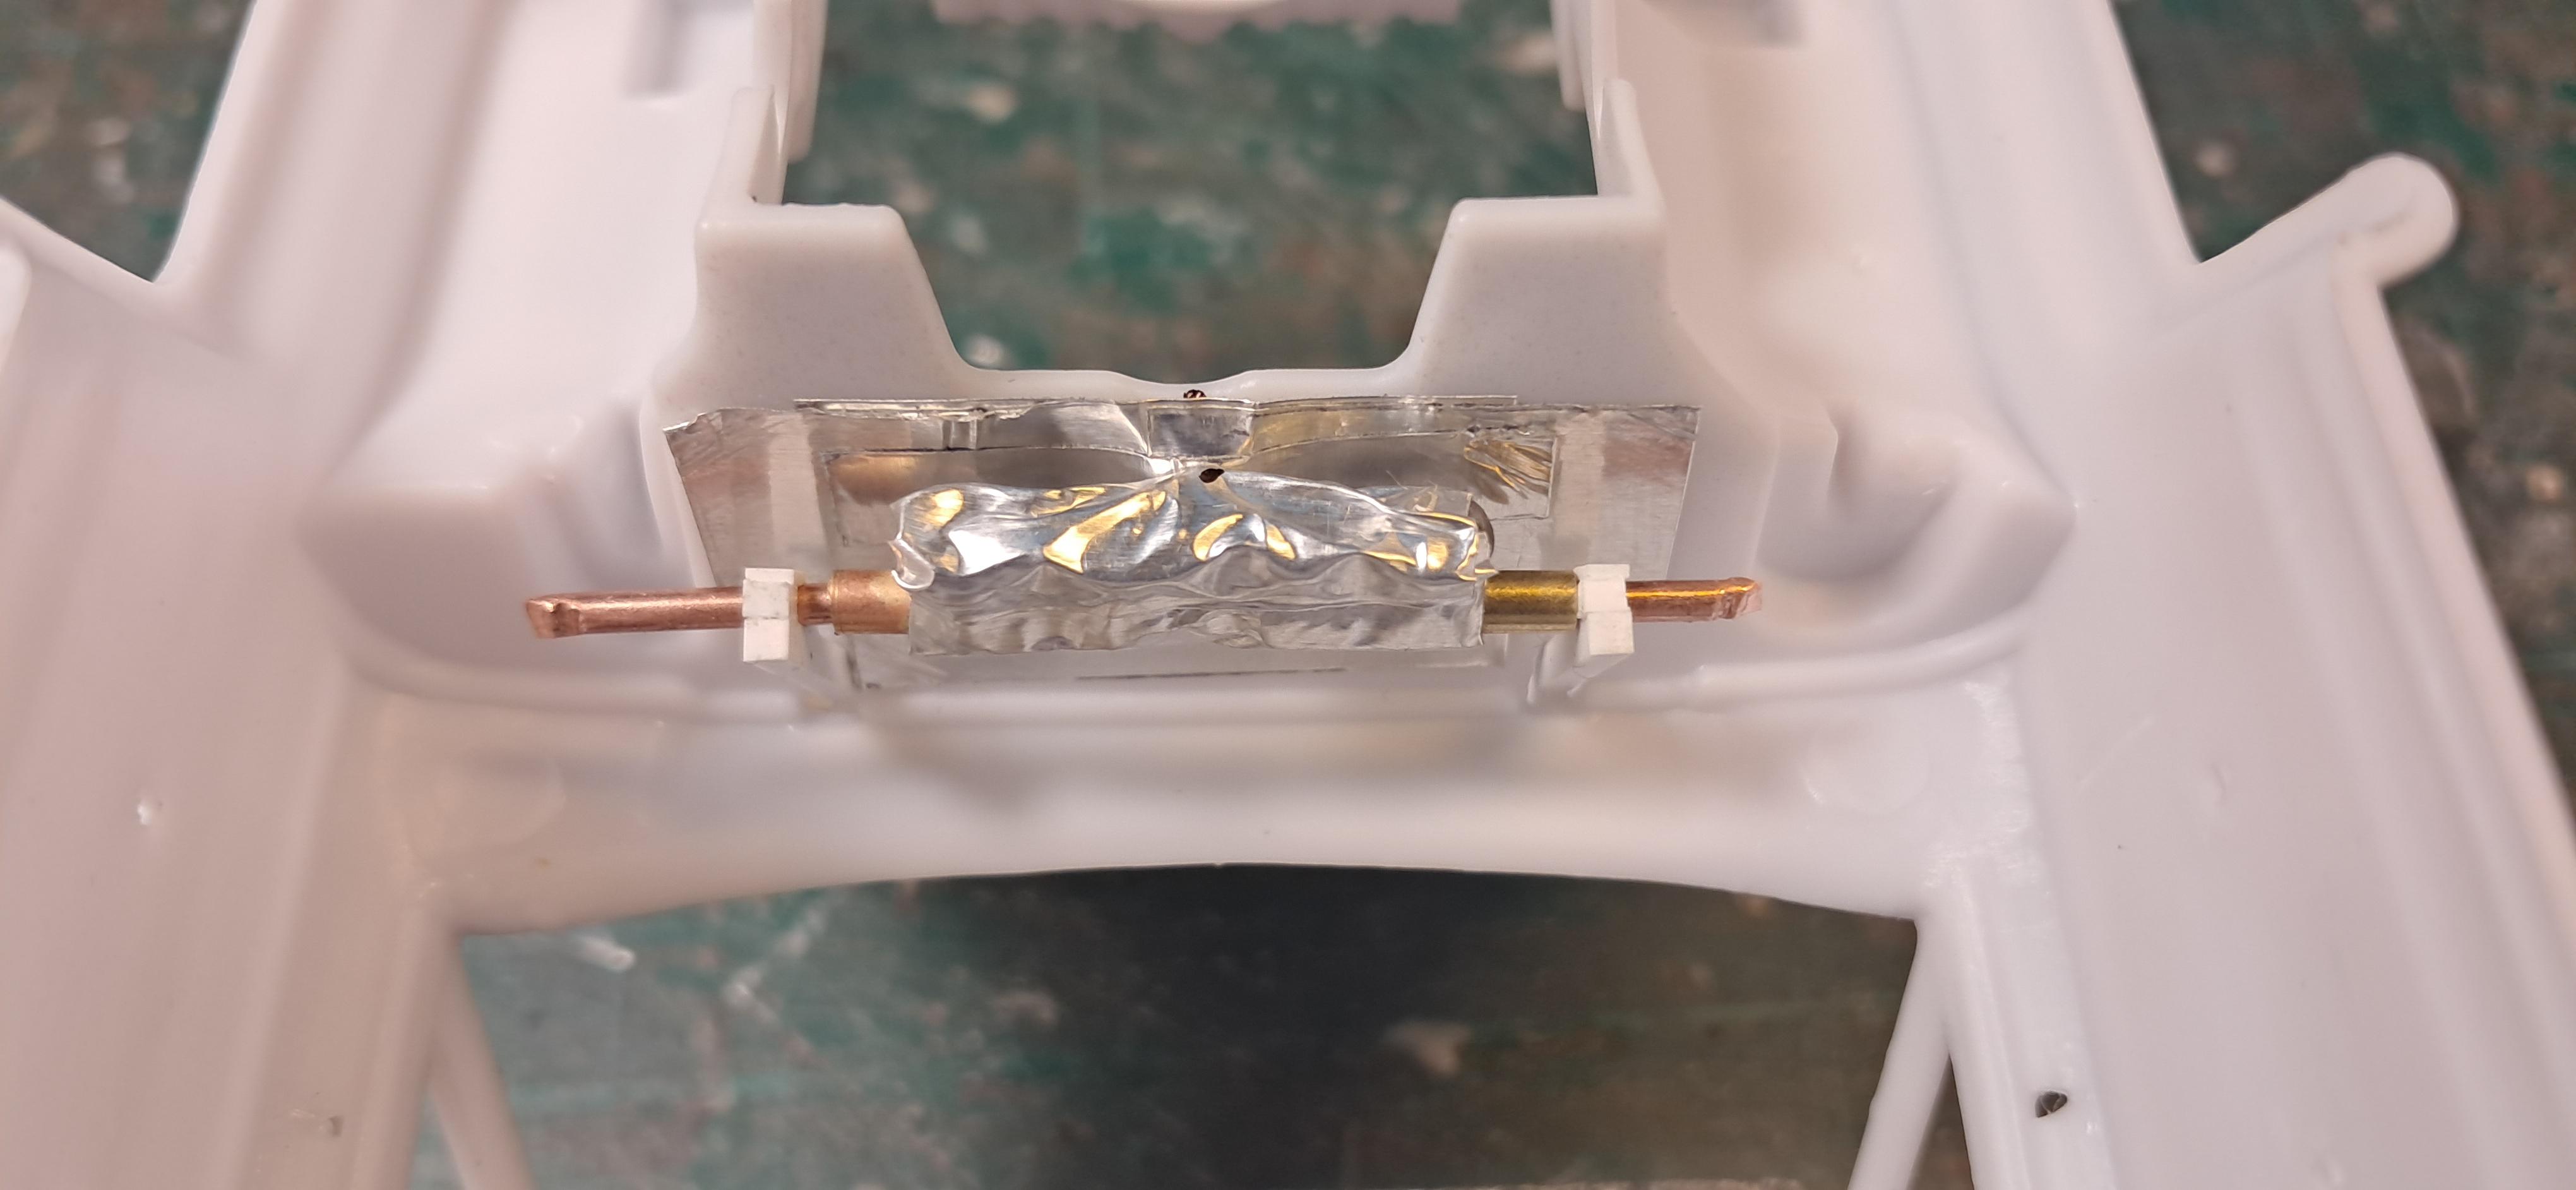
I hope these pictures show how the magnets work. Hood hinges were lengthened. This mechanism is under the dash.

-
 2
2
-
 2
2
-
-
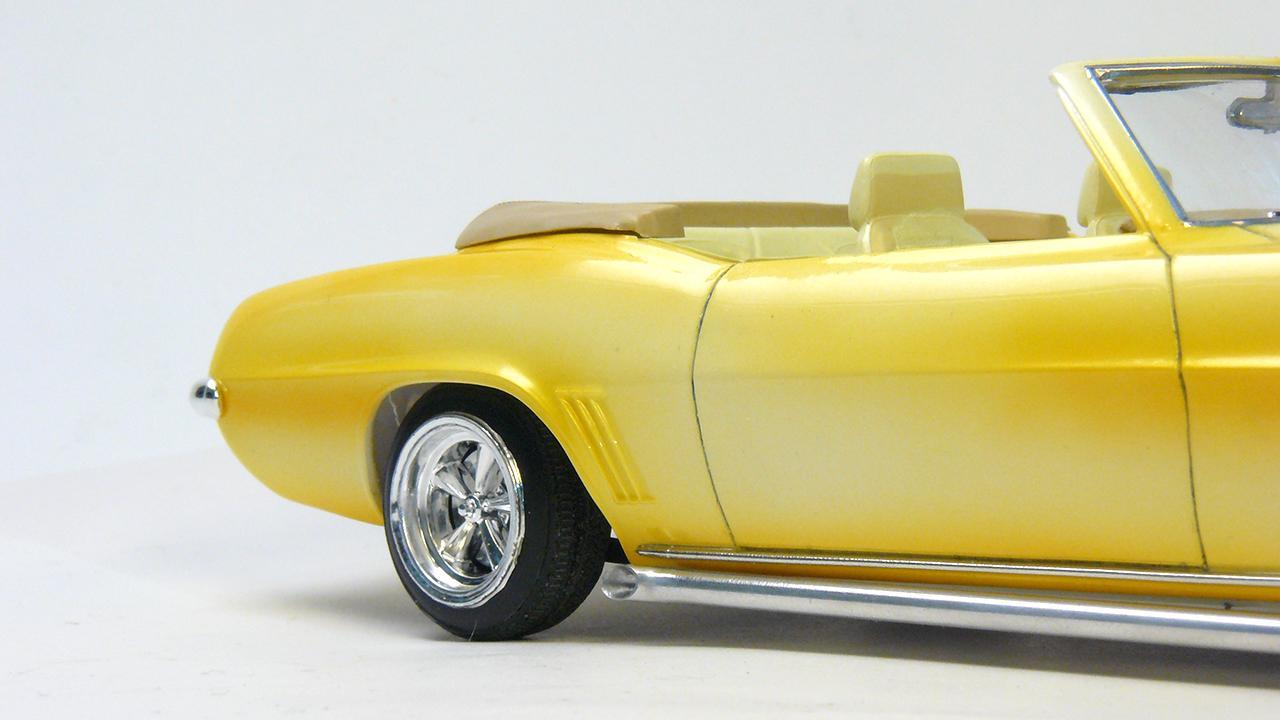
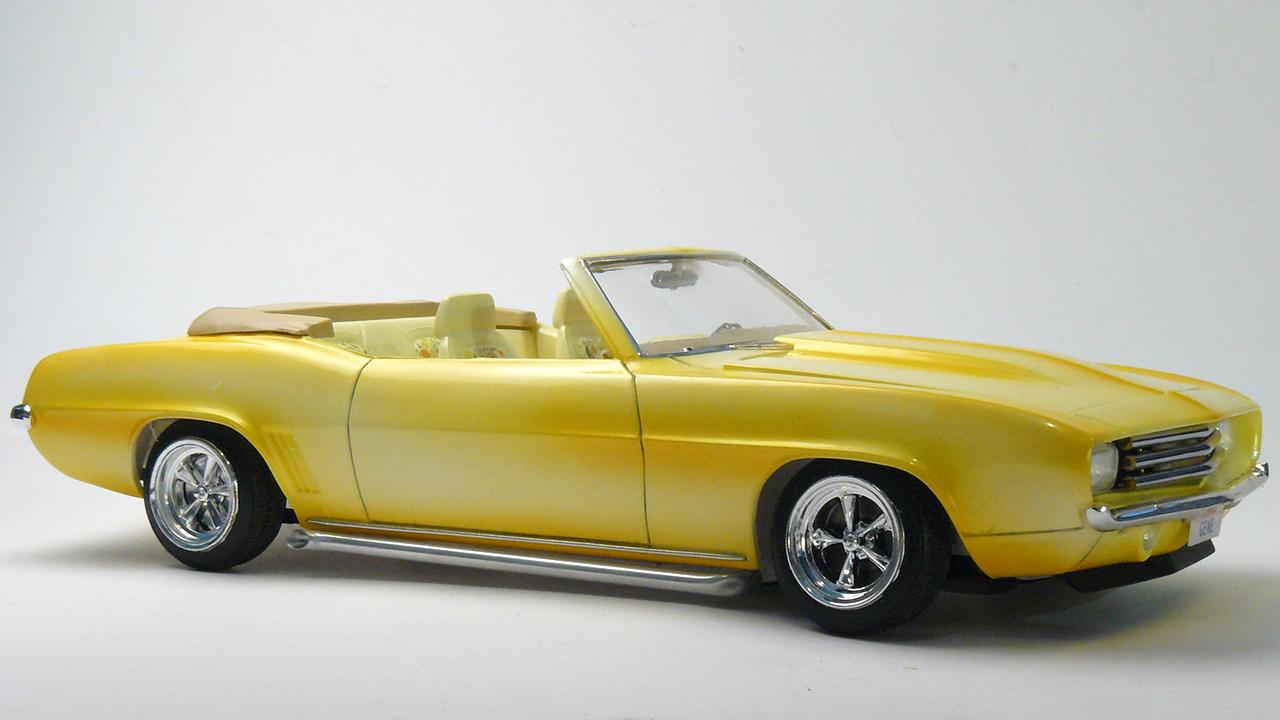
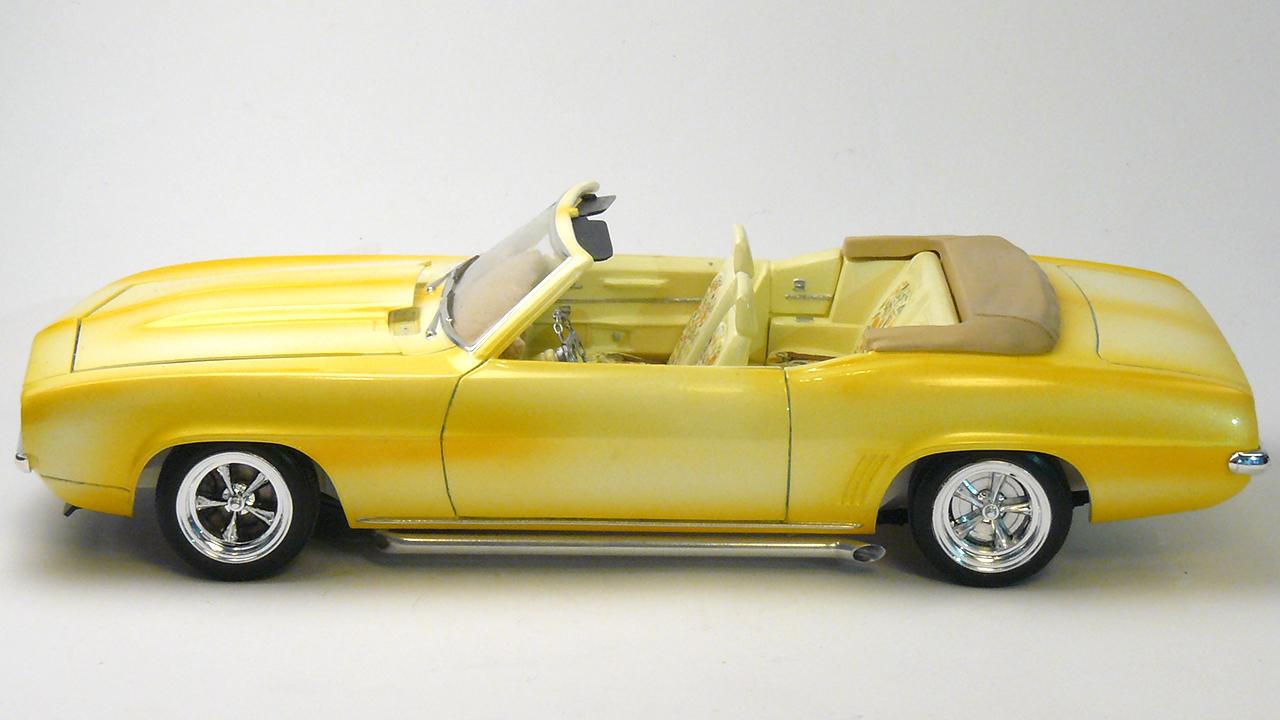
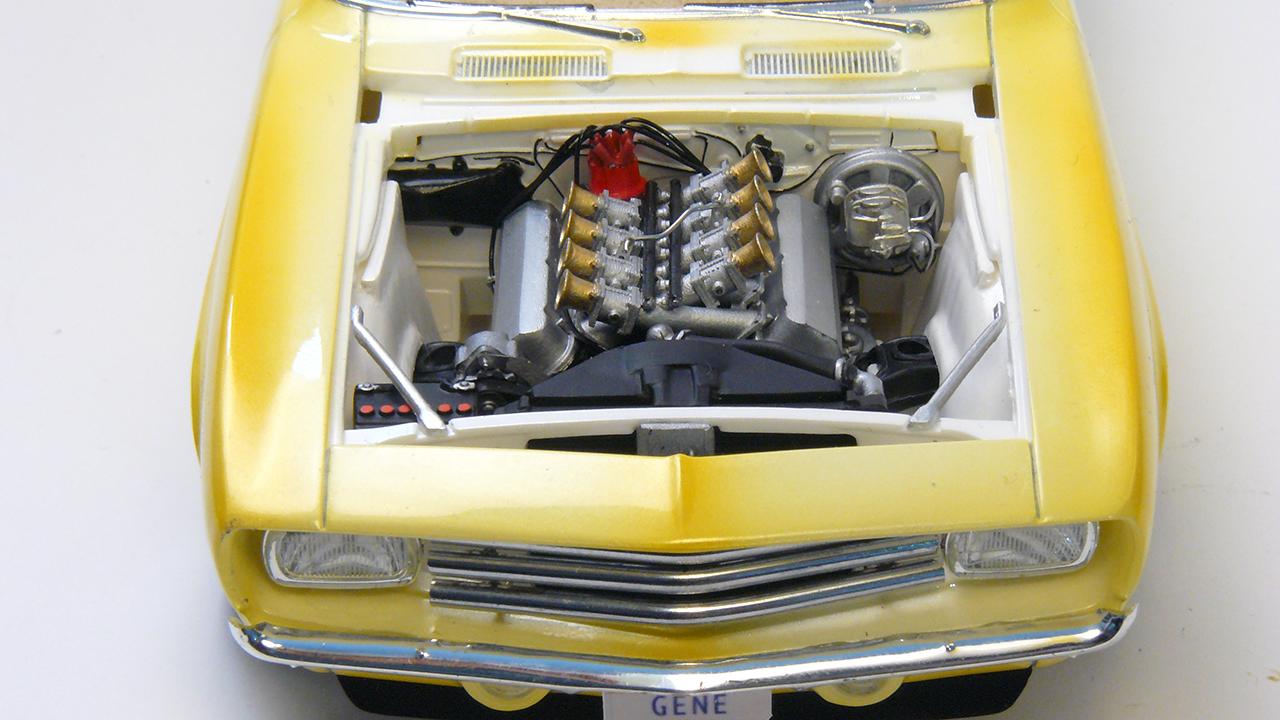
Revell 1969 Camaro Custom
- Custom mask from chromed brass rods and rectangular lights.
- Engine got 3D printed intake manifold and resin valve covers.
- Real chain steering wheel. Washi tape used for flower pattern.
- Aluminium side pipes.
-
24
-
-
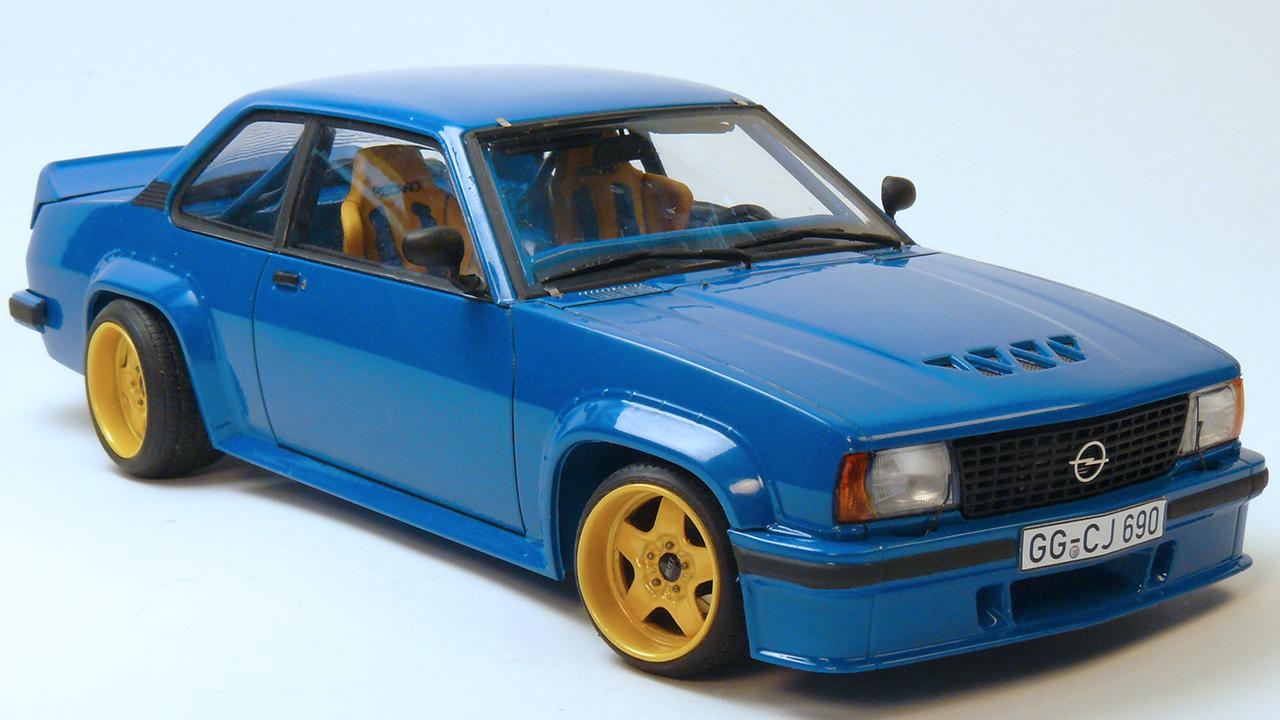
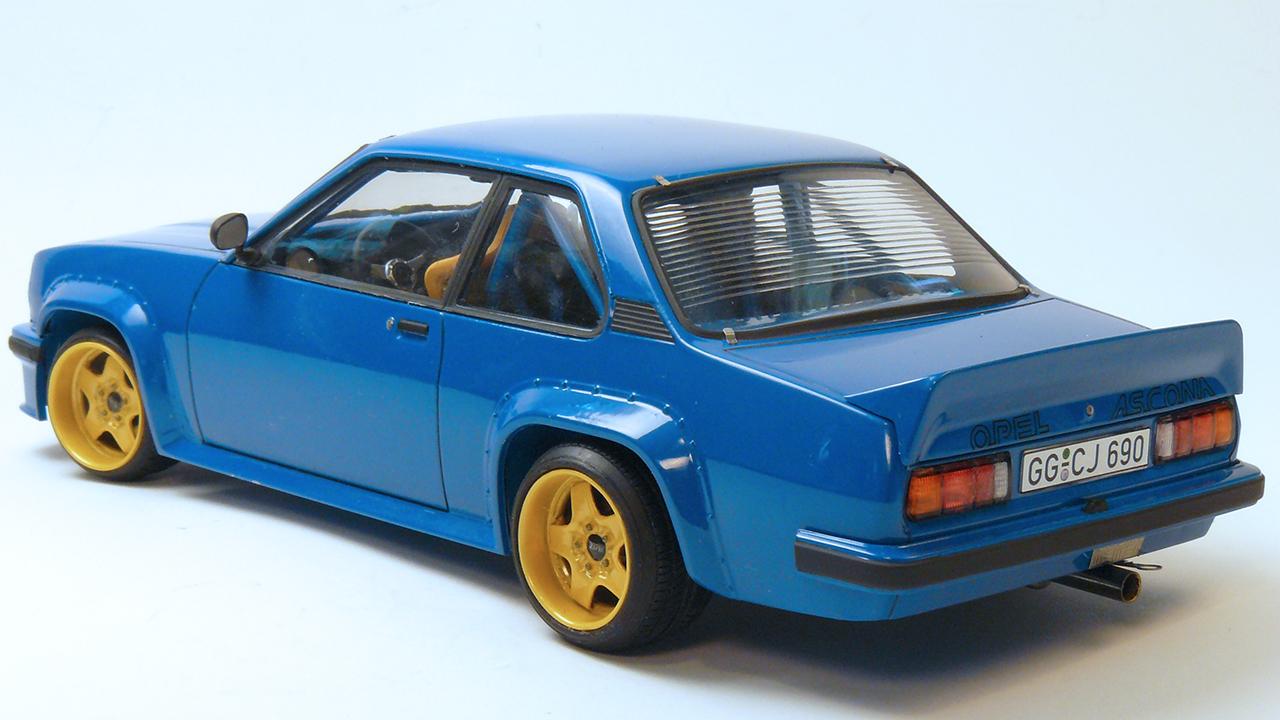
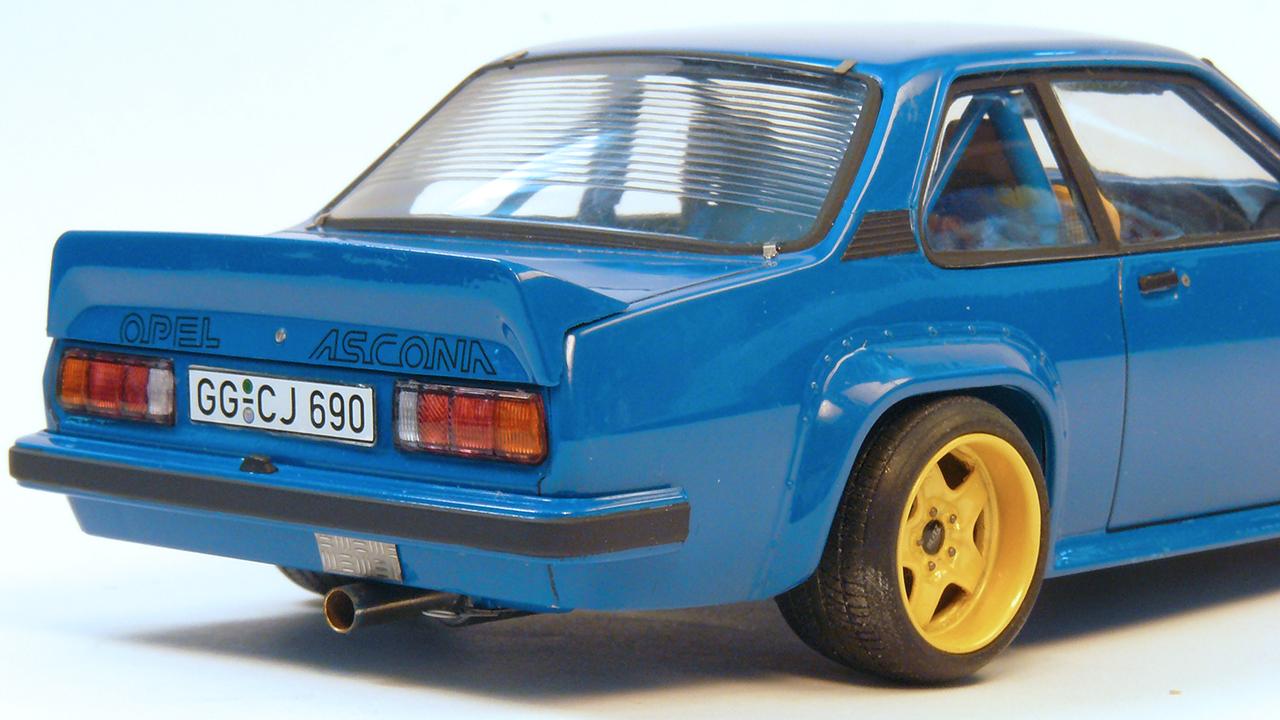
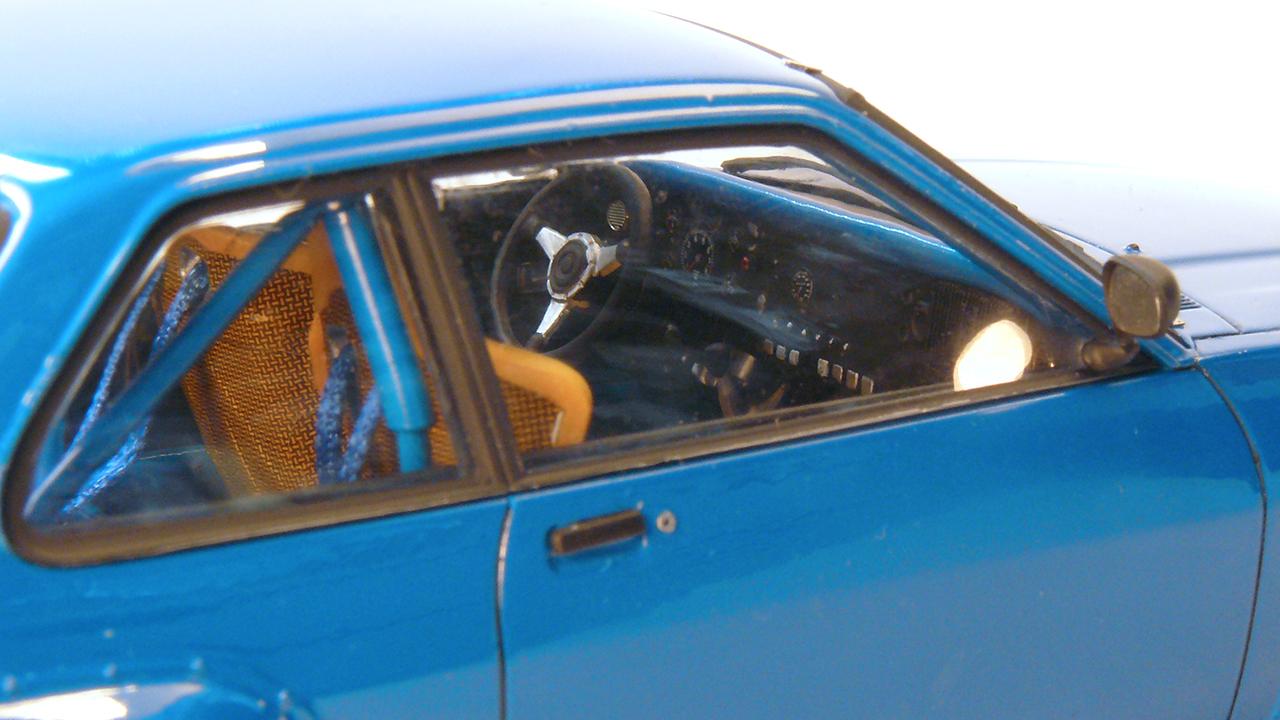
- Made to look more street version.
- Wheels: USCP Opel steel wheels.
- Self mixed colour and 2K clear.
-
12
-
-
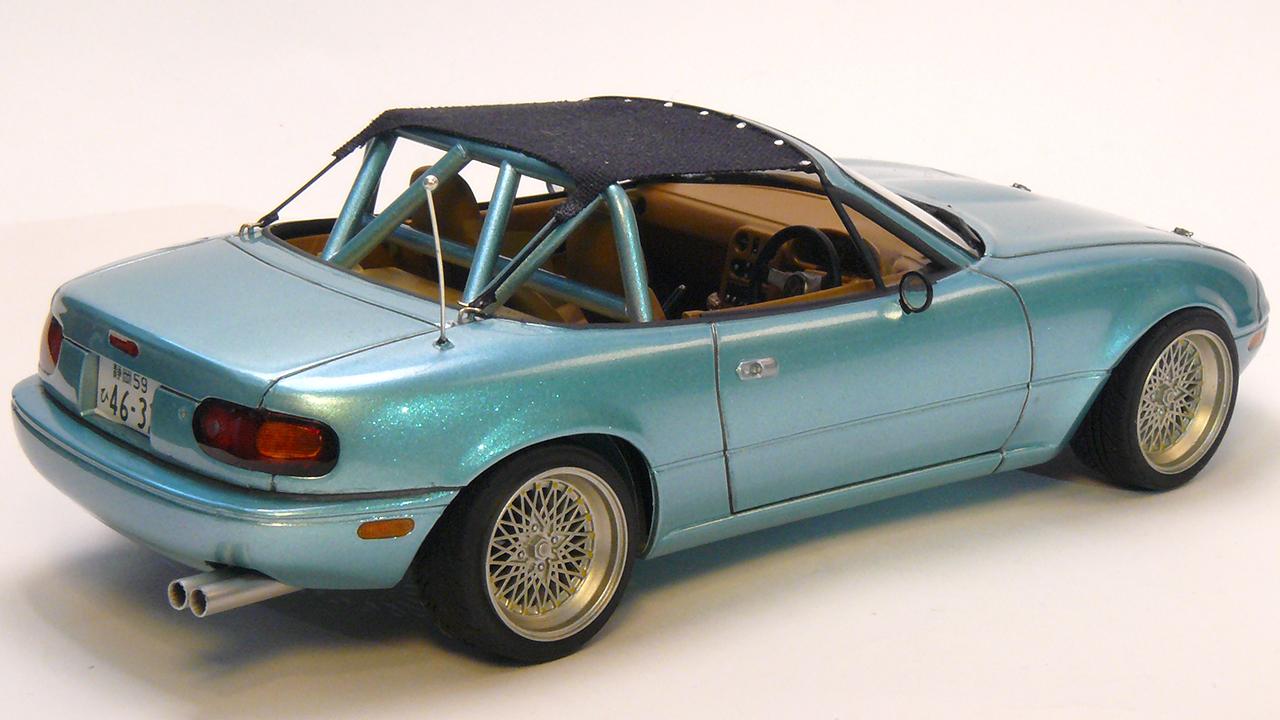
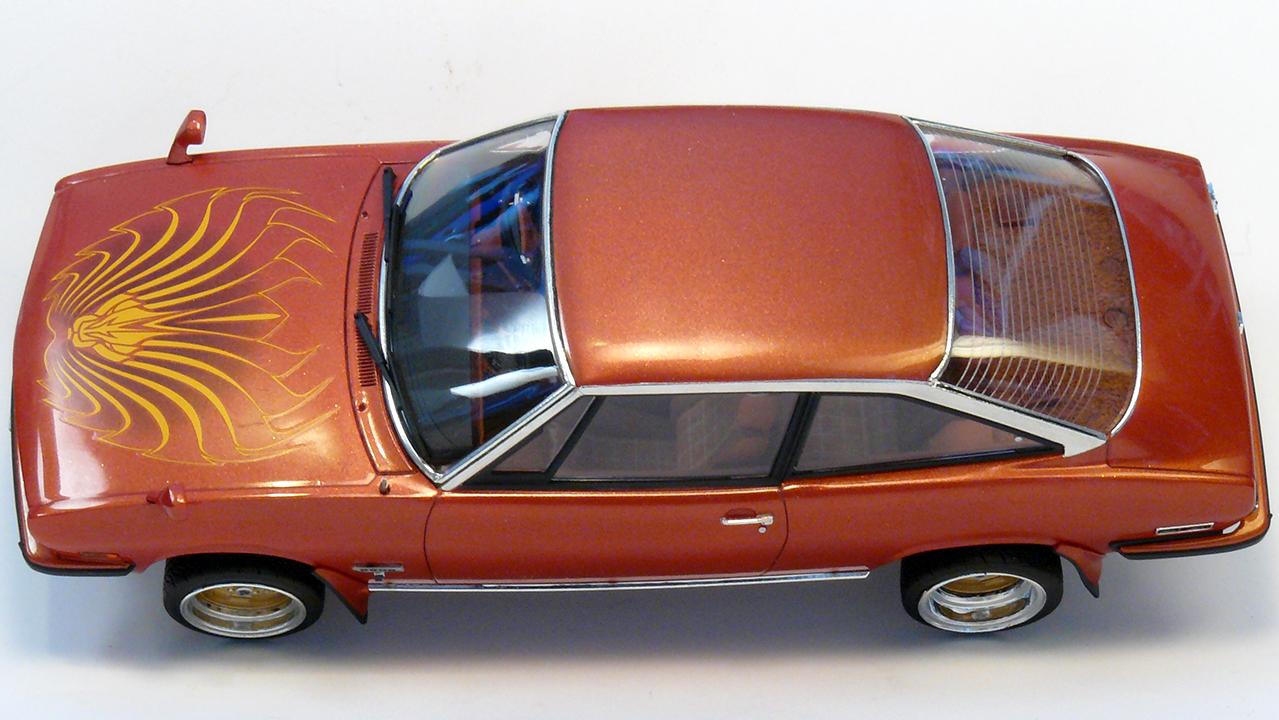
- Wheels changed.
- Modified exhaust.
- Made the roll hoop and bikini-top roof.
-
7
-
-
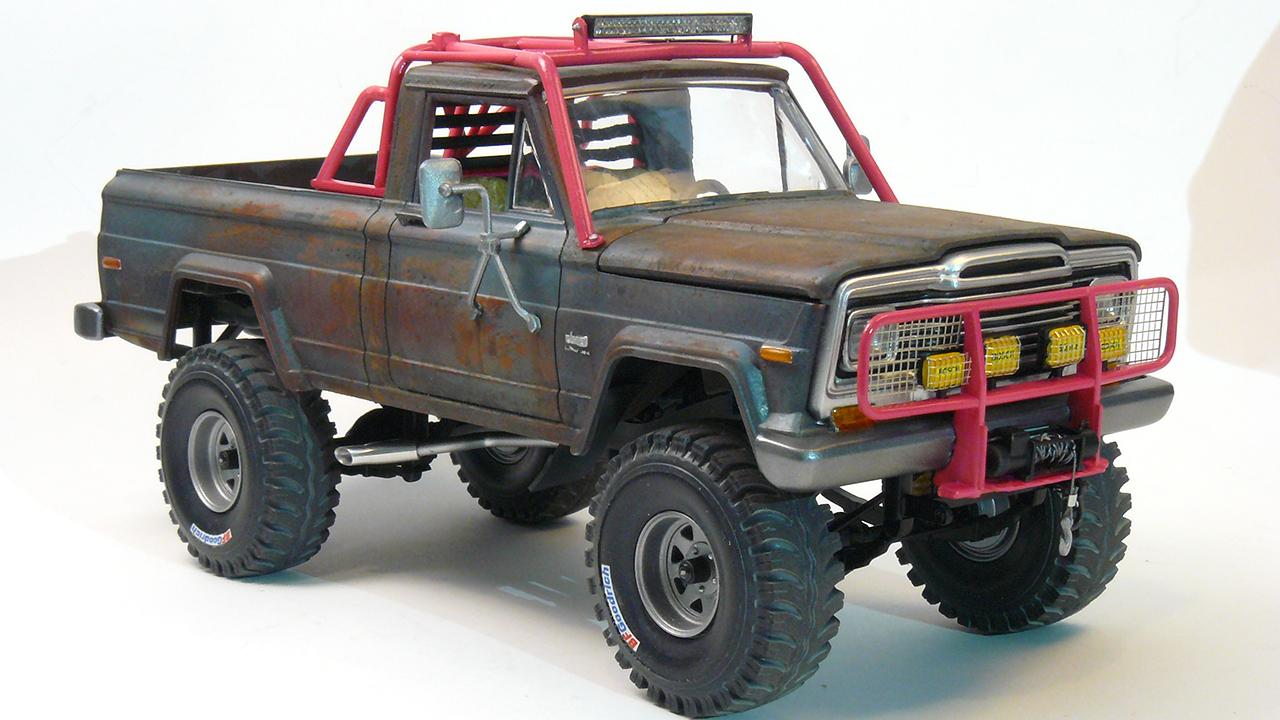
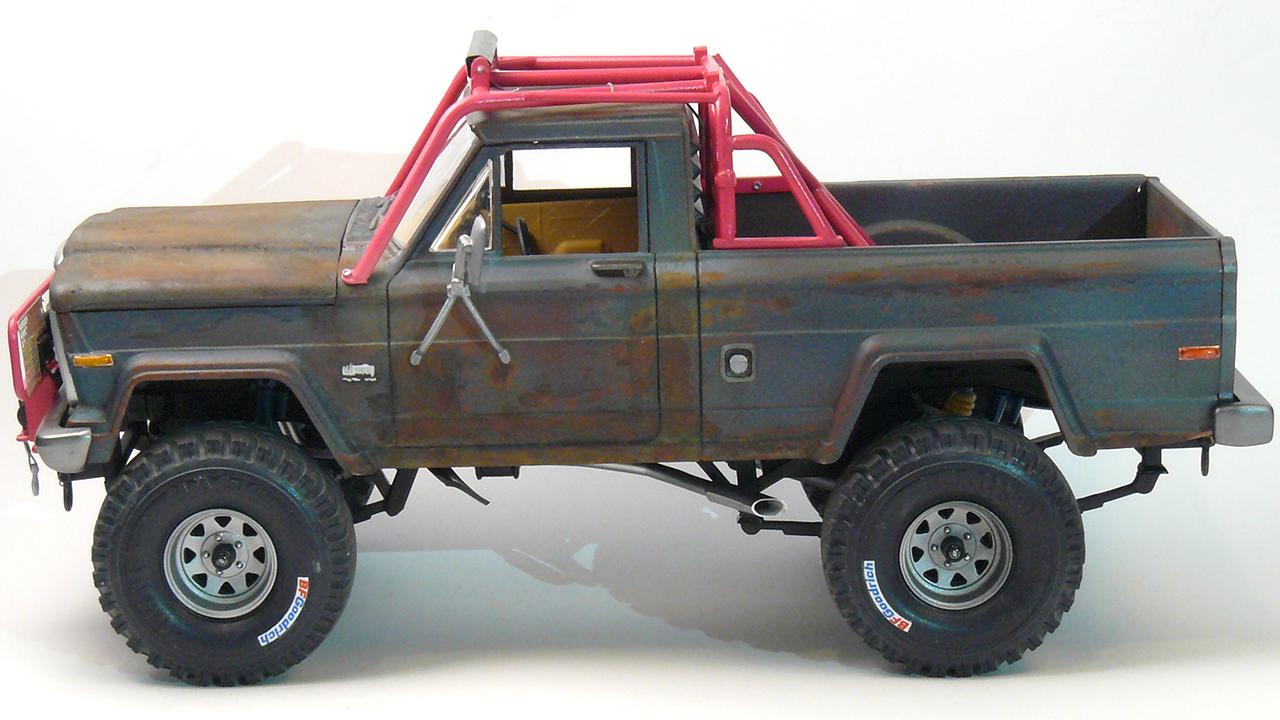
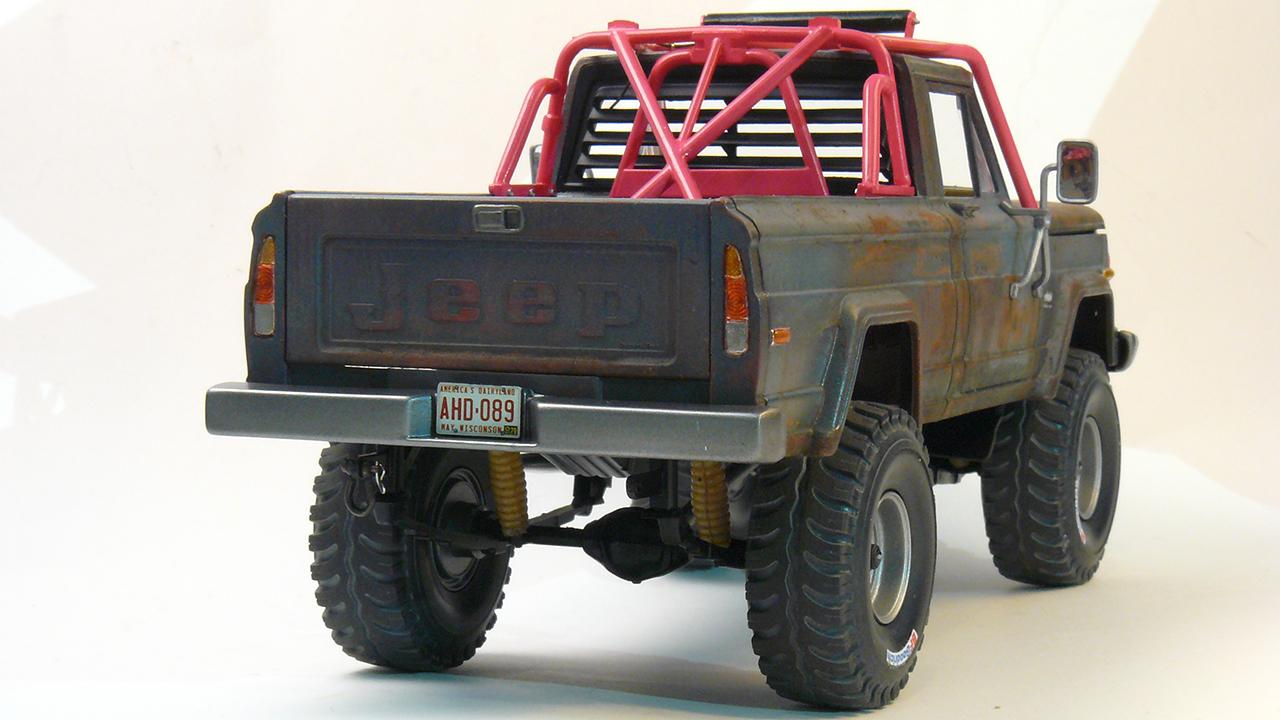
- Suspension raised for the clearance. Bigger off-road wheels.
- Kits roll hoop modified to cover the cabin.
- Added roof led light and winch.
- Magnets used for the hood mechanism.
-
11
-
-
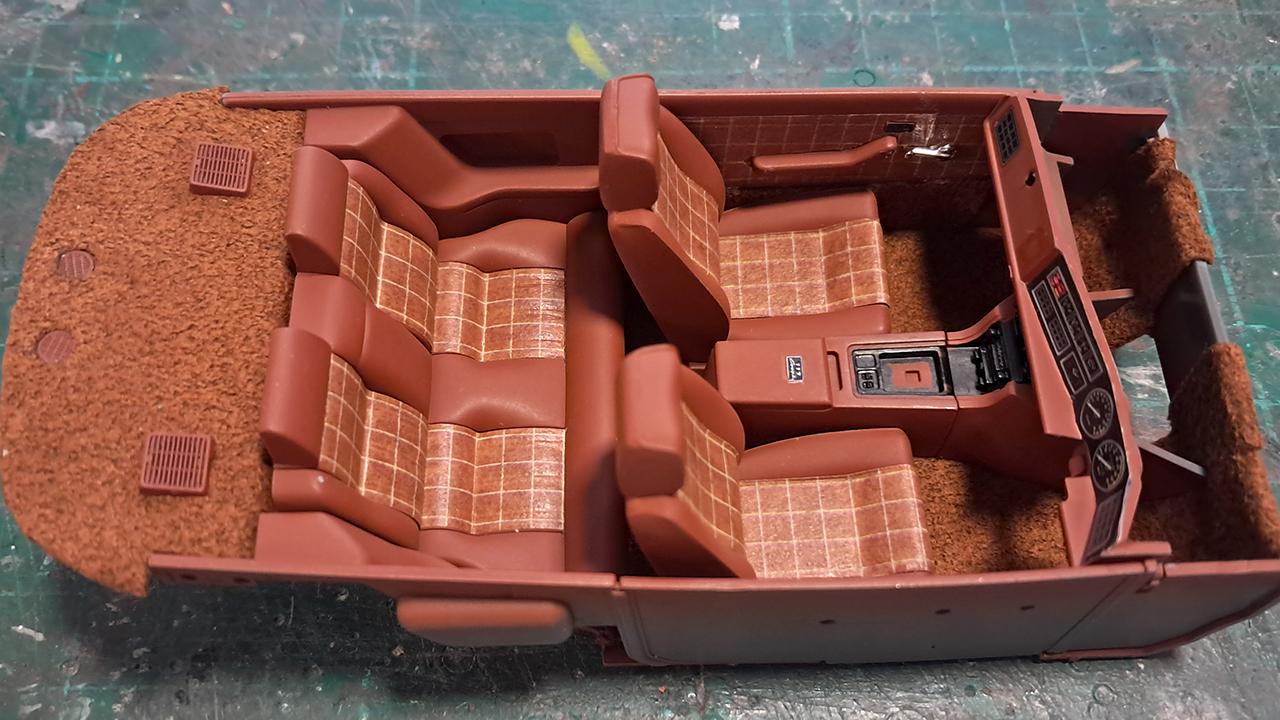
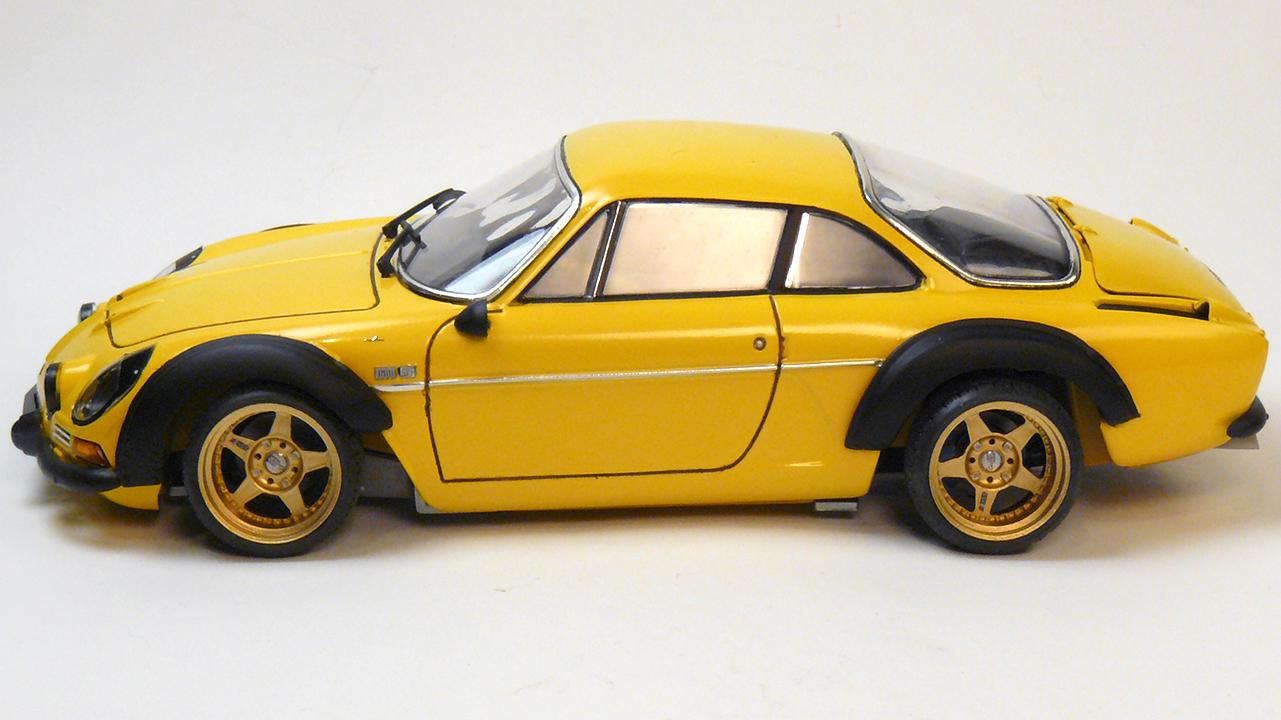
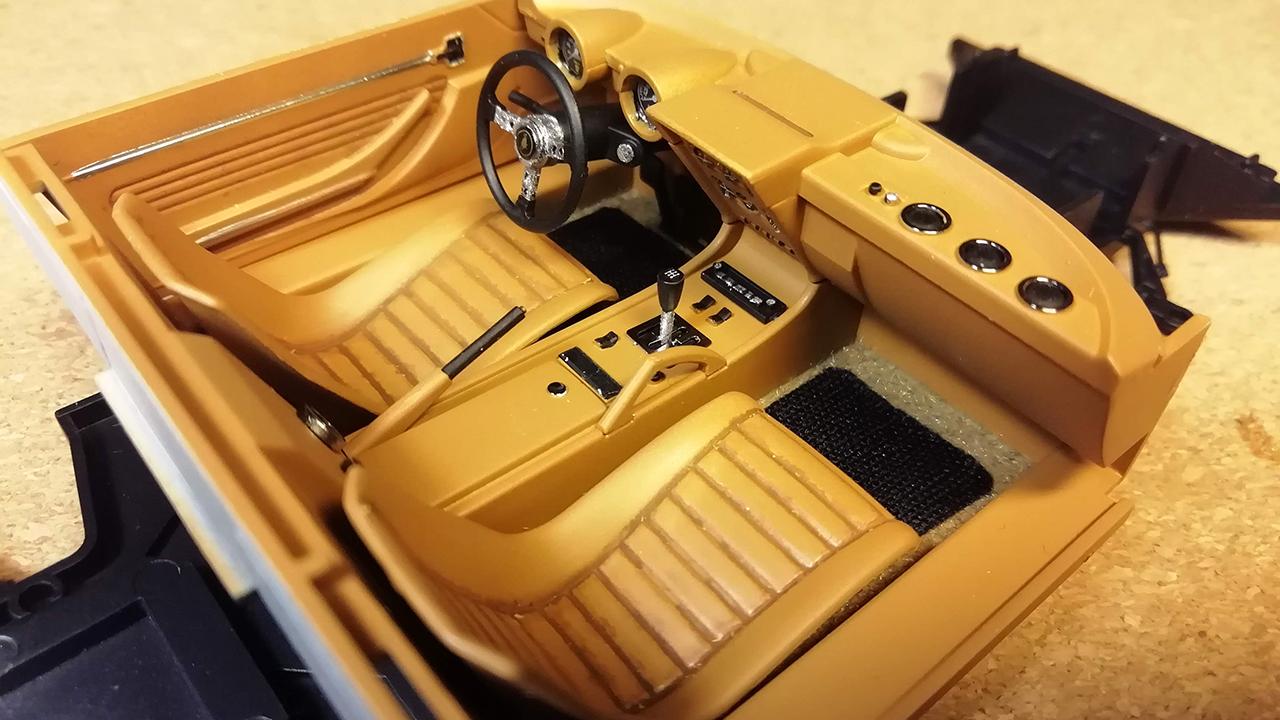
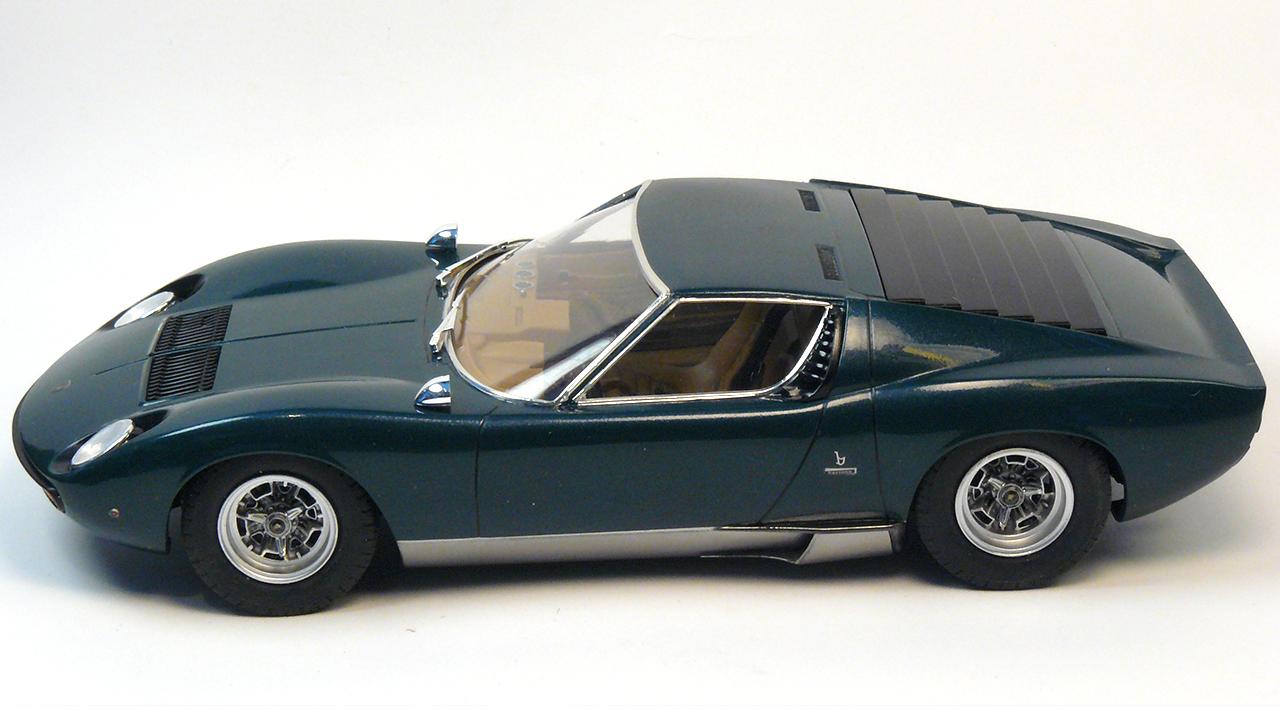
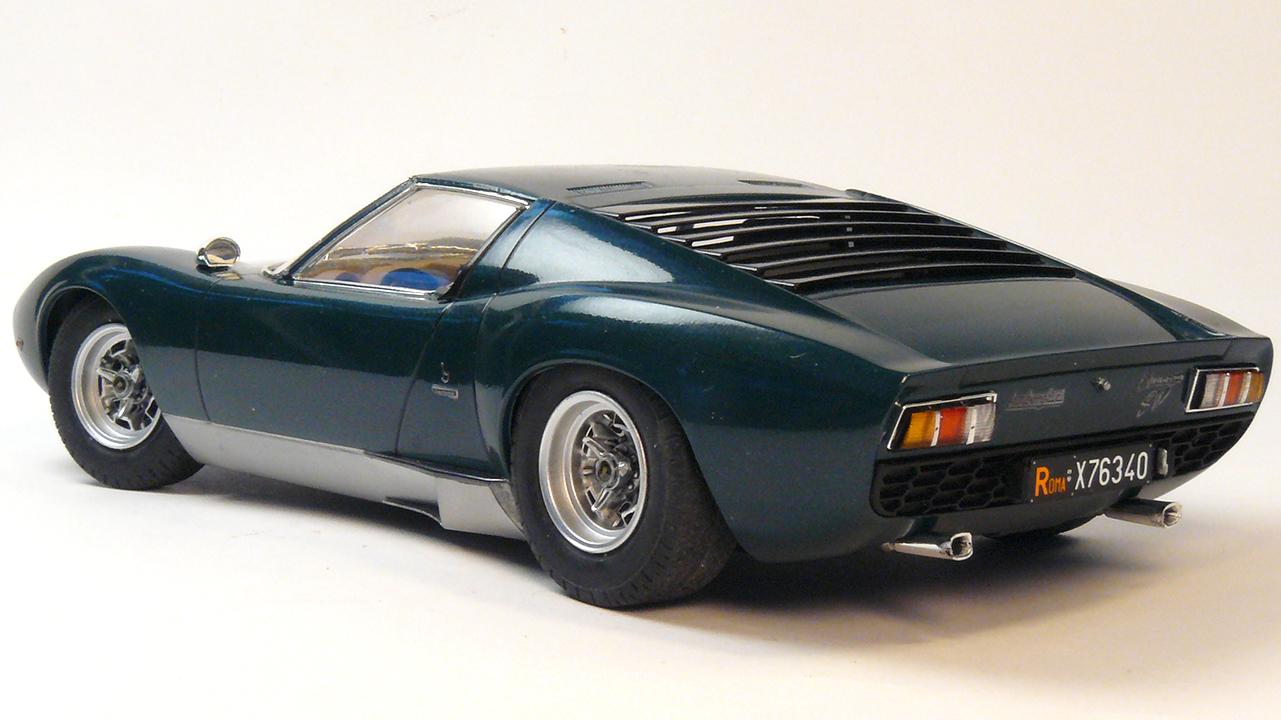
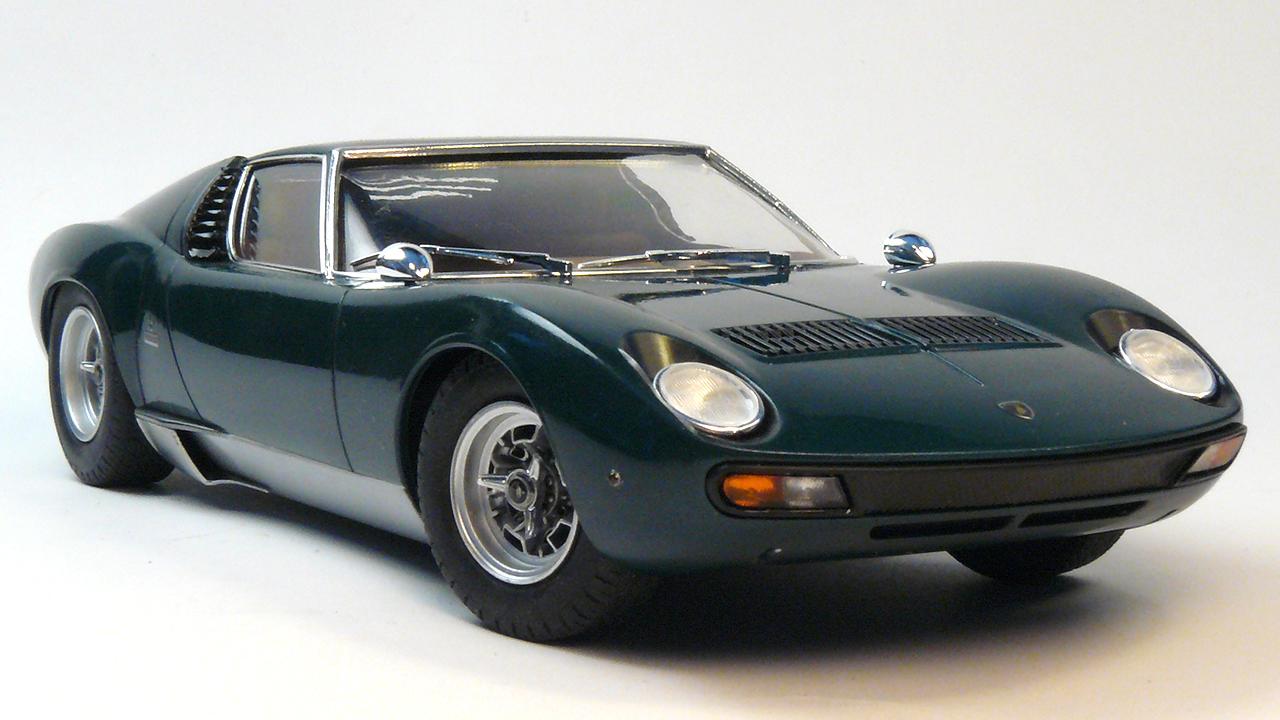
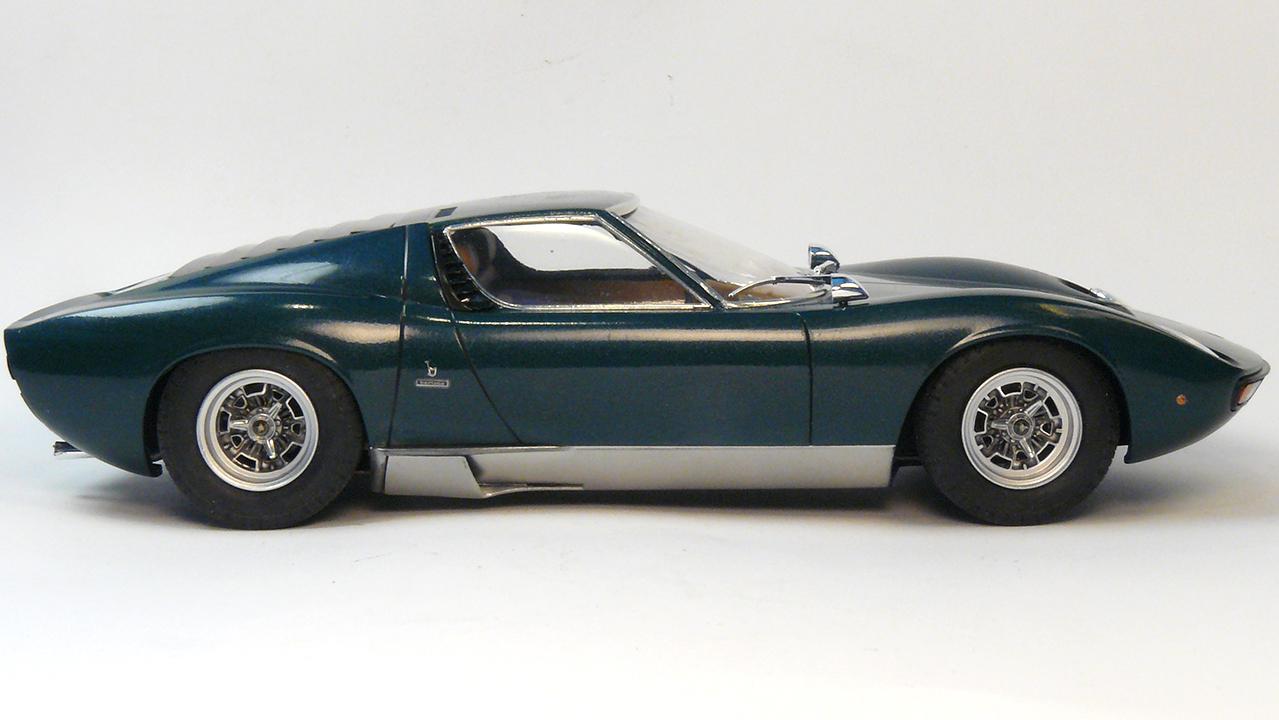
-Hasegawa kit with following changes.
-Kits rims are widened with chrome lips. Low profile tyres changed.
-Metal exhaust tip.
-I used Model Factory Hiro suede fabric as carpet. Washi tape on the seats.
-Paint is custom mix.
-
15
-
-
28 minutes ago, 89AKurt said:
Love the concept and execution! I spy a Porsche whaletail, and cigarette package foil (?). I also like the third photo with ghosted lid, beyond my ability.
Cigarette foil is correct. Whaletale is Aoshima Honda Beat add-on piece.
-
1
-
-
Modifications:
-Aluminium velocity stacks and exhaust tip
-USCP wheels and tyres
-Fender flares from Italeri Renault 5
-Candy wrapper heat shields
-
15
-
-
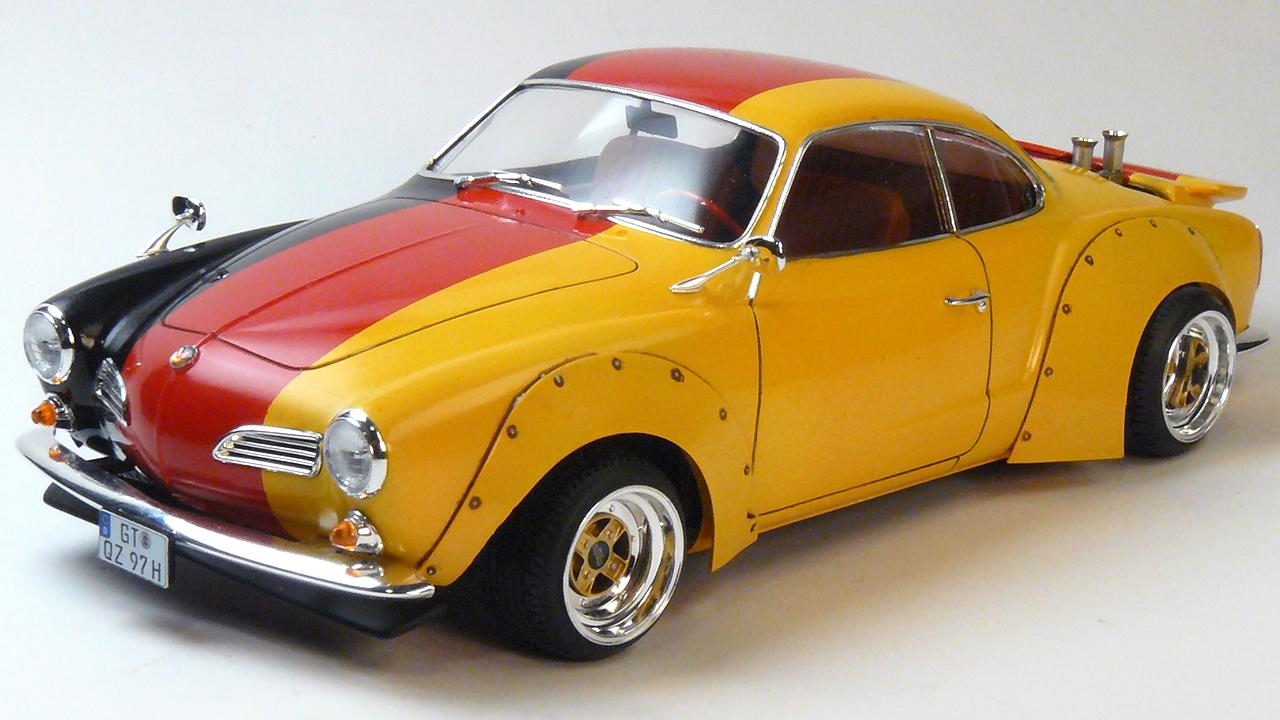
Modifications:
-Fujimi fender flares
-Front lip and rear spoiler added
-Aoshima wheels and tyres
-2 superchargers added with double carburetors and velocity stacks
-Brass used for pulleys, carburetor links and exhaust tip
-
18
-
-
On 1/17/2025 at 8:31 PM, seanyb505 said:
Decal design and execution looks amazing! What kind of nail art pack did you use?
I bought several different ones. Then chose that had similar styles of shapes.
-
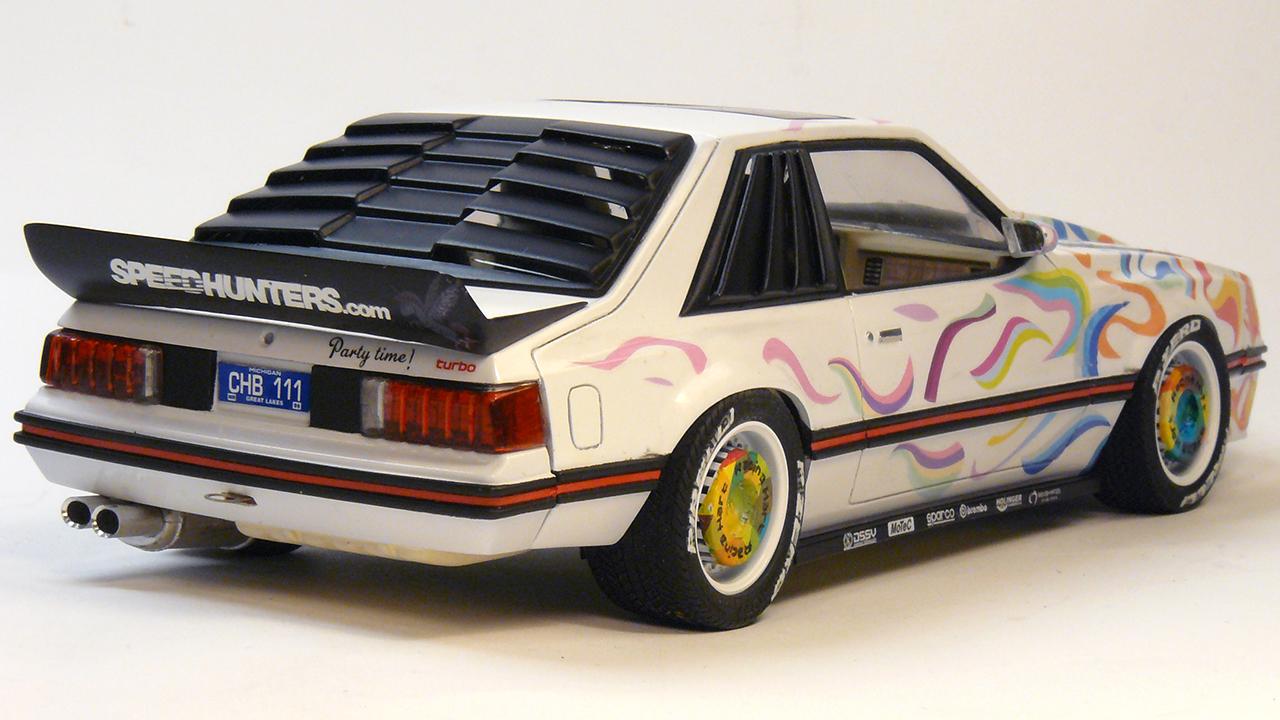
This is a 1979 release of Revell Turbo Cobra. I decided to build it as a track oriented road car. Paint scheme would be similar to BMW art cars. On top of Tamiya white, I used nail art decals. Each decal was placed individually. I had problems with the decal carrier film showing under the clear coat. Other notable modifications are:
-Modified rear spoiler
-Side skirts and muffler with aluminium tips added
-Washi tape interior fabric
-3D printed gear shifter, breather tank and blow-off valve
-Handbrake and pedals added
-Scratchbuild intake manifold and intake piping.
-Resin intercooler, turbo, wastegate, battery, brake booster, side mirrors and steering wheel.
-Wheels and tyres changed
-
19
-
-
Revell Hemi Hydro kit
- Mahogany veneer added to the sides and on top
- Two Revell parts paks Chevy 283 cid with supercharges added
- Exhaust manifolds made from solder
- Scratchbuild transfer case from styrene
- Working fuel filler caps made from brass
- New propeller and rudder from brass
- Custom gauges
-
11
-
1
-
-
On 11/26/2024 at 6:16 PM, BK9300 said:
Well done on your modifications - so much detail! Did you print the toggle switches for the dash, or were they molded in?
Switches are added. I bought separate set for those. Cant remember who made them.
-
1
-
-
11 hours ago, TarheelRick said:
That is one bad-a$$ gasser. That short wheelbase and big engine would make this a handful. Really like the overall build. Did you build the headers or are they from a kit?
Headers are 3d printed aswell as the intake. Kit didnt have engine or engine bay at all.
-
-Engine is from AMT Dodge D-50. Resin turbo and scratchbuilt intake manifold.
-Battery, radiator and brake reservoir added.
-Air suspension setup built mainly out of aluminium.
-Seat fabric from washi tape.
-Photoetched window cranks and door handles.
-Roof is Bare Metal Foiled with blue tinded clear.
-
10
-
-
-Scratchbuild front suspension with working steering.
-Scratchbuild firewall with 3D printed oil catch can and brake reservoirs.
-Chevy 427 with 3D printed intake and exhaust manifolds.
-Driver seat, seatbelts, steering wheel, shifter changed.
-Control panel made into dashboard.
-
11
-
1
-
-
9 hours ago, BK9300 said:
Just a great looking build! Is your engine from the kit or elsewhere?
I used the block from the kit. Then added 426 Hemi heads and valvecovers. I sanded the spark plug holes off from the covers. Then added intake, carburetor and air filter from my parts box.
-
1
-
-
9 hours ago, BK9300 said:
A beautiful car and a great interior - what color/paint did you use for your interior?
I used this:
https://www.migjimenez.com/en/new-releases/9829-cobra-motor-brown-leather-amig-0319.html
-
1
-
-
1 hour ago, ncbuckeye67 said:
That looks amazing, both inside and out! What do you use to glue your embossing powder down? I use Elmer's white glue or Mod-Podge, and if I paint over it, the paint causes the powder to "clump up" and look like BLAH_BLAH_BLAH_BLAH.
I too use white glue. Then airbrush the color on top.
-
1
-
-
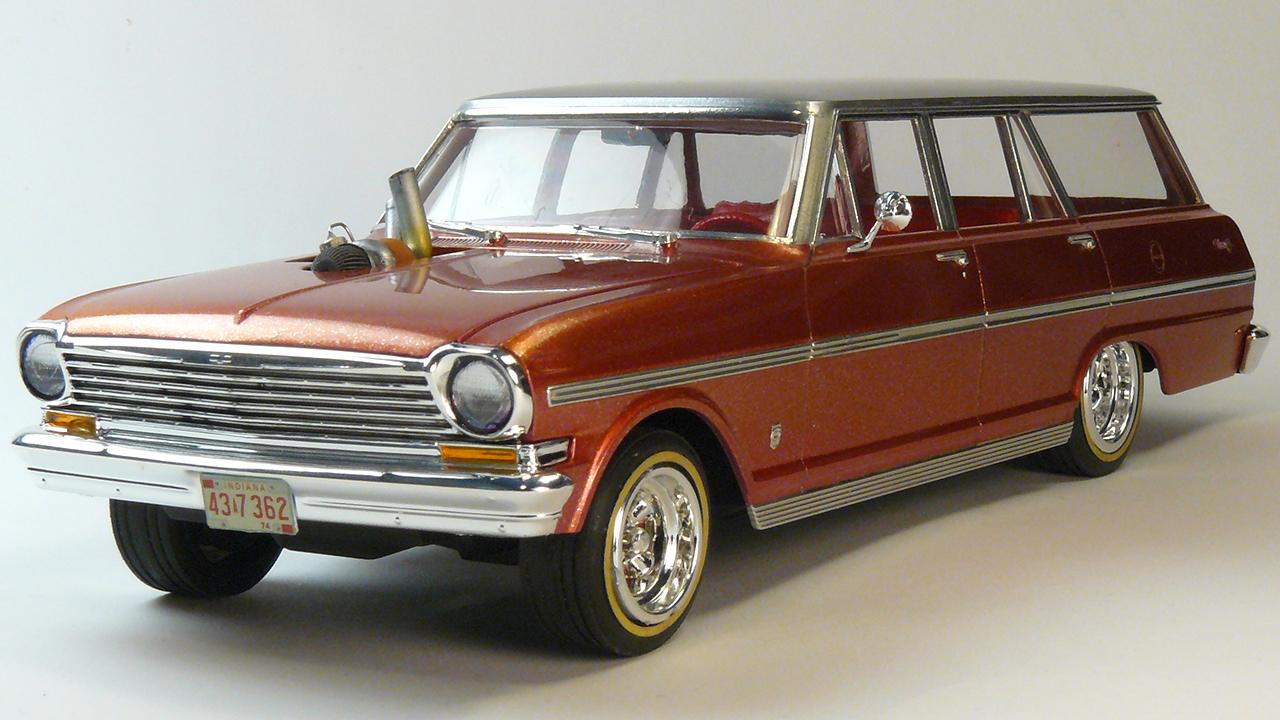
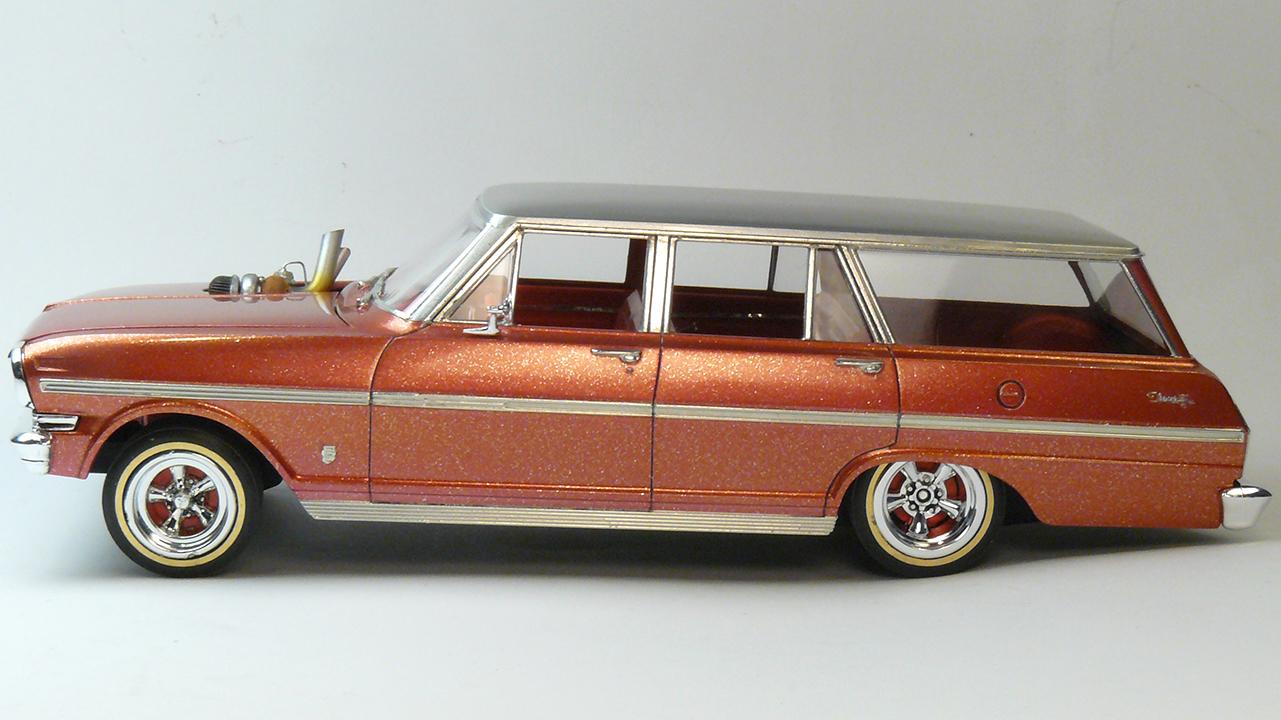
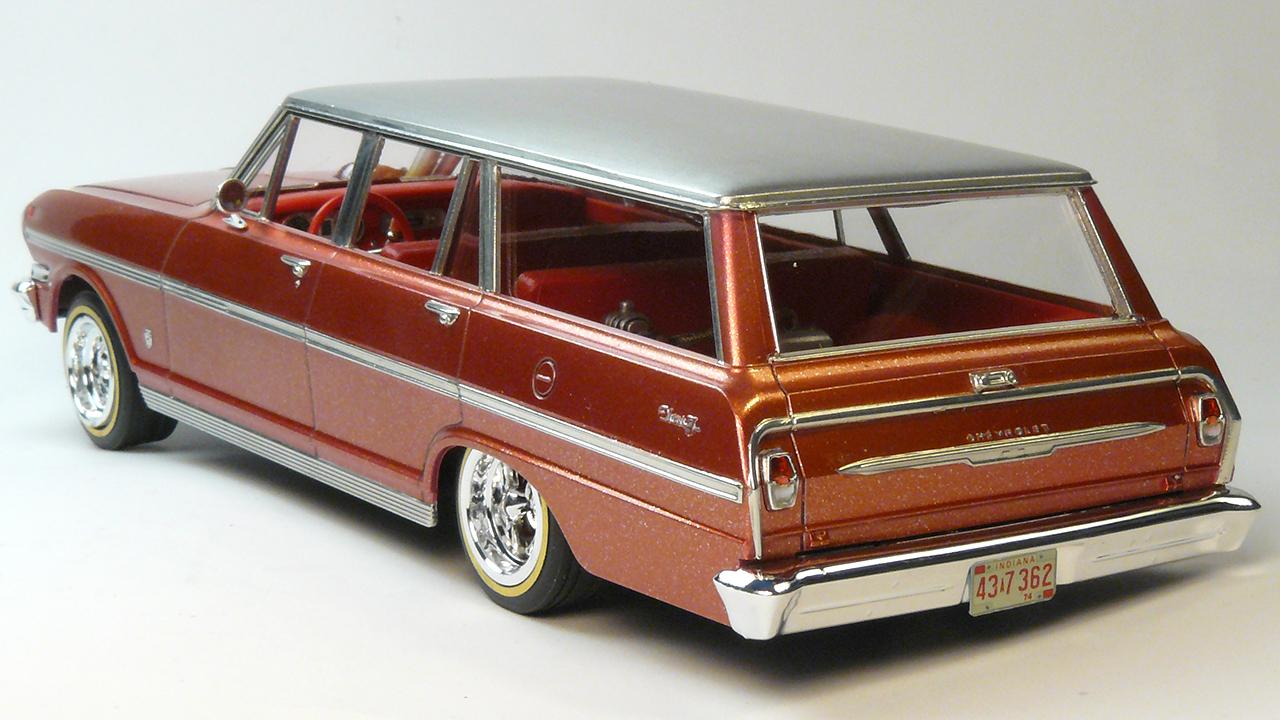
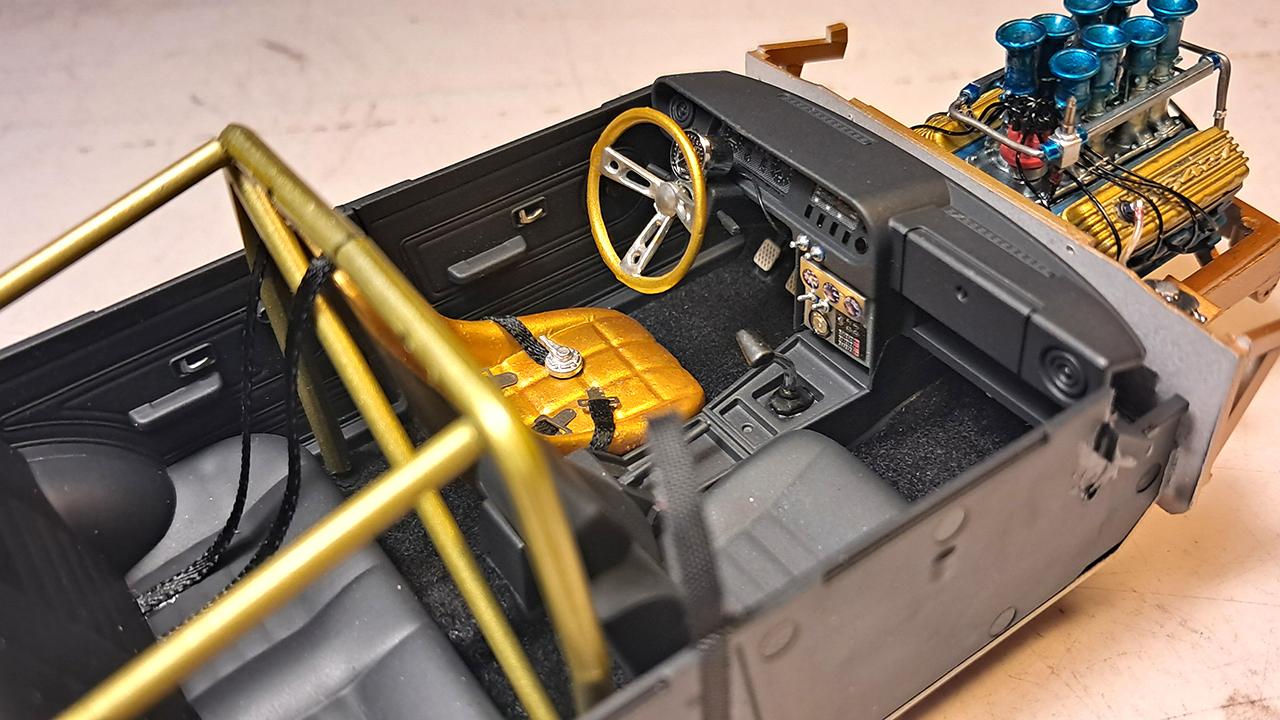
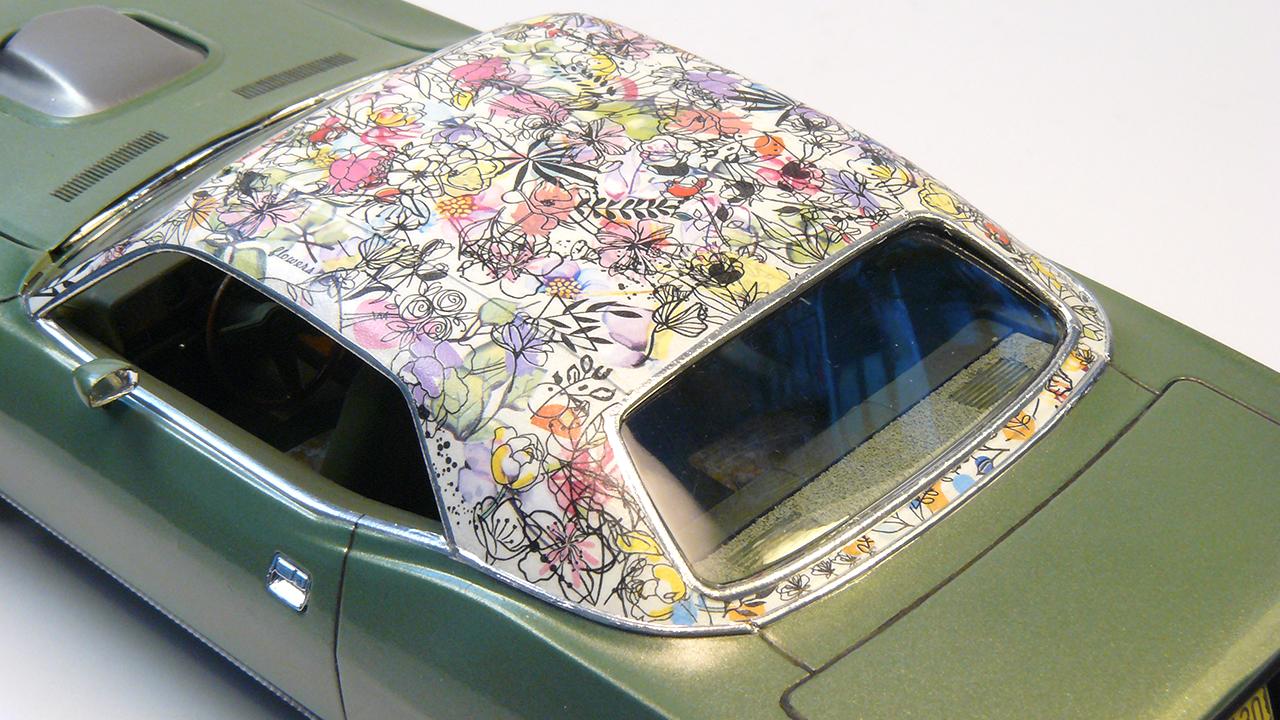
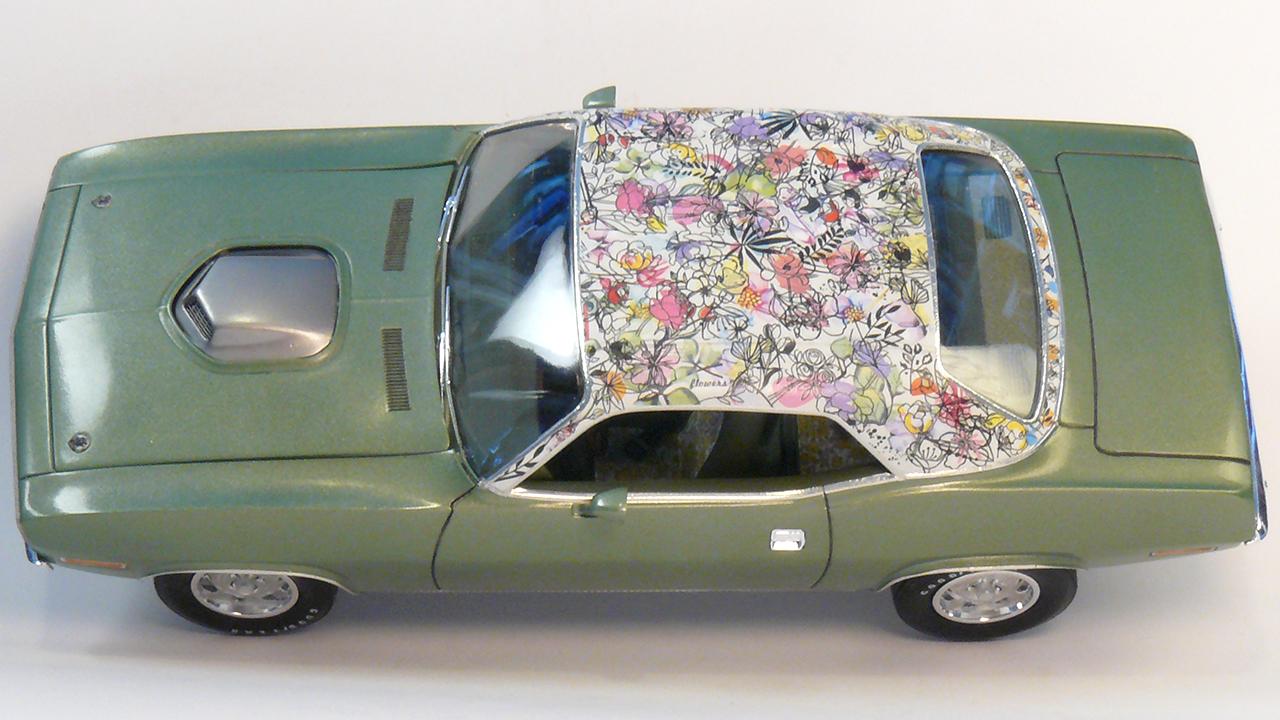
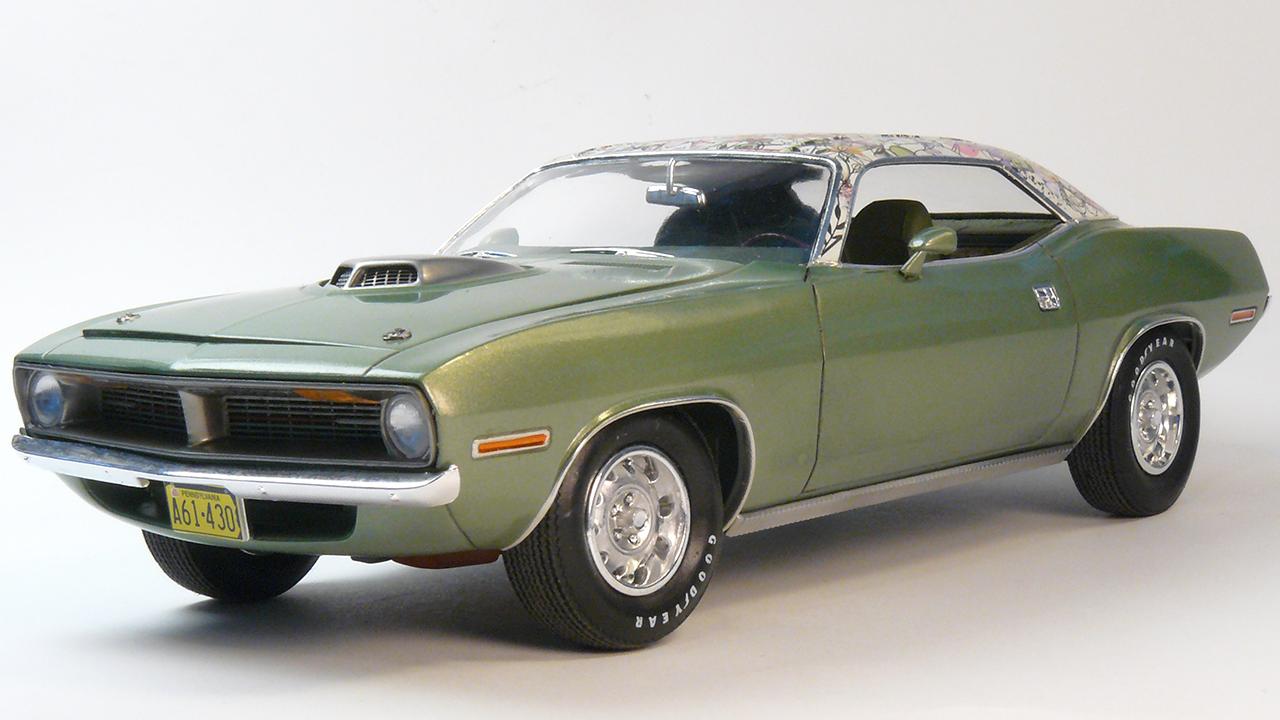
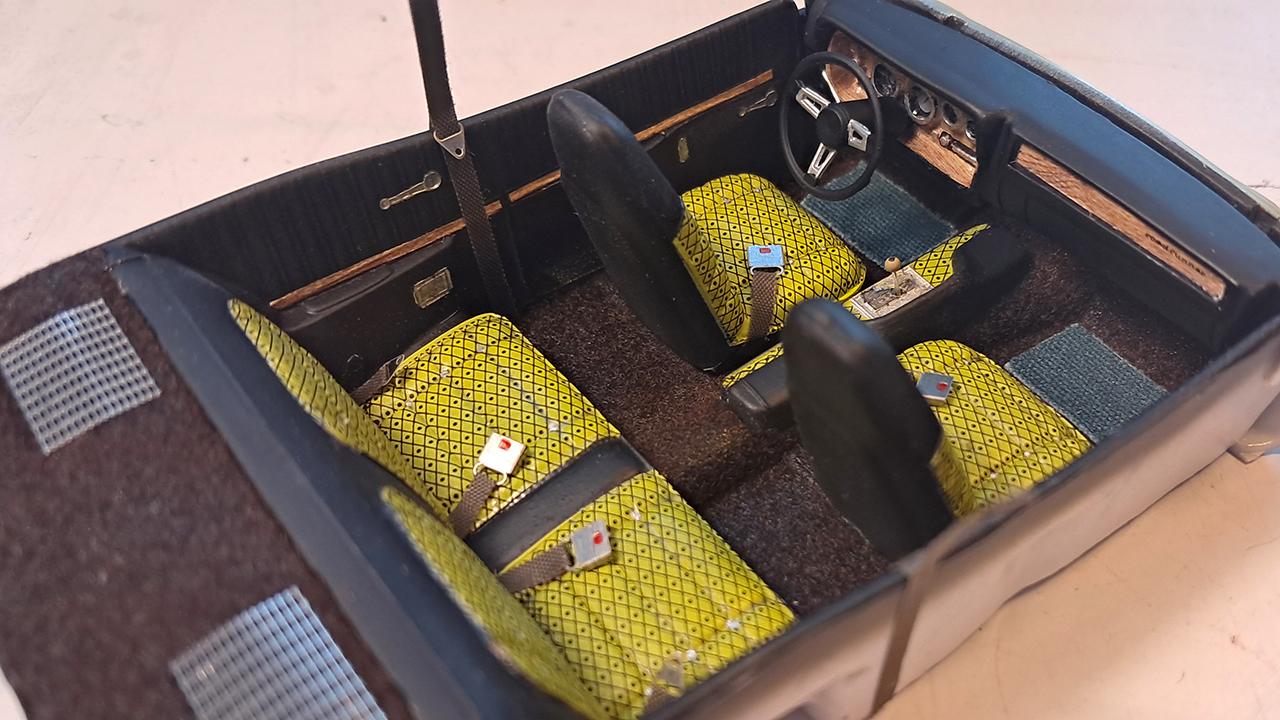
Plymouth offered "Mod Top" option back in the day, so that was the inspiration.
Vinyl top texture is painted with airbrush. Then flower nail decals added on top one by one.
Washi tape with flower pattern used for seats.
Floor mat is painted embossing powder.
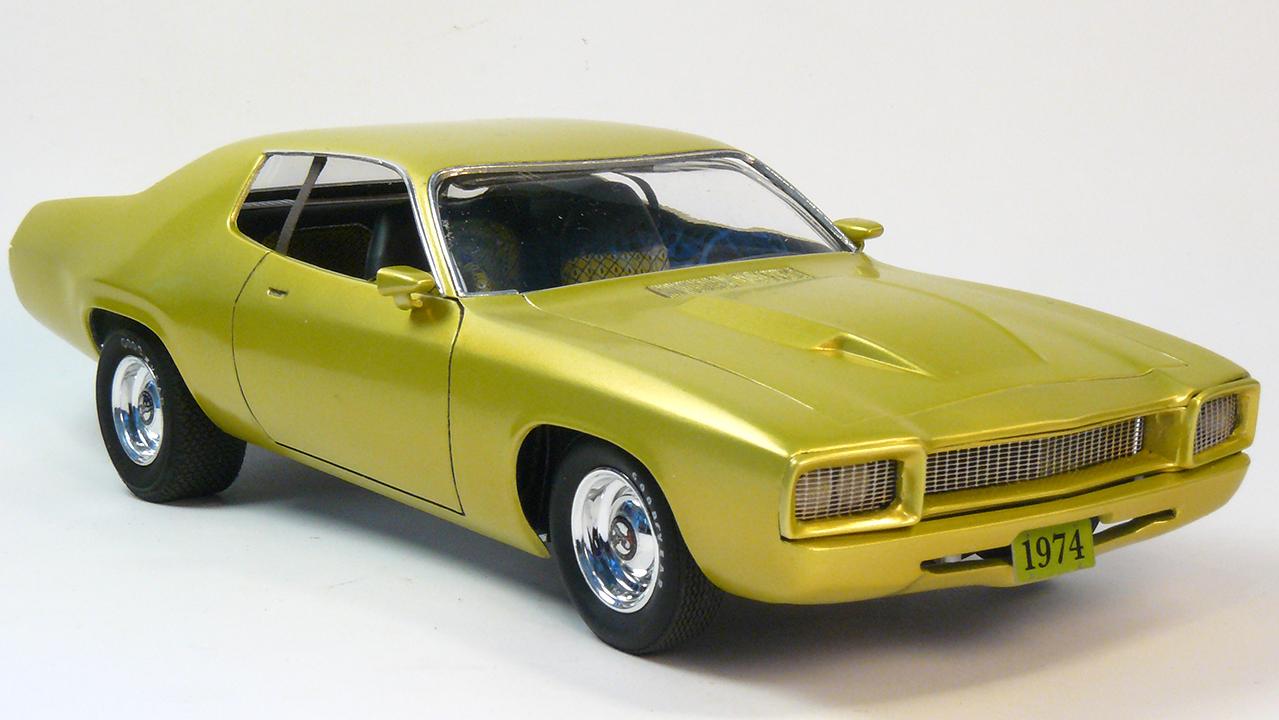
Self mixed light green paint.
-
20
-
-
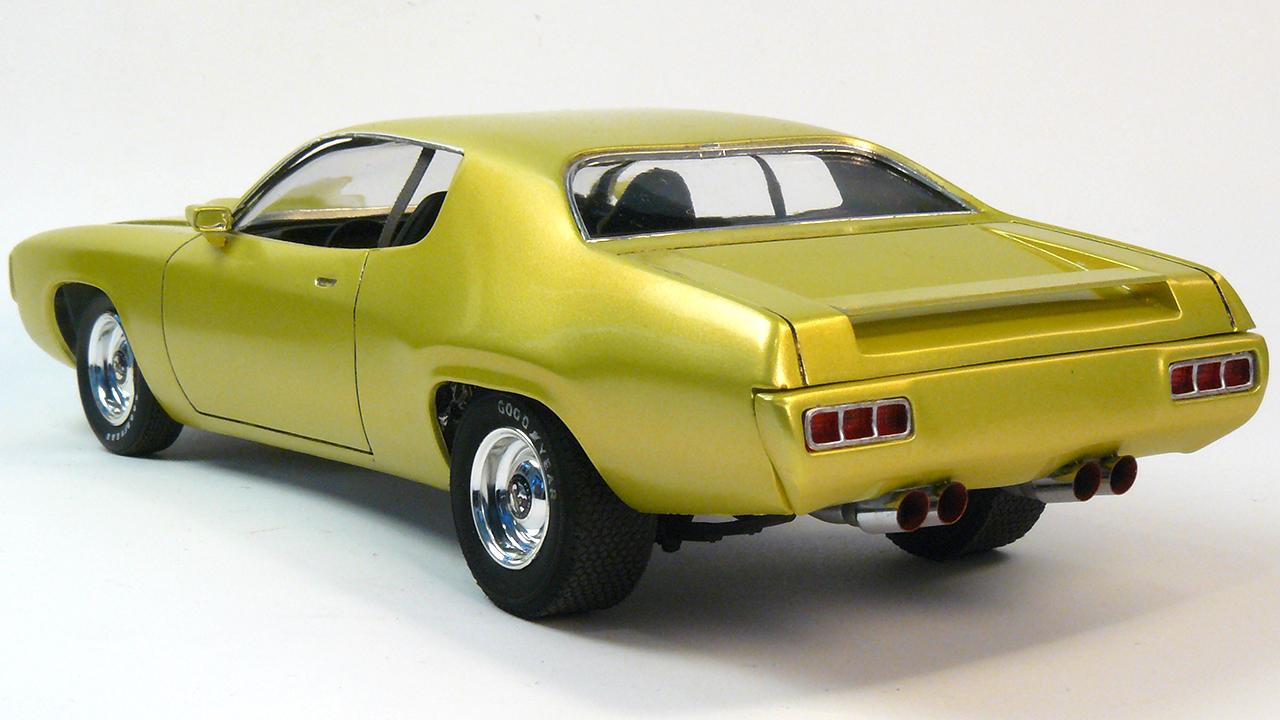
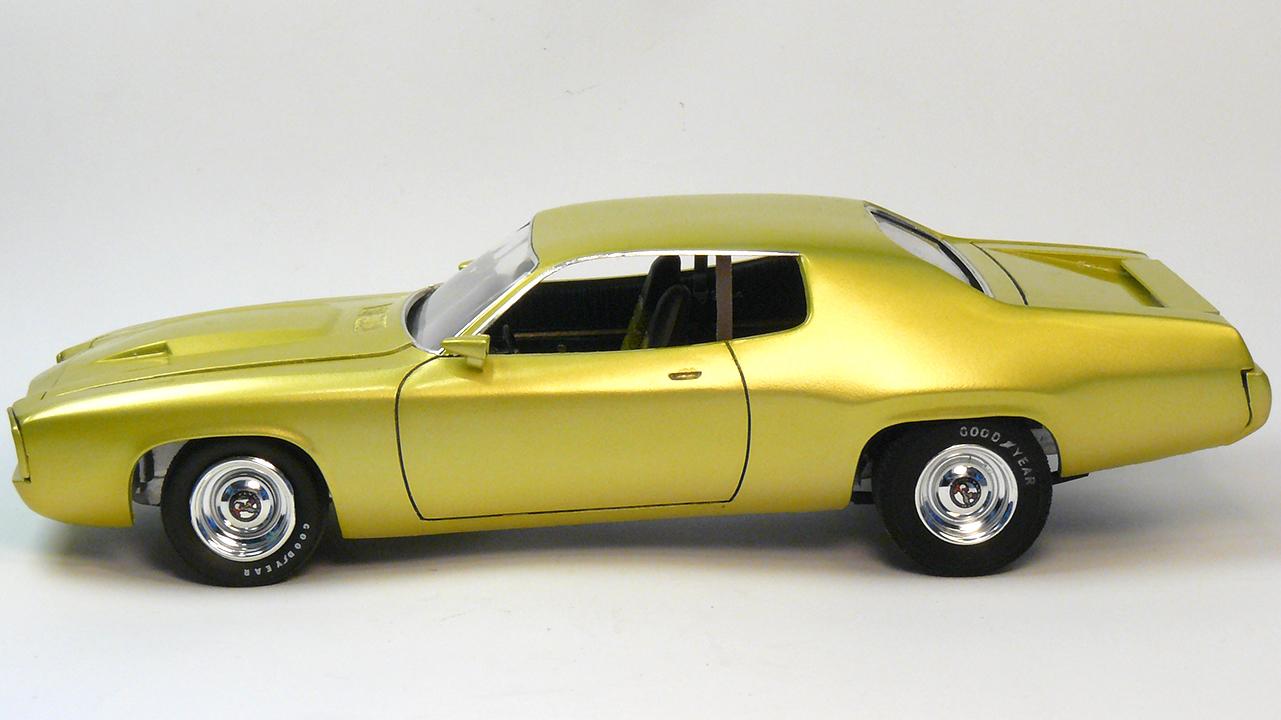
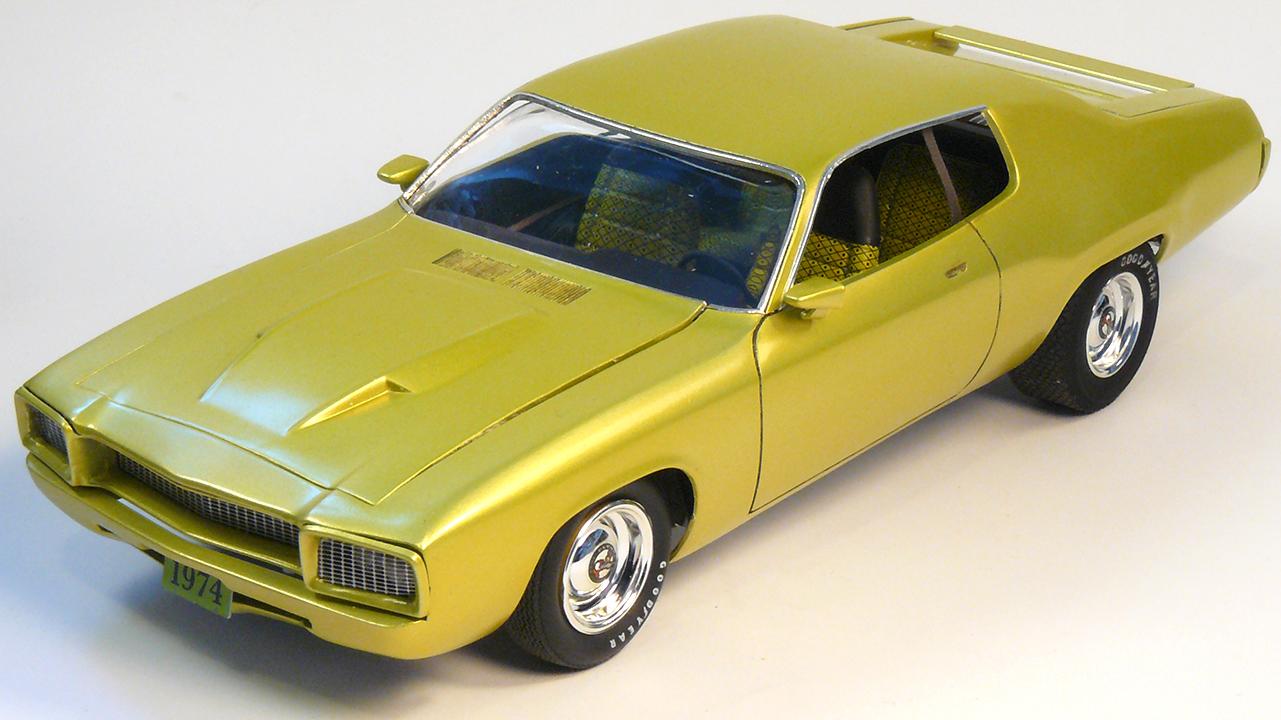
MPC kit made as imaginary concept car. Inspiration came from 1971 Plymouth Road Runner Rapid Transit concept.
That's why rear decklid/bumper and front grill were modified.
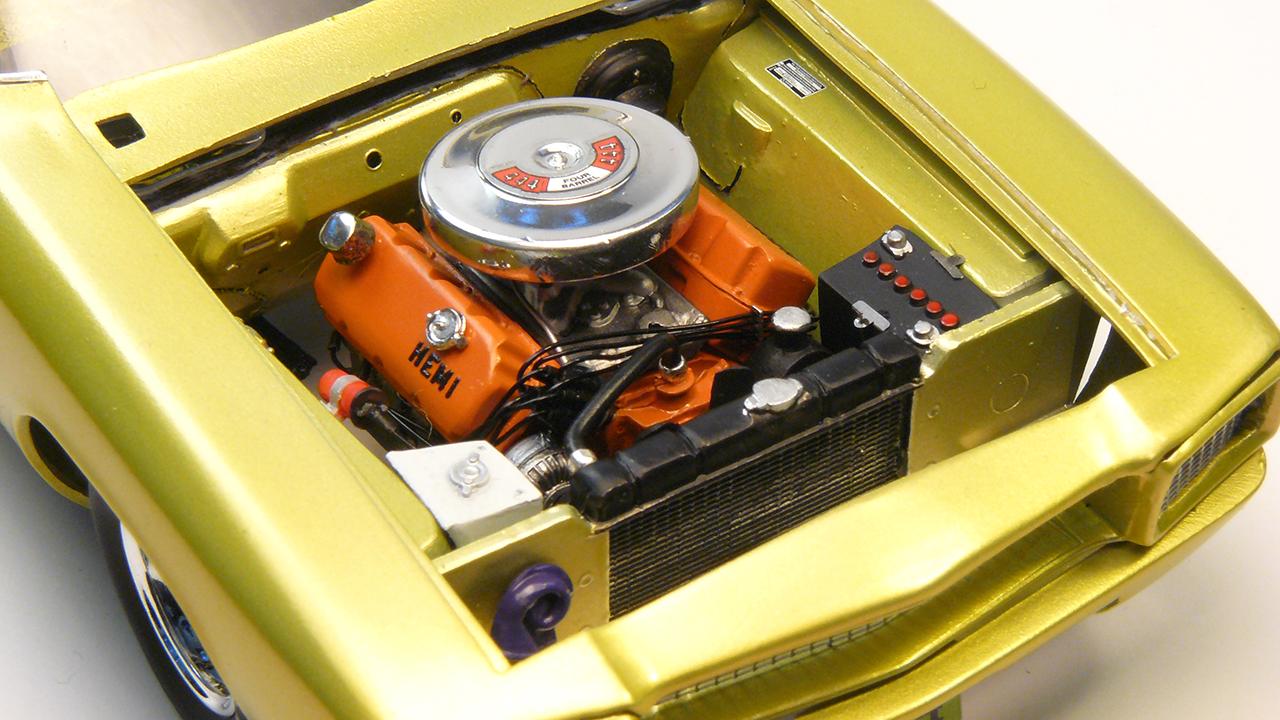
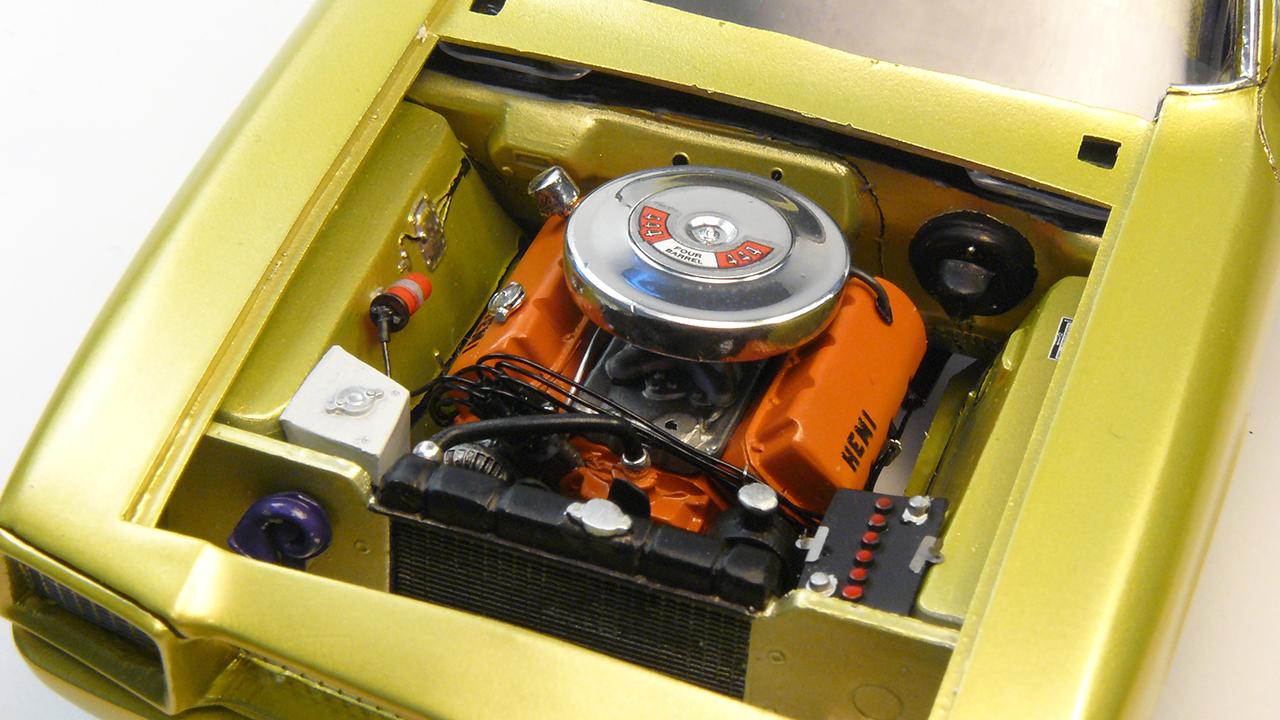
Engine is modified to look like Chryslers 444 cid Ball Stud Hemi prototype engine.
-
24
-
-
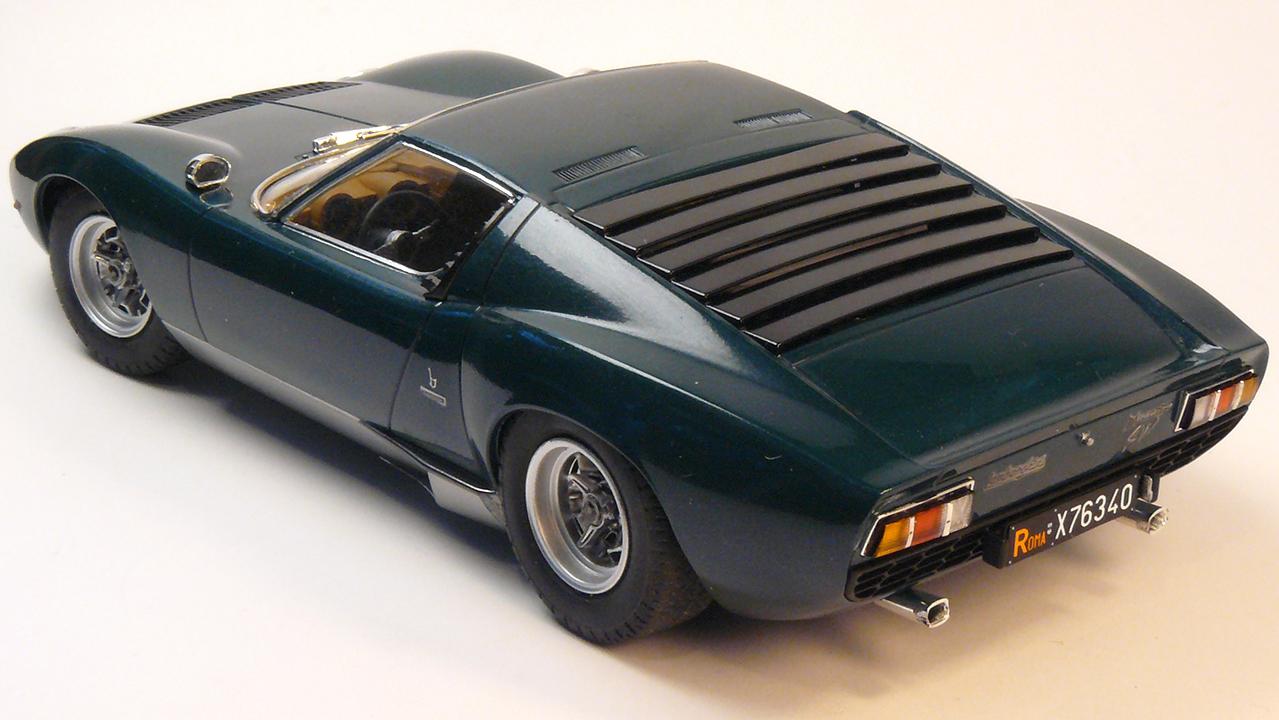
Hasegawa kit built almost box stock. Added interior flocking and floor matts.
Paint is mixed by me.
-
17
-
-
On 9/14/2024 at 5:21 PM, ncbuckeye67 said:
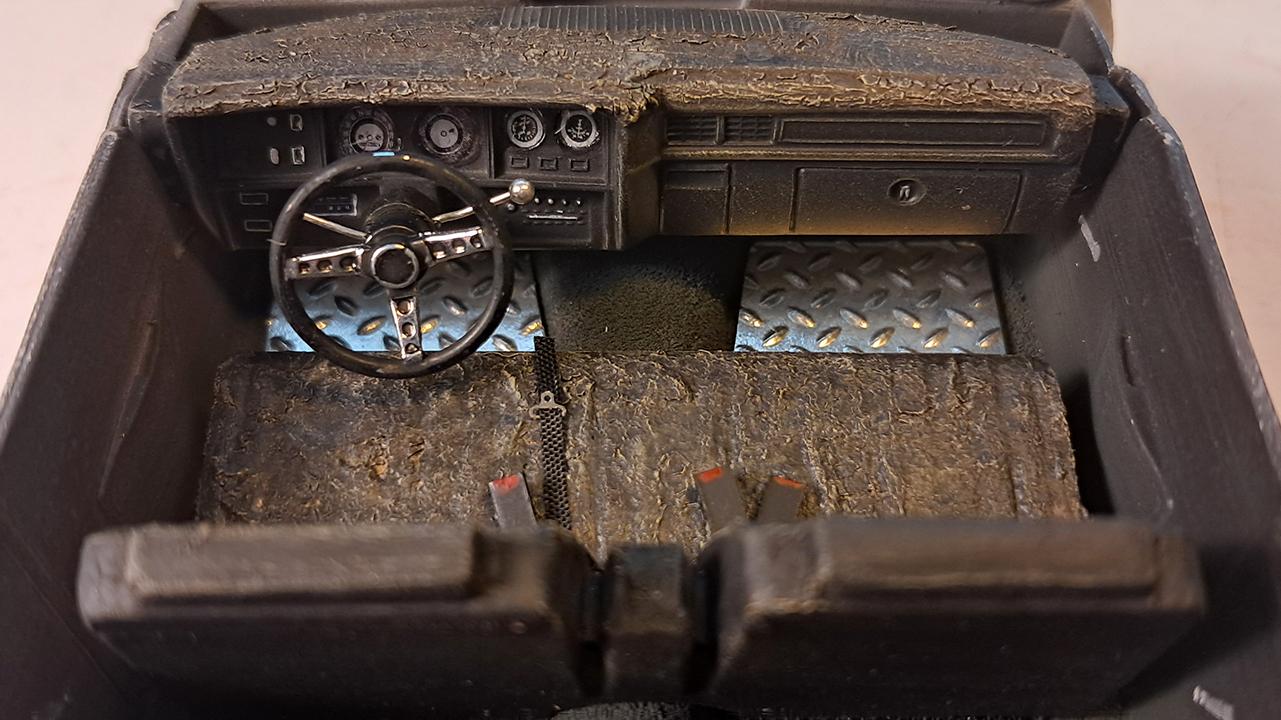
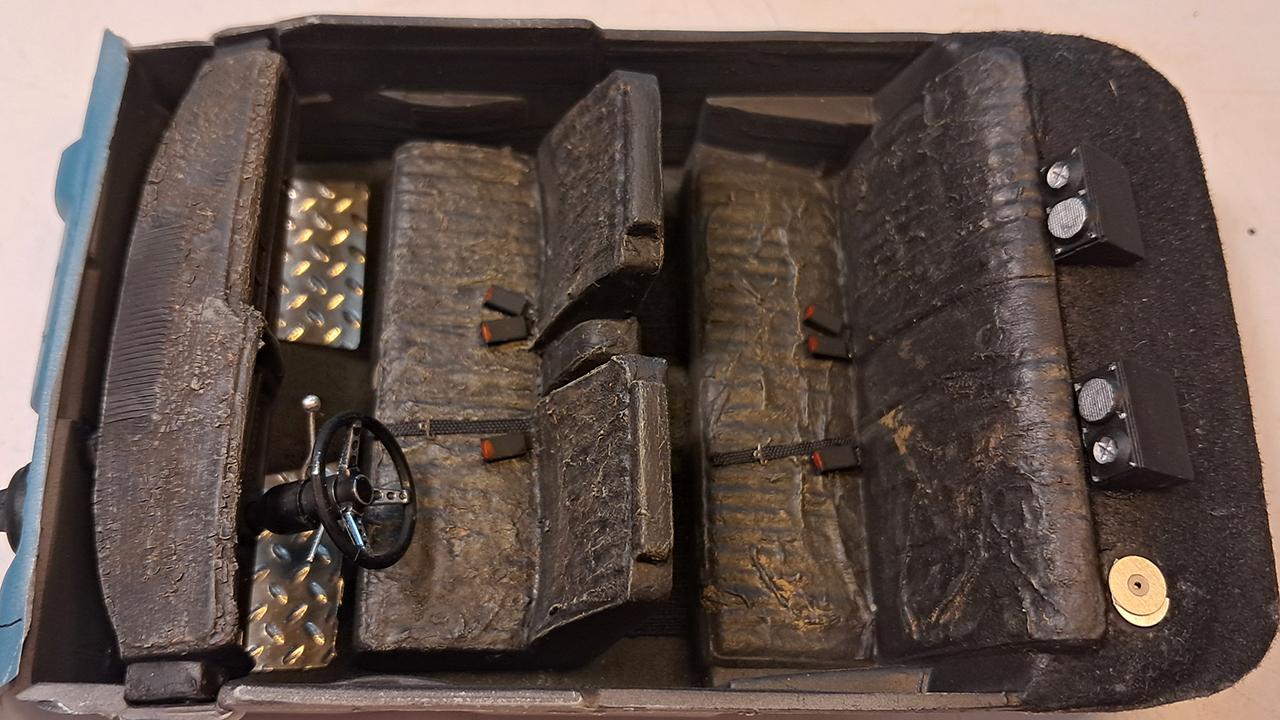
That's pretty bada**! What really got my attention was the interior pics. The seats & dash look incredible! How did you do it?
I used Citadel Agrelland Earth for the crackled look. As that paste dries, it crackles. then washes and dry brushing.
-
1
-
-
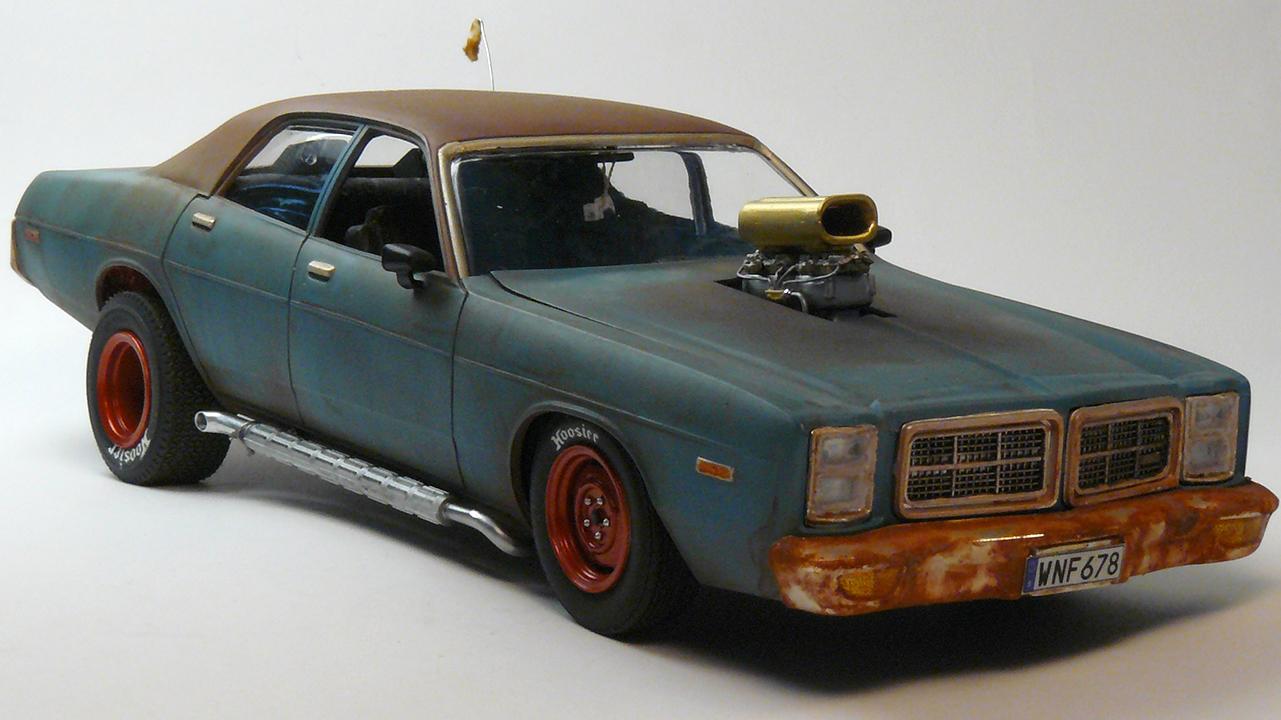
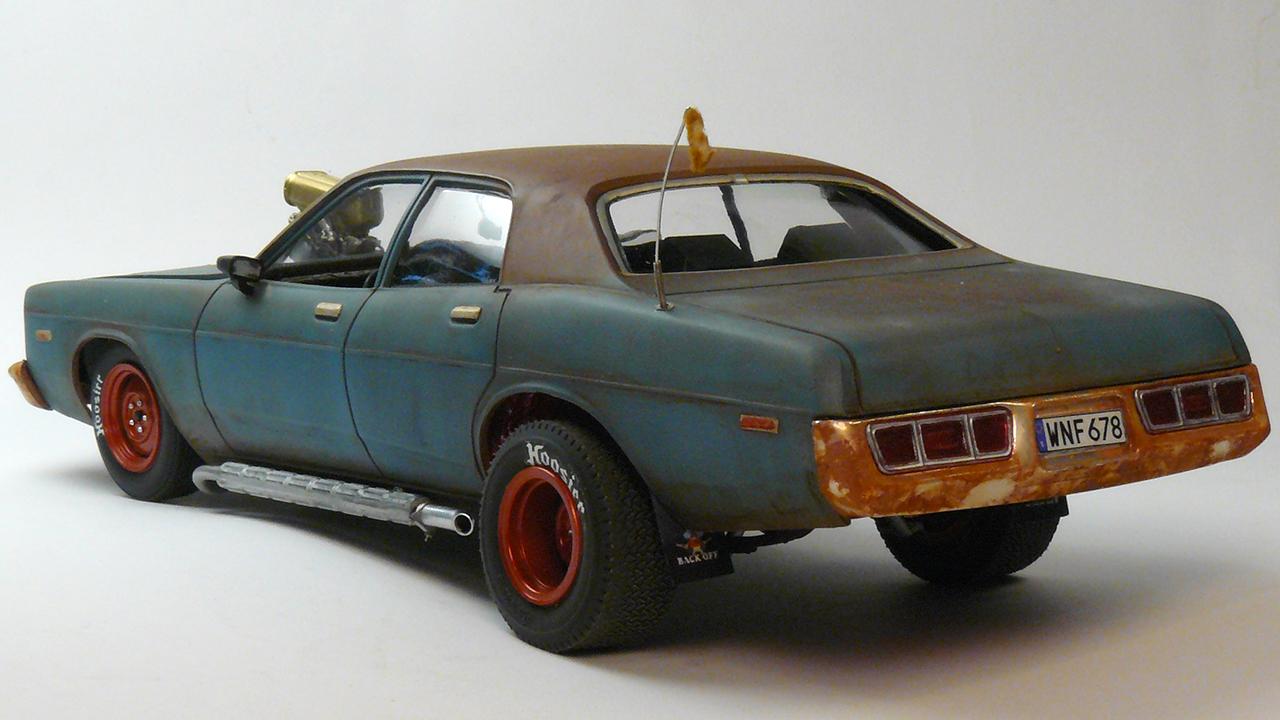
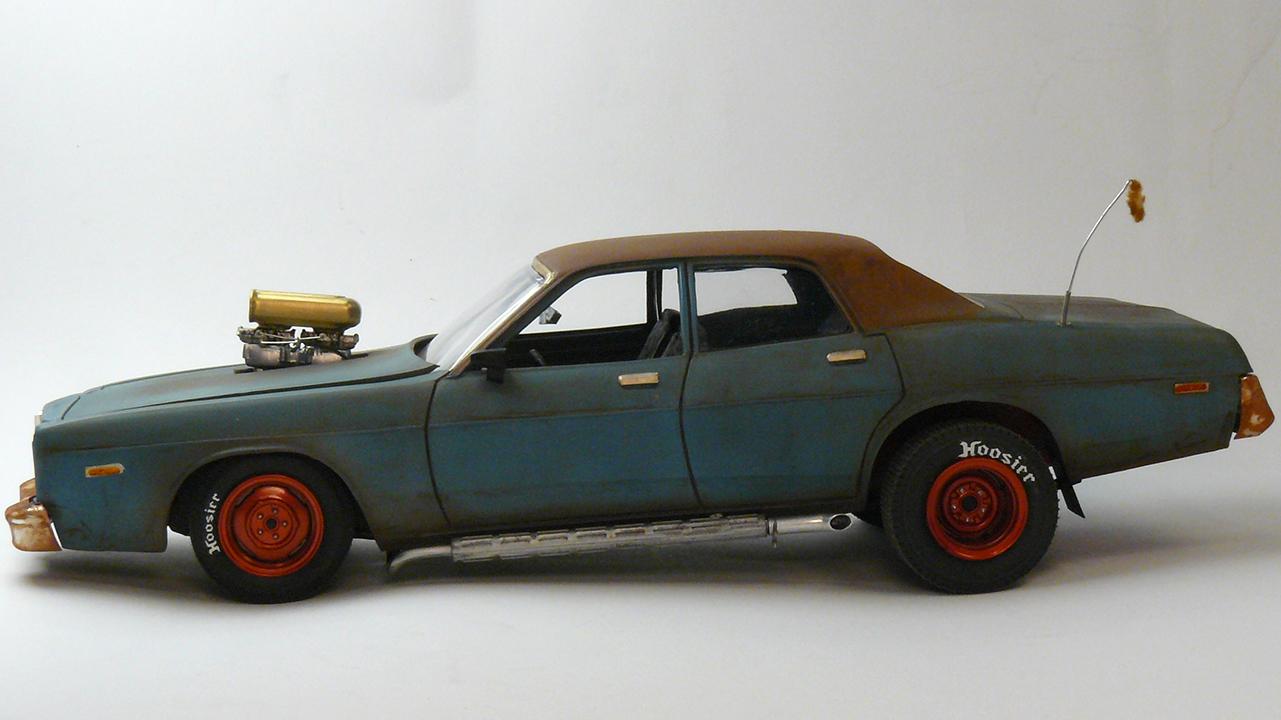
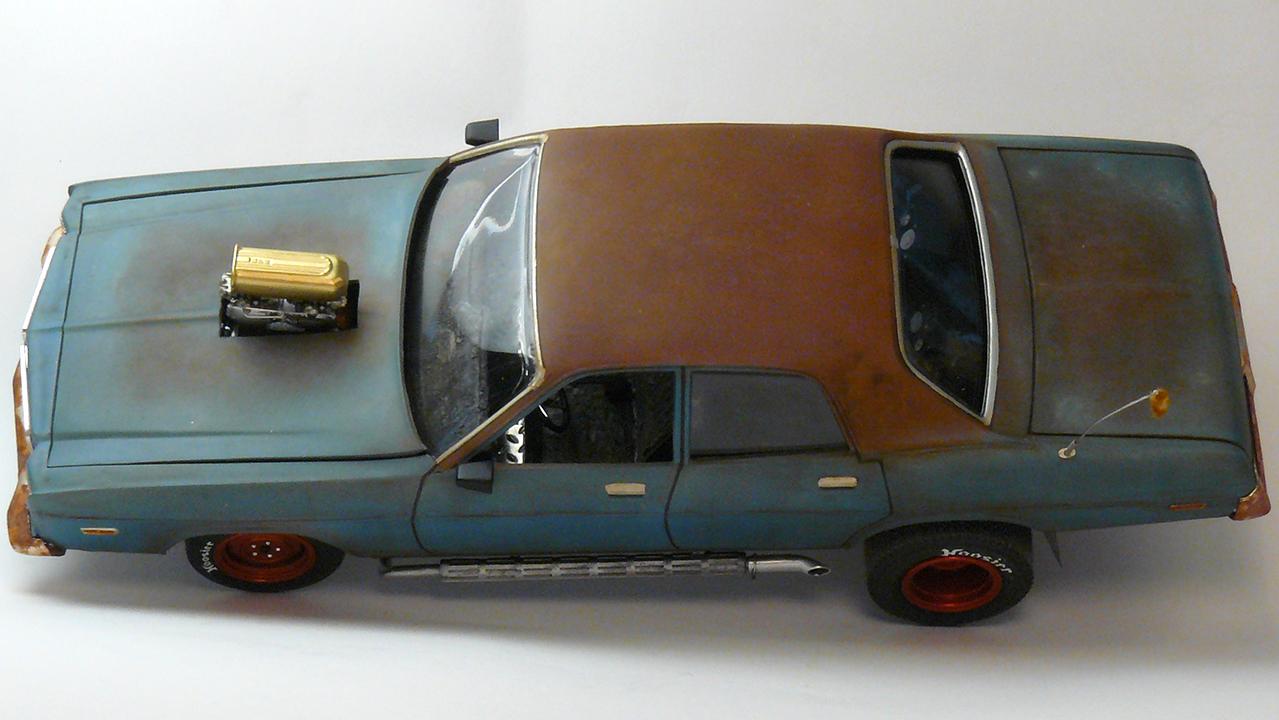
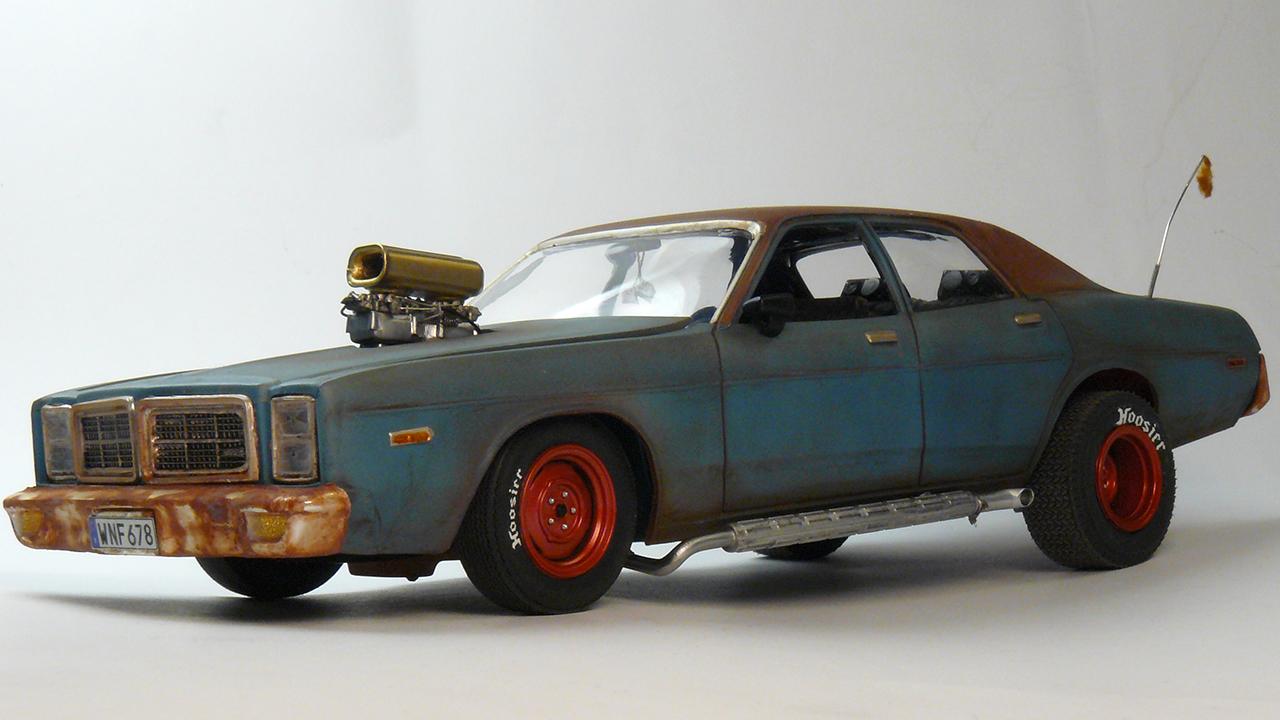
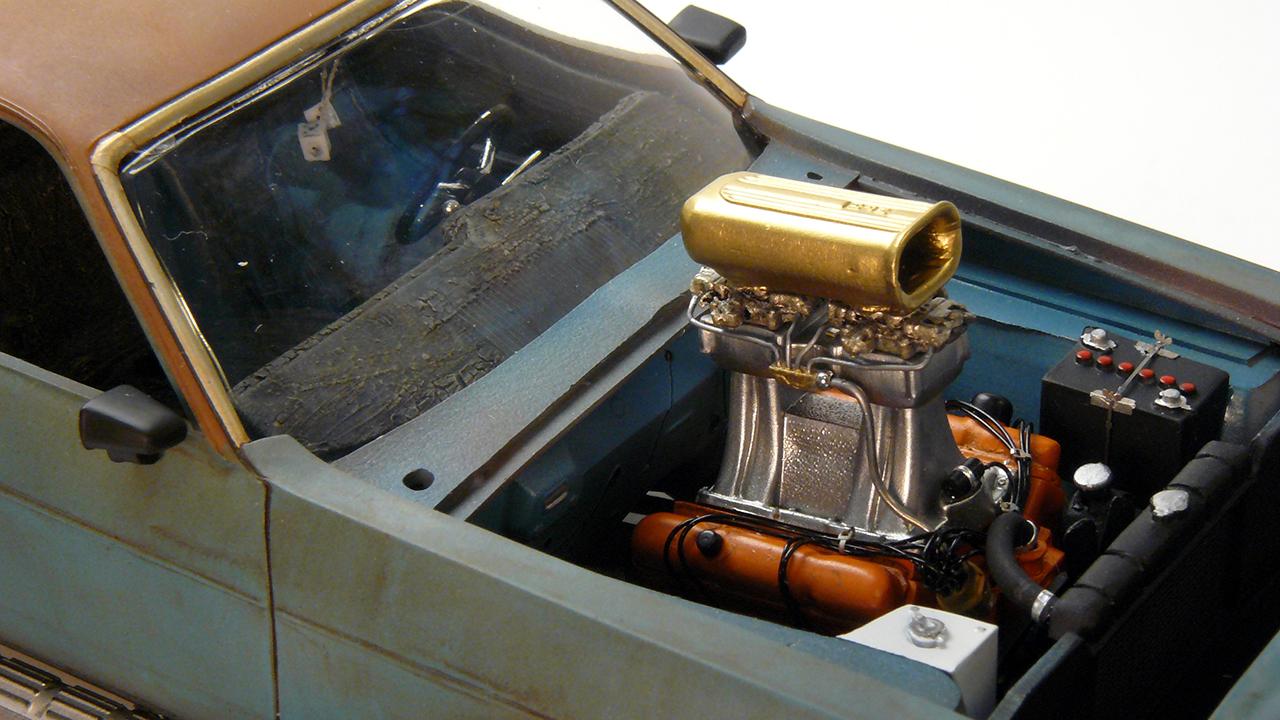
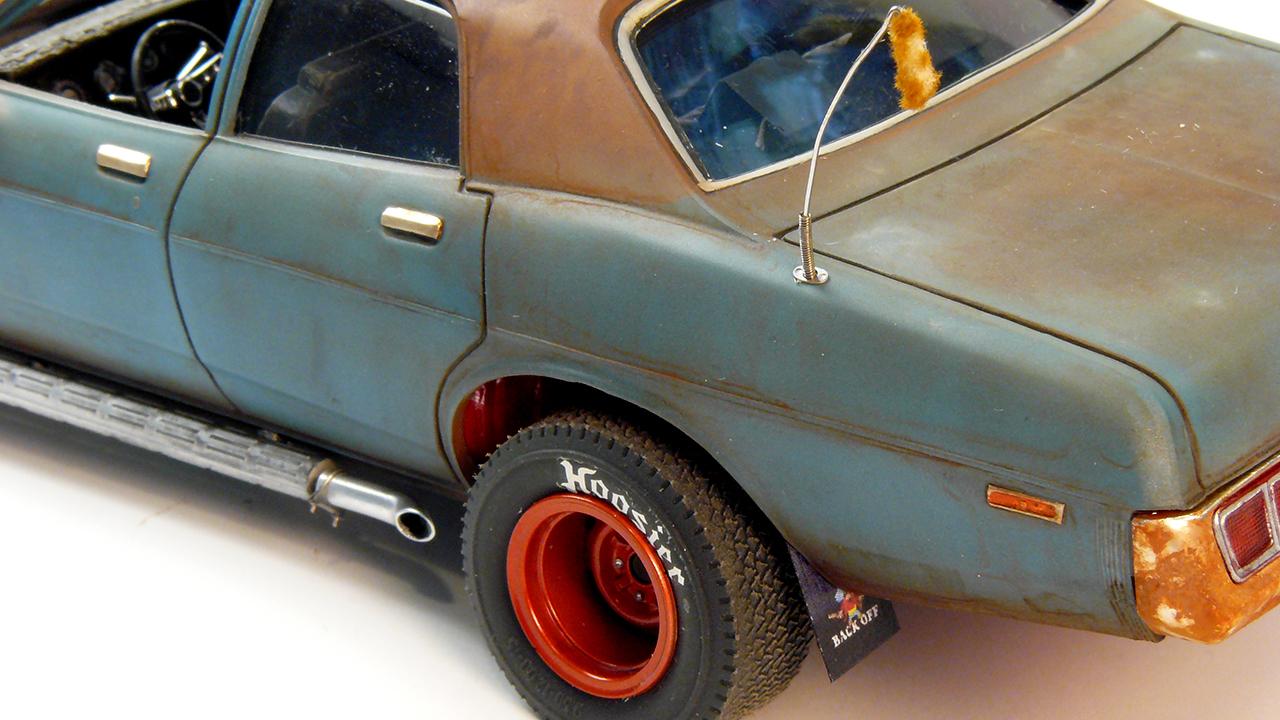
MPC police kit with couple of modifications:
- Raised rear suspension and wider rear tyres
- Tunnel ram with twin carburetors
- Sidepipes, mud flaps, antenna added
- Painted fuel tank and wheels wells
-
8
-


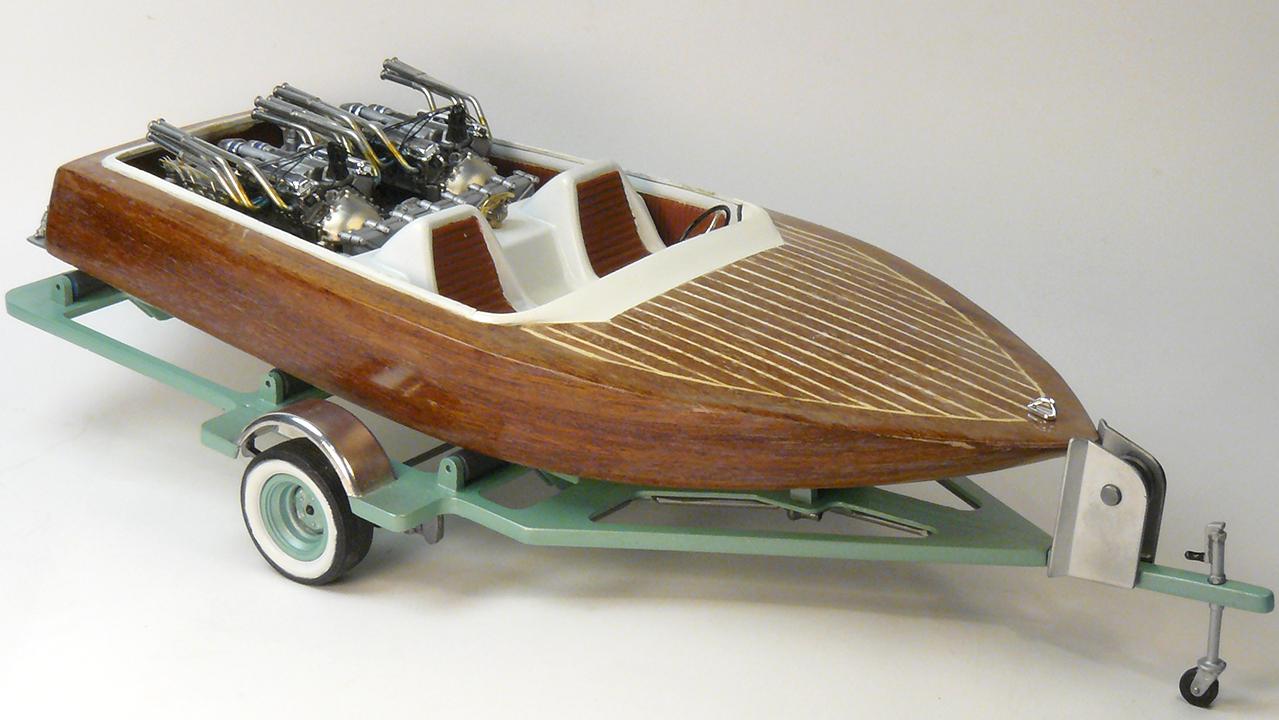


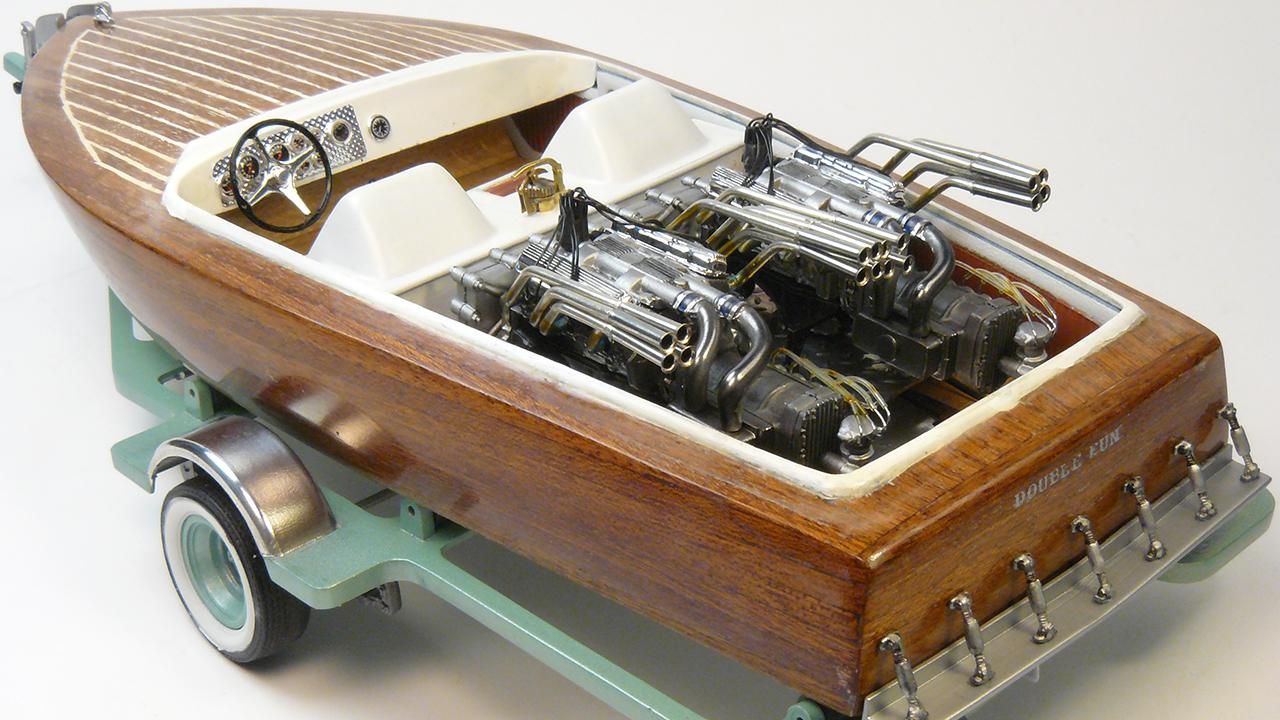


Wooden boat "Double Fun" with twin engines
in All The Rest: Motorcycles, Aviation, Military, Sci-Fi, Figures
Posted
I used basic super glue for the wood veneers. Putty used for the parting lines. Plastic strips would have been cleaner.