Search the Community
Showing results for tags 'renwal'.
Found 3 results
-
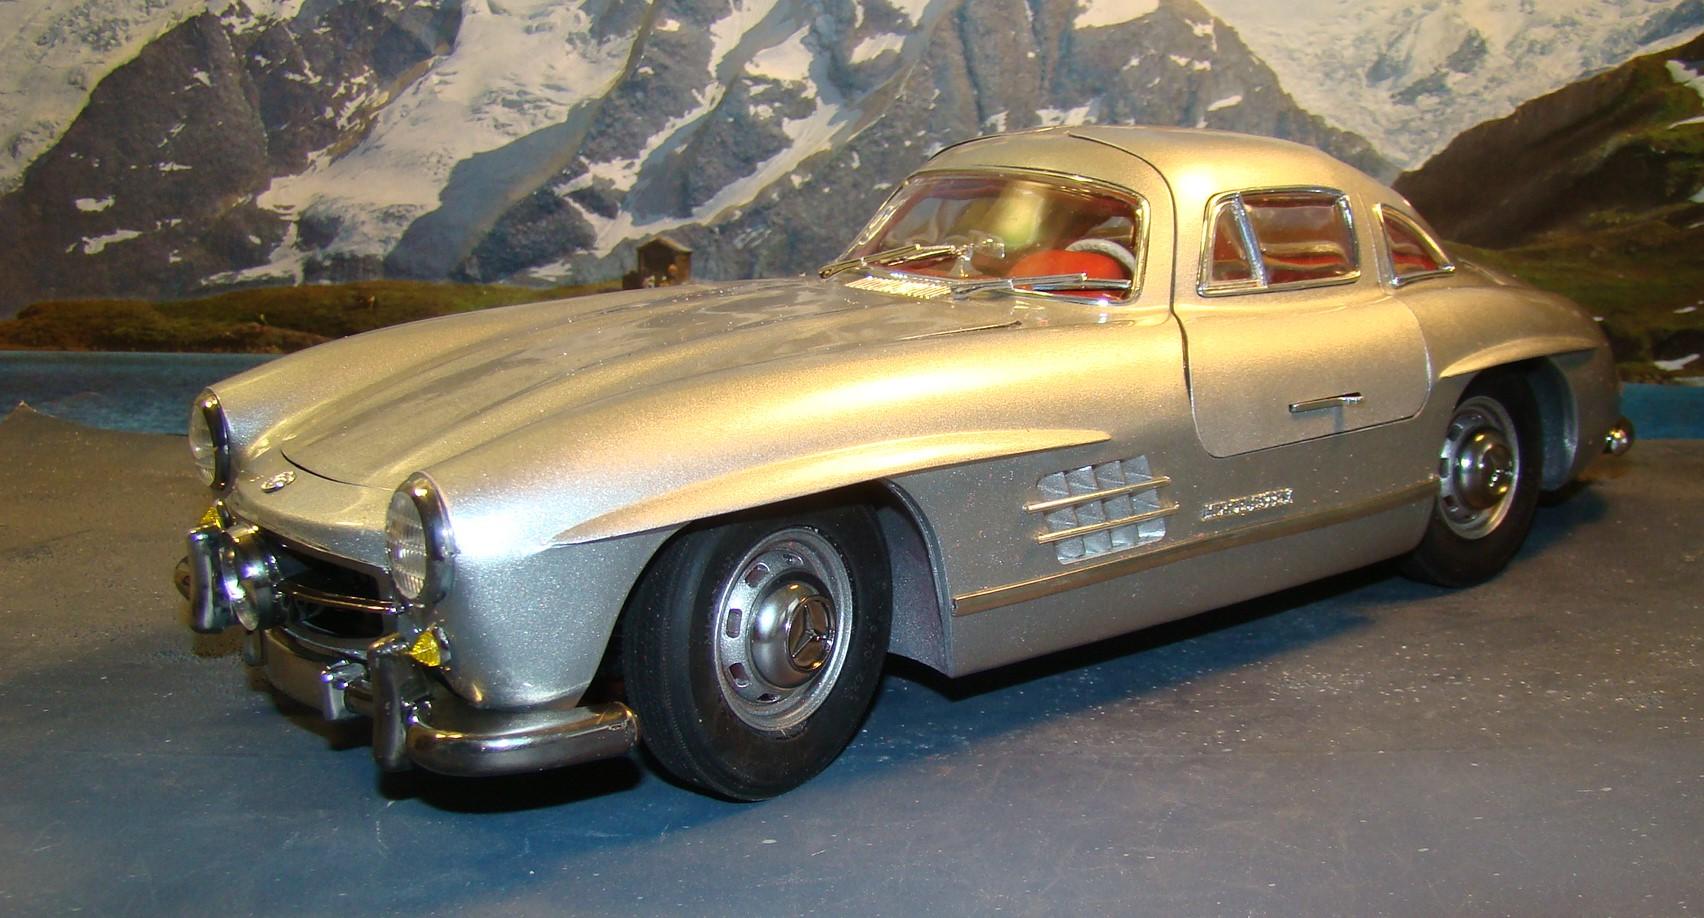
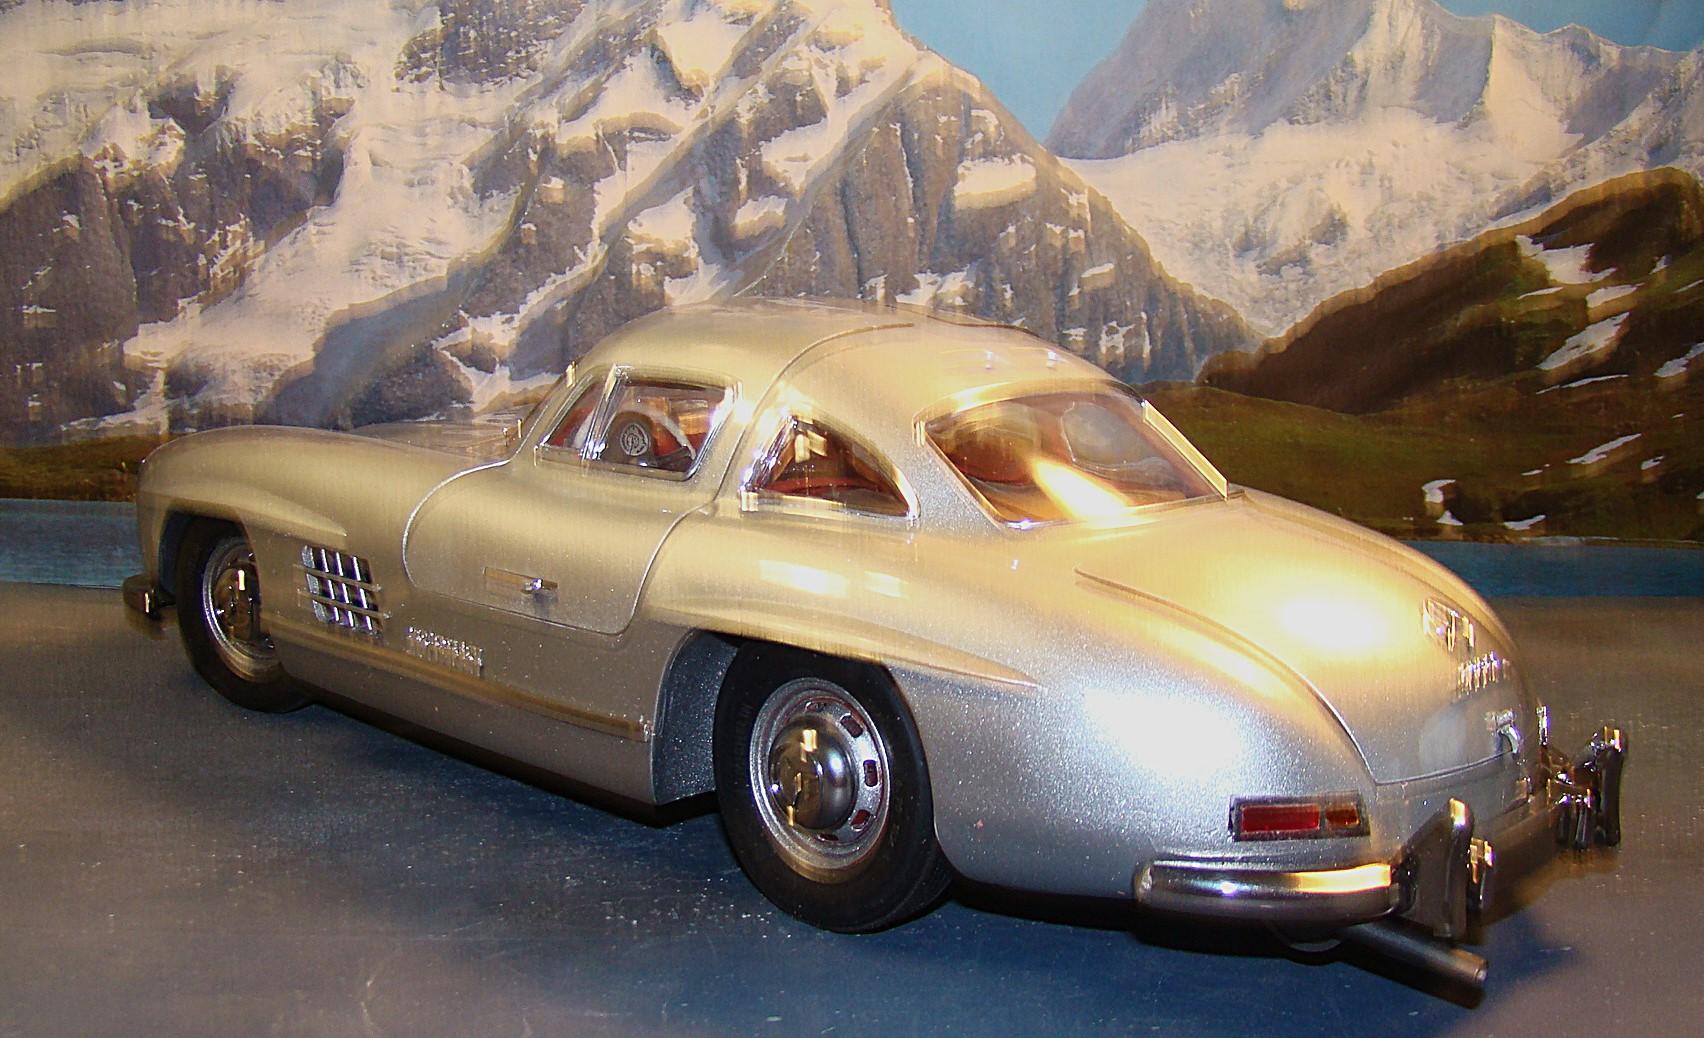
Cpontinuing my series of 1/12 kits. I dug this one out of the stash and was pleasantly surprised to see everything painted . Looked like and easy finish project. Well thqat is just the wrong thing to think because it rarely turns out that way and this project was no exception. For starters this whole kit had to be re-engineered as the body was an upper and lower half. I cut the bottom chassis plate away from the lower body and then glued that to the upper half so I could fill in the seam that ran through the middle of the car. That was done a long time ago and I had to remember how to install everything once done. No notes either. At least the hard part was done and it had a real nice finish. Color was 1830 Testors laquer Diamond Dust with their Wet-Look clear. More information in the picture captions. Thanks for looking and comments welcome. . Finished car on its wheels. Some thing fit well, like bumpers and window surrounds and others had to be massaged into place. This kit was originally produced by Renwal in the 60's. Revell aquired the molds and changed nothing except the box and instructions. It showed. rear veiw. Trunk opens and there is a spare tire inside. Had to make new tail lights and a trucnk latch as they somehow disappeared over the years. I am bot usually critical of the proportions of a model but this one is just plain off. The green house and the windows are just way too small. I suppose this was done to compensate for the working gullwing doors but it really shows. Since this was painted over 30 years ago I wouldn't have thought to try and fix this. It would have been more work than I bargained for anyway. So I just finished it the way it was. Not the worst but not the best either. This particular car has been made by many manufacturers and I have it in several scales. I recently posted a 1/16 version. The Tamiya 1/24 is the best example in my opine. Aaahh those working door struts. One of my favorite features of this kit. But if you knew how much trouble it was to get here. Lots of engineering here mostly with the hinges but in the end the doors fit fairly well and operated to spec. Even the door latches work and hold the doors closed. I(nterioor of the car was nice and had all the details including the special luggage. I add carpet and dash decals. Paint isd Testors flat red. Engine was painted various shades of Testors metalizers. There was lots of chrome in this kit and most of it was sprayed with Tamiya Smoke to tone it down slightly.

-
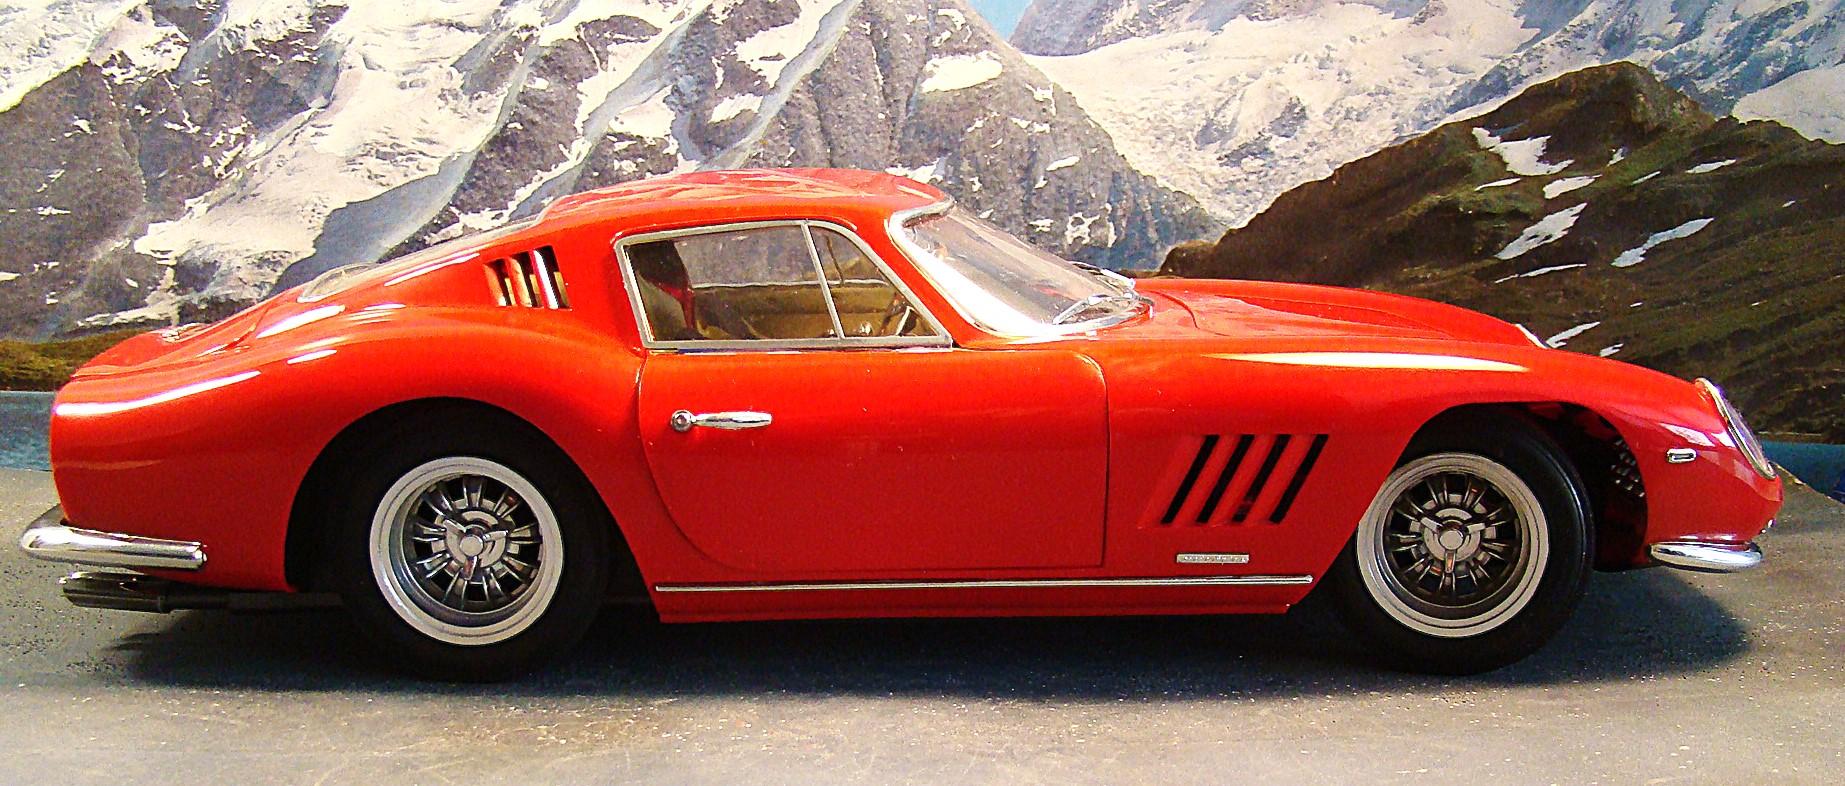
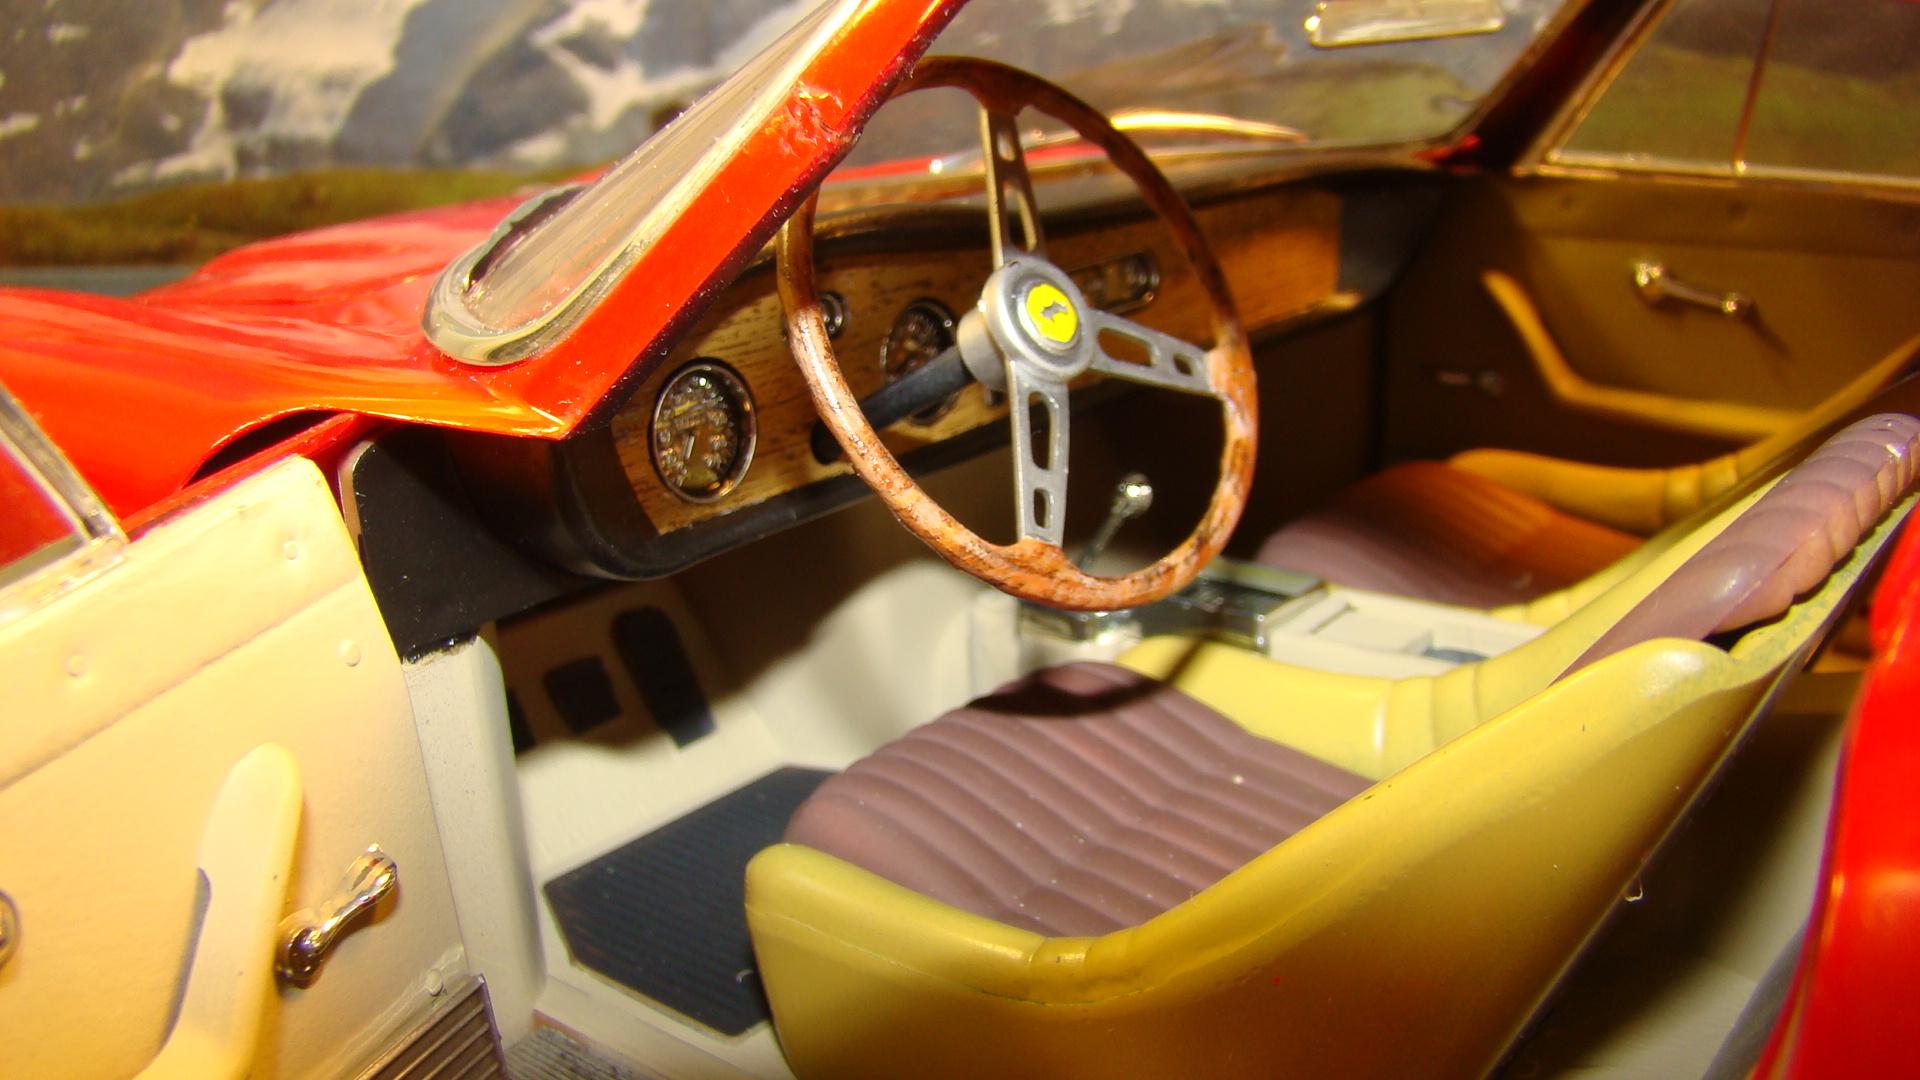
I dug this body out of my display case where it has been sitting for the last 35yrs. It was all polished and the front and rear windows were installed. I originally purchased this kit as a Renwal and my intention was to super detail it with working suspension and every concievable detail. I had lots of reference as I had spent some time with a real one and even got to drive it. But that was a very long time ago and I am over that now. I just wanted it finished. I have three of the kits so there was no shortage of parts. One of the biggest problems with this kit is the roof either caves in or is warped. This is usually from having something sit on the box. All three of mine had this problem. It was solved by breaking the window posts and gluing the windshield securely in place. The rest of the kit is mostly box stock. Color on this is Testors 1103 red with their clear over top. More details below. Getting the body over the chassis was way easier than I thought it would be. All the body pieces open and fit well but the doors were a little tight. Rear veiw has some nice detail. Raised Ferrari script was real cool. Bumper is held in place with epoxy and poster tack. This model is quite large (as is the real car) and surprisingly heavy. Hollow rubber tires were nice but had to be filled with urethane foam to prevent collapsing. Original kit has two piece hard vinyl tires that were horrid. I threaded the axles and threaded the wheels on so if I ever find a really nice set of wires they get changed. Interior is done is several shades of Tamiya LP. Woodgrain on the dash is decals from the stash. Doors attached nicely and opened well. Renwal (the original issue of this kit) molded the Ferrari logo on the steering wheel upside down, Go figure. Steering wheel operated the front wheels. Had to take a shot of that big v-12. Its really a lump of plastic but it had real nice valve covers that I sprayed with a combination of smoke and semi-gloss. All the chrome was srayed with this or just semi-gloss. Thanks for looking. Comments welcome.
-
 We've seen images of the old '50s and '60s era molds Revell had stored in their Illinois warehouse, some (many?) of which Atlantis Models acquired. They have begun to share publicly exactly what they acquired, starting with this mold for the Revell Douglas D558-2 Skyrocket: Let the automotive model related speculation and hopes begin.