kilrathy10 Posted September 17, 2020 Share Posted September 17, 2020 It does look really good in that green... I love that paint can... Too cool... Amazing... Over here, paint cans are printed in English and Spanish.... The top language is usually English... Cool how it's reversed over there... And why wouldn't it be? Awesome.... Quote Link to comment Share on other sites More sharing options...
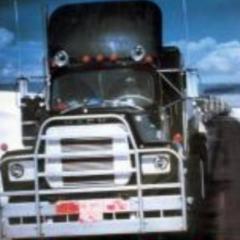
Aerodyne03 Posted September 17, 2020 Author Share Posted September 17, 2020 Here are the latest progress??, Charles, thanks for the compliments on making another one more than wanting to, it must happen to me, in Italy these kits are not very popular diff Thanks for the compliments JT??, I like that green too much, it's interesting to see how even some little things like the writing on the cans change from one country to another! ???? Quote Link to comment Share on other sites More sharing options...
Rockford Posted September 19, 2020 Share Posted September 19, 2020 That's brilliant Aerodyne! Colour worked out great too. Looks fantastic! Quote Link to comment Share on other sites More sharing options...
DRIPTROIT 71 Posted September 19, 2020 Share Posted September 19, 2020 Looks great! I like it in green! Quote Link to comment Share on other sites More sharing options...
Aerodyne03 Posted September 19, 2020 Author Share Posted September 19, 2020 Thank you so much for the compliments guys !! ??? Even though it is still a wip, I would like to add some scratch details I have enrolled it in an exhibition so for a week I will not be able to work on it ... ?? Quote Link to comment Share on other sites More sharing options...
mario pagano Posted November 12, 2023 Share Posted November 12, 2023 looking at the fire trucks you built very nice can you tell me what model kit you used for the providence Rhode Island model thanks mario Quote Link to comment Share on other sites More sharing options...
Chariots of Fire Posted December 10, 2023 Share Posted December 10, 2023 On 11/12/2023 at 7:41 AM, mario pagano said: looking at the fire trucks you built very nice can you tell me what model kit you used for the providence Rhode Island model thanks mario The Providence, Rhode Island truck is made from the same Monogram kit used in this post. I extended the cab and added the extra doors. The body was modified to look like the Providence rig. Quote Link to comment Share on other sites More sharing options...
Gmatta691 Posted April 14 Share Posted April 14 @Chariots of Fire do you have any progress pics of that mostly out of box Mack? I’m starting my own soon. How durable is that body and chassis? As this is my first time modeling in 1/32 I’m sure I’ll screw it up a dozen times. Also how did you fill the headlight and turn signals to make it look as though there are lenses? Thanks in advance. Quote Link to comment Share on other sites More sharing options...
Chariots of Fire Posted April 15 Share Posted April 15 On 4/13/2024 at 10:28 PM, Gmatta691 said: @Chariots of Fire do you have any progress pics of that mostly out of box Mack? I’m starting my own soon. How durable is that body and chassis? As this is my first time modeling in 1/32 I’m sure I’ll screw it up a dozen times. Also how did you fill the headlight and turn signals to make it look as though there are lenses? Thanks in advance. Sorry that I don't have any in-progress pix of the Mack. The headlights are clear lenses that just pop in place. I used Tamiya clear red and clear amber to paint the red warning lights and the amber turn signals. It really pops over the chrome base. The body and chassis are very durable and easy to work with. They did some nice work on the kit. Why they molded in the cross lays above the pump panel is beyond me. The other thing that they could have improved on was the tires. But then it would not have been a snap kit. To fix that I cut the sidewalls off some spare tires of the same type of kit, sanded them flush, and glued them to the open face of the tires that I was using. This fills in the back of the tires and adds to the overall appearance. Don't forget to add a vertical windshield divider to the windshield area. Windshields on those Macks were not one-piece. Plastic strip stock works well. Hope this helps. 1 Quote Link to comment Share on other sites More sharing options...
Gmatta691 Posted April 19 Share Posted April 19 On 4/15/2024 at 11:07 AM, Chariots of Fire said: Sorry that I don't have any in-progress pix of the Mack. The headlights are clear lenses that just pop in place. I used Tamiya clear red and clear amber to paint the red warning lights and the amber turn signals. It really pops over the chrome base. The body and chassis are very durable and easy to work with. They did some nice work on the kit. Why they molded in the cross lays above the pump panel is beyond me. The other thing that they could have improved on was the tires. But then it would not have been a snap kit. To fix that I cut the sidewalls off some spare tires of the same type of kit, sanded them flush, and glued them to the open face of the tires that I was using. This fills in the back of the tires and adds to the overall appearance. Don't forget to add a vertical windshield divider to the windshield area. Windshields on those Macks were not one-piece. Plastic strip stock works well. Hope this helps. I bought one of the revel kits of the same model. I was digging around at home today and found 2 of the monogram kits! Man, there is some disparity in quality with the newer mold. The only clear pieces are the windows and the rotator cover. Looking at the monogram I have a lot more to play with. Have you ever simulated a lense before and how would you go about doing that? I couldn’t agree with you more about the crosslay situation. It’s odd they decided to mold hose there but not in the rear, thought I am glad they didn’t. How did you go about cutting the crosslay and boosters out? Then, how did you fill that void? Forgive me for all the questions. I’m going to screw around with the revel kit and make my mistakes there before transitioning to the better monogram kits. Thanks again Quote Link to comment Share on other sites More sharing options...
Chariots of Fire Posted April 19 Share Posted April 19 (edited) Hi, George: I used my dremel with a cutting disk to clean out the cross lay bins and cleaned up the cuts with files and Xacto knife. After that I put in pieces of plastic sheet stock for the bottom of each. If you have some scribed sheet that would be good as back then deck boards were used that were made of wood and painted. That gave the hose a chance air out and not get mildewed. I did the same for the booster reel but took both half pieces of the reel and glued them together to make one. A small piece of electrical wire the same basic diameter as the "hose" on the reel was added and draped over the rollers. For lenses I have made molds of them and then cast them in clear 2 part resin. Which lights in particular are you concerned with? Charlie Edited April 19 by Chariots of Fire 1 Quote Link to comment Share on other sites More sharing options...
Gmatta691 Posted April 19 Share Posted April 19 (edited) @Chariots of Fire I was concerned with the headlights, but I put a drop or 2 of testors glue and let it dry. I used some testors paint for the turn signals and warning lights, placing just enough paint to not break surface tension. I’m pretty happy with the results, both look like lenses now instead of the stickers the kit provided. I’ll have to go get a cutting wheel for my dremel, my starter set didn’t come with one unfortunately. I assume you did something similar to remove the rotator beacon and siren mounts on the roof. Needless to say I’m most nervous about that. How did you go about filling the unused holes in the mold? Or how would I go about filling holes I will almost certainly make in the cab with my dremel? Thanks again. Edited April 19 by Gmatta691 Quote Link to comment Share on other sites More sharing options...
Chariots of Fire Posted April 20 Share Posted April 20 Use your Dremel with a sanding disk after you cut most of the beacon base away. Don't worry if you sand away a little more than you need to flatten the roof. Use some Evergreen plastic rod or something similar to fill in the hole. After the glue has set trim off the extra rod flush with the cab and fill in the abrasions with some putty like Tamiya gray. Sand that smooth using sanding sticks and then fine sand paper or sanding sponges. That should do the trick. If you can get some Tamiya acrylic clear red and clear amber the lenses will look great as well. Quote Link to comment Share on other sites More sharing options...
Gmatta691 Posted April 20 Share Posted April 20 (edited) Ran to the store and grabbed a cutting wheel. I wouldn’t say I butchered it but I’m certainly not a surgeon with the dremel yet. I jumped the gun a little with the chrome as well. I poured too much of the paint to justify wasting most of it. I’m hoping some masking tape will save it when I throw some red on the body. The hollow plastic color really isn’t doing it for me. Gonna have to run to the store again tomorrow for a file and some of that sewing elastic. I ordered some plastic sheeting as well. I also attached some pics of the lights, let me know if they look as good as I think they do. Edited April 20 by Gmatta691 1 Quote Link to comment Share on other sites More sharing options...
Chariots of Fire Posted Sunday at 12:19 AM Share Posted Sunday at 12:19 AM You've got the right idea. Be as neat as you can be with the red and amber. I know it's hard to do but it will make all of the difference in the world. Some file work on the body where you did the cut and then some plastic sheet stock and you should be good. Again, be as precise as you can when putting the sheet in place as the inside corners are going to be hard to clean up otherwise. Cut a little big and then sand a little at a time to get a close fit. Quote Link to comment Share on other sites More sharing options...
Gmatta691 Posted Wednesday at 12:43 AM Share Posted Wednesday at 12:43 AM Spent the last couple days cleaning up cuts and filling the voids I’ve made. I used a part of the tree to fill the hole where the beacon was. I made the booster reel, originally making some legs out of the tree but having to cut them off so it still fits. I found a string off some paintbrush packaging and made myself a halyard. Just got the plastic sheeting glued in. I plan to prime it tomorrow, paint on Thursday. After that I can start making some serious progress and hopefully wrap up by next week. Quote Link to comment Share on other sites More sharing options...
Recommended Posts
Join the conversation
You can post now and register later. If you have an account, sign in now to post with your account.
Note: Your post will require moderator approval before it will be visible.