customline
-
Posts
3,791 -
Joined
-
Last visited
Content Type
Profiles
Forums
Events
Gallery
Everything posted by customline
-
"No matter how he tried he could not break free; and the worms ate into his brain" 🤯 Sorry, couldn't help it. 🥴
-
😣
-

-
This is it until I can figure out what to do next. Thanks for looking. Probably a wash job on the floor pan and running boards after the repaint to dirty it up some. Big problem now is the dash. The AMT dash is not molded in such a way that's conducive to proper detailing. The dash is about the only part of the interior that is half-way interesting and I want to do a decent job with it but it just plain sucks. I can't use the Revell dash, it's not even close for a fit. 😞
-
OK, now you're bragging 🙄
-
Thanks, Robert, but I cheated. The fenders are new. In fact it's just the body proper and the interior that are from the "built" tudor. I had this bash, using the Revell chassis, on my mind a long time. I don't recommend it unless a narrower front axle is used. There are other issues too but be aware of that one.
-
That's pretty sad, Len. You'll find a home for it 😌
-
Yeah, it's peaceful in the wee hours but I gotta find a good dark roast decaf. 😳
-

1957 Ford Del Rio "Shooting Brake" Ranch Wagon
customline replied to LennyB's topic in WIP: Model Cars
Now THAT'S REALLY SLUMMING ! 💩 -
Thanks, Len. I think it has a nice "swing jazz" look. Very "Glen Miller" I thought Wifey would approve. That was a disappointment. ☹
-
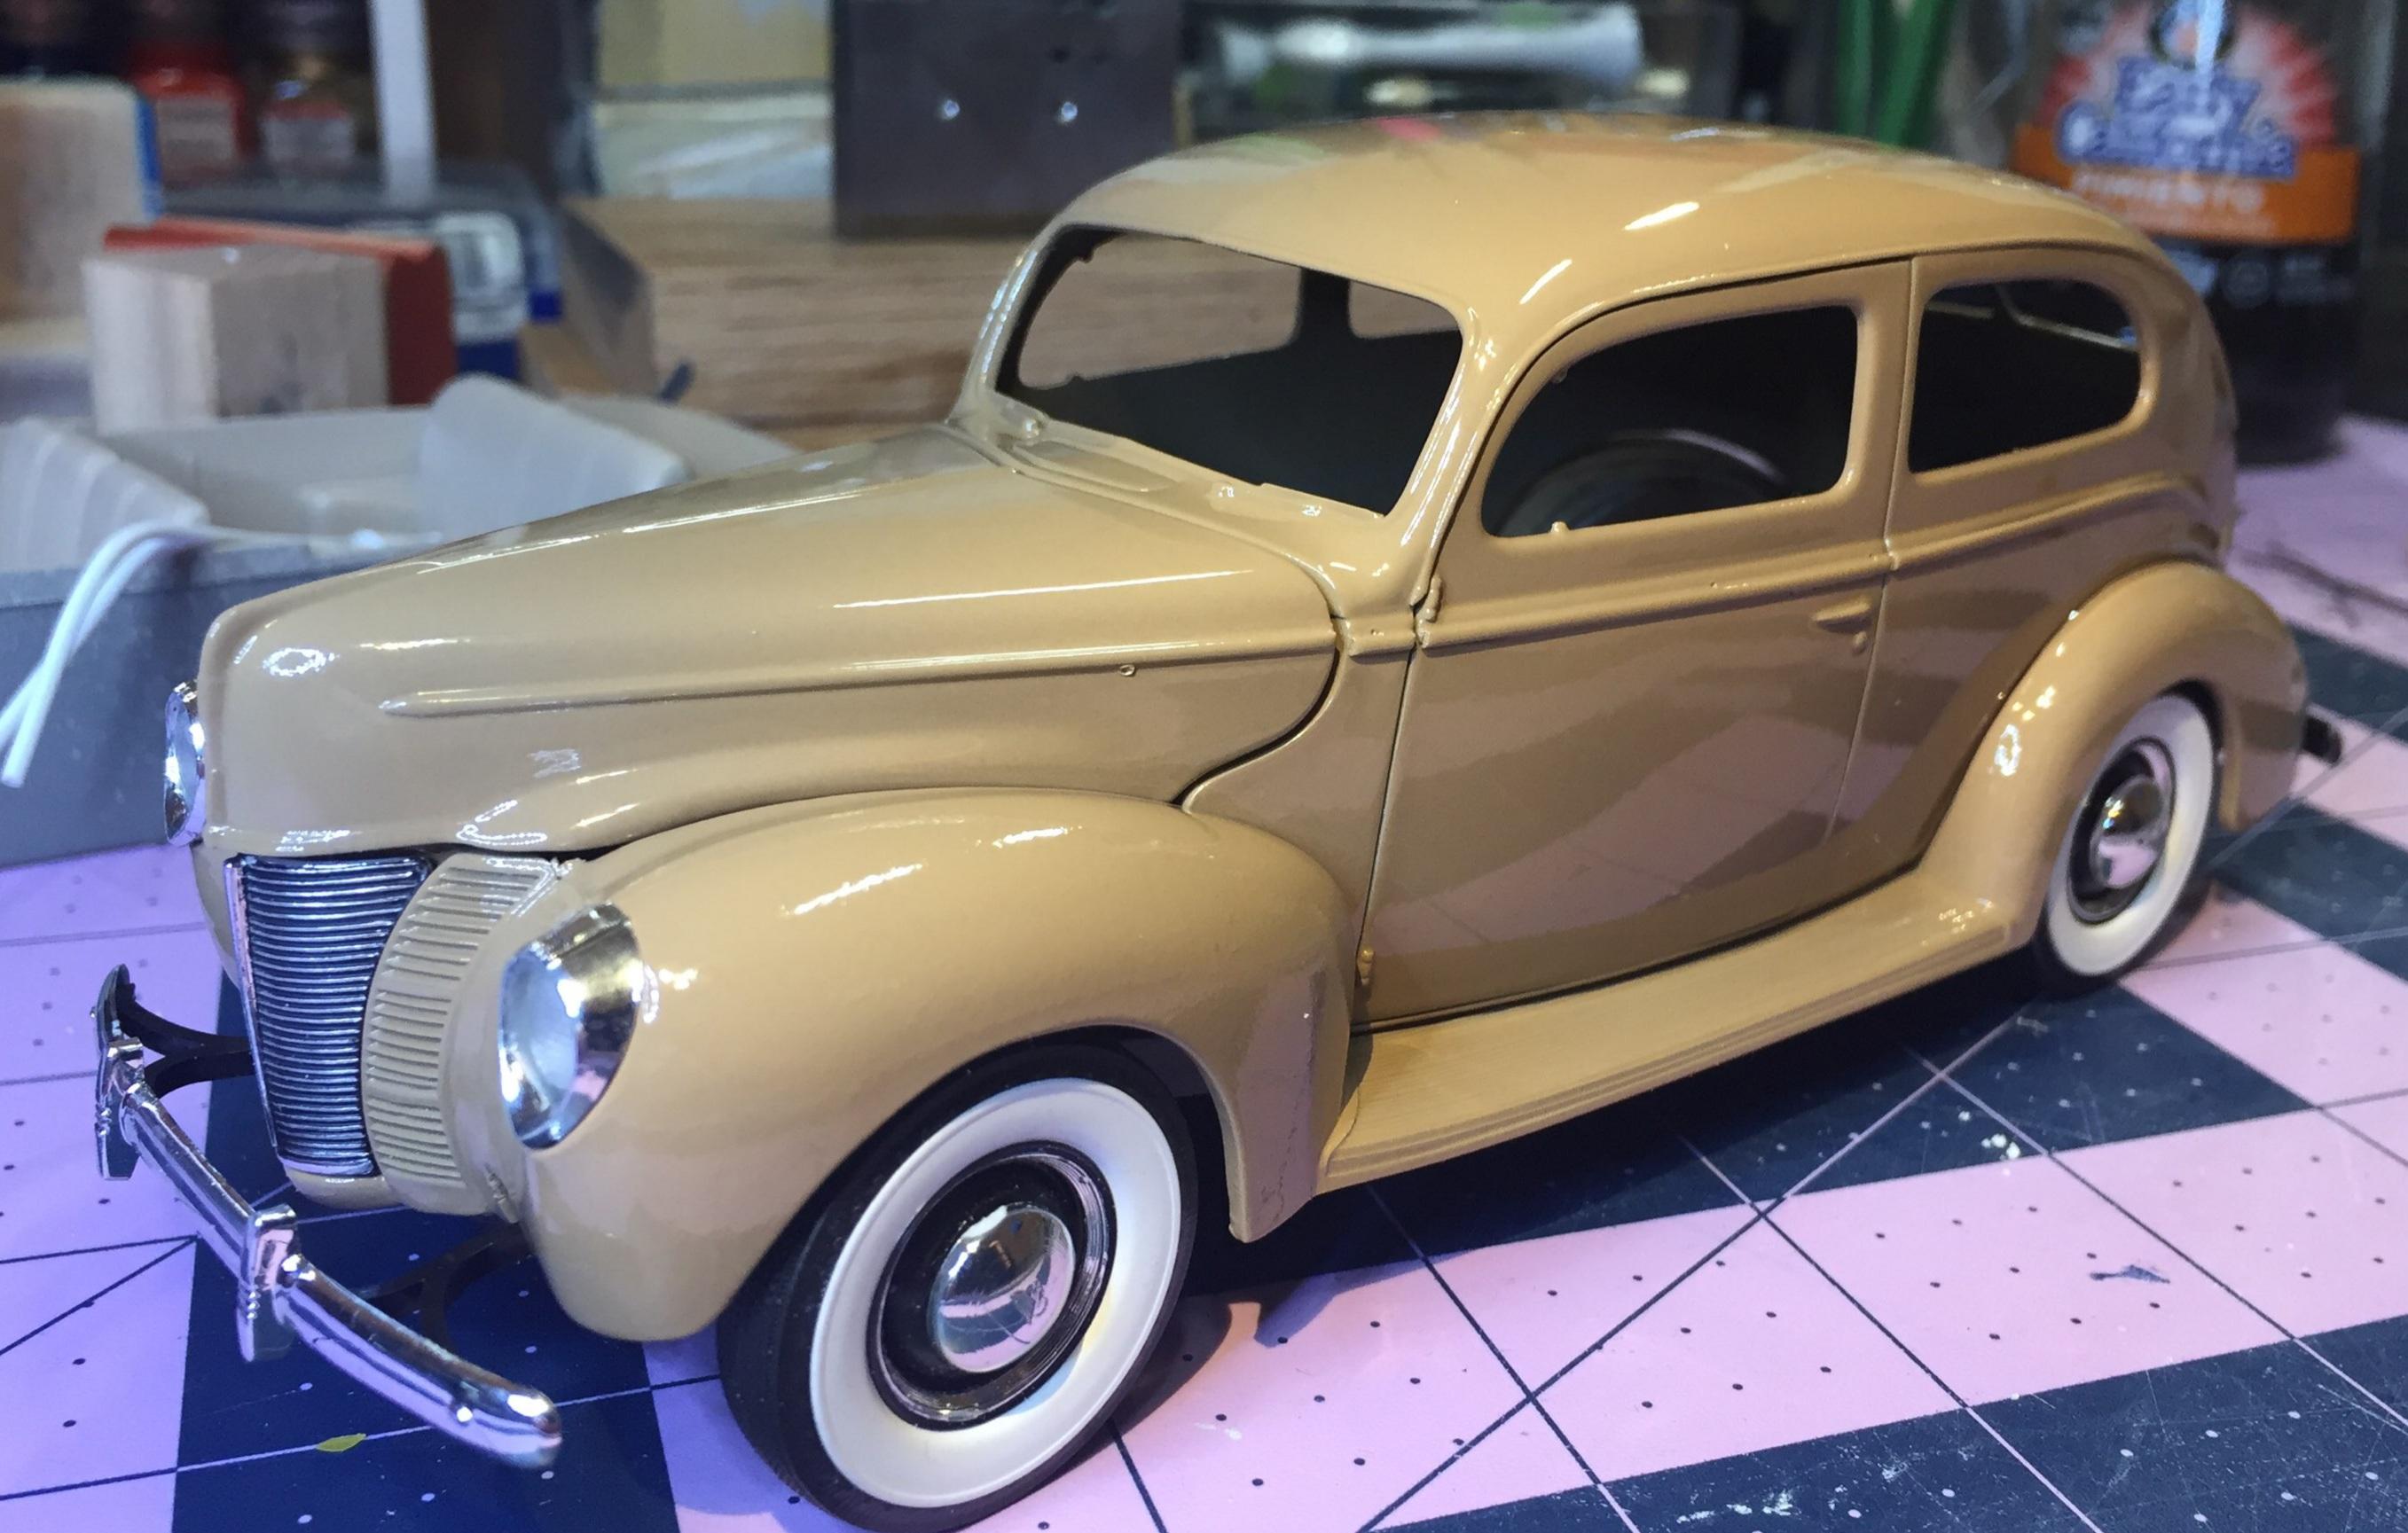
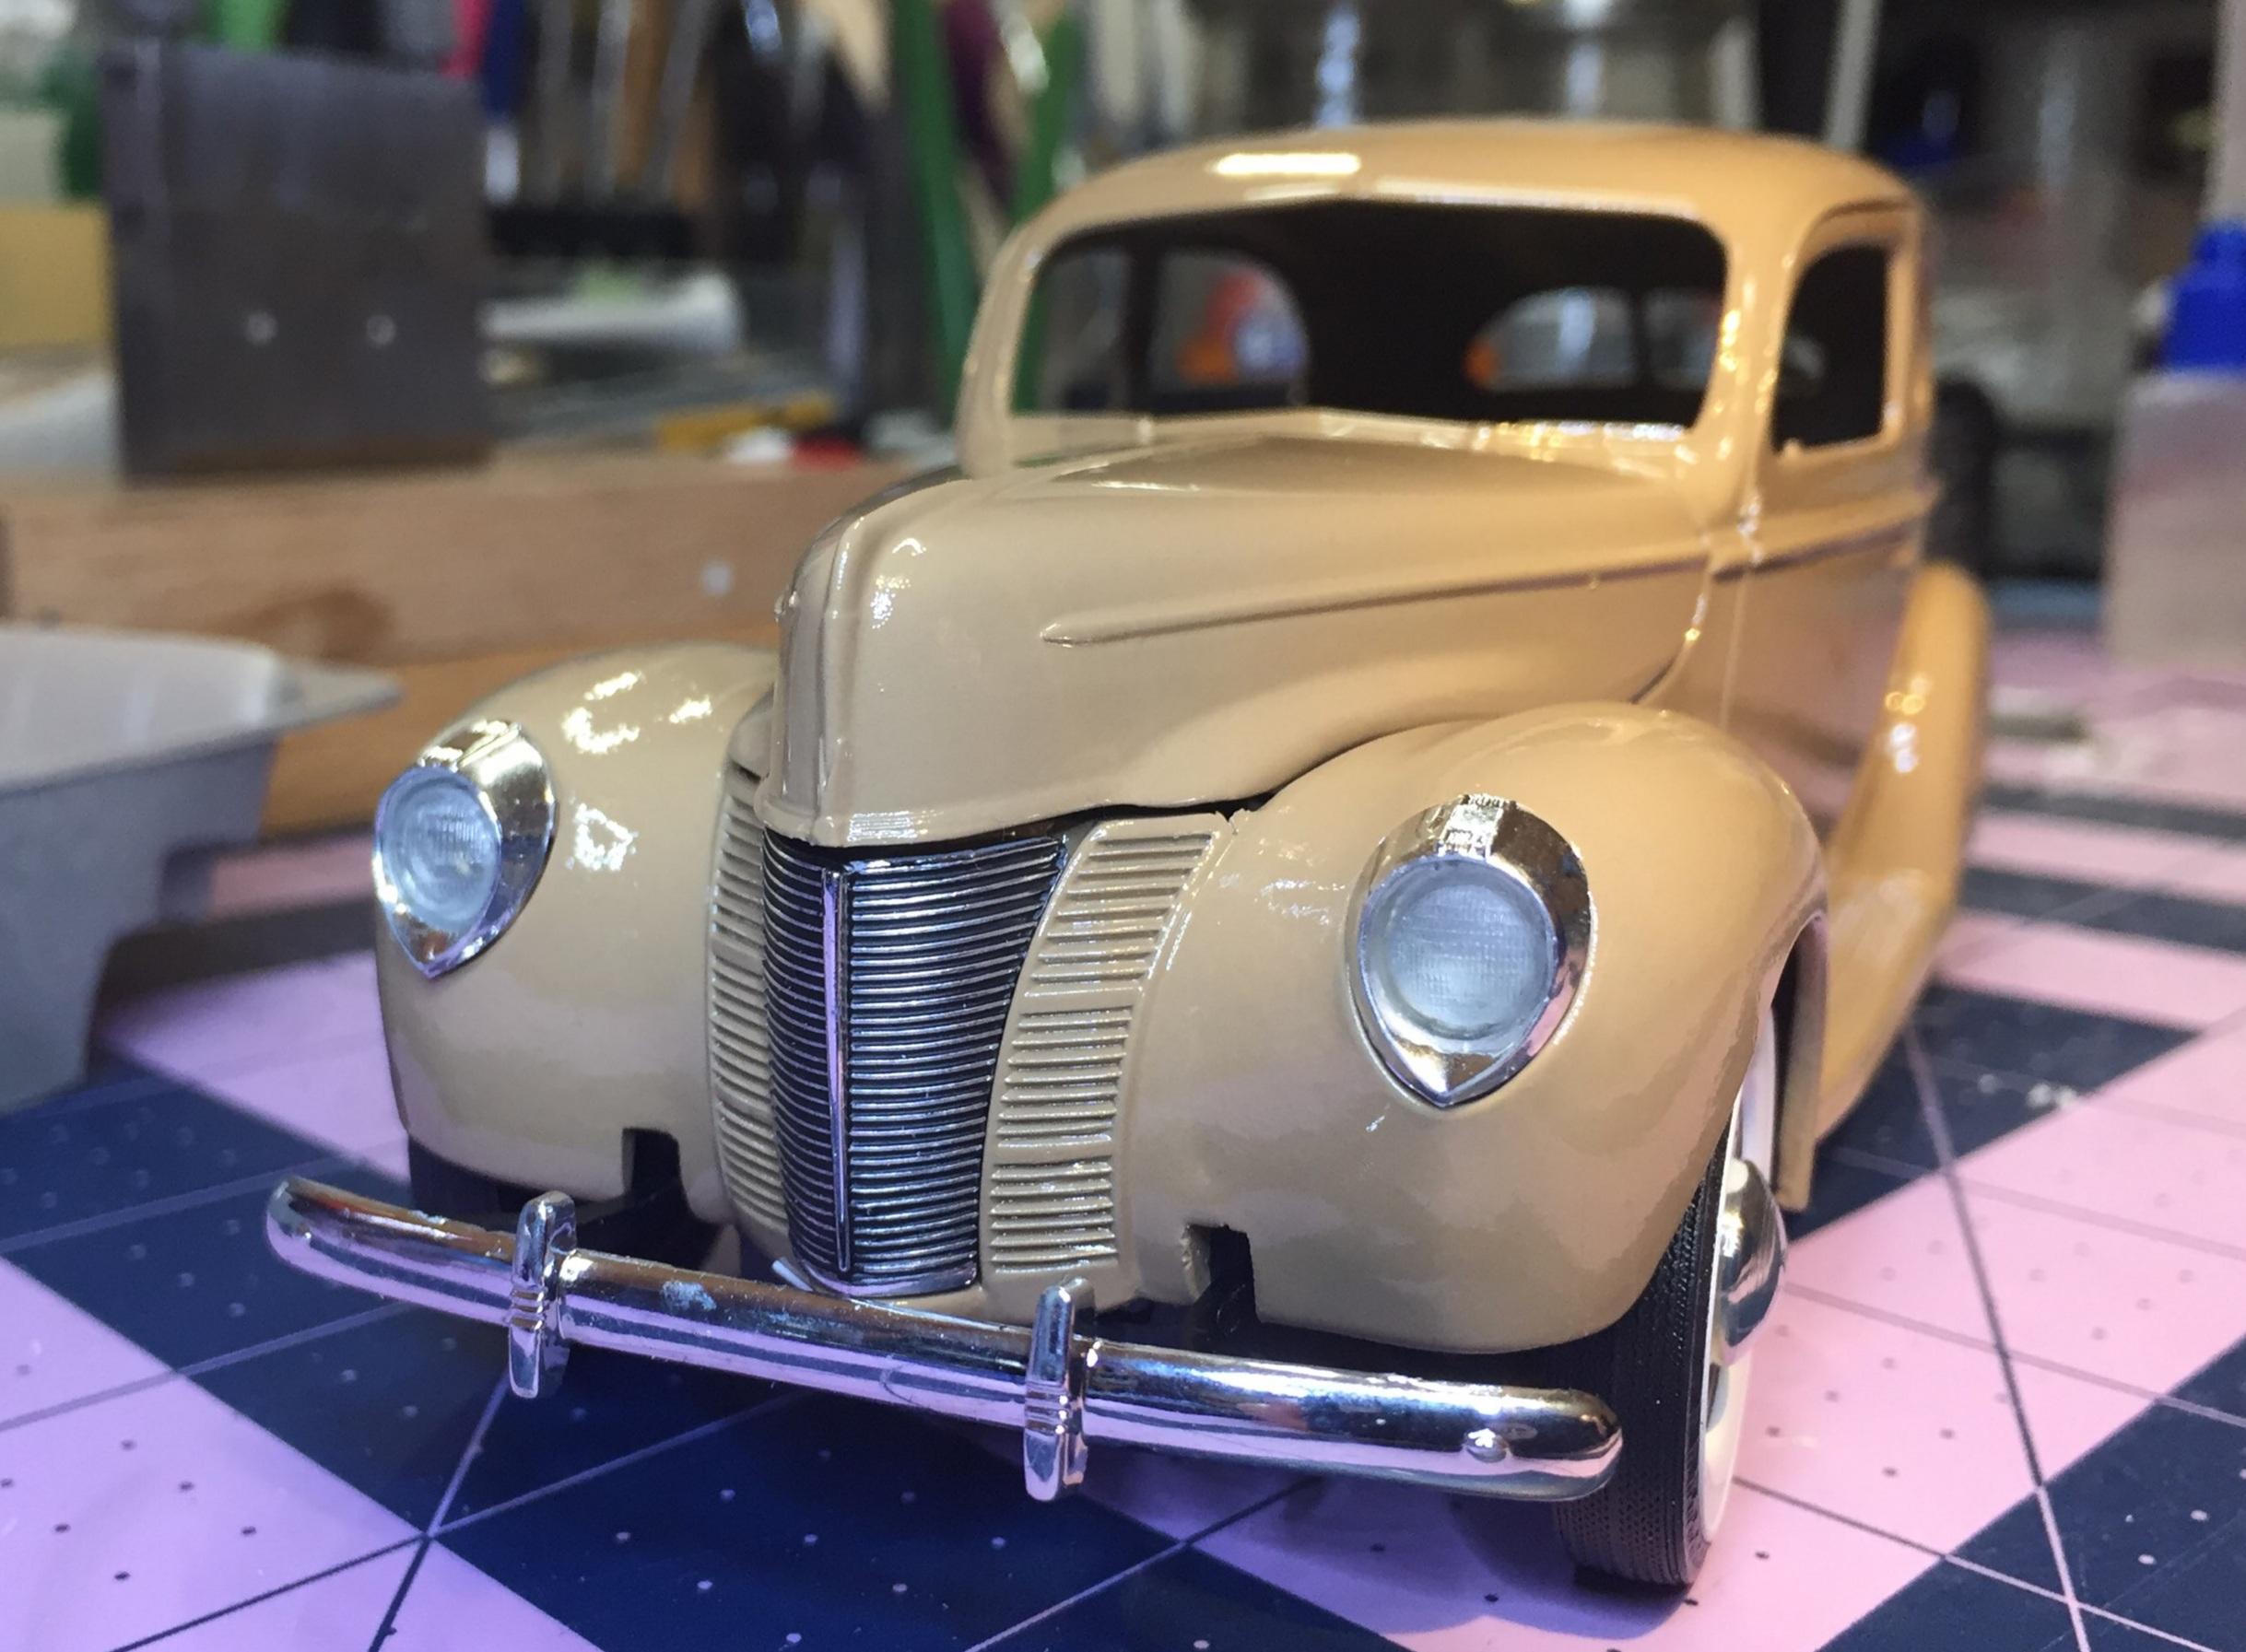
That makes three of us, Dave! Thank you! I wouldn't call it khaki, though. It's more like "coffee with heavy cream and four sugars".
-
You've got a lot on the bench, Bil. One could wonder 🙁. At 3:30 this morning I gave up and decided to try it. I ended up with this 👇 but it eventually worked. It has a nice shadetree look to it, don't you think? The 1/16" rod seems too thin but in scale its equal to 1 1/2" pipe. Just about right for this application. The paint passed the fingerprint test this afternoon so it got wet-sanded. I think maybe I should decant and add some leveling thinner and hit it on the next good day. The driver side was A-1 for a rattle can enamel but the other side was like a Sunkist navel. I get an F in "Paint 101". Wifey hated the color. No surprise there. There would have been some great ironic symbolism if I had gone with orange. Maybe next time. 😅
-
Oh thank goodness! There's three coats on it 🥲. Luckily, there's enough left in the can for about twelve more. I might need 'em. Thanks, Bil. It was a gamble. Do you go to the bench when you can't sleep?
-
Today the temperature climbed to 62f with 30% RH. 😃! I grabbed my tudor, taped up the hood hinges( the devining rods, Len), got it all mounted for painting and hobbled out to the garage. I was still undecided on color. My top 3 choices were orange...no....hunter green....mmmm...nah....and khaki 🤔 ...okay! So where's the right side shot, you say? Well, you certainly figured that out, didn't you? This one will be sitting on the "rack of respite" (not to be confused with the "shelf of shame") for a couple of weeks when hopefully the Krylon enamel will be hard enough to wet-sand. Funny, it looked okay while I was spraying it. I've gotta get more light out there. 😔
-
A very cool idea, and it looks like it's going to work.
-
Actually, Bil, I ended up with "Uptown Girl" playing for a while. I tried to force some Pink Floyd but eventually I ended up with some annoying tune you get when you're on hold for 45 minutes on some customer service line. I'm taking the brake line down. I tried installing the other side and that convinced me it was a fools errand. I have done brake lines on other builds but it's just not practical for this one. If I had planned it, maybe; I can't make it look good now. It draws attention to how bad it looks with straps holding it to the wish-bone. The vacuum lines are strapped to the torque tube on the 1:1 so that's legit and it looks okay to me so I'll settle for that.
-
I enjoyed creating the problems, John. Solving them is kinda hit-or-miss but thanks for the encouragement, I do appreciate it.
-
Well, I figure after one of my horrid paint jobs or a chop that looks like it was done with a chain saw, y'all can point to my brake lines and hit the heart button. Edit: no one thinks you are crazy, Bil, but now I'm stuck with that gee dee song in my head. Thanks a lot! 😟
-
Well, I suspect there's a few Ph.D.s here. I can't even get a good paint job, so I'm trying to compensate 😕. You don't need brake lines, Bil.
-
I'm just trying to run with the big dogs, Bil. 😉
-
I was just trying to keep up with you, Bil. 🥴
-
I didn't want to, Bil, but if I didn't, some (including me 🤓) would think "well, the vacuum lines are there, so where's the brake lines?" Pretty soon, I'm trying to make grease fittings and using my grandson's orthodontic elastics for fan belts. 😓. Once you go down that road....nope, it stops here!
-
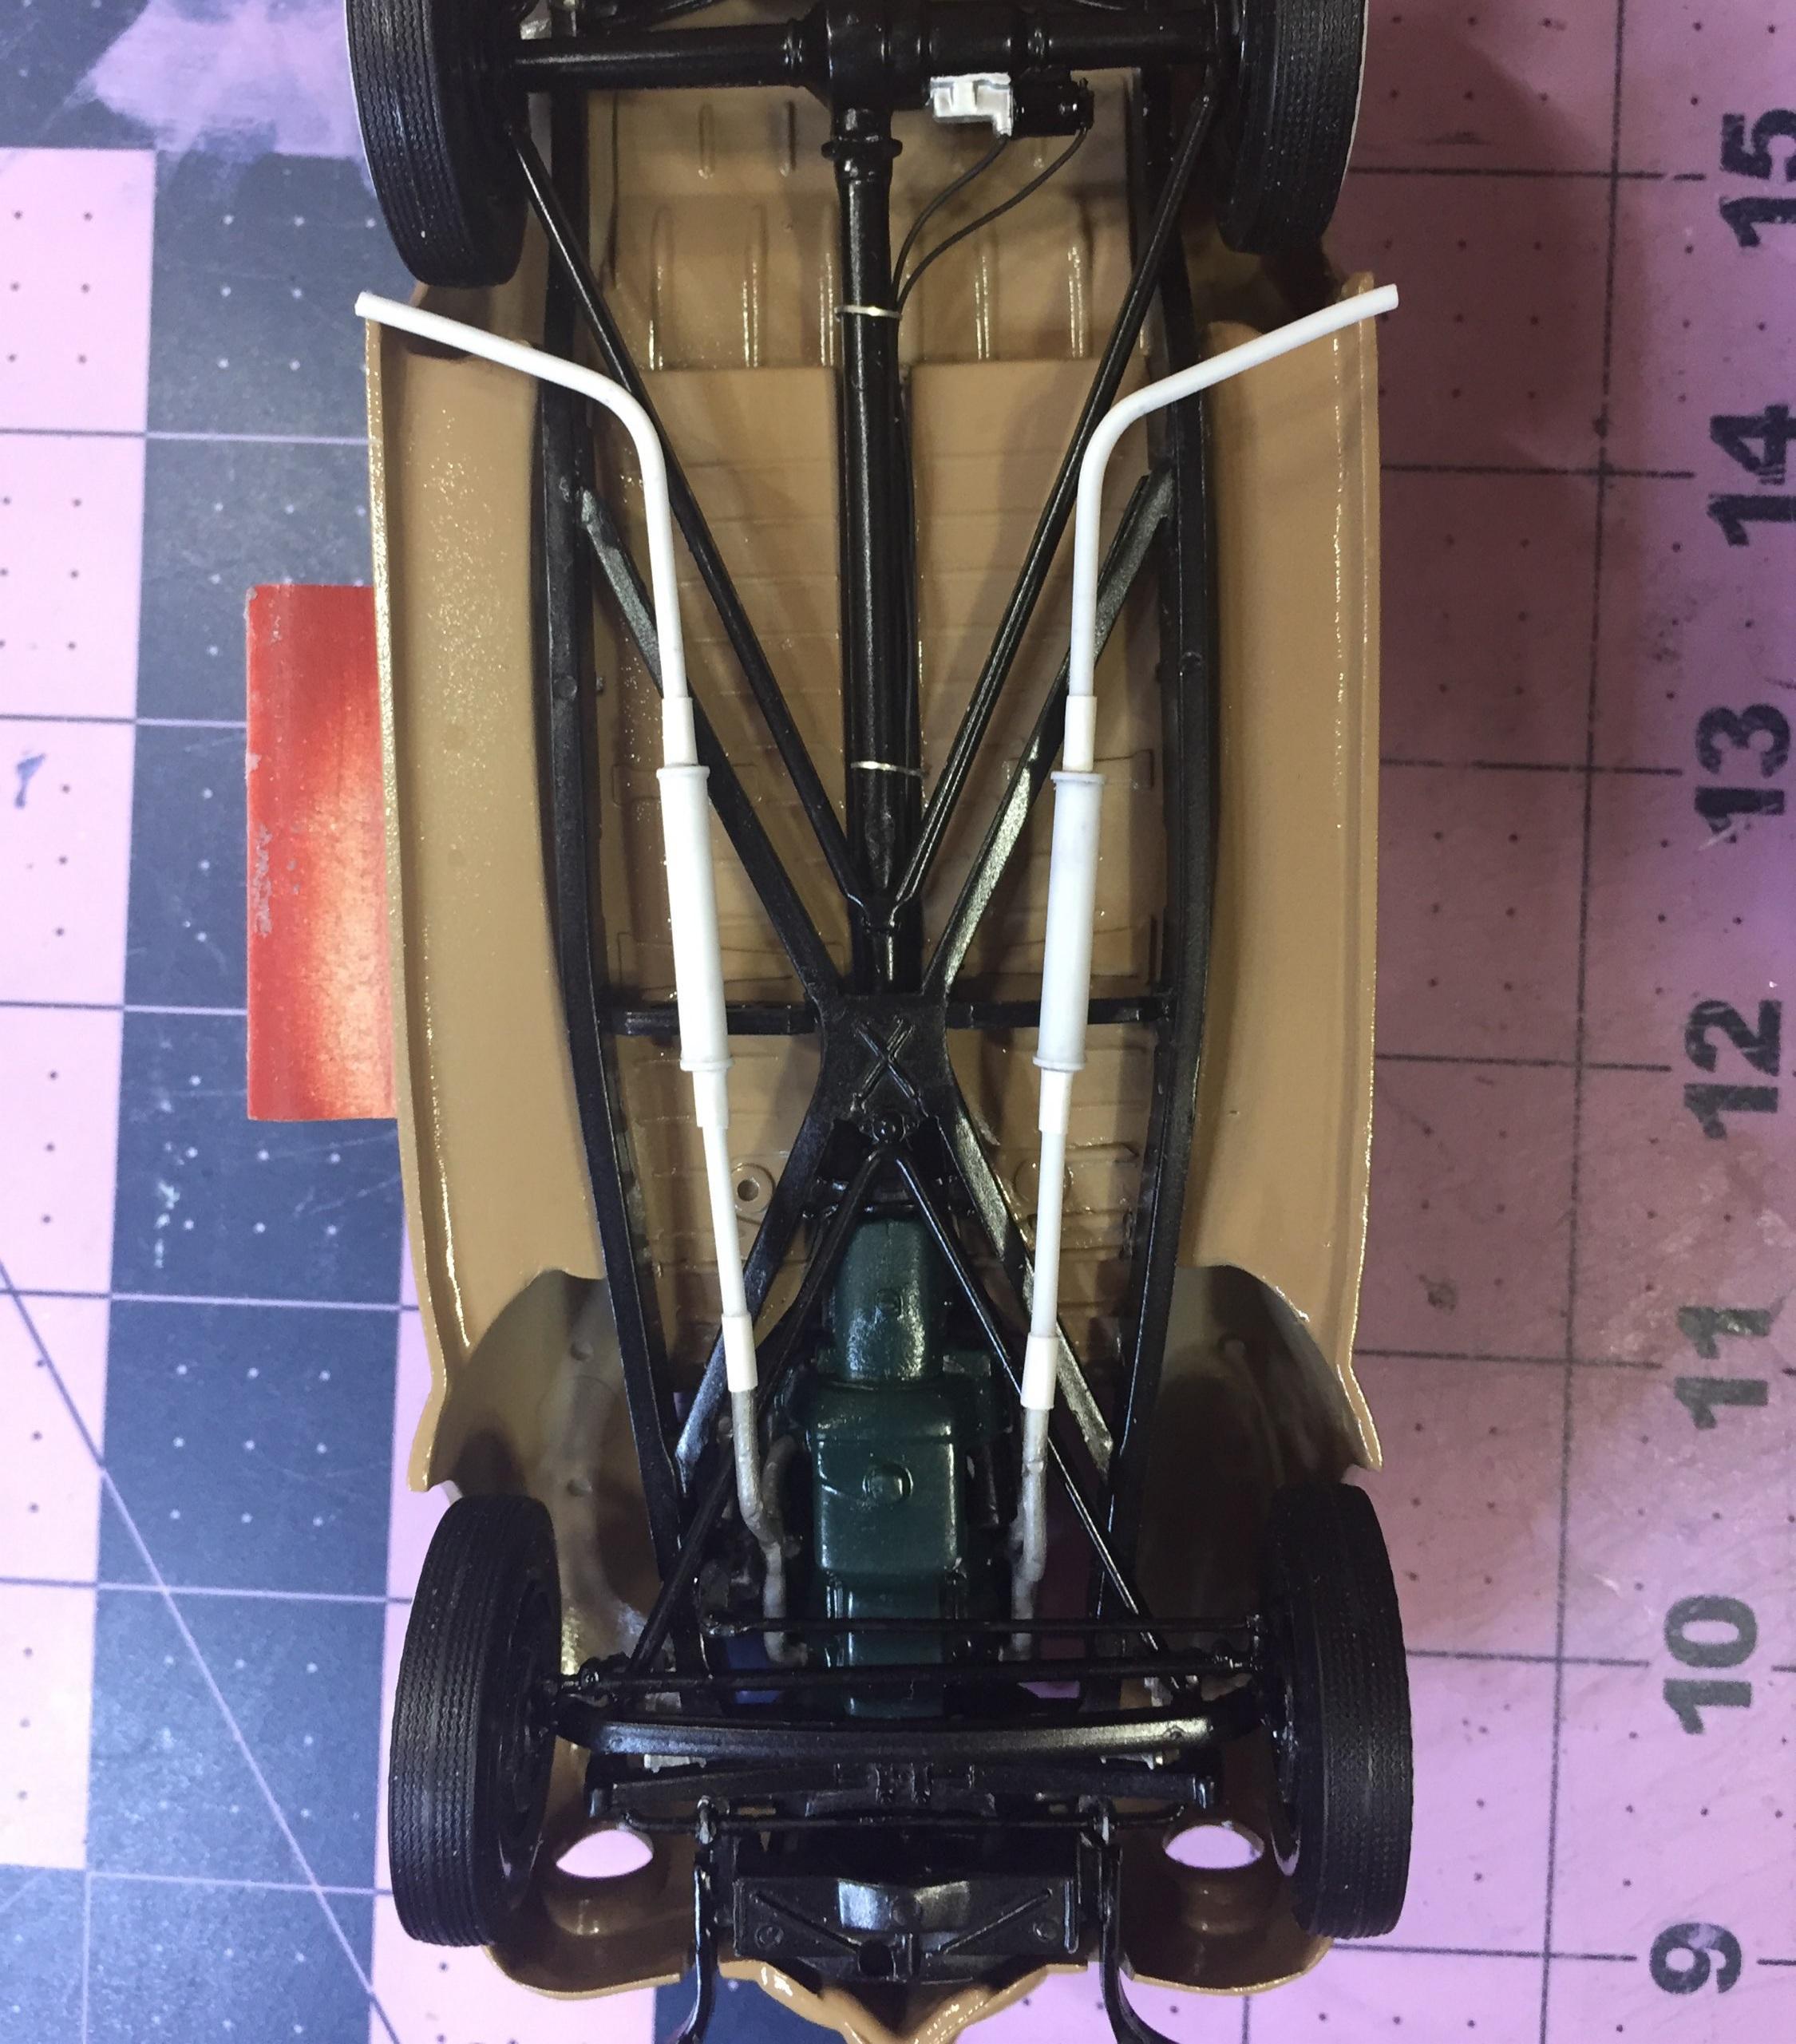
I had no knowledge about the Columbia but I found this: https://fifthaveinternetgarage.blogspot.com/2018/07/the-ford-skyway-columbia-overdrive.html I highly recommend this article if you are in the dark like I am (was 🥴) Here's what I did today 👇 These are the images I am using to guide me in my quest to detail the Columbia overdrive axle and I couldn't do that and ignore the hydraulic brake lines which, as you all know, was new on a Ford for the 1939 model. Better late than never. I started by creating a socket to accept one of the vacuum lines located on the outer end of the vacuum canister. I drilled a piece of square stock and glued it to the canister. At this point I feel compelled to admit this operation would have been easier before assembling the frame and suspension and backing plates, etc. Anyway, heads up on that....another hole was drilled (per reference photo below) for the other vacuum line. I then added the black wire that I usually reserve for ignition wires. The hoses had to be fastened to the torque tube with straps so I pulled out my PE stash and found suitable items to use for that. I used some very fine beading wire for the brake lines and installed per reference photos and fiddled with more PE straps to get that in place on the wishbone. At this point I had had enough. I find it odd that Ford chose to send brake lines down both sides rather than splitting the line on the axle but this was still new for them so.... yeah. The master cylinder glues up to the floor pan so I can't detail any more of this now. I will probably add the brake line to the other side when my neck eases up and maybe add a couple more straps on the torque tube. Good night and thanks for your undying support. 🥲
-
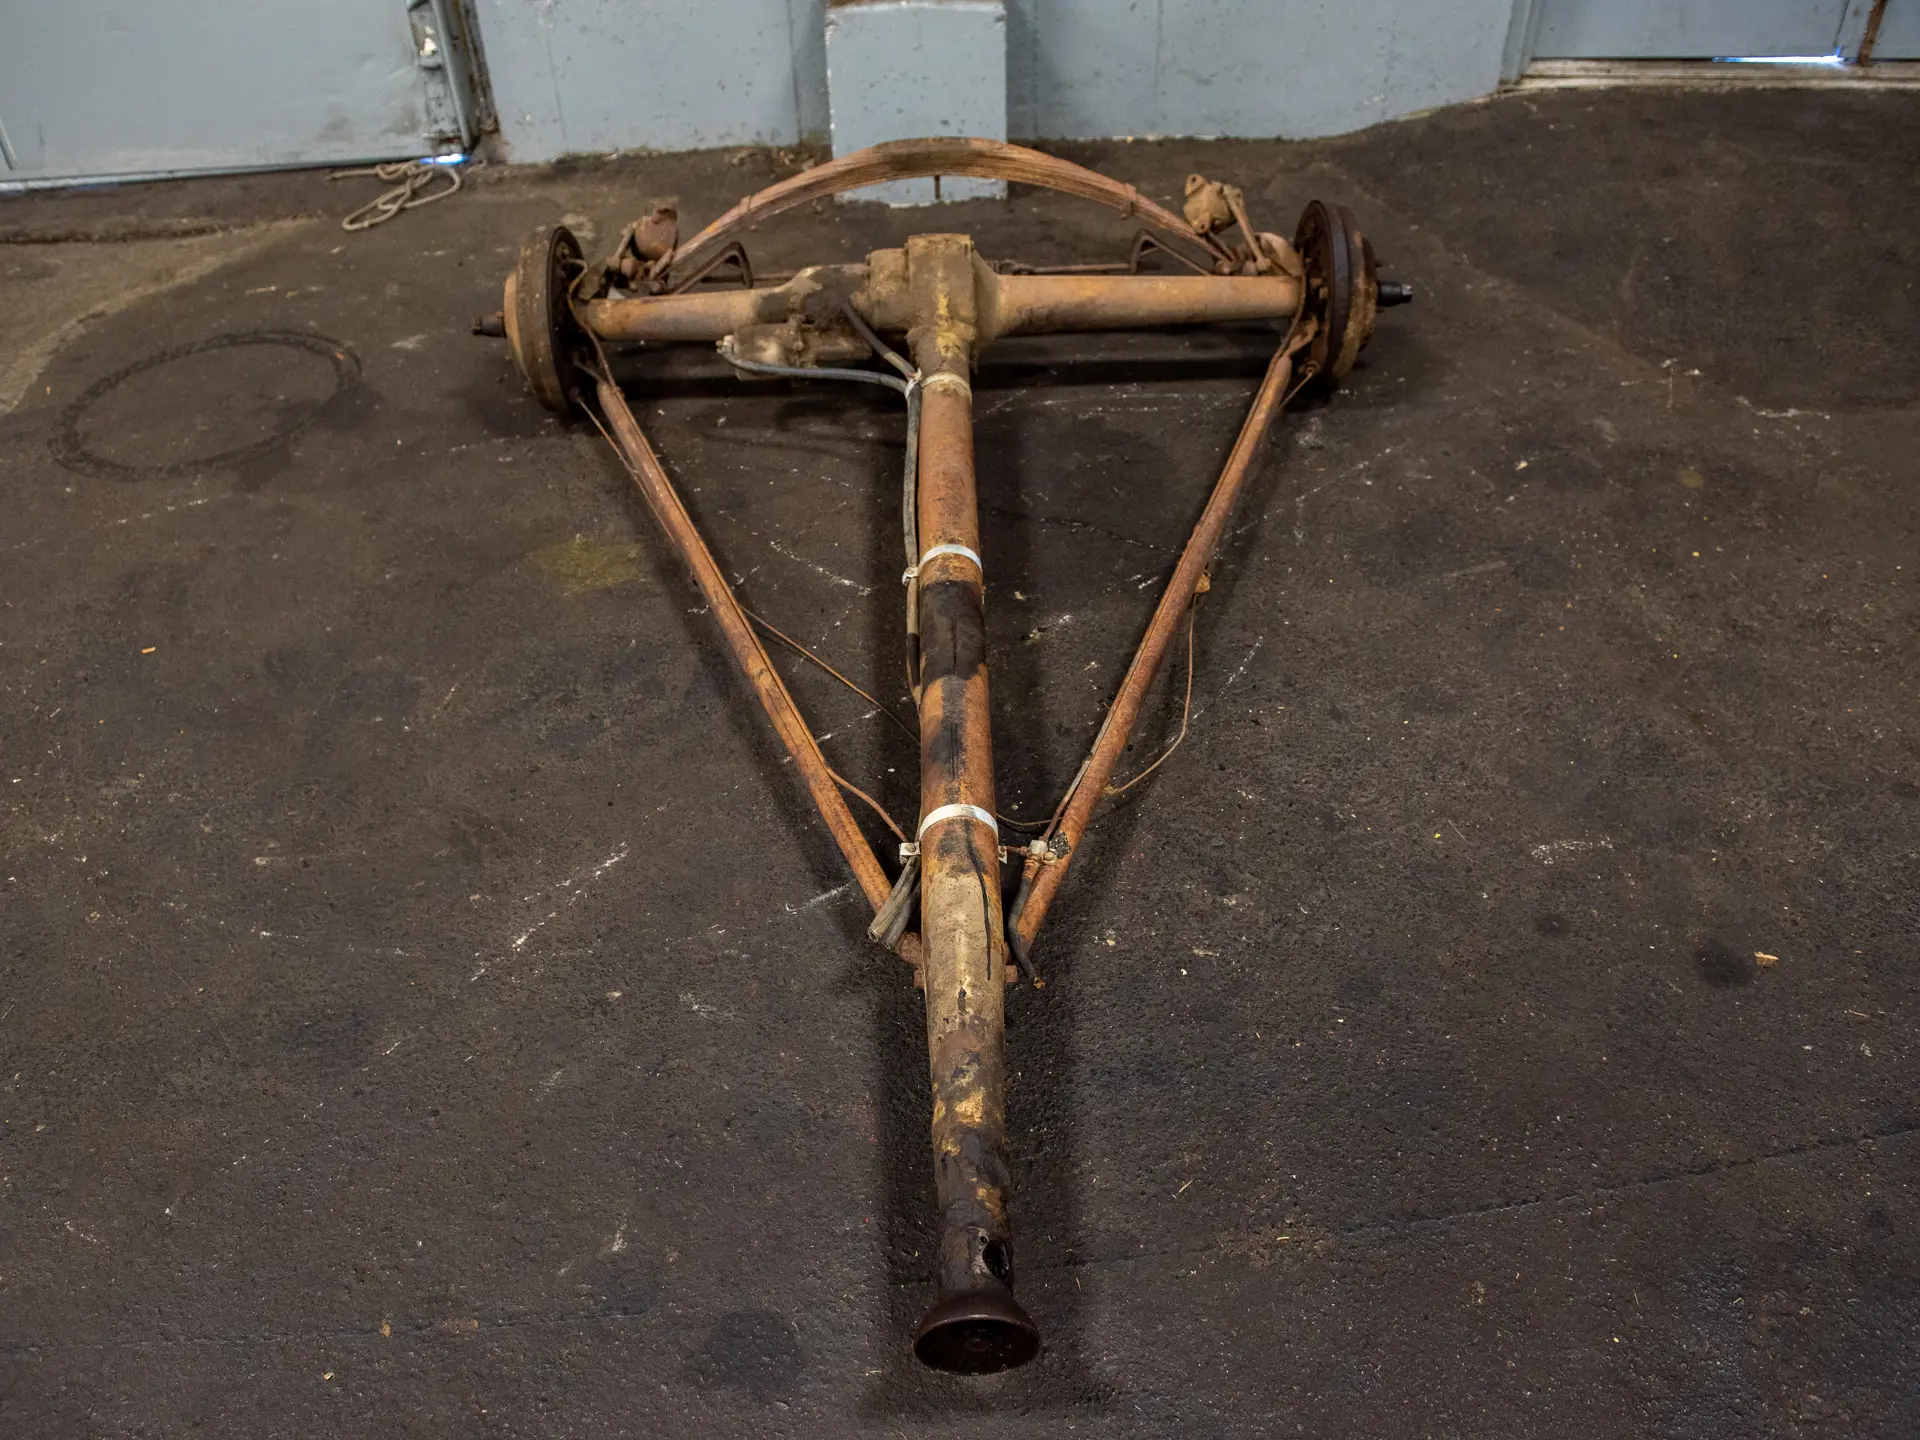
Oh my....and you couldn't work with that? 🤣. I had a '66 Merc ragtop that was in danger of that happening. The body was holding the frame together...rotted away at the rear kick-up on both sides. I was a welder then...you can imagine.
-
Wouldn't it need to be a lot worse than that? you can lift a body off a frame and it doesn't do that unless it has no structure left in the body. Maybe it's still there in a flat pile of rust flakes and four tires. 🙂