JPolli
-
Posts
270 -
Joined
-
Last visited
Content Type
Profiles
Forums
Events
Gallery
Everything posted by JPolli
-
Jesse Skip Samples was a credit to our hobby. He is certainly missed.
-
Scale Models By Chris (SMBC)
JPolli replied to Chi-Town Hustler's topic in Car Aftermarket / Resin / 3D Printed
Lee I did the same thing as you. I placed an order for a Trans Body on May 20th through PAY Pal via their web site. A short time after I placed the order, I saw their web site was closed down. My money was withdrawn from my account. I knew Paul was in bad health however, I thought things were getting better. I wrote to them about my order and the closure of their web site. They did reply and told me about Paul's health and to be patient as they were trying to do their best to fill previous orders. My thoughts go out to Paul. Jim Polli -
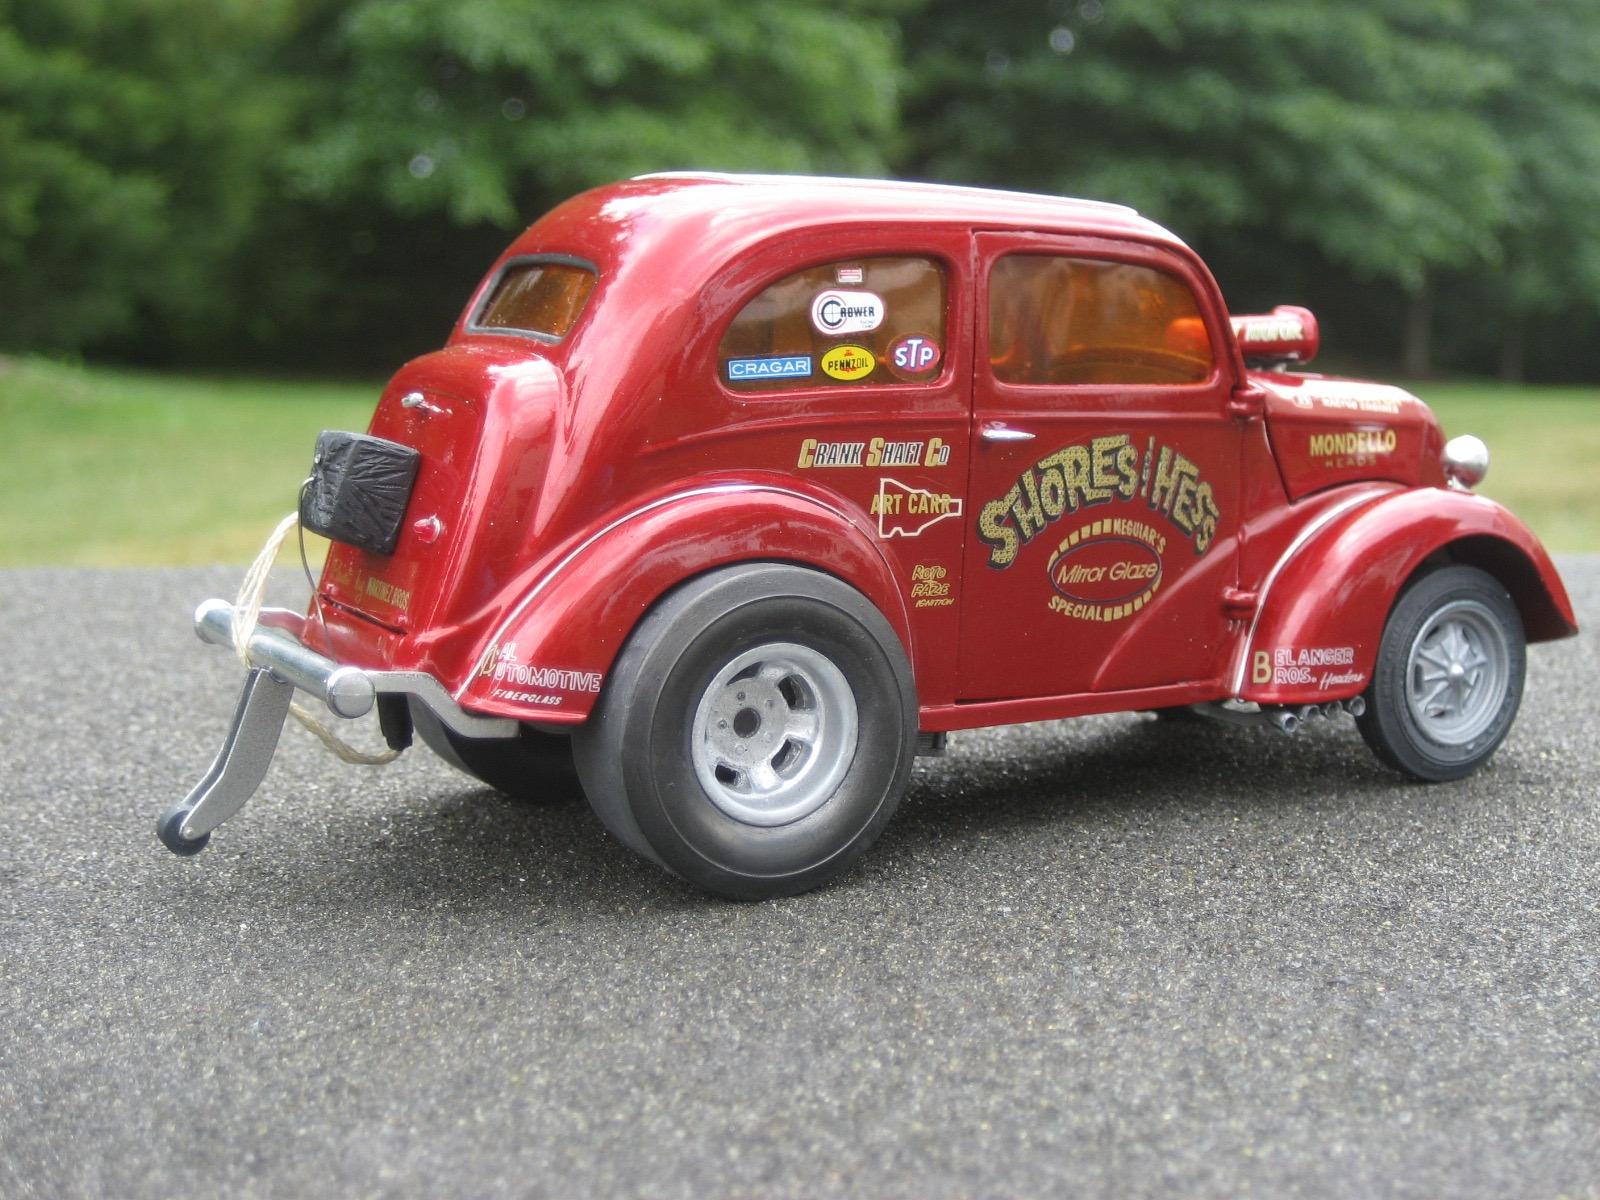
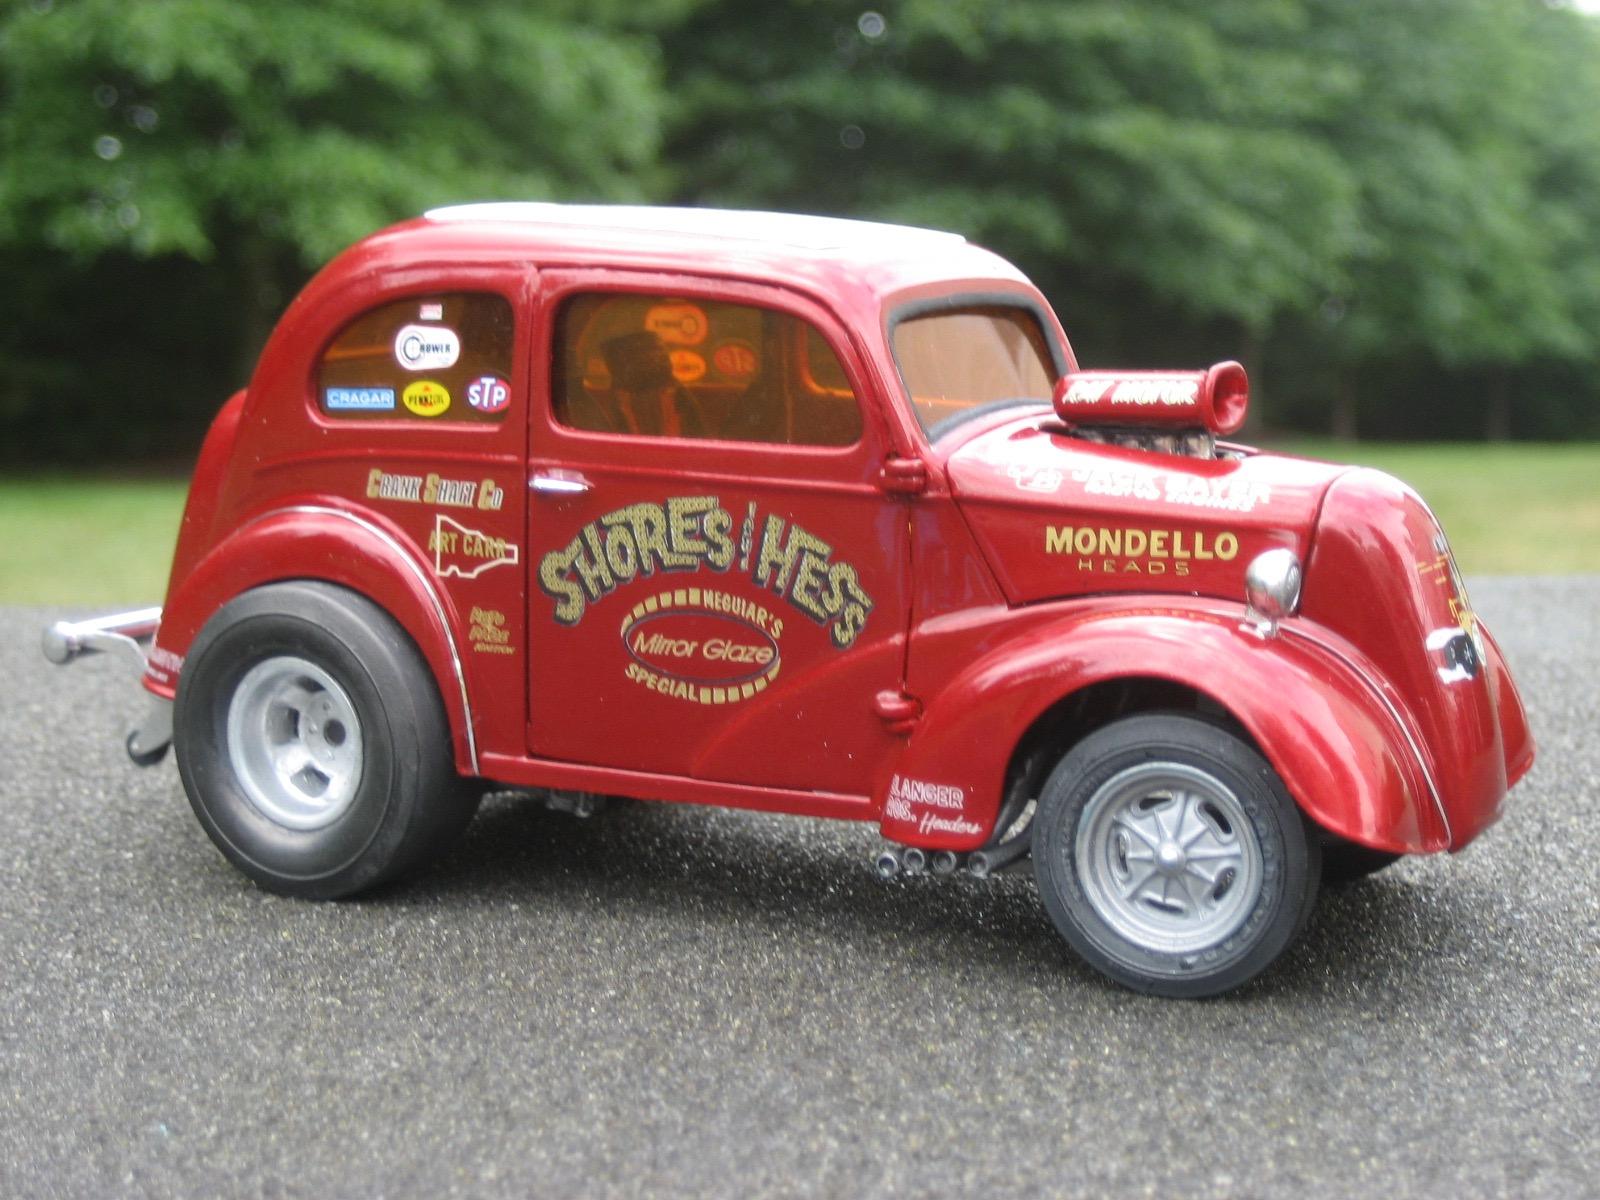
Mike The kit is the Revell Angila Kit with a modified front and rear suspension. The engine, valve covers, breathers, blower, blower hat, are from my parts box. The headers and front wheels are from the Malco Gasser kit. Rear wheels and front tires are from Speed City Resin. Rear slicks are from the Revell Austin Gasser kit. Rear push bar is from the Revell SWC Willys kit. Wheelie bar is scratch built. Paint is Duplicolor Inferno Red Metallic over a silver base followed by Tamiya clear red. Decals are from PoleCat decals, Joe Curtis and from the Revell Anglia kit. Not sure what what you mean "WIP Pics"? Let me know if you would like more info.
-
Just Finished.

-
Roger Very Nice Build. Thanks for posting. Jim
-
Phenomenal Build!!!!!!!!!!!!!!!!!!!!!!!!!!!!!
-
Contemplating building a 1/25 scale funny car with the parachute opened out the back. Have the parachute from the AMT Blue Max F/C Mustang kit. However, the parachute in the kit is not opened. Might anyone know if a 1/25 opened resin parachute is available in kit form or from a resin caster? Thanks.
-
Rubbery resin from paint remover?
JPolli replied to JPolli's topic in Car Aftermarket / Resin / 3D Printed
Oh no Joe!!!!! All that work down the drain not including the cost of the resin and paint. However, you are now a better modeler as a result. -
Rubbery resin from paint remover?
JPolli replied to JPolli's topic in Car Aftermarket / Resin / 3D Printed
I have good news to report that I have remedied my rubbery resin body caused by stripping the paint with Scale Coat. This is how I did it: After washing and cleaning the body with dish soap and water; I put it in a dehydrator for 2 days. I then lightly sanded it Then applied 2 coats of Aluminum plate METALIZER . Then it was put back in the dehydrator overnight. The body now seems usable and is ready for paint. -
Rubbery resin from paint remover?
JPolli replied to JPolli's topic in Car Aftermarket / Resin / 3D Printed
Interesting Ron. Hoping I get some more feed back. -
I put an old painted resin body in Scale Coat to remove the paint. Unfortunately, I left the resin body in too long. The paint did come off. However, the body now has a rubbery pliable texture to it. It seems as if I could use for a build though. Not sure if it will hold paint? And, will the resin body become more rubbery with time? Thought maybe if I shot it with Metalizer it might firm it up a bit? Or, should I just "chuck It"? Any help. Jim
-
Excellent build. Thanx for posting.
-
Tremendous build! Thank you for posting.
-
Some 1/16 funny cars and dragsters I built
JPolli replied to Nicholas's topic in WIP: Drag Racing Models
Tremendous builds! Might I ask with their size 1/16, how do you display or store these? Would like to build on this scale, however I would have difficulty putting these on display. Jim -
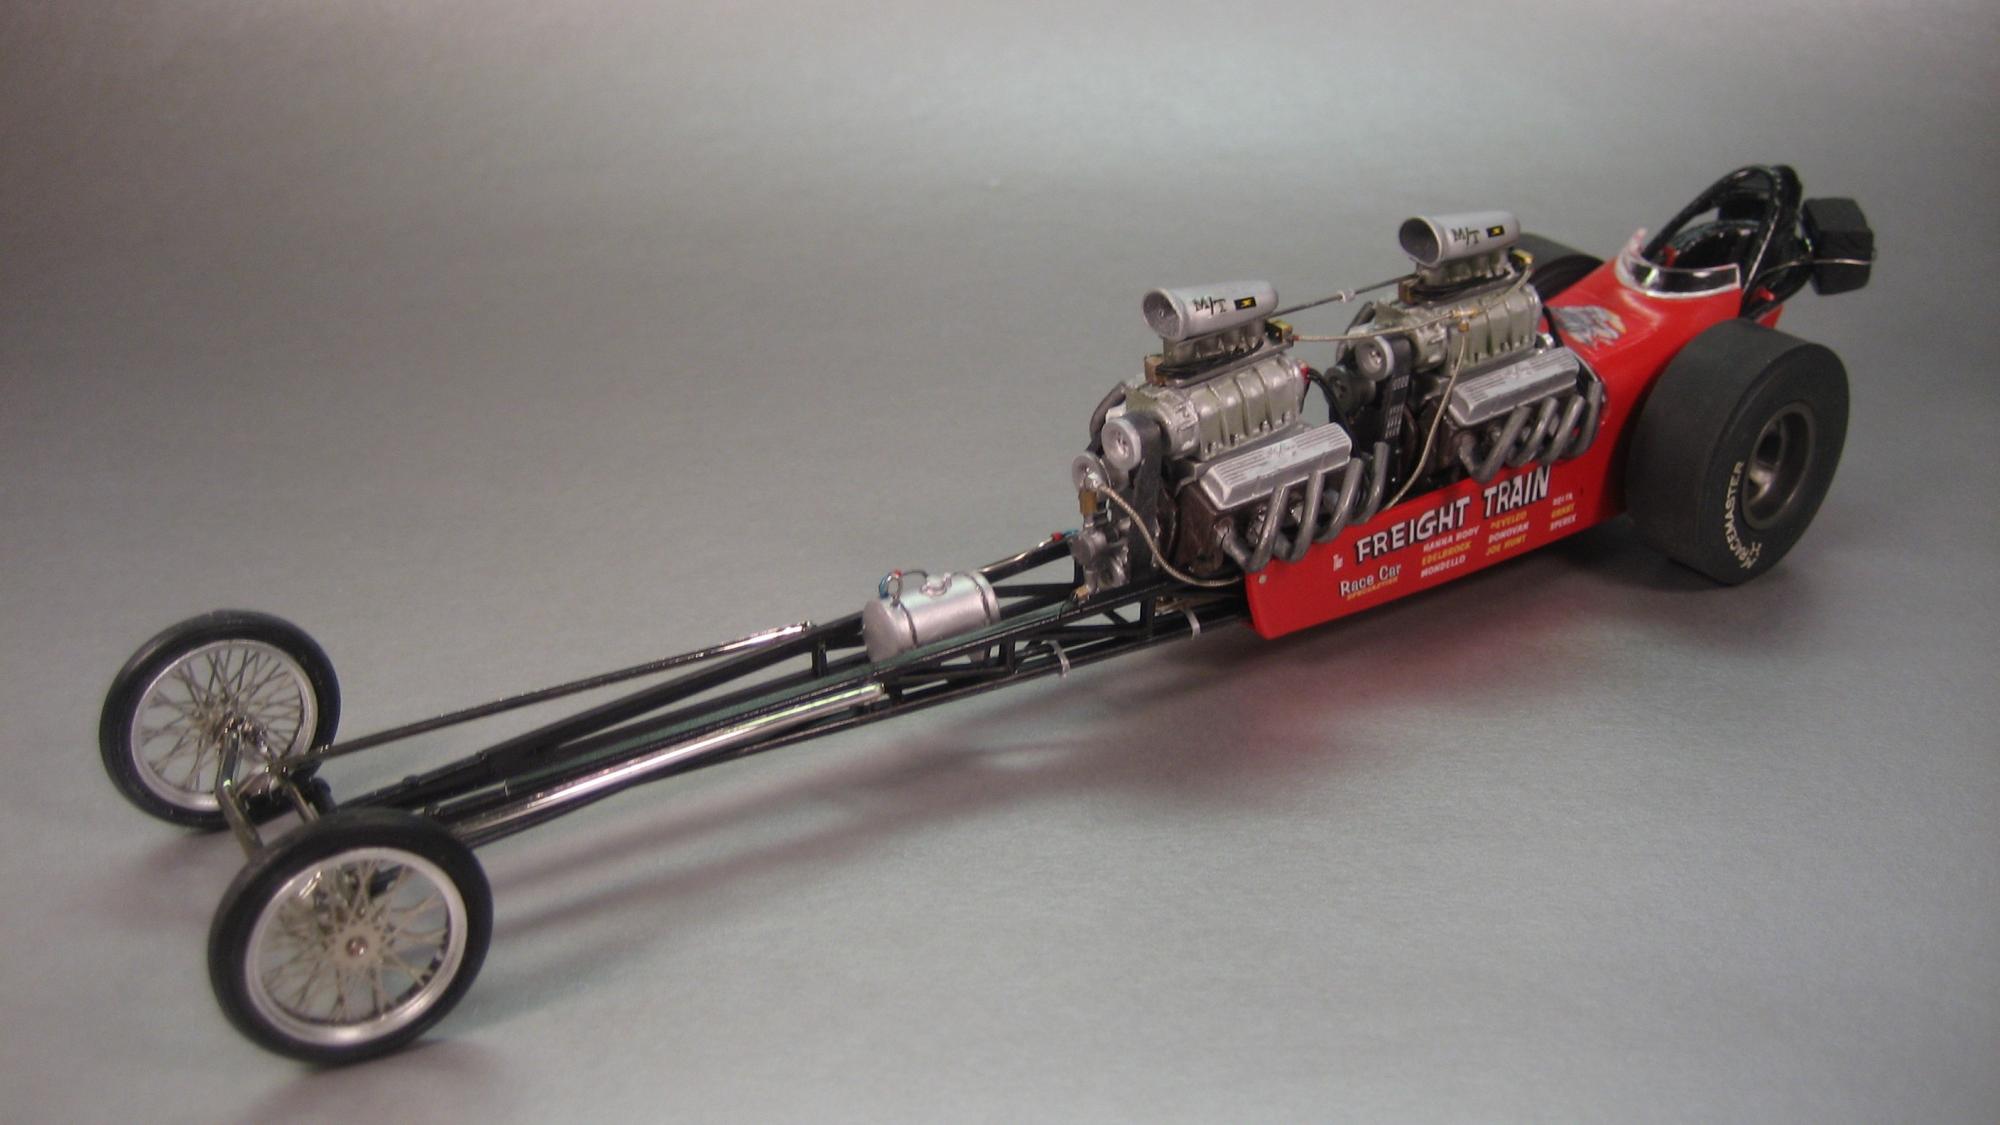
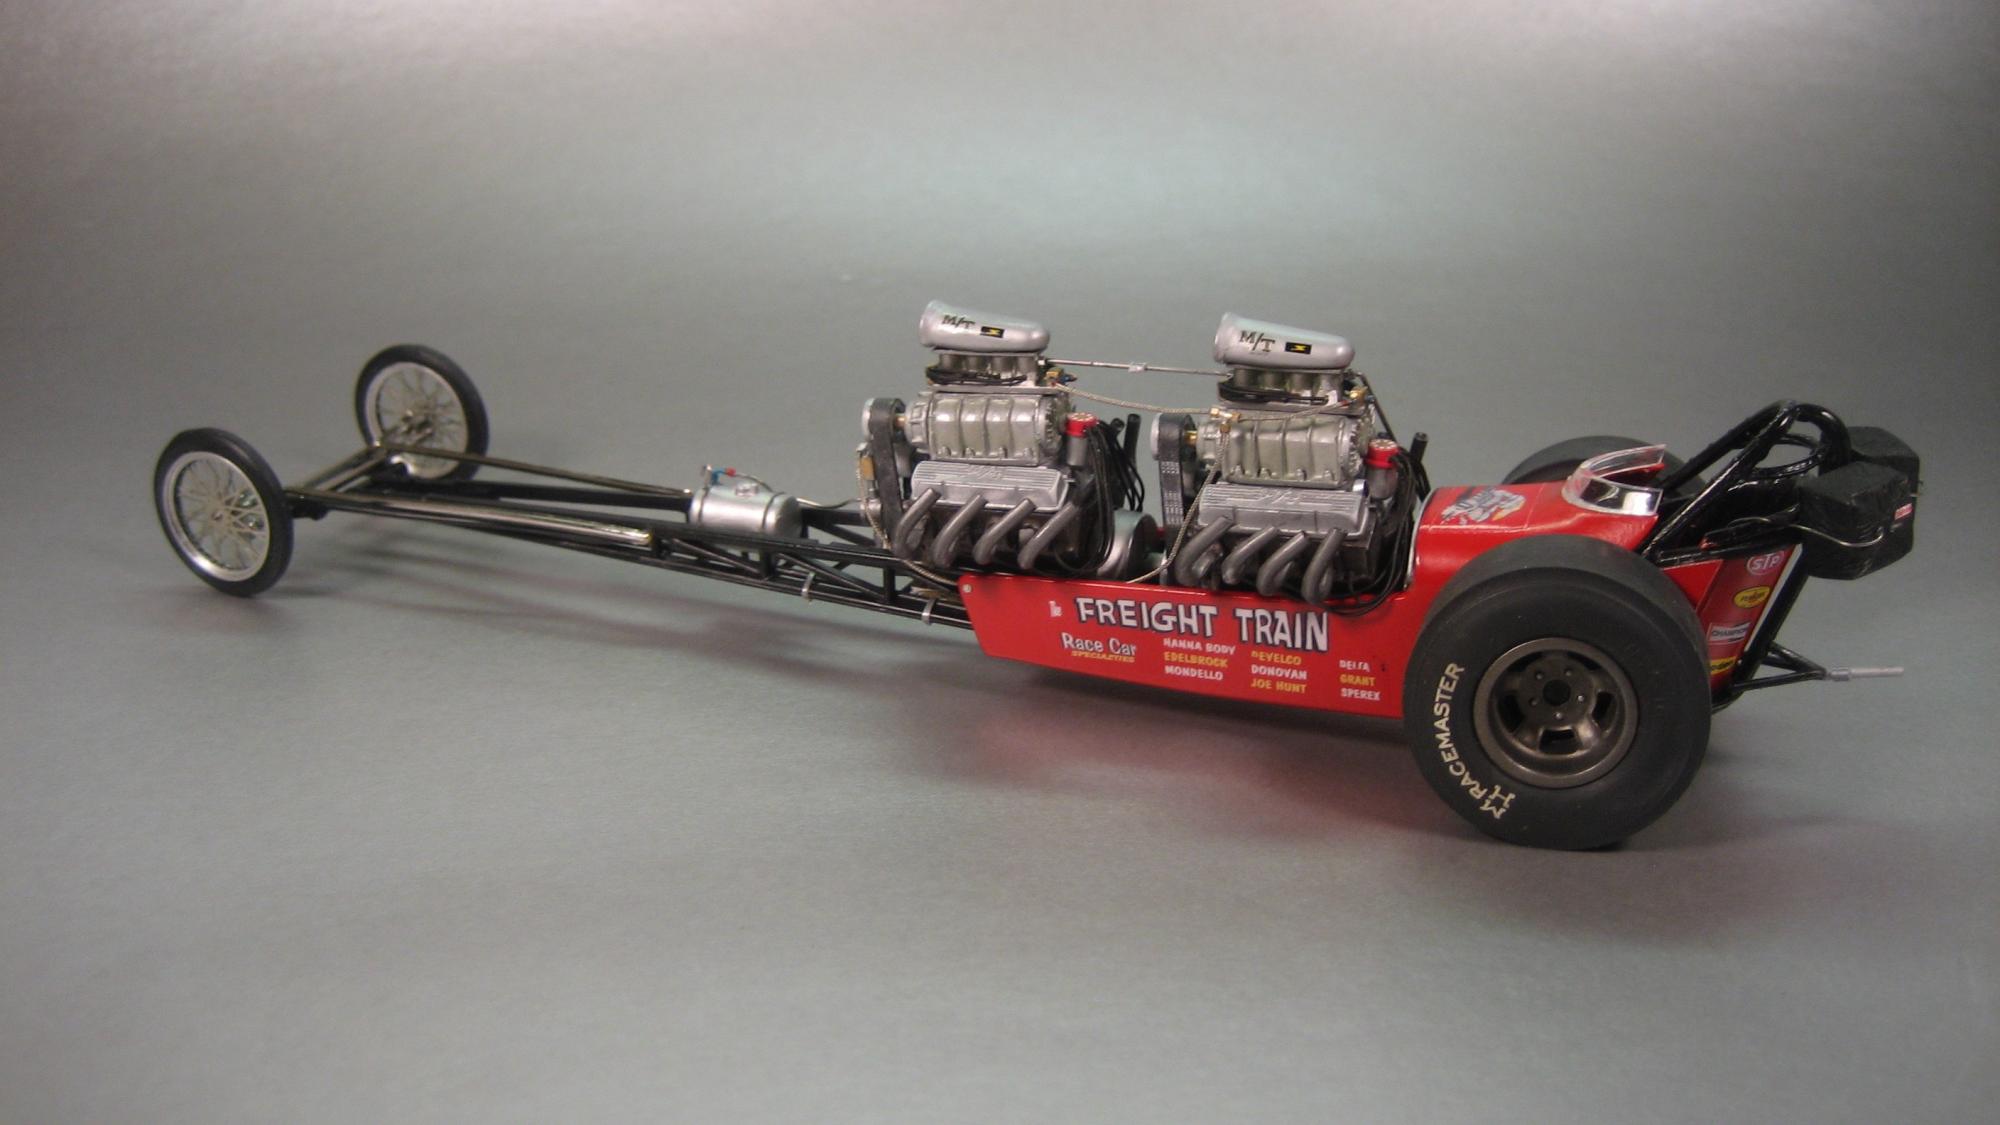
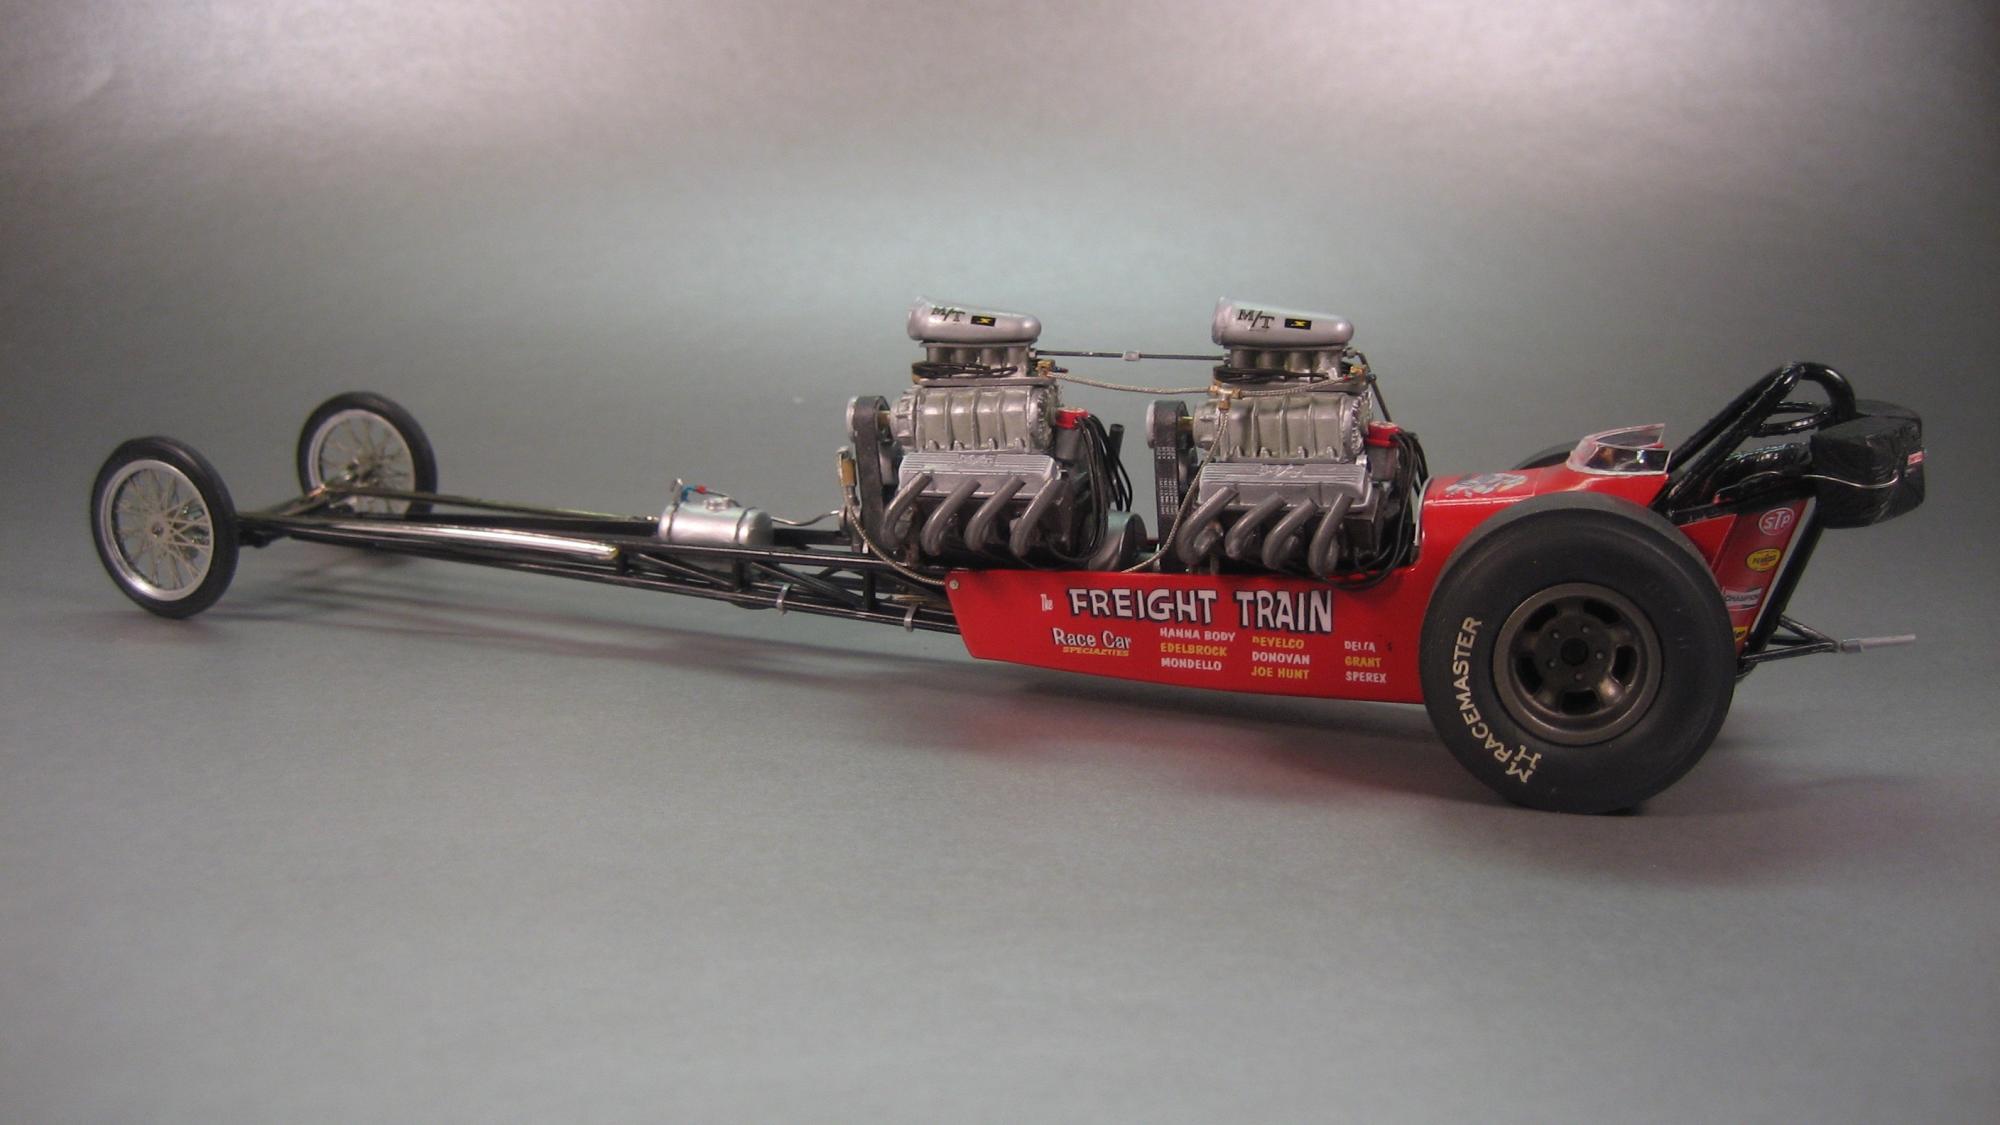
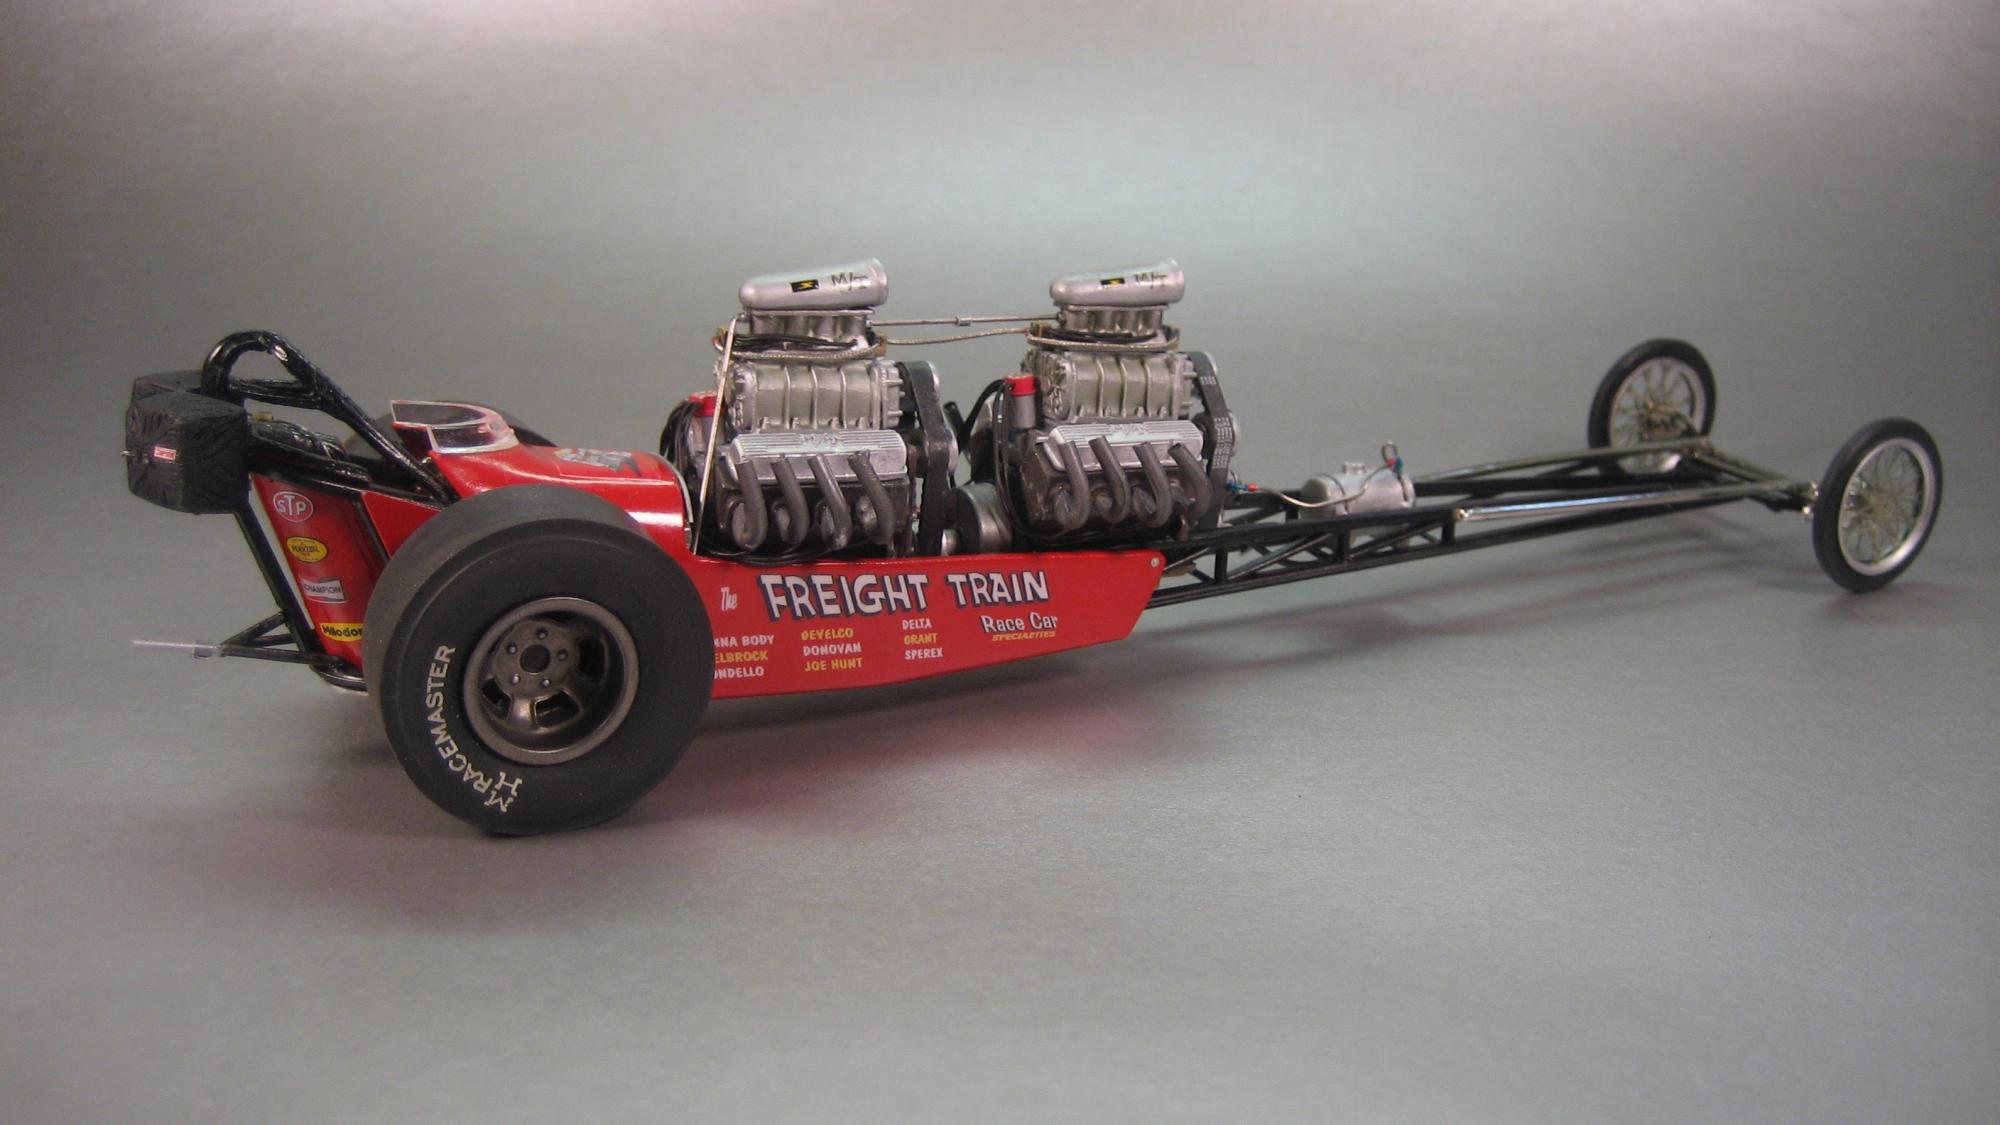
Thank you for the compliments. Jesse, I did build a cow catcher for the front. Was not sure if this version had one on the front? Could not find any reference PICS. Might you know? I know there is a cow catcher on Hemi version and the current reproduction. A cow catcher does add a nostalgic touch.
-
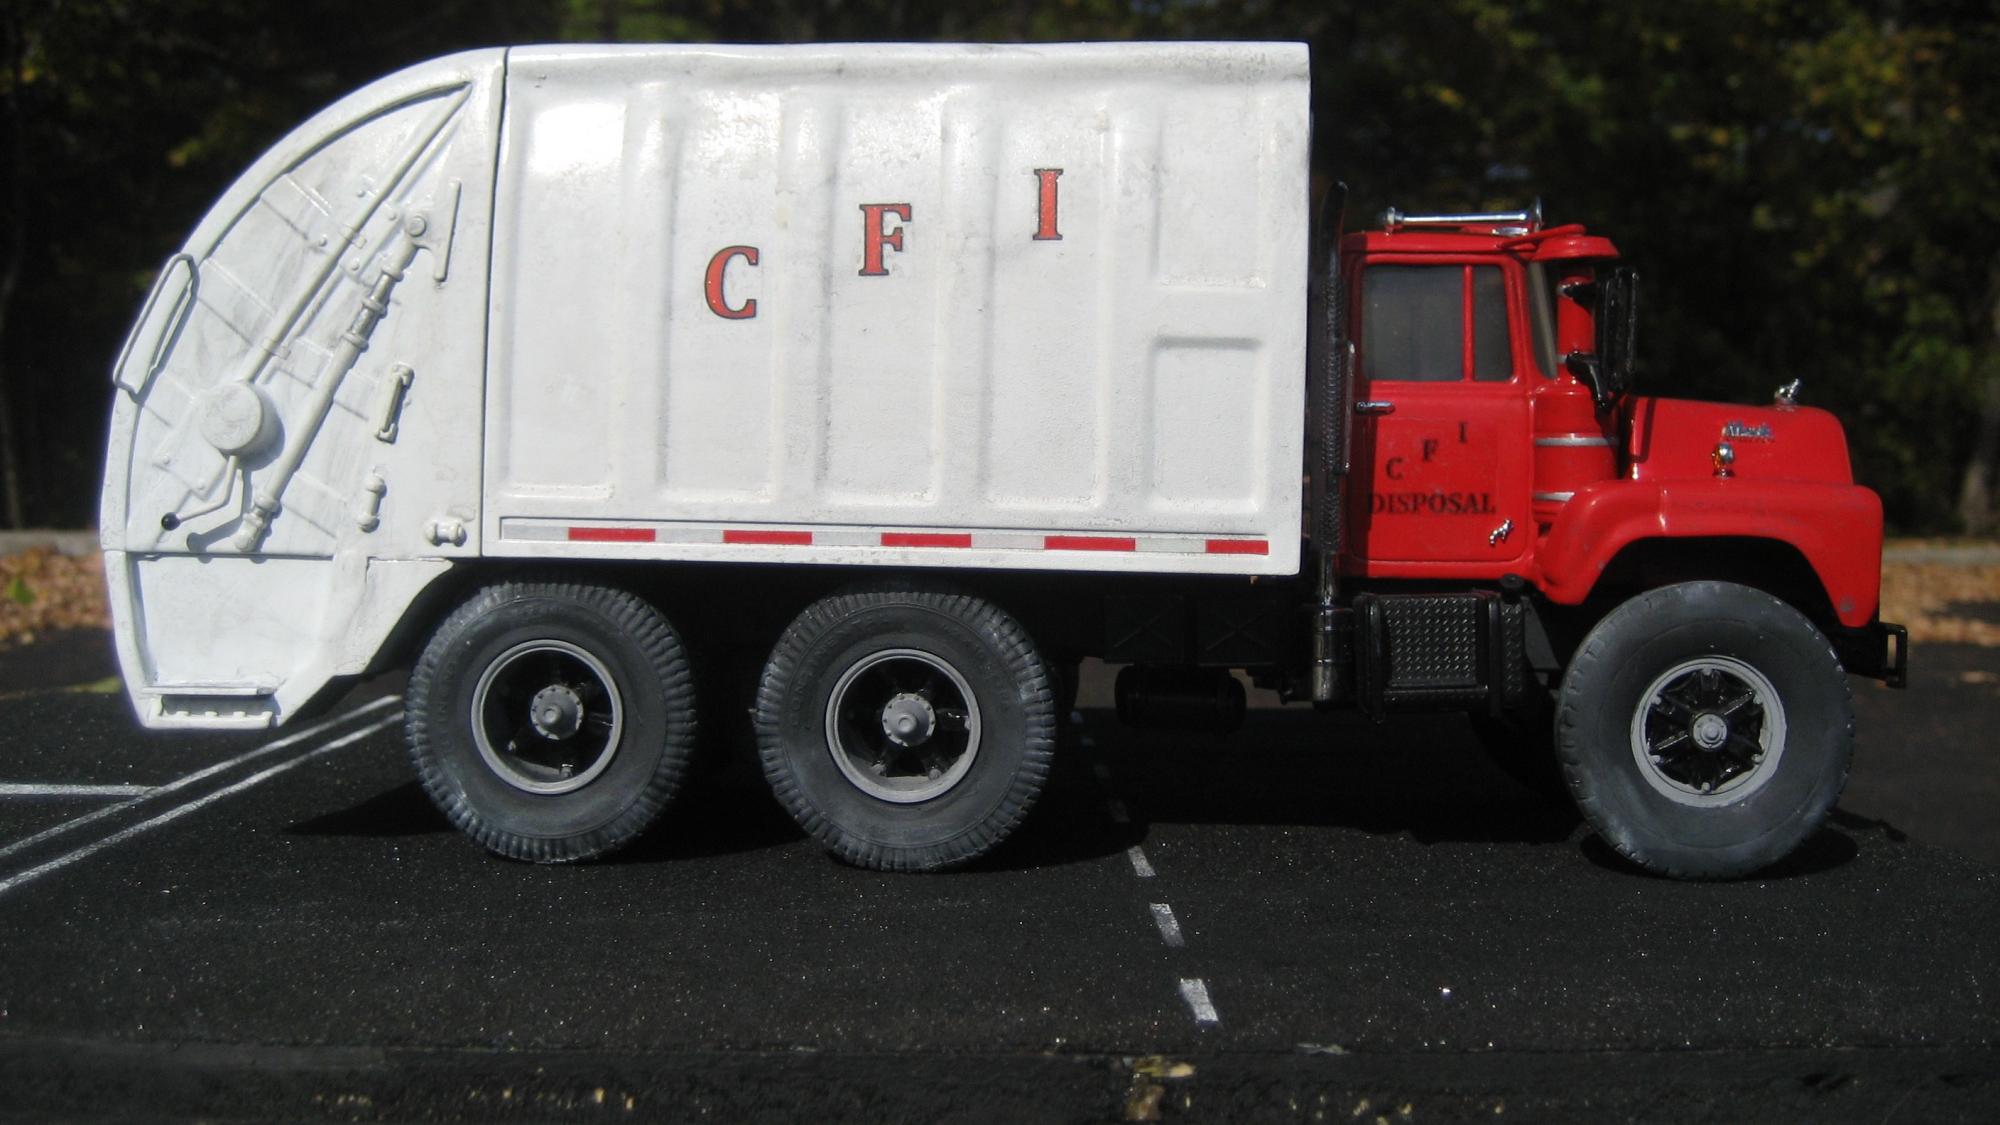
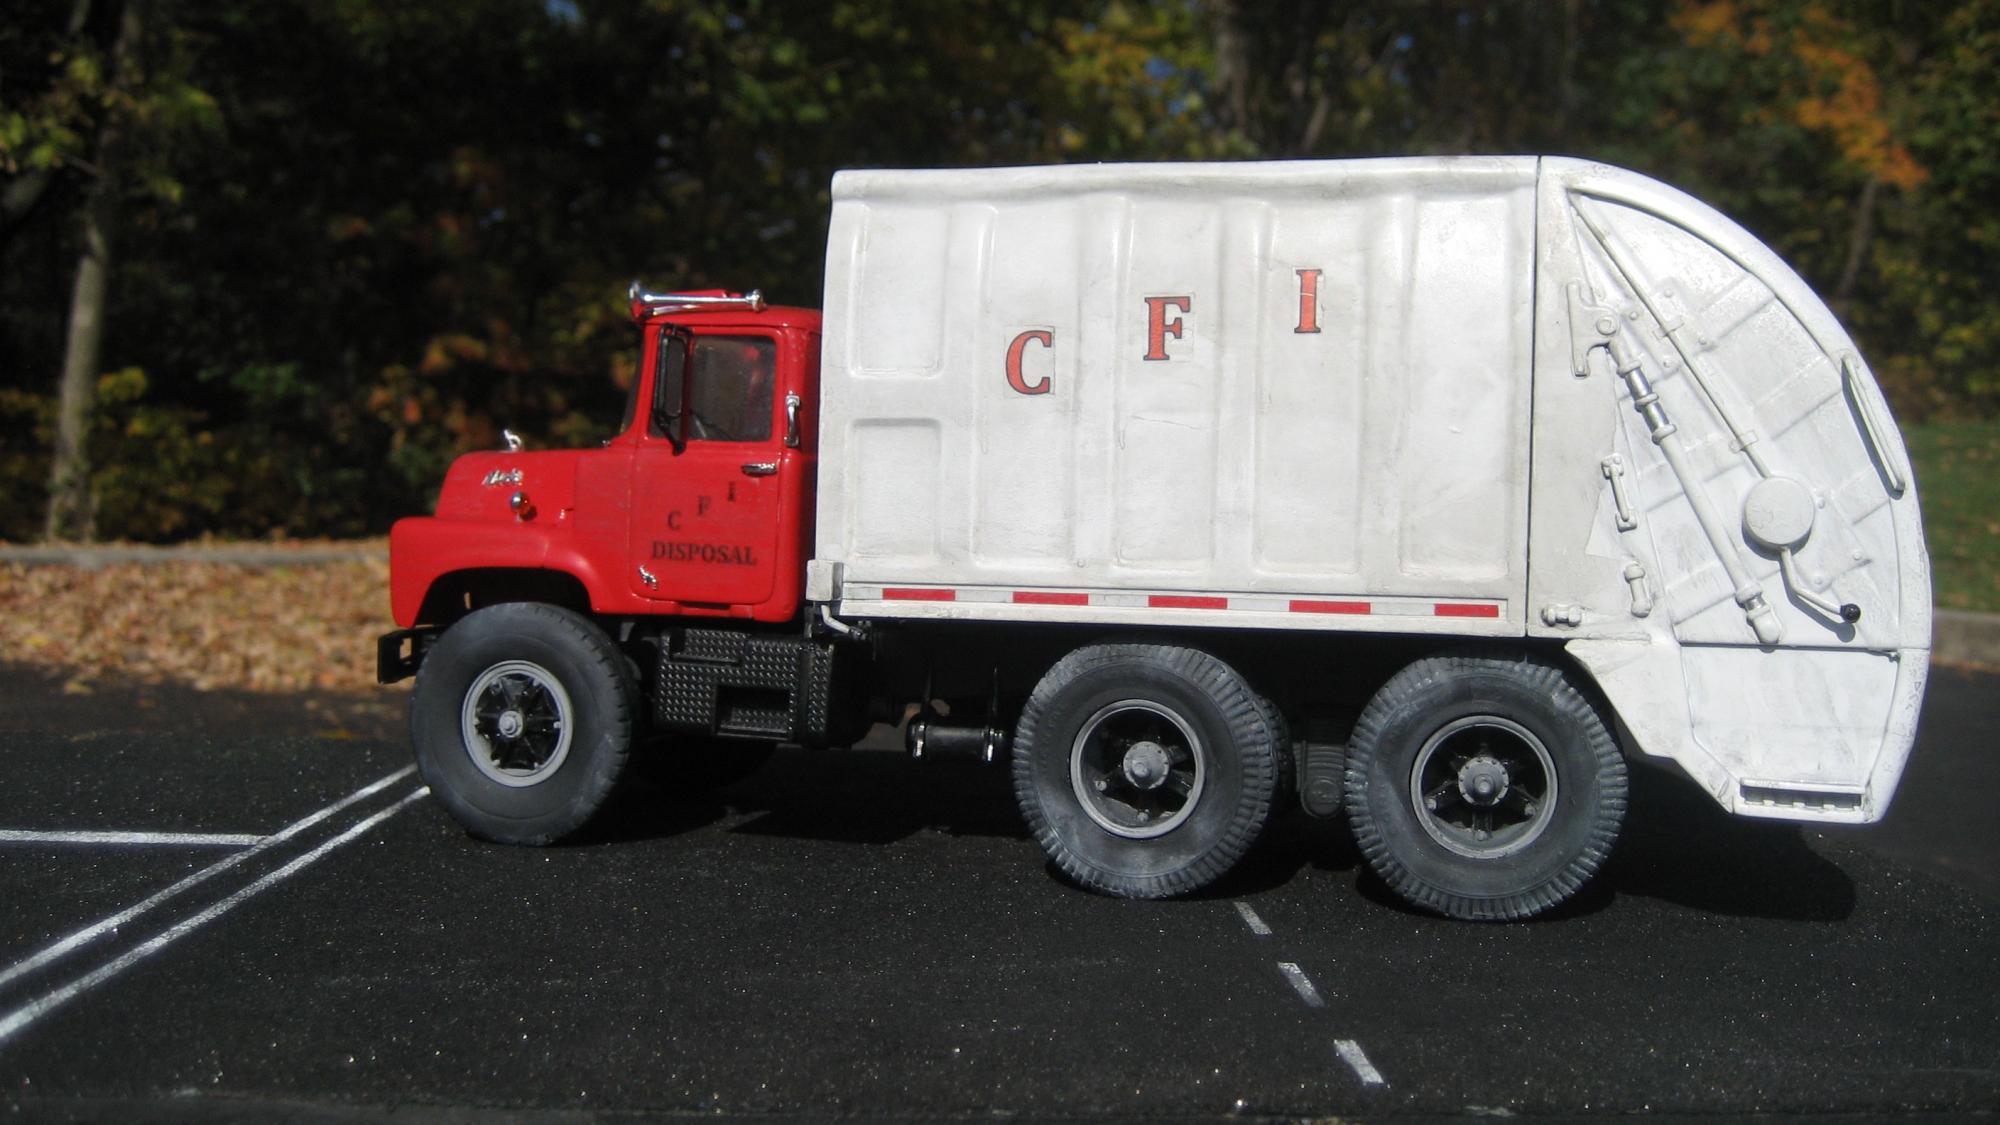
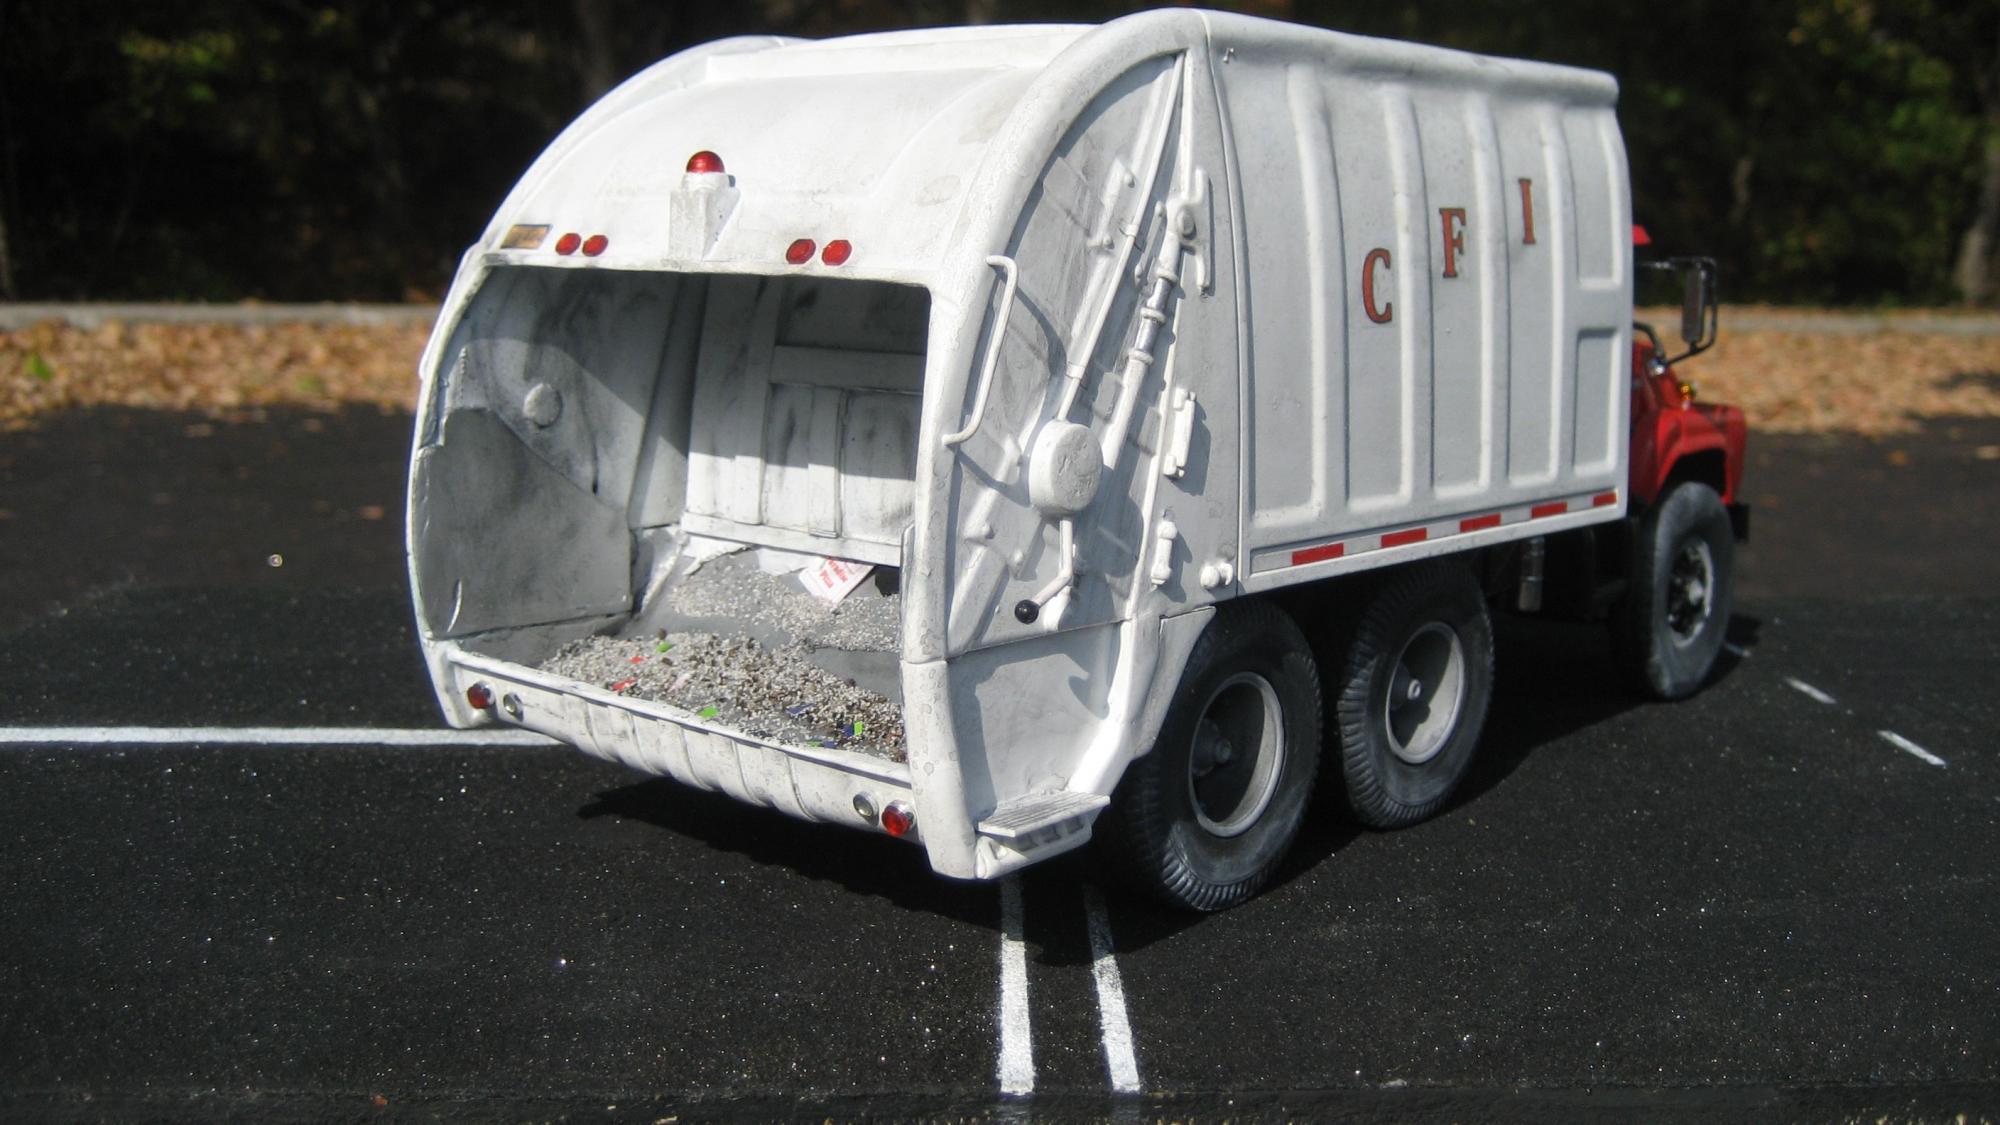
I was inspired to do this model by the tremendous "Freight Train" builds of Steve Perry and John Teresi. Hope you like.
-
Very Nice build. Thanks for posting
-
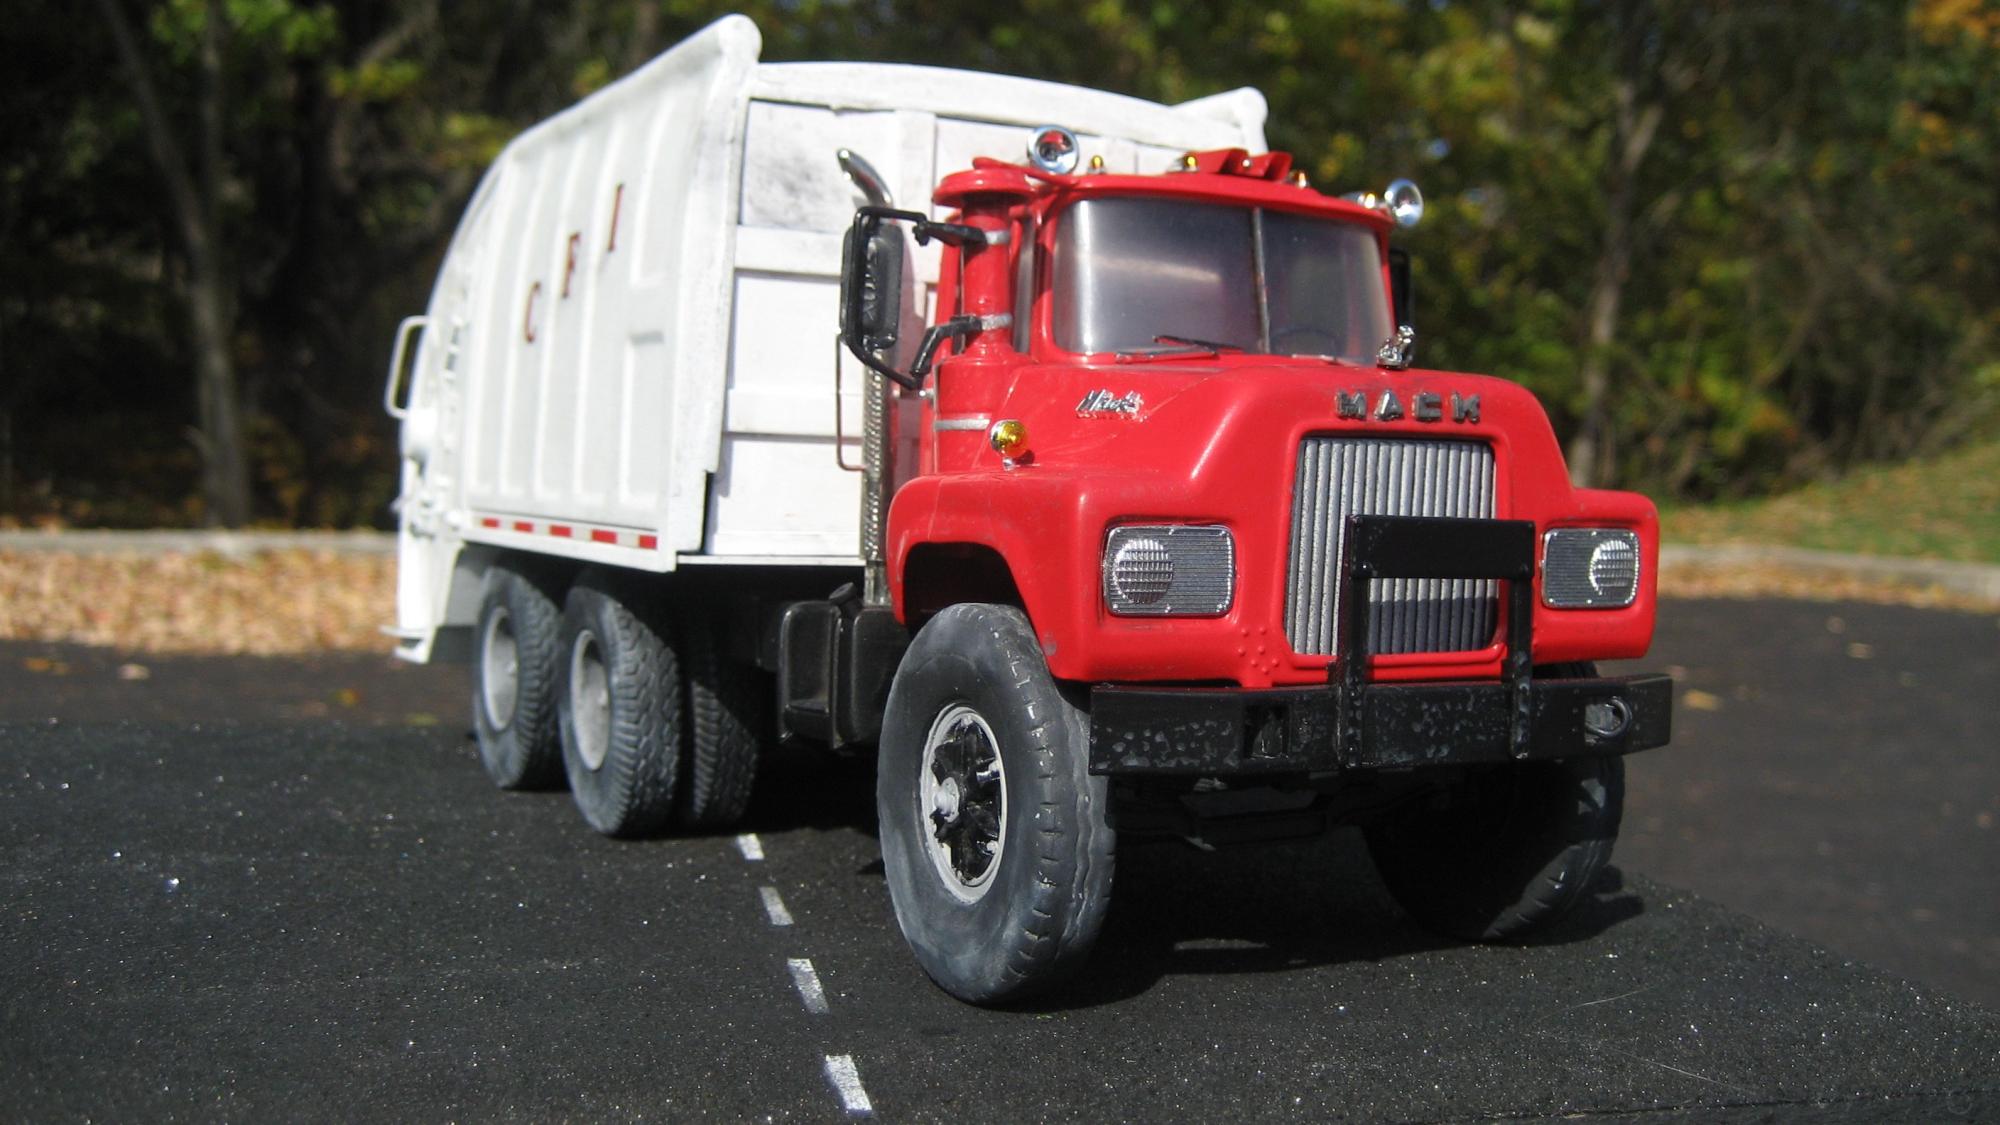
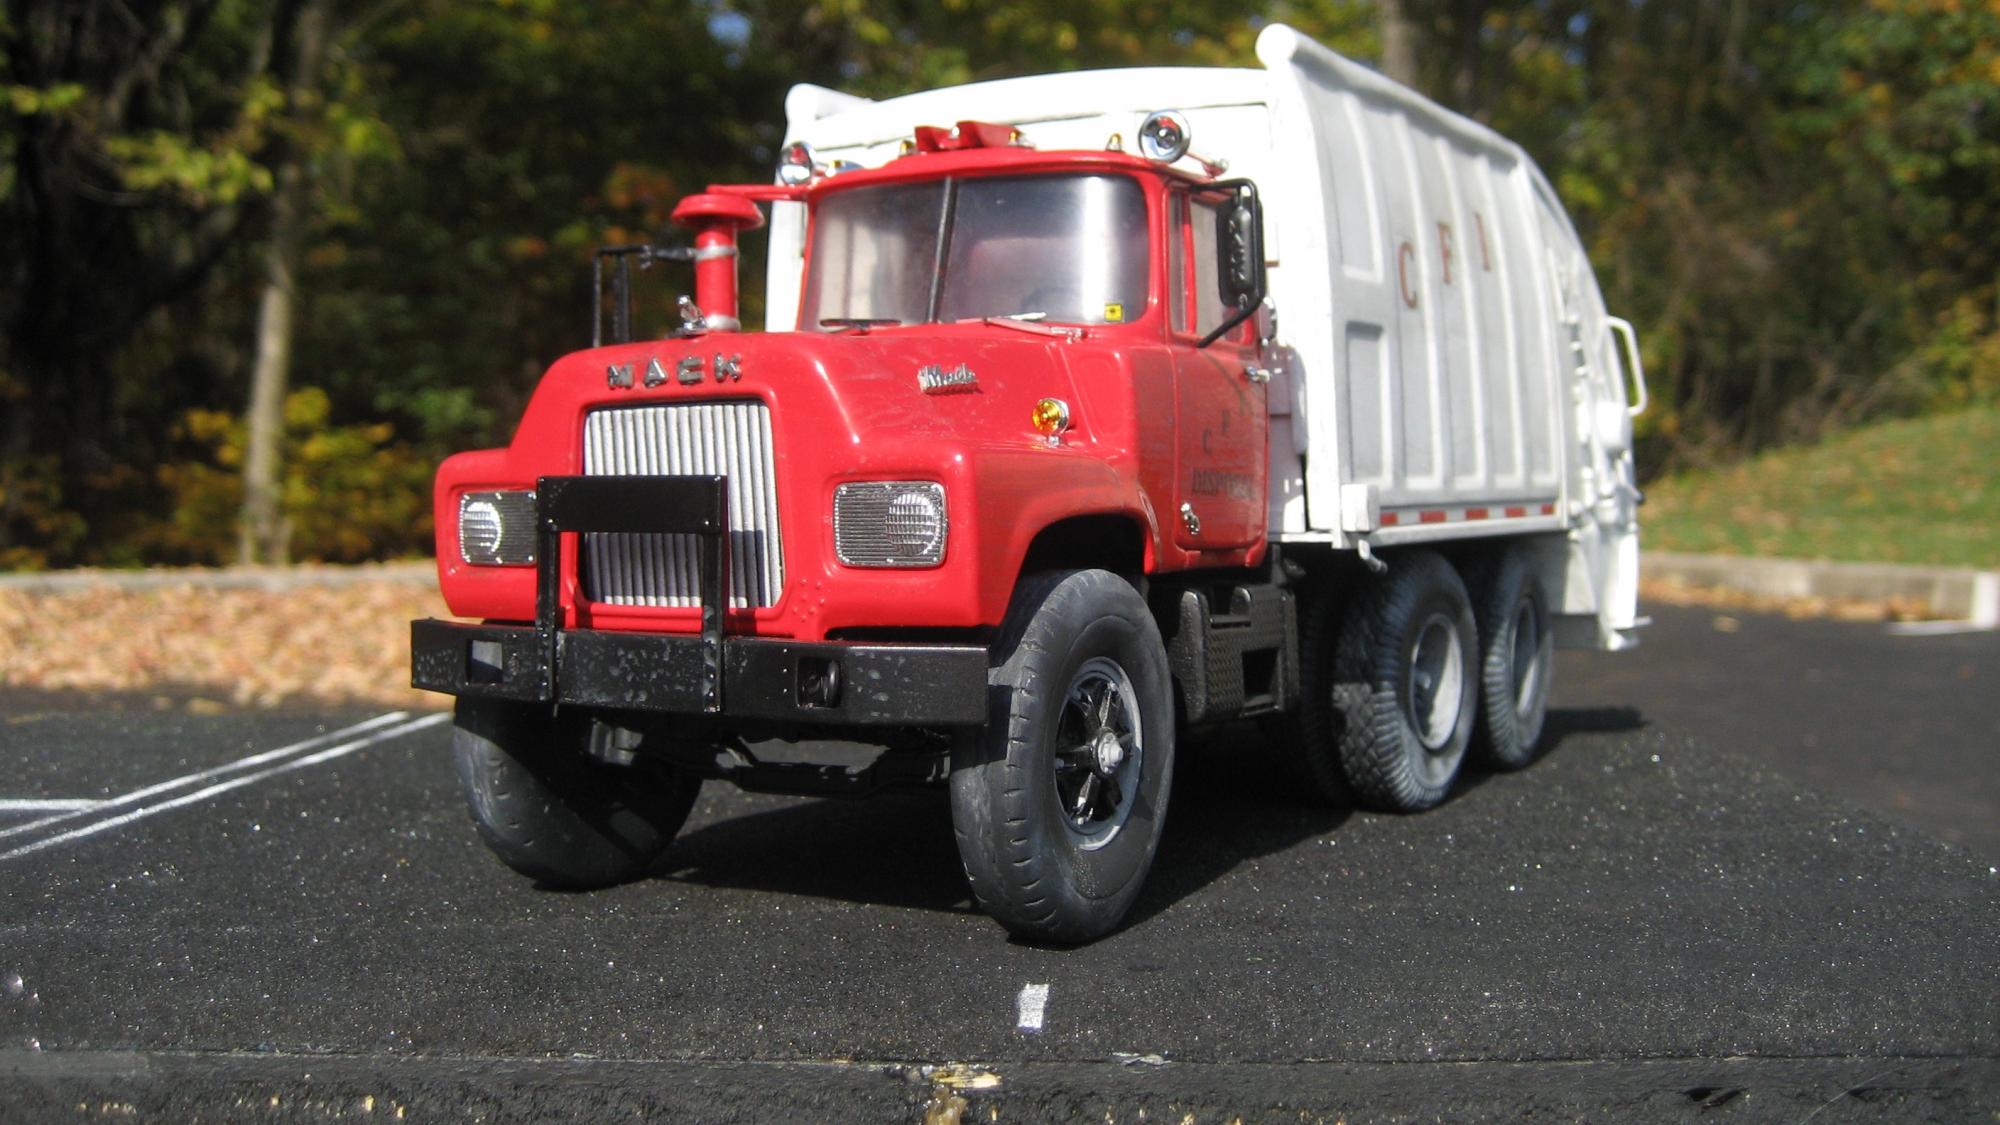
Thanks for the nice comments. No, I don't have a link to the toy trash truck. I purchased it at a discount second hand store for one dollar. I had to do major cutting and reshaping to make it a rear loader. I do remember the Mattel name on the bottom of it when I was hacking. It would be nice if a resin maker would come out rear loader garbage truck body.
-
'66 Barracuda "Hemi Under Glass" --To be cont'd......
JPolli replied to mustang1989's topic in WIP: Drag Racing Models
Joe Sounds go. Keep those updates coming. Jim -
Hi Guys This is my 2nd attempt at a truck build. It is a MPC Mack DM 600 with a heavily modified garbage truck body that was taken from a Mattel front loader trash toy truck. The wheels and tires are from American Industrial Truck Models. The decals are hand made. Jim
-
'66 Barracuda "Hemi Under Glass" --To be cont'd......
JPolli replied to mustang1989's topic in WIP: Drag Racing Models
I would appreciate that slick info Joe. Thank you in advance and keep those HUG update photos coming. Jim -
Very Nice build. Thanx for posting. Jim
-
'66 Barracuda "Hemi Under Glass" --To be cont'd......
JPolli replied to mustang1989's topic in WIP: Drag Racing Models
Joe I do like the tire combination that you plan on using. Can you please tell me about the slicks (from Hugh) that you are going to use (i.e type, size)? Thanks. Jim -
'66 Barracuda "Hemi Under Glass" --To be cont'd......
JPolli replied to mustang1989's topic in WIP: Drag Racing Models
Joe Will be watching for your posts with "heavy lenses". The Hemi Under Glass is on my future build list. Thanks for posting a great reference PIC. Jim -
Thank you for the kind words. The body is a resin AI Mack body over the International Pay Star 5000 Mixer chassis and mixer. The paint is Tamiya Camel Yellow. The decals are home made. Jim