

mustang1989
-
Posts
6,398 -
Joined
-
Last visited
Content Type
Profiles
Forums
Events
Gallery
Posts posted by mustang1989
-
-
6 hours ago, Codi said:
I see what you're describing Joe with the ZM engine. A lot more to work with, hopefully it fits well for you. Great subject on a pretty rare plane. Will be sure to follow your progress too. cheers, tim
Thanks for taggin' along Tim and it's good to see you again bro. I was pretty surprised to see that the ZM had more detail than the Aires counterpart given the fact that Aires (at least in my experience) has it ALL goin' on. I was again surprised to see no less than 25 parts to this 1/48 scale engine. WOW!!
Engine fit into the Dragon fuselage and paint up processes coming soon......
-
On 4/7/2024 at 8:19 AM, FoMoCo66 said:
Any more updates on this awesome build?
Hey Ace. I had finished it up. Here's the link and thanks for stoppin' in man. :
-
 2
2
-
-
14 hours ago, Big_John said:
I've got a few cars for fun.
My '70 Chrysler 300 parked next to my '65 300L. This was at the Syracuse Nationals in 2023.
I also have a '65 Formula S Barracuda. Another pic from the Syracuse Nationals, this time in 2021.

Man.....you lucky dog. Those early Barracudas are the forgotten ones but IMO are still some sharp looking rides. I had a 66 Barracuda as my first car. It wasn't fast but it was a cool ride. Good lookin' '65 John. 4 speed or automatic?
-
 1
1
-
-
You're a brave man tackling these Revell Corsair kits but they turned out great!
-
1
-
-
Lookin' good so far Rod!!
-
Been a while since the last update but here's after I put these fabric seat belts from HGW together and I've gotta say that I'm impressed with them. Not only do they look a lot more realistic than the PE ones that I've seen (and used), but they can also be lain pretty much any way you want them. I laid these out in a bit of a non-traditional way that I've done in the past so a lot more of the details on them can be seen and for a more natural "lay".
So far....
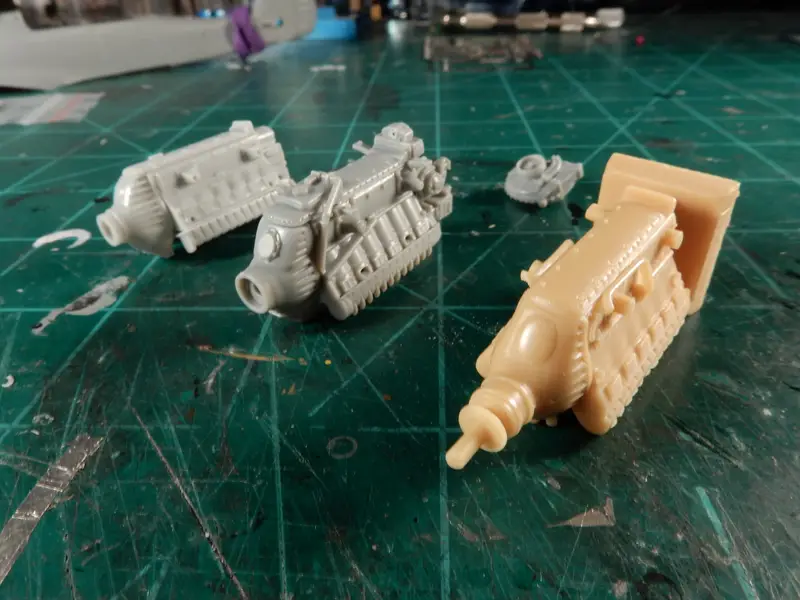
I've now moved on to the powerplant section of this build for now because I'm going to have to get the fit right with this before I close the fuselage halves together. I built up the OOB Dragon Jumo 213 along with the 213 from Zoukei-Mura and set out the Aires 213 next to them. I've got them all next to one another in the following photo to check the difference in dimensions as well as to show the differences in details from one kit to the next because they are dramatically different. Dimensionally, the ZM version is only slightly larger and has a TON more detail than either the Dragon OR the Aires version. I'm really wanting to use the ZM 213 in this build provided that it will fit in there. I'll be test fitting things soon to find out what my real options are. If the ZM wont work then I'll use the Airies offering as it's next in line for detail.
Left to right. Dragon, Zoukei-Mura and Aires.
-
1
-
-
Nice work Steve! Made me look twice to make sure it wasn't the real thing.
-
Model rail roading is something that I never got into but I do have a good bit of admiration for. Takes a LOT of work to come up with some of the layouts that I've seen. Good work on repairing this Bill.
-
1
-
-
Welcome aboard John. What a cool back story and we're looking forward to seeing your builds as well as the 1:1 scale rides.
-
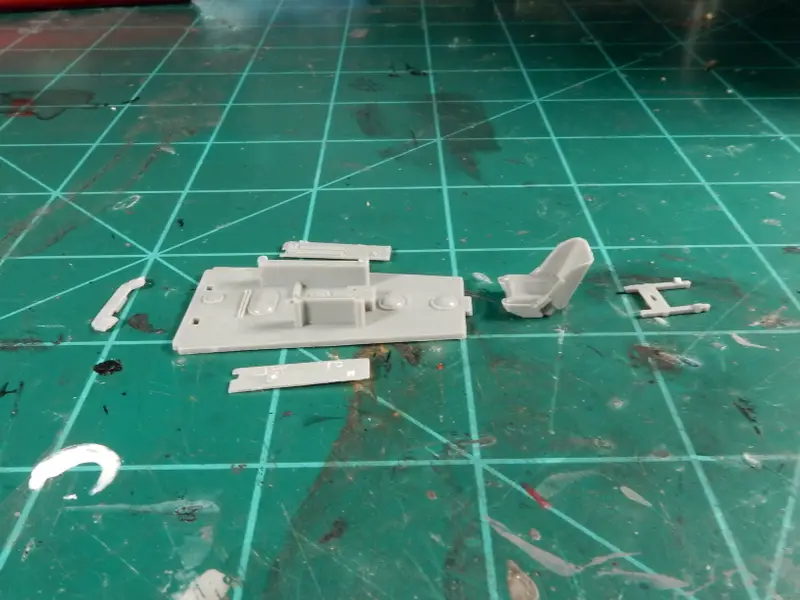
I managed to make a couple of changes so far to the interior. One of which was the usage of PE rudder pedals from Eduard. Kit parts are kit parts and the plastic ones just didn't look right. Same goes for the control column as I robbed that from one of the spare Fw-190 A kits that I had in the stash. Flip switch / guard for the button at the top of the column hand grip was added using a PE strip that I had and I added the column wiring retainer at the bottom of the column shaft made from a BMF strip and given a coat of flat clear to tone the chrome effect down into a metallic look. Pilots seat is all painted up, detailed and weathered and is ready for the seat belts that came in the mail yesterday.
-
3
-
-
On 2/13/2024 at 6:08 PM, Ace-Garageguy said:
HO scale model railroading is getting pretty expensive, especially now that many online auction sellers are hawking items they know nothing about, asking stupid prices for old toy-train junk just because it's old and it looks kinda like the good stuff, or was made by some of today's well known name mid-range manufacturers before they moved from toy-quality products into high-quality scale models over the years.
HOWEVER...I'm usually pretty good at finding deals, and I do a lot of research before I buy anything.
My to-be layout will include a coupla different mining operations, and ore-carrying short-wheelbase hoppers (they're shorter than regular hoppers because iron ore is HEAVY) can run into a substantial pile of cash if you want enough to realistically model the kind of long ore-trains that run from mines to ports or steel mills.
Anyway, these ore car shells came up pretty cheap, missing underframes, trucks, and couplers.
I got to looking at them carefully, and they looked to me like they were one-piece copies of the Varney multi-piece ore car kits dating back to the mid 1950s I'd seen online earlier.
So I rolled the dice and bought several of the vintage nobody-much-want's-em multi piece kits to see what what was what.
Turns out I was right, and the ancient Varney underframes are a drop-in fit under the much newer one-piece cars (which appear to have been tooled directly from an assembled Varney kit). A little silicone mold work to copy the ancient Varney underframes in a low-melting-point-metal cerro-alloy (I've already been amassing decent Bettendorf trucks and Kadee couplers in bulk as they come up cheap) and I'll have a nice fleet of shorty steel iron-ore cars for a fraction of what I'd have to pay for new...or even good used.
The 1950s Varney underframes fit under the new one-piece shells like they were made for them...which they kinda were.
")
This is frickin' COOL!!! If I had the space I would build a small town with a railroad surrounding it. I've heard from more than one person that model railroading prices have skyrocketed.
-
1
-
-
Jeez.....it's been a long while since I've looked in on this one Simon. Aaaand the good work continues!!! I'm gonna have to get all caught up here.
-
1
-
-
Cobra
in Model Cars
This looks really good and it's dropped into the perfect setting Bob.
-
WOW!! Sorry I was so late in responding to all of the great and encouraging feedback fellas. I am truly humbled by all of the responses. Thank you all so very much.
Joe
-
A different but captivating color you used on this one and the end results speak for themselves. Very good-looking build Jeremy.
-
1
-
-
Good LORD man!! This is a very plush build with beautiful detailing and brilliant color and shine. VERY convincing work.
-
1
-
-
Love the color on this car. Also like that shop!
-
That's a pretty darn clean build you've turned out with this kit Keith.
-
1
-
-
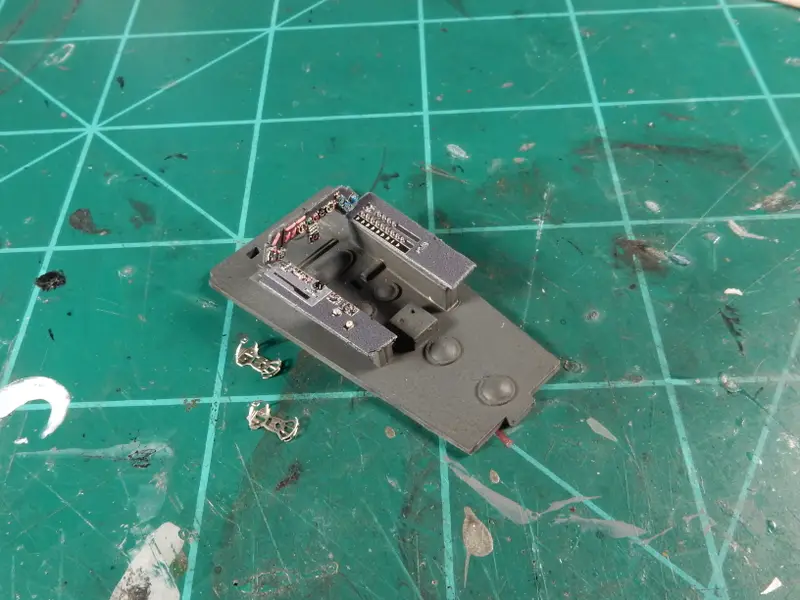
I decided to break the first few bits of this kit out and start doing something with it. I've got the base interior cut out and removed injector pin marks from the flooring. I'll more than likely go with an aluminum plate silver for the floor and seat as a base and then put a super light coat of RLM 66 over that. I'll weather the flooring and seat back some to account for a little bit of wear and tear in the cockpit and then start getting those Quinta decals put on the IP and side consoles. I've got enough Fw190 PE to last me a life time so I'll be using some of that here and there on the build as well.
Next is the fun part. rimed the flooring with Model Master Aluminum Plate and then shot a coat of Model Master Acrylic RLM 66 over that. After that step I airbrushed a coat of MIG dark wash over the whole thing and then scuffed the areas on the flooring where the rudder pedals are to replicate the worn areas on the floor. After coating the consoles and IP backing with RLM 66, I busted out with the Quinta 3-D decals. I really like these things!!!
-
1
-
-
Very cleanly built and these look superb Helmut. Top notch work!
-
Gotta love a Maverick. Lookin' good.
-
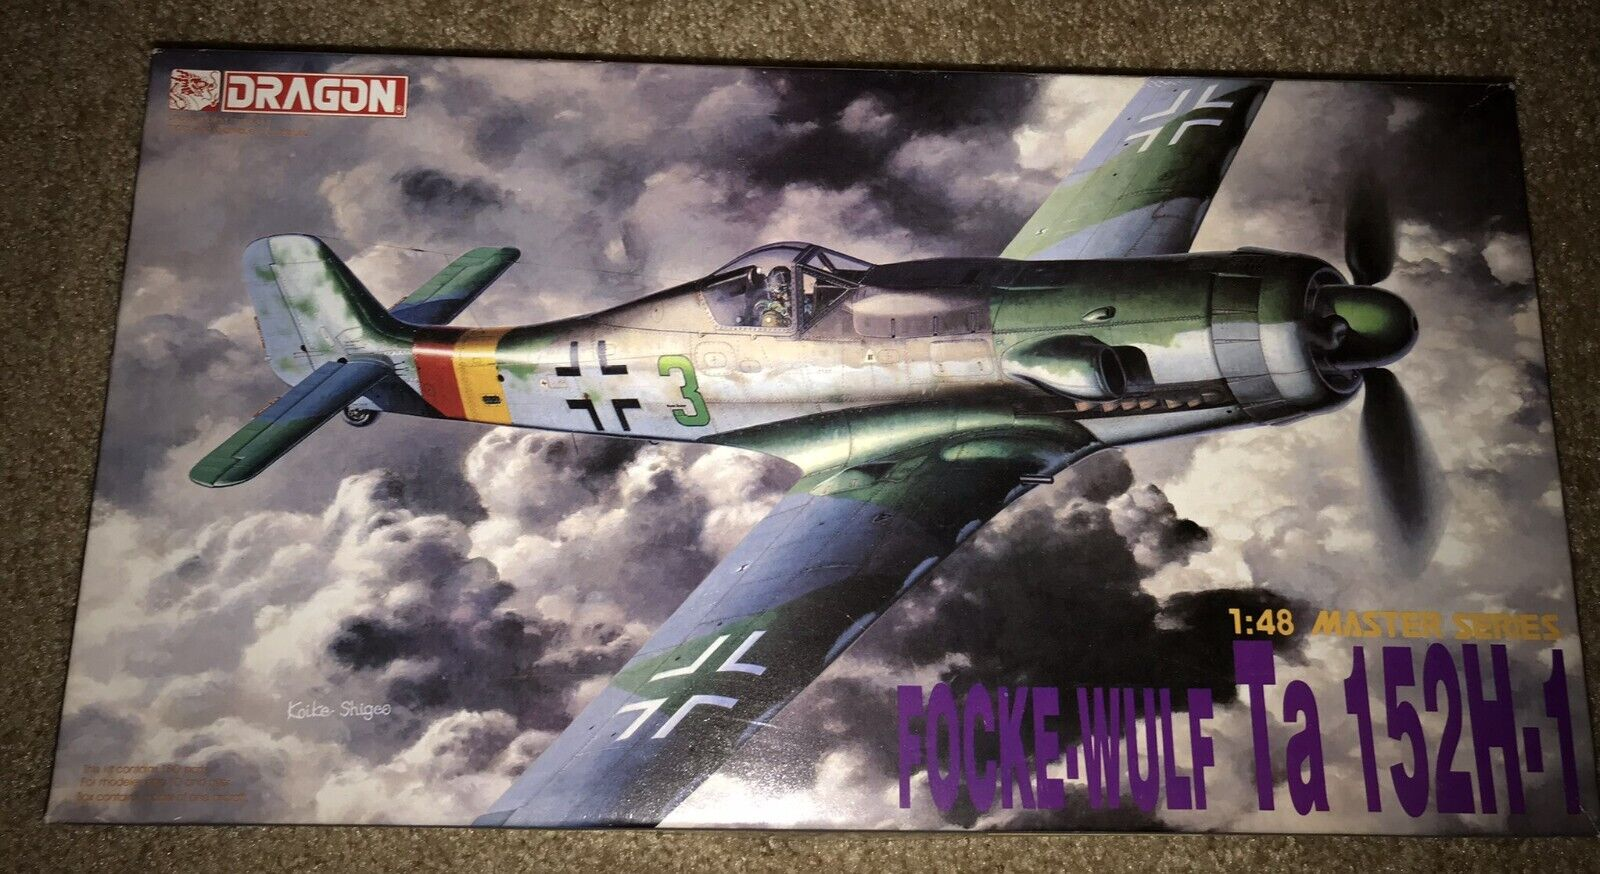
Ok gang, It took me a LOT of thought on my decision to arrive at this build. First, I was going to go with the newly released IBG 1/72 Fw190 D-9 but there's no engine cowlings or engine firewalls available for that one yet (hopefully they are coming because I do want to try my hand at a 1/72nd scale build), then there was the 1/48 Dragon Ta-152 C-0 that I've got in the stash but I'm still on the fence about that one.
That lead to me selecting another version in the Ta-152 series....the H version with a wider wingspan.
I'll be going with this one from Dragon and will end up opening it all up to display the engine and maybe an open panel .....or two.
-
DEFINITELY a better swap out with the wheels and tires. I had this kit in my stash and took one look at those wheels and tires and the "engine" that was in there and quickly decided that this wasn't the kit for me. I can most certainly appreciate and admire your efforts on this one though Dave.
-
Sharp lookin' Nova Todd and love the old school air cleaner/ filter. Don't let that engine backfire back up through the carburetor!! lol .


AMT 1955 Chevy Bel Air sedan
in Model Cars
Posted
This looks just great especially considering the kit that you worked with to make all of this happen. I'd definitely be down to see that Nomad being built.