StevenGuthmiller
-
Posts
14,962 -
Joined
-
Last visited
Content Type
Profiles
Forums
Events
Gallery
Everything posted by StevenGuthmiller
-

Painted trim vs. BMF
StevenGuthmiller replied to chunkypeanutbutter's topic in General Automotive Talk (Trucks and Cars)
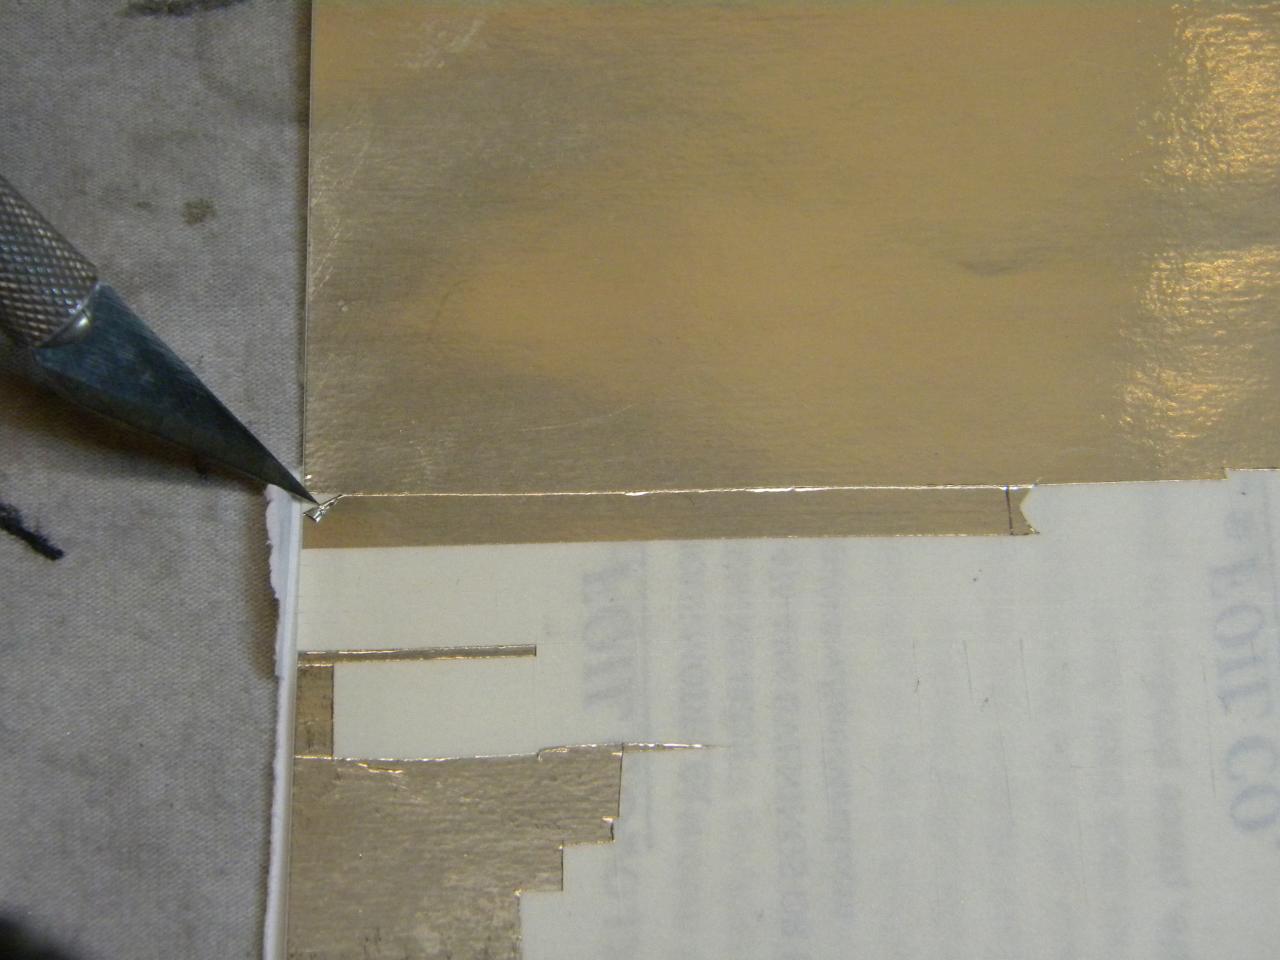
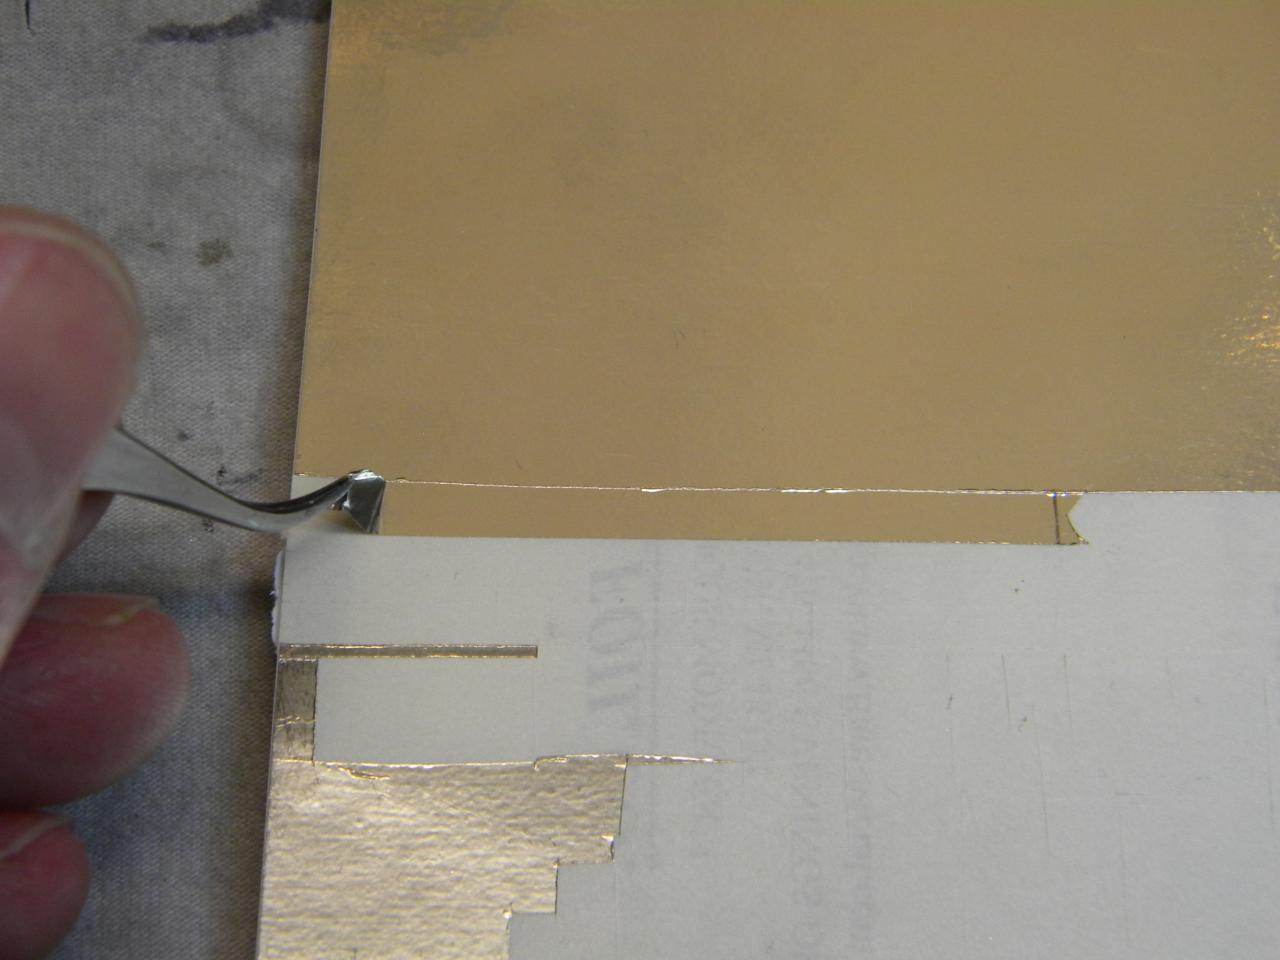
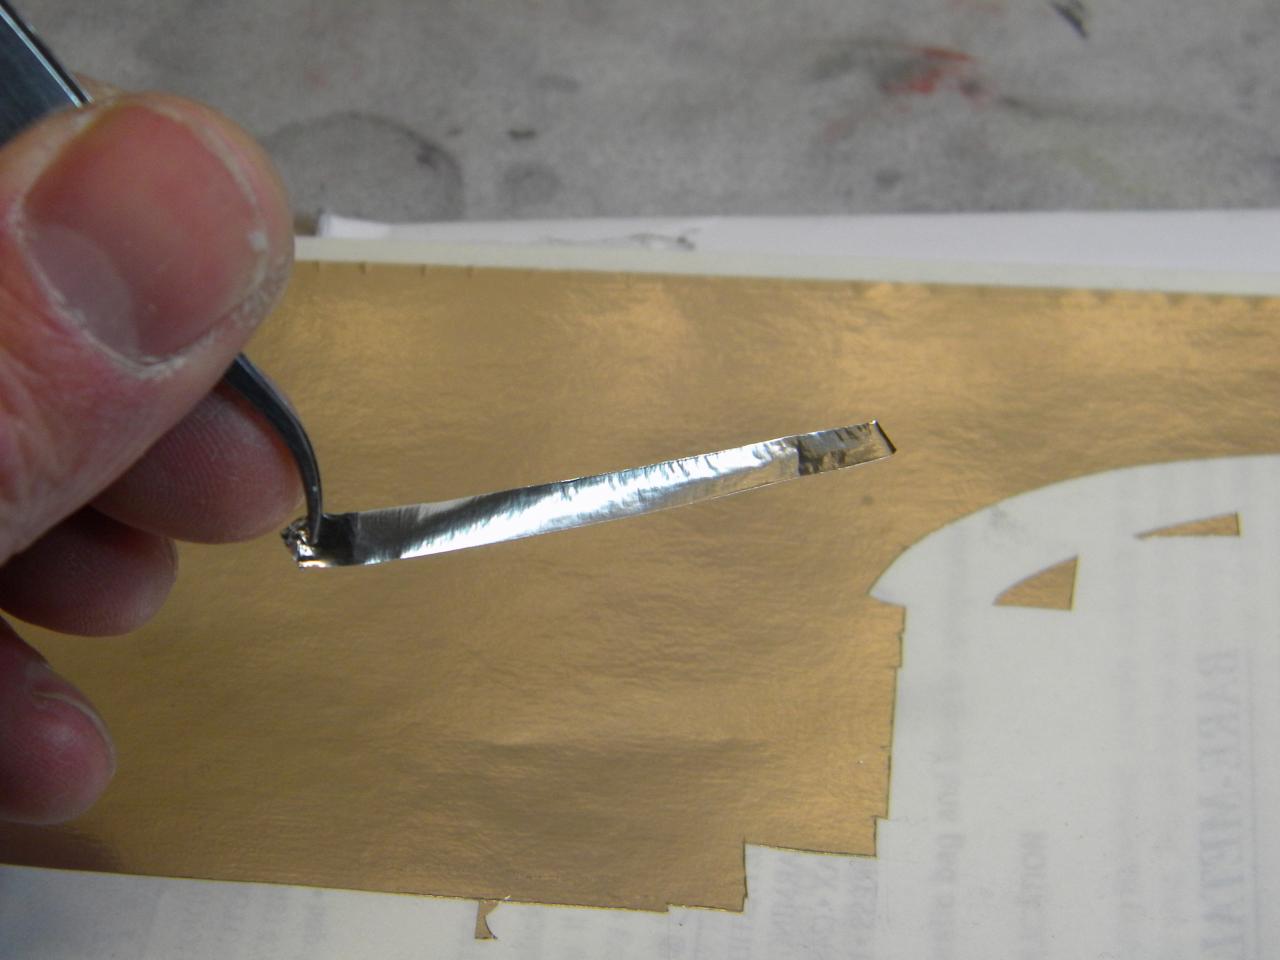
Just a quick "pictorial". Steve
-
Painted trim vs. BMF
StevenGuthmiller replied to chunkypeanutbutter's topic in General Automotive Talk (Trucks and Cars)
Once I get about a quarter of an inch off of the backing, I grab the end with the tweezers & pull it up length wise. Steve -
Painted trim vs. BMF
StevenGuthmiller replied to chunkypeanutbutter's topic in General Automotive Talk (Trucks and Cars)
I do it pretty much the same way. I cut my piece to the size I need, "pick" the corner of it with the tip of the blade until it's lifted enough to get a hold of it with a tweezers & peel it off. For the life of me, I can't understand where the wrinkling comes from. The only time I've seen wrinkling is when the sheet of foil is old & ready for the trash. Then the adhesive begins to deteriorate & the foil is no longer sticking to the backing as it should. Steve -
Painted trim vs. BMF
StevenGuthmiller replied to chunkypeanutbutter's topic in General Automotive Talk (Trucks and Cars)
I'm not sure. I've never had that problem. Could it possibly be that you're using too long of pieces? When I do a side spear, I do one body panel at a time. Front fender, door, rear quarter. There's a break at each panel anyway, so it just makes it easier to use smaller pieces if possible. Steve -
Painted trim vs. BMF
StevenGuthmiller replied to chunkypeanutbutter's topic in General Automotive Talk (Trucks and Cars)
I've never had a wrinkling problem. In over 20 years of using it, I can't remember that ever happening. Not once. Steve -
1959 Plymouth Fury, Update, 6/6, Finished!
StevenGuthmiller replied to StevenGuthmiller's topic in WIP: Model Cars
Yeah, my computer & shop are in my basement so whenever I take these quick shots, it's down here, so the lighting is not good. I may have already answered my own question anyway. I had forgotten about a jar of 1969 GM "Azure Turquoise" that I had to be used on my '69 Grand Prix build when I get around to it. I checked it out & it looks like it will be a perfect compliment to the body color. Natural light will yield much better color definition. Steve -
Looks like a great job to me! Steve
-
1959 Plymouth Fury, Update, 6/6, Finished!
StevenGuthmiller replied to StevenGuthmiller's topic in WIP: Model Cars
Started getting color on this one. Now I want some opinions. This color was something I mixed up from some leftover MCW paint. It's kind of an "Aquamarine" shade, although it looks basically pale blue in the photos. (bad lighting as usual) My question is, what does everyone think would look better for a top color? White, or a darker shade of metallic turquoise? I don't really have any darker turquoise on hand, but I do have colors I could mix. Just not sure which one would look better. Steve -
Painted trim vs. BMF
StevenGuthmiller replied to chunkypeanutbutter's topic in General Automotive Talk (Trucks and Cars)
This is MCW #6758 1967 Mopar "Dark Turquoise Metallic". Steve -
Painted trim vs. BMF
StevenGuthmiller replied to chunkypeanutbutter's topic in General Automotive Talk (Trucks and Cars)
I use it because it is without question the closest you will get to the actual look of chrome trim. A Sharpie is fine, but it will never look like chrome. If done correctly, there should be no "wrinkles". take your time, be patient & you'll avoid those wrinkles. The weight of the knife itself is more than sufficient to cut the foil. I use a fresh X-acto blade for each project, possibly 2 if it's a big job. Steve -
One technique that I use on occasion is to apply a white lacquer to the gauge faces first & then put a wash of black acrylic over it. Then if the detail is pronounced enough, you can lightly wipe the black off of the numbers with a tooth pick or a fine tipped swab with a little water or thinner on it depending on the paint used for the wash, exposing the white. A lot like doing scripts on a body by foiling under the paint. Steve
-
What was your 1st 1 to car
StevenGuthmiller replied to 69NovaYenko's topic in General Automotive Talk (Trucks and Cars)
A lot like my '67 300. Back in 1979 it was just a big old boat of a used car to most people. I'll bet you'd get some looks now! I actually used that enormous trunk a couple of times to smuggle several friends into the drive in theater! Yes......people actually did that. Steve -
They were made to be built, just like real cars were made to be driven. We all know how many car collectors there are out there that stash a hoard of beautifully restored classic cars into a warehouse somewhere never to see the light of day again, unless it's to be trailered up & hauled to a show or an auction to be sold to another collector who will never drive it. Steve
-
What was your 1st 1 to car
StevenGuthmiller replied to 69NovaYenko's topic in General Automotive Talk (Trucks and Cars)
I bought mine from a junkyard for $200.00. rebuilt the engine in auto mechanics class in high school & had it repainted the next summer. Drove it until I graduated, which is when I bought my second car. A 1969 Pontiac Grand Prix which I still own & have just begun the long expensive task of restoring. Steve -
What was your 1st 1 to car
StevenGuthmiller replied to 69NovaYenko's topic in General Automotive Talk (Trucks and Cars)
A red 1967 Chrysler 300 hard top. Steve -
That ought to do the trick for your Plymouth Tommy! Good luck! Steve
-
need some sungate ivory for '53 Ford
StevenGuthmiller replied to fun9c1's topic in Model Building Questions and Answers
MCW has it. Steve -
1959 Plymouth Fury, Update, 6/6, Finished!
StevenGuthmiller replied to StevenGuthmiller's topic in WIP: Model Cars
I already have a '59 Edsel in that exact combo Charlie. I have to mix them up a little. Keeps me interested. Steve -
1959 Plymouth Fury, Update, 6/6, Finished!
StevenGuthmiller replied to StevenGuthmiller's topic in WIP: Model Cars
The more I thought about today, the more I started thinking of a nice pale 50s "Aqua". I may investigate that as well. Steve -
1959 Plymouth Fury, Update, 6/6, Finished!
StevenGuthmiller replied to StevenGuthmiller's topic in WIP: Model Cars
I kind of agree John. I told myself a long time ago when the AMT '58 Fury came out that I would never do one in red. I thought this would be a good one to use that color on. I guess I didn't realize the rule applied to the '59. The only other colors I was considering were black or copper. I don't have any copper in my arsenal @ the moment, so unless someone talks me into the black very soon.....red it will be. Steve -
Sorry Christian, You're correct. I was just testing you. You passed! Steve
-
Exact same one I've been using for many years! Keep it clean & it will last forever! Steve
-
I agree with you on the polishing. BMF on the other hand is one of the things I enjoy doing. Steve
-
I've been having model building "withdrawal" symptoms while I wait for the top for my '60 Lincoln & the body of the '60 Imperial to strip clean. They both seem to be taking their time in the purple stuff. So, in the mean time, I decided it's time to "resurrect" this old X-EL '59 Fury that I had built many years ago but had never liked. It was molded in this bright, almost florescent, green & I had just left it in that color & painted the top beige. The green just always bugged me! So. after a light soak in Super Clean to remove the top color & the foil, as well as the paint from the resin interior, I'm off & running. I'm thinking just a very basic bright red with a white top & red & white interior. Sort of a "Christine" thing, but on a '59 instead. Steve
-
1960 Chrysler Imperial Update, 4/18 Starting Over
StevenGuthmiller replied to StevenGuthmiller's topic in WIP: Model Cars
Sorry Bill. I originally had photos in this thread but deleted them when the build went south to save on my "attachment space". I since started using Photo Bucket for posting photos so I don't need to delete any photos, but now I can't find any previous pics of this Imperial. When it comes out of the soup I'll post some "start" pics. This one was a brand new un-started kit anyway, so really no "built up" photos to begin with. Steve