StyreneAddict420
-
Posts
35 -
Joined
-
Last visited
Content Type
Profiles
Forums
Events
Gallery
Everything posted by StyreneAddict420
-

1/16 Revell 73 Hawaiian Funny Car
StyreneAddict420 replied to Lee Yoder's topic in WIP: Drag Racing Models
Great to see you getting back into the Hobby, you couldn't have picked a better project to start. That is a great kit and a really fun build. Good luck and thanks for sharing. Looking forward to more project pics along the way -
Congratulations!
-
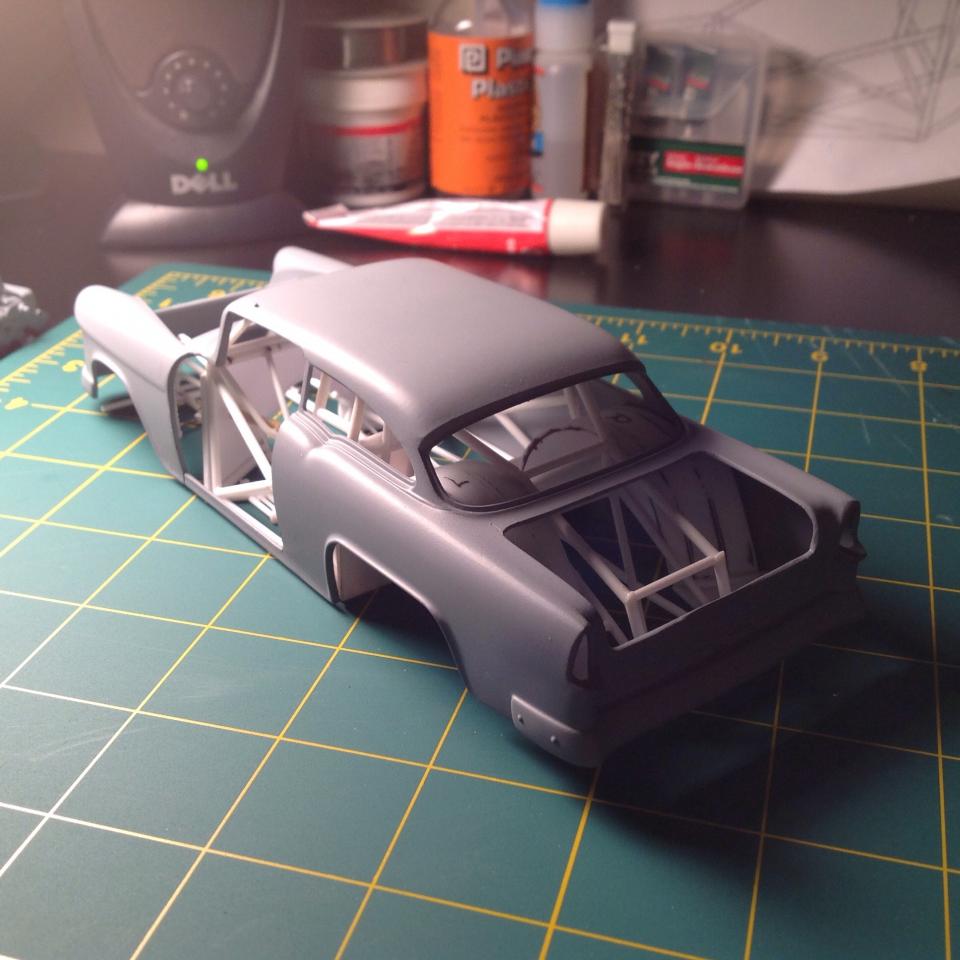
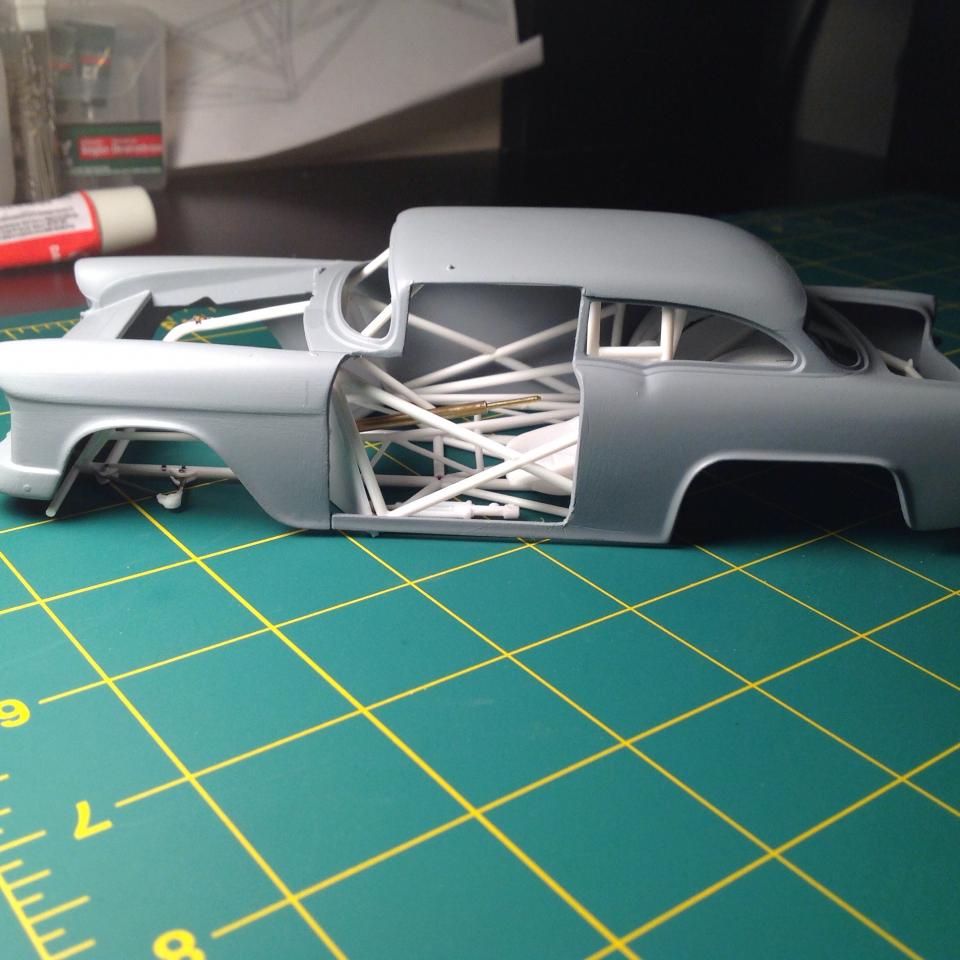
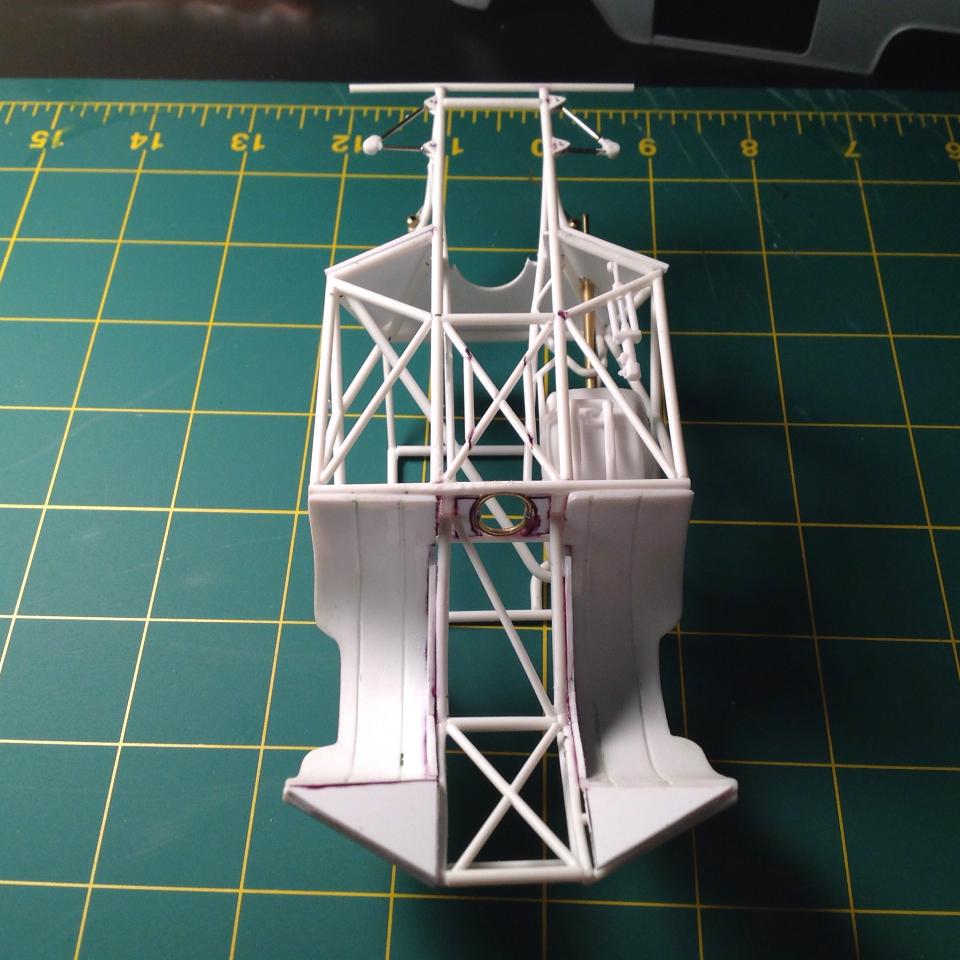
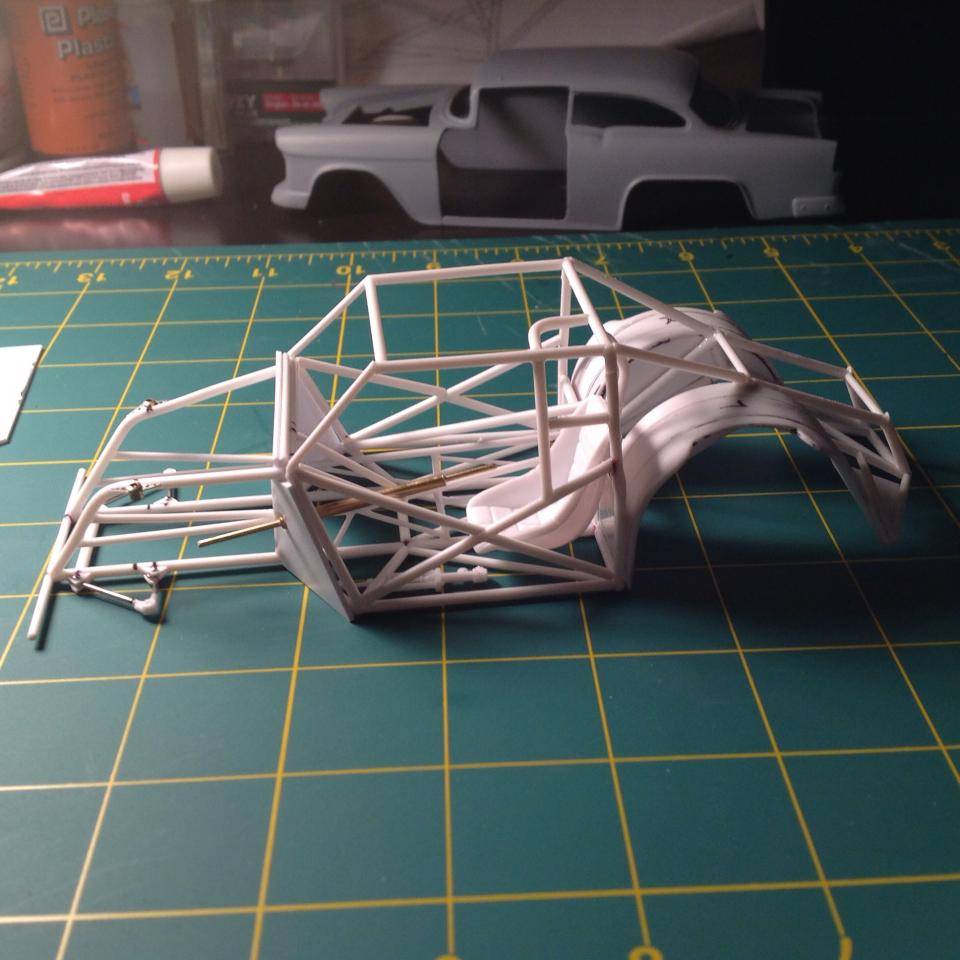
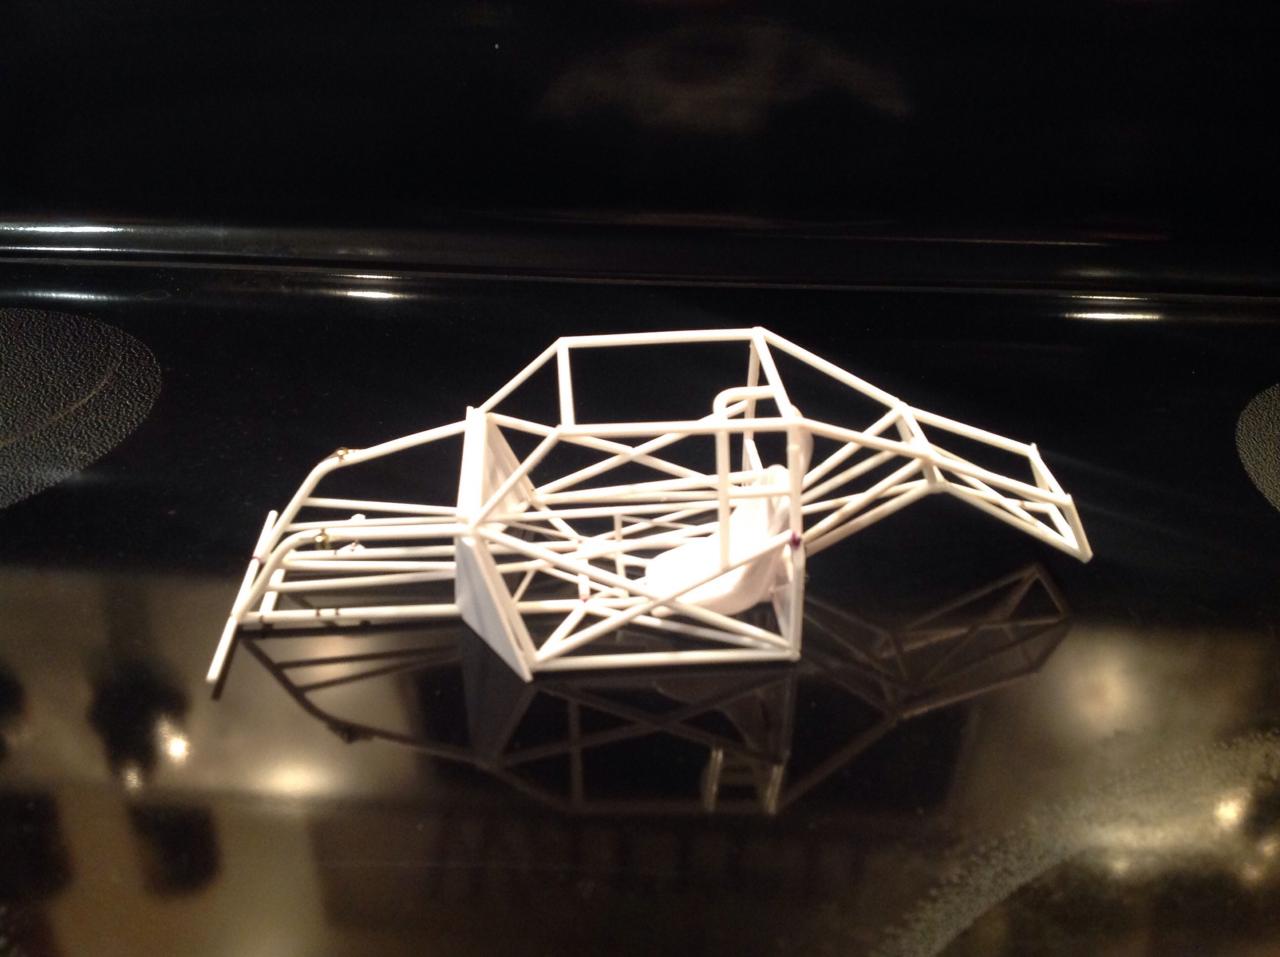
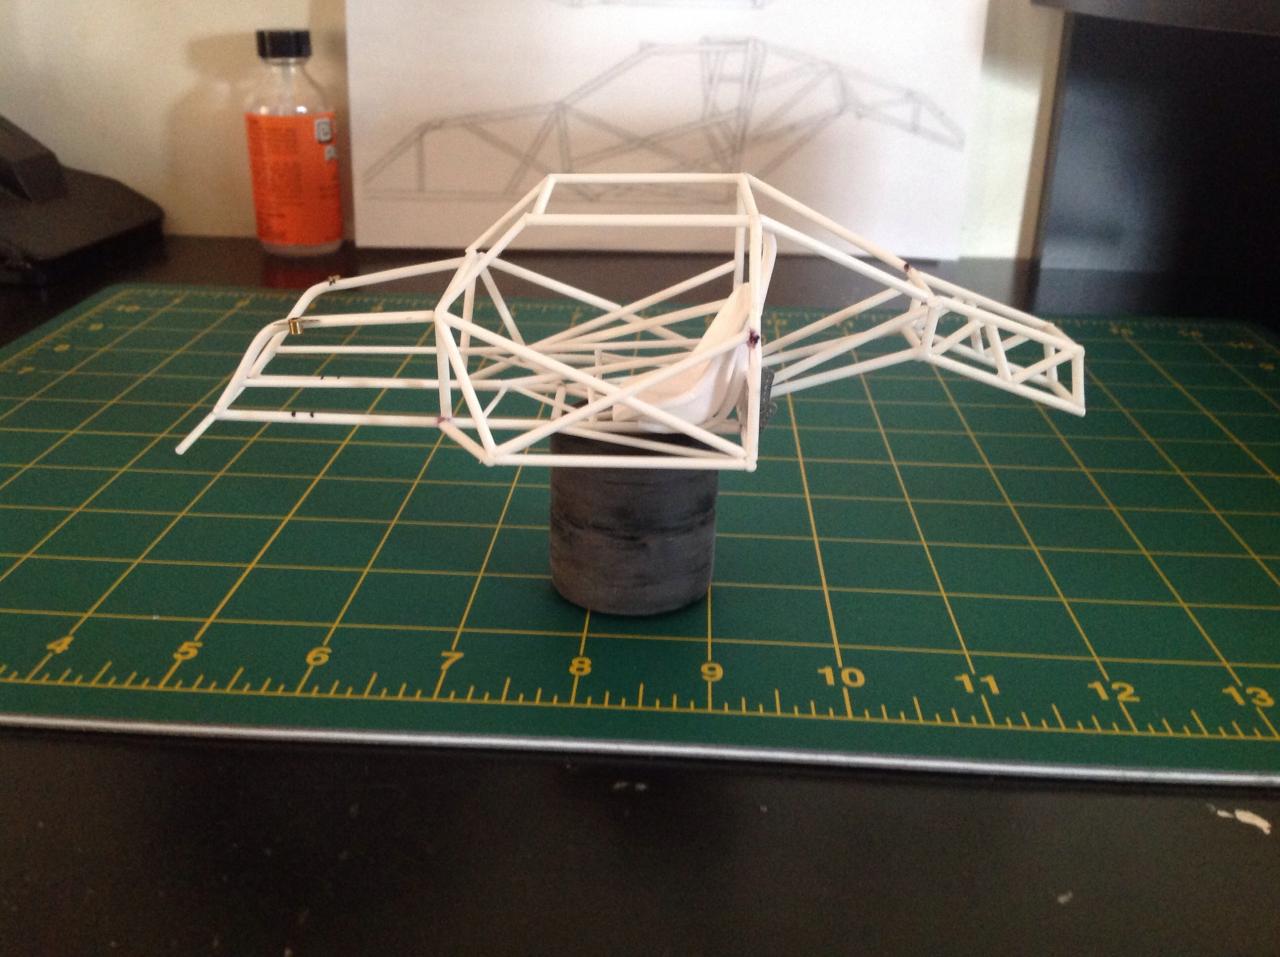
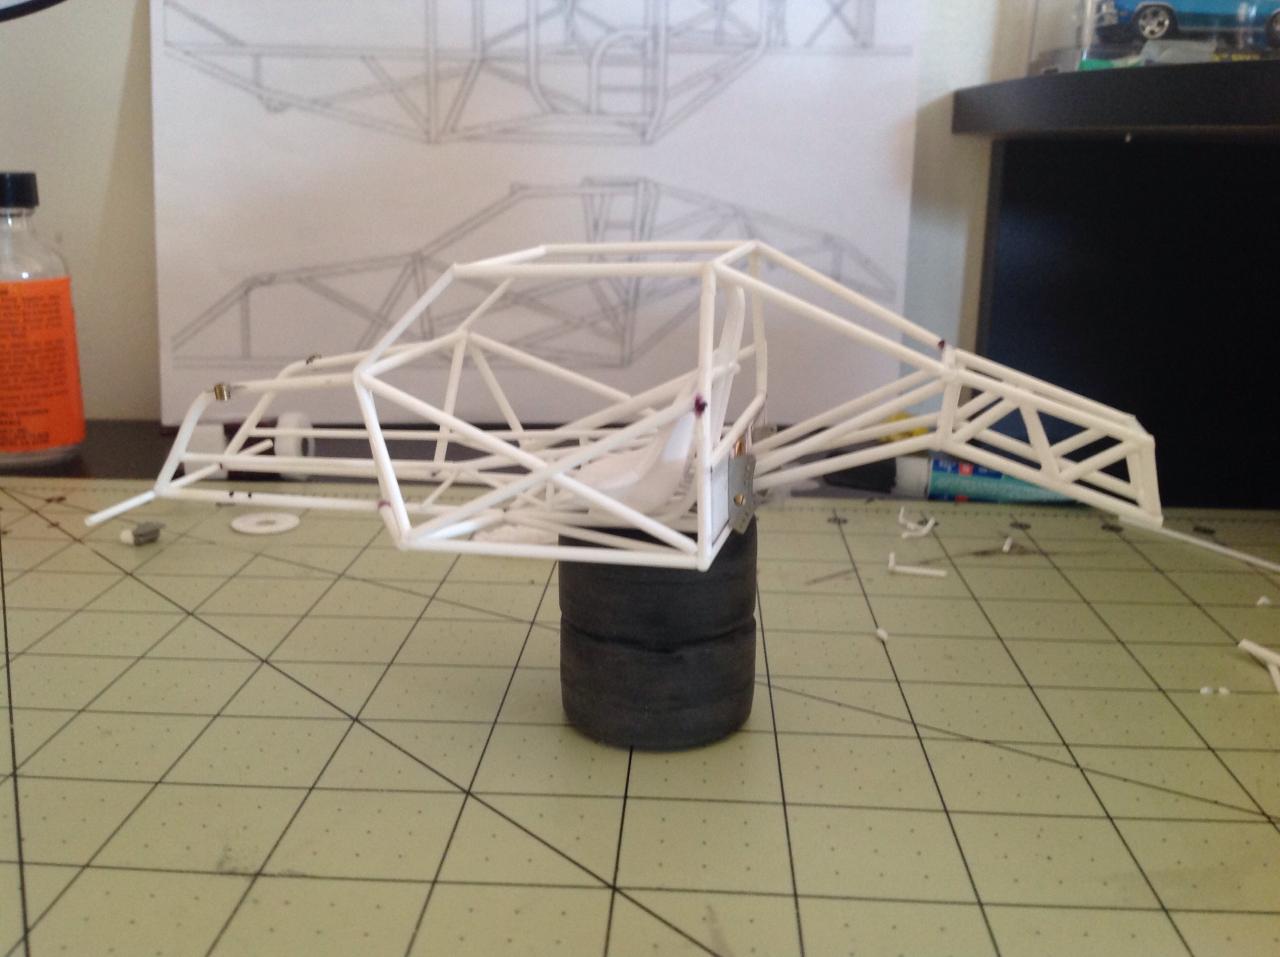
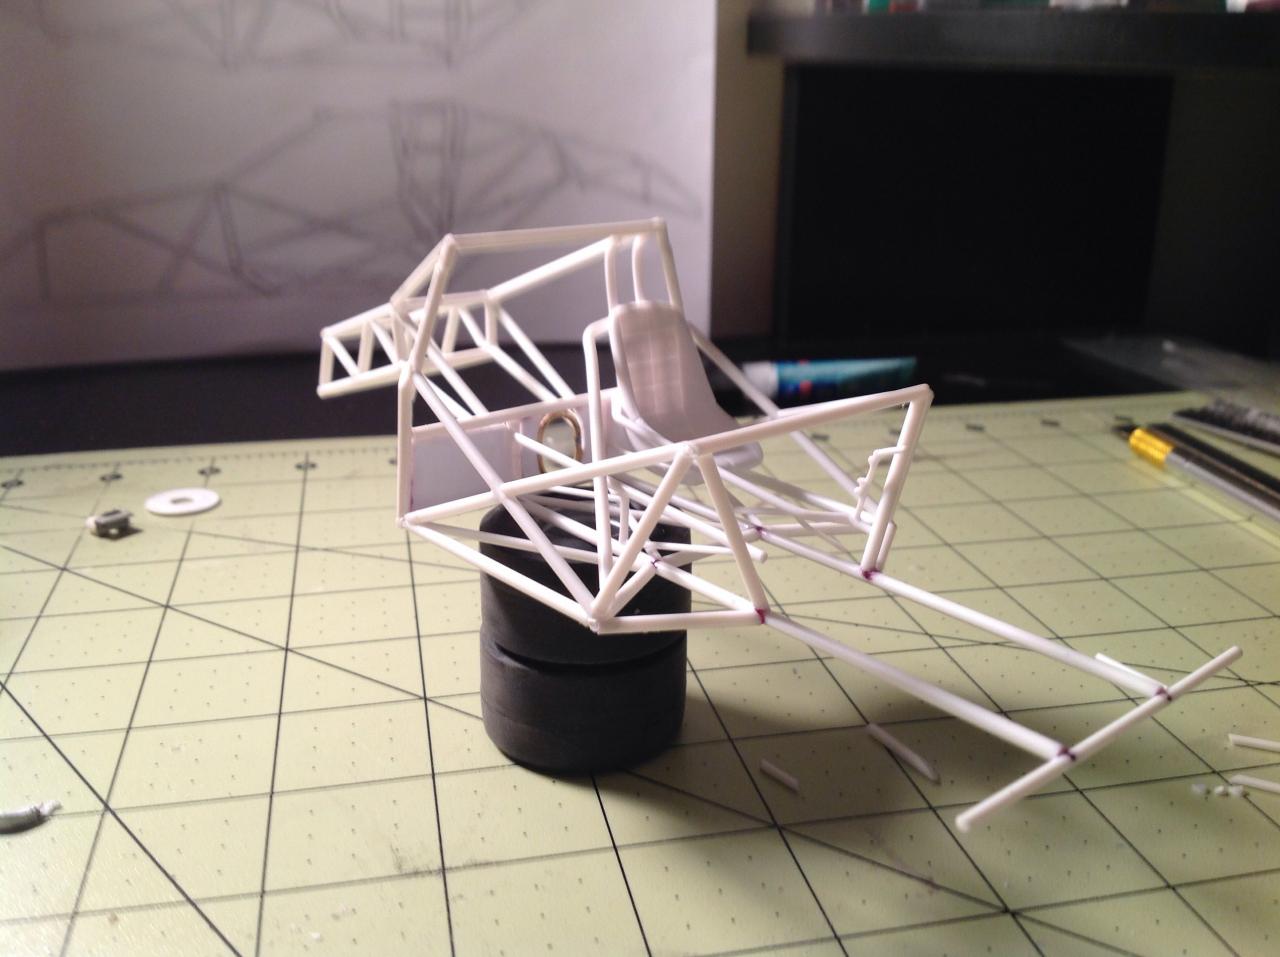
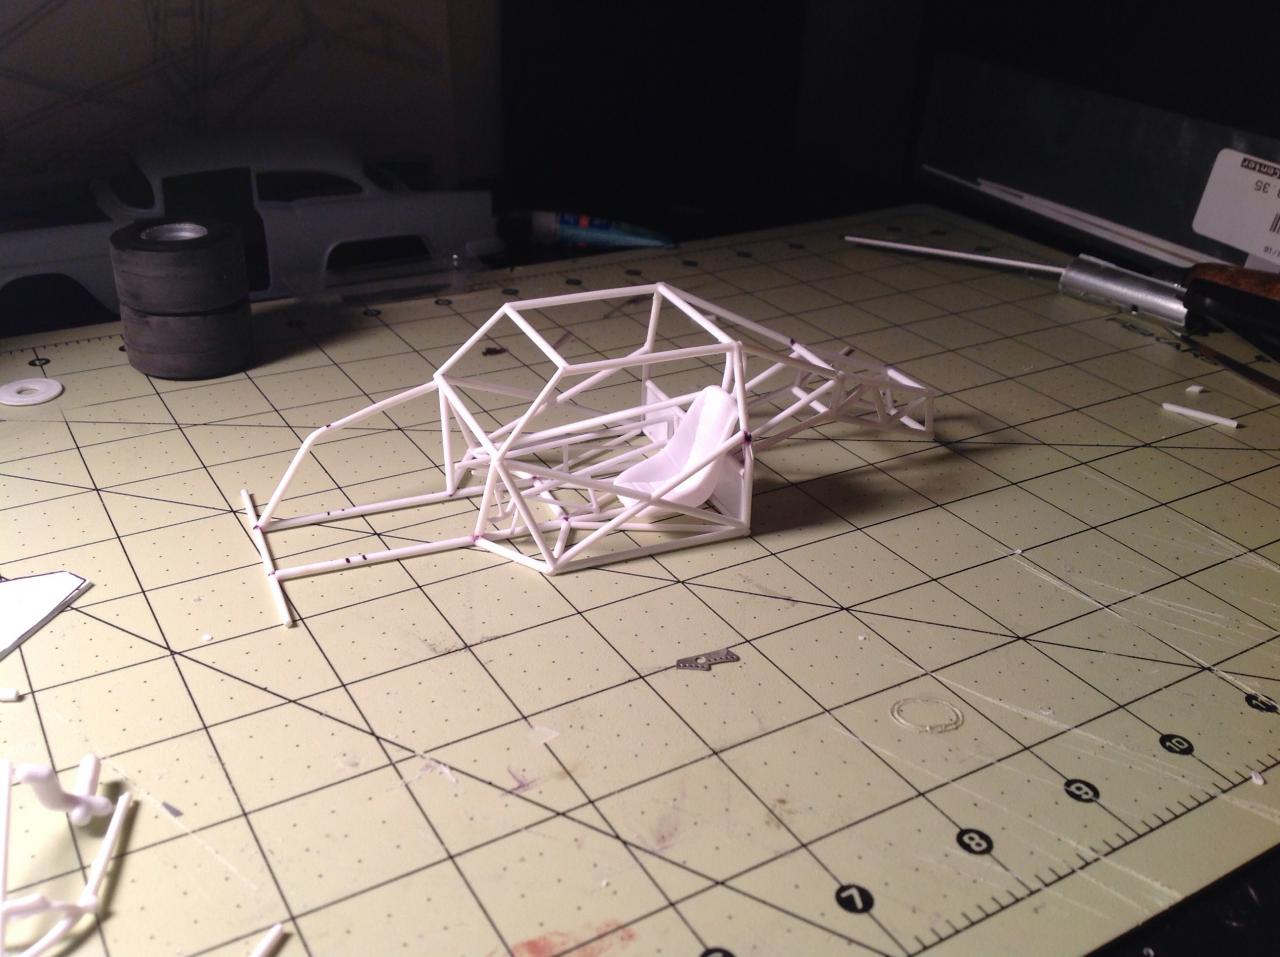
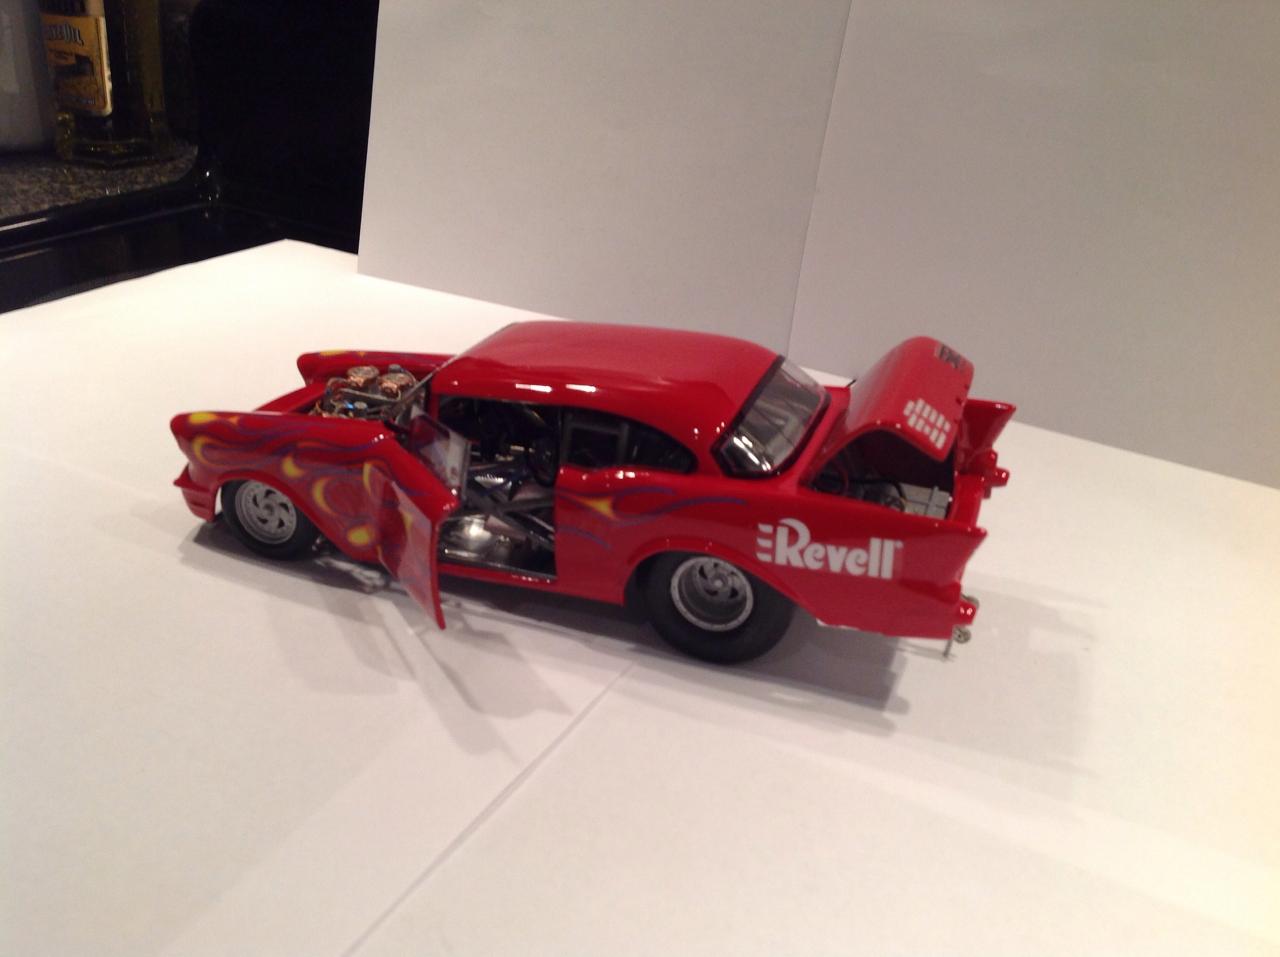
Here's the progress I've made on the Pro Mod. I'm just about ready to primer the roll cage and chassis, I just have a few more little details I have to finish up. Thanks for looking I hope you enjoy. Comments welcome.

-
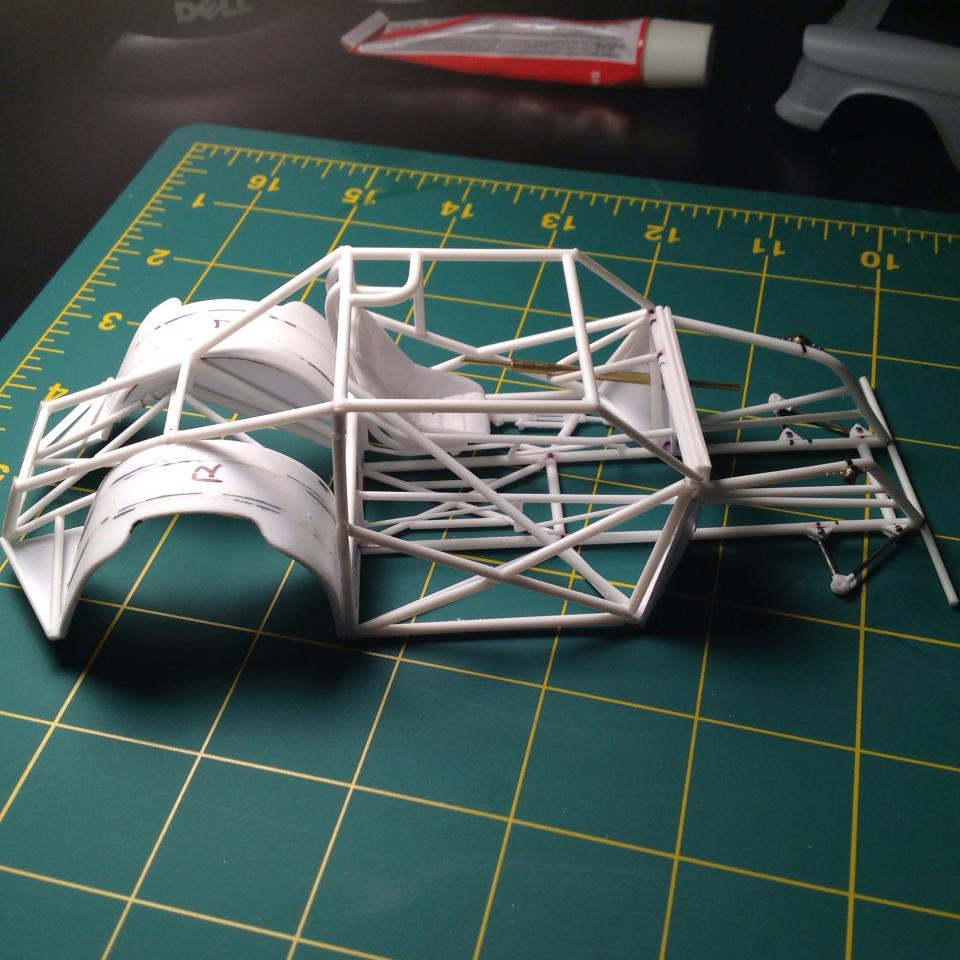
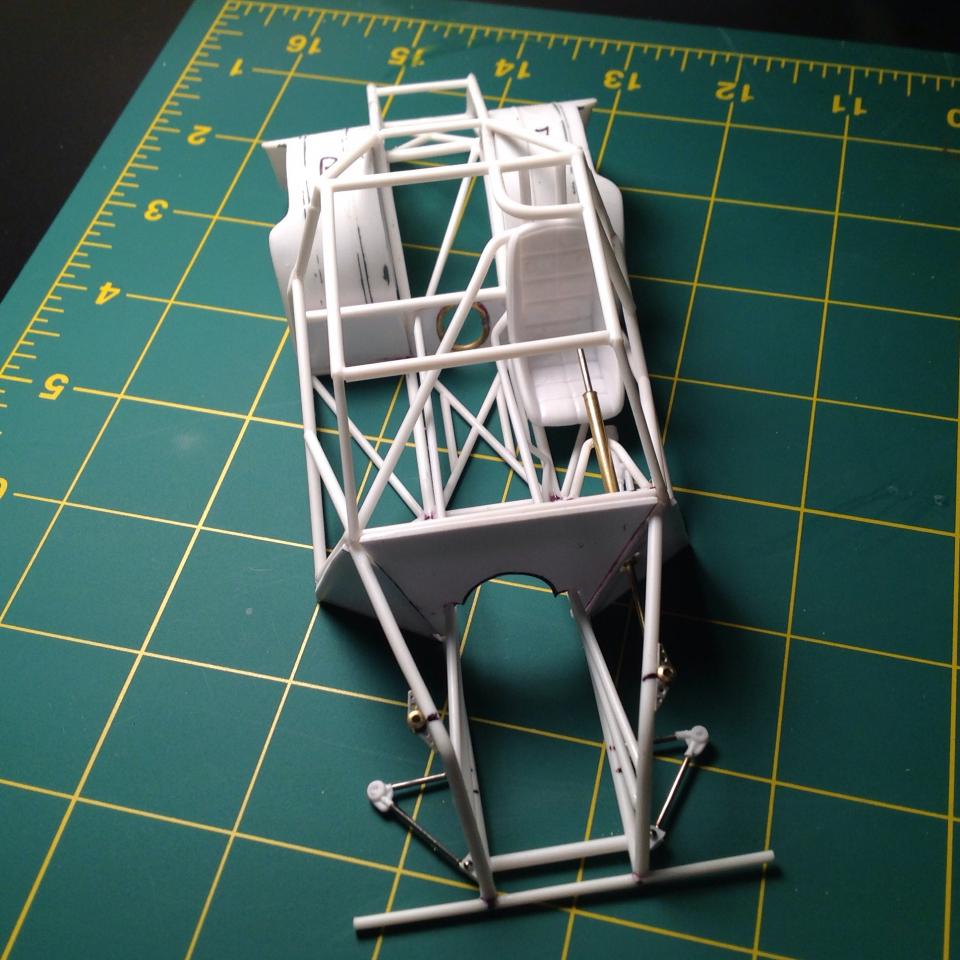
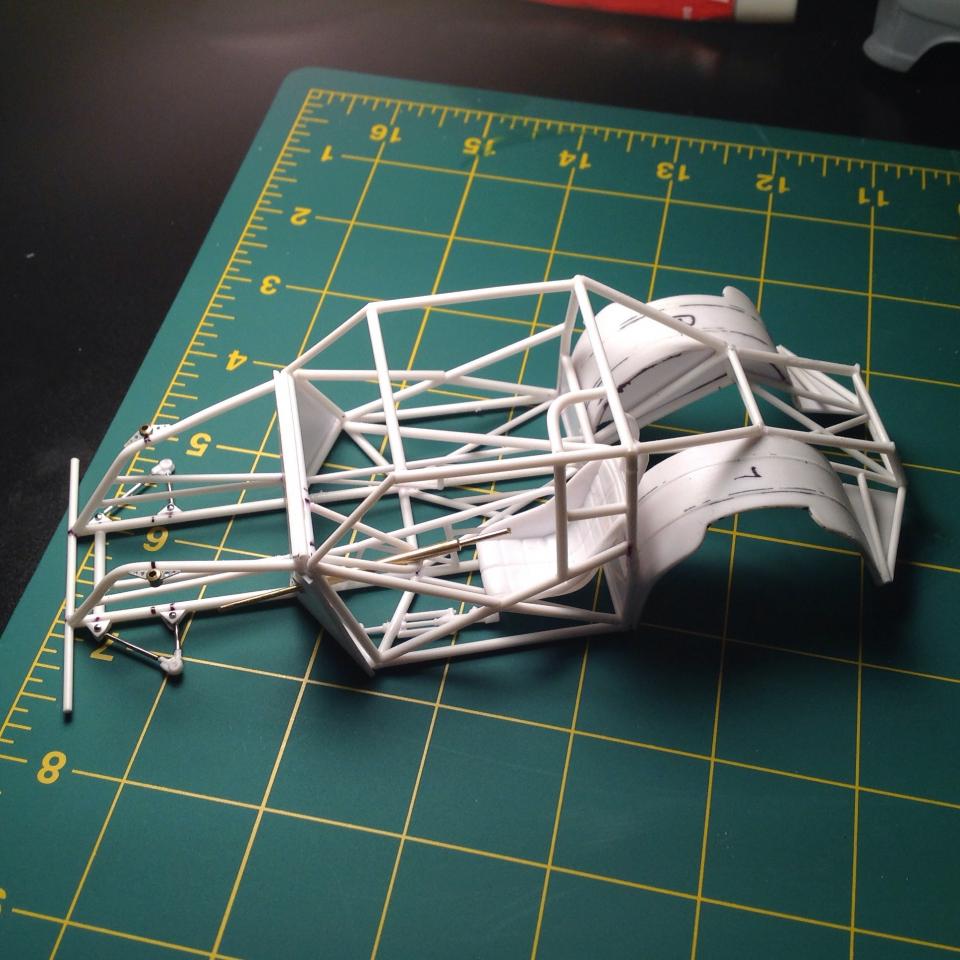
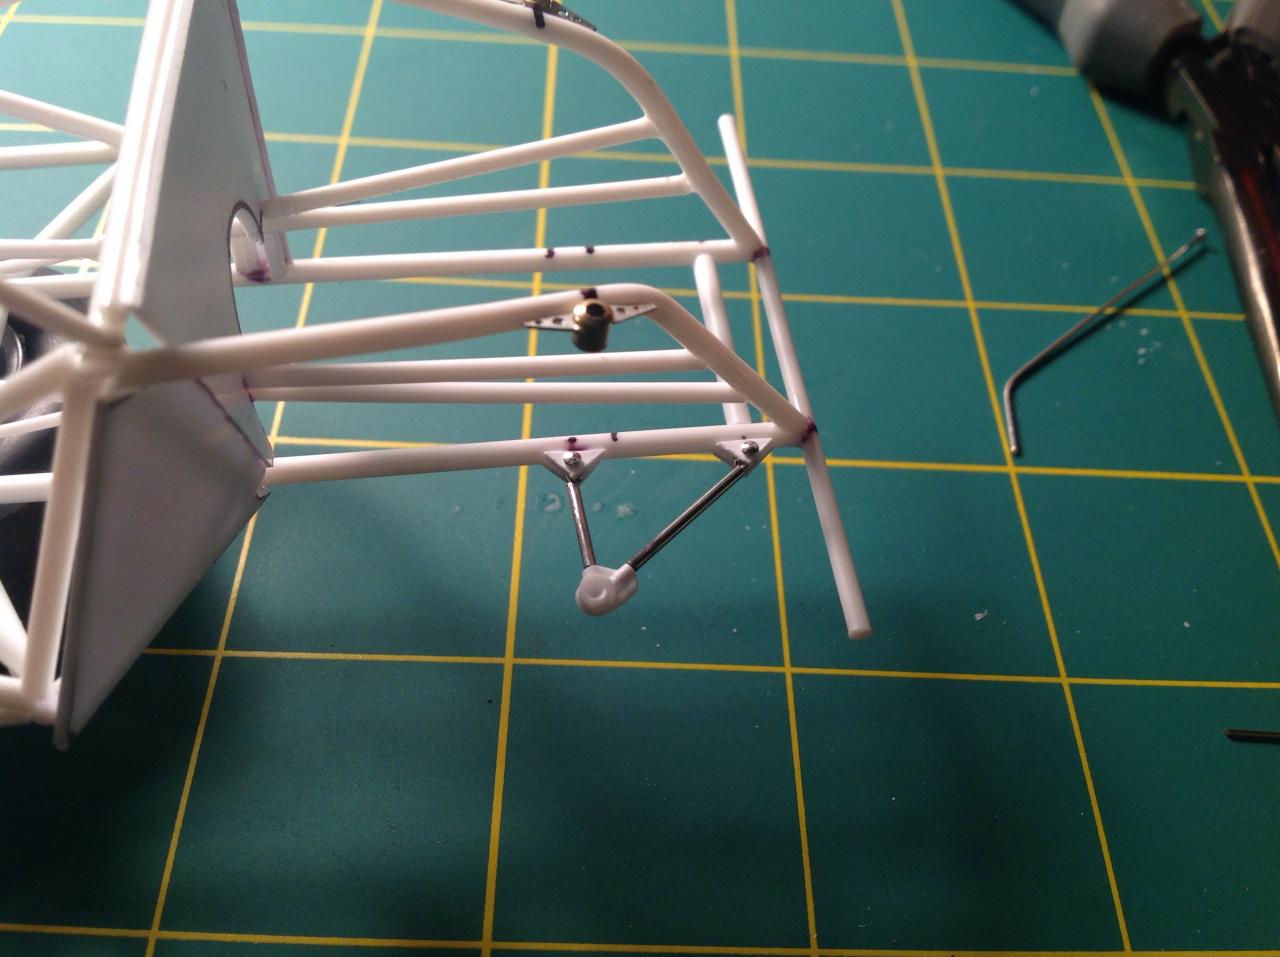
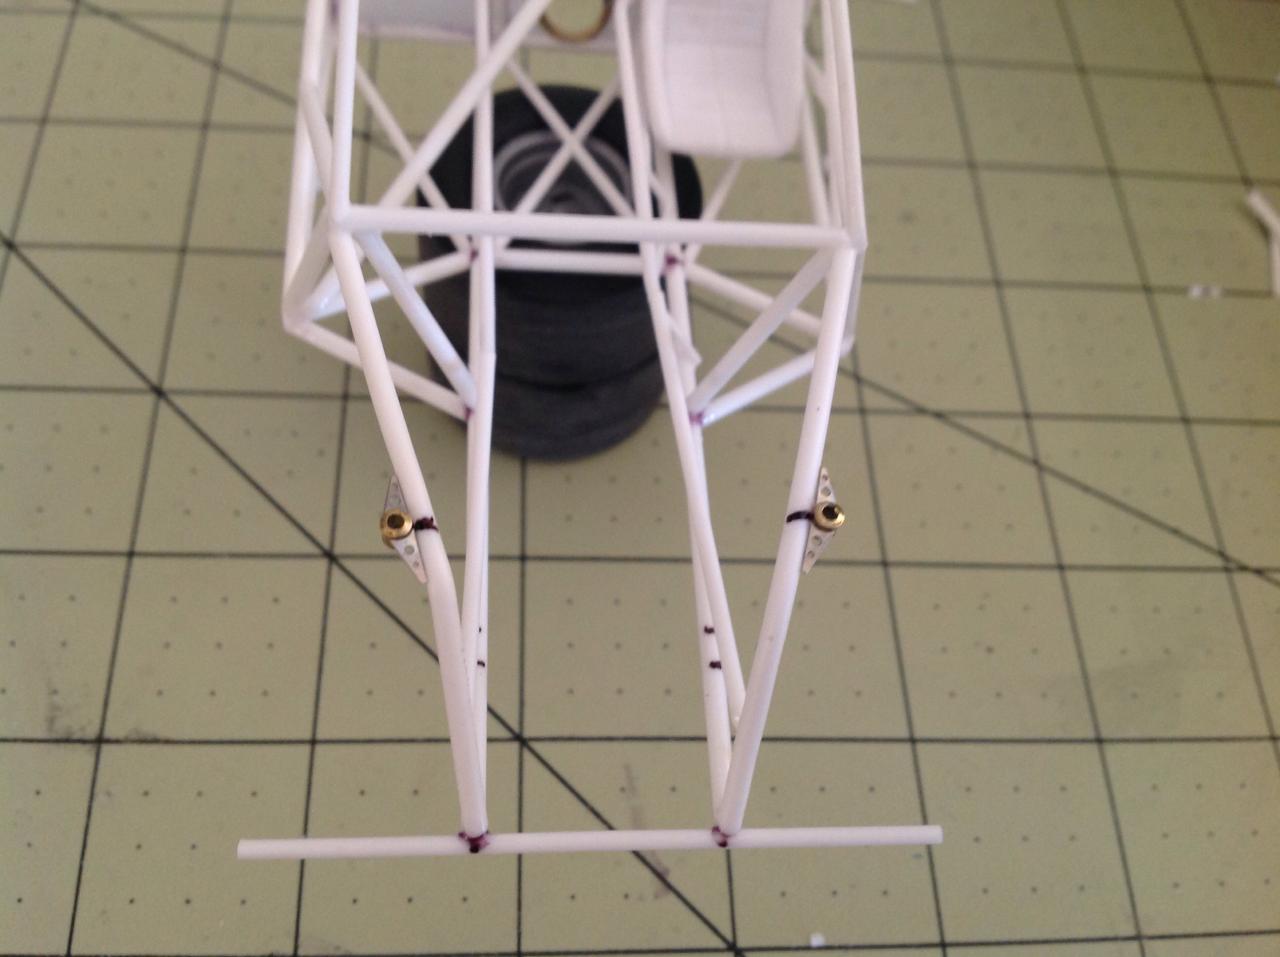
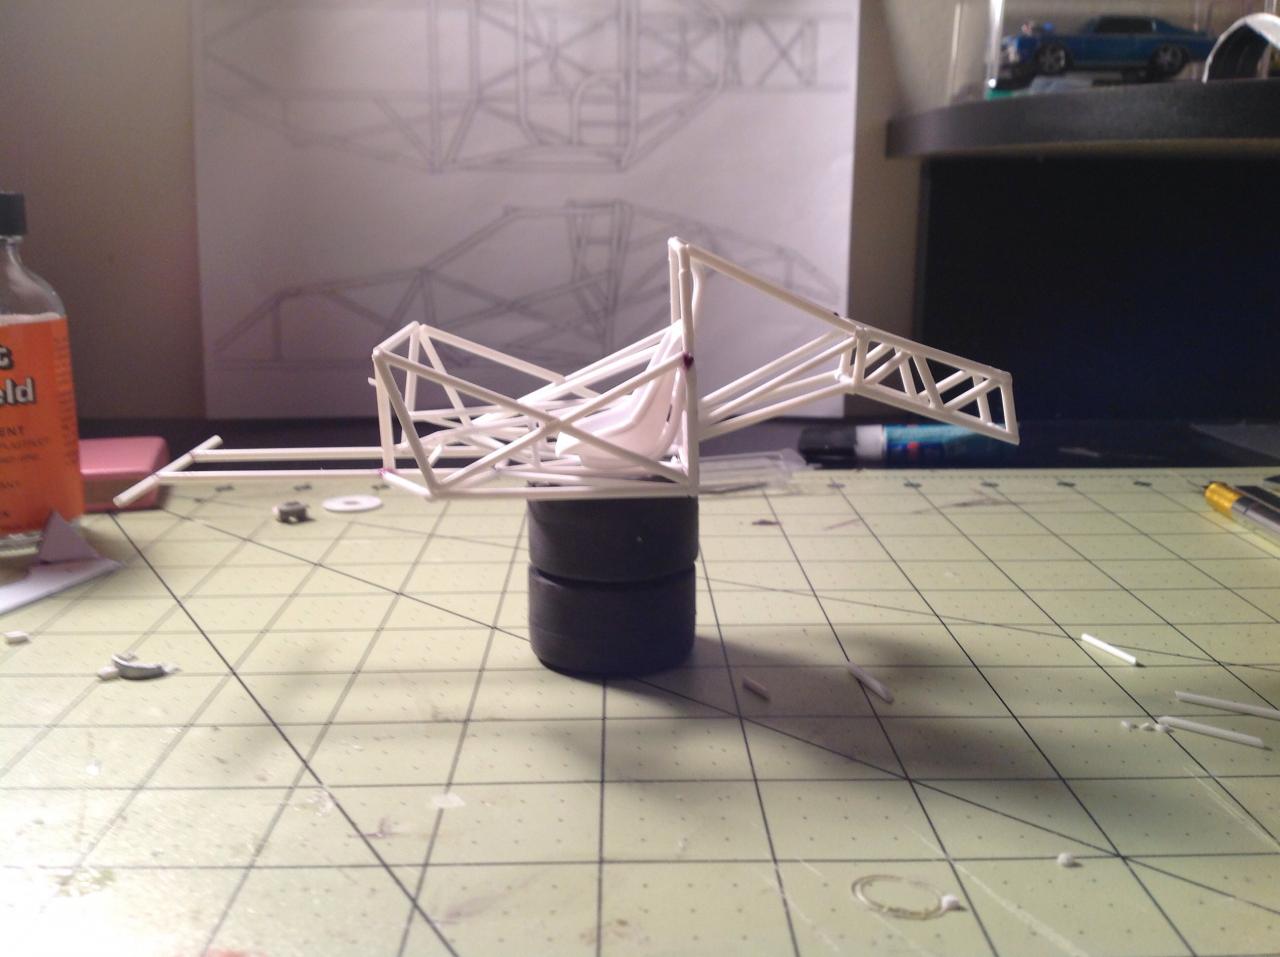
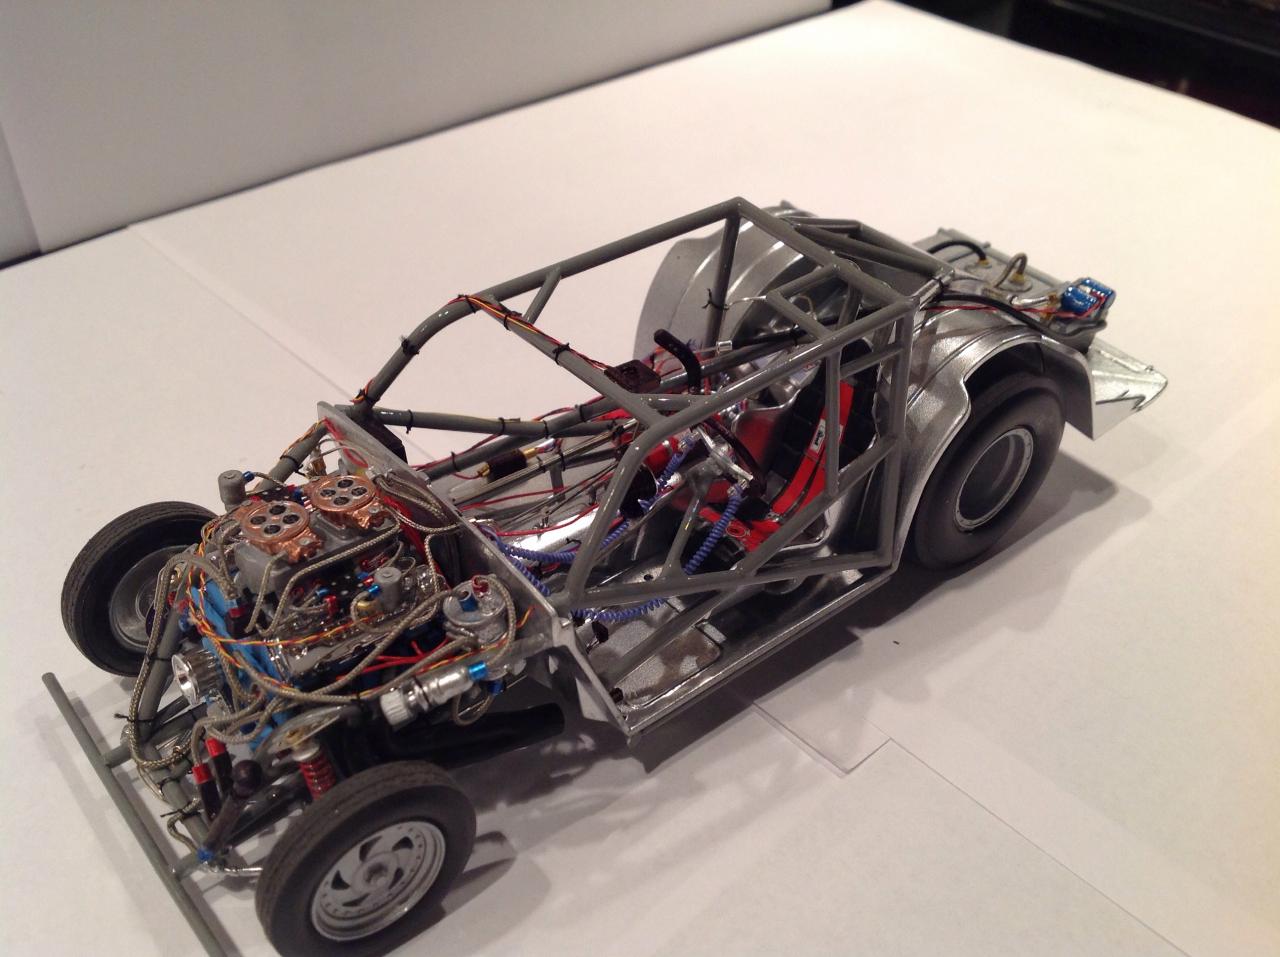
So here is the progress I've made so far, after having to completely re-do the back half because the ride height was way too high. I've got most of the firewall finished, and have started on making the lower control arms. I've purchased a front end strut suspension package from Scott at future Attraction, can't wait to get it rolling. Anyways I hope you enjoy, tomorrow night I will work on getting the wheel tubs made up! Hope everybody had a great weekend, thanks for lookin' ?
-
Here's the newest project I started last week, had to completely re do the back half to get the right ride height but other than that it's been coming along fairly well, thanks for looking ENJOY
-
Thanks for all the compliments Guys! I appreciate it.
-
Wow thank you for the kind words chunkypeanutbutter!
-
Here's one I built quite a few years ago, thought you guys might like it. its mostly box stock with a couple little goodies like a Pro-Tech distributor and some Braided line. Thanks for looking and I hope you enjoy! Have a great Day Friends.
-
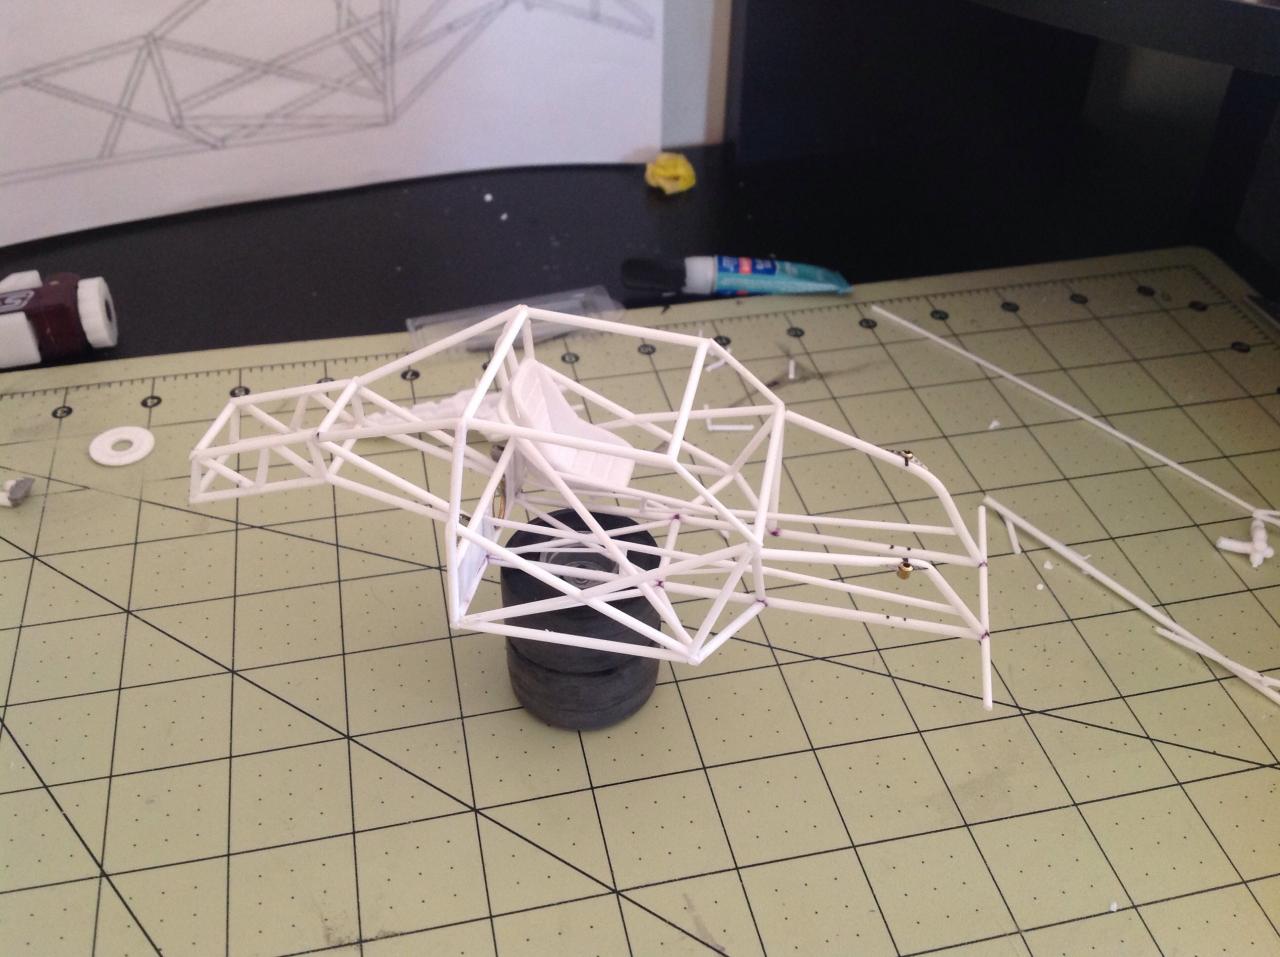
Here's some more pictures of the progress I've made so far,it's coming along ok except for when I started mocking up the rearend with the 4 link I noticed my ride height was too high. So now I've got to rework the back part of the chassis a little to acheive the right height. This is only my second attempt at scratchbuilding anything. Also Does anybody have any info on how to make a frame jig? Or if anybody offers one? I would really like to learn how to do it using a jig. Anyways thanks for looking, hope you enjoy
-
So I normally use windex to strip chrome off of styrene, but it doesn't get that yellow coating off underneath! I've tried a bunch of stuff from Brake Fluid to Simple green to Purple Power! You name it I've tried it.mthey all seem to just get that first layer of chrome off and that's it. Does anybody know of a product that strips BOTH Coatings? And does anybody know what that yellow stuff actually is? Any info on this would be greatly appreciated?
-
68 Mustang Twin Turbo Outlaw.... (updates 06/03/15)
StyreneAddict420 replied to tyrone's topic in WIP: Drag Racing Models
WOW Tyrone! Your Scratch Building is SICK!!! Looks Absolutely Killer keep up the Great Work -
70 Chevy Nova Outlaw..updates (11/08/15)
StyreneAddict420 replied to tyrone's topic in WIP: Drag Racing Models
Looks Awesome Tyrone im interested in how you hinge your doors, the technique I'm using works, but i just don't like the way it looks. Any suggestions?? P.s. I use the old school brass or styrene tubing with a bent up paper clip method. -
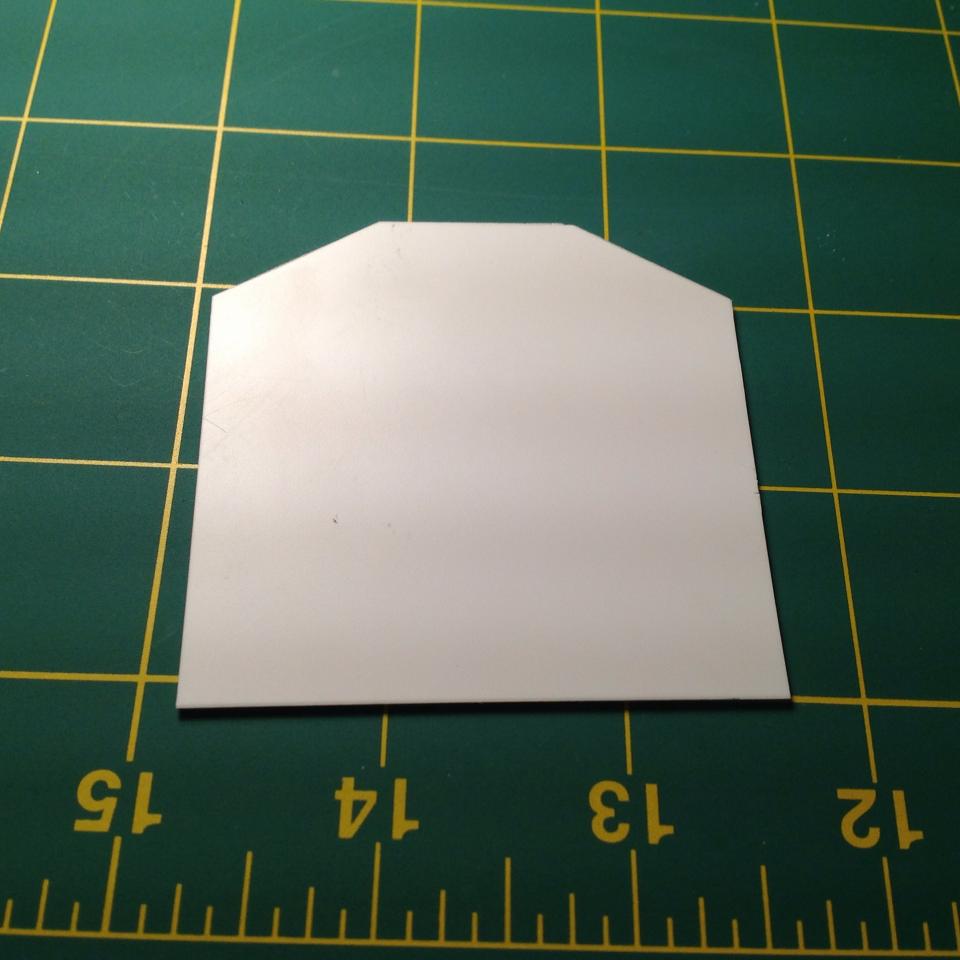
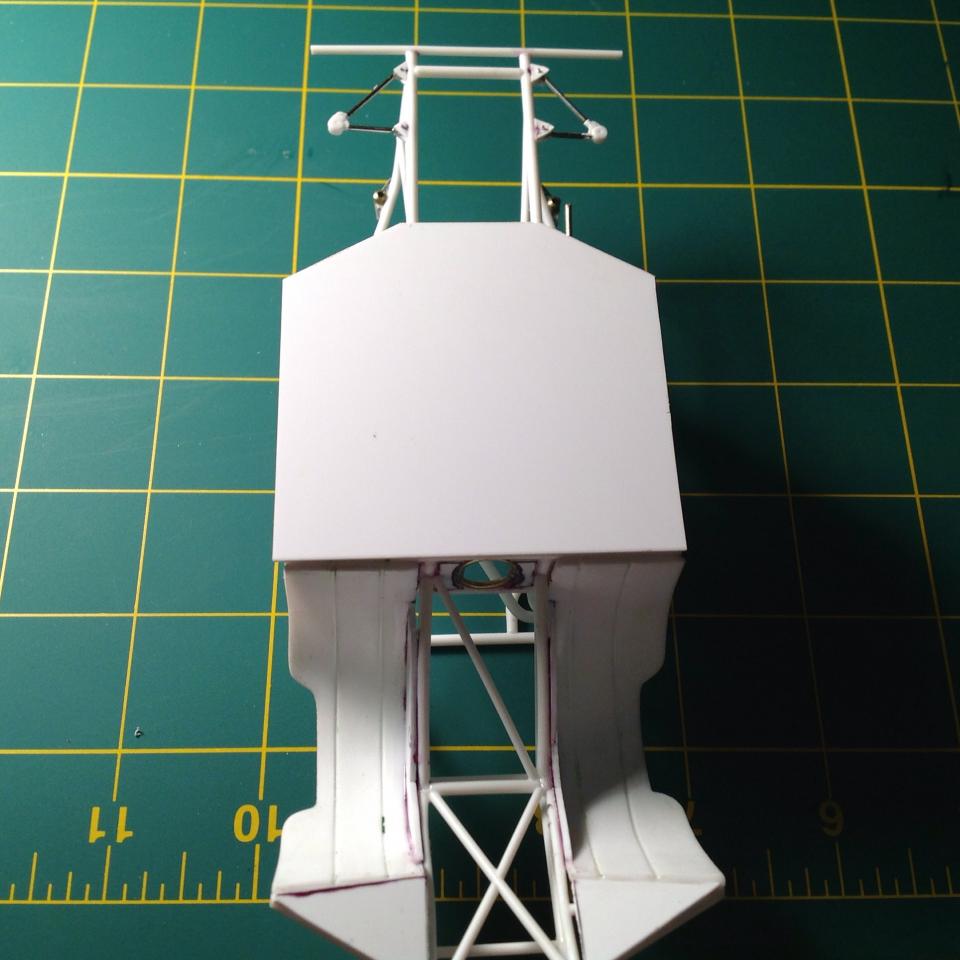
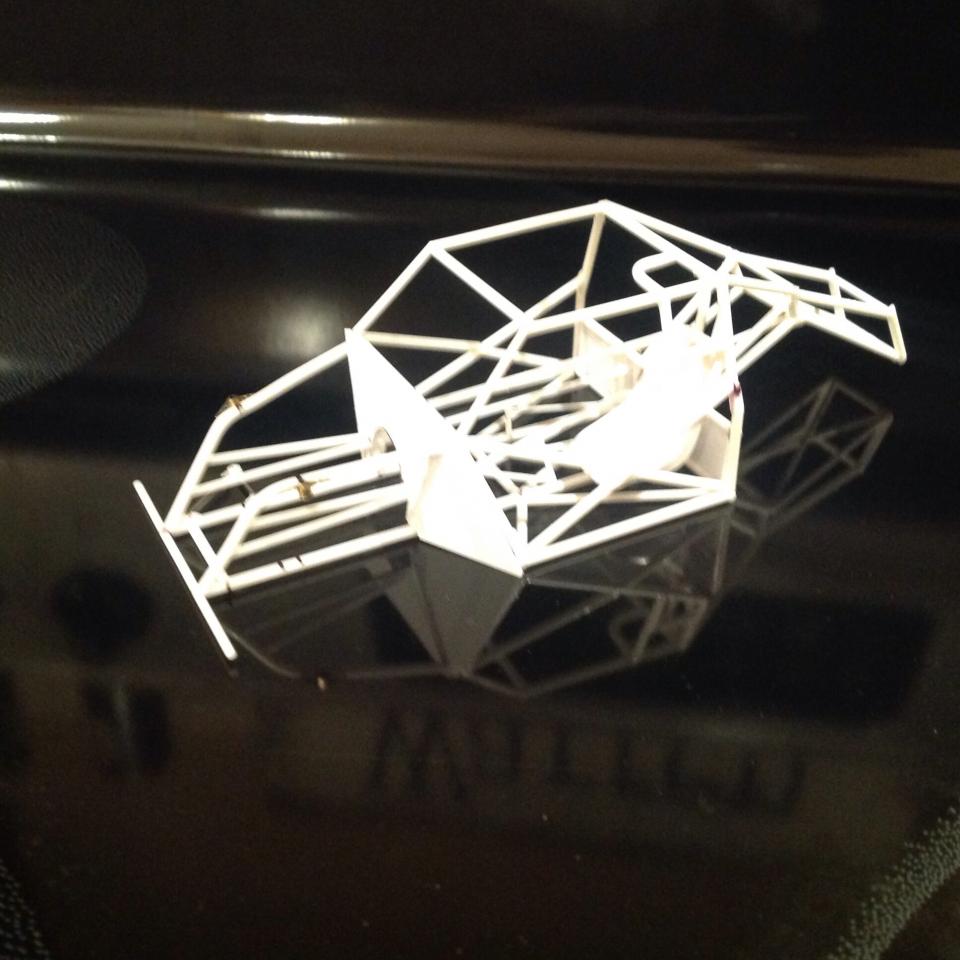
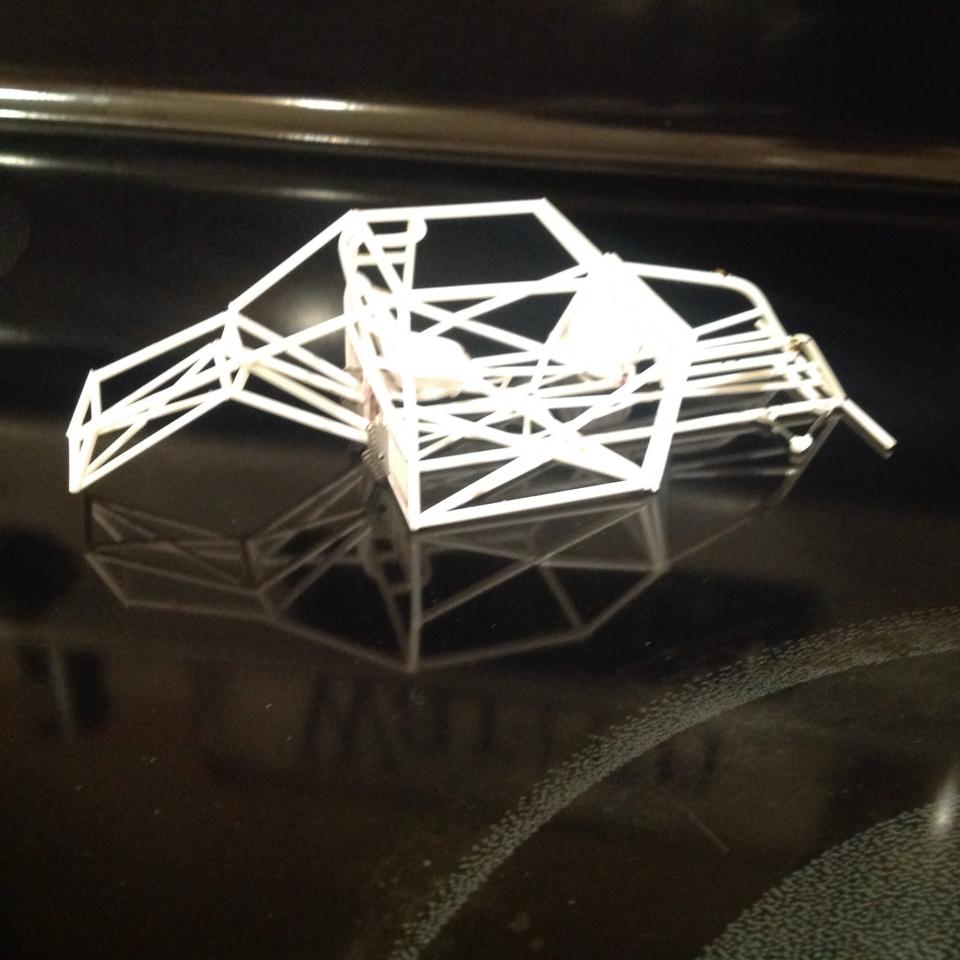
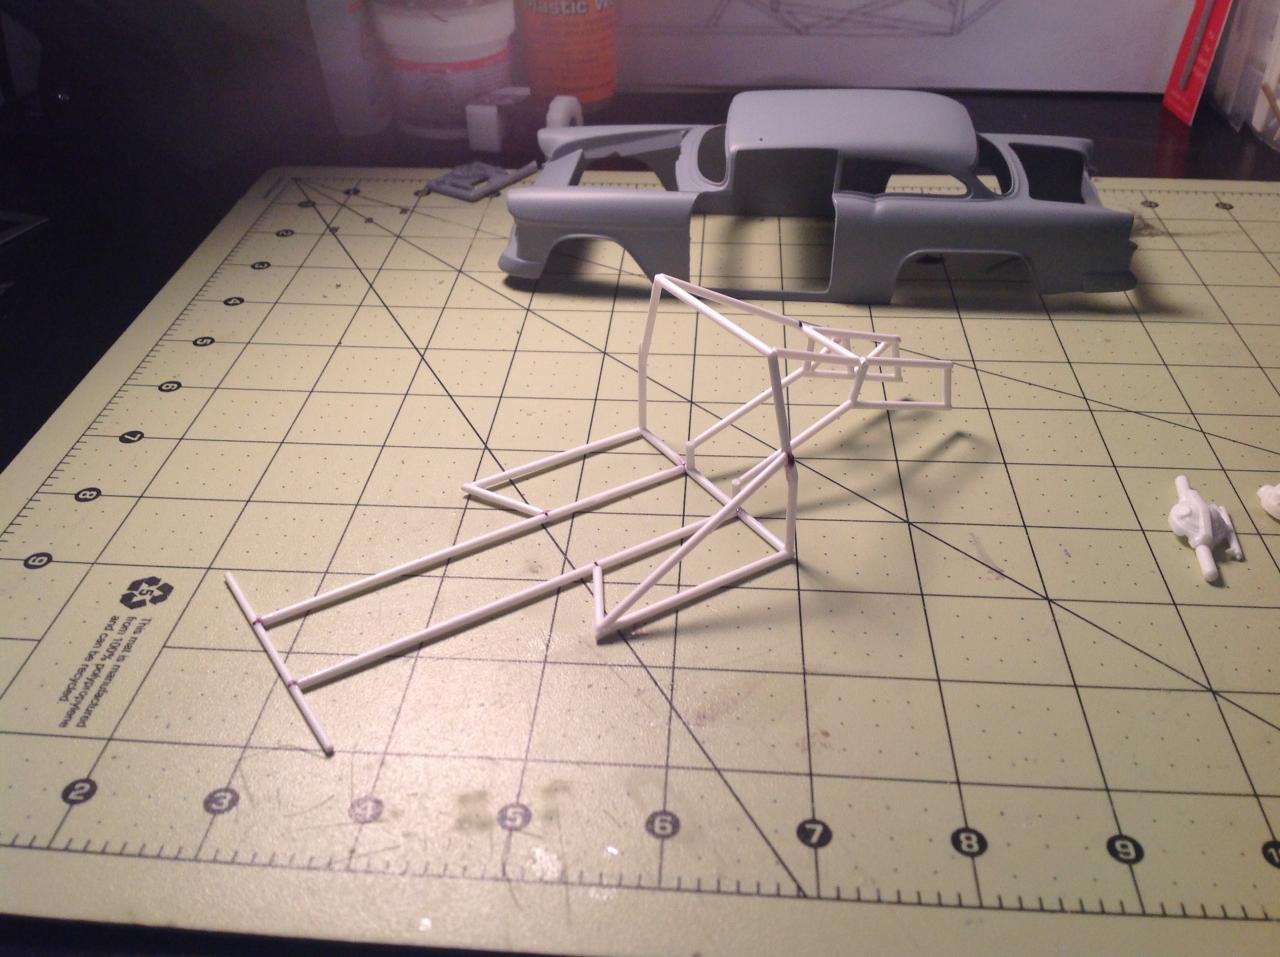
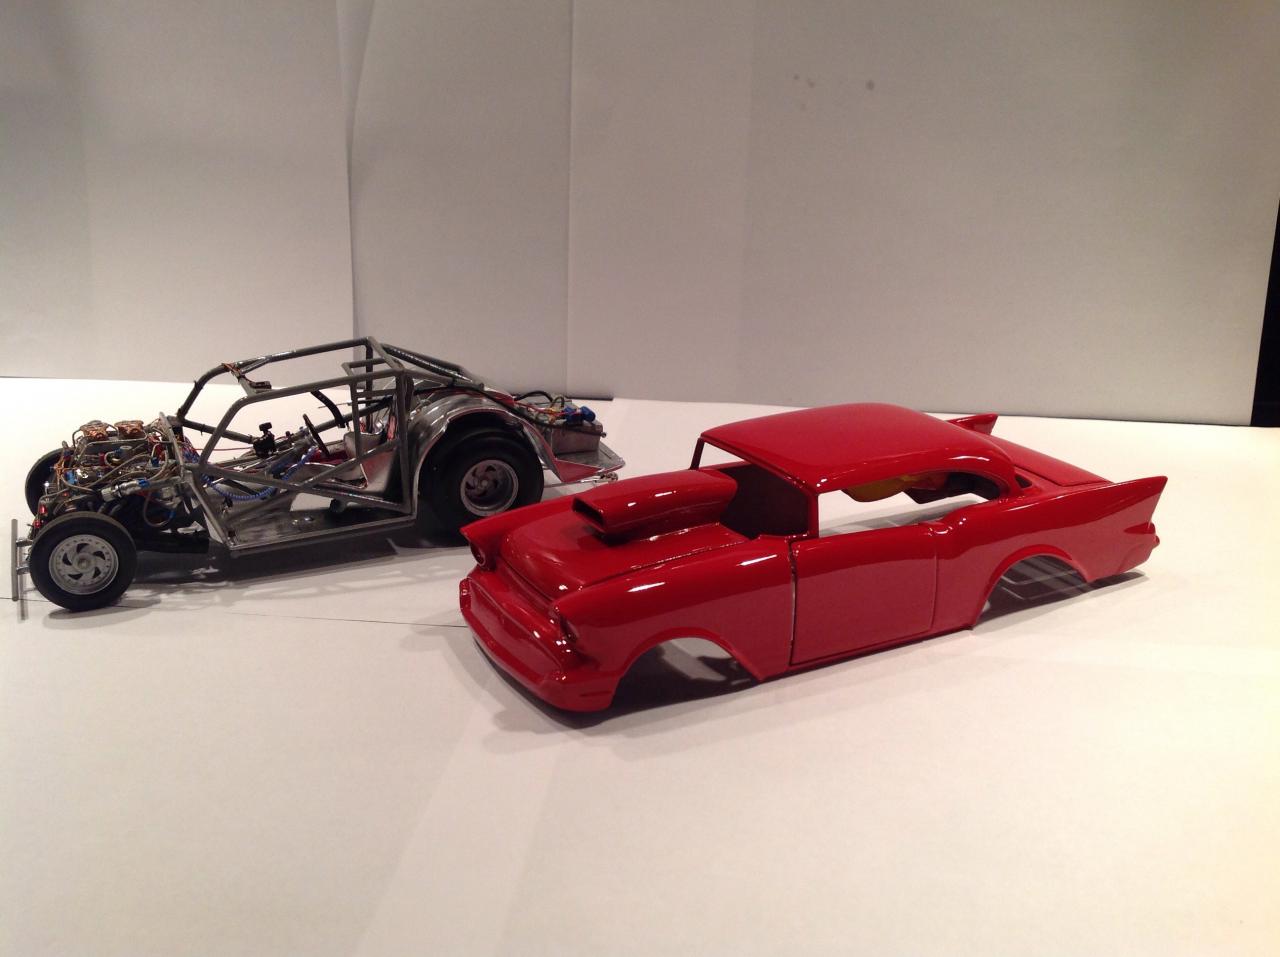
So here's the progress I've made on the Chassis the past couple of nights, I'm getting ready to make up the firewall, then I'll move on to getting the rearend and 4 link mocked up. After that I'll get the front controls arms made up and the front struts! I've got a front end suspension kit and 4 link photo etch kit from Scott at Future Attraction and a bunch more goodies, way too much to list. I'll keep posting pics of my progress as I go. As always constructive criticism is welcome and any suggestions! Thanks for looking hope you enjoy.
-
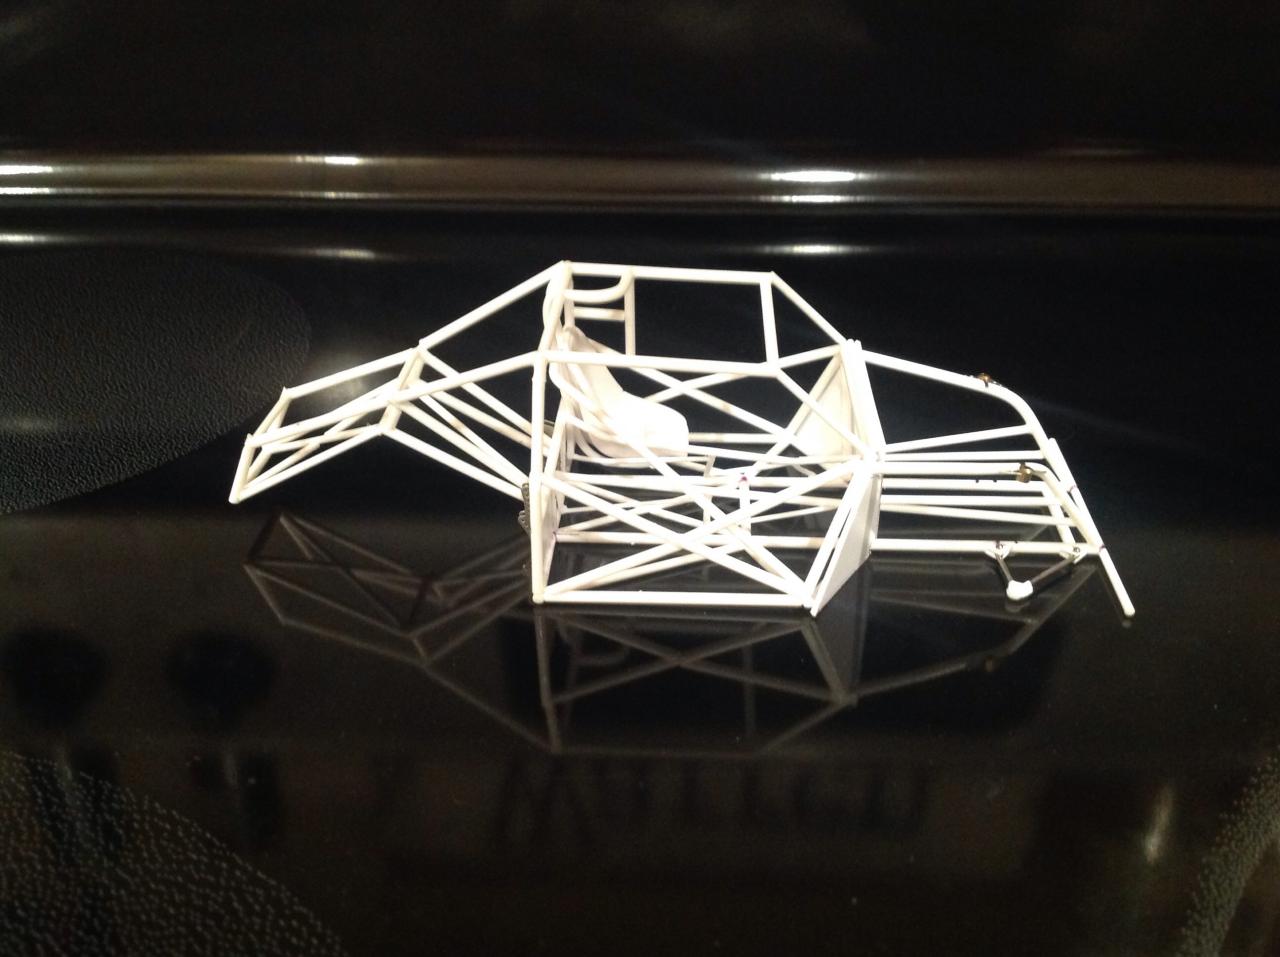
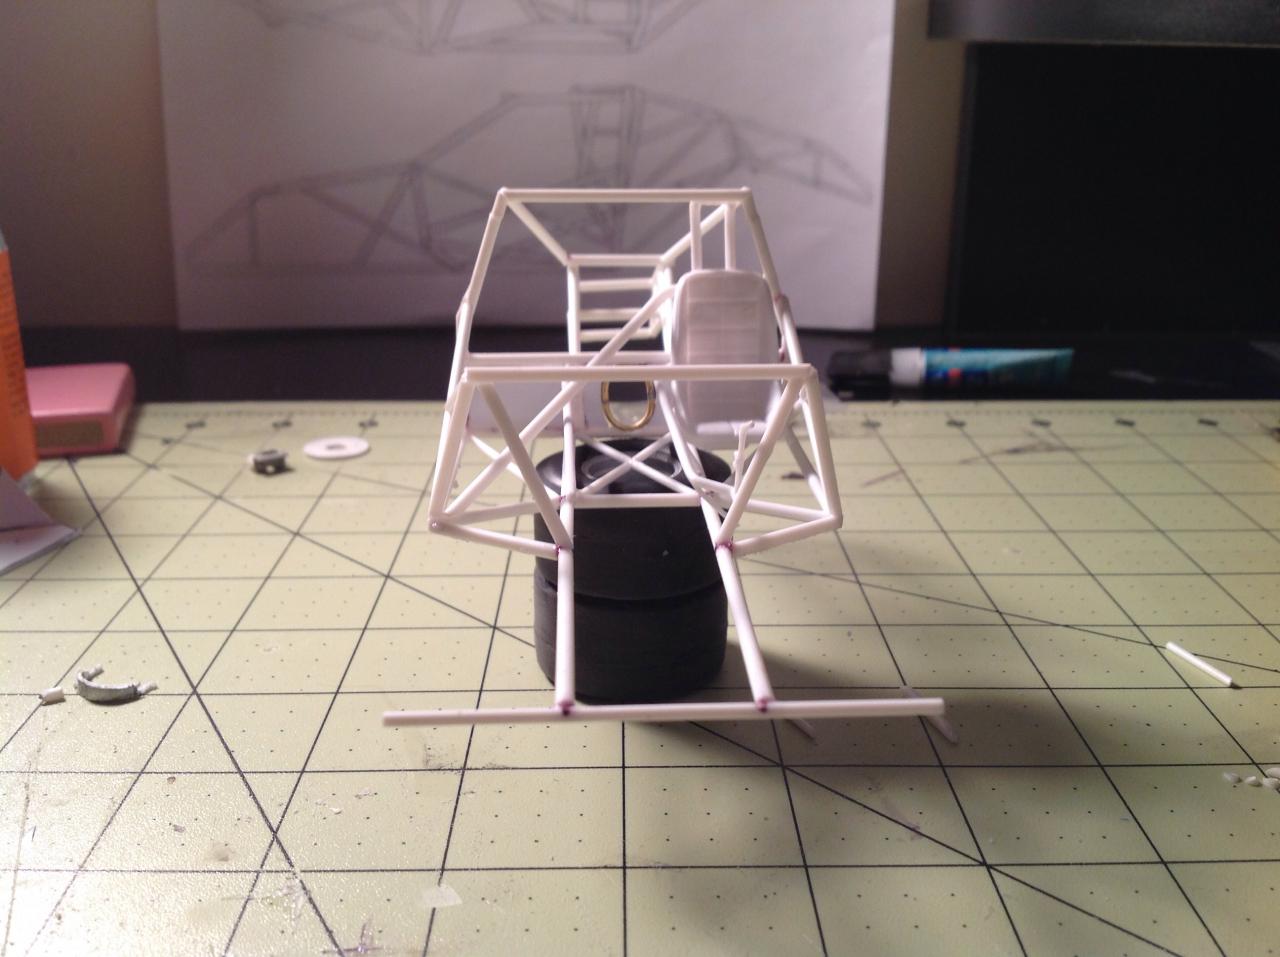
I'll be attaching the doors to the body, I made the cage so that I would have enough room for door hinges mounted to the body, I'm still playing around with hinge designs as well, not sure what type I'm gonna use yet. I will be posting more pictures of my progress tonight. And thanks to Everyone else for the positive vibes if anybody has any constructive criticism for me or notices that something is not correct, please bring it to my attention, I am trying to replicate a pro mod as correctly as possible. This is only my second attempt at Scratchbuilding
-
-
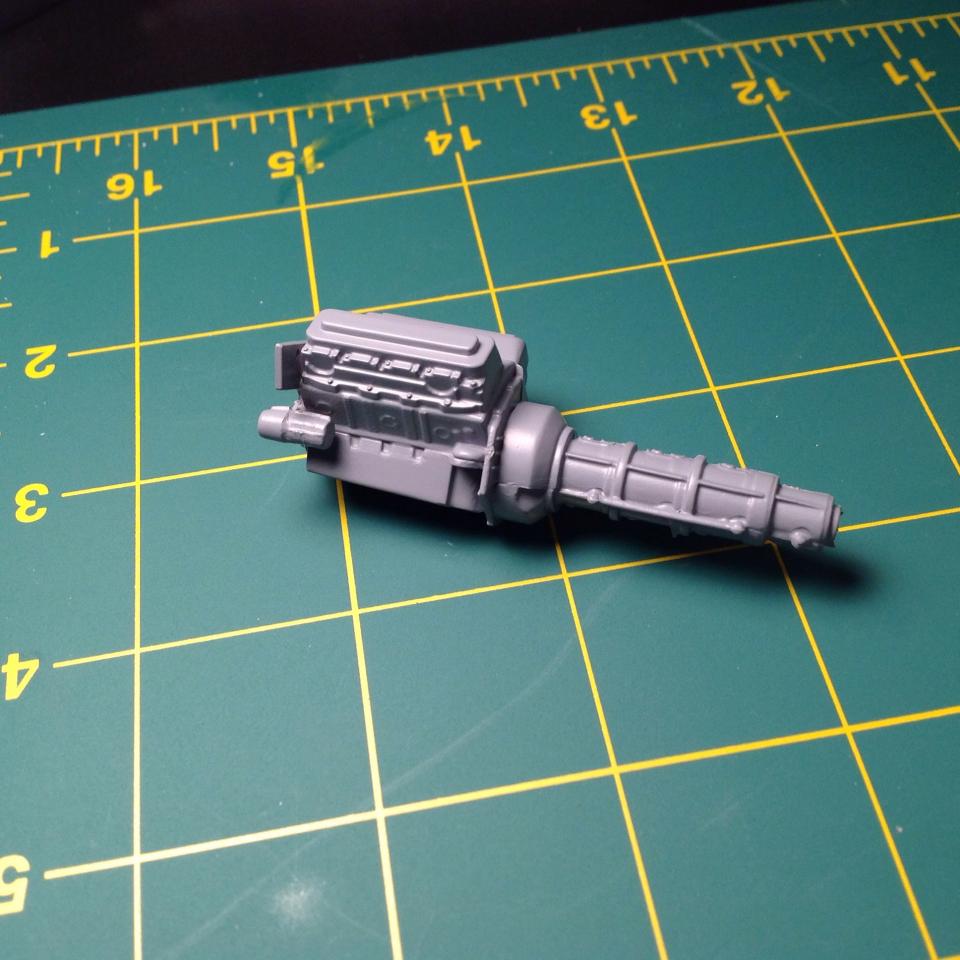
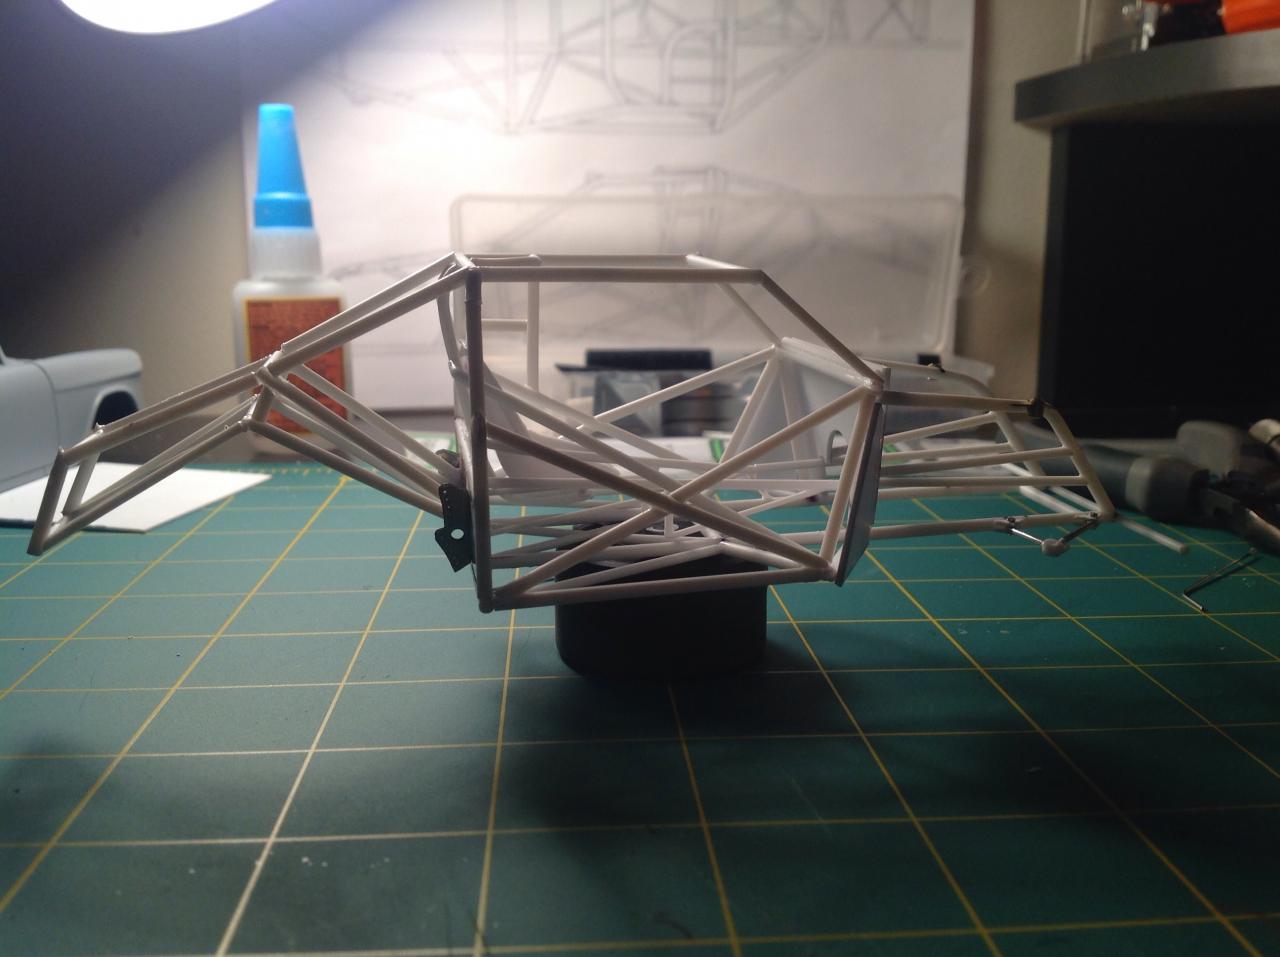
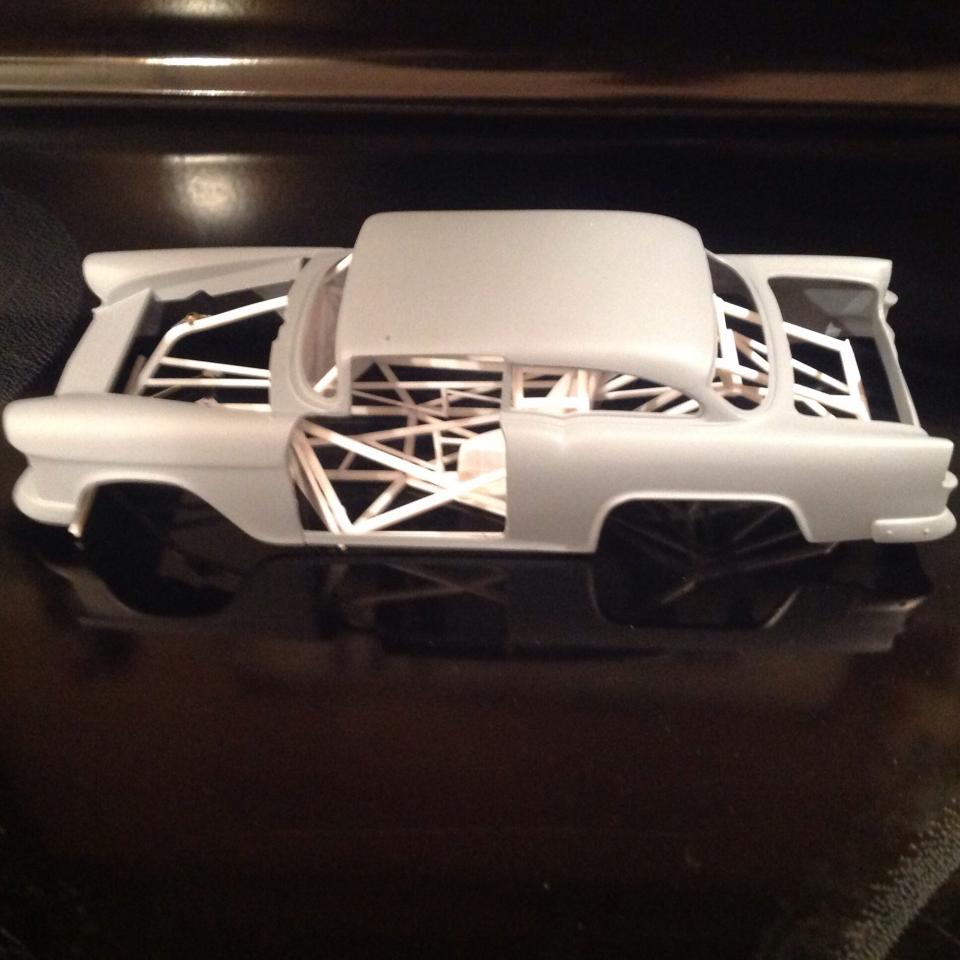
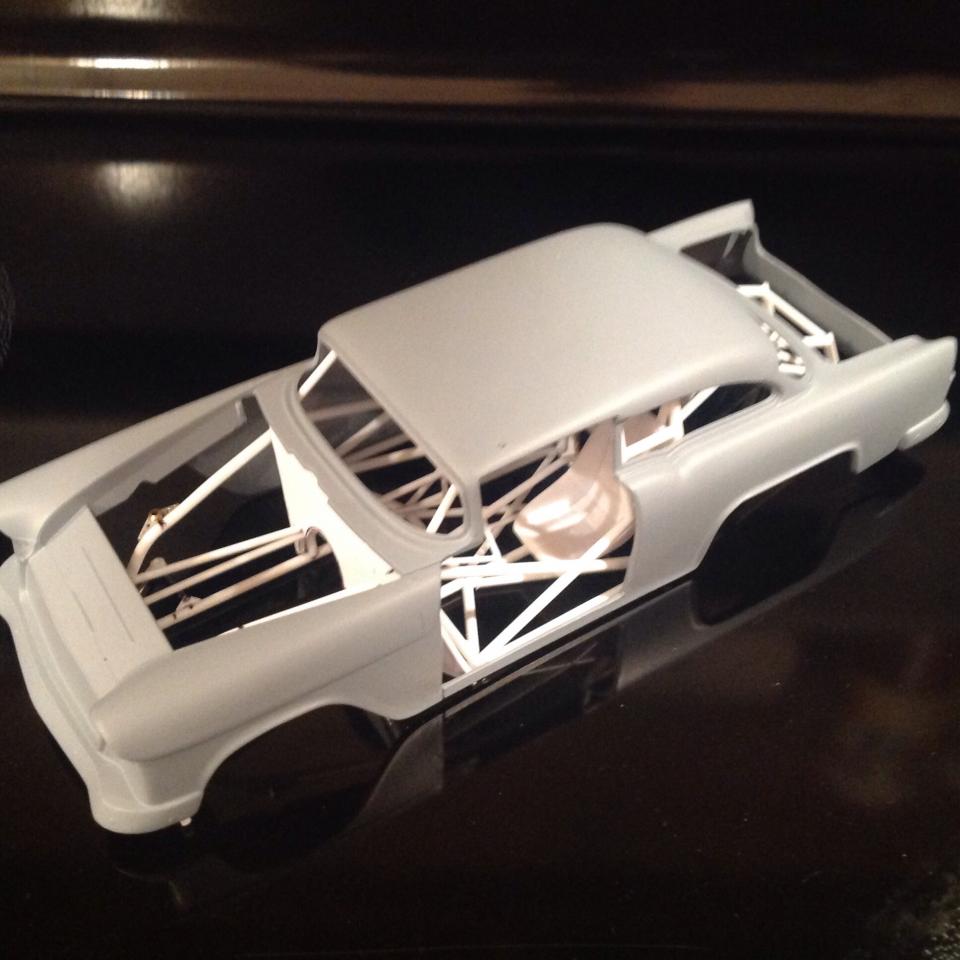
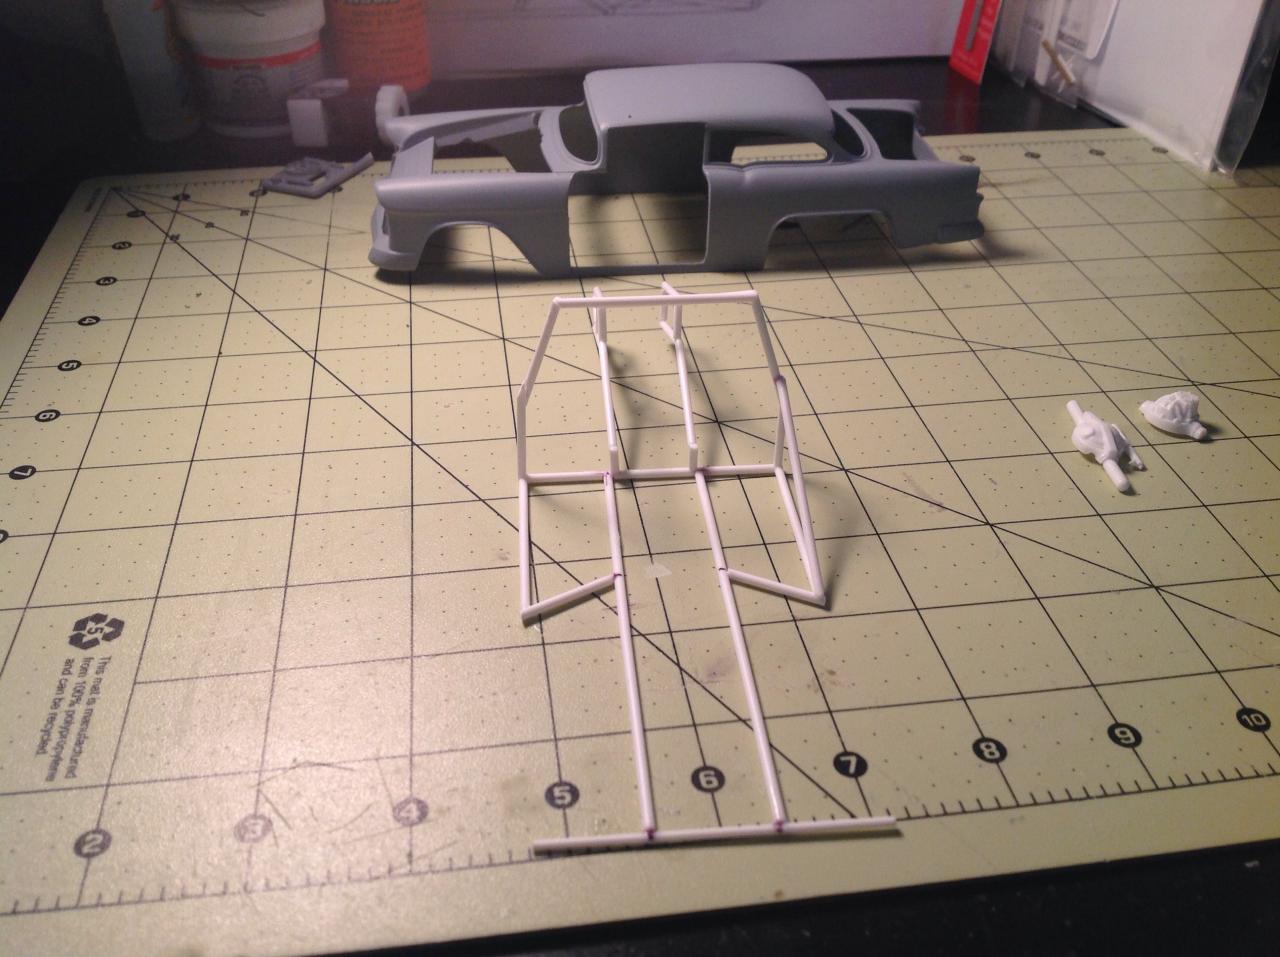
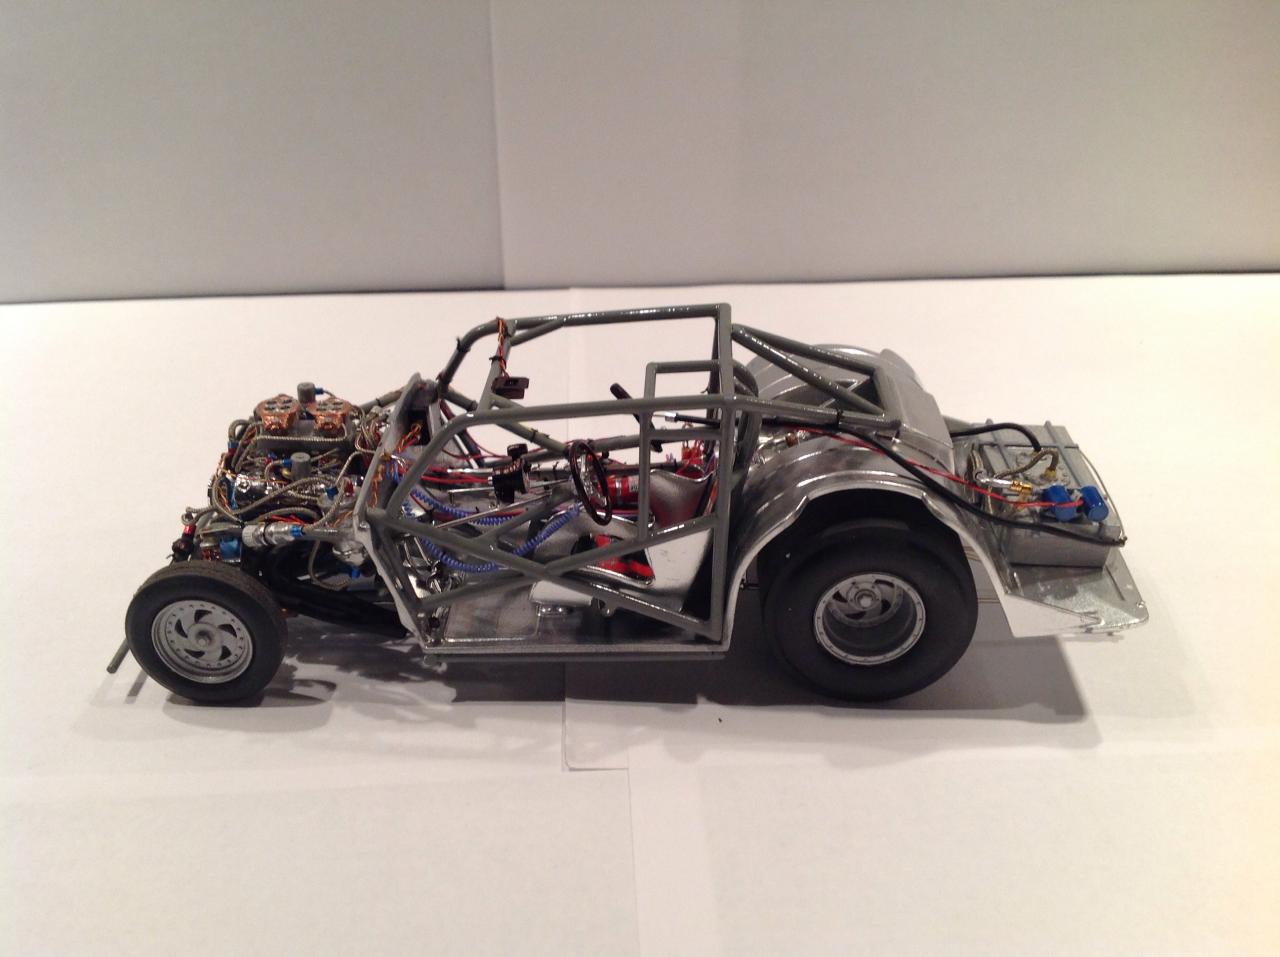
Hello Friends, so after building my very first Pro Mod Car I had so much fun I wanted to do it again. it was also my first attempt at scratch building the chassis . Although it came out ok there was a lot of stuff that wasn't correct. So this time I did a lot of research and gathered a bunch of reference photos, I want to have the car as accurate as possible. The body Im gonna use is a 55 Chevy Bel-Air from a Revell kit. I ordered a bunch of parts from Scott at Future Attraction, Charlie from Pro-Tech and Ted from Teds modeling Marketplace! anyways here's a few pics of what I've got done so far, hope you like it! ENJOY
-
"Not another General Lee?! **11/24/15 ENOS STRATE AUTOGRAPH**
StyreneAddict420 replied to Rdkingjay's topic in Model Cars
Very Nice Build! Keep up the great work -
I am using a Sata Jet Spray gun with a 1.3 tip. It is also the same size tip I use on 1:1's, after trying it once on a model I will never go back!
-
HELP! Need help with Funny Car Chassis
StyreneAddict420 replied to StyreneAddict420's topic in WIP: Drag Racing Models
Absolutely! Thank you AZ Boy and thanks for the quick response -
Hi Friends, so I want to start a new project, I have several funny car body's and engines that I purchased years back. I have no other funny car kits to use as a reference, does anybody know how I can go about scratchbuilding the frame? Any diagrams, pictures or measurements would be so greatly appreciated. My goal is to completely Scratchbuild this car without buying a kit and using parts I have lying around, my only trouble I'm gonna have is with the chassis like I said. Any help would be greatly appreciated. P.s. I will be building a modern funny car not a nostalgic one. I'm pretty sure the body I'm using is a McDonalds funny car made by Revell if that helps
-
Revells' Hawaiian - The End is Here!
StyreneAddict420 replied to Len Carsner's topic in WIP: Drag Racing Models
I was very excited to find this, I am starting the Hawaiian kit today and this is going to help me tremendously. I plan on scratchbuilding the chassis and getting everything exactly like the 1:1 car. I will definitely be using this tutorial, thank you for posting -
So I painted the body like always, sprayed three coats of base then put my decals on that night, the next day I sprayed my Clearcoat over the decals like I always do but for some reason the clearcoat didn't hide the clear parts of the decals! I've never had this happen to me before, every time I have done it this way I've had great success. the decals were from a kit I purchased in 2006 so the decals are fairly old, I'm thinking that might be the problem. Any input would be great!
-
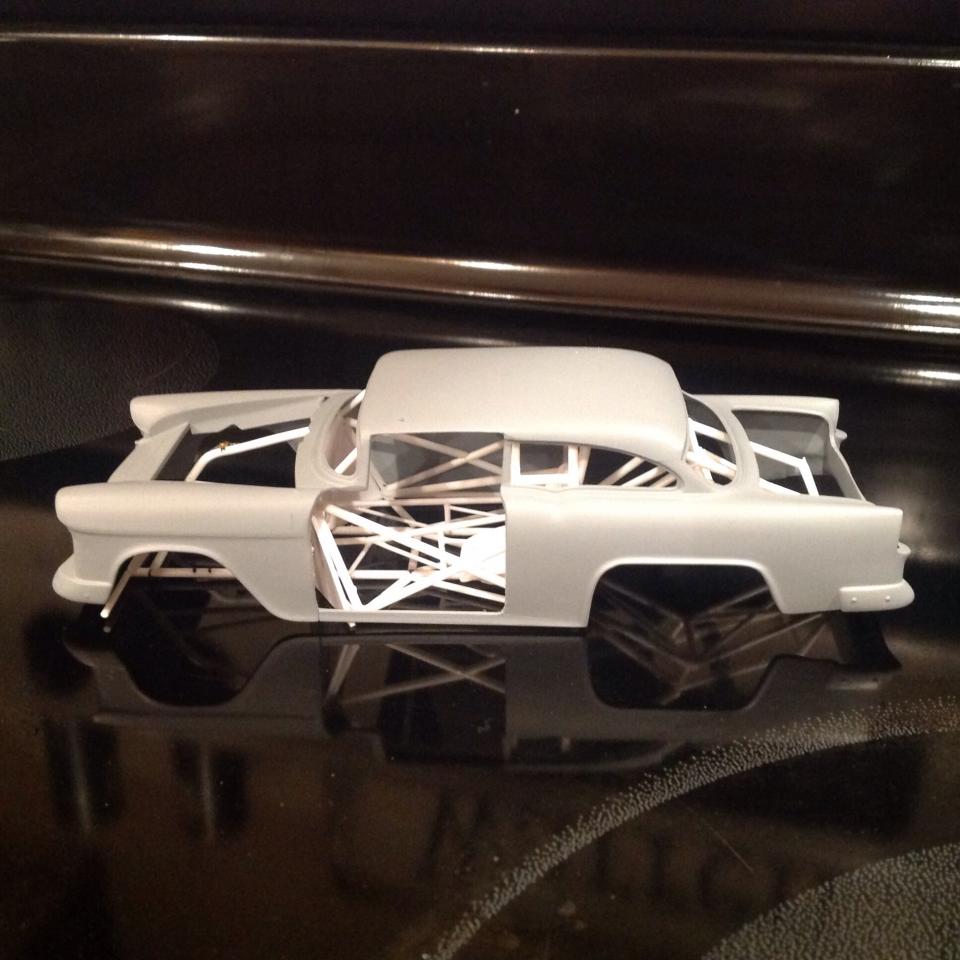
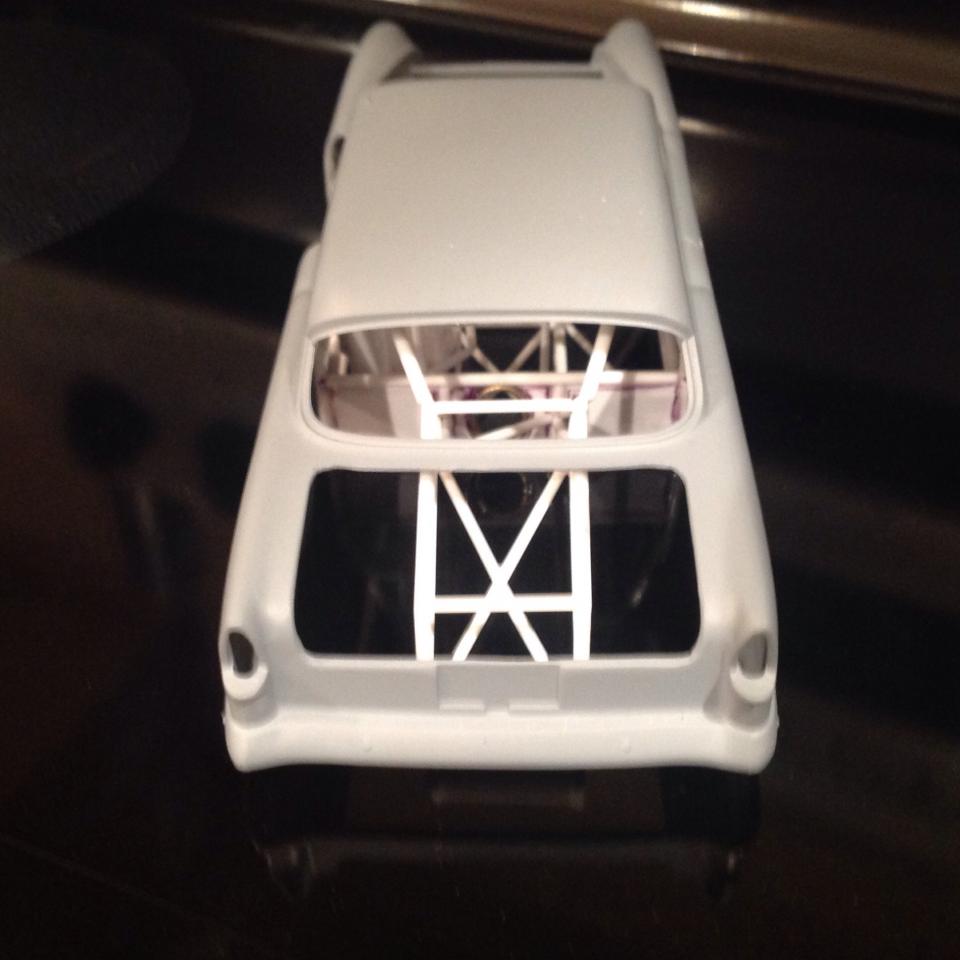
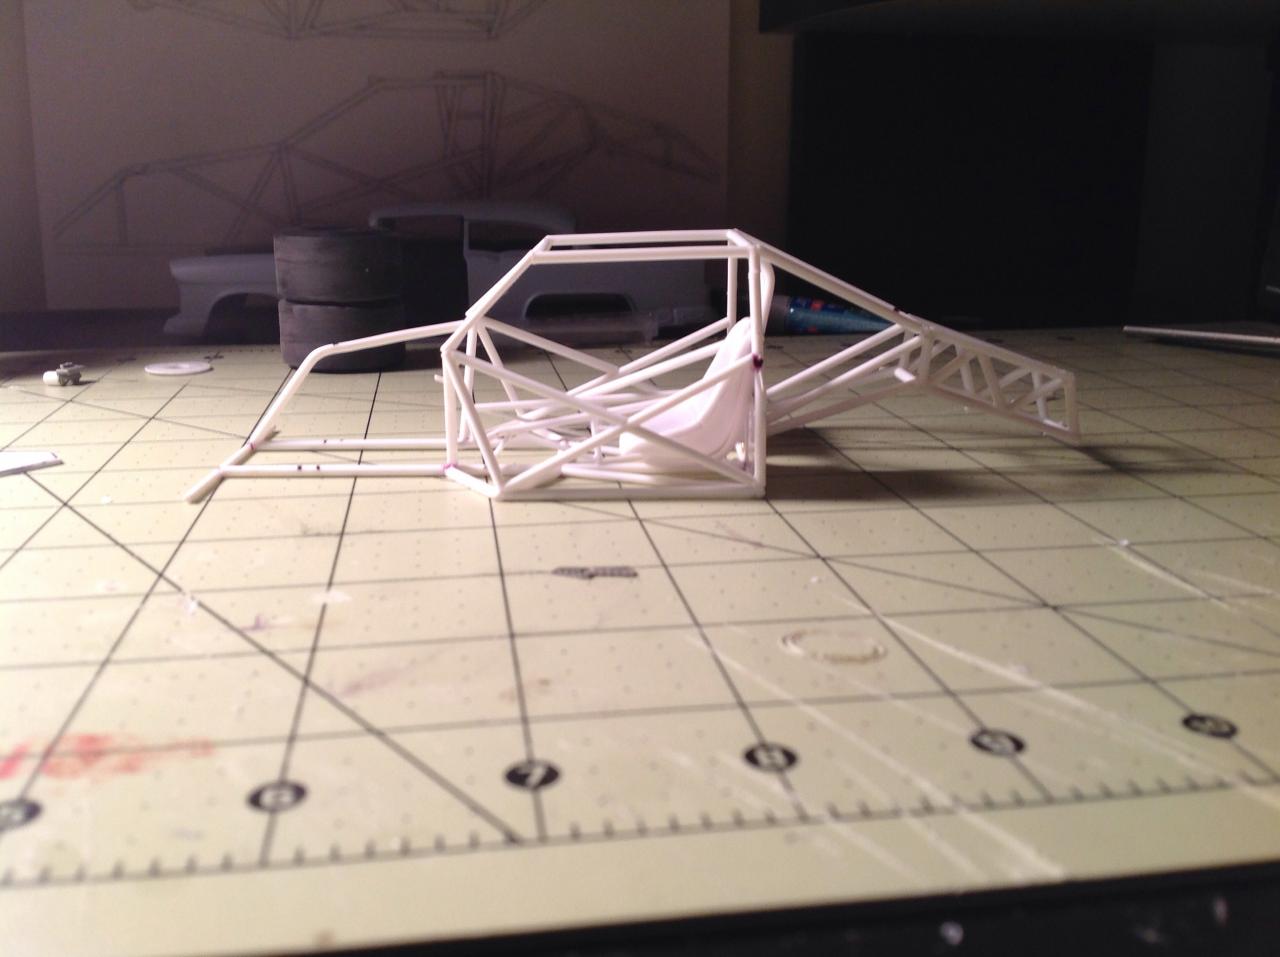
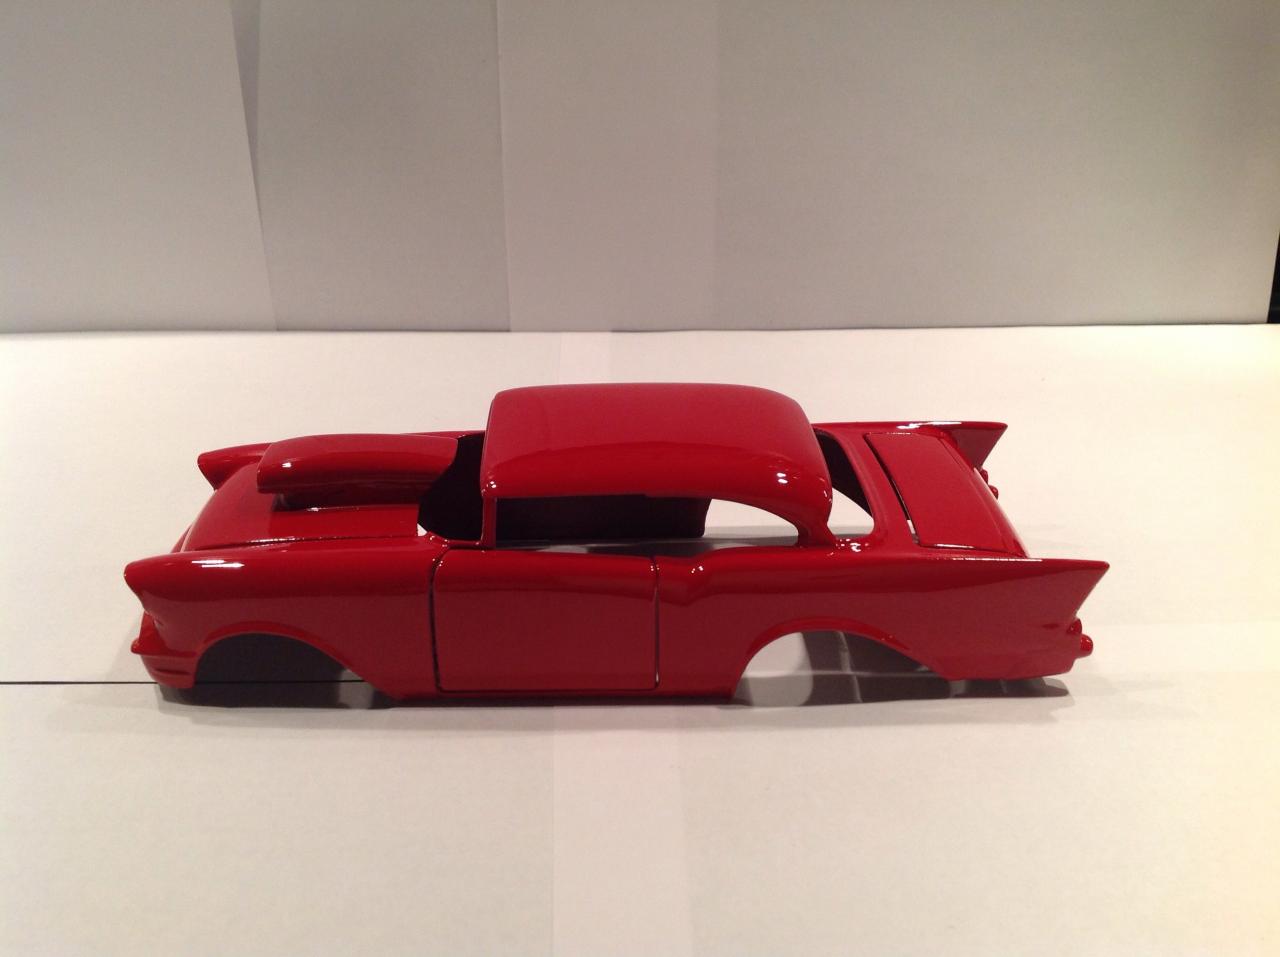
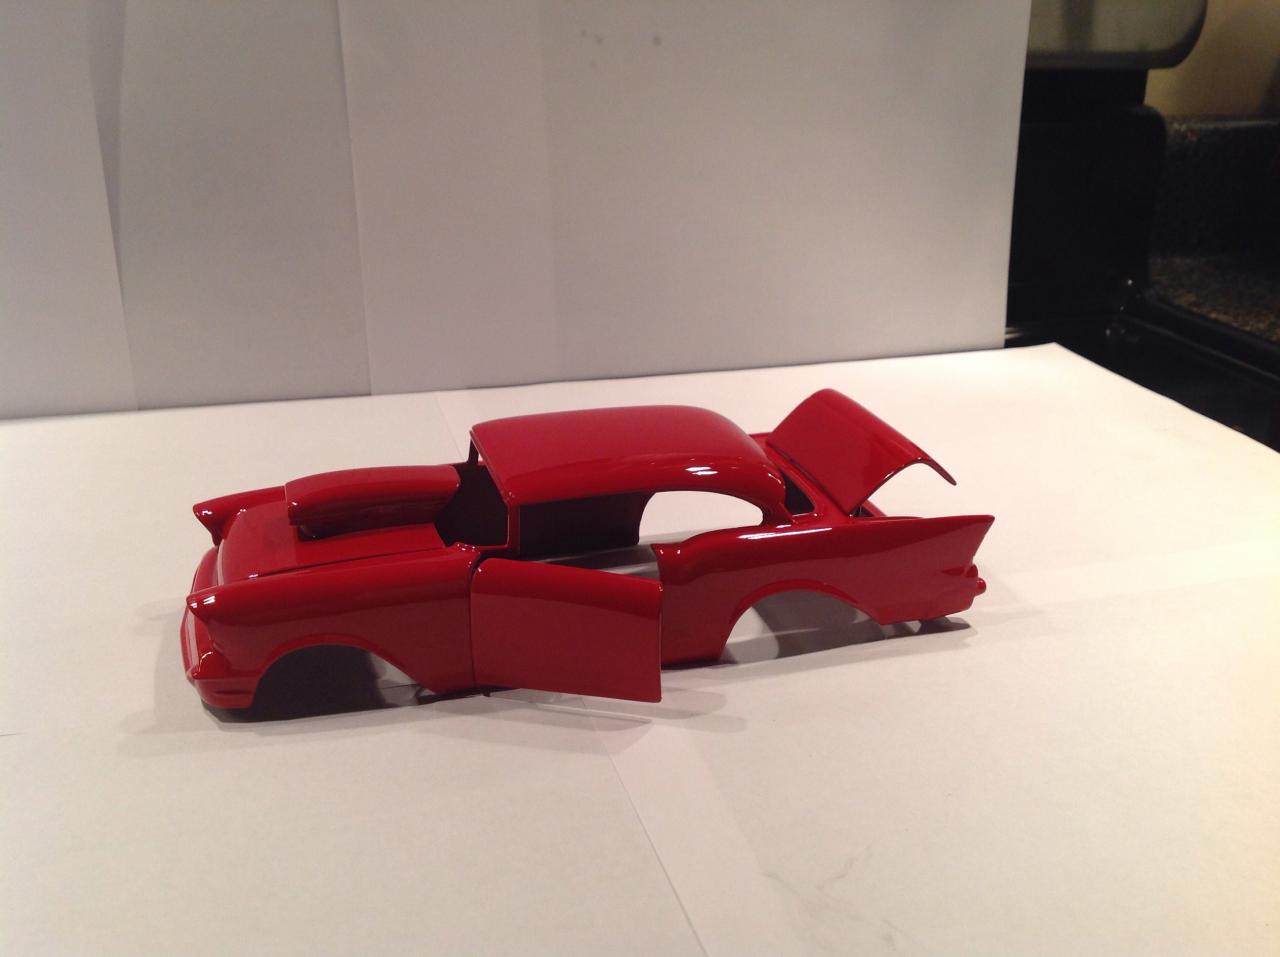
Here are some pics of the Chassis And the body, I Sprayed 3 coats of base on it today. I will let it dry overnight and tomorrow I will wet sand with 800 grit, then lay the decals down and then finally finish it off with 3 coats of PPG Clearcoat. The chassis is pretty well done other than a few small details, thanks for looking hope you enjoy
-
Looks Killer
-
Wicked cool! Hope to see more pics