

MOPARmaniac
-
Posts
268 -
Joined
-
Last visited
Content Type
Profiles
Forums
Events
Gallery
Everything posted by MOPARmaniac
-
In order for the trunk to look good and real the opening in the back of the interior has to be filled in. Unfortunately i do not have any styrene or sheet plastic so im going to fill it in with cardboard. It will look wierd but it'll work. I did it on my mustang to fill the gas tank cavity
-
-
-
ok the interiior is now finished. Here are a few pics of the interior
-
I finished the steering wheel
-
o
-
I got the seat covers on. Don't judge too badly because I used glove fingers to slip over the seats for the seaat covers. Id say they look pretty good for glove fingers
-
o
-
o
-
I painted the interior with sray paint and it turned out better than hand painting it. So from now on im going to spray my interior unless im doing a multicolored job. Made my own shifter and Automatic Letters (Park, Neutral, Drive, 2,1 also Reverse). And am currently making seat covers for the front seats
-
o
-
o
-
Ok I painted the firewall and epoxy that I put on the trunk lid Green to match the rest
-
Well today I did a lot of work and Im gonna call it a day. But heres pics of the stuff I did making trunk hinges with coffee stiring straws and paper clips o measuring where the hinges are going to go on the trunk lid I put them in with epoxy Here it is glued on with epoxy putting the hinges in the car The trunk lid is on now I test fitted the interior and the back piece was too long and messing with the hinges. So I drew a line to cut off After the cut Fits grreat! o
-
I painted the remaining trim on o I asked my dad about the engine bay and he said he didn't know. He can't get it out either because its buried in parts and junk. So I get to put however much rust and black stuff in there I want
-
painted the engine bay green, but since he never restored the green paint its probably mostly black and rusty. I will have to ask him.
-
I painted the holes where the trim is supposed to clip on
-
Originally when my Dad got his car it was green. When he restored it and primered it he did't do the undersides of the hood or trunk lid, and of course he didn't do the engine bay either. So far I have the trunk lid and top of rear panel painted green. o
-
Completed cutting out the trunk lid
-
ok primer finished. Trunk almost cut out, cut off door trim and also got rid of thr R/T emblems on the grille because his is not a R/T. The painted the light covers flat black
-
Final coat of primer for the day, getting dark enough to where this coat barely dried. Next thing to do tonight is to cut out the trunk
-
ok I got the first coat of primer on
-
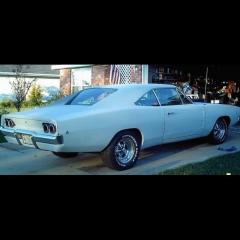
well this charger was the first one I ever built. And because of that didn't turn out very well. It has been sitting next to my dads awesome looking cars all these years and decided to make mine better. I figured it would be a good time killer because the other day I ordered a 68 dart model of ebay. So that will be my next project here it is all taken apart. the desired engine is a 426 engine. Ive decided to make my version of my dads car. his is painted in nothing but primer and has a torn up interior. The only thing that will be different is the engine
-
Knight Rider K.I.T.T (Knight Industries Two Thousand
MOPARmaniac replied to MOPARmaniac's topic in WIP: Model Cars
ok guys,its finished now so go to under glass for some more pics -
Here is my mostly custom KITT that that I just finished today. The spoiler I made myself, heater hoses, A/C line, exhaust, battery wires, spark plug wires. Other than that it is built box stock http://i1083.photobucket.com/albums/j392/DART4door/006_zpsaqjph9ko.jpg] http://i1083.photobuckhttp://i1083.photobucket.com/albums/j392/DART4door/005_zpsstumhueq.jpget.com/albums/j392/DART4door/005_zpsstumhueq.jpghttp://i1083.photobucket.com/ahttp://i1083.photobucket.com/albums/j392/DART4door/003_zpsdhjsf1we.jpglbums/j392/DART4door/004_zpsiuh2klac.jpghttp://i1083.photobucket.com/albums/j392/Dhttp://i1083.photobucket.com/albums/j392/DART4door/001_zpsbmyxevqp.jpgART4door/002_zpsgi1zwaam.jpg]