J007KLEIN
-
Posts
54 -
Joined
-
Last visited
Recent Profile Visitors


J007KLEIN's Achievements
MCM Regular (3/6)
-
1/18 scale '69 Hurst/Olds convertible build
J007KLEIN replied to J007KLEIN's topic in Diecast Corner
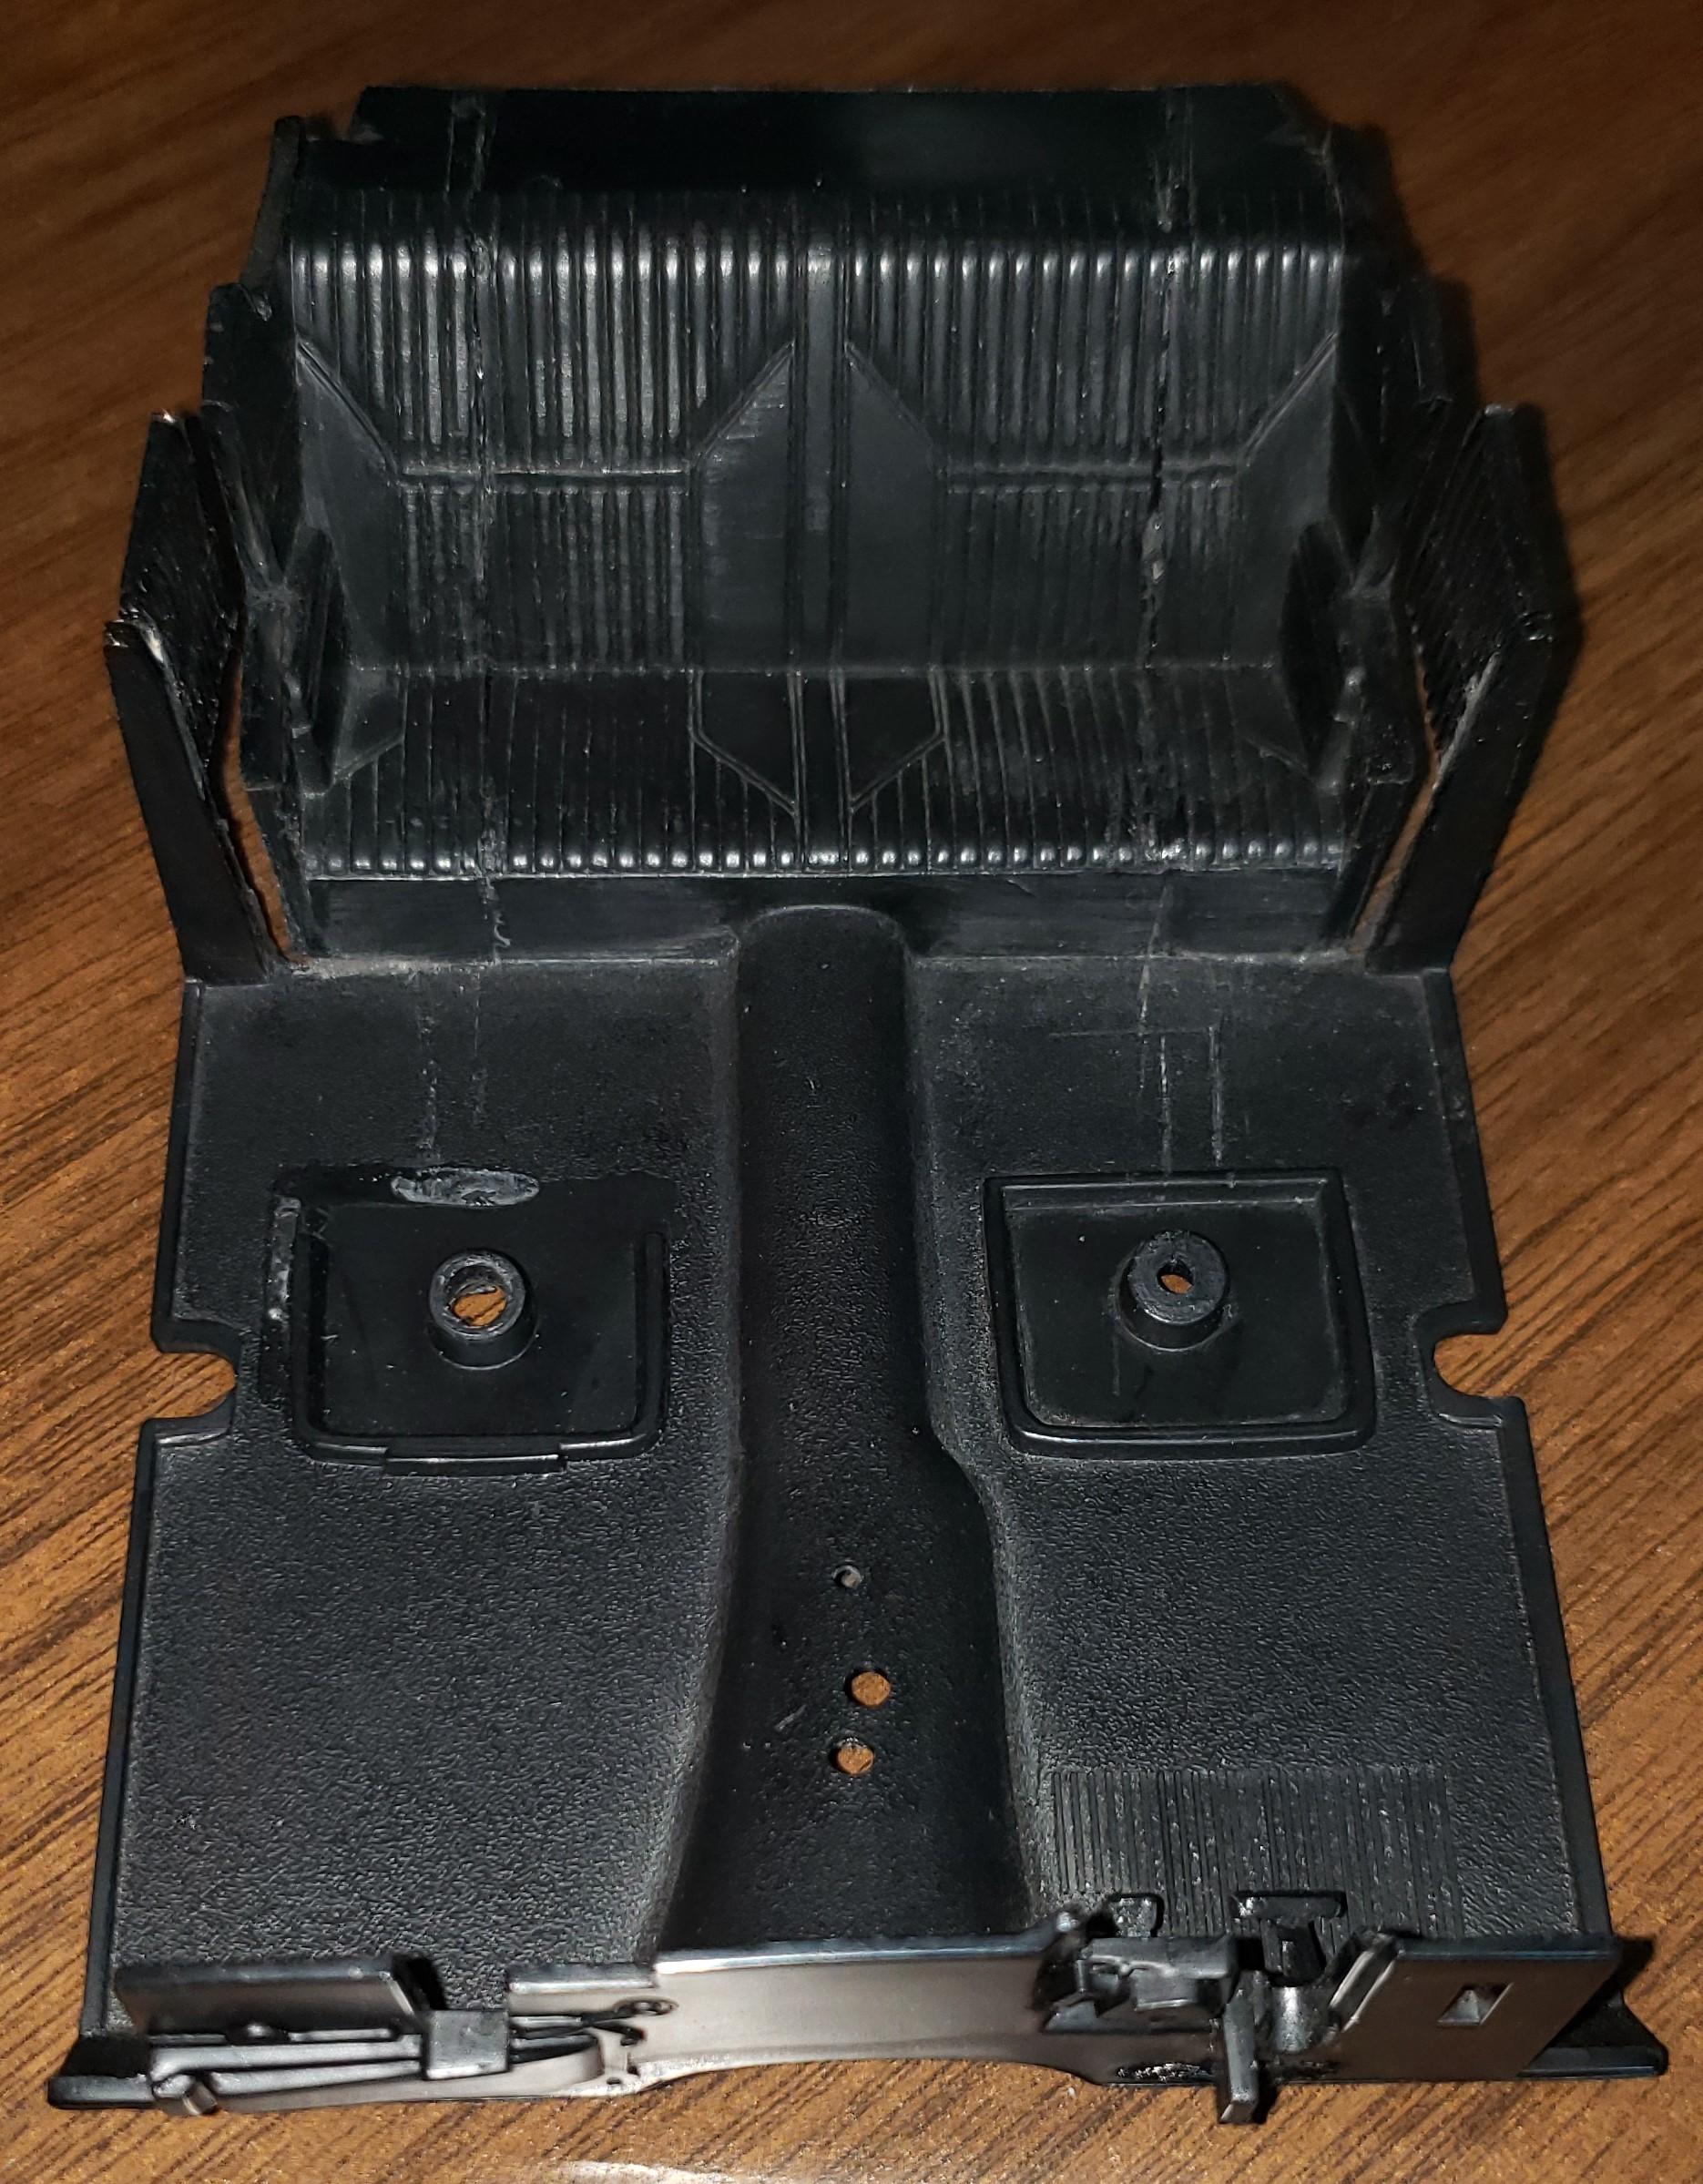
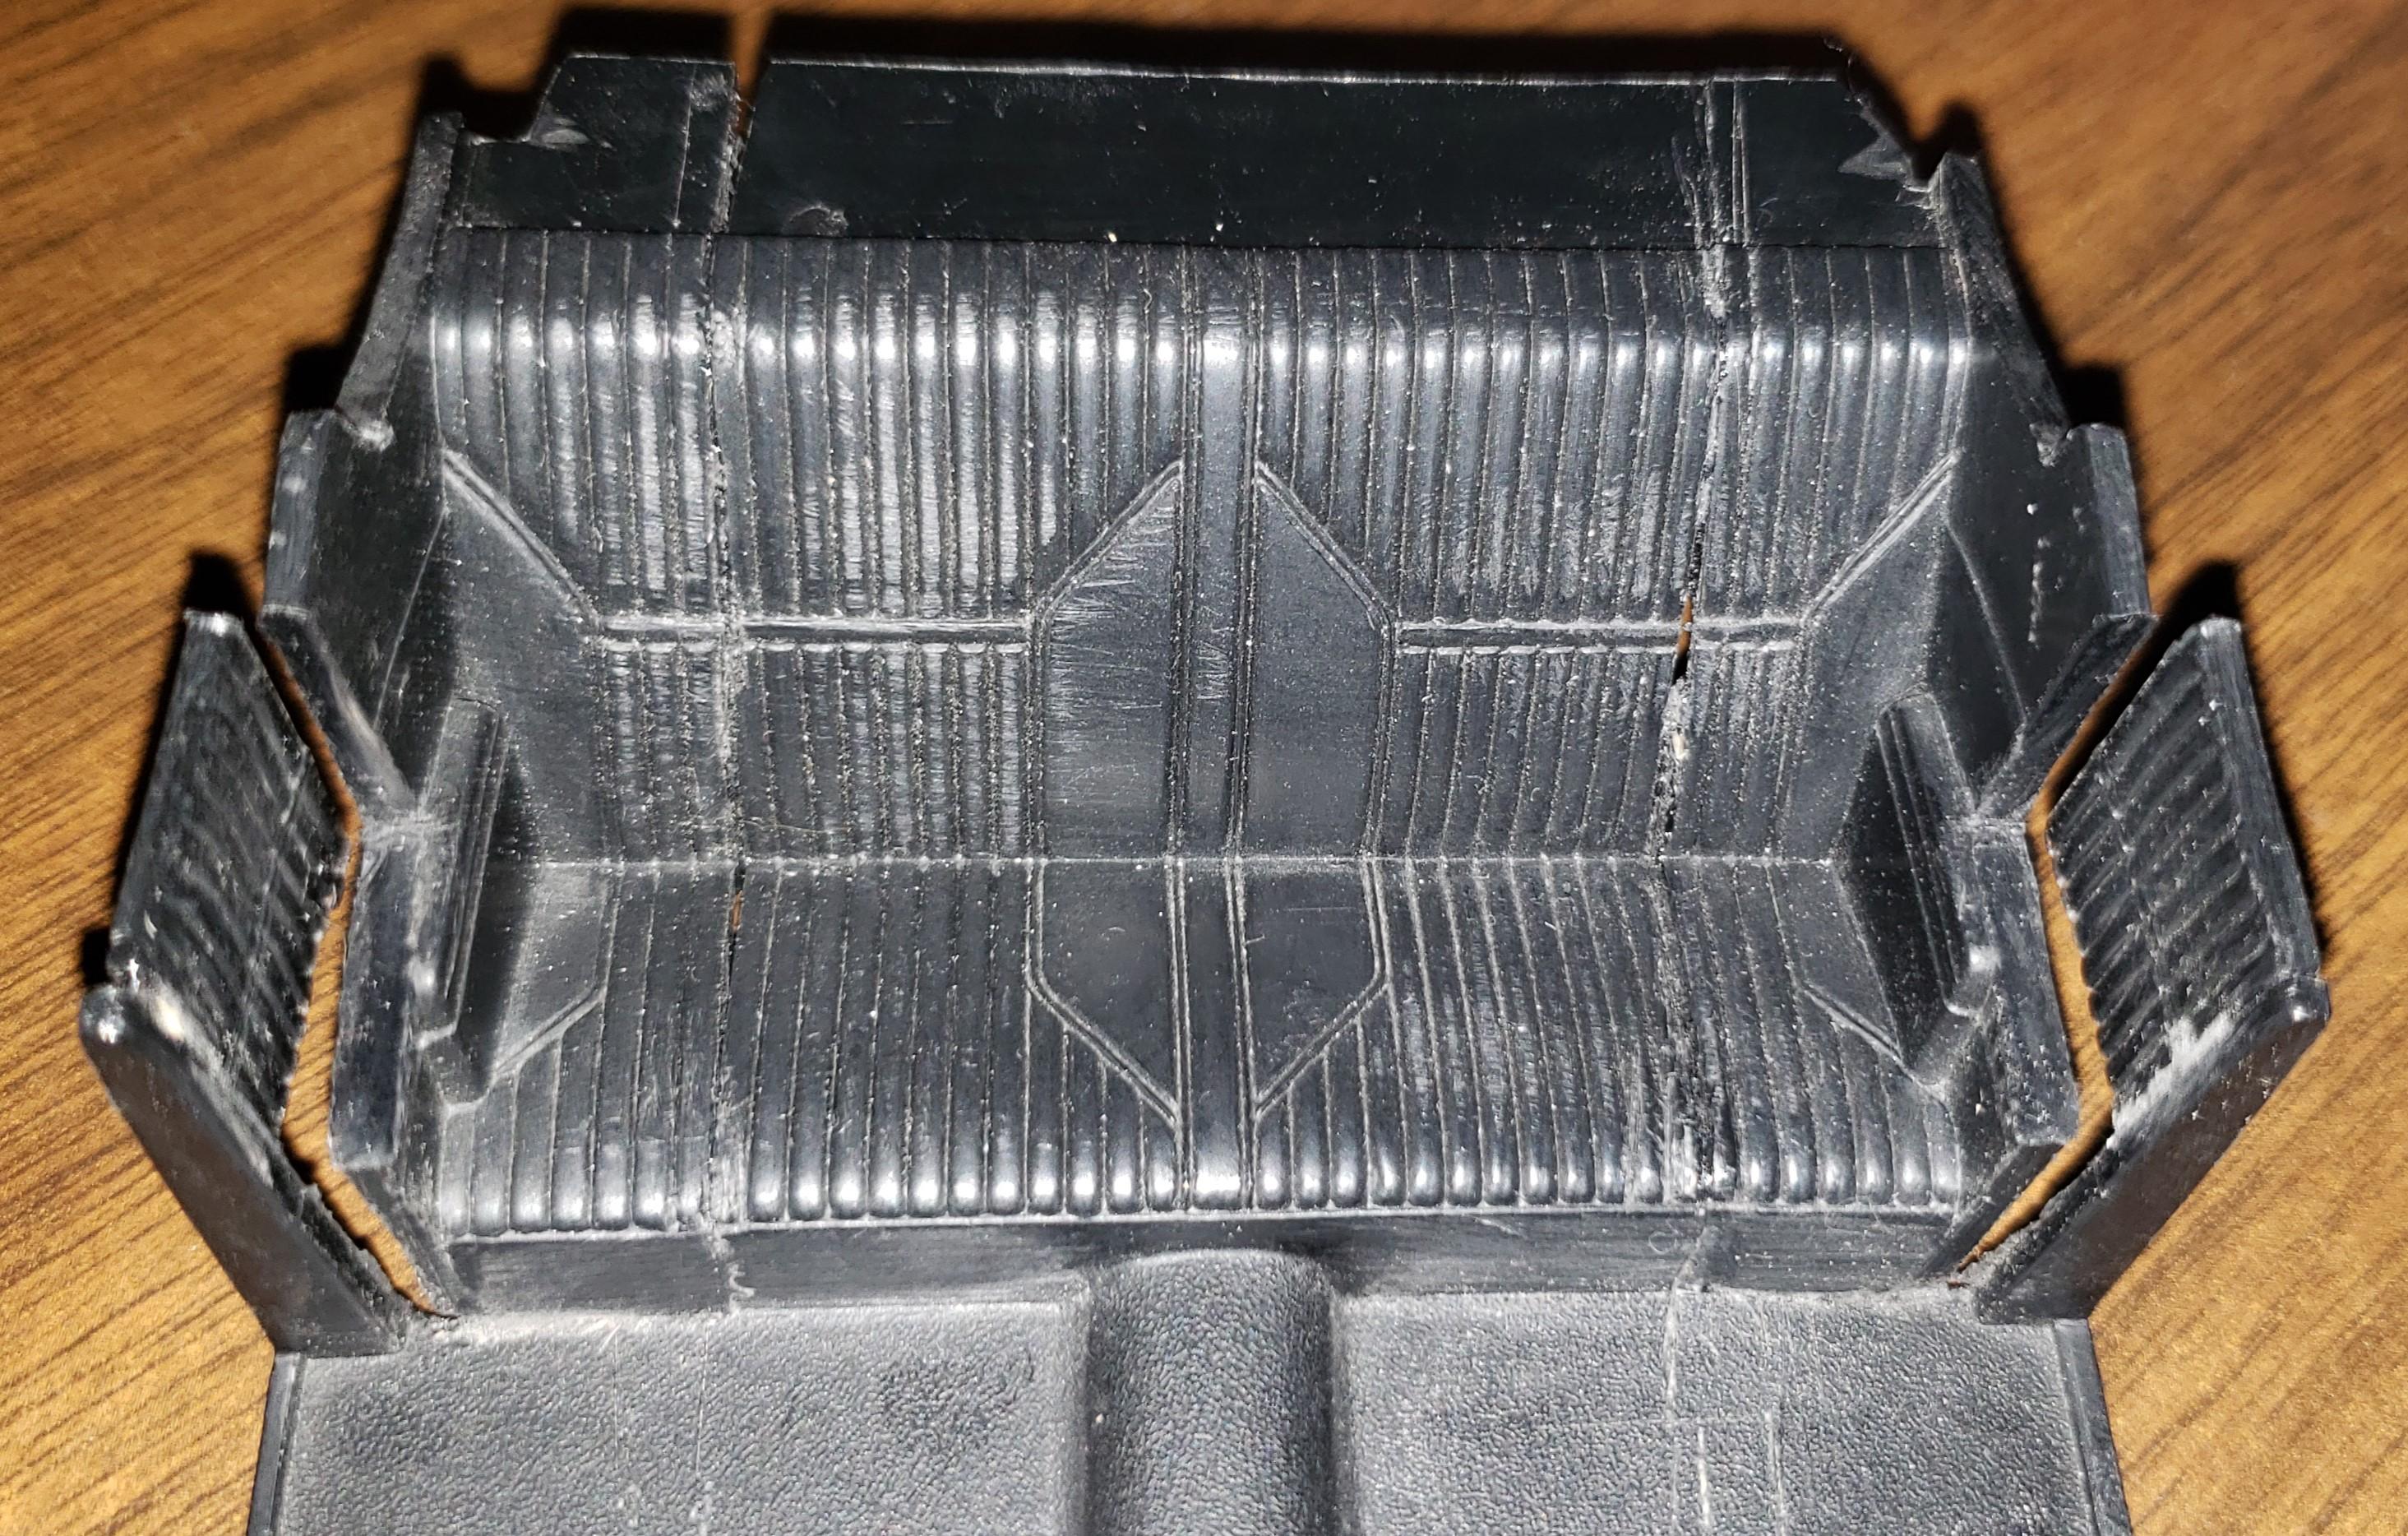
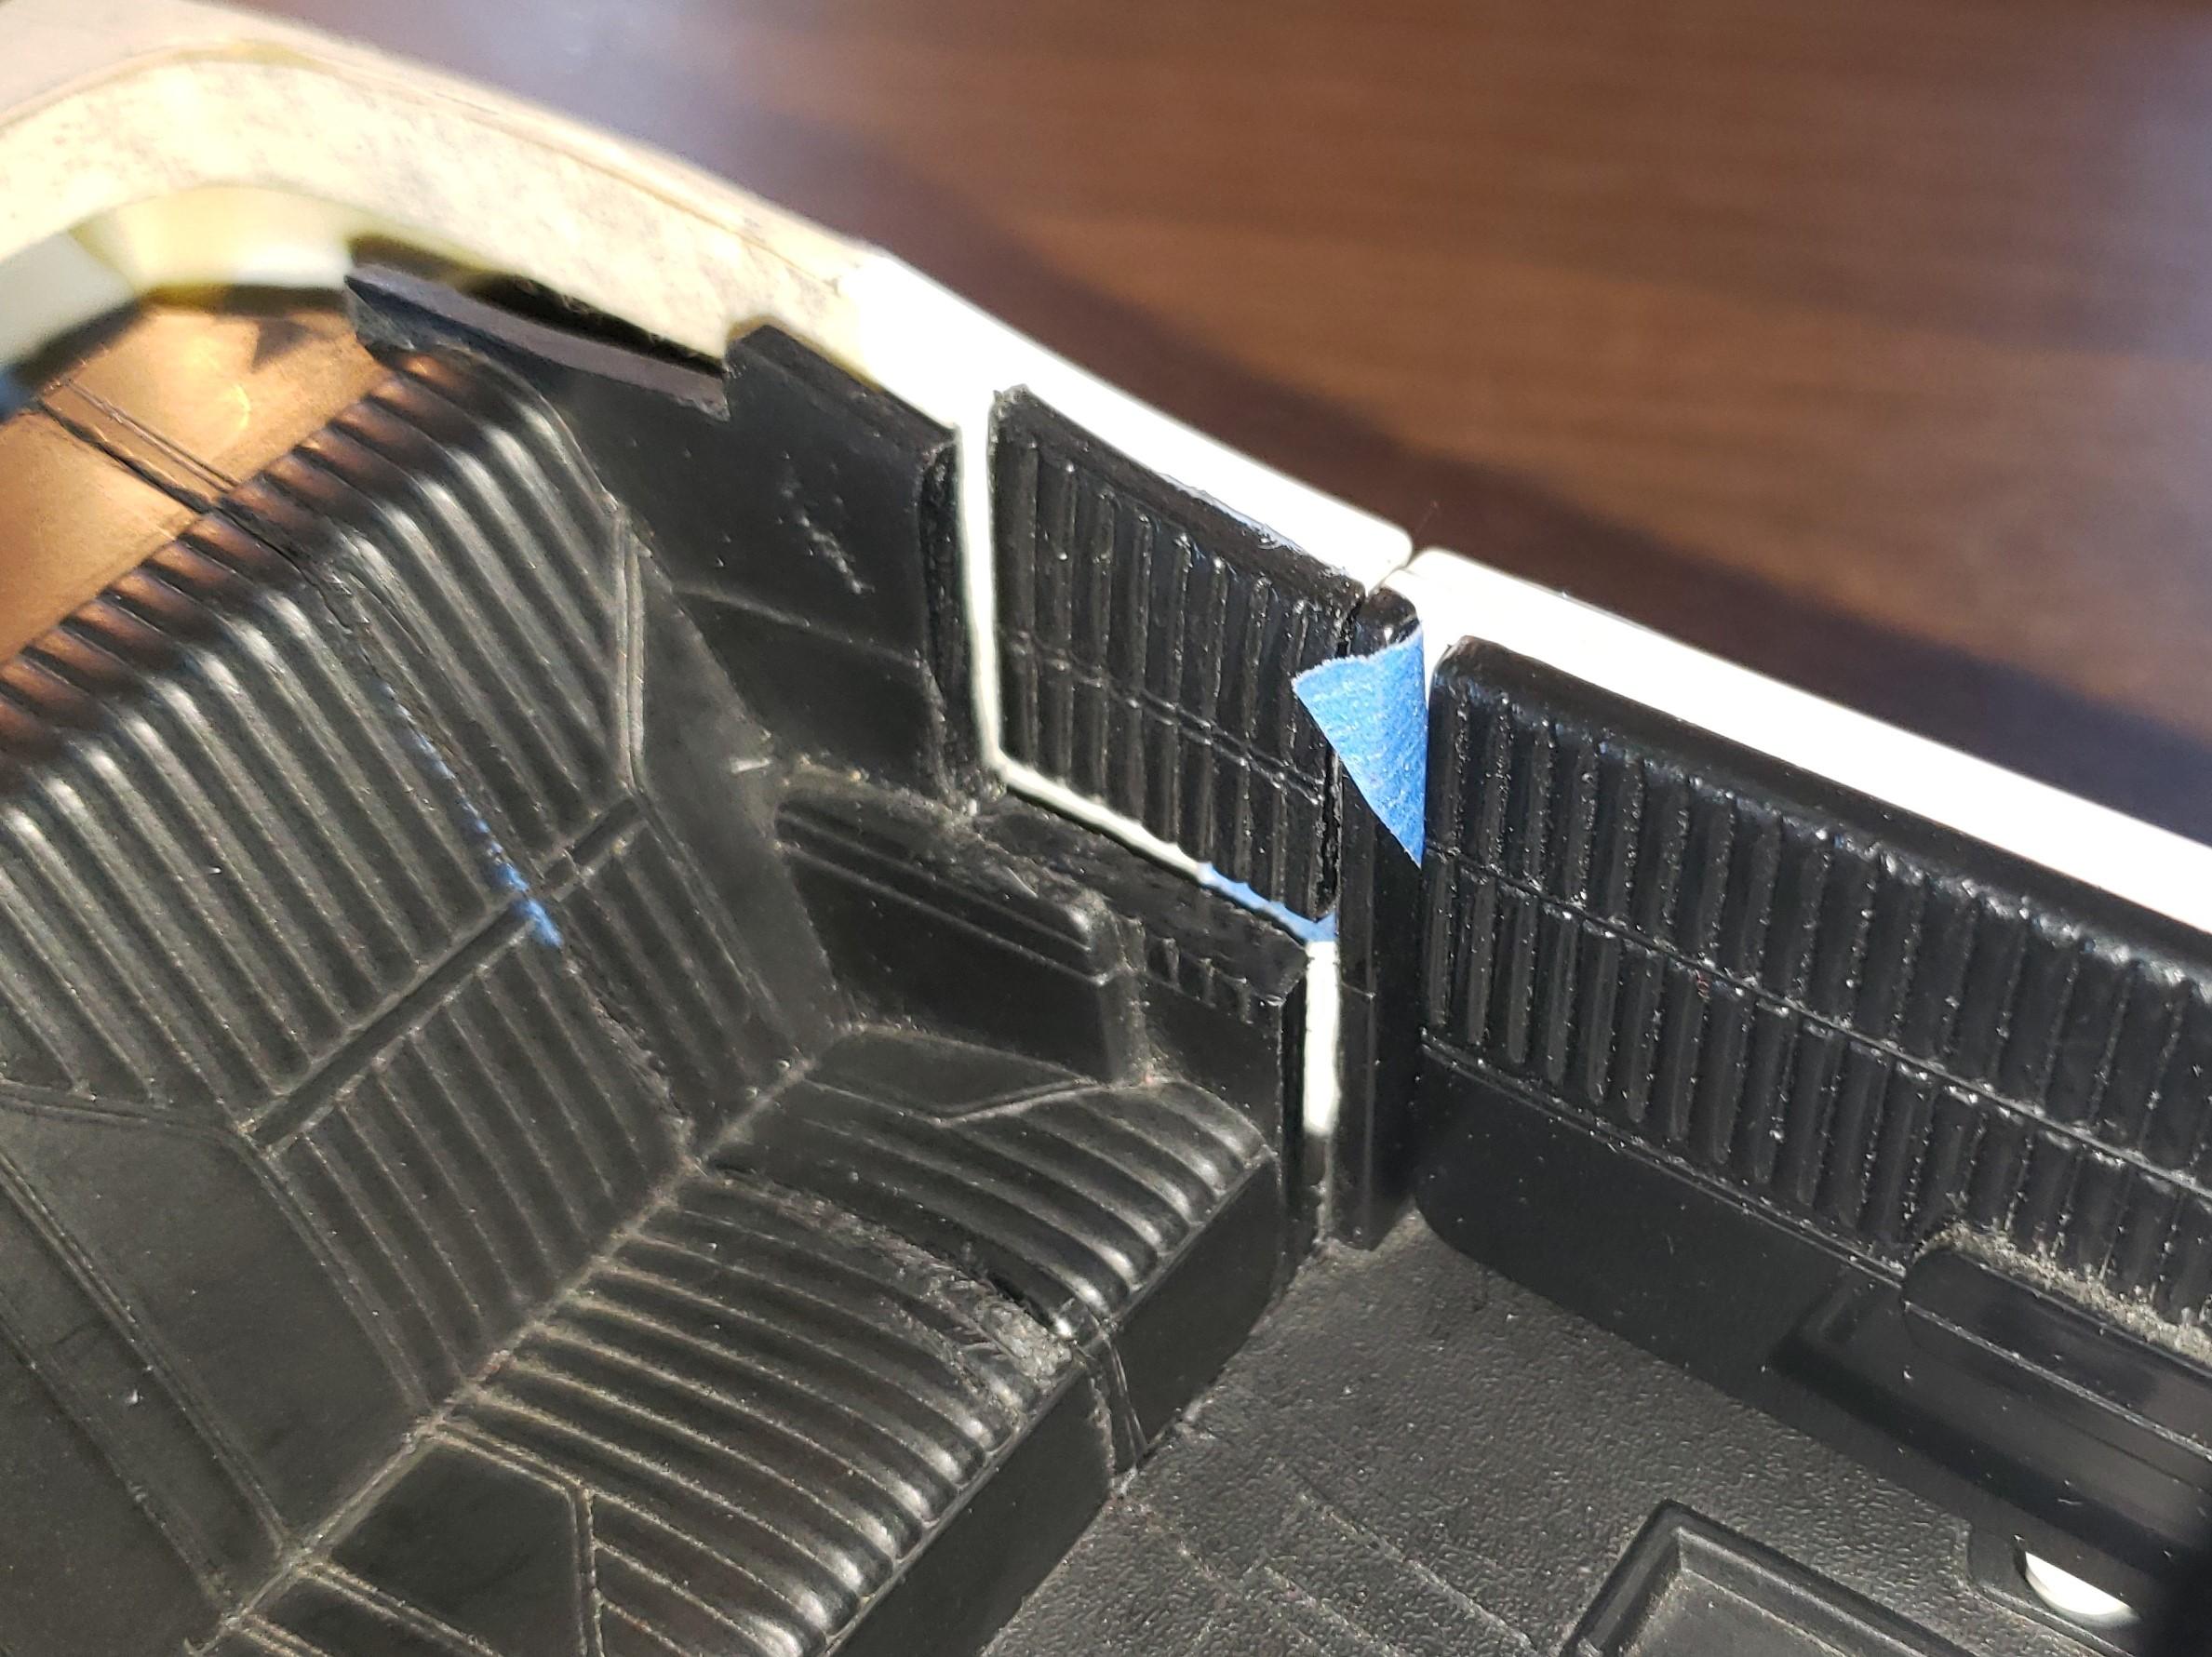
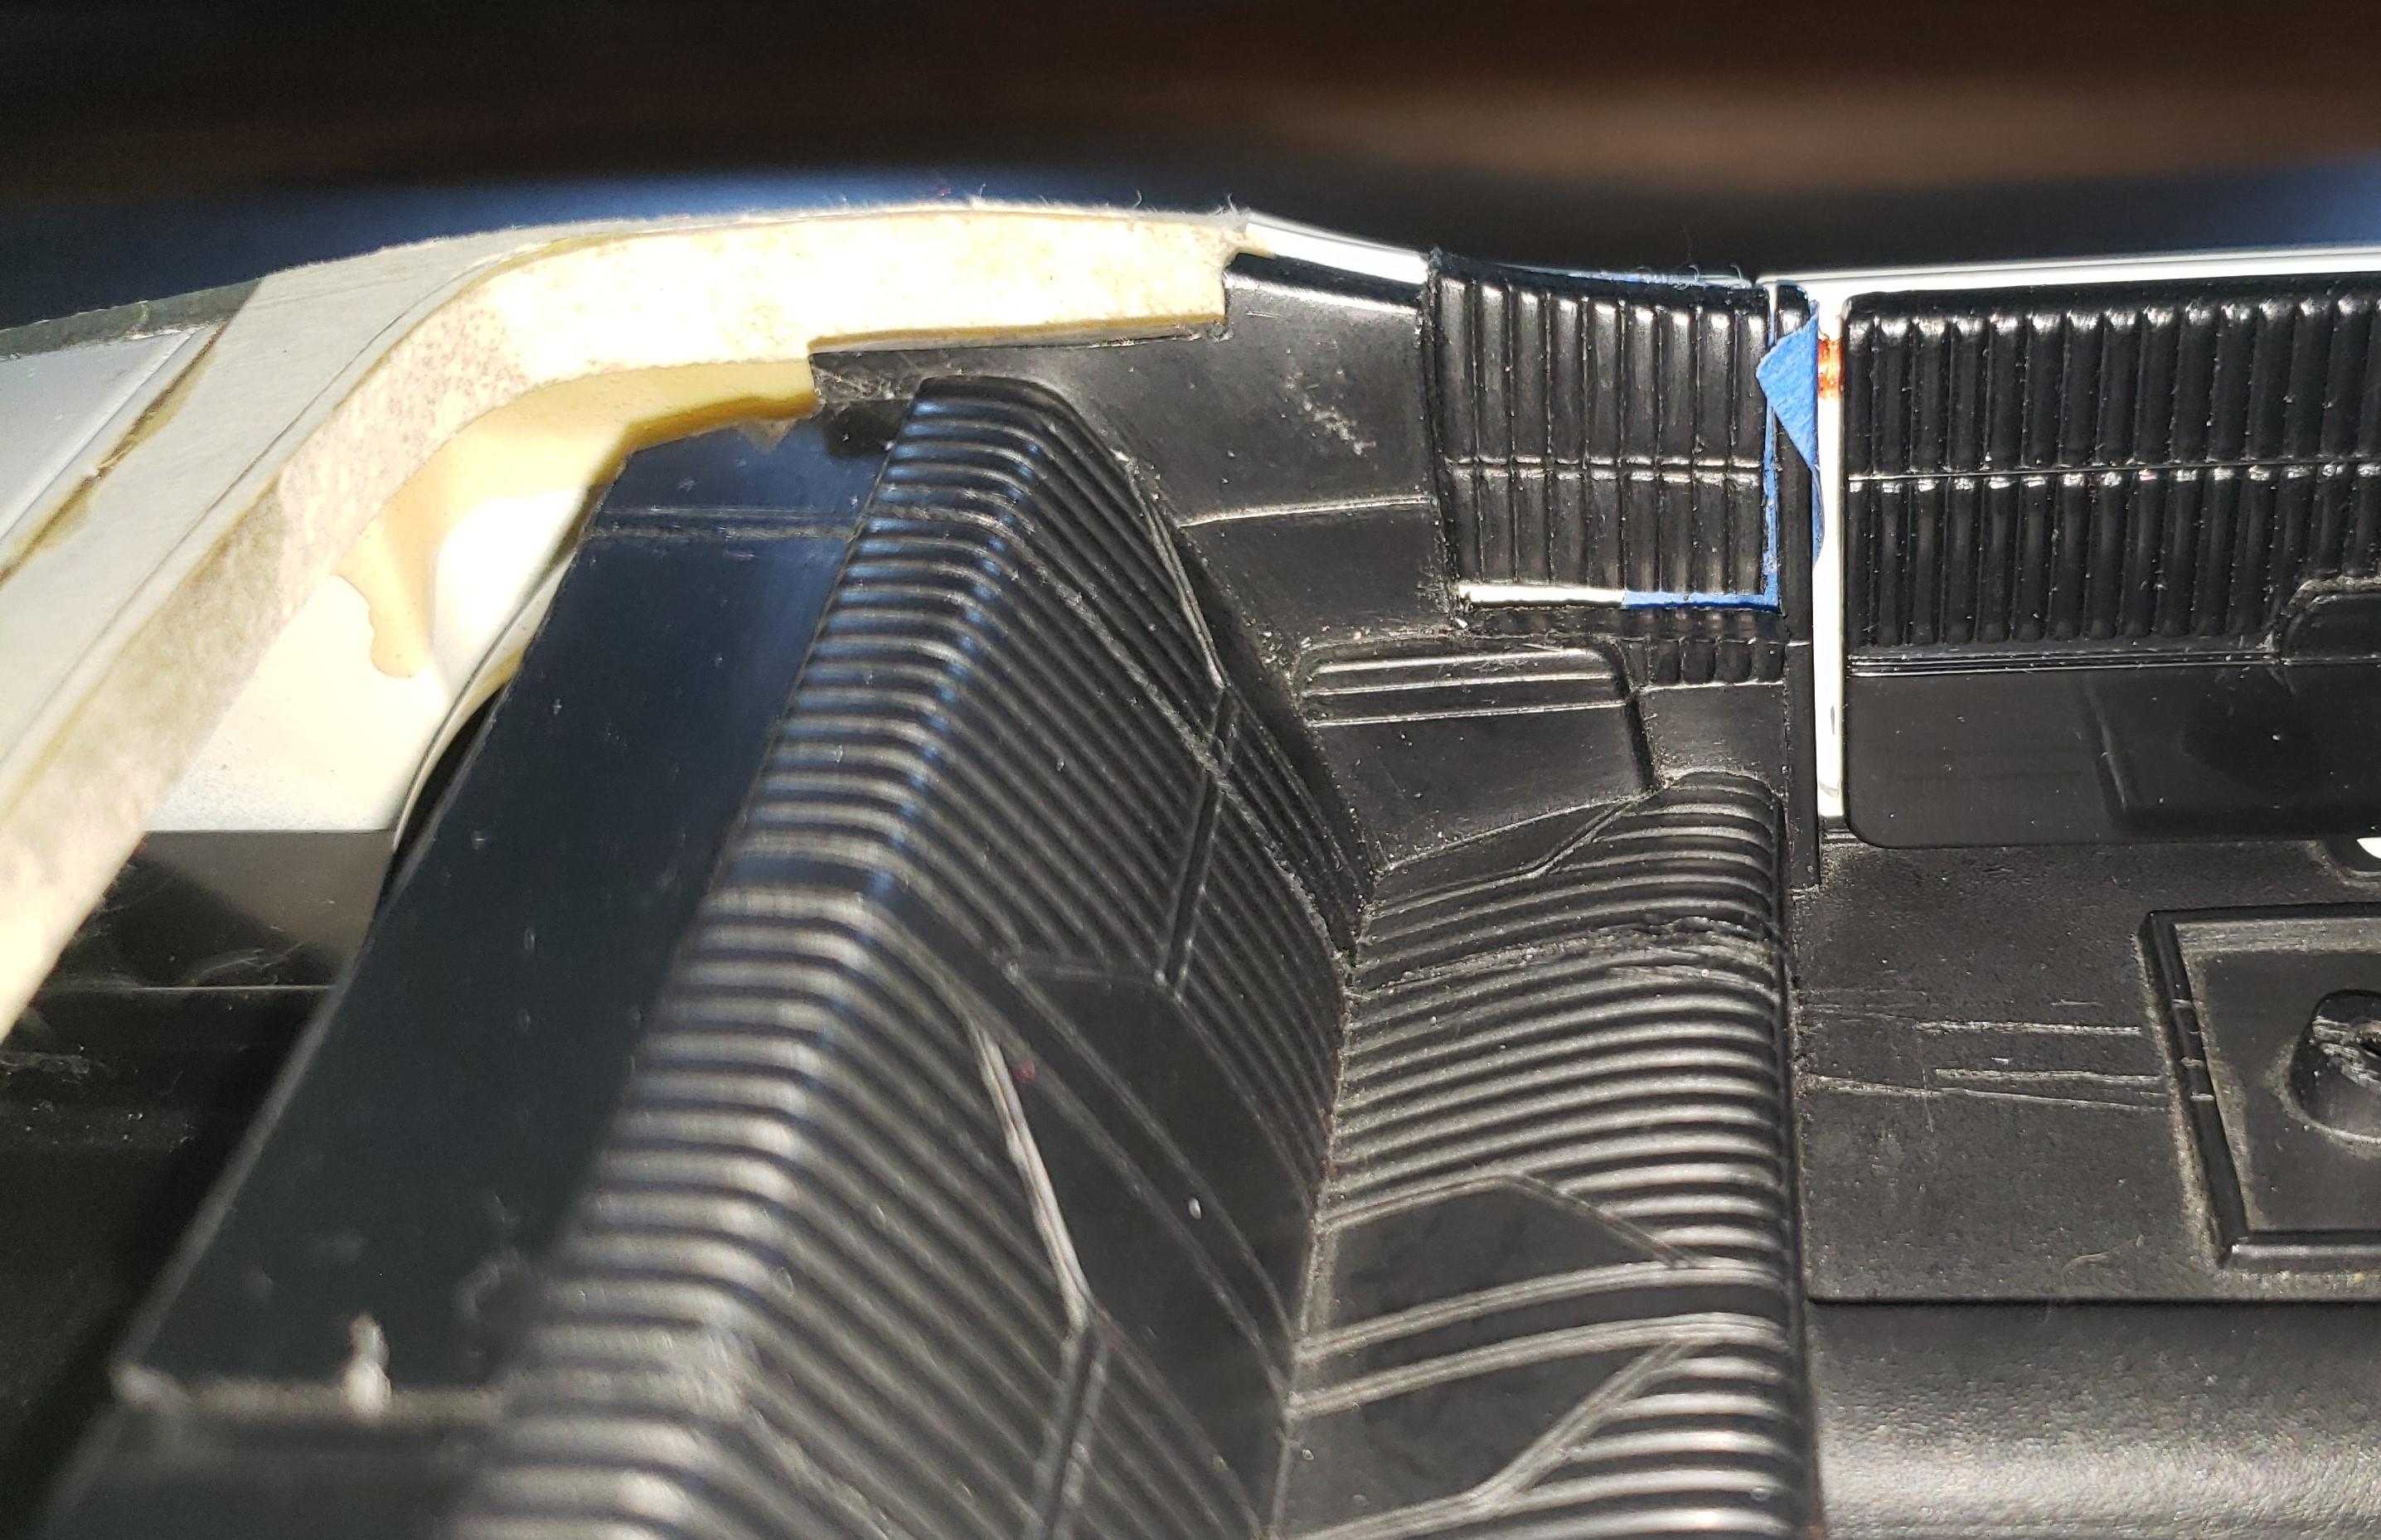
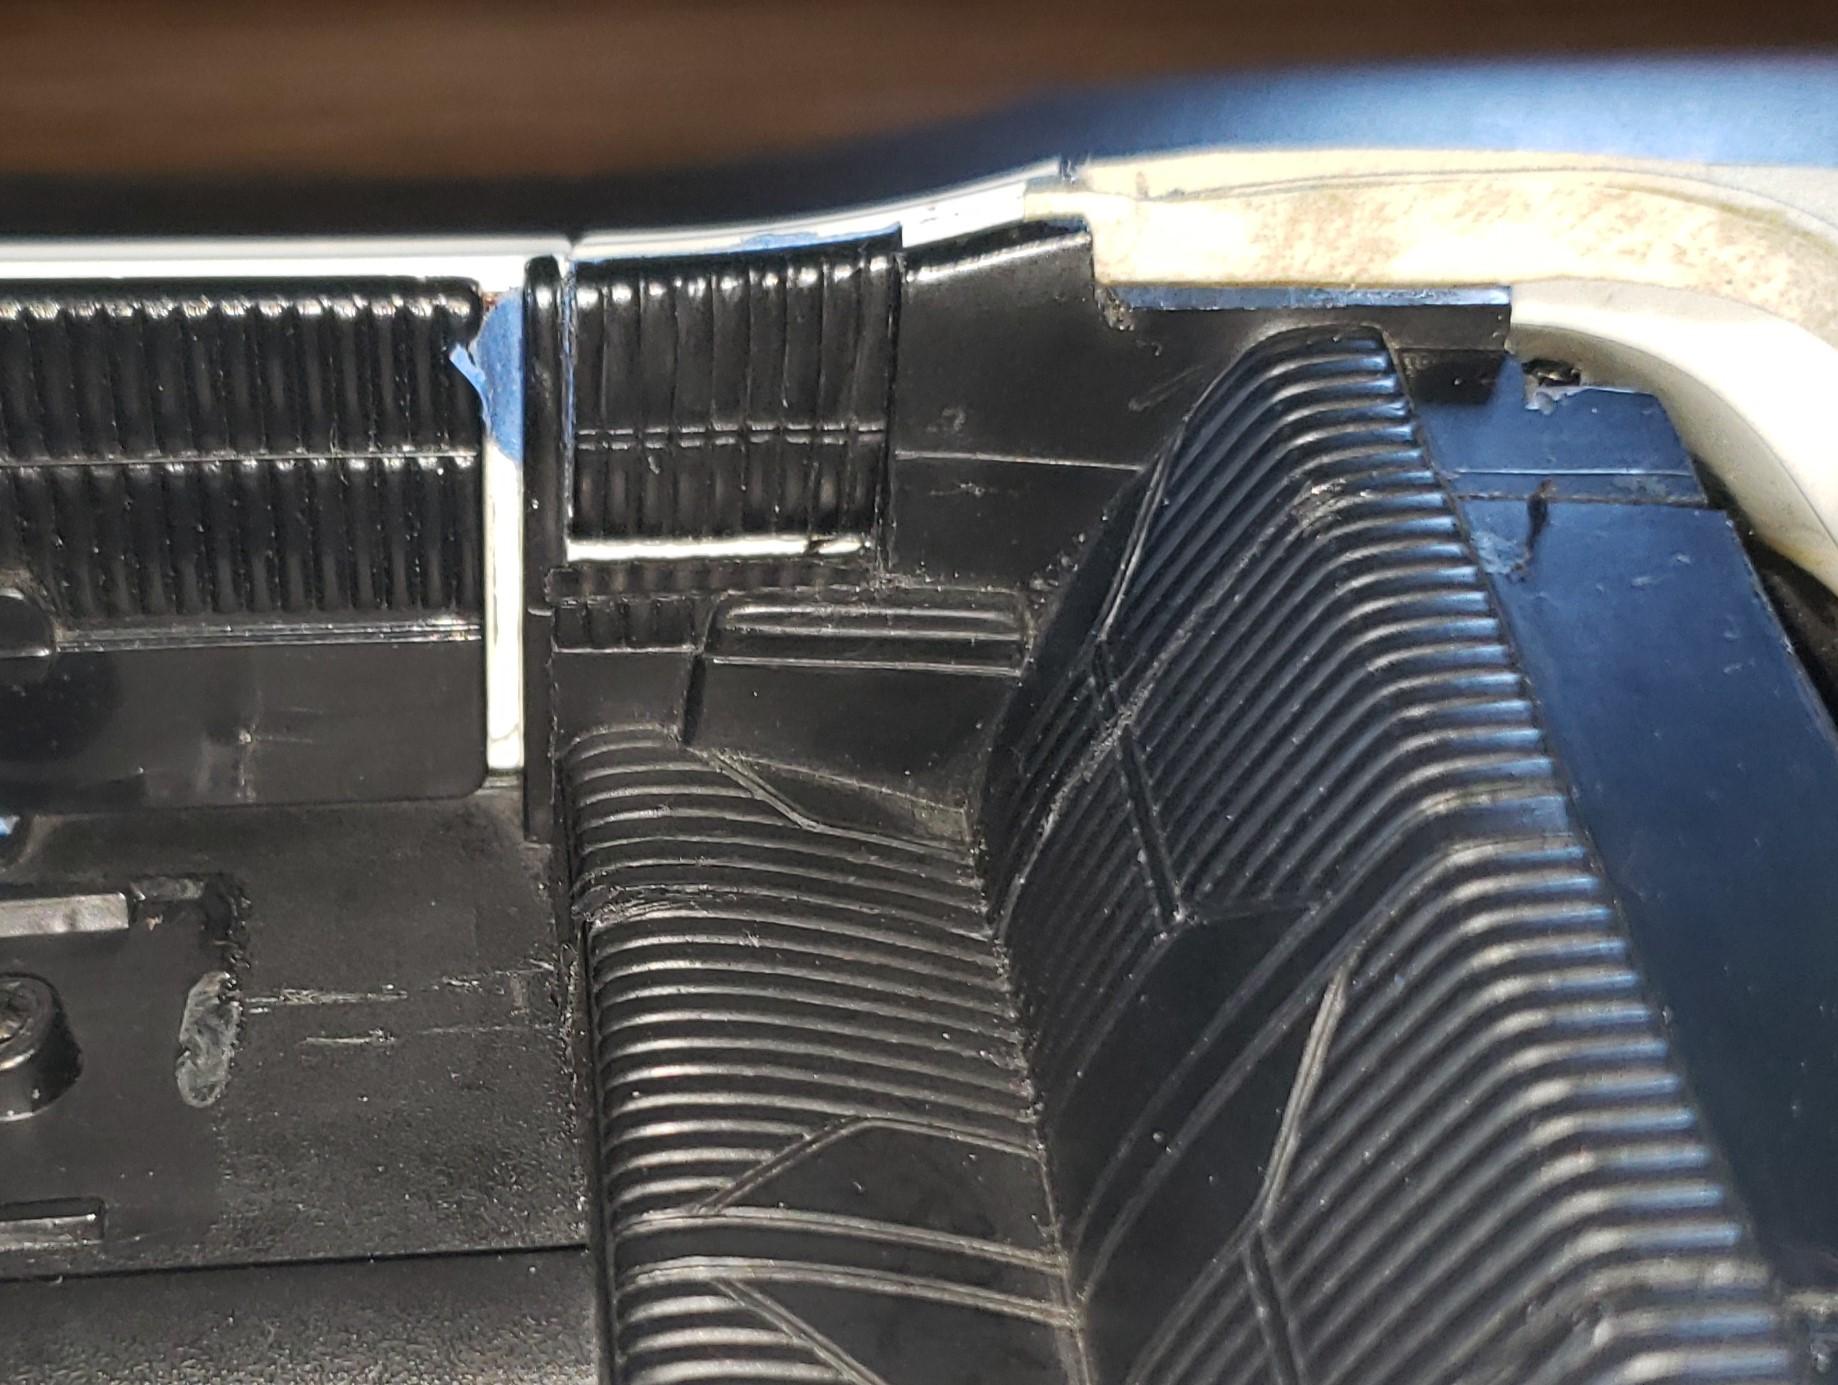
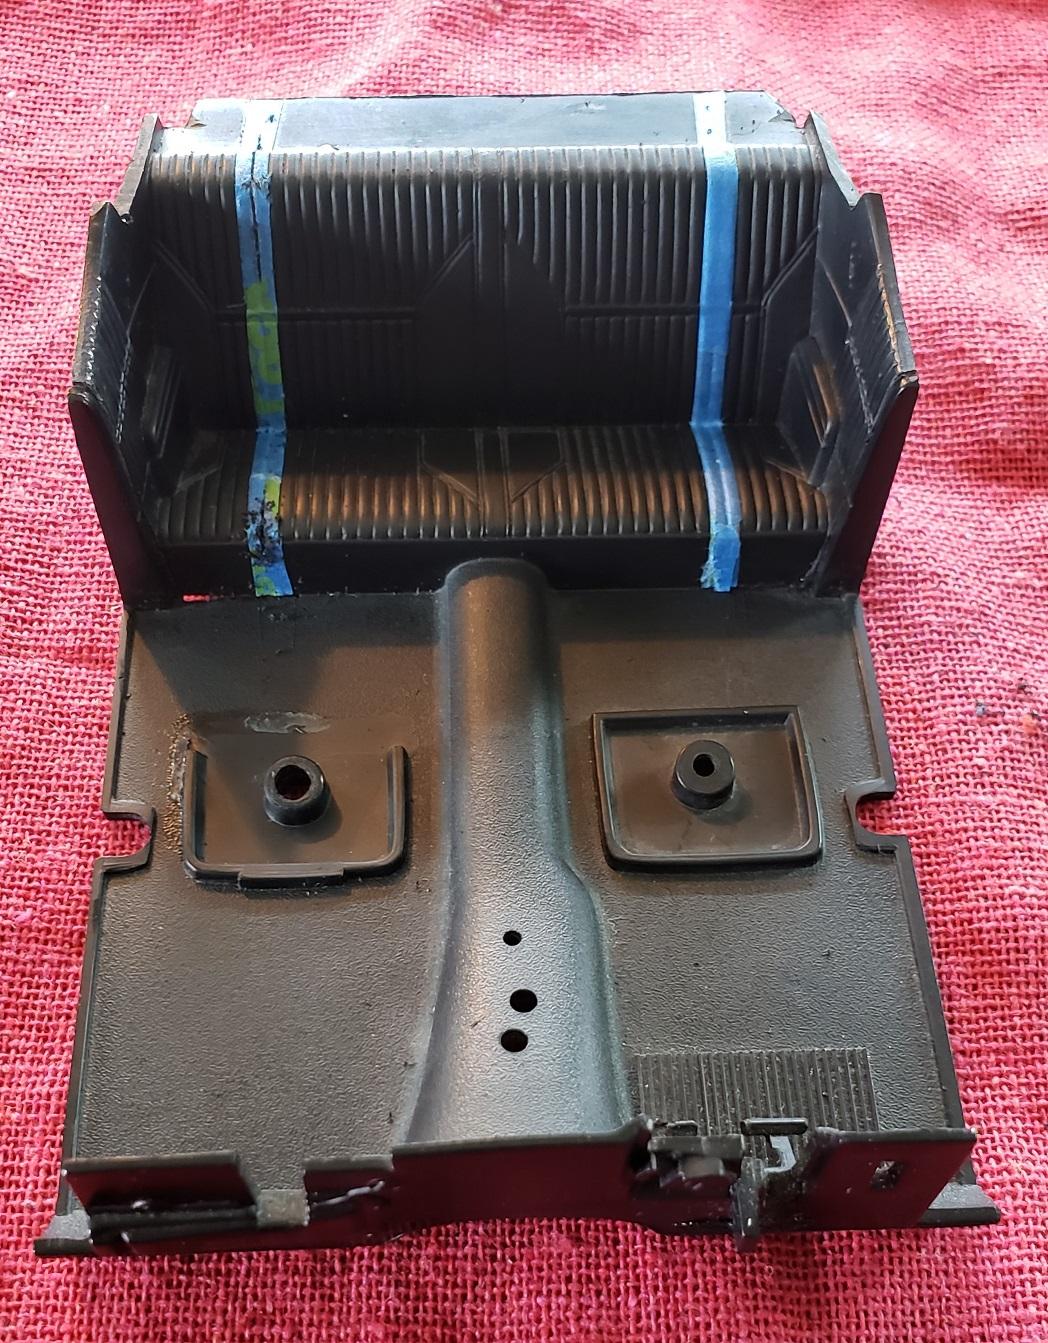
A bit of progress to report on the HO convertible build. Glued the seat sections together and started smoothing out some of the super glue that squeezed out of the joints.... Next task will be creating the rear seat side panels that wrap around the top frame cavity and the rear seat armrest....
-
1/18 scale '69 Hurst/Olds convertible build
J007KLEIN replied to J007KLEIN's topic in Diecast Corner
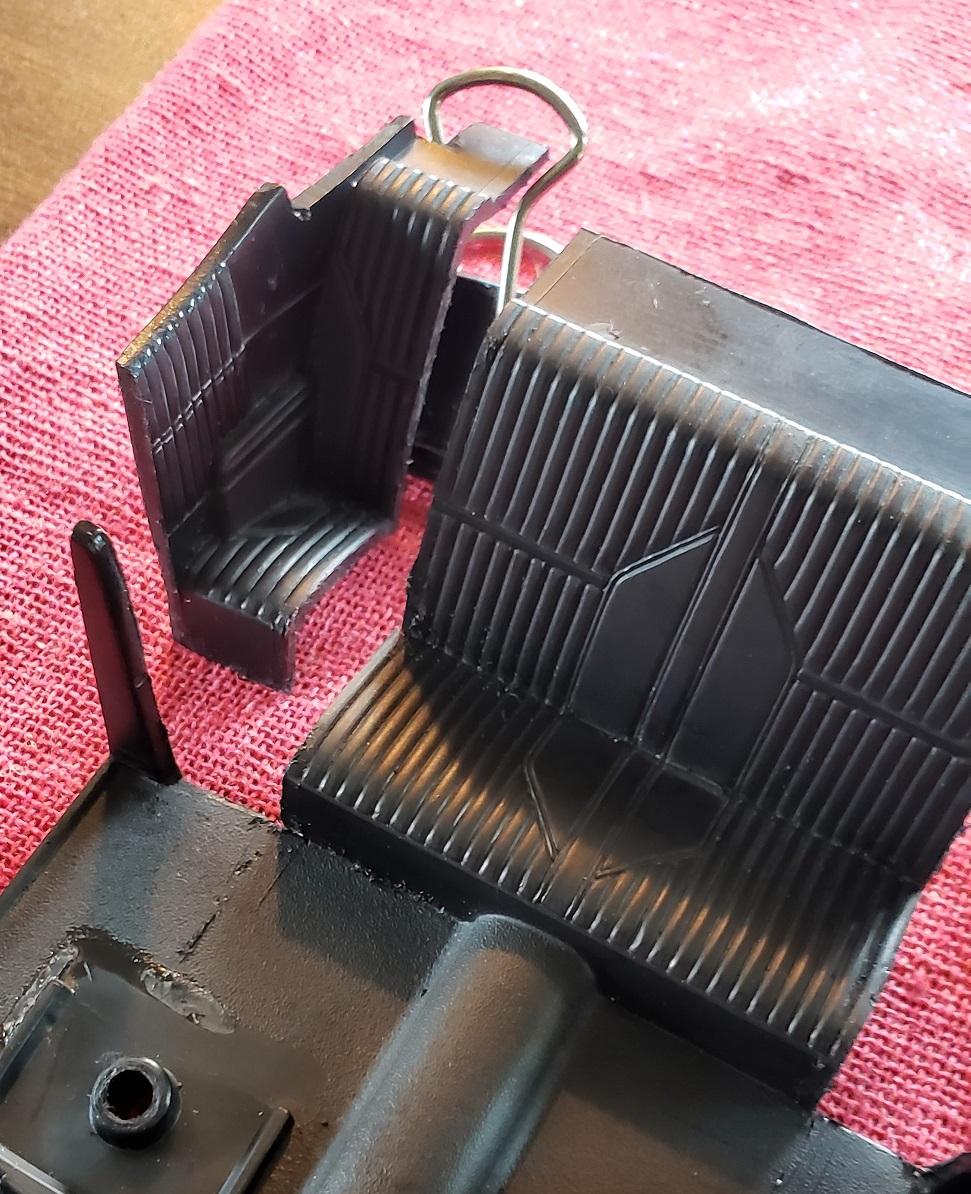
I thought before I glued the side panels back onto the seat portion it might be easier to cut the side panels to create the trim panel offset for the top hinge mechanism.... Next steps will be to form the hinge mechanism surround and arm rest platforms before gluing everything together. Guess I'll need to run to the local hobby shop to pickup some sheet styrene. Until next installment....
-
1/18 scale '69 Hurst/Olds convertible build
J007KLEIN replied to J007KLEIN's topic in Diecast Corner
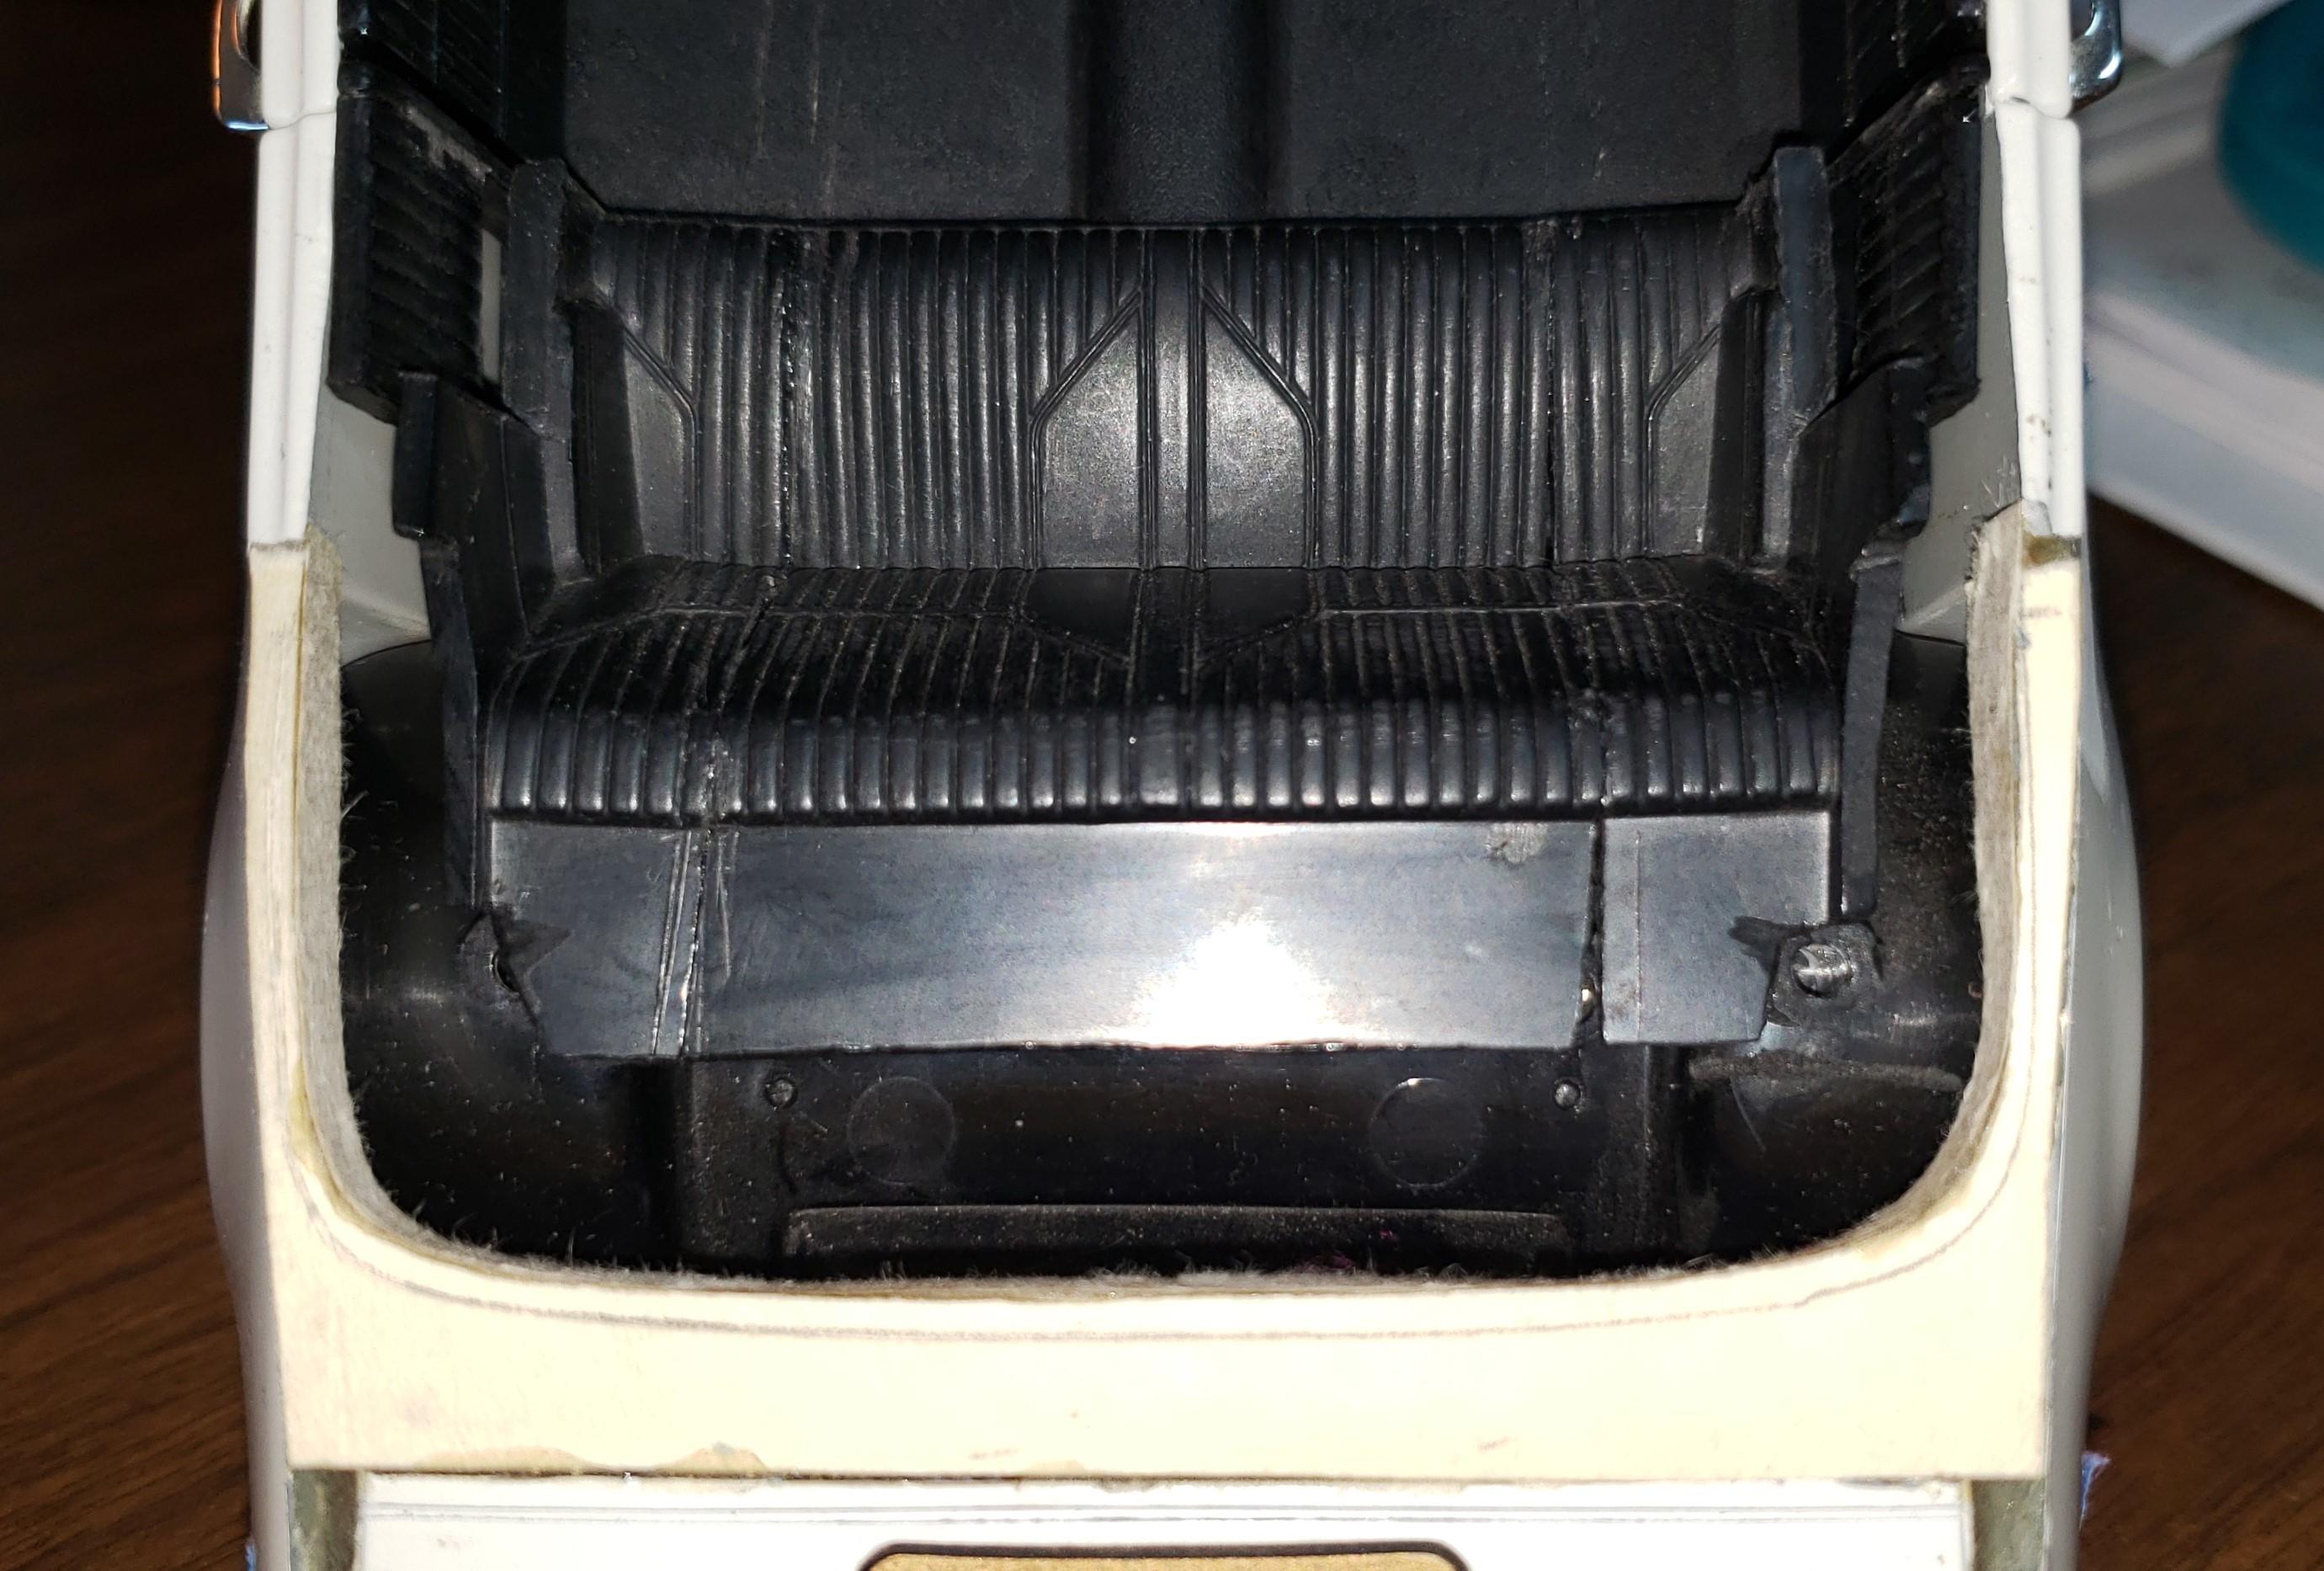
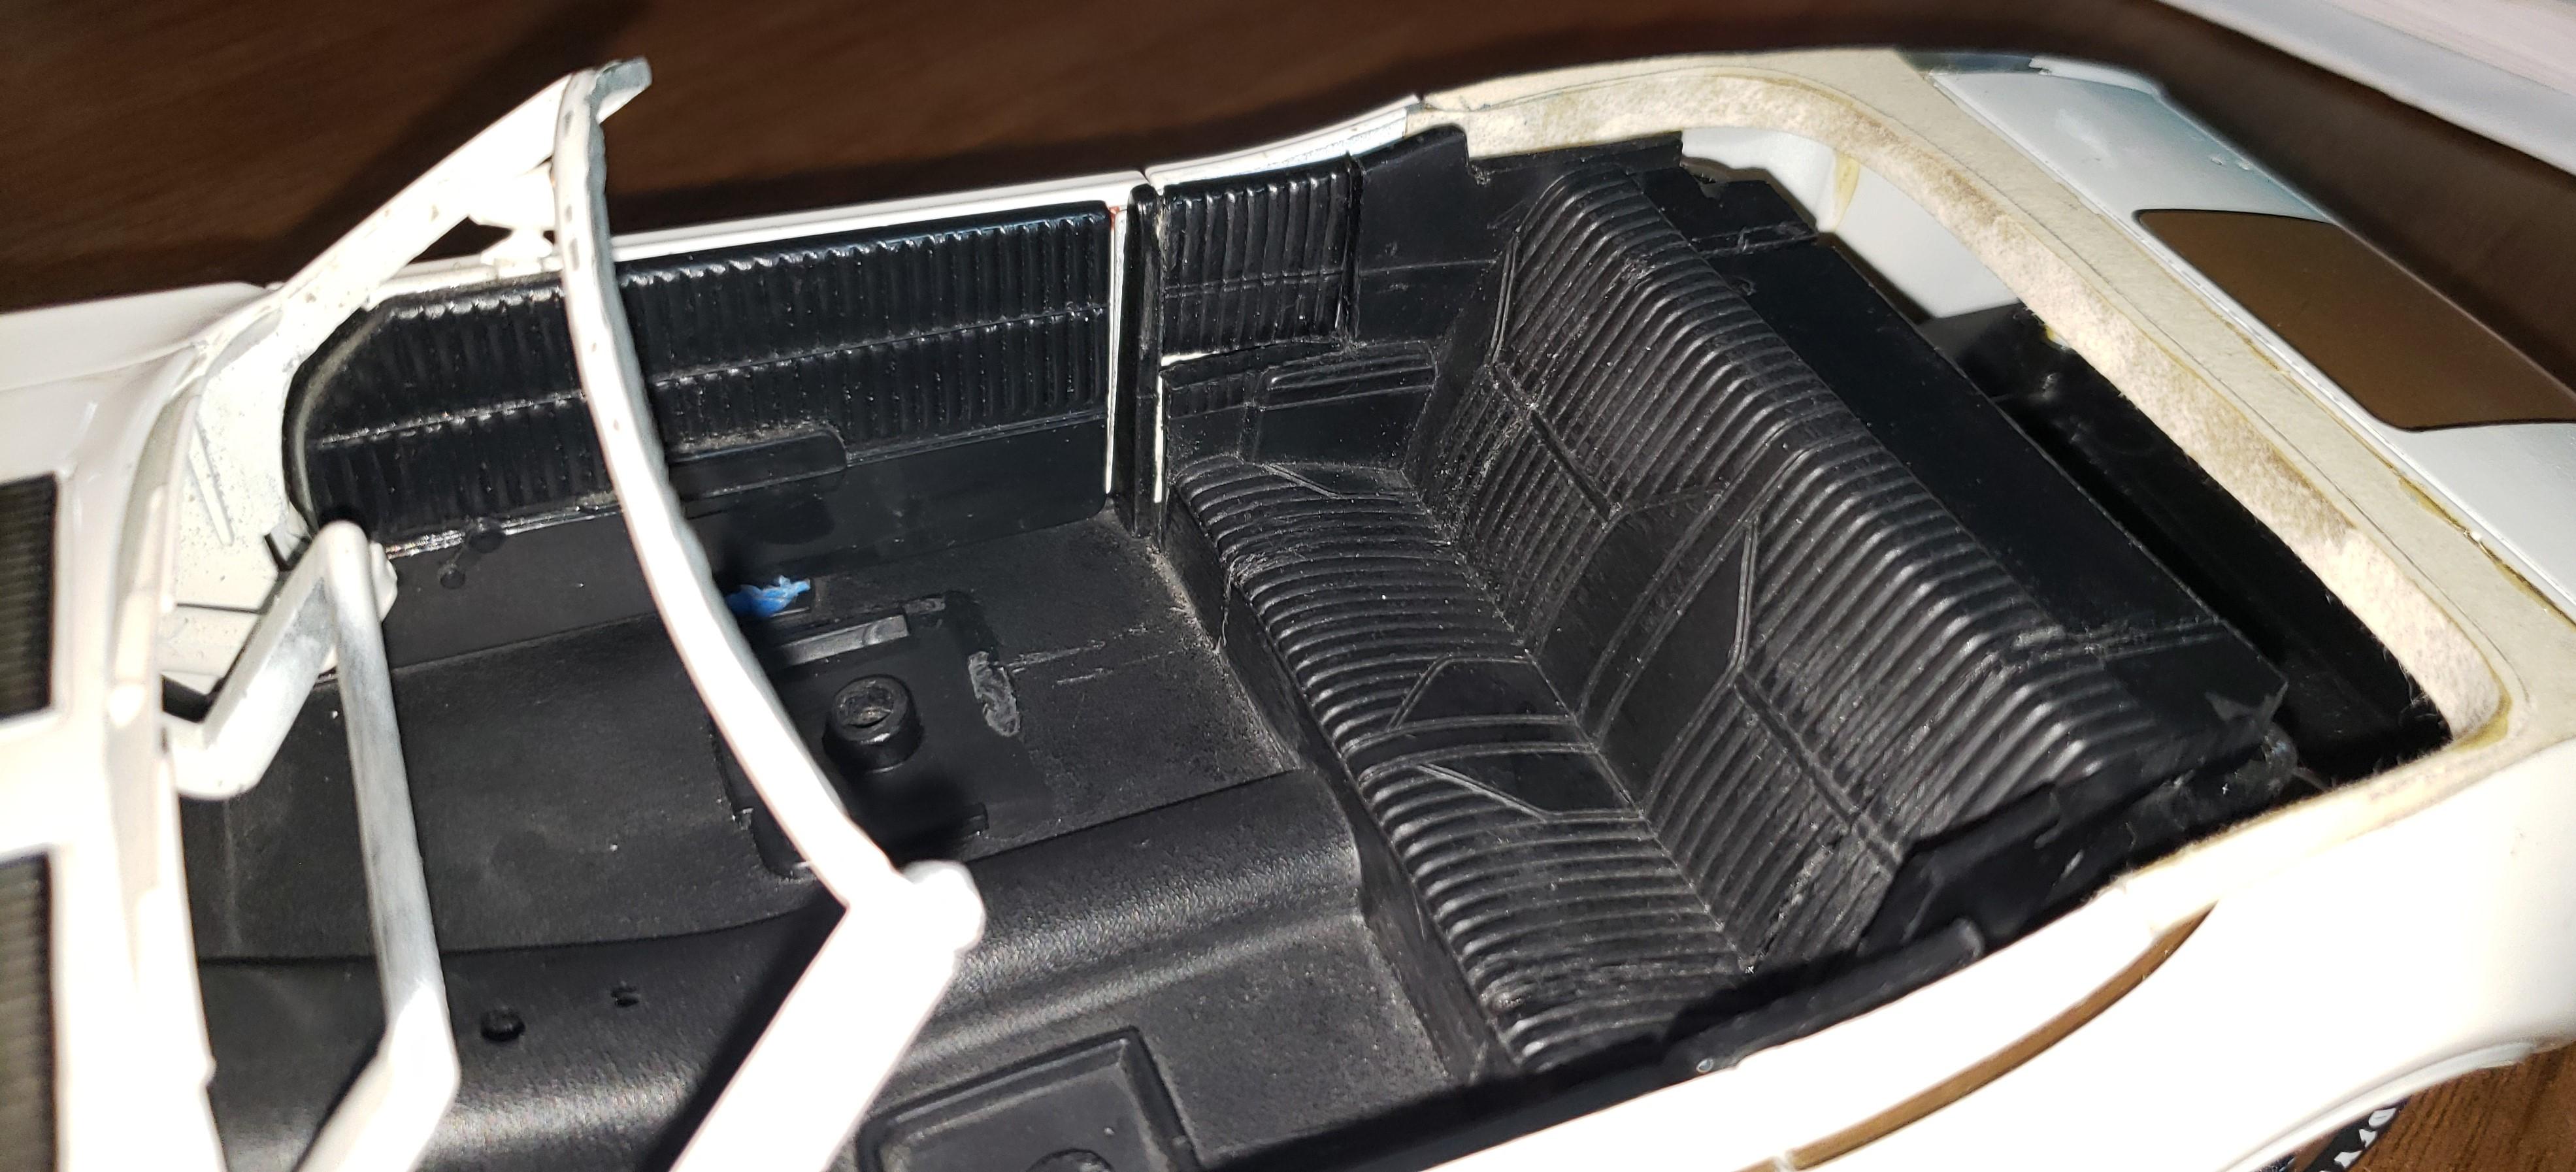
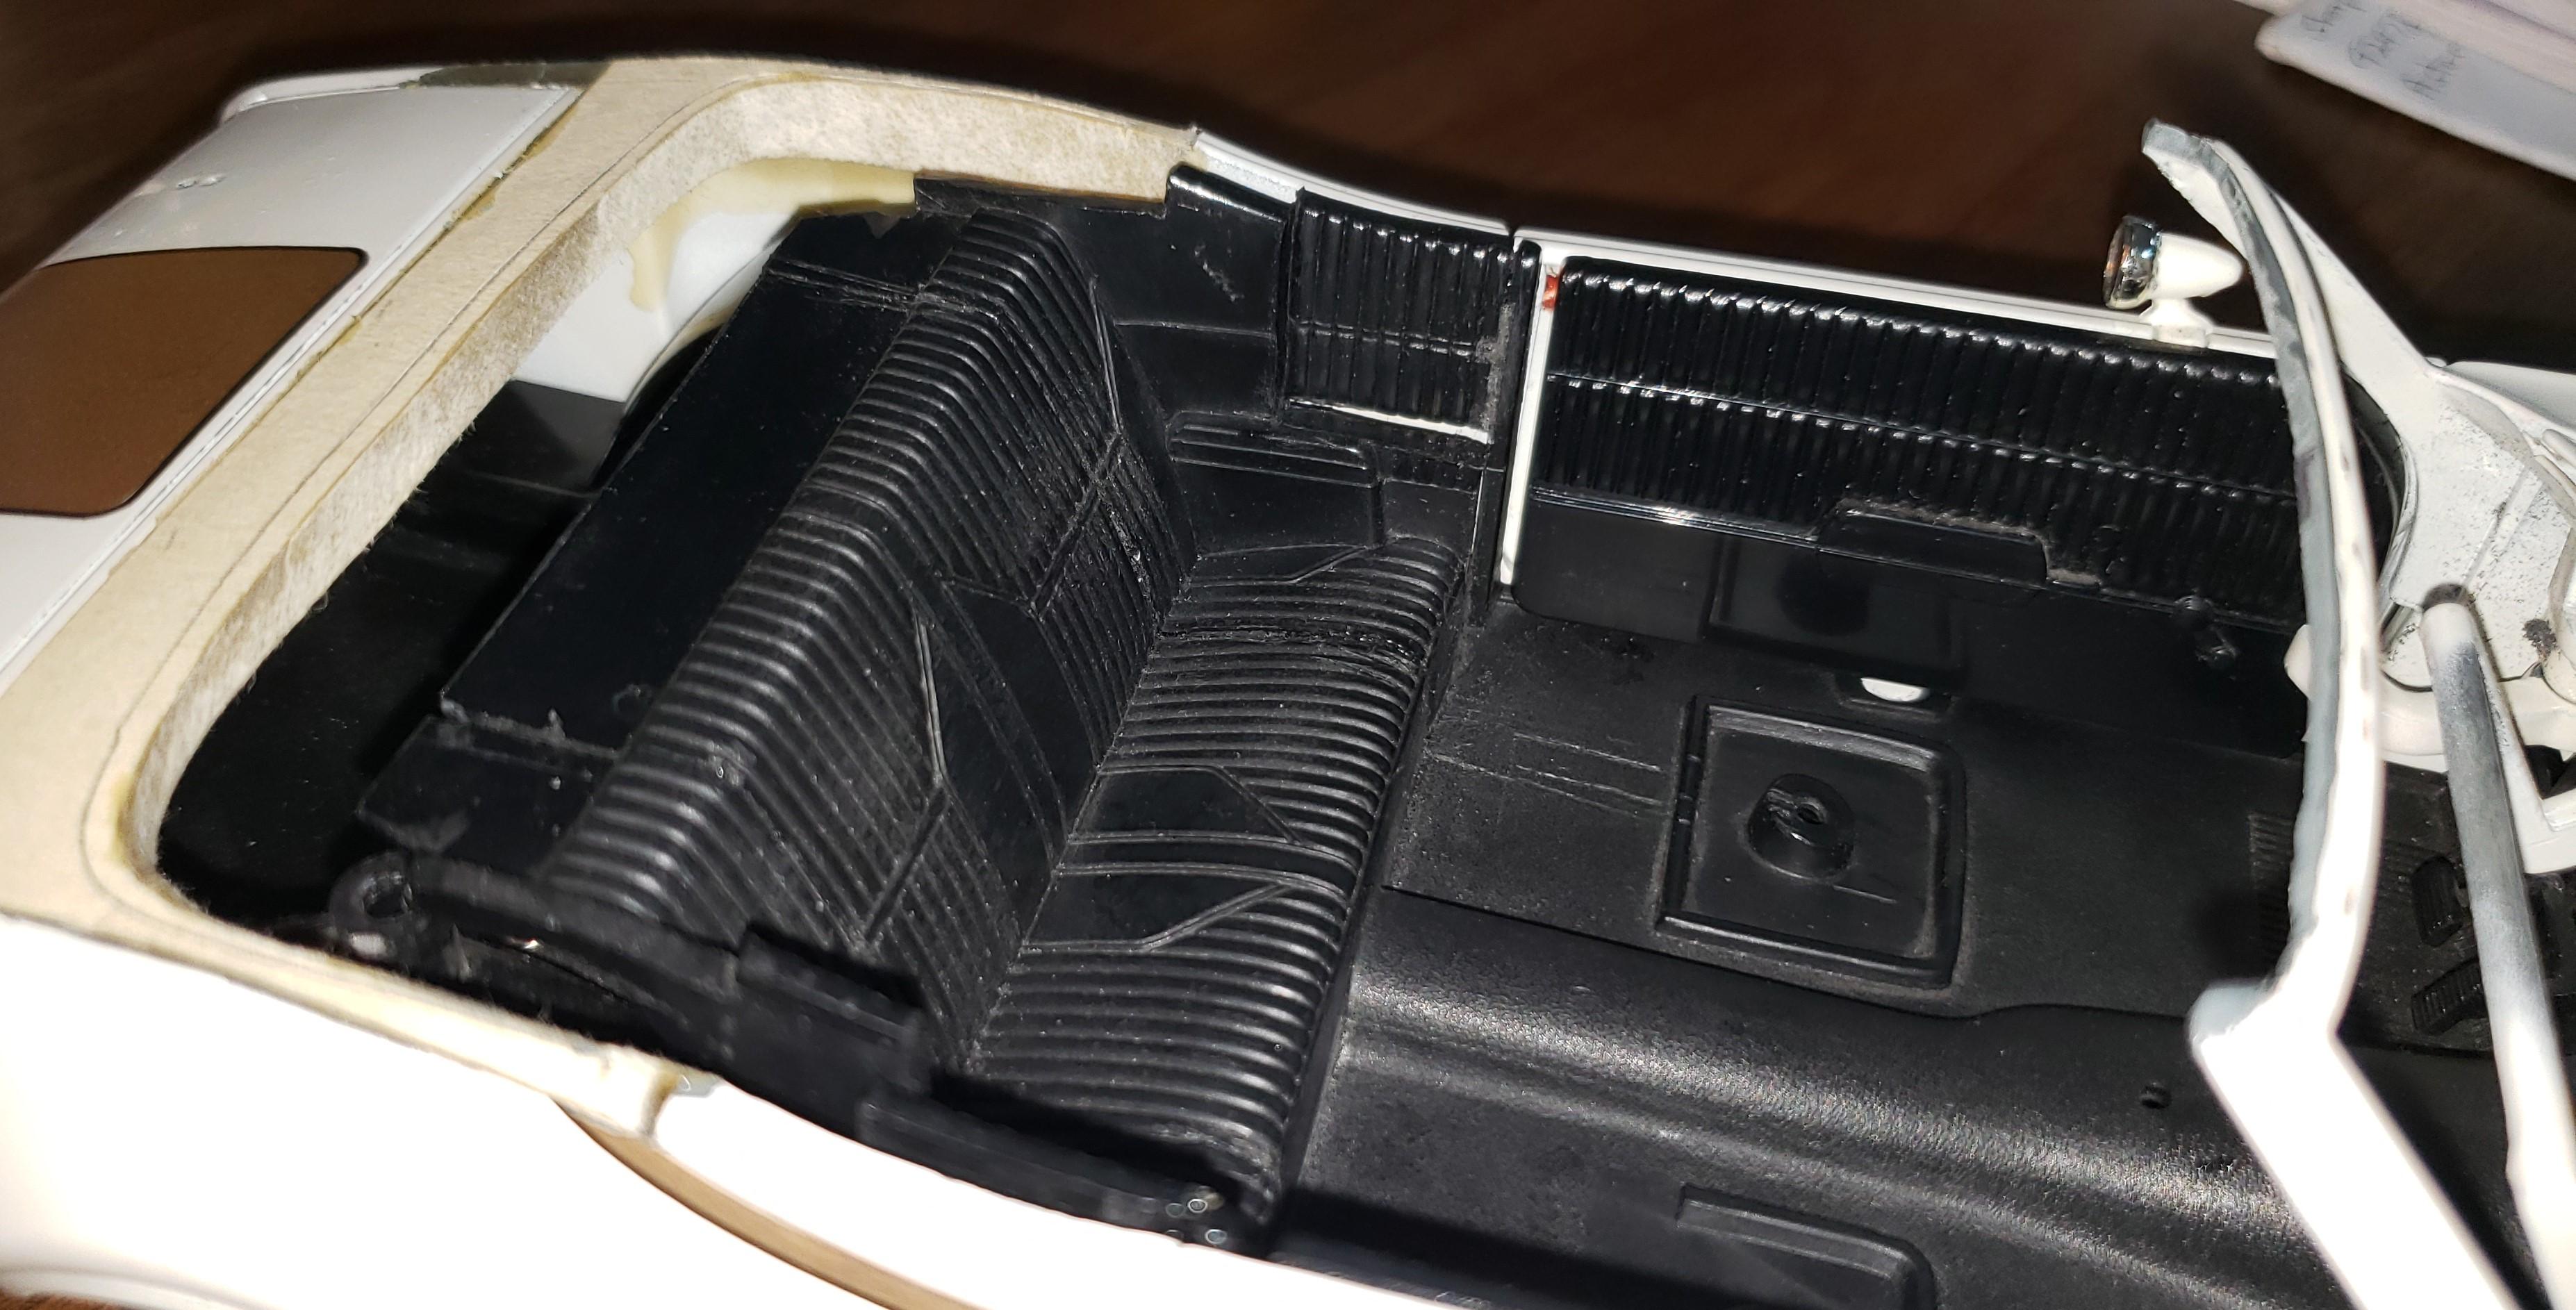
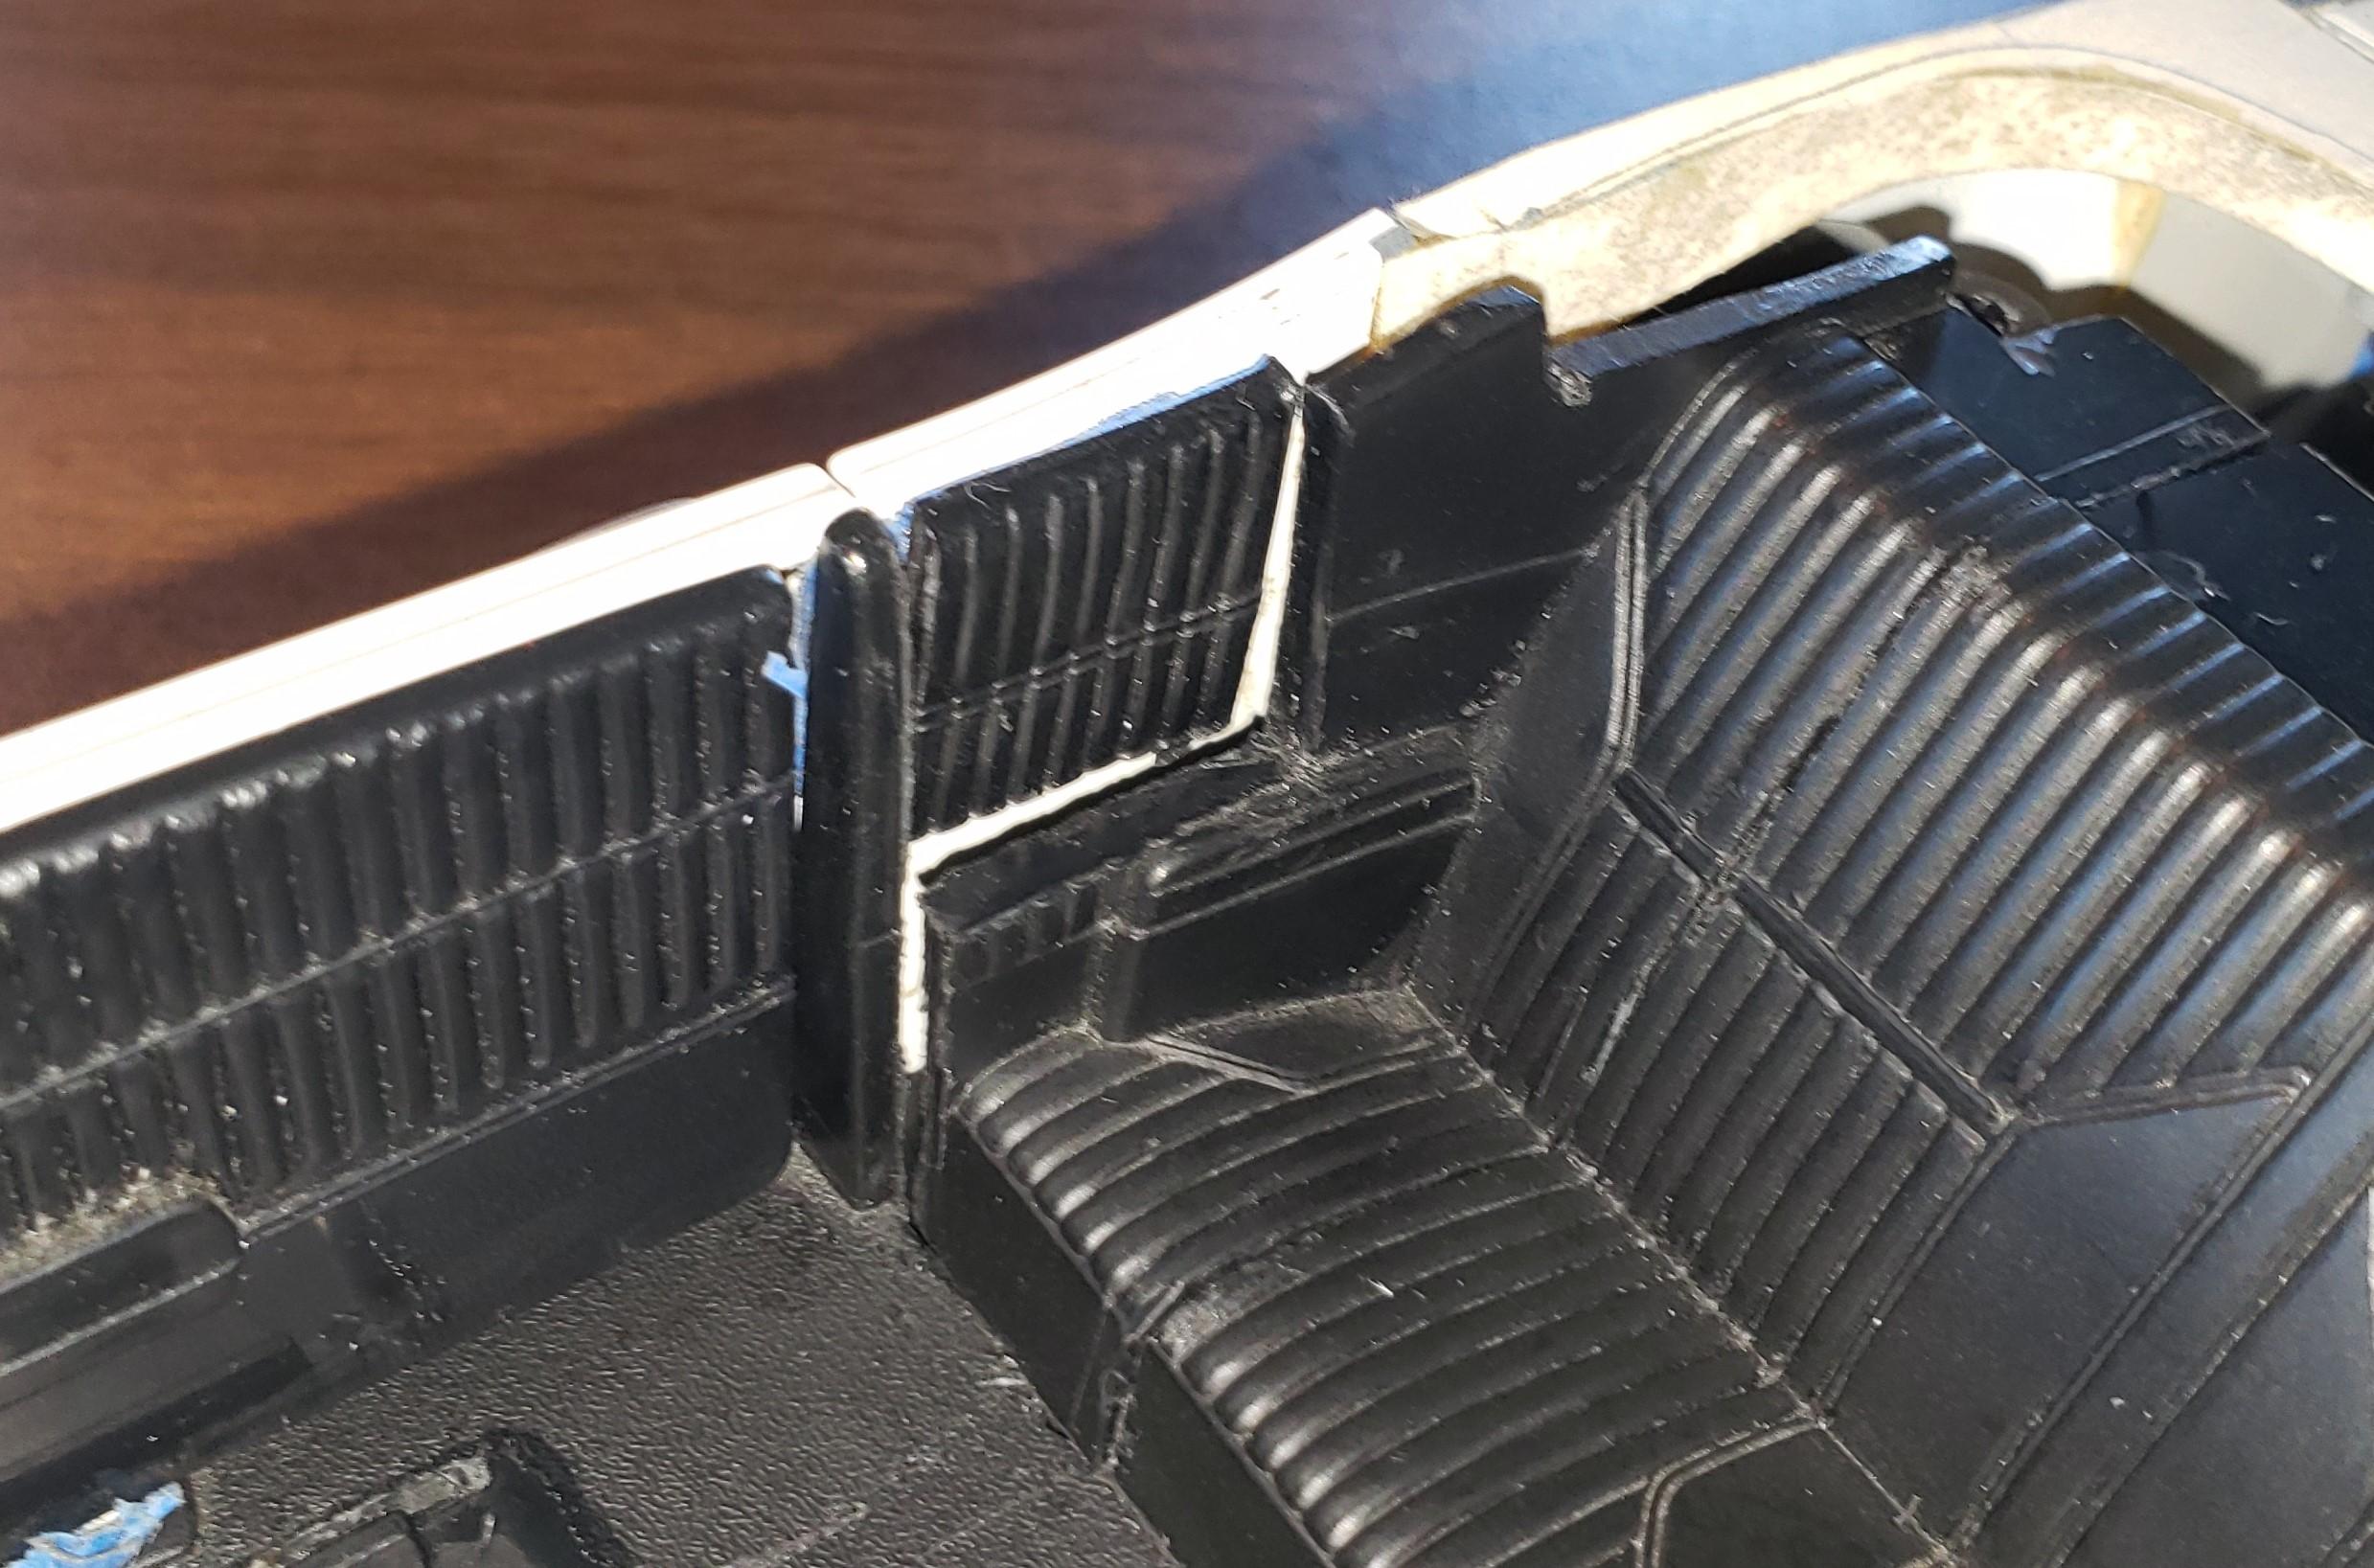
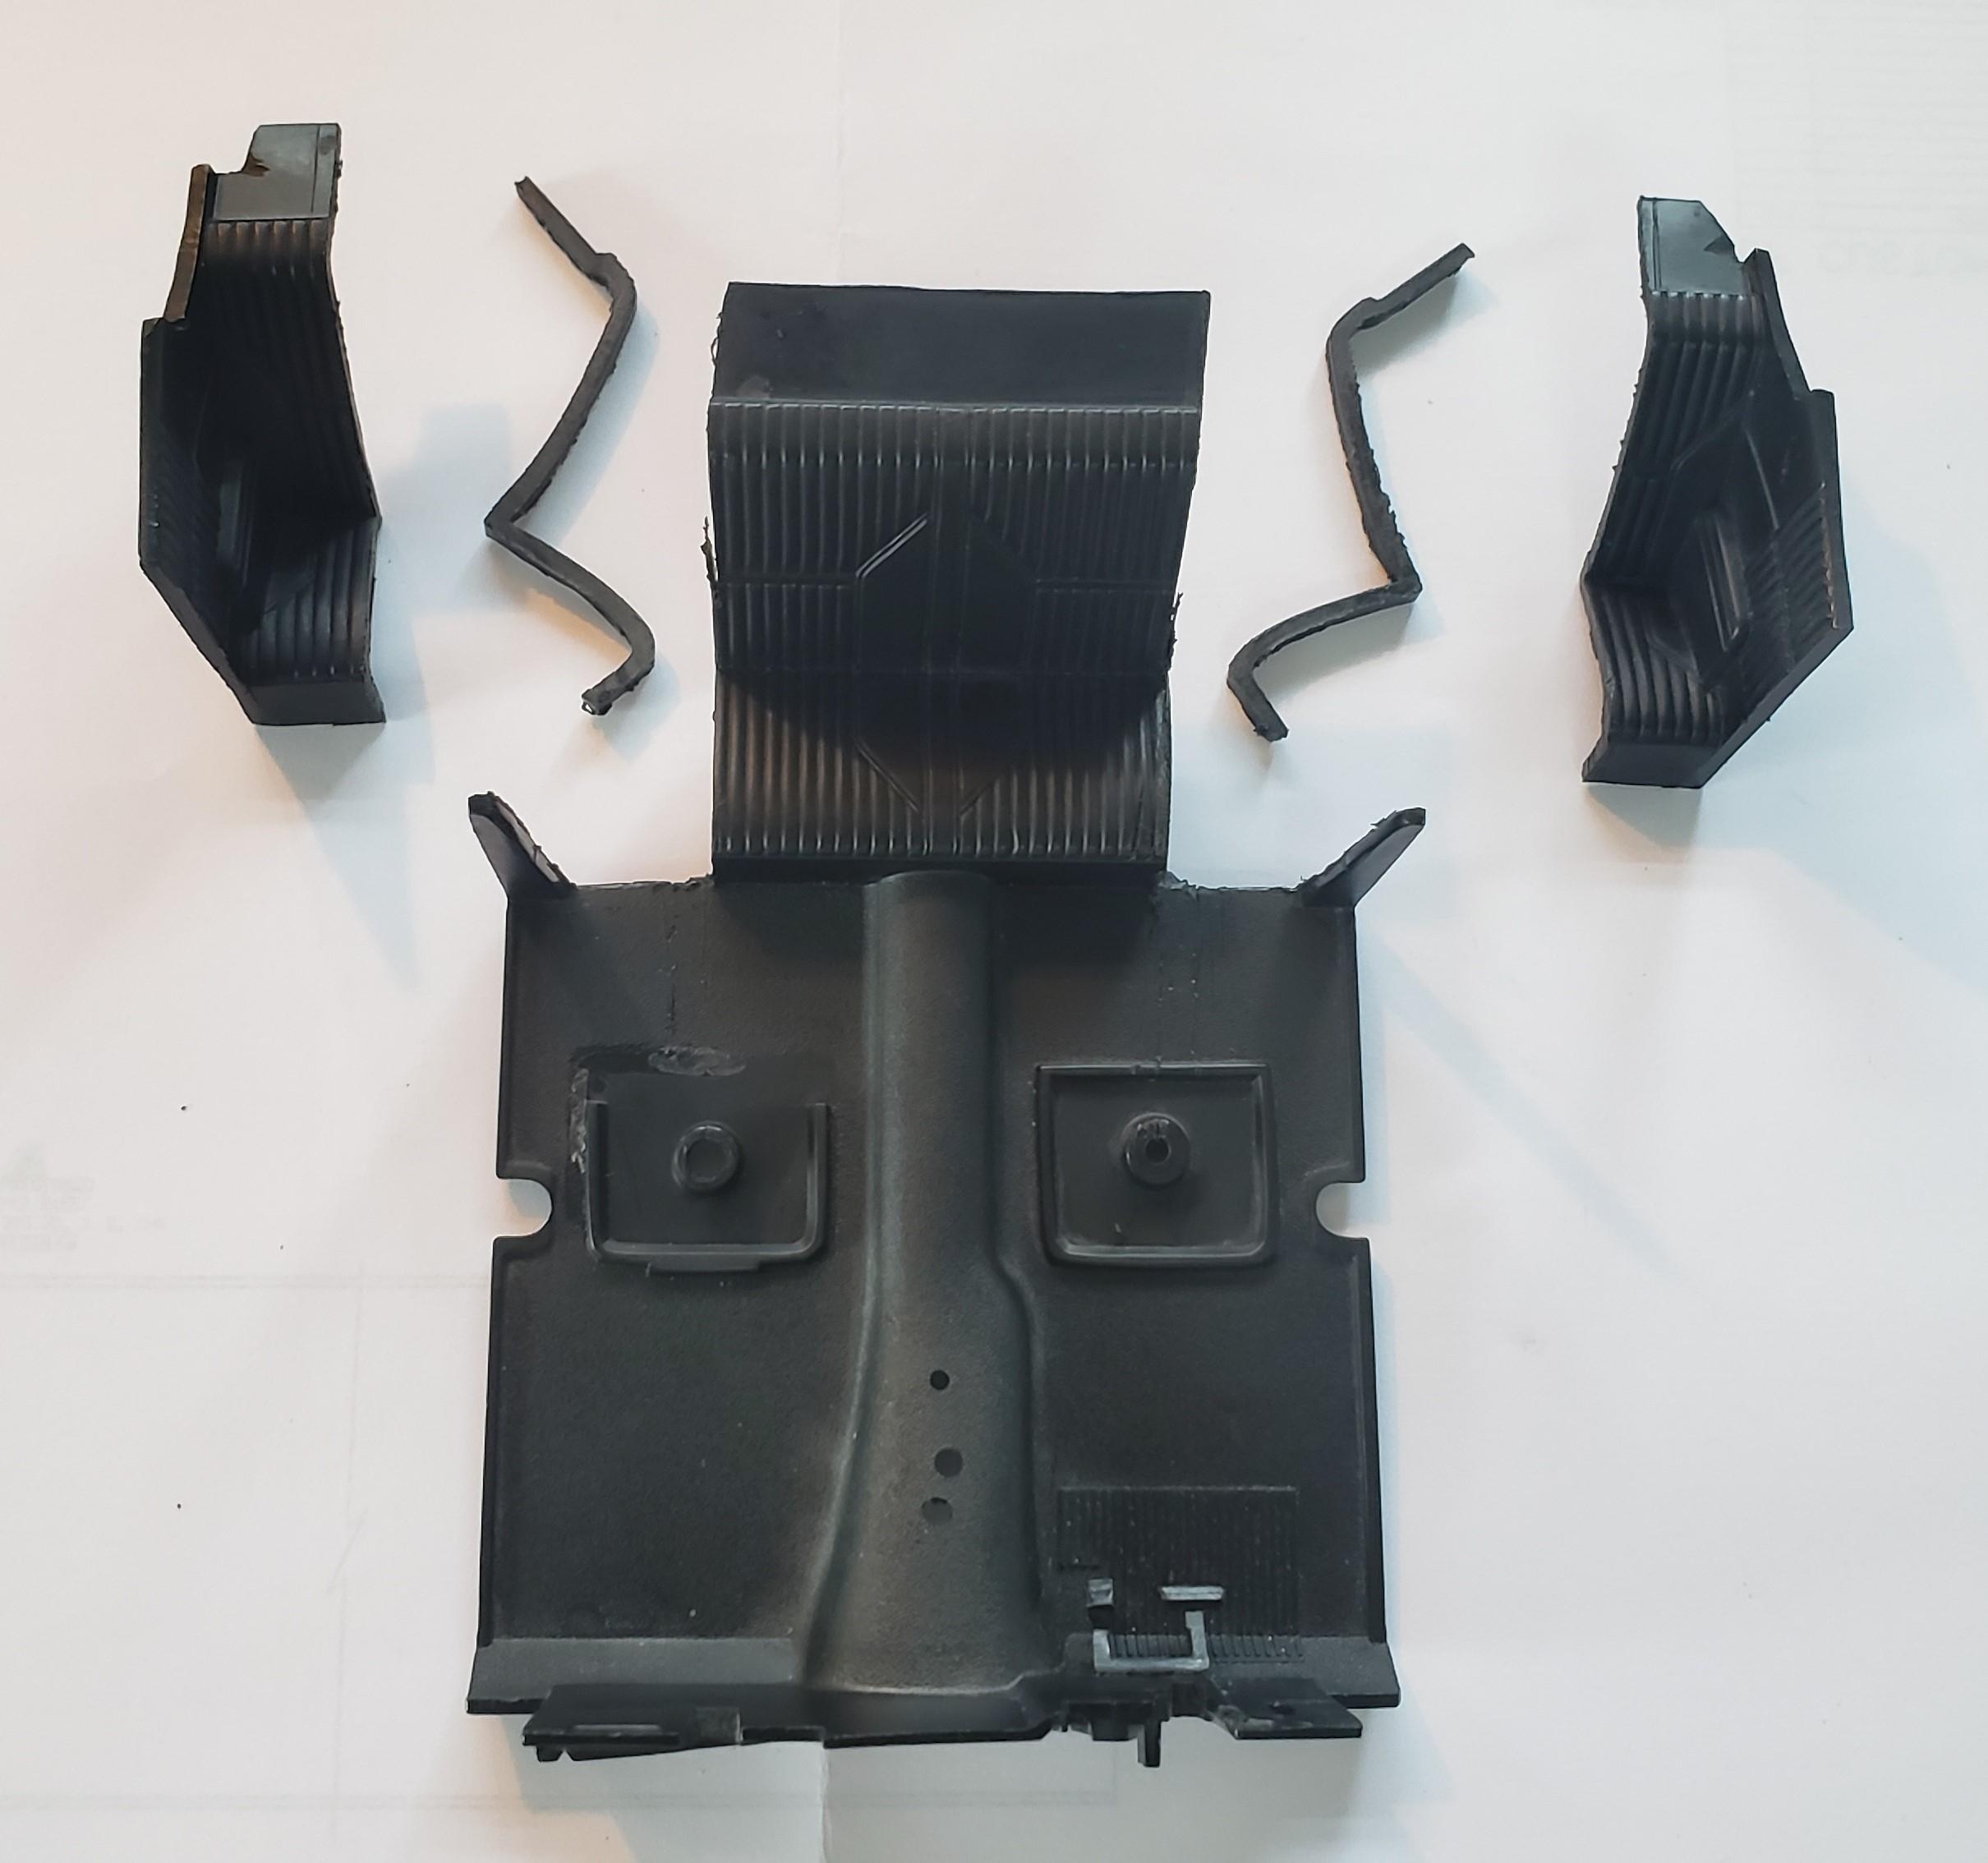
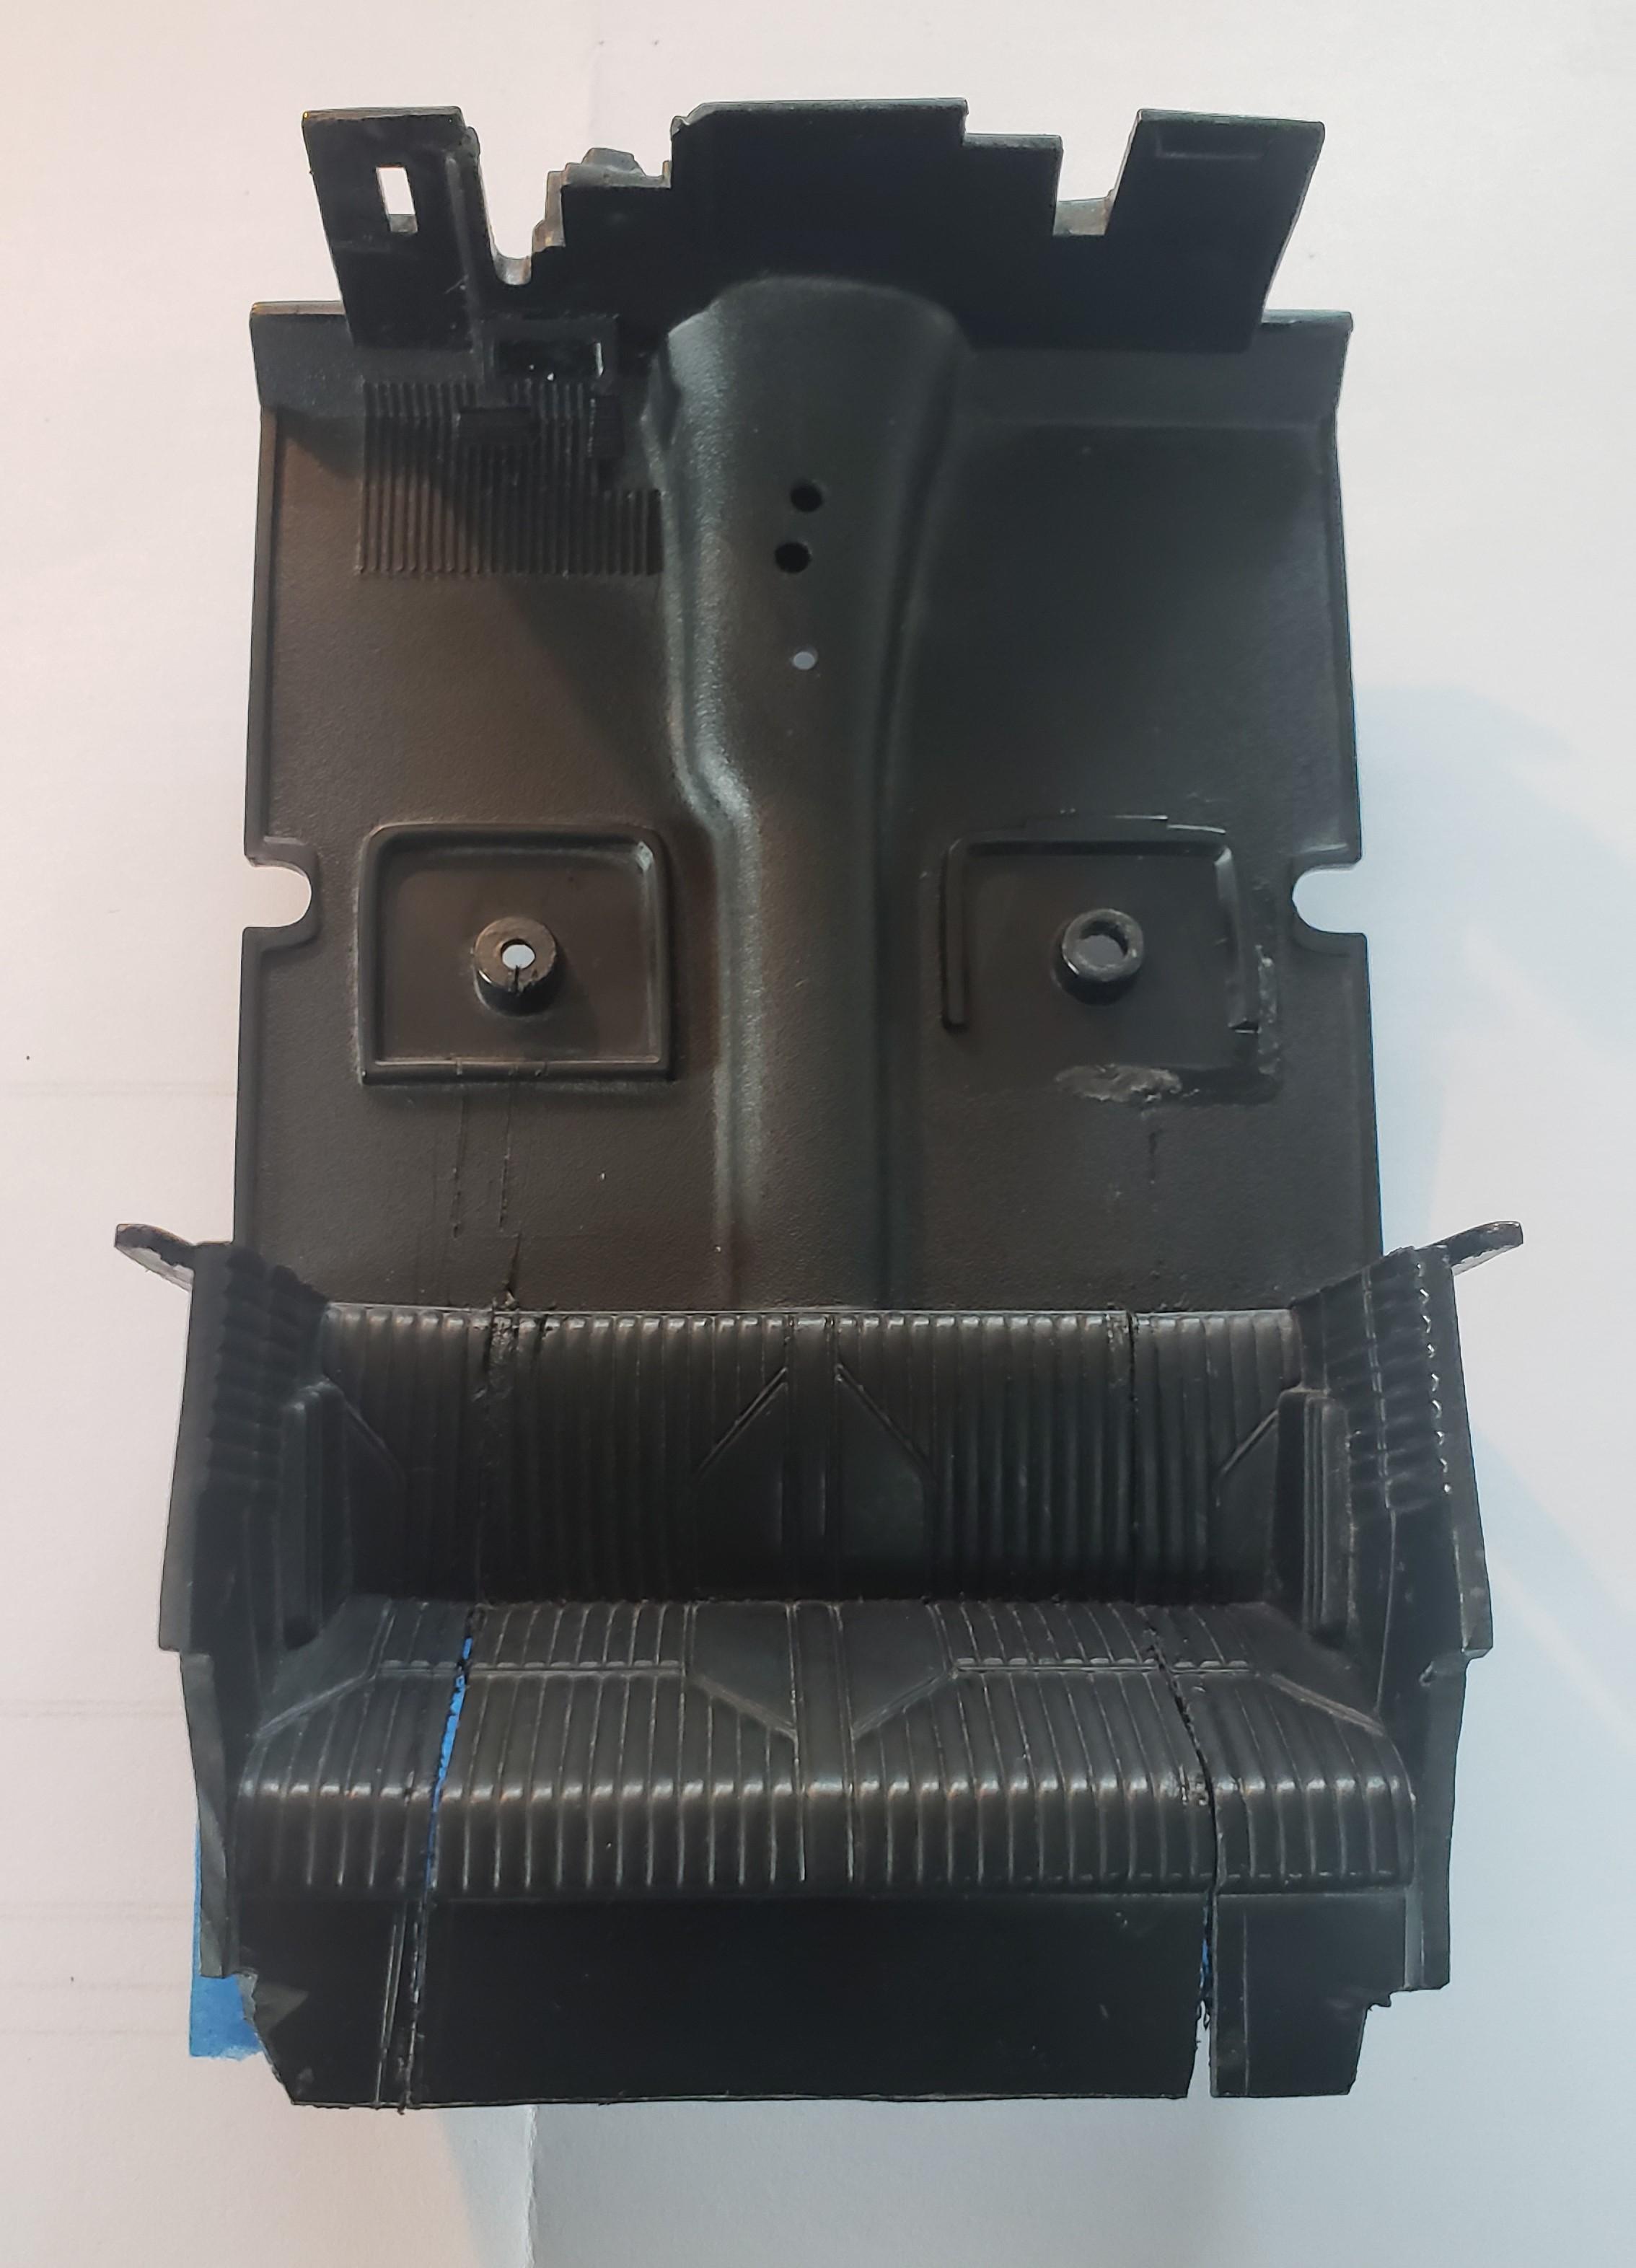
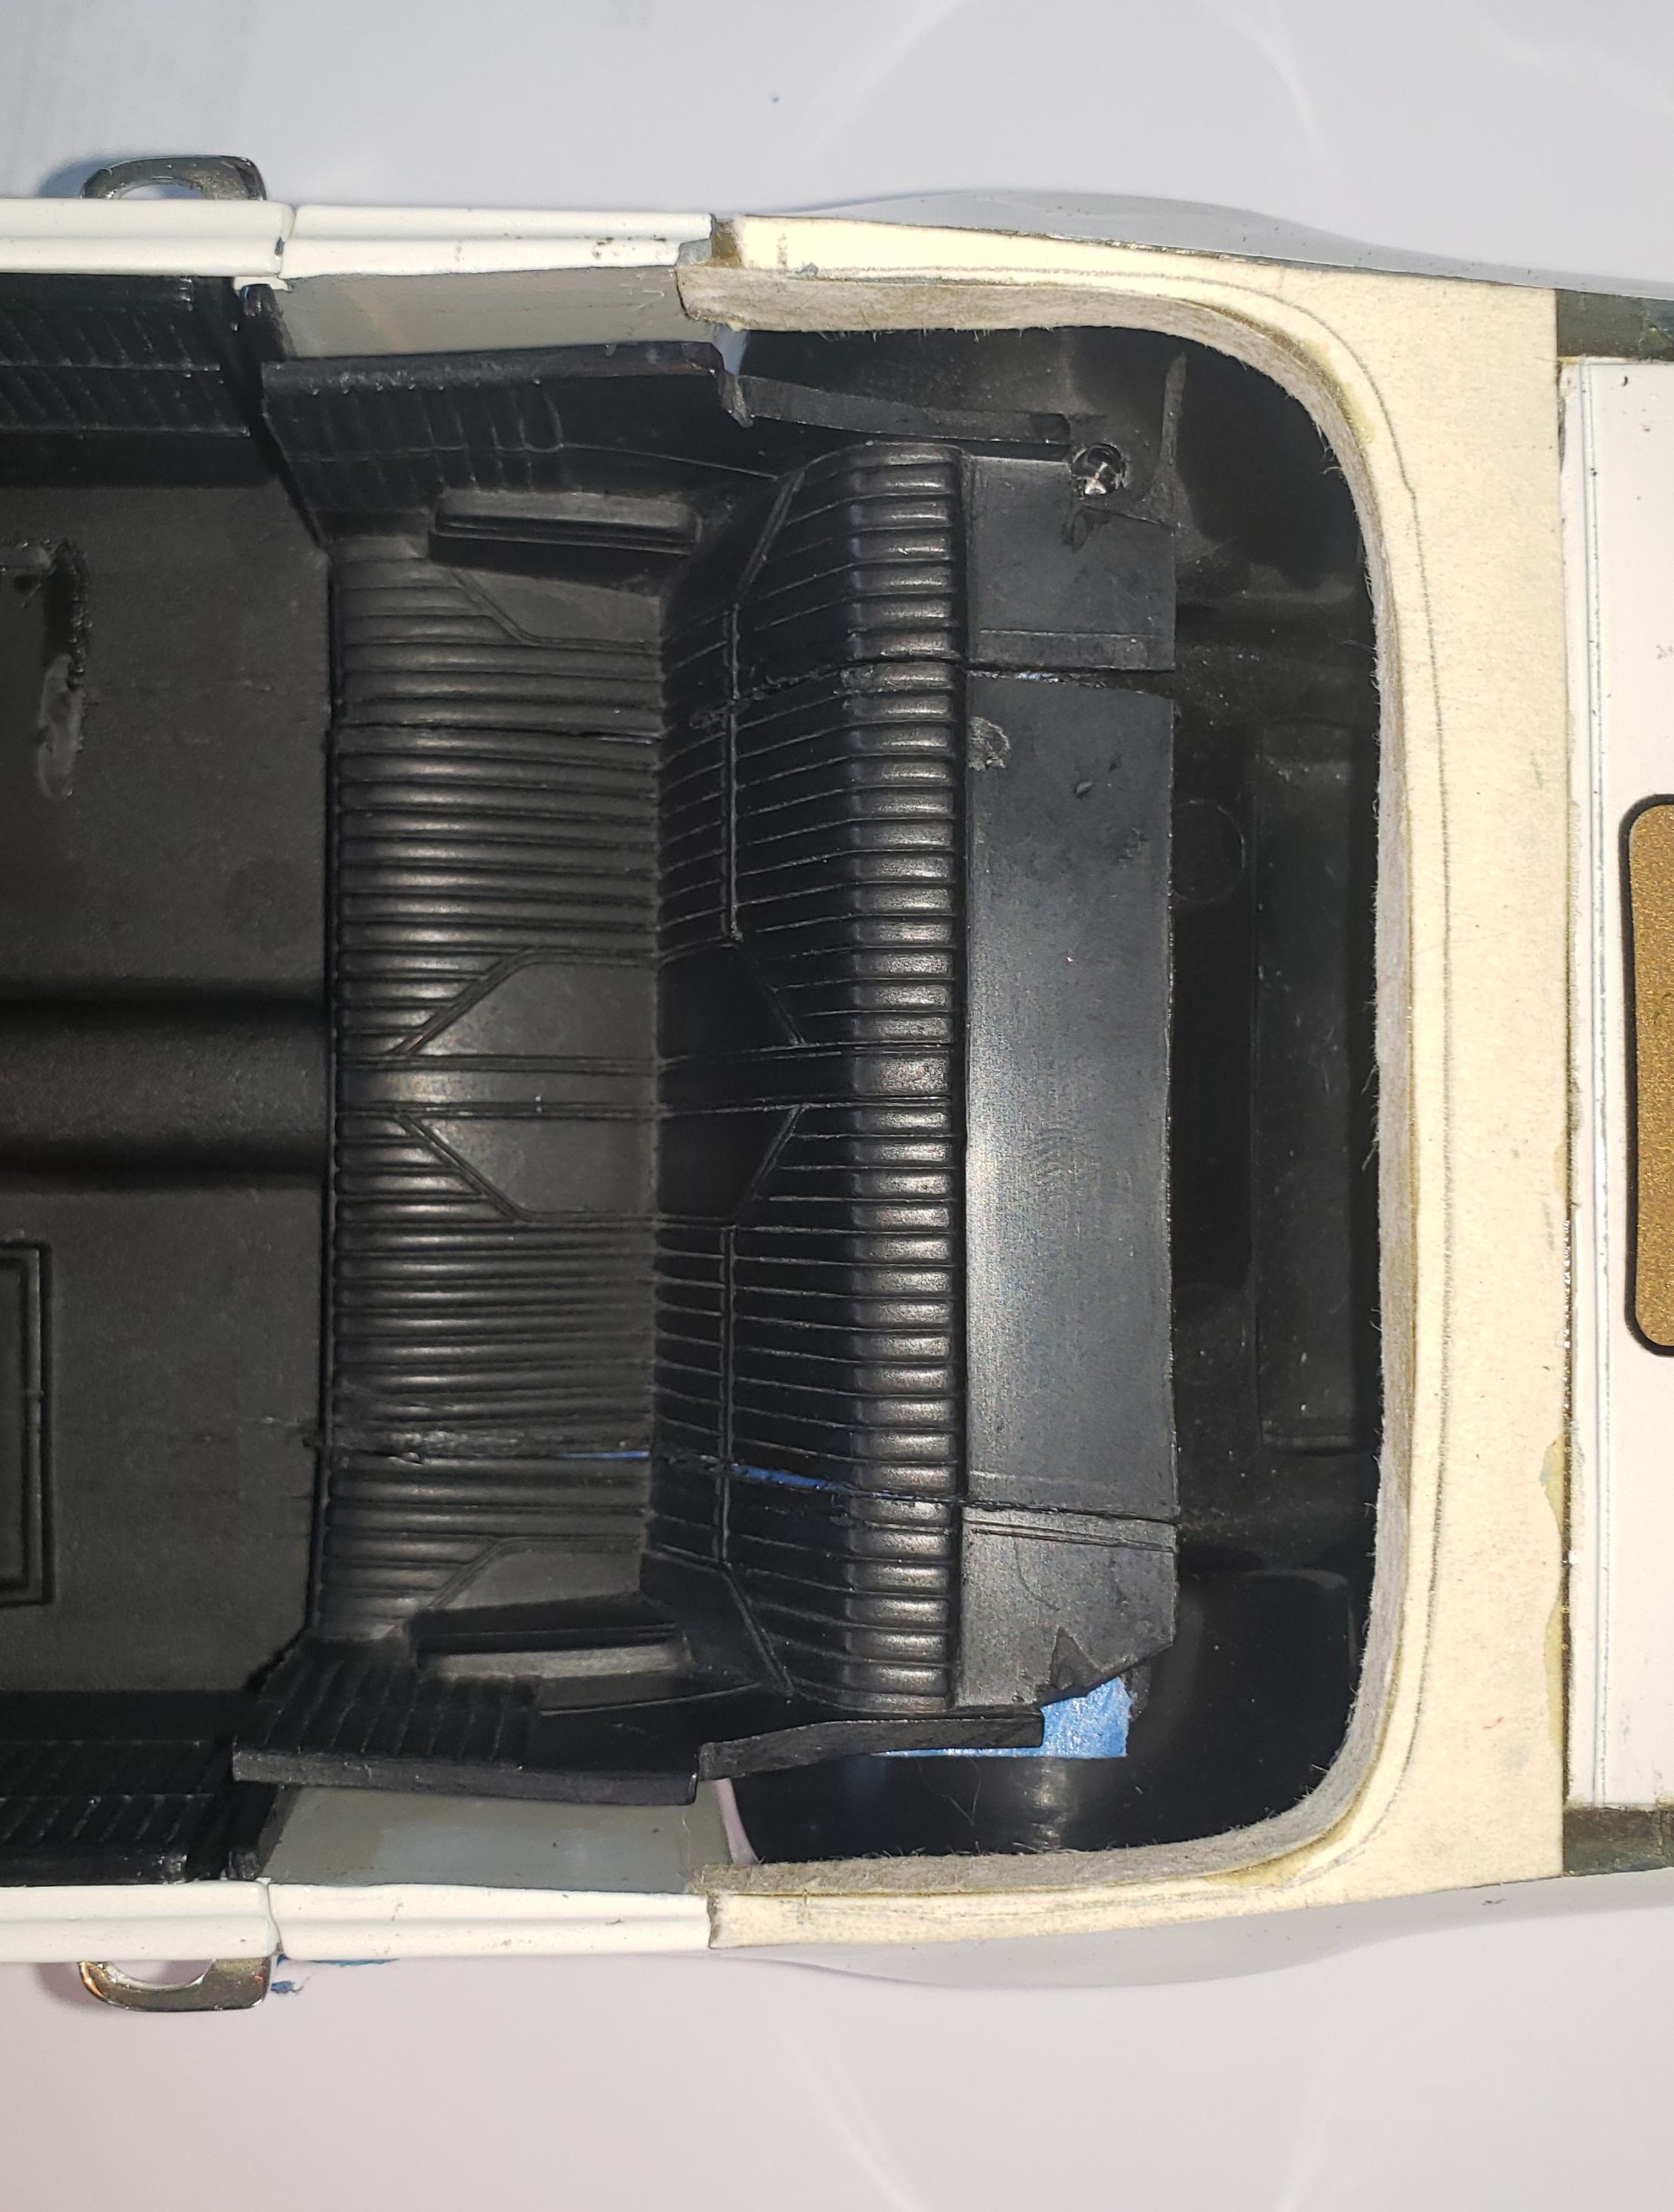
Well had some time this morning so I pulled the H/O project and made the second sets of cuts on the rear seat. Didn't cut as true as the first set put close enough that I can (hopefully) make them work and have an invisible seam.... Taped the pieces together to get an idea how well they fit together as well as setting in the car.... Next step will be to sand the edges of the cuts smooth and then slightly bevel the back side of the edges so I can get a nice heavy seam of superglue on the back of the joint. Stay tuned....
-
1/18 scale '69 Hurst/Olds convertible build
J007KLEIN replied to J007KLEIN's topic in Diecast Corner
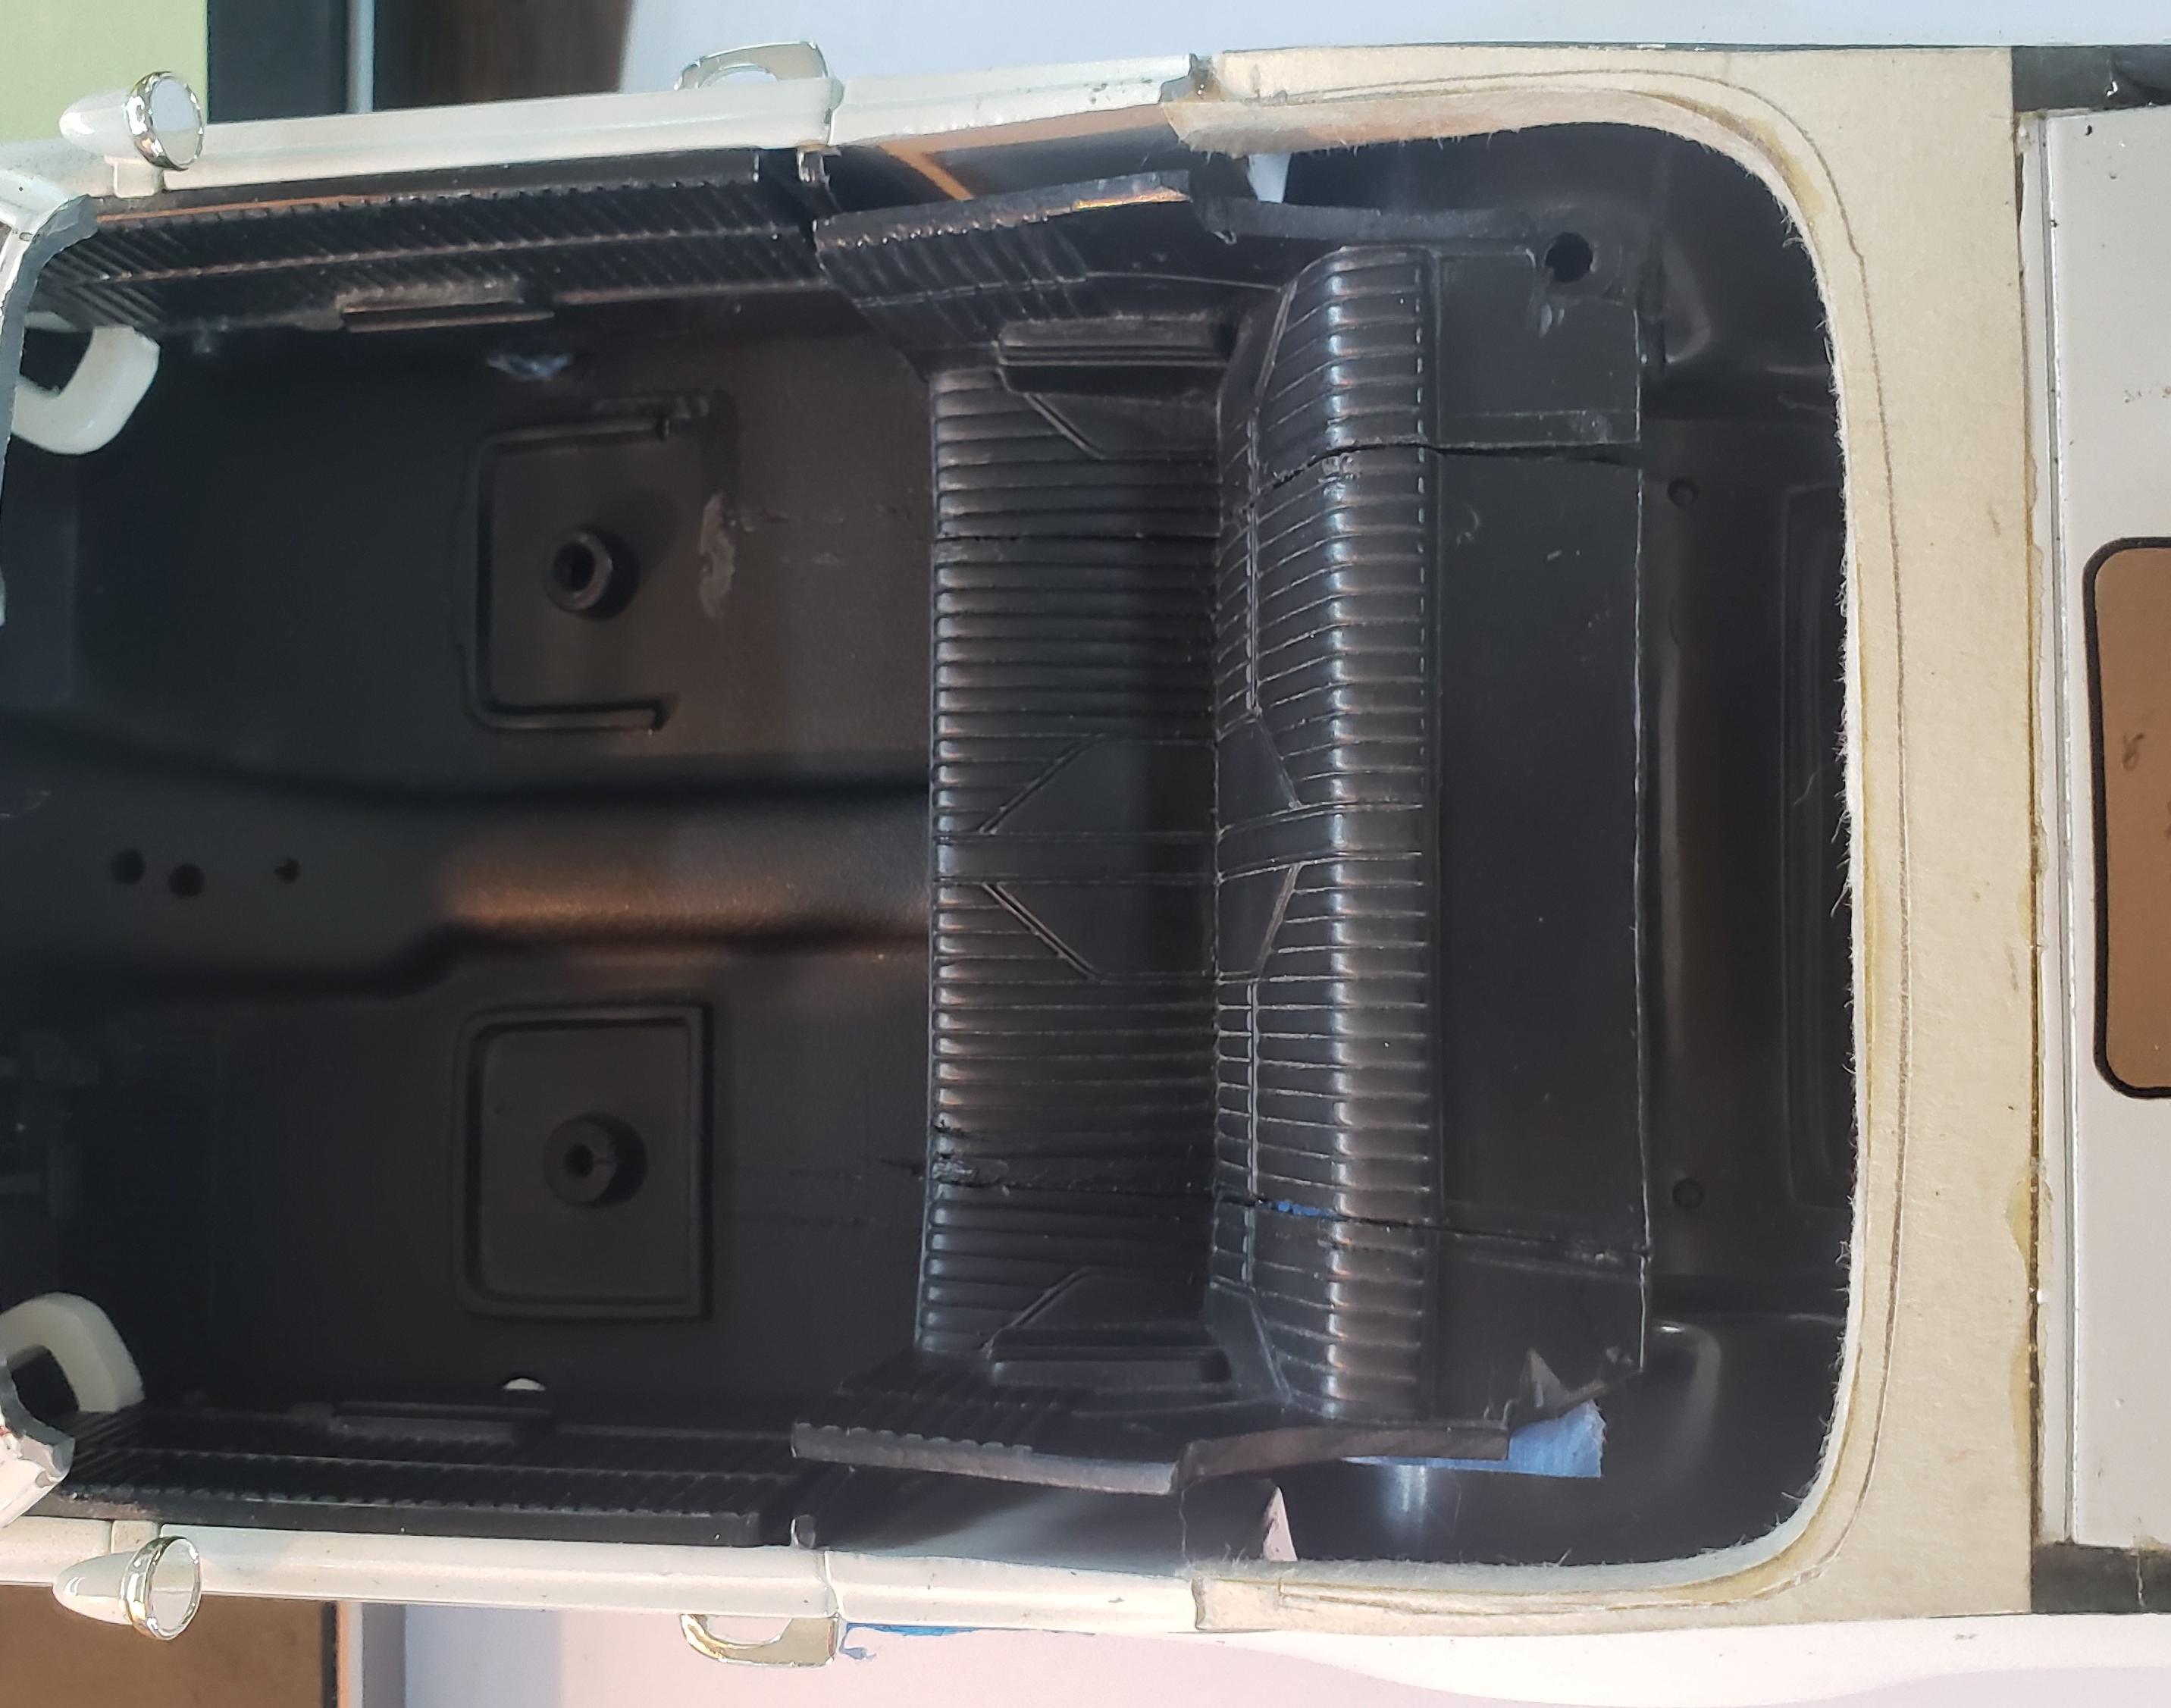
DAMN.... been a couple minutes!!? Well I pulled out the H/O convertible project this morning and dusted it off a bit to see where I left her. Seems it now time to address the rear seat area to narrow the seat cushion and back up enough to allow for the folding top mechanism on either side. I determined two pleats from each side should be about right for the mechanism cavity, so I applied a strip of masking tape to each side of the back seat and cushion and then trimmed it to be two pleats wide. I'll be coming in two pleats from the outside diagonal panel of the seat back and making my joint there to try and hide the seam at the seat pleat. With the tape trimmed to size, I first remove material from the underside of the seat at the floor level so I could easily make my cut along the floor line with my razor knife. I next took my hobby saw and made the vertical cut along the door edges and then proceeded to make the cuts on the rear seat. I used the center seam between the two pleats I was removing as my cut line and then slowly made the cuts thru the seat using my razor saw and my razor knife to finish the cut once my saw bottomed out on the blade top edge. With the seat corners removed, I'll next sand the cut edges up to the pleat seam that I'll be using as my finished edge and then figure out the top mechanism well and arm rest offset. Hopefully it won't be so long until my next installment......
-
1/18 scale '69 Hurst/Olds convertible build
J007KLEIN replied to J007KLEIN's topic in Diecast Corner
WOW, can't believe it's been almost two years since my last update! I decided I best get back after it because my buddy's 55th birthday is the end of October... So today I formed the body opening for the top well and the filler panel between the well and the deck lid. I used an old manila folder to act as my form for the two part Epoxy I'm using as my body material. I plan on soaking the body in water once I've got the shape nailed and then slowly peel away the paper down to the Epoxy. So I trimmed the folder into shape and taped it all together and on the body... then I mixed three packages of the two part epoxy and drizzled it into place... once the epoxy had set up, I pulled away as much of the folder as I could to see how it did... and then put the interior and chassis with the body to see how the convertible top fit. The top is a bit too blunt on the back, so once I have the body tweeked into shape, I'll see about flaring the trailing edge of the top a bit to make it blend a little better. -
1/18 scale '69 Hurst/Olds convertible build
J007KLEIN replied to J007KLEIN's topic in Diecast Corner
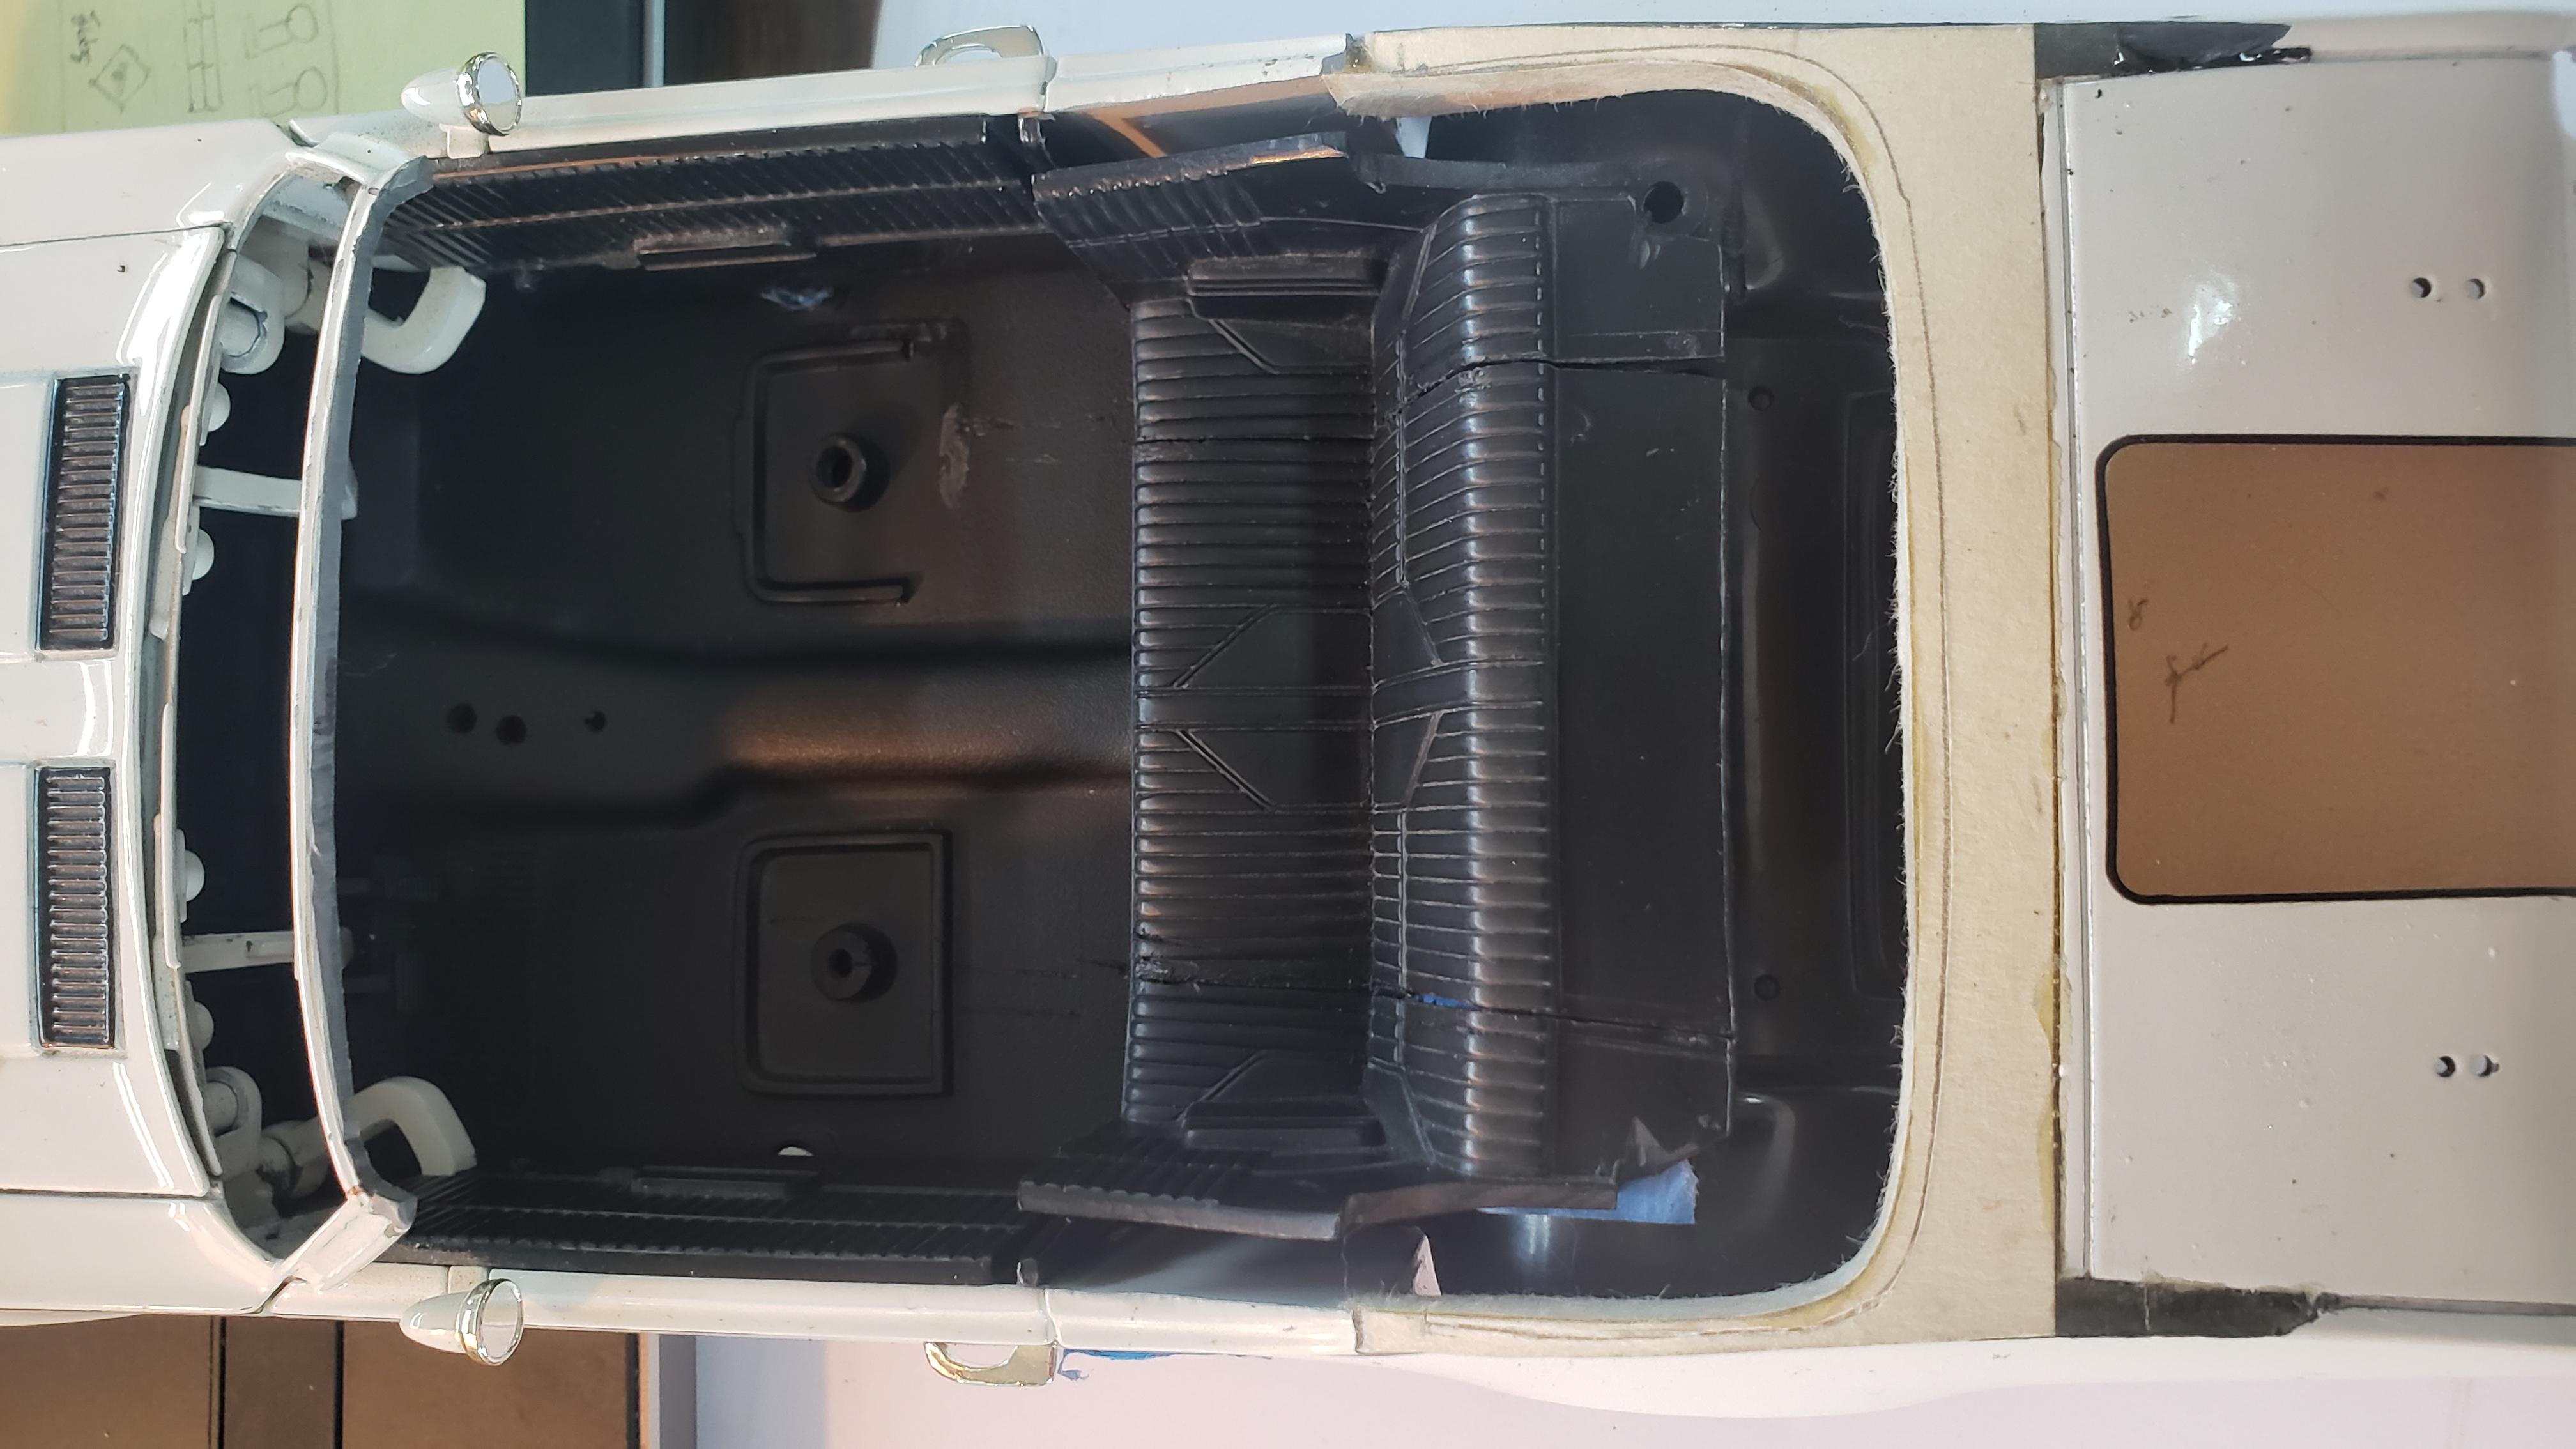
With all the major trimming and cutting complete, I decided to put it all together to get a feel for how it was progressing.... Looks like she's moving in the right direction! Next up on the agenda will be to construct a bridge between the quarters to positively locate the rear of the convertible top not only from side to side but the depth into the body to allow me to form the deck lid filler panel to sweep more gracefully into the back edge of the top to more closely mimic the real H/O convertibles.... I'll also need to recontour the body transition into the rear quarter windows a bit so it blends more smoothly into the quarter panel top return.... I'll also need to narrow up the windshield header to match the with of the convertible top...... then trim down the width of the windshield to match the header as well as trimming away the clear material around the sun visors and forming an opening between them for the top locating tab it fit into. Once the all the top up mods have been made I will turn my attention to the interior modification to replicate the Olds interior. Stay tuned! -
1/18 scale '69 Hurst/Olds convertible build
J007KLEIN replied to J007KLEIN's topic in Diecast Corner
Well finally had some time this weekend to try out an idea I had while recently doing some sheetmetal work at the house (creating a pair of gable doors in the corrugated steel siding on my garage). I bought a pair of duck-billed vice grips... to help flatten the ridges and I thought that they might be just the thing for lowering the leading edge of the deck lid in line with the re-contoured quarter panels on the H/O build.... TA DA..... I think now I may be coming into the final stretch! Looks like I may need to shorten the top length a little, create the filler panel between the deck lid and the top well as well as the top well itself and narrow the windshield header a bit to match the top. I also need to get creative for making the molding that follows the quarter panel profile at the beltline and figure out how retain/recreate the H/O & Olds emblems & decals. A lot of smaller things yet to do but I think the hard part is behind me! Until next time.... -
1/18 scale '69 Hurst/Olds convertible build
J007KLEIN replied to J007KLEIN's topic in Diecast Corner
Had some feedback from traditional (Cliff) about how to re-contour the decklid using a heat gun to get the material hot and a bit pliable, then use some flat blade pliers to reform the leading edge to match the quarter panel profile. I'll document the process for others to follow should they try their hand at customizing diecasts in the future...... Wish me luck! -
Metalworking Diecast Bodies
J007KLEIN replied to J007KLEIN's topic in Model Building Questions and Answers
Art, Not doing anything TOO drastic, just need to lower the leading edge of the decklid about 1/16"-3/32" on the 1/18 '69 H/O I'm converting into a convertible to better follow the new quarter panel profile. Here's the link to my build... http://www.modelcarsmag.com/forums/topic/110996-118-scale-69-hurstolds-convertible-build/ Thanks everyone for your input! -
Looking for advise, tips, tricks, etc on re-contouring the deck lid on my '69 H/O convertible build. How malleable is the zinc(?) body? Will it bend a bit before fracturing? I am amazed by the diecast cars you guys build and hope there's someone who knows their way around a diecast body who will share their knowledge and can keep me out of trouble and on point with my project. My sincere thanks in advance for you assistance!!!
-
1/18 scale '69 Hurst/Olds convertible build
J007KLEIN replied to J007KLEIN's topic in Diecast Corner
Thanks Lance. I think the hardest task is going to be getting the deck lid reshaped without breaking the material... have no idea how giving the zinc is going to be?? Was hoping Manny or one of the other members with experience reworking the diecast bodies would offer some tips or tricks on how I should approach that feat..... Wish me luck! -
1/18 scale '69 Hurst/Olds convertible build
J007KLEIN replied to J007KLEIN's topic in Diecast Corner
Finally had a few minutes this afternoon to work a bit on the HO. Laid out the approximate profile on the rear quarters with some 1/16" fine line, masked off the surrounding area and then broke out the motor tool with the cutoff wheel. I initially made my cut along both sides of the trunk gutter to maintain the panel size then slowly trimmed the top edge of the quarters along my layout line.... I think I'm slowly getting there! Need to trim the interior package tray area a bit on the passenger side to drop the chrome trim down into the body like it is on the driver side and then figure out how to slowly roll the leading edge of the deck lid to match the contour of the quarters. -
WOW.... amazing work!! Thanks for sharing!
-
1/18 scale '69 Hurst/Olds convertible build
J007KLEIN replied to J007KLEIN's topic in Diecast Corner
Yeah Dan, the next item on the TO DO list is to get the quarter panel profile correct, then re-contour the leading edge of the deck lid to match the quarter and then tackle the trunk filler panel! Manny, any tips on re-contouring the deck lid? How malleable is the zinc(?) body and will it bend a bit before fracturing? Thanks guys! -
1/18 scale '69 Hurst/Olds convertible build
J007KLEIN replied to J007KLEIN's topic in Diecast Corner
Had some time on Sunday to work a bit on the convertible. Trimmed a little more off the quarter panel and interior side panels to get the back end of the top lower onto the body. Getting it pretty close....... Now to reshape the top of the quarter panel a little and drop the leading edge of the deck lip to match before tackling the trunk filler panel.