.jpg.54ecf0d4a006234146ea24c7f6762038.jpg)
redneckrigger
-
Posts
1,579 -
Joined
-
Last visited
5 Followers


.thumb.png.e64ca4fead948adbdf6a111229b6cf2f.png)
Recent Profile Visitors
8,514 profile views


redneckrigger's Achievements
MCM Ohana (6/6)
-
.thumb.jpg.4bca3333e1da4027c381d8d56a564ec1.jpg) Thank you all! I’m finally finding a bit of dexterity coming back, and had a good night at the bench last night. The most importing I can take away from this is if something doesn’t feel right, get checked out. Life is too fragile and precious to let our pride and macho attitude get in the way. Building stuff is great therapy, for the dexterity and the mind. But none of that works well when you’re looking at the dirt side of the grass! Will have some build updates pretty soon!
Thank you all! I’m finally finding a bit of dexterity coming back, and had a good night at the bench last night. The most importing I can take away from this is if something doesn’t feel right, get checked out. Life is too fragile and precious to let our pride and macho attitude get in the way. Building stuff is great therapy, for the dexterity and the mind. But none of that works well when you’re looking at the dirt side of the grass! Will have some build updates pretty soon! -
To all who have given me good thoughts, I thank you. Yeah, this was a wake up call. The docs seem to have a good plan going forward. The aim is to try to keep the little ones from becoming a big stroke. So, different meds, salt free diet, (yuck), other dietary changes, weight loss, and it should be good. I am giving it a good go at it as the alternative sucks! I find my right handed self having some dexterity issues with fine tasks, (left side lower cerebellum damage results in right side deficits), as well as the balance issues. I can get out to my deerstand, but trying to fabricate and assemble small parts is proving to be a bit of a challenge. But, this too shall get better! Just put some time in tonight taking all of the winch drums out of the upper to start making the cable guards for them. It was ............................ok. Will I be setting time records? Not of the fast variety! But, this hobby is not about completing a build at least for me. It is about the joy of being able to partake in the build. And that joy is still being fulfilled. More updates to come soon! Thank you ALL for the good thoughts.
-
Thank you.....................now just have to get my dexterity with tiny pieces back in line! But this too shall transpire.
-
Thanks Gary….. this too shall pass, but it is just further proof that we all must be vigilant about our health!
-
Got out of hospital yesterday. Feeling okay but do have a deficit with right side fine motor function, strength and balance. But, can still function not much differently than before. Just have to watch my balance on stairs and uneven ground. No big deal there as I’ve had to do that anyways due to my back issues. So, new meds, and life’s adventure continues. Old age is not for the timid or faint of heart. Back to the modeling bench tonight…..after I get out of the woods!
-
Jamie Rahmoeller…..MOLUMINUM
redneckrigger replied to redneckrigger's topic in General Automotive Talk (Trucks and Cars)
You can find updates at Jamie’s Journey on Facebook -
Yes sir. First time someone has witnessed one of these with me. Happy he was there as I probably would have blown this one off as well. This too shall pass !
-
Have been looking for an original ‘63 Pontiac Tempest hardtop for years. Saw a couple on eBay at astronomical prices well into three figures. Figured I’d never find one. Then was just perusing Facebook Marketplace about two weeks ago and there it was. Unbuilt, all original, parts still on trees, decals, original box, everything except one original tire that wasn’t there. Holy cow…..and for less than a new Round 2 kit is going for. It has a new home now! Wow!
- 39,114 replies
-
- 5
-

-
- johan
- glue bombs
- (and 1 more)
-
Good question…….. not quite sure what’s gonna transpire right now. Have been having headaches so doc sent me for CT scan which didn’t show anything for headaches but showed I had previously had two small strokes that I had no idea had happened. Then I had another one yesterday out hunting and my hunting buddy witnessed it. So I am still in the people repair shop getting diagnostics run on the old man brain. Hoping for no long term deficit and that they can prevent the little ones from becoming big ones. Hoping to be able to get back to the crane and building in general but that is a point in question right now! Sure would like to come out there!
-
That is a superb replica Charlie! A neighbor has a junk one in his yard and looking at it, you have hit it out of the park! Your work continues to amaze sir!
-
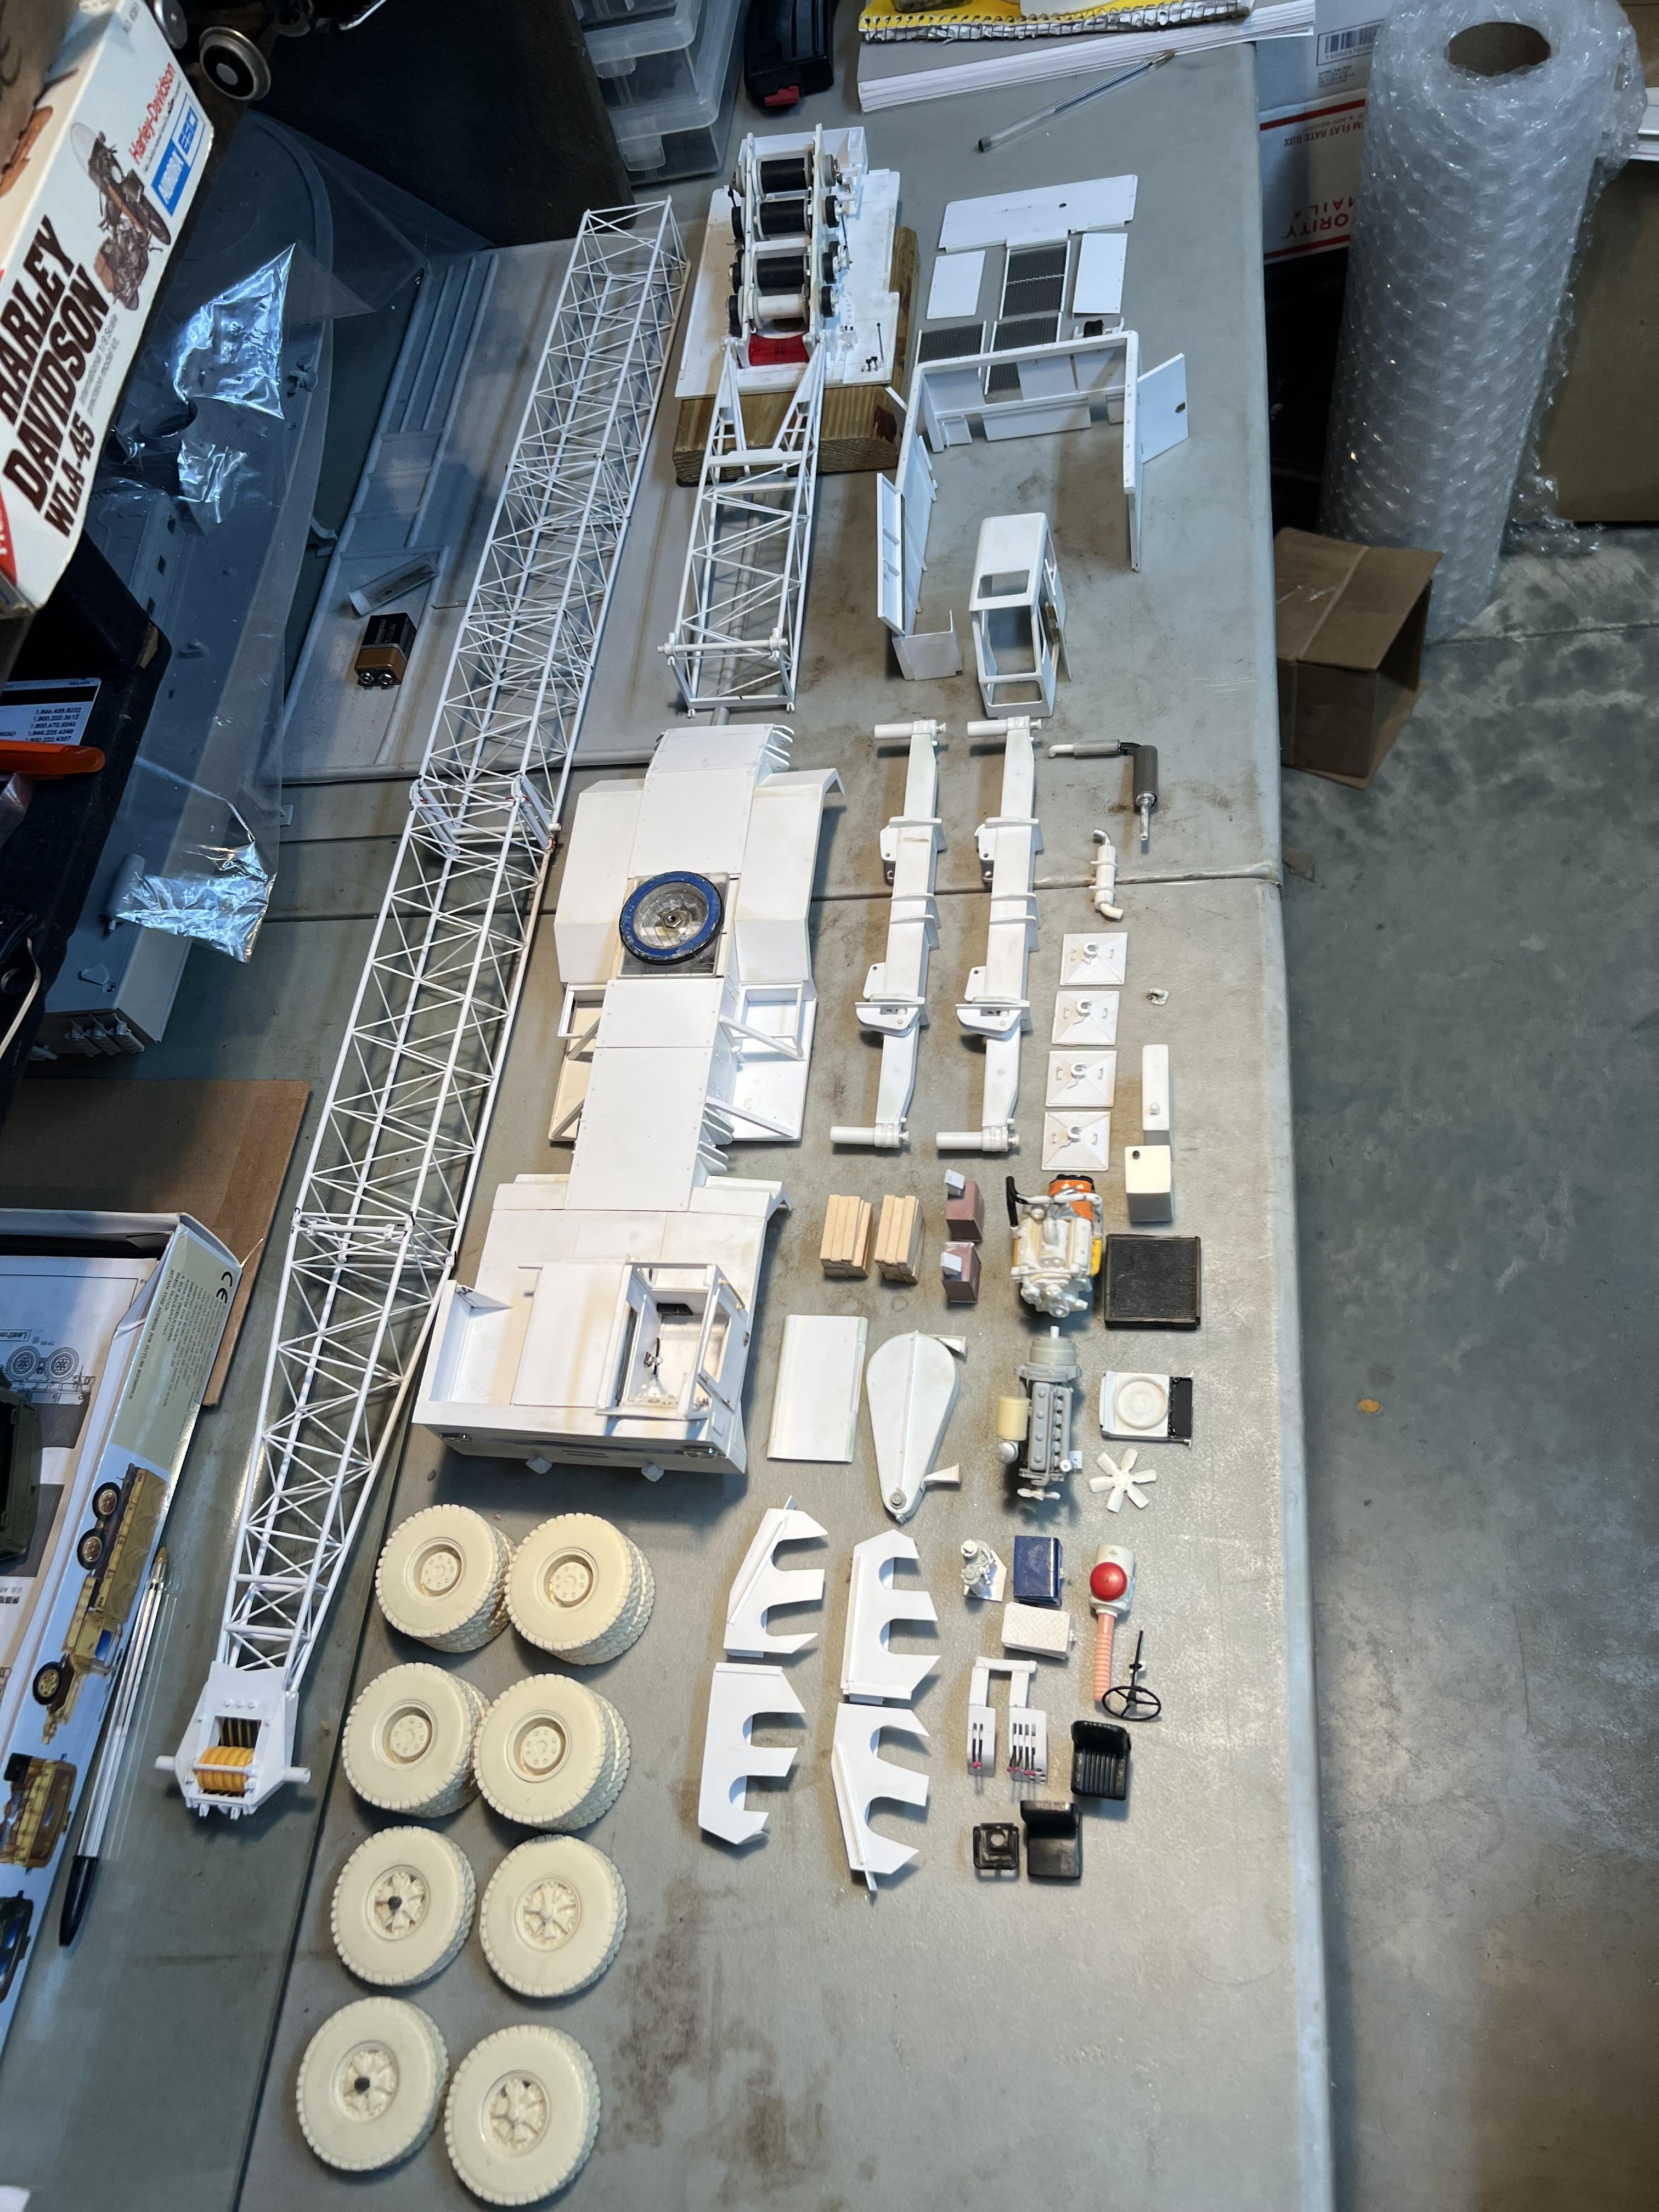
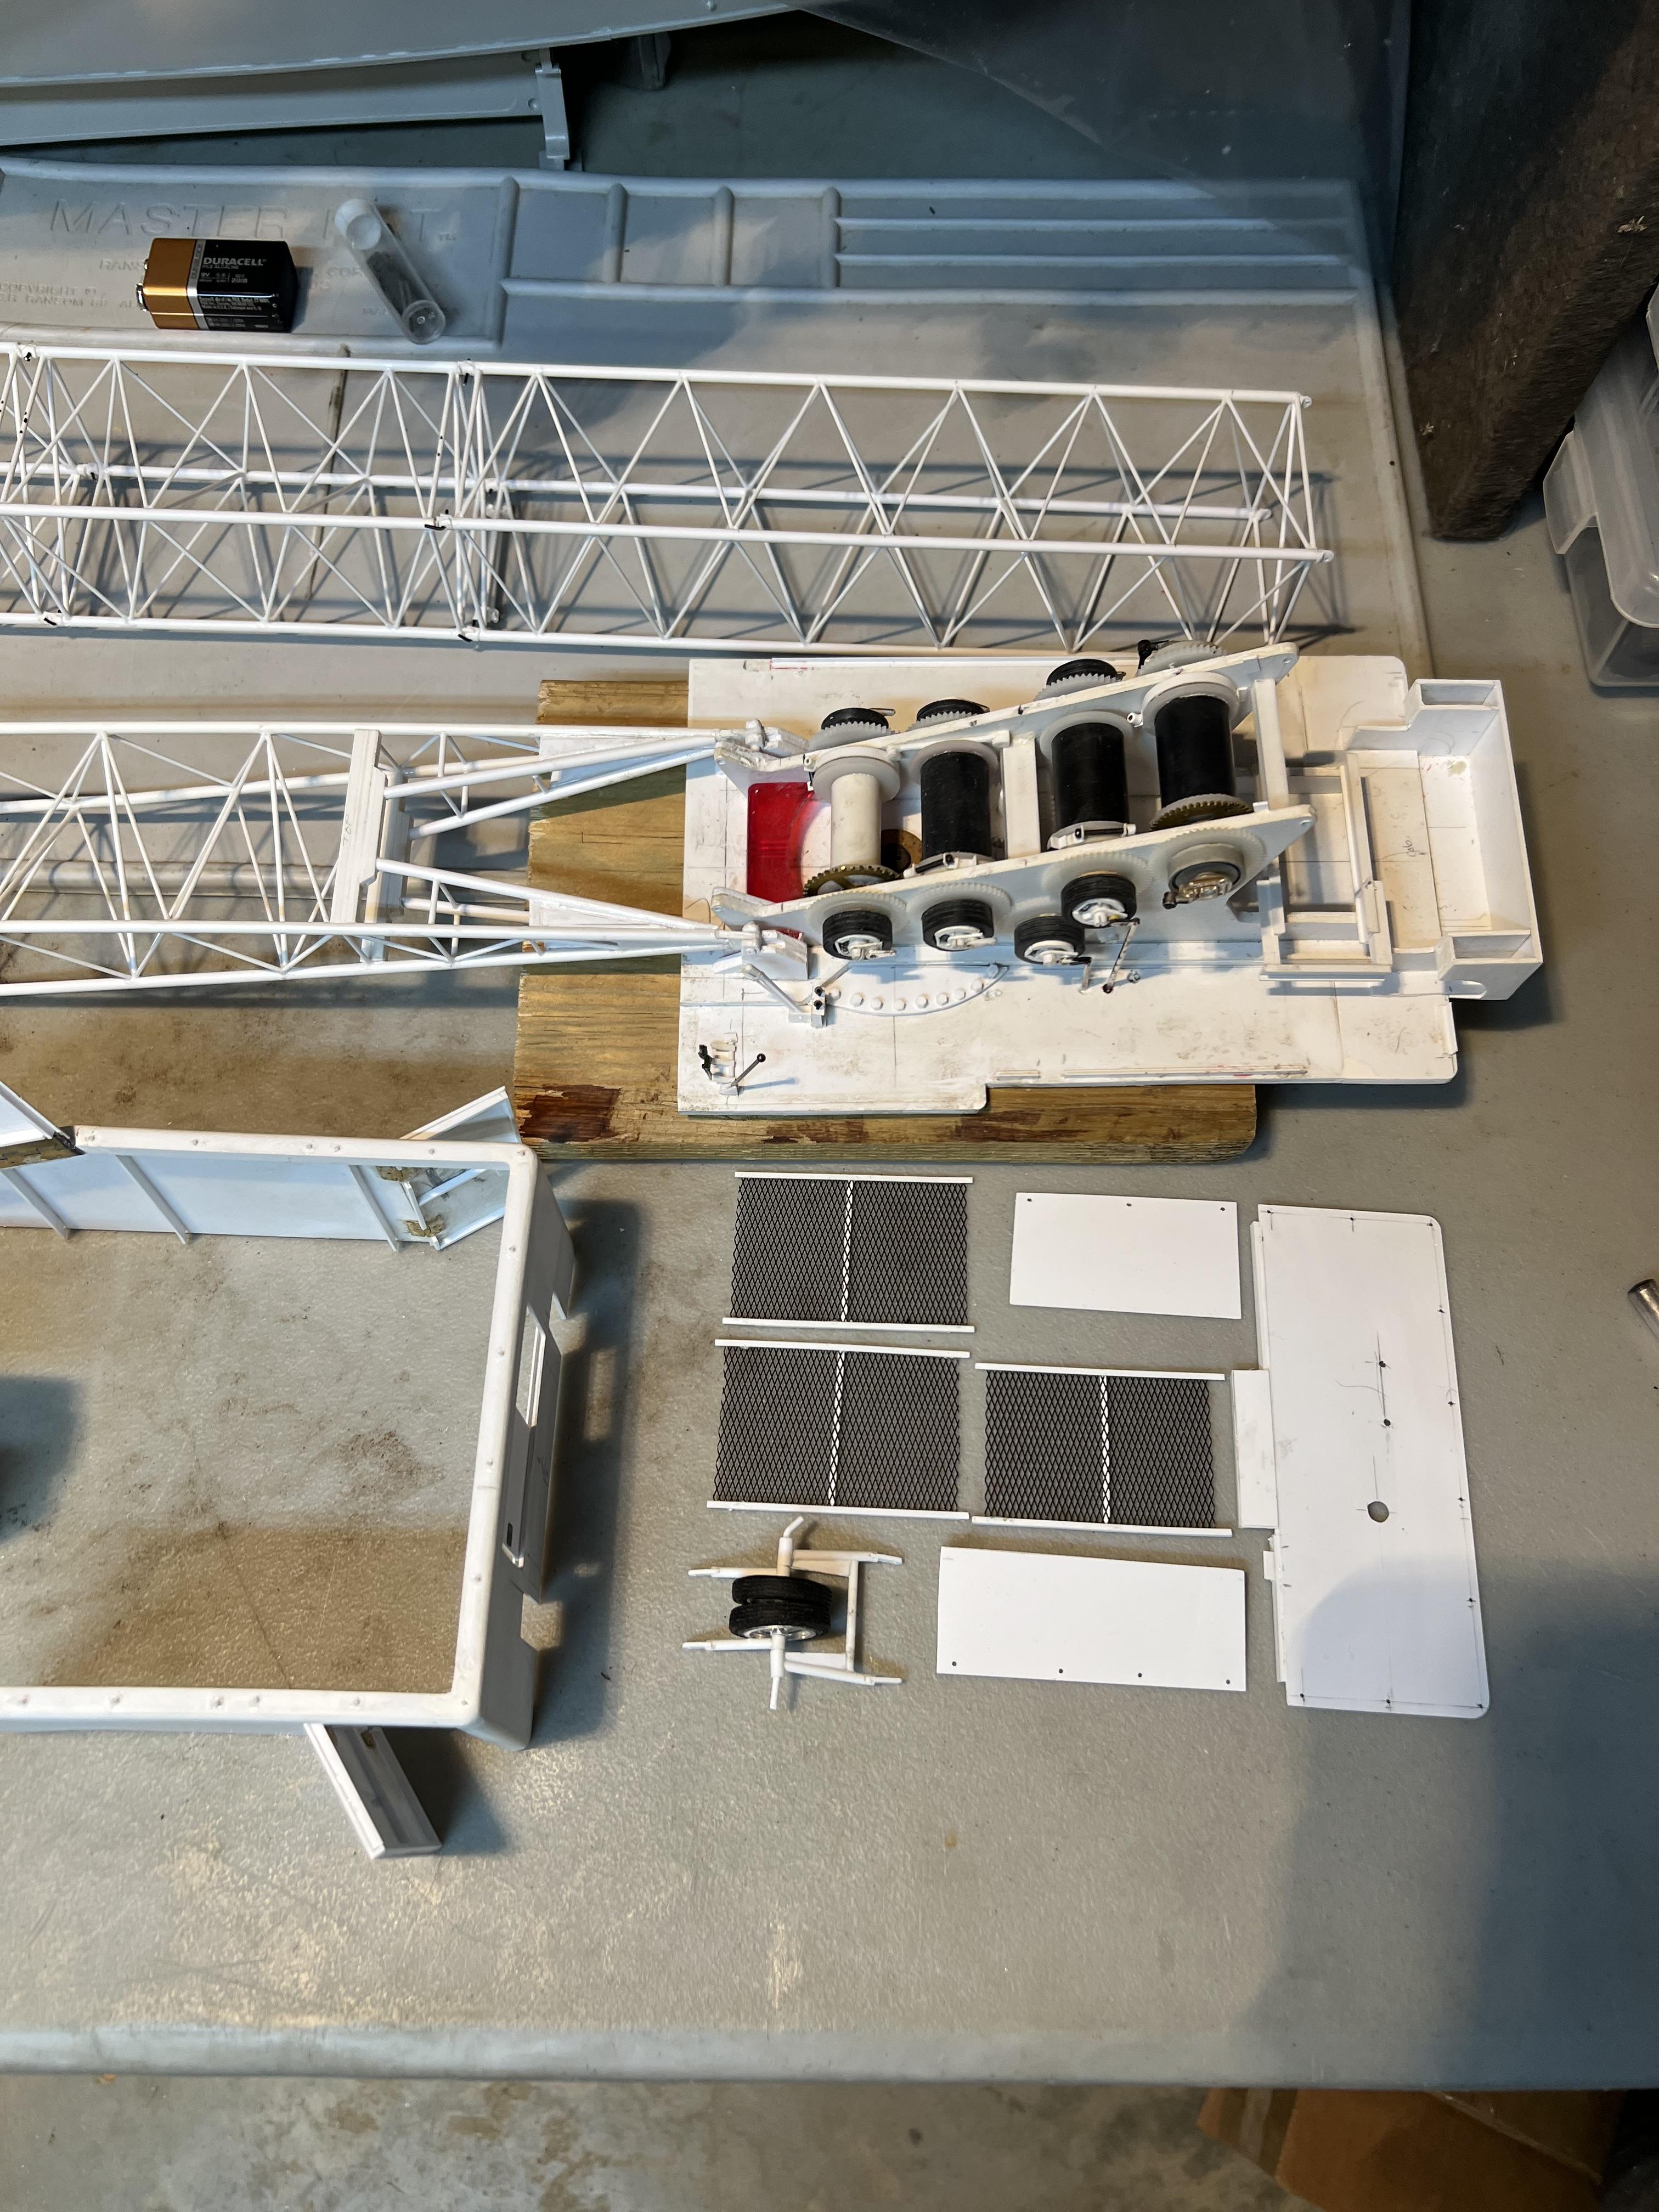
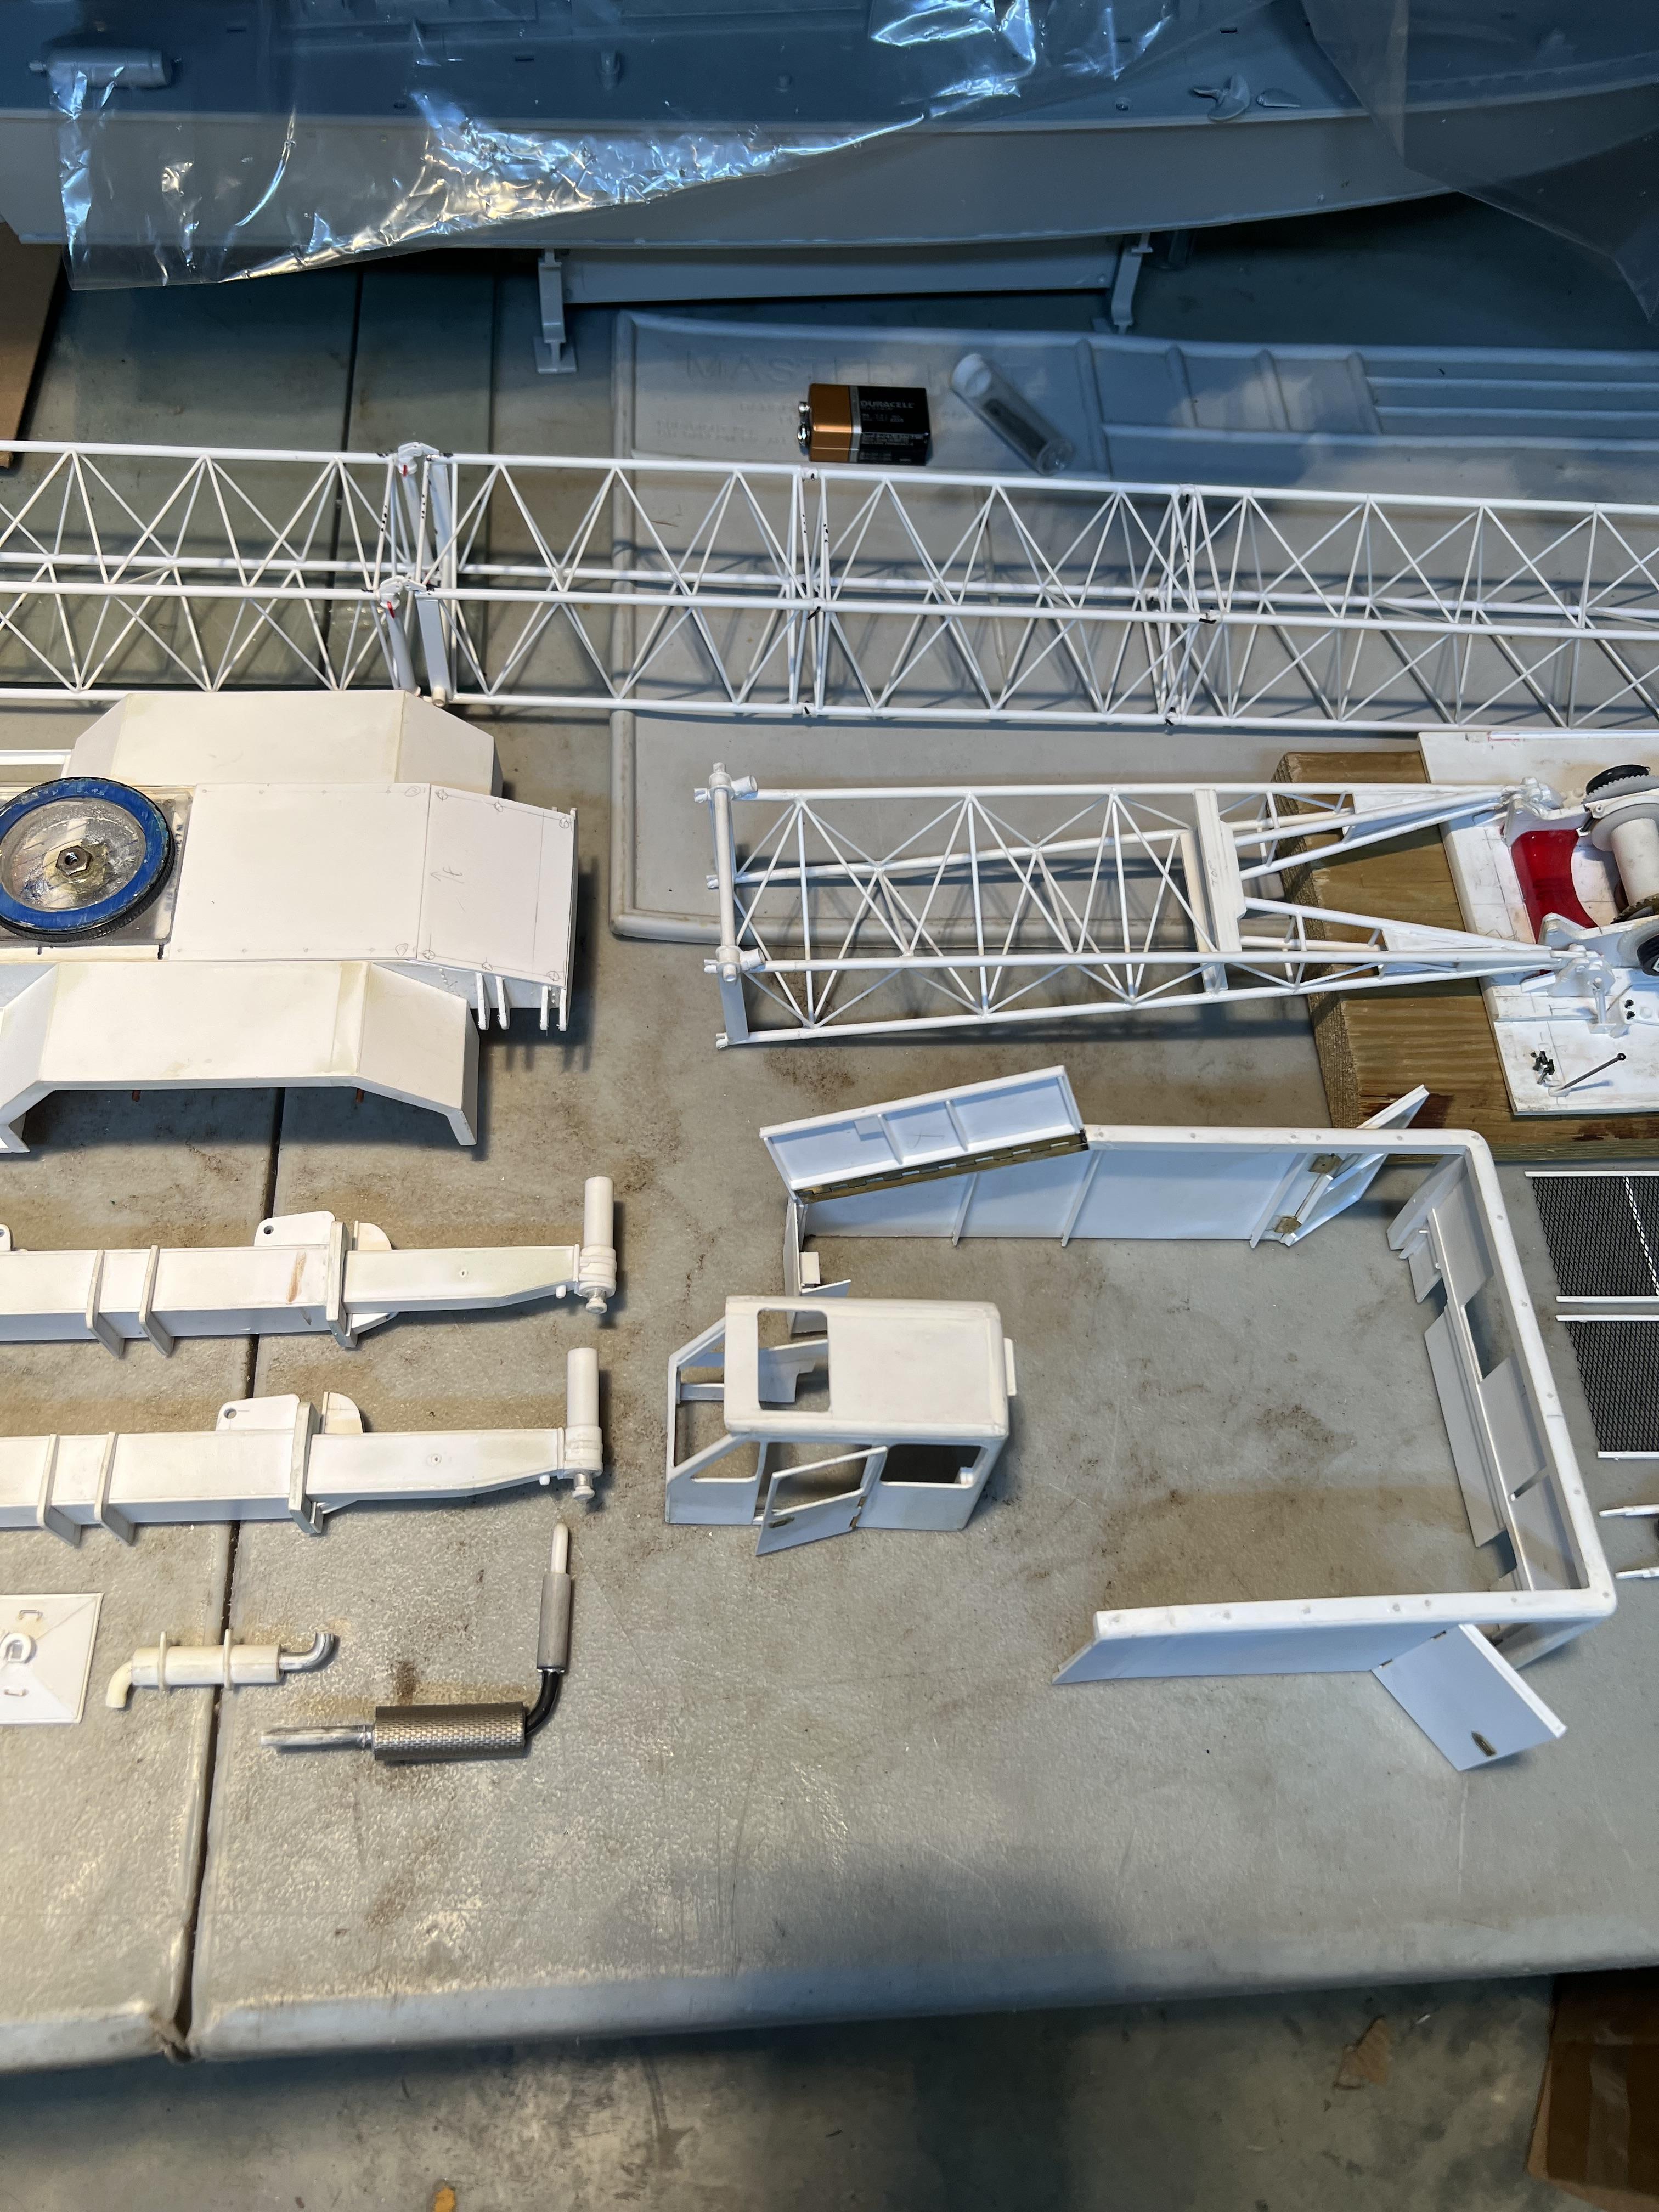
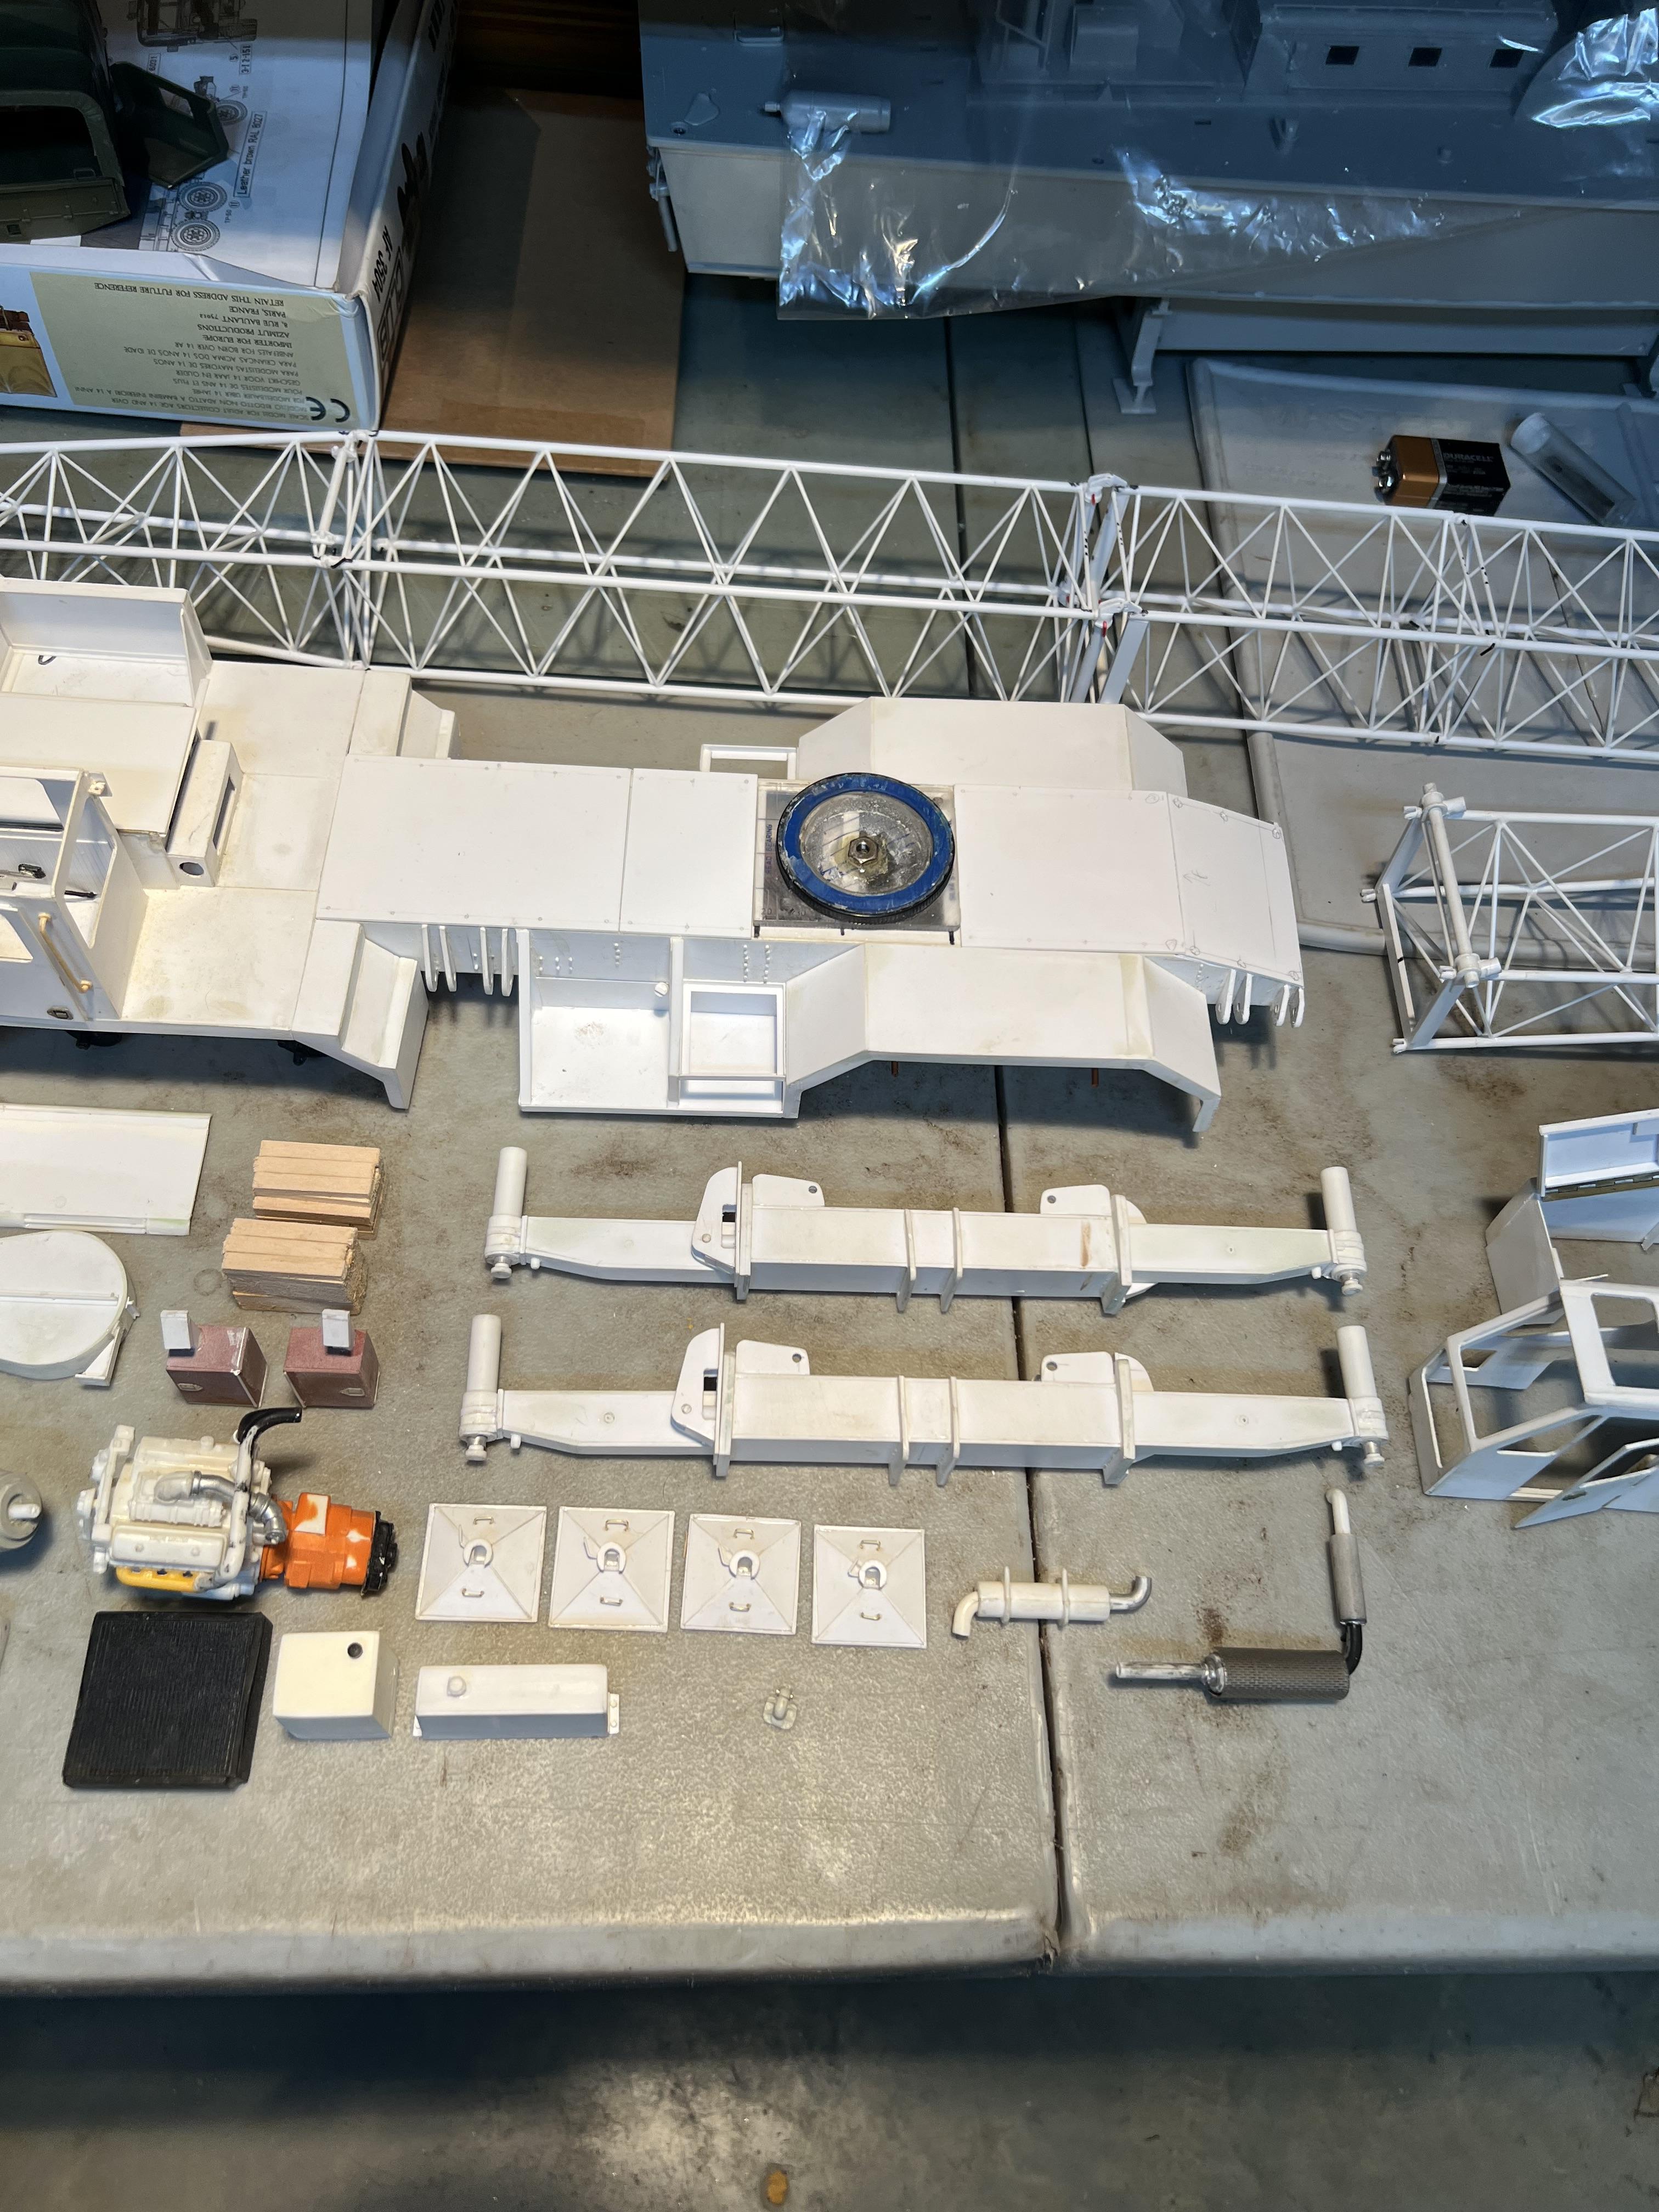
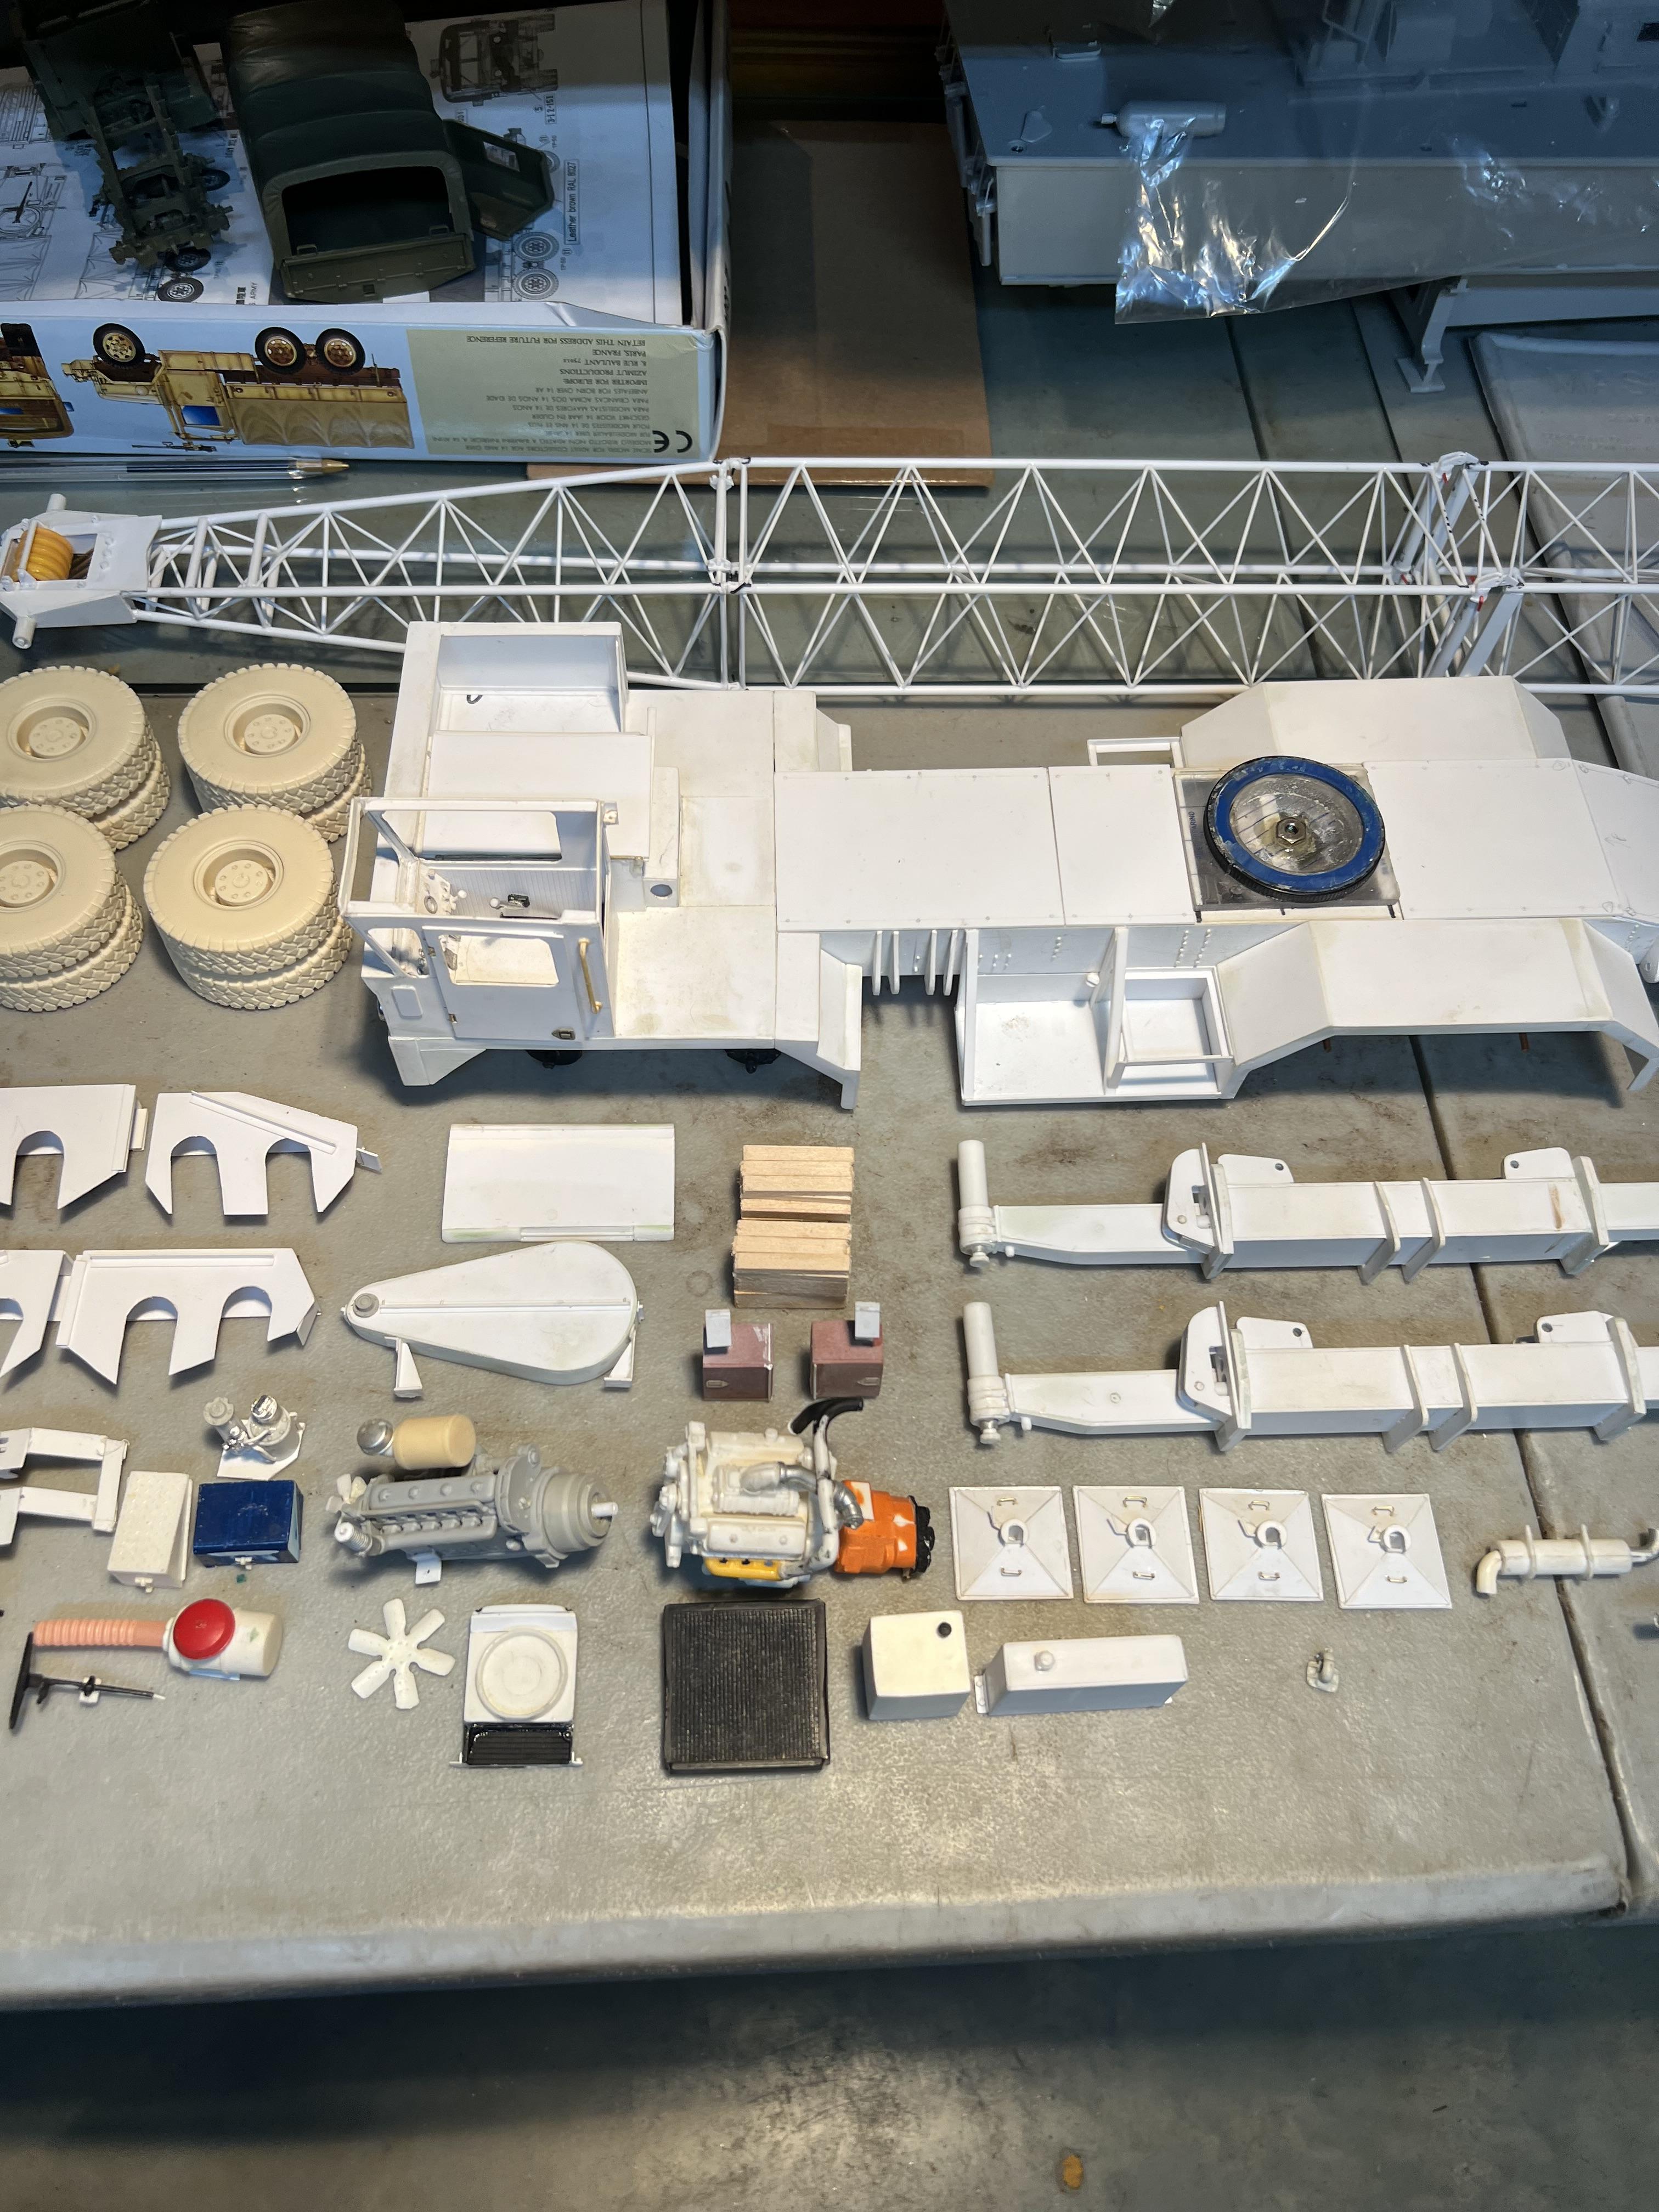
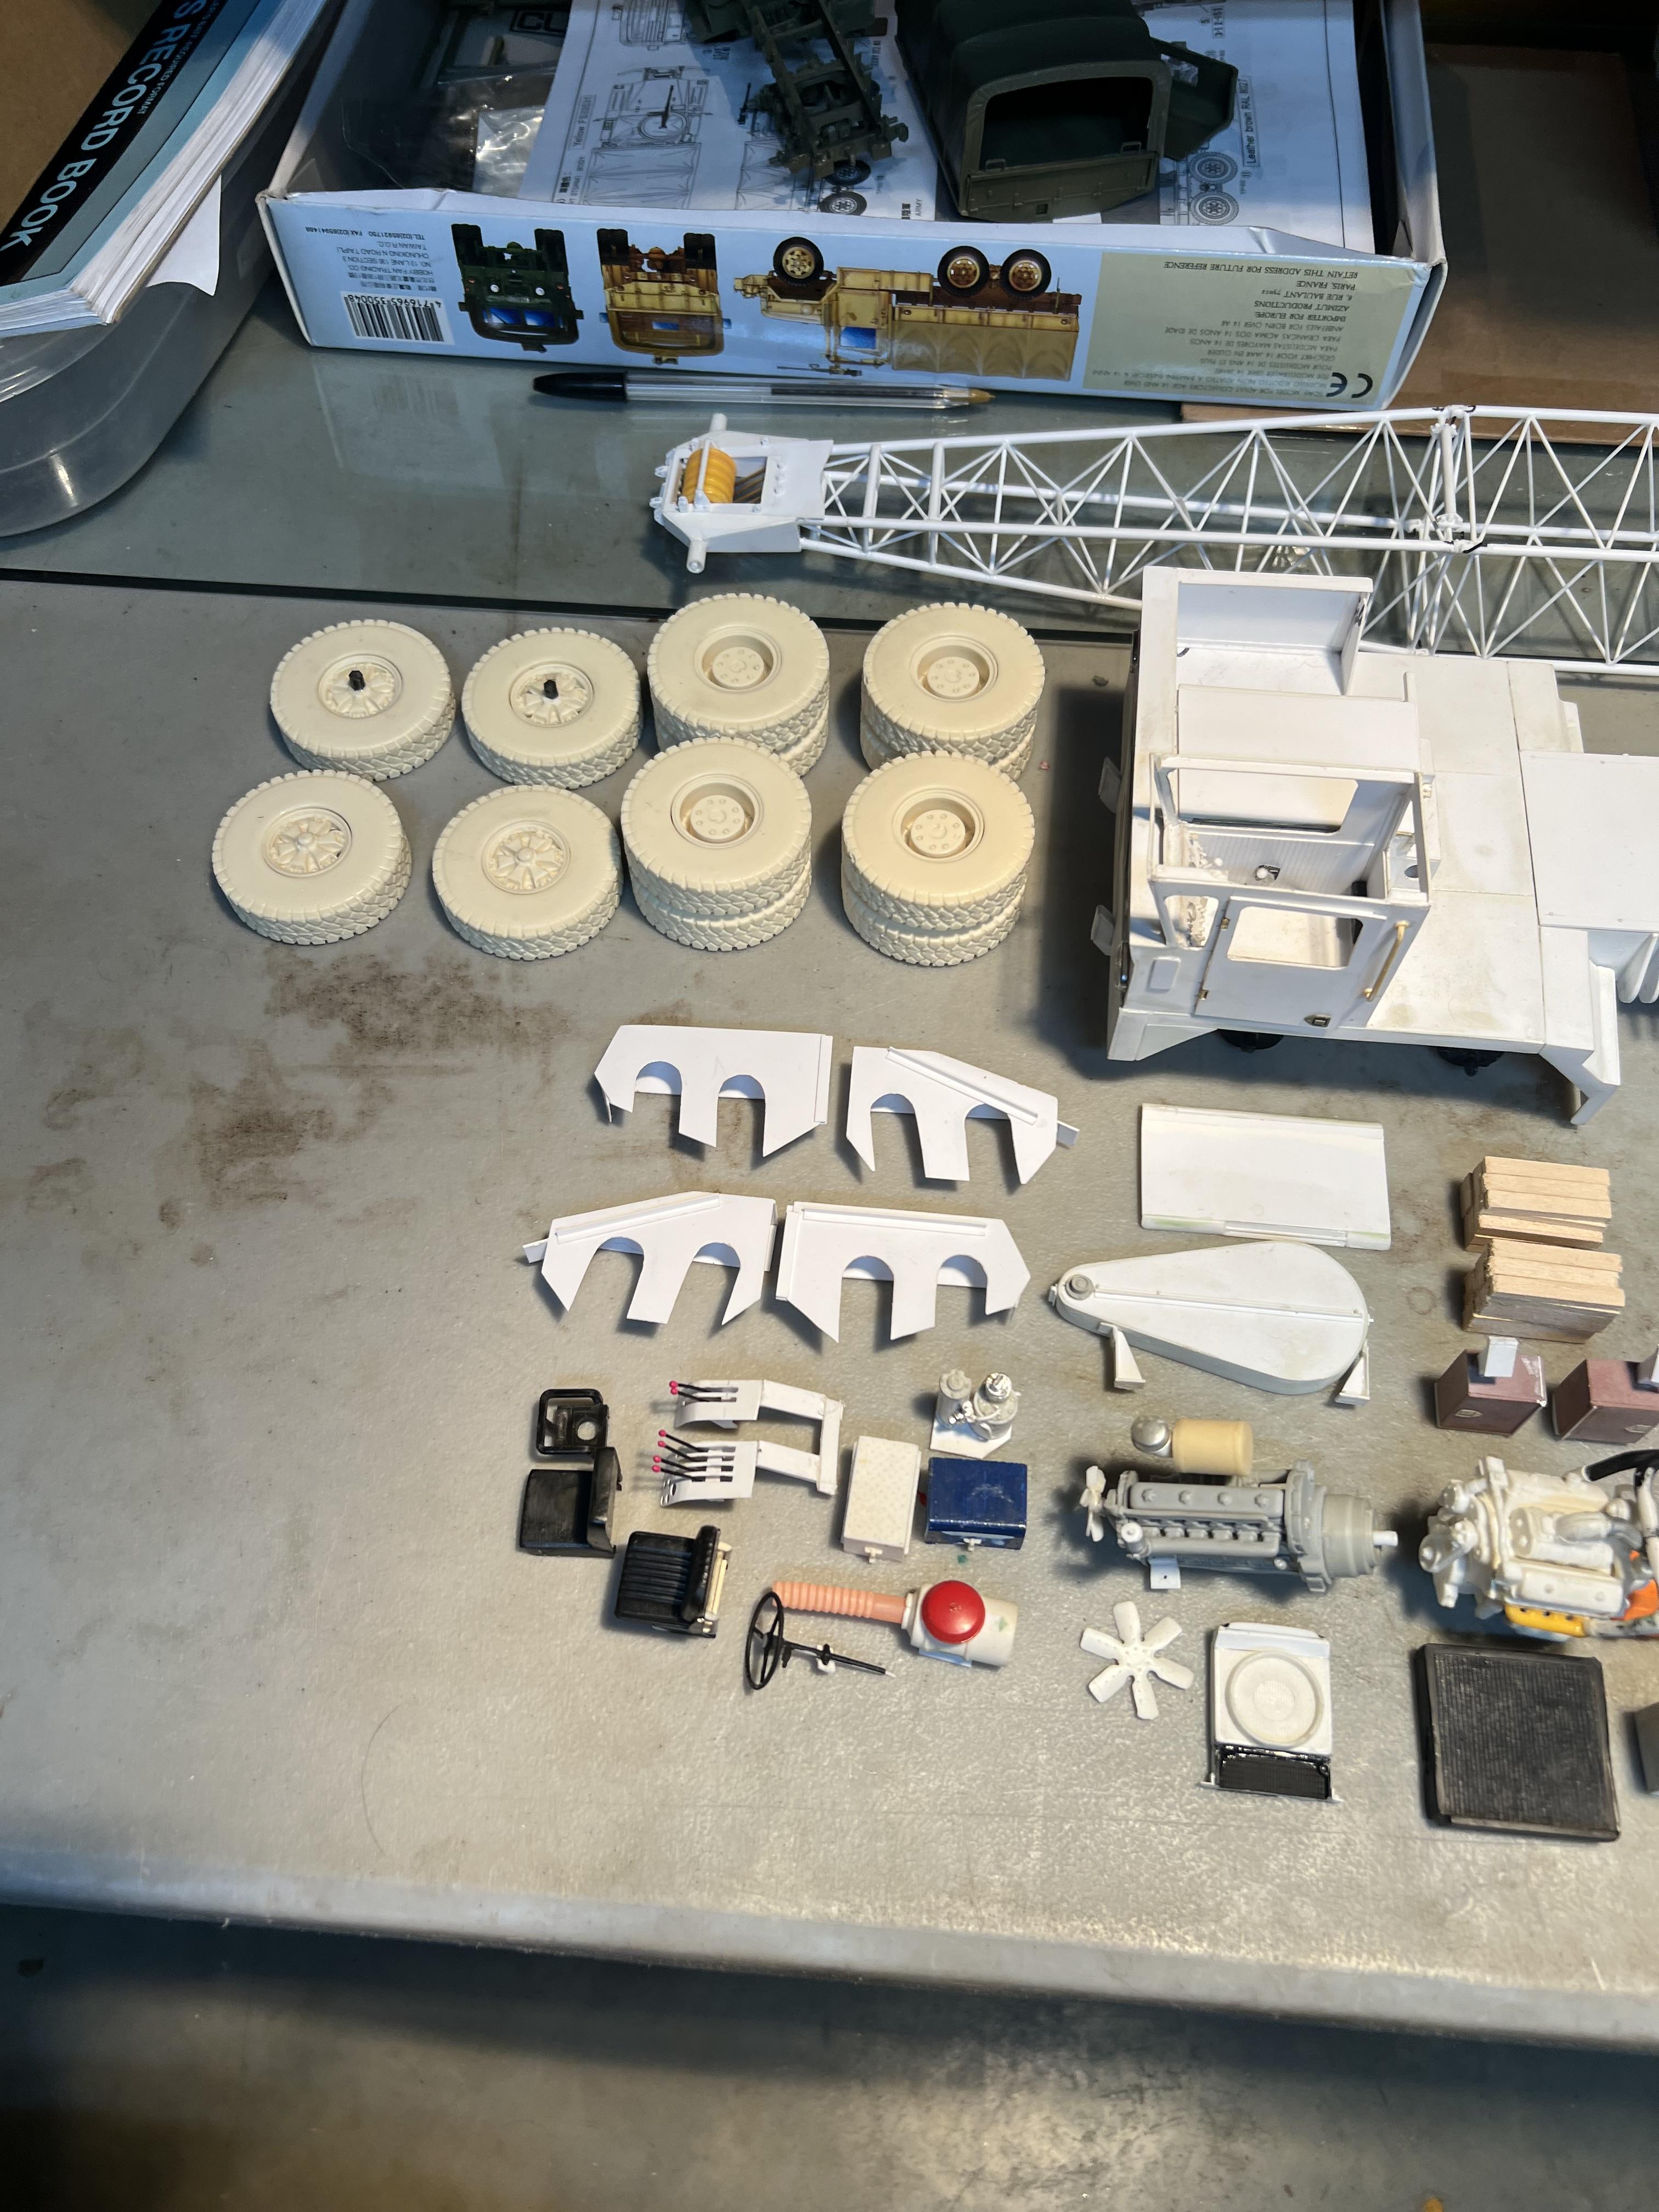
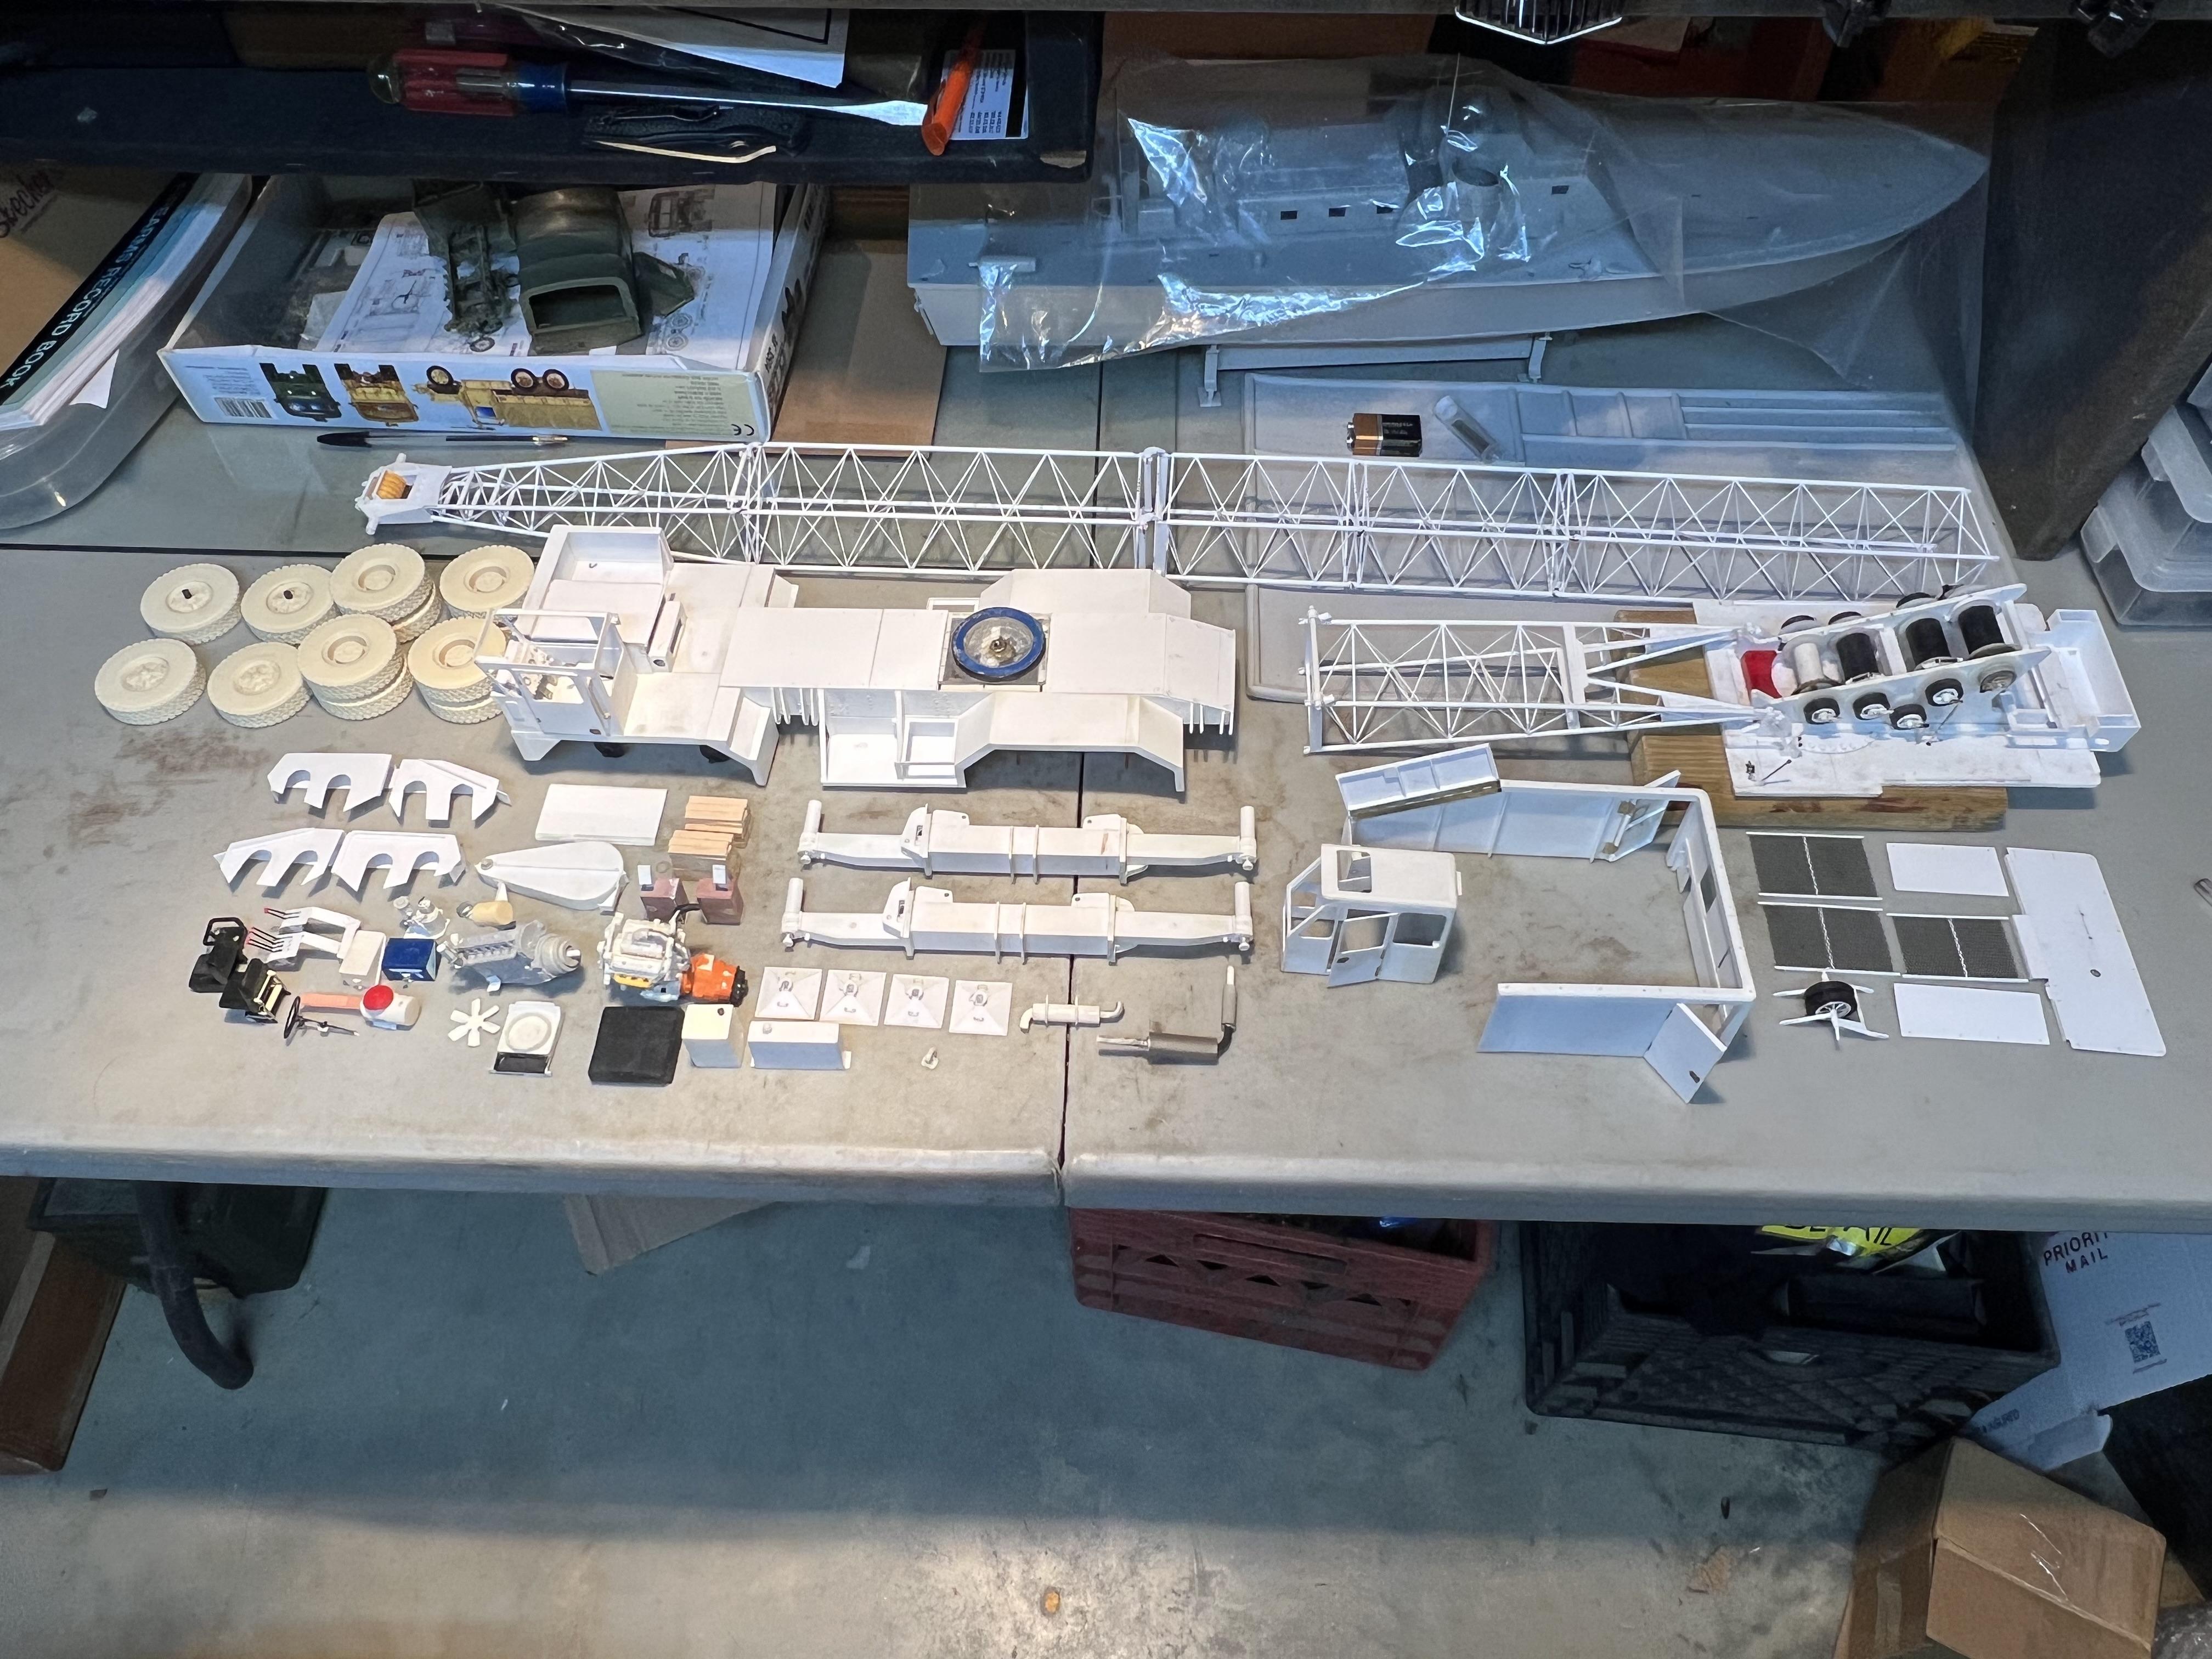
Here is an overview of where this project is right now. This is all of the sub assemblies that are done so far. There is a whole lot more to go, but it might be getting close to seeing a pinprick of light at the end of the tunnel!

-
Thanks. Don't know how she put up with me for over 50 years. She has a bucket list as most do. One of the things was to see a Broadway musical, so we checked that off her list, twice! Had no idea that I would also enjoy it so much either! I f I knew how great it would be, it would have been on my list as well!
-
Thanks for the great words. The boom is all styrene, so is ultra light, but still incredibly rigid. It is for static display only so it won't be posed with any loads on it. So, with the light boom, and static display only, no real heavy counterweights will be needed. The entire boom assembly weighs less than 3 ounces! Nevertheless, the counterweights will be made from Ren Shape material, which is heavy enough that the upper counterweight alone will most likely weigh more than the entire boom. Ren Shape is an awesome material that can be cut or milled to about anything, that was recommended to me from Charlie Rowley, probably the best modeler I have ever known. So, there is still lots more to do!
-
Thanks. Finally able to give it the time it needs to try complete it!
-
Western Star 4900 FA plow truck
redneckrigger replied to BK9300's topic in WIP: Model Trucks: Big Rigs and Heavy Equipment
The details are amazing. You have a real knack for it. I think the window rubbers came out great. On my crane, I’m going to have to make the actual rubbers and make them overlap the window opening. I then paint them black and assemble to the cab with the glass going in behind it. Kind of a pita but it works. I like your work better! Looking at your build, if photographed with a realistic background it would be about impossible to tell if it were real or a scale model. Cant ask for much more than that!!