.jpg.54ecf0d4a006234146ea24c7f6762038.jpg)
redneckrigger
-
Posts
1,579 -
Joined
-
Last visited
Content Type
Profiles
Forums
Events
Gallery
Everything posted by redneckrigger
-
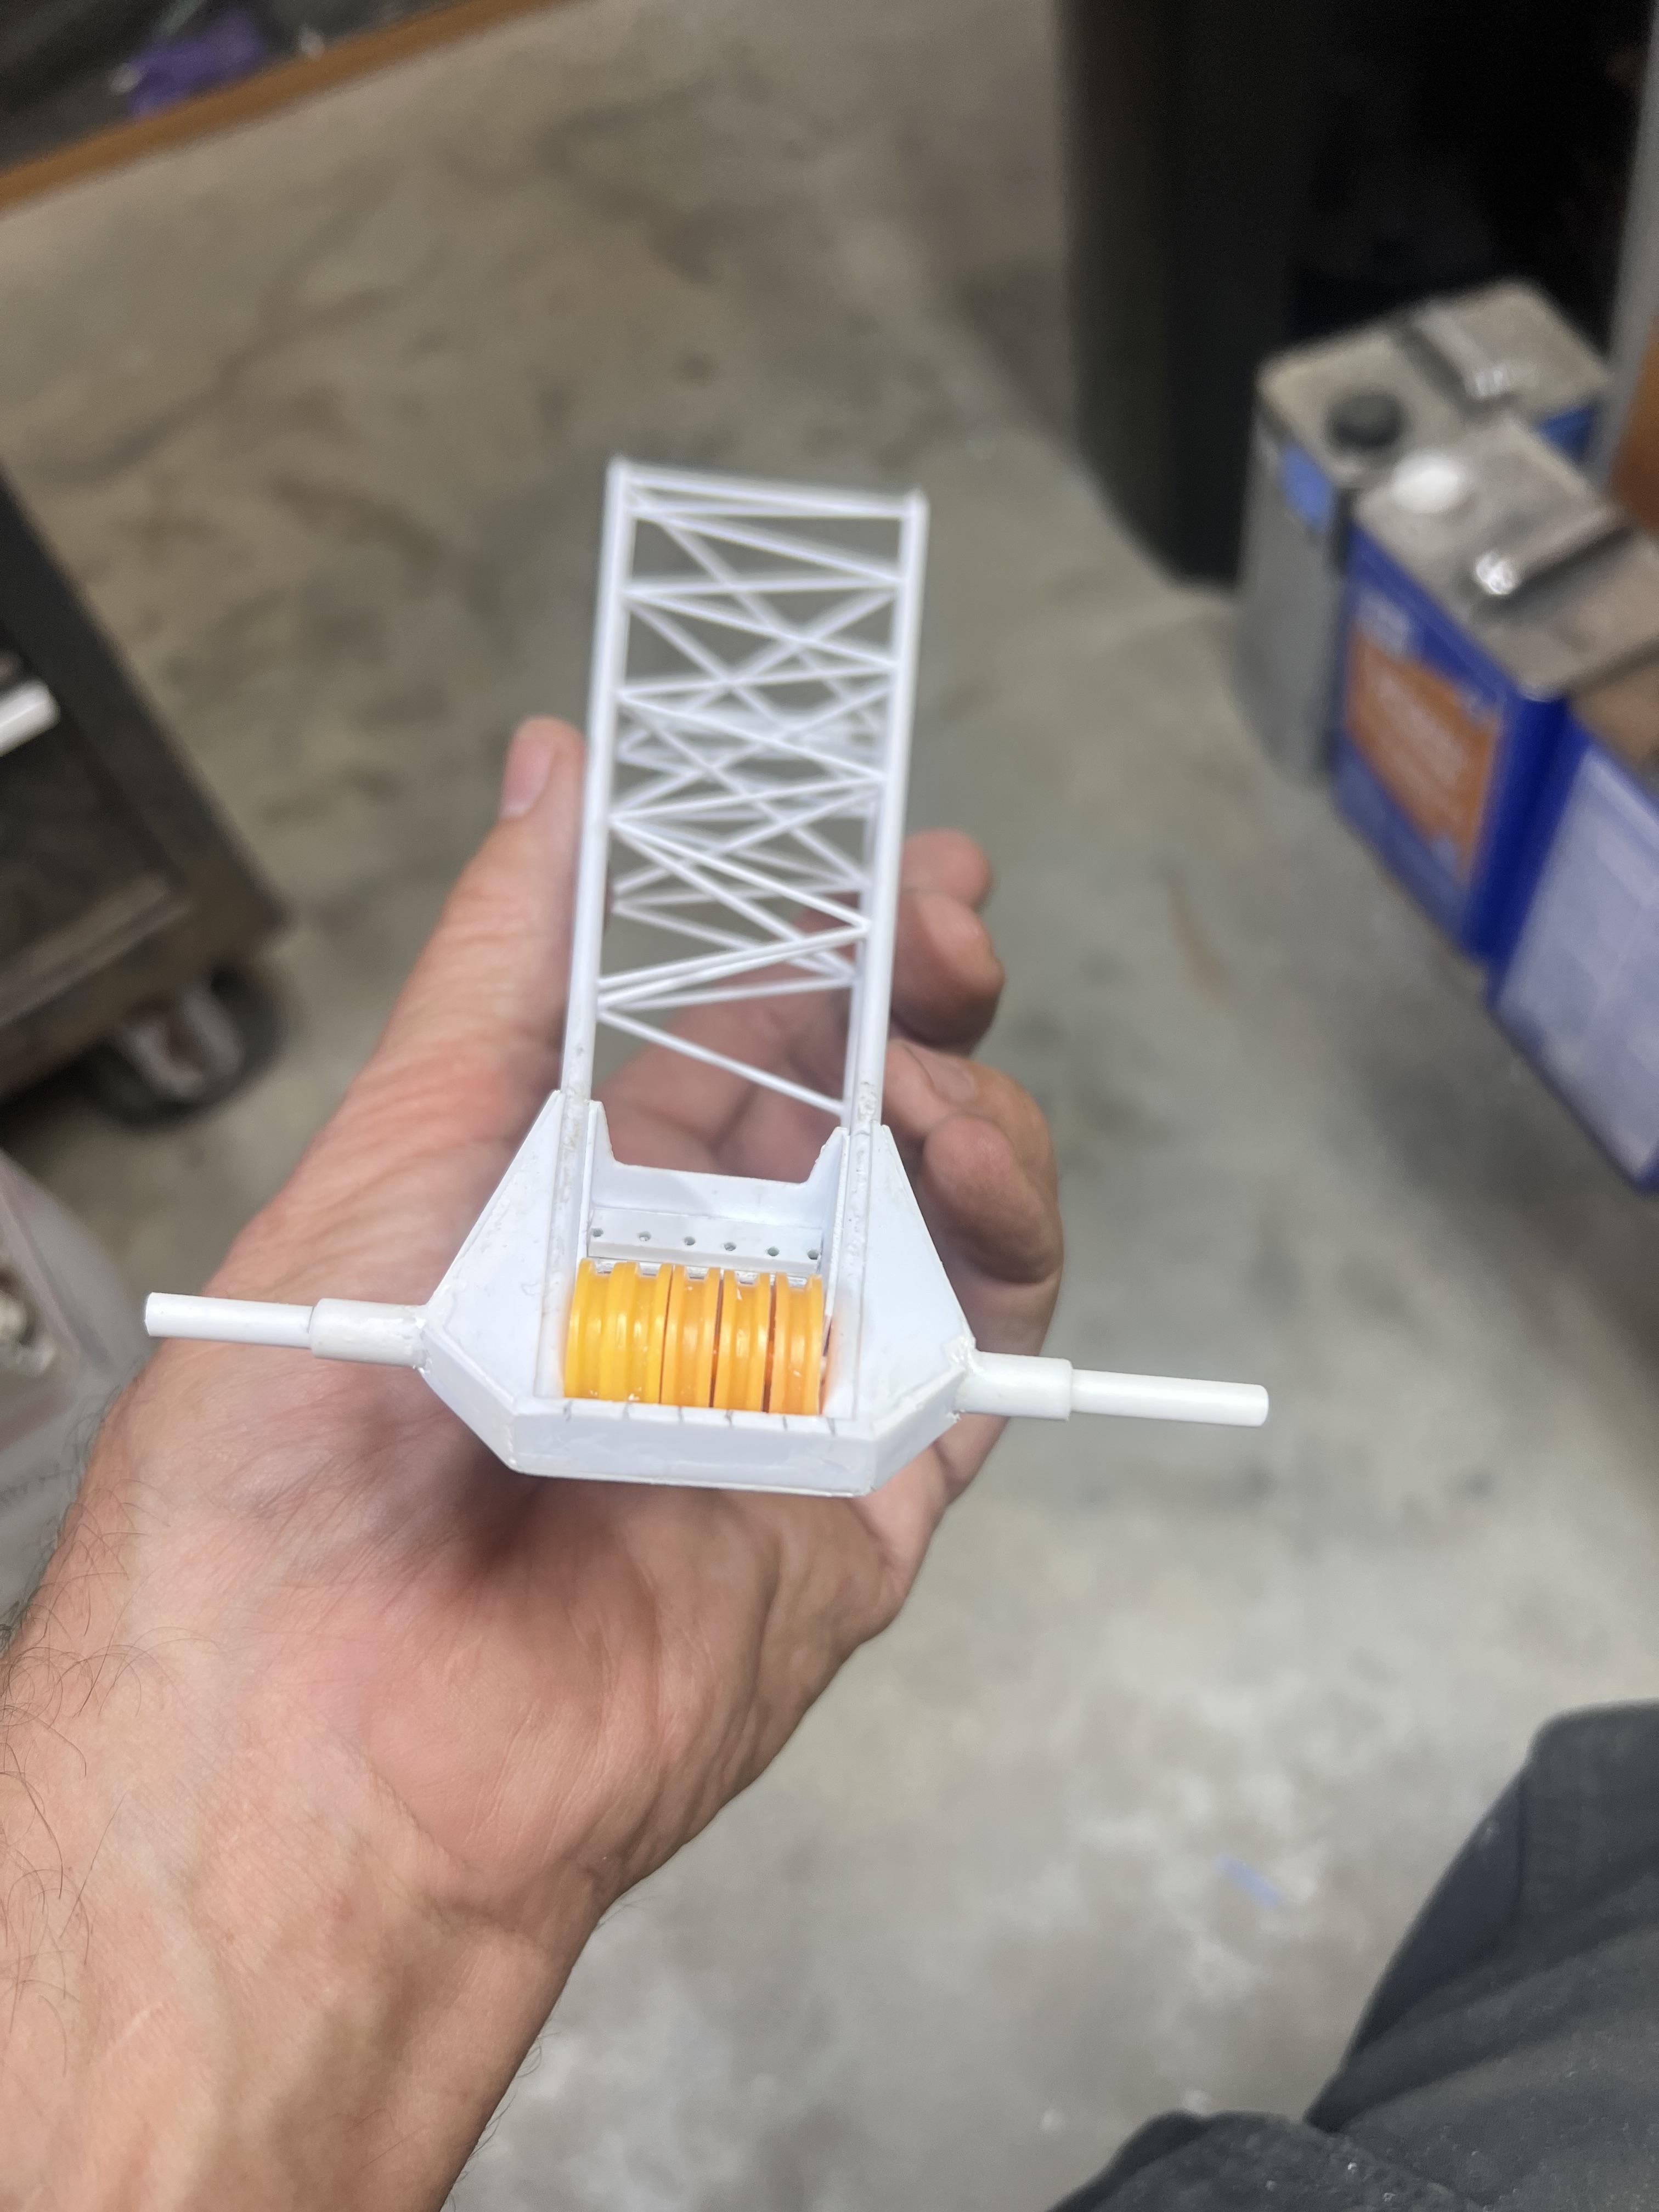
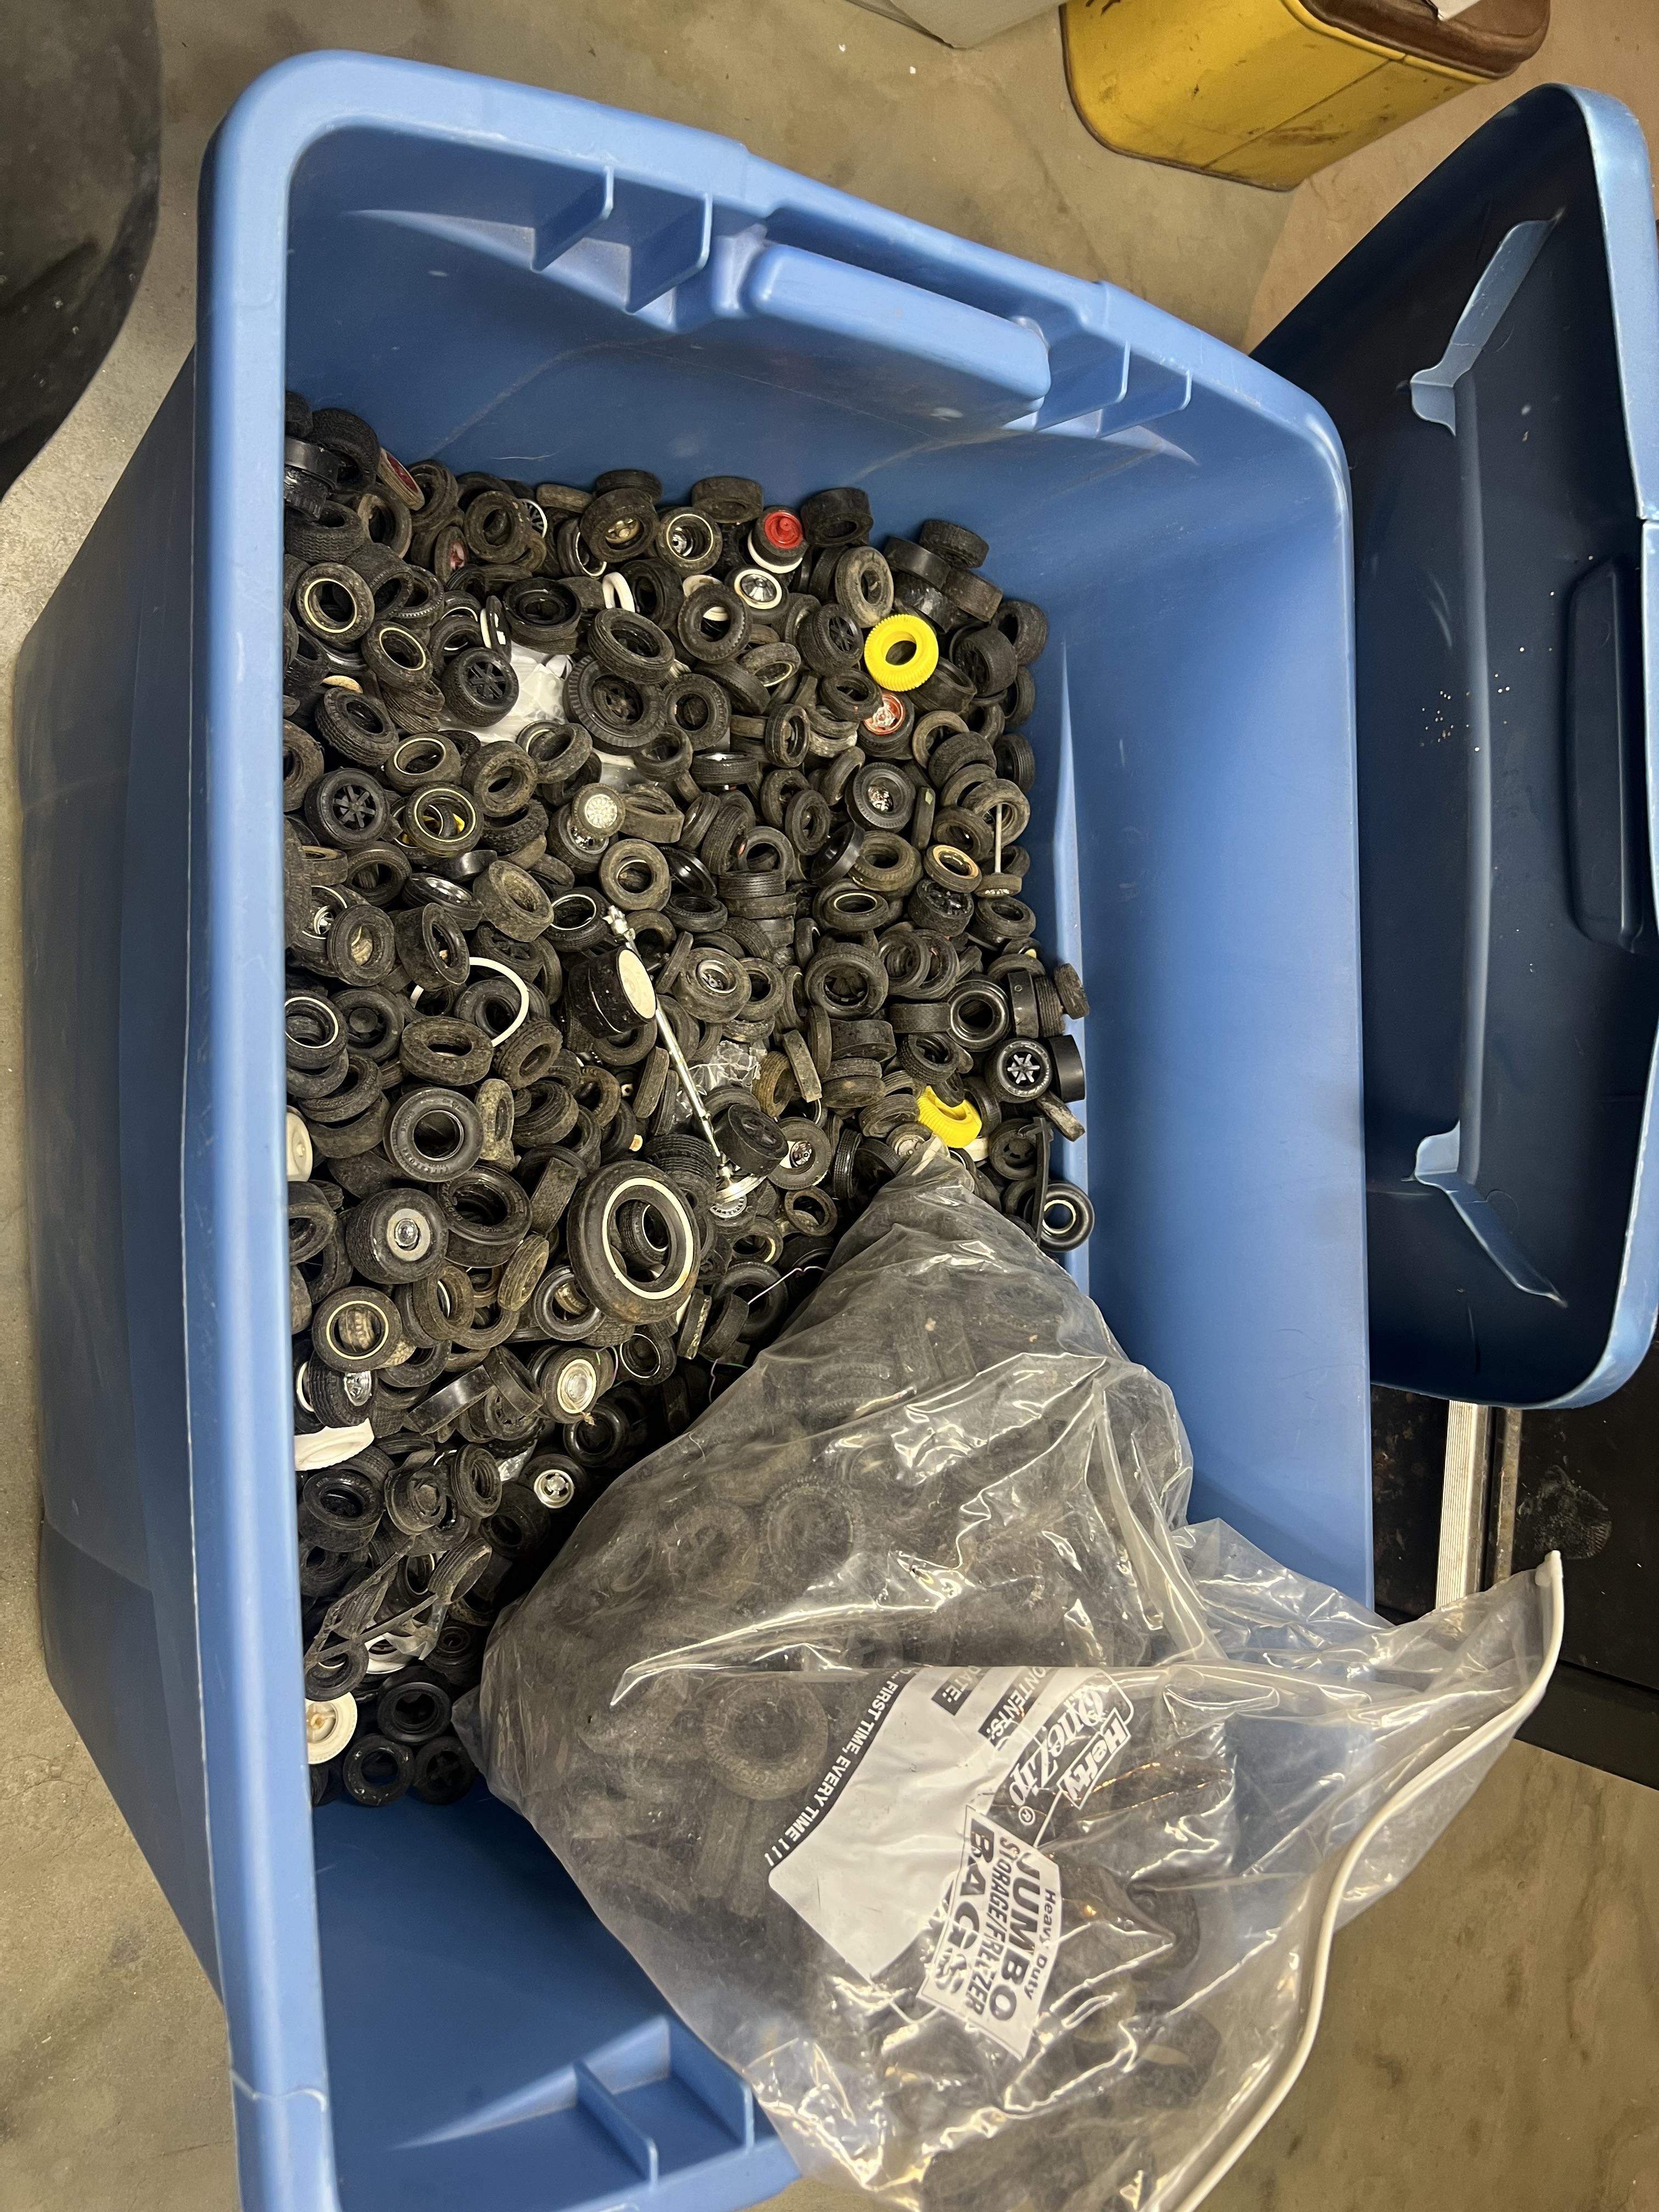
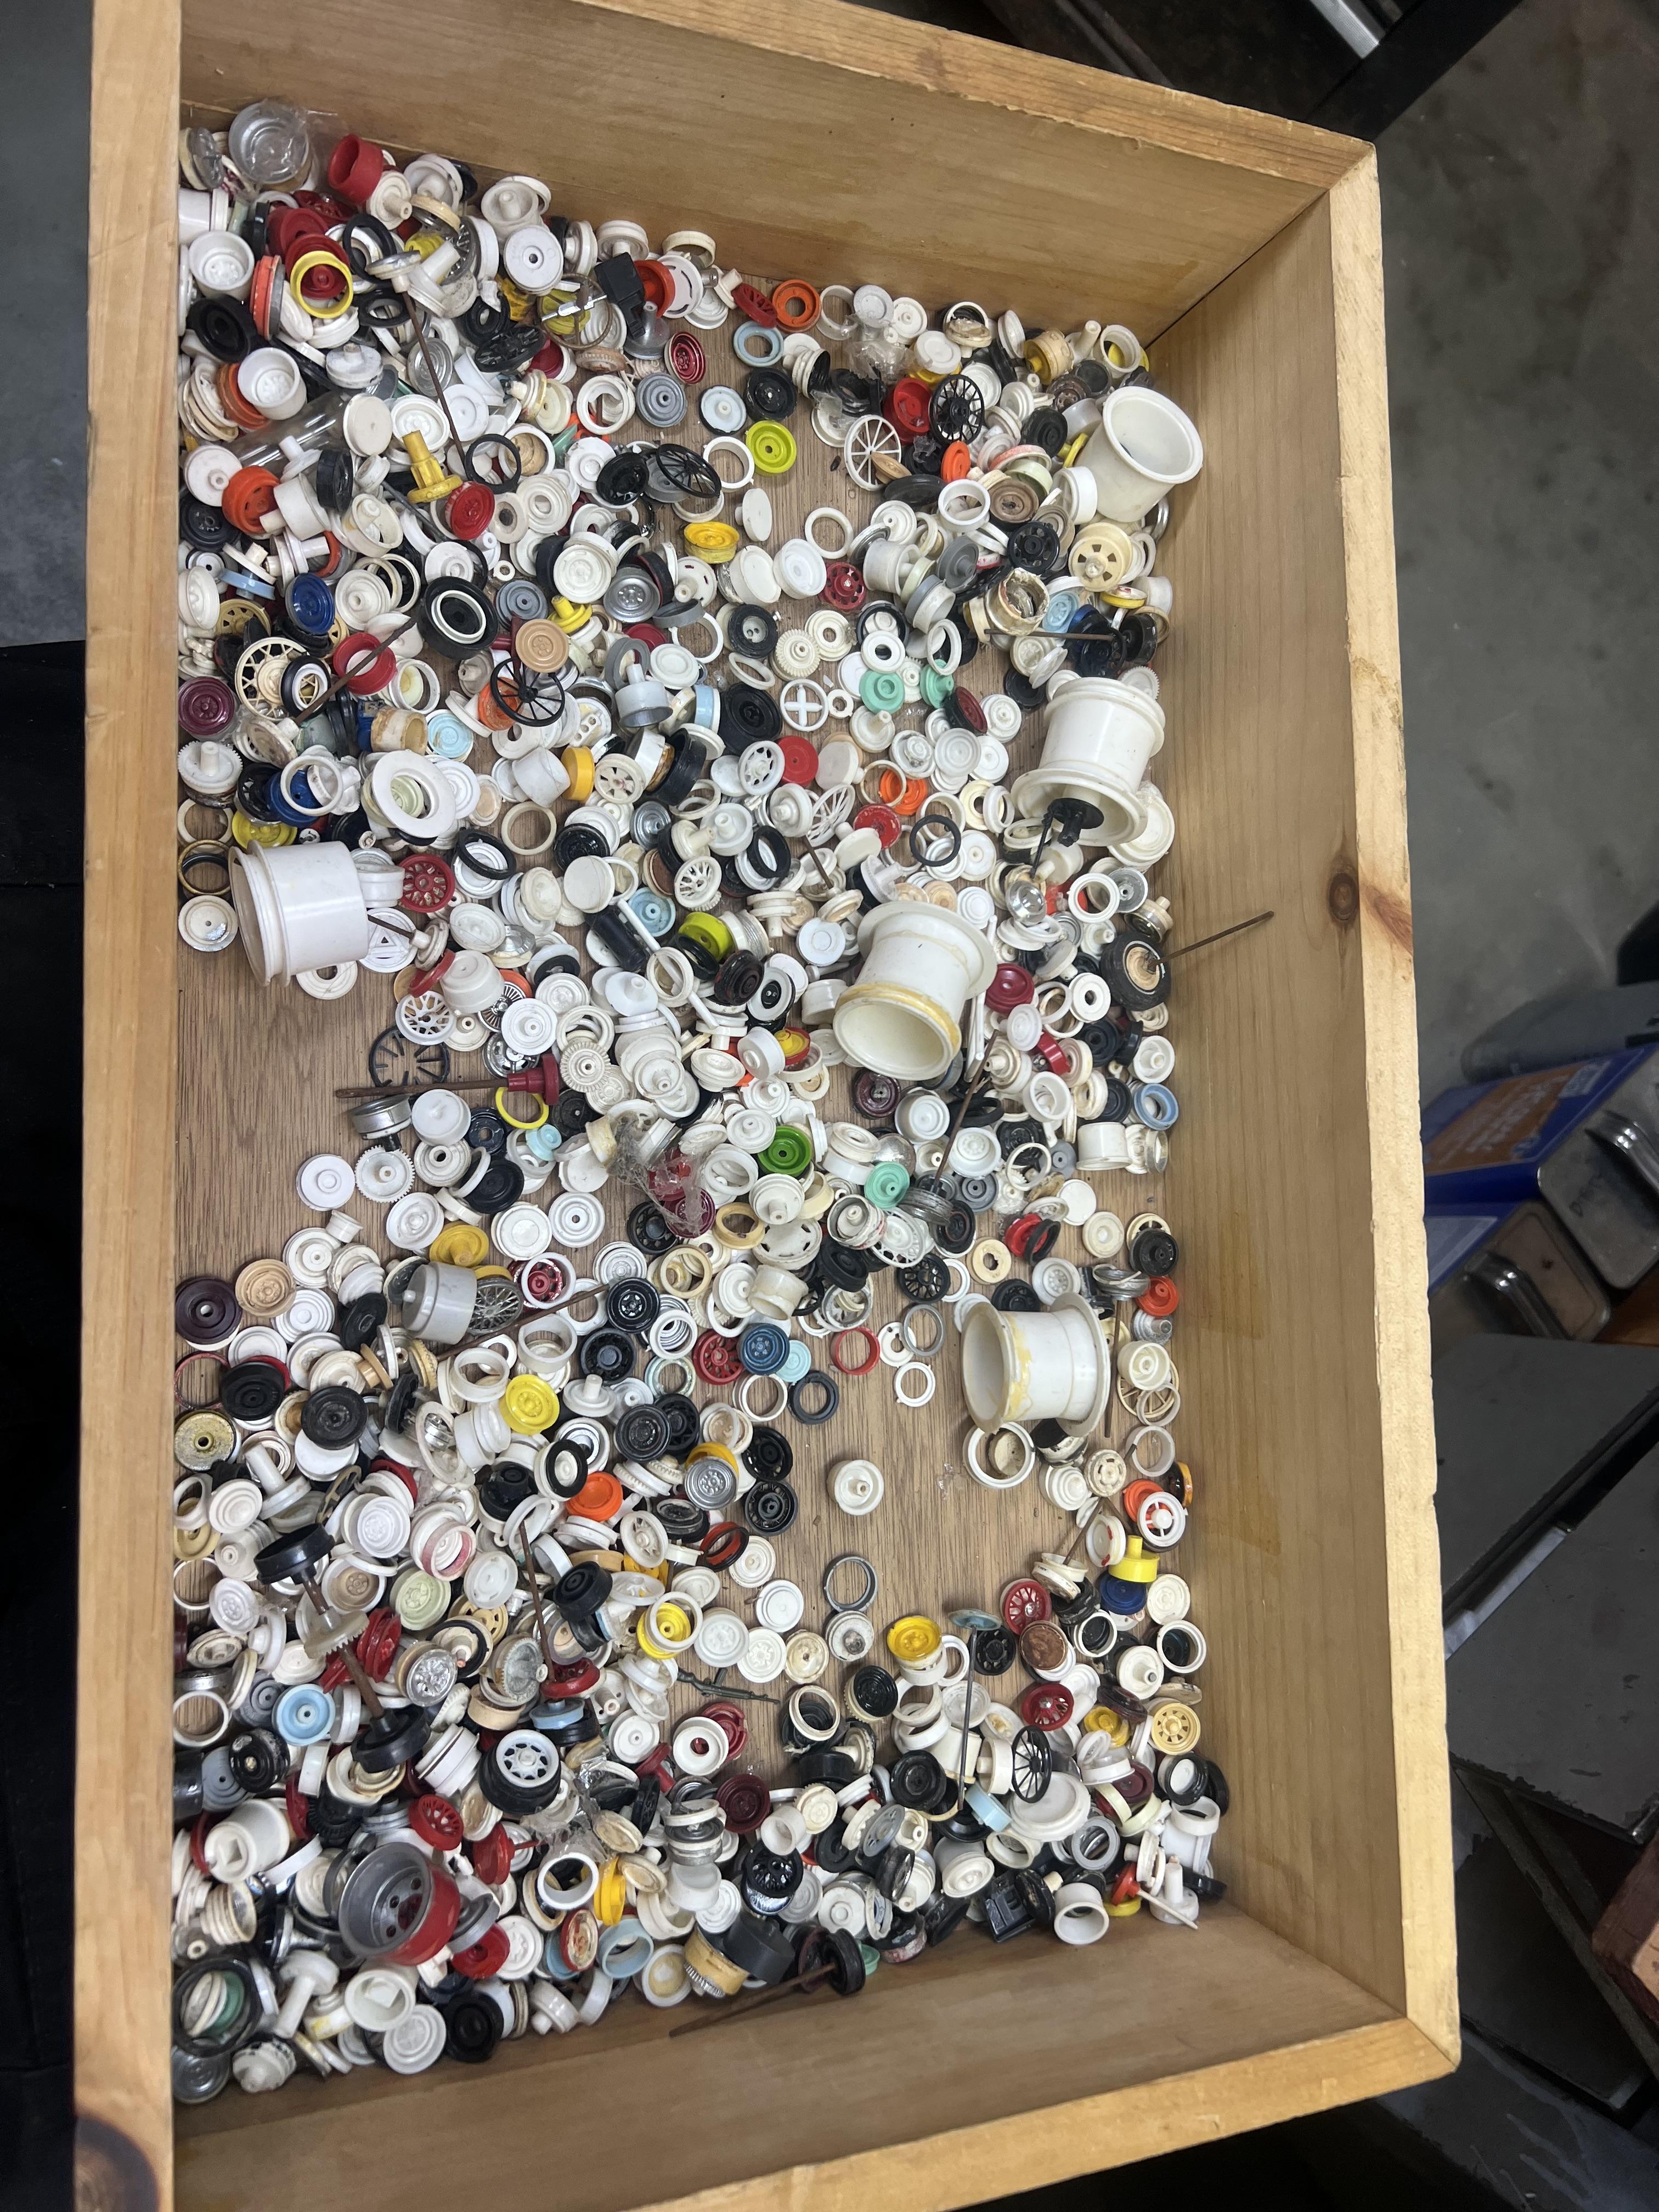
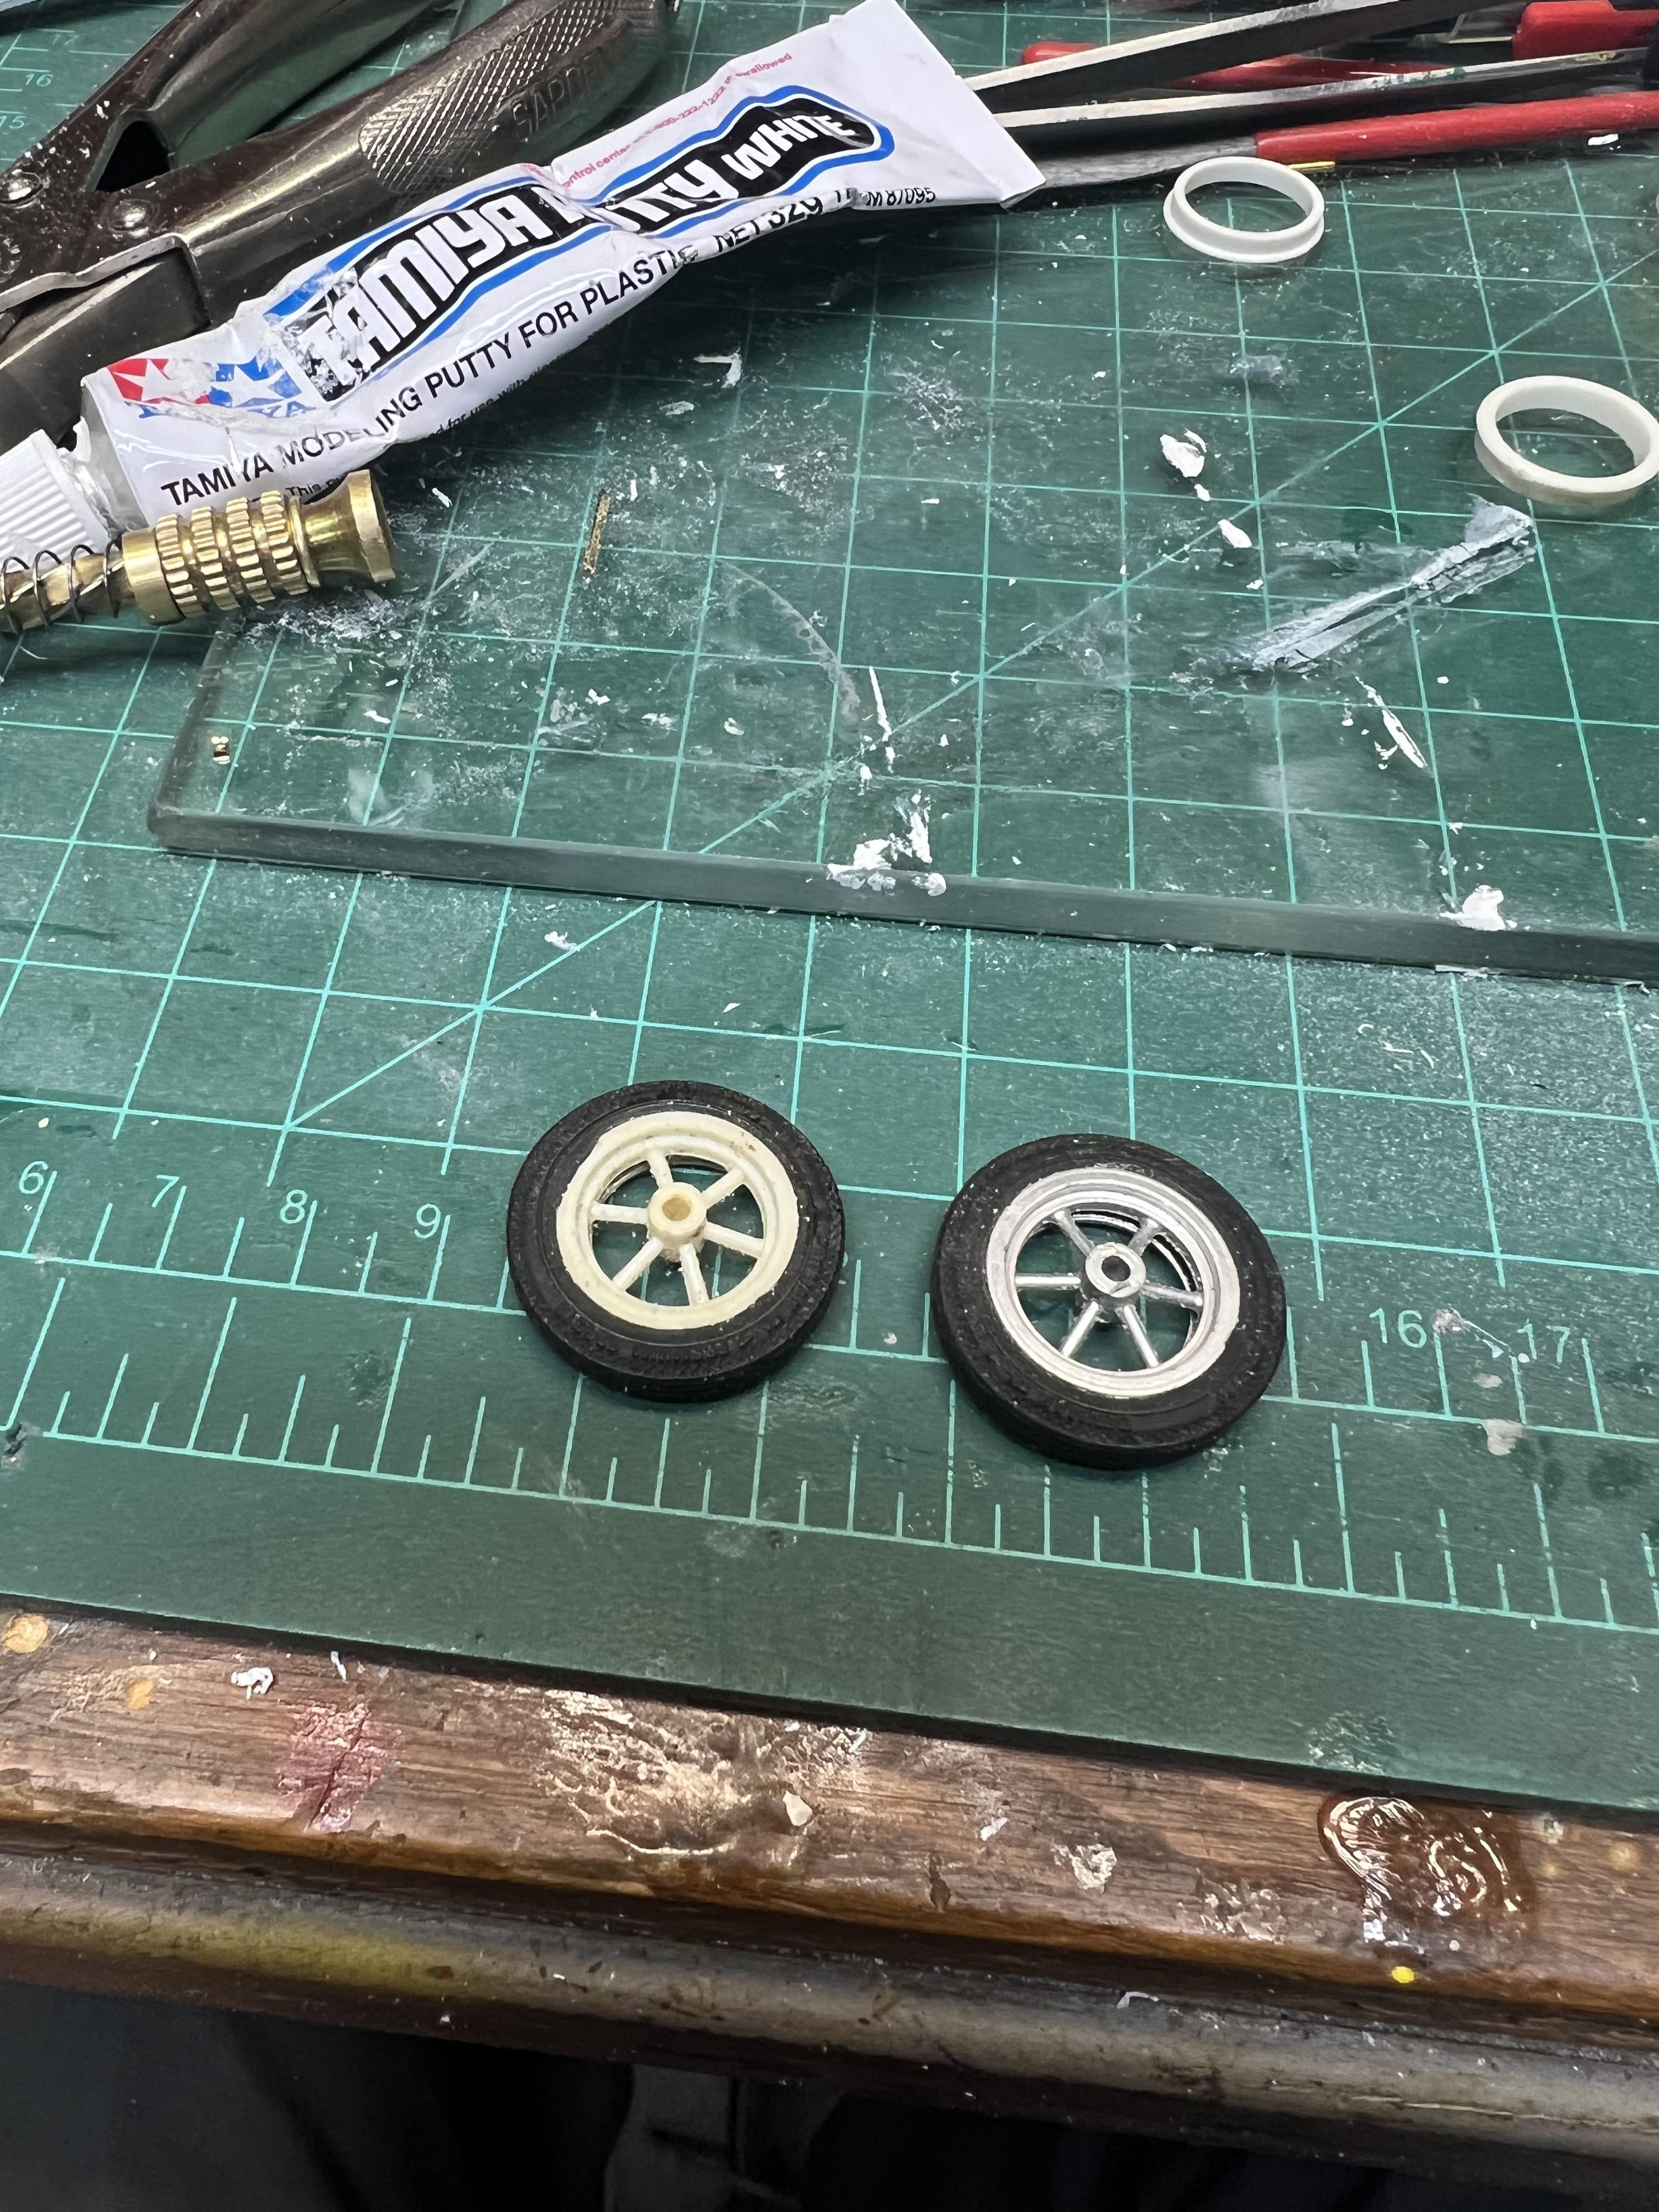
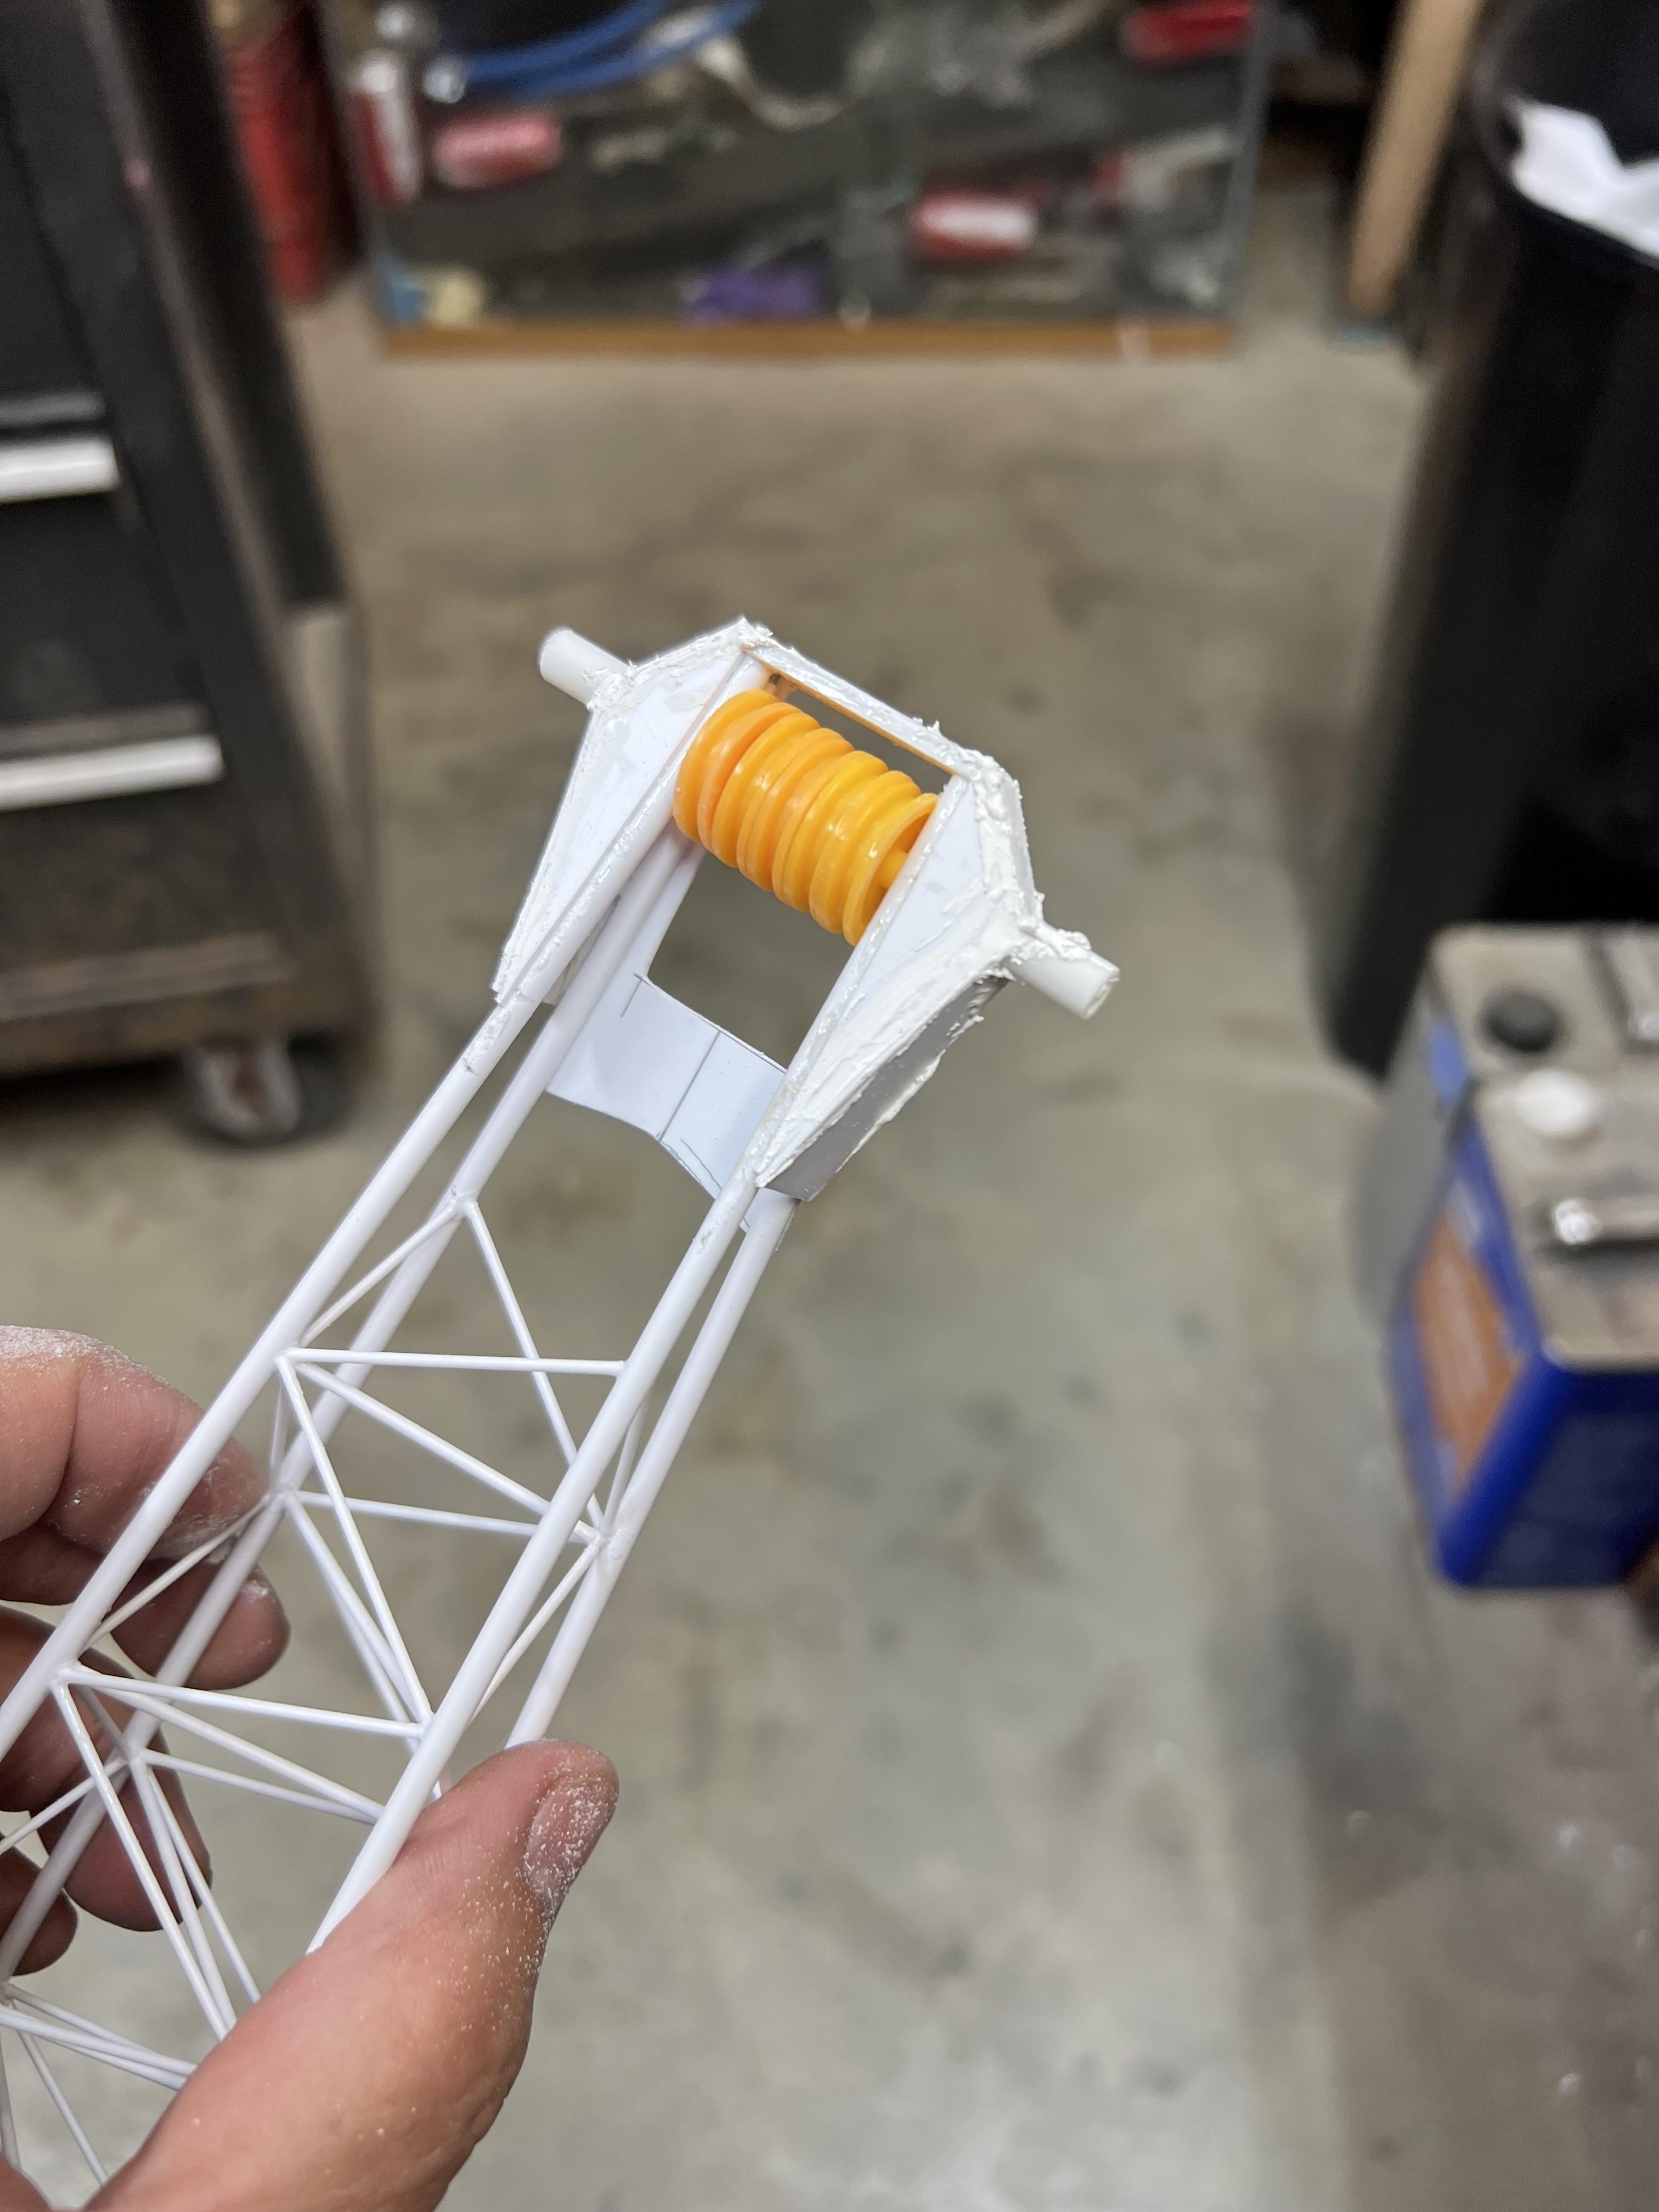
.thumb.jpg.4bca3333e1da4027c381d8d56a564ec1.jpg) Finished up the rest of the head gear support housing tonight with a bunch of flat pieces cut to fit to replicate the photos and measurements I have of the real one. Now have to add the rest of the lattice bracing, make the sheave guards, the jib boom mounting brackets, and the boom folding tires and their support. The tires are used if it is decided to fold the boom. The boom is lowered to the ground. The tires are attached to the end of the head gear and the folding point on the boom is opened. Then the boom is lifted and the boom folds as the tires roll toward the carrier as it folds. When the front section reaches vertical, it is moved past center toward the carrier and the boom is lowered as the tires continue to roll toward the carrier as the boom folds. When completely folded the upper boom is attached to links that support it off the lower boom and then the boom is raised enough to clear the road and the carrier can then travel with the boom folded. Hope my description can be understood. Had to find two small skinny tires so off to the parts boxes. In a former life I built cars. I used to also buy bunches of built stuff to take apart for parts. So I had a small bunch of tires to look through, (see the photo)! Unbelievably, when I took the lid off, sitting right there next to each other there were two of the exact size I needed. Should have gone right out and bought a lottery ticket! Amazing! Then I had to sort through a bunch of wheels to find the right ones. Only took me about an hour to find what I needed! The fun continues! My retirement has been good for this project!
Finished up the rest of the head gear support housing tonight with a bunch of flat pieces cut to fit to replicate the photos and measurements I have of the real one. Now have to add the rest of the lattice bracing, make the sheave guards, the jib boom mounting brackets, and the boom folding tires and their support. The tires are used if it is decided to fold the boom. The boom is lowered to the ground. The tires are attached to the end of the head gear and the folding point on the boom is opened. Then the boom is lifted and the boom folds as the tires roll toward the carrier as it folds. When the front section reaches vertical, it is moved past center toward the carrier and the boom is lowered as the tires continue to roll toward the carrier as the boom folds. When completely folded the upper boom is attached to links that support it off the lower boom and then the boom is raised enough to clear the road and the carrier can then travel with the boom folded. Hope my description can be understood. Had to find two small skinny tires so off to the parts boxes. In a former life I built cars. I used to also buy bunches of built stuff to take apart for parts. So I had a small bunch of tires to look through, (see the photo)! Unbelievably, when I took the lid off, sitting right there next to each other there were two of the exact size I needed. Should have gone right out and bought a lottery ticket! Amazing! Then I had to sort through a bunch of wheels to find the right ones. Only took me about an hour to find what I needed! The fun continues! My retirement has been good for this project!
-
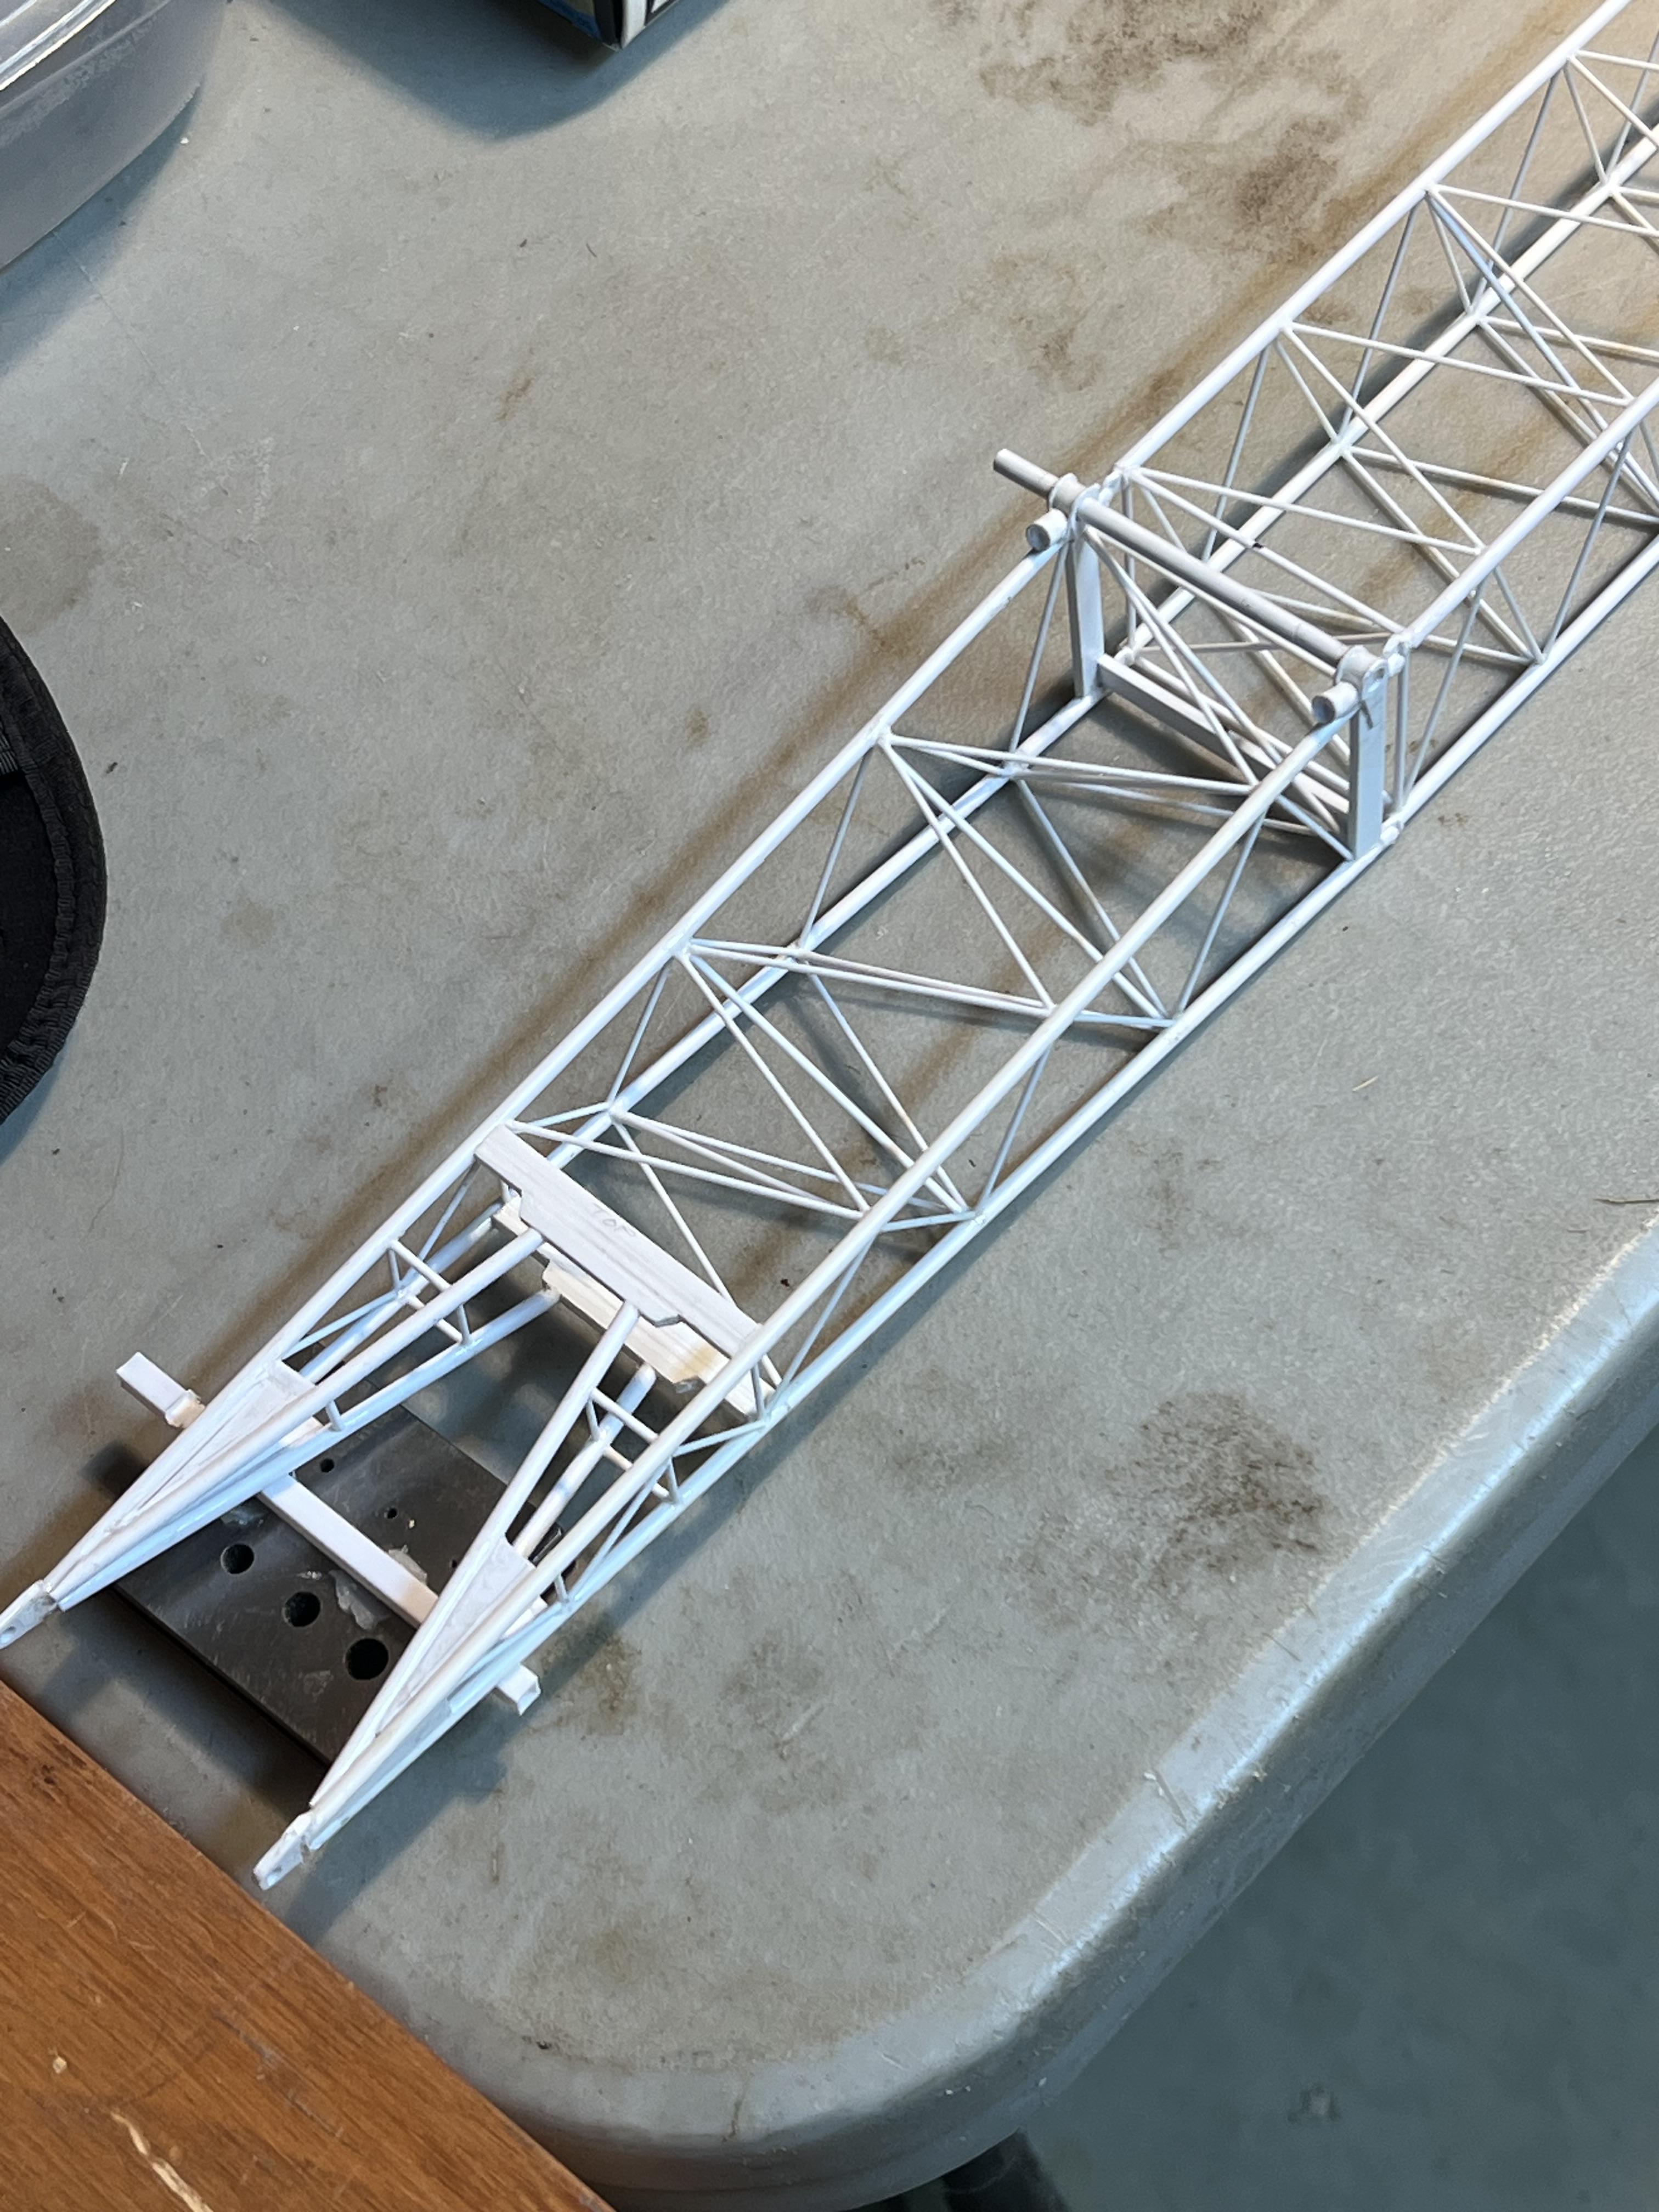
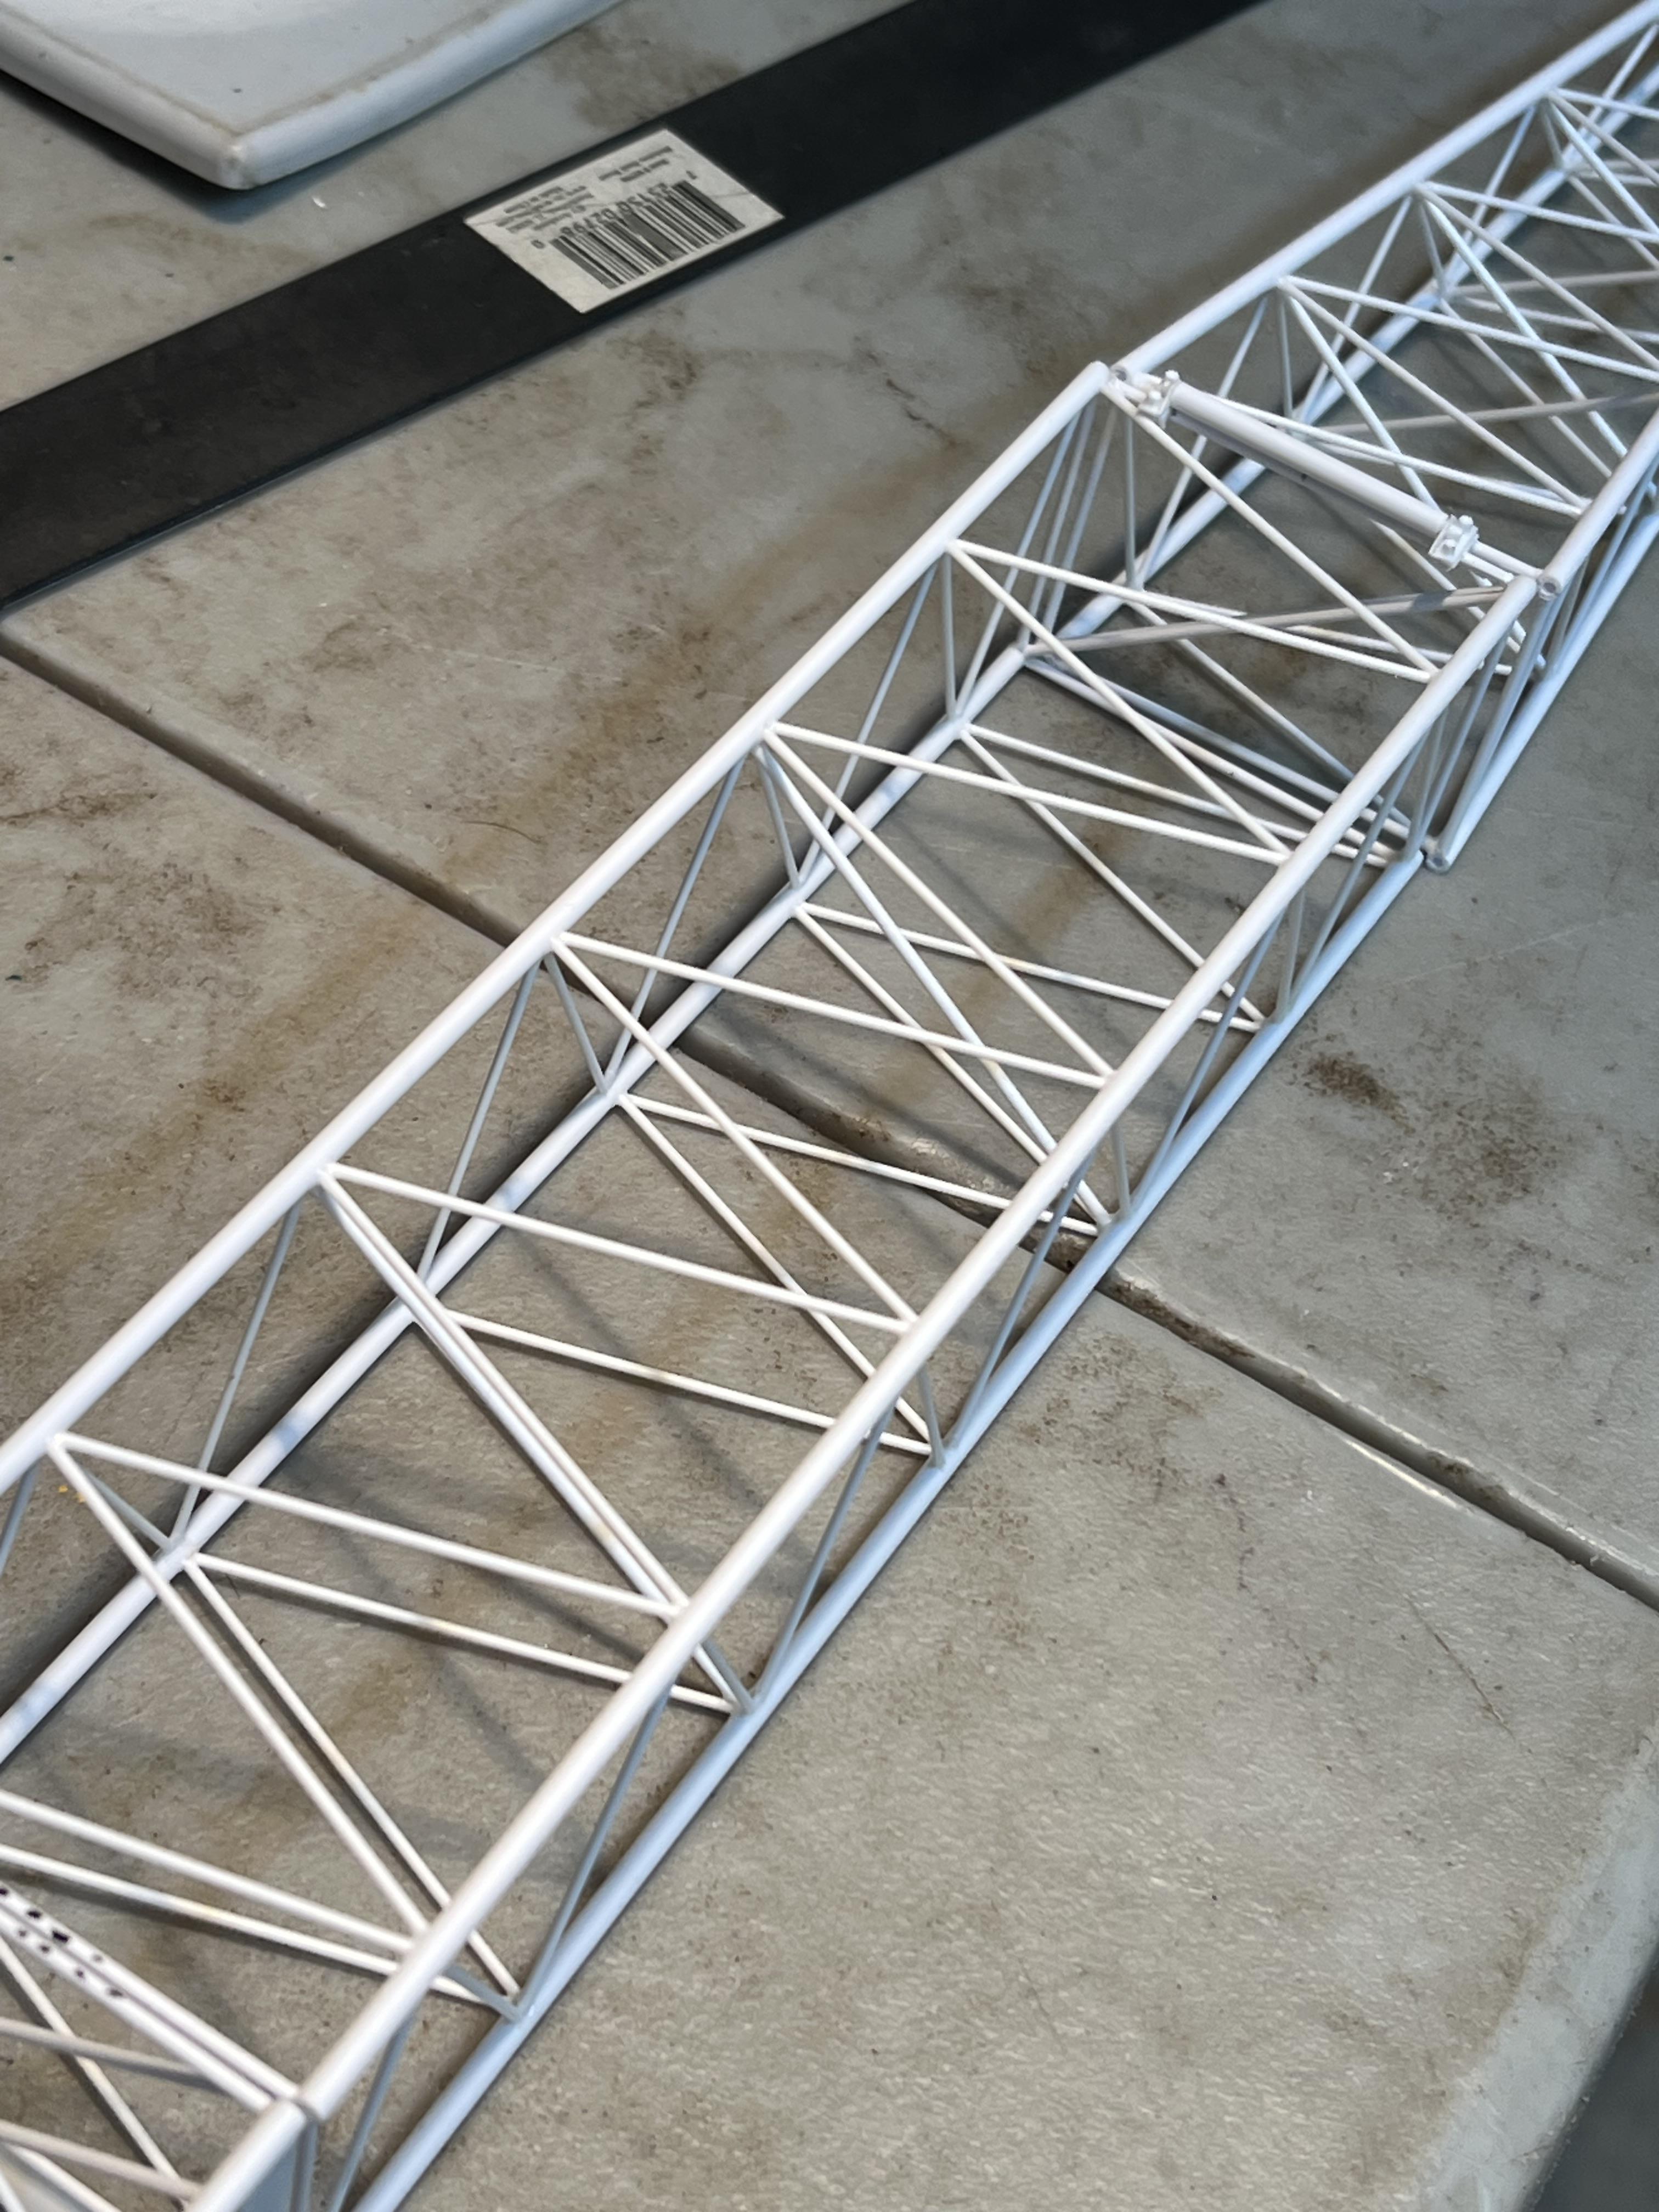
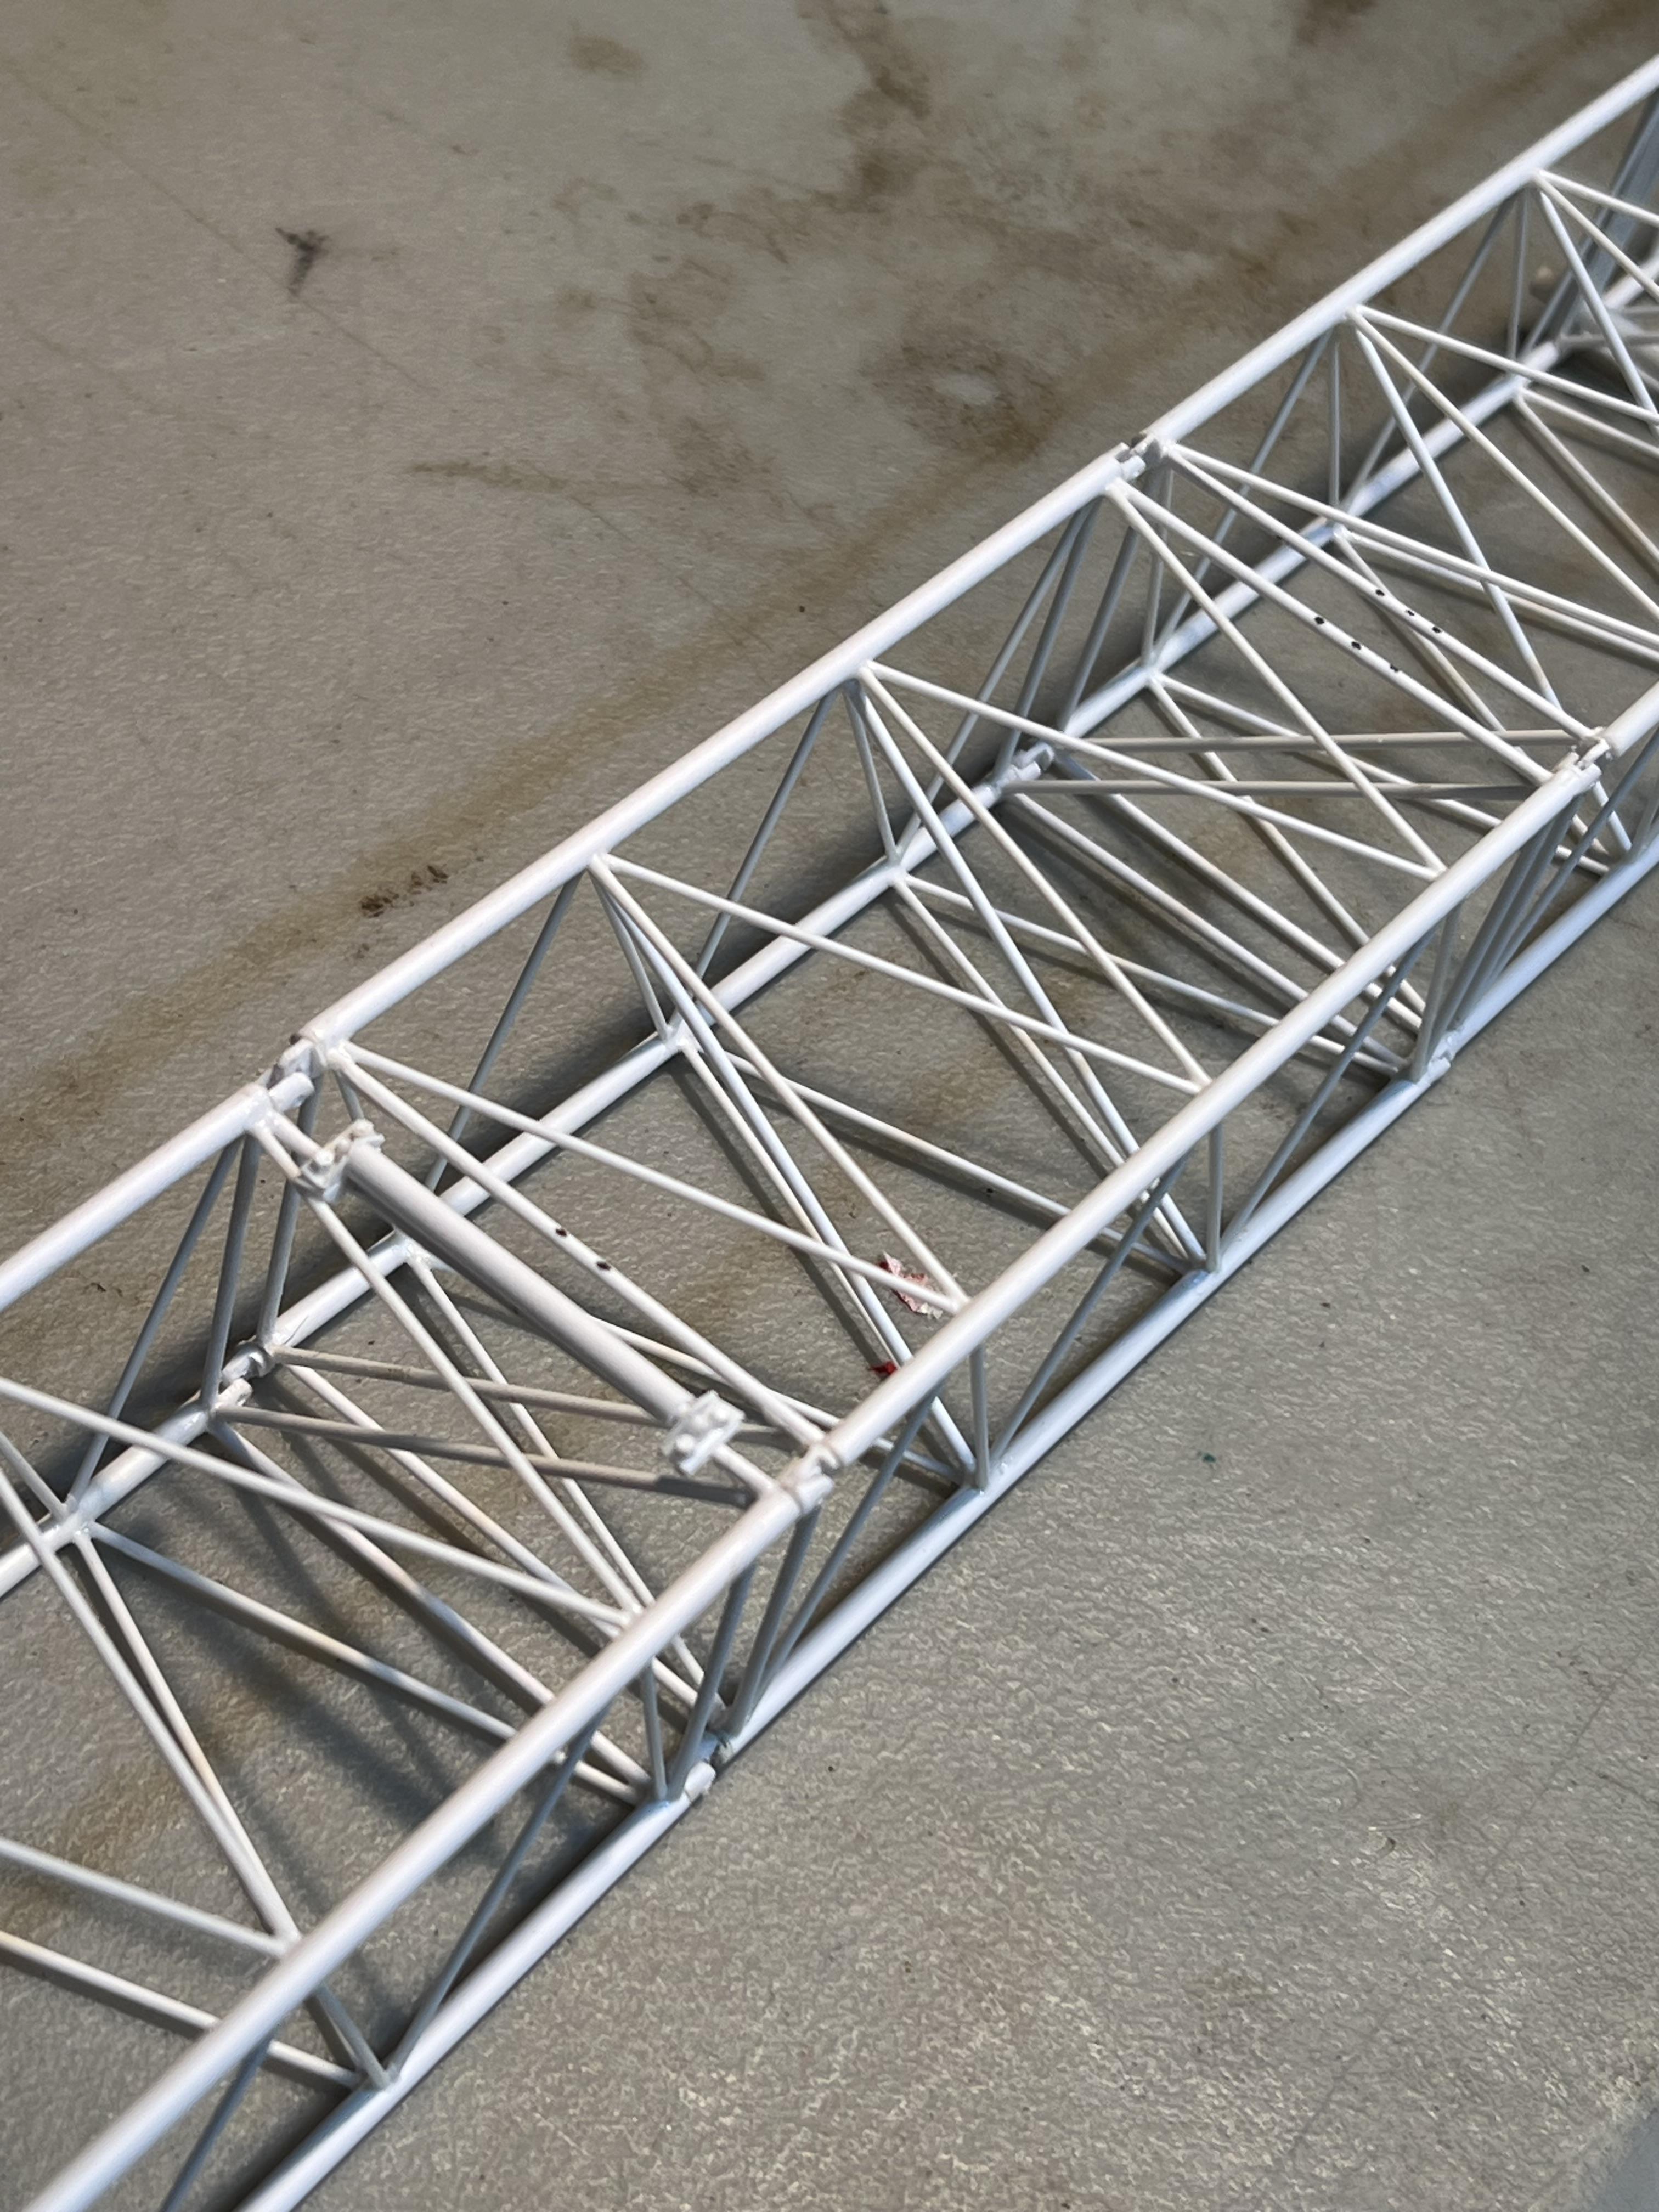
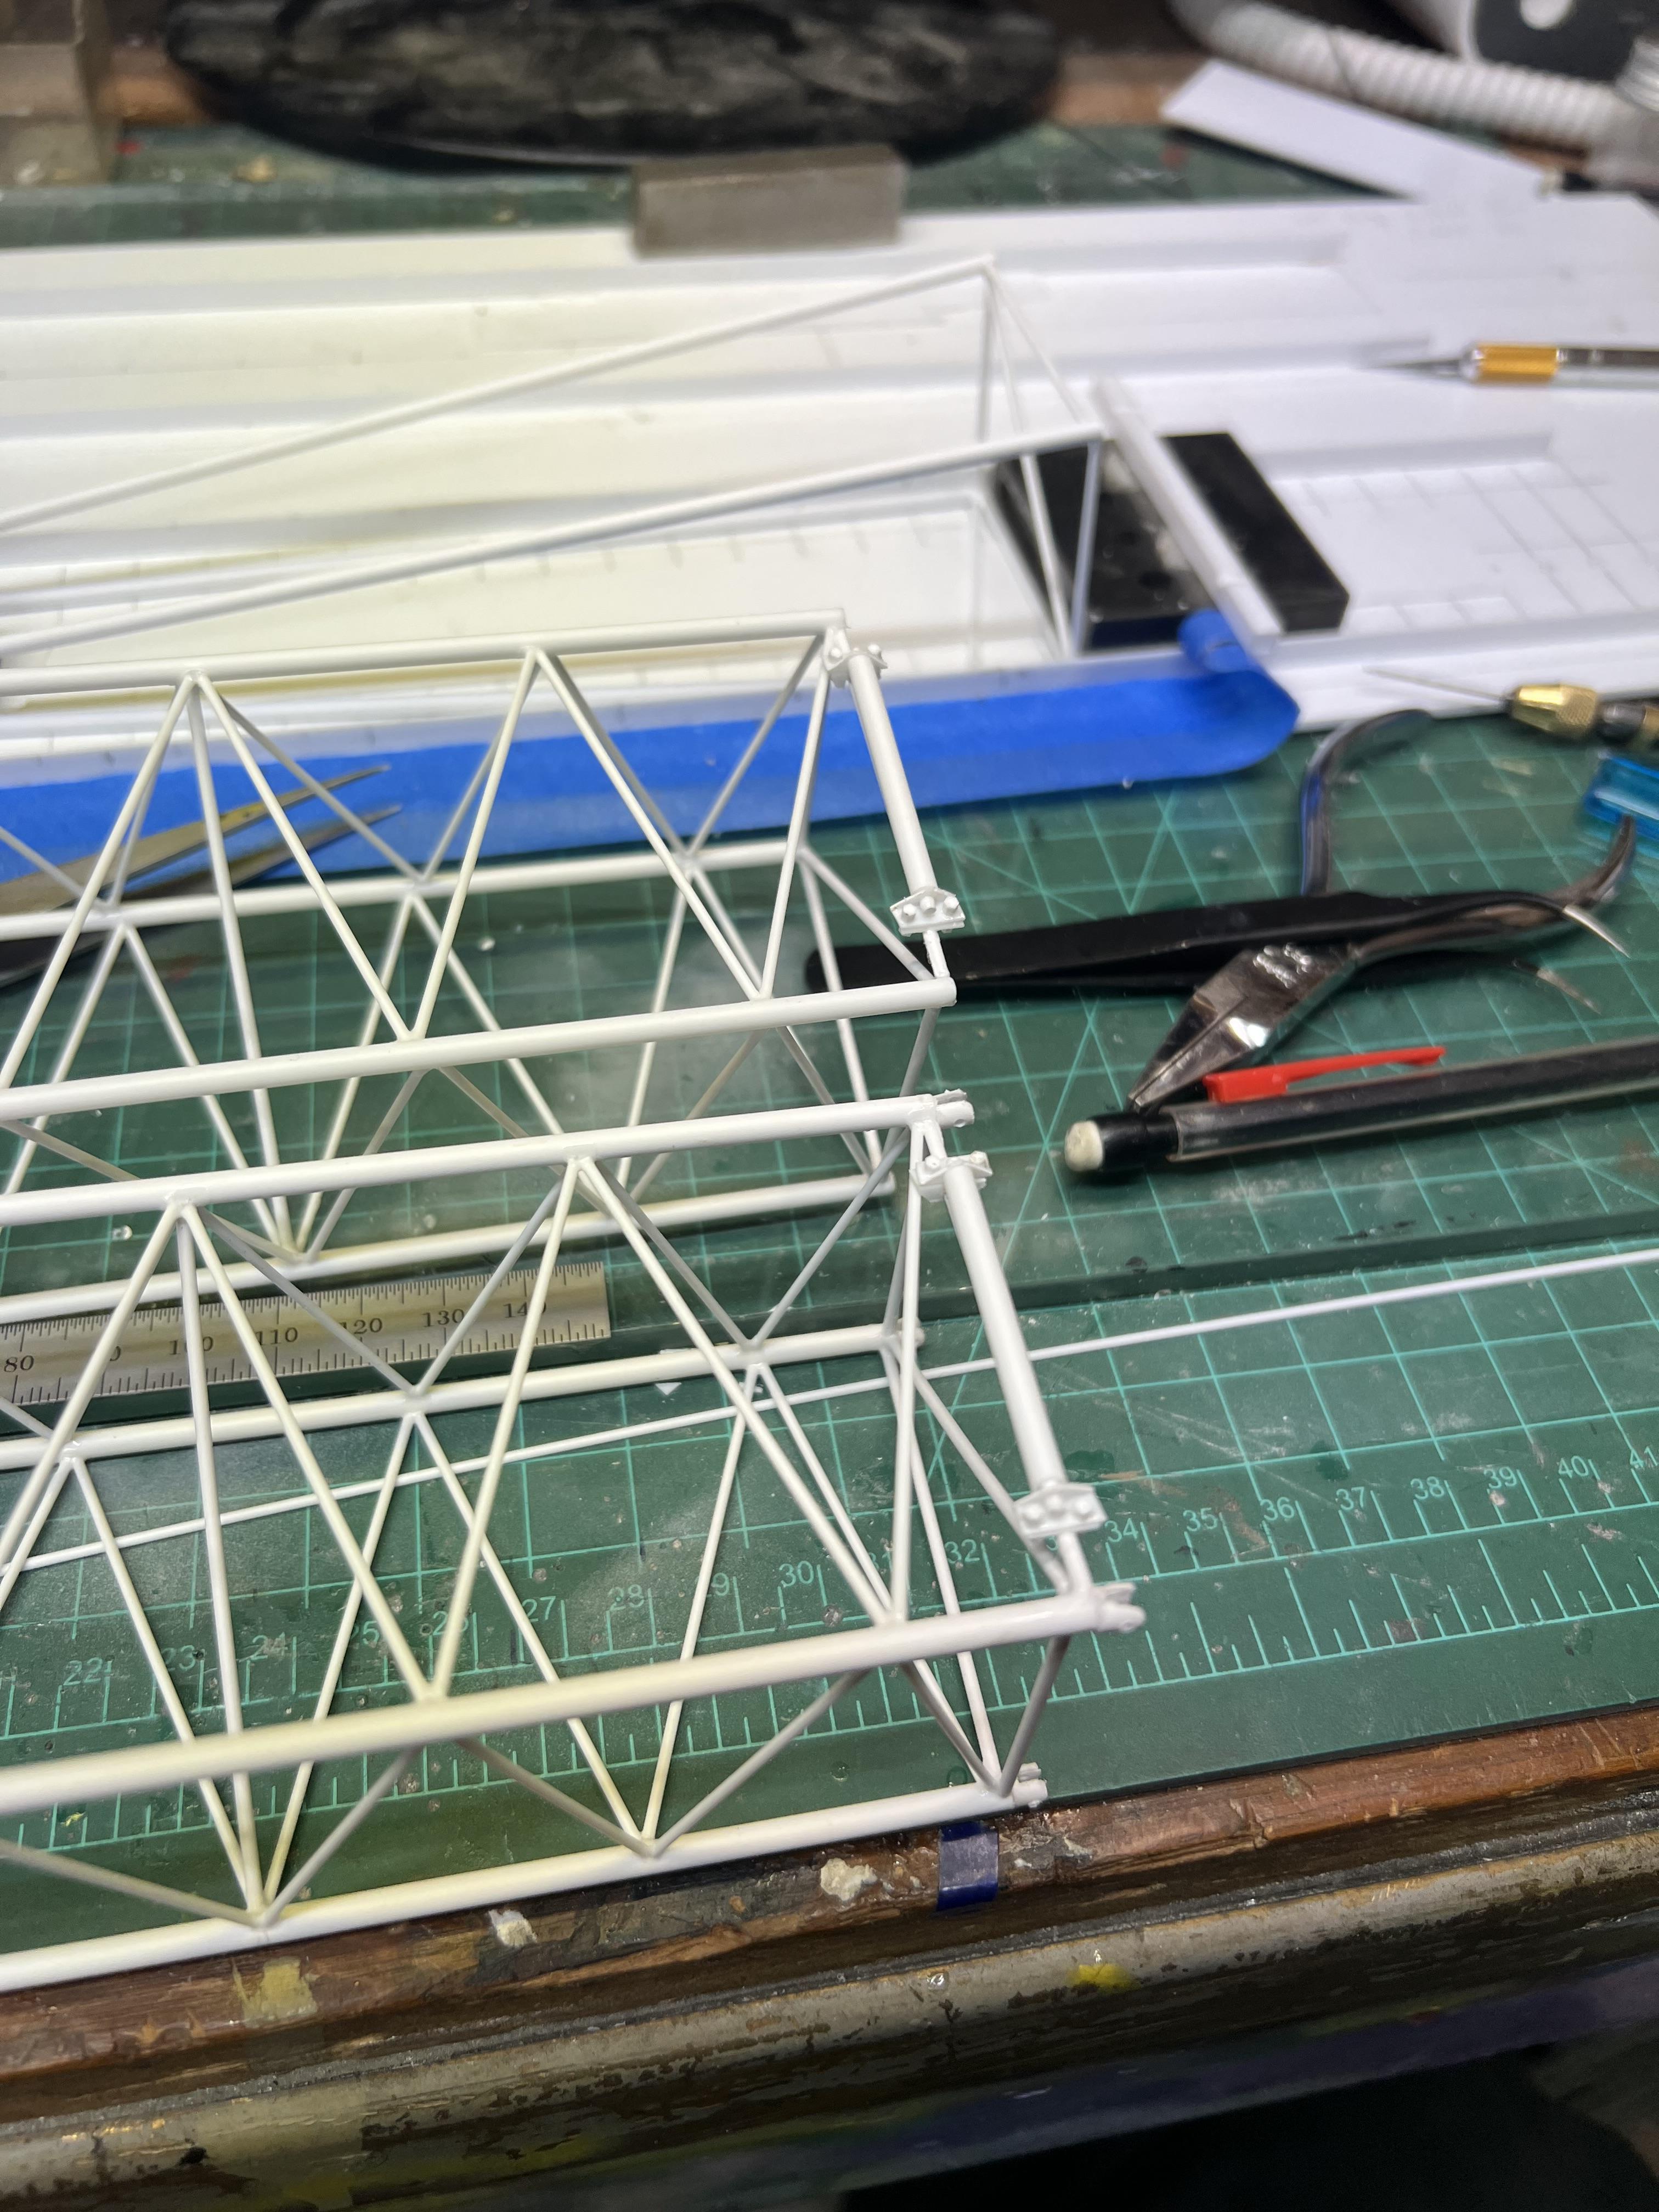
One of the 20’ sections complete, weighs 0.3 ounces. And just for hoots and whistles, when I was figuring out how to build these, I made a prototype and tested its ability to take a vertical as well as a torsional deflection. It took over twelve pounds of force to bring it to failure. Anything less and it finally deflected but went back to shape when released. It broke at just over 12 in the vertical direction. The geometry, engineering and physics involved in the design carries right over to this mini version in styrene. One reason the lattice cranes are still used is even though they take time to set up as opposed to a hydraulic boom crane, which is very quick, lattice cranes can often allow a physically smaller, physically lighter unit to accomplish a similar task. Hydraulic booms of lengths similar to a lattice boom are HEAVY. Lattice booms are also very often the choice for extreme heavy lifts due to many of these factors, though the hydraulic cranes are also available in mind blowing capacities as well. And if it’s a task that is going to take a while without breaking it down to move it, lattice can excel. Lattice cranes can also take shock loads better as encountered in dragline or wrecking ball work. The hydraulic boom cranes have very heavy booms, especially as their capacity increases. That is one reason I chose this monster to build…..not only has it challenged the daylights out of me, but I already built a hydraulic crane. Gotta keep trying something new!
-
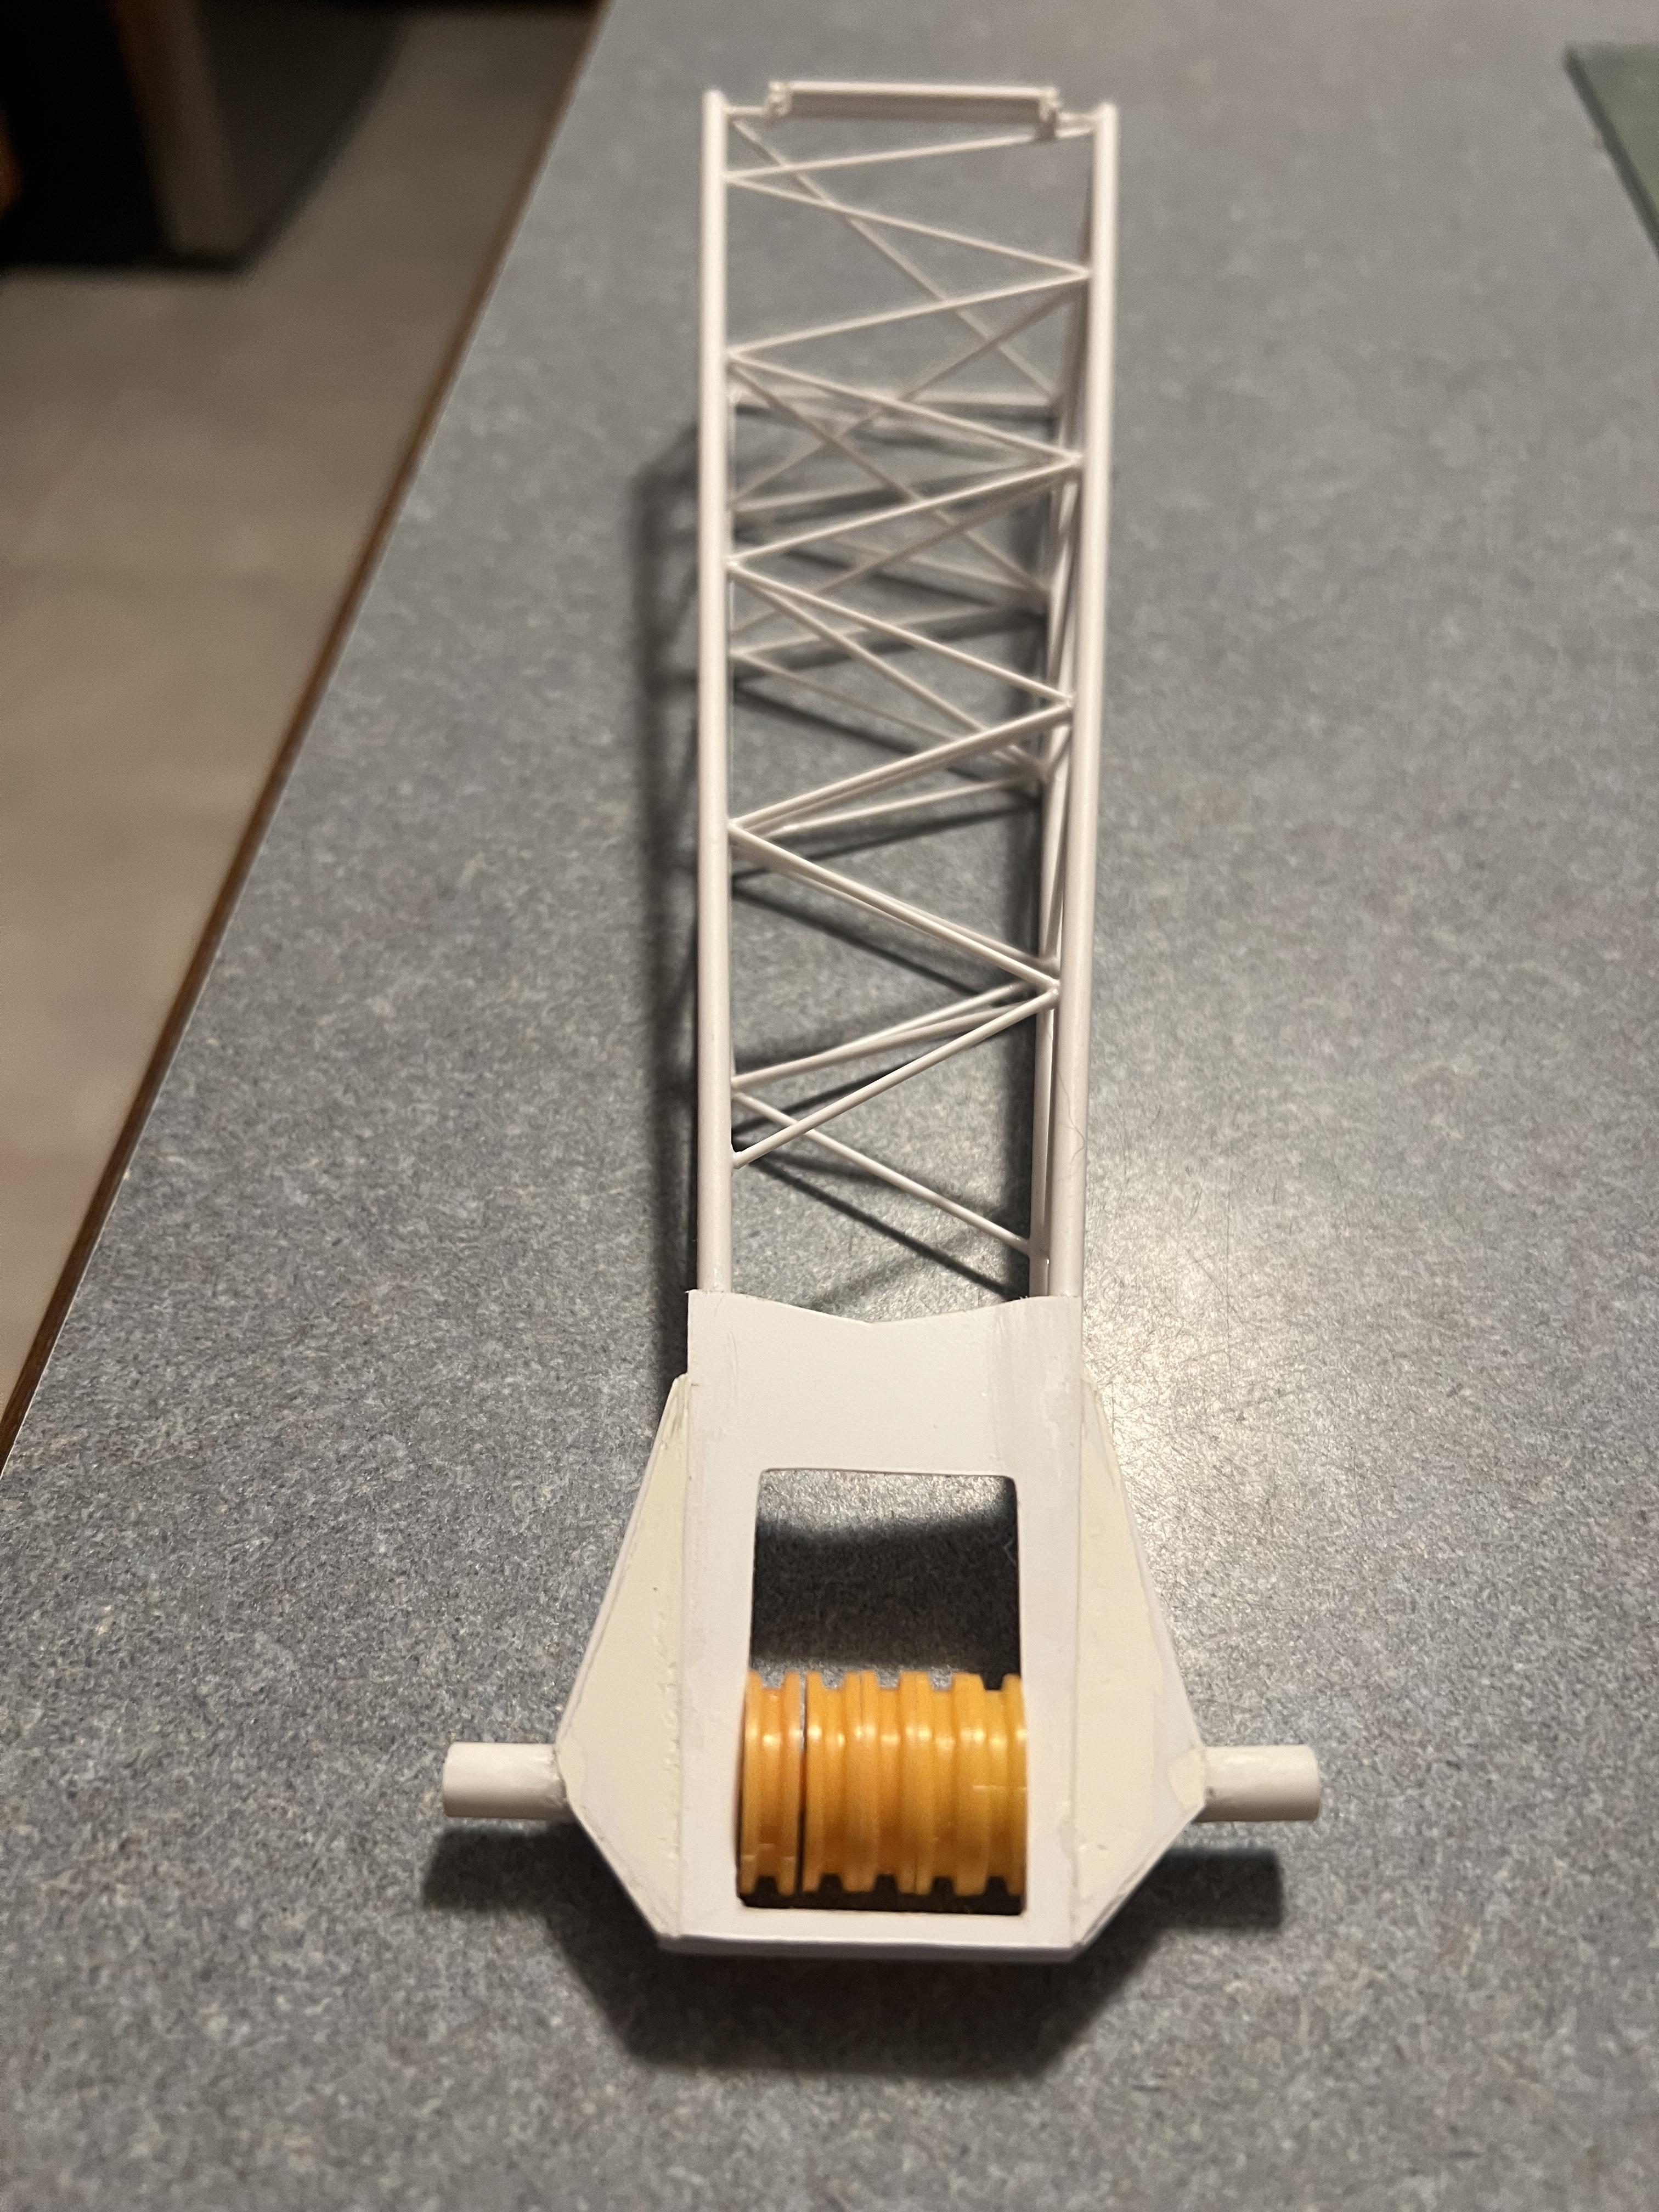
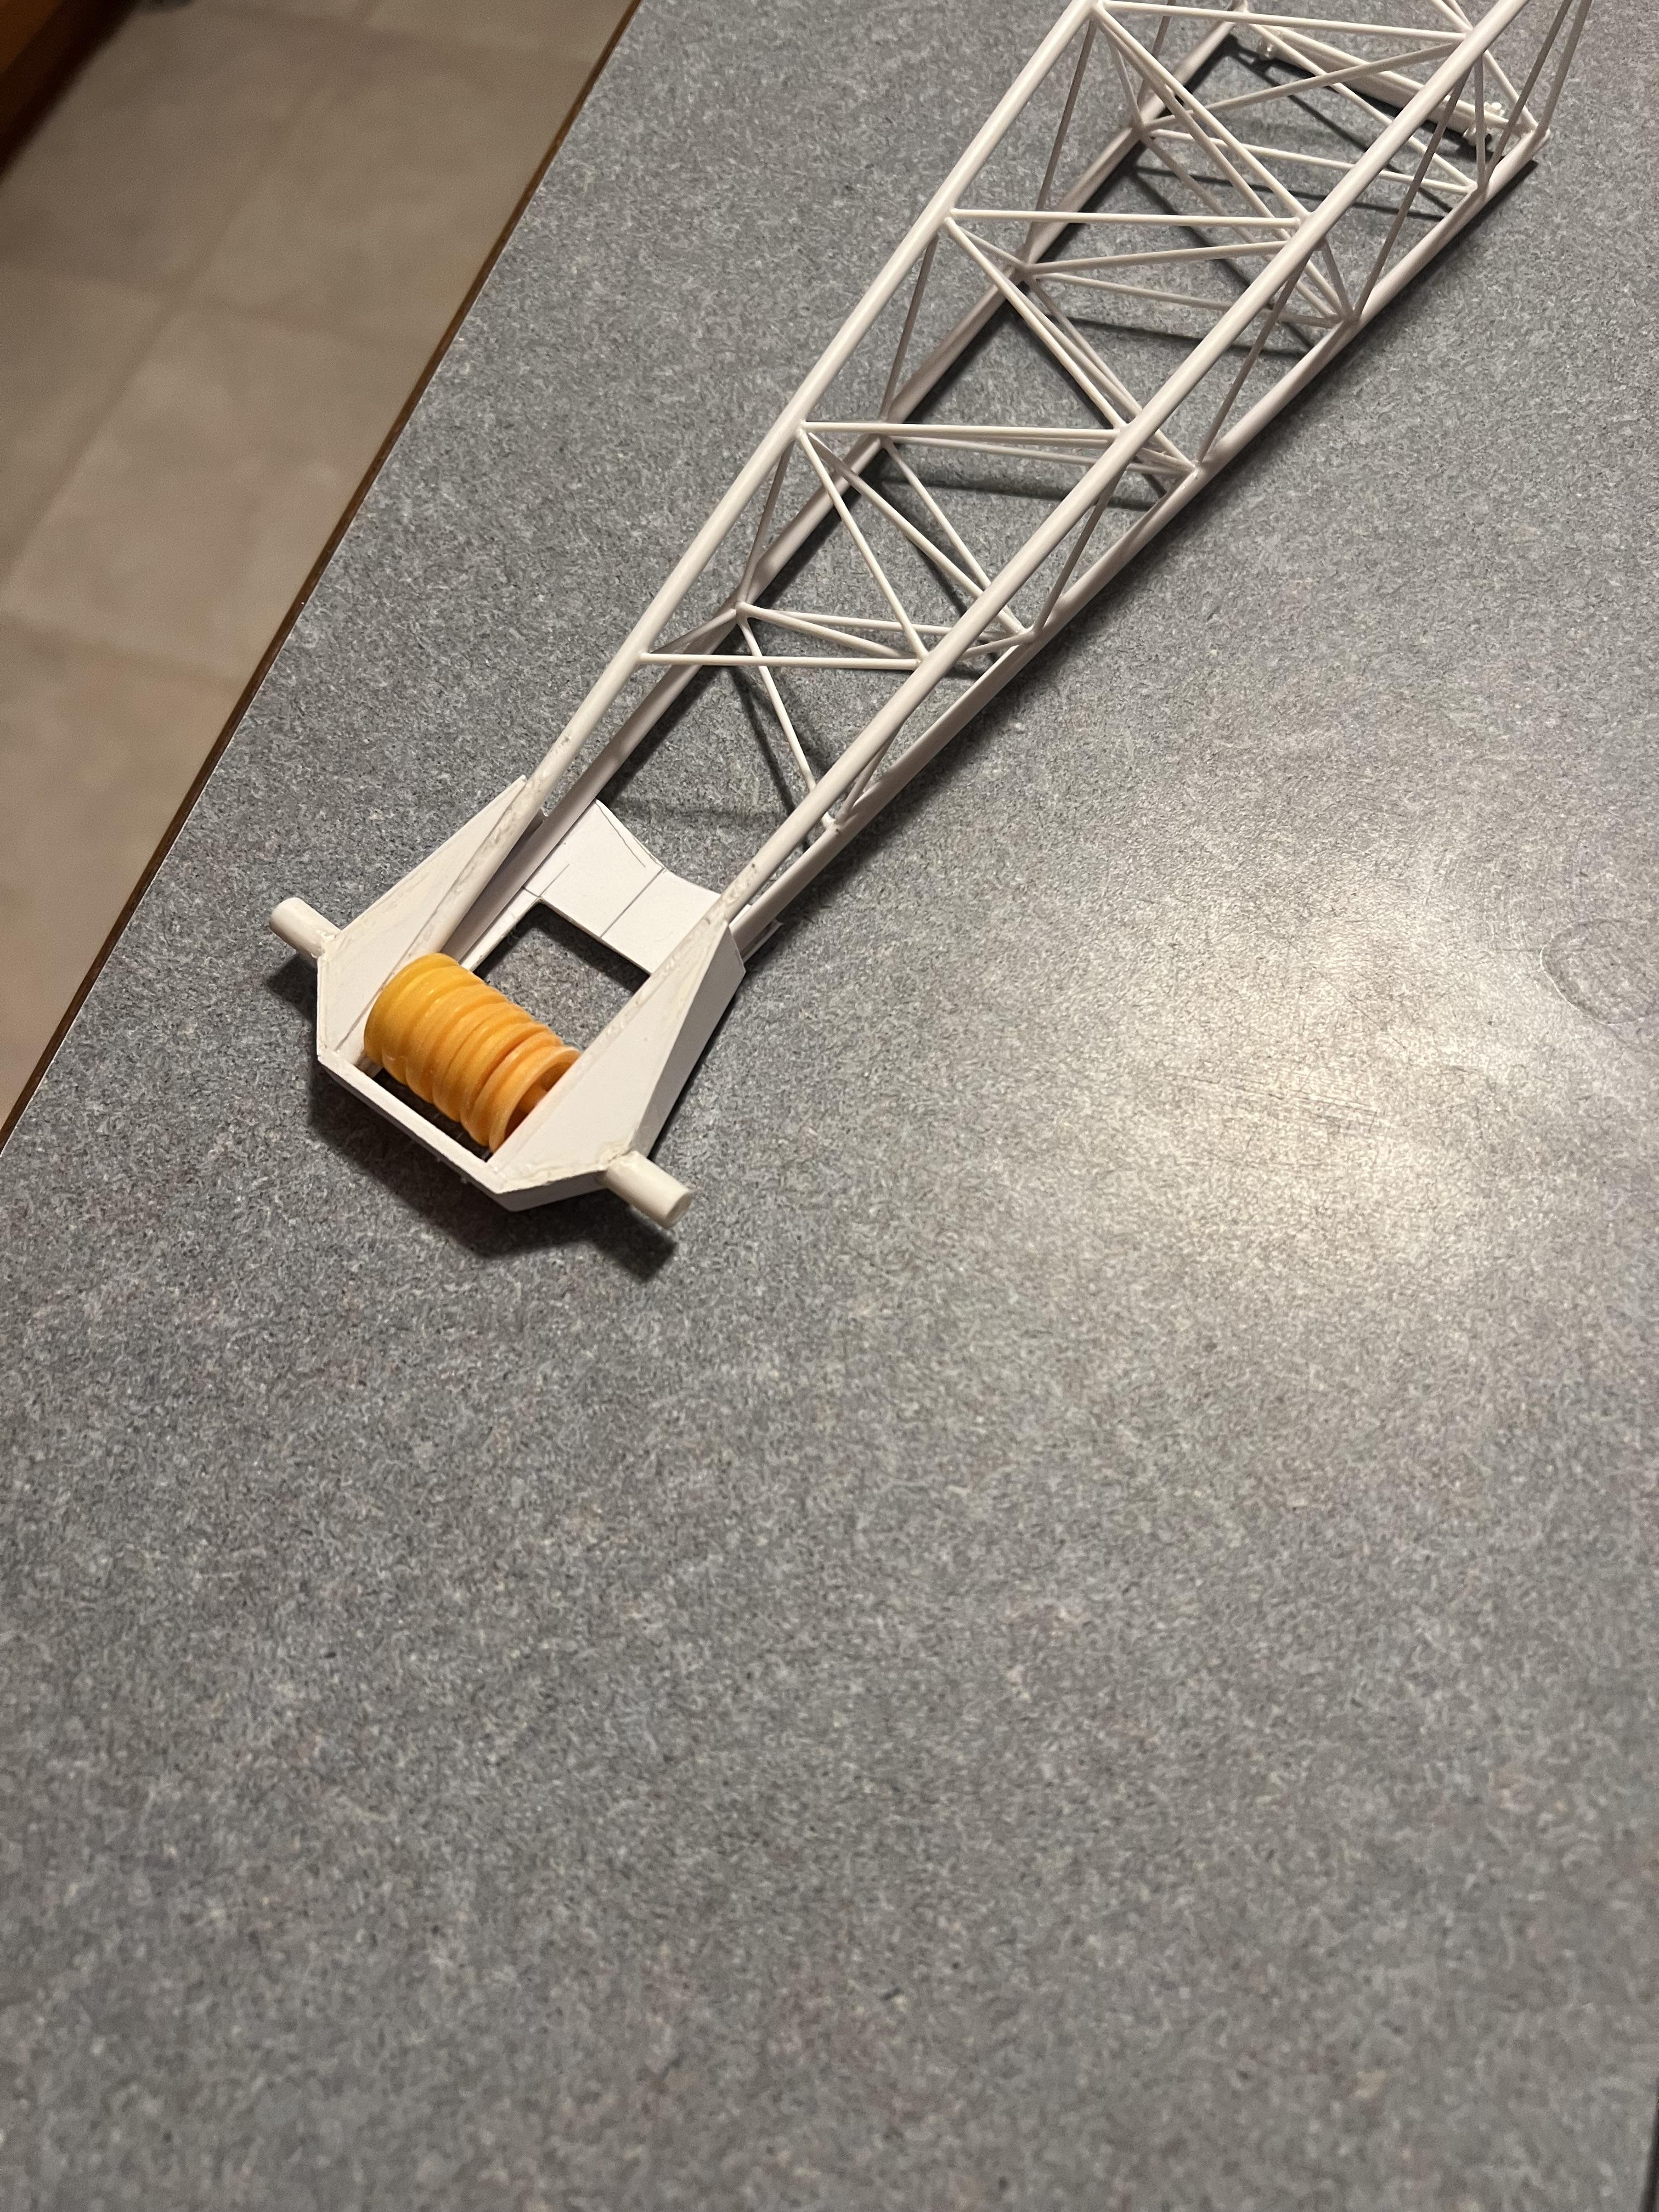
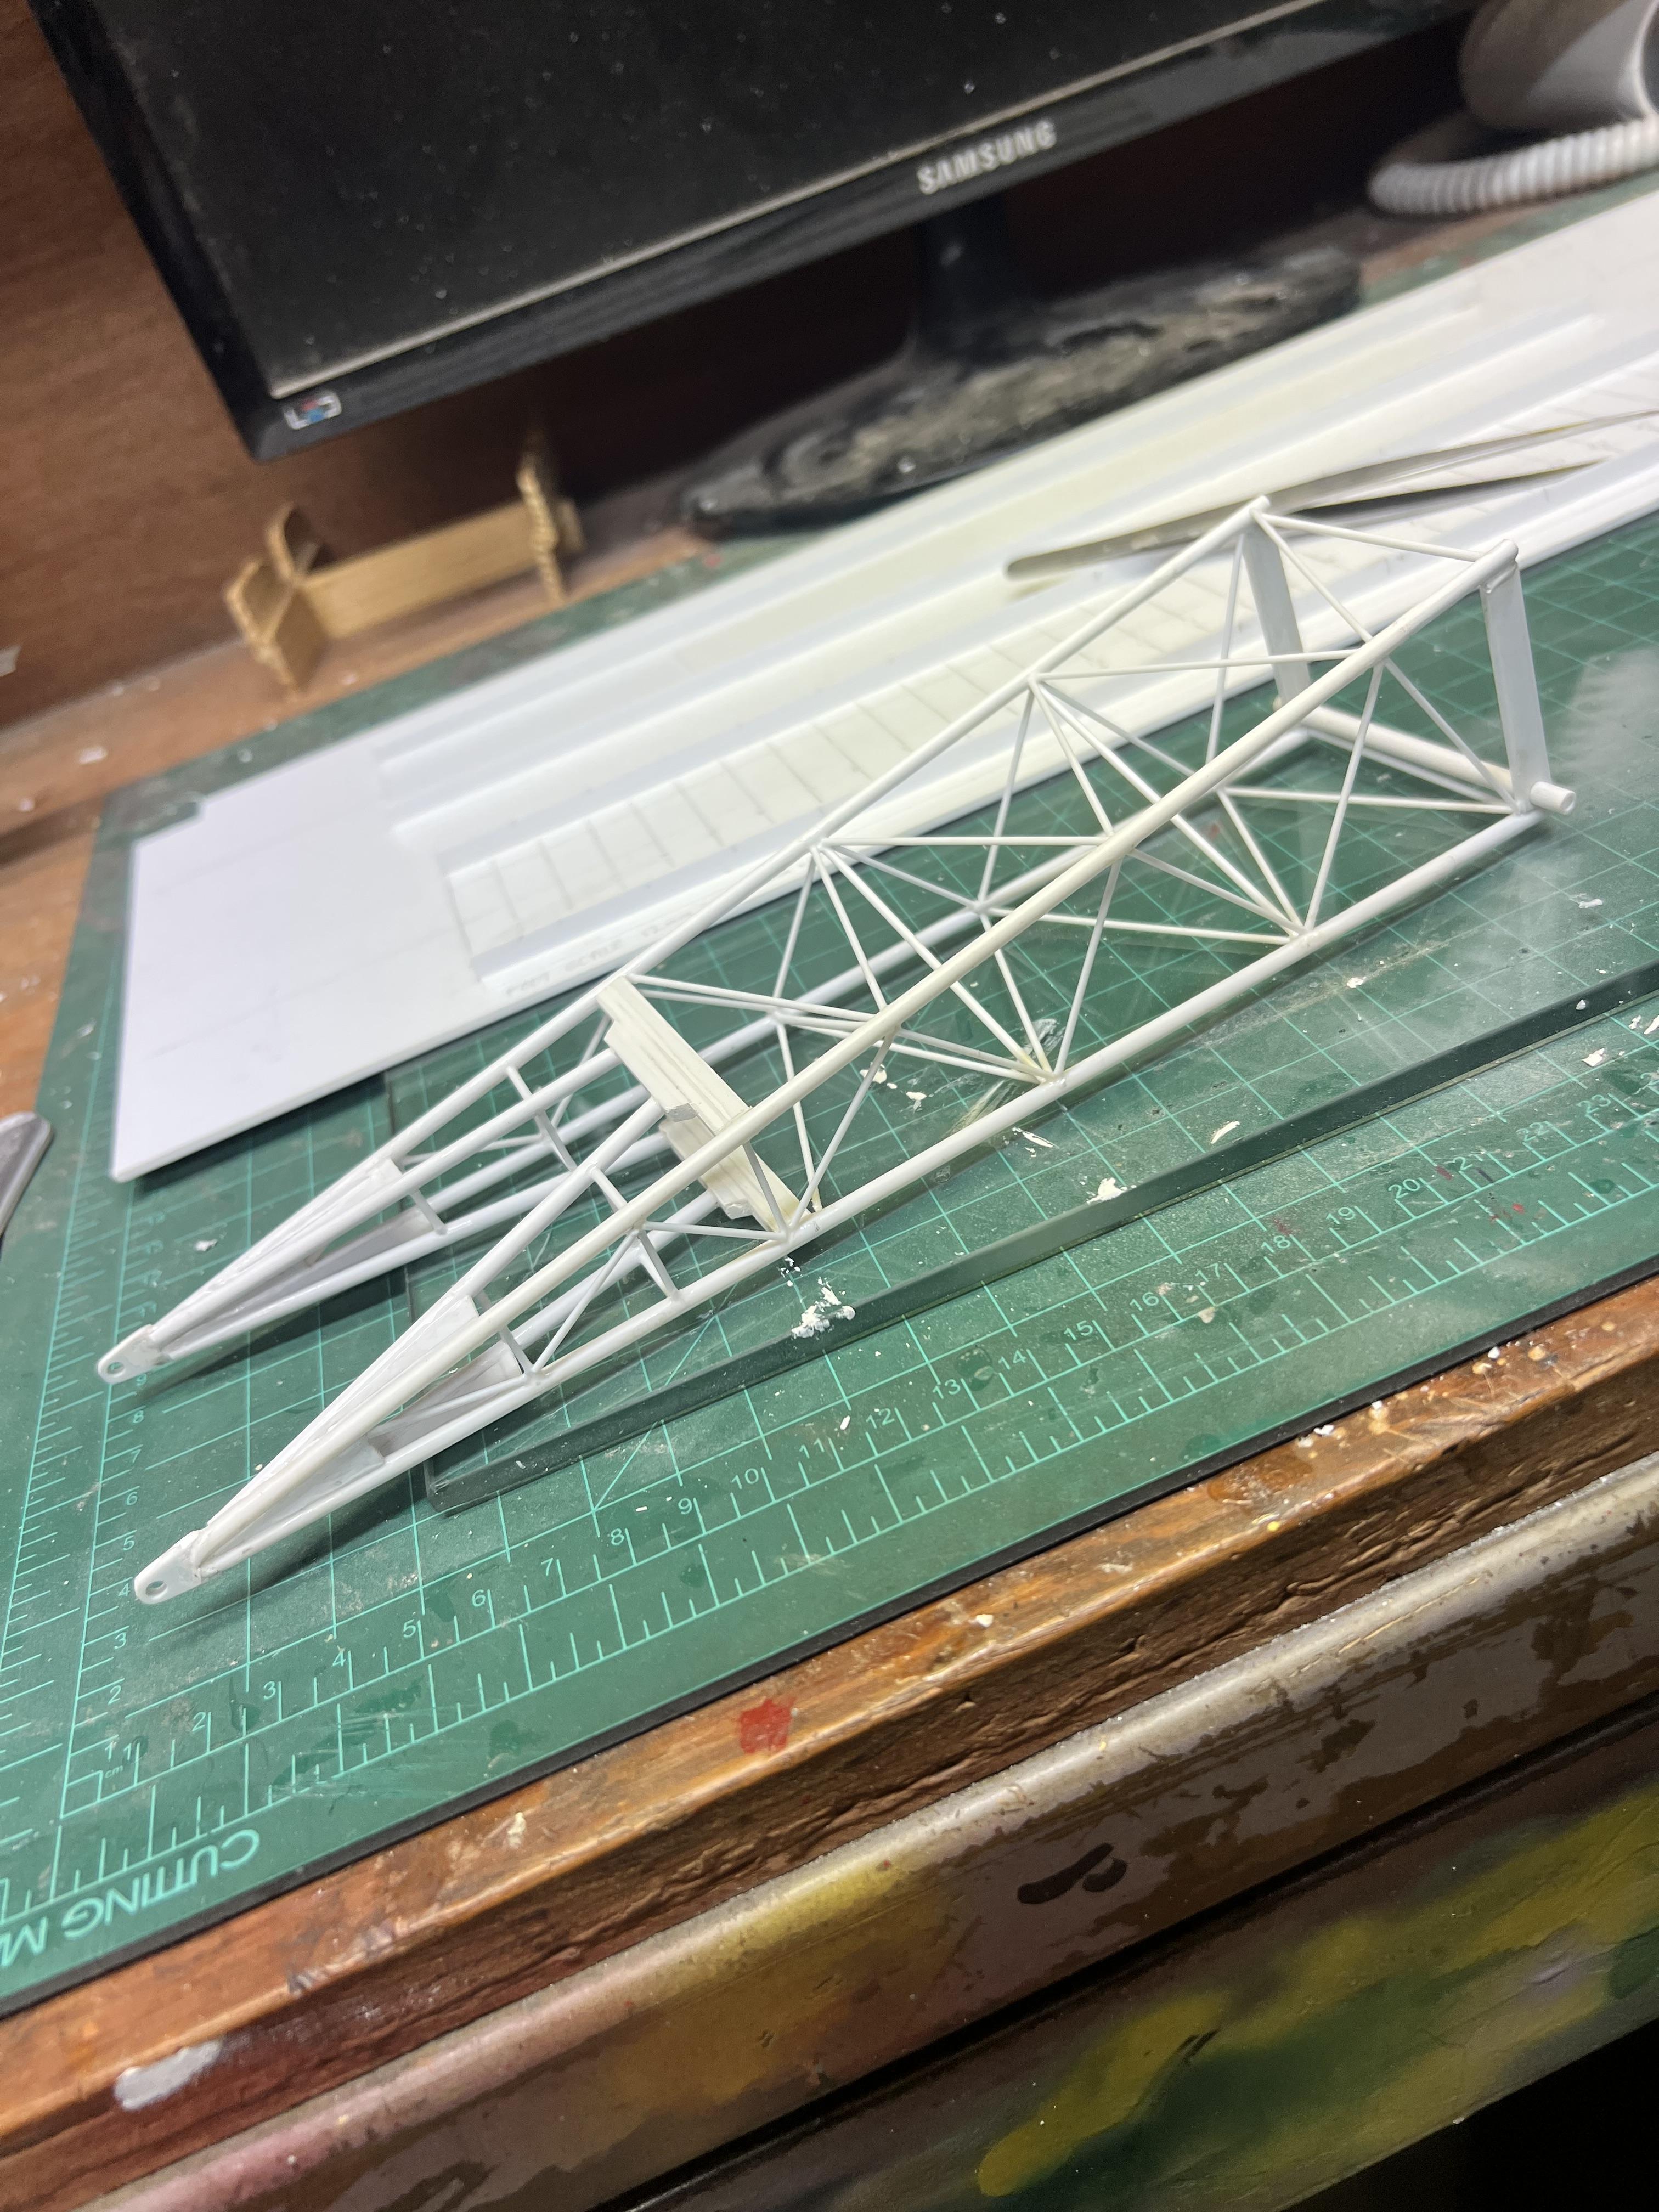
Amazingly, these little flimsy styrene boom sections are incredibly stiff once fully constructed with all of the lattice work installed. That’s the beauty of a lattice crane, light weight booms that have superb lifting ability.
-
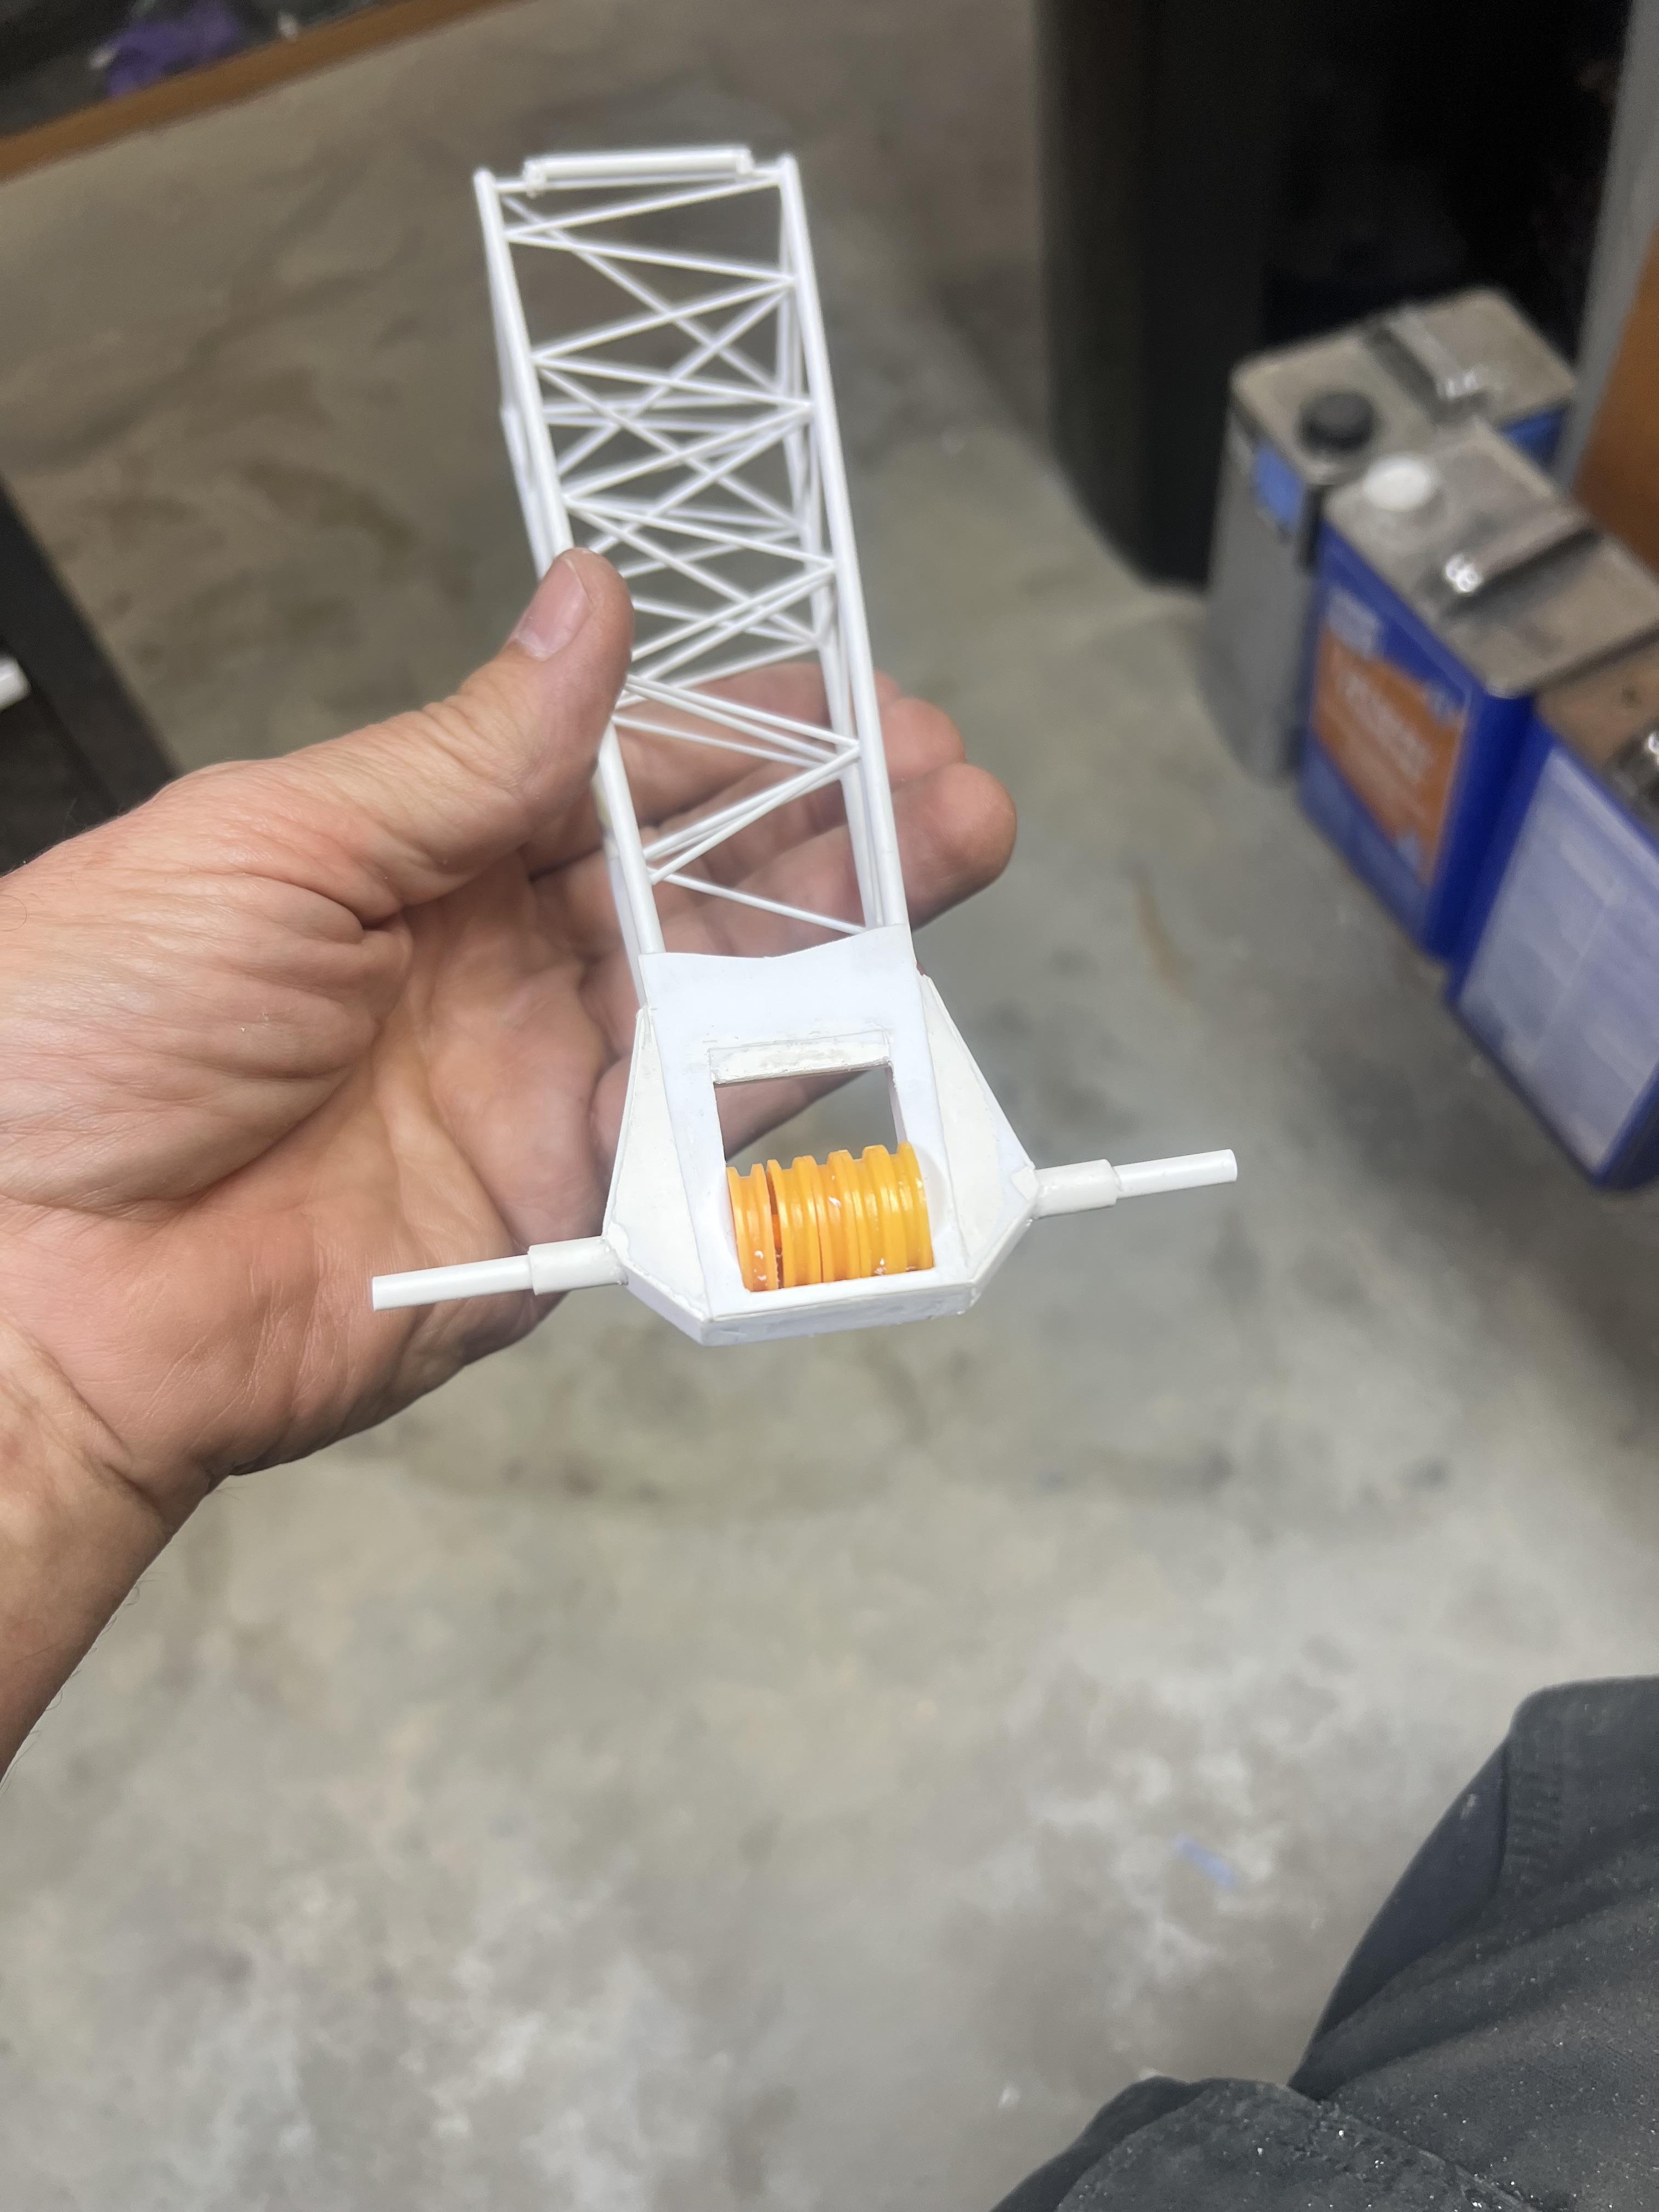
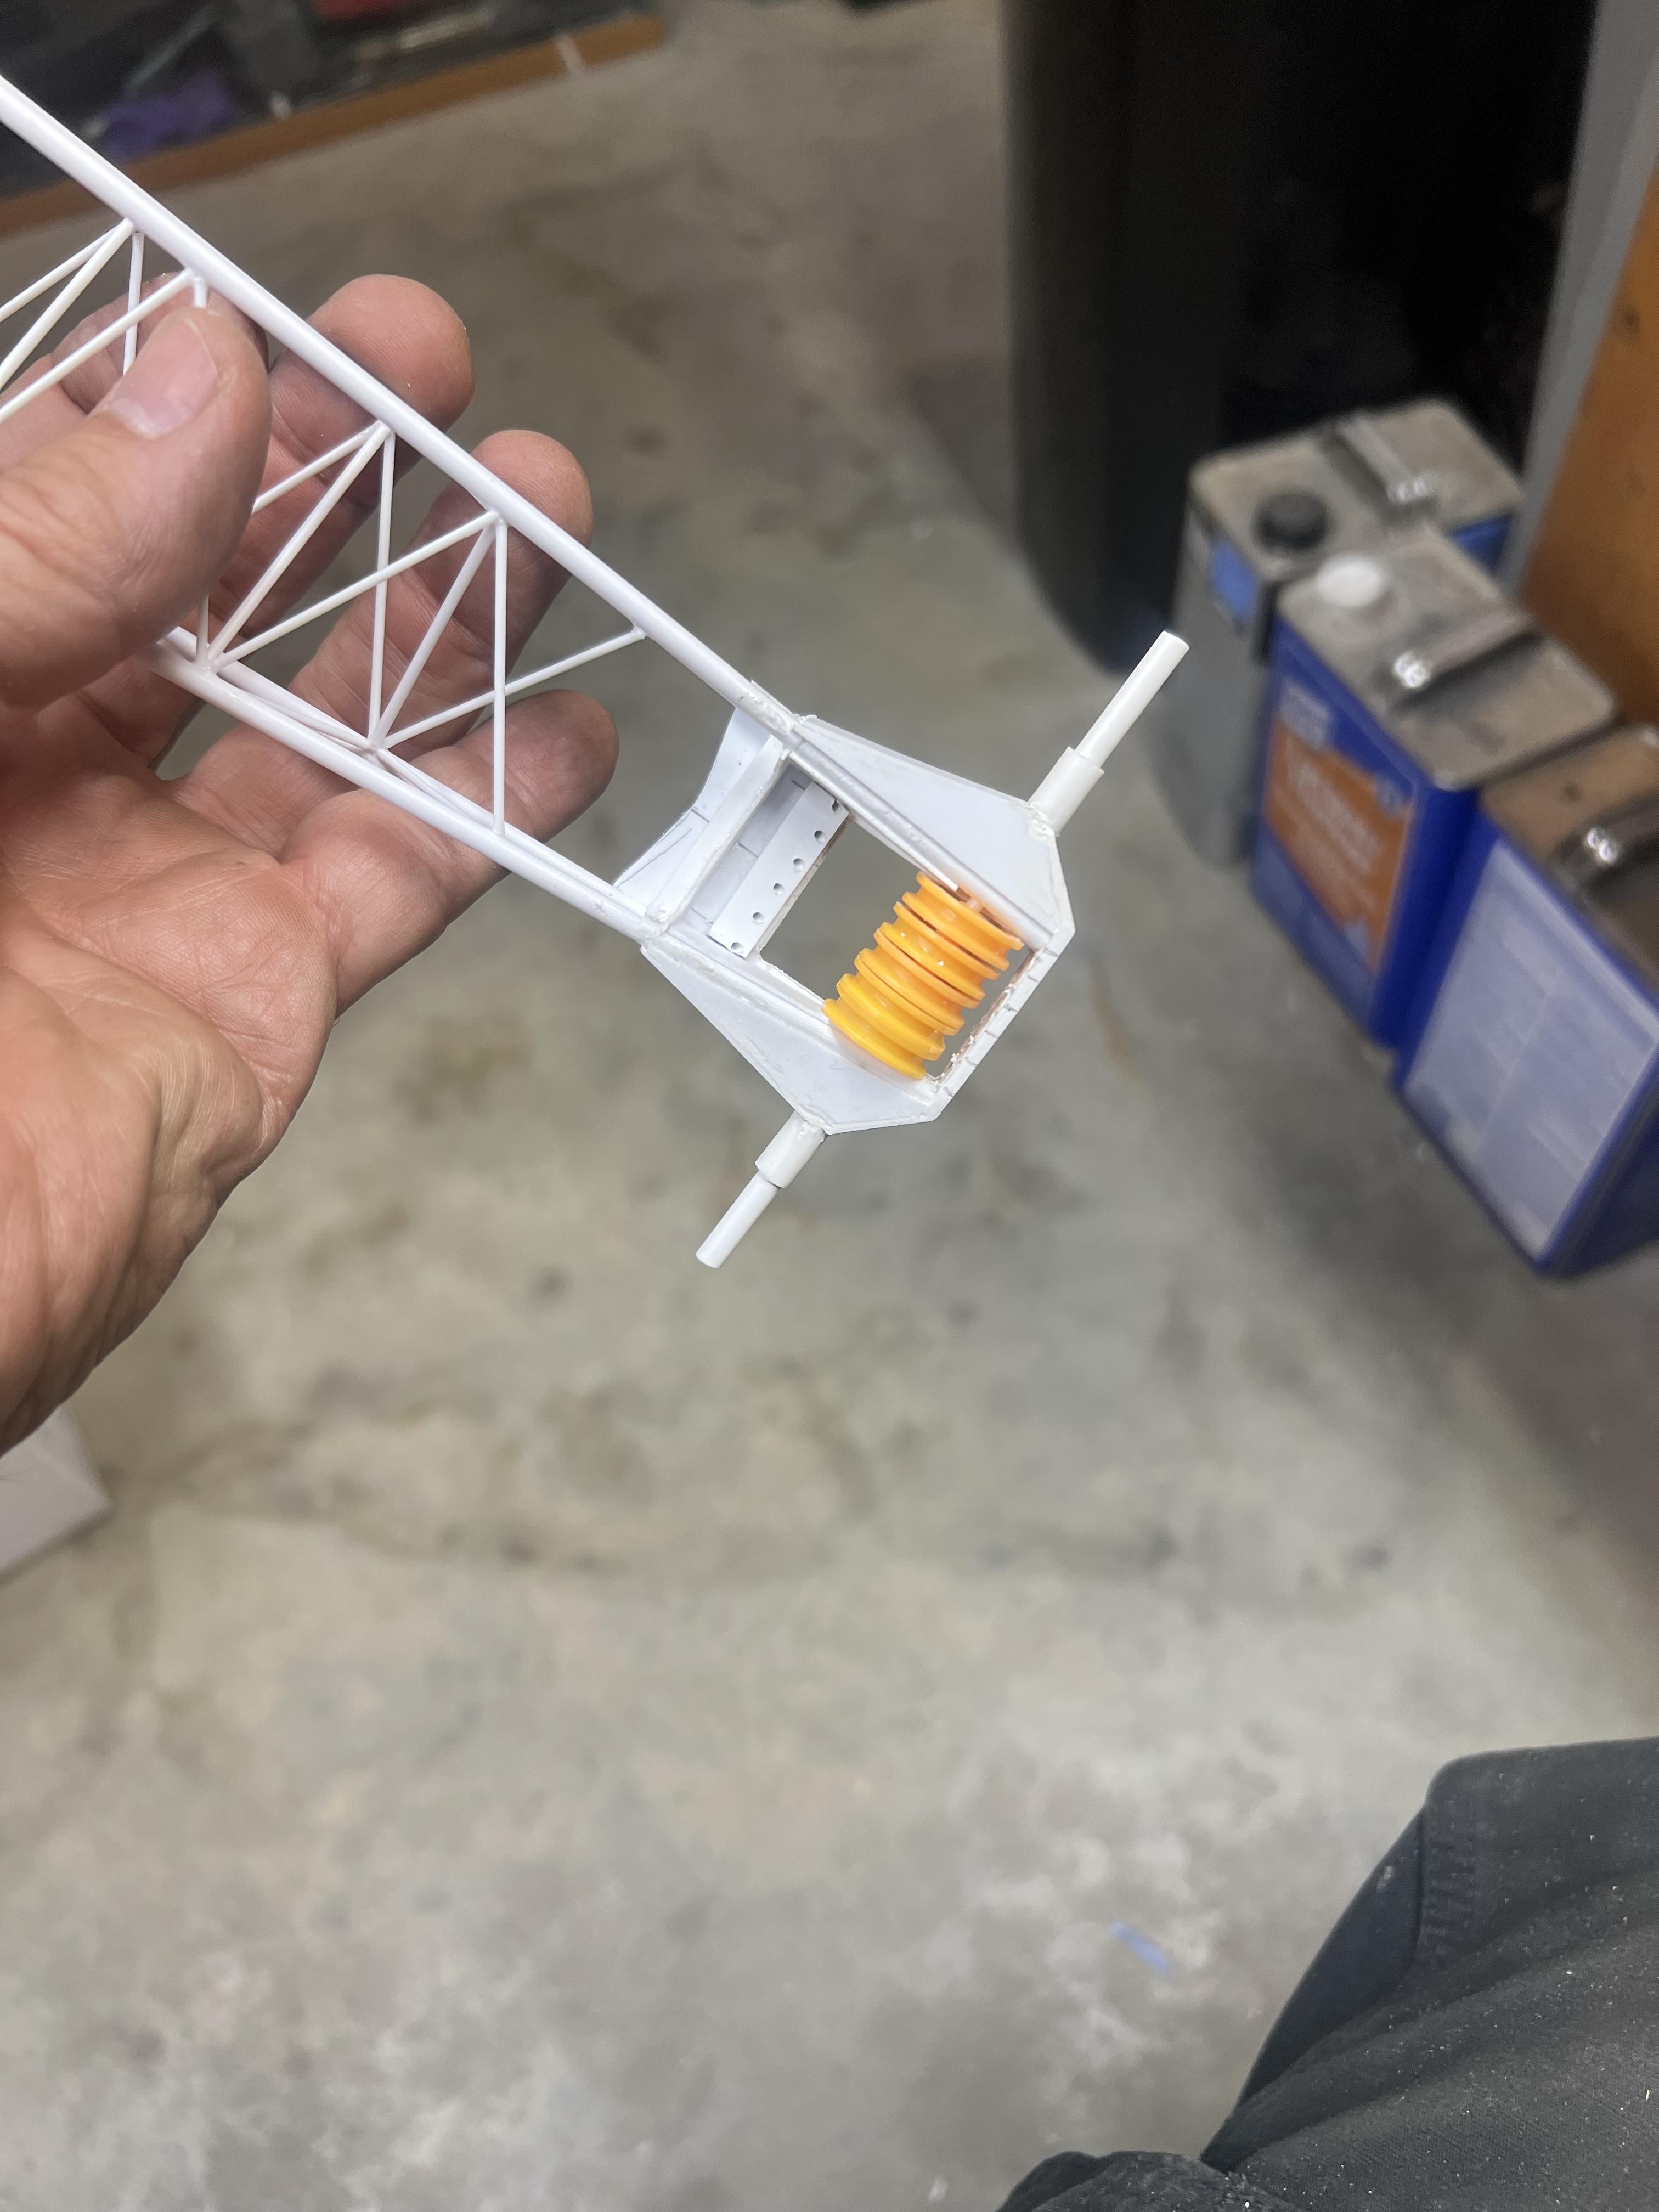
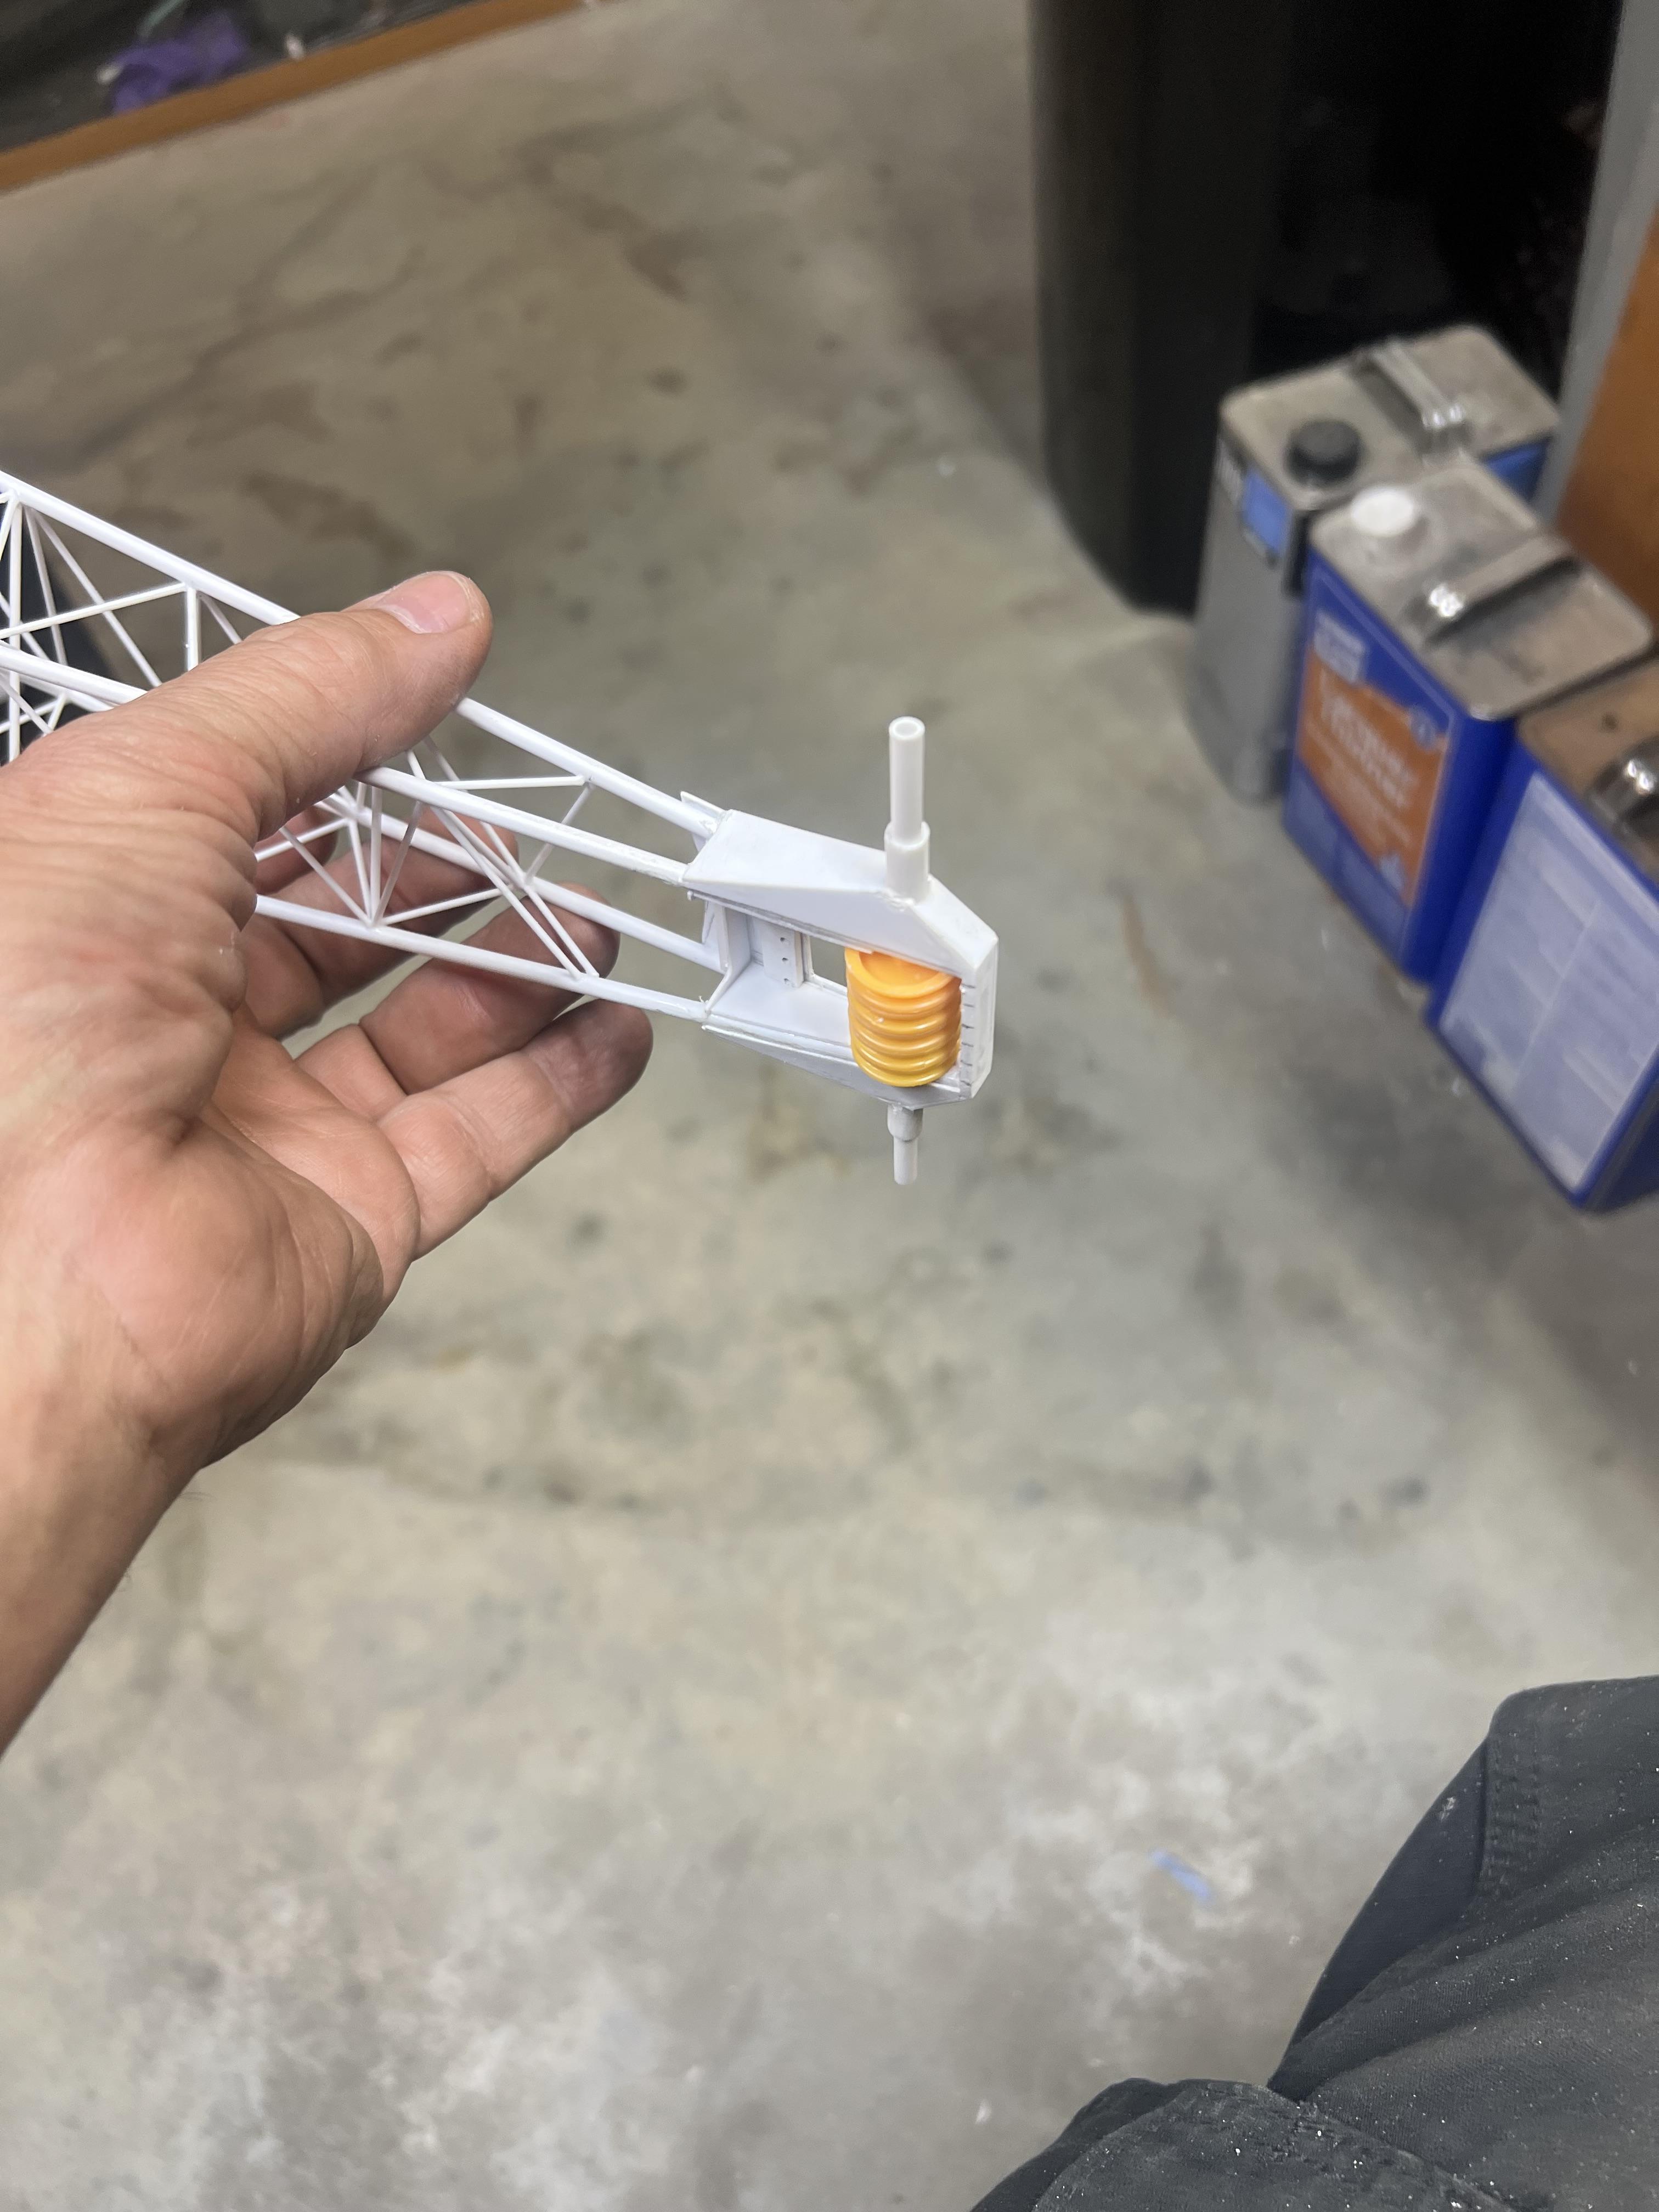
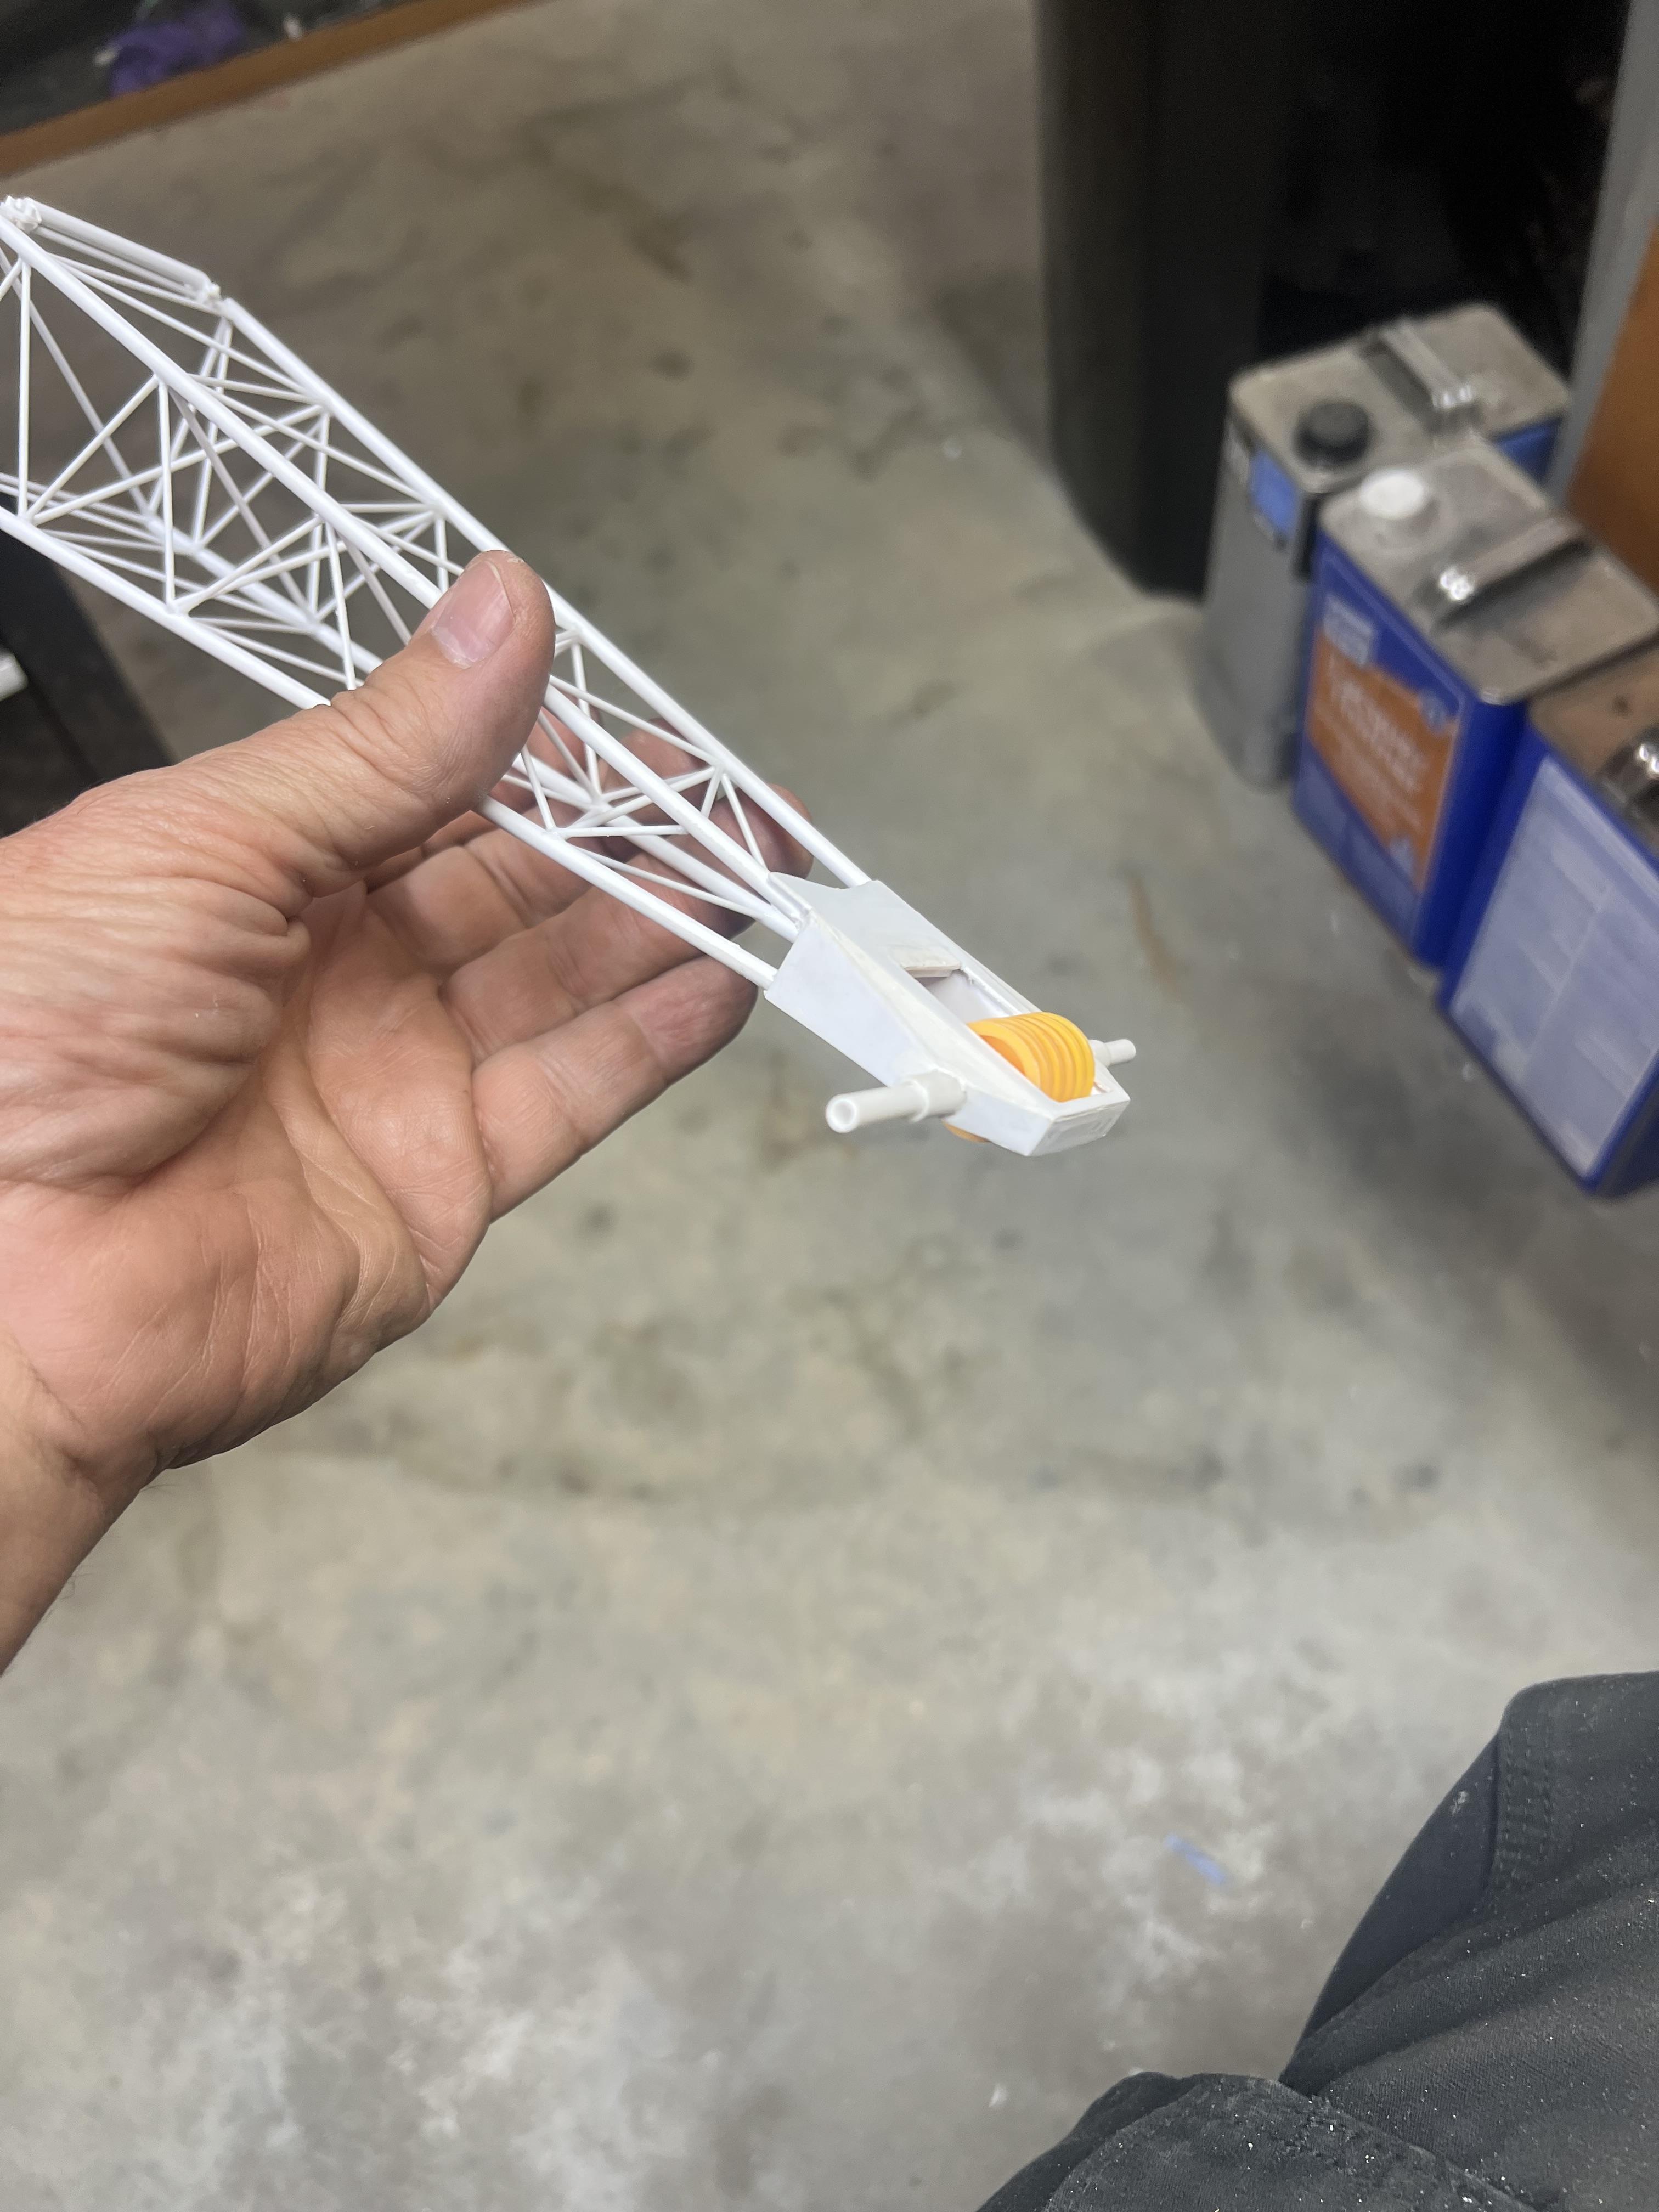
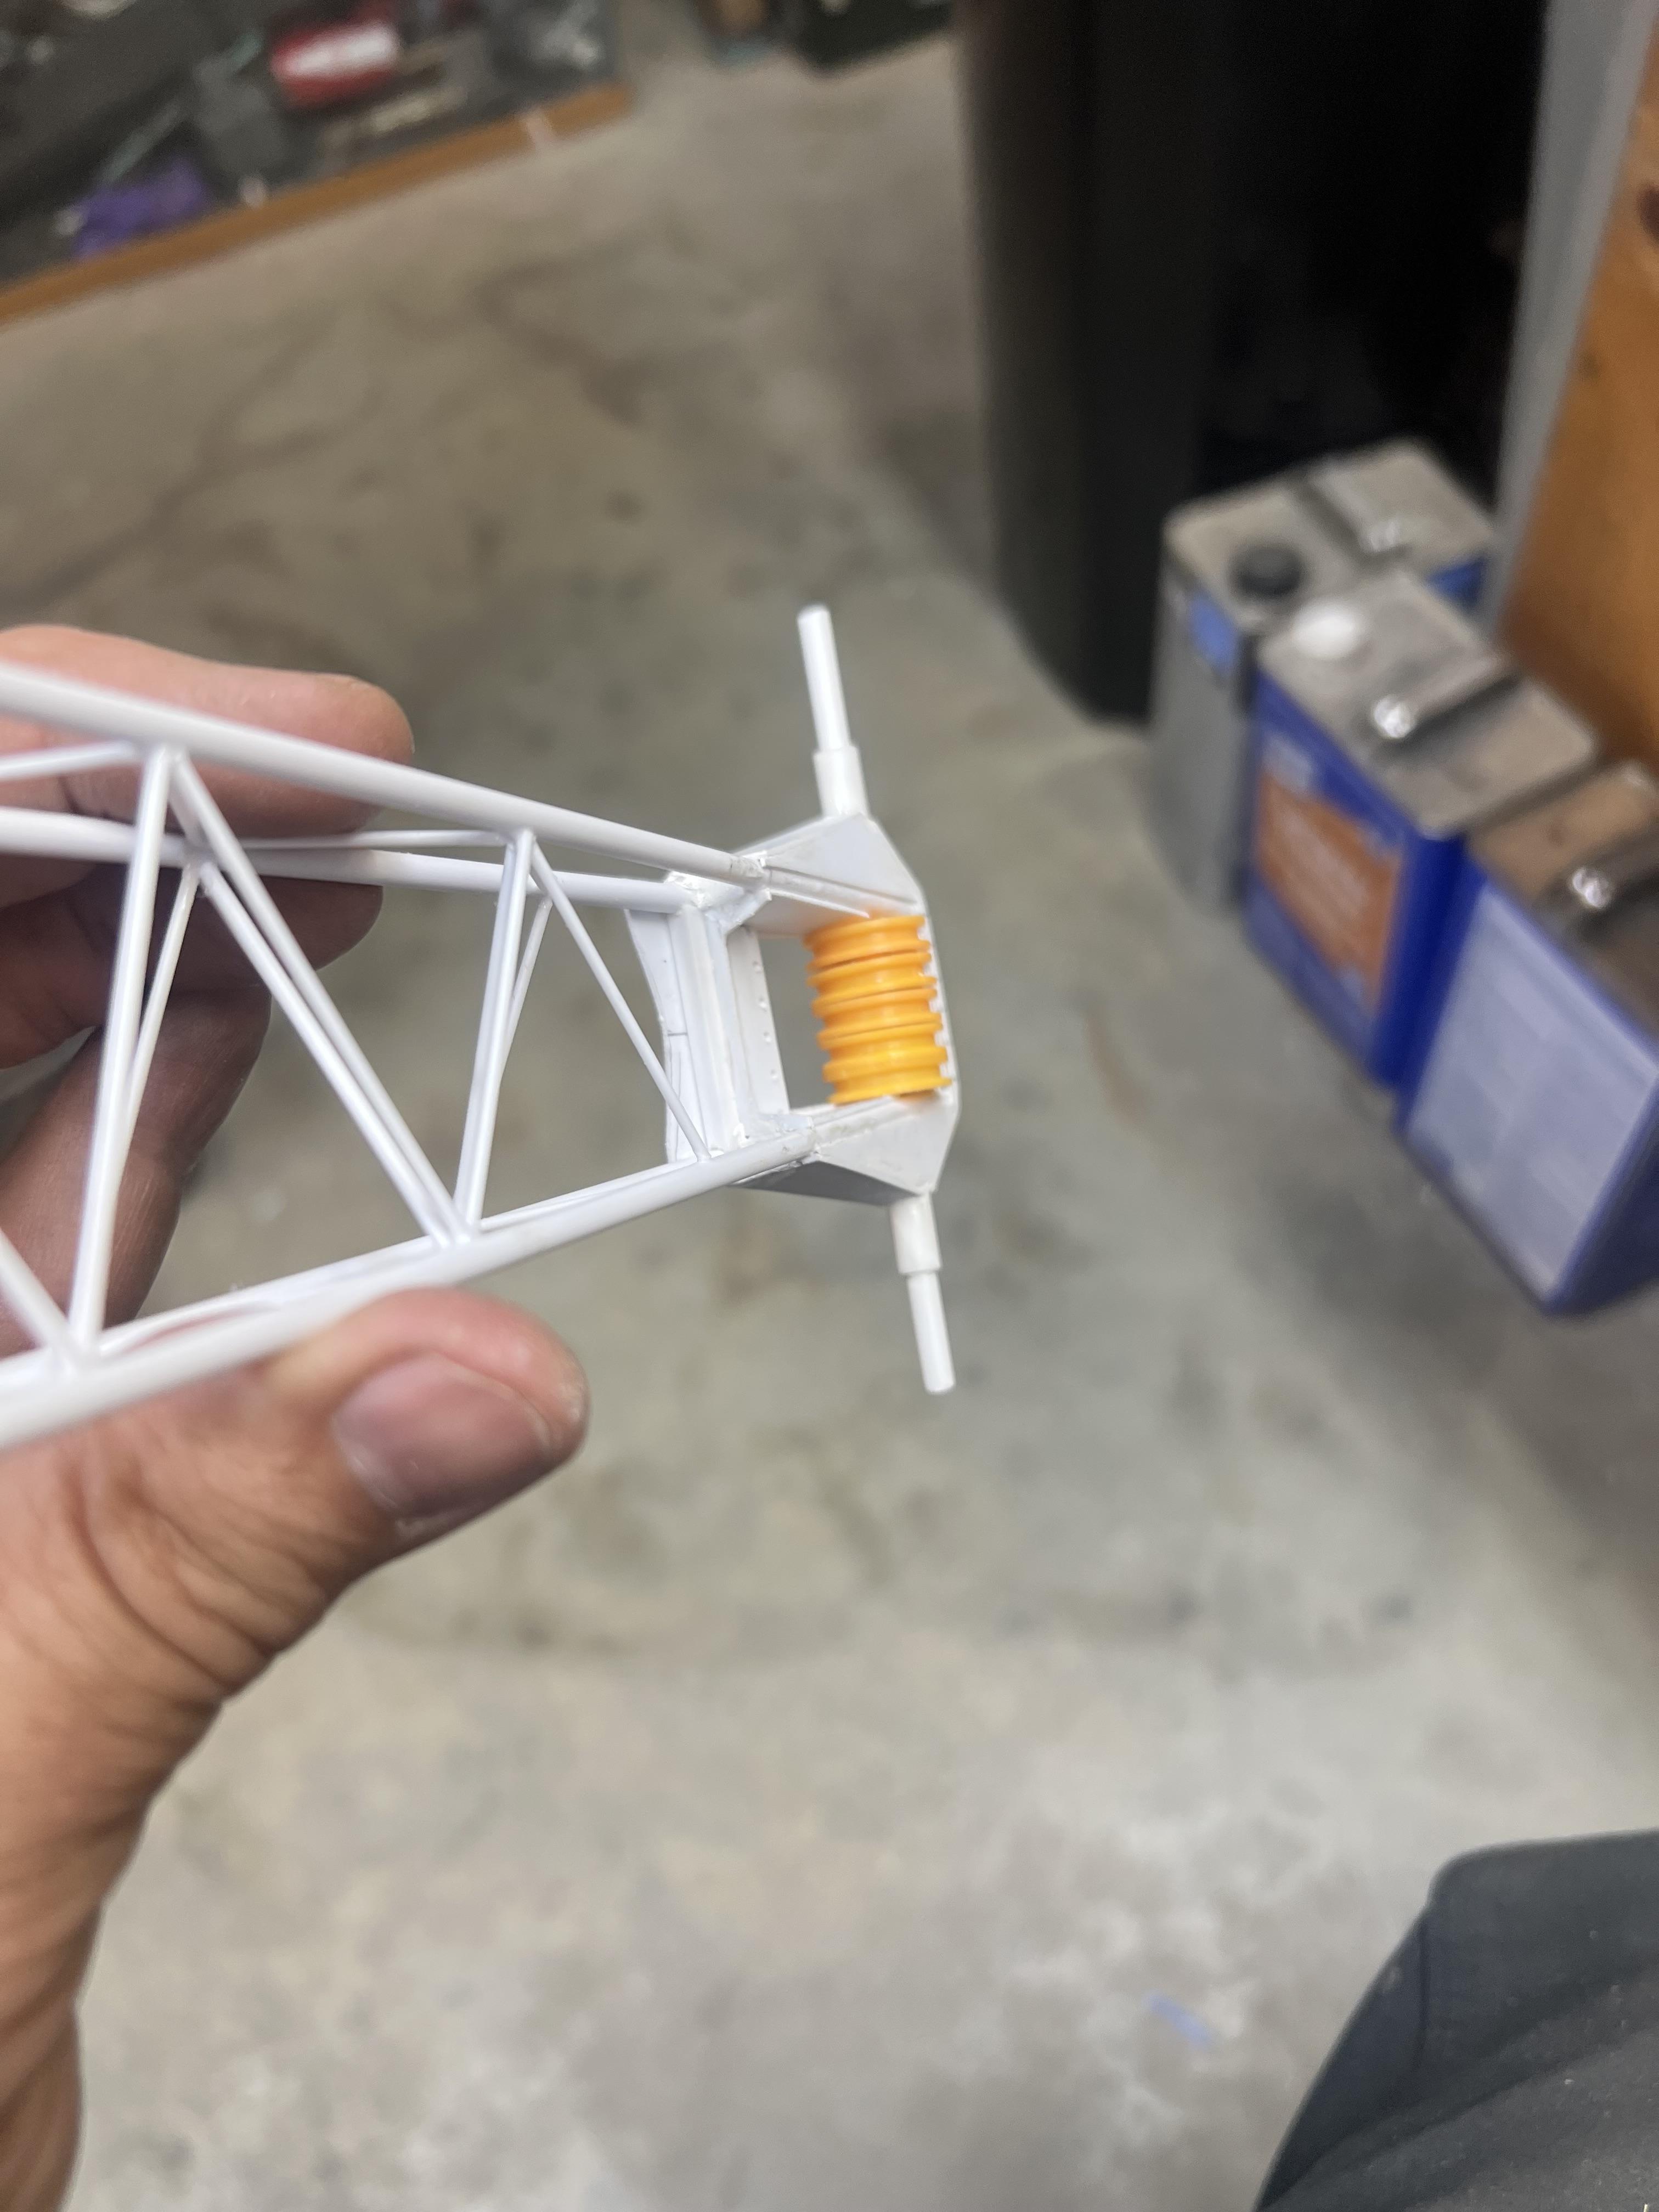
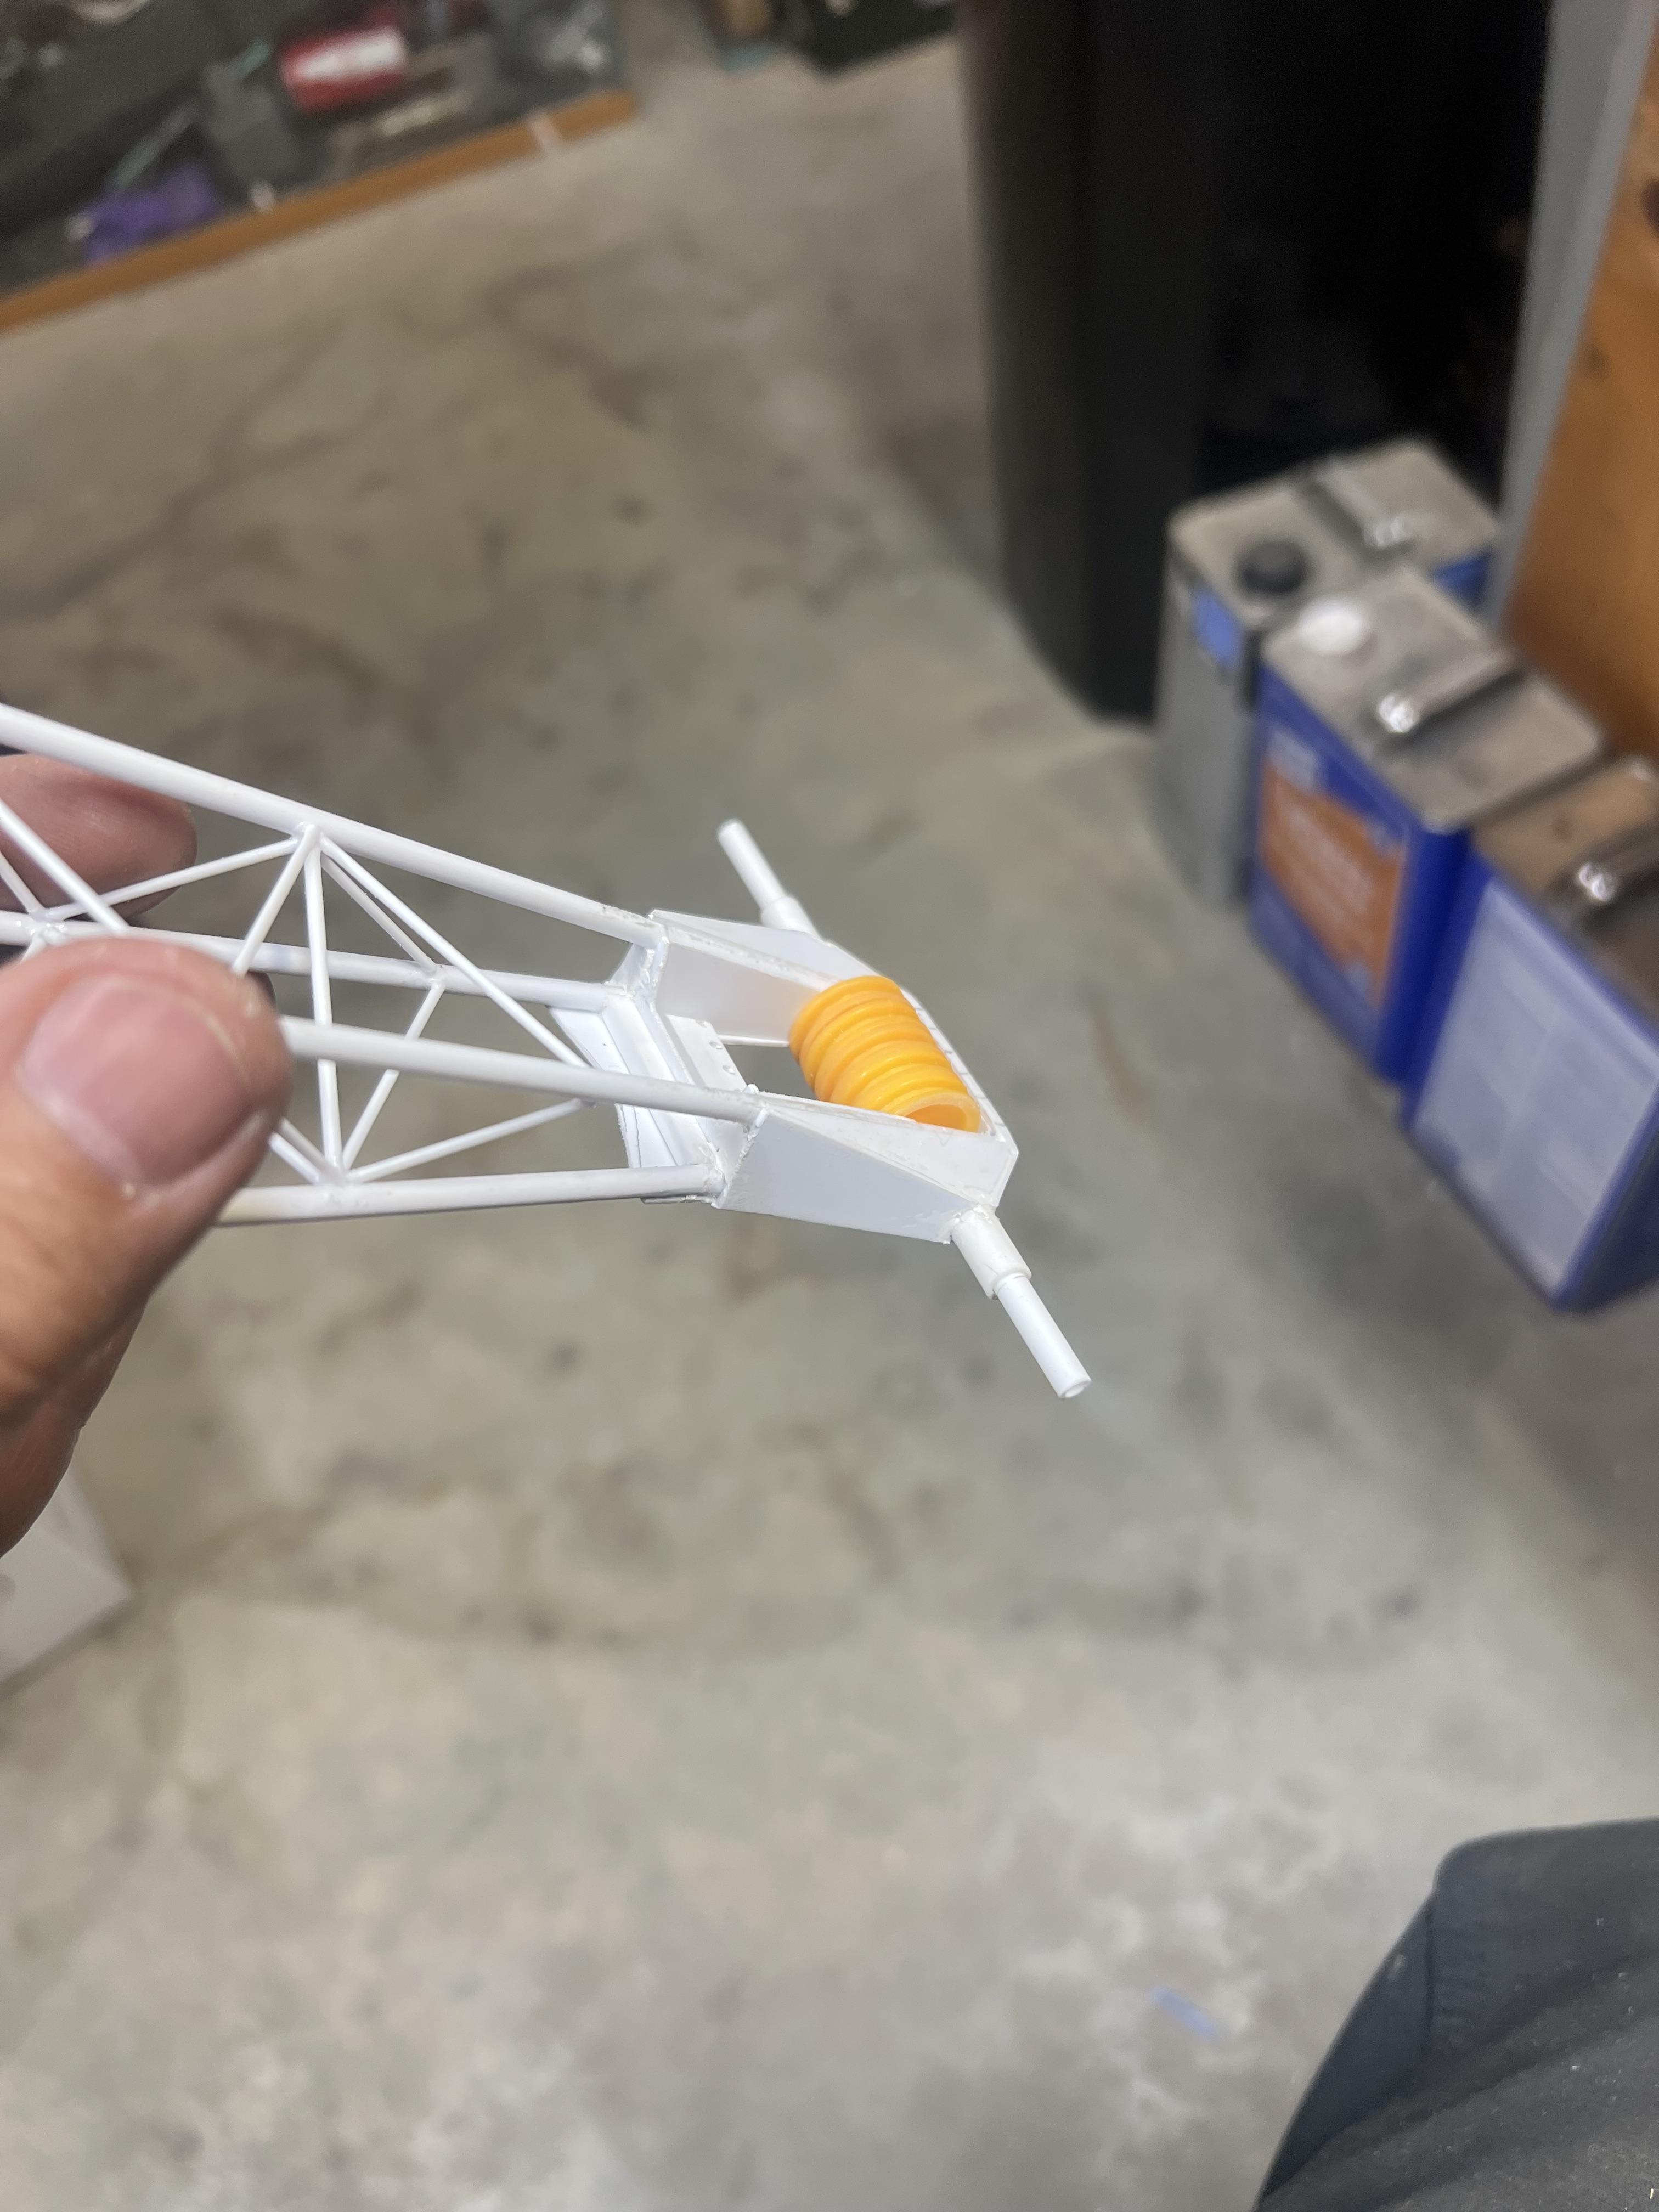
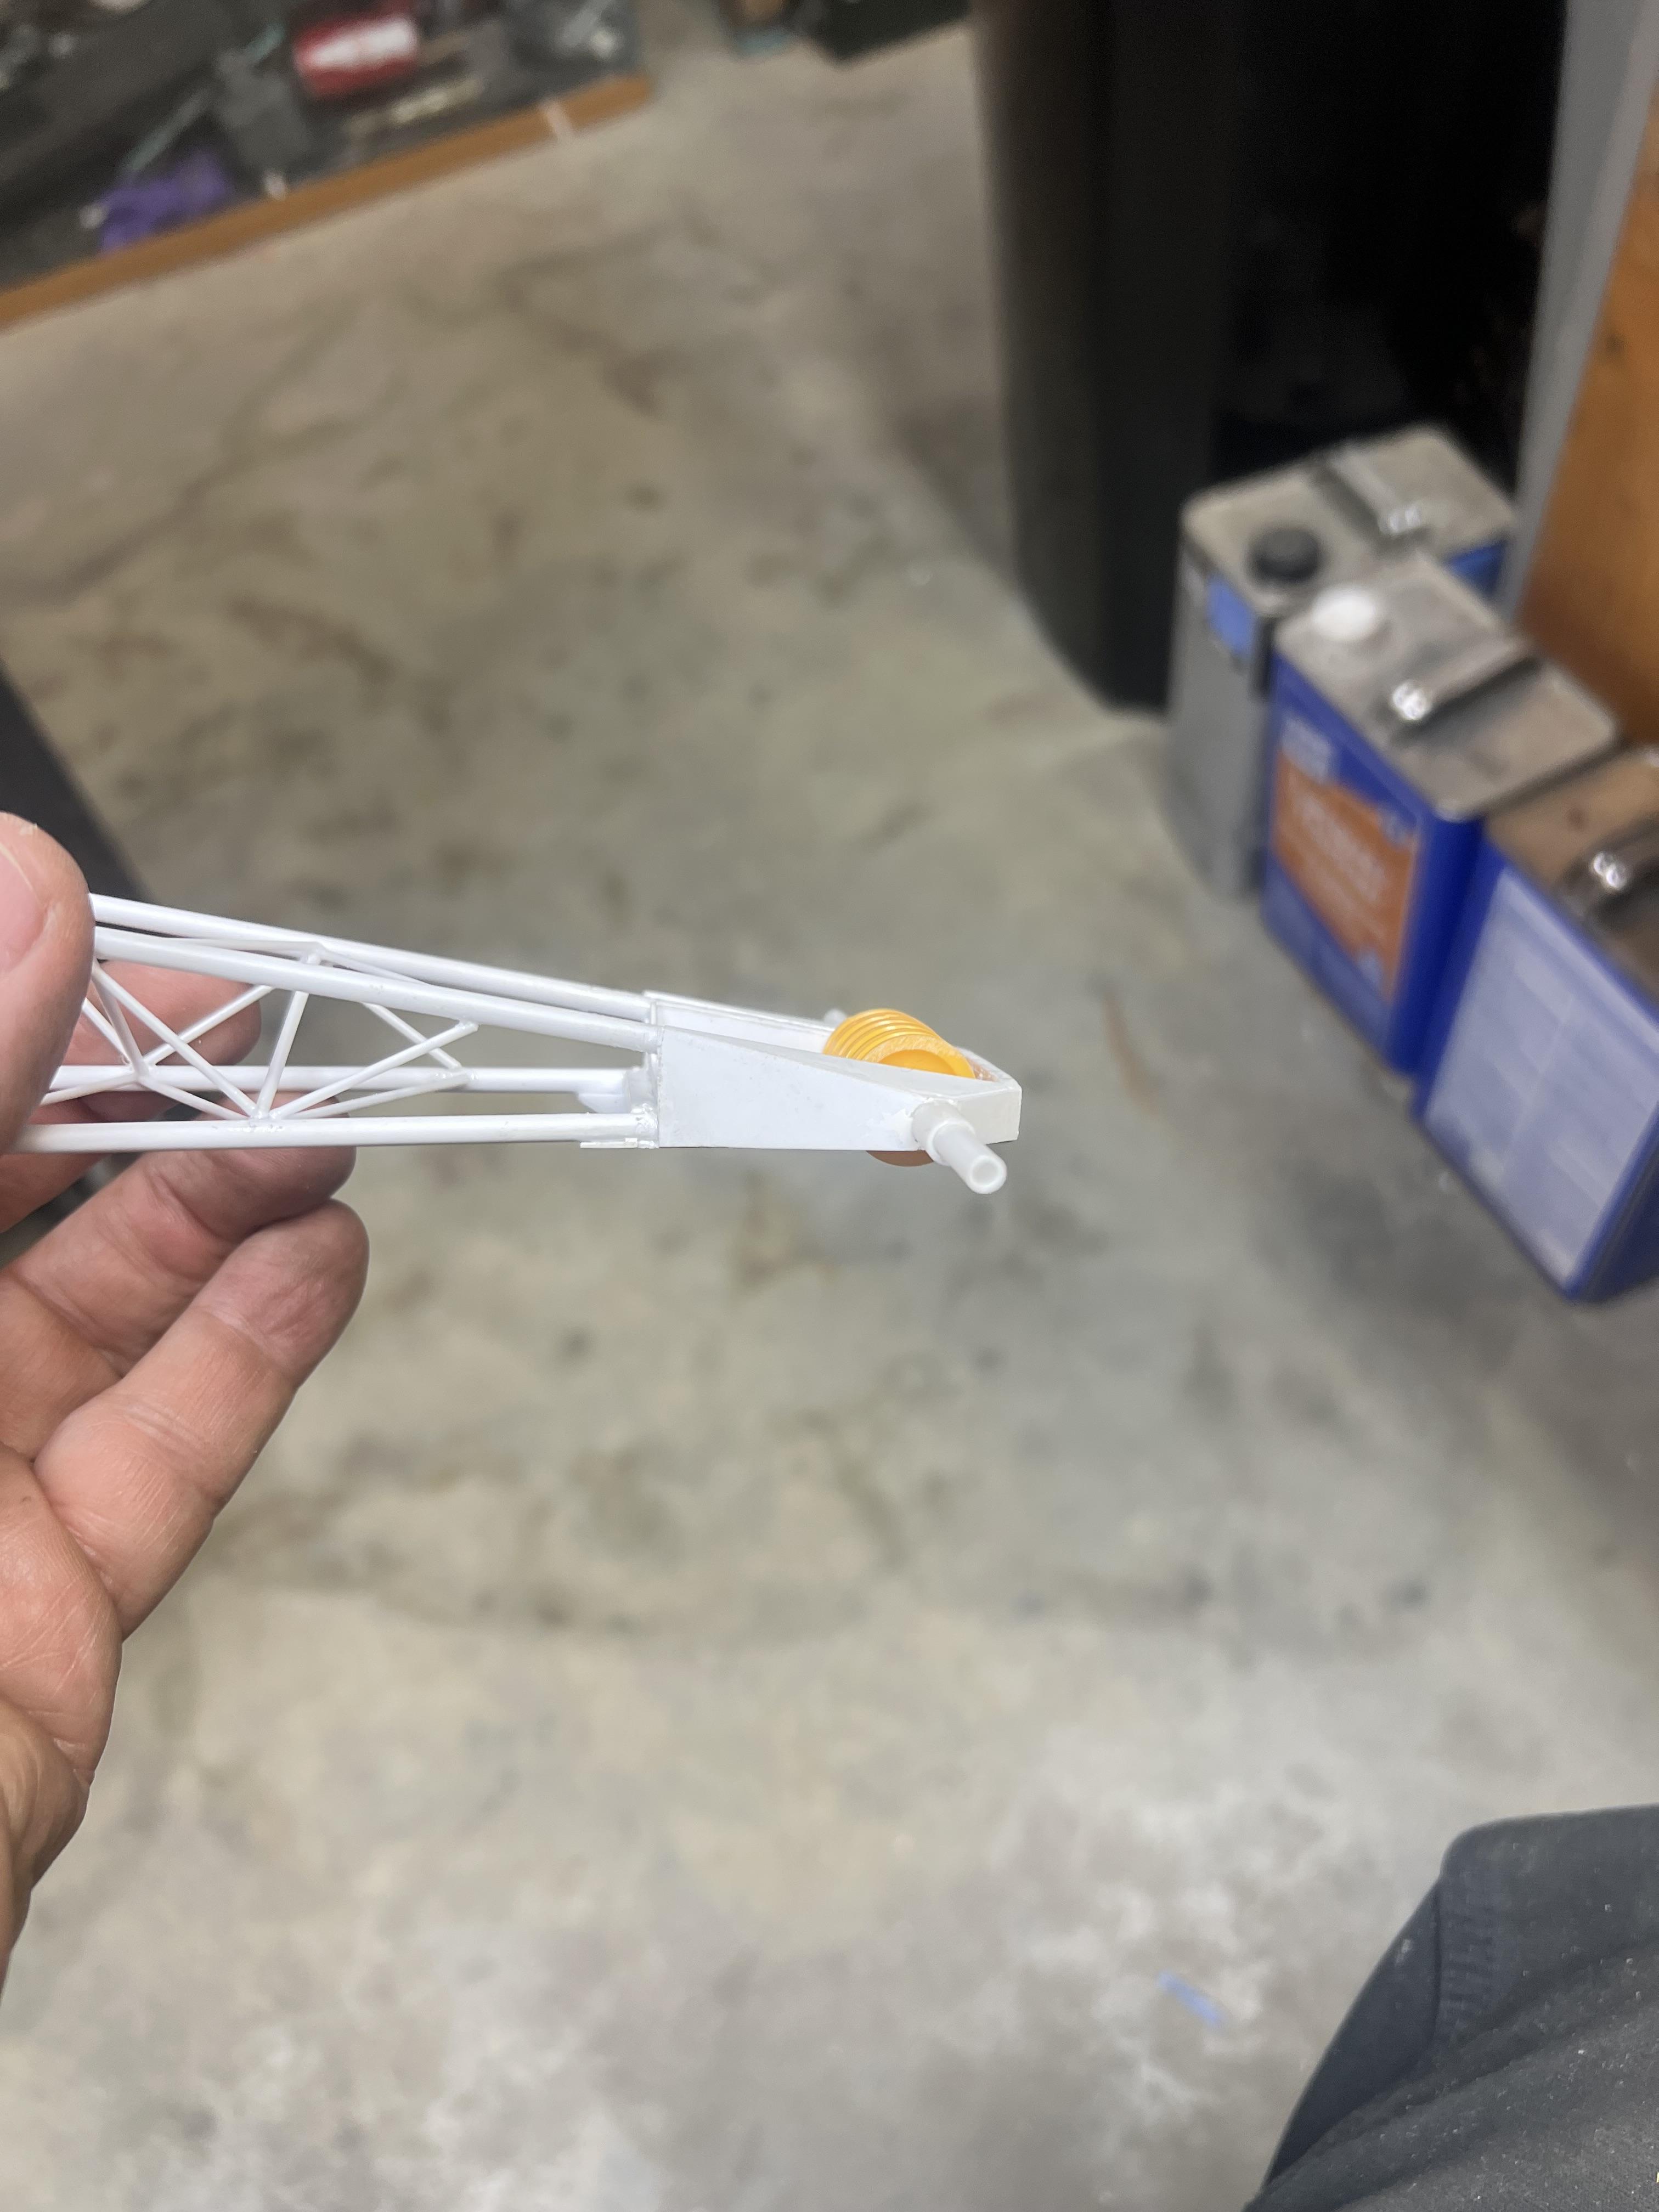
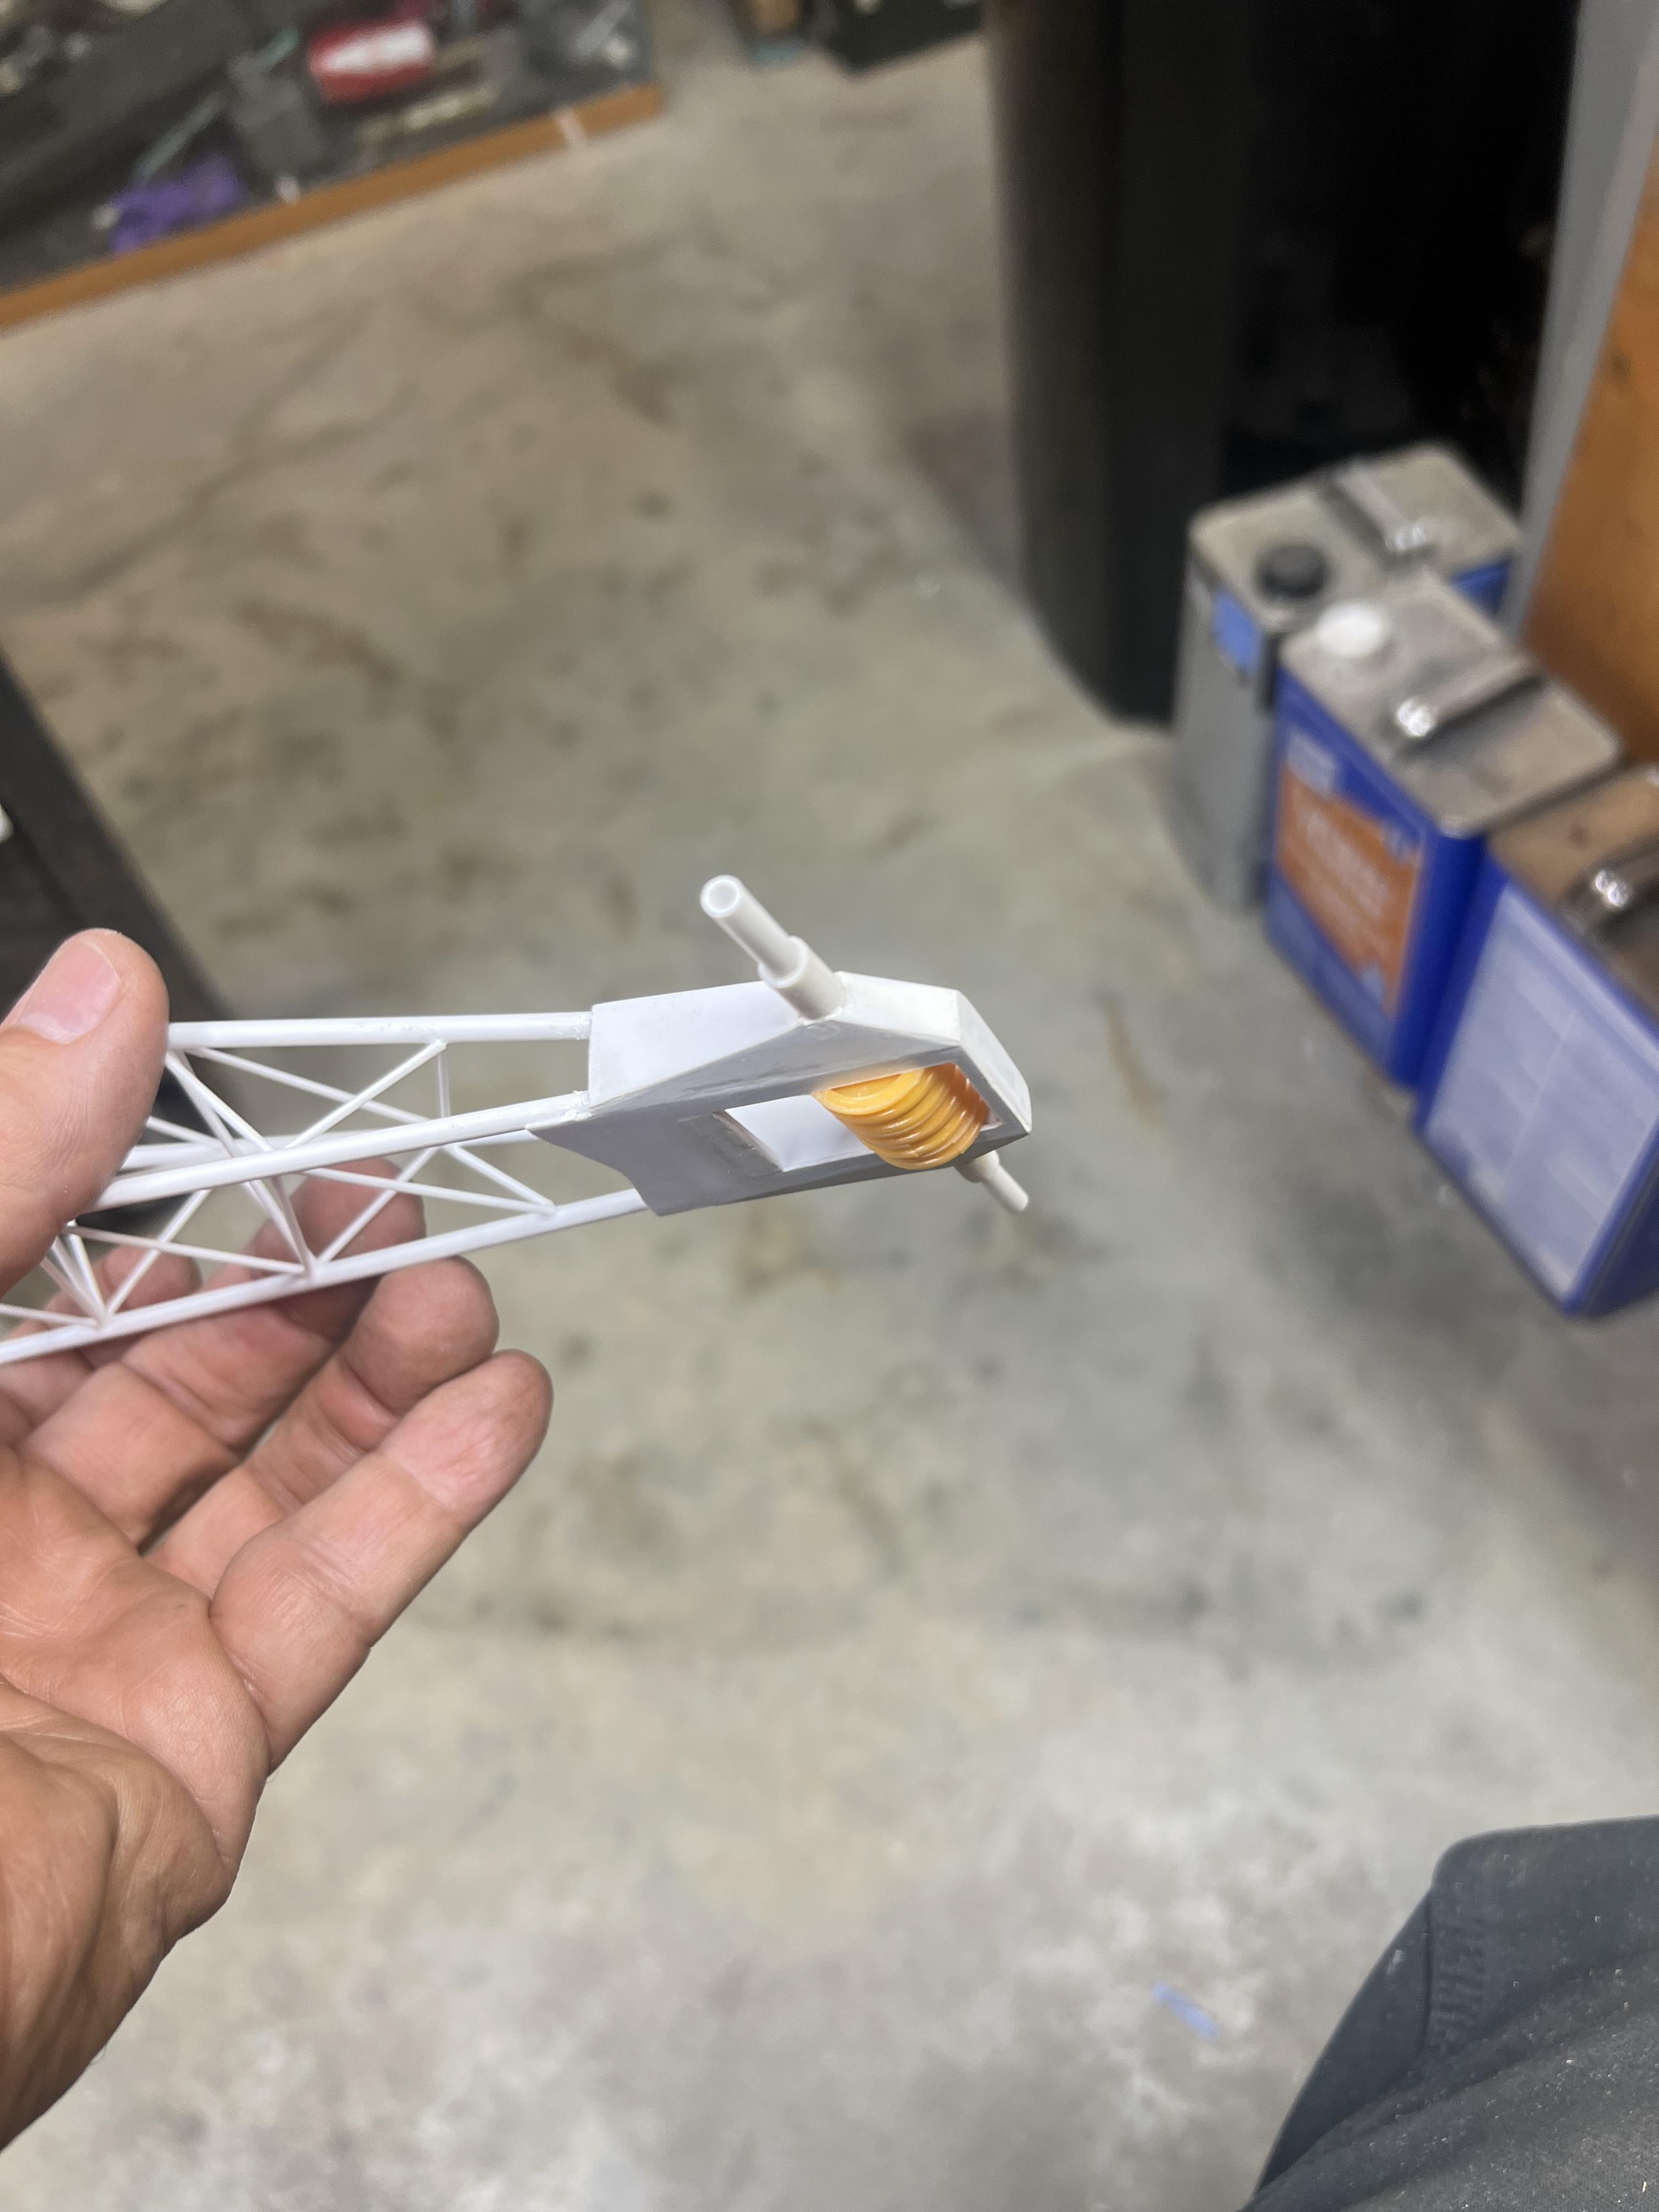
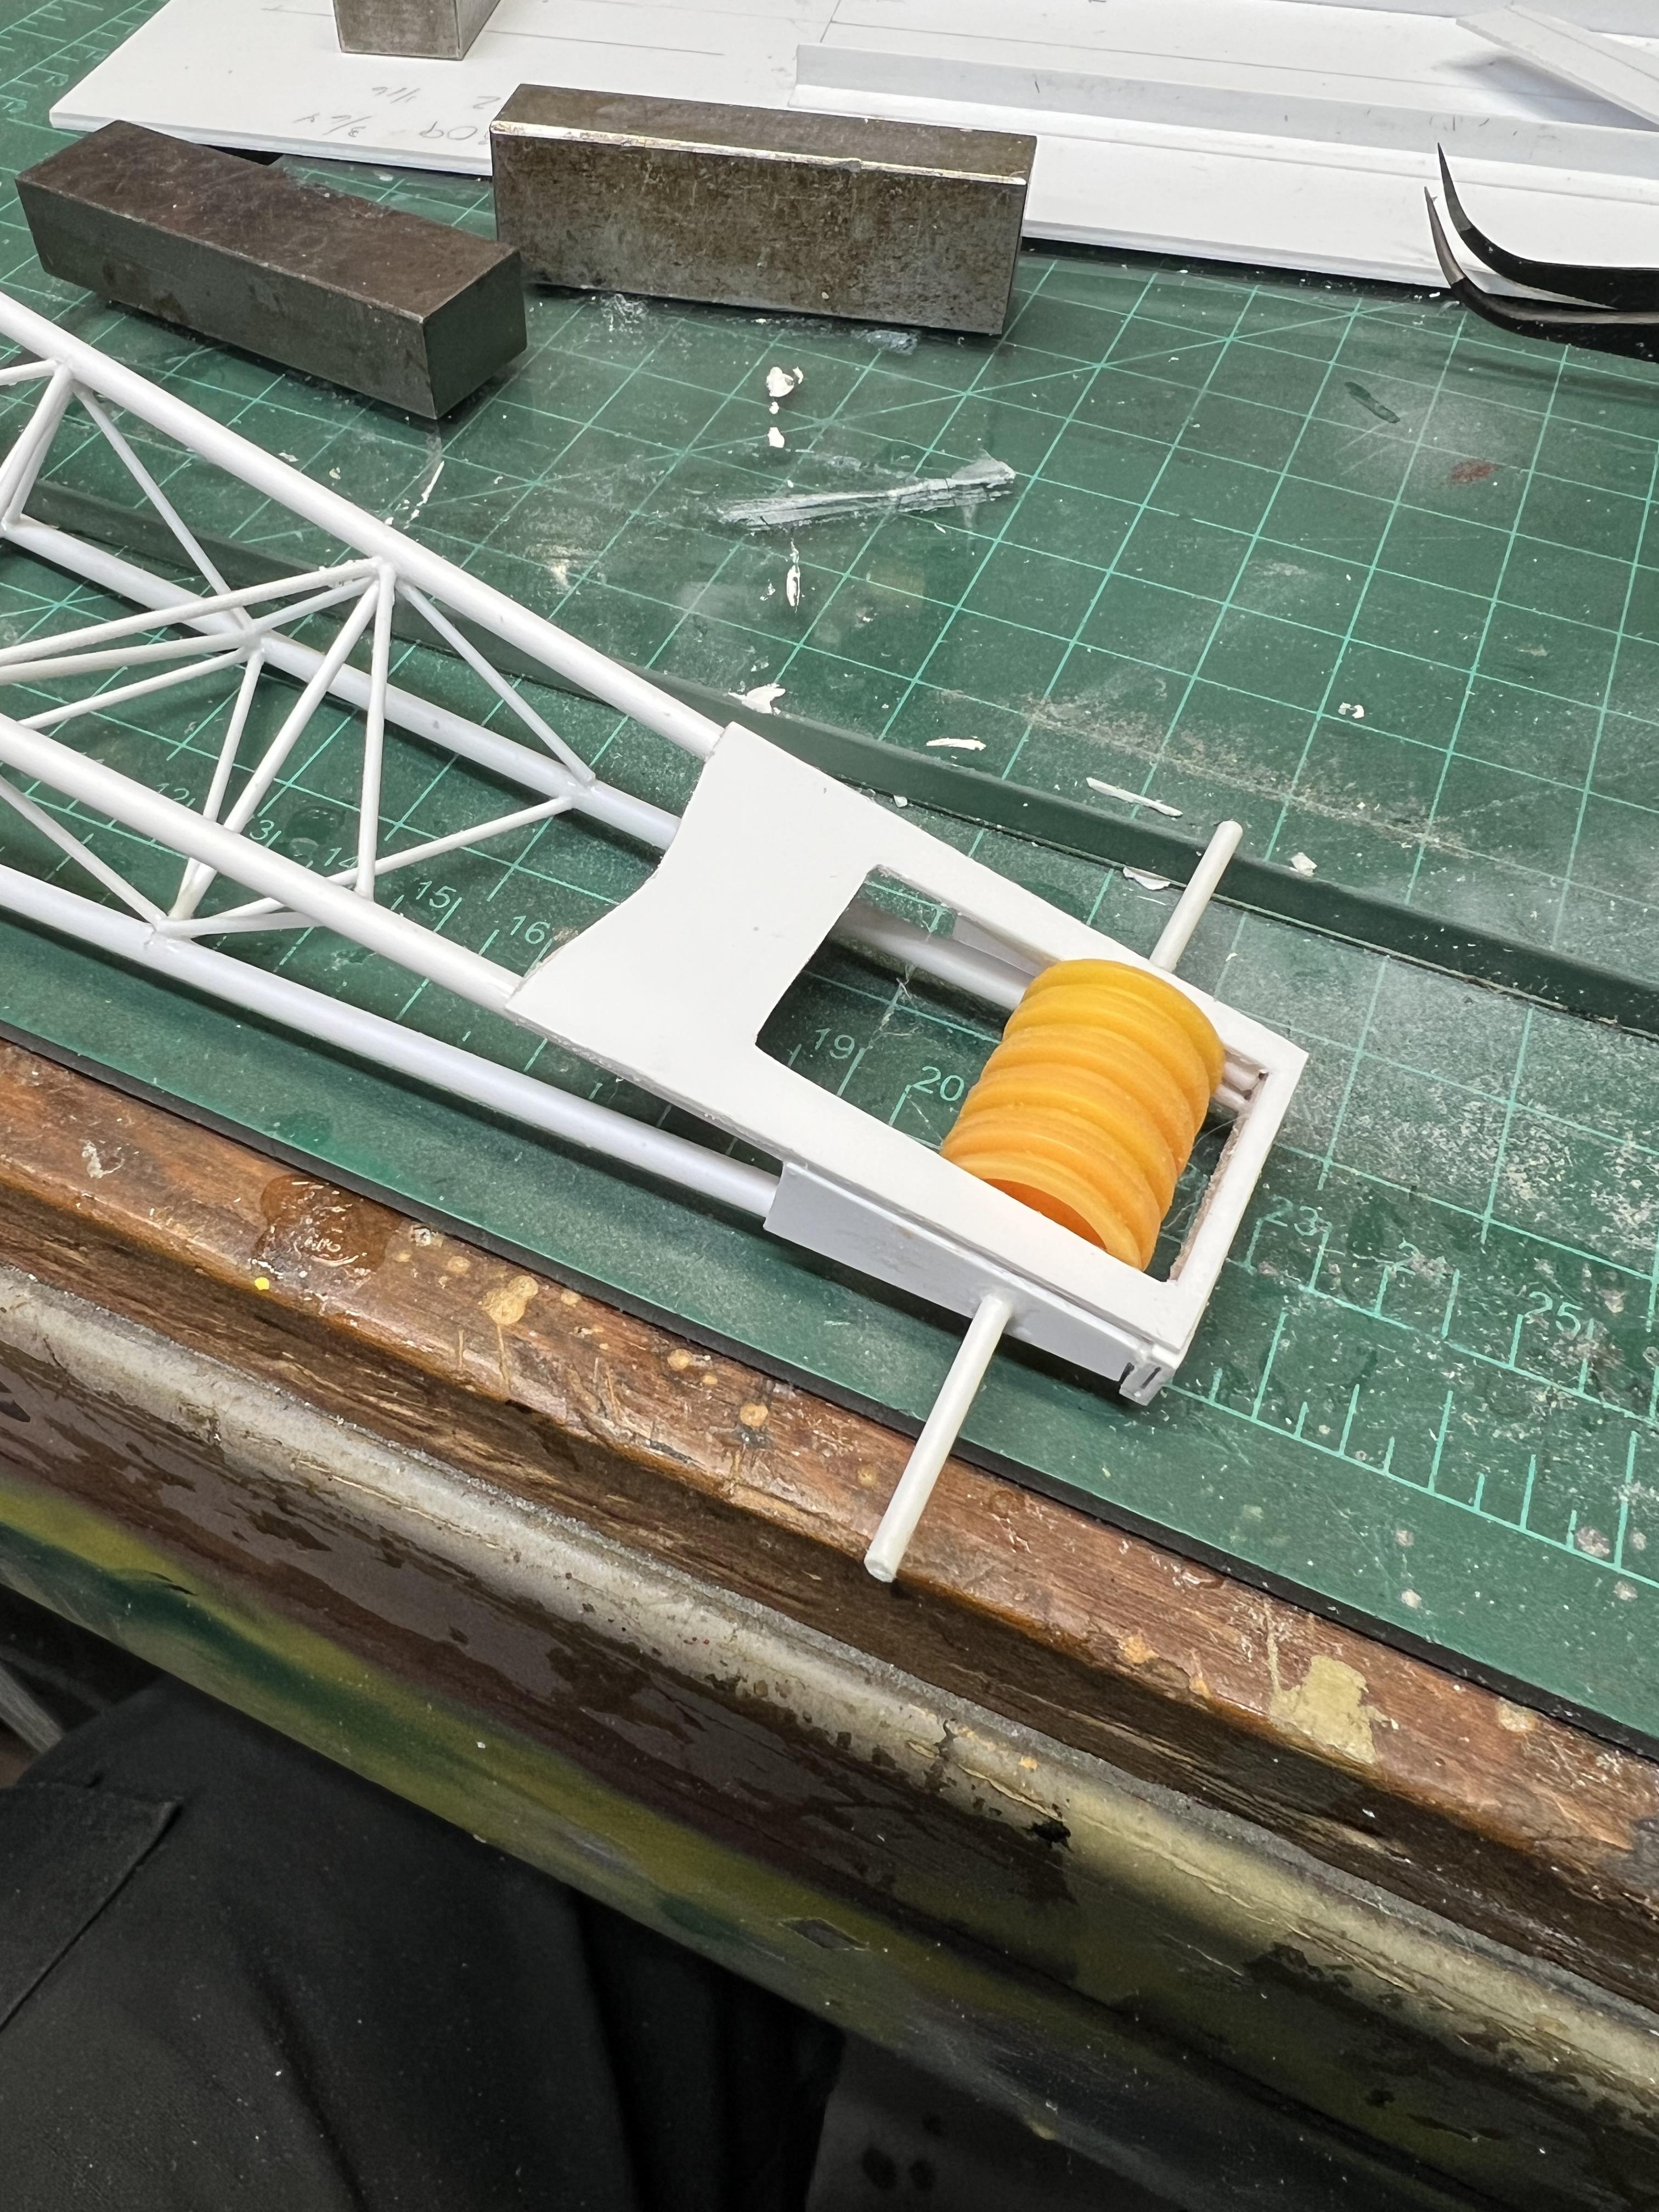
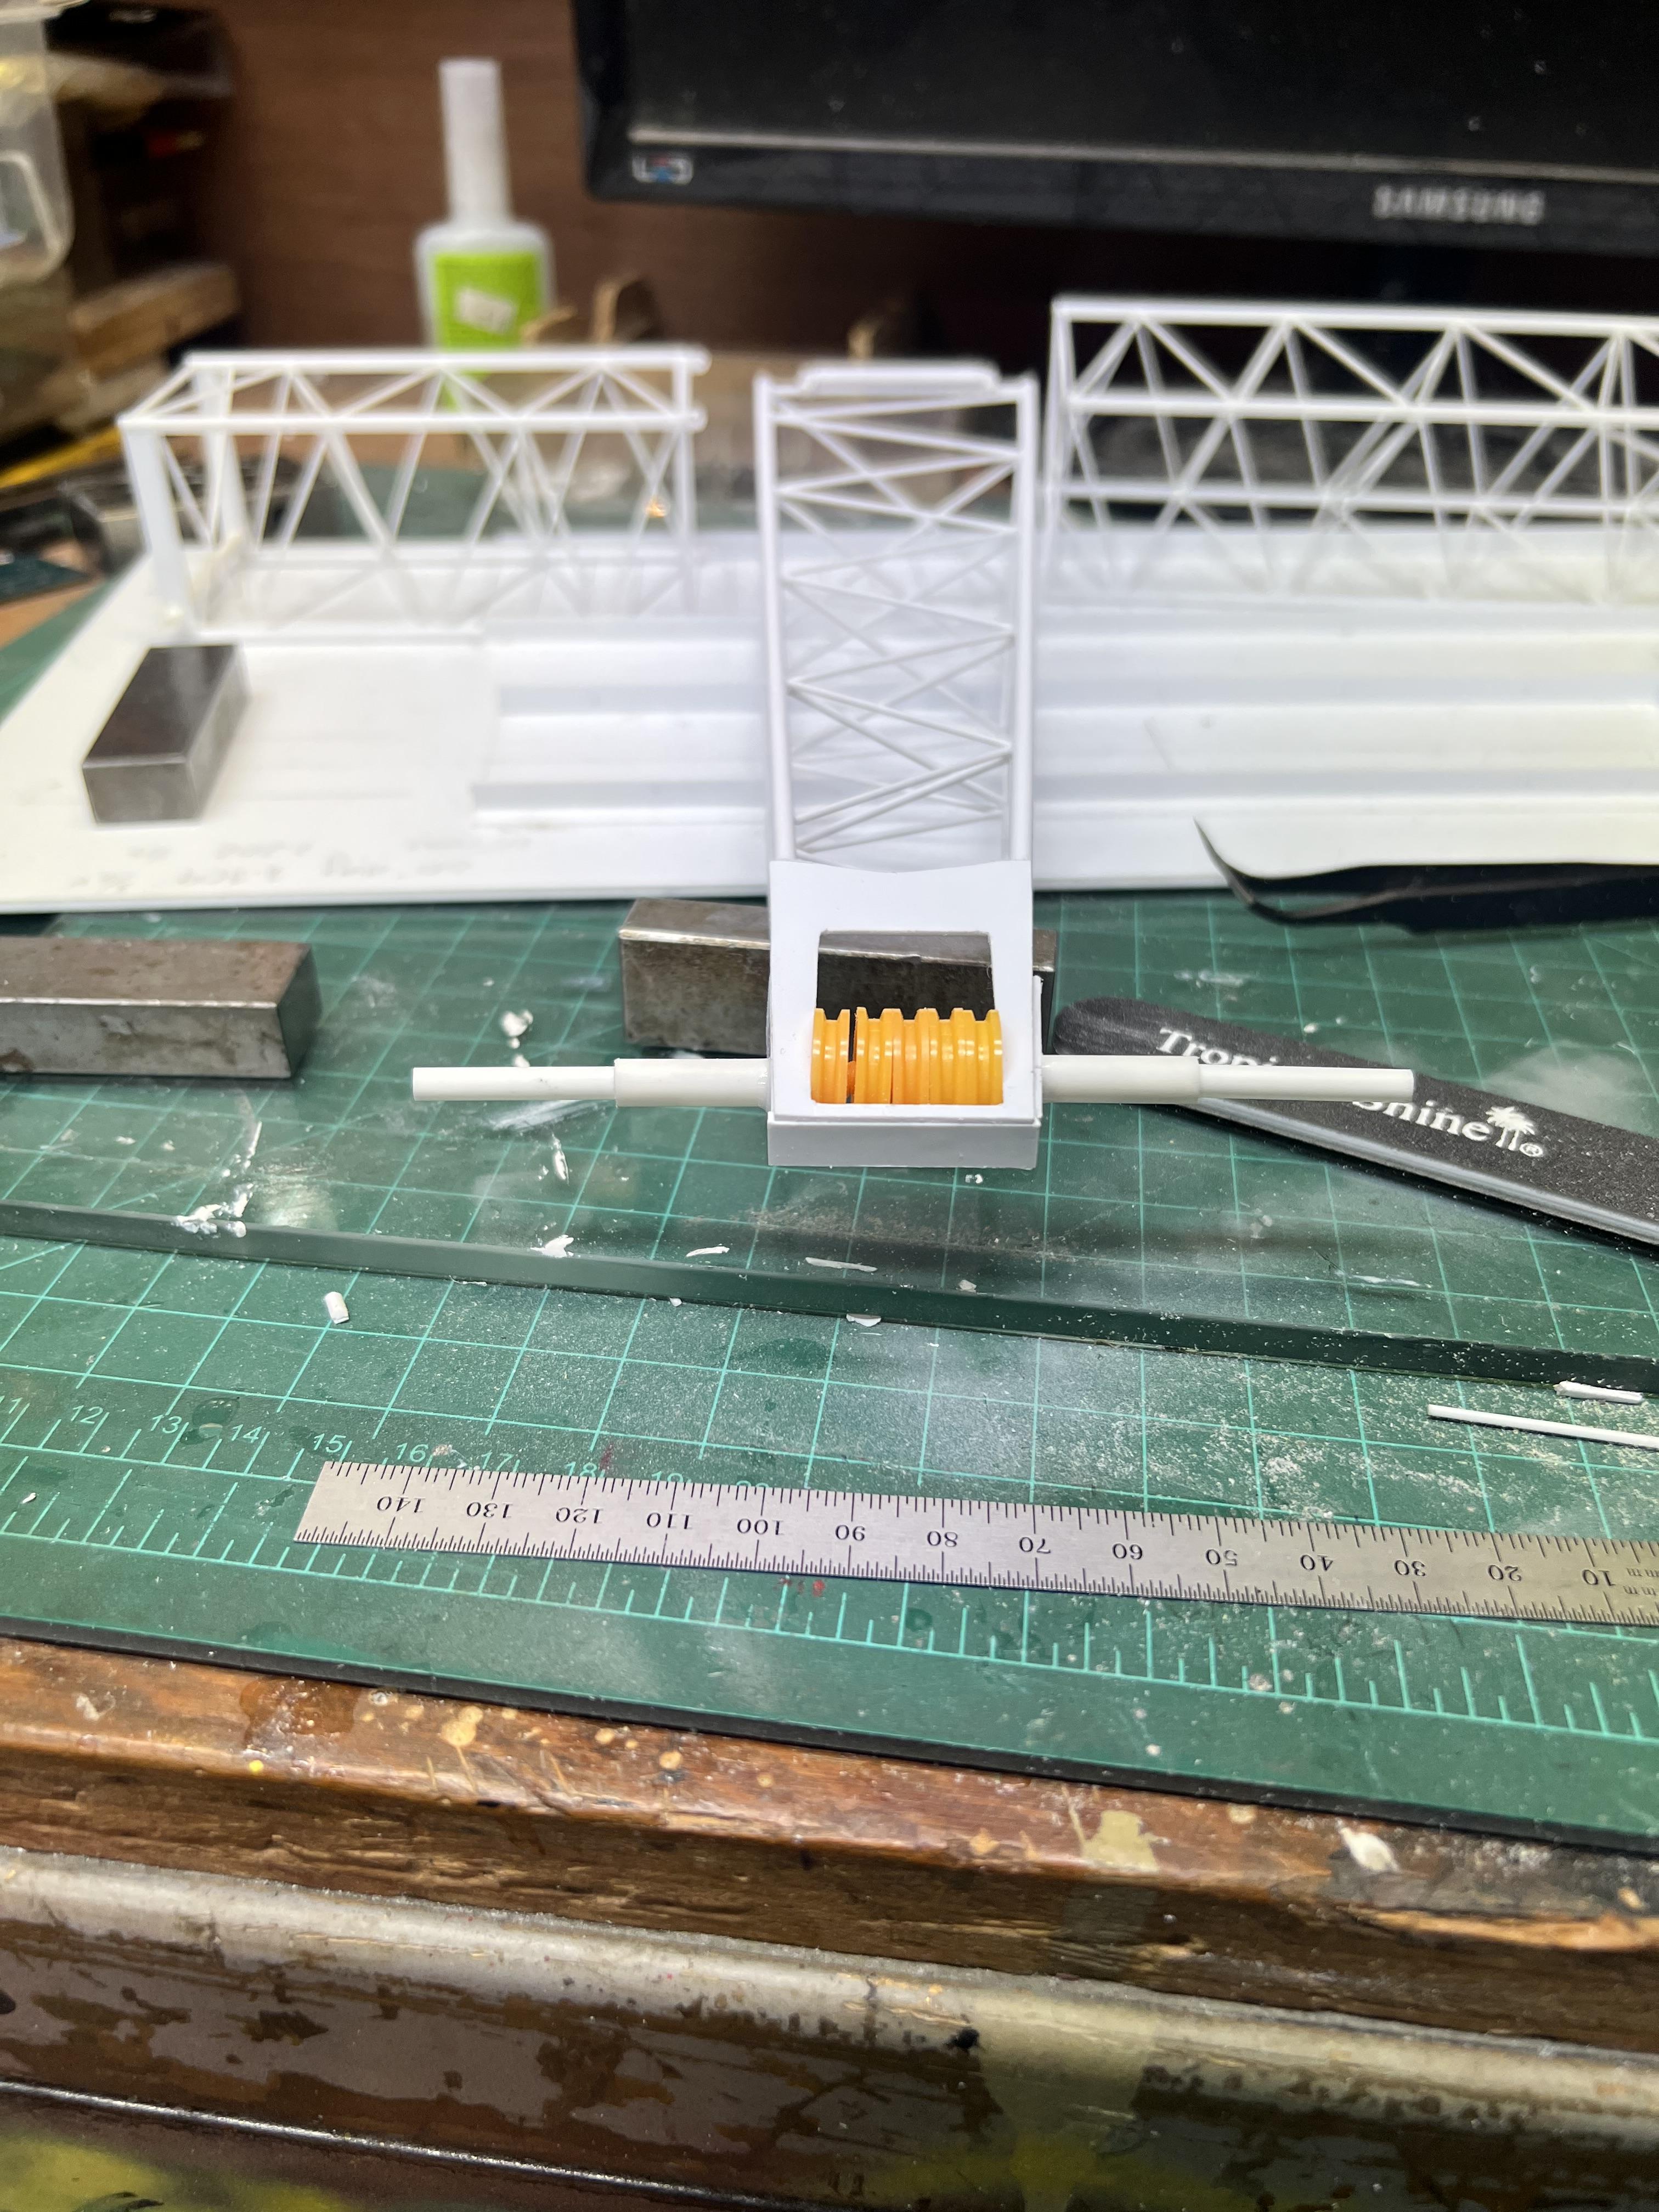
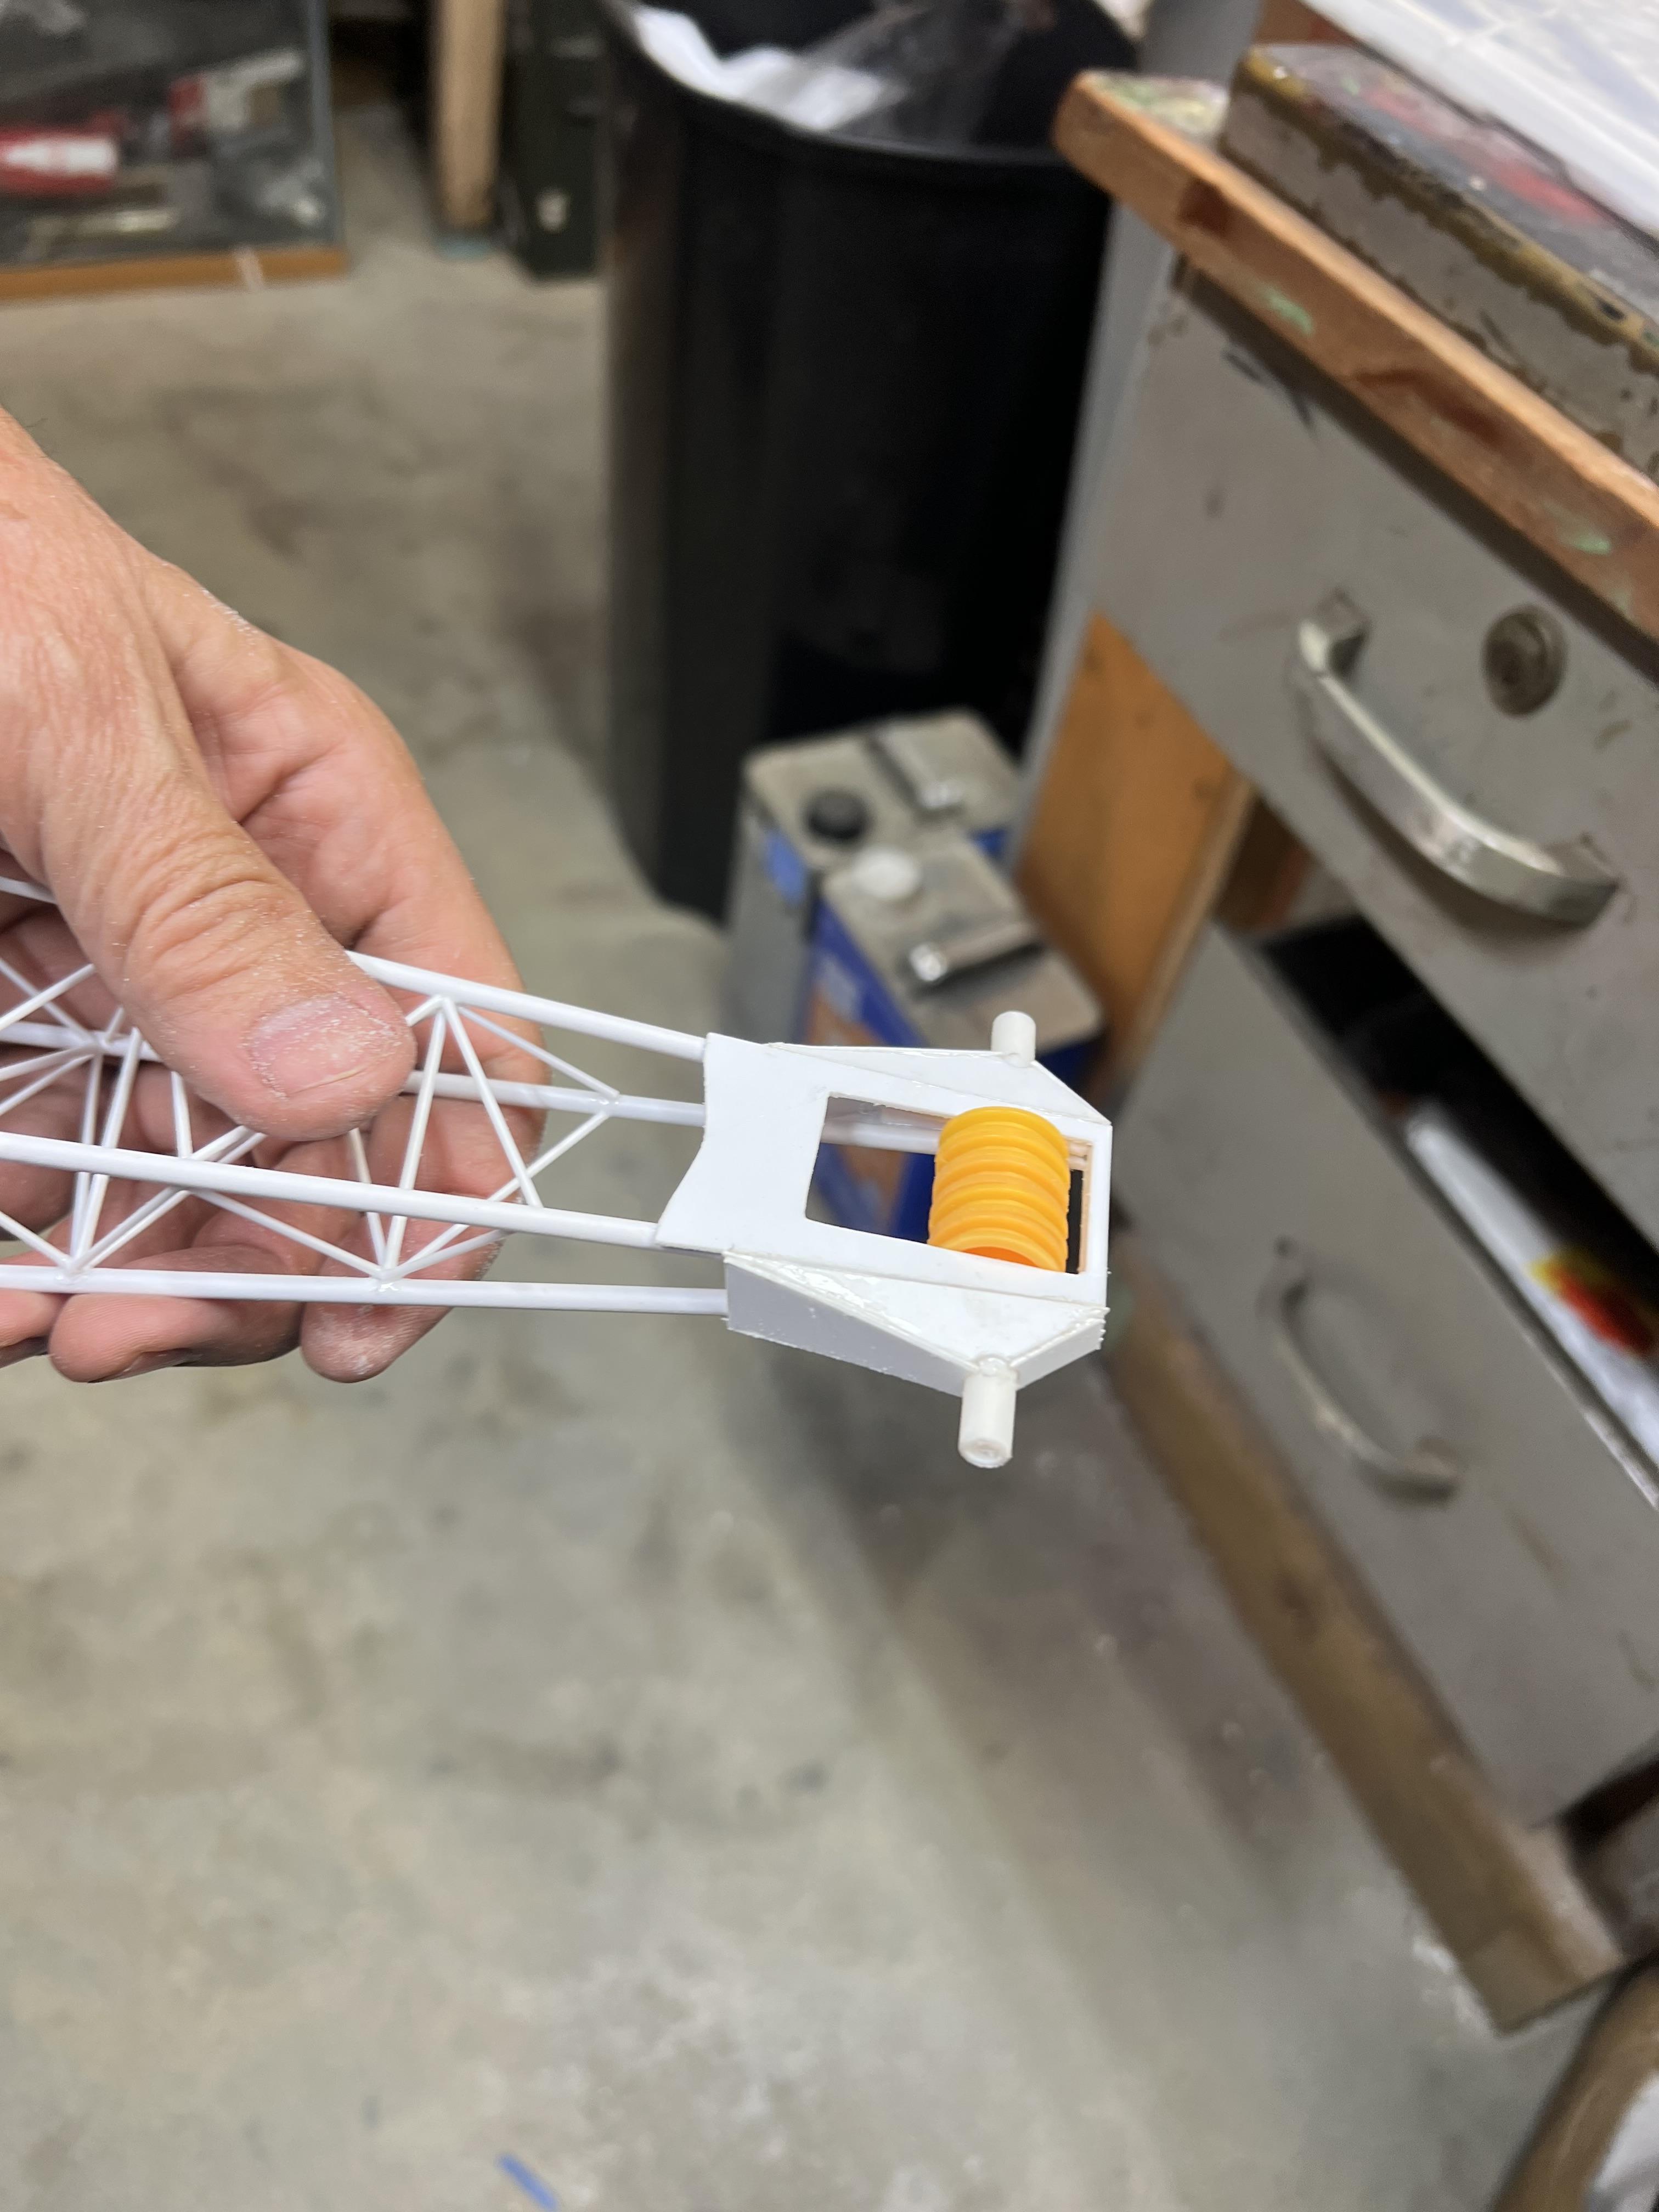
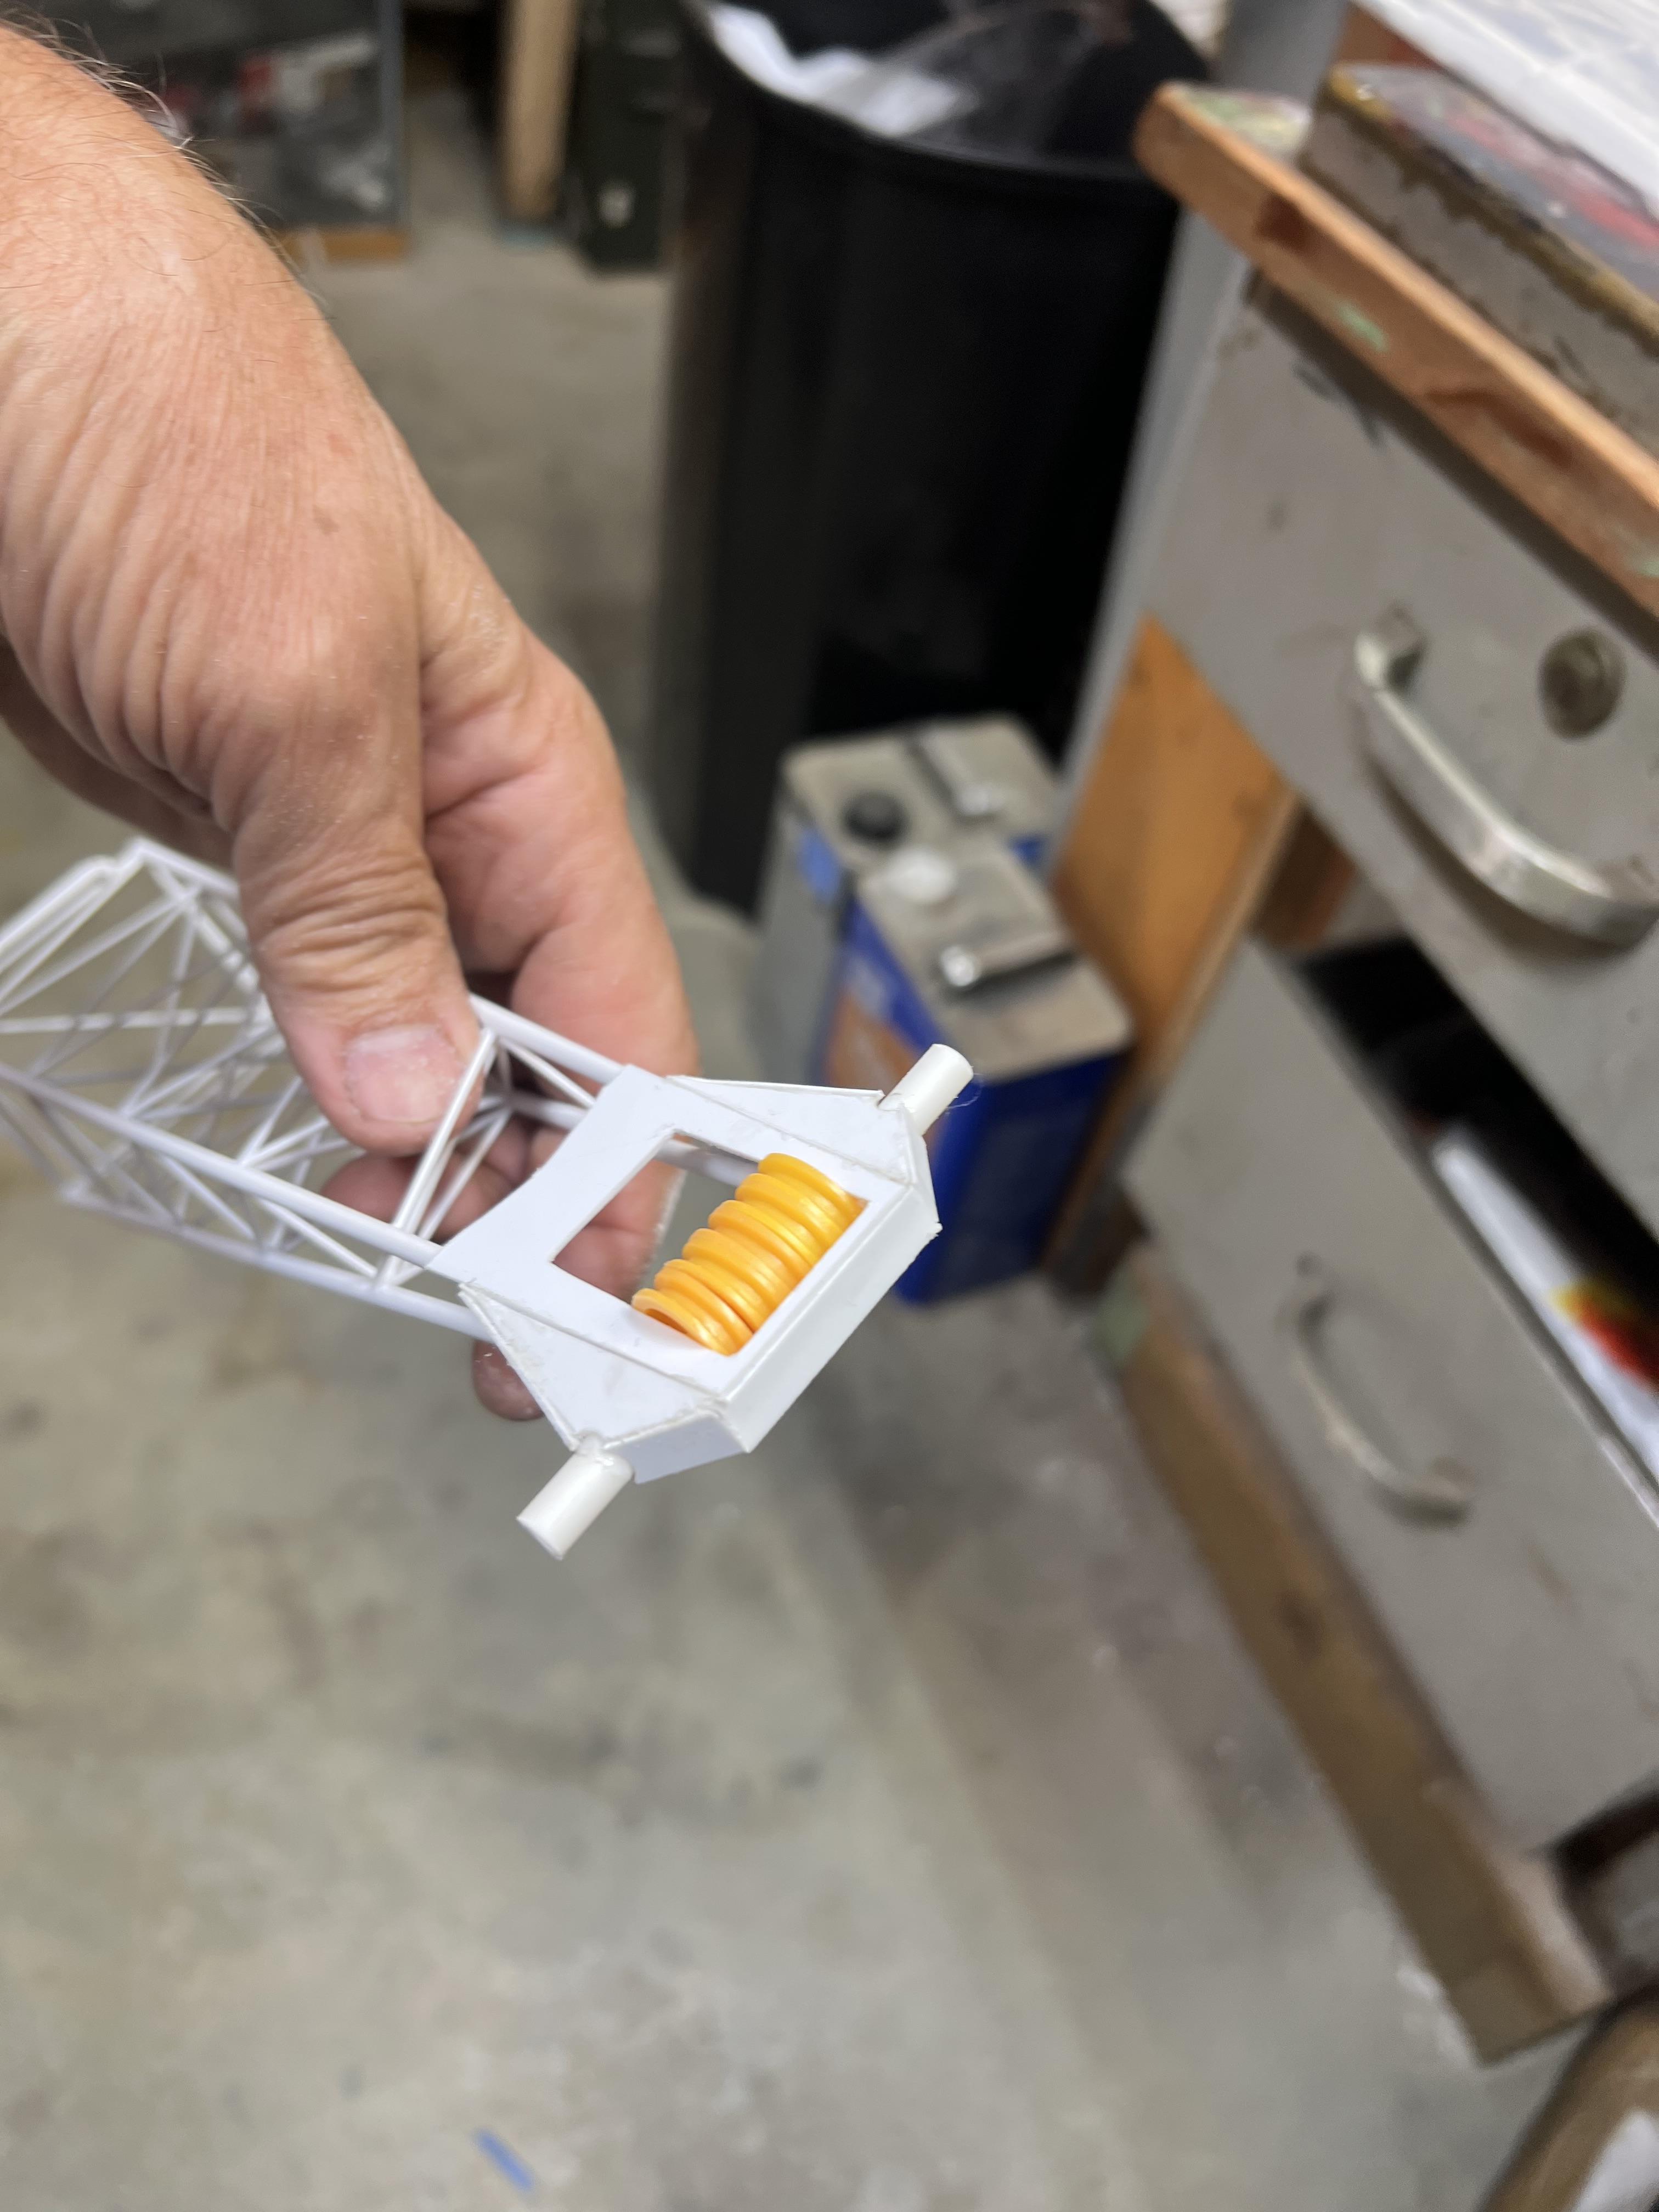
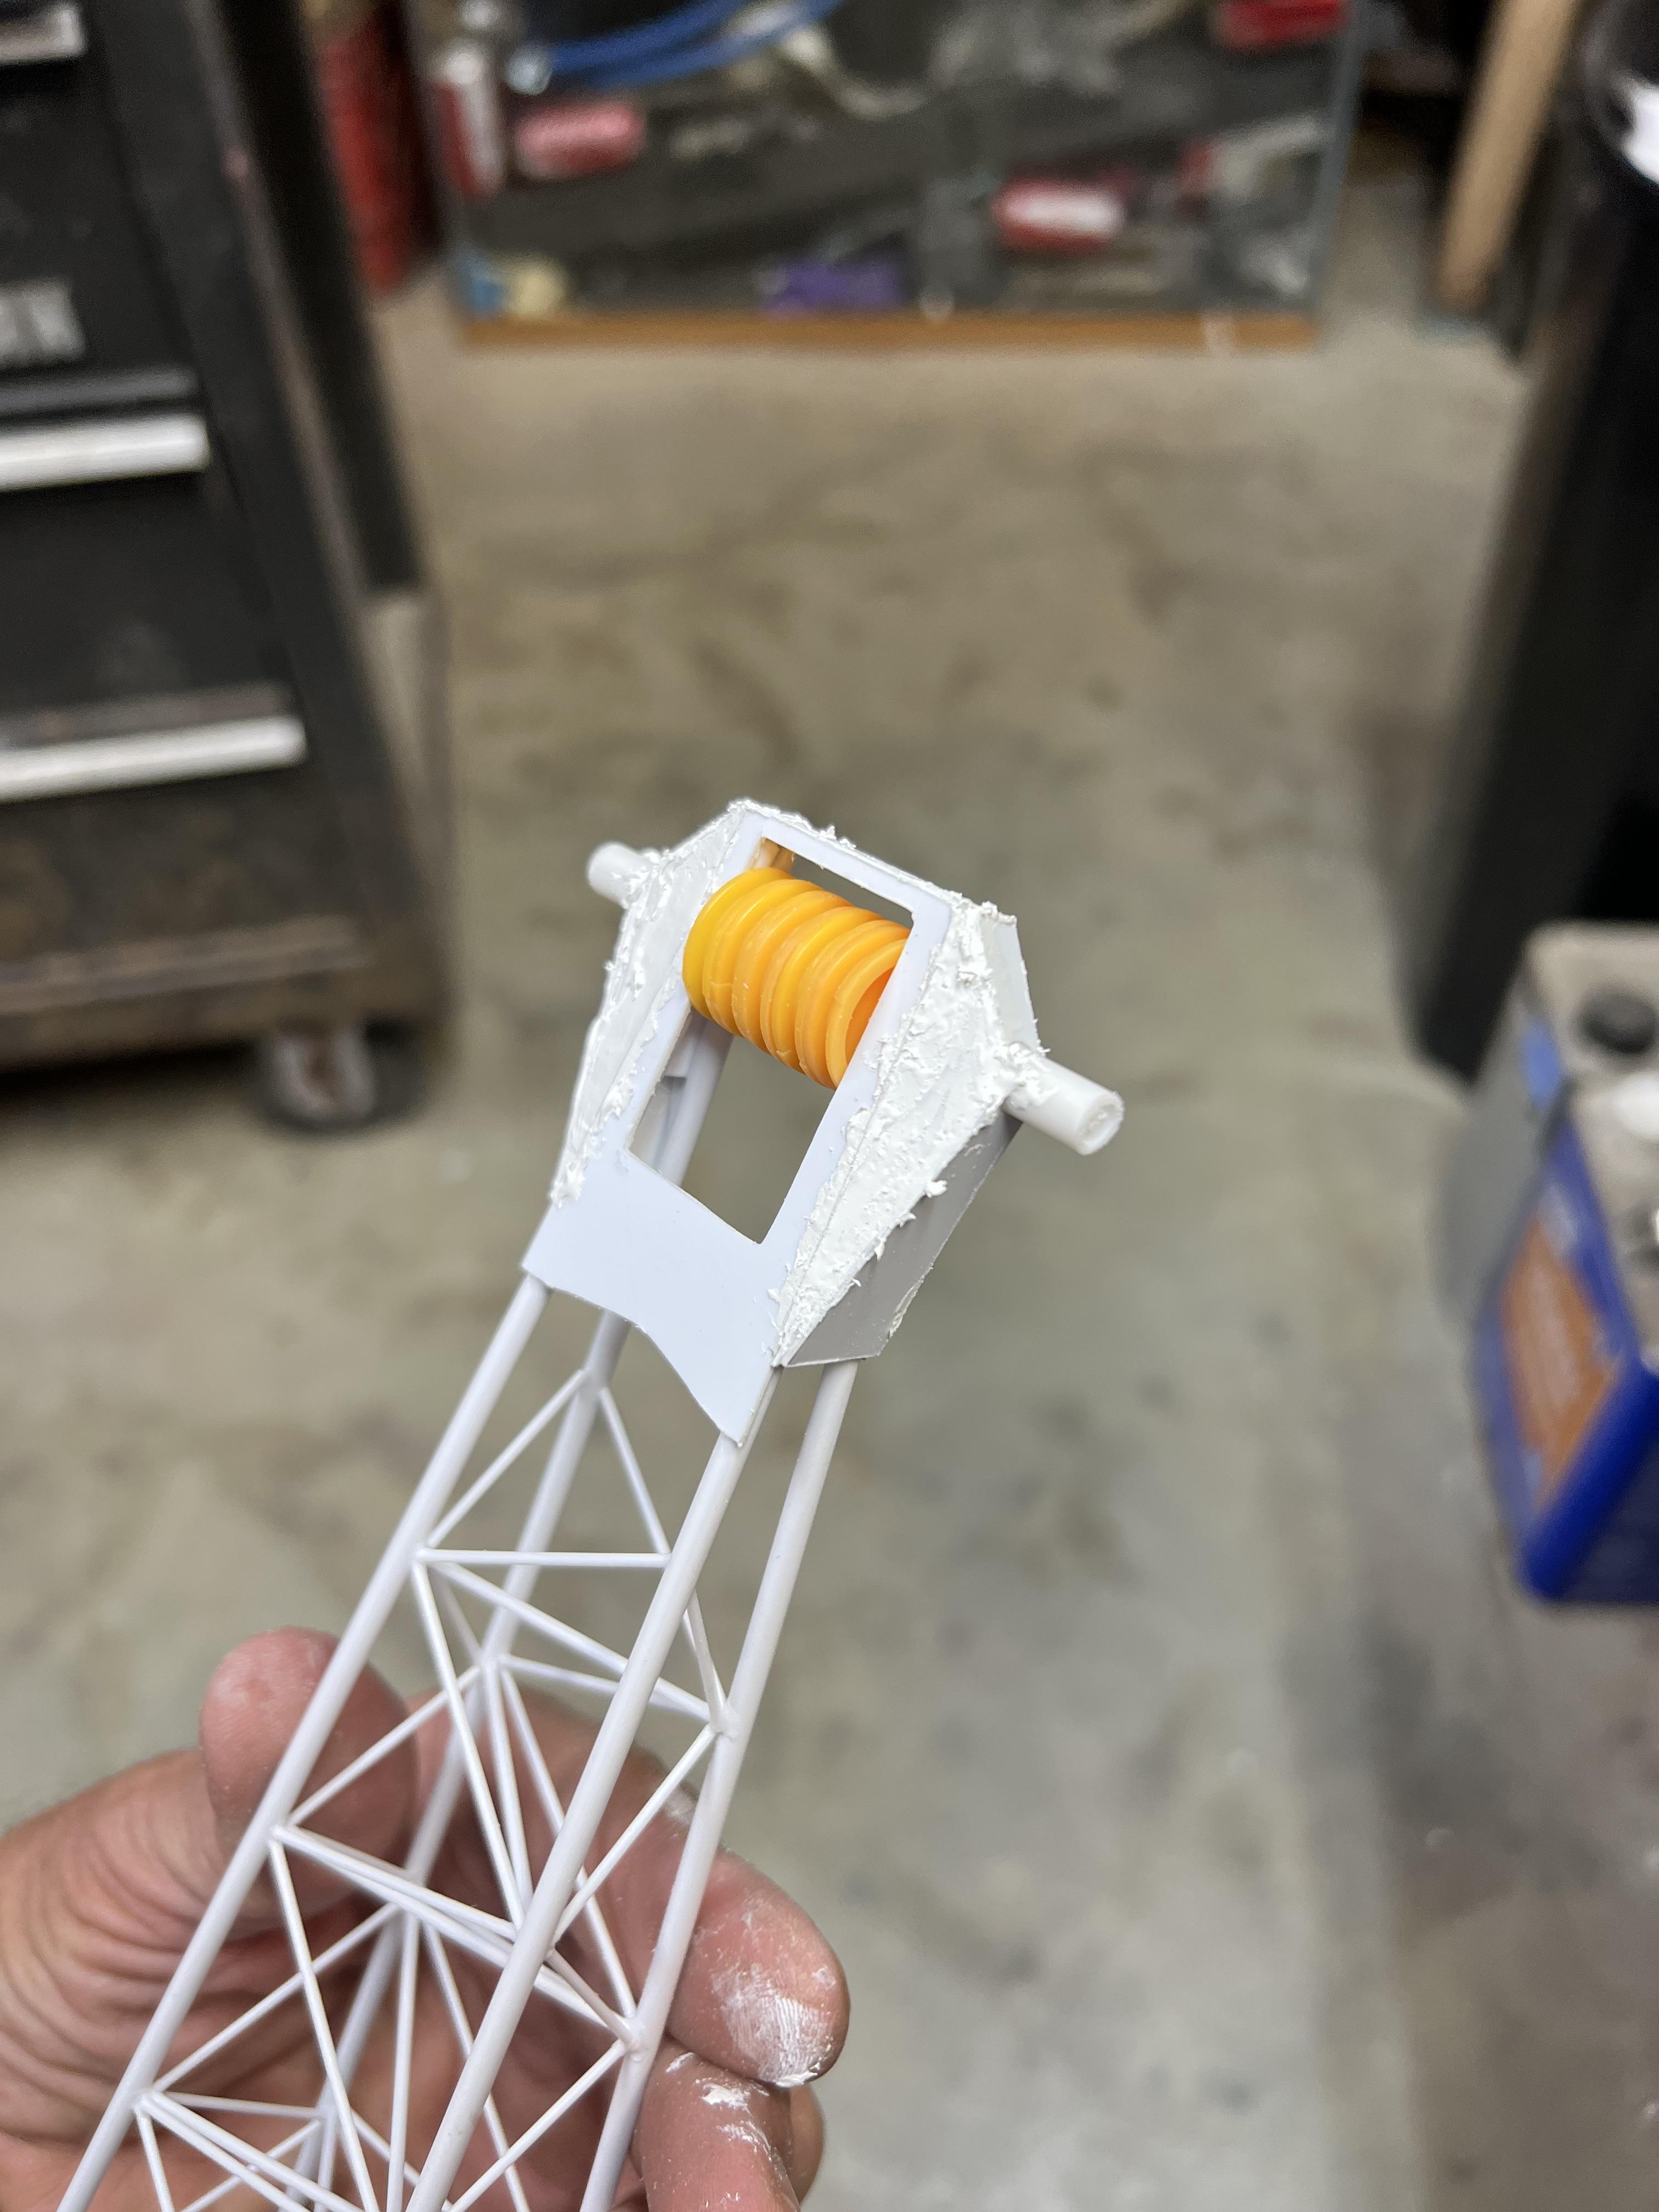
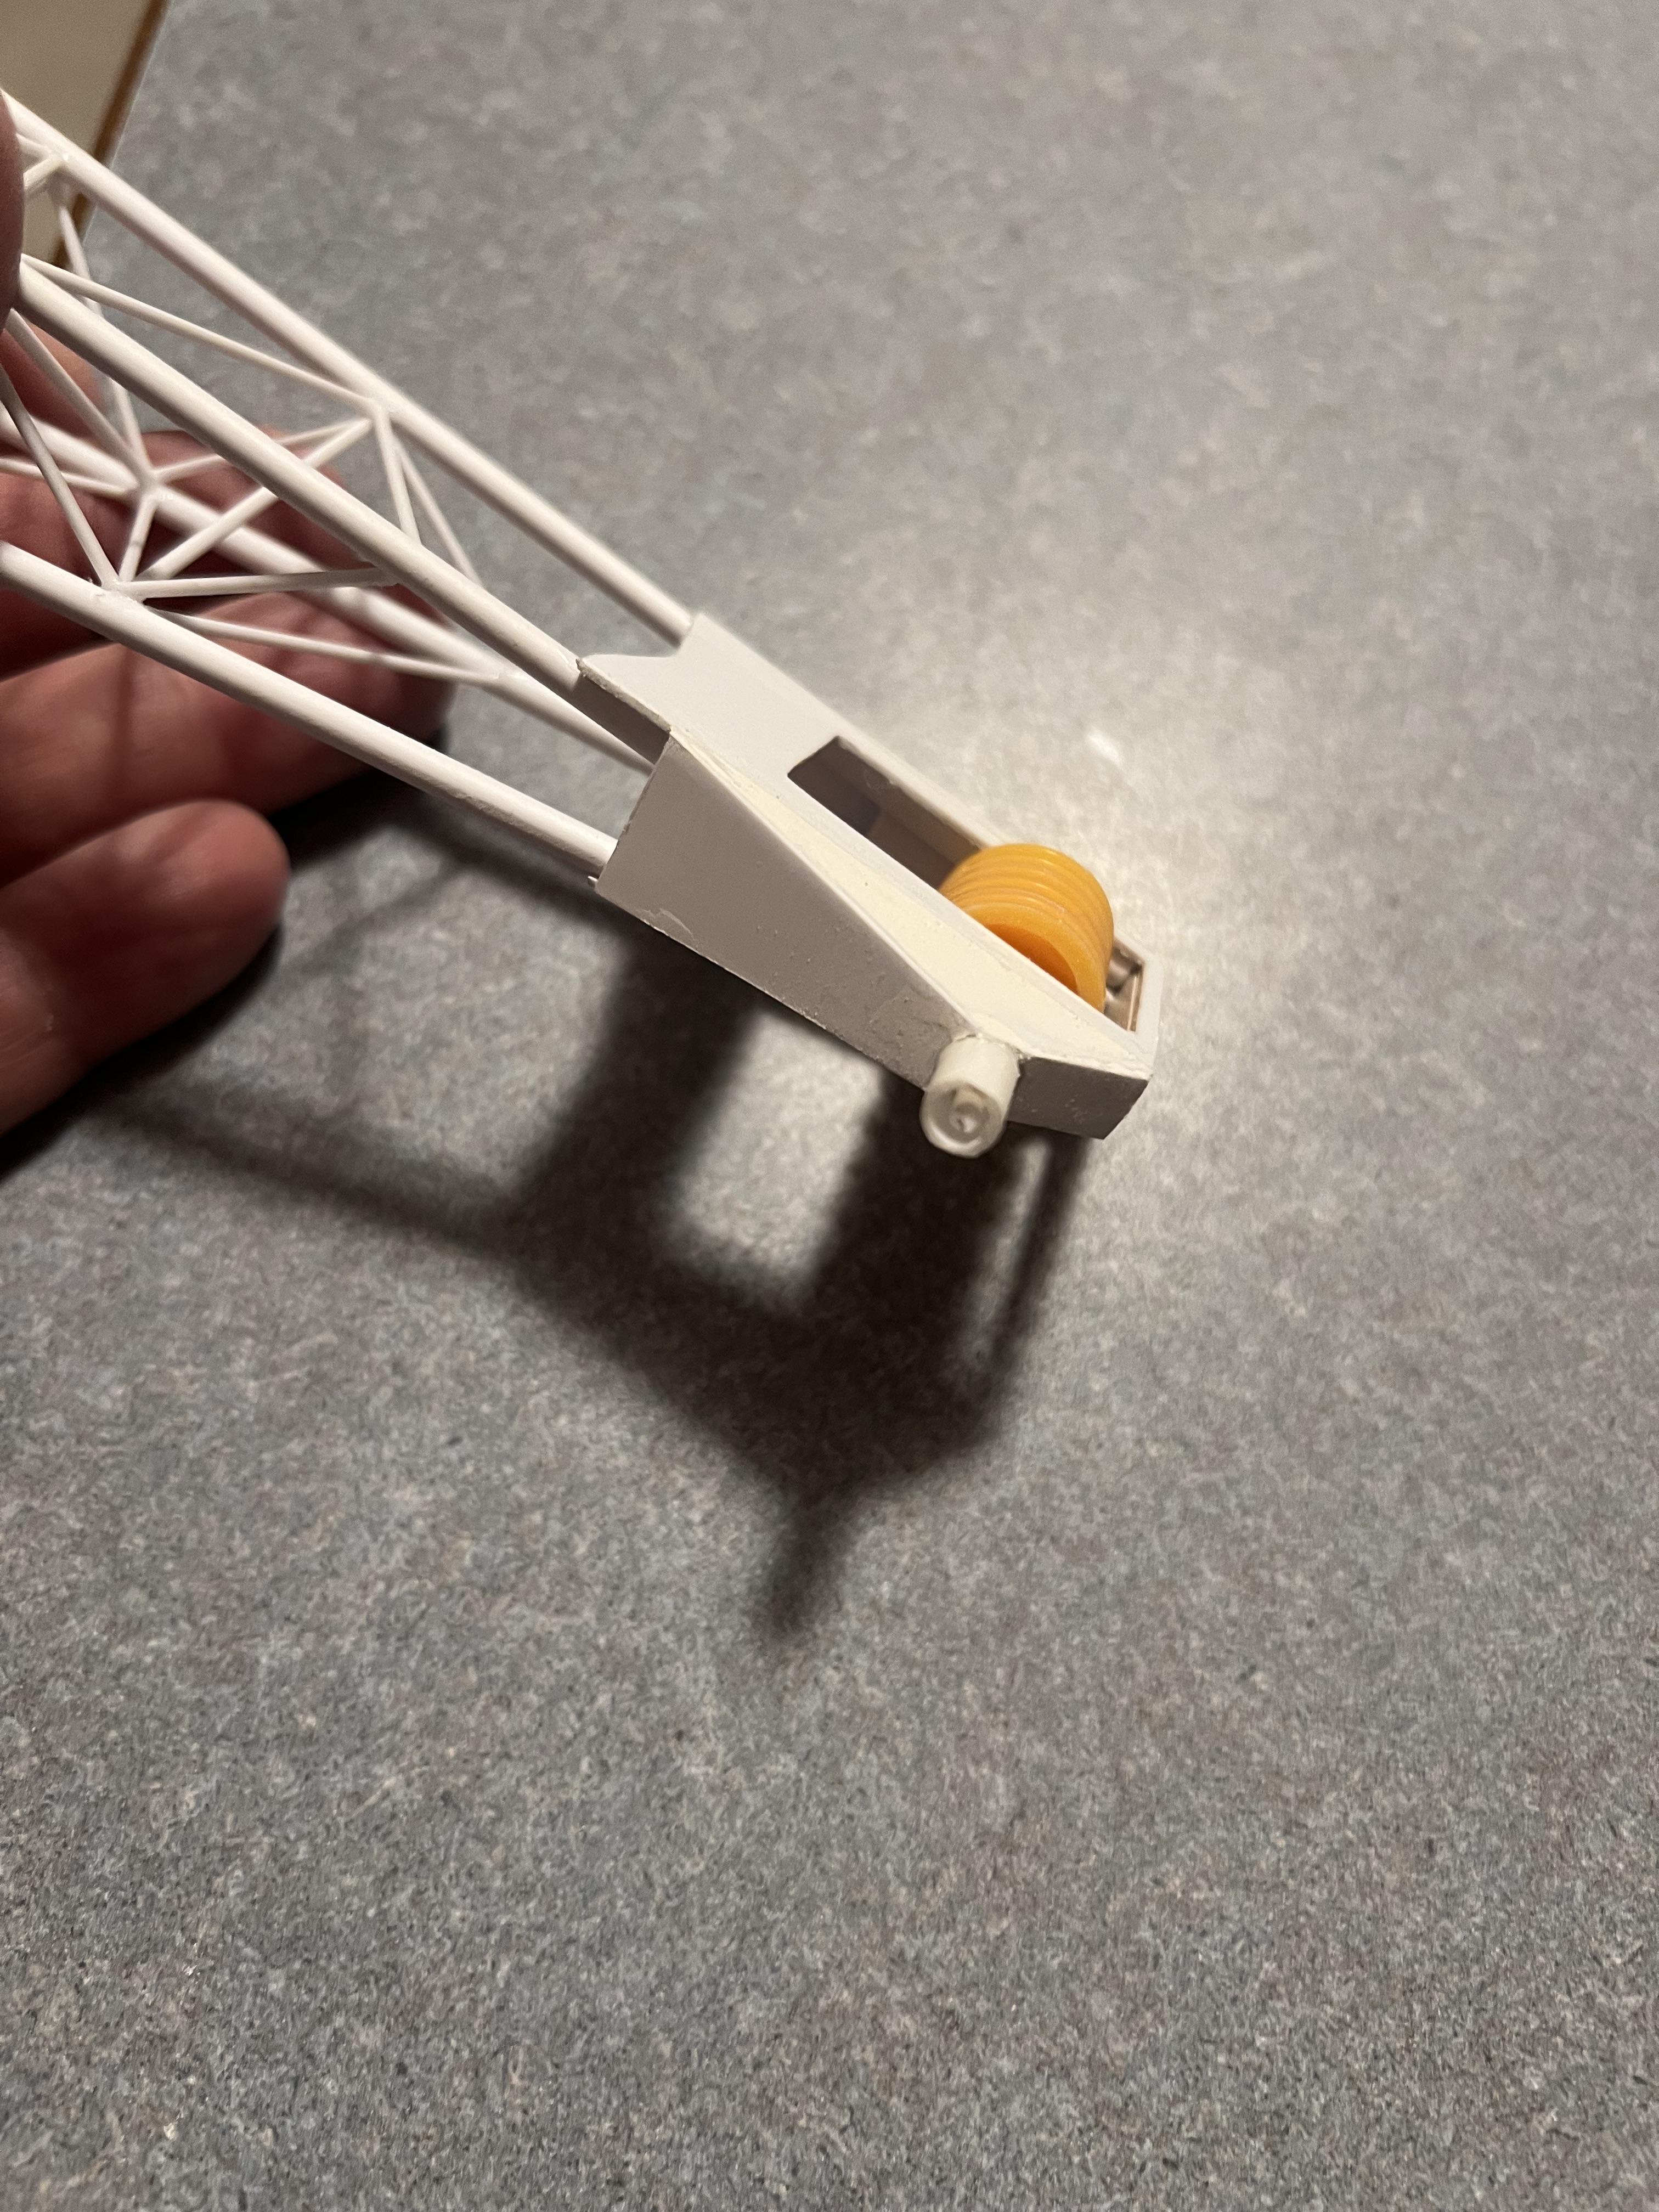
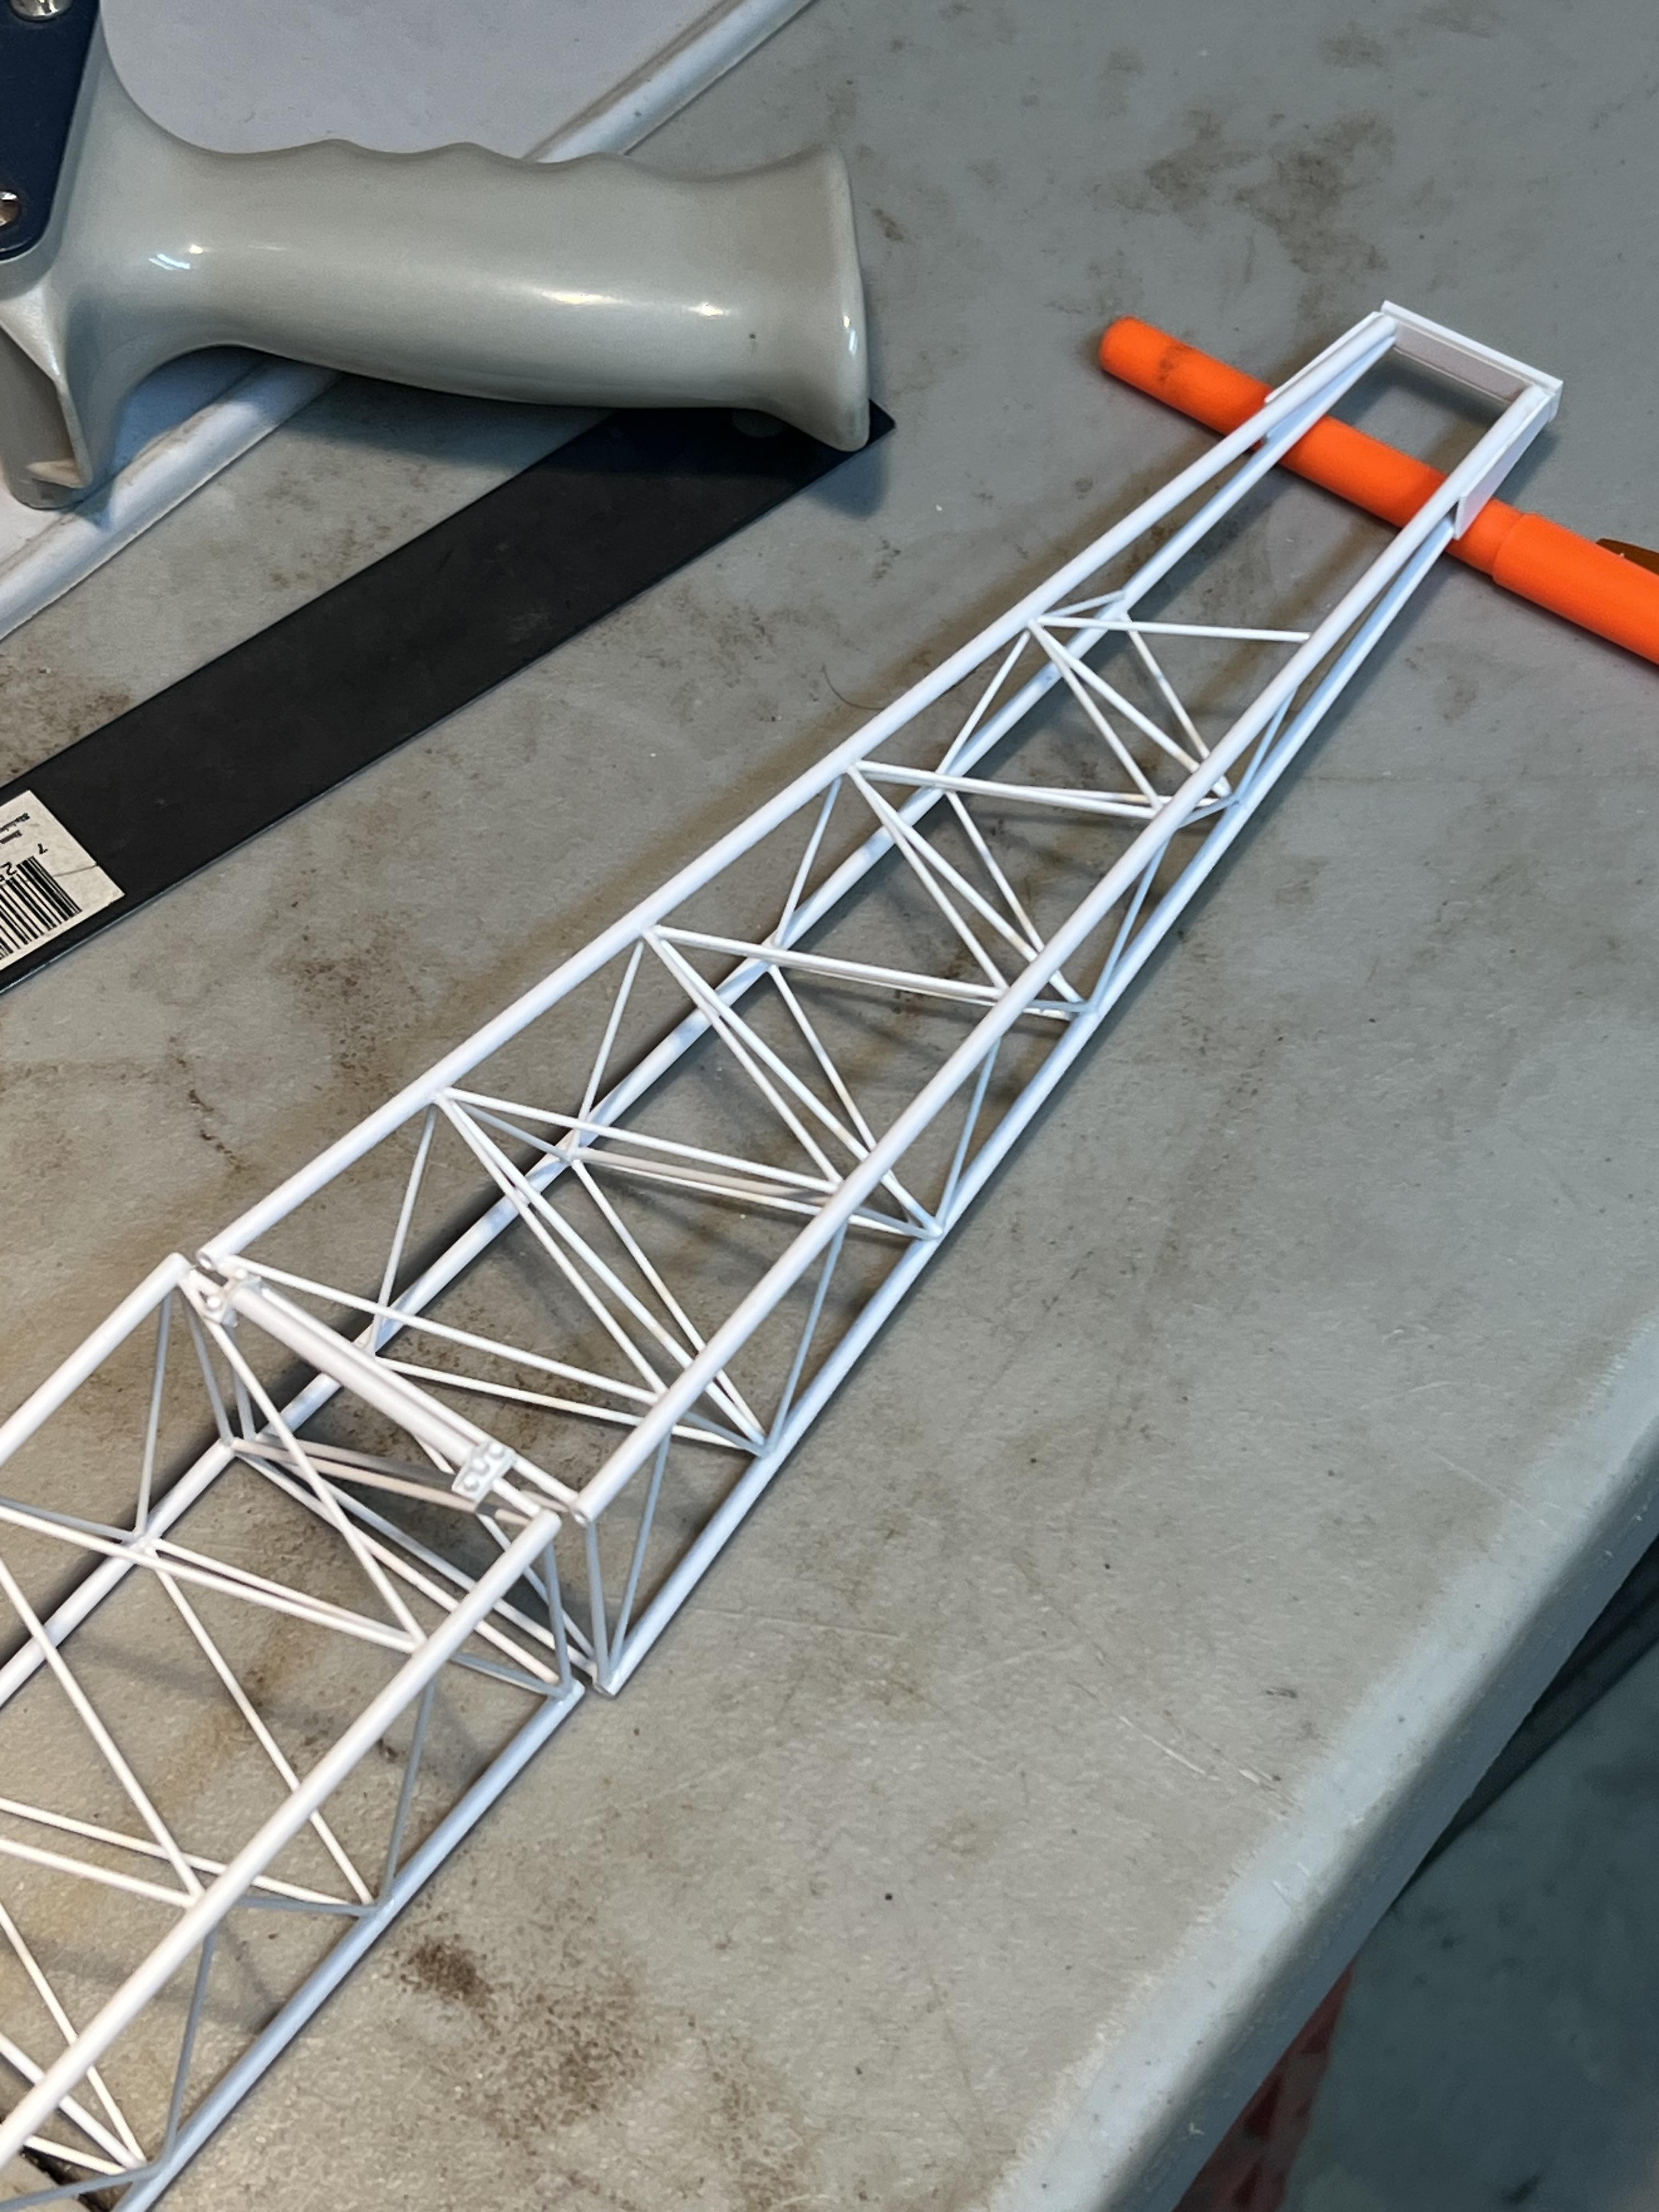
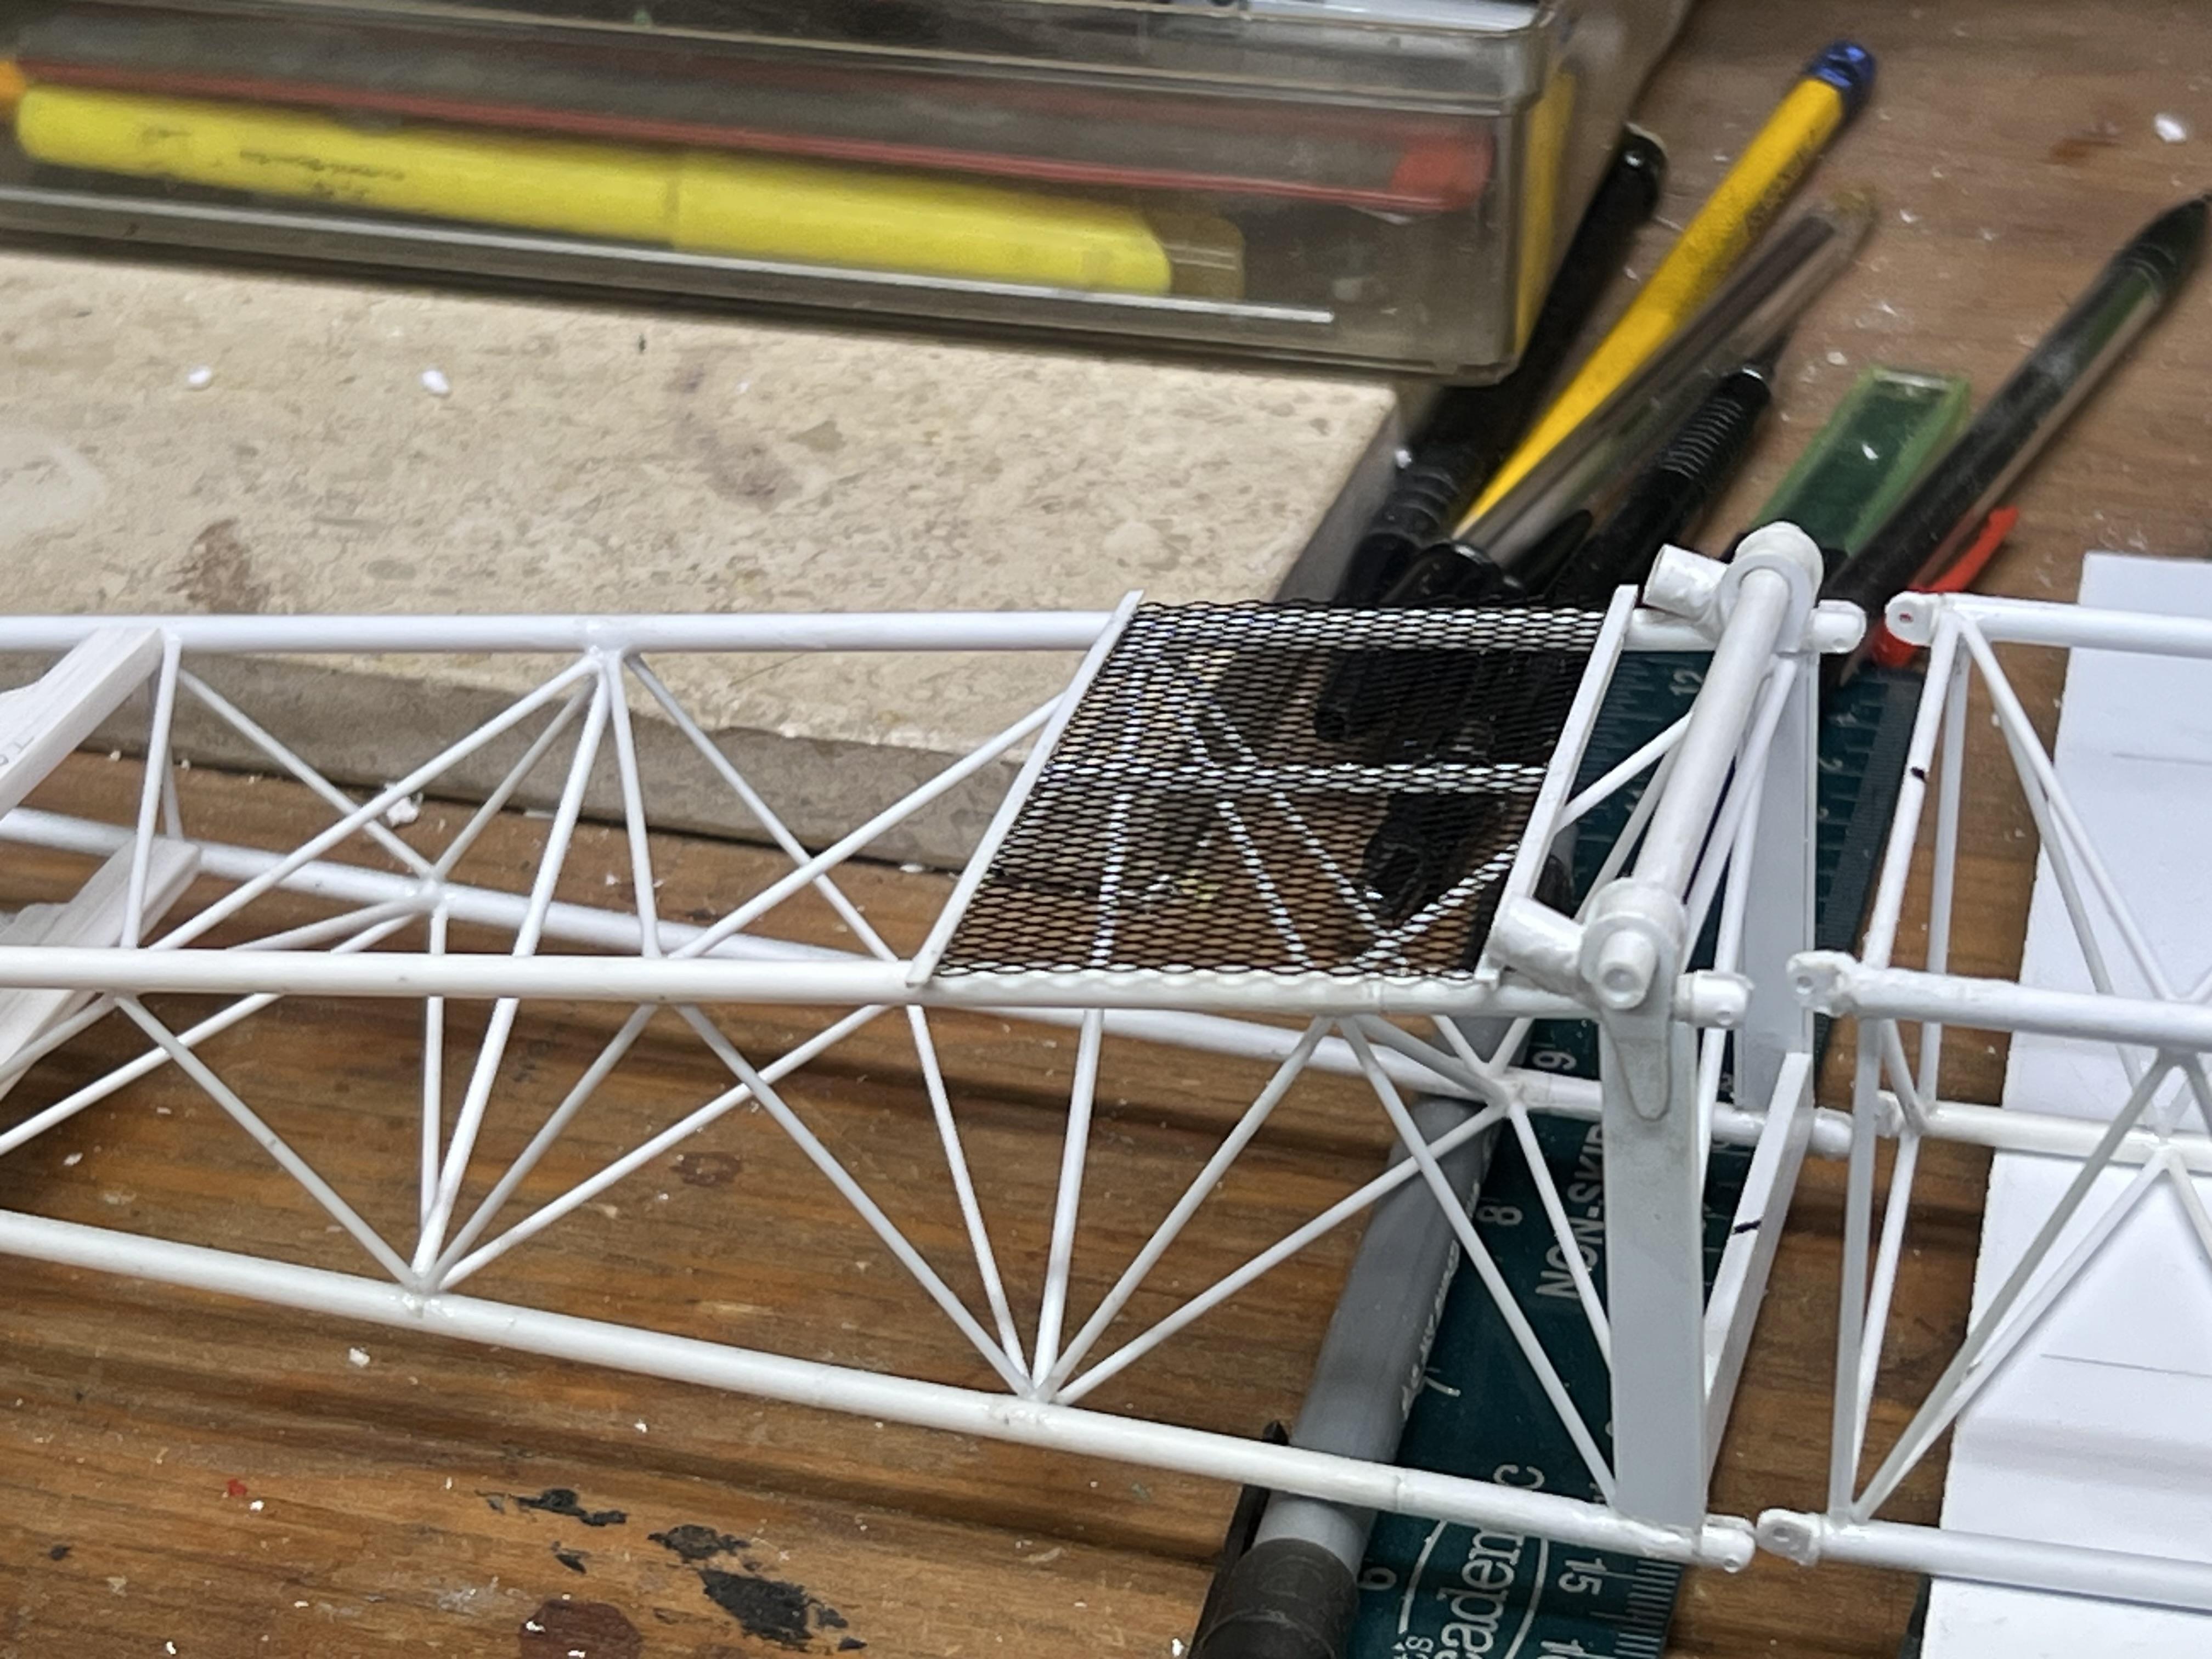
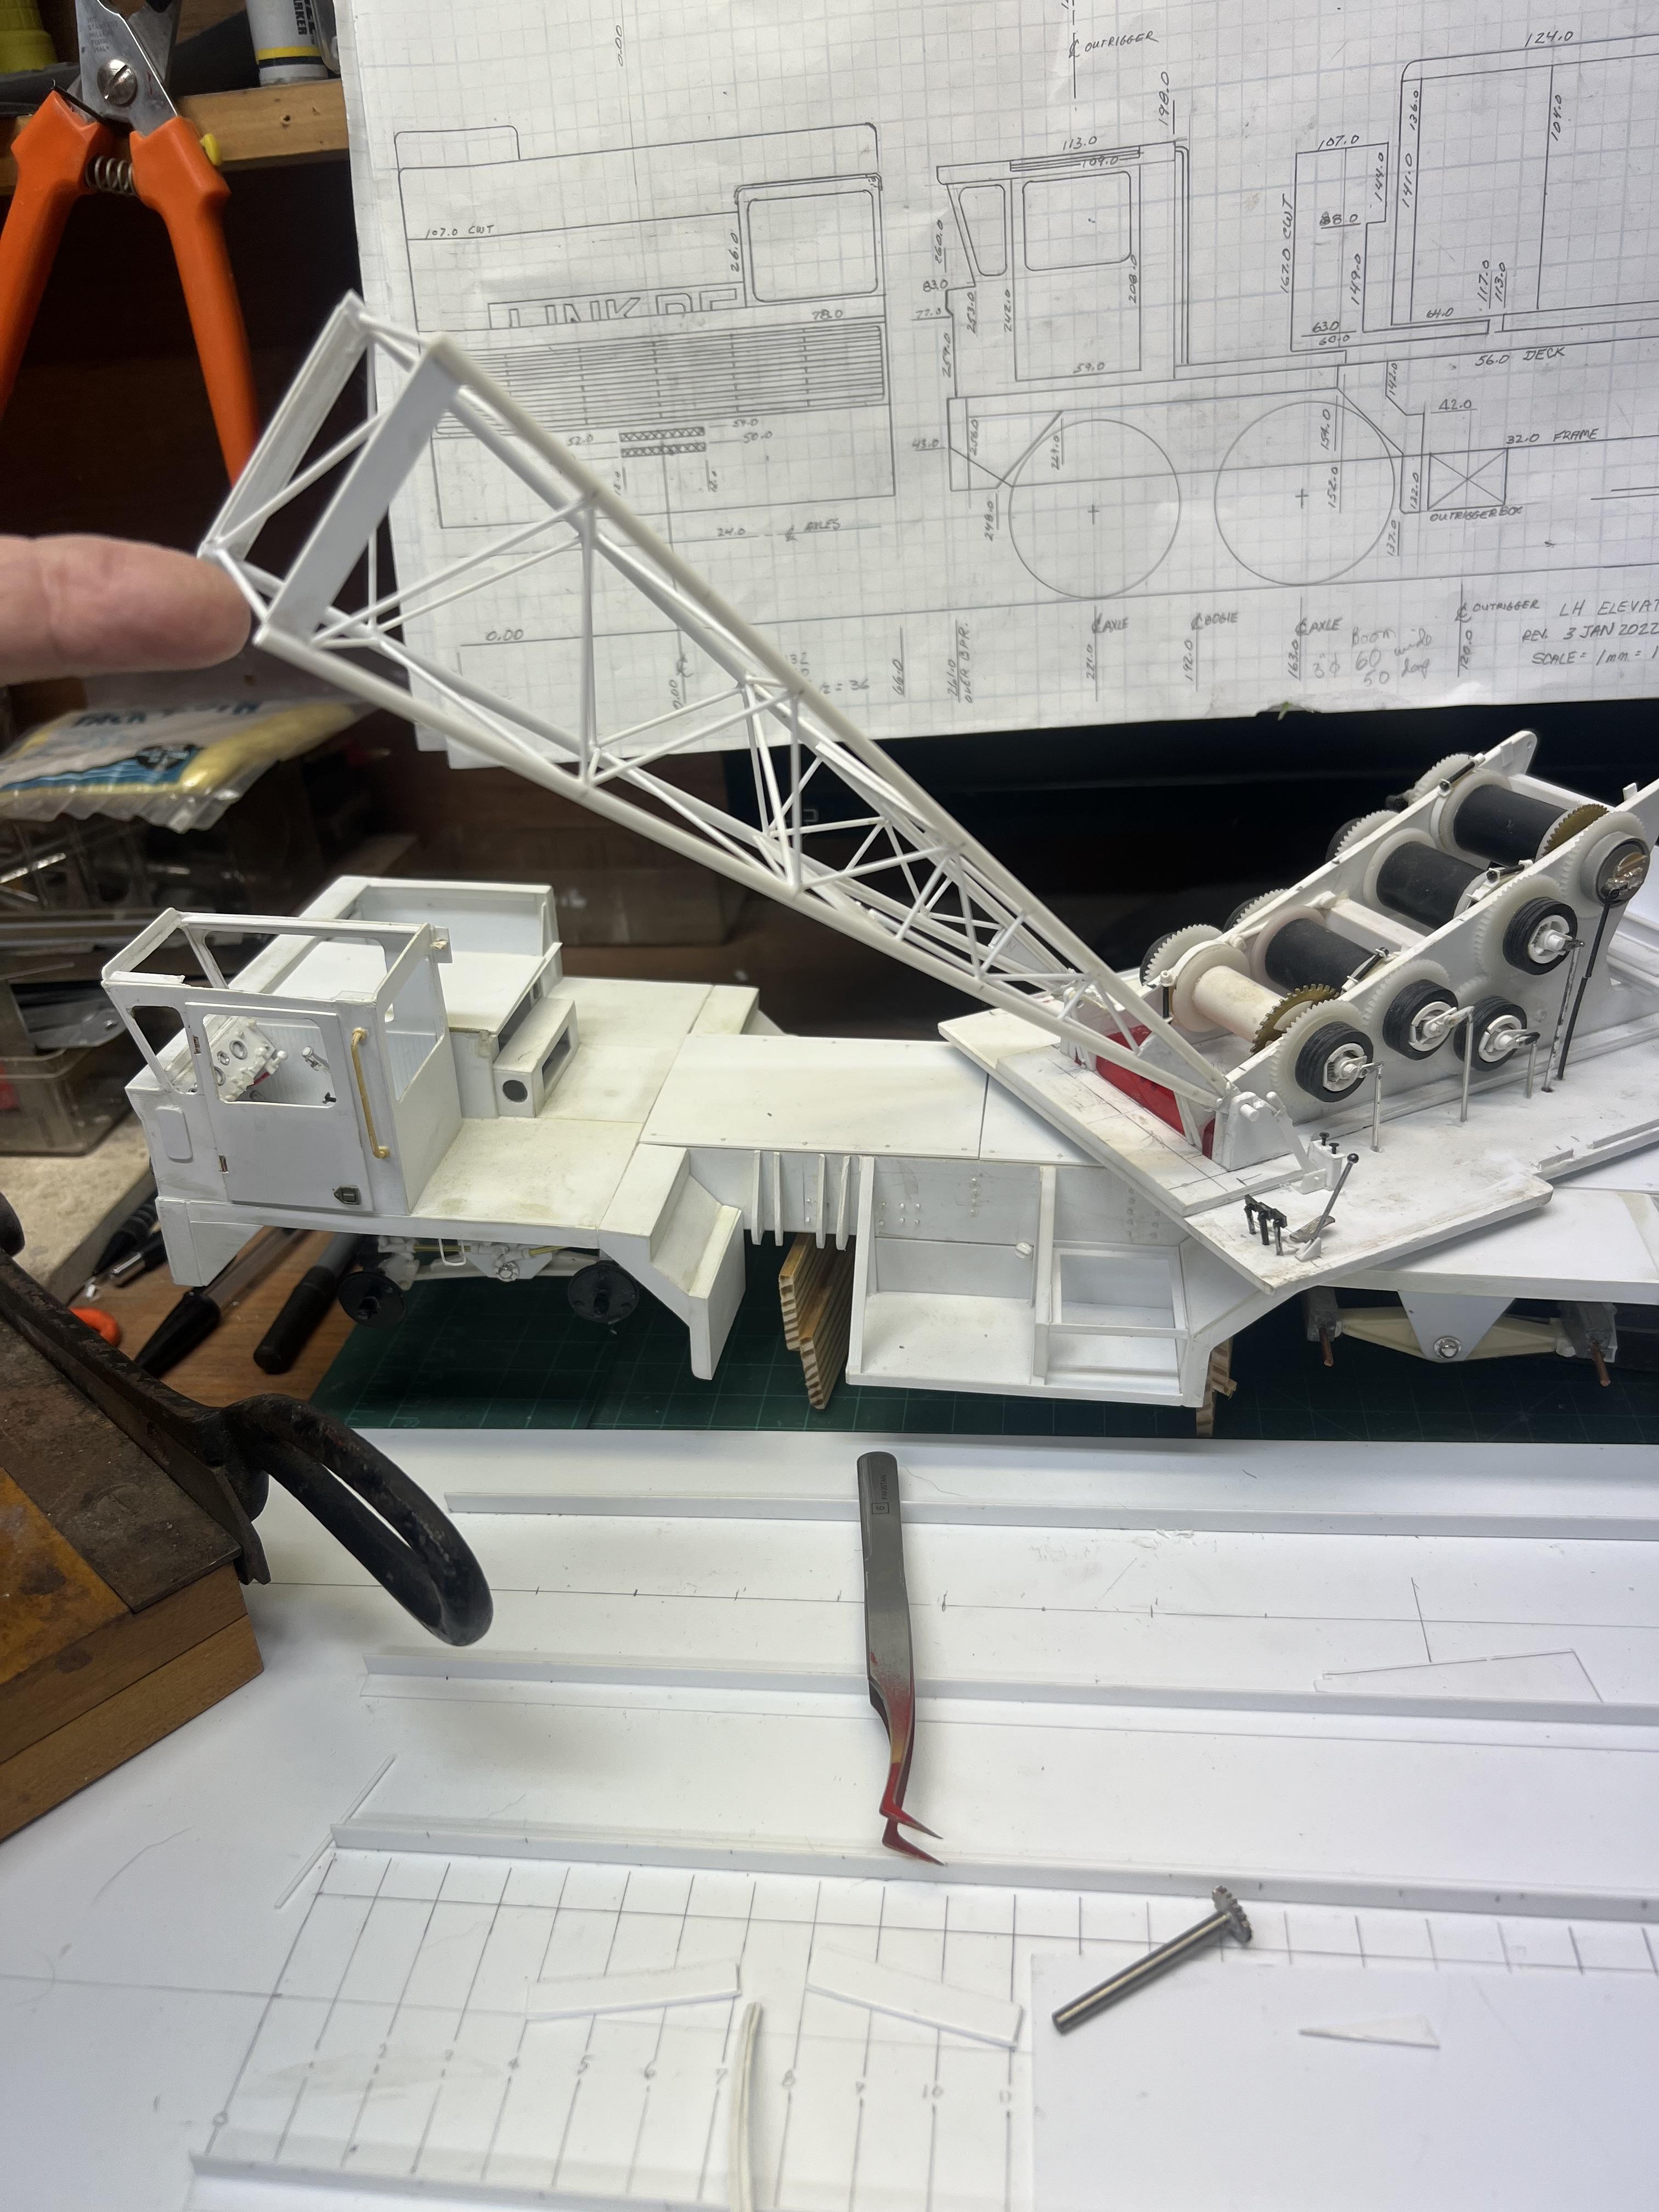
Here is the final section of boom with the start of the headgear installed. The five sheaves and the housing around them has been added as well as the two attachment points for the boom pendants. This was just simple making shapes and fabrication work, much like working with the real deal, only in 1/25 scale plastic. Still have a lot more to go just on the head gear, probably about 75 tiny pieces to make. More to come…..!
-
Western Star 4900 FA plow truck
redneckrigger replied to BK9300's topic in WIP: Model Trucks: Big Rigs and Heavy Equipment
That crank and joint assembly is beyond words! There is no way that I could even think of making something like that, it is just amazing! Keep up the incredible work, and keep giving the rest of us something to strive for sir! WOW! -
All just one more reason, besides keeping my sanity, for choosing not to replicate the real one with 240’ feet of boom! I simply cannot imagine having a boom that is 9’ 7” long, 240’ in scale! One of the logistical issues will definitely be how to move it if I take it to a show. There are so many cables etc. that will be involved in setting it up, it actually will be like setting up the real one, many hours of effort. Of course, I have to finish it first before I worry about showing it! I will cross that bridge when I get there! I may just have to make the boom assembly be self standing with all cables and pendants attached, then attach it to the crane and fasten the cable ends to the drums etc. Gonna be just one more challenge!
-
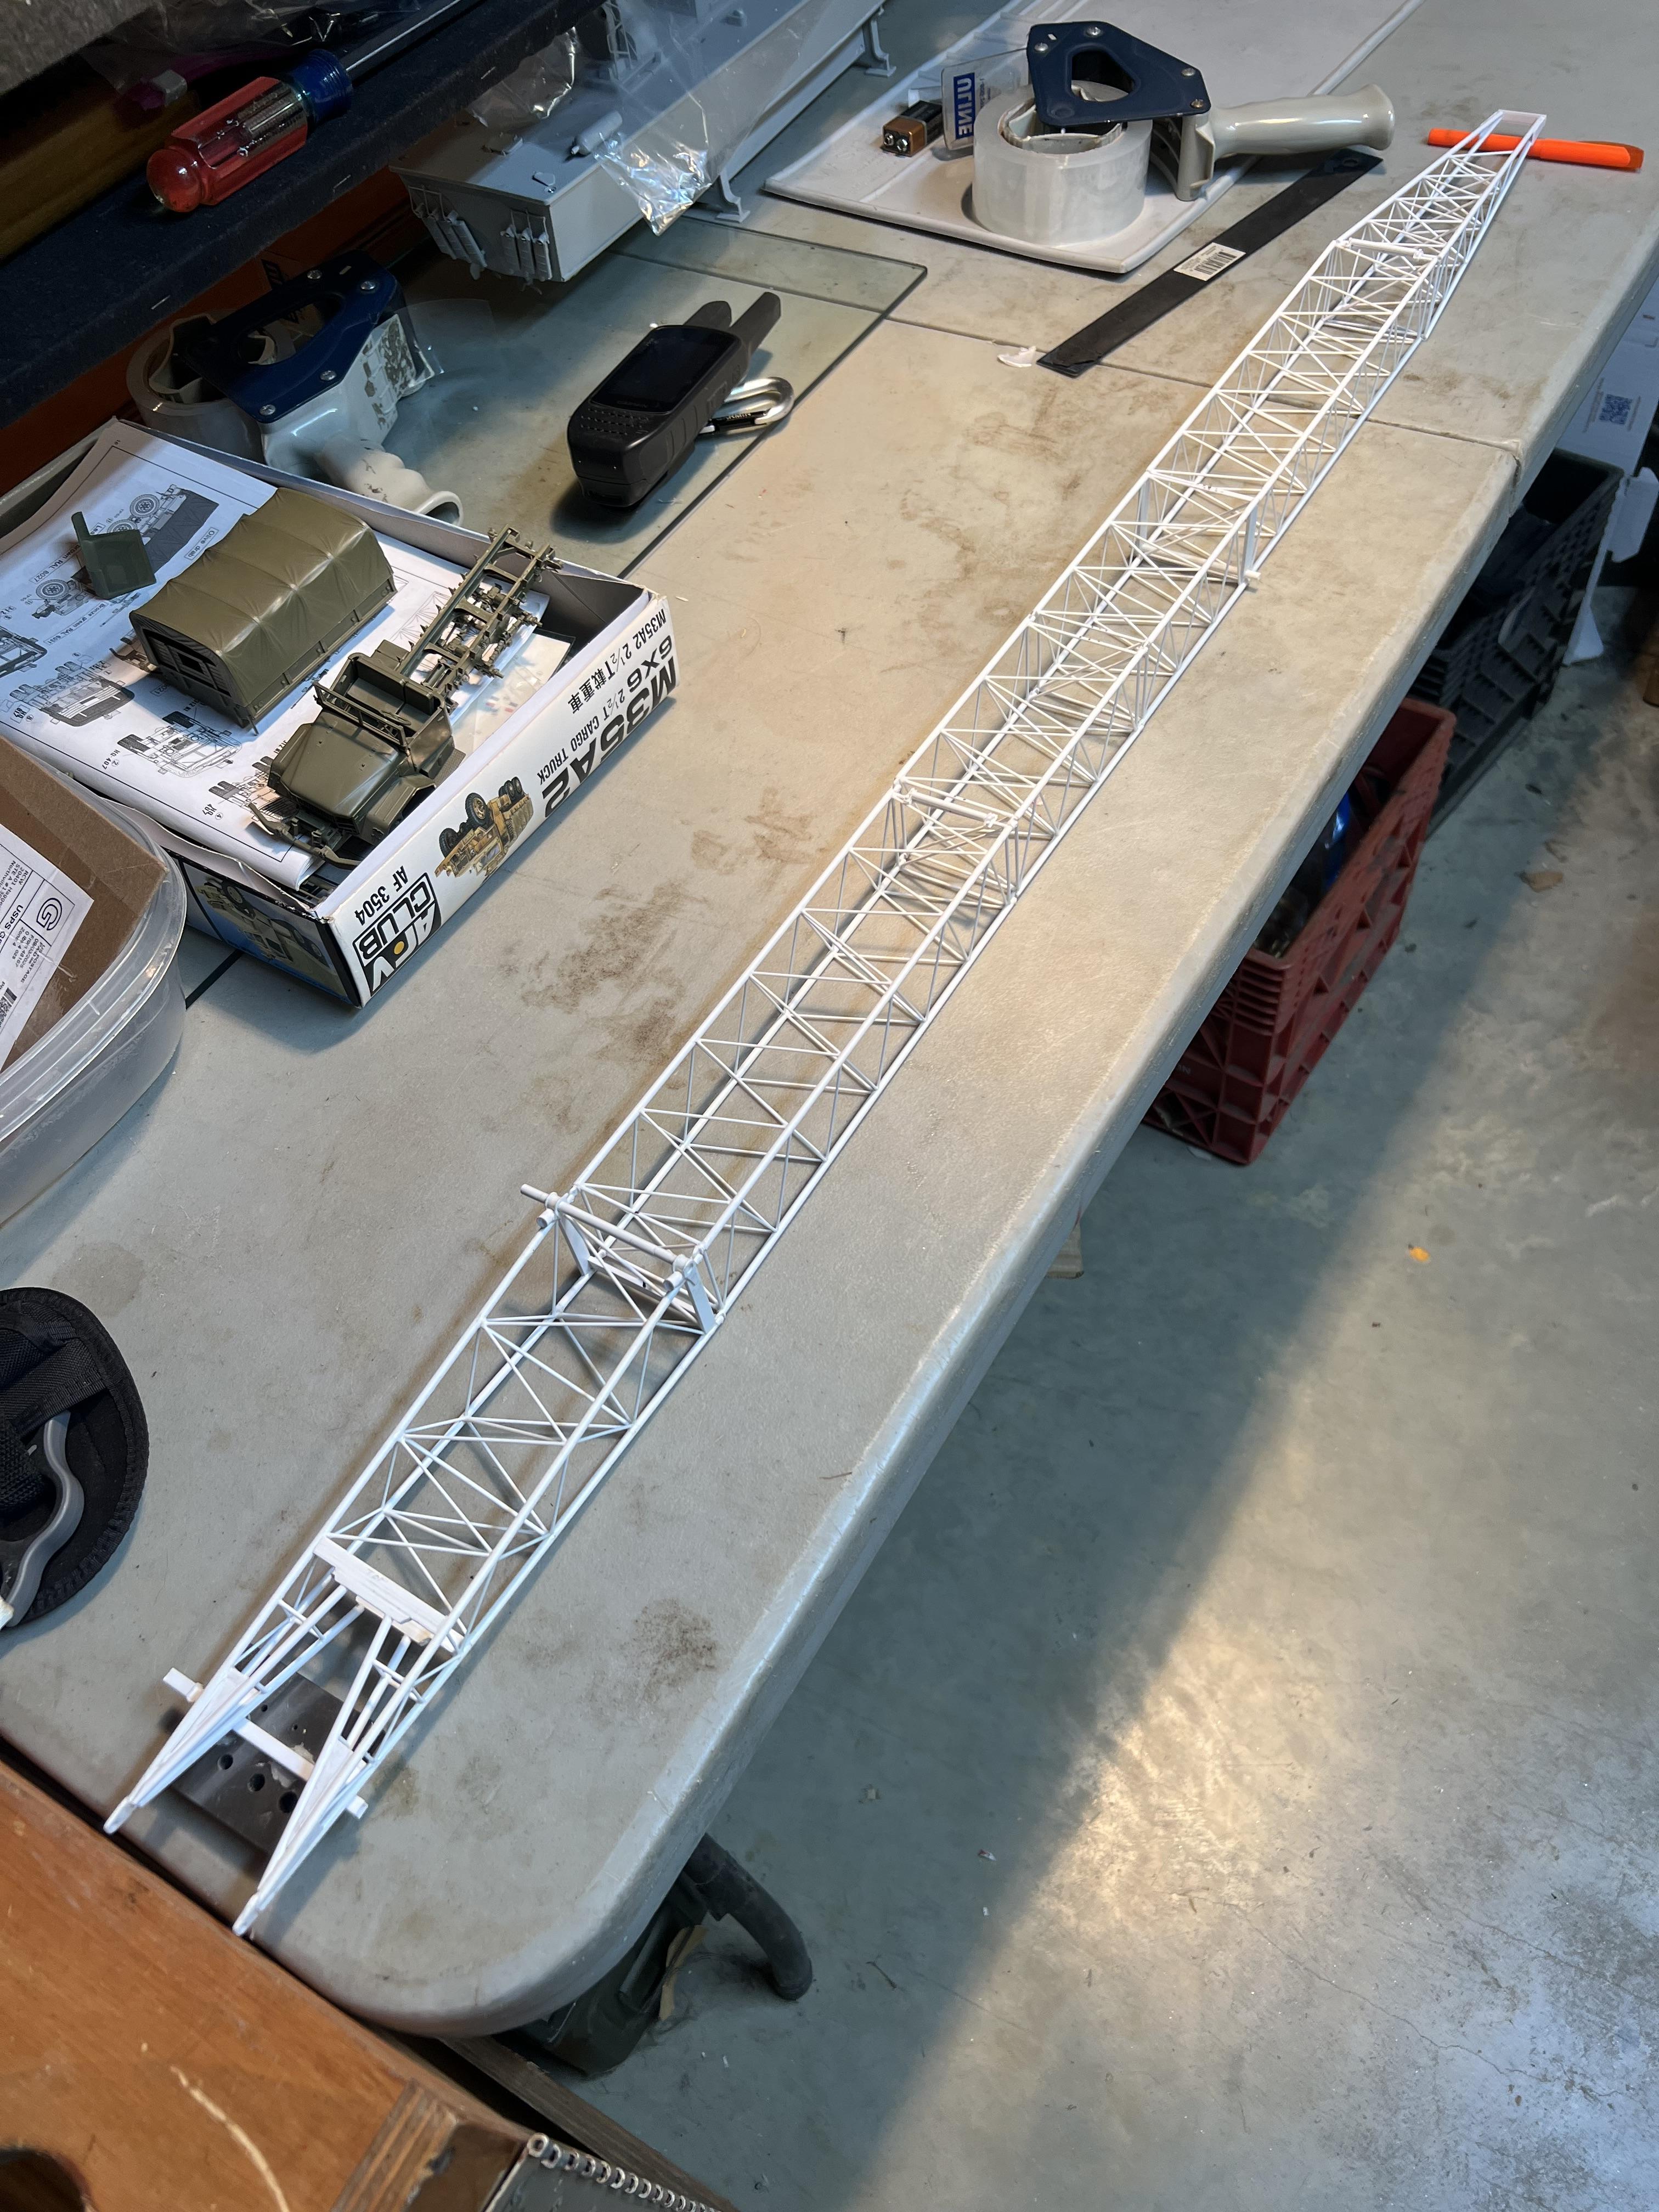
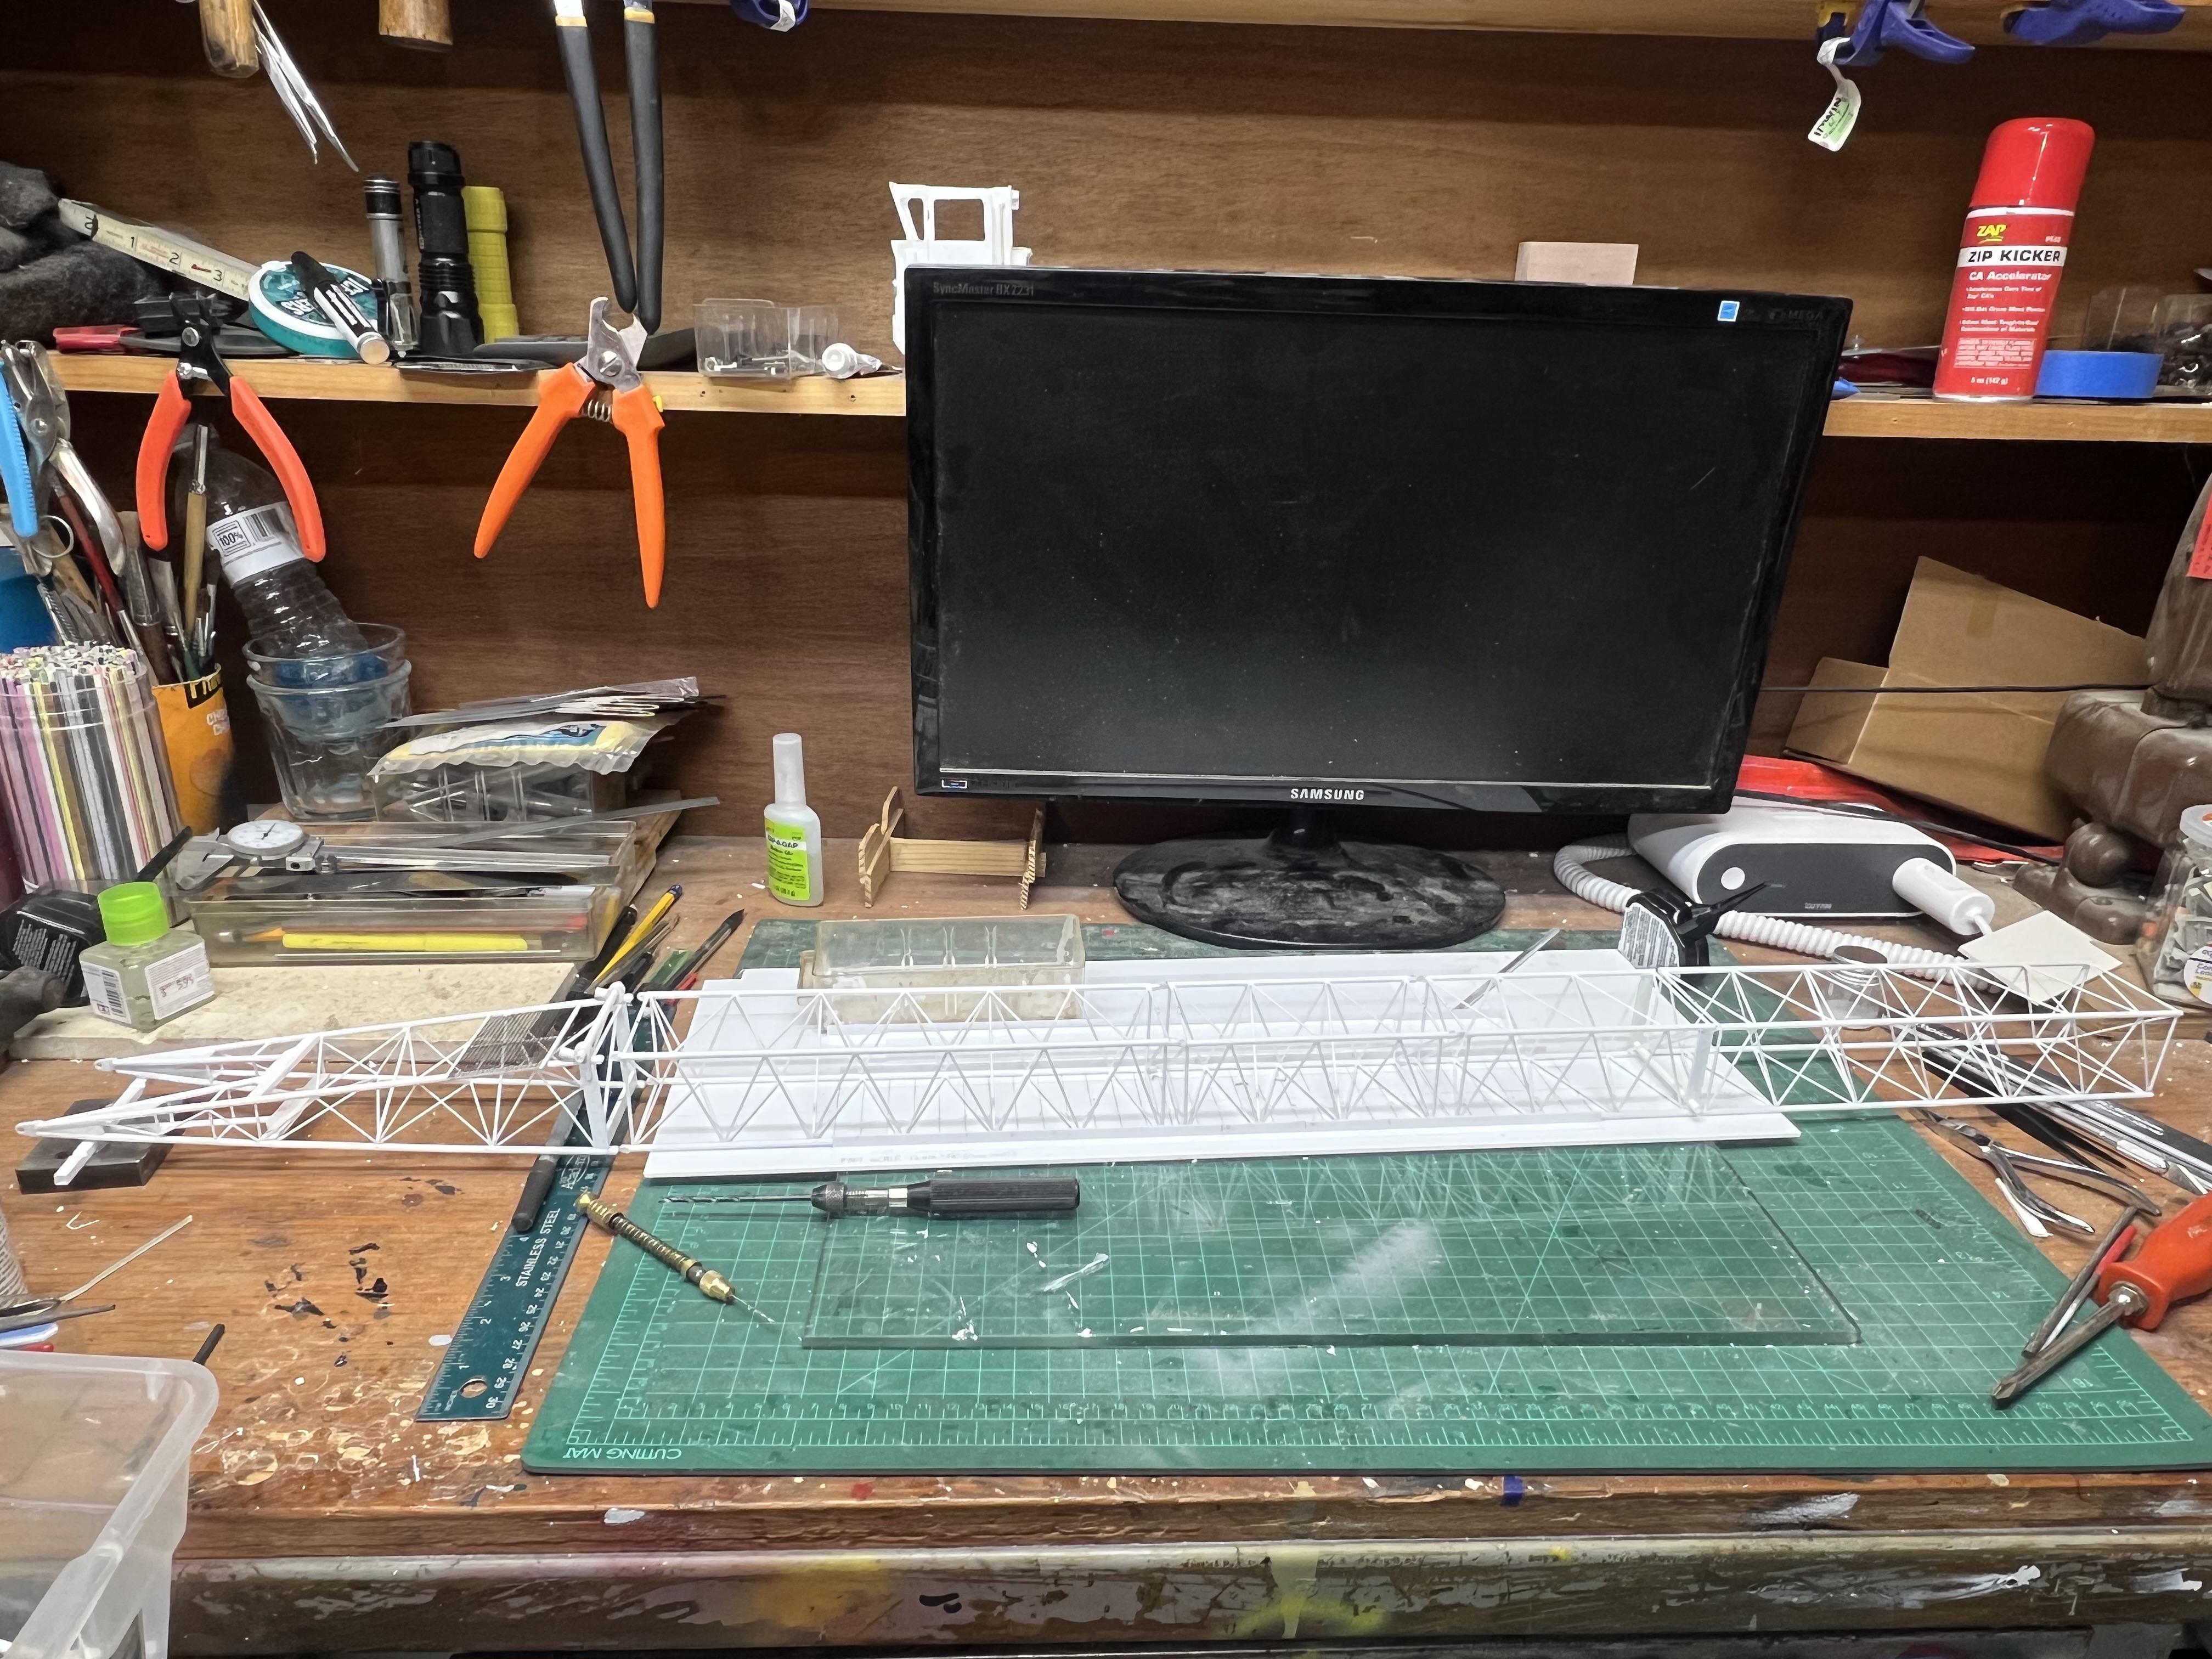
Finally seeing the size of 100’ of boom…..!
-
Finished adding the main latticework for the top section of boom. Still need to add the headgear with the sheaves, sheave housing, pendant supports and pendants, links, turnbuckles, swivels, folding gear and innumerable tiny teeny parts to the boom assembly, but at least I have 100 feet of boom built. I simply cannot imagine what this would look like with the 210 feet of boom and 30 feet of jib so I am happy with the 100 feet in my original plan. But, if I ever find myself with nothing better to do, I can always make more sections as I’ve had plenty of practice making them! I am trying to keep this authentic and not to fall to the temptation of artistic license with the details. Every night when I get done, I review the operators, parts and maintenance manuals and all of the photos I have amassed to see what is needed for the next step.
-
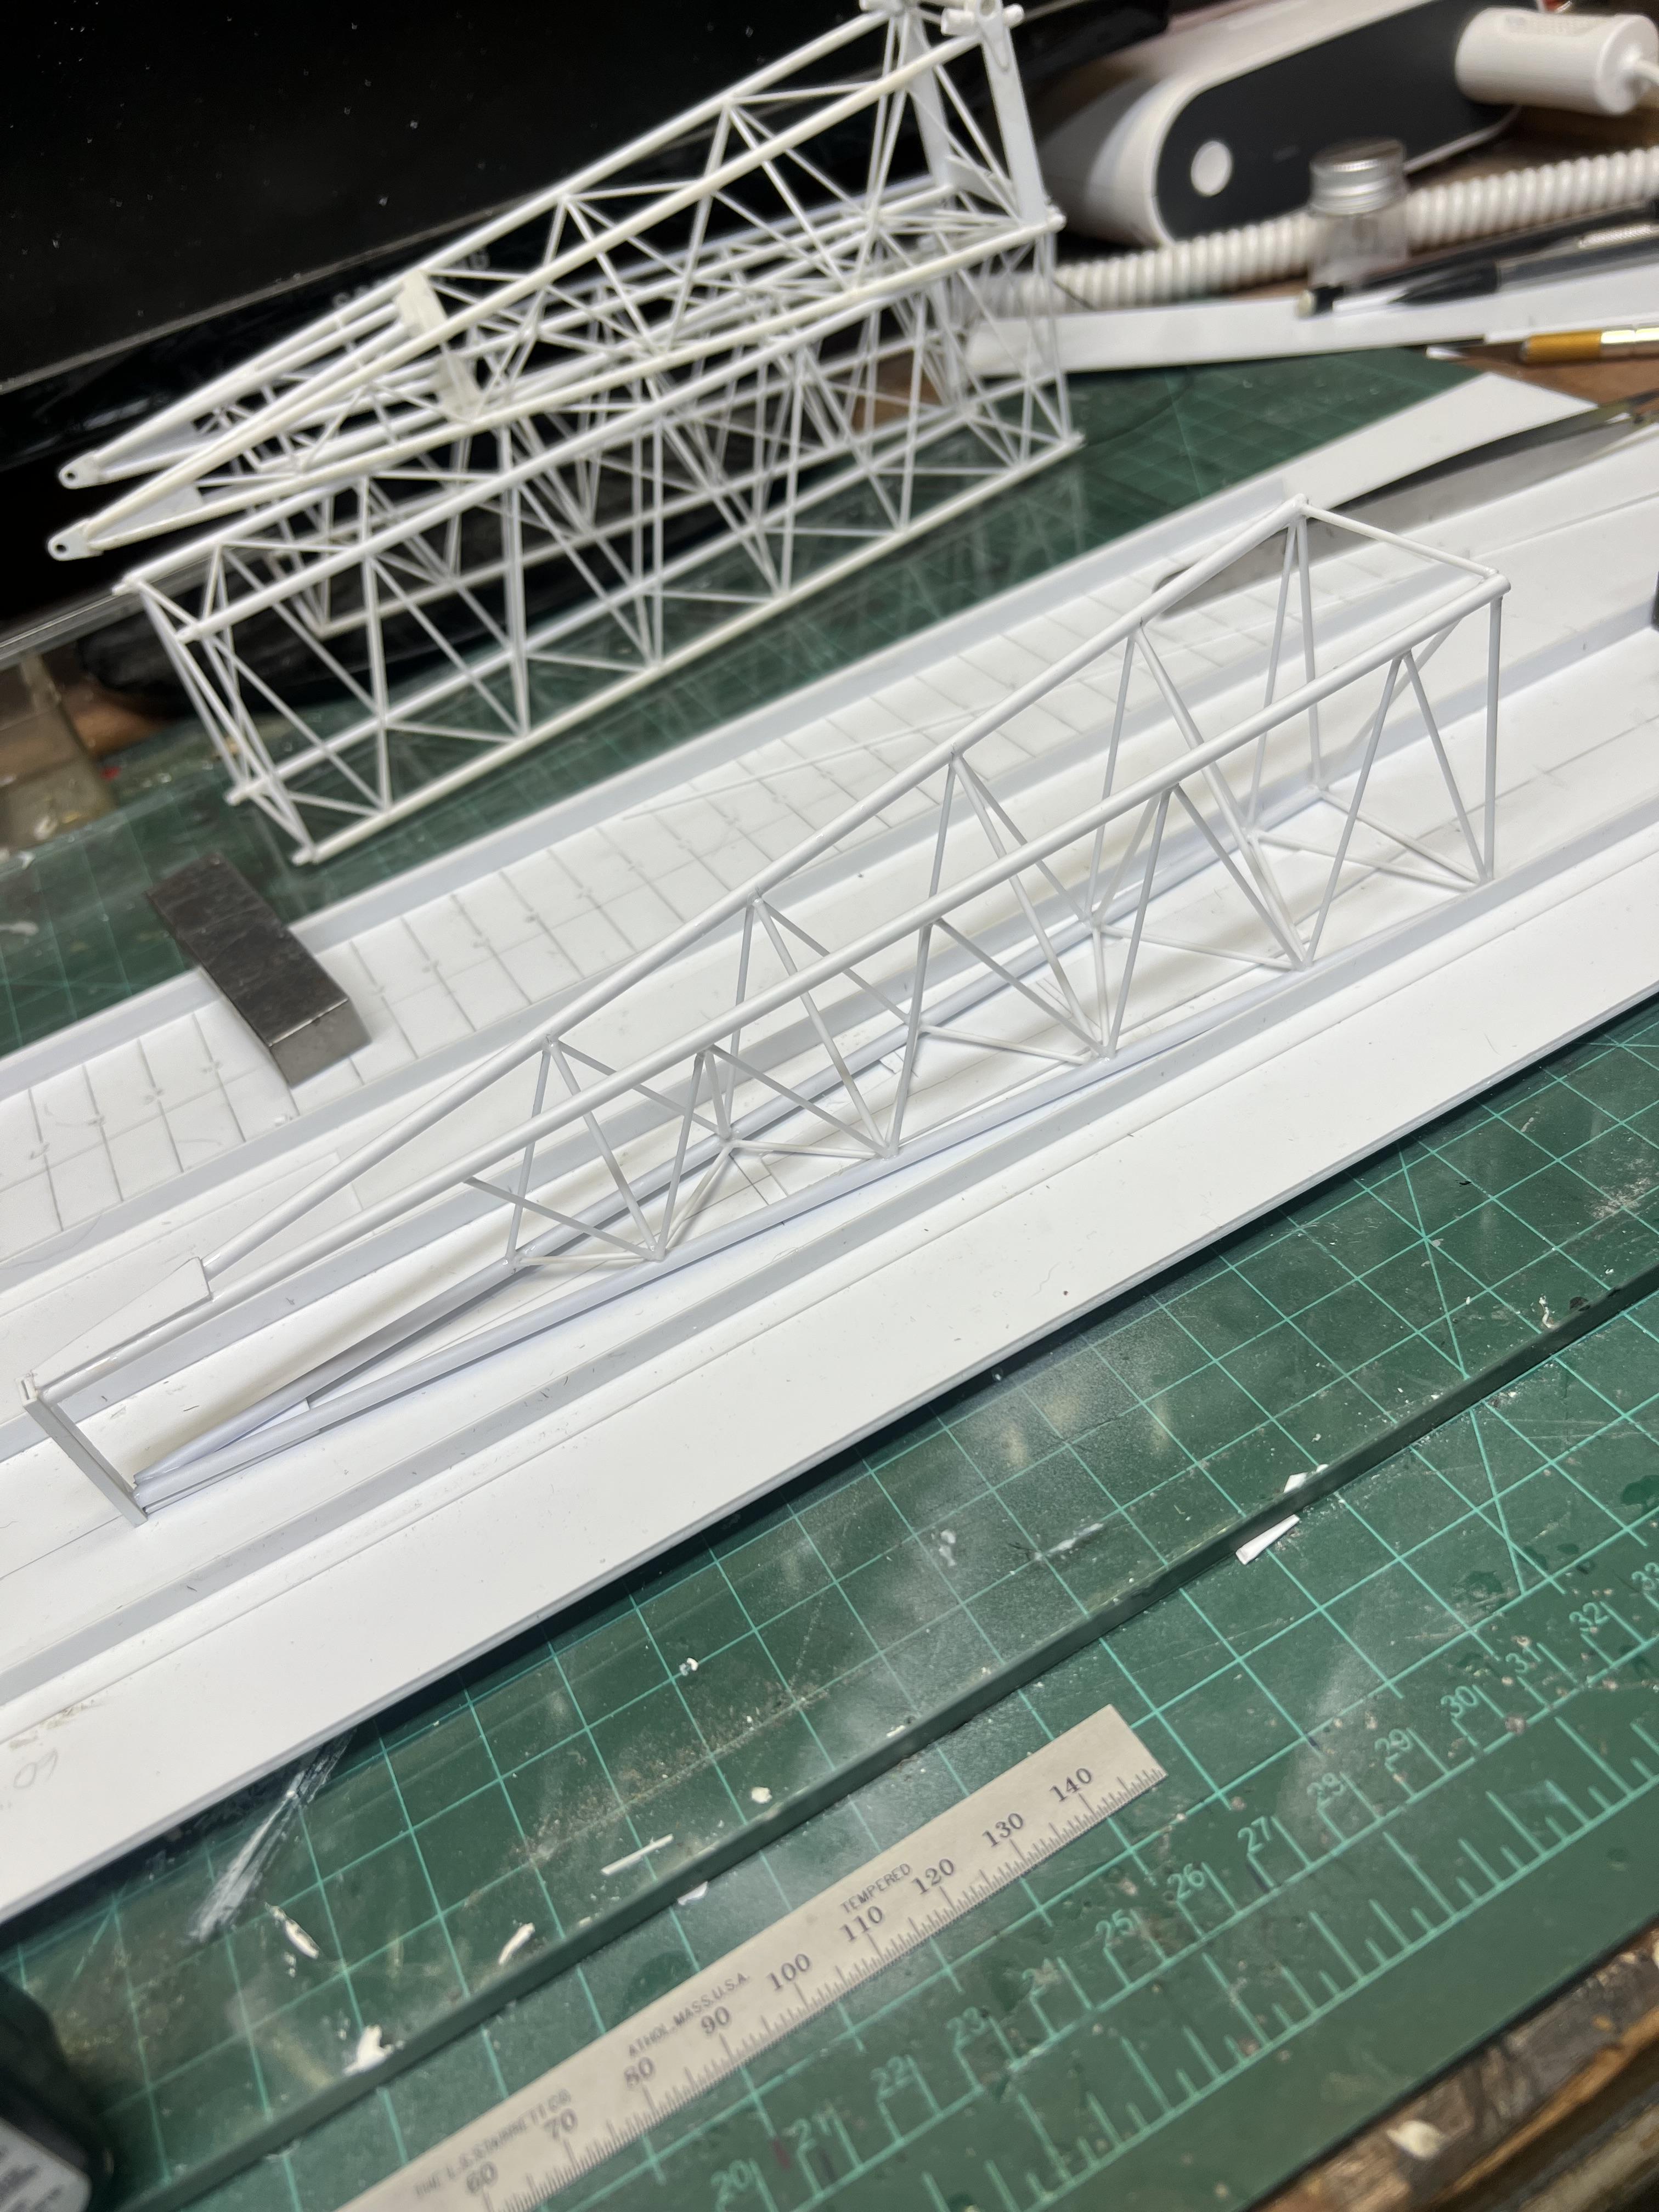
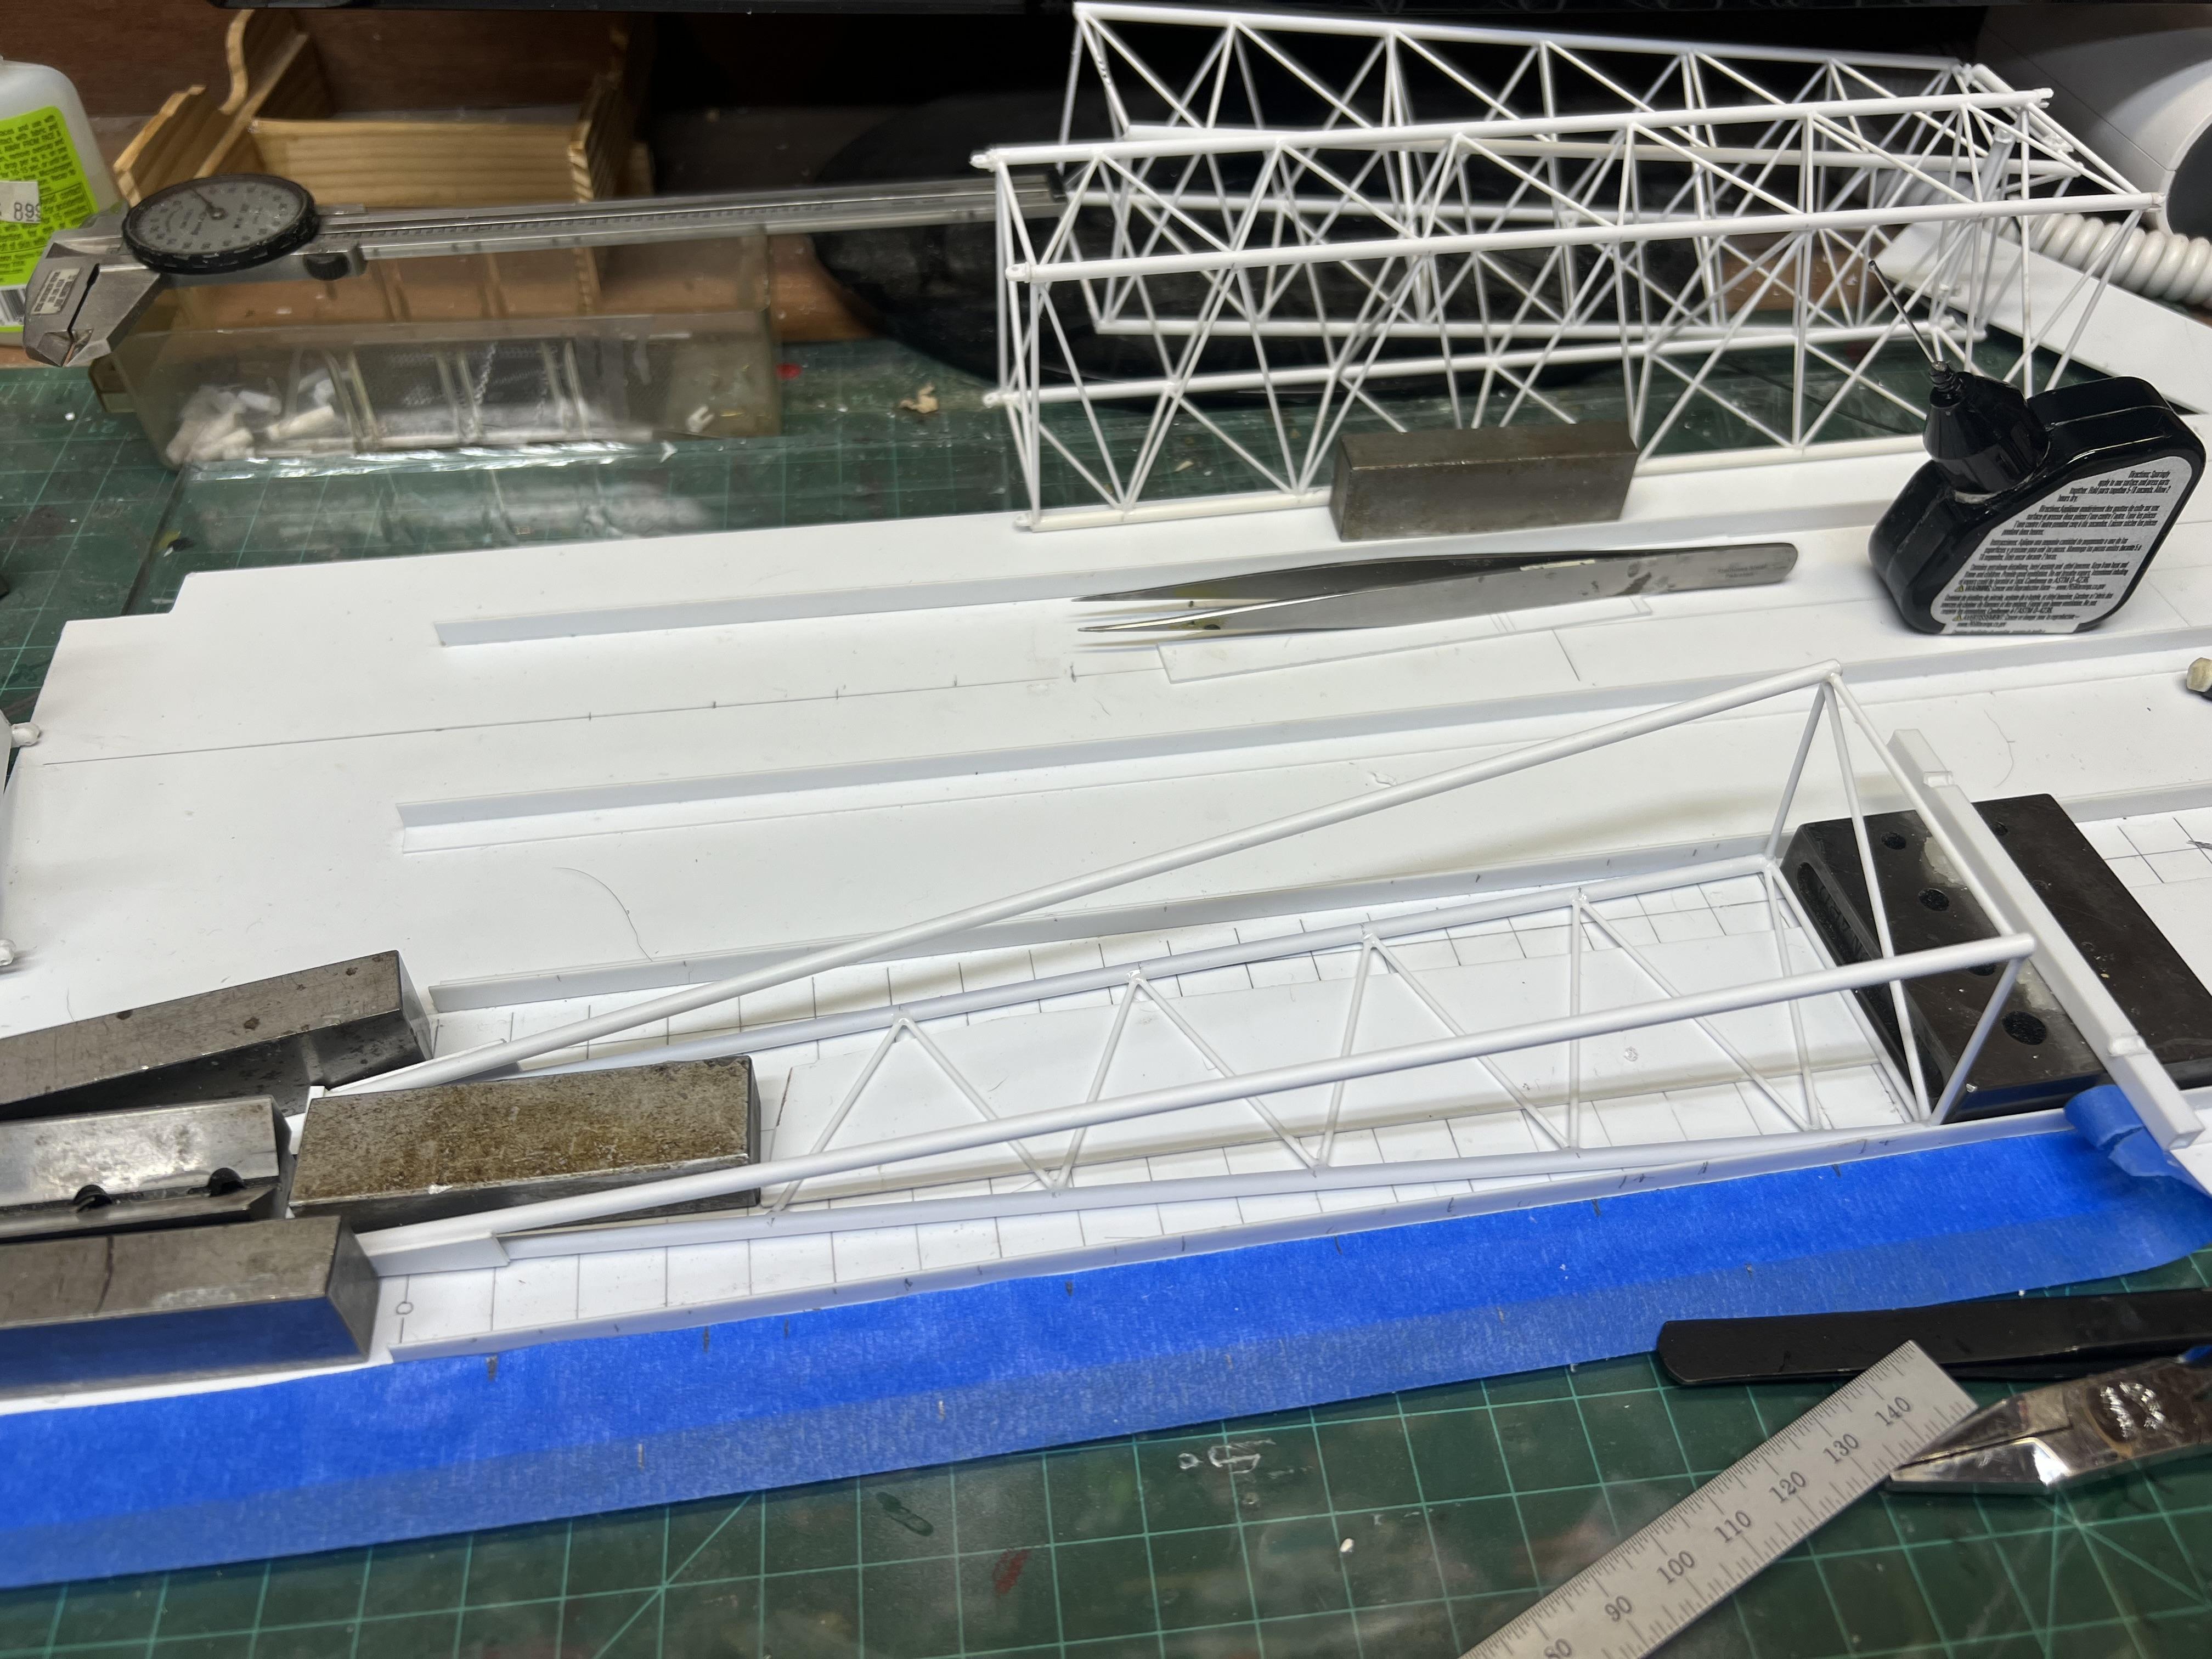
Thank you, but my work pales to your attention to replication and details on your builds. Holy COW! Started the end boom section which is doubly interesting as it tapers both vertically and horizontally as you can see in the photos. Made up the cable deflector rollers for the two 20’ boom sections. Started putting the crossbrace lattice work in the boom. Still have to do some more research on the construction of the head end of the last boom section. Also found another oversight that had to be corrected……the end of the carrier chassis had to have 6” more taper put into it. Missed it somewhere along the way! Like it was, if it were the real crane, the base boom would not be able to lower to touch the ground to assemble the rest of the boom to it. All better now!
-
The boom continues to be a major part of this build. So far, it has about 380 pieces. When done, with the rigging connectors, the folding portion and the boom head it will have well over 750 pieces in its construction. Started putting the boom connector pieces in place today. THIS is where I wish I knew how to 3D print. If only for the uniformity alone, it would be fantastic! Boy, do I miss Shapeways! Used to be able to get all sorts of tiny intricate parts made to order. But making 20-30 of the same piece just builds character!!!
-
Western Star 4900 FA plow truck
redneckrigger replied to BK9300's topic in WIP: Model Trucks: Big Rigs and Heavy Equipment
Absolutely pristine work! That looks for all the world like the real truck you are working on…..only giveaway is your tools and bench light etc. Absolutely incredible, wish I was able to do such fine detailing! Incredible!!! -
I know what you mean. When I discovered the problem, I just took the time to figure out how to fix it. I guess retirement has been good for me. The working me would have had an issue or two with it, and it probably would not have been fixable, as the section would have been kinda flat! But my fix plan worked well! Now back to making progress again!
-
Well, it was not too bad, just about 5 hours of re-do. But it came out well and now clears the drivers cab as it is supposed to. And while it was in the shop, I made a few other changes to the diagonal boom supports at the base to make them more prototypical.
-
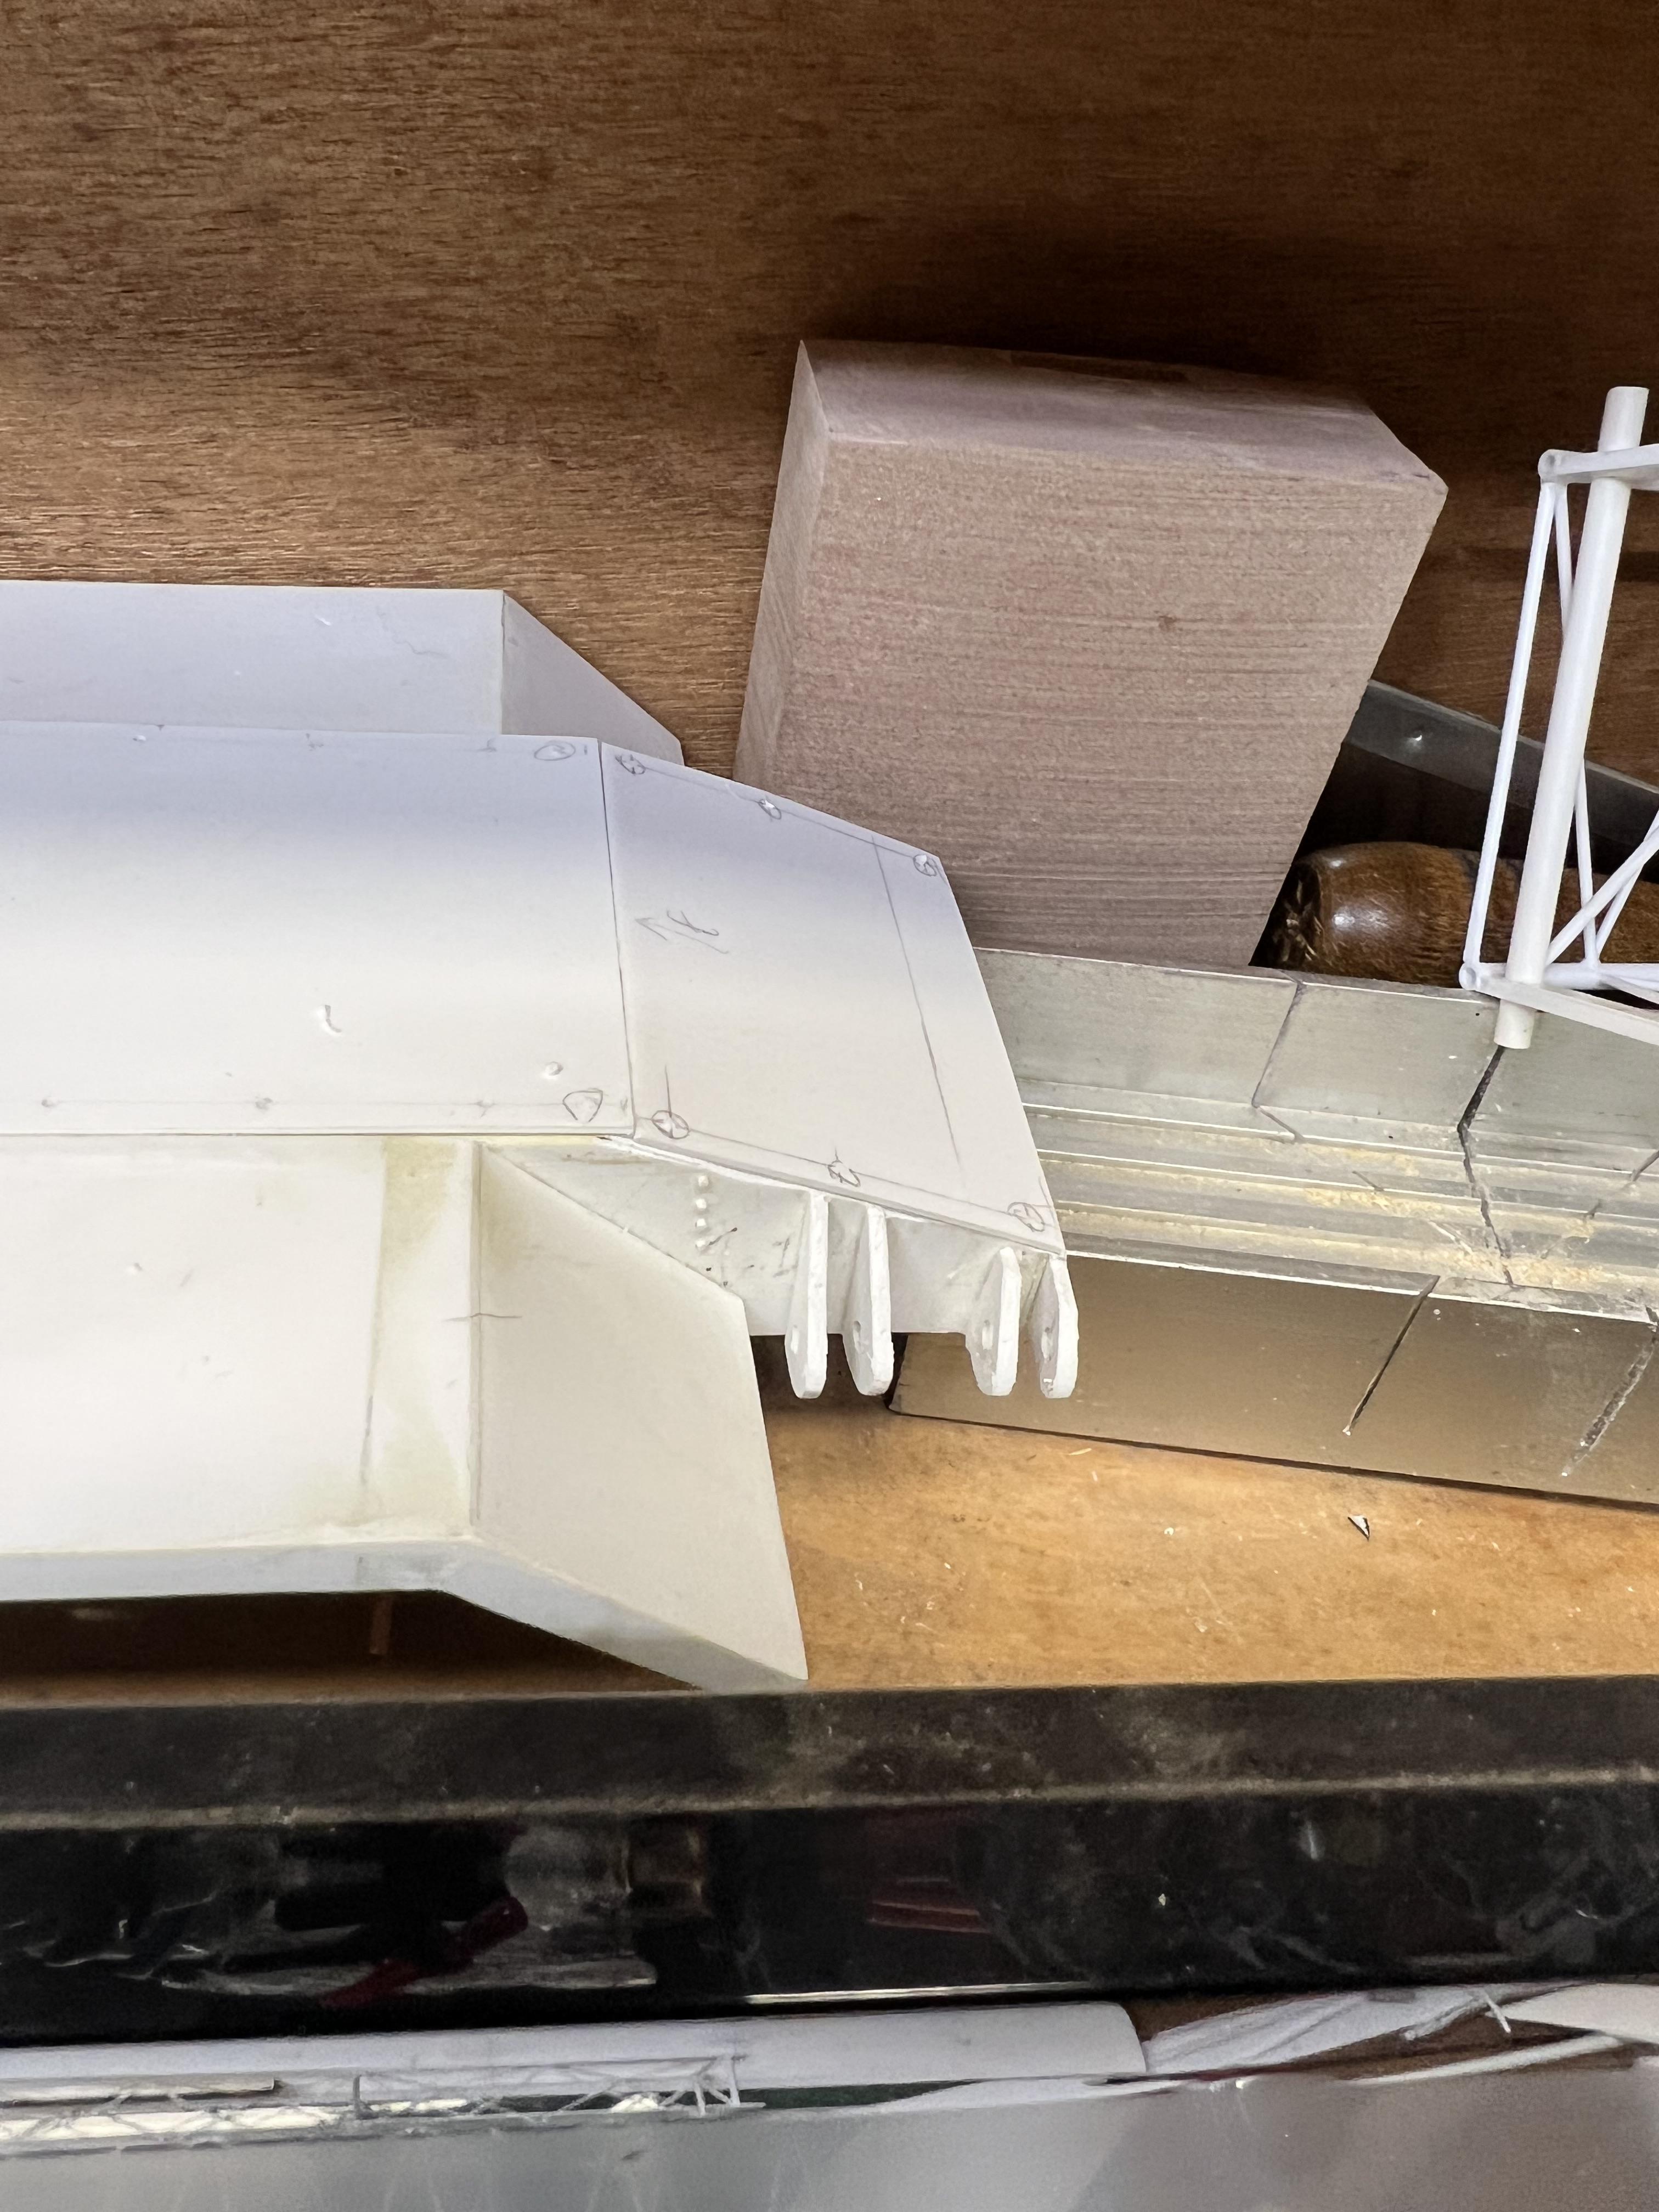
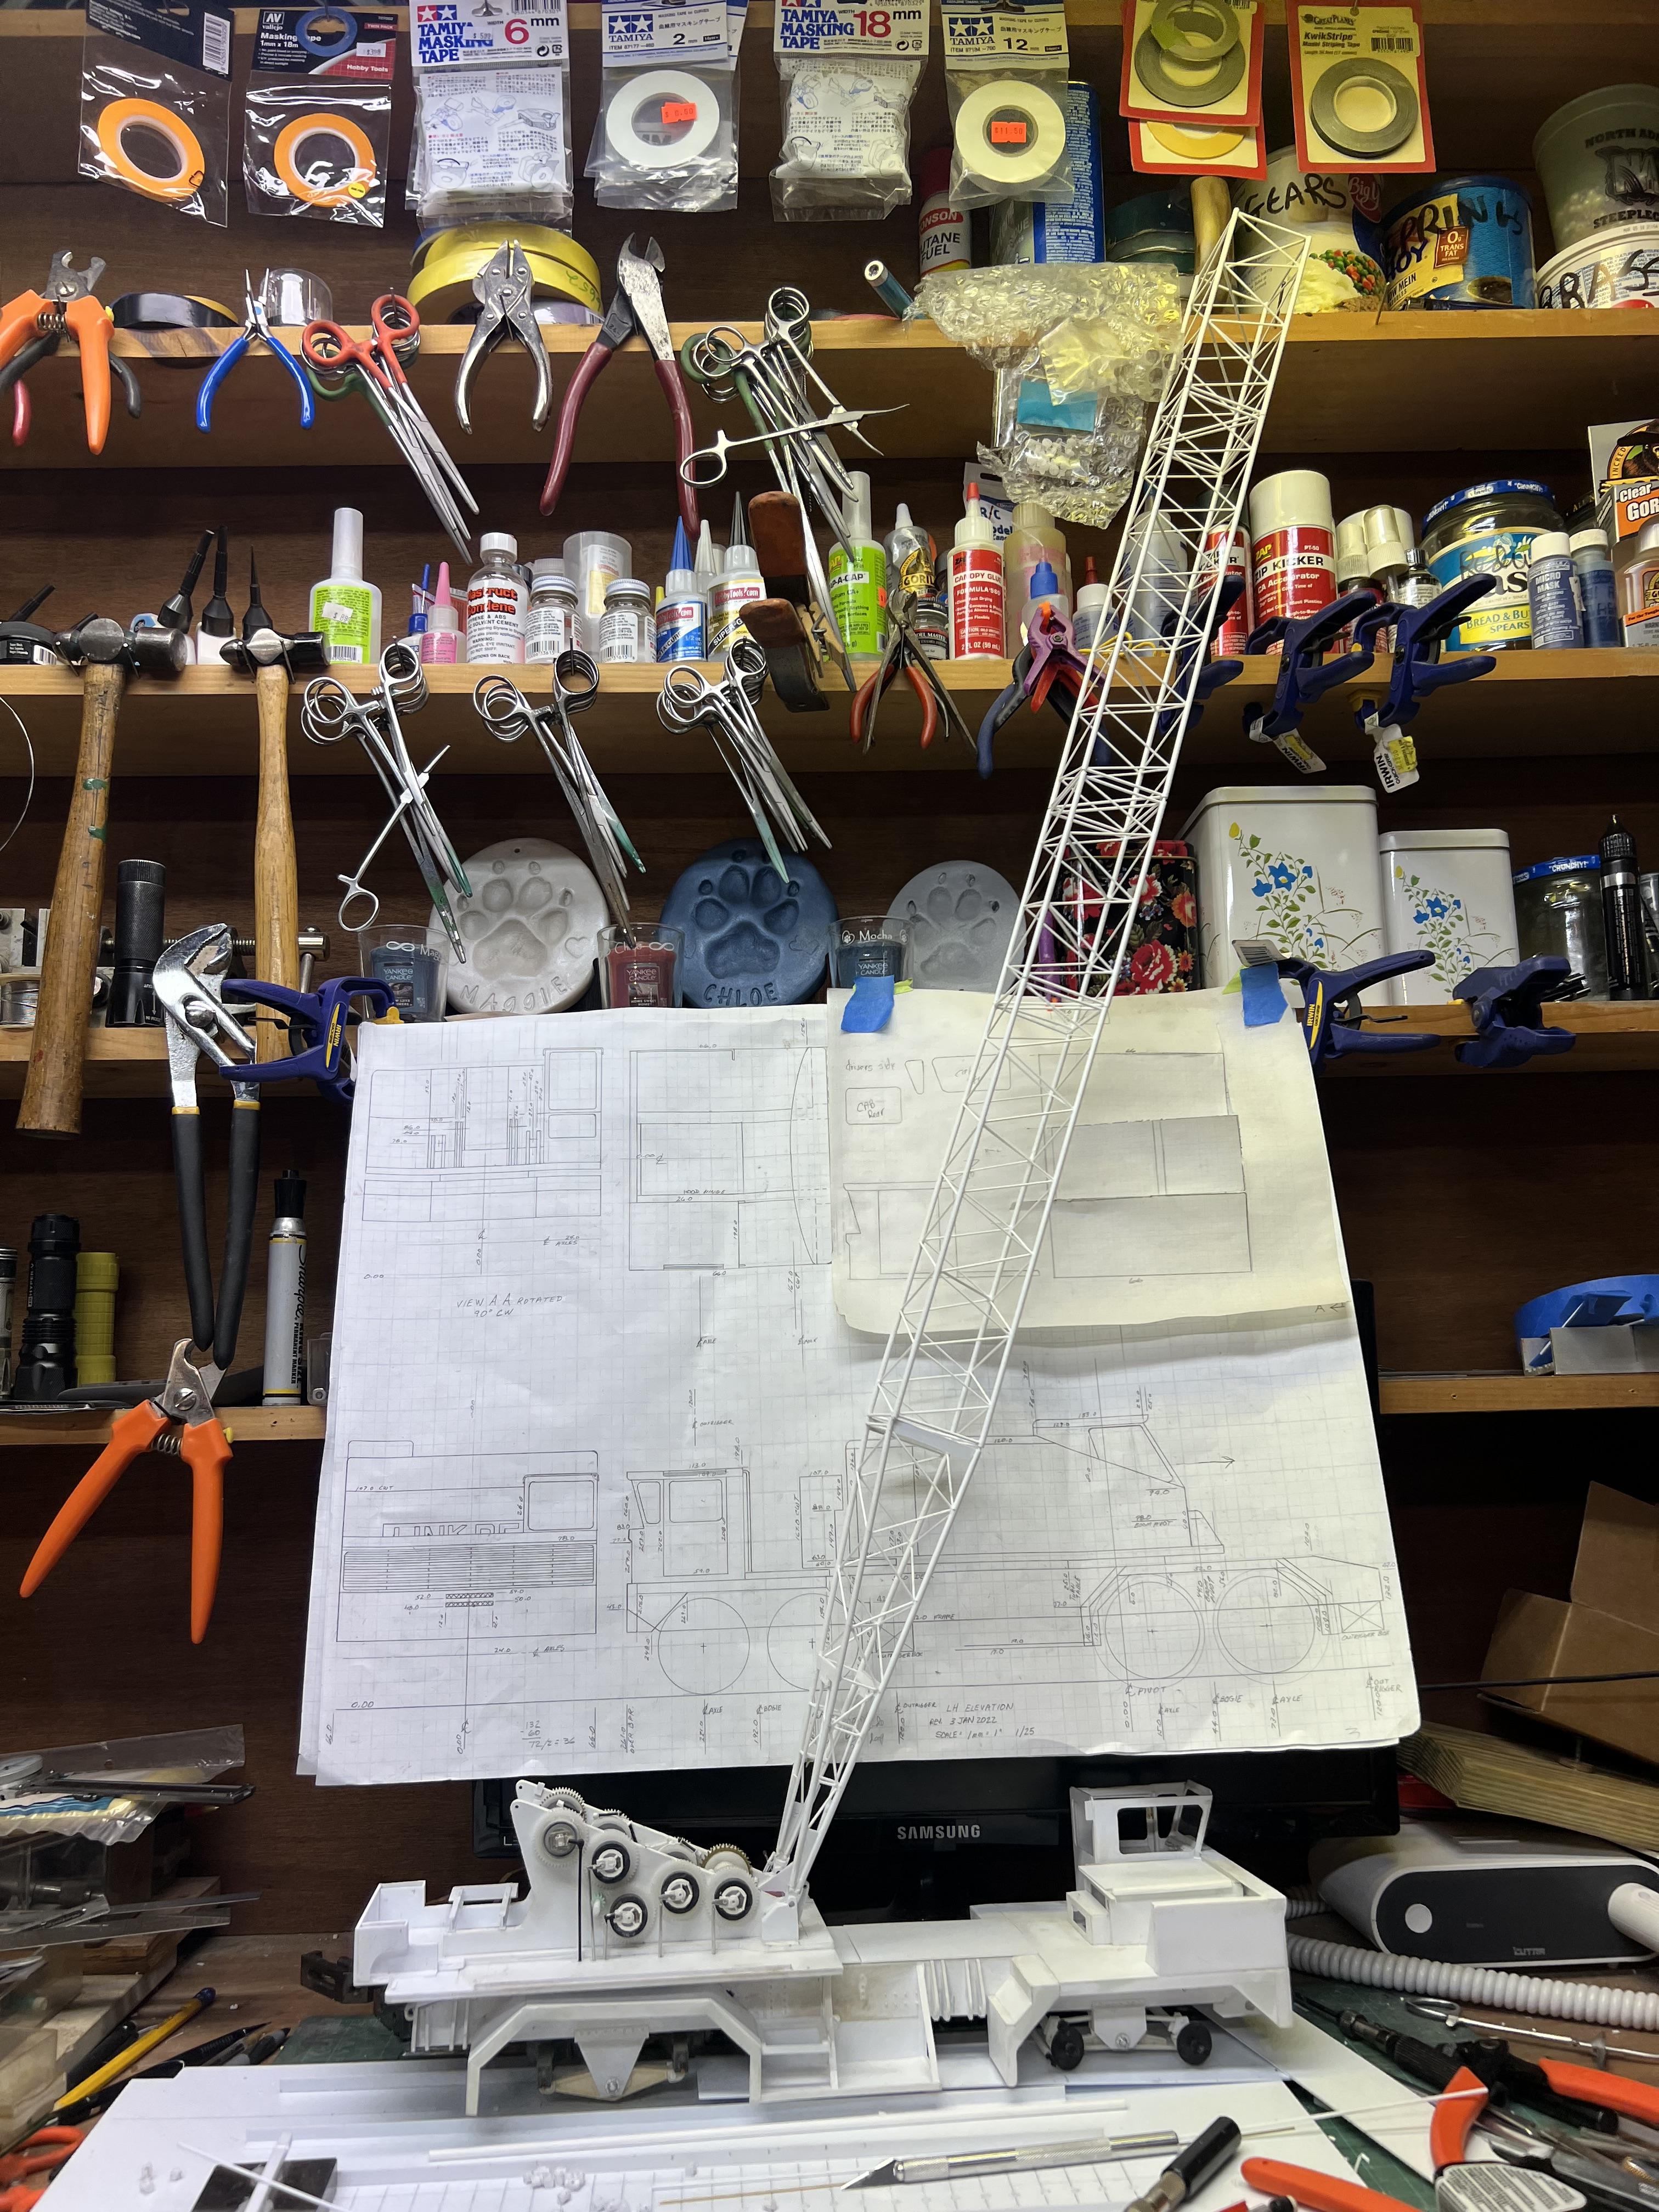
Well, I made all kinds of blueprints after taking actual measurements on the actual crane. And it worked out incredibly well, with almost no “two steps forward, three in reverse” scenarios in the five years this project has been underway………..BUT all good things come to an end. When I went to take the measurements, the boom was up in the air about 150 feet. So I could not take actual measurements of it but took plenty of photos. I made some educated guesses, took scaled measurements from the photos and thought my boom construction was going well. Until last night, when I started putting the pivot joint onto the boom foot. Seems that the actual boom foot is just a bit longer than I thought, which turned out with the pivot joint end of my boom foot being about one foot too short and it crashed into the carrier operators cab. So, I ended up having to lengthen the boom foot by about one foot. No biggie……if it was a straight section of boom. But it is a tapered section and by making it longer it was now too tall on the sides to properly mate with the straight sections. So, out comes the torches and welders, (sprue snippers, razor knives and glue), and I lengthened the main tubes, but now the sides had to have all of the latticework that was in place changed to make them all shorter to account for the taper. So tonight’s project will be about another 50 pieces of latticework made up and installed to AGAIN complete the boom foot! Photos to follow…….!
-
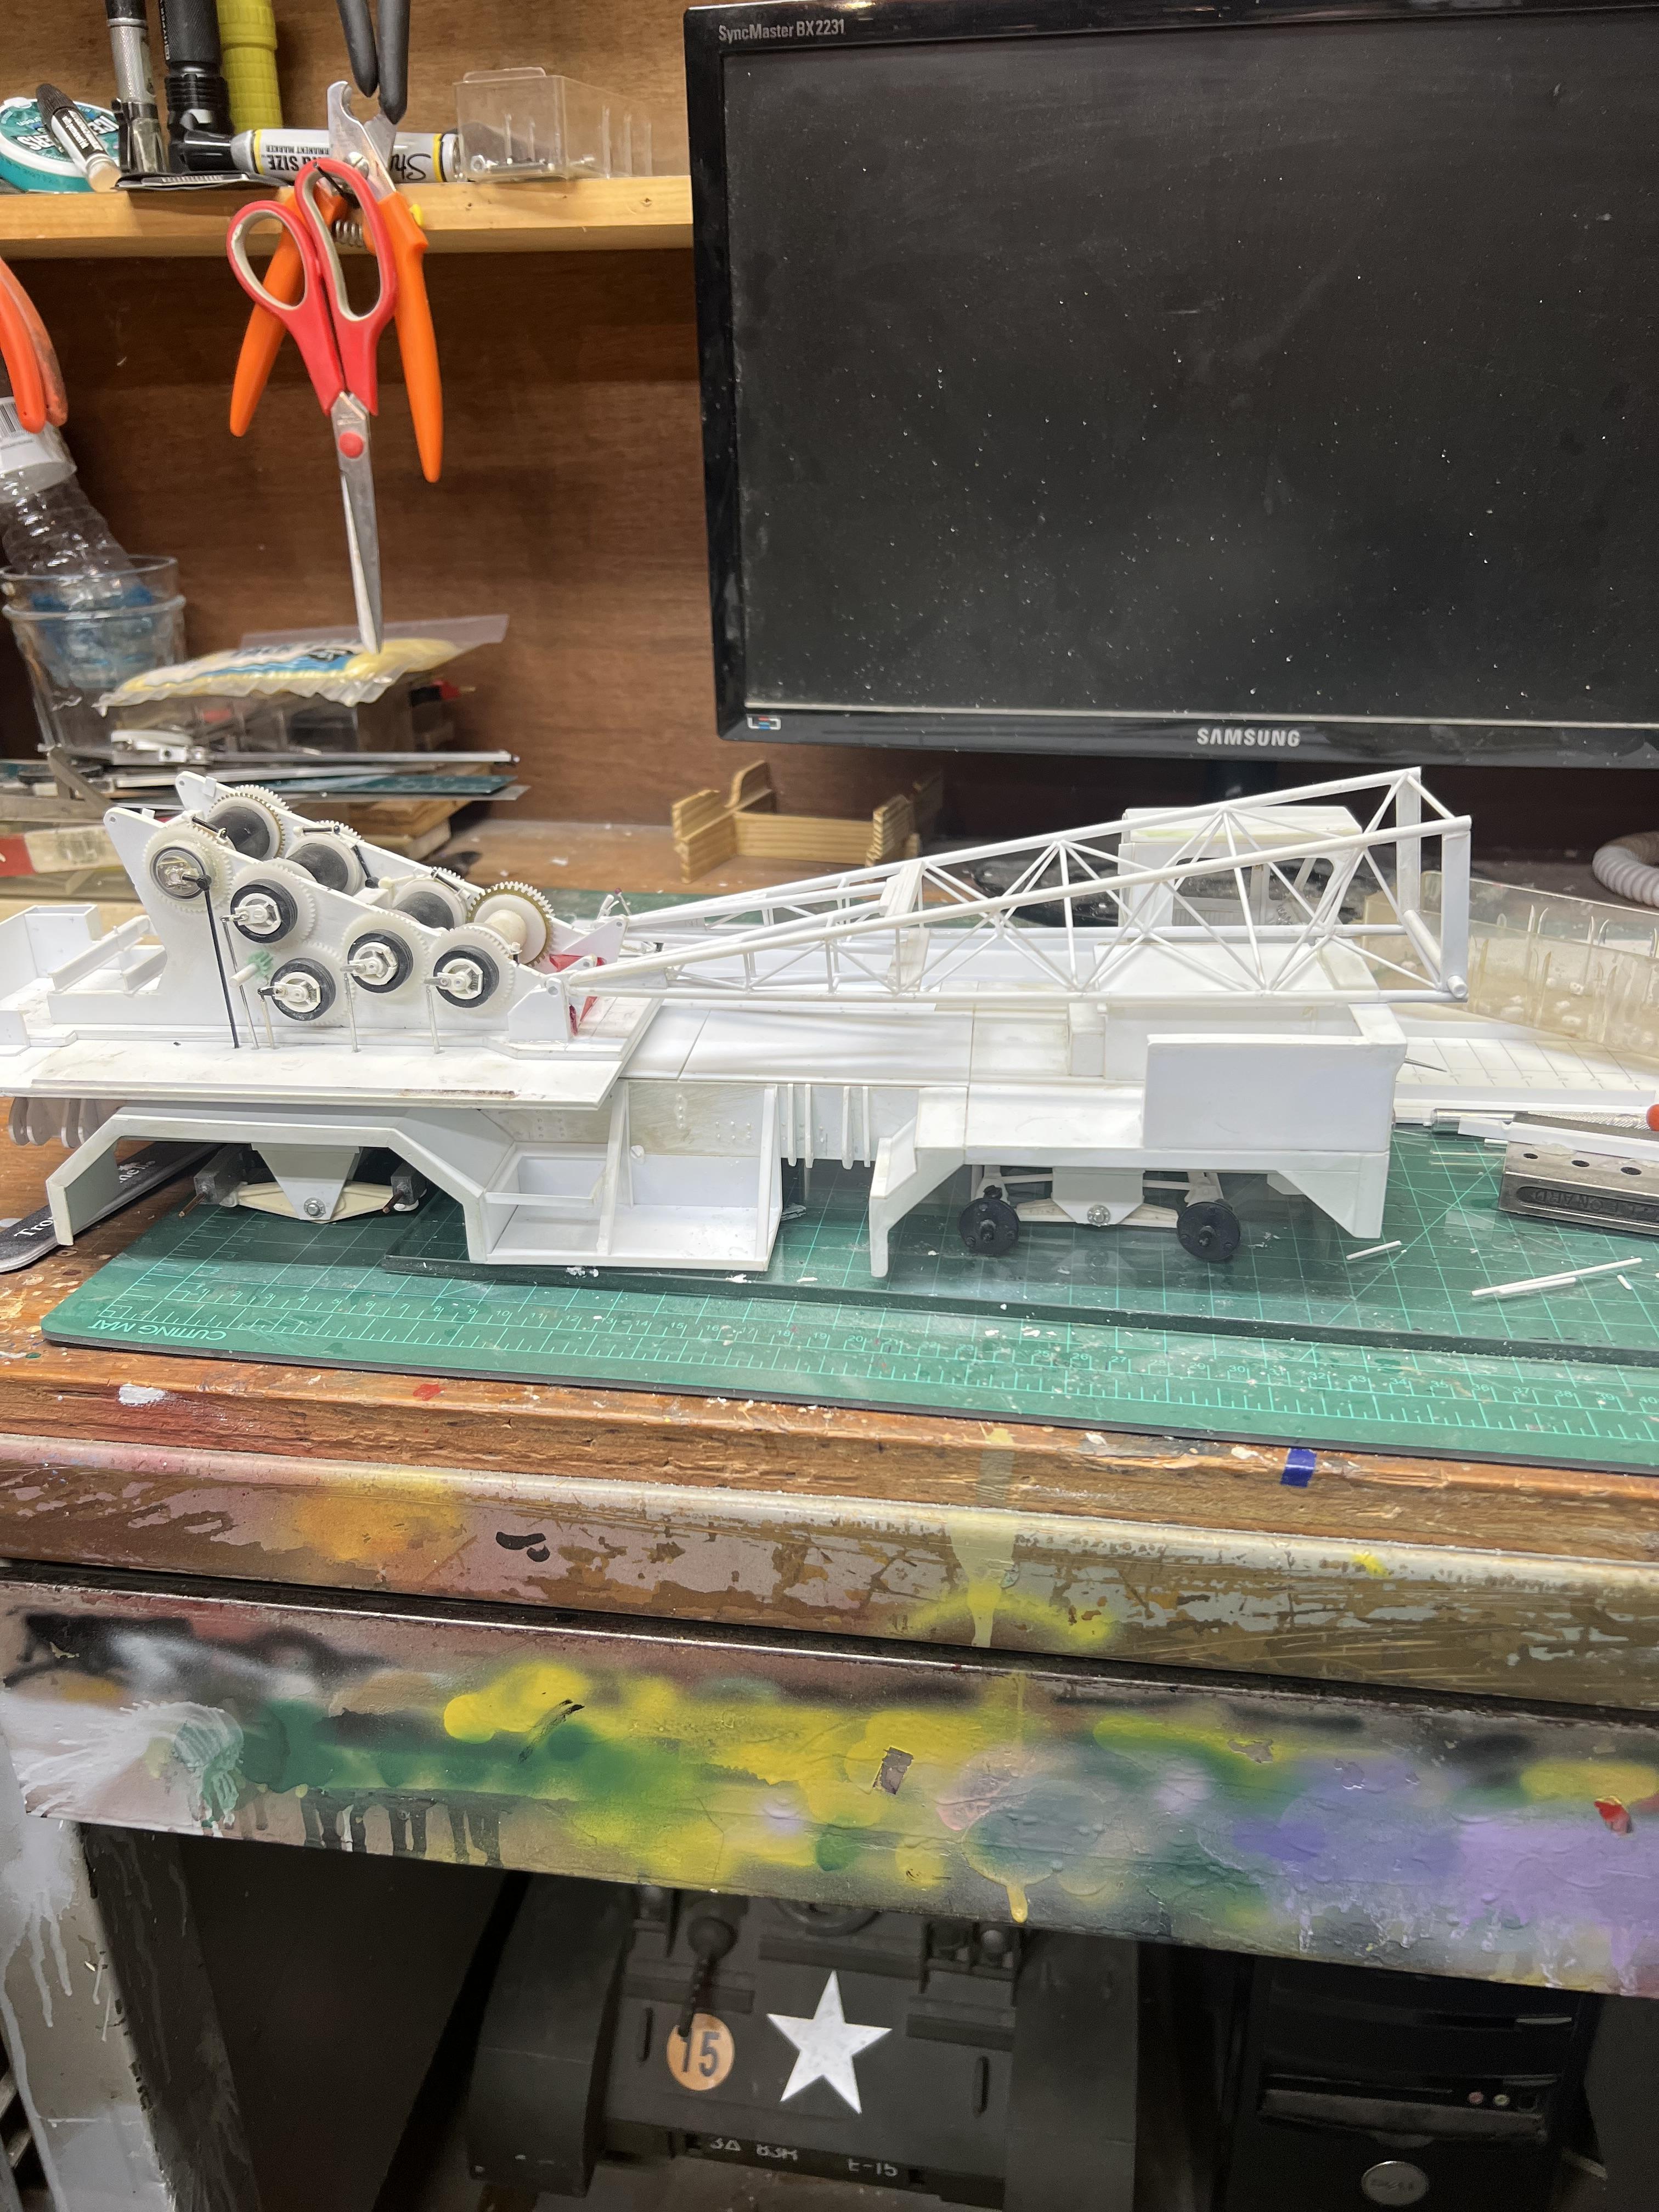
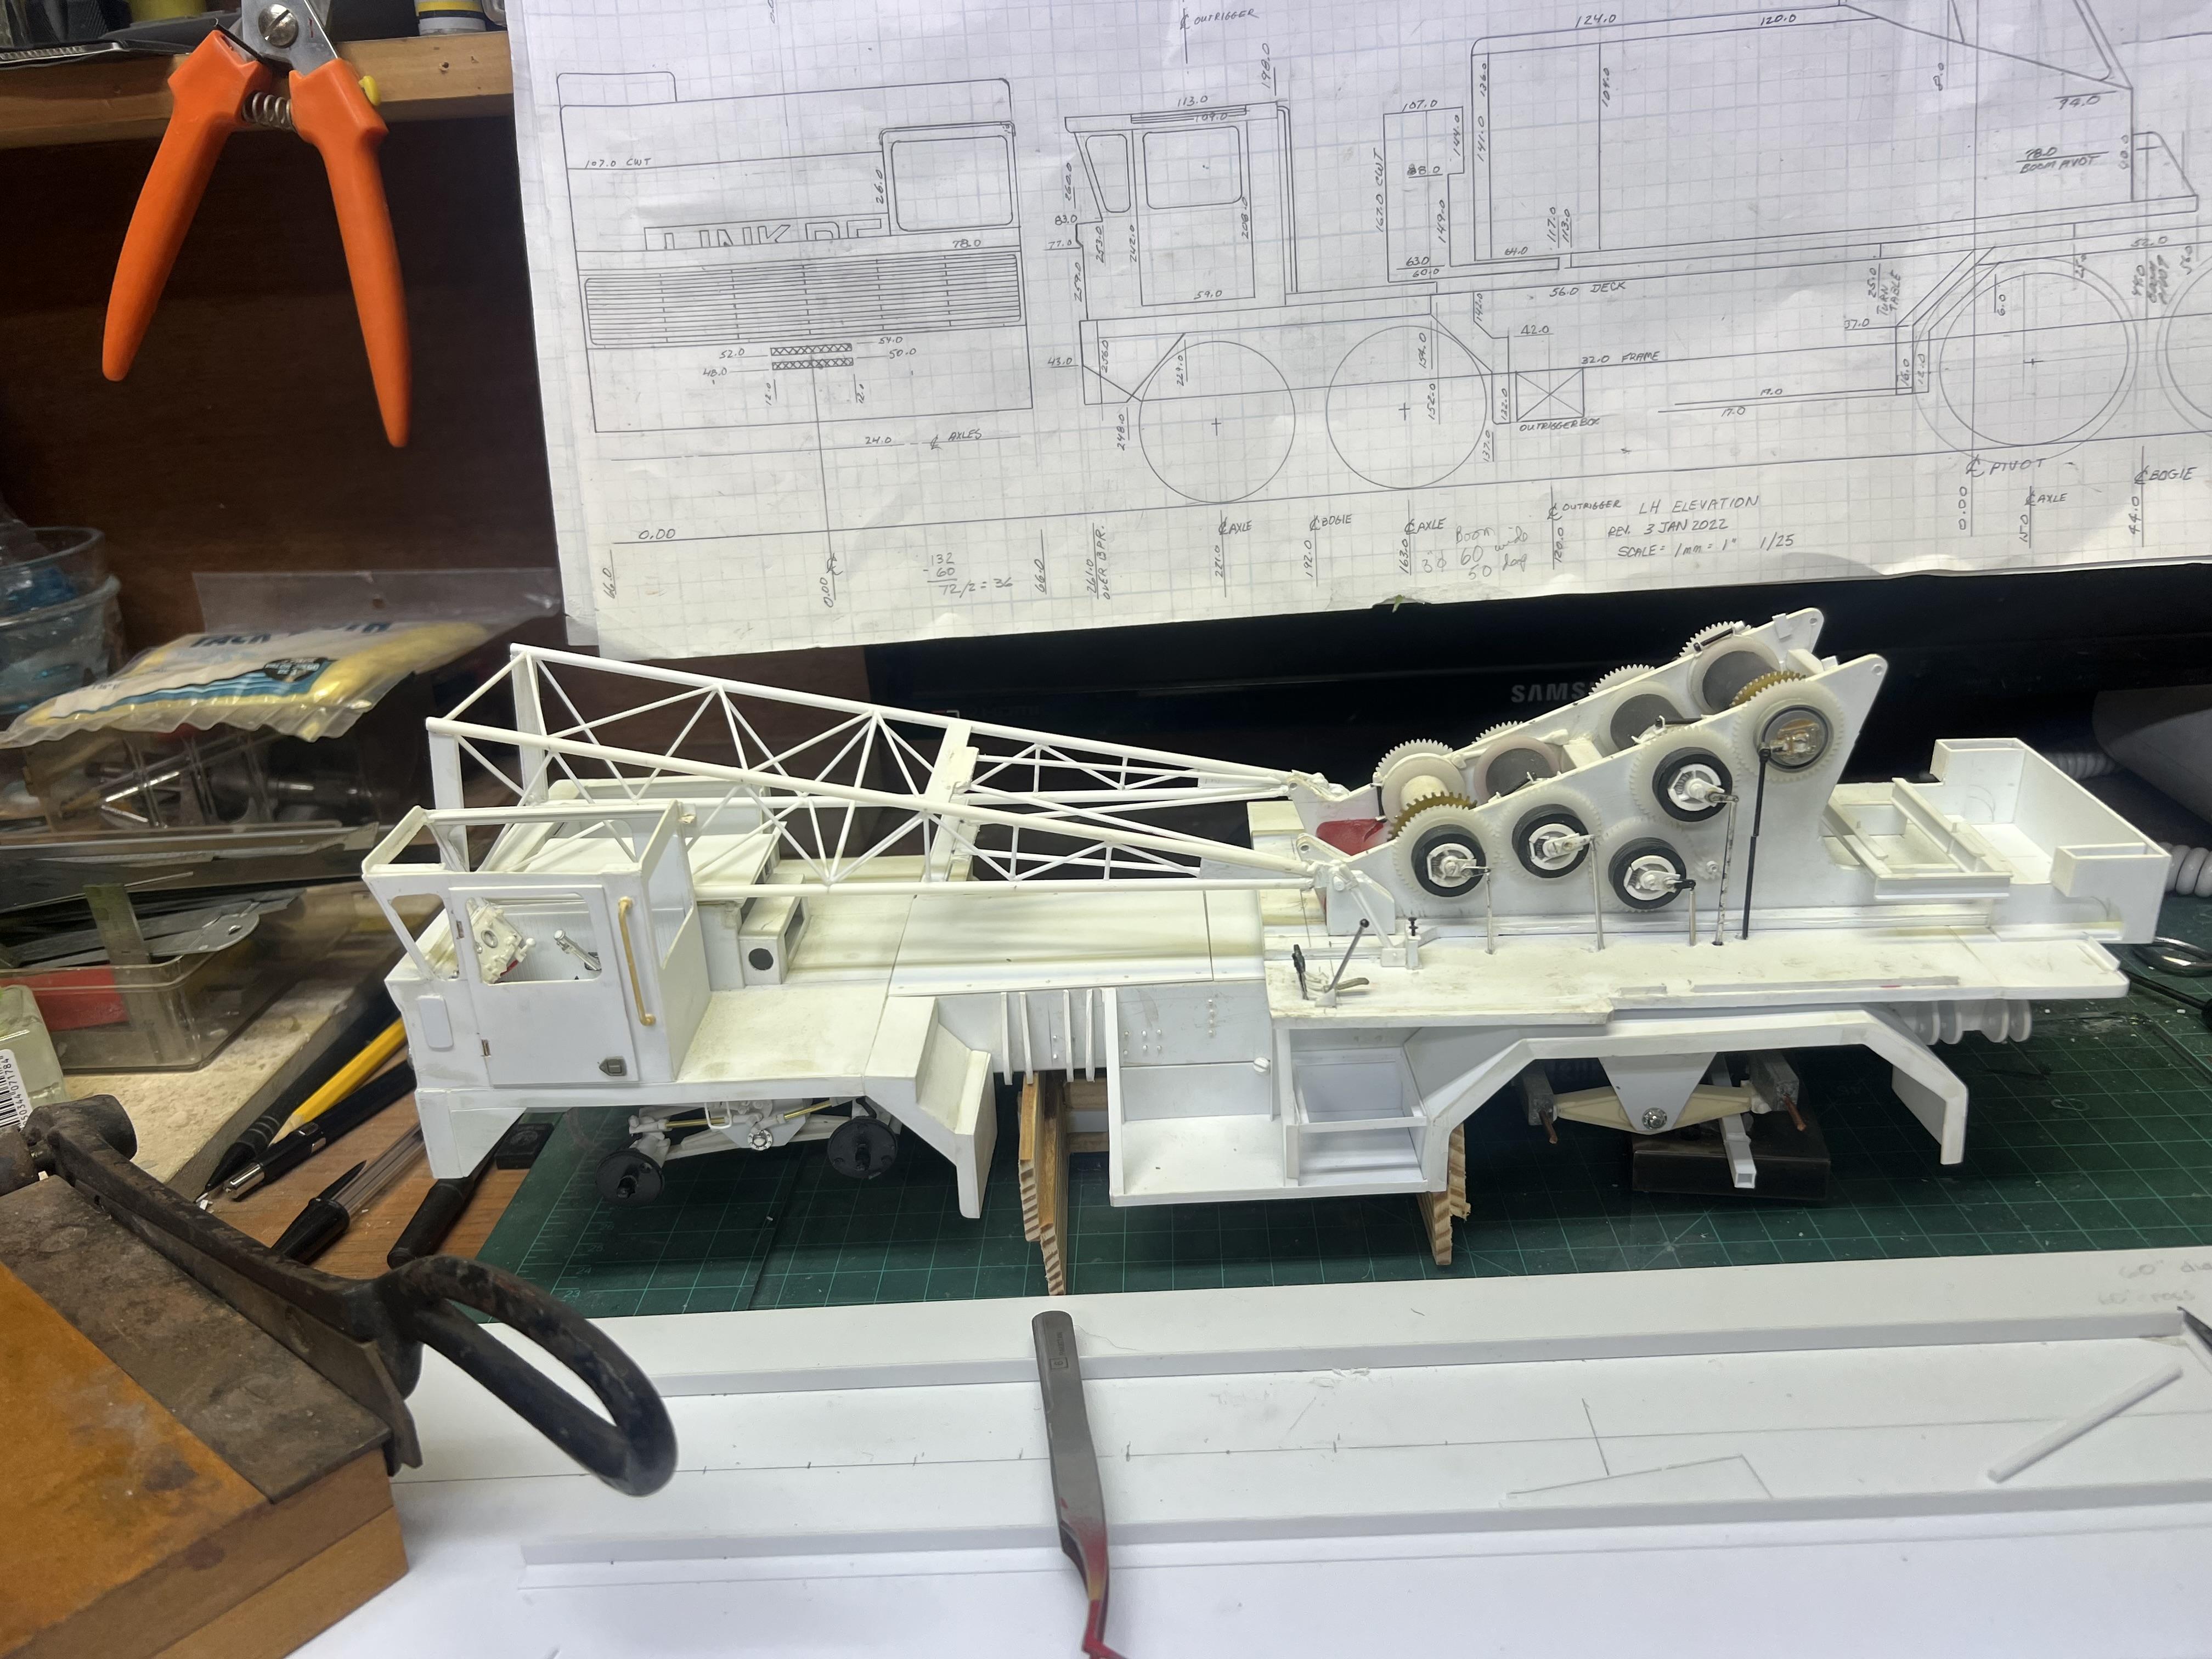
Finished the reinforcements for the boom foot and did a quick mockup to see what it looks like. Next step is building the boom head section and then the folding joints and then install the joints. Happy with what it looks like! Good thing is, when and if I ever finish it, if I want to stretch the boom, just gotta put in a work order to the fab shop and pin them on!
-
1970 Ford C 600
redneckrigger replied to Biggu's topic in WIP: Model Trucks: Big Rigs and Heavy Equipment
Nicely done! Building something that has memories makes it all the more special! -
All good thoughts……and I like the idea. Good thing is drawings are done, but no idea when the crane will be!!
-
The completed '57 Chrysler 300, This is the "Build" of it!
redneckrigger replied to 426-Hemi's topic in WIP: Model Cars
Yeah, I last talked to John in 2017 whenhe went to the NNL that year with me. Haven't heard a word from him since. He did have a pretty serious case of diabetes, also hoping he is still with us. -
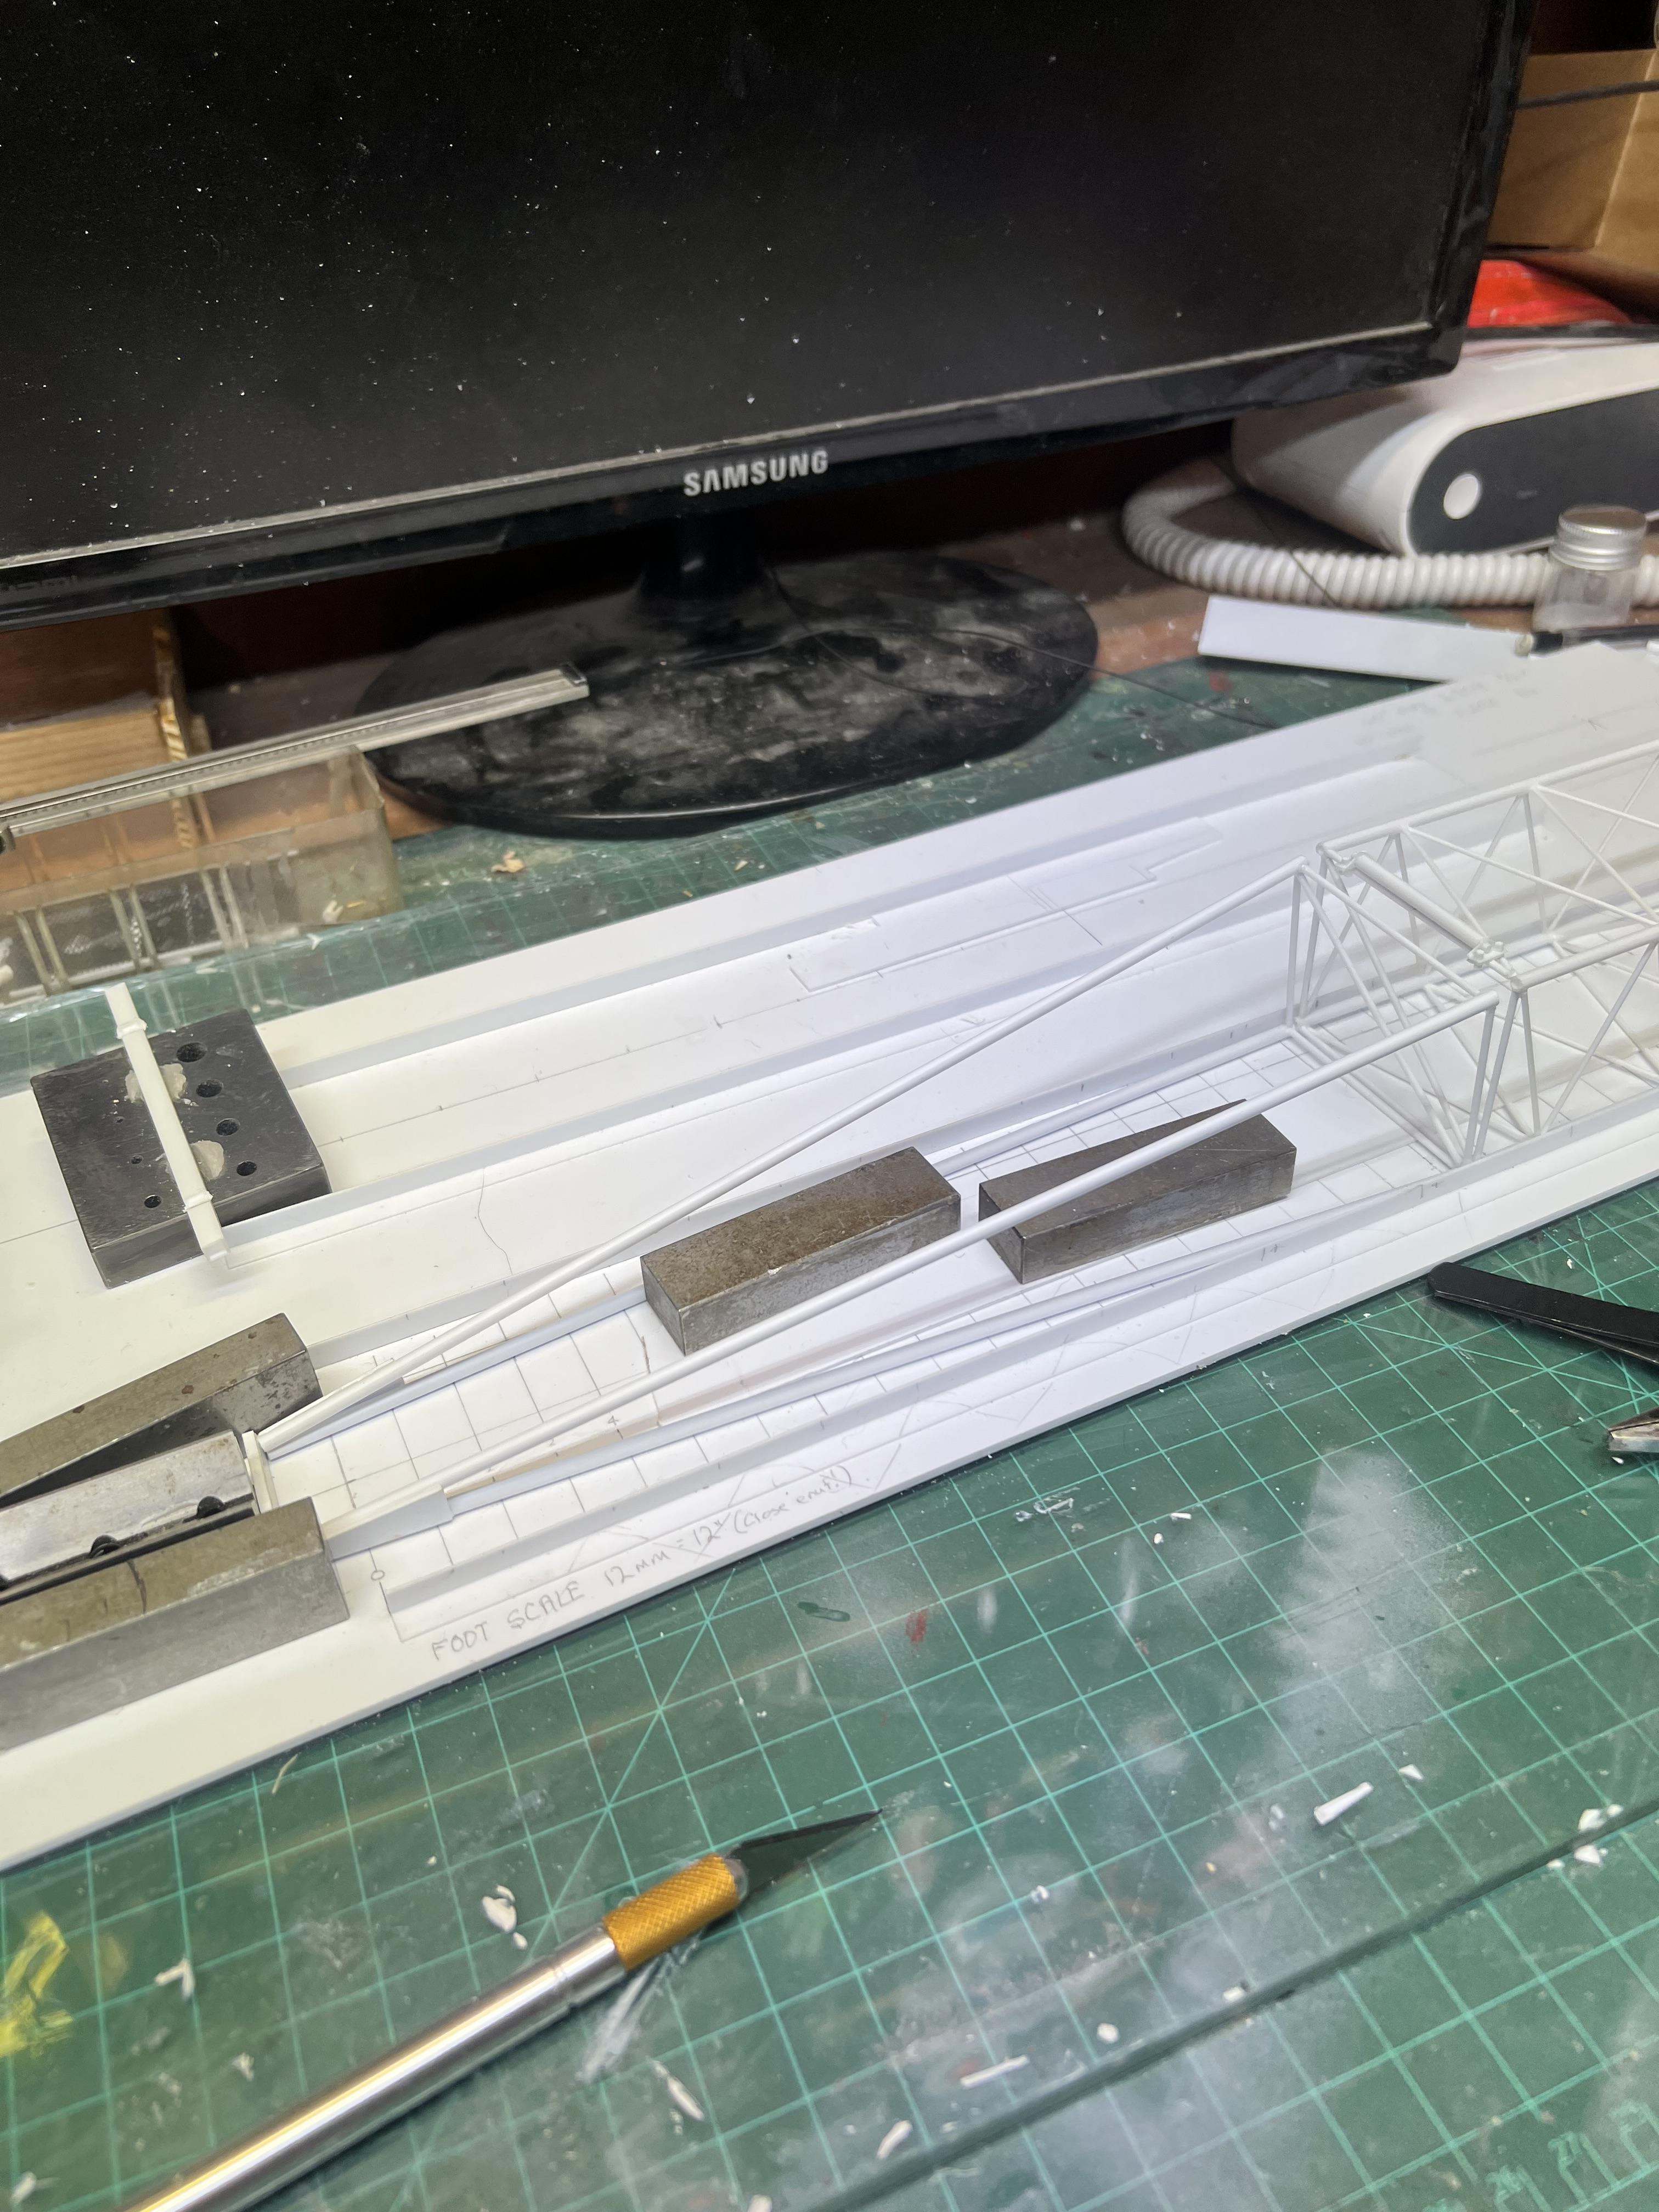
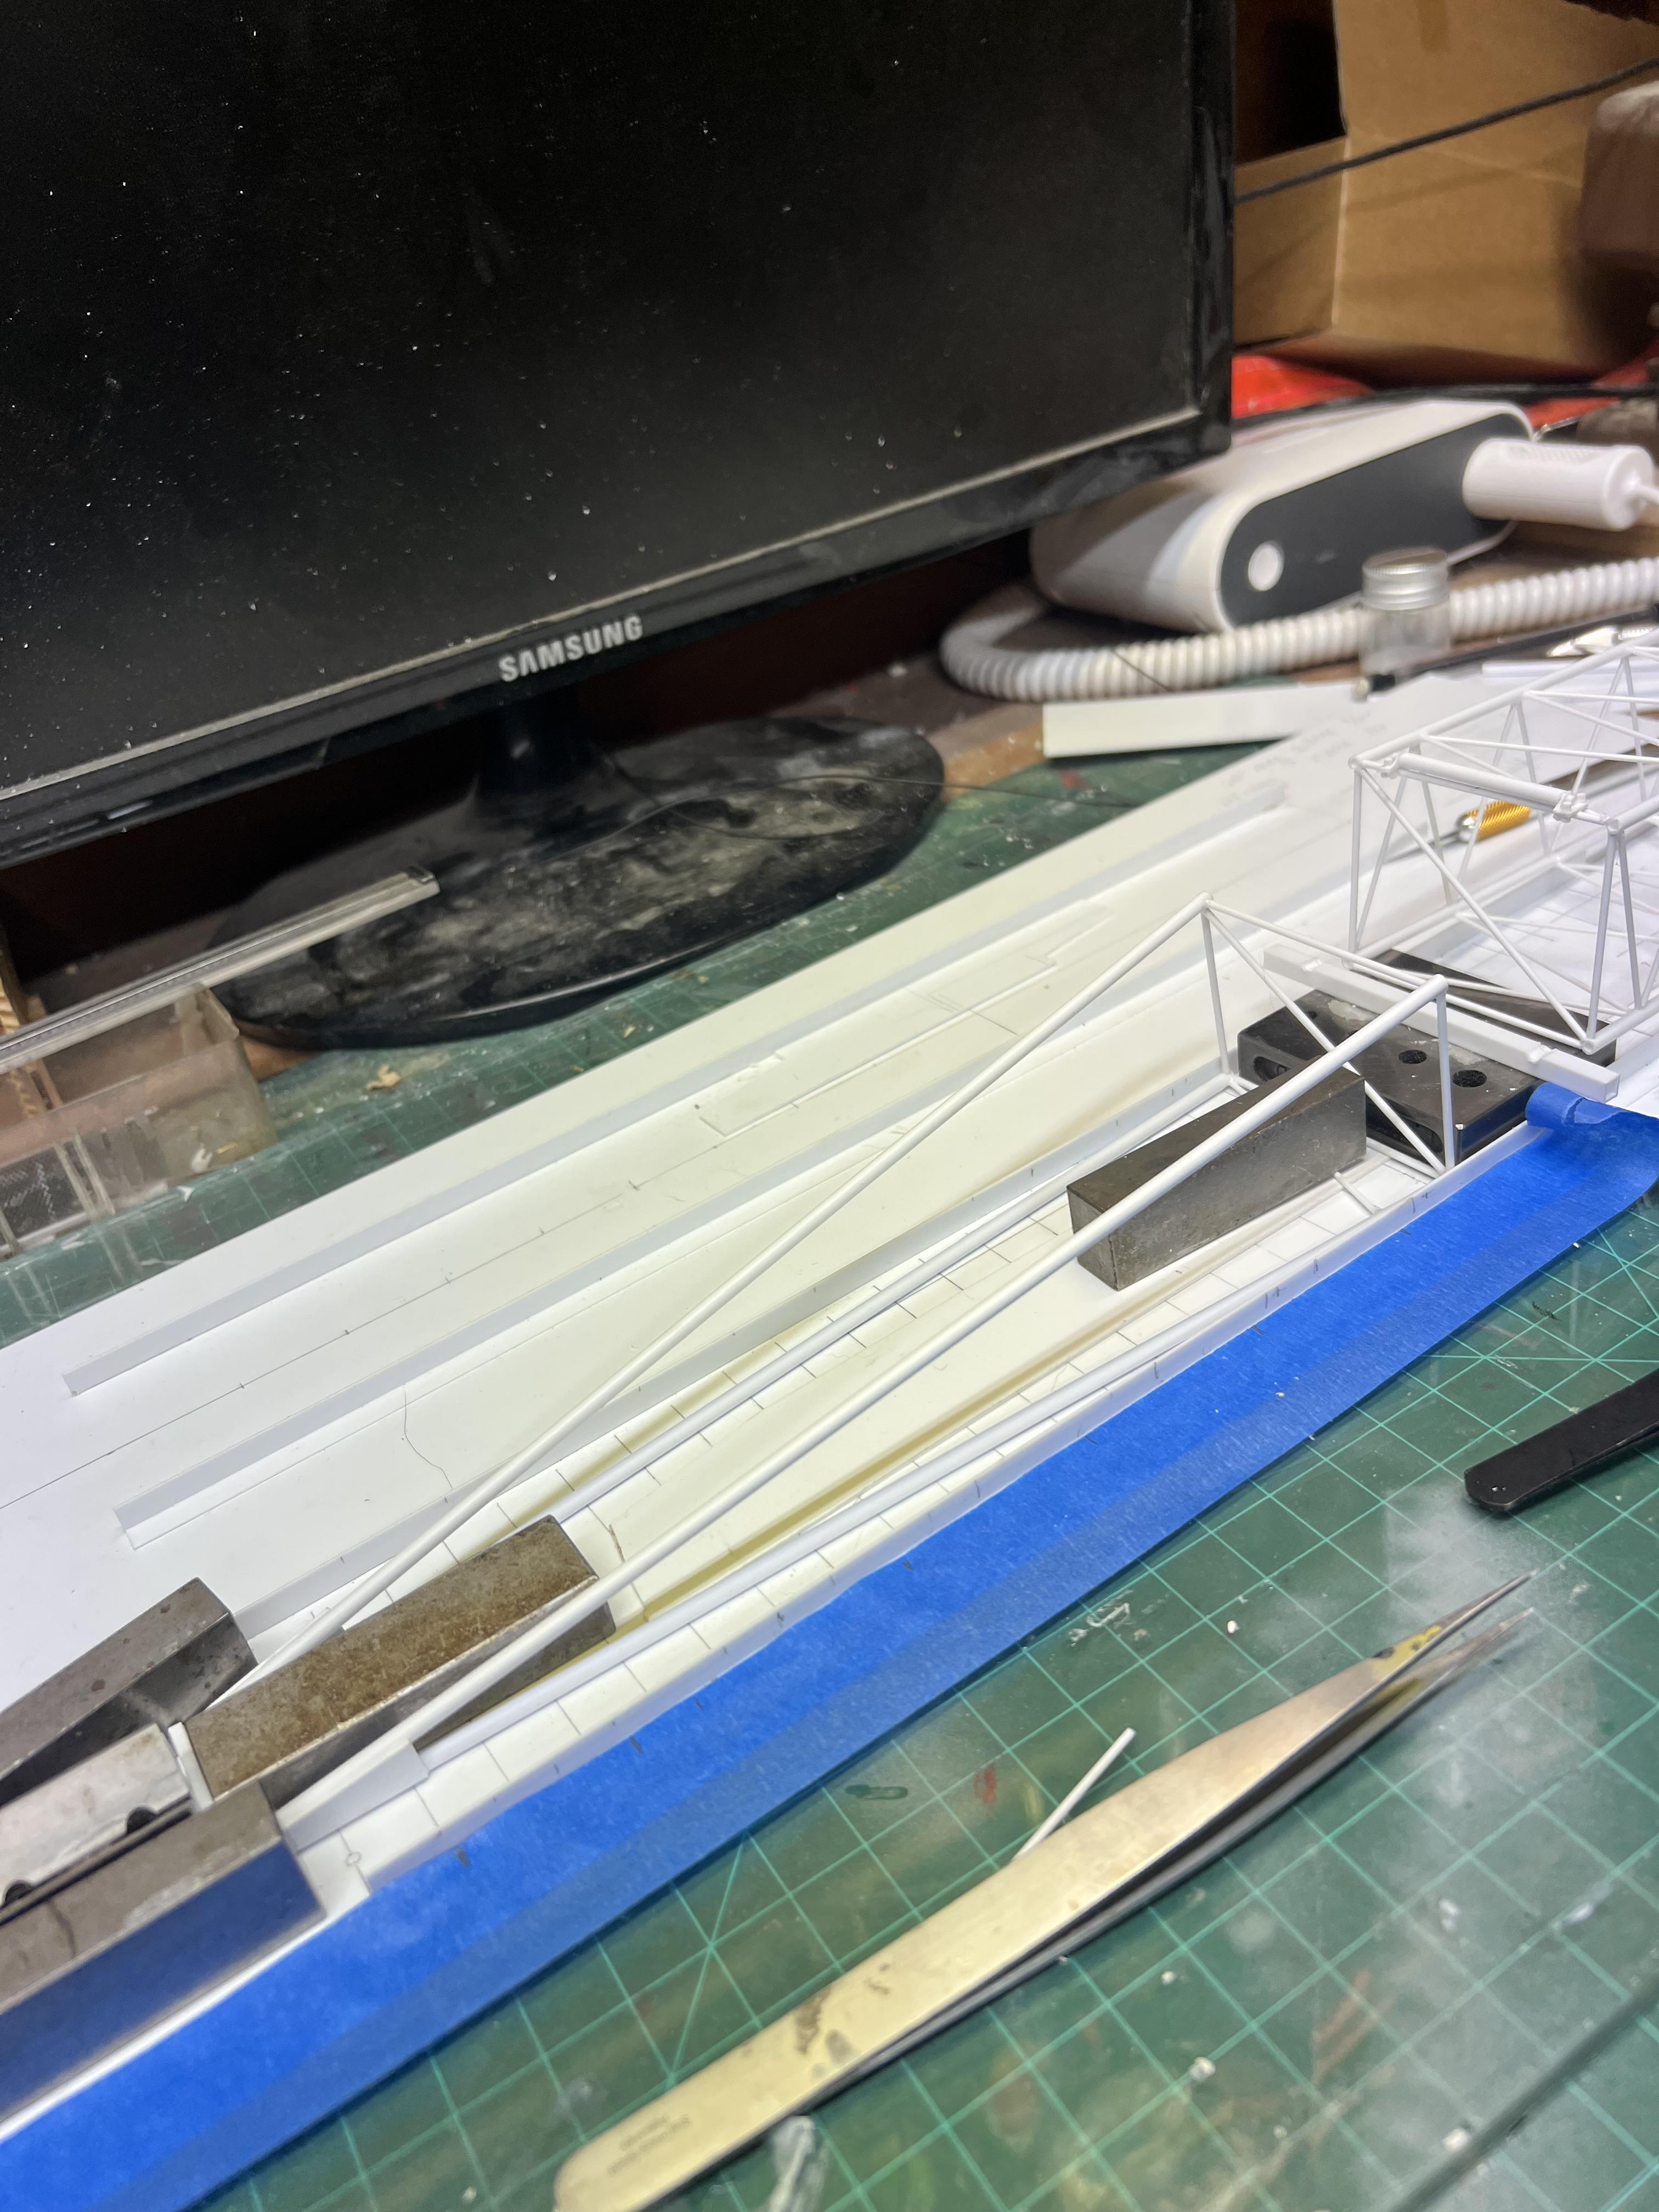
Got the boom connectors all done...........WHEW! That took a toll on my arthritic hands, but they are done. Next step will be to finish detailing the boom sections, make the boom head section, make the folding joints, and then get the connectors installed to pin the boom sections together. The connectors are all match marked because they were drilled assembled, but they will still have to be fitted to each boom section so they assemble properly. I hope to make it so it can come apart easily enough for transportation, with brass pins to hold them together but with all the rigging and drums and cables etc., that may be a bit of an issue. No matter, I'm not at that stage yet, so it's a problem that does not need solving yet!
-
Ha! That is a problem yet to be figured out..................just WHERE I am going to park her!
-
Not a bad idea! I have another sheet with all of the drawings for all of the outrigger parts etc. Knew I kept them for a reason!
-
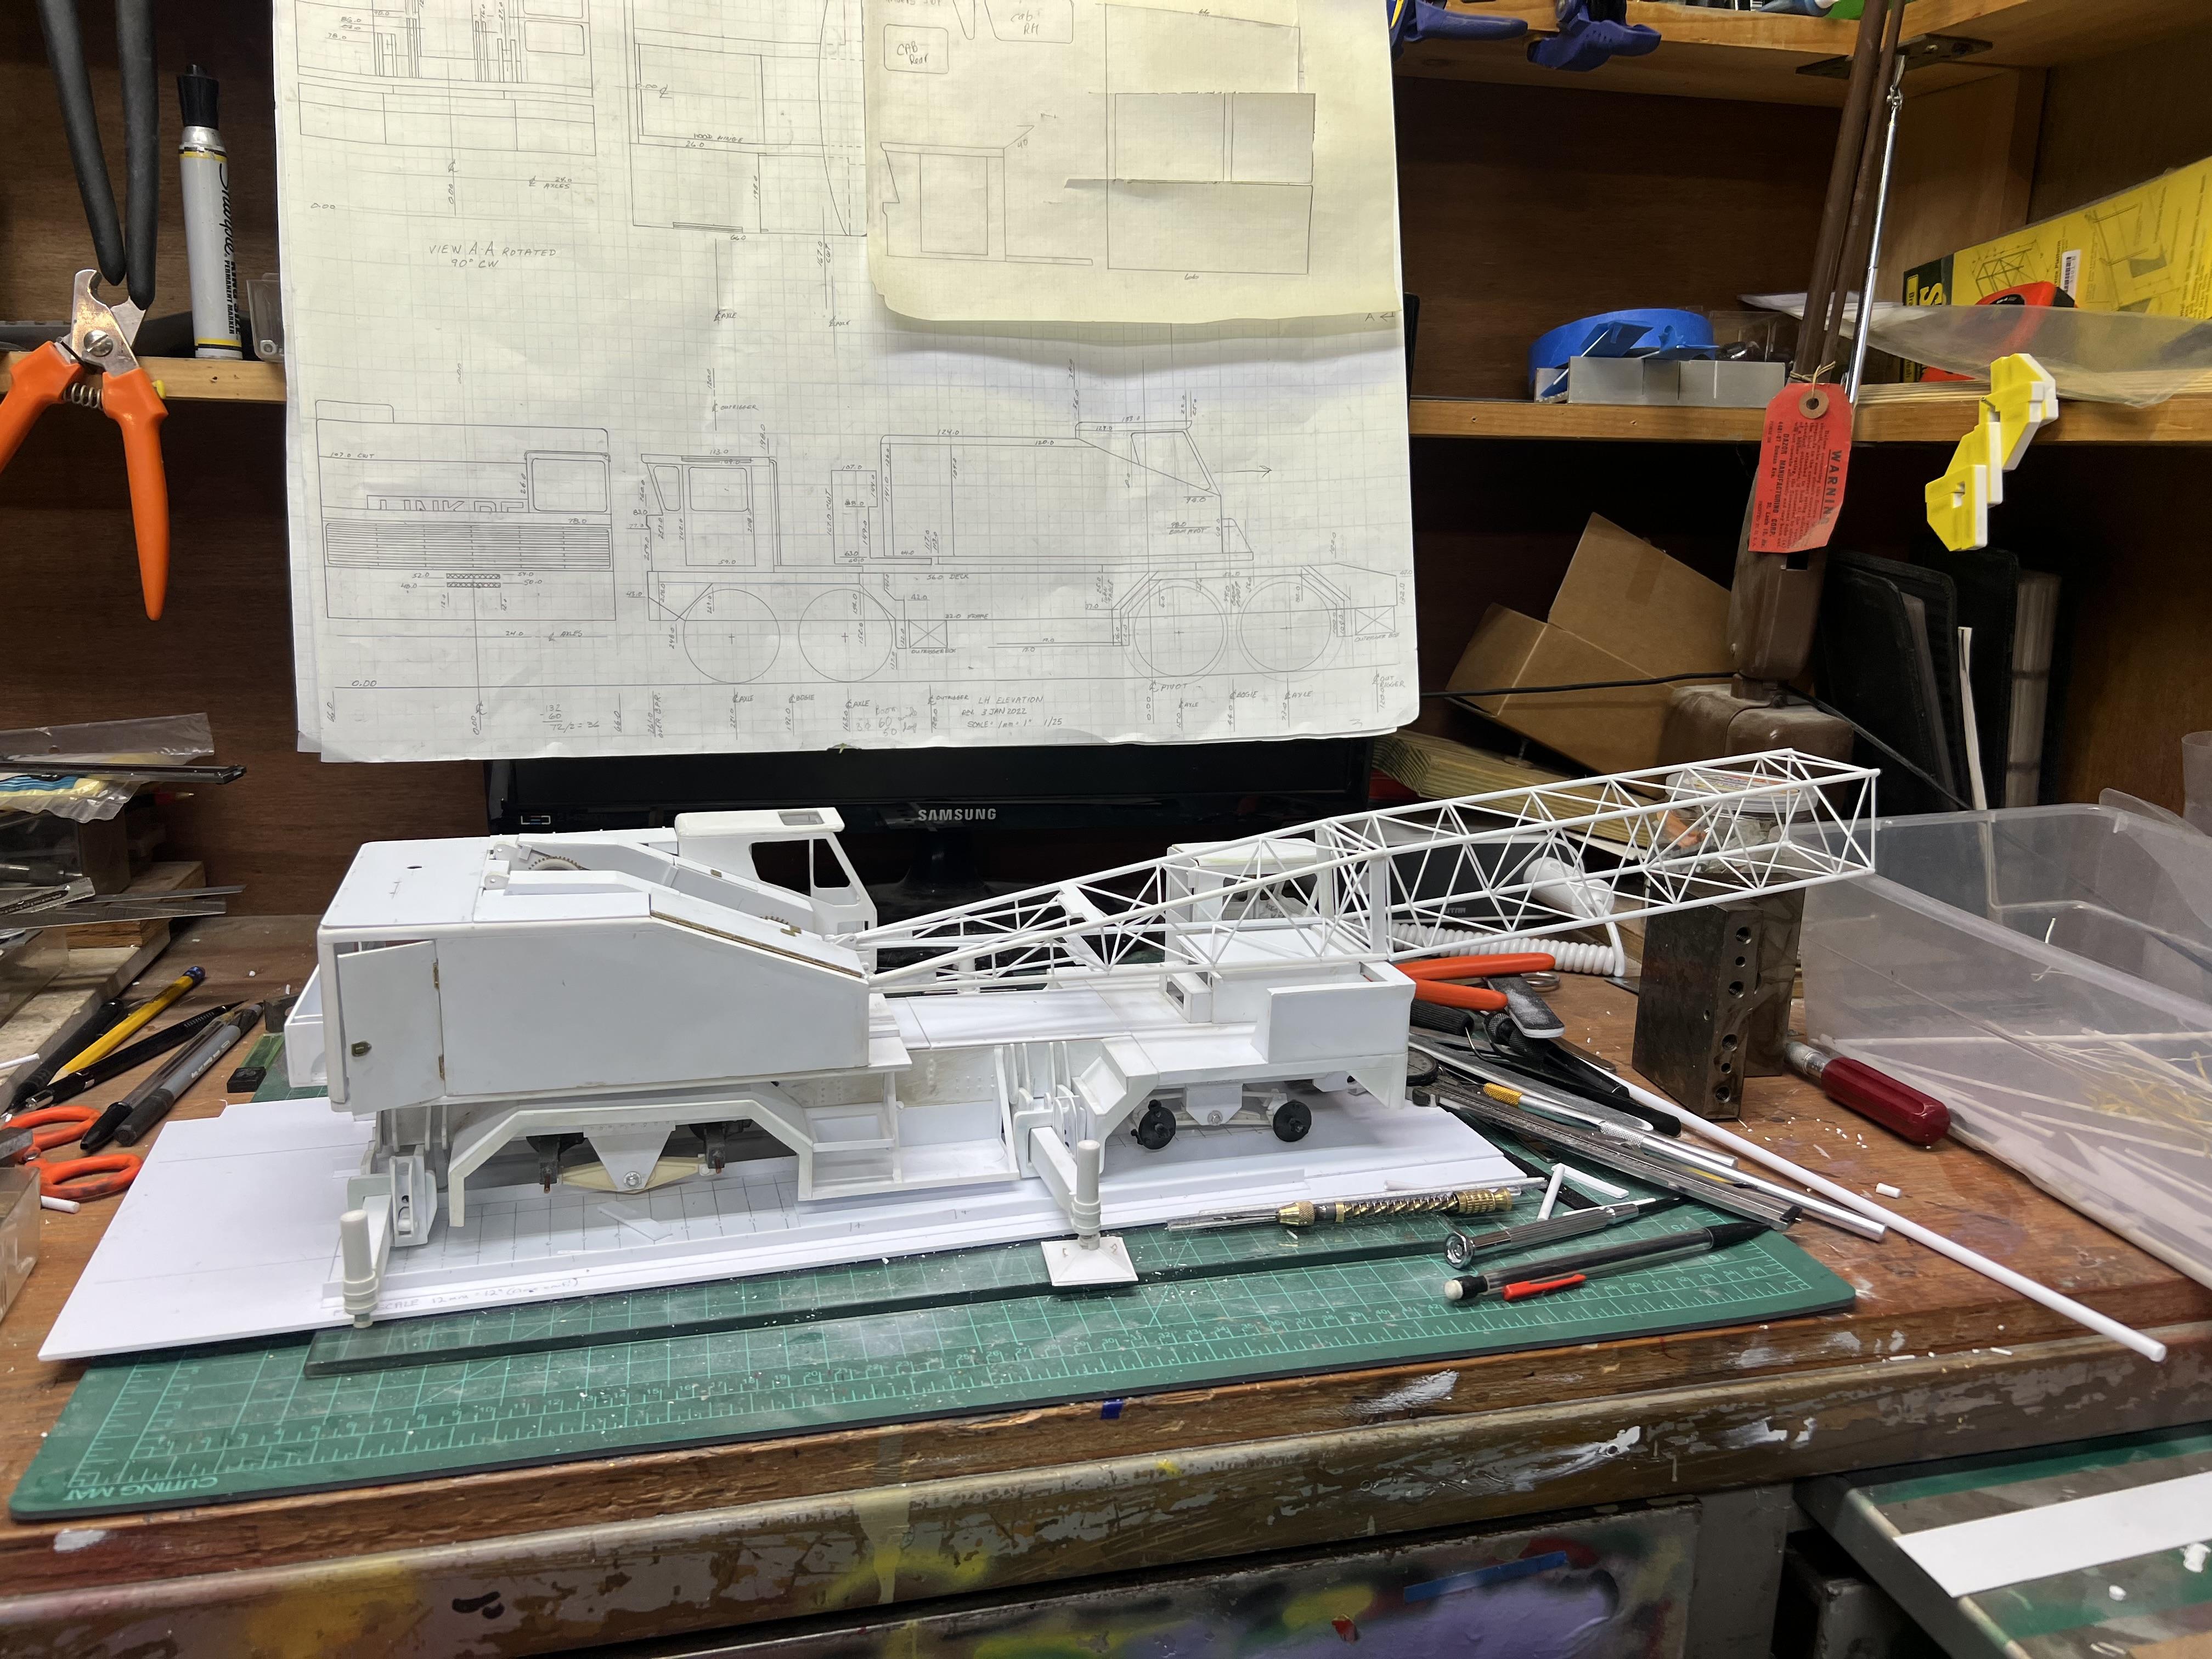
Quick mockup to ensure the boom fits with the cab and upper enclosure. So far so good!
-
Farm Floater Truck 1/24th scale
redneckrigger replied to Randy D's topic in WIP: Model Trucks: Big Rigs and Heavy Equipment
This is a stunning build! But way down deep, a piece of me thinks that just maybe instead of doing all this incredible detail work, you built a 24 to 1 pair of tweezers and found a huge fiberglass hand to hold them and are showing us pictures of a real truck……..just sayin’! This is absolutely incredible work sir!!! -
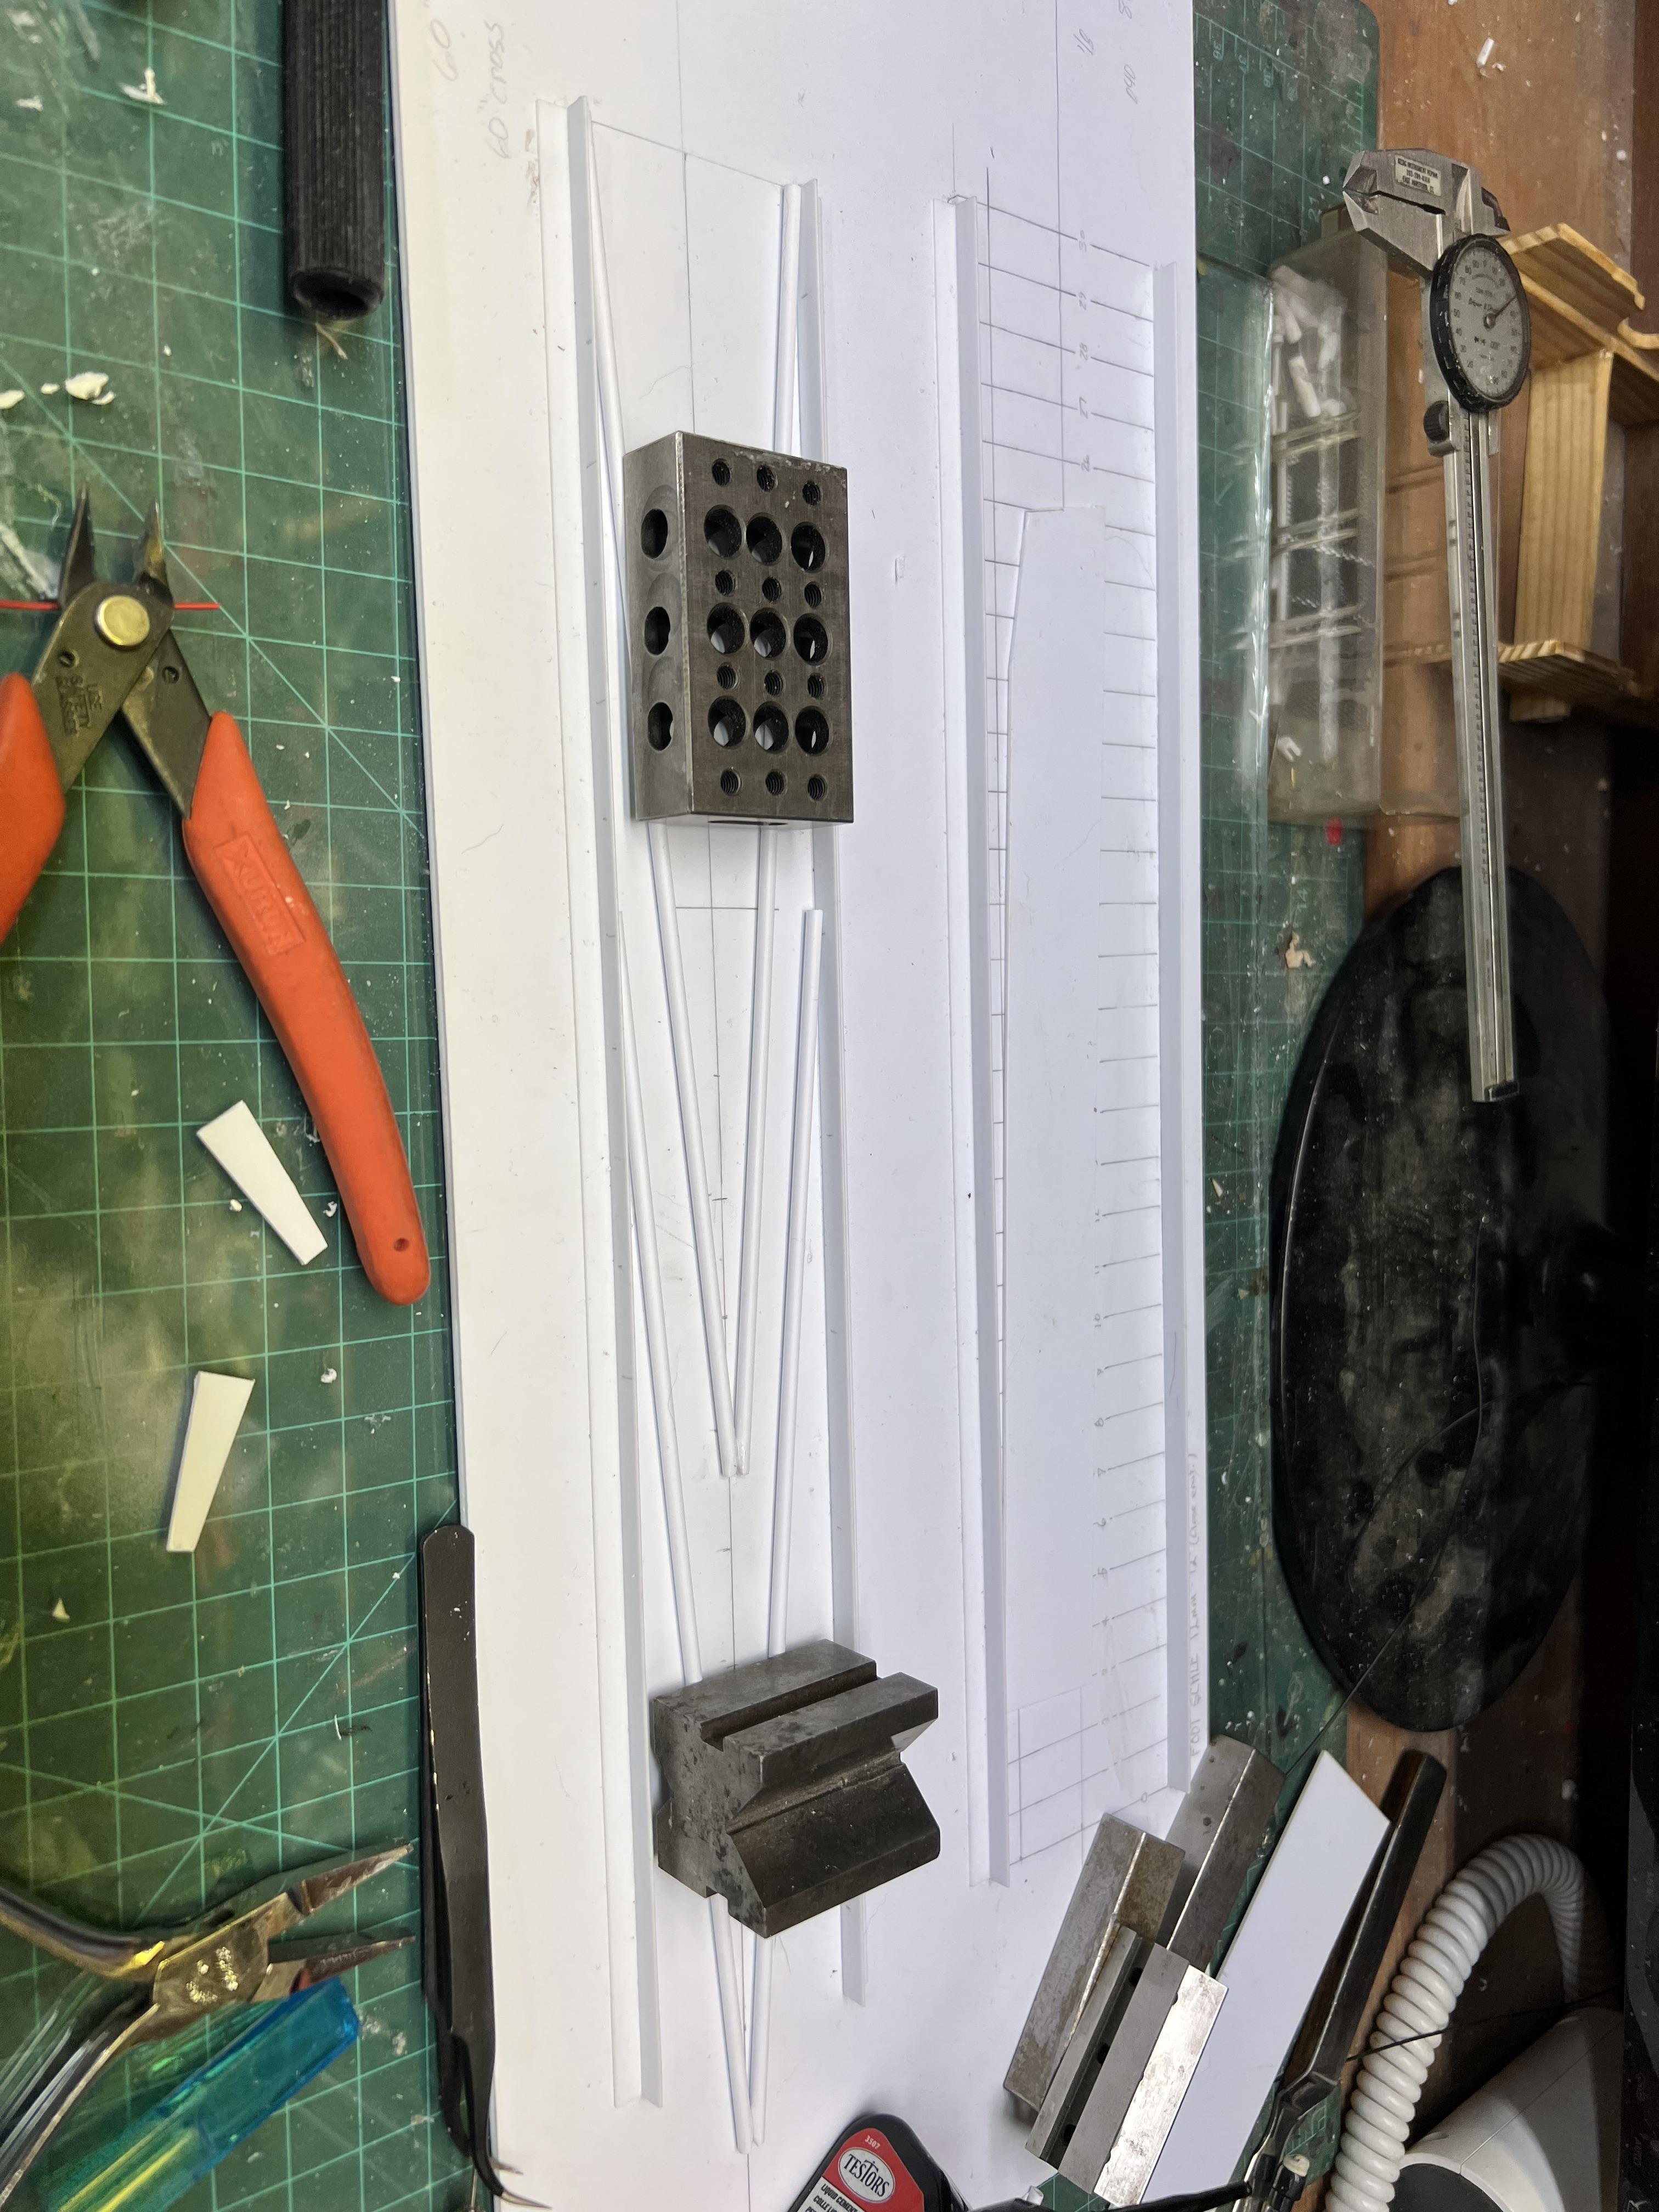
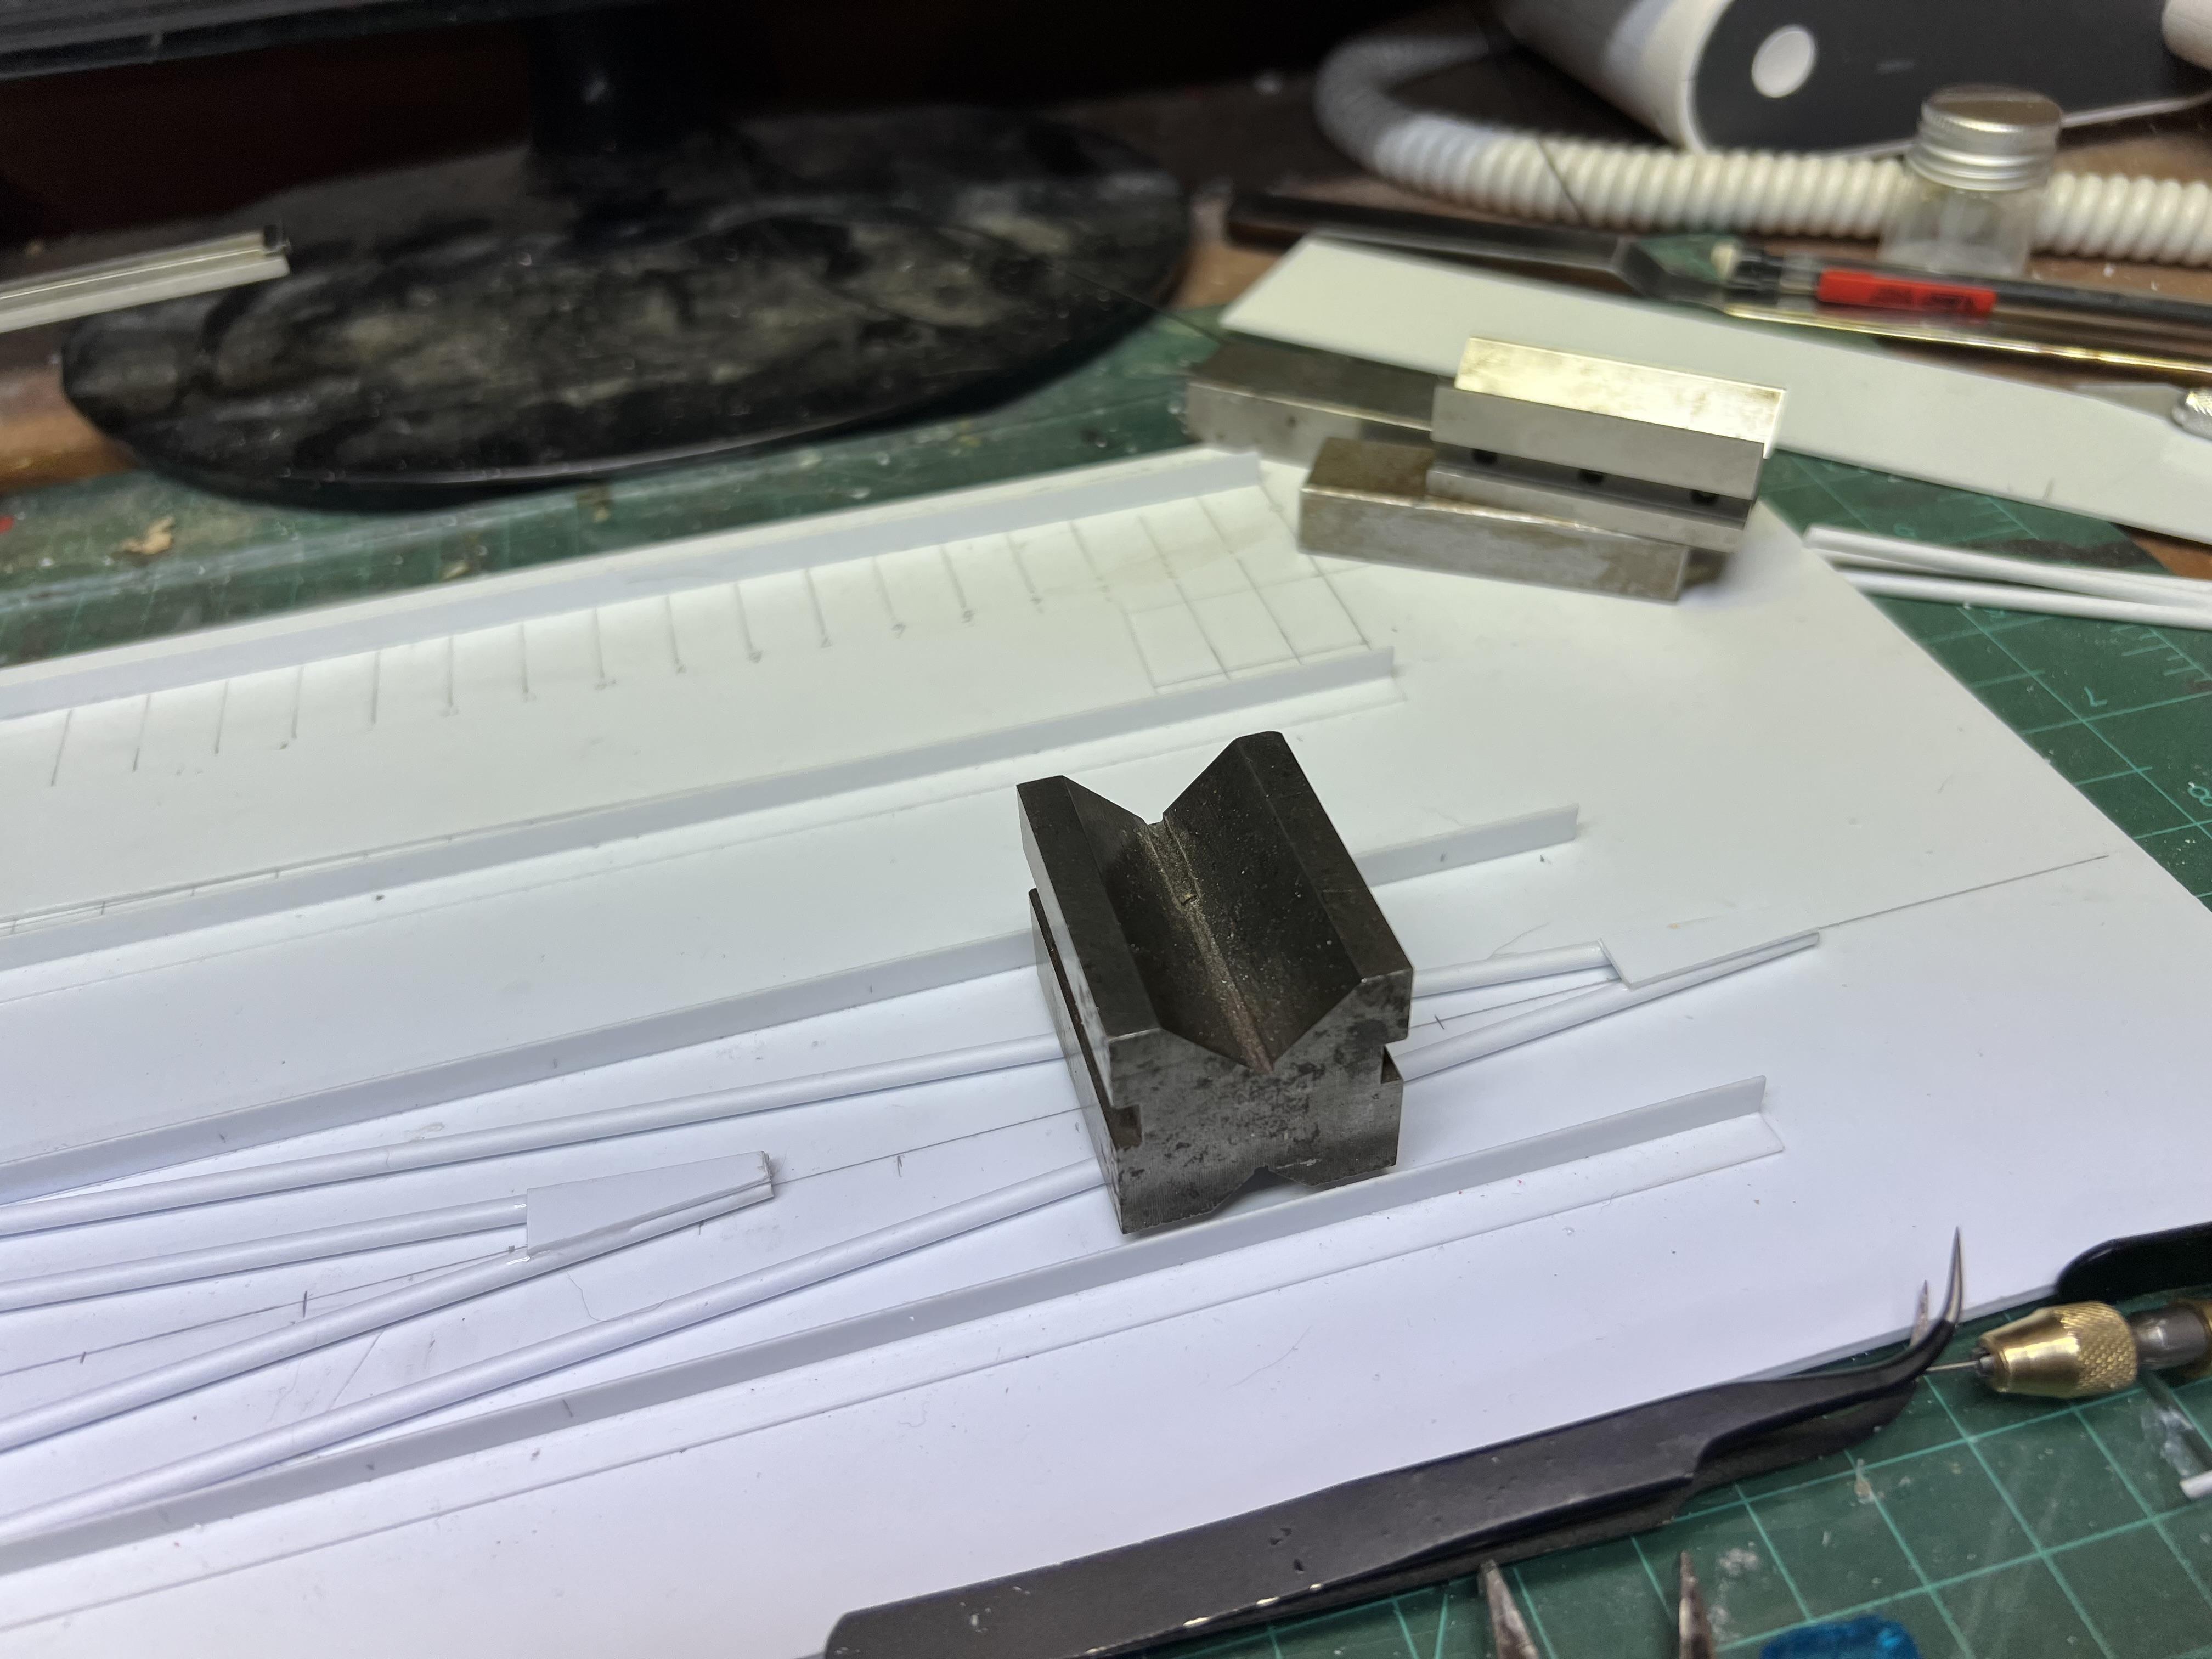
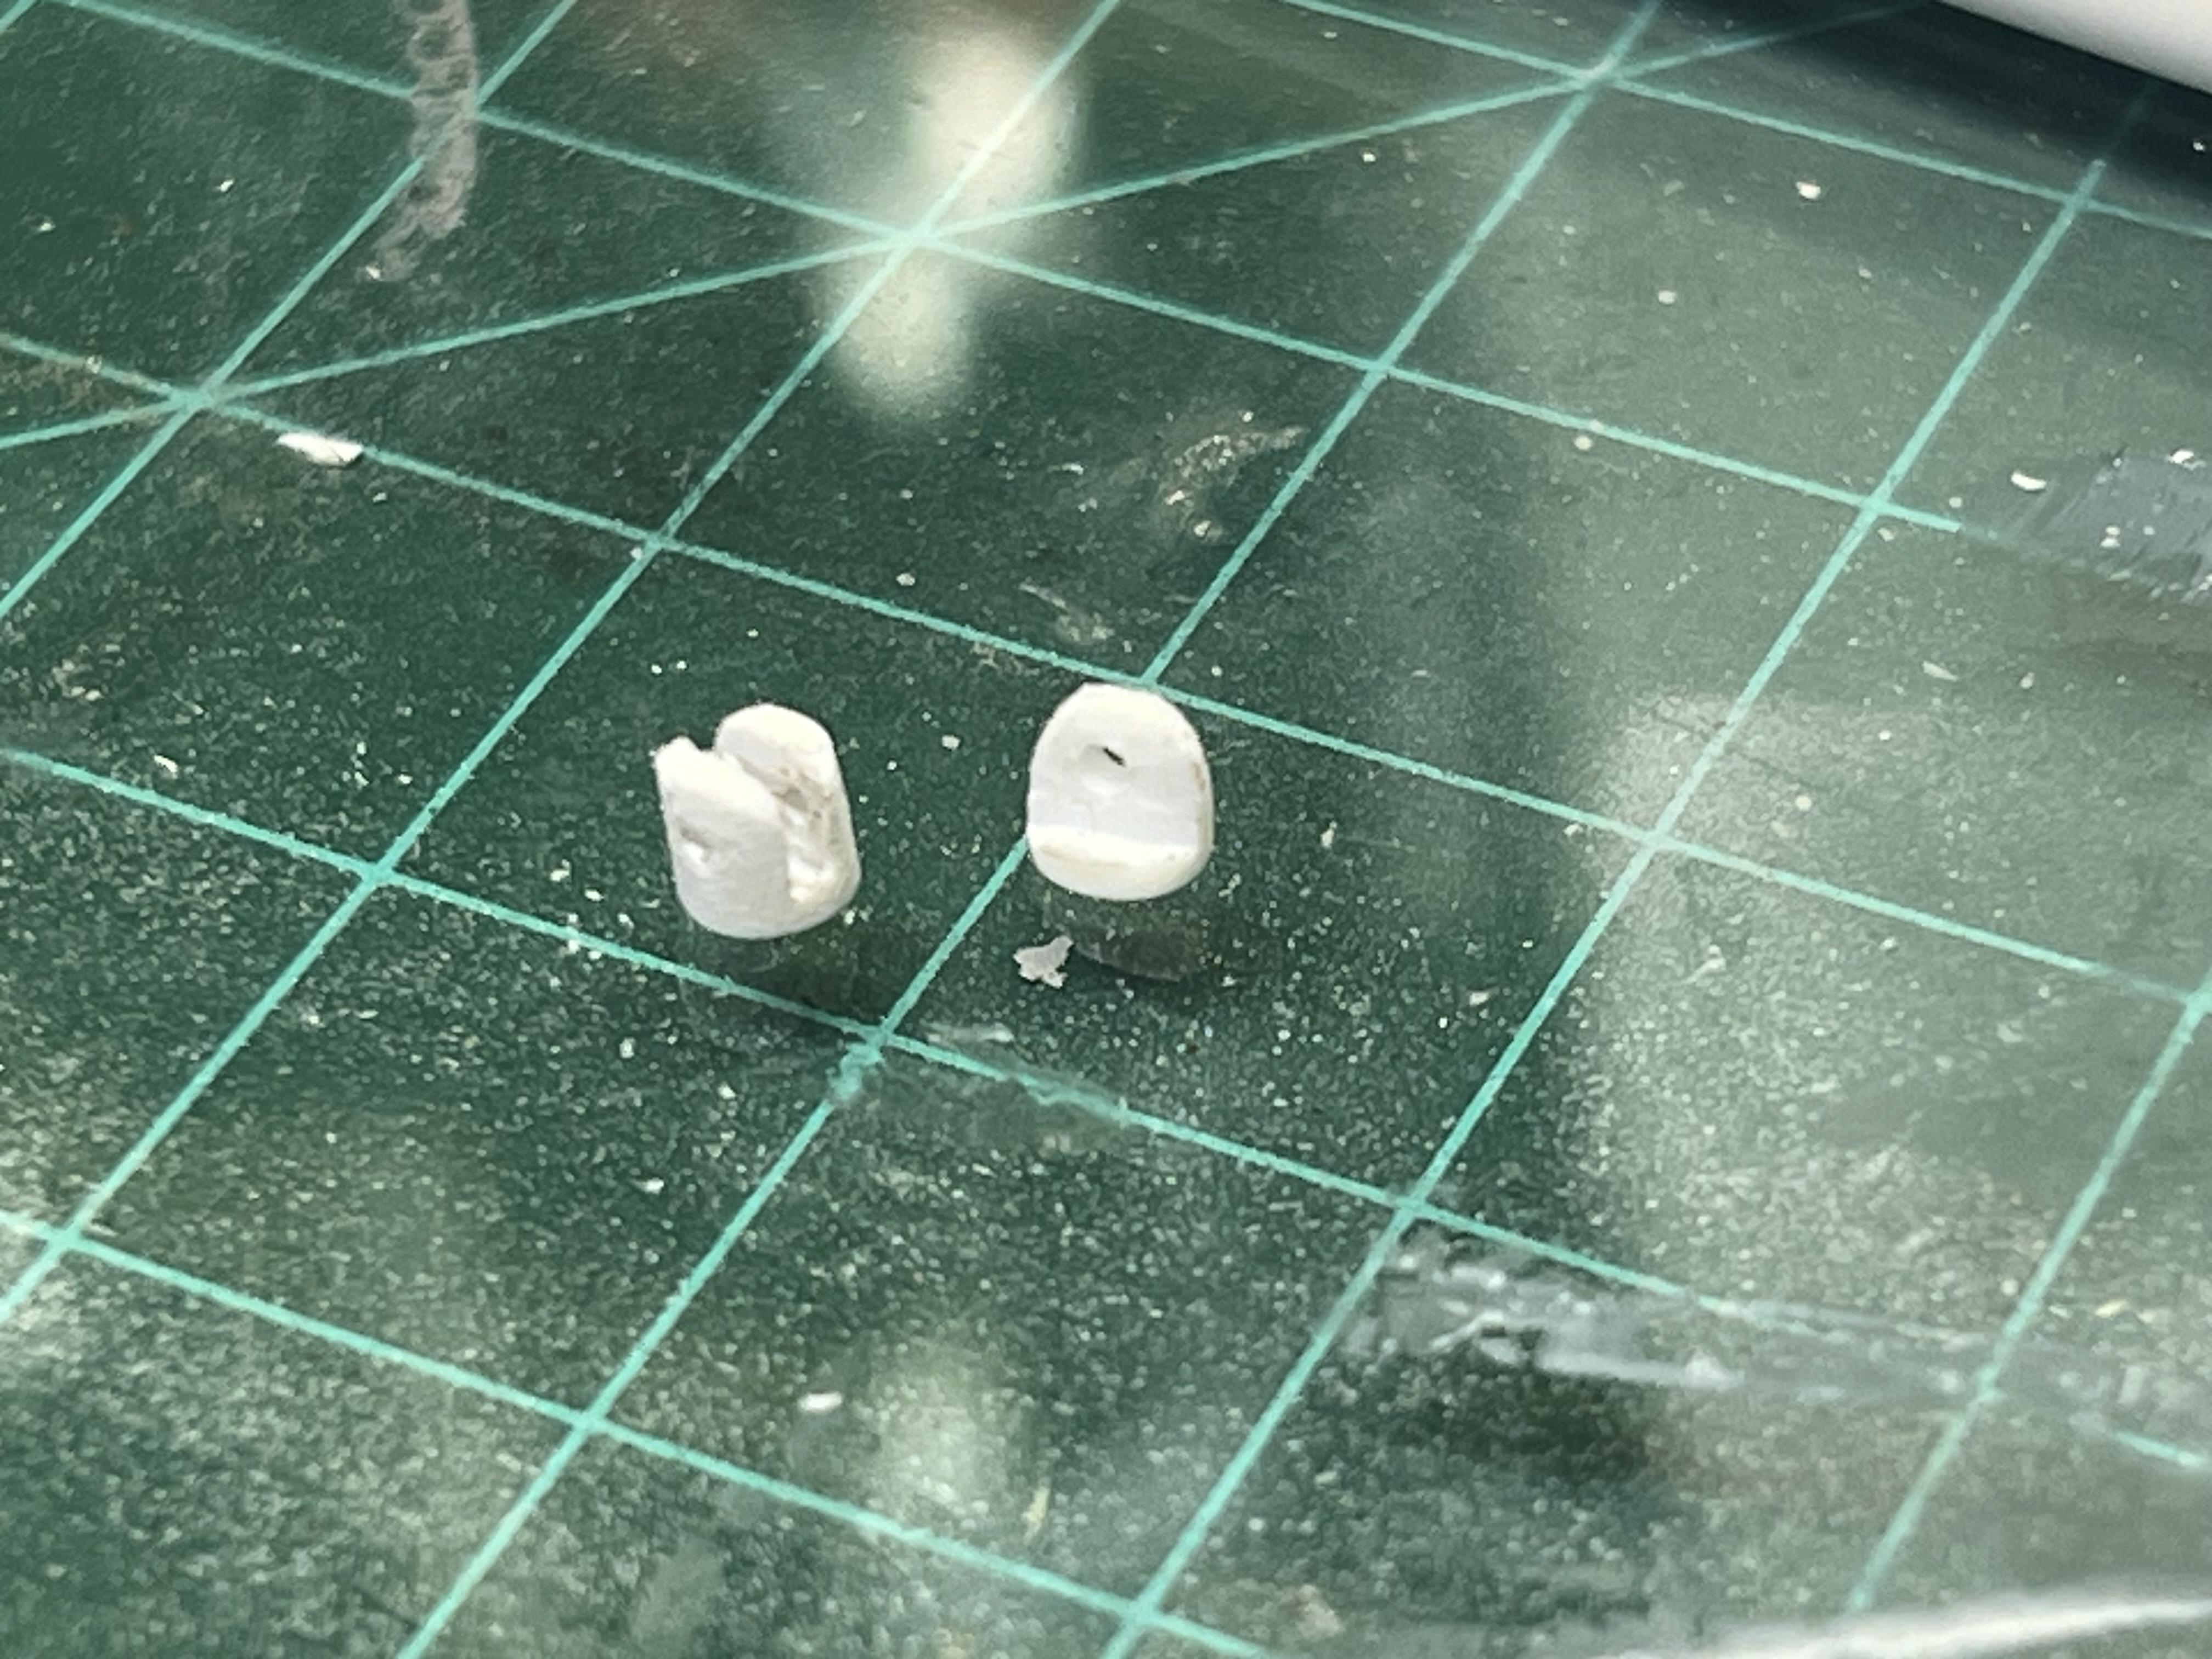
Today’s chore, and maybe spread out over a few days, is making 20 each of the female and male boom connector parts. Still trying to perfect the method of making them as they seem to love to take flight across the cellar while I’m shaping them! It is for these kind of repetitive parts that 3D would be awesome! But for me it is a piece of 5/32 tube with a rod inserted into it to make a 5/32 rod, Dremel tool with cutting disc, files, sanding sticks, drills, a jig to hold them, and a chopper to make them up!
-
Yes sir, they will fold exactly like the real one. Trying to make it as authentic as possible. Just mounted the boom foot this morning to see how it fits. It still needs a lot of reinforcement pieces added and such, but it looks pretty good.