Deuce Coupe
-
Posts
34 -
Joined
-
Last visited
Content Type
Profiles
Forums
Events
Gallery
Everything posted by Deuce Coupe
-
Lucky you! You're not far from living in that world. In fact, if you have the $$$$ you're almost there already. The technology already exists. Give people a few more decades and the software to print out whatever kit you want will most likely exist as well. They already have the ability to 3D scan existing parts and print them out in whatever scale you like.
-
Time for a little update. There are no alignment pins or tabs or even an overlap for these body sides. It's just a butt joint. So I made my own overlapping alignment guides that will also serve as great support for the front firewall of the body. You can see below where I glued a couple of pieces of scrap plastic onto the inside of the firewall on each body half. This will help to align them and provide a very strong glue joint to hold the firewall together. In the next photo I've actually glued the two pieces together. I have them clipped together with sawed-off clothes pins. This win in sure a prefect alignment as they dry. In the next photo I'm just showing that I'm doing this to five bodies. I have five to build so I'll probably do the other two whilst I'm at it. I'm confident that this is going to work pretty well. Finally the glued and dried lower body half mounted temporarily on the chassis in the photo below. It's like a spring now since the body halves naturally want to spring outward. But that's cool, it actually fits very snugly into the chassis. So next step will be to glue the body top on to this lower section. I think I'll just glue on one side at a time. There seems to be enough play in the plastic to allow that. That will make it easier since I can wait until the first side is totally dry before trying to align the other side. Things are coming along! I've got three lower bodies glued together and well-aligned. As a second more ambitious project I'm just starting to cut out the rumble seat door on the black body. This will be my FIRST door panel cut-out project. So we'll see how this goes. I painted the body with flat black paint just so I can more easily see the panel lines I'm scraping out. Close up of the rumble seat panel lines: I did a boo boo on the left side, But I think I can fix that up with a little primer and sanding. What happened was I accidentally turned the Exacto knife around to the sharp cutting edge down and it went off the panel groove. So live and learn! Never use the sharp edge of the Exacto blade when scraping out a panel groove. I knew better too, I just wasn't paying attention. I think I'm getting too carried away with model building cutting out door panels already. This hobby can be addictive! Somebody needs to STOP me if I start getting bogged down in too much detailing. But hey one working rumble seat out of 5 coupes? That's not too much of an addiction is it?

-
Yeah, that's a lot easier to arrange but very difficult to live with. That's why I prefer the ten-body monogamy thing. Just one nice girl I can trust.
-
You guys have been blowing my mind ever since I've joined this forum. The details are quite simply unbelievable. Right down to the lettering on the tires! That's crazy! Did you actually find model tires like that? Or did you do that lettering yourself somehow?
-
Hey I'm trying to imagine a "Perfect World" and you're bursting my bubble with the hardcore facts of reality. And besides, whilst I'm not a religious person God did come to me in a dream once and she's the one who said that she would fix me up with ten wives in the afterlife. I argued with her because I'm actually quite monogamous minded. I told her that I would actually rather have just one devoted wife. She said, it's not a problem. She can simply give one woman ten physical bodies that she can simultaneously live in. With God all things are possible. So everything is cool. I'll have one wife who exists in ten different bodies all at the same time. I realize that I started out writing a letter to Santa Claus and this is probably beyond his capabilities so perhaps I'll have to write the Goddess a letter: Dear Goddess, I would like,.... (actually she's omniscient and already knows what I like so the letter would be redundant anyway.) It was her idea for the ten-bodied wife anyway. Honest!
-
The detail in this scene is absolutely stunning! It totally amazes me that this level of realism can be achieved in a model. I do agree about the cat though. The bird looks real, but the cat looks like a porcelain cat. It has the potential to look like a real cat, but I would have no clue how to do that. Maybe some kind of paint wash to make the fur look more realistic? I have no clue, just a suggestion. But other than the cat everything else looks extremely realistic.
-
Truly! I forgot to mention my robotics laboratory in my letter to Santa! And oh, yeah, the ten wives: Just use your imagination for the other six. May as well round it off to an even ten wives. This way each one only has to do only 1/10th as much housework. (hee hee) Gotta keep em happy!
-
I'll have to apologize up front, but if I lived in a perfect world I wouldn't be building model cars, I'd be building the real thing! In fact, I recently answered this question a while back when I was asked what I would like "heaven" to be like. As strange as this may sound I would love to have a complete auto and machine shop. And be able to order brand new parts for cars and trucks from the 20's to the 60's. I would personally focus on only a few specific models from various eras and probably build a few of each. When I tell people this they often ask, why not just have them delivered ready to drive away? Clearly they don't understand. Building things from the ground up is my passion. I would also have a Woodmizer sawmill, a complete woodshop, and a forest full of great trees, I would build my own house from scratch too! I would also like to have stuff to make my own concrete. Oh yeah, a metal furnace for casting model train parts out of aluminum and bronze. I would still continue to build model G-scale railroads to put in my yard around my wooden house. I suppose it would be cool to have G-scale model cars to build too. Or maybe the trains could built to 1/24 scale. I'll have to think about that one. I keep forgetting that this is a "perfect world" we're talking about. Where's Santa Claus? I want to put in my order right now. I'll need at least 100 acres of land near a small tranquil lake since I'll be building wooden boats too. Oh yeah, I also need at least a 1000-year extension on my lifespan too (possibly with a renewal clause when the 1000 years is up). And since this is a "Perfect World" I'll assume great health is automatic. Thanks for asking. I'm looking forward to this dream coming true! Dear Santa, I would like,....
-
 @ Steve, Yes I know you are correct. But for my purposes I thought it might be close enough for an abstract representation.. It's better than having no model to work with at all, unless you know where I can get a model of a 1982 Virago? By the way, since I'm actually rebuilding my 82' I can "bash" it a little too to make it look a little bit more like the model of the '84 For example, I could add the Chrome Air cleaners and horn to the real bike and make it look a little bit more like the '84. But you're right, a lot of details will be different. The tank and side covers are larger on the '82 and the tank doesn't have as much of an angle. Also the front fenders are mounded differently, and the '84 has rear shocks with spring, where the '82 has a hidden mono-shock that can't be seen. Also the '84 you show above has real spokes in the wheels. But the Tamiya kit has the larger aluminum spokes a bit closer to my '82. Except my '82 has curved spokes and the Tamiya model has straight spokes. Yeah, there's a lot of differences in the details. But does anyone make a '82 Virago kit? Anyway I didn't mean to hog this whole thread with my bike project. I just thought this might be a cool idea and the question in this thread inspired the thought. I would much rather use a model of an '82 VIrago if I can find one. But kit bashing the '84 might do in a pinch. It won't be exact, but it will give the general appearance of being a model of the bike. Between "bashing" the kit and "bashing" the real deal during the rebuild I'd probably end up with something pretty close. By the way, just this conversation alone has me thinking of adding the chrome air cleaners and horn to the real bike. I wasn't thinking of doing that originally.
 -
I'll second this! I love to build dioramas too, but mine are definitely on a very amateur level to be sure. You'll never mistake mine for a real life scene. None the less they still serve to inspire the imagination. Great photography Ken, and an awesome web page! Those models look like photos of actual cars and garages. Thanks for sharing your work.
-
That's some pretty crazy attention to detail there. You could have built the real thing by the time you're done with this model.
-
Nice looking truck. One of my favorite years. I only wish I could build the real thing. I have about five or so of these to build in 1:32 scale. Mine are 1930 Lindberg kits.
-
Hello Everyone, I truly am as stupid as I appear so let's get that out of the way right off the bat. I'm currently working on a 1:32 scale Lindberg 1934 Ford 3-Window Coupe. I bought 5 of these kits at $5.11 each, so I have plenty of room to learn. Ok, here's my first problem. I thought I was being smart painting the parts whilst they were still on the sprue trees. But this has turned out to not be so hot for this particular model. The body is in 3 pieces, plus the fender/chassis. But the problem is that this body is not going to go together easily, especially after having been painted. You can see how the firewall isn't even close to lining up. So I'm going to need to glue that together first and then set the lower part of the body into the chassis as shown in the picture below. Right now I don't have anything glued: But you can see how the firewall is very far from being lined up. So I'll have to glue that first along with some reinforcement and then "spring" the two halves of the sides of the body into their proper place. Then I'll have to fit the top part of the body onto the lower parts and glue it to the bottom half. I'll probably have to do this using the chassis as a guide/holder to be sure that everything will line up. I should probably glue one side panel to the top at a time right? Then I should end up with something like shown below on hopefully far better lined up. The only problem is that I'll probably ruin the paint job by the time I do all this gluing and aligning. Notice in the above photo I'm also thinking about trying to "bash" a 1:32 scale T Street Rod engine into this kit. But this is going to be one extremely tight fit. I think it might make it, but it's going to be close. I'll have to cut out the floorboards or tranny to get it to fit, and probably even remove the distributor entirely. I'm not sure if this engine can be made to fit or not. It's going to be really close if it can be done. In any case, I'll probably ruin the body paint by the time I'm done trying to glue the body all together. I don't think I should have painted the body first. But not to fear, I have five of these kits! As you can see above I have a second chance to learn how to do this right. I think on this second model I'll glue the three body pieces all together first before any paint has been applied. Get that all lined up and squared away and then paint the body as a single piece. The only question here is whether I'll be able to install the glass in the upper part of the body afterward? The instructions state to install the glass before gluing the top piece to the bottom panels. But I don't want to have the glass in it when I paint it, that would require masking off the windows which would be a real pain. Anyway, I warned you that I'm stupid, so all suggestions are welcome. I took this last photo just to show the three body panels clearly. Like I say, I have five of these kits to play with. So this is all a learning experience. I might even buy more if I can get this construction down to a science. I was even thinking of toying with trying to cut open the doors on one of these. But I won't try that until I get a few of them built. I would imagine that the body would need to be constructed as a single piece with some seriously good structure before I moved forward to cutting doors open. Or do you think it would be better to cut the door out of the bottom section and top section separately and then glue those two pieces back together? That would seem to me to be far more likely to end up with bad alignment. So anyway I have five chances to build a good body here. So all suggestions are welcome. I haven't glued anything yet, but I have painted the first body as you've already seen. I think that was my first mistake.
-
Yes, I had to add the back rest too. I used a lightly taller sissy bar as well. My was also a 1982 it looked very much like the one in the photo below when I bought it. It was mundane black like this one. It's a shameful mess right now. It ended up being stored in a shed that had a leaky roof and the paint all blistered off and a lot of the chrome is now rusty. I'm too ashamed to post a photo of the actual bike. Its pretty bad. This is why I'm totally disassembling it and redoing the whole thing. Fortunately then engine itself seems to have made it through without too much cosmetic damage. I'm thinking of painting it yellow, I current have the fuel tank sanded and primer, and the side covers aren't bad since they are plastic. I'm going to do them in bright yellow and leave the Yamaha logo off the tank. Mainly because the original logos are pretty ugly and they seem to be a bit pricey to replace, so I'll just leave them off. I like the simple clean look anyway. By the way, I wish I had a 1941 Indian Sport Scout that Davemodeltech posted out in my garage to rebuild. That would really be cool. But I guess this 82' Virago will have to do as my "antique" restoration project since this is what I have to work with.
-
@ Steve, My Virago is actually a 750, but this model would be close enough, you can't really tell them apart much other than maybe for some engine details. I also took off the stock seat and replaced it with a really nice King-Queen seat. That makes a huge difference in the ride comfort. In fact, after I made the post here I was wondering how I would fabricate a replica scale King-Queen seat? I also have black leather saddle bags on the back, and an after market windshield on the front. With the wider King-Queen seat, the saddle bags, and the windshield it actually looks like a much larger bike. I only use it locally anyway, so I don't take major trips with it. But it's really nice to have a bike in the summer. And the saddle bags come in handy for picking up a few items from the grocery store. I just realized also that my pipes are different. I have one pipe on each side, they also flare out at the end instead of narrowing down. So this model isn't going to be an exact match of my bike anyway. But I could probably bash it to look pretty close. Other than the add-ons and the different pipes the rest is pretty much identical.
-
Sorry to hear about your need for surgery, I certainly hope that goes very smoothly for you. For whatever it's worth my next door neighbor had a double by-pass when he was about 80 years old, and he was home out in the yard raking leaves less than a week after his operation! He finally did pass on, but not for another 10 years! And I'm not even sure if his final demise was related to his heart. I don't recall as that was some years ago, but I vividly remember him out there raking leaves right after coming home from a double by-pass surgery because I was amazed that he was feeling that good at 80 years old so quick after an operation like that. In any case, I'm glad you asked this question because you got me thinking about it, and I came up with the following model that I would like to build. e The reason I chose this model is because I have the real thing out in the garage currently undergoing a complete rebuild. Right now I'm still in the process of disassembling the original bike for a total overhaul, everything except the engine which is in really good shape. In any case I just realized that it would be cool to build this model alongside the actual real life project. Then when I'm done with both of them I'll have a matched pair. One full-sized and ride-able, and the other a 1:12 scale model look-alike. So thanks for the suggestion!
-
I can't pass by without chiming in. This is absolutely awesome! No doubt about it. Fantastic job! I'm a real fan of cars from the 30's era too so that's even a plus in my book.
-
$30+ kits - hows it affect you?
Deuce Coupe replied to Jantrix's topic in General Automotive Talk (Trucks and Cars)
Prices have caused me to focus almost entirely on 1:32 scale Lindberg kits which I can purchase for about $5 to $7 a piece. Although I have to say that these kits are lacking in many ways. Typically no engines, no chrome, no decals. And even the parts are few and not as nice to work with as the 1:24 scale kits. Still they serve my purpose which is to build them for use in dioramas on a G-scale Model Railroad. At $5 to $7 a kit I can build far more of them than if I went with the 1:24 scale kits at $30 a piece. Also the smaller cars actually work out better for the layout anyway. Dioramas built at 1:24 scale get very large very quickly. The 1:32 is a bit smaller than the trains which are 1:29 scale, but they make it possible to have more complex dioramas in a more compact space. So it works out better than way for my layout. I decided that consistency in the scales is more important than precision. And the cost factor certainly played a large roll in the decision as well. Consider this: (10) 1:24 models cost about $300 (at $30 a piece). while (10) 1:32 models cost about $50 to $70 (at $5 to $7 a piece). The savings adds up real quick. So I'm learning how to make do with these cheap little models. -
Beautiful model. I just missed buying the real deal for only $900. Yep, that's right $900! I'm sick to my stomach that I missed the deal. It was in my local paper, I dialed the number immediately and the guy answered and said he's filling out the paperwork to complete the sale. Darn it! I was that CLOSE to owning a 1930 Ford Sedan for REAL! The real car. One that I could have actually driven on the road! $900. No zeroes missing there! Less than a grand! I'm sick to my stomach that I missed that deal. Of course to be fair, it was a "project car" and no doubt needed a lot of work. But still, I would have bought just the body alone for $900, and this was a COMPLETE CAR! With engine, tranny, chassis, wheels, and body! I'm sick to my stomach. I'll probably never see another one like it for less than $9000. But yeah, love the model. You did a great job!
-
Hi Mark, welcome to the forums. I'm new here myself, only joined a few days ago. I build mostly 1:32 scale cars and trucks for model railroad dioramas. I've already had the pleasure of meeting some great model builders who have shared some fantastic photos of highly detailed models. This looks like it's going to be a great forum.
-
Newbie with 1:32 scale question?
Deuce Coupe replied to Deuce Coupe's topic in Welcome! Introduce Yourself
I checked out all the threads you linked to. Your models are fantastic. I just now noticed the coiled brake line tubing you did on the master cylinder of the 34 coupe. That's just amazing. You may not be the master modeler on this forum, but you're certainly a master modeler to be sure. No question about that. I have a confession to make (probably one that needs to be made to myself more than anyone else), I tend to get over-ambitious about doing things "all-out". So I need to be careful that I don't spend the rest of my life detailing a 1;32 scale model car. I need to keep in mind that the bigger project is a huge G-scale train layout in my front yard. I decided to go with these Lindberg 1:32 scale models for the autos on this layout. The reason being that the cost is very low (I've been getting these kits for between $5 to $7 a piece. This allows me to build quite a few of them without spending a fortune. And the other main reason I decided to go with these kits instead of finished die-cast painted cars is because I wanted the freedom to modify them and paint them up to match the diaroma's I plan on building. In any case, cutting out for opening doors is actually a quite ambitious addition to the project. But having a few doors open here and there can really improve a diorama. So I'm going to take a shot at trying it to some degree. After reading your thread I looked up videos on YouTube for how to cut out doors. I see the most popular method is scratching them out with the back edge of an Exacto knife as you say. Some people are also using thread to cut with like a saw. I'll definitely be trying this out on some of my models. But I need to be careful not to get too carried away. If I catch myself coiling brake line tubing I'll know that I'm getting too carried away (for my purposes). Like I say, my purpose is to use these on dioramas on a model railroad. So I really don't even need to spend time detailing undercarriages either. That can be a fun project for model car building, but basically a waste of time on a diorama where no one will ever see the undersides of the cars. So I need to keep my purpose in mind and not get lost in unnecessary detail. But opening doors would be really nice in some cases. Thanks for posting your 34 coupe. I'm very excited to see what's possible with these tiny 1:32 scale Lindberg kits. I have at least 5 of those 34 coupes to build and I may even buy some more after that. I can make these things look so different that when its all said and done they'll look like entirely different cars. It would be nice to have a coupe with the rumble seat open. So I'm excited. Thanks for sharing your artwork. -
Newbie with 1:32 scale question?
Deuce Coupe replied to Deuce Coupe's topic in Welcome! Introduce Yourself
Ok Mike, you have me drooling over the awesome detailing of your 1:32 scale 34 coupe. Just looking at the model I'd swear it had to be 1:24 scale that came with opening doors and rumble seat lid. I too have been dreaming of cutting out doors, but cuts would need to be so thin and precise the dream seems like an impossible nightmare. But here you did it! You're going to have to share your secret. Have you already posted a thread on how you did this? If so I would really appreciate a link to it. At first I was thinking of using my power shop jig saw, but the blades are way too thick. Then I thought of using a hand-held coping saw. The blades are a bit thinner but still way too thick. Plus on both of those methods you'd need to drill a huge hole to get started and then patch up the damage. Then I thought of rigging up some kind of homemade "hot melt wire" tool to cut the plastic with heat, but I can only imagine that turning into a nightmare as well. Finally I just decided that it's too much to ask for. But here you are doing it! I even thought of using some kind of Dremel tool but I'm not sure how that would work either. Can you share your secret oh Great Model Master? -
I like it! You did a really nice job on this. Almost looks like the real thing. I used to own a 1949 Ford many years ago. Only mine was a hardtop.
-
Newbie with 1:32 scale question?
Deuce Coupe replied to Deuce Coupe's topic in Welcome! Introduce Yourself
Thanks for the quick replies and information gentlemen. I just bought 5 of the Lindberg 1925 Model T. So I guess I can use those engines for some kit bashing. @Talon63, You did a really nice job on that 1932 Ford B Roadster. I have one of those kits but haven't built it yet. I just looked and noticed that the hood is molded right onto the body on that one. So I'd have to cut the hood off to expose a motor on that particular model anyway. I'll probably just build that one stock. The two models I have with removable hoods are the following: 1930 Ford Model A Pick Up. These have a removable hood but no engine. I have 7 of these to build. Some I'll make into a stake body work truck. Pick up trucks come in handy on model railroad layouts. The other models I have with removable hoods are the 1934 Ford 3 Window Coupe. These also have removable hoods, but no engine. I currently have 5 of these to build. I just ordered 5 more of the 1925 Model T Street Rods I ordered these mainly for the engines. But I'll have fun kit bashing these. These also come with a nice frame and chassis. All the other ones have the chassis integrated with the fenders and running boards. But I should be able to do some serious kit bashing will all these kits. The main problem is they have no fancy exhaust headers or pipes. These just come with those short exhaust stacks sticking straight out from the engine. Other than that it's a pretty nice engine. @blunc, That's really pretty 1934 Coupe you have there. Surely that's not 1:32 scale is it? That must be 1:24. That's not the same kit as the 1934 3 Window Coupe pictured above. My kits don't have opening doors or the rumble seat. That's a really nice model you have there. Lots of great detail. @Talon63,by the way, I have some of those 1949 Fords to build too. You did a really fine job on that one too. -
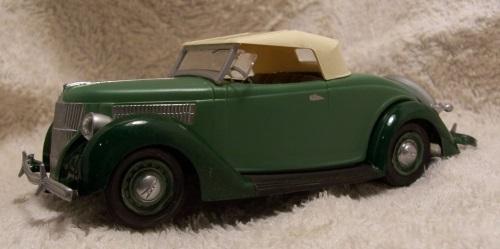
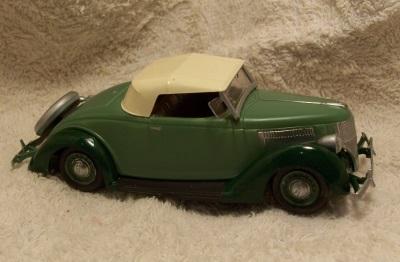
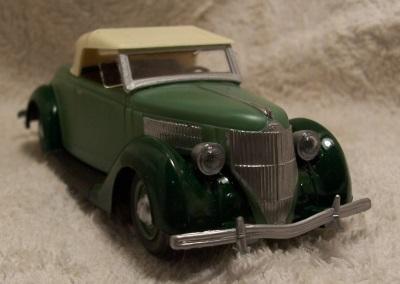
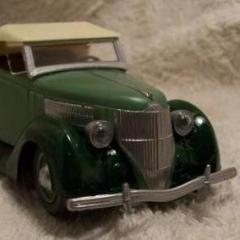
Hi, I have a small question, It's a 1:32 scale question. First a little about me. I am just starting to build 1:32 scale Lindberg car kits from the 1920's to 1940's. I'm building these to use on dioramas on a G-scale train layout. I realize that G-scale trains are 1:29 scale (at least the ones I have are). But I chose to go with 1:32 scale cars instead of 1:24 scale because the smaller cars will work better for my layout. Plus they are a lot cheaper to buy and I want lots of them. The trains will just look a bit large. But I can deal with that. In any case, I've noticed that most of the Lindberg kits come without an engine. Yet many of the 1930 models actually have removable hoods. So my question is this: Does anyone make kits of just 1:32 scale auto engines? I've been looking around and haven't been able to find any. Lindberg does make a 1925 Model-T Street rod that comes with a Cadillac engine. But other than this I haven't been able to find any kits of just engines or engine accessories for 1:32 scale model cars. So if anyone knows of any I would appreciate it. Thanks, James I've attached some pics of my recent build
.JPG.2212b558f8c522d83f72bde6cc8fc43d.JPG)
.JPG.2201d67e60ceafbaed27550a570a19e9.JPG)
.JPG.9134f9d93a5bd801e382c0ea7a19c082.JPG)
.JPG.cf73b8afe50f0d9d2782b63a745b6e92.JPG)
.JPG.d9e6e56b7618f1d2d379ef74c0d97e79.JPG)
.JPG.773d858f6d0c977dd8f0f9571e02ee8b.JPG)
.JPG.d915a928bbaf461b59ea3162b1f79e08.JPG)
.JPG.3855bcbaa044c487a7c7b37445300675.JPG)
.JPG.f815052313fa3502594544b6b99ad394.JPG)
.JPG.4c8f3f939785886647be161c8f52e4ee.JPG)
.JPG.13a91ebcc577b17ec65a18062d2d5c4b.JPG)