gijoe
-
Posts
43 -
Joined
-
Last visited
Content Type
Profiles
Forums
Events
Gallery
Everything posted by gijoe
-
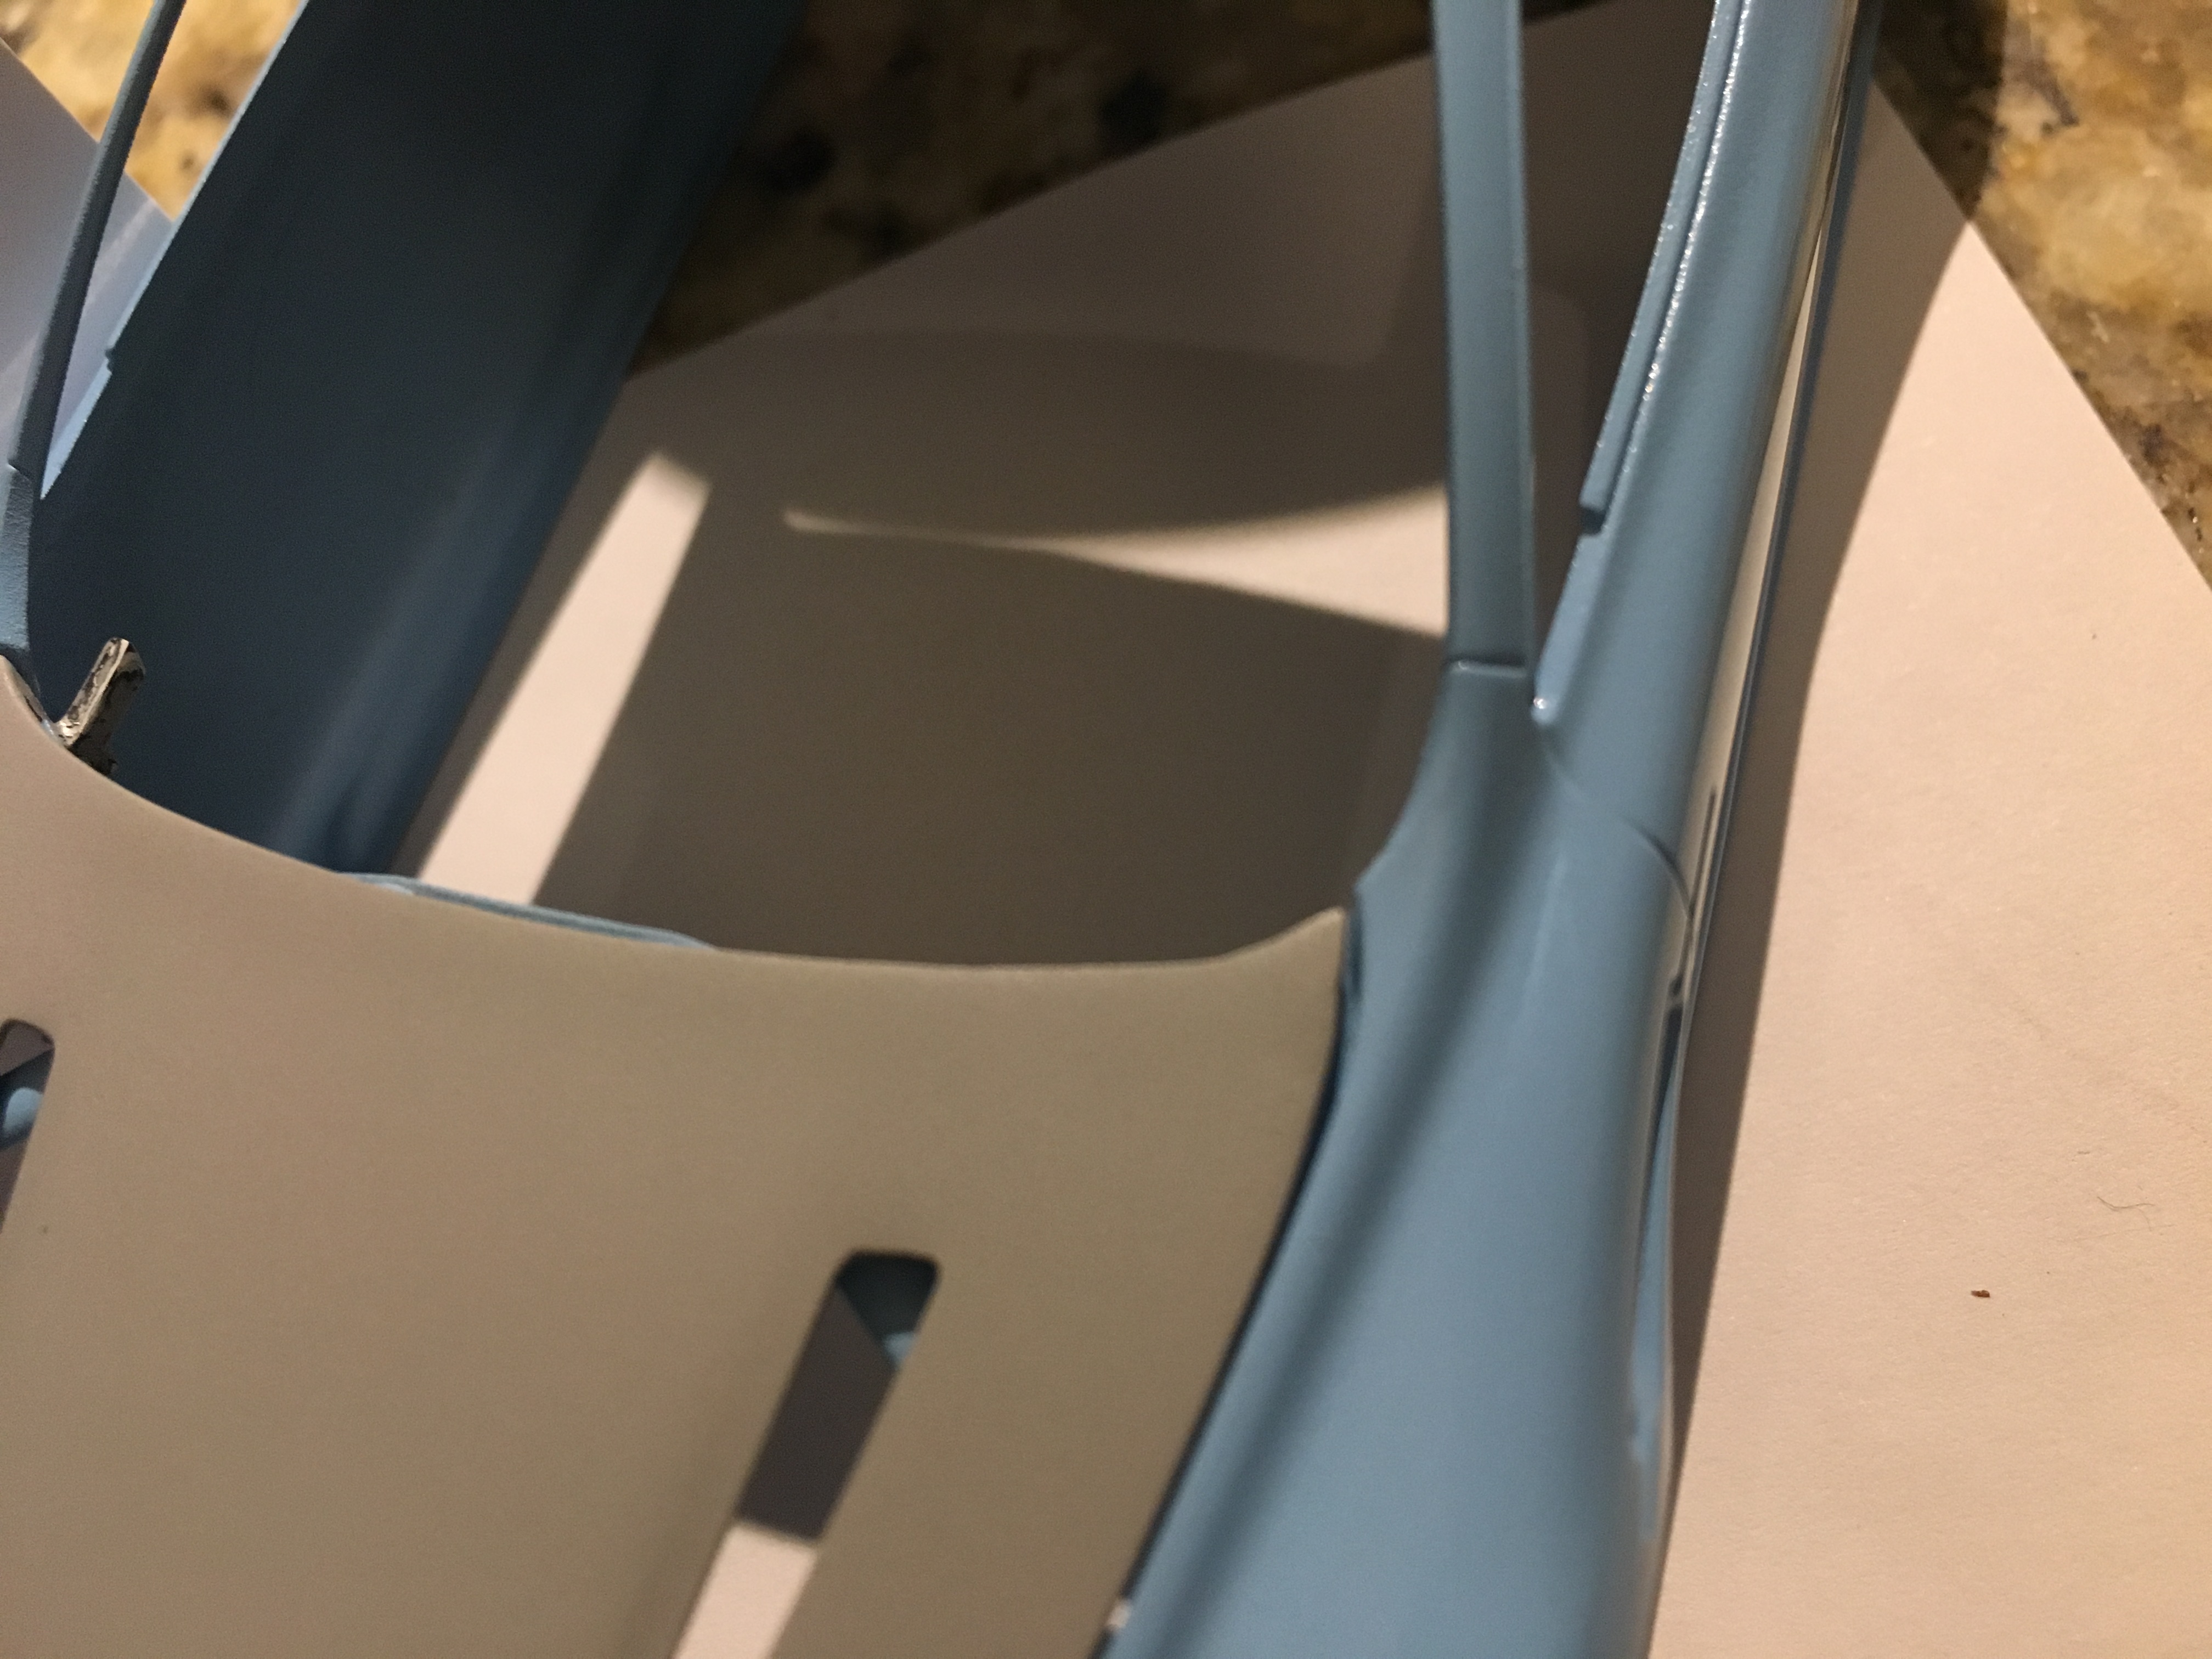
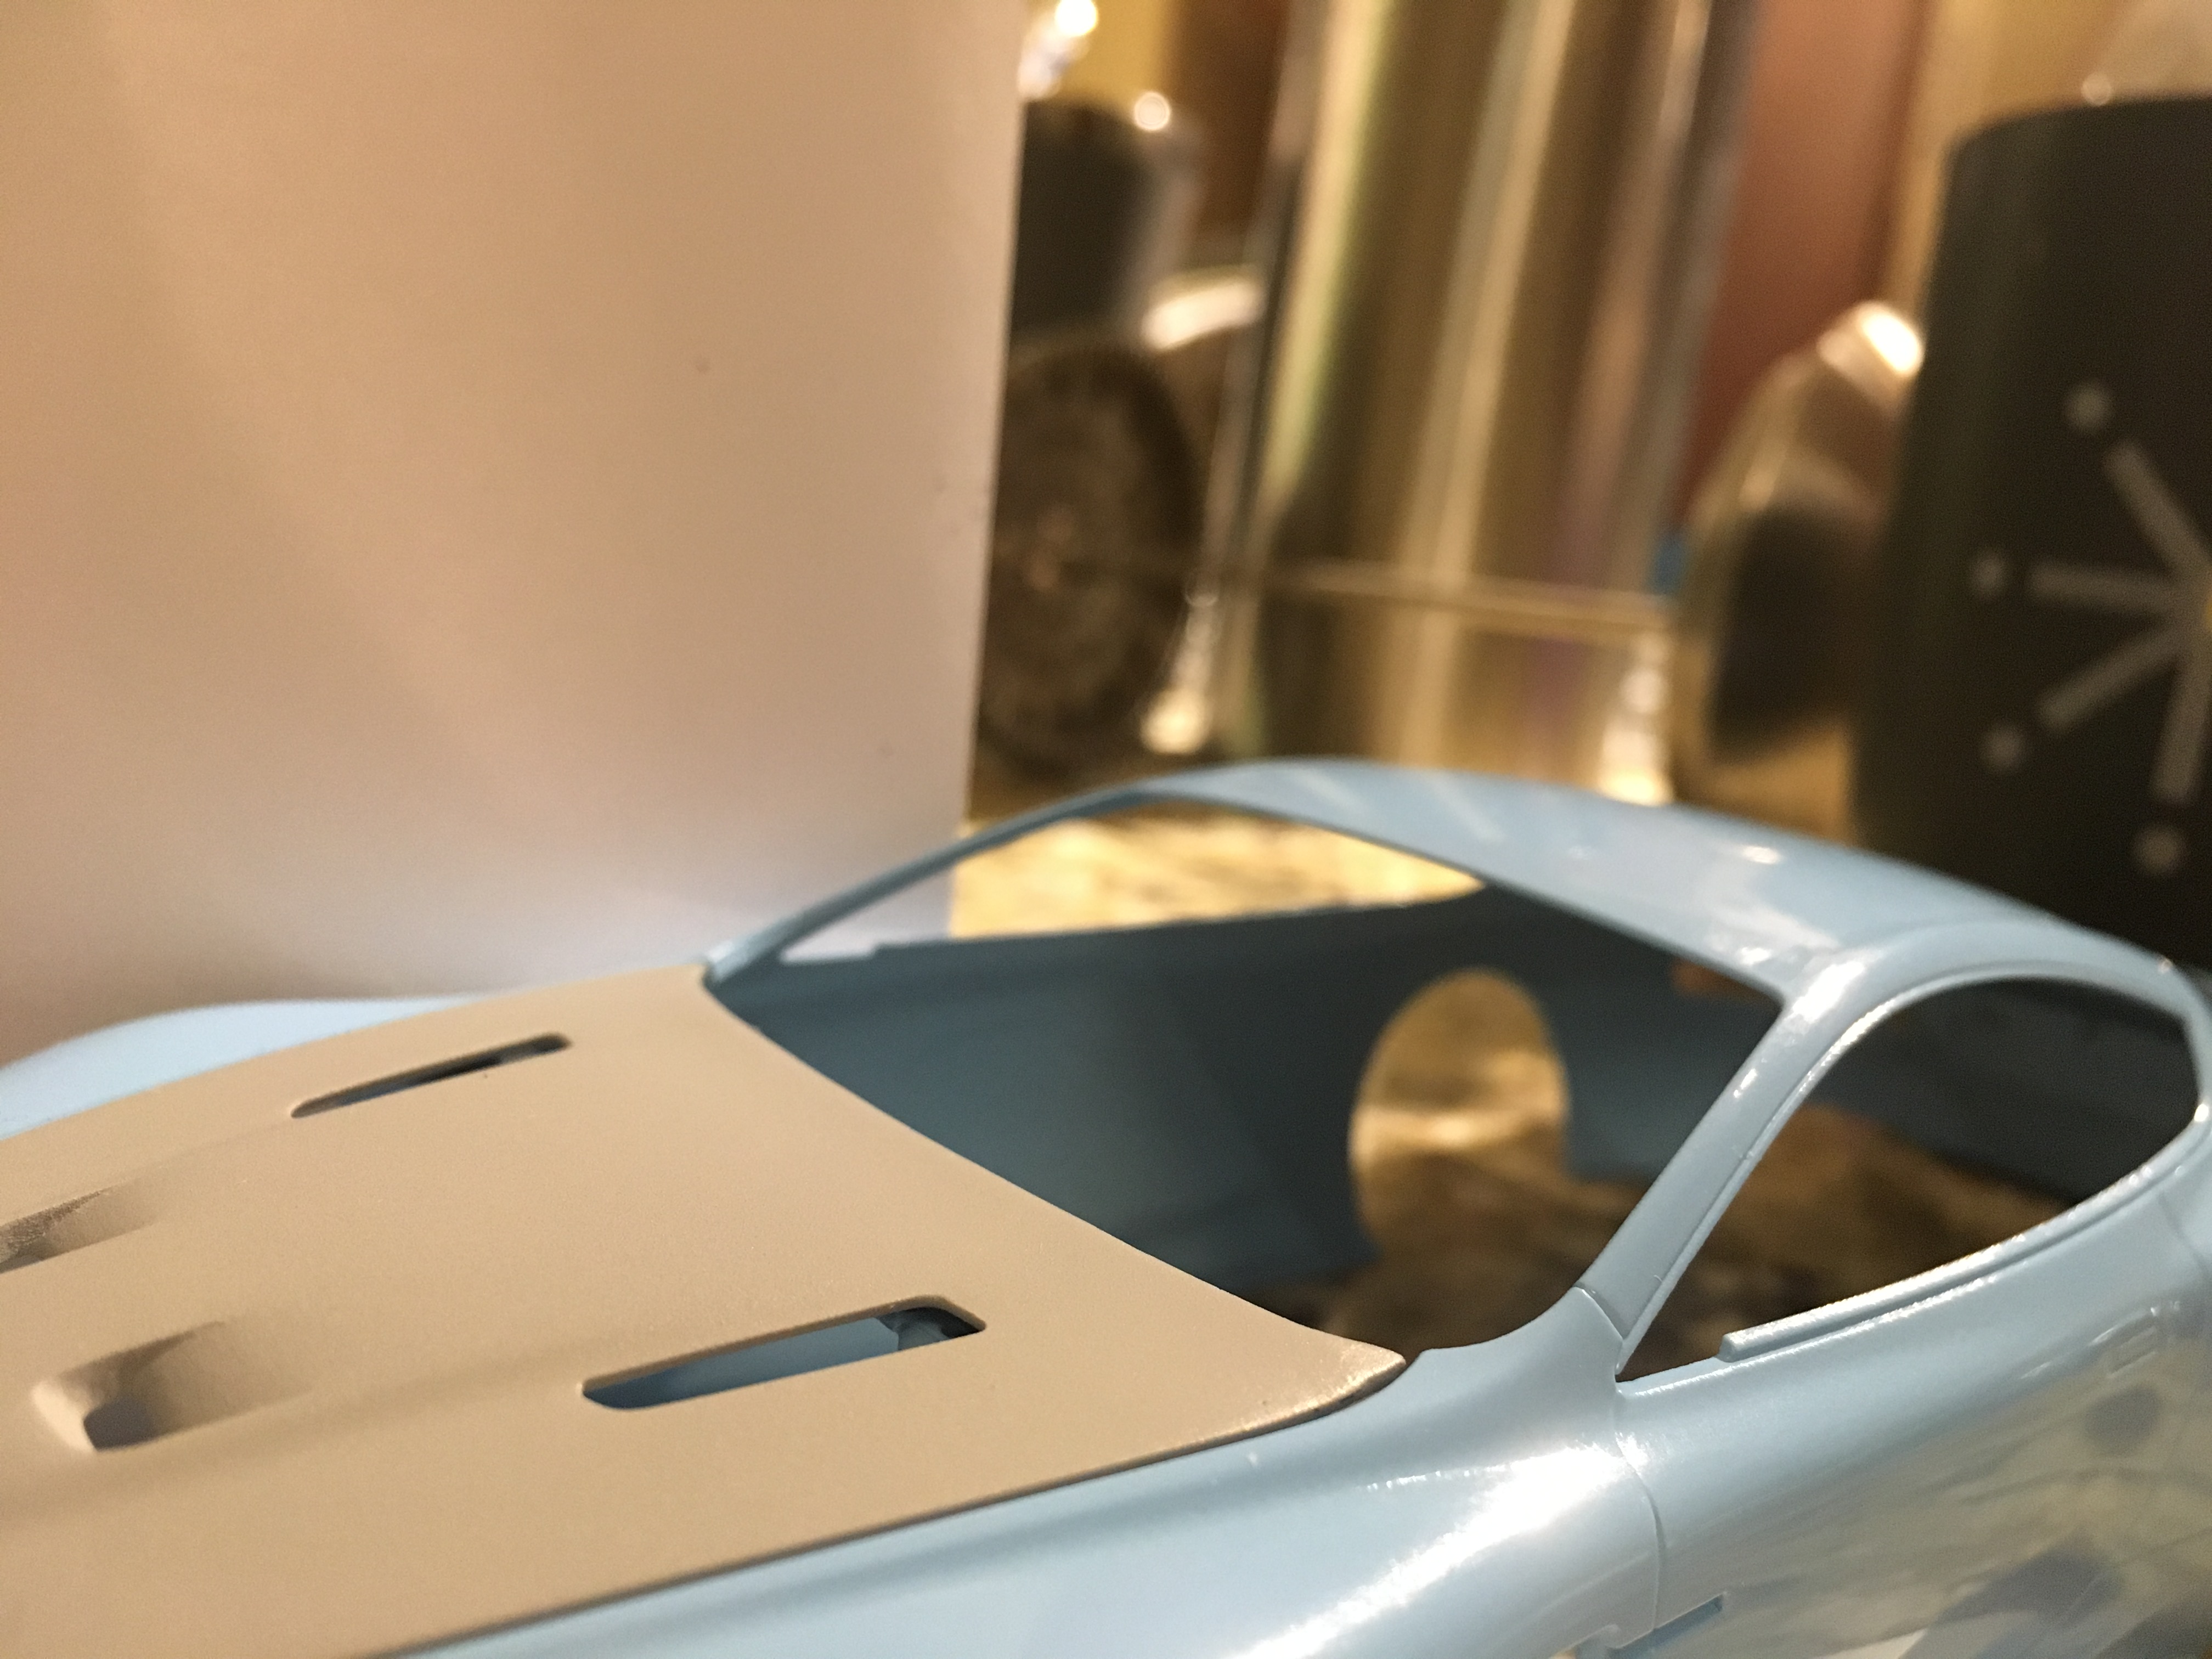
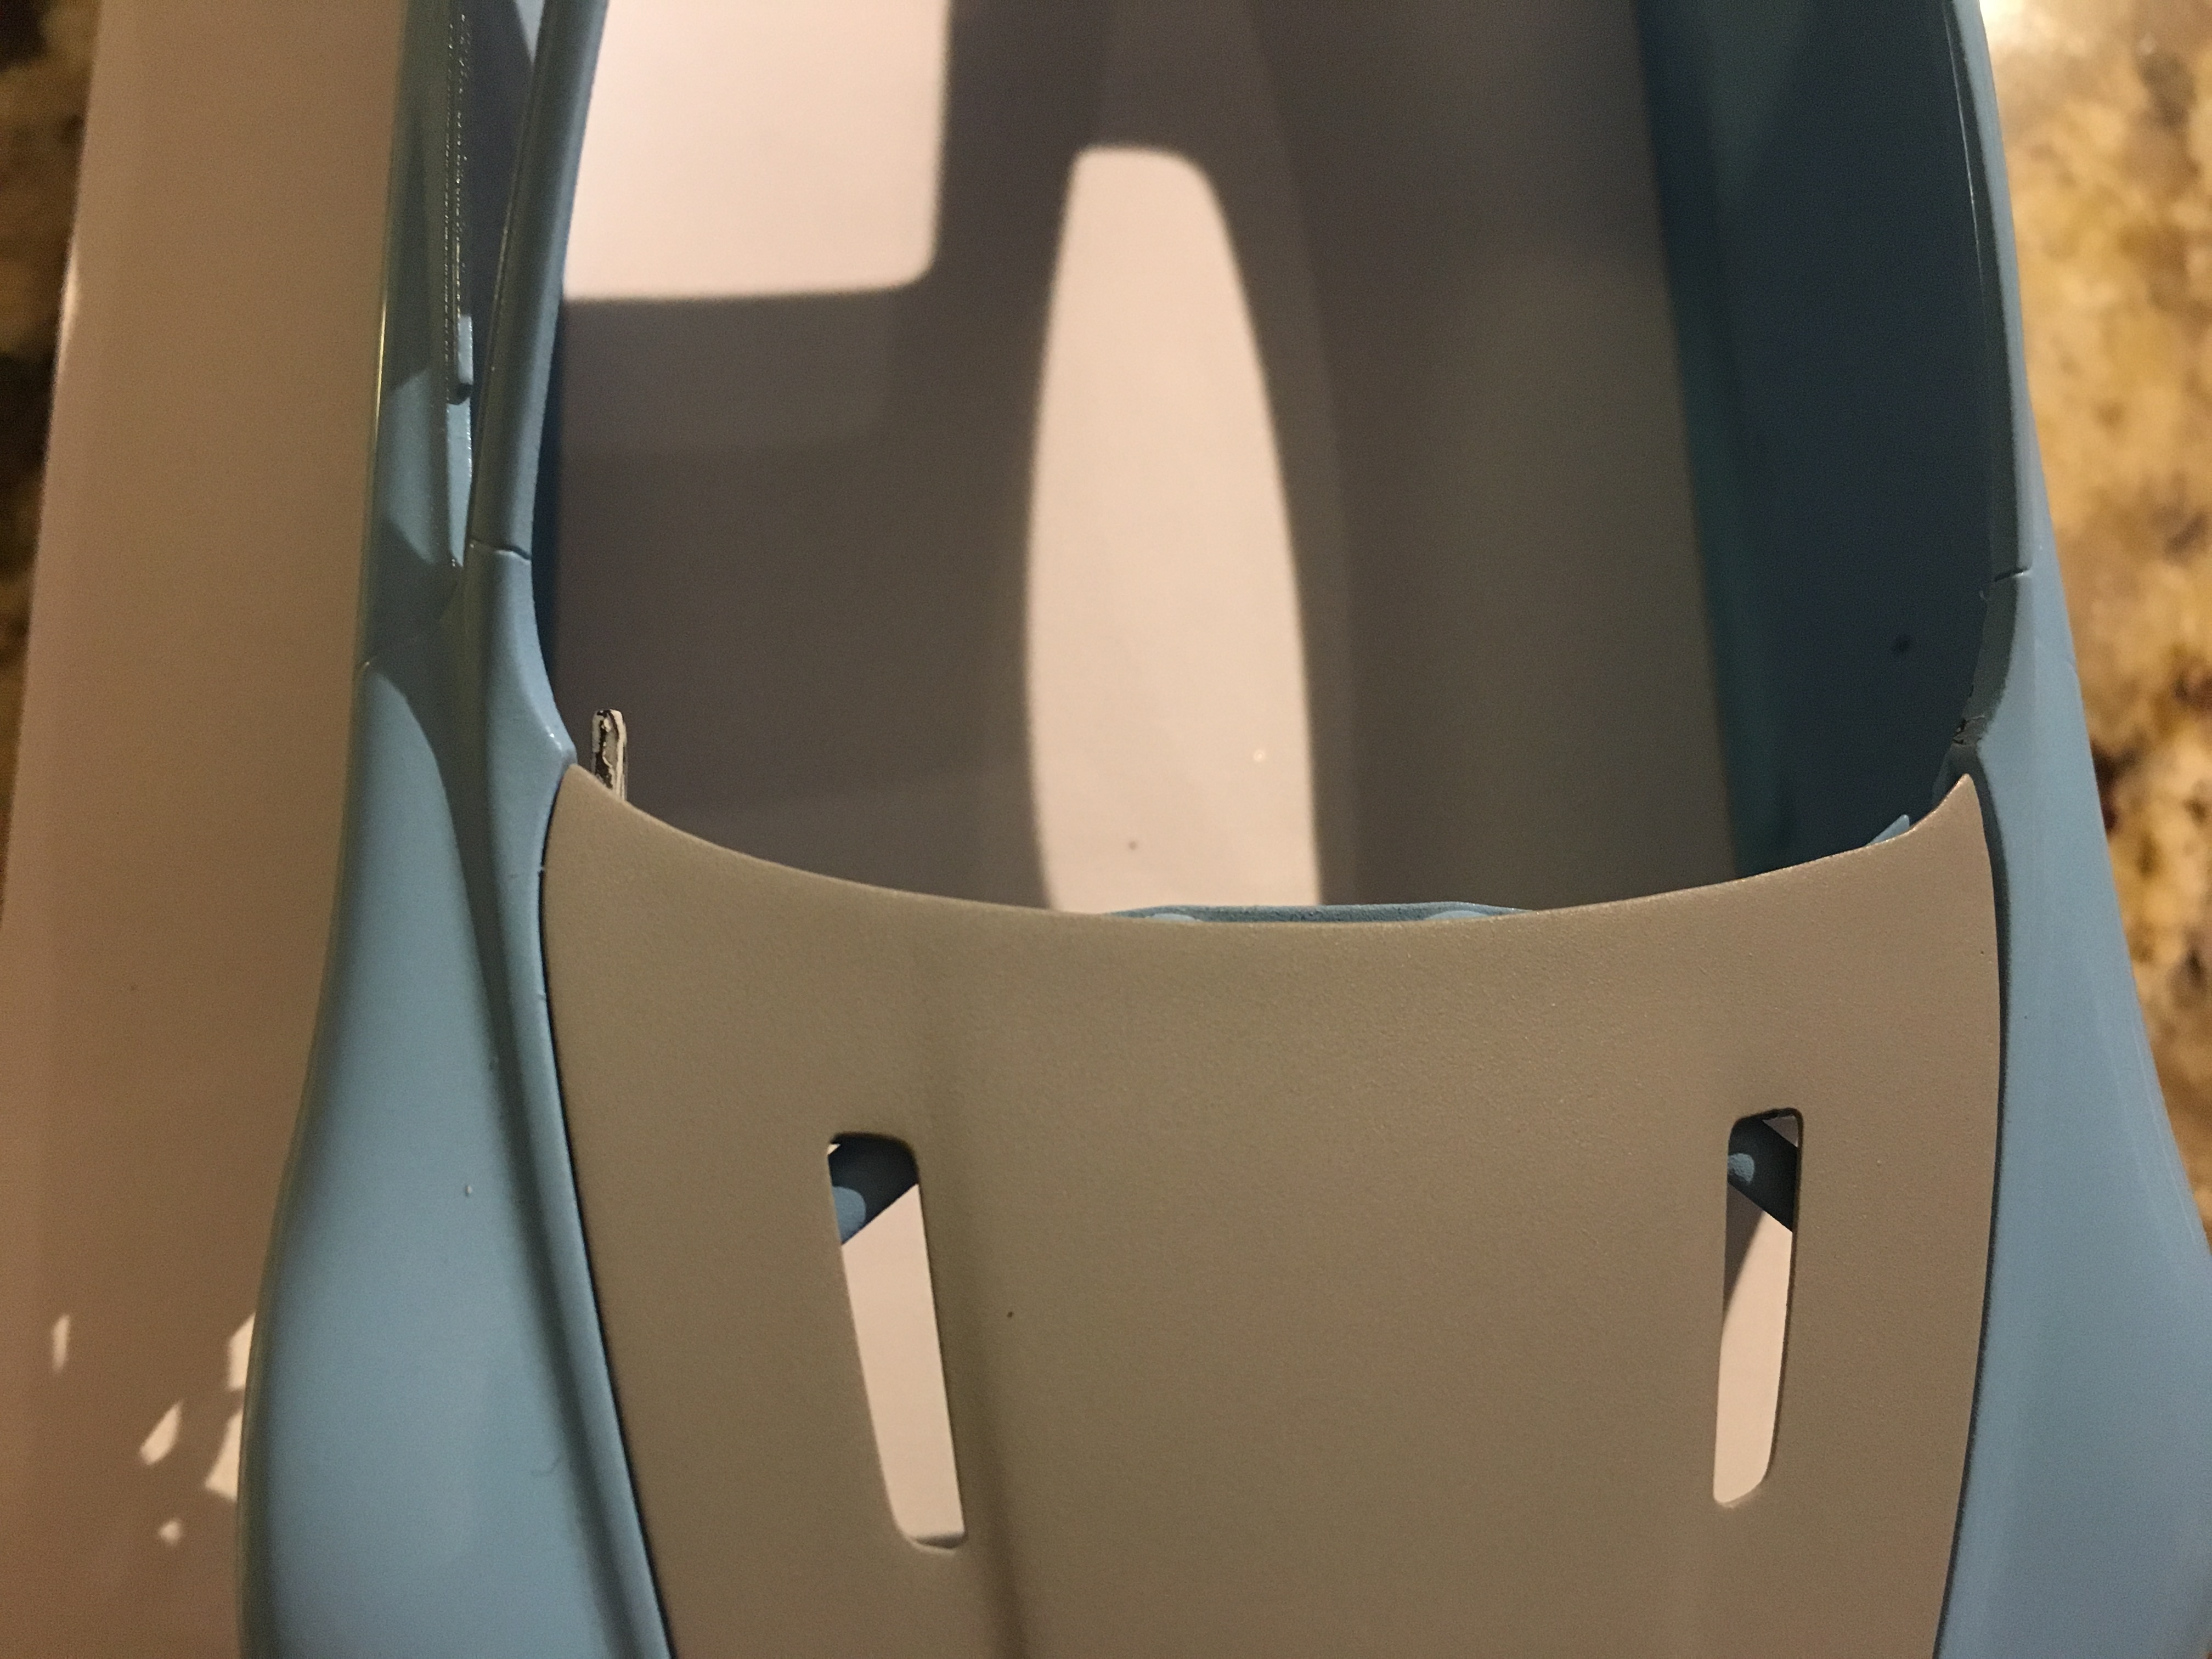
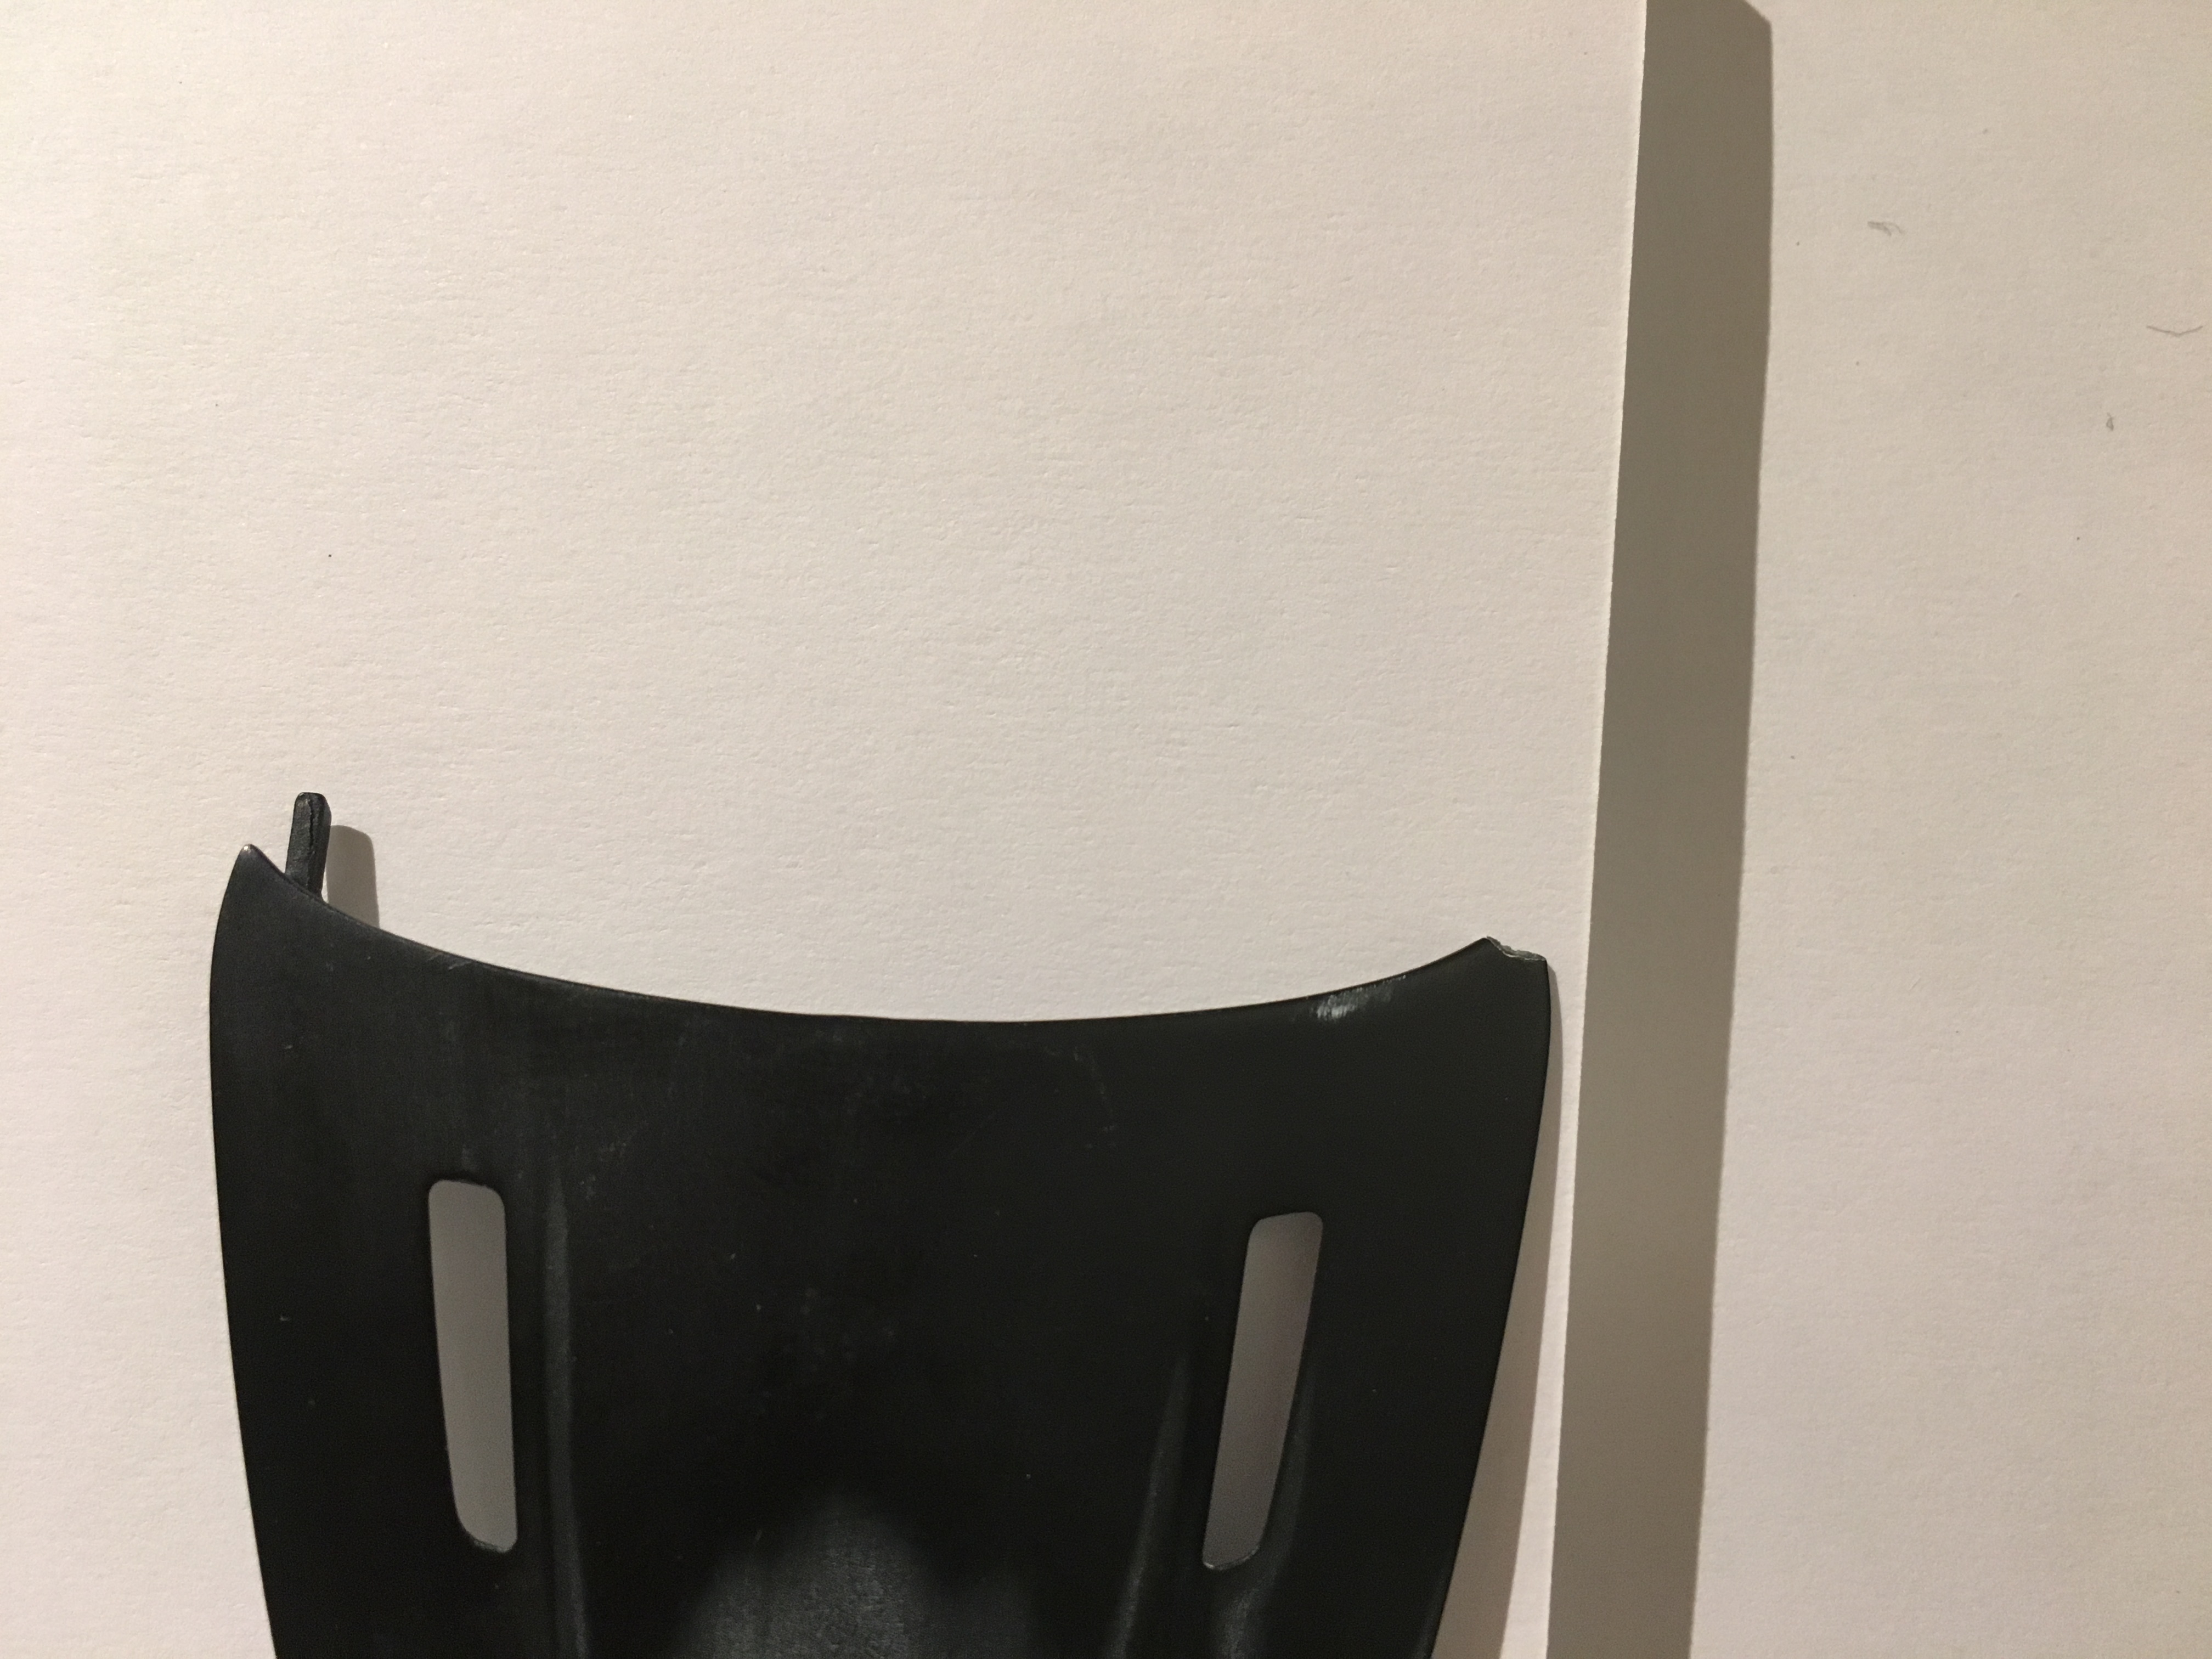
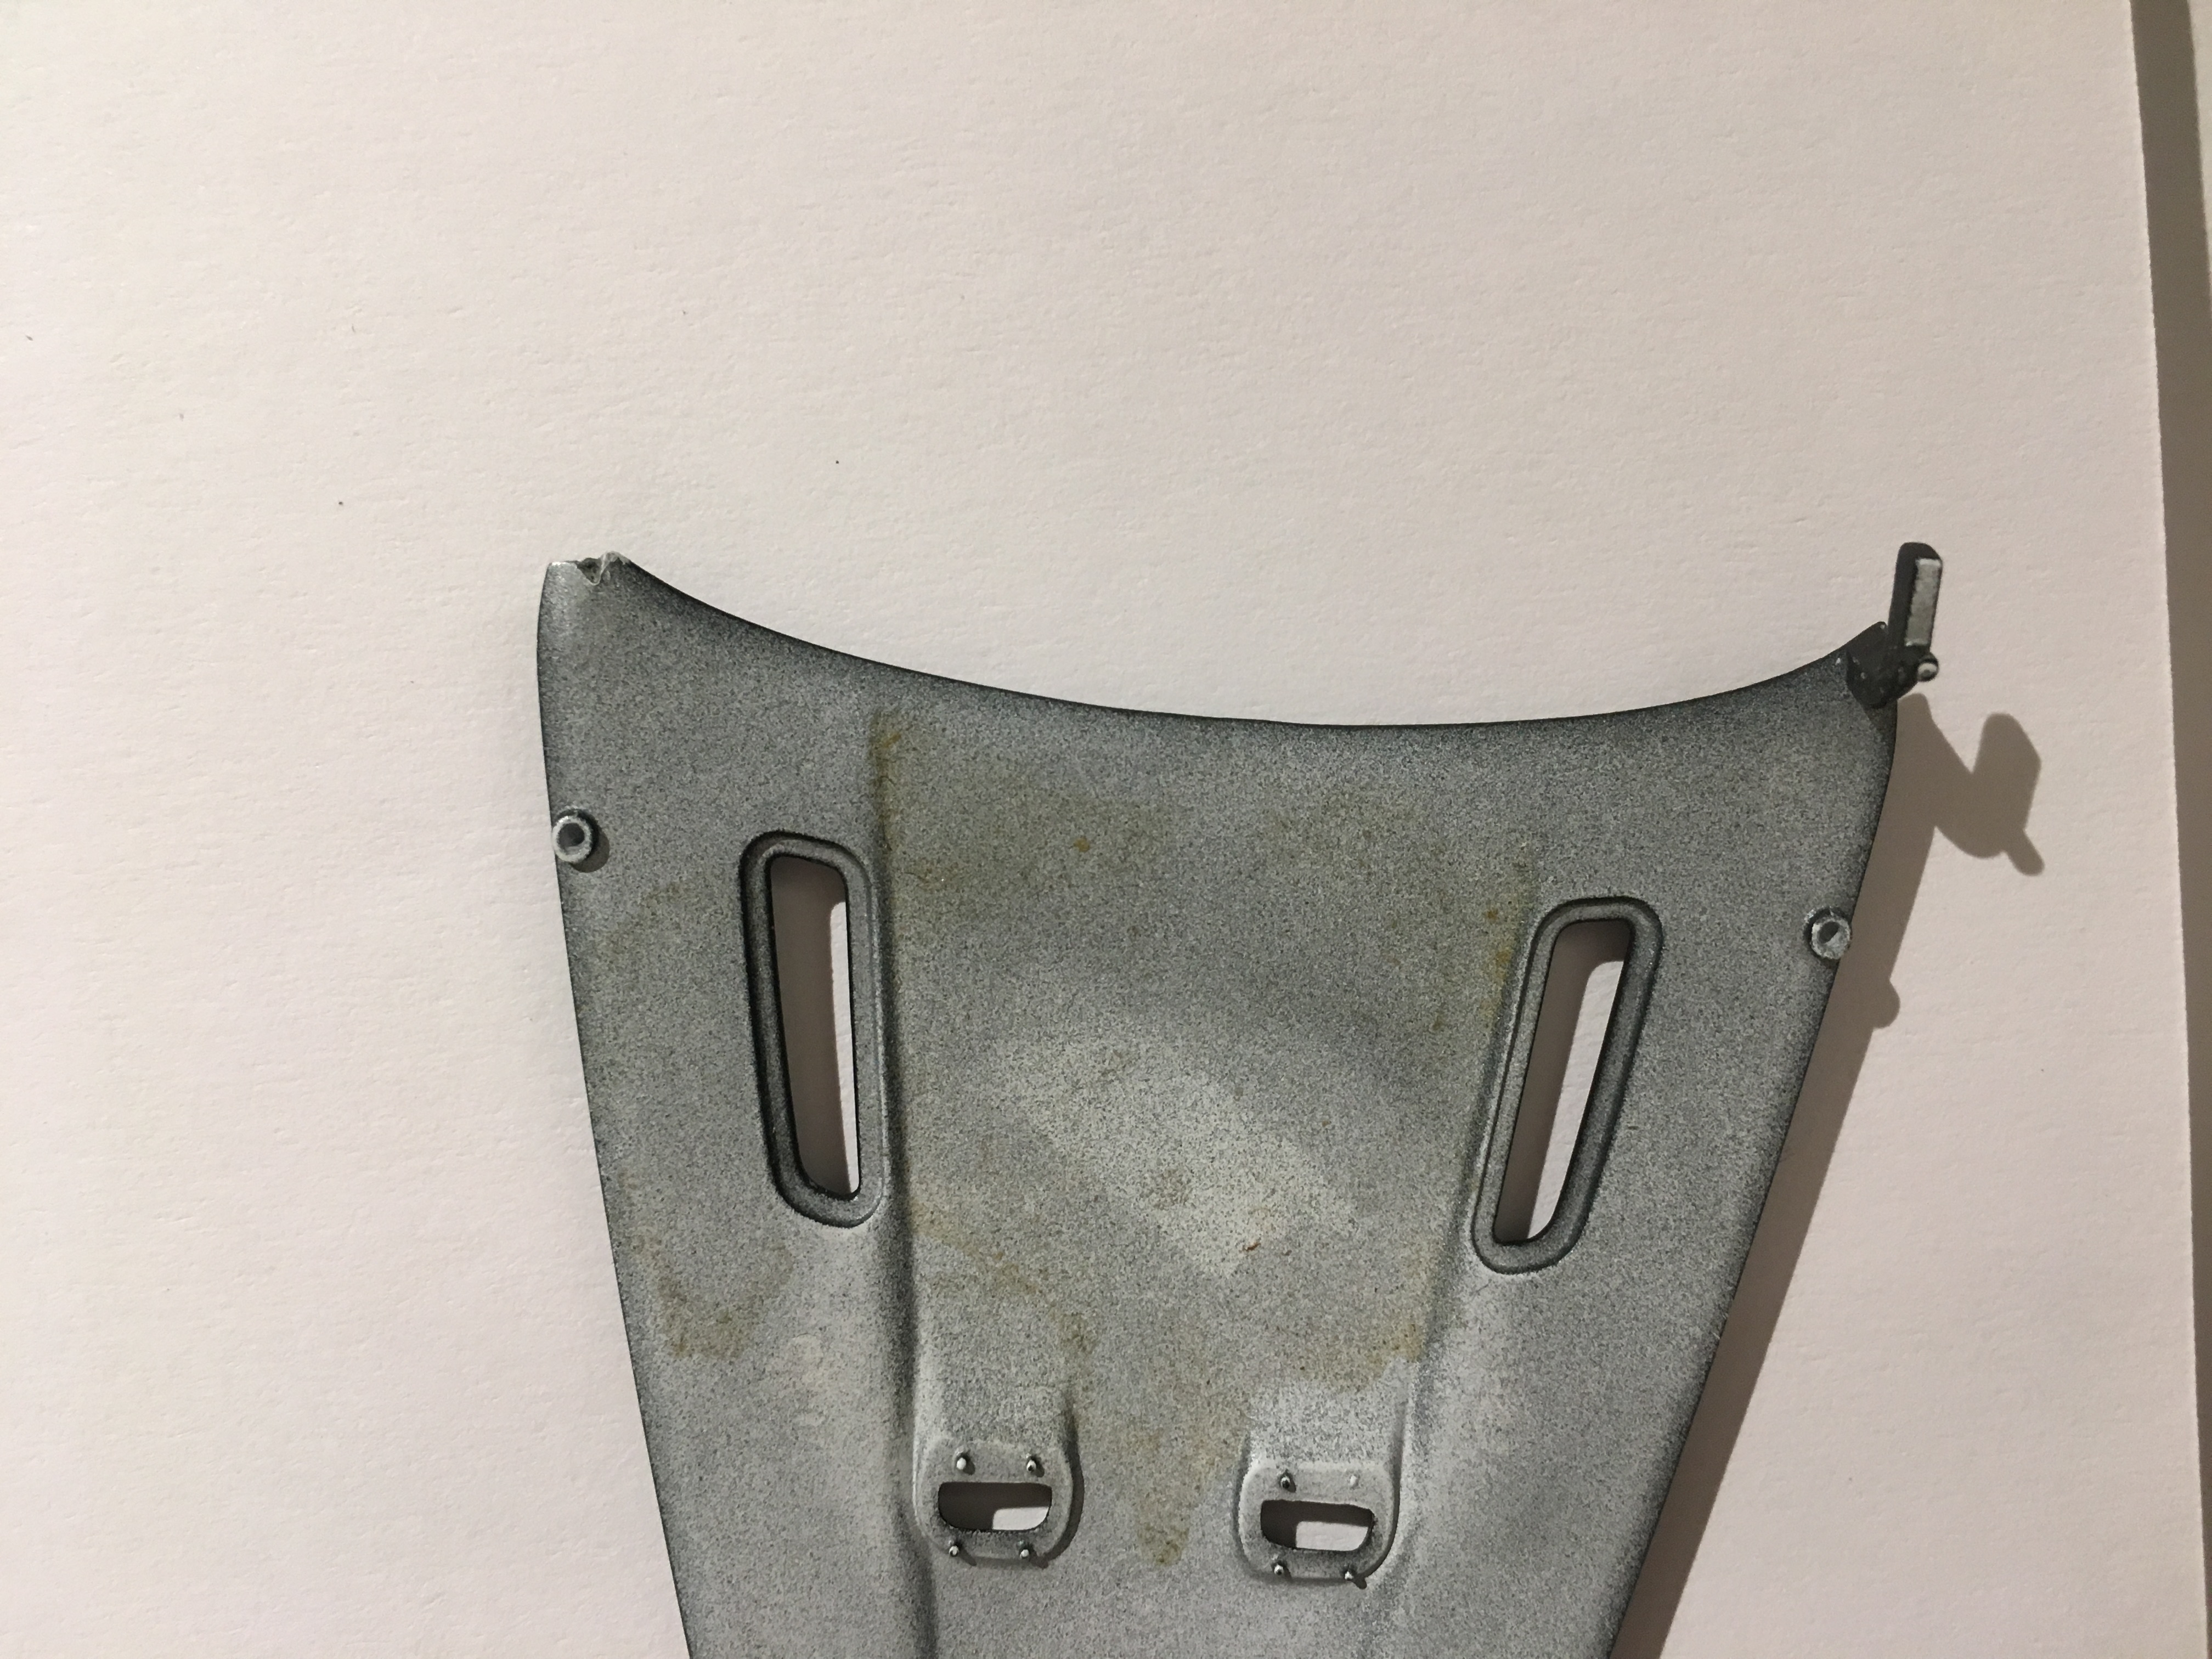
Here is the final product for the hood repair, not perfect, but satisfactory for this build. The paint was a bit of a problem on this build, I found a rattle can of Rustoleum Enamel that was a color I liked, and I figured I'd decant and spray it from my airbrush. The paint would work well at first, then start to splatter the longer I sprayed. I had a lot of trouble getting the right air pressure, and paint consistency right, needless to say, I wouldn't recommend using this stuff. I was able to polish it out fairly well, but it wasn't worth the trouble.

-
This build stalled out for a while, but I've resurrected it, and for the most part I'm pretty happy with it. I ha ve a tendency to break hood hinges, and this build was no exception. The repair isn't perfect, but it turned out decent enough. I was a bit worried about being able to build up this corner without it breaking, but after a push from a couple of members here, I tacked the project, and it was much easier than expected. As long as you give the cement enough time to dry it'll hold very well!
-
Sweet! I'm going to use this idea for my the MKii Jaguar that I just started. The rear window on that kit has a pretty undefined trim (either that or I was too aggressive with the sandpaper when I first started it a couple of years ago).
-
Tamiya tapes have been my favorite, make sure you get a couple sizes. You really need a thinner tape when masking curves, don't try to do everything with wide tape.
-
I think you can fix them using a hair dryer as well. Like64SS350 said, take it slow and don't try to get it perfectly straight in one go. Be care where you apply heat, and pay close attention that you aren't damaging the thin bits, like the pillars. It may be a bit of a hassle, but you could pre-paint the bodies, dark colors will heat up faster, so you could leave the pillars a light color, or bare plastic so they don't heat up as much as the rest of the body., and paint the rest black/dark, that way you know that the pillars will be at least a tiny bit cooler than the rest of the plastic.
-
Thanks, guys. I've been in the hobby for a long time, but I don't really do much scratchbuilding, so I wasn't confident, but the results are pretty decent. I may work it a bit more to get a smoother edge, but it's not too bad in person, that last photo really highlights the flaws. I might start a thread in On The Workbench to follow the rest of the build. The interior is done, and the chassis is mostly done as well. I'm working through some paint troubles, but those should be resolved soon. Thanks again for the encouragement, I didn't have nearly enough confidence in the cement holding, but it did the trick!
-
Returning to Modeling After 40 Years
gijoe replied to Dave Z's topic in Model Building Questions and Answers
One of the members here has some great tutorials on his site called Italian Horses (I don't know the rules about linking that here). He has a tutorial for prep/primer, and one for color/finish. Those two tutorials will cover it. Anything not covered there should be easy to find on here. -
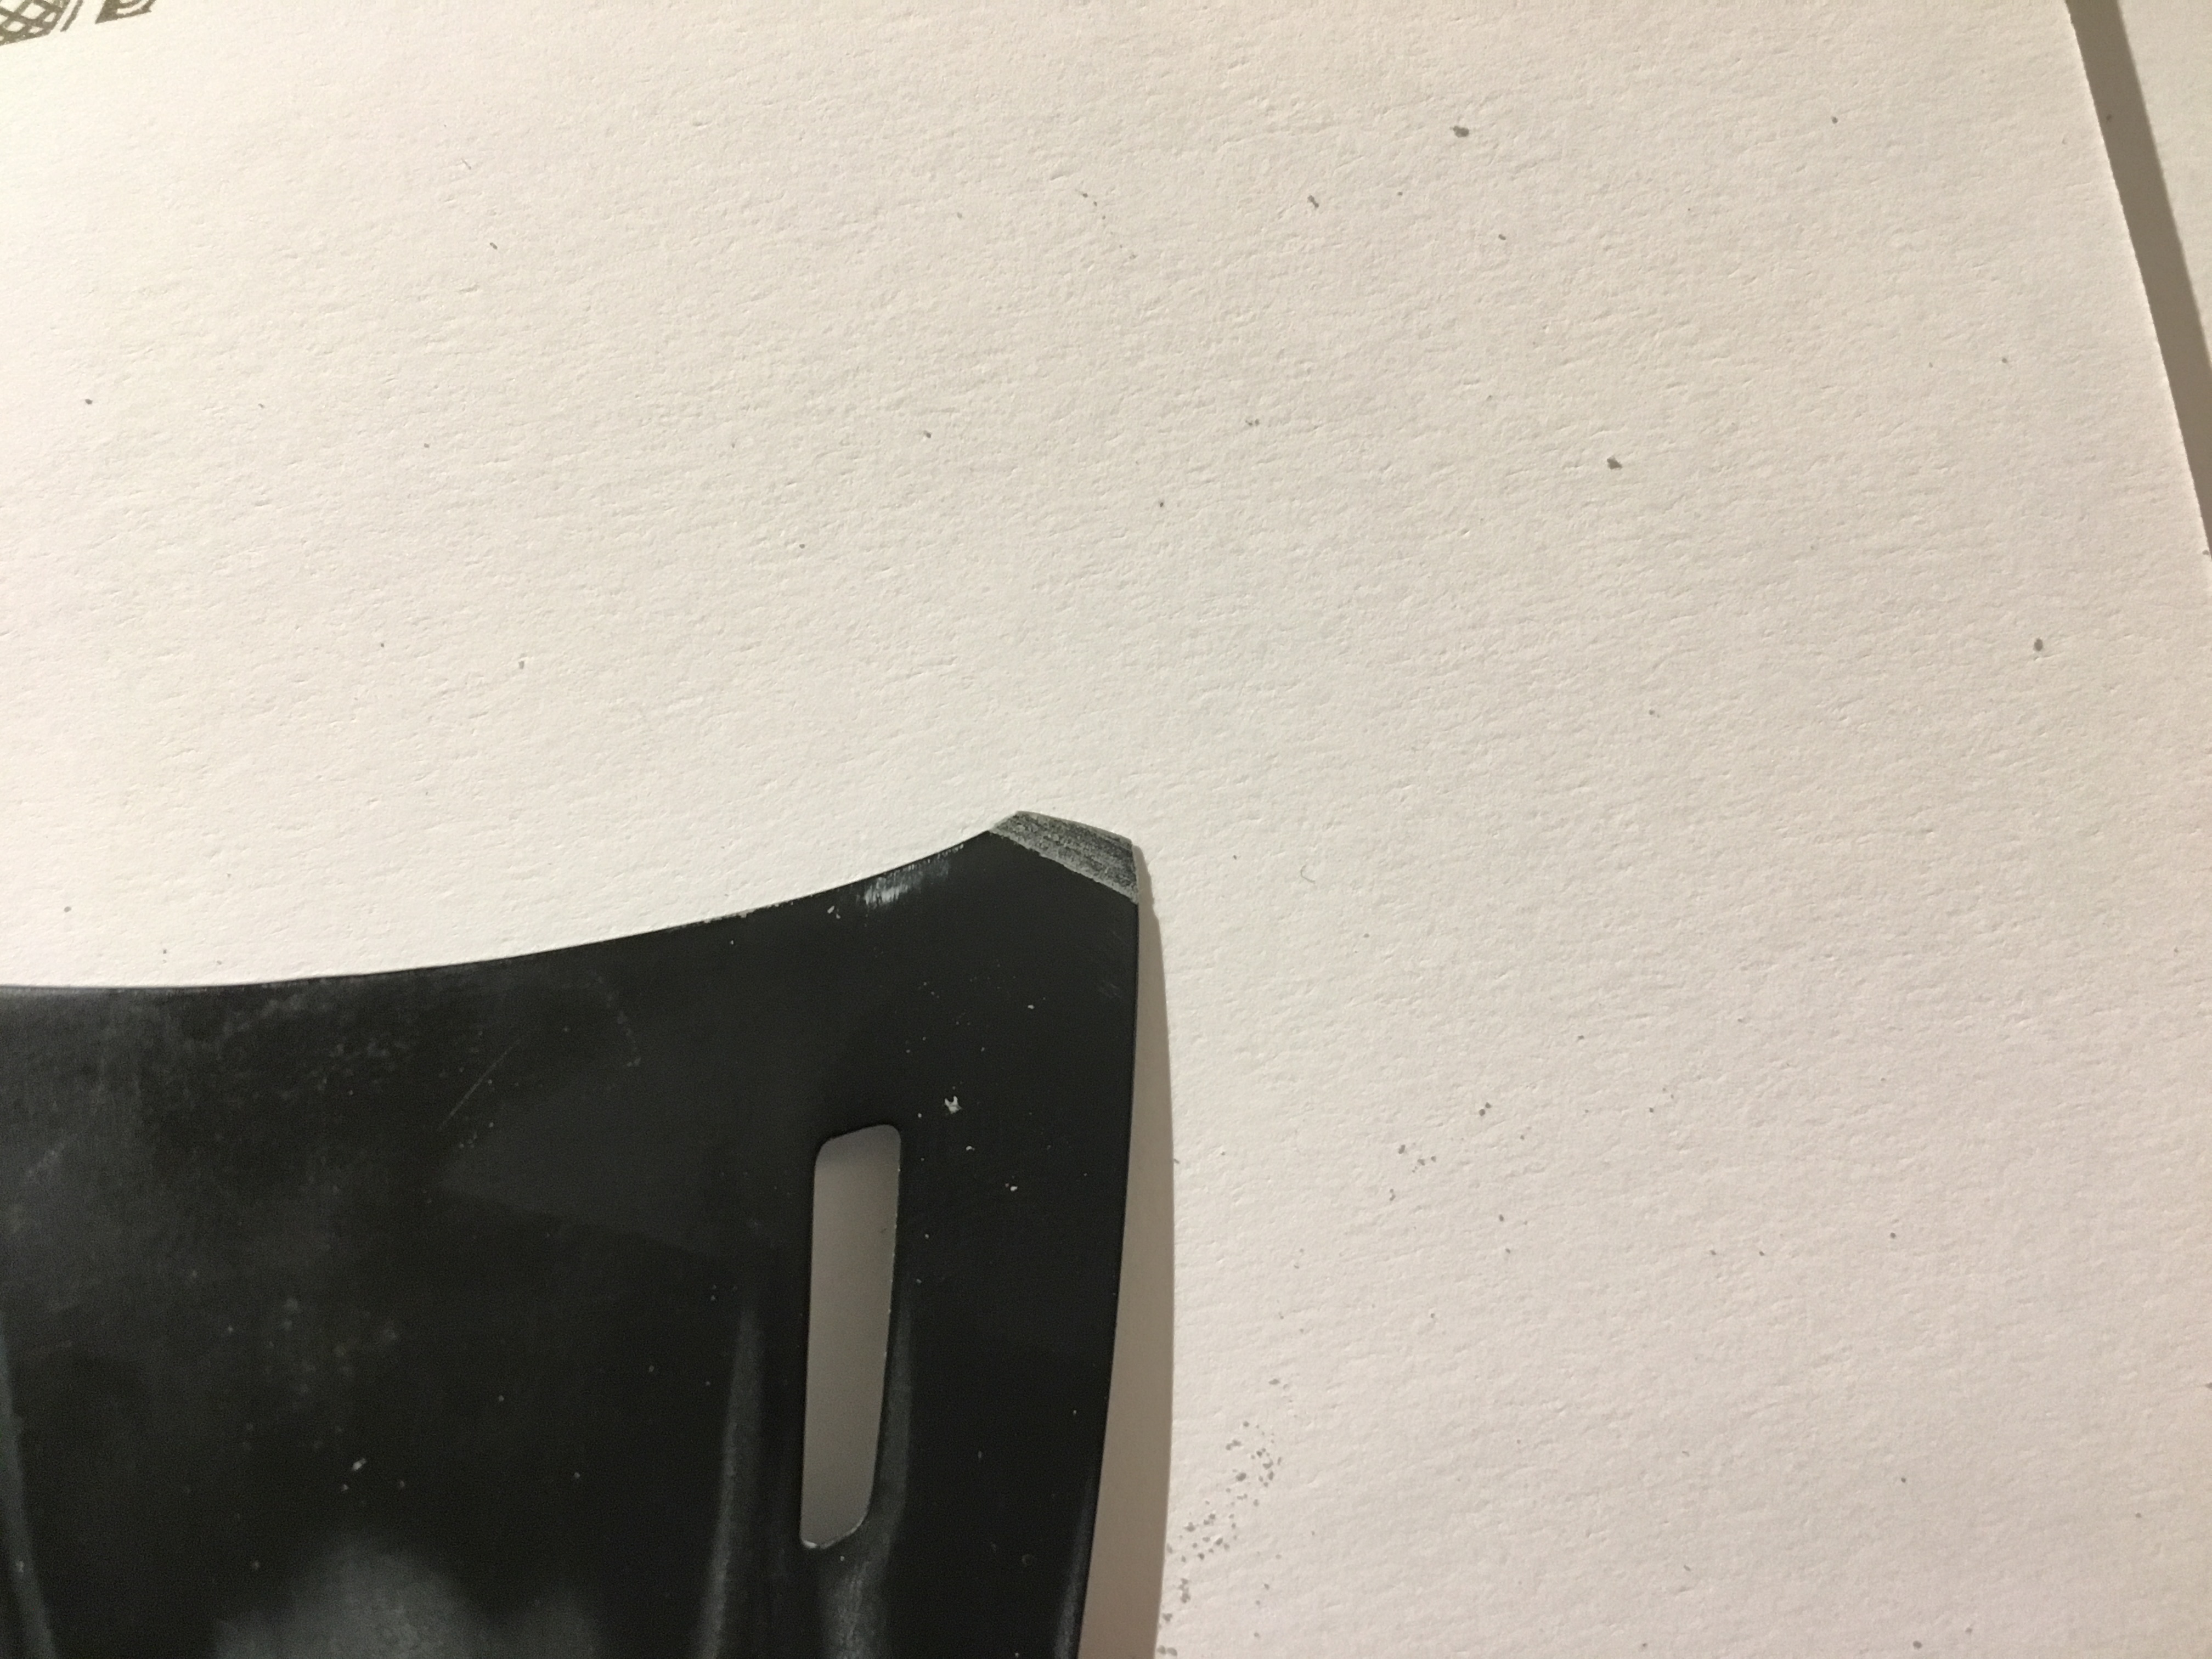
Alright, so with the boosted confidence I got, I went ahead and started the repair. I was surprised at how strong the repair was, once the cement dried, I ended up sandwiching 3 layers of scrap styrene together in order to get the thickness I needed to shape it properly, it's not perfect, I over-worked the outside edge a bit, but I think it will do. I may fine tune the edge a bit more, and maybe add the hinge, but I'll probably skip the hinge build up, it won't be noticeable when the hood is closed, and when it's open there are struts to hold the hood open, I'm just not sure it's worth the trouble. Anyway, here are some progress pictures.
-
The good thing is that the kit includes 2 struts to prop the hood open, so the "hinge" isn't super important, but it may help keep the hood straight when propped open. I'm far more concerned with being able to fabricate the corner piece of the hood than the hinge/support. I plan to use some of the advice given here to reshape the hood, after the body work I'll know how delicate it is and whether or not scratch building a new hinge makes any sense. Thanks again for everyone's input!
-
Thanks, Snake, that's certainly an option, I could replicate hood insulation with that. The only concern is that the hood won't lay flush with the extra material underneath. It's something to consider though.
-
Thanks, for the input everyone. It sounds like you are confident that a properly done repair should hold up against the shaping and sanding. I'm not sure I'll be able to pull off a half lap joint, like Tom posted, since the hood is fairly thin at the corner, but at a minimum I will be able to regularize the break (as Ace mentioned) and add a bevel. If anyone else has any suggestions, I'd appreciate all of the input that I can get. It's possible that I can get a replacement from Tamiya, but I might as well try to fix it before resorting to that.
-
I've picked up an old project that I abandoned for a while, Tamiya's Aston Martin DBS. I set it aside because of some paint issues, and some damage to the hood. The corner of the hood broke off, with the hinge, and must have been eaten by the carpet goblins. I posted a "wanted" ad on this site knowing that it was a long shot and nothing has turned up, so I'm going to attempt to repair it, but how? I don't think I can use putty, it won't stay stuck, and would snap right off. I may or may not rebuild the hinge, I think I'll have better luck just trying to rebuild the corner without the hinge. If I cut the damage cleanly off, and add a bevel to add more surface area, do you think I can cement some sheet styrene? Will it hold strongly enough to withstand the sanding and shaping that will be needed to smooth it out afterwards? This is an expensive model, and I'm super happy with the interior that I built, and the chassis is coming along nicely. I don't want to scrap it over something silly, but for the cost of the model, and hours invested so far, I really want the body to be as perfect as possible. If anyone has any suggestions, I'm all ears! Thanks.
-
Harder & Steenbeck Infinity CR Plus
gijoe replied to aurfalien's topic in Model Building Questions and Answers
This in one of my airbrushes, they are excellent, you won't regret it. -
Thanks for the welcome, everyone! Dave, as long as Tamiya has the cars that you want to build, I think you'll be impressed with the kits. Tamiya kits are much better than most of the other guys.
-
Hello, my name is Joe, I'm in my early 30's and have been building since I was a kid, off and on of course. I'm looking forward to learning from you and sharing with you. I build almost exclusively Tamiya sports cars.