

Tommy124
-
Posts
1,614 -
Joined
-
Last visited
Content Type
Profiles
Forums
Events
Gallery
Posts posted by Tommy124
-
-
On 10.11.2018 at 10:50 PM, Ich_Will said:
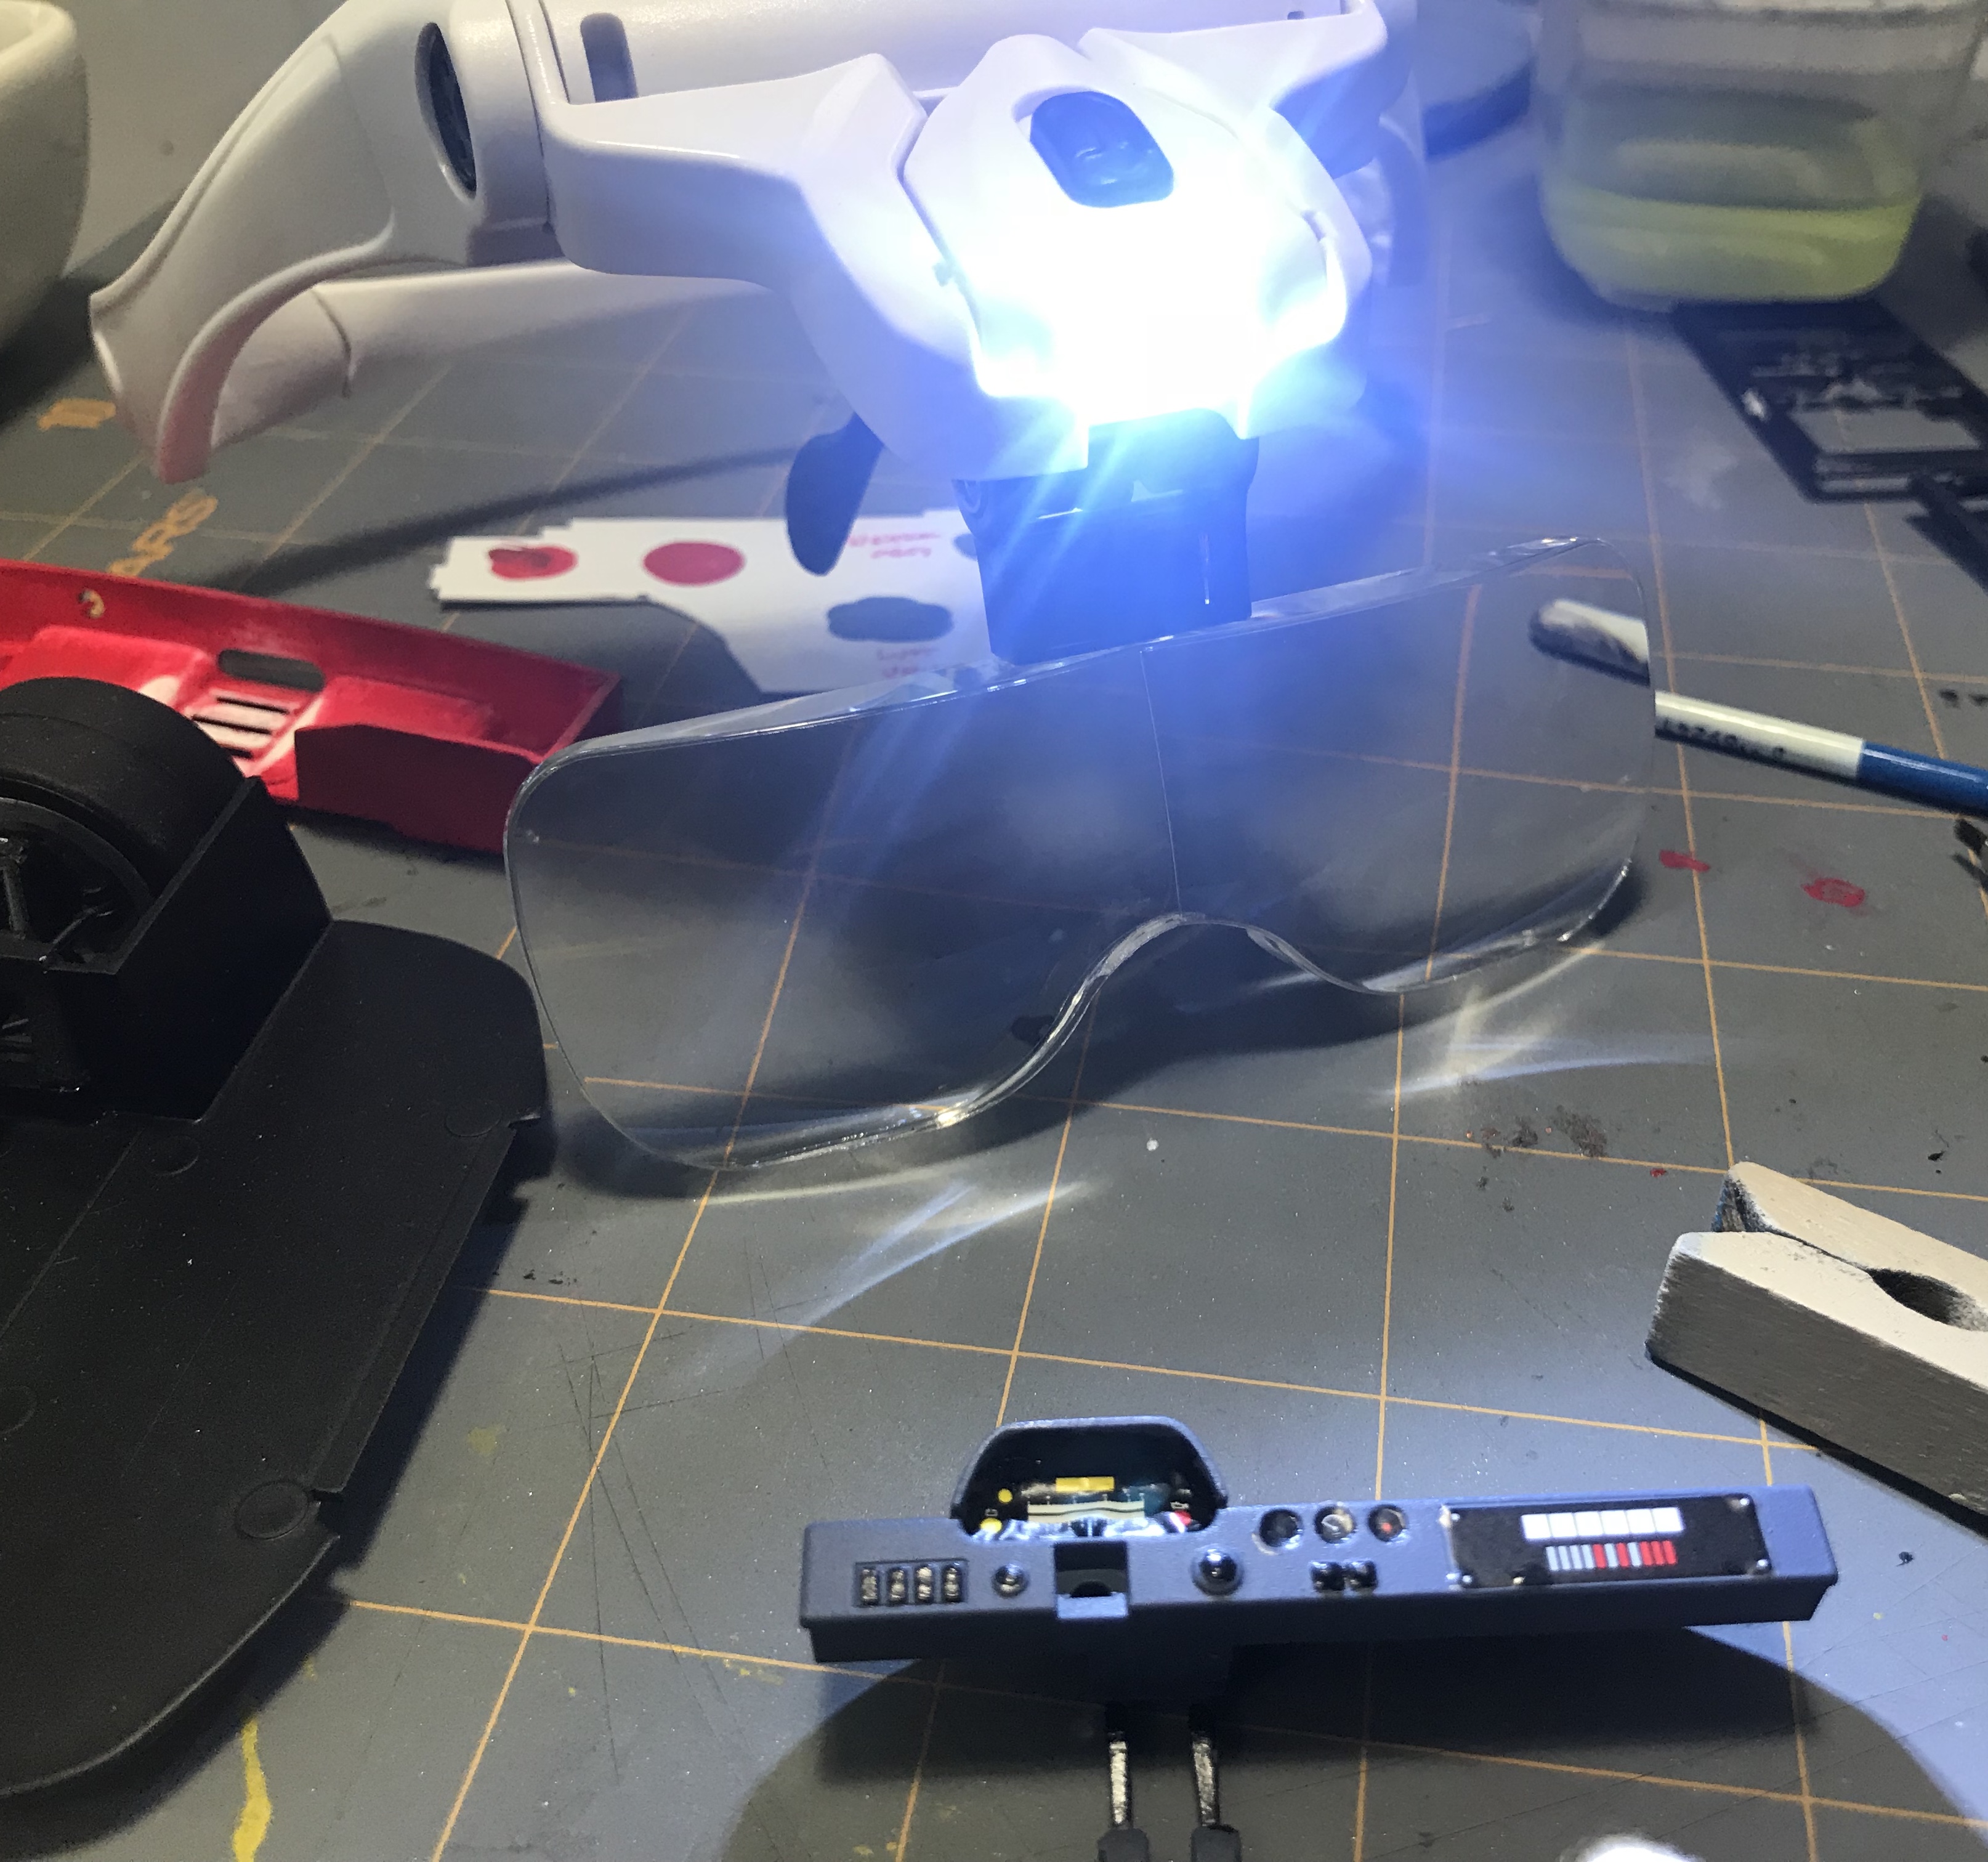
The dash was too light for my taste so I reshot it with a darker grey. I also opted to add the passenger seat (not shown in the assembly instructions). I had one day where all I did was go backwards. I had to repaint the passenger door 3 times. Lol. Oh well. I also picked up a cheap headlamp/magnifying lense. It’s already helped me get a better dashboard on this car.

Hi Will, your progress is looking fine!
I just saw you are using the same headlamp that I ordered yesterday... 18 EUR on Amazon... I have another one but the headband is kind of annoying and it's either too tight or too loose. Plus I'm sweating buckets beneath that plastic headband. Hopefully this new one will work better for me, as it has sort of a fixing to the nose, I understand?
Did you already glue in the clear parts before painting the window seals black??
-
8 hours ago, Italianhorses said:
Moldings and window frames painted black.
Clean masking, clean paint job. The contrast looks good.
-
On 10.11.2018 at 1:39 PM, Dann Tier said:
then painted them by brush with Tamiya's Chrome Silver.
On 10.11.2018 at 1:39 PM, Dann Tier said:brush-painted them with XF-84
Brush painting all the way... Do we need to be worried??
-
Quite a bunch! I love those late 60's and early 70's Mustangs the most.
Like this one: https://www.classicdriver.com/en/article/cars/ford-mustang-mach-1-bonds-favourite-pony
-
22 hours ago, Italianhorses said:
I never really had any success polishing metallics straight without clear though - I always end up with some spots that are different in color. So clearcoat is a must for these IMO. Plus, when you airbrush these, they come out rather flat.
Okay... Clear can't be wrong either way. Just had the impression that there is some nice sheen on the green already. But you have a point about polishing metallics, probably easy to get spots of uneven color effect.
-
18 hours ago, Twokidsnosleep said:
Interior is strikingly gorgeous....looking forward to her all buttoned up!!
Fully agree! I love that terracotta-style leather color and it makes a gorgeous contrast with the body color. I will definitely try something in that style on one of my next interiors myself.
-
I got 3 built kits some days ago. They will need some re-working...
Revell BMW M3 (E36 model)
Italeri Ferrari 288 GTO
Airfix/Heller/Matchbox Maserati Bora
The Maserati is missing it's tyres and some other parts that should be replaceble, one way or the other.
The M3 is in pretty good shape.
Too bad I never liked the Dakargelb (BWM yellow) color. So it will be stripped of it's paint and get a nicer color.
Not sure yet about the interior, it could use some re-working too, but then again it's not too bad. And BMW interiors from that era really did not look any better...
The GTO is some sort of a funny car, look at this:
Front bumper fixed upside down, never seen that before...
-
Nice result! Goes to show that the basic kit and body shape is really not bad...
-
Looks great in green!
If my guess is right and you used Tamiya TS color, you might skip the clear coat and just get a good, natural-looking 70's shine by polishing. The way I did on the Fairlady back then...
-
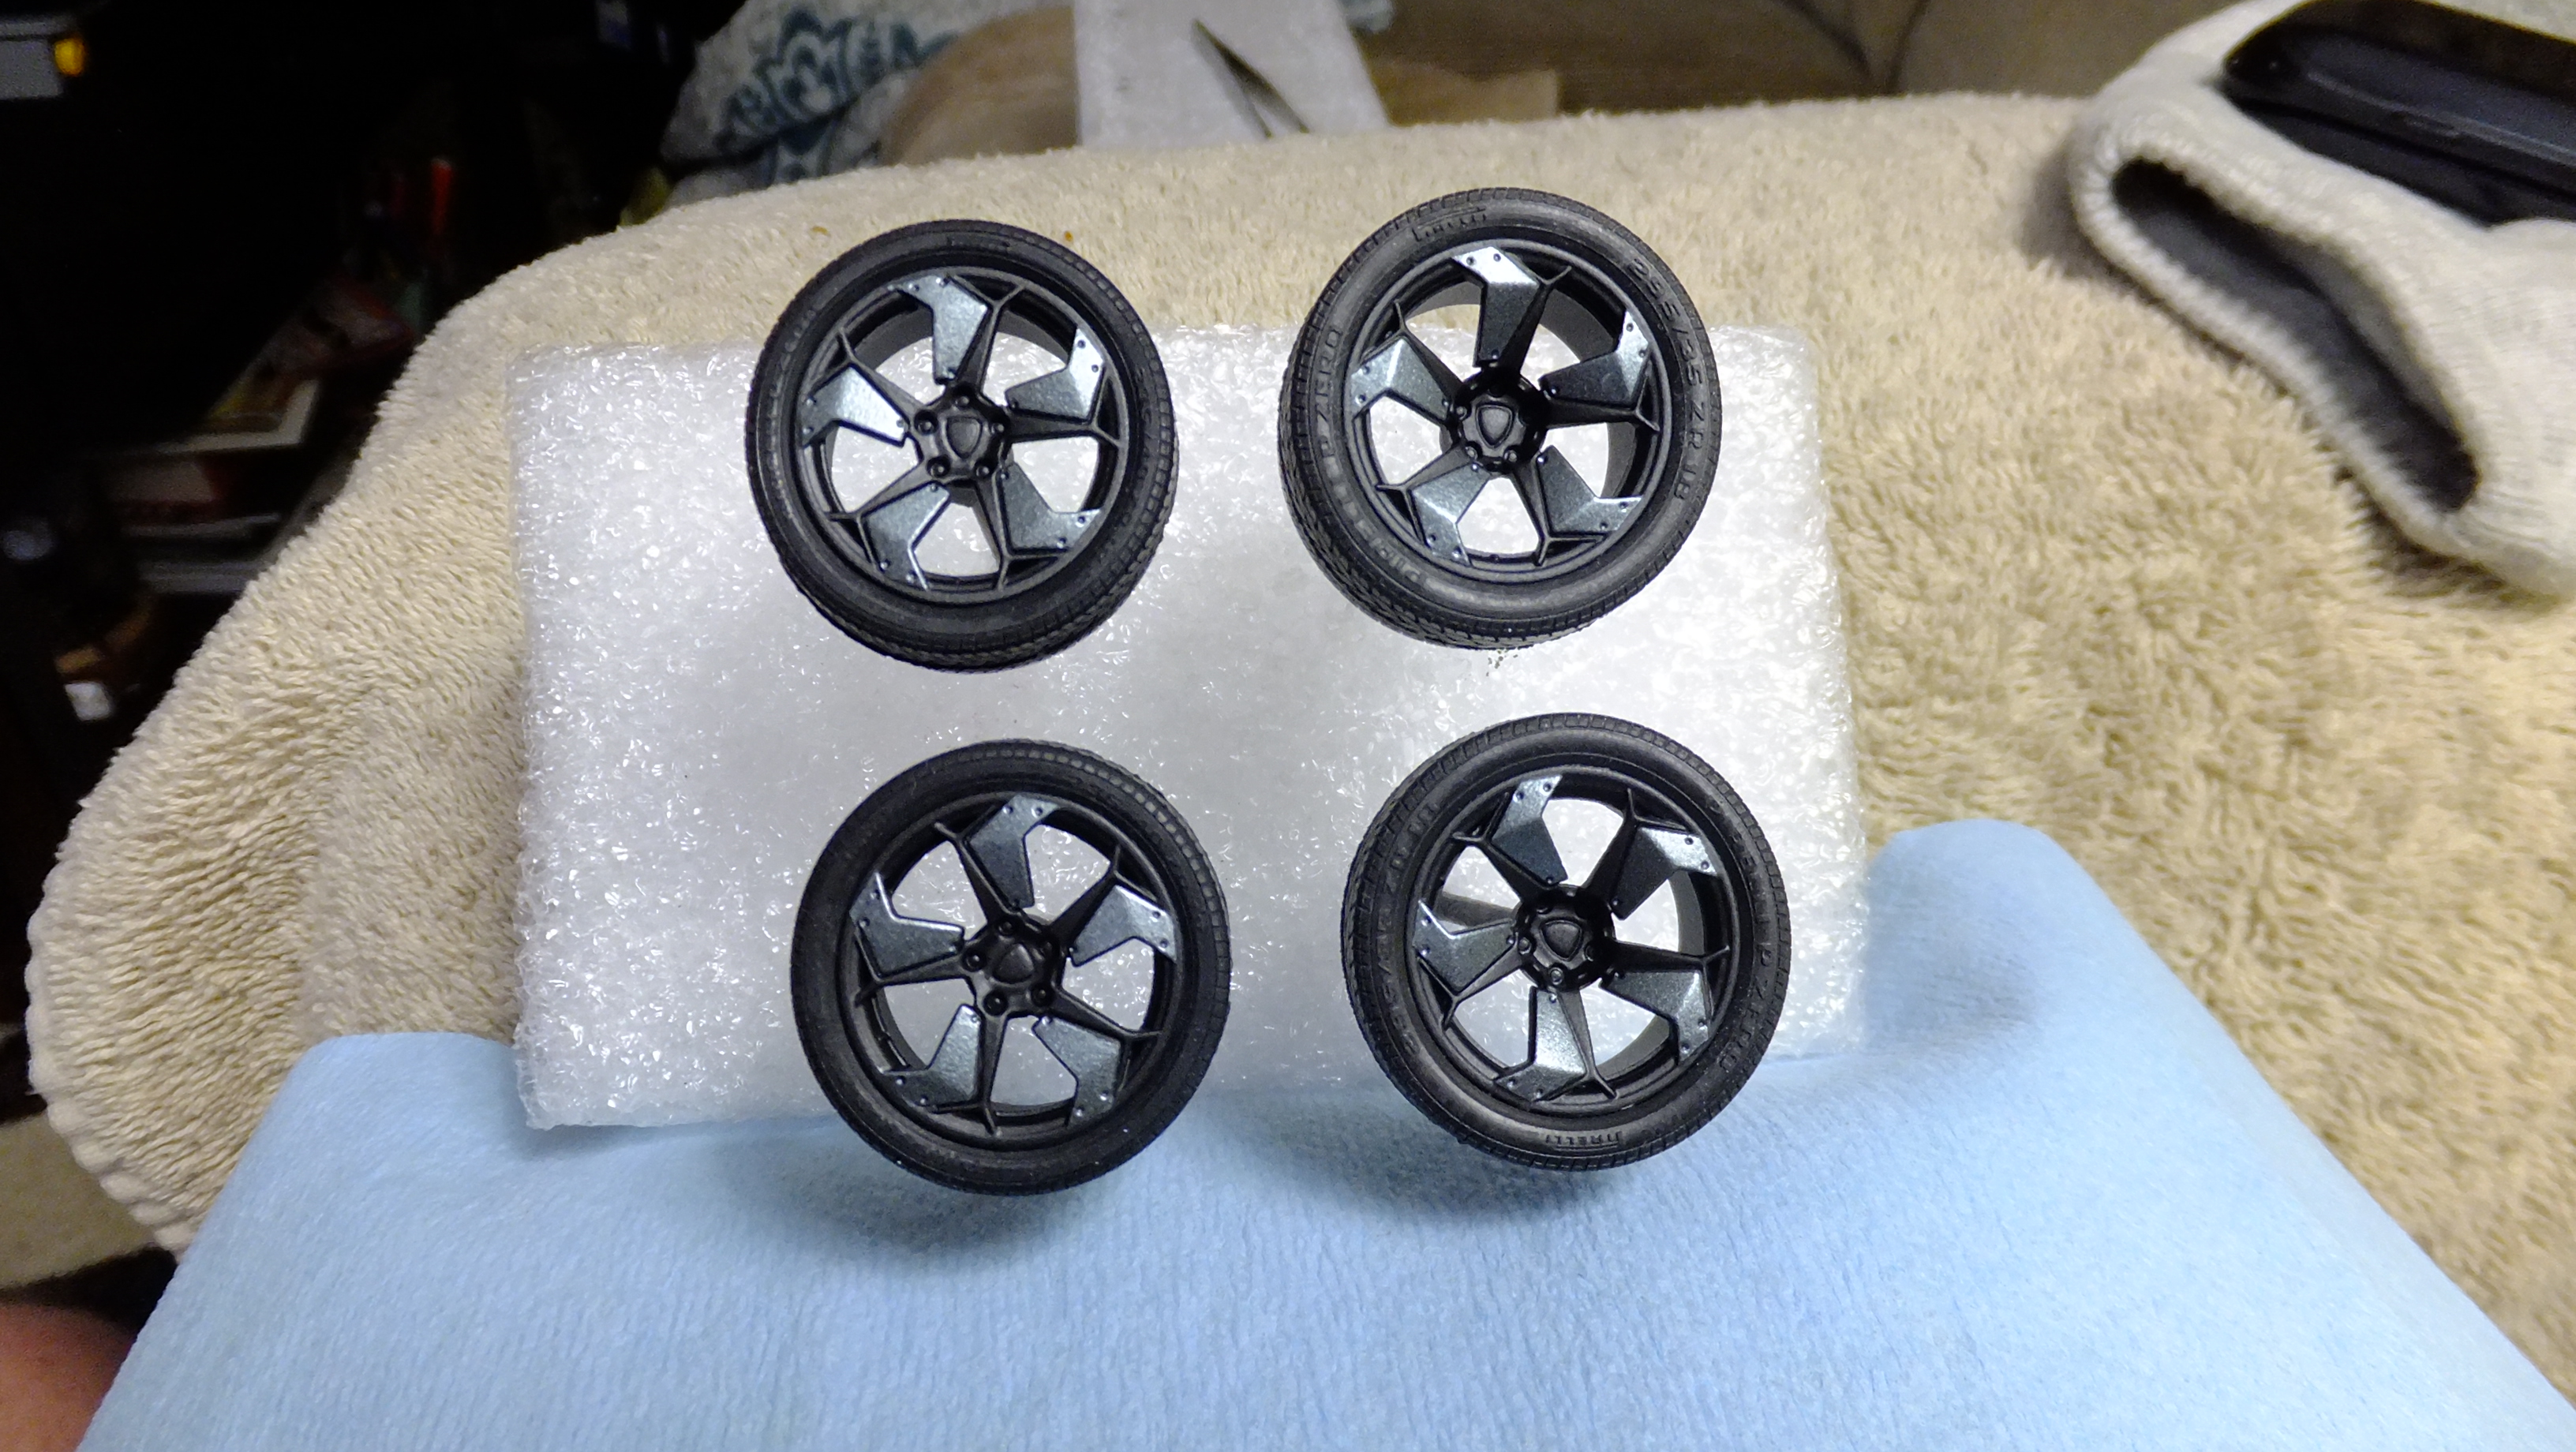
On 6.11.2018 at 2:38 AM, Dann Tier said:
Wheels look great!
-
Great work so far, and yes, I love the color too!
-
@Nathan: this is coming along nicely. I guess the HD PE set will really add some useful details to the kit. As regards the decals, I trust that you will be able to use them and they'll look fine in combination with the body's silver color.
@Kurt: I don't quite get it why you'll need the C9 kit for building the C111...?
-
This is one awesome project and you're showing great skills in it!
-
On 5.11.2018 at 8:19 PM, Italianhorses said:
Plus, you can't be serious thinking I'll stick to kit assembling, rather than kit building, right?
THAT'S the spirit...
-
Lovely result, Will. Great combo of colors!
On 2.11.2018 at 6:49 PM, Ich_Will said:Now that I know the kit better I can do some add-one next time (like opening the rear grille ala @Dann Tier)
If I may, I'd like to share the good news here aswell:
On 2.11.2018 at 10:33 PM, Dann Tier said:On 2.11.2018 at 2:37 PM, Tommy124 said:I'd like to come back on this honeycomb grille issue if you don't mind, Dann. I contacted a small German specialist for PE aftermarket parts regarding this. He's doing quite a lot of parts for American car kits actually. I asked him if he was interested in making these PE parts that are so dearly missed on the market - and he agreed to do it!
At this stage he is creating the design that will become the master for the PE parts. There will be a bigger and a smaller version. See the images:
BIG:
SMALL:
The bigger one will have honeycombs in size 4.3mm x 1.5 mm each - perfect size for the Miura! The smaller one will have honeycombs in size 2.8 mm x 0.80 mm each, designed for smaller grilles in modern cars like the Ford GT 2016. Both products will come in size 88 x 44 mm net, 92 x 54 mm with the frame. The products will be available for purchase in around 4 weeks time.
Again, I hope you don't mind me showing this here, Dann, but I find this to be good news to all modelers who don't have skills (and nerves) good enough to drill the grilles open...
Just to point out that I don't have any commercial ties to this, but if someone should be interested in this, I'll gladly help. Shipping to the US won't be an issue...
That's GREAT news!!!, I will definitely be interested!!
-
Looks lovely already, looking forward to the final result!
-
Dann, a job well done on the mesh. Fingers crossed that eventually fixing them will work as well as the test-fixing!
On 3.11.2018 at 5:12 PM, Dann Tier said:I hope that this thread, and my videos helps more people to start building them!
Well brother... not a chance I will build this. I have the kit, yes, but I was never that convinced of the (orginial) Huayra, I just thought it might be a nice kit. It is, or let's say it is what you made of it. But I hoped that it would be more of a relief for the sad fact that there isn't any kit of the Zonda available (how is that even possible?). Because I really love THAT Pagani. The way I feel, just like a McLaren P1 could not fill the emotional gap of an F1, this won't work for me with the Huayra and the Zonda. Fortunately, there are at least a lot of McLaren F1 kits around and I will rather do several of them than one Huayra. But that's my personal preference, I really admire your work on this one and it's about to become a great-looking model!
-
Alex, great idea to pick up on those kits again... Finishing them in stype will become quite the opposite of "will only build some Tamiya kits box-stock"... Wasn't that what you said a few days ago?
Take your time on these and they will become great results!
-
On 31.10.2018 at 11:17 PM, Matt Bacon said:
So if you're planning to use aftermarket wheels anyway, then save yourself some grief and buy the yellow plastic version, which should be (at least a bit) less of a pain to cover with another colour! They seem to be under $30 including shipping from Japan on eBay at the moment. The S seems harder to find.
I'd recommend to go for the Cayman S kit that is including window frame masking seals, as this is containing an alternative set of wheels aswell: https://www.1999.co.jp/eng/image/10330151
-
Lovely result!
-
Looking good, Dann! The bottom is looking very clean. I guess you will add some washing to that?
-
The master of masking strikes again - great result!
-
On 7.9.2018 at 6:04 PM, Dann Tier said:On 7.9.2018 at 10:44 AM, Tommy124 said:
Hi Dann,
I've seen this kit being done for so many times now and yet I'm sure you will add a new level of quality to it...
Very anxious to see your further process, especially the "honeycomb grille trick"...
Btw, isn't it strange that this type of grille is not available as separate aftermarket material in our beloved modelling scale? At least I have not found anything to this day. One could use this on several models besides the Miura, Ford GT 2016, for instance...
Thanks, Thomas!, It wont be long before I get to that Honeycomb grille, and yes, I think its Very odd/stupid that there isn't a PE part for that grill. The best PE set that I've seen...and have, is from Studio 27, but they not only lack that part, but they only give you ONE "Eye lash" headlamp base...….but you get the "lashes" for both!!?????....who does that???? I thought that maybe it was just loose in the package, or they forgot to put the other one in, but when I ordered my second set...…..it wasn't there either!!!! I still love their PE set though.....heres what it looks like.....
I'd like to come back on this honeycomb grille issue if you don't mind, Dann. I contacted a small German specialist for PE aftermarket parts regarding this. He's doing quite a lot of parts for American car kits actually. I asked him if he was interested in making these PE parts that are so dearly missed on the market - and he agreed to do it!
At this stage he is creating the design that will become the master for the PE parts. There will be a bigger and a smaller version. See the images:
BIG:
SMALL:
The bigger one will have honeycombs in size 4.3mm x 1.5 mm each - perfect size for the Miura! The smaller one will have honeycombs in size 2.8 mm x 0.80 mm each, designed for smaller grilles in modern cars like the Ford GT 2016. Both products will come in size 88 x 44 mm net, 92 x 54 mm with the frame. The products will be available for purchase in around 4 weeks time.
Again, I hope you don't mind me showing this here, Dann, but I find this to be good news to all modelers who don't have skills (and nerves) good enough to drill the grilles open...
Just to point out that I don't have any commercial ties to this, but if someone should be interested in this, I'll gladly help. Shipping to the US won't be an issue...
-
Keeps looking great, Dann! And I just love that color you used for the interior leather. I remember it was call a red primer or something? It's not mentioned on your list, BTW!


SEMA Corvette Z06 - Foose + Trufiber
in WIP: Model Cars
Posted
Looks nice... Are you going to drill the front grille open...?