
Ermiloff
-
Posts
28 -
Joined
-
Last visited
Recent Profile Visitors
1,033 profile views


.thumb.png.e64ca4fead948adbdf6a111229b6cf2f.png)


Ermiloff's Achievements
MCM Regular (3/6)
-
People appreciate only what they are interested in and see only what they want to see. Therefore, they do not see the difference between these. But here's 40-60 hours ... building and sharpening. And everyone passed by this model, but I believe that I have almost completed the main task of modeling - the model is perceived as a real car. But nothing can be done, as they say - "You can't be cute by force." I hope it’s clear, because I don’t speak English.
-
Thanks guys! I tried, but it does not look realistic, rather like ... a piece of soap ... but this is the second and last model without finalizing the joints of the panels (as on EVO 6)?.
-
Hello and glad you liked it. The main value is a huge 40-50 hour work on finalizing the panel joints (build-up of body panels with the features of painting and sanding varnish with polishing), only thanks to them the model looks ... realistic (the experiment turned out to be successful), the rest of the improvements are insignificant.?
-
 Ermiloff changed their profile photo
 -
An experiment to give a realistic look to an old unpretentious collection model by modifying and fitting joints of body panels. Removed sunroof Bumper mesh added Headlights modified, turn signal reflectors made, lamps added Replaced brake discs, adjusted suspension Repainted wheels and added nipples Made the shape of the tires is close to the shape of real tires New exhaust system Door handles improved, added door locks and windshield washer nozzles Video here. https://www.youtube.com/watch?v=WWYLBg82zkk https://www.youtube.com/watch?v=gL0nLutyKAs&t=2s ...aaand... Before and after, in the last photo the usual version of the EVO 6, the other front bumper and wheels, the rest of the model is the same.
-
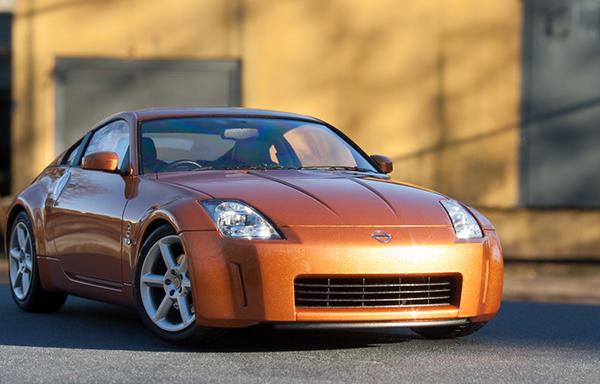
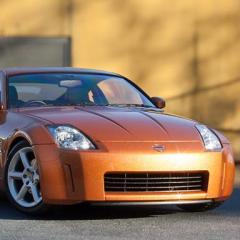
Light modification and a little tuning. Wheels replaced and tires modified New brake system (calipers, discs) Suspension changed (height and reach) New exhaust system Lenses added to headlights Front splitter made New bonnet hinges Color Renault Jaune Sirius The main task was to try a three-stage color.
-
Thanks guys, I tried my best! And I think this is a cool comparison))). Overhauled Mitsubishi Lancer EVO 6 TME (AUTOart 1/18) Before After Before After
-
Subaru Impreza WRX STI (2006) (AUTOart 1/18)
-
Find ten ... or more differences! Overhauled Mitsubishi Lancer EVO 6 TME (AUTOart 1/18)
-
Some old photos
-
Thanks guys! I do what I can for the maximum quality of both the model and the photo. I still have a lot to learn and I will learn and practice!
-
Color Nissan Deep Blue. Repaint. Replaced wheels and brakes. Adjusted suspension, drilled exhaust, fixed some inaccuracies and repainted some details. The emblem was replaced by the whole after the photo))).
-
I'm glad you liked it)) I didn’t plan to show the building, much less I didn’t plan to do anything with this toy except repainting, and then I didn’t particularly photograph 1.1 and 1.2 because I didn’t know if something would turn out or not, just a couple of pictures for myself as a memory. The first two nets were made immediately, the remaining 8 (6 body, 2 bottom) from the painted body. Paint, painting and sanding. After fitting the headlights to a painted body, it turned out that against his background they were pieces of ... plastic, had to be modified. After making the holes, it turned out that, due to the size of the car, these holes are too big and it would be bad without a filling, I had to do it at least as ... filling the voids and covering the RC mechanisms. The photo is bad, but the stock wheels are best seen on it. At first I was afraid to touch them, even in version 1.1, but the car continued to look bad, and I undertook to shred to version 1.2.
-
Glad you liked it. So it is not for nothing that I redid the wheels and... spent several months photographing and preparing photos!)))))))))
-
Hi guys! Thanks for the comments, very nice and a little unexpected and glad that you liked it! Next time I will try to fix on a similar model what I could not on this one, what I wrote in the description and more.)))
-
Experiment with painting something big (after the 24th scale). But just repainting over time has turned ... into something more. As it turned out, even a perfect painting doesn’t matter on a child's toy because of the primitiveness of this toy, we had to gradually fix everything as much as possible, risking to spoil the painted body (especially cutting out holes and thinning the hood and trunk). Unfortunately, further modification of the wheel arches and doors on this model is impossible, since it is painted, and therefore it does not make sense to change the humpback glazing. But still, the experiment in version 1.2 can be considered successful, albeit with a stretch. Version 1.0 Repainted body. Added nets, door locks, seat belts with locks and fasteners in the cabin, modified headlights, their glazing and exhaust nozzles, adjusted suspension. Floor and ceiling covering added, turn signals simulated. Improved interior, added pictures of devices. Version 1.1 Cut out the necessary holes in the body and installed the grid and a new grille. Added radiators and air ducts. Modified aerodynamic elements of the bottom of the body and painted. The glazing is cut and installed flush with the roof. Thinned hood and trunk. Fully replaced wipers. Nipples were added, brakes were altered, discs were varnished. Installed magnets in the door. Version 1.2 Replaced brake discs and rebuilt their mount. Upgraded front suspension for the correct rotation of the wheels and their deviations. Removed internal toy ribs of rims. Replaced all grids with more realistic ones and added missing ones. Added exhaust pipes inside the exhaust nozzles. Removed the latest fasteners from the glazing of the front headlights and added leveling seals glass for flush with the body(Удалены последние элементы крепления с остекления передних фар и добавлены уплотнители выравнивающие стёкла вровень с кузовом.). Added glass in the door and completely replaced the rear side windows, their mounting and ... design. Extra items from the bottom are deleted so that they do not stick out (fixing the bottom and the consequence of the radio control design). Color Aston Martin Emerald Green.