
THORDOOR220
-
Posts
179 -
Joined
-
Last visited
Content Type
Profiles
Forums
Events
Gallery
Posts posted by THORDOOR220
-
-
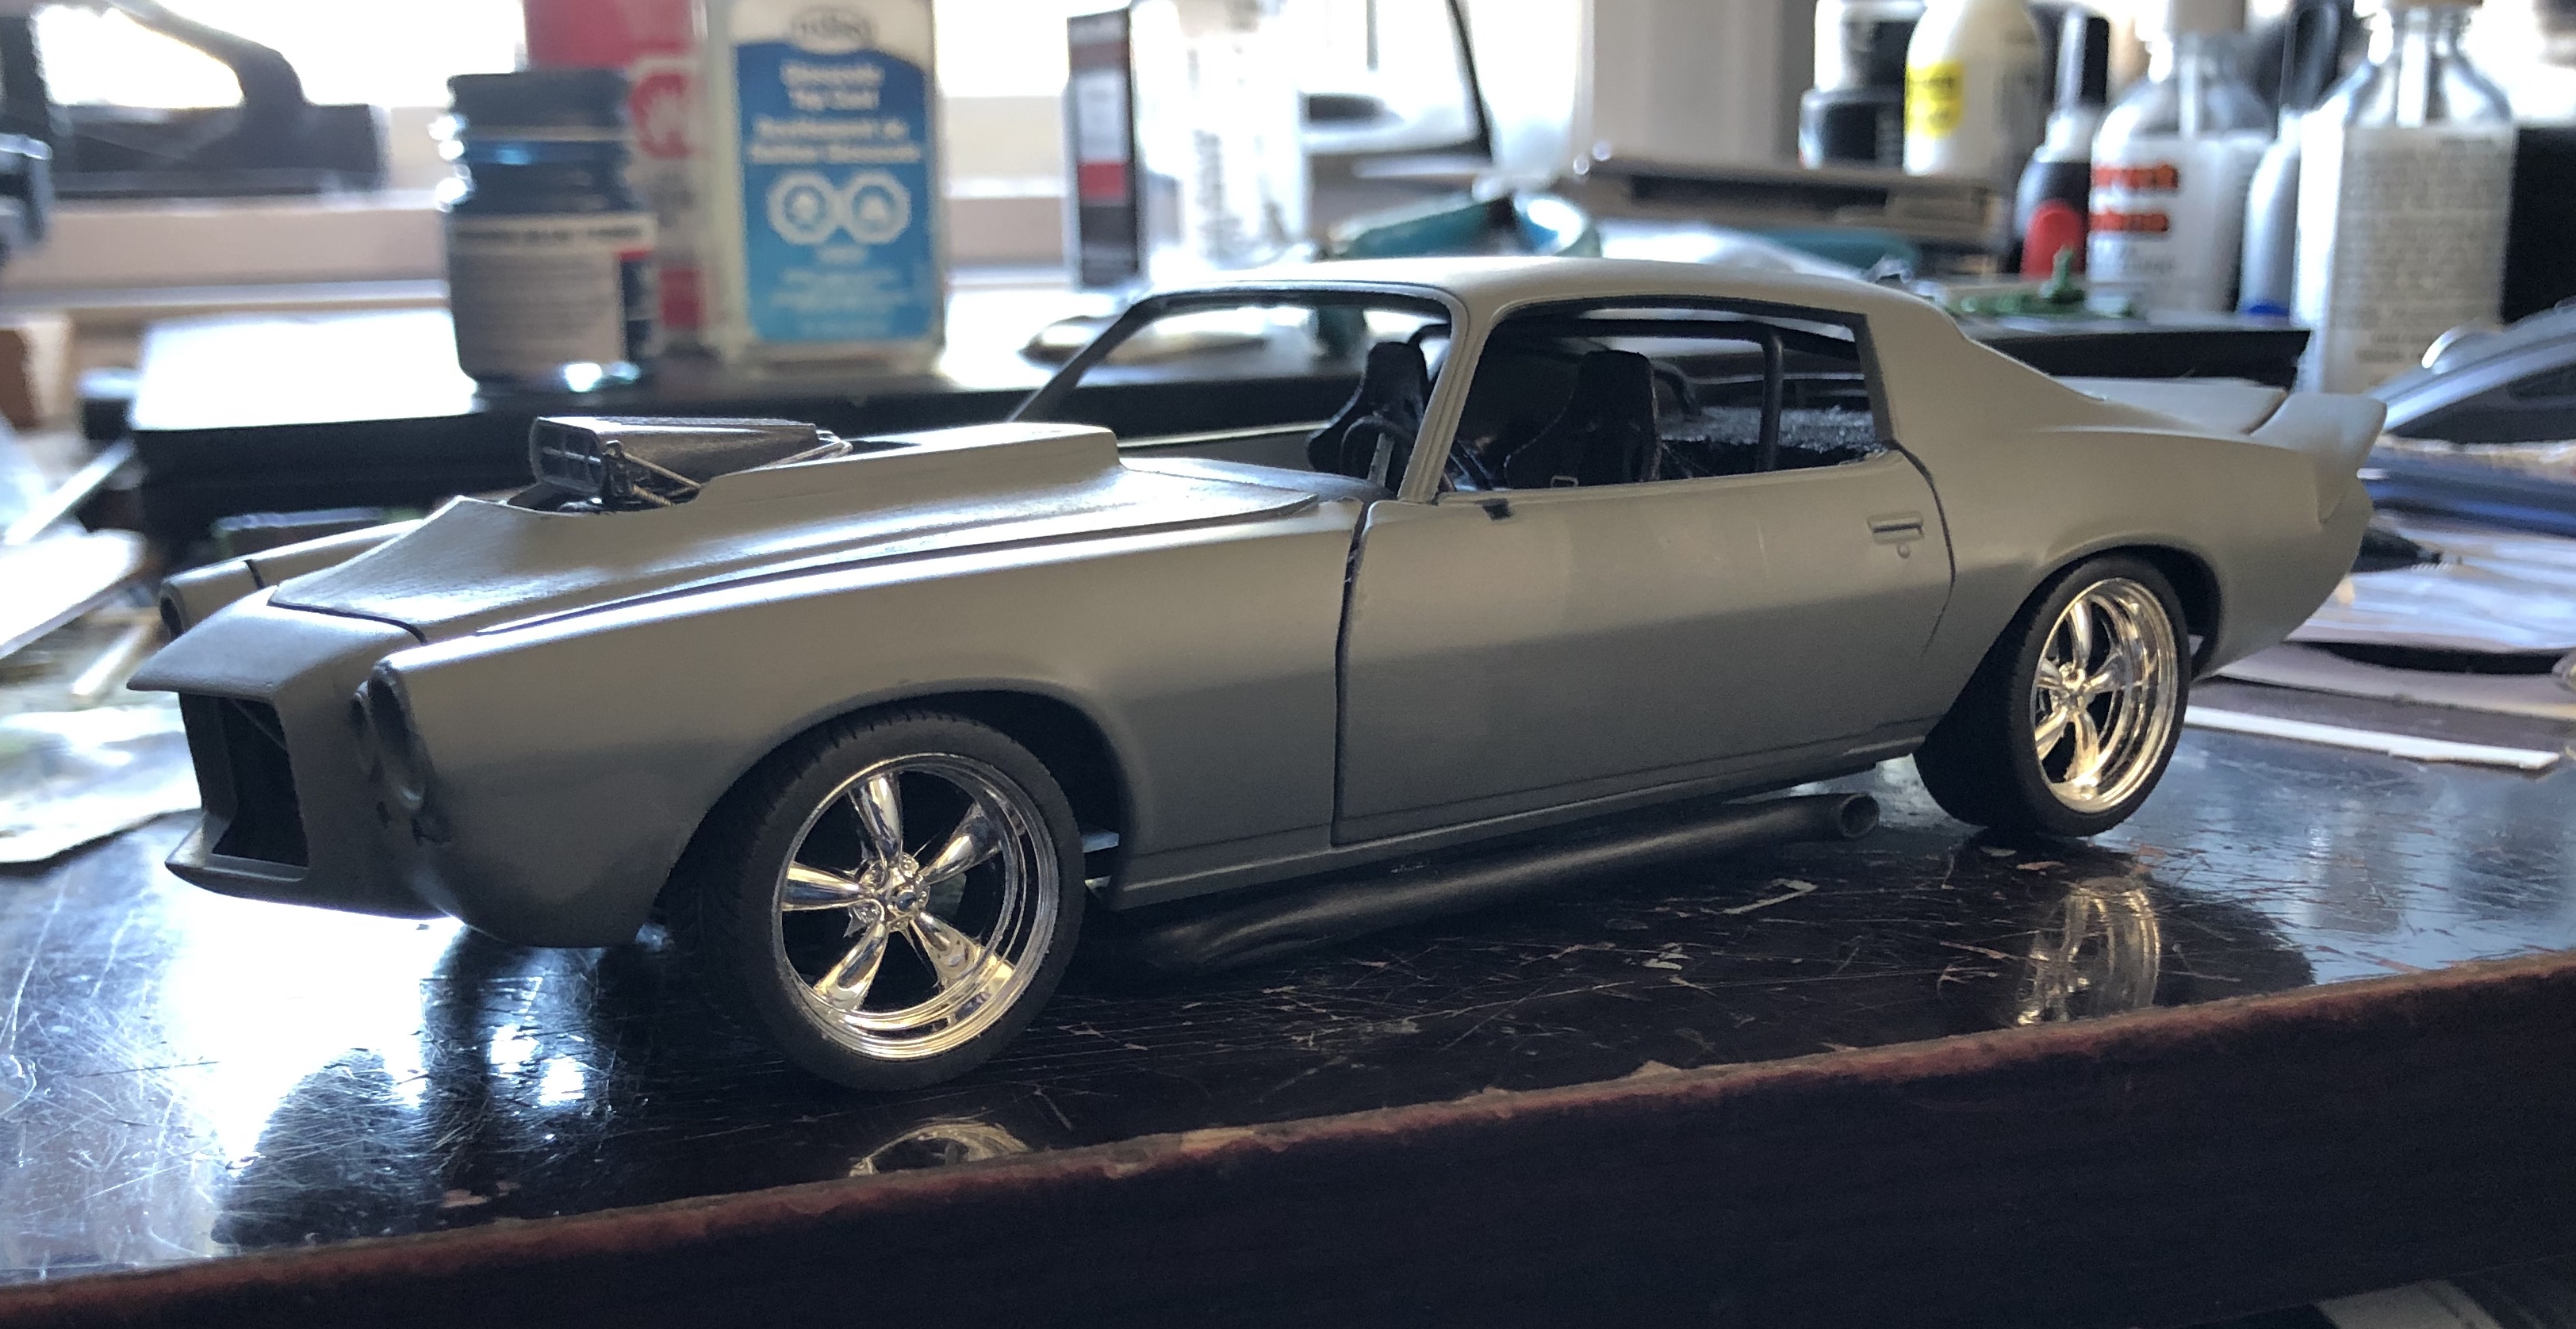
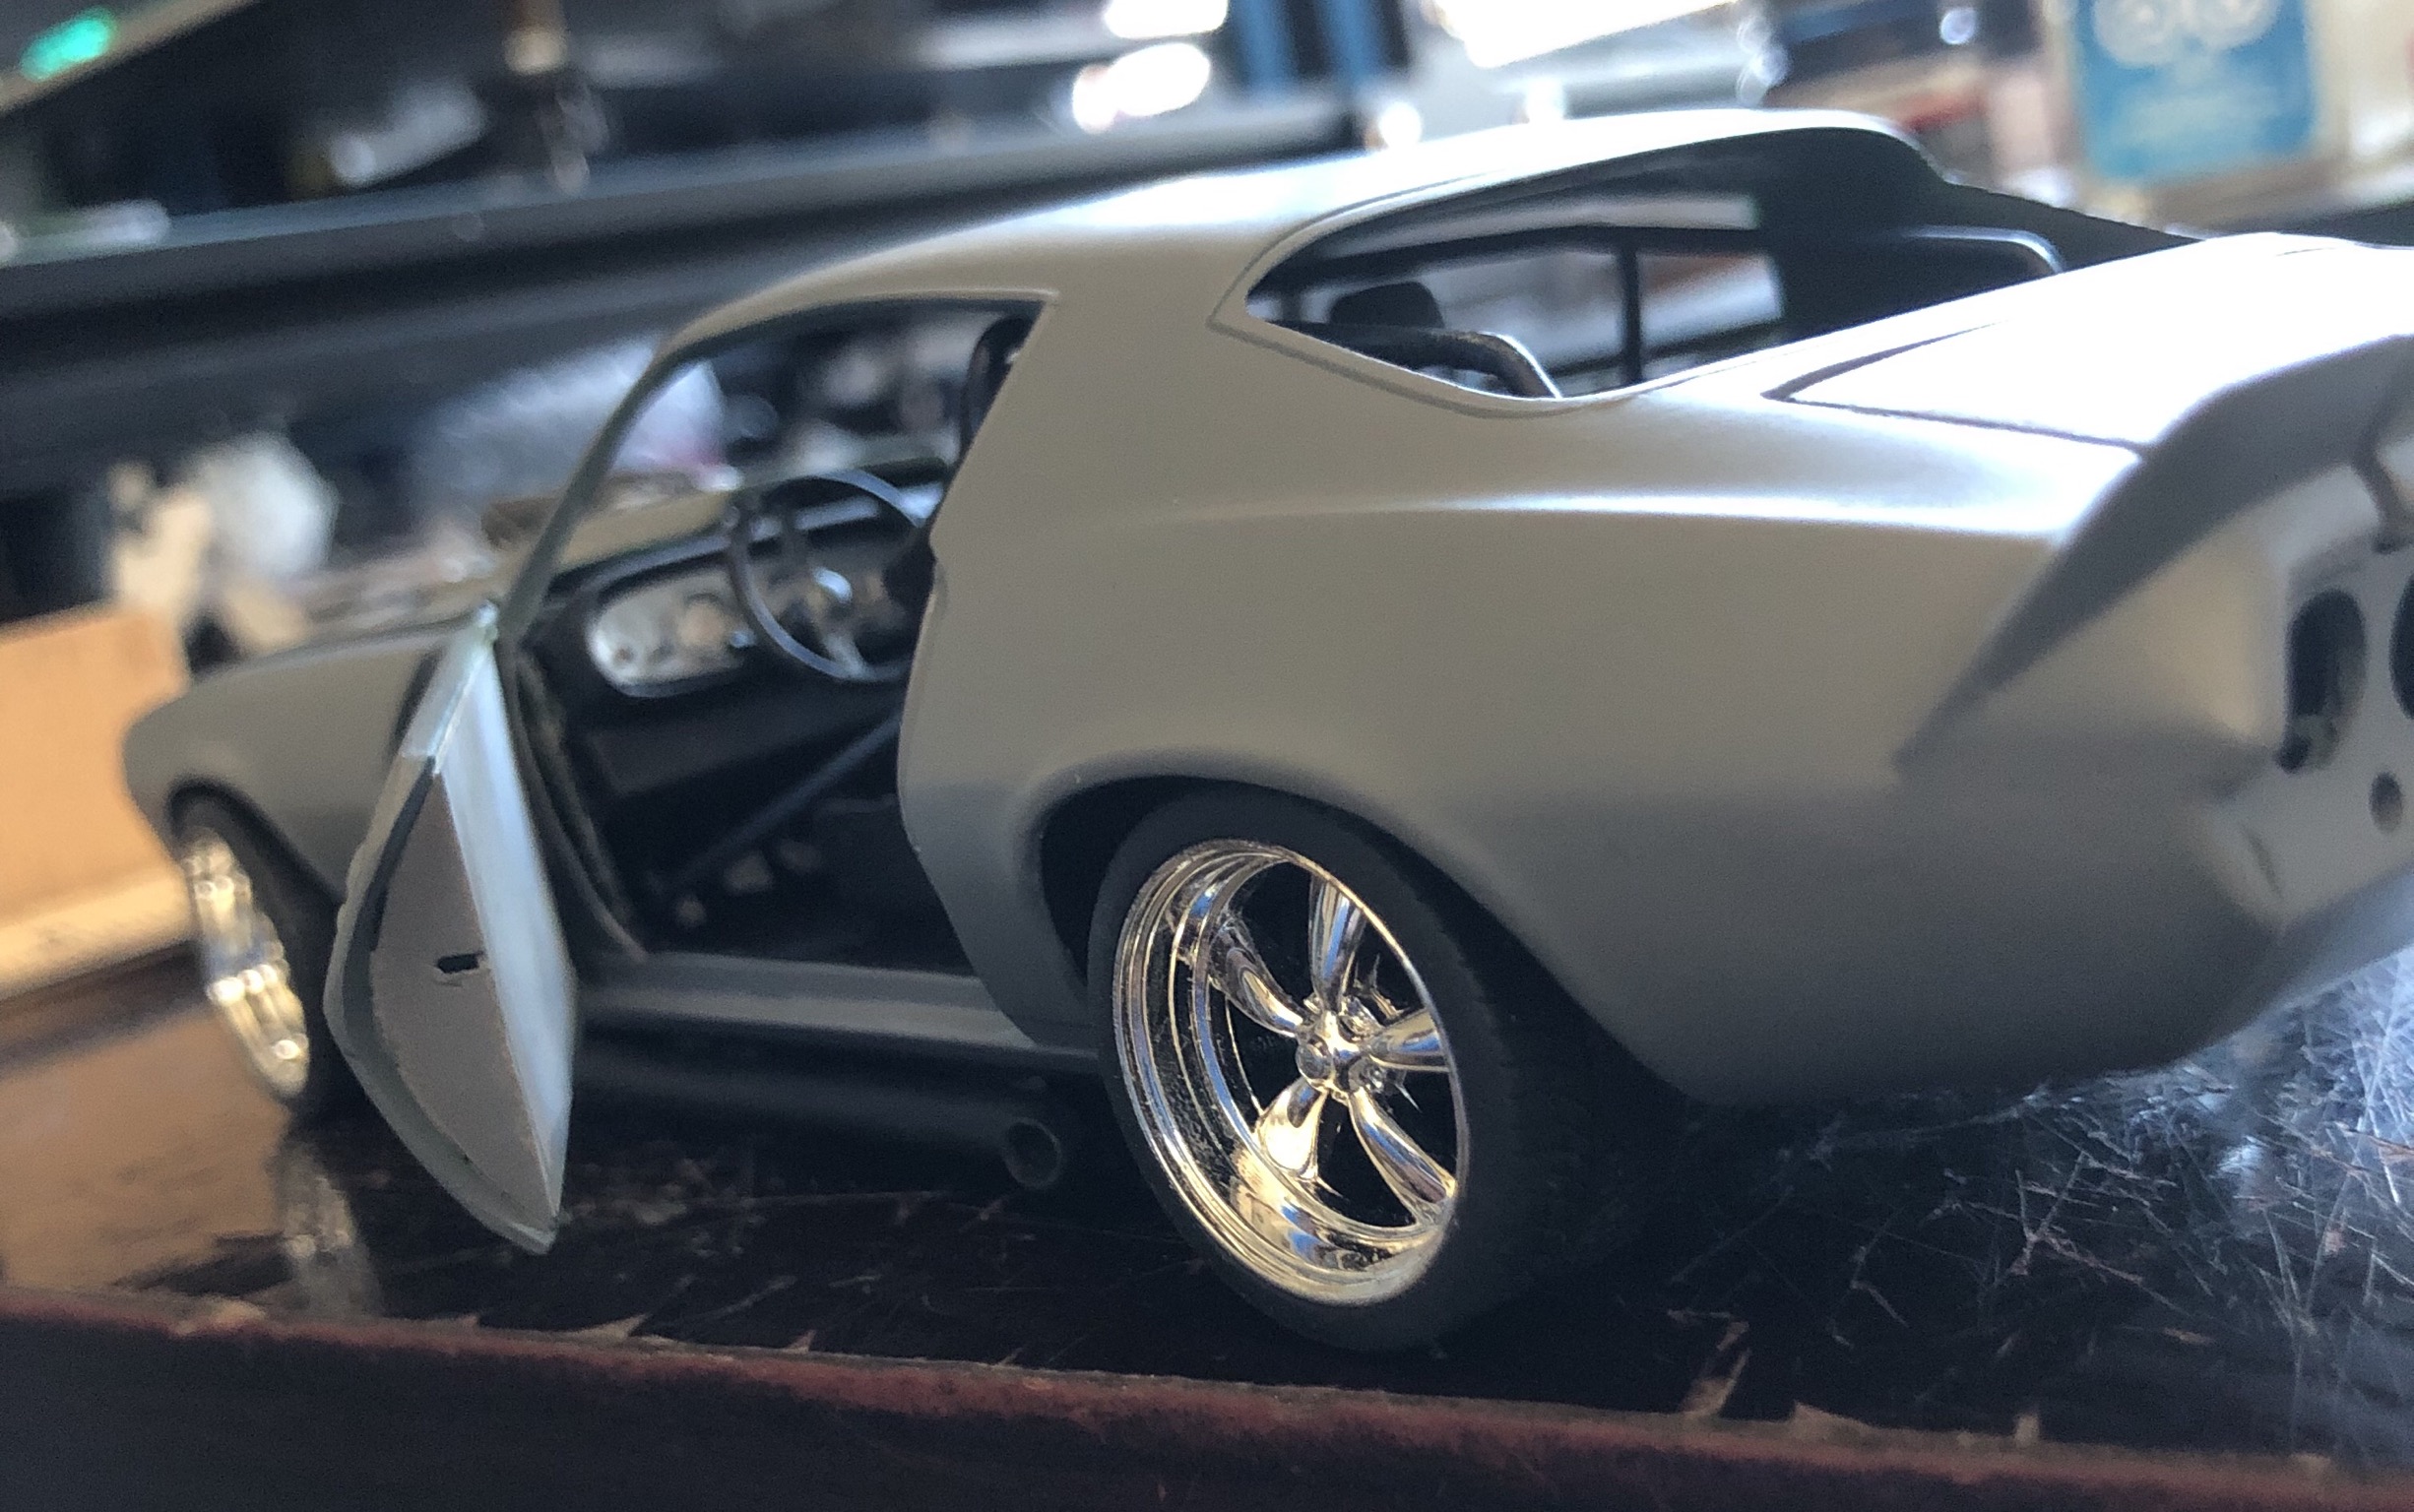
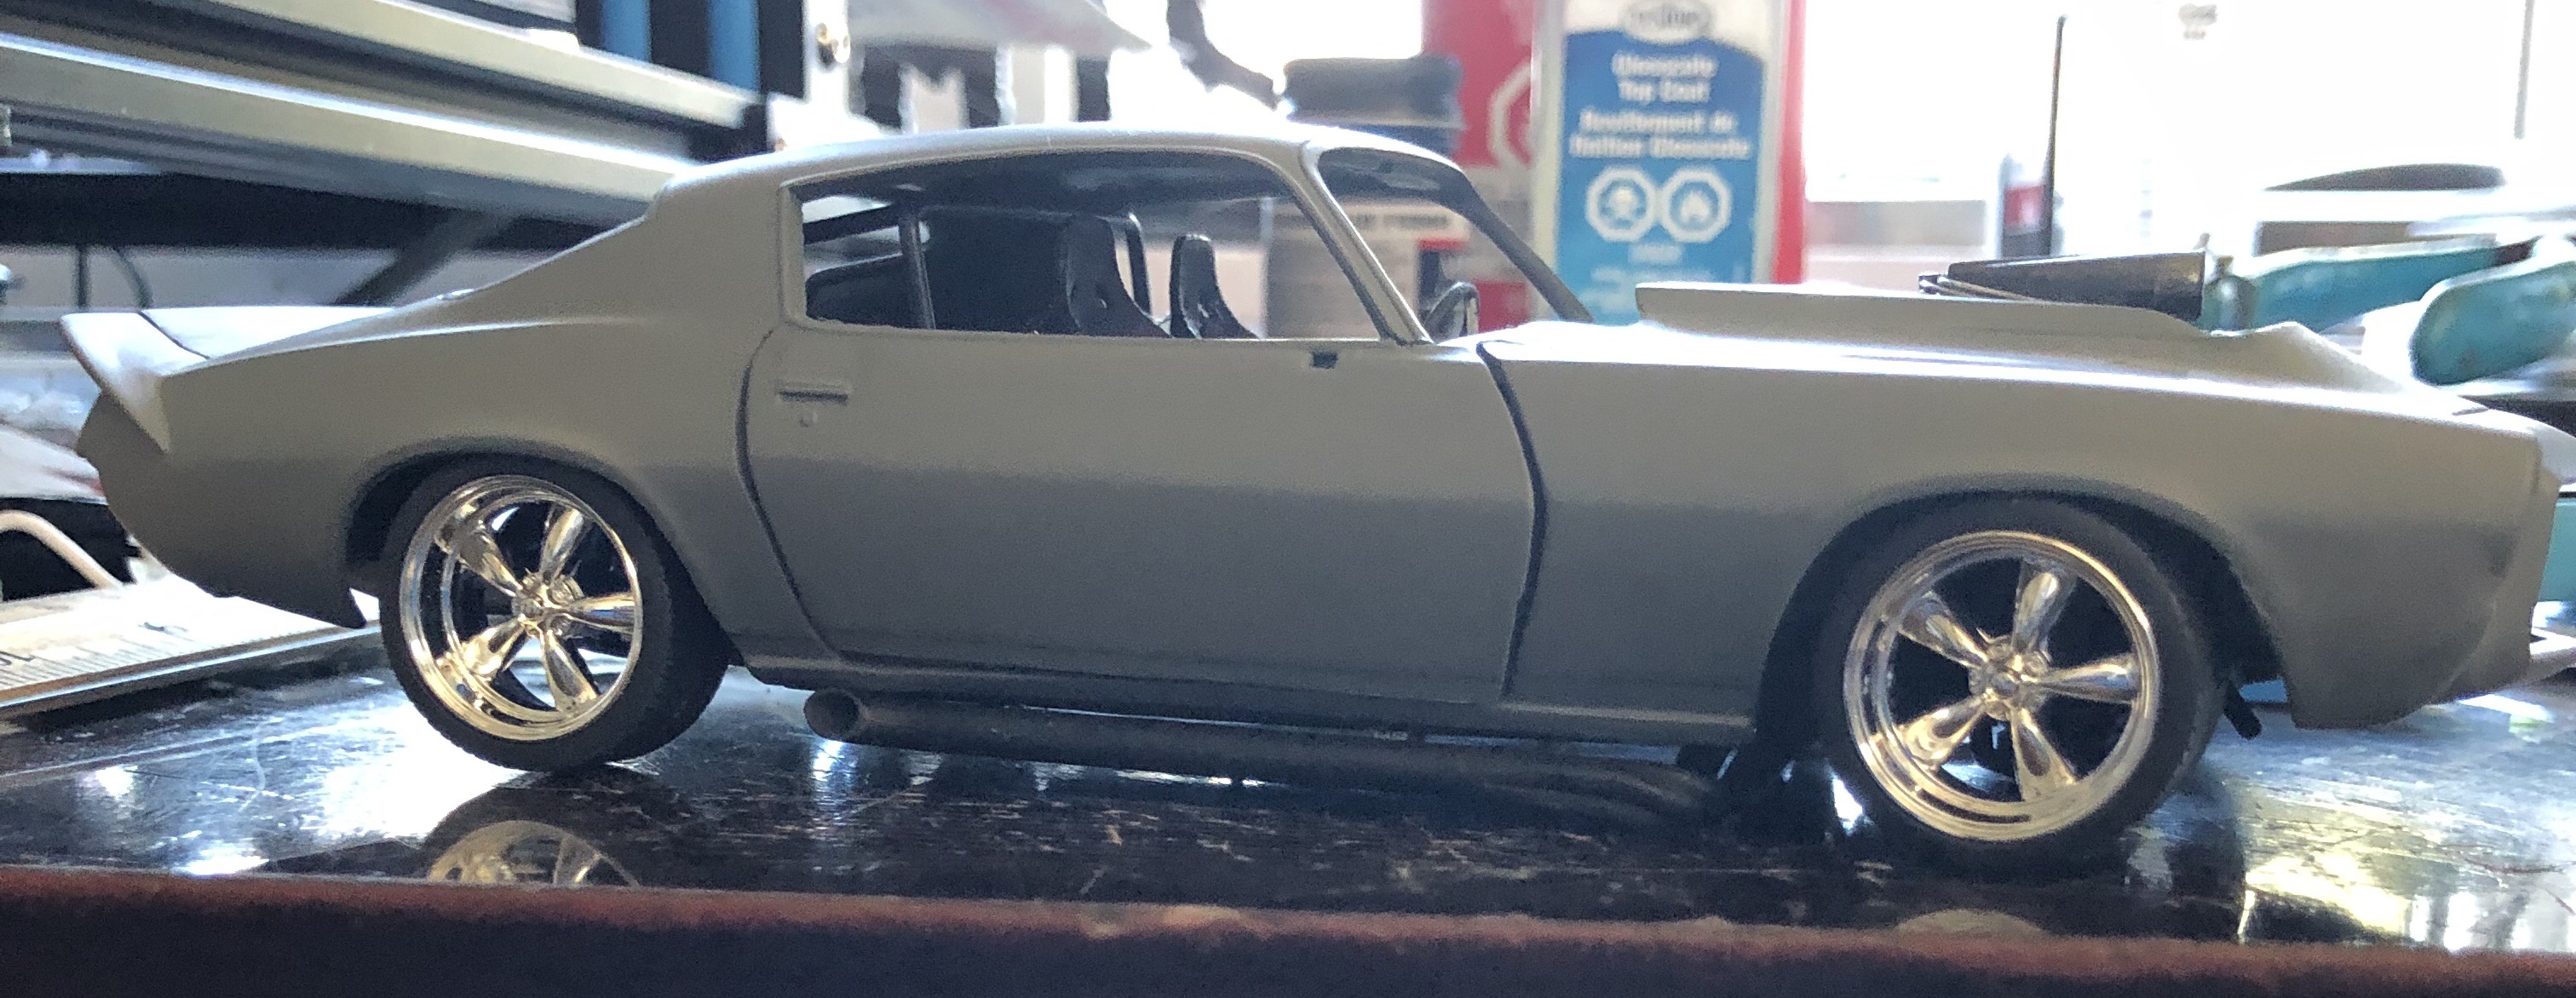
So, good news and bad news. Good news, I’m on track to have it painted over the next couple days. The car is in primer, gonna shoot the stripe color here shortly and probably base color tomorrow, followed by clear either tomorrow or Monday. The bad news is I had an unfortunate mishap where the model came between my phone and the floor. Broke both a pillars and the body half way under the passenger door. It’s fixed (or as much as it can be), but the passenger door doesn’t fit up right anymore and the exhaust hangs down in the front on both sides. I’ll try yet to fix the exhaust, but the door I think will be a permanent flaw in the car. The whole body is twisted.
Still needs a few things, namely brakes and door panels, but we’re pretty close.

-
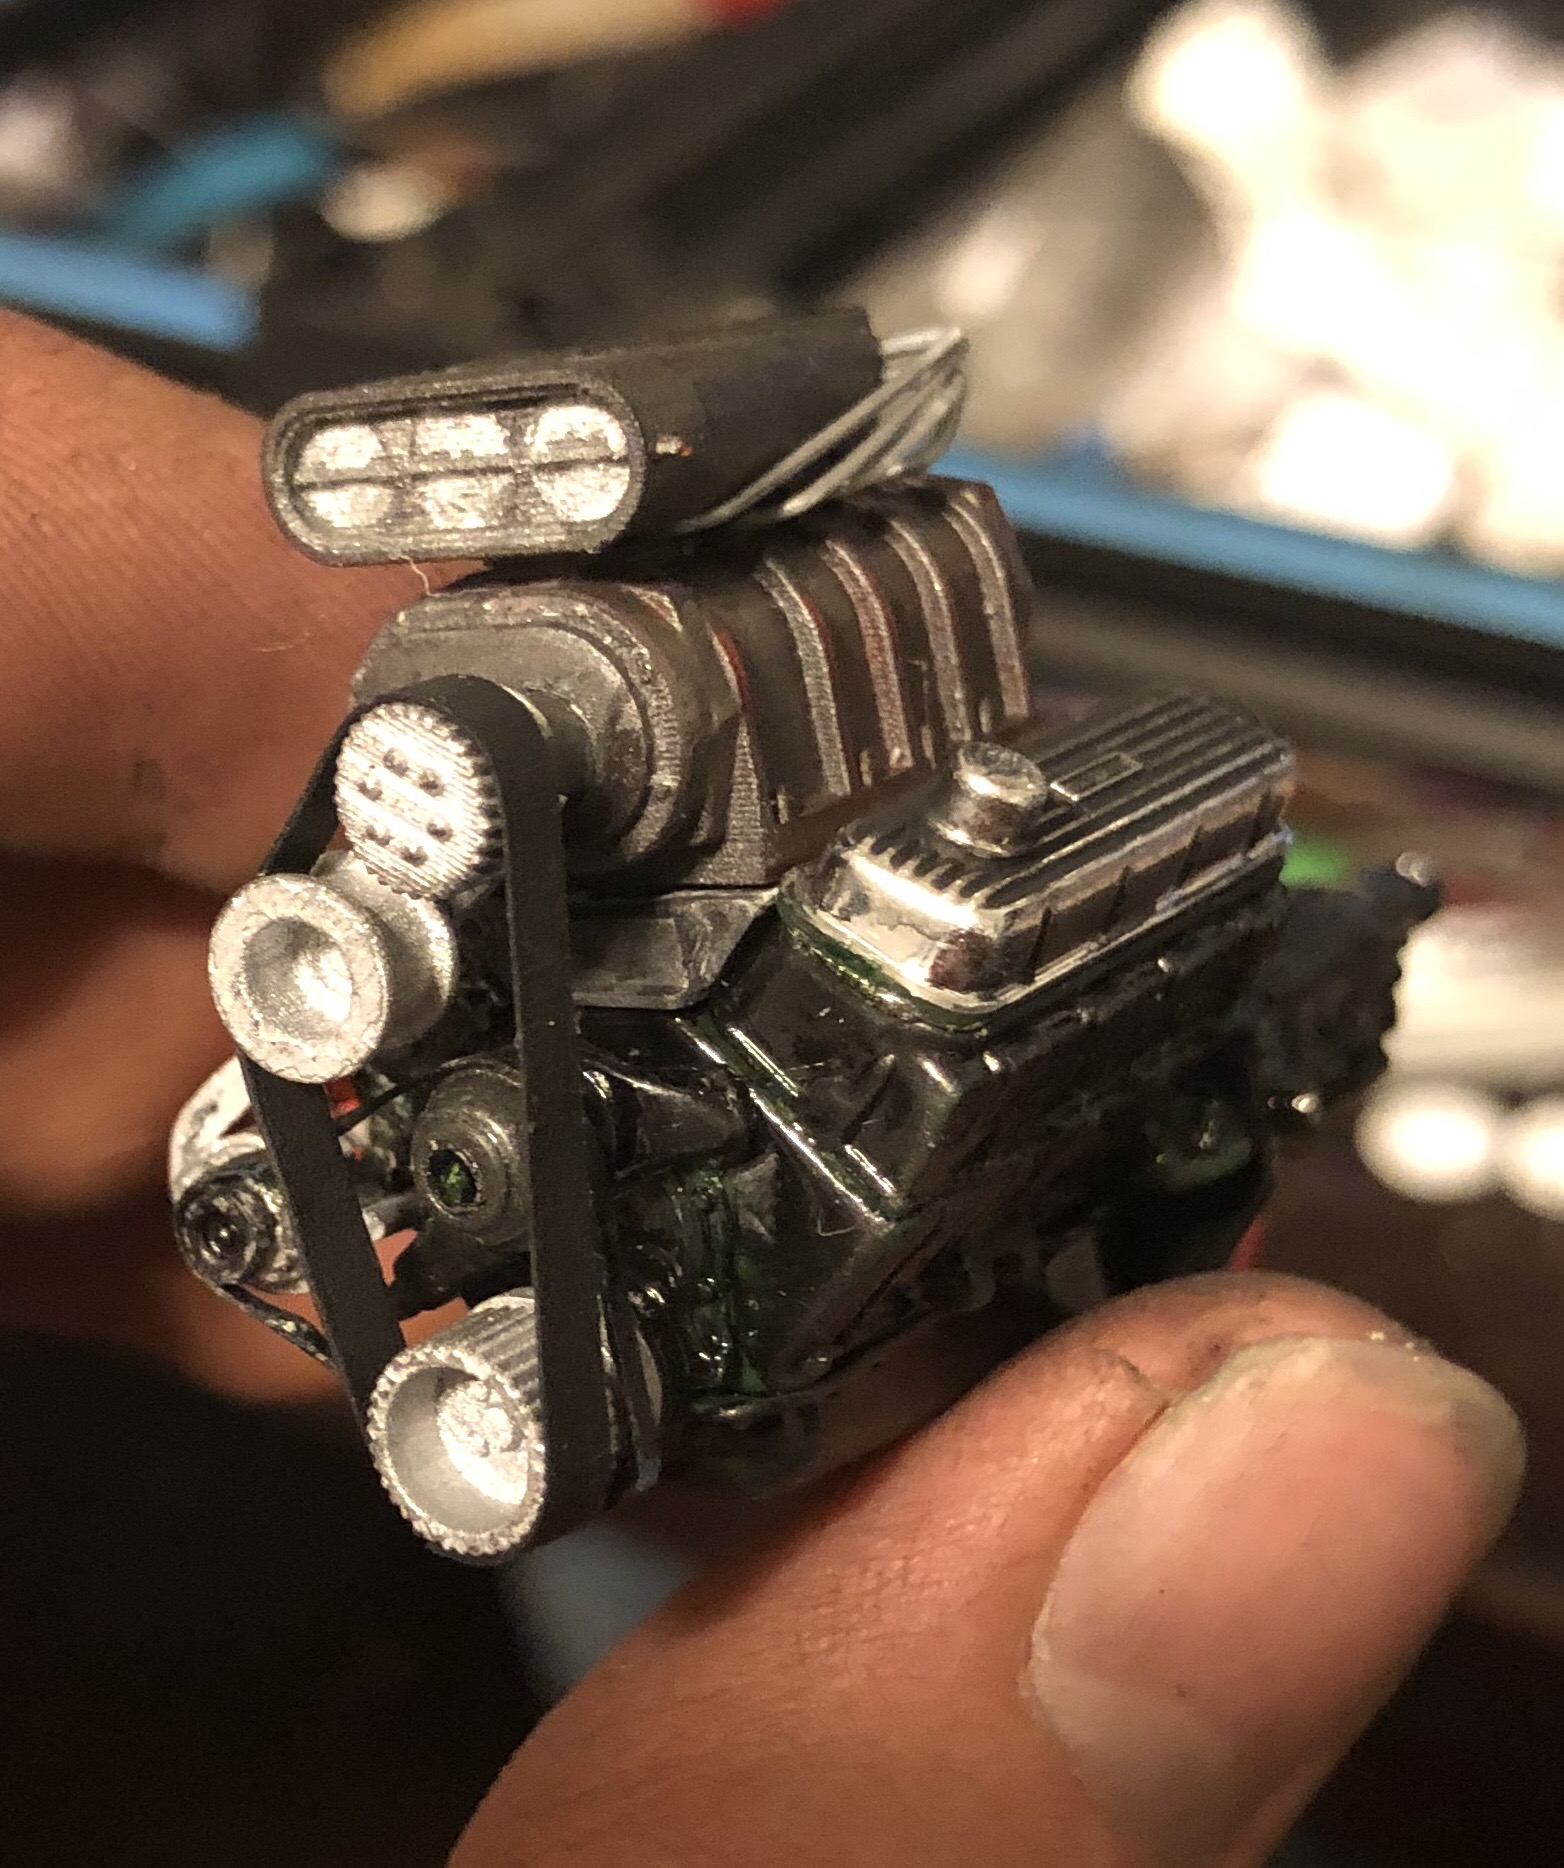
On 3/6/2019 at 4:55 AM, Dann Tier said:
Love your subdued engine!....looks freaking TOUGH!!!!!!
Thanks Dann, if only it ran!
-
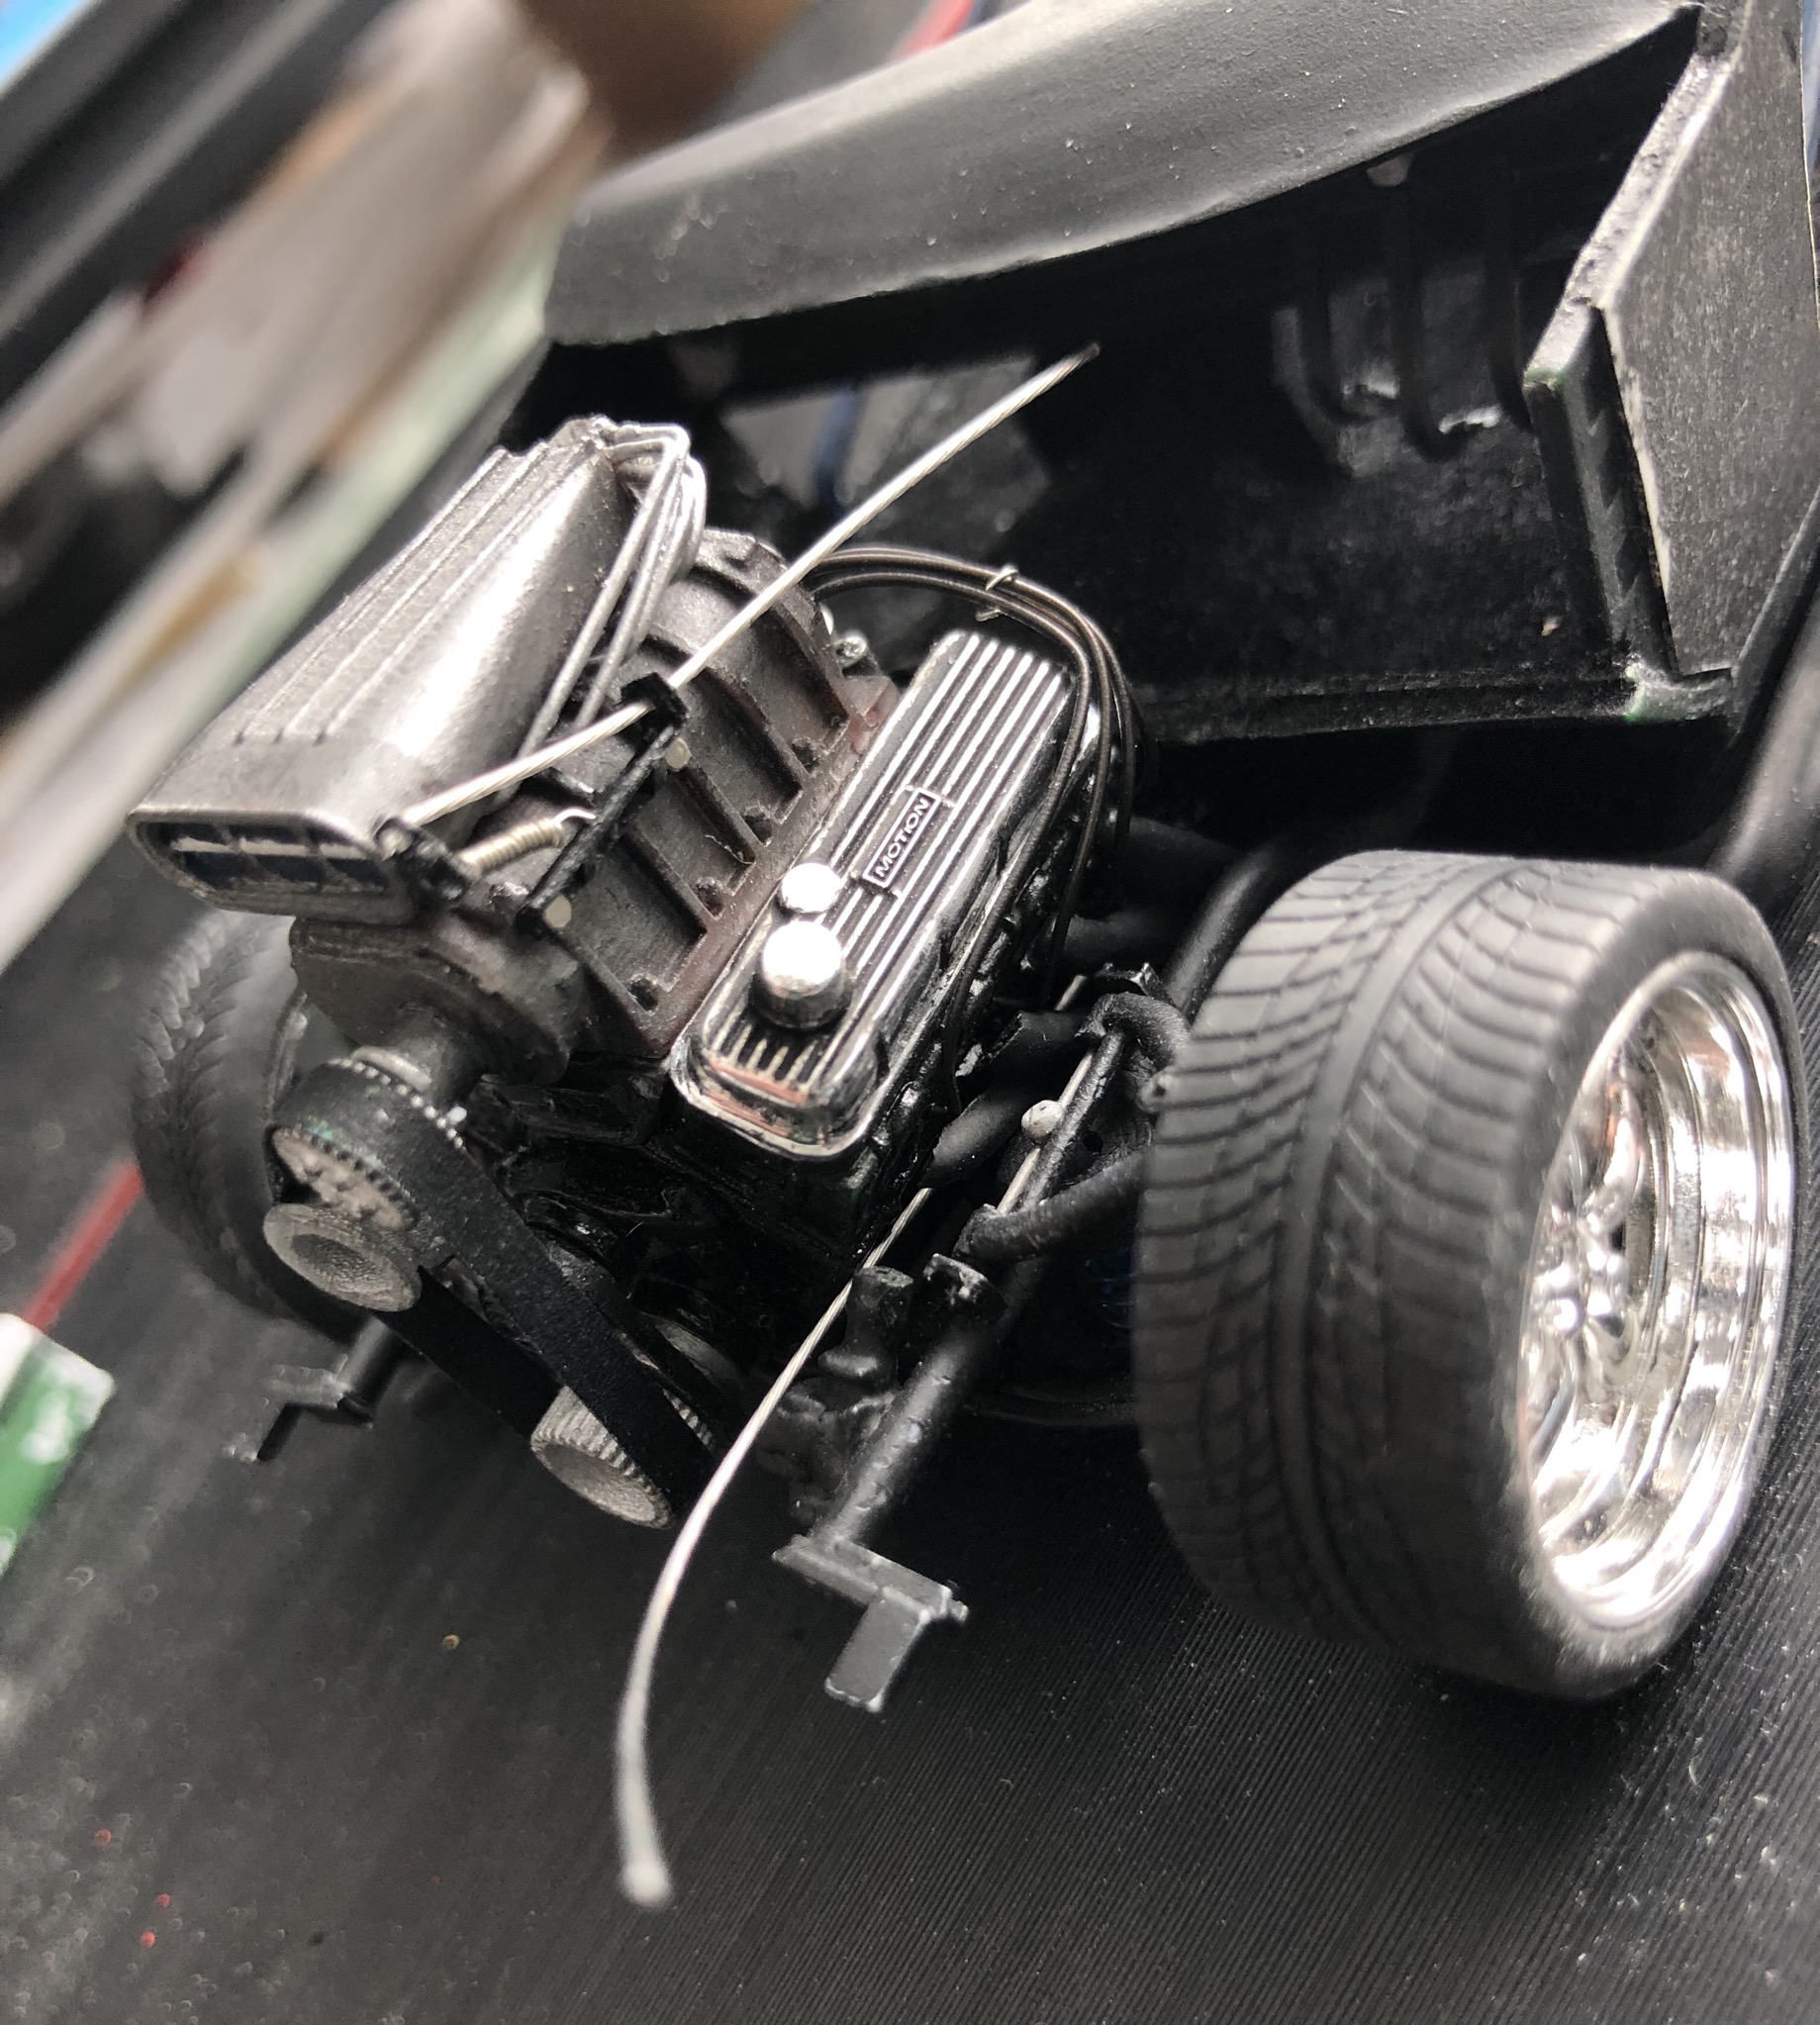
Its been a little while, not a lot to show at the moment though. Motor is in and throttle linkage there, that’s about all I have to show for the moment. There are other things (fuel line, exhaust, stuff like that), but that’ll be shown later. That line coming from under the header is the clutch cable, it’ll get hooked up when the firewall is put in. Working on doors right now, getting them to stay shut with magnets. Hoping for nice weather this week and next weekend so I can get the body sprayed, we’ll see if I get there as planned.
-
Been following for a while, love how it turned out. Very nice build
-
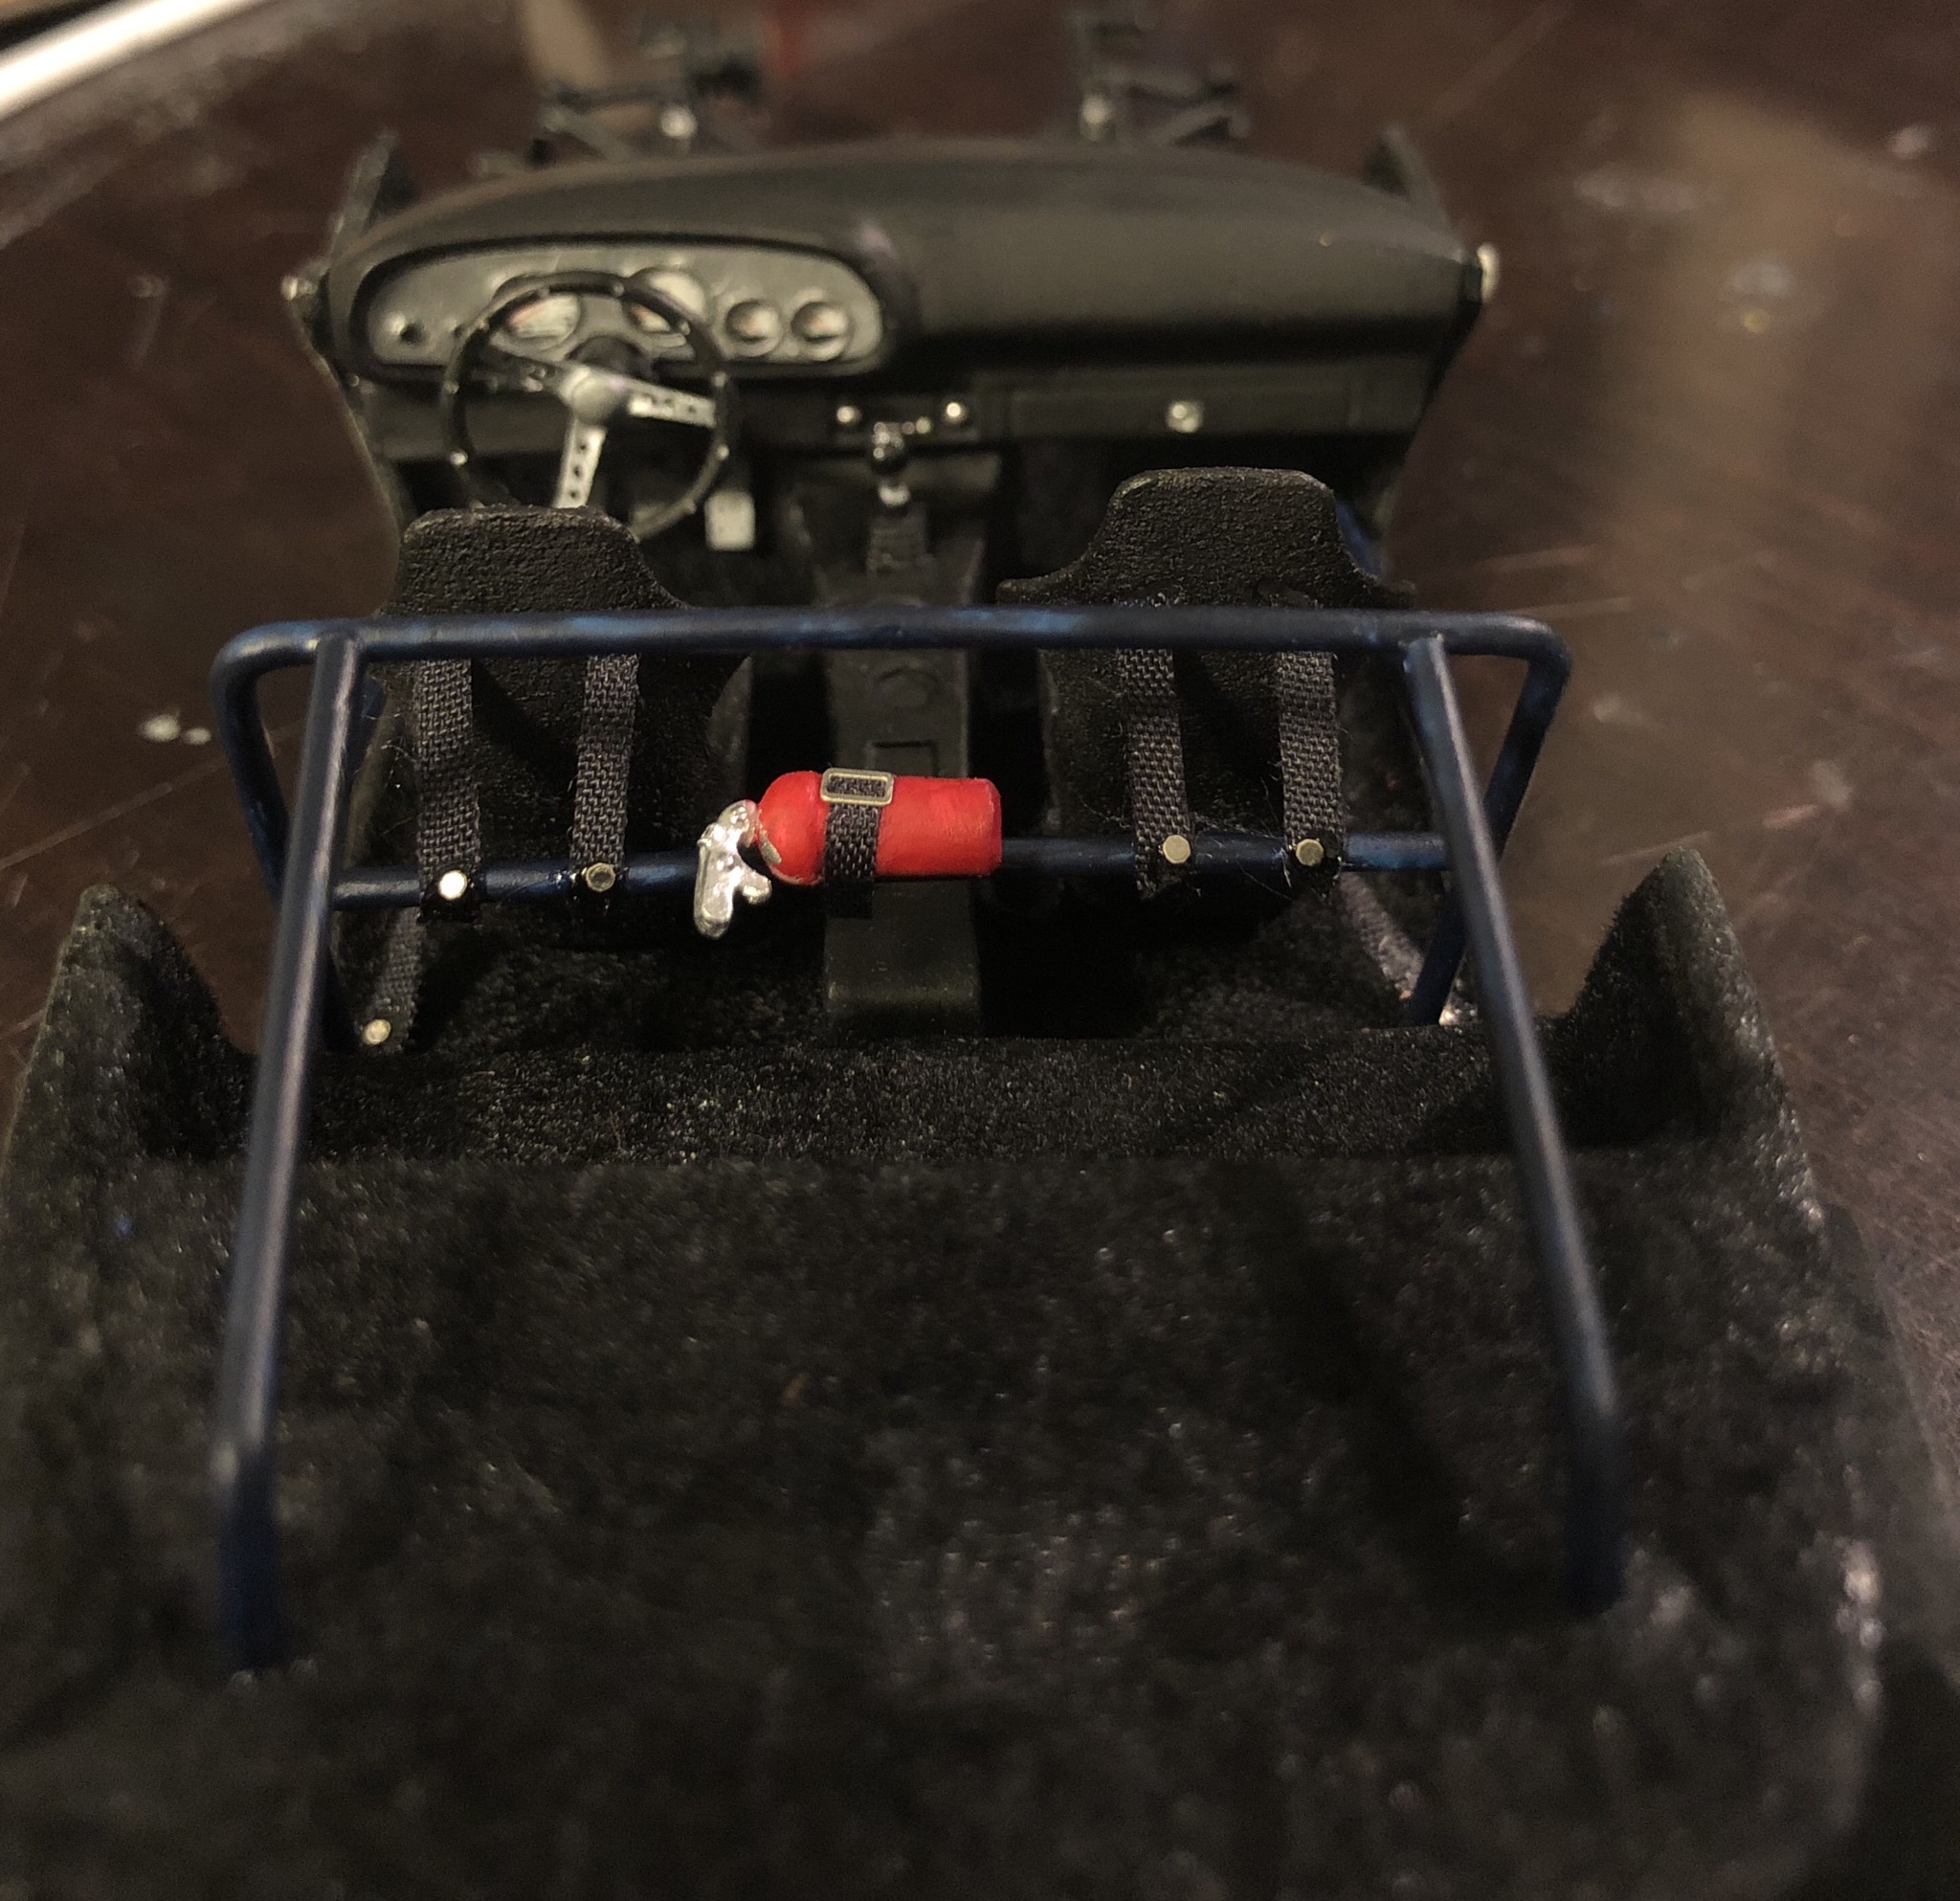
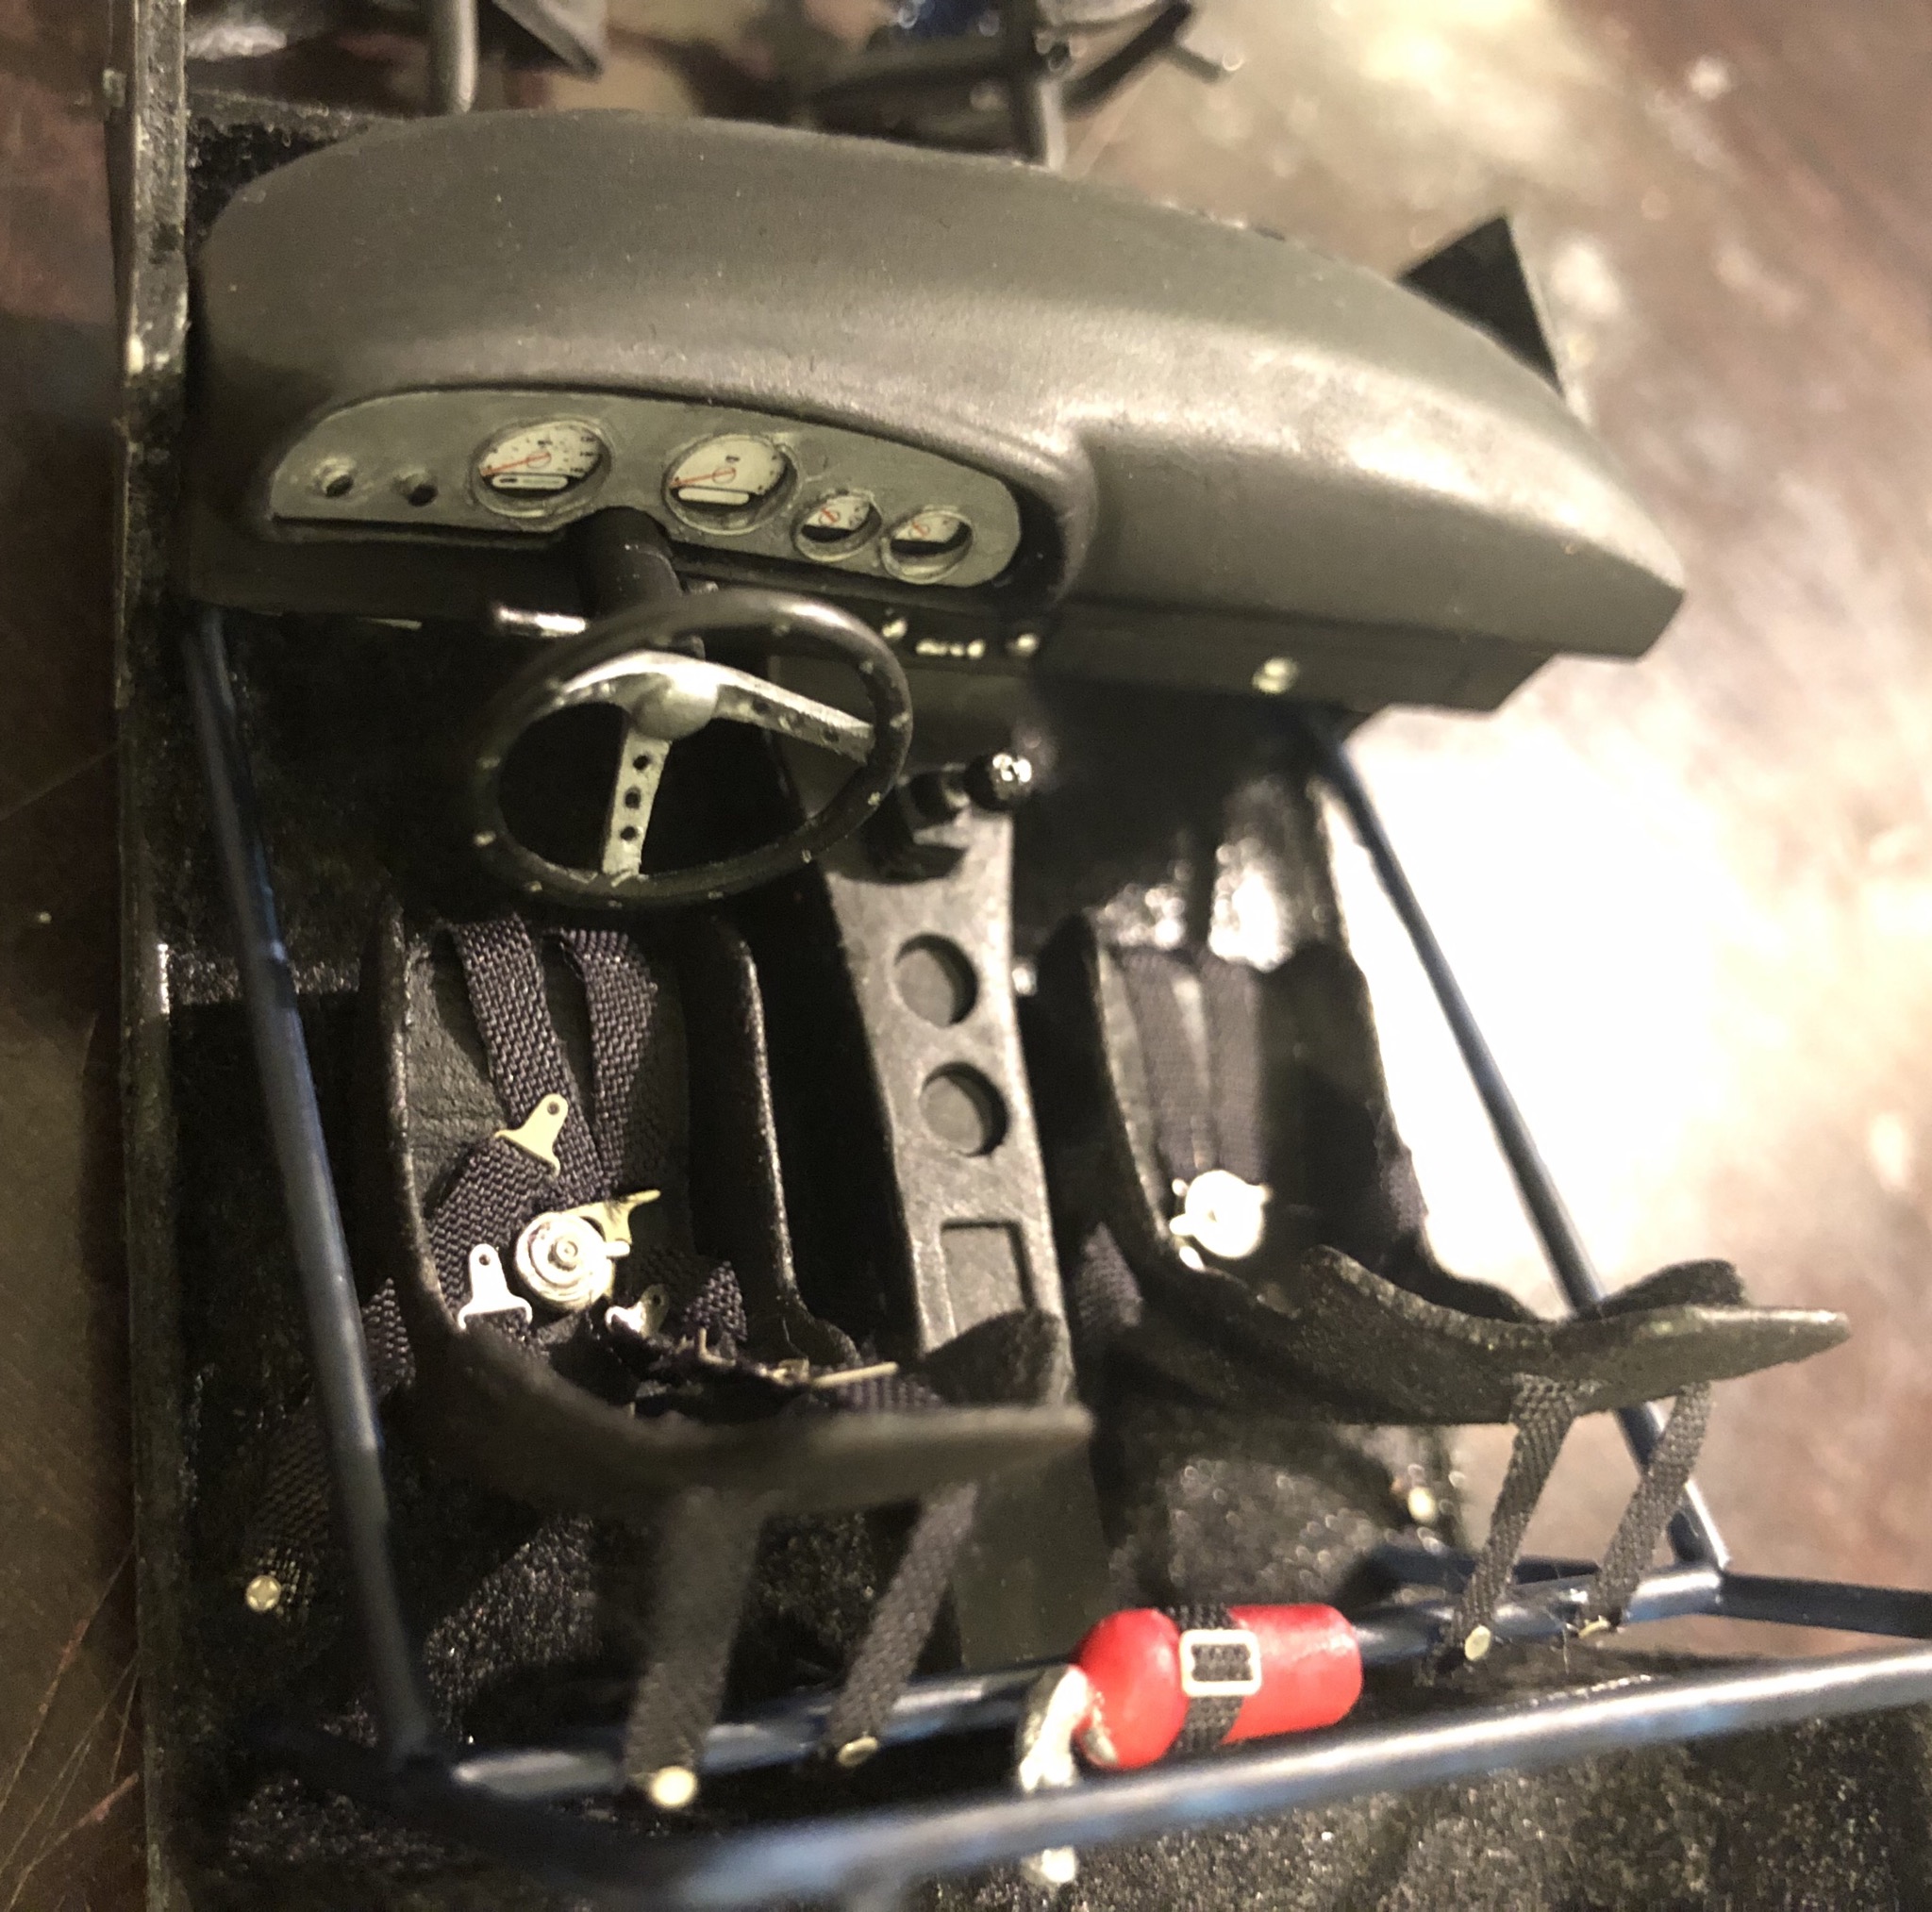
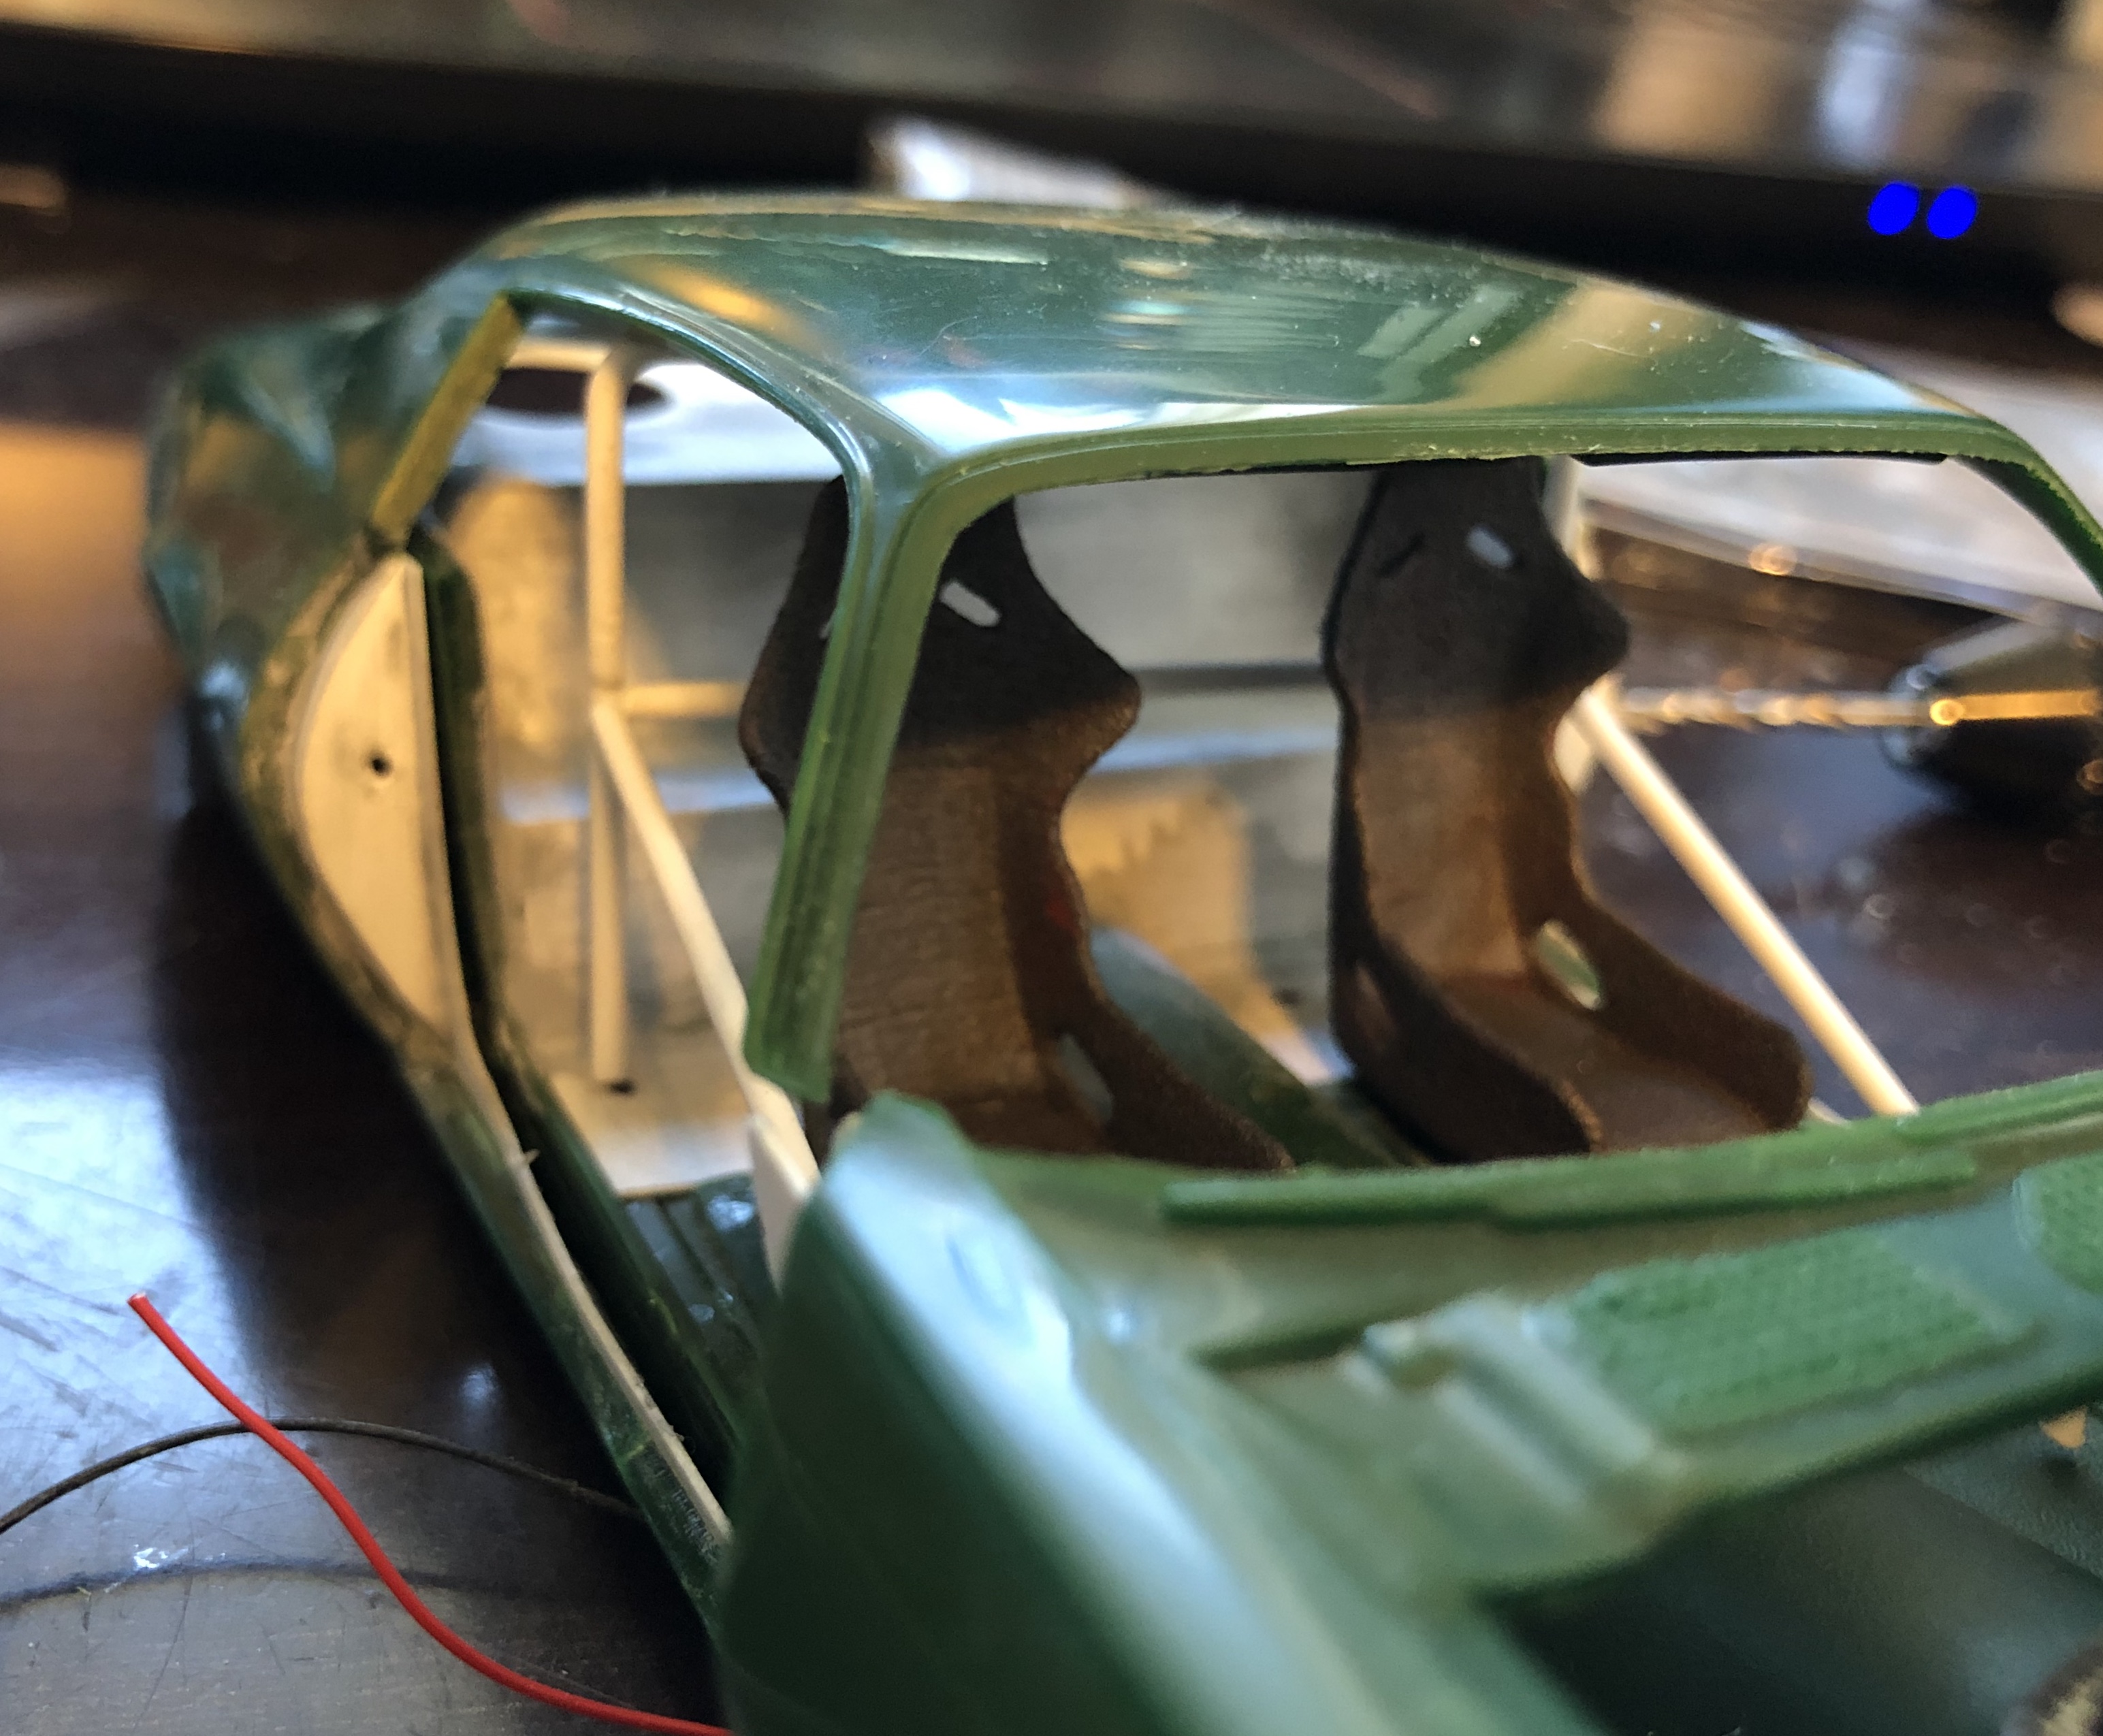
Got the front suspension together, but broke one of the steering pieces. Haven’t fixed it yet, so it isn’t on the car. However, I did get the interior done. Still needs door panels, and then parts on the body itself (a pillar trim and such), but this part is complete.
-
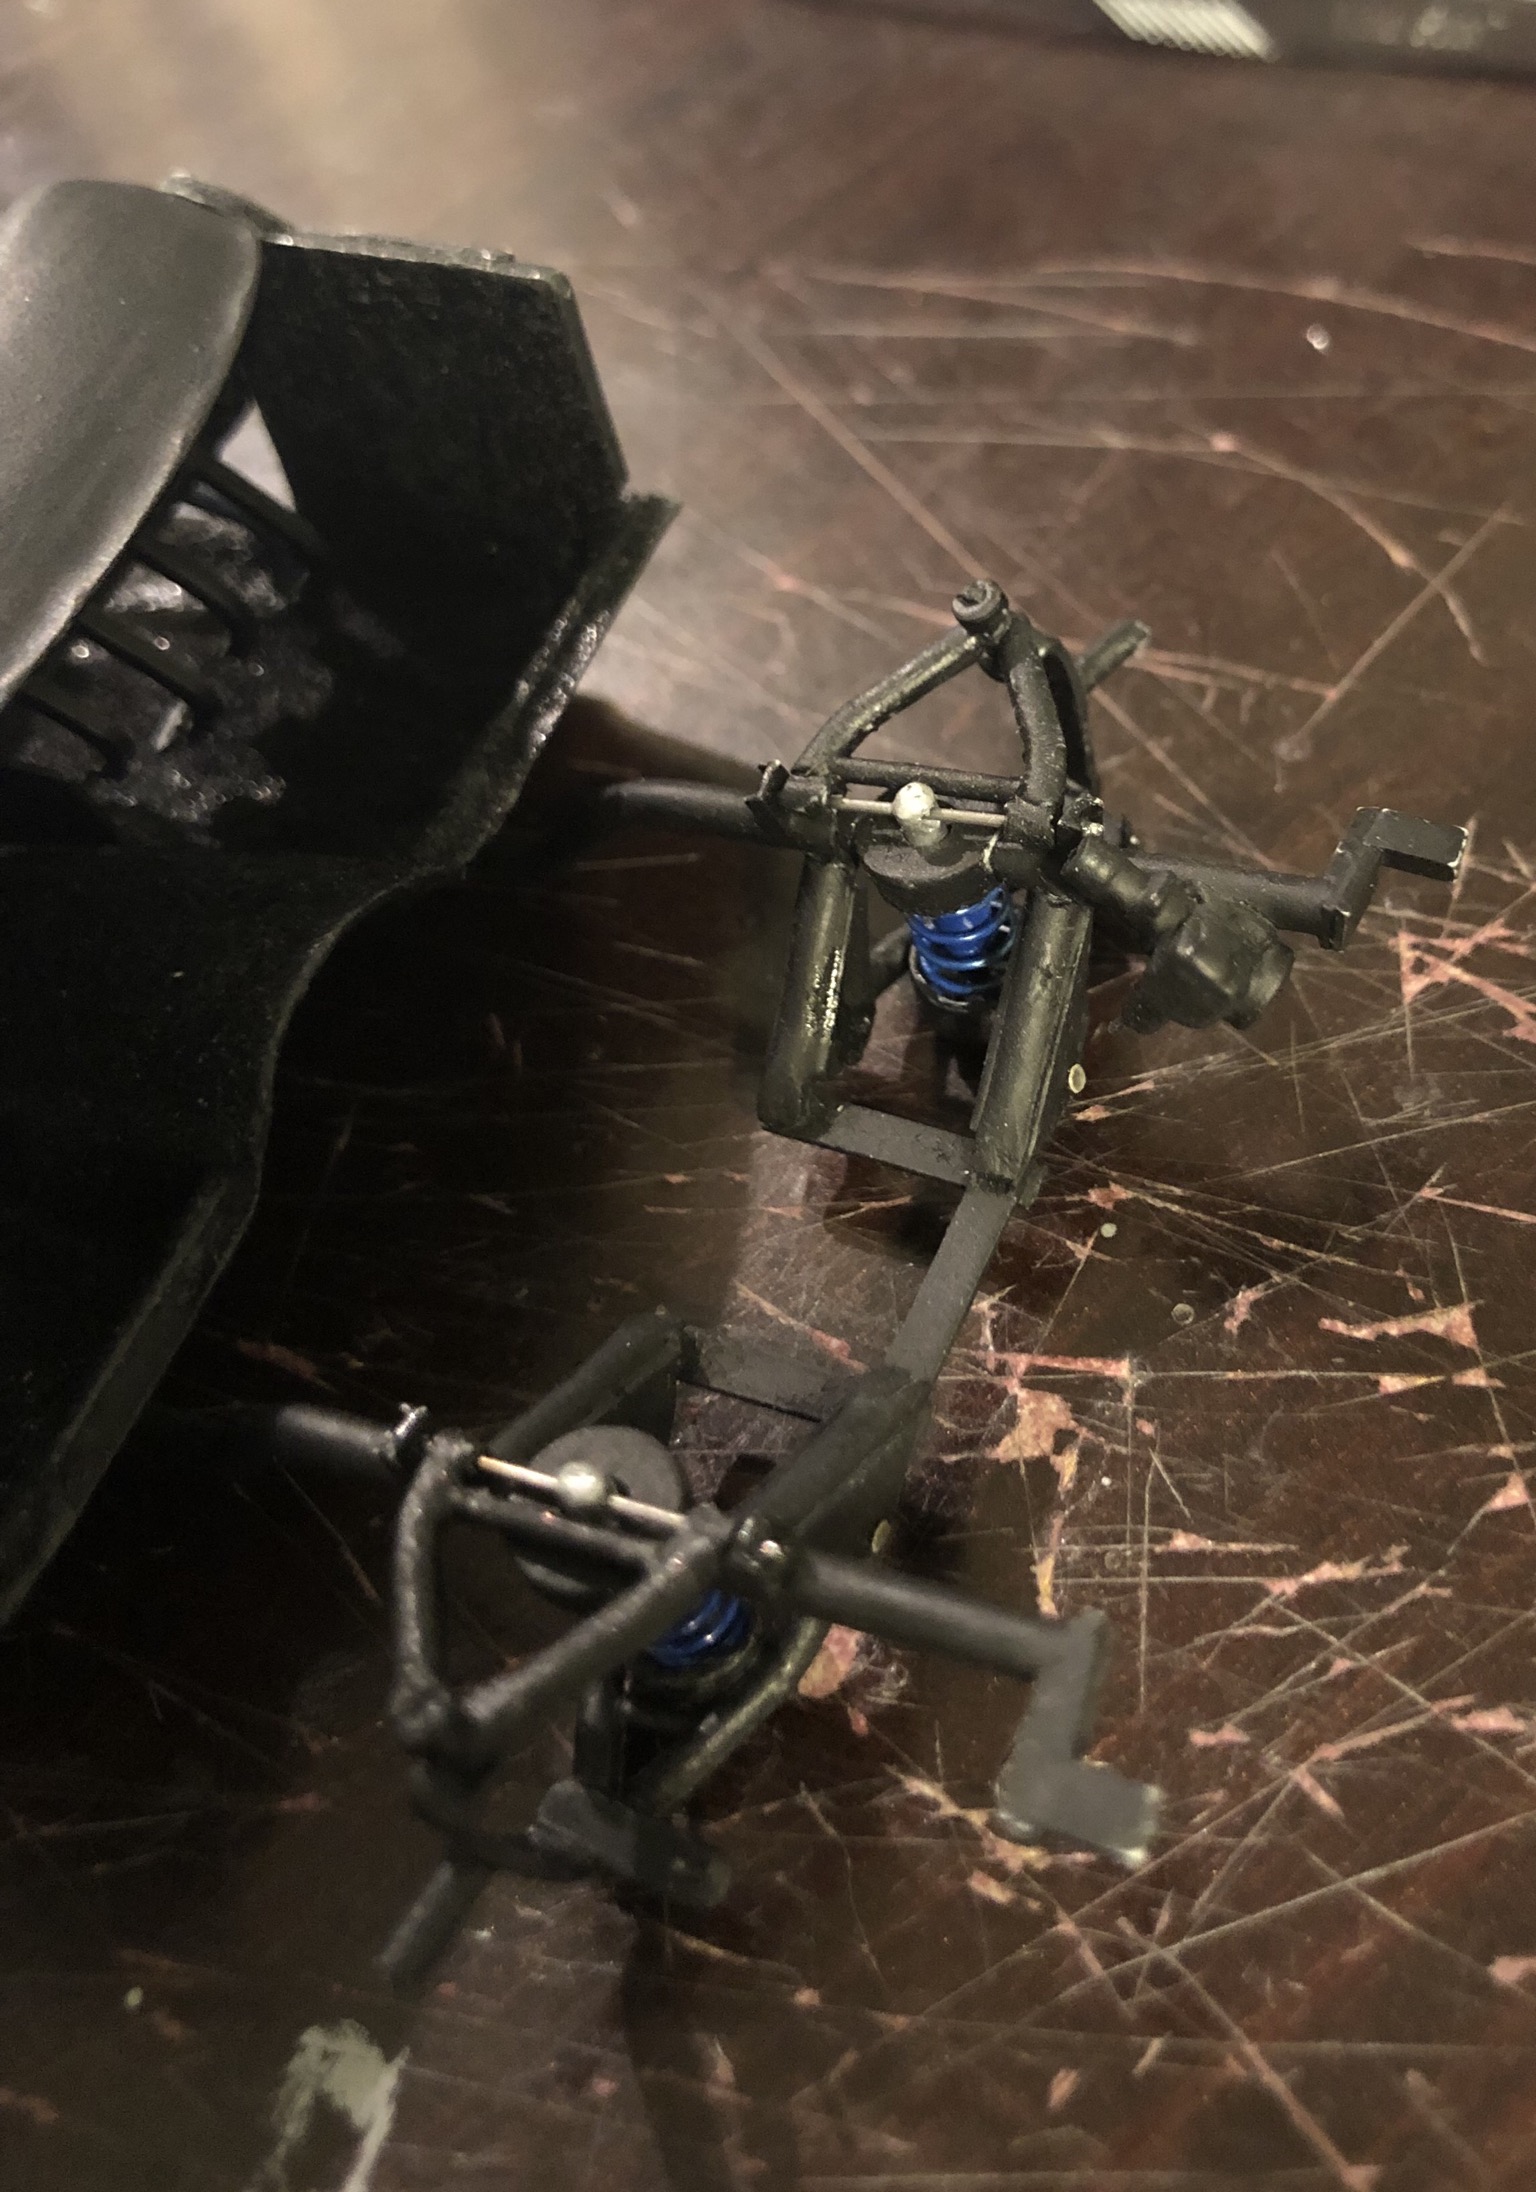
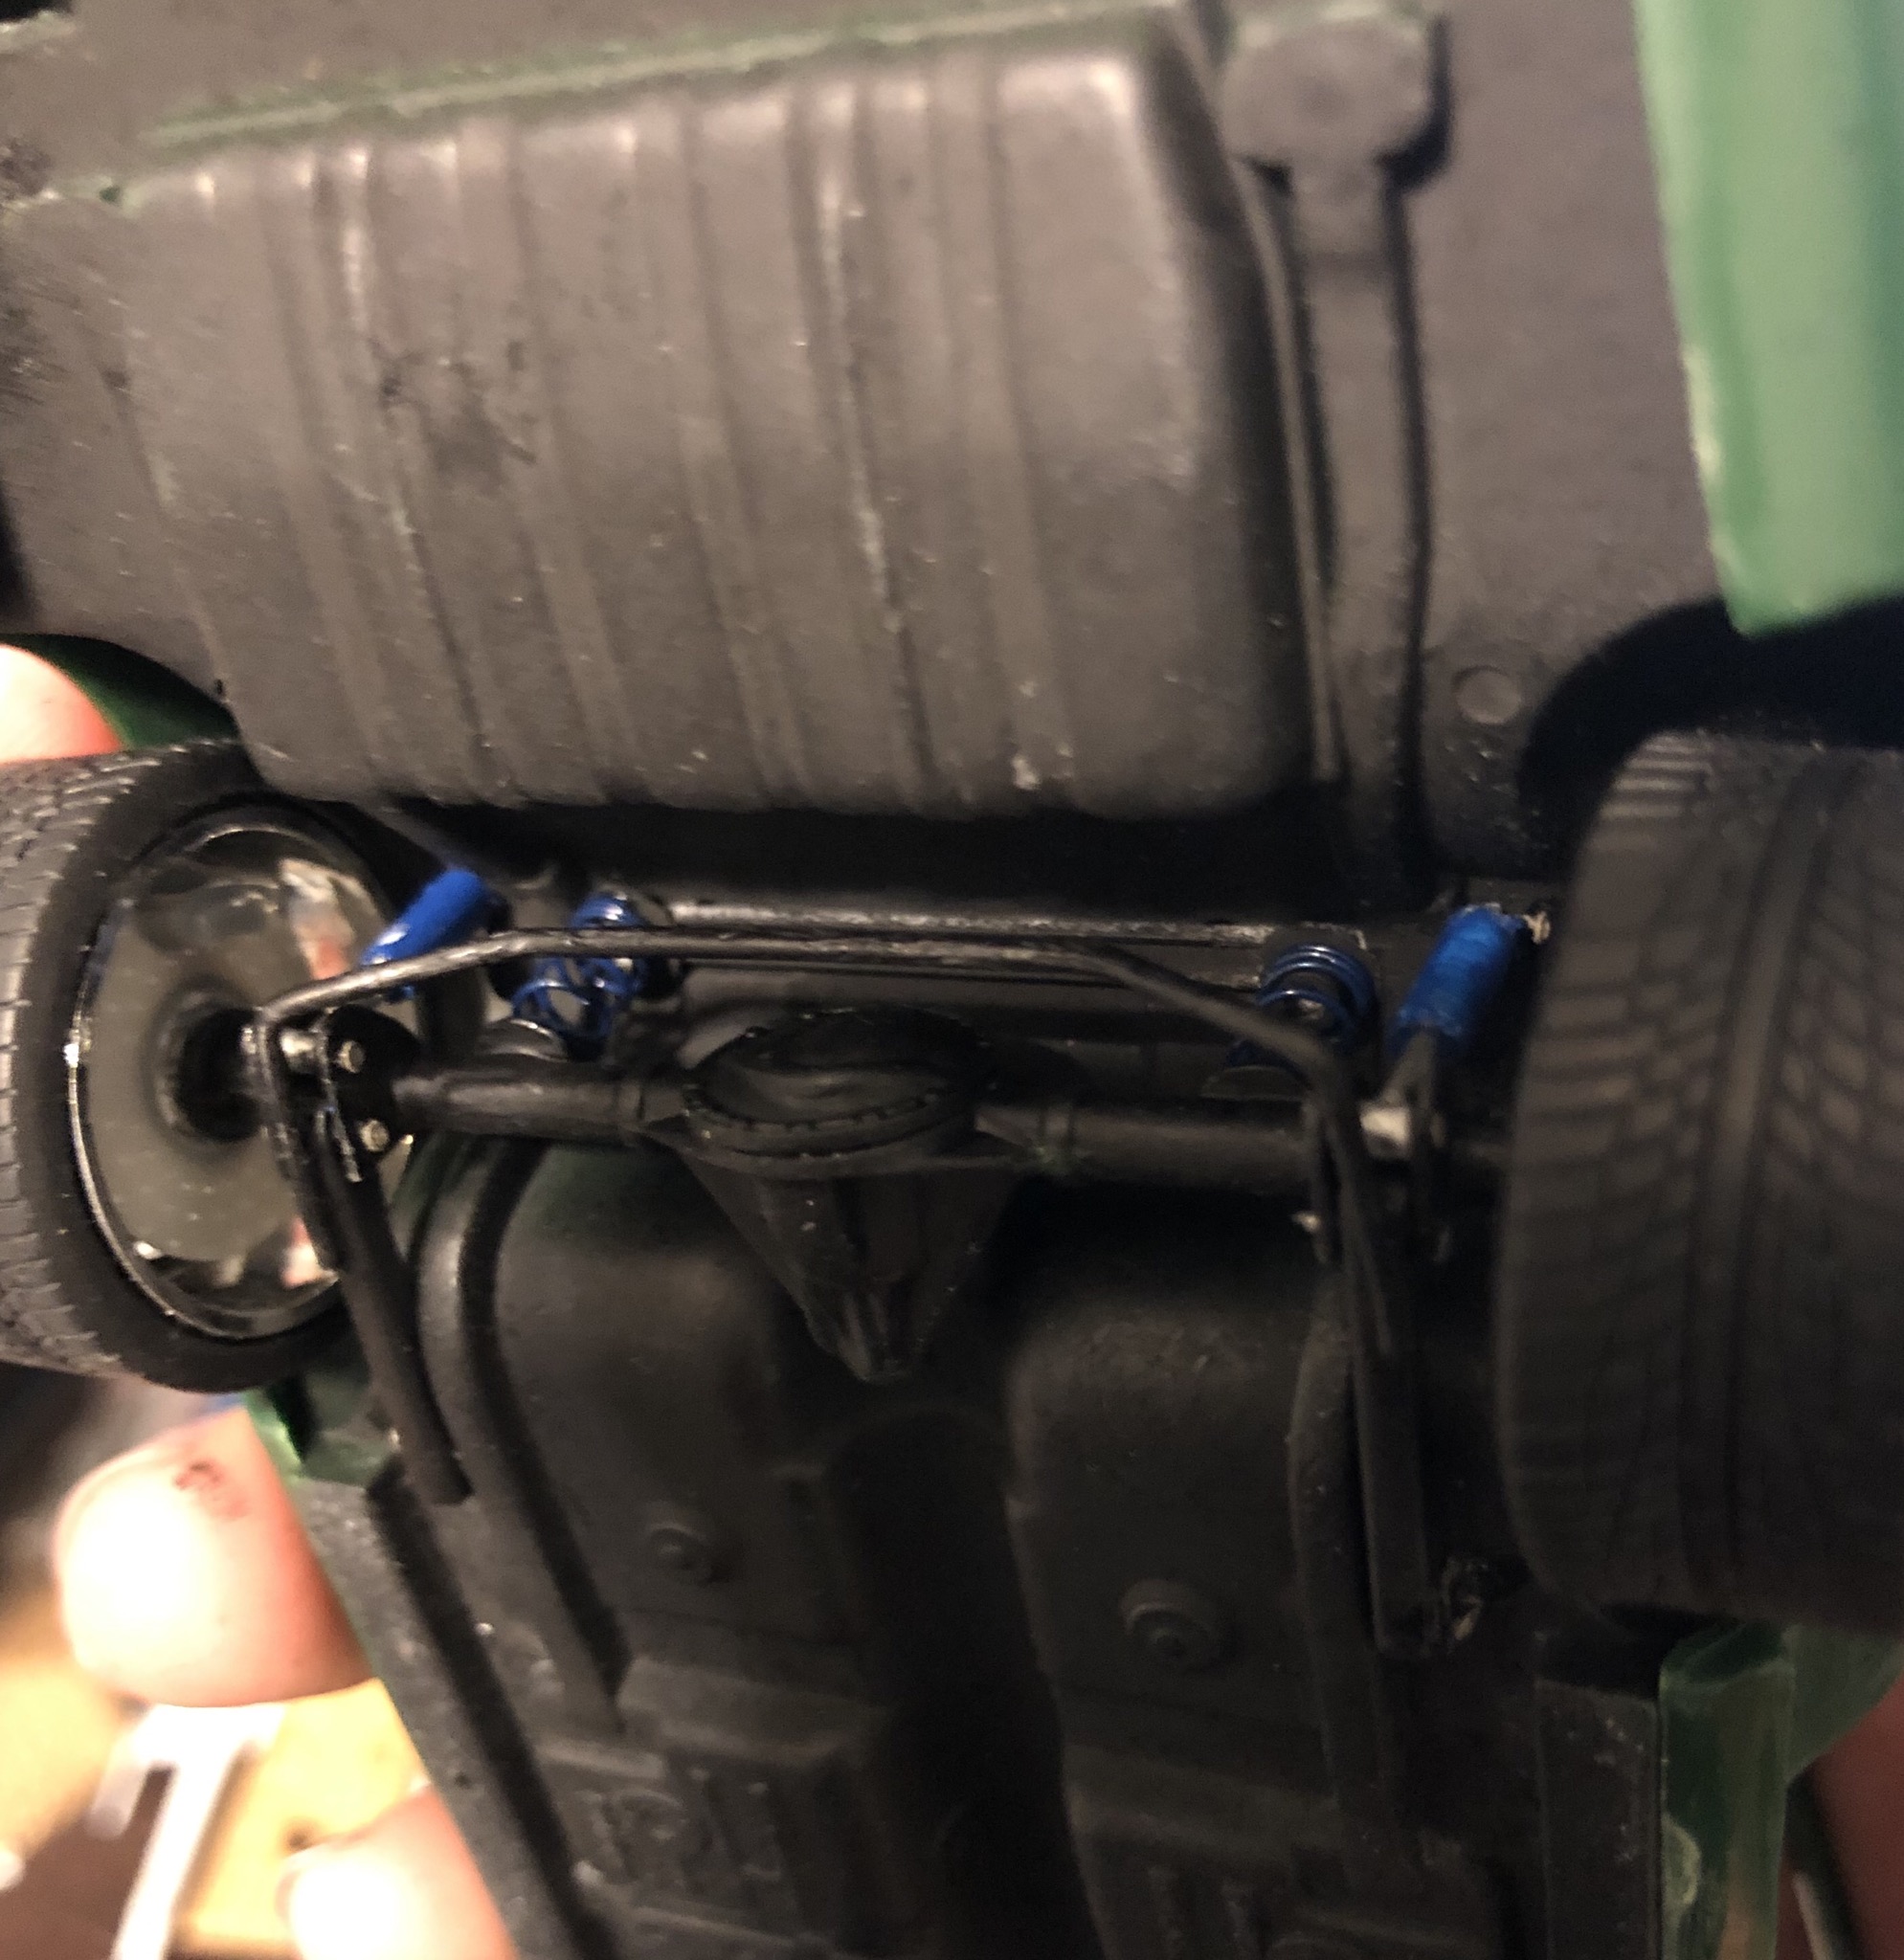
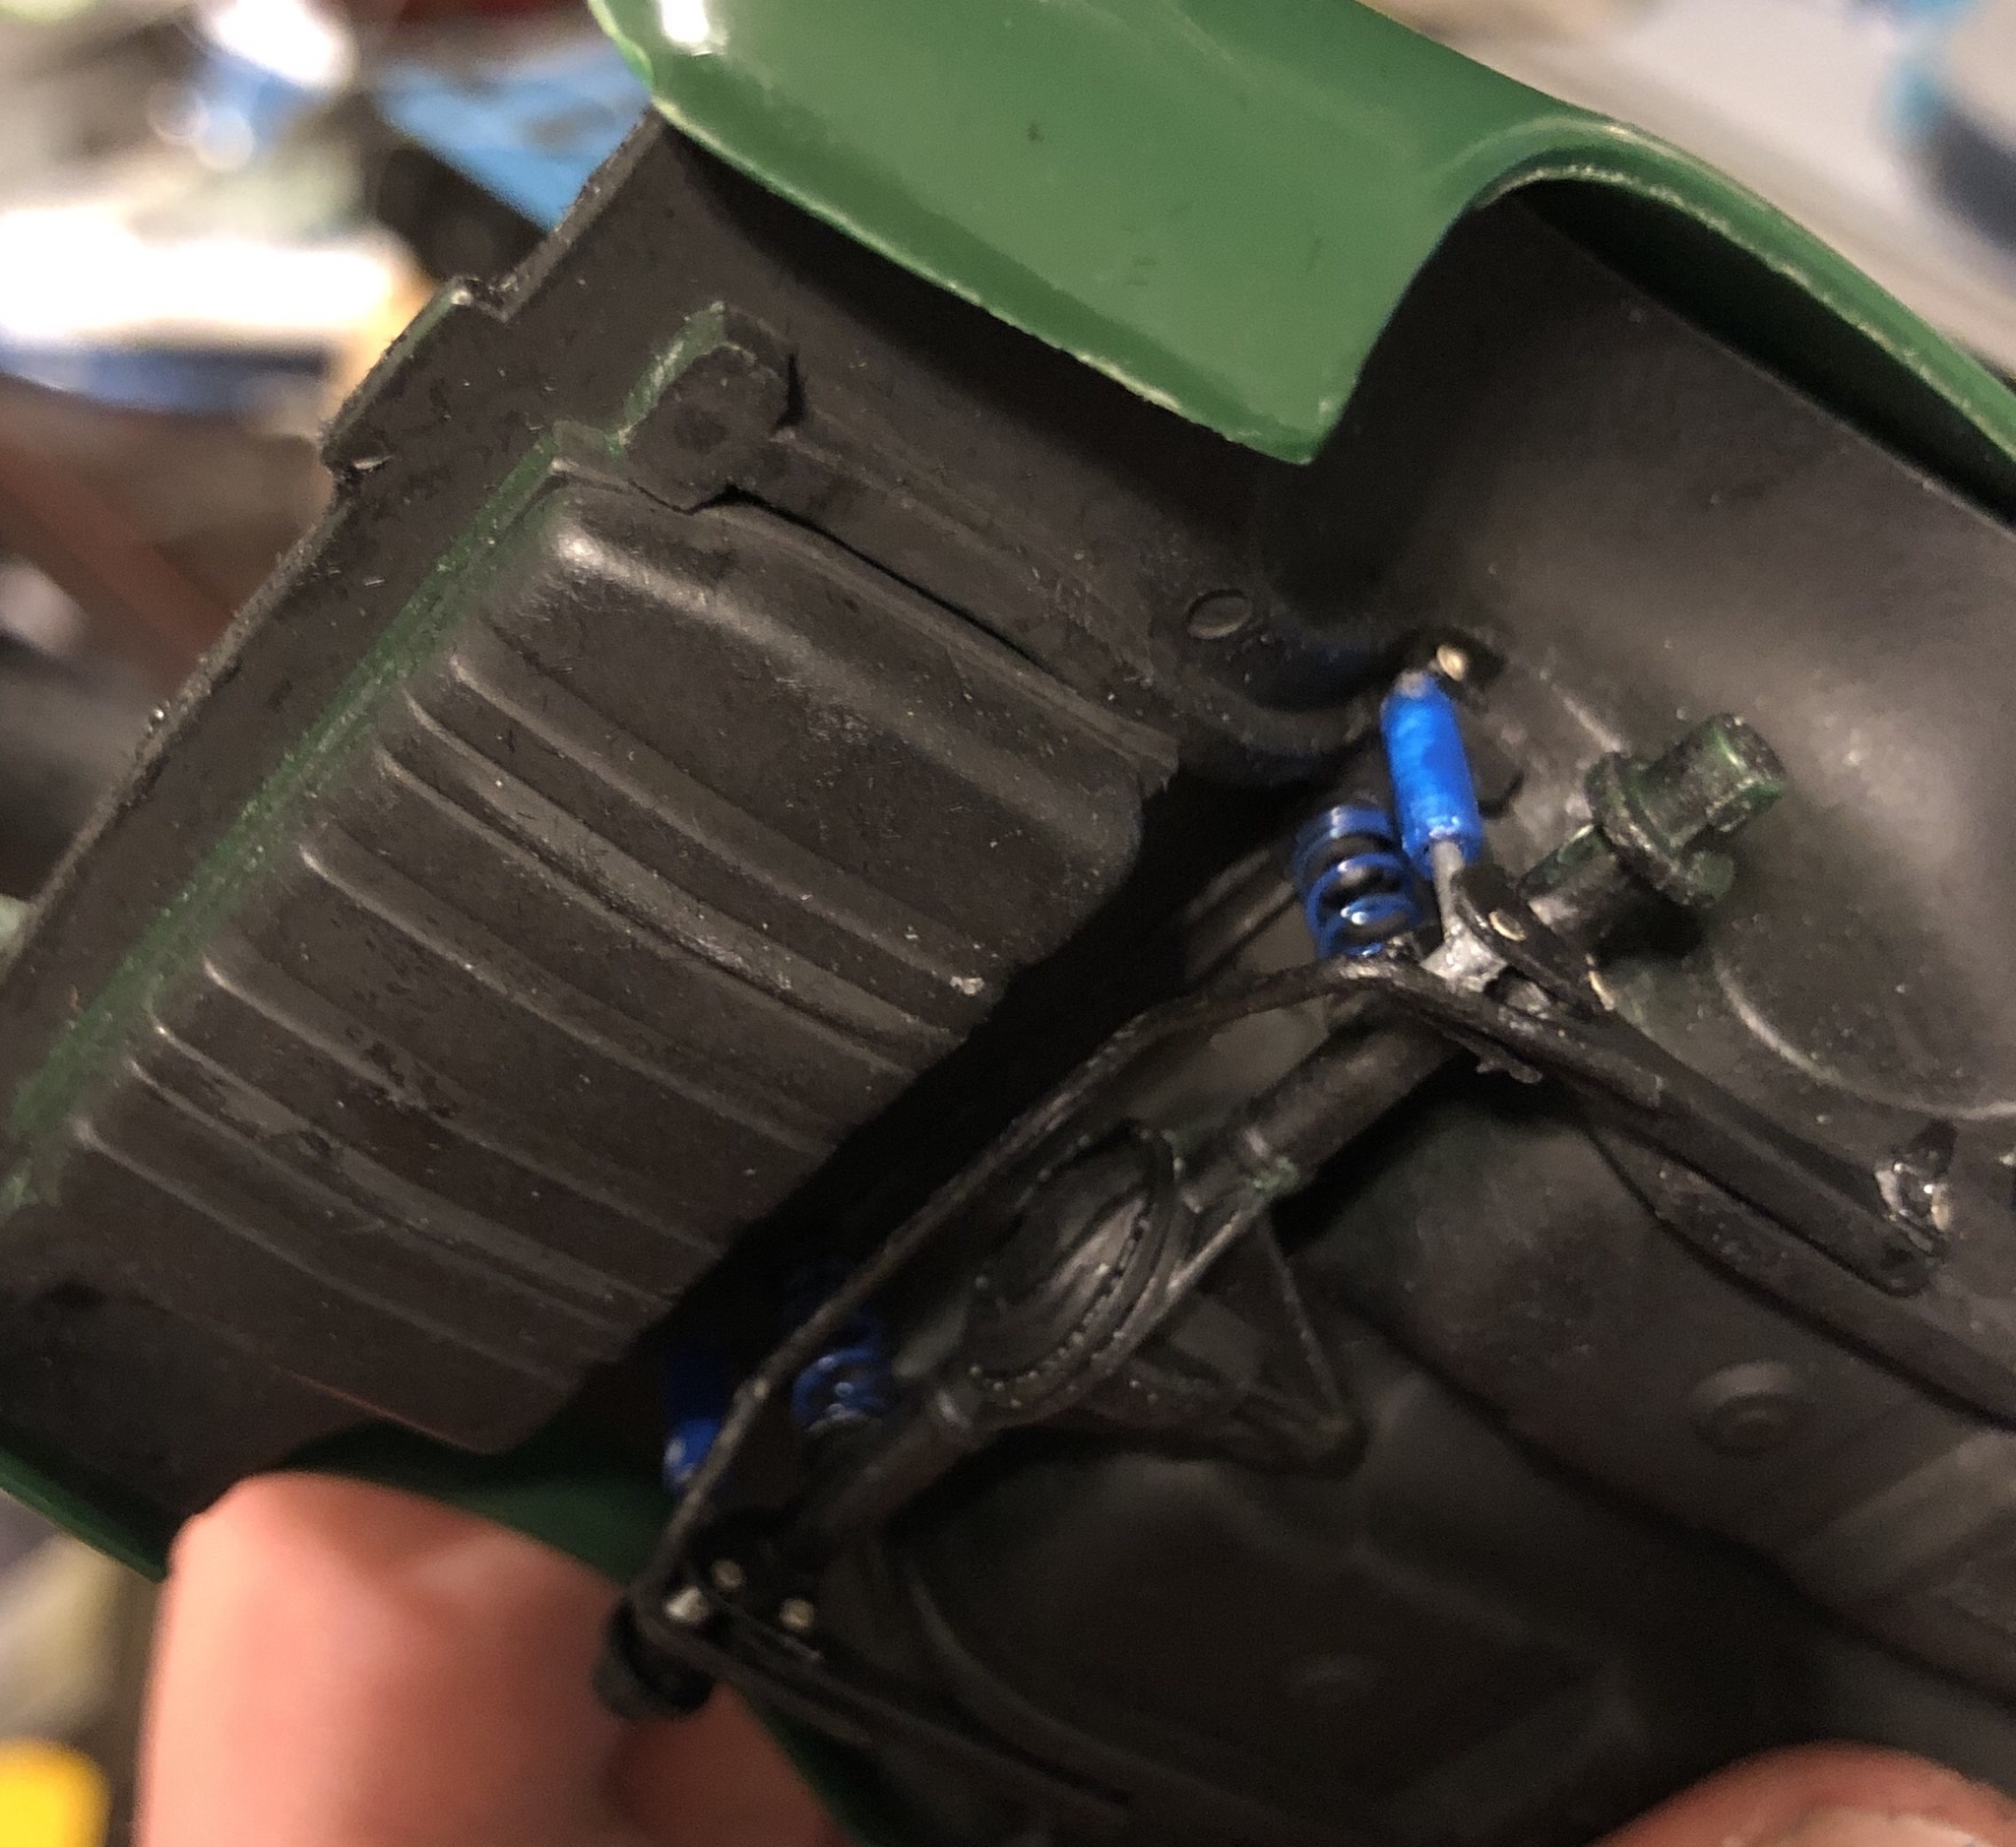
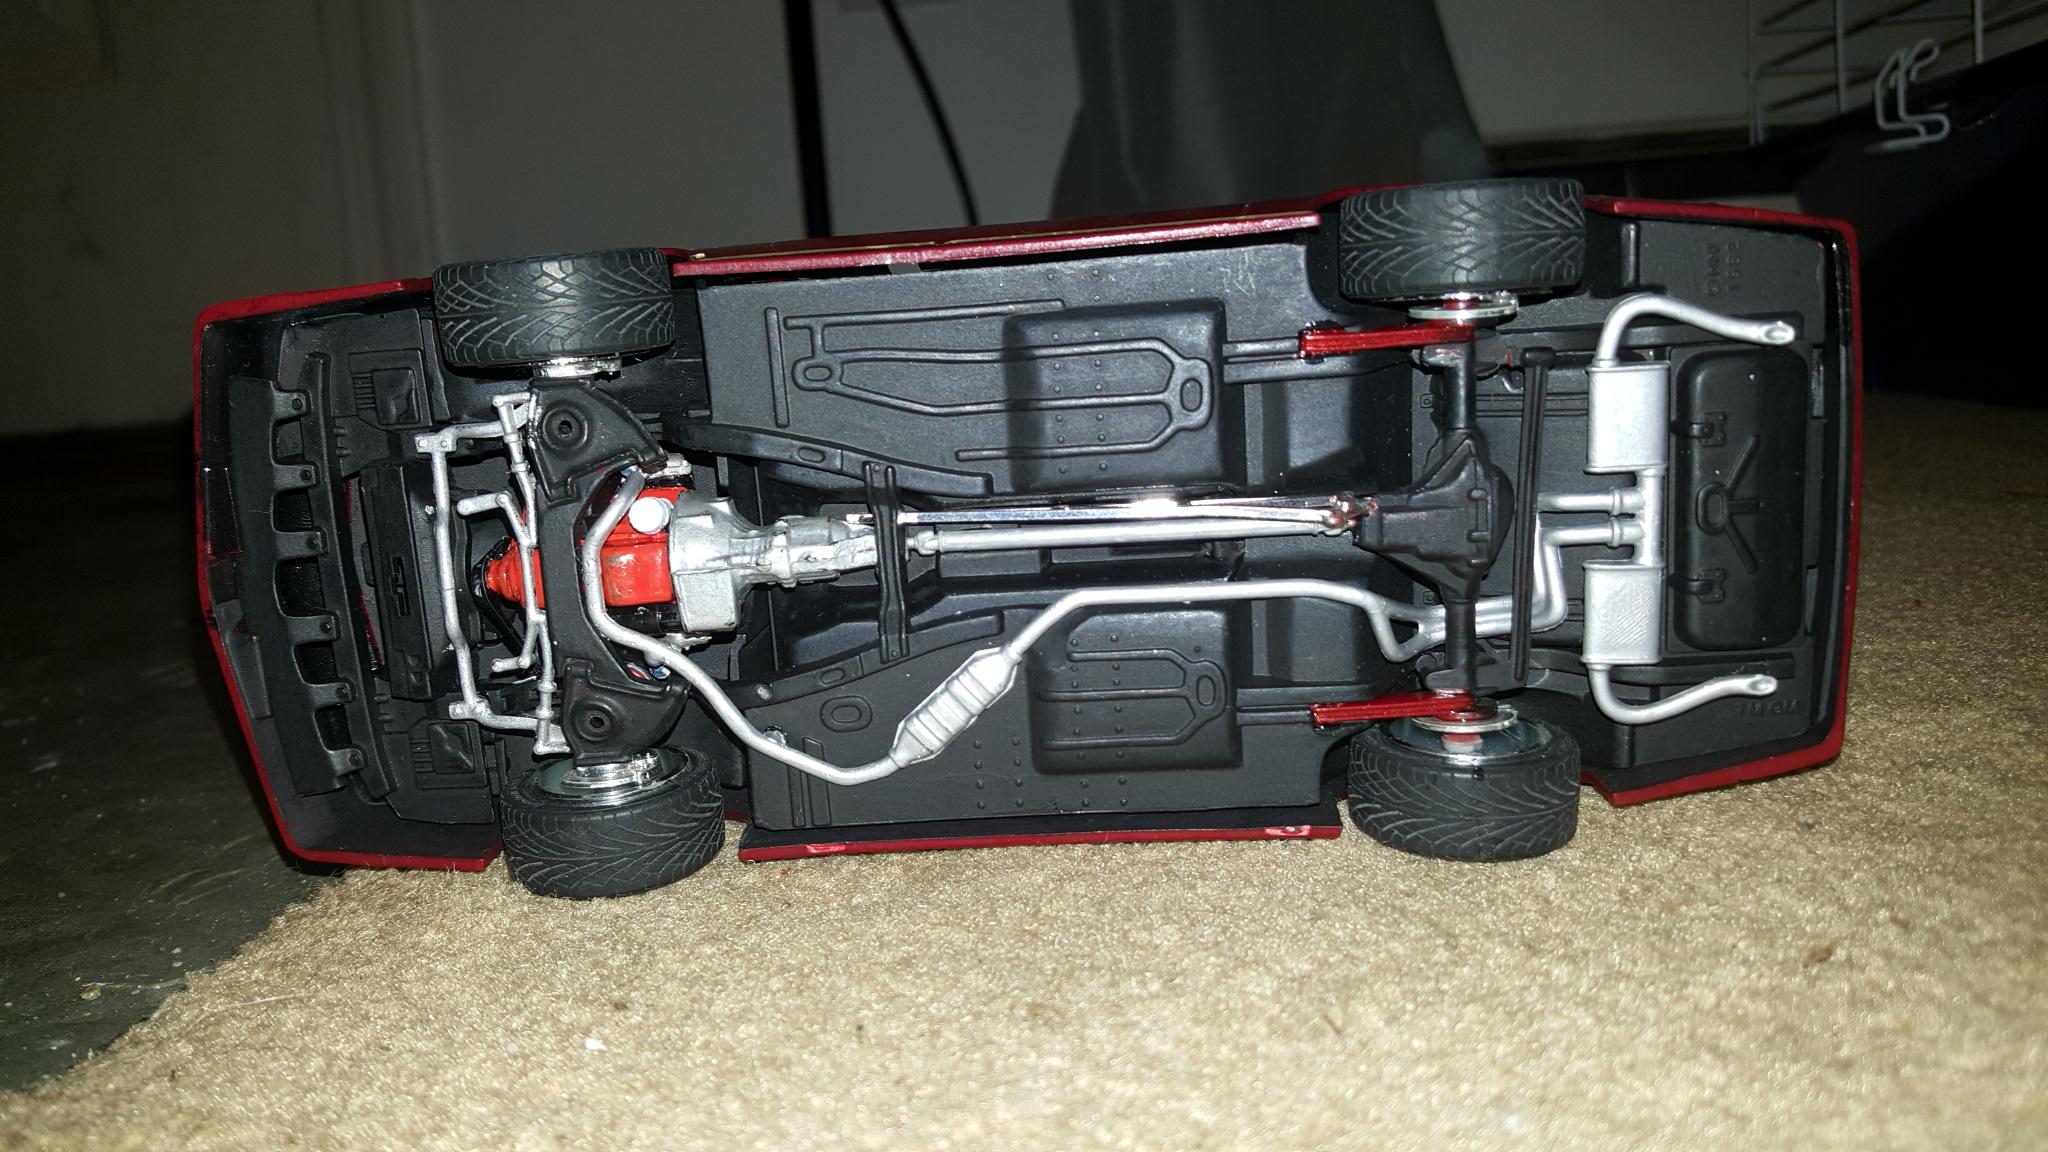
Final assembly for the rear suspension. All works. Not a lot of travel and it’s fairly stiff, but that’s how it should be right?Front is probably going to take a while. Also got steering done (technically incorrect for the car, but there’s a lot on here that’s ‘wrong’), that’ll be shown with the front suspension.
-
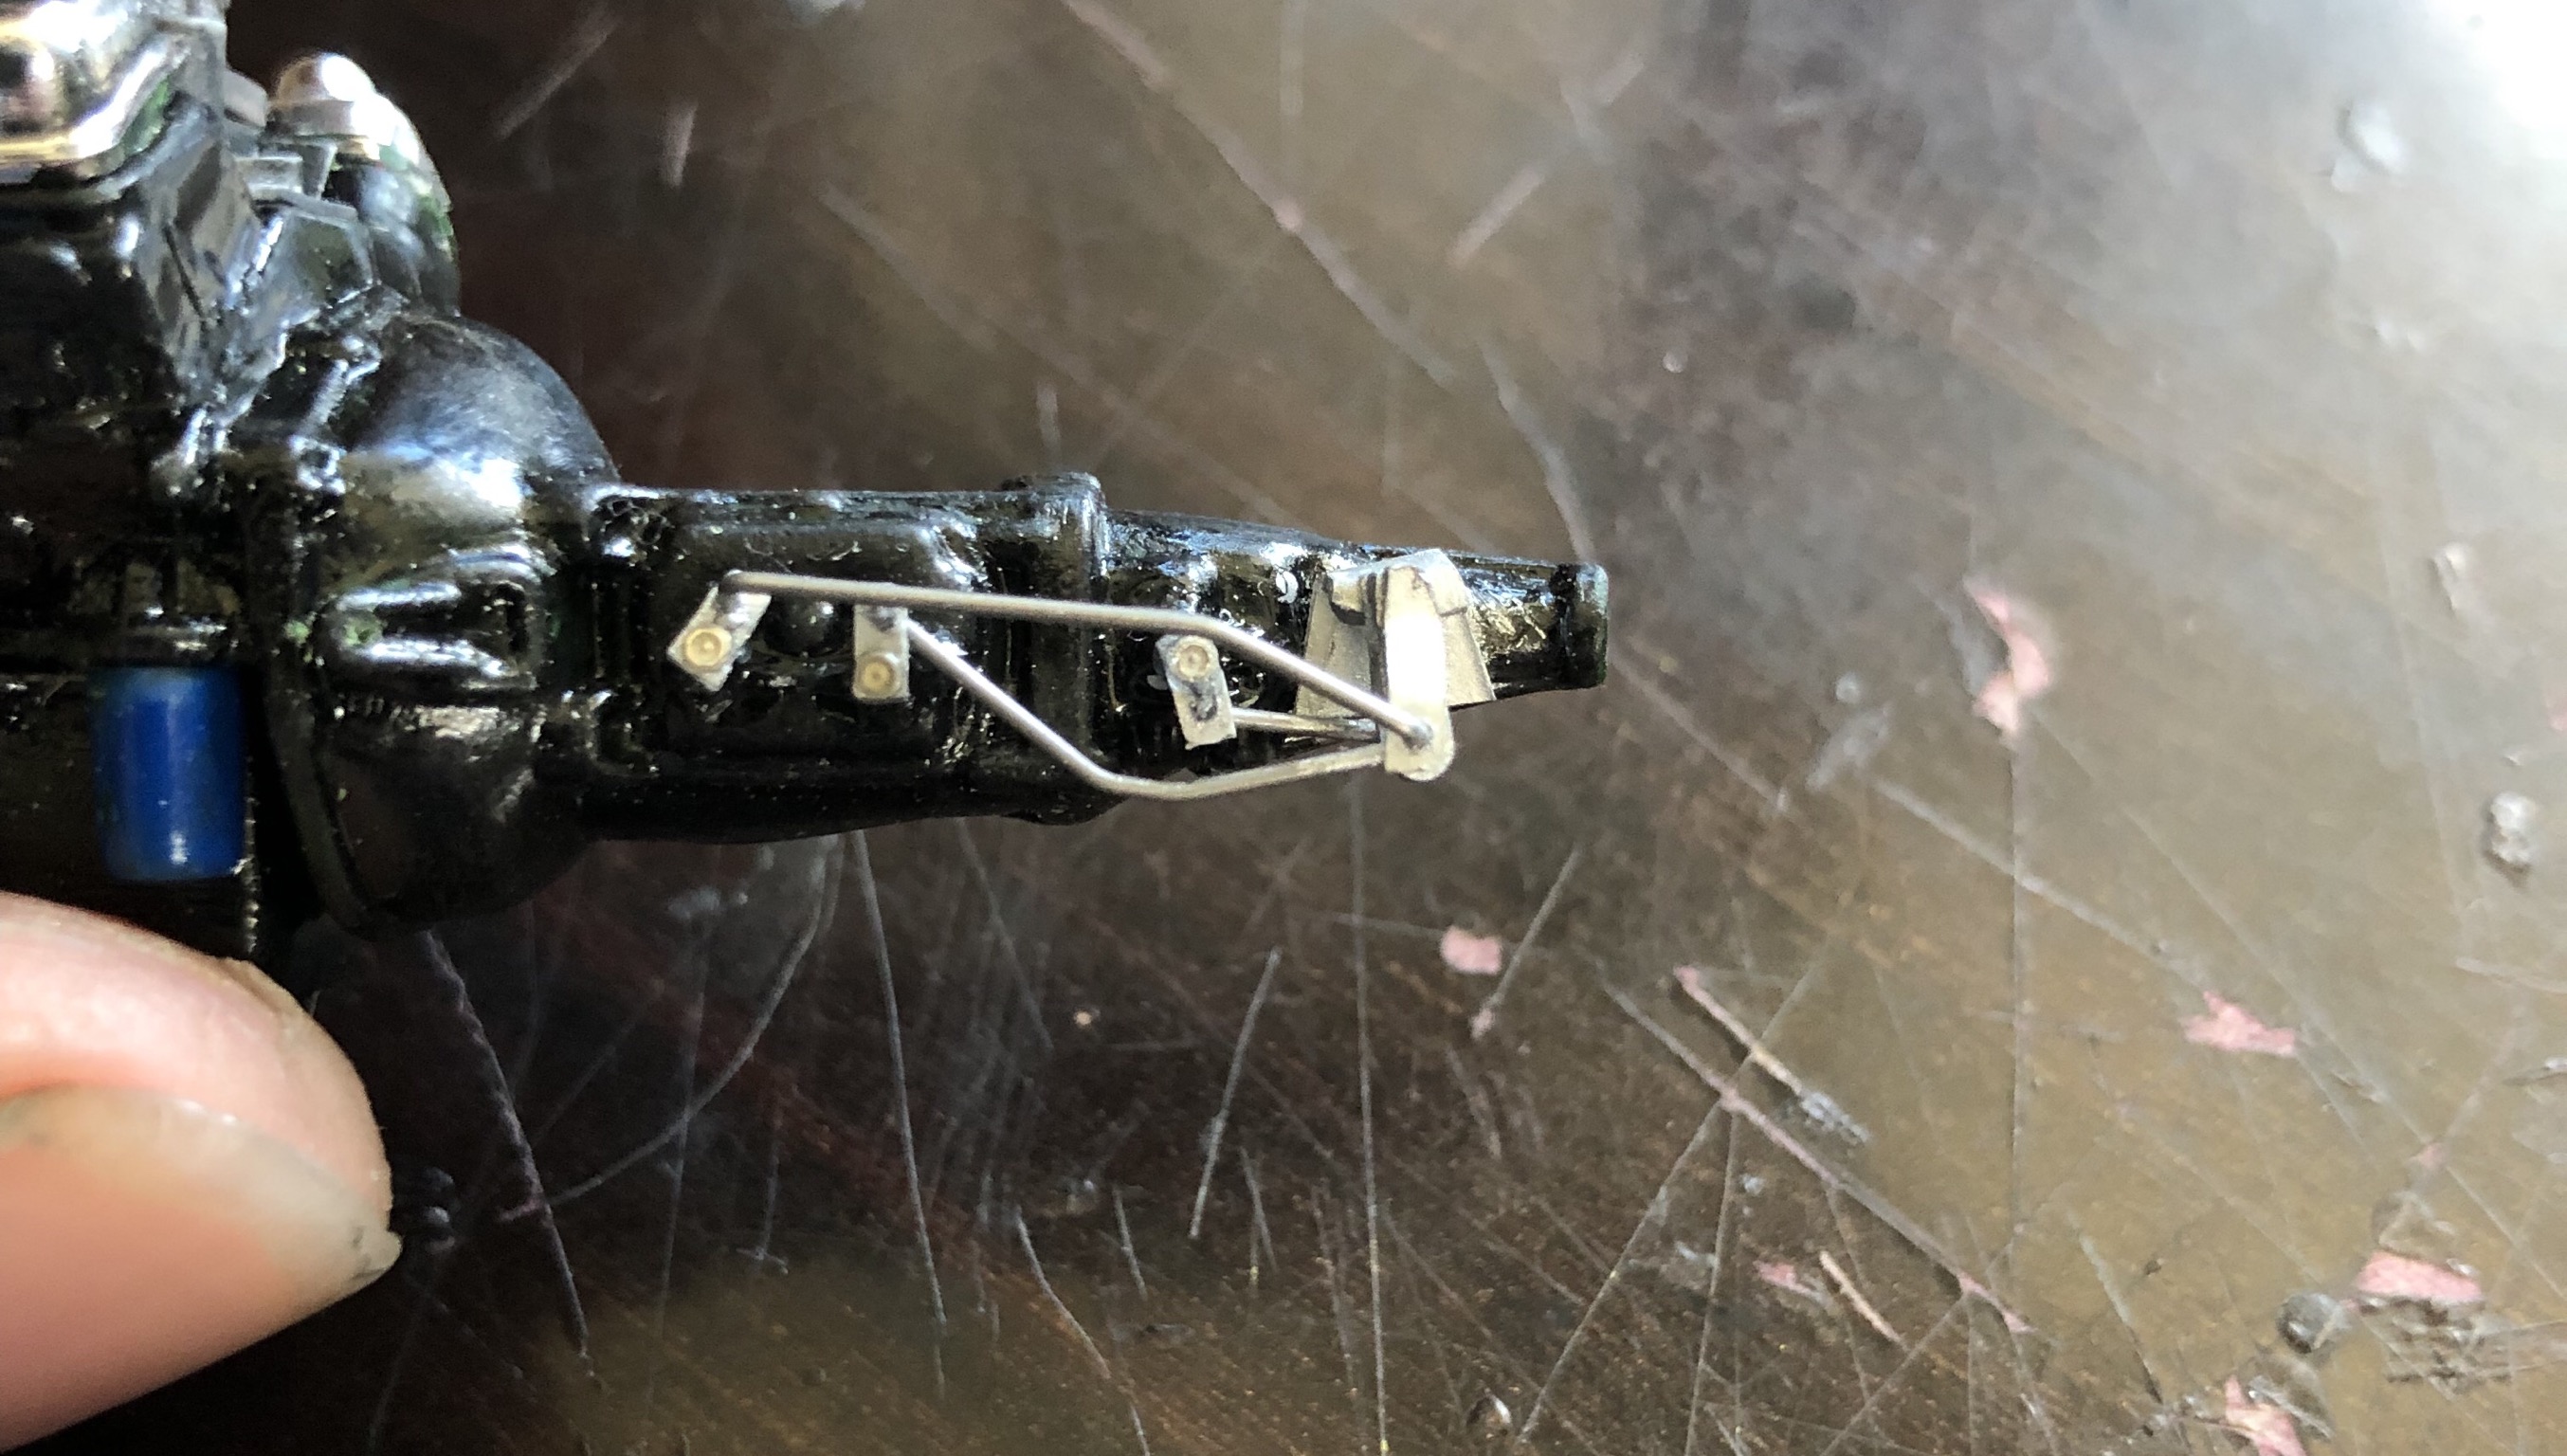
Little progress. Still need to do shocks for the rear suspension, and then sway bars and steering. I’ll show what the rear looks like when that’s done. Here’s how it’ll sit, or similar anyways. And then I did the shifting linkage on the transmission, got bored one day and thought it would be fun. Didn’t do the shifter up, but that won’t be seen anyways. Also got the trunk cut out and the wing on, but needs work and hinging yet.
-
Just out of curiosity (and impatientness apparently), is the truck going to have the radical degree (for lack of better words) of camber like that when it’s finished? Or is that simply from mock up, since it’s difficult to keep the wheels upright?
-
It’ll be a lot of work no doubt, but I have time to figure it out
-
I didn’t take it as such, so no worries lol haven’t thought of cardboard, that’s an idea. I’ve considered creating a seat frame and covering it in actual cloth, or maybe a real thin vinyl. The seams and such could be difficult, though I suppose they could be cut into the frame (sheet styrene and putty to make the ‘foam’?). Could be something to try. I won’t mess with that for this build, but perhaps my ‘48 ford model coming up.
-
Though I suppose it fits better for cloth, where as your typical flocking is better for carpet
-
21 hours ago, Plastic_Passion said:
My girlfriend accidentally turned my 300zx into a convertible that a 18 y/o would drive
I am 18, and my convertible is a little bit nicer than that lol
So you basically made your own flocking with paper? That’s a smart idea
-
You know, I hadn’t considered using putty for those. I think I might, thanks for that. And I’d like to know your (or whoever’s) trick to the upholstery too, I’ve always wanted to make that look more realistic. My impala turned out okay in there, but that’s the only car I’ve had where the interior looked right. I might use the gel glue idea, too, it would be far easier than building up styrene. Those pictures should also be helpful...I’m glad you liked the door idea. It wasn’t entirely mine either, I saw something similar on a ‘69 mustang. He did it straight onto the interior tub though, and a little bit differently. I’m hoping mine ends up looking a little better than his did.
-
I had to cut them to get the doors off. I’m thinking of finding a way to attach them to the same part where the door is hinged at, like the actual car, but that gives some clearance issues with the windshield. I’m going to have to make some modifications to the windshield (or make a new one) anyways, so we’ll see what I come up with. I’m wanting to do all the a pillar interior pieces and everything too, so I’ll find some way to make it look good.
-
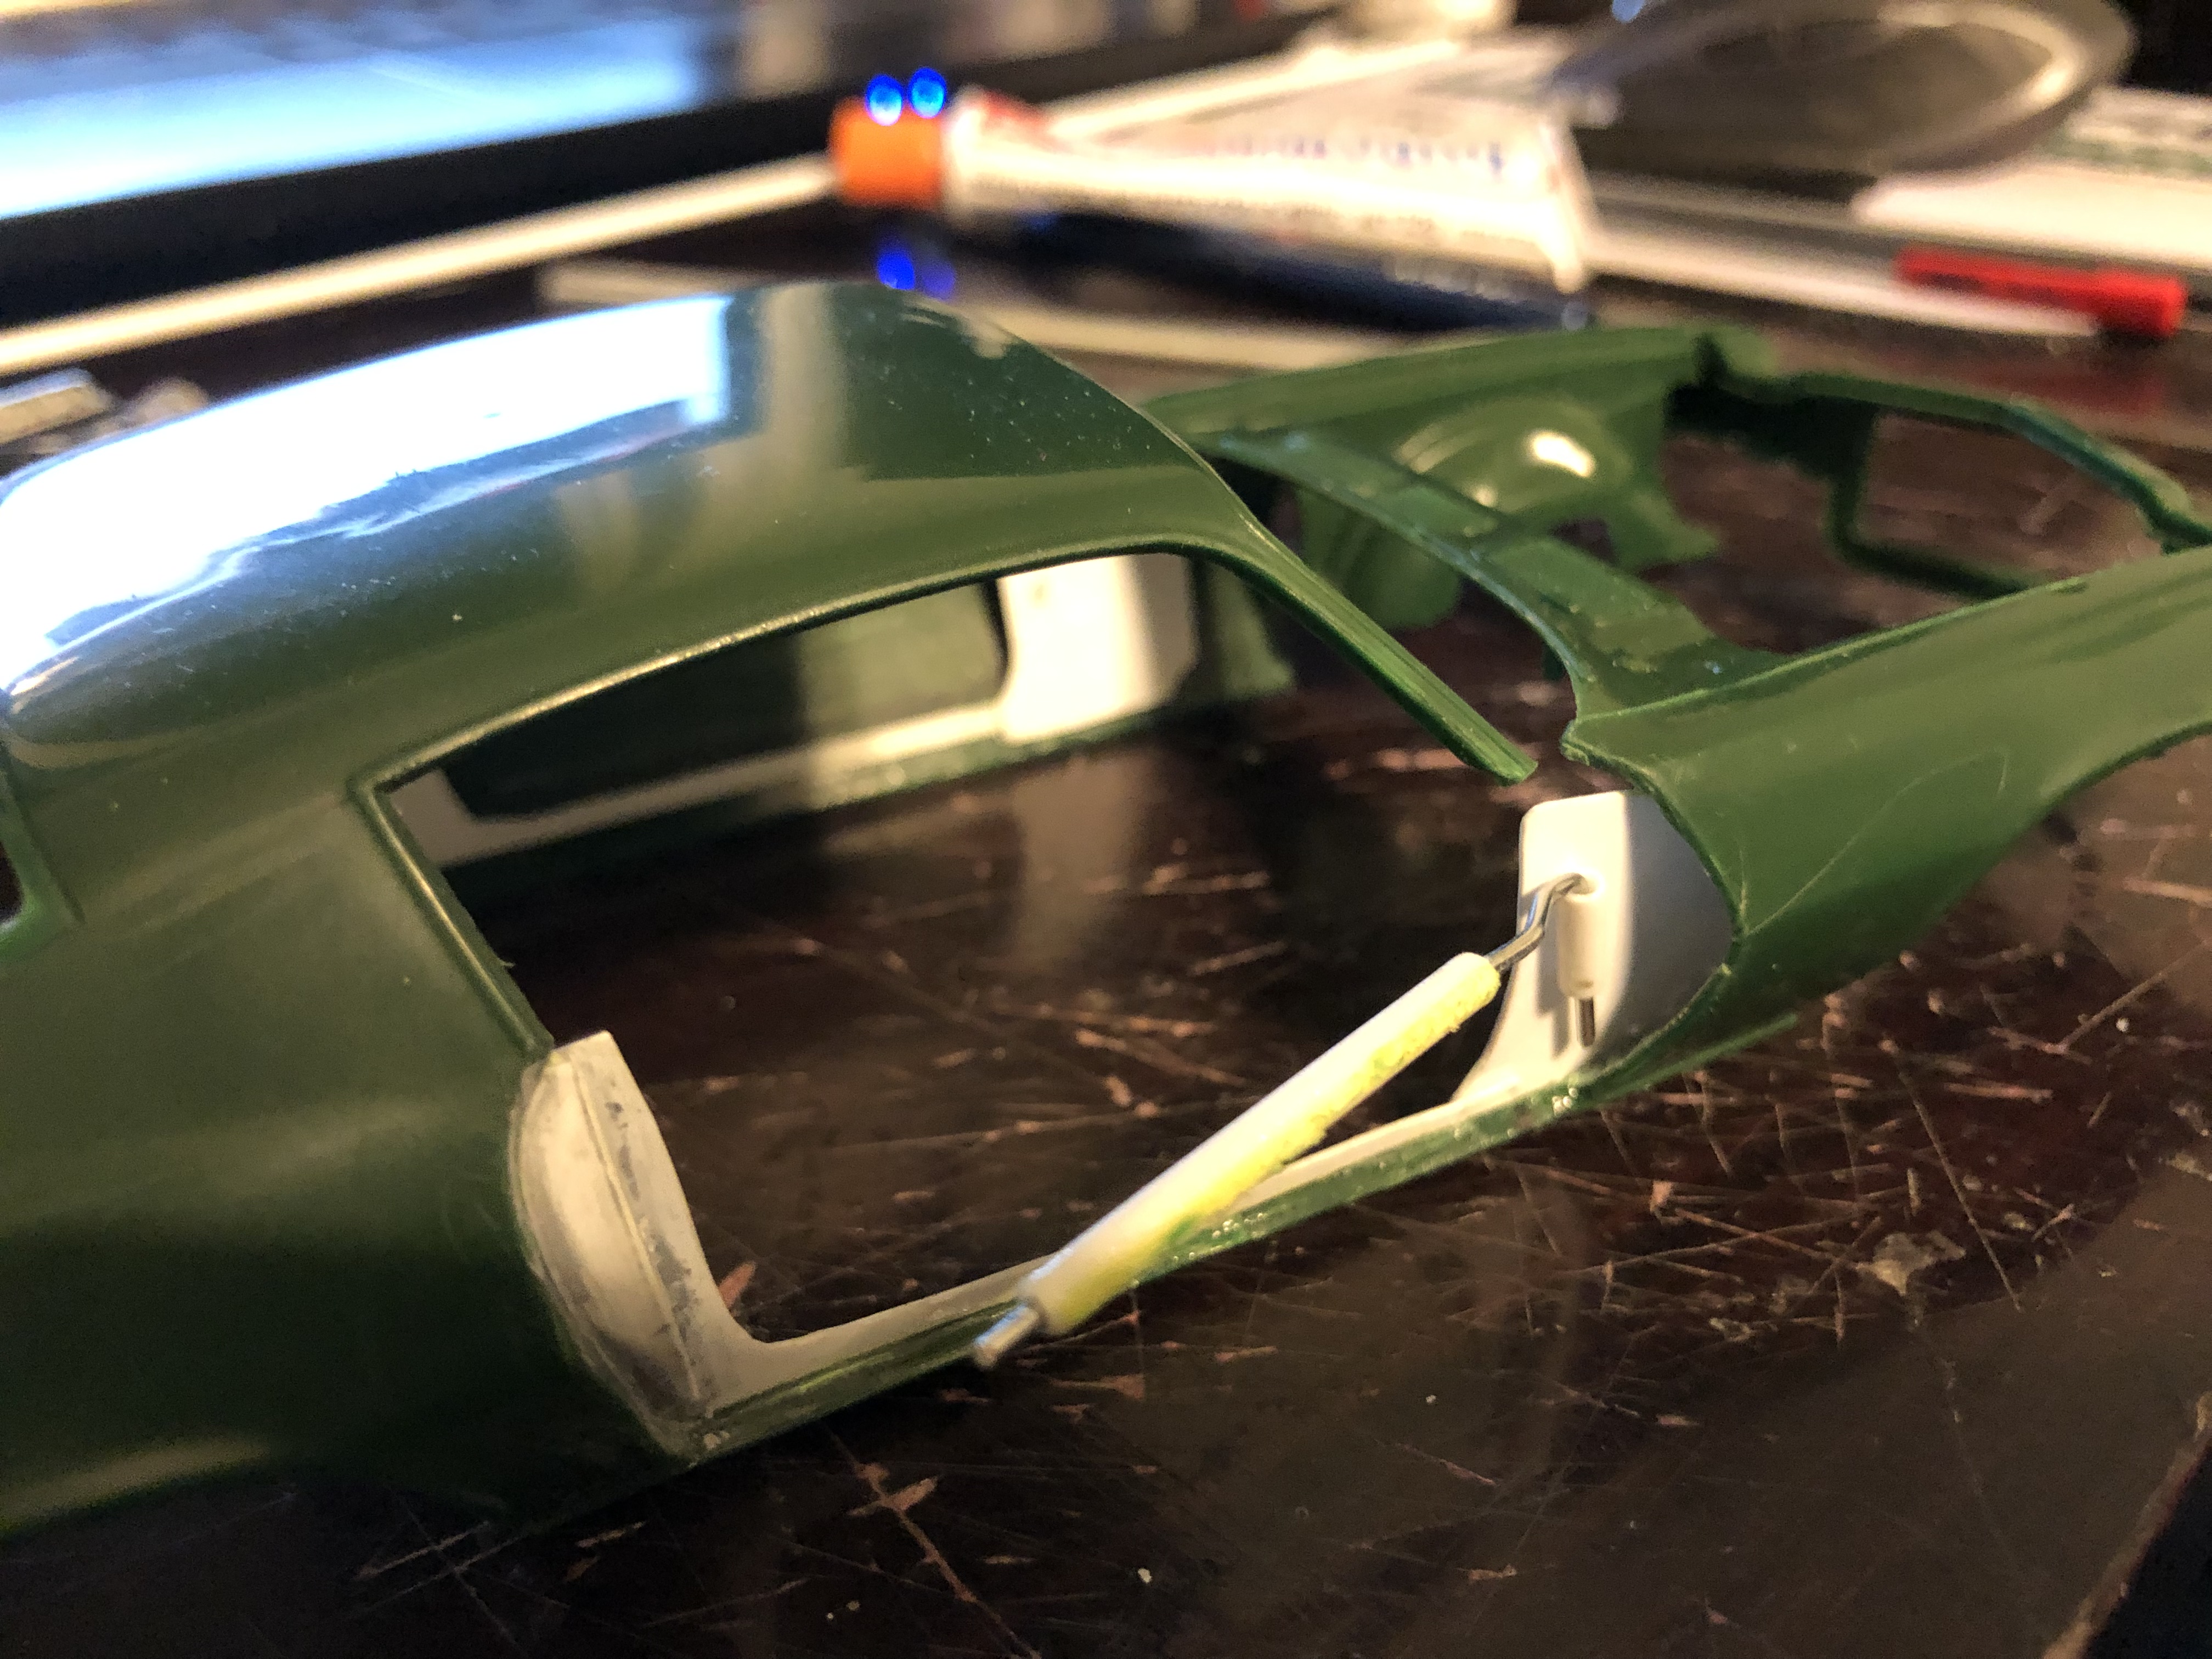
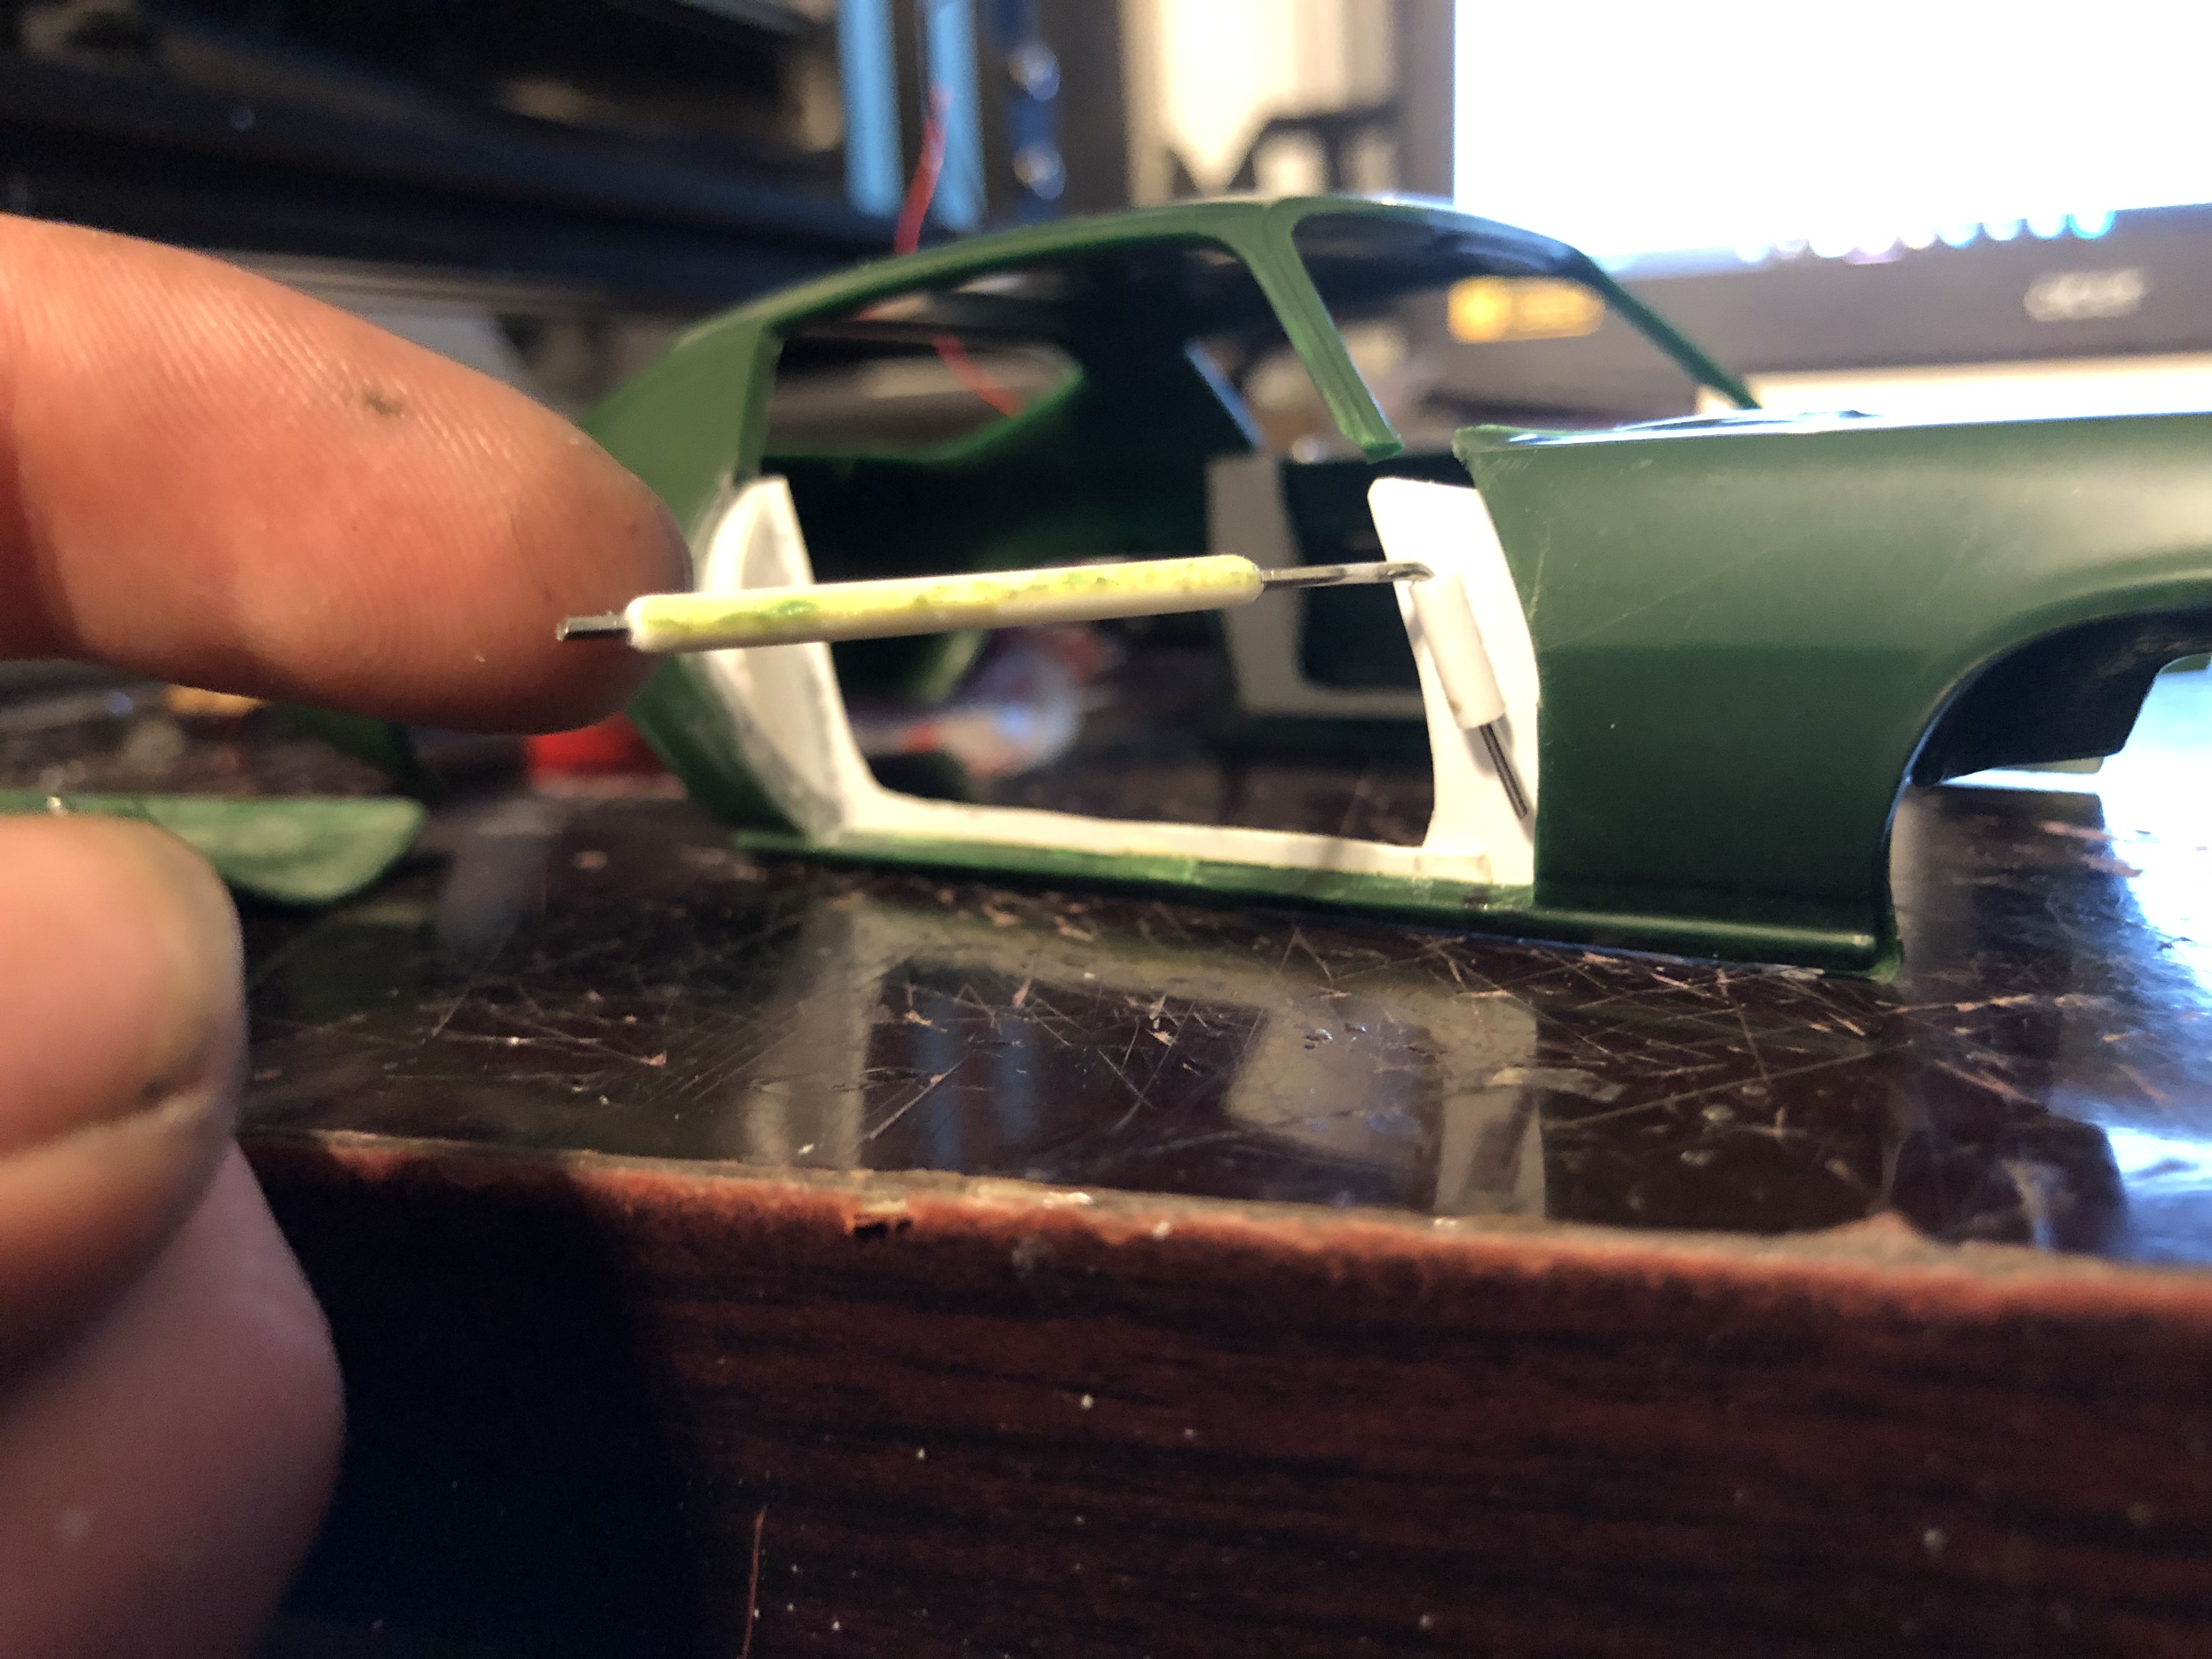
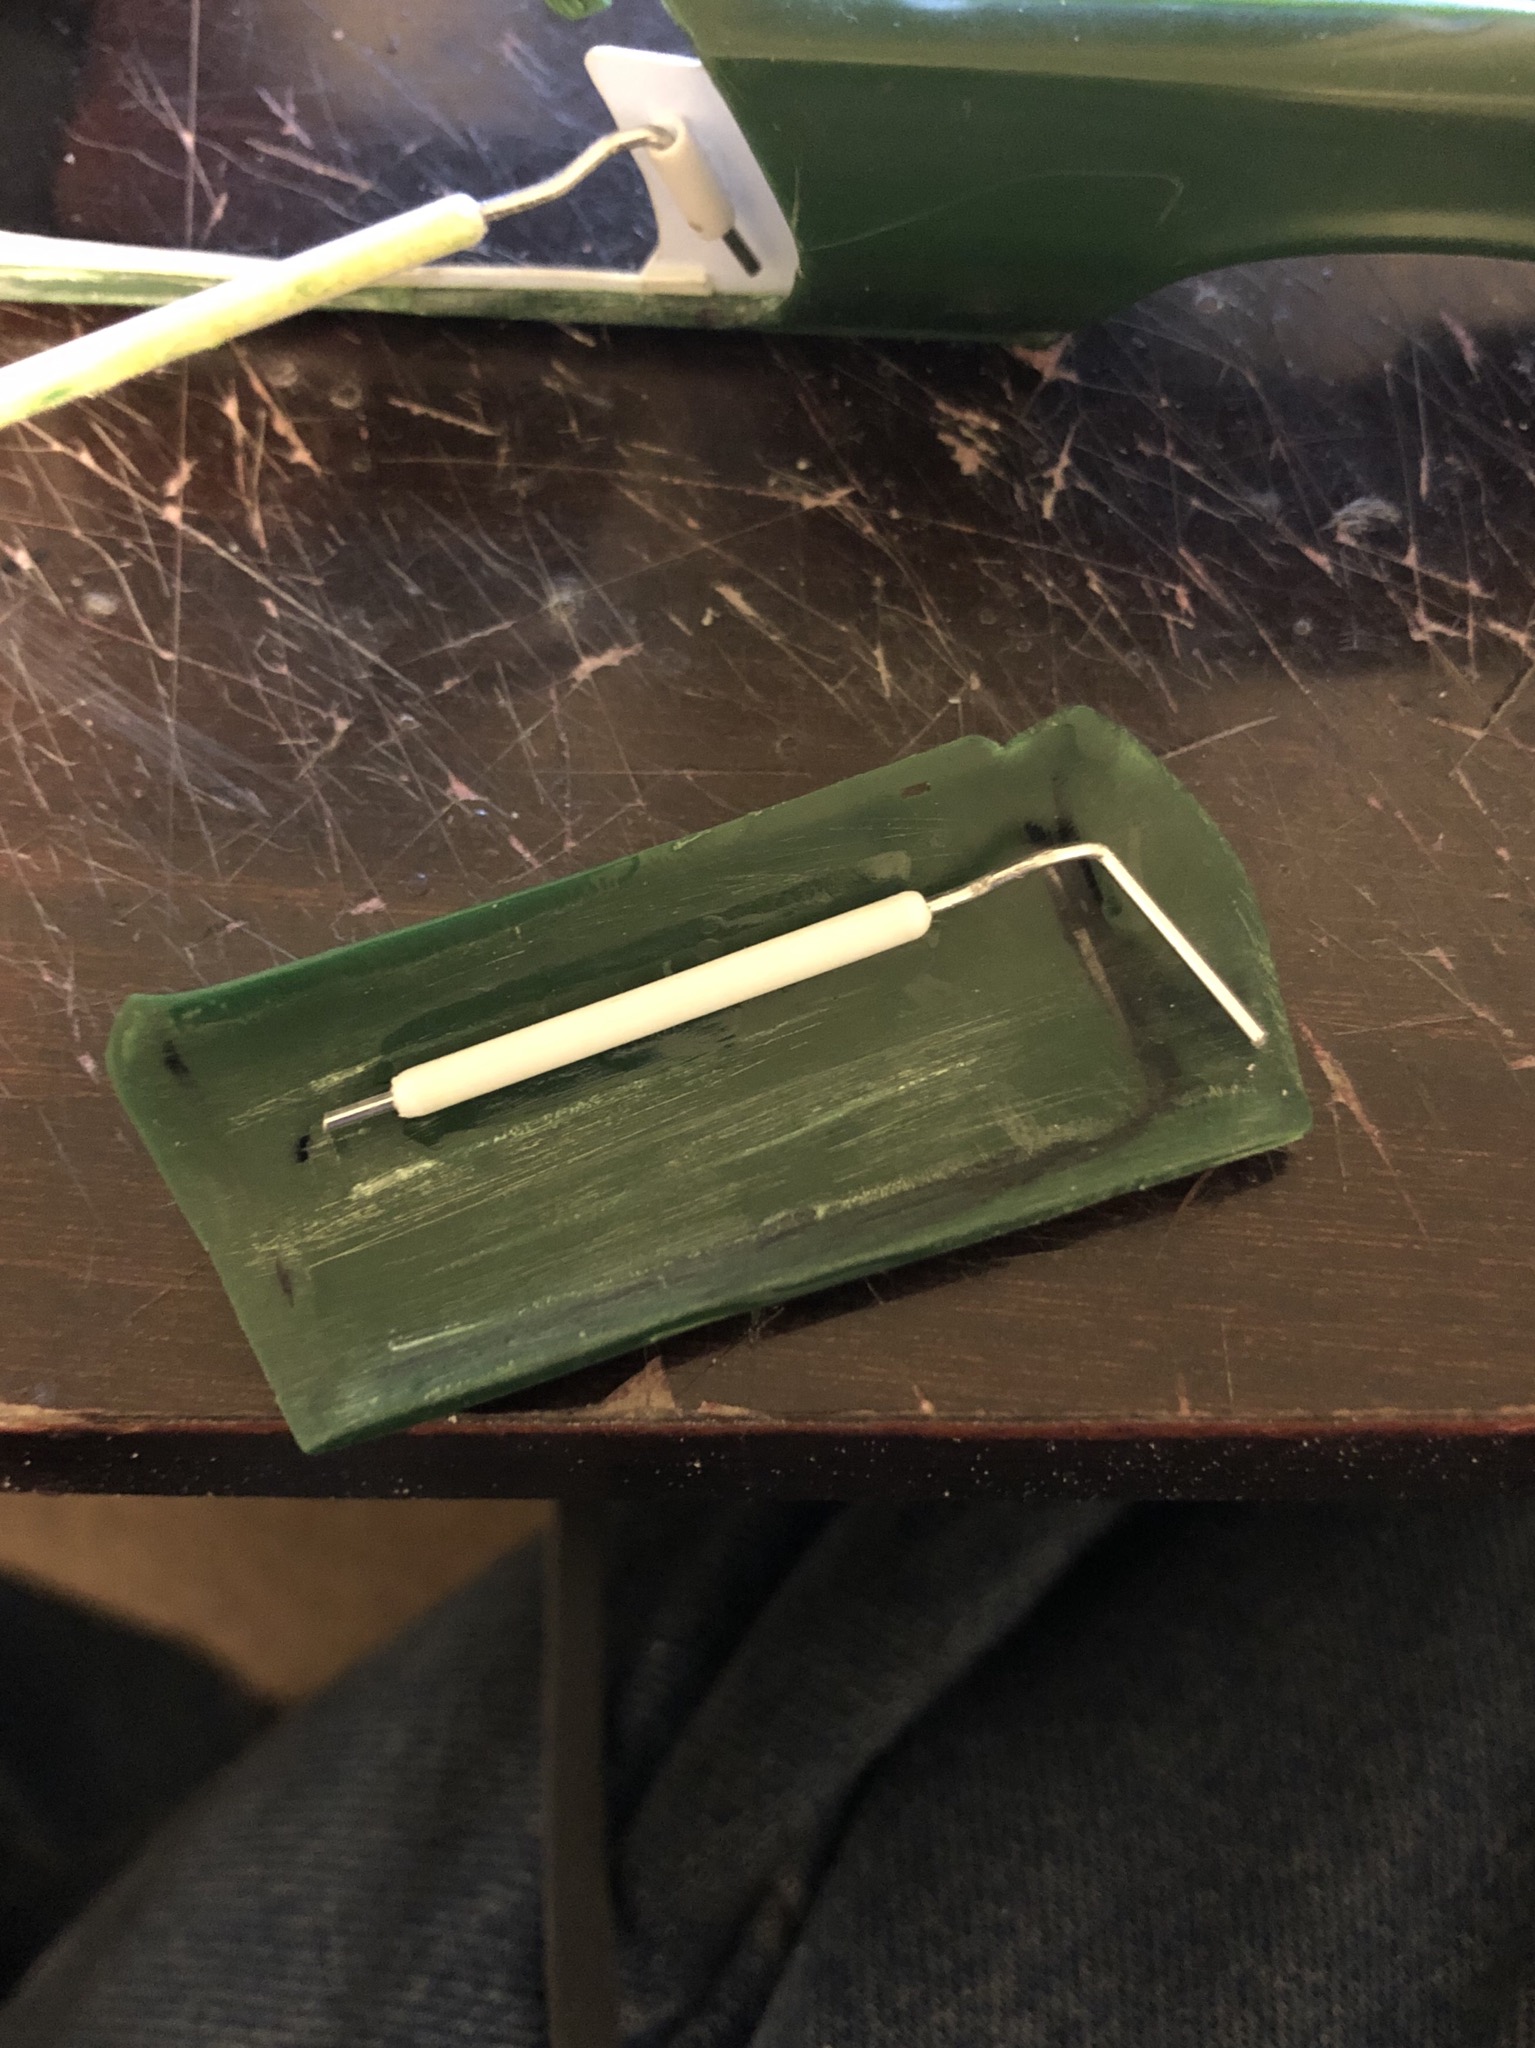
So before, when I made the door jambs, I made those white pieces that match the interior tub towards the front. You’ll see what I’m talking about in the pictures. This is where hinges on the actual car would be. So I put a small piece of tubing there, which had to be angled since the piece it’s glued to is angled. That’s kind of difficult to explain, but without doing so, the doors opened more downward. I used a paper clip for the rod, and then the same tubing as before for where the door is attached to it. Of course I thinned out the edges of the door, and front of the door opening, before attaching it. Takes a bit of trial and error to get everything lined up right, but the results are, in my opinion, better than traditional methods. You could do the same thing just attaching to the interior tub if you wanted to, but I decided to have it just on the body itself. I found that it made it easier to work with. Hopefully that’s easy(ish) to follow
-
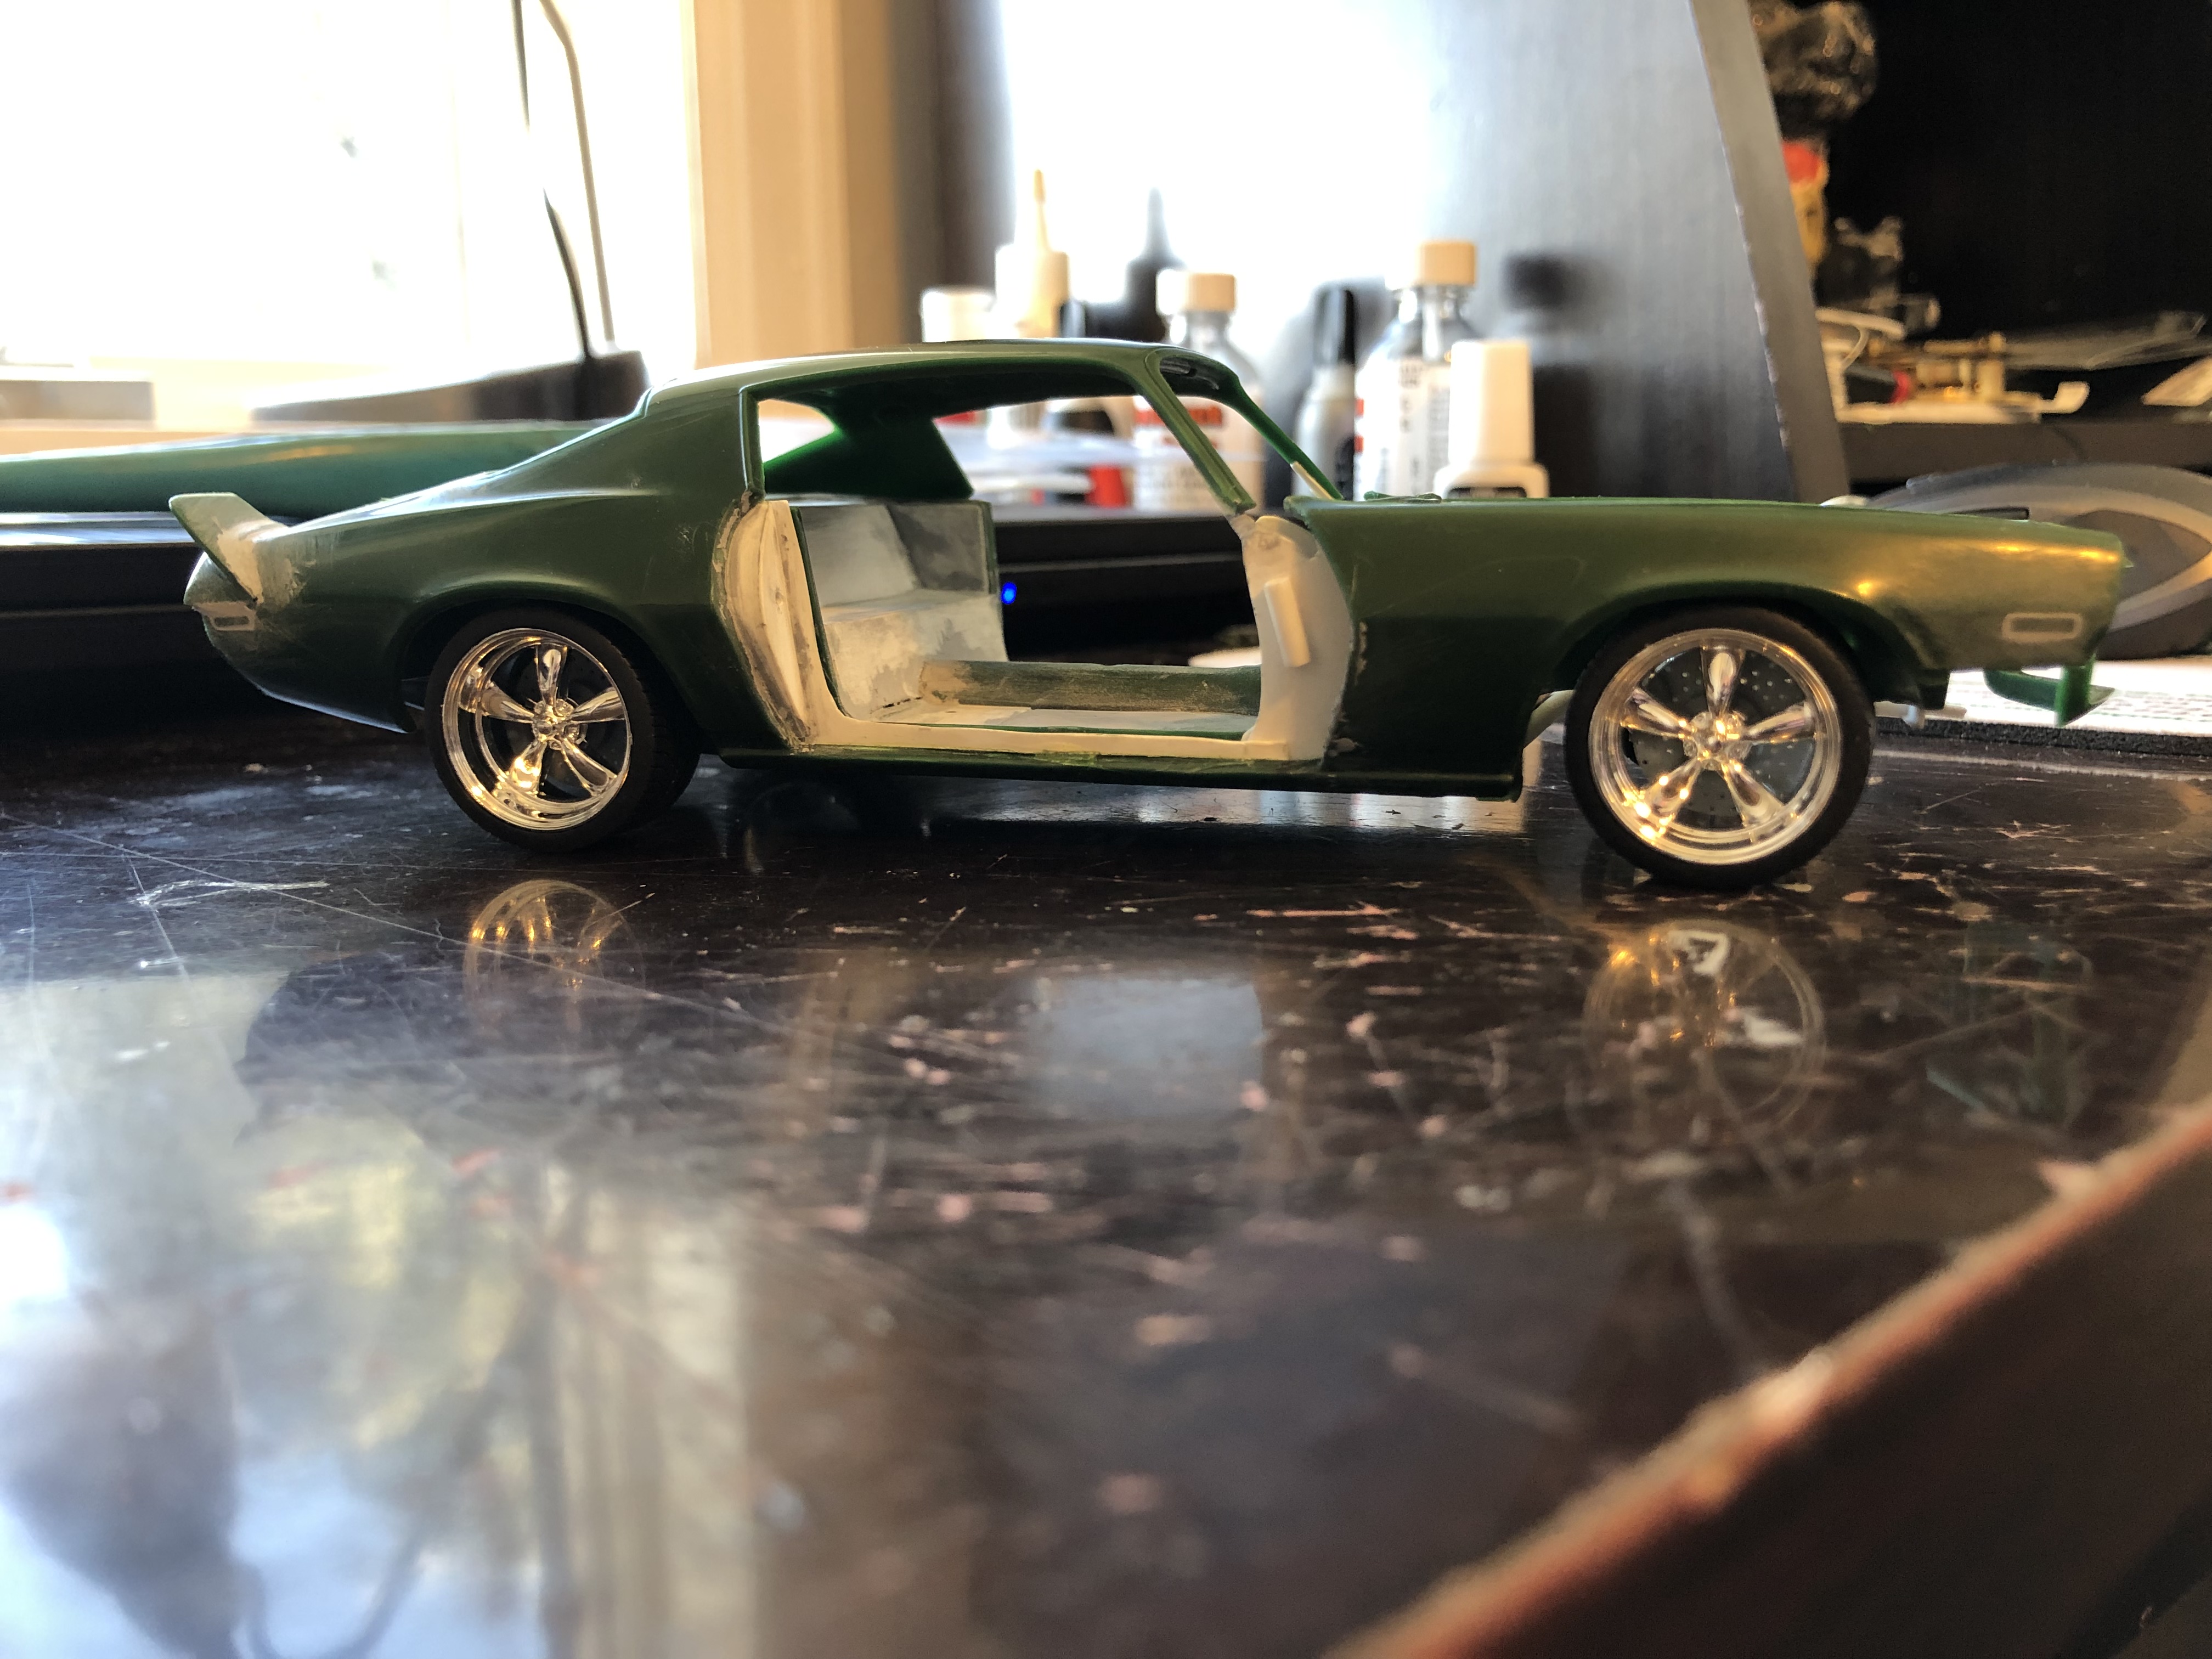
I ended up spending the day helping my dad make a Carson top for his 1:1 ‘51 Chevy, so I didn’t even end up getting the other door hinged (though it’s most of the way there). Here’s the drivers door anyways. It doesn’t like to stay shut, but I think that having the body of the door done will help with that. I’m done working 12 hour days now, too, so I should have a little more time for modeling shortly.
-
1 hour ago, Plastic_Passion said:
Thanks man! I'll certainly post it. I have been on a short hiatus this year as I've made a few life changes. Bought a condo, a dog, and a new truck.... go big or go home right??? Lol but yeah I'll be hopping back in shortly.
I definitely feel that, I’ve gone through a couple new cars and I’m looking at a career change. Modeling is all that’s keeping me sane!
-
Man, that’s a lot of work. Good bit of inspiration for me though, I appreciate you sharing. I’ll be keeping an eye out for your 70.5, I’ll be interested to see how it turns out. If you’re posting it, that is
-
On 12/31/2018 at 4:52 PM, Plastic_Passion said:
My camaro I did suspension in. Front and rear.
That looks fantastic. Your suspension was working? How’d you get it? I wanted to use the factory stuff, but couldn’t make it work, hence the tubular stuff.
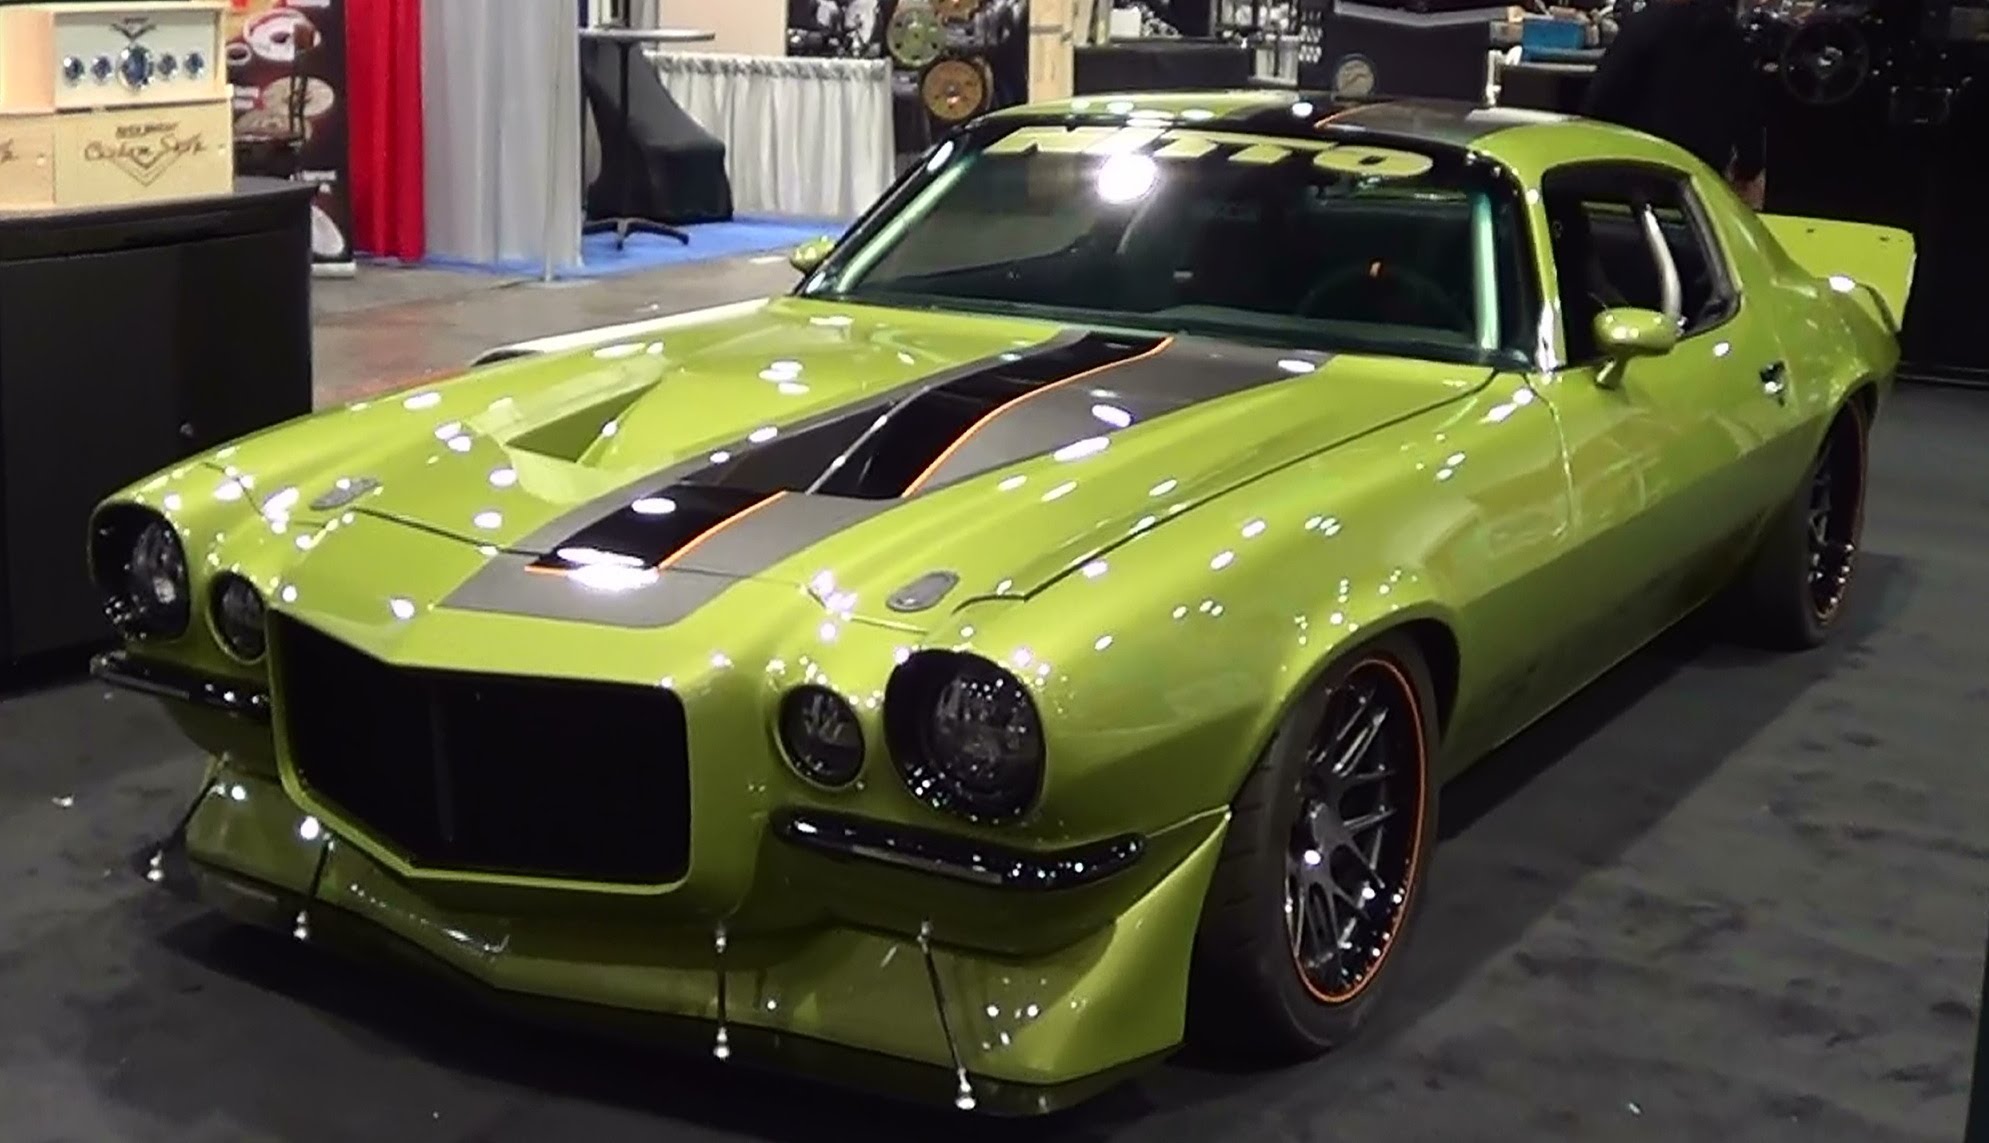
On 12/31/2018 at 4:56 PM, Plastic_Passion said:My '70 inspiration
What’s your plan for the hood, or are you going a different route? Looks like it’ll be a fun build.
I’ve made a little progress, mainly just got one door hinged (almost done with the second). I’ll probably get around to that sometime this weekend, and I’ll get some pictures up of whatever I get done.
-
Unfortunately, my December bad luck continued, and I now have to replace my truck. I swear I'll get back to this build, it just might be a little bit before I can really put more money into modeling. Until then, I'll be using what I have available to work on my camaro build. I'm really hoping to be back on this before long. Sorry guys
-
Looking great! I have to ask, How are you keeping all of the body panel lines there? A lot of primer usually fills them for me. Figured I’d ask, since I’ll have a similar project coming up soon
-
Merry Christmas guys!
Finished up the front suspension this morning. Needs finishing work to look good yet, obviously enough, but it’s actually all fabricated at this point. Still needs steering...but I have an idea for that. The motor is crooked in the pictures, I have yet to make motor mounts is why. It’s just kinda chillin in there. Also made the cage (just a small 6 point, I might add a couple bars yet to make it more like the 8 point in my foxbody). Made the other door jamb last week. More progress to come
-
On 12/11/2018 at 11:43 AM, Jantrix said:
Very impressive so far. Looking forward to more.
Thanks
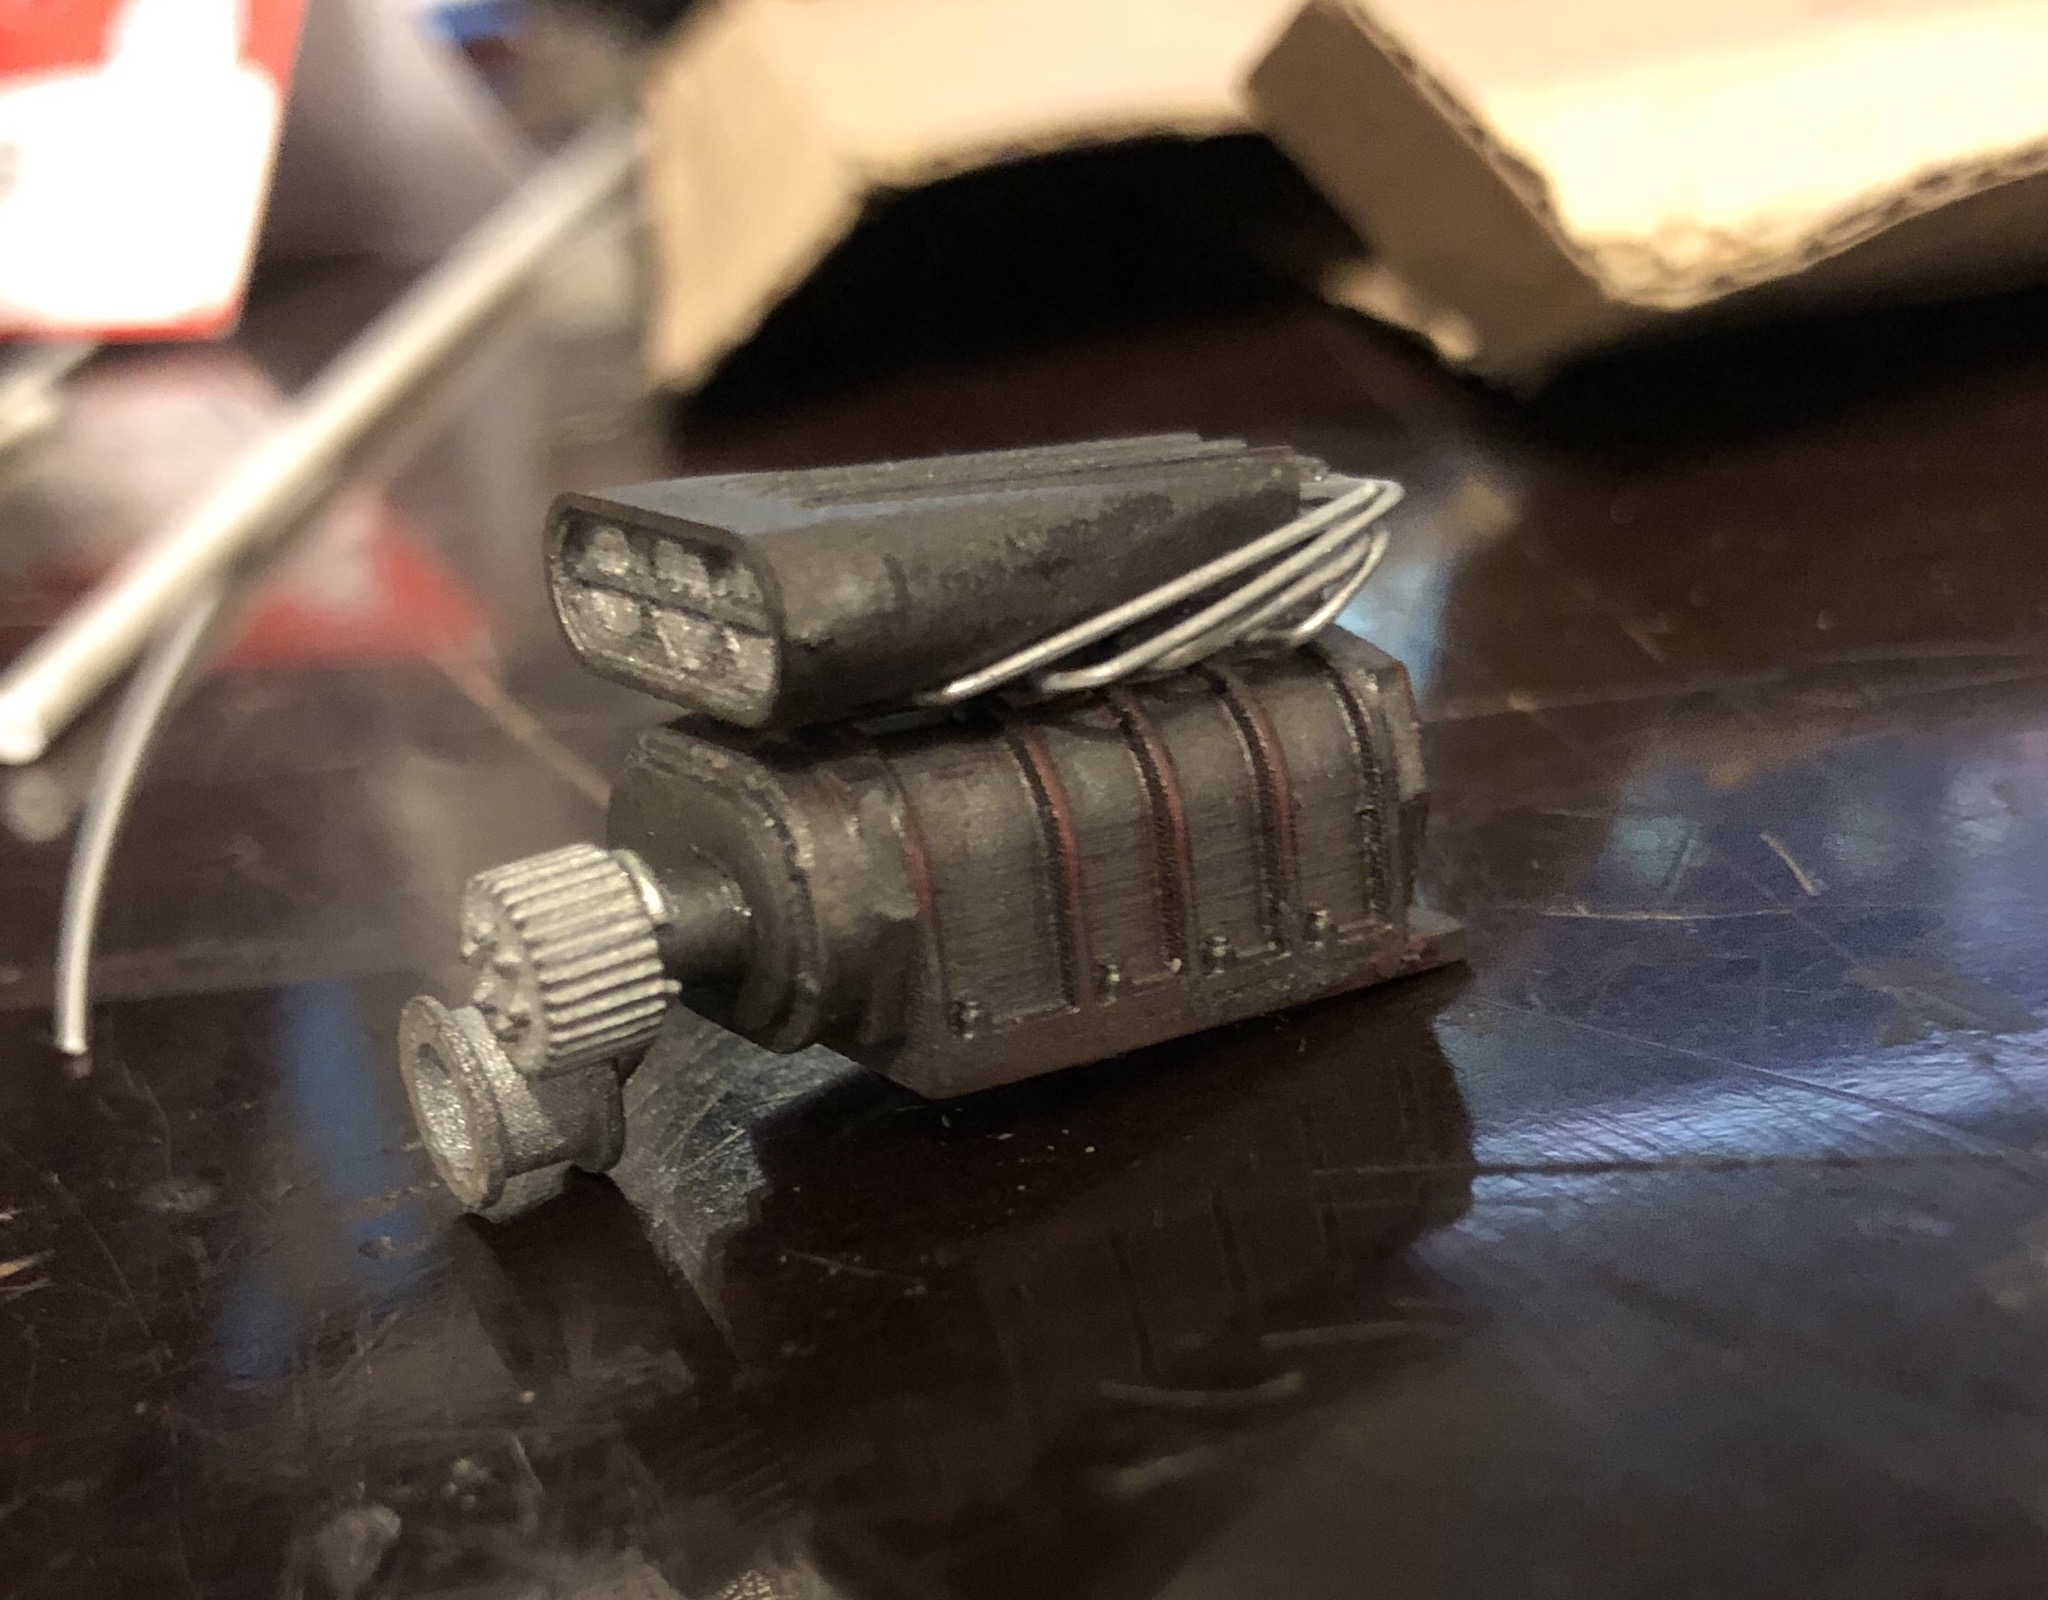
Got the fuel lines on the injector hat done. Not much, but it’s something.
Edit: found a little more time and got some more motor work done. Looking good I think. Need to touch up the butterflies though, trying to get those looking right is tough.
-
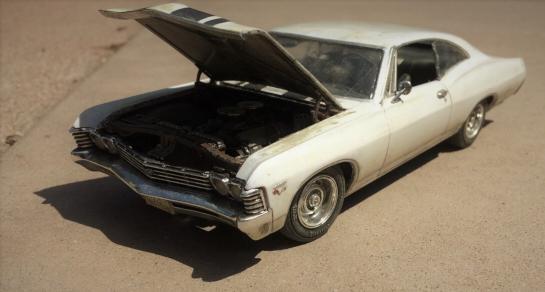
Nobody got hurt, so there’s that. There’s no fixing the insurance though. They’re just giving me less than half of what it would take to replace the car because it has a rebuilt title (it was stolen and stripped in 2011, but it had all brand new stuff (including motor and trans) with less than 40k miles since then). I was less than happy with them to say the least. I bought a donor car, and I’m swapping over everything from the old one. Modeling will just be postponed until that’s done


'70.5 Baldwin Motion Camaro
in WIP: Model Cars
Posted · Edited by THORDOOR220
Thanks, I think it’ll be alright.
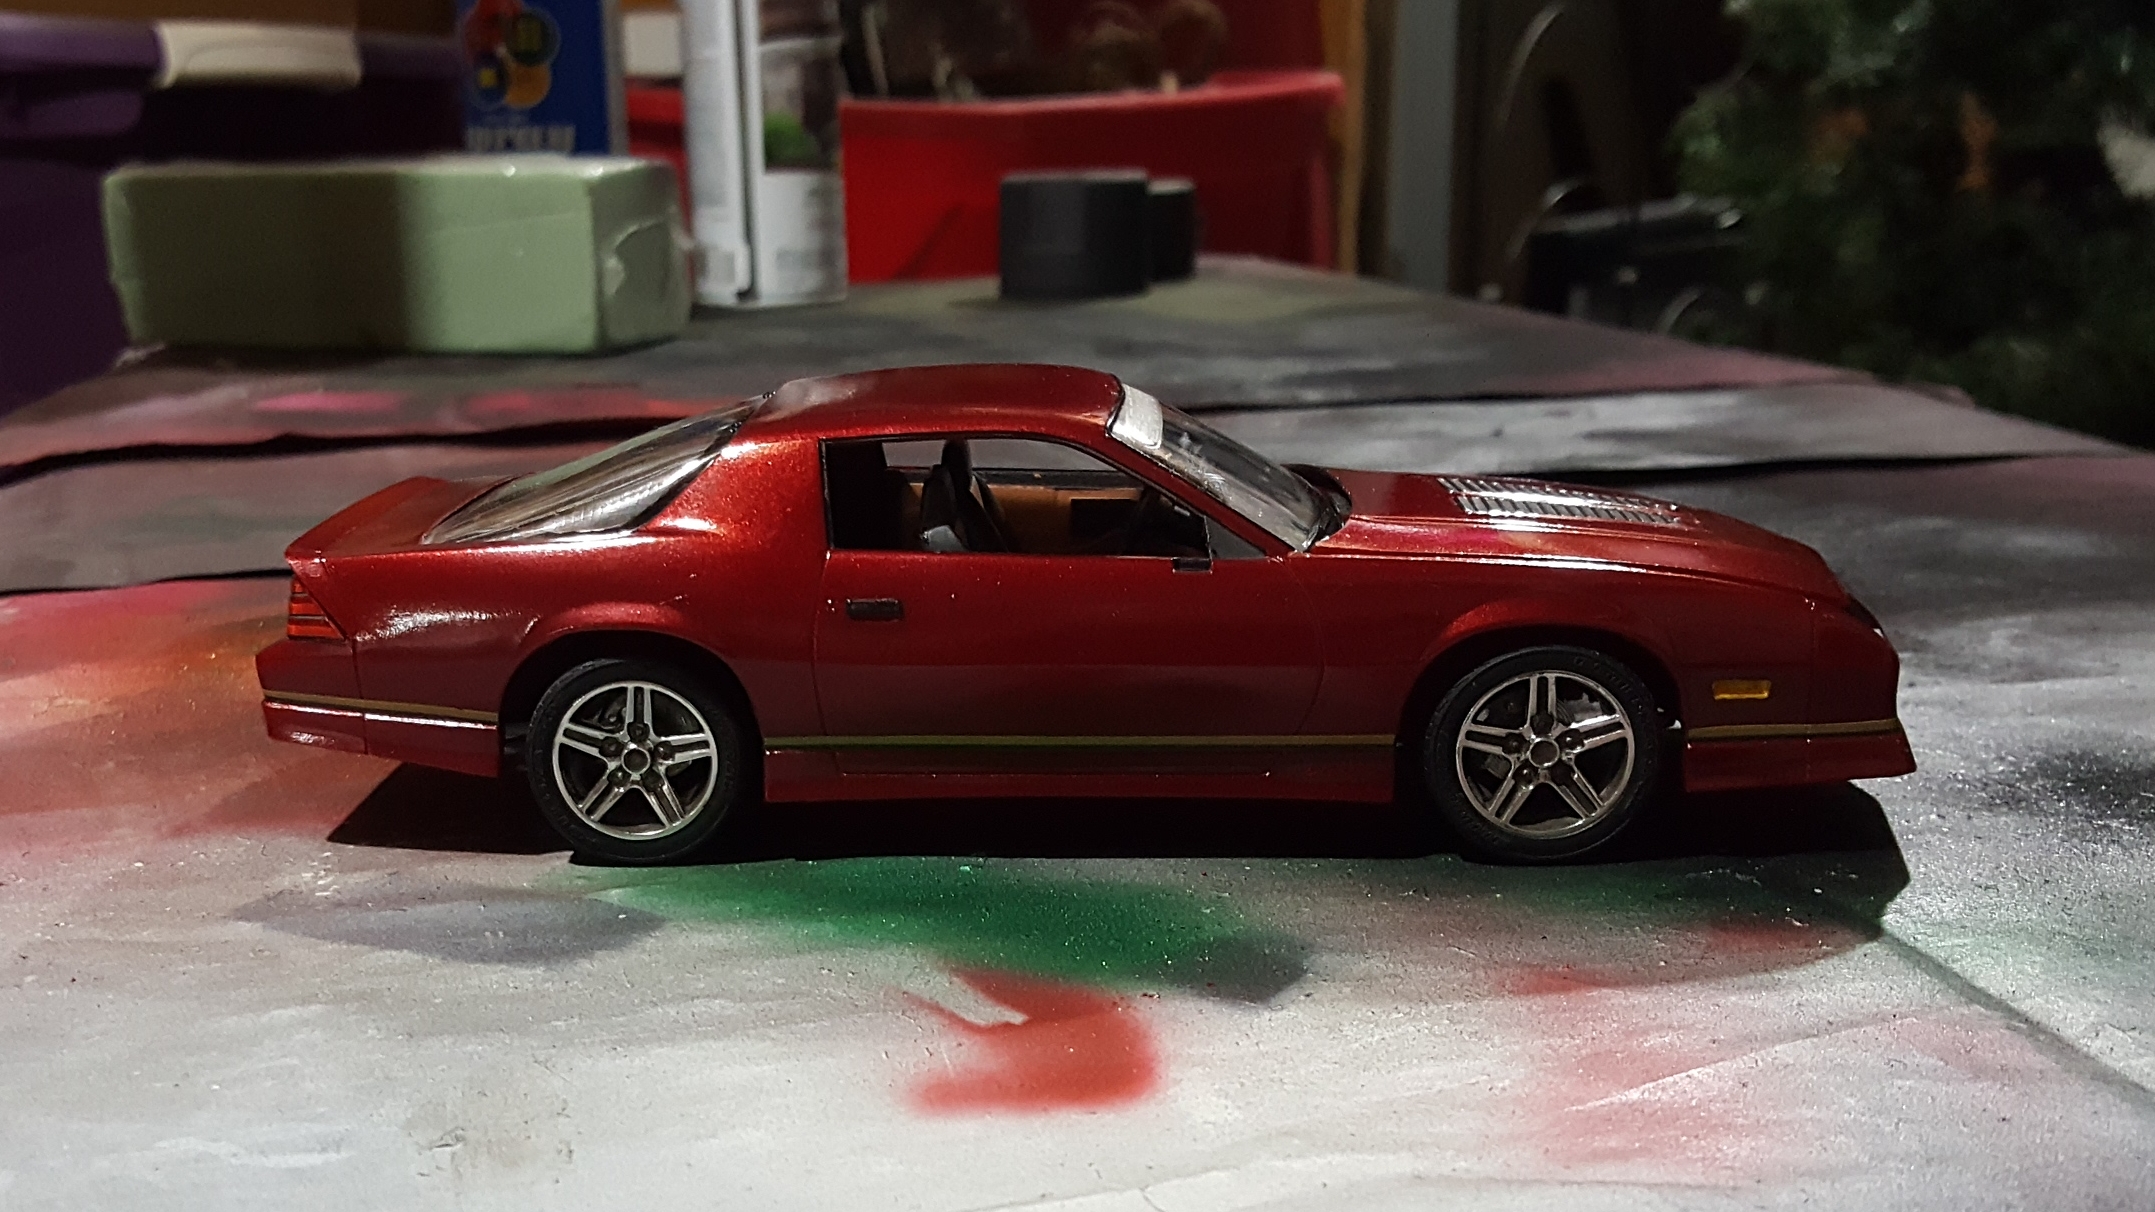
Got it painted and cleared, first time I’ve used an airbrush. Turned out okay, considering all the issues I had. Going to have to buff it to at least reduce that orange peel a bit. Personally I think the stripes look a little goofy up front...but it is what it is at this point.