Everfree Customs
-
Posts
8 -
Joined
-
Last visited
Content Type
Profiles
Forums
Events
Gallery
Everything posted by Everfree Customs
-
As soon as I heard about this kit, I wanted to pick one up. It was going to be built basically box stock, but sometimes things don't always work out that way..... I've been messing around with poseable steering. It seems to be easier to do with early cars and 4x4's. And the fact that this kit came with a separate tie-rod is a huge plus! The overflow can is made from some bits and pieces out of the parts box. Its taped to the radiator for placement as everything else goes together. In this spot, it clears the hood while it's closed. Once the chassis is painted, a bracket will be made and it'll be mounted. The original engine in this kit is a 394 Olds with a really beefy automatic. I wanted to save that for whenever I got my hands on an early '60's Oldsmobile, so another motor would be needed. Another trip to the parts box yielded a Chevy 427 with an equally beefy 4 spd. Judging by the valve covers (In the next photos), I suspect it's the mill from the Revell '66 Malibu Street Rat. Either way, it's a good fit.........except for the motor mounts. Those will have to be repositioned. There we go! A couple of cuts, glue the mounts forward, and it's like it was built for this chassis. This is just a mockup. The blower and the valve cover are painted flat black, but will get a touch-up in silver. It originally came with a pair of dual quads on the blower, but those are being replaced with the injector from the kit engine and a kitbashed blower scoop.

-

WIP: Roy Revant's car from Solty Rei
Everfree Customs replied to Everfree Customs's topic in WIP: Model Cars
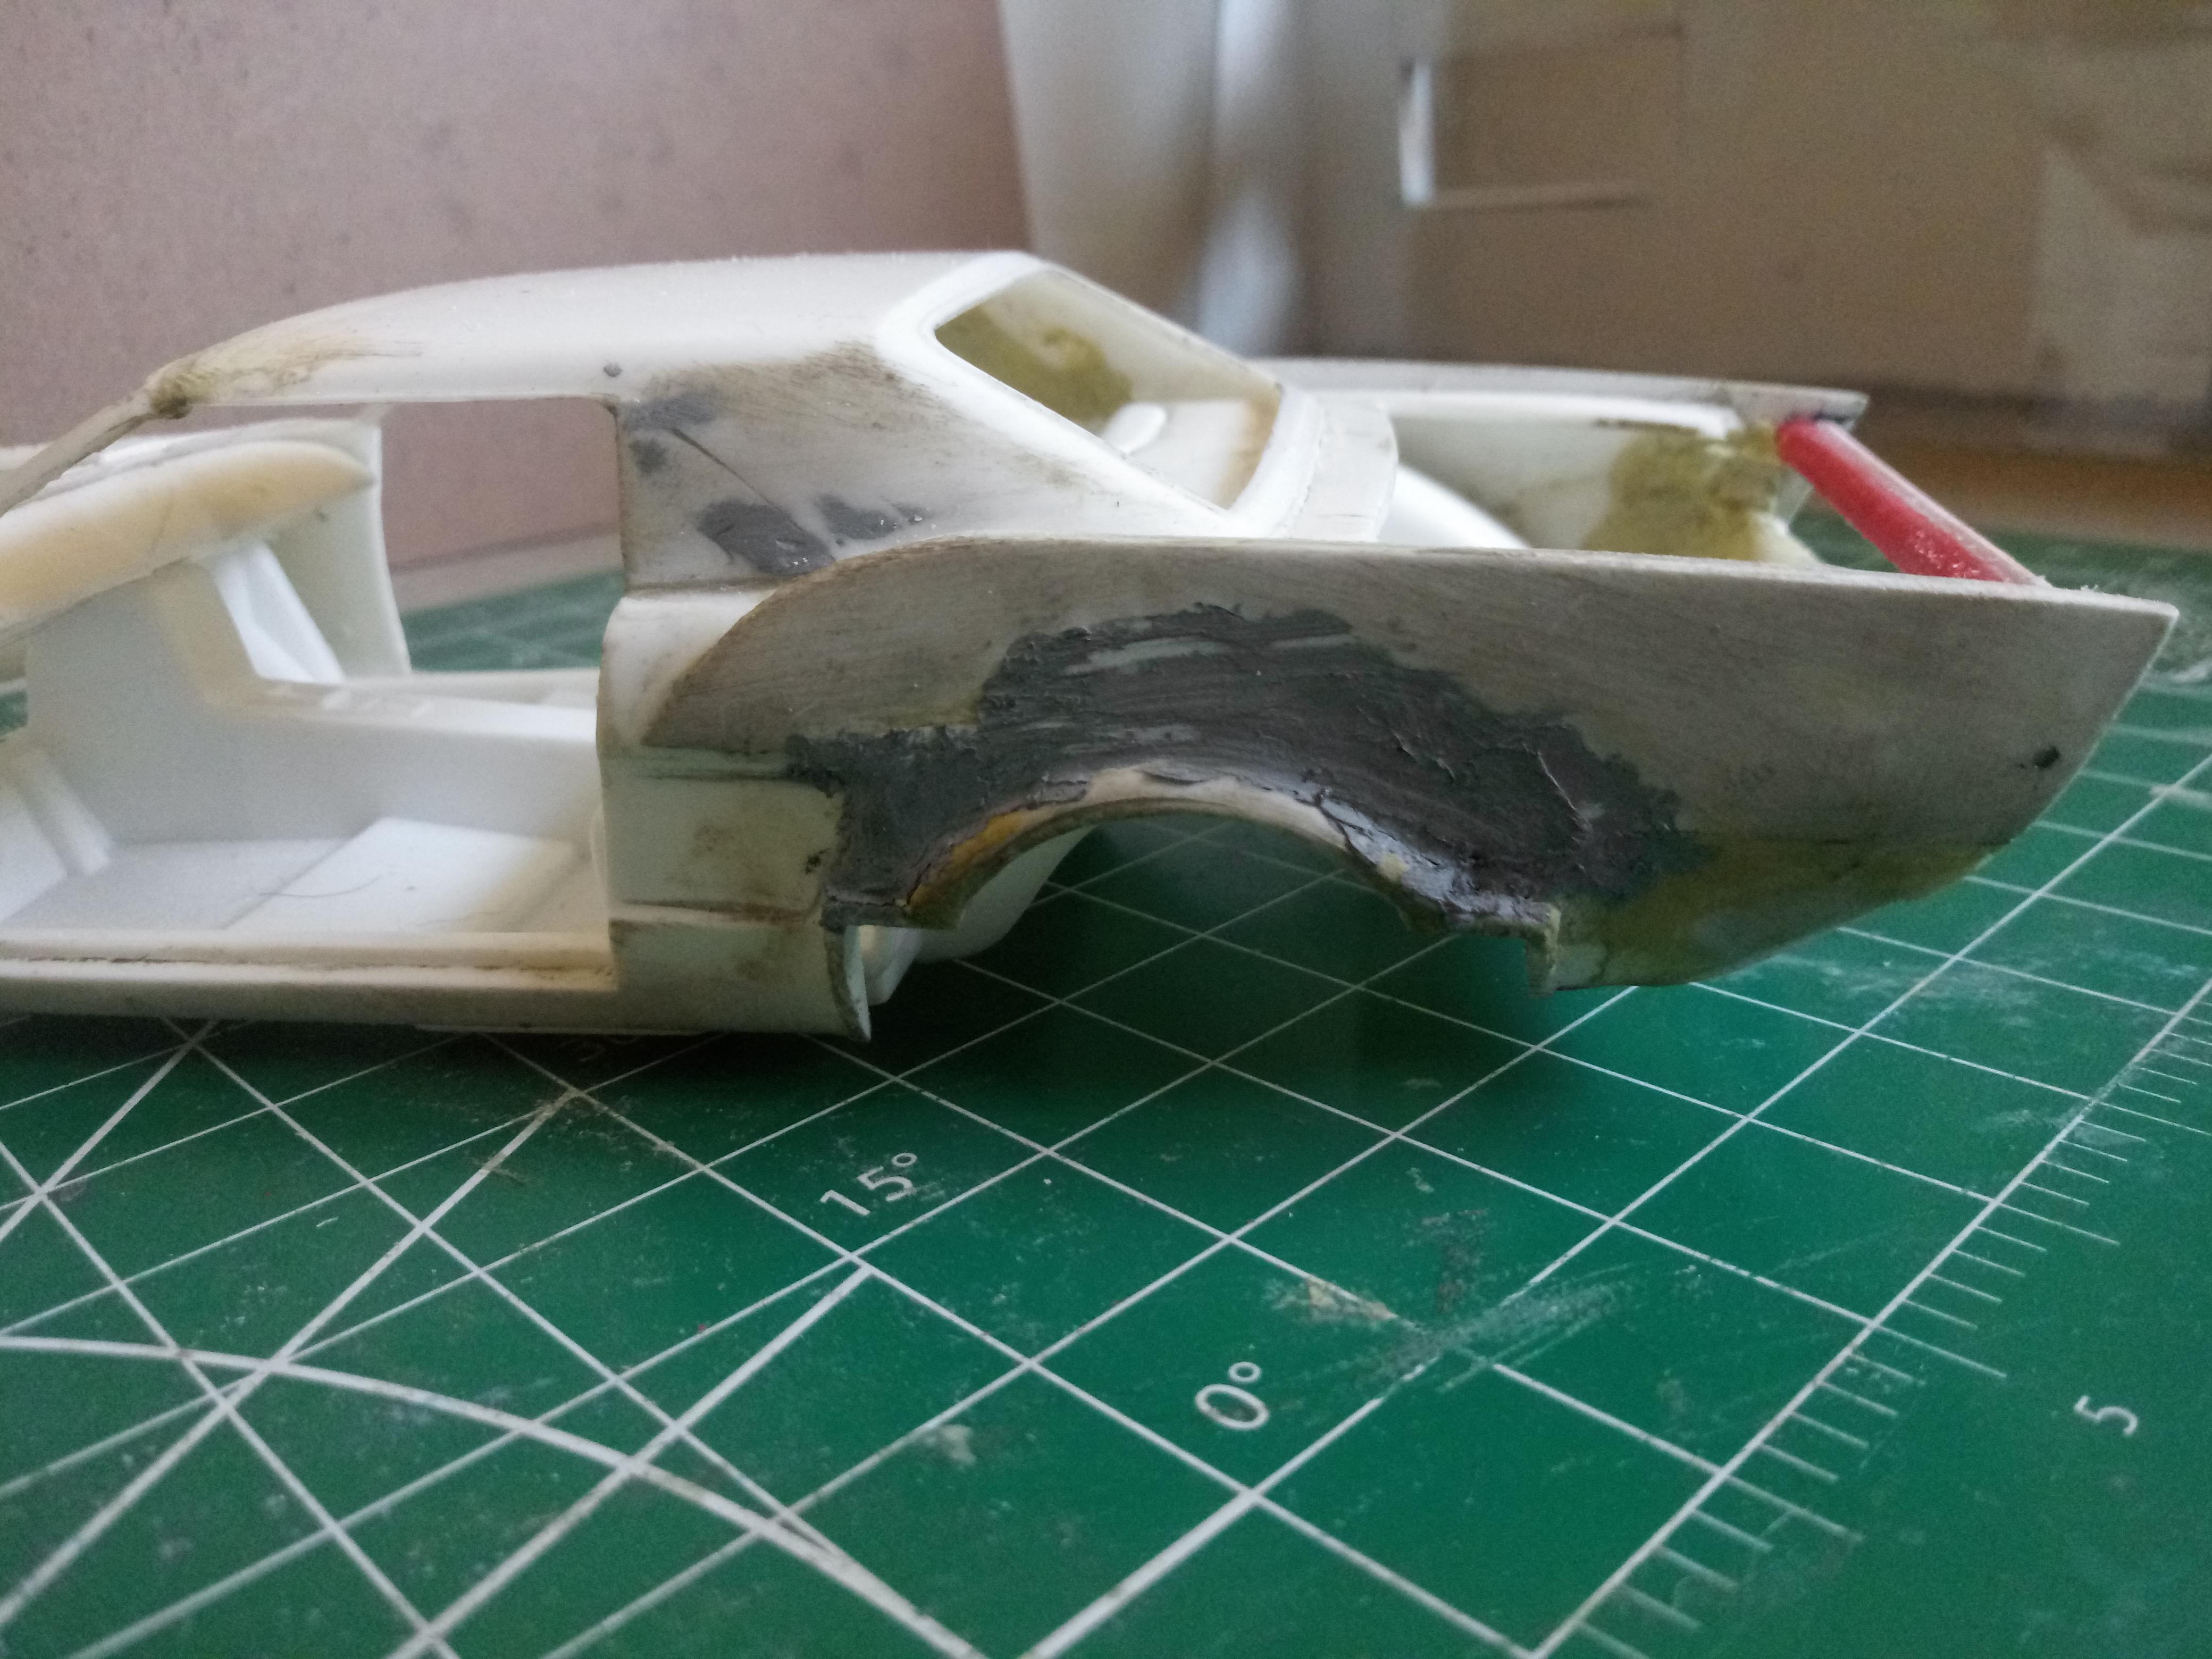
Thanks for the suggestions. When you mentioned the door/ window opening, I looked it over and noticed that the bottom rear of the opening is slightly angled forward while the anime car's is almost completely vertical. That shouldn't be a problem because the interior is a platform instead of a bucket, so the side panels will be easier to cut. That part wouldn't affect the front of the fin, so it would have to be extended forward
-
WIP: Roy Revant's car from Solty Rei
Everfree Customs replied to Everfree Customs's topic in WIP: Model Cars
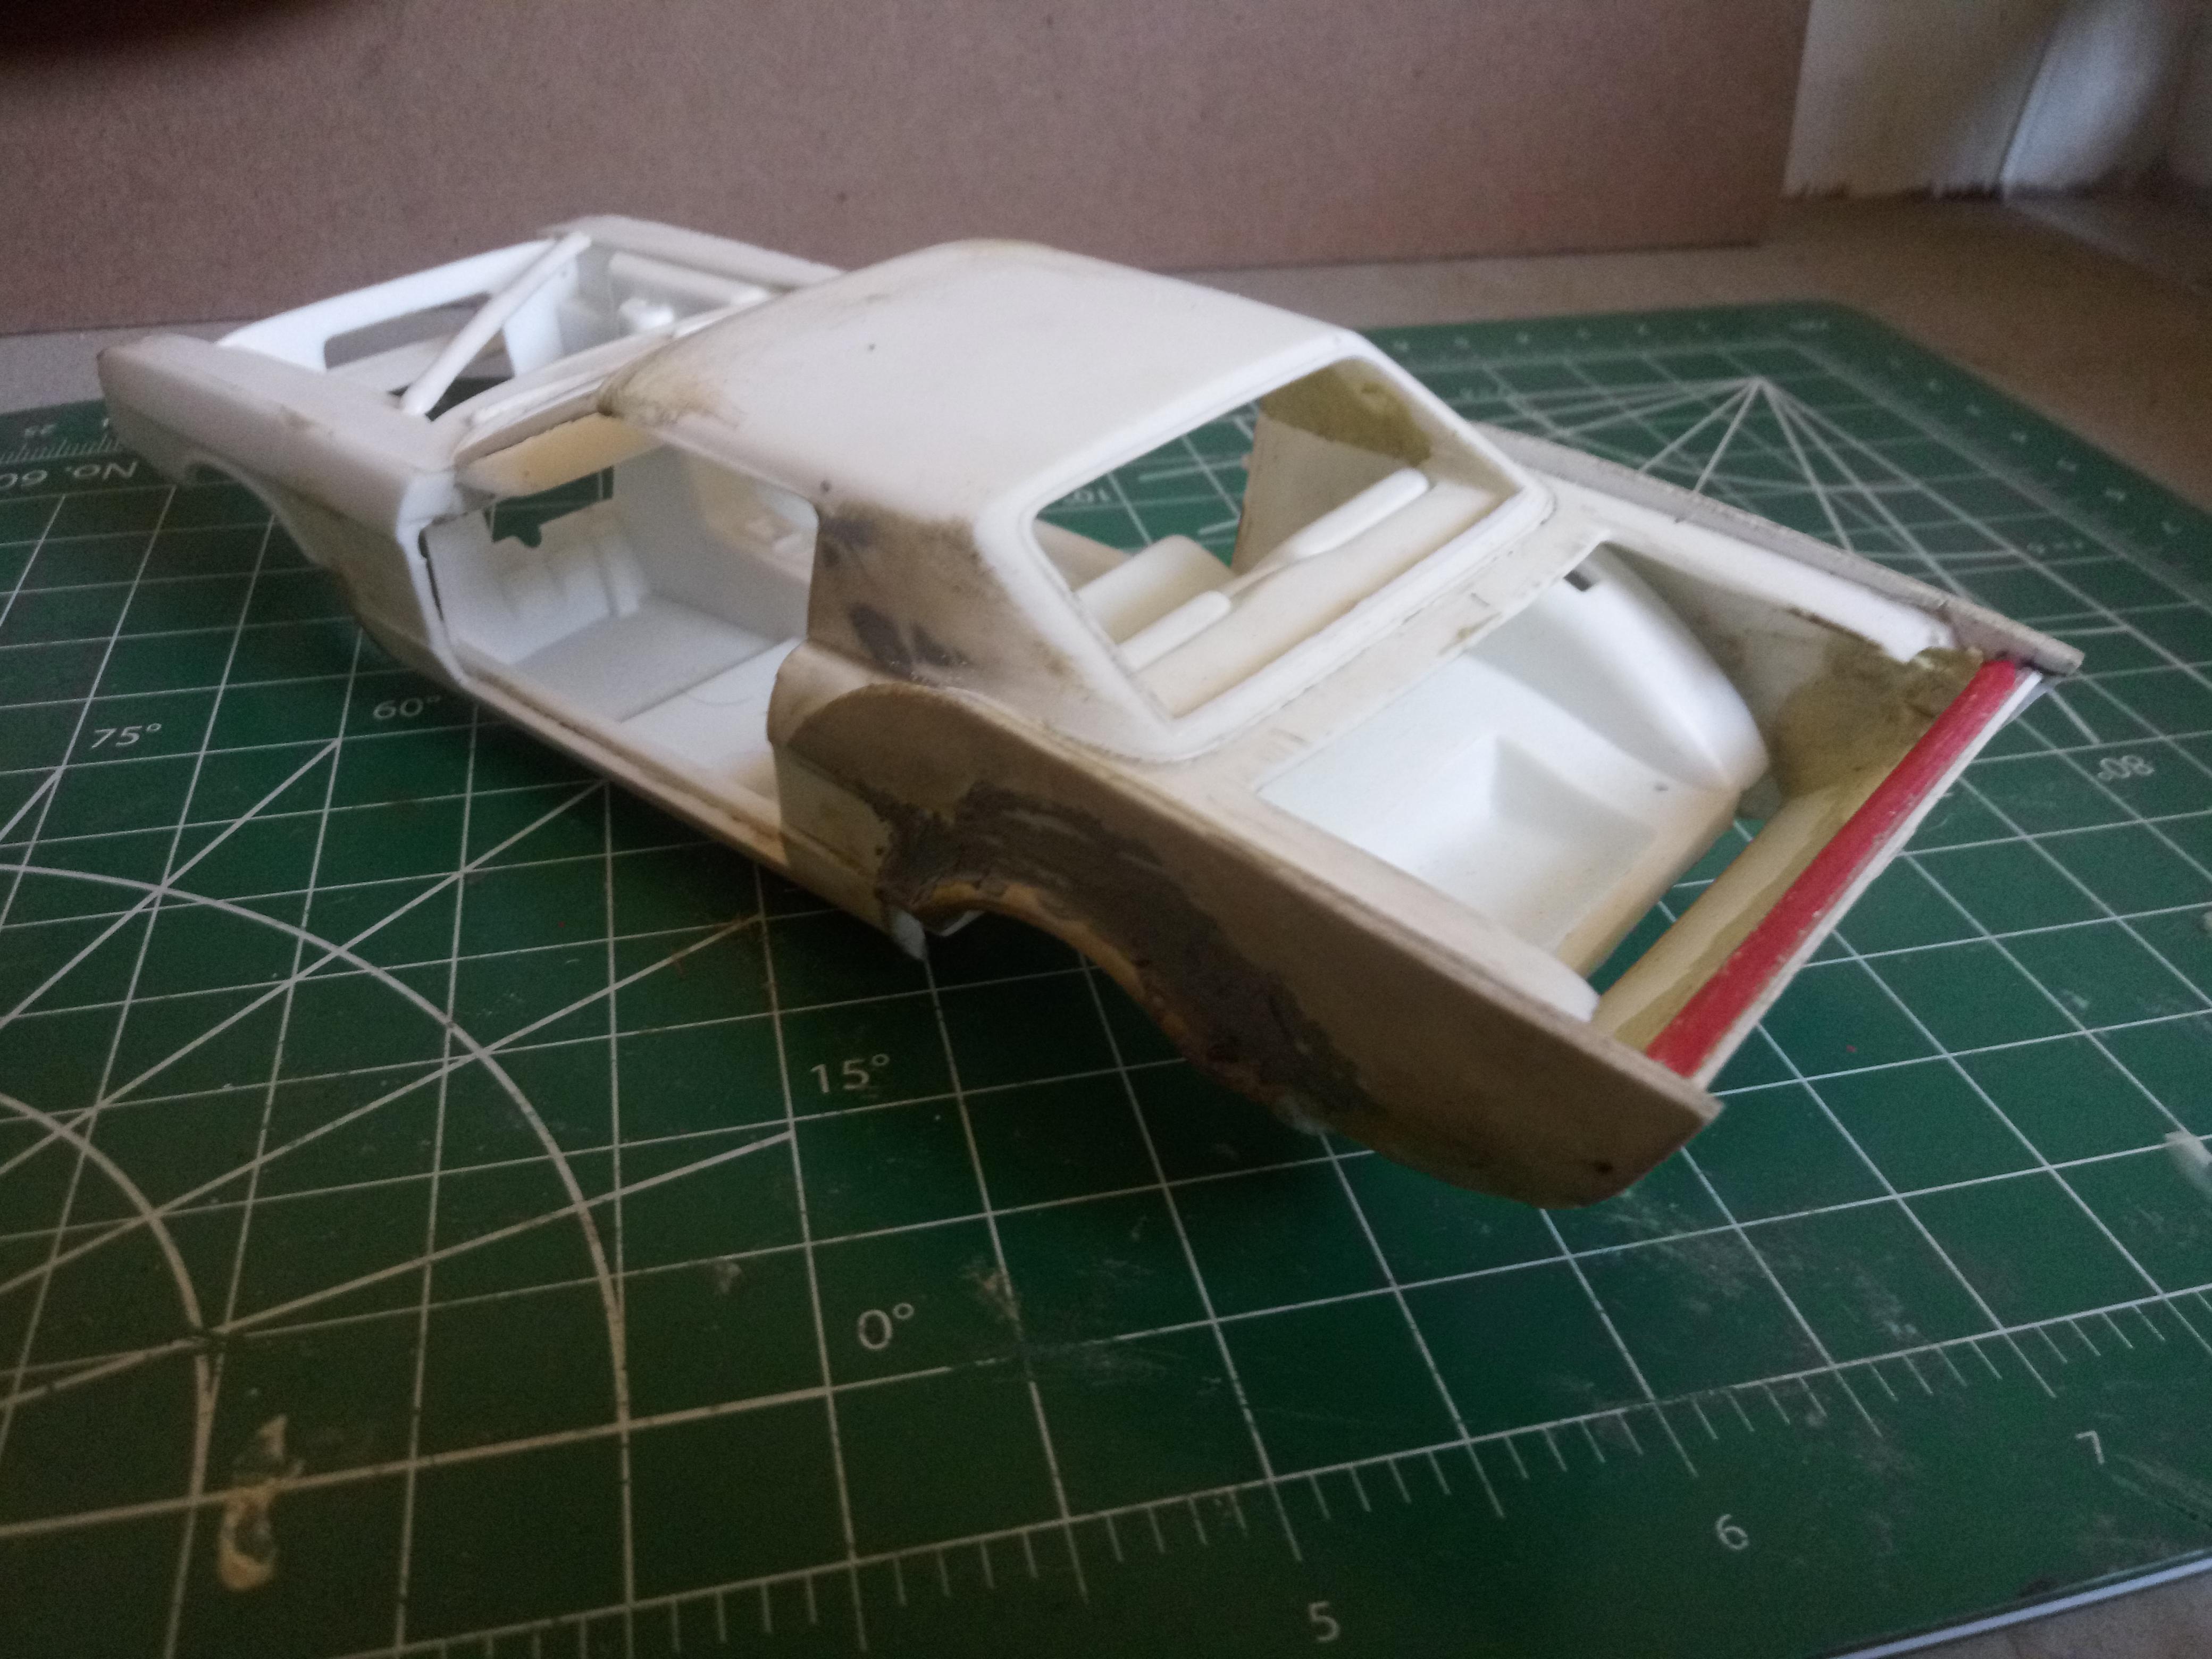
Adding some Milliput and putty to continue roughing the rear panels out. Added a long piece of sprue to keep the fins from folding inward and to extend the rear deck.
-
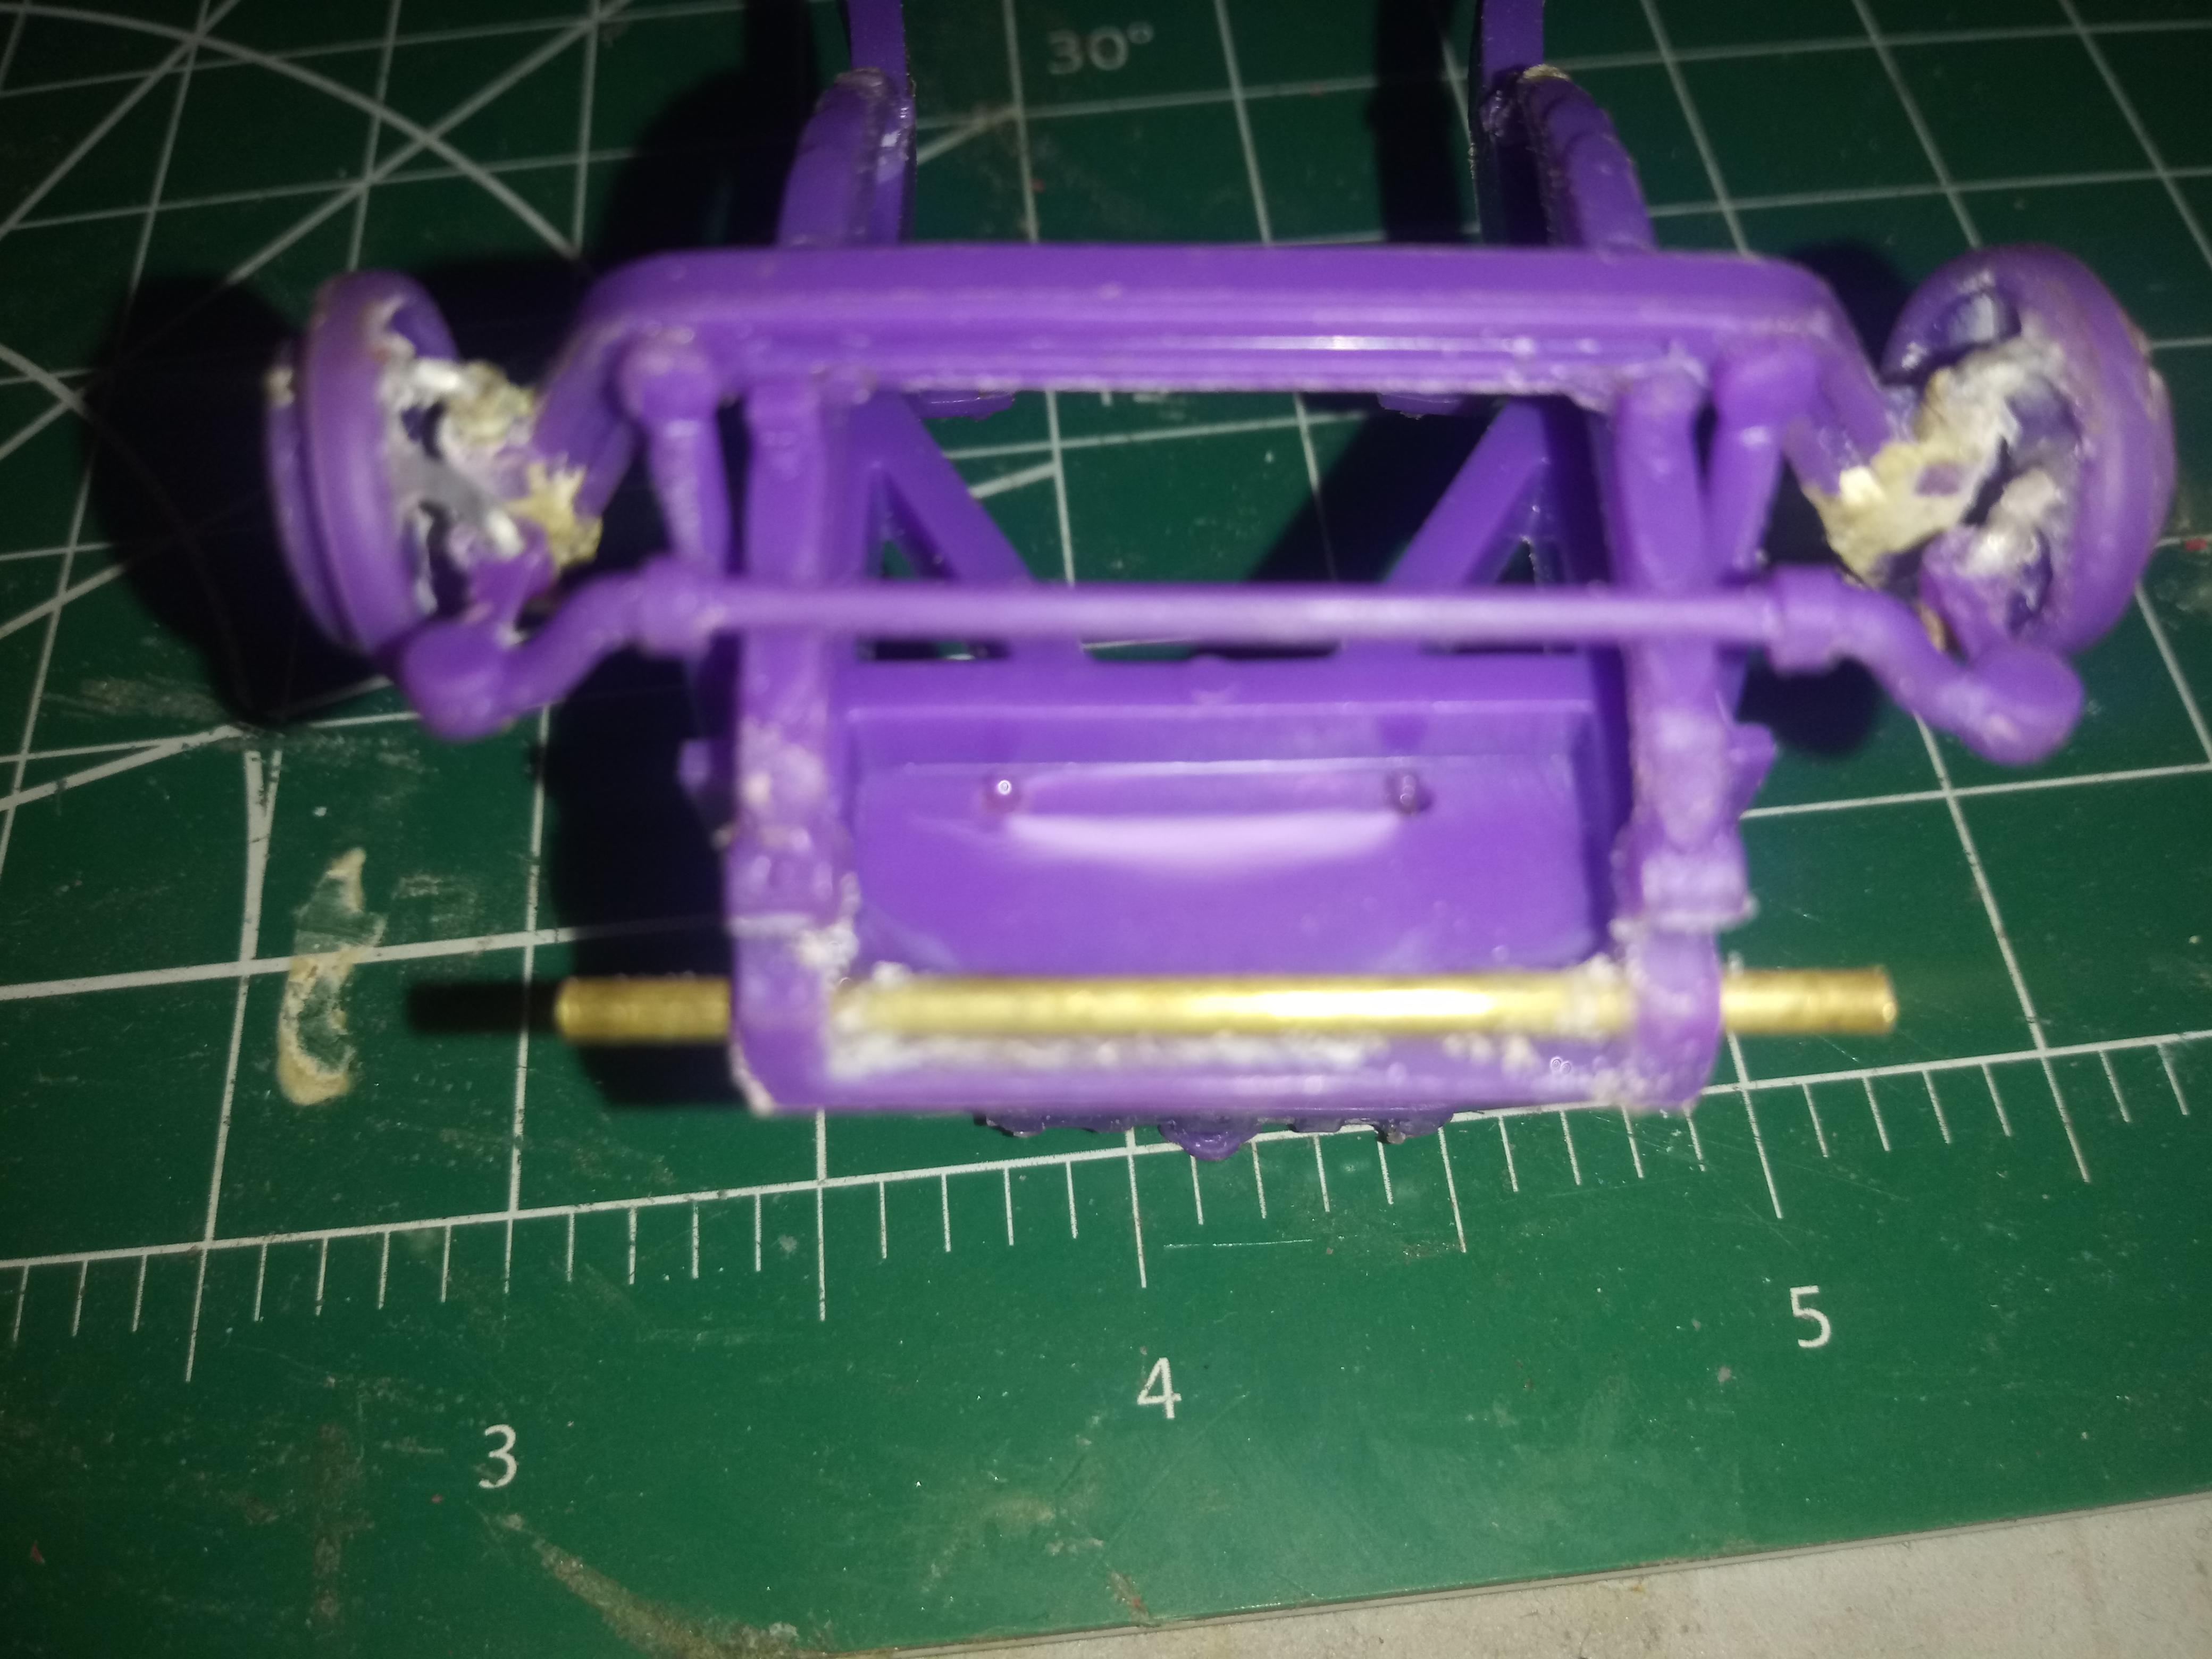
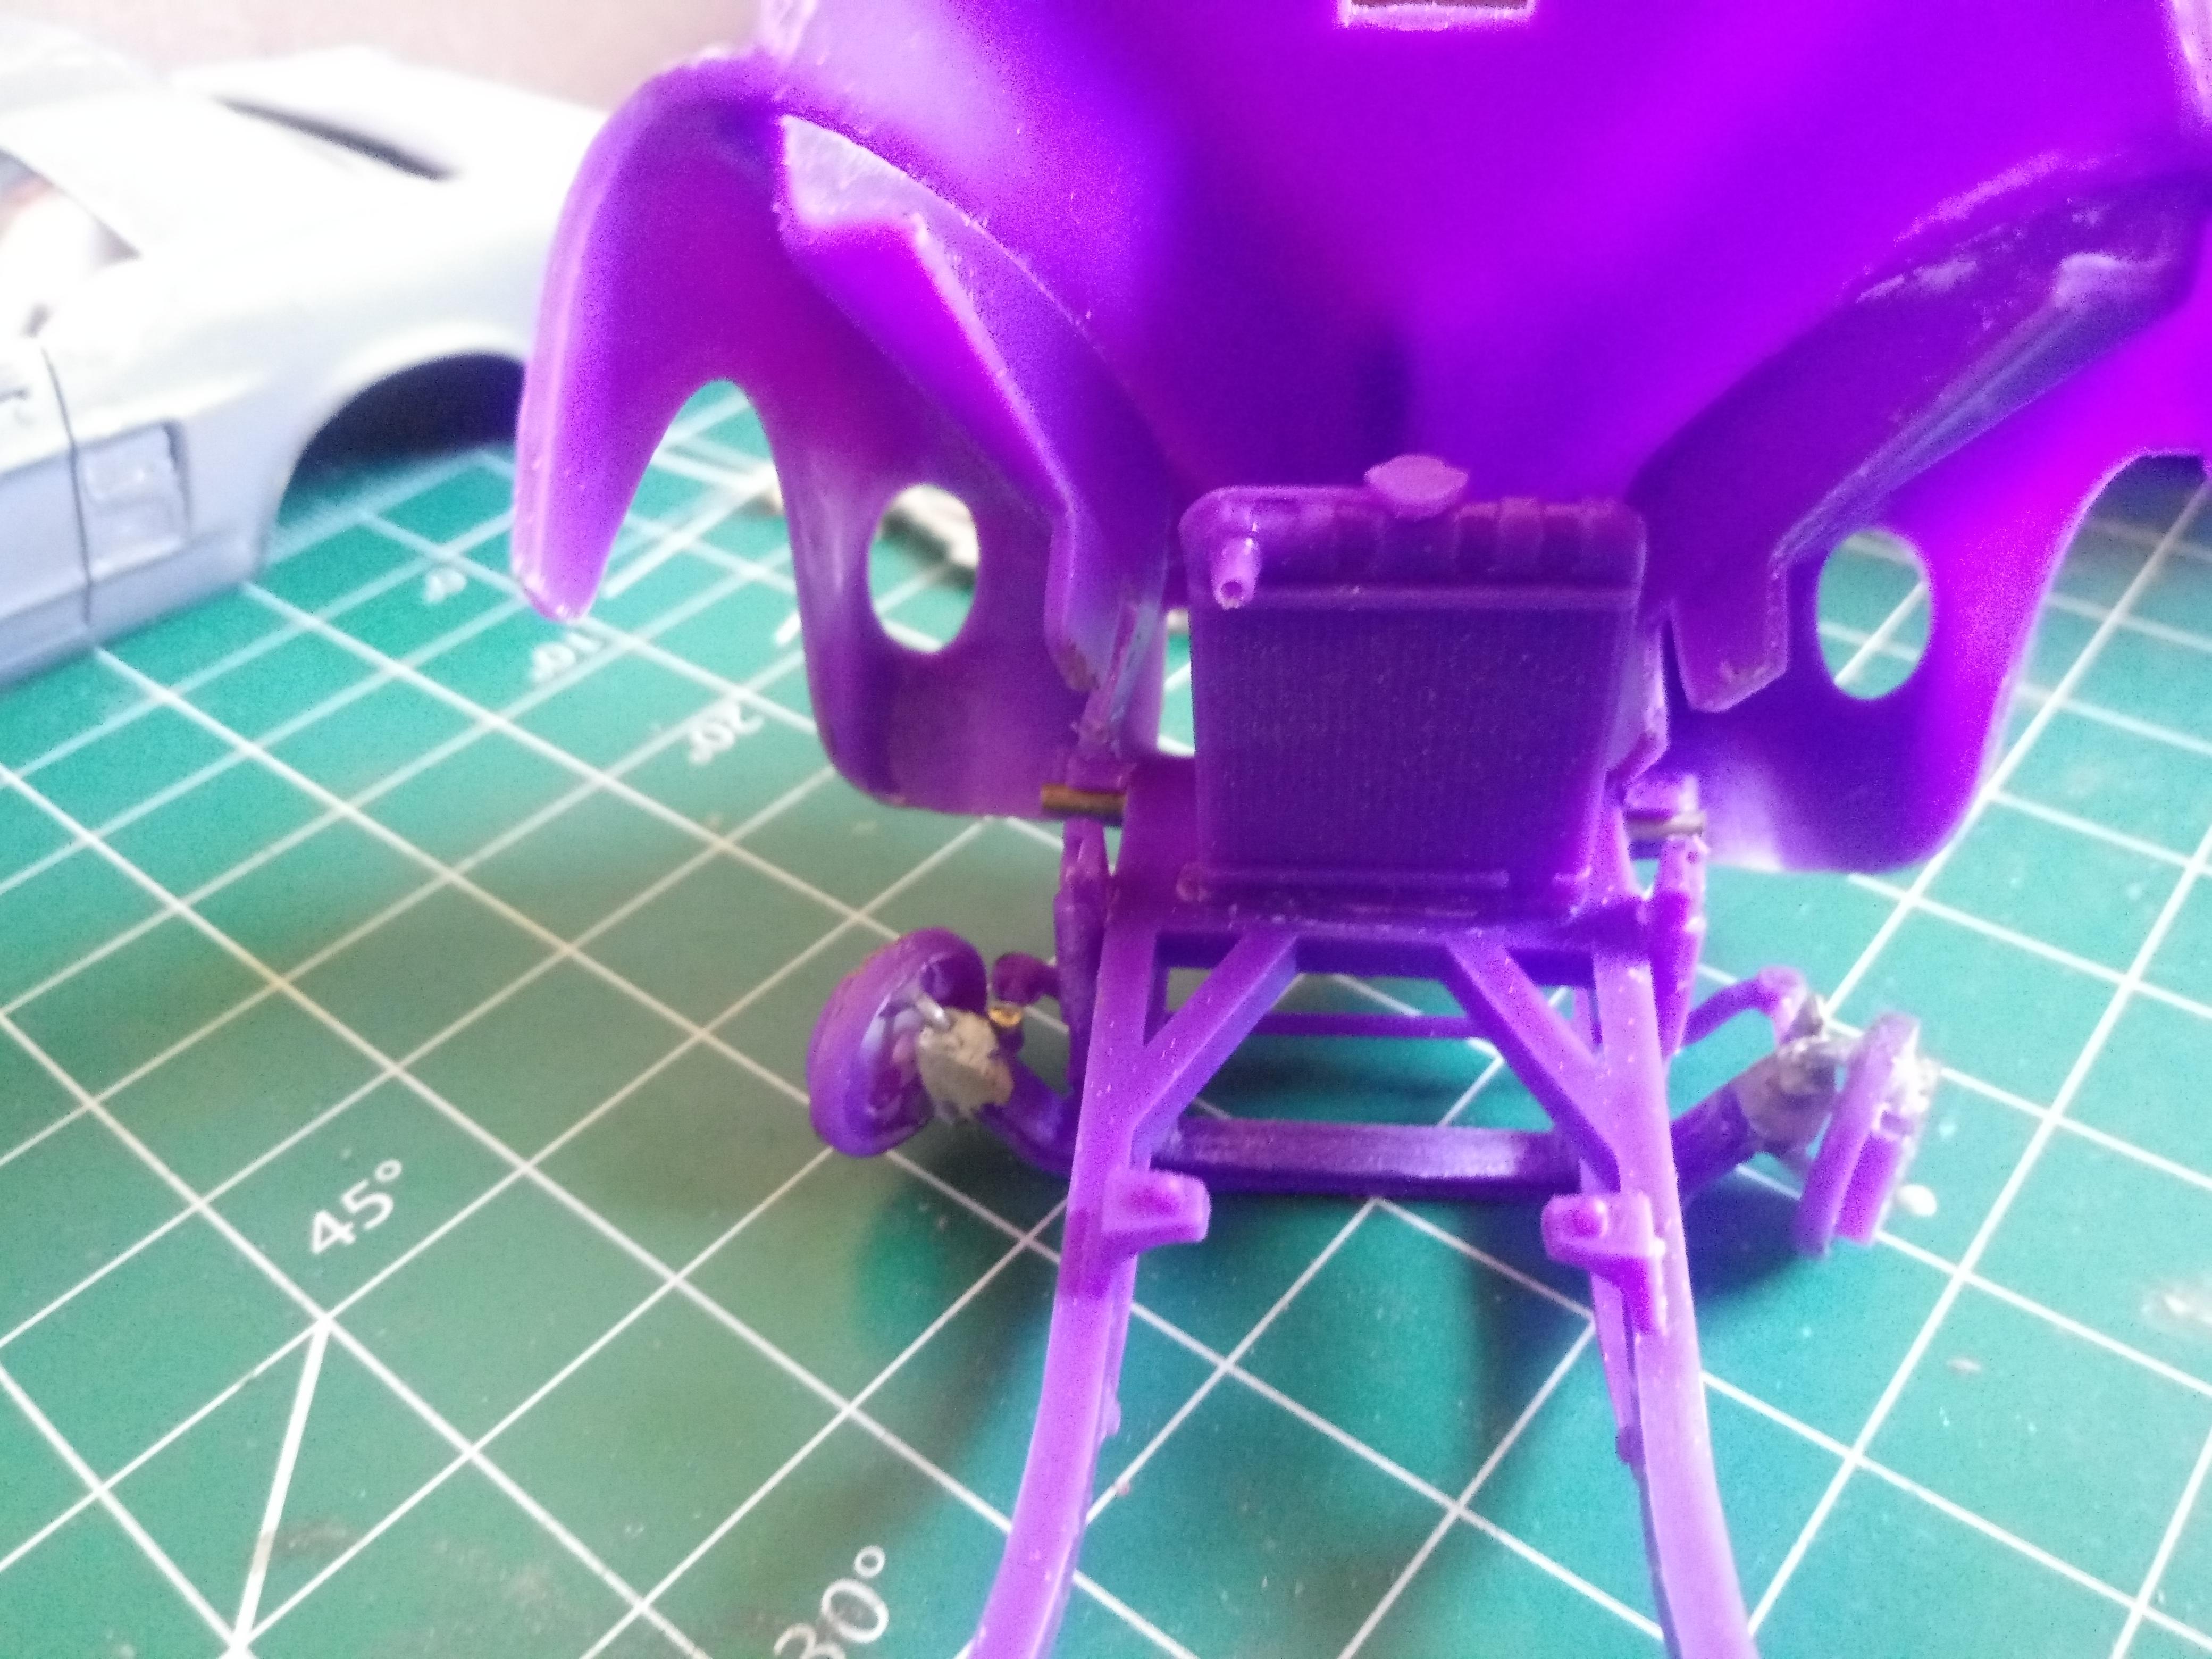
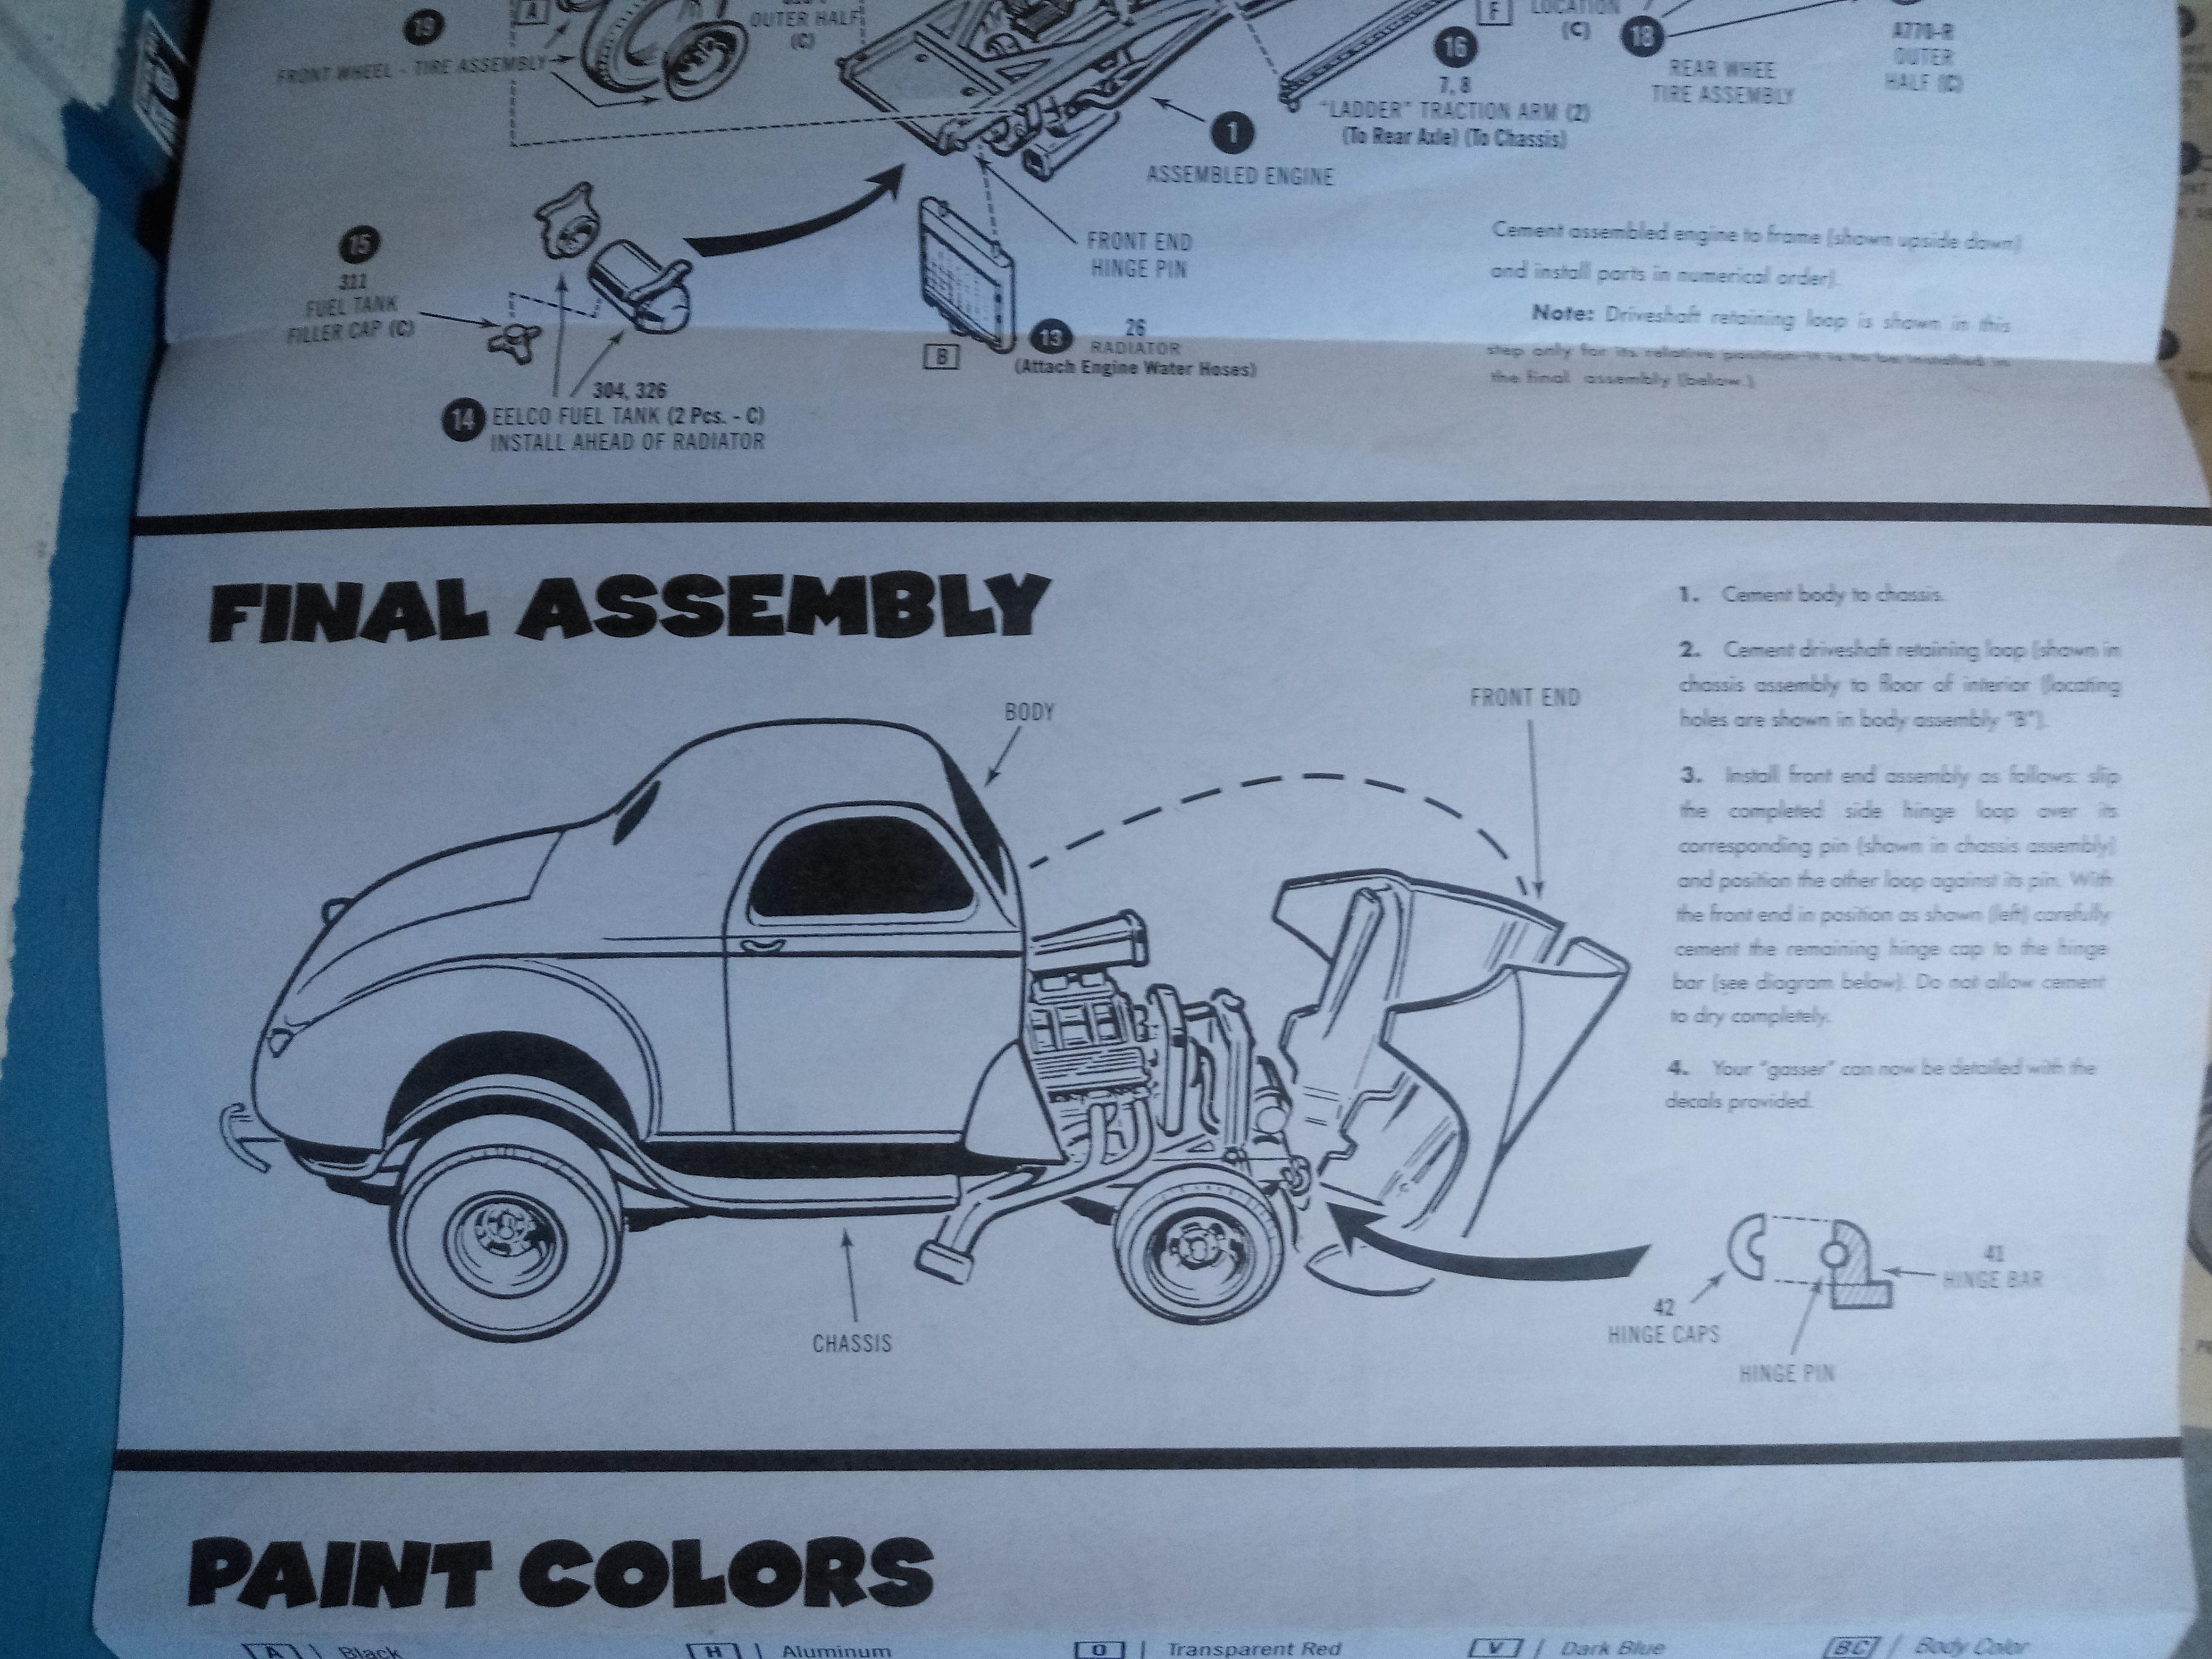
I was putting together the chassis of one of the later issues of the AMT '40 Willys gasser coupe (The Curly's Gasser version) and found something that maybe some of you have had a problem with as well; The holes that line up the radiator on the chassis are off center, so when it is glued down, the hood won't close all the way. The angle of the hood on the driver's side literally interferes with the driver's side top corner of the radiator. I came across this same problem many years ago when I built the '80's issue of this kit (the one molded in yellow), but didn't think much of it because I was 13 and simply glad to have finished the model ( I ditched the hinge caps and just placed the hood on loose). I suspect it was like this in previous issues, as well. Cut the tabs off the bottom of the radiator and move it 1 - 1.5 mm towards the passenger side and the hood will clear. No more than that or you'll have the same problem with the other side. I hope this will save a lot of other builders of this subject a lot of headache.
-
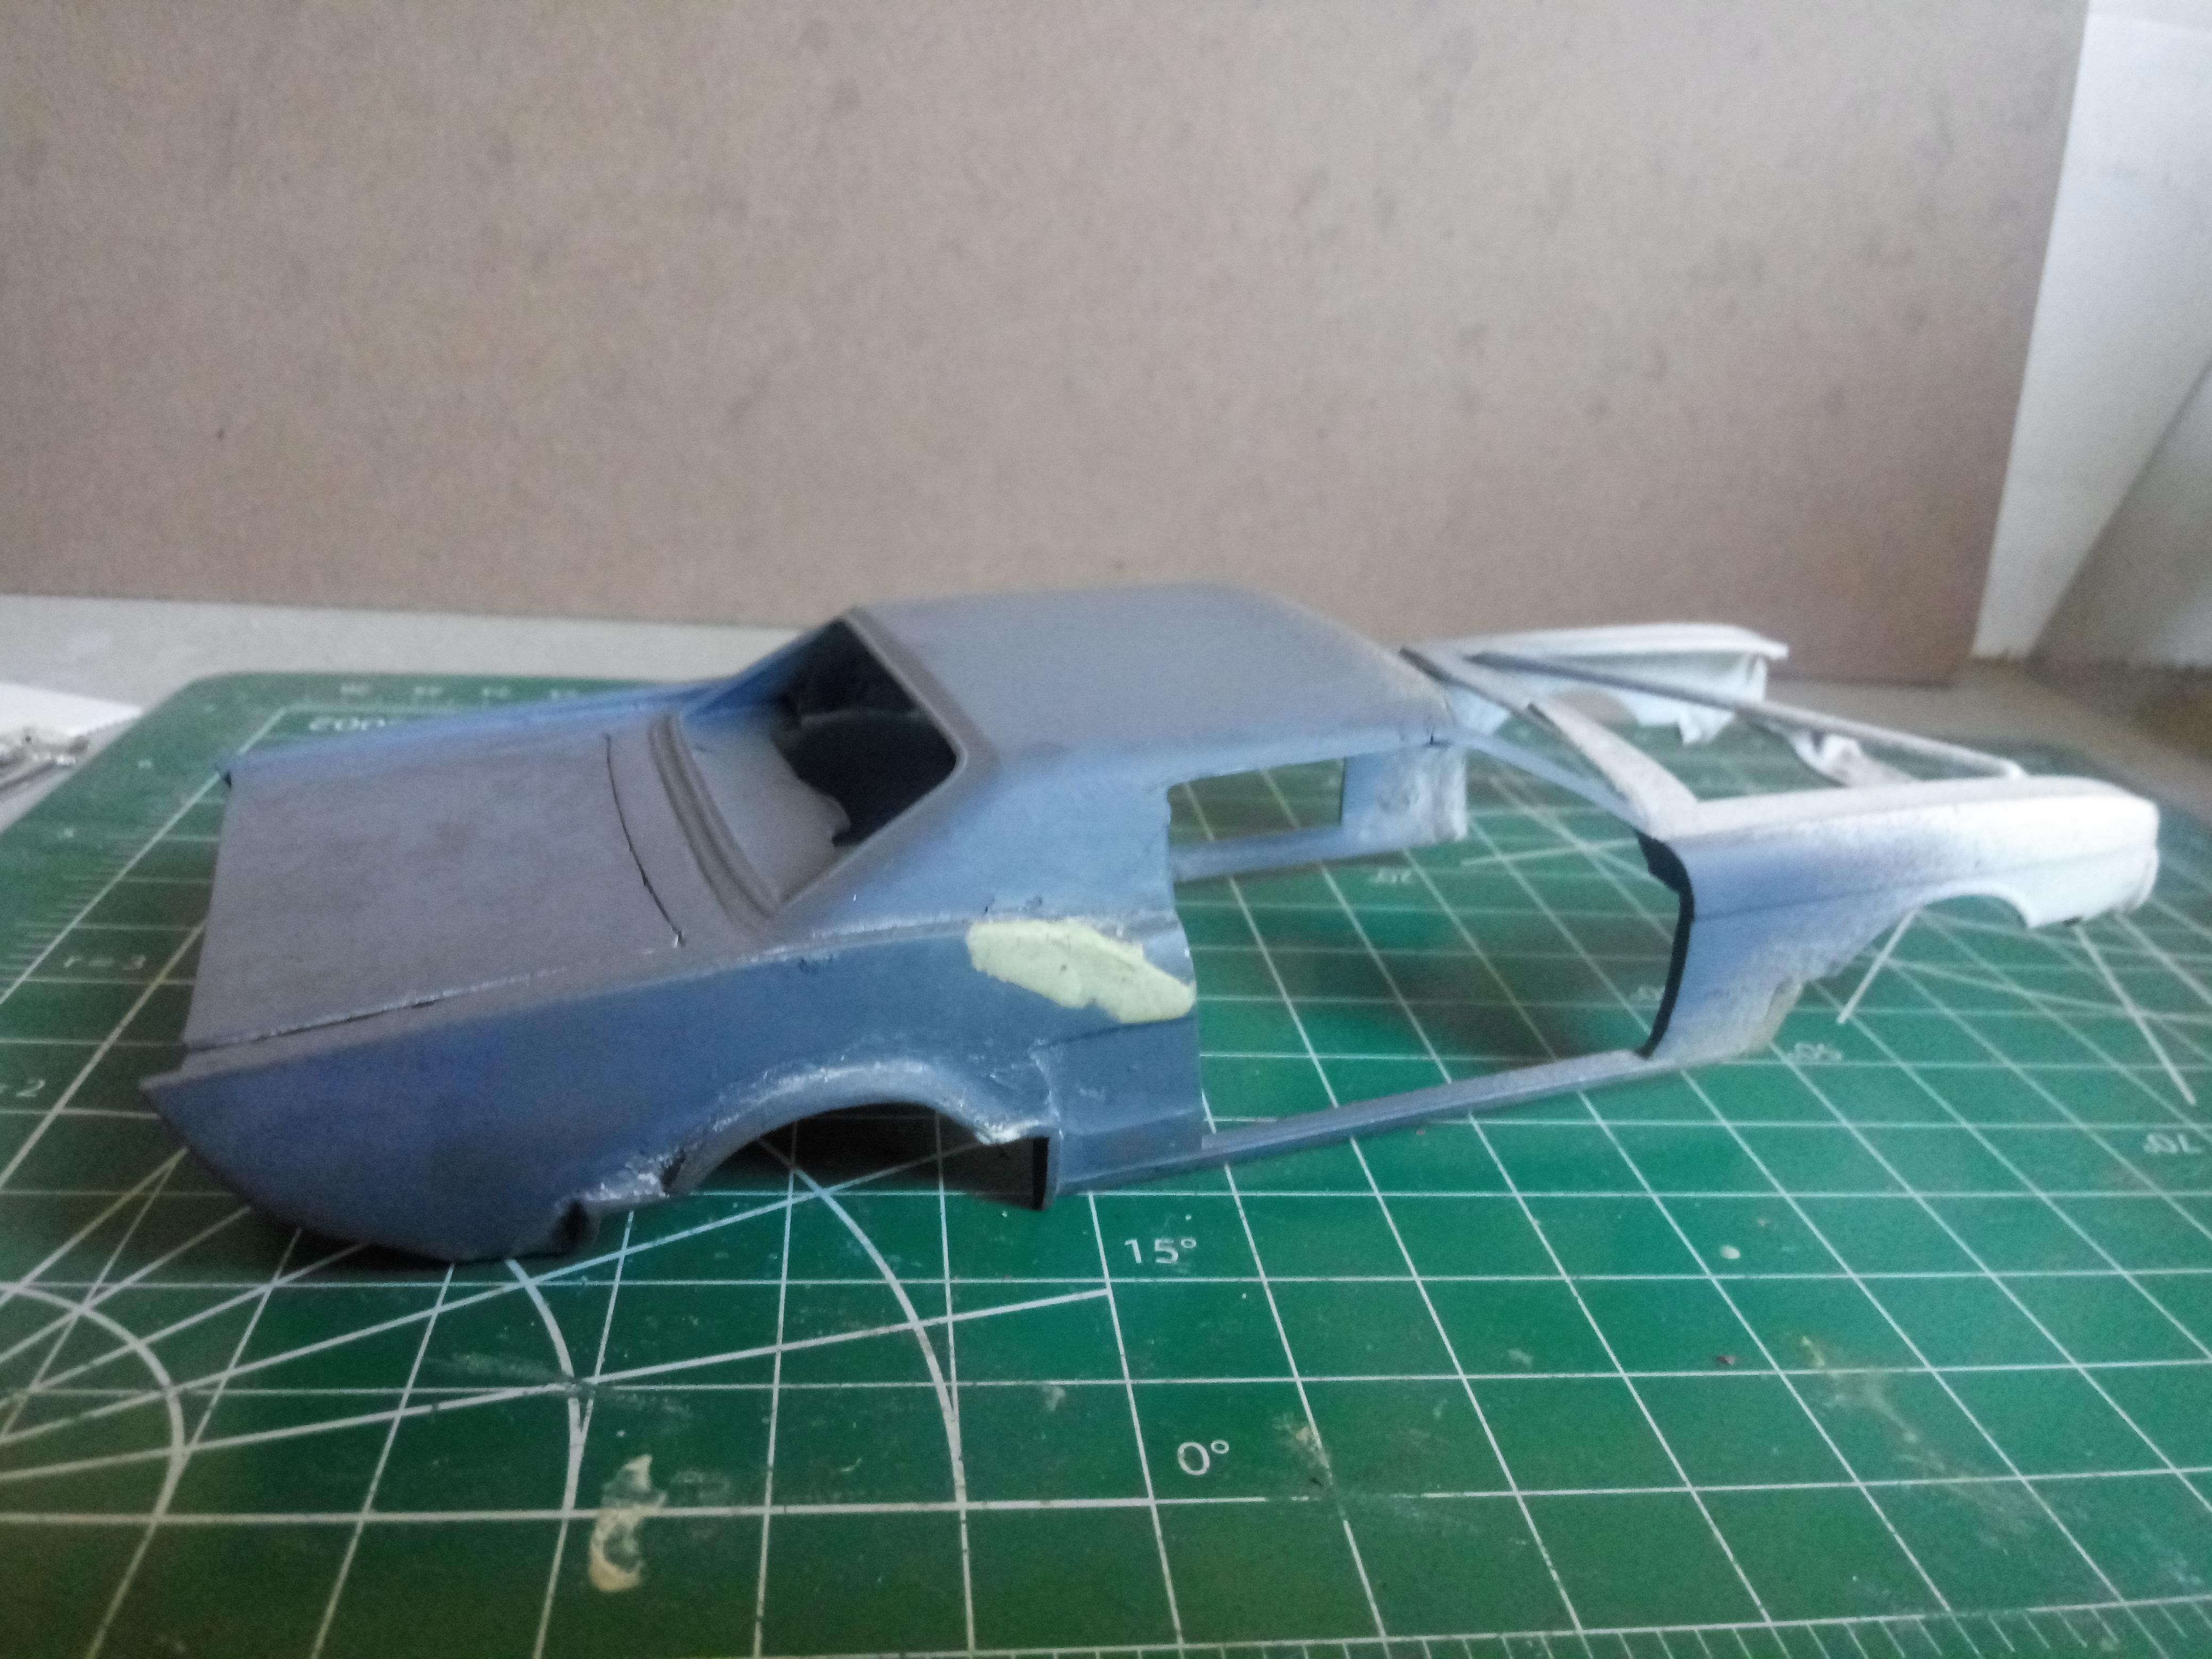
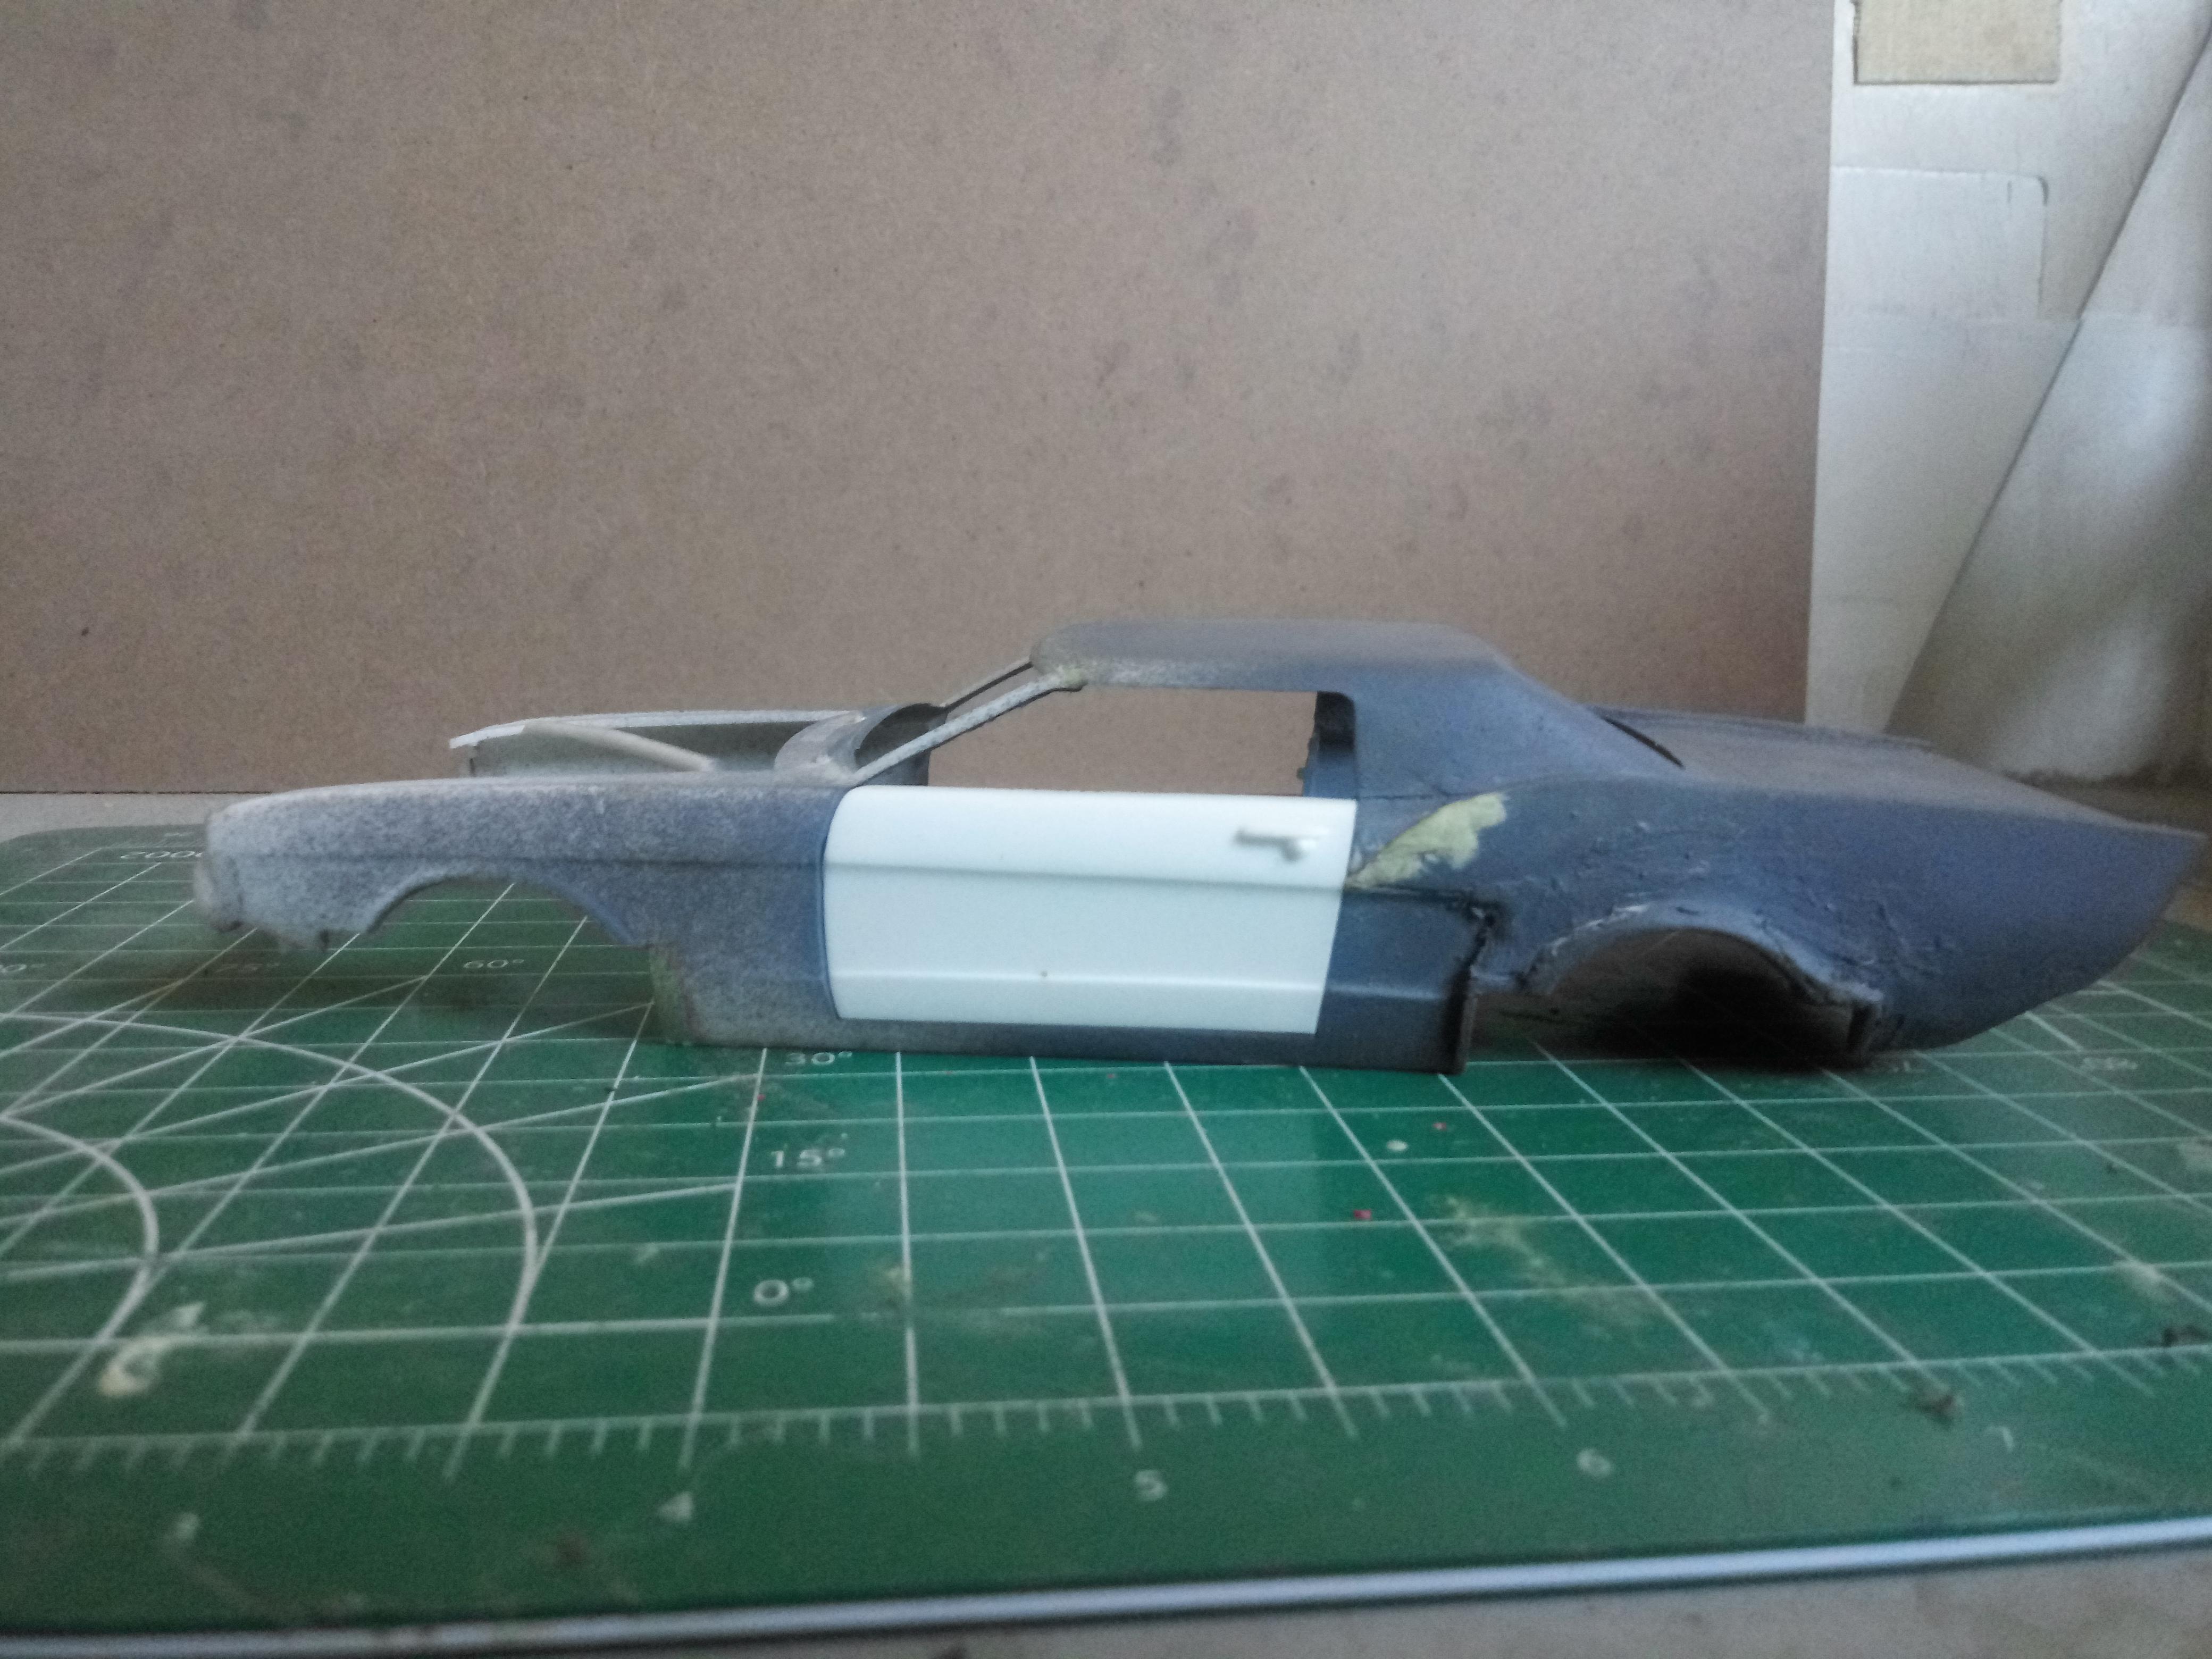
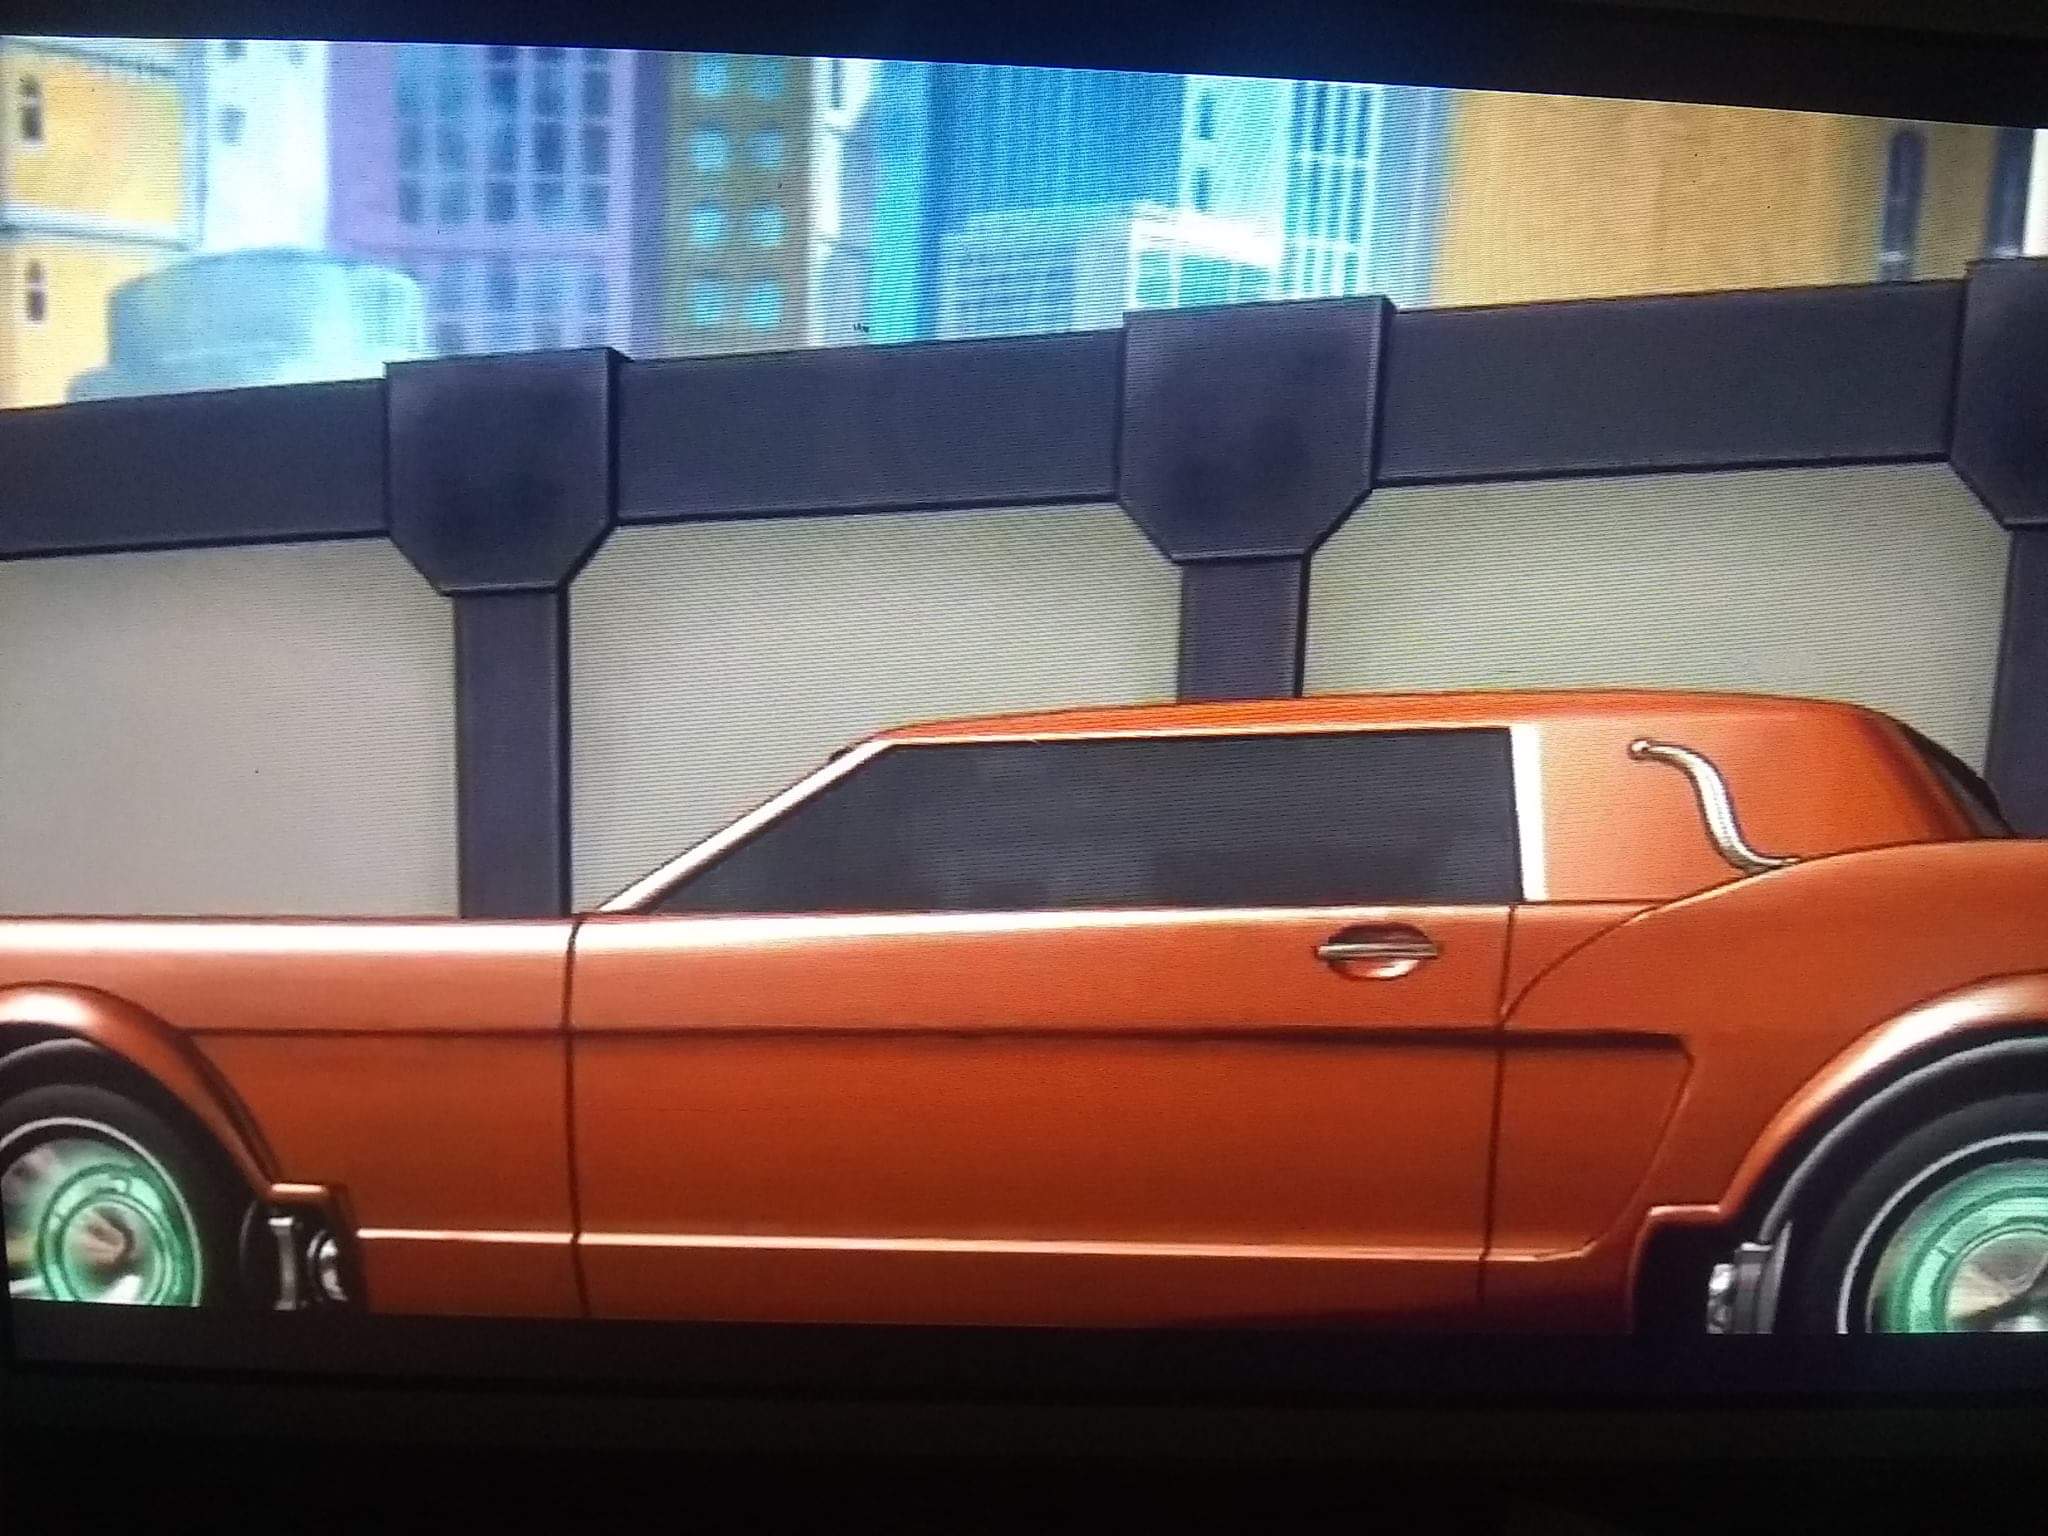
This is one of many builds that are languishing on my workbench, slowly but surely coming together. It is of Roy Revant's car from the anime Solty Rei. The first thing I noticed about it is how much it looked like it was derived from a 1st gen Ford Mustang, especially in the side coves and general front end shape. In fact, in this anime, most of the vehicles are modeled after real world cars and trucks, so it's only fitting. I found the best base to start with was a '63 Mustang II concept, partly because the styling is closer to Revant's car that the production model and partly because it's fully articulated with poseable steering and opening doors. The Lindberg version is used here ( I would have had no problem with using an original IMC kit, but this came along dirt cheap). Here, the rear quarter windows have been filled and a pair of styrene 'fins' have been glued to the rear fenders. Those will be feathered into the main bodywork. Marks have been made for the cutouts at the lower wheelwells. It appears to be part of some sort of otherworldly drive system. I intend to take a few liberties with this build and make it as if it was a live action movie car. The plan is for it to be powered by a small block Ford V8, probably a 289 or 302 hooked up to an automatic. Basically Pony running gear. Haven't decided on whether to go with the squared off turret top, though.
-
Thanks! And you're doing an excellent job on the Puma. I can't wait to see it done.
-
I also come across gluebombed versions of desirable cars. Recycling is good!
-
Very nice!