
69*Goat
-
Posts
131 -
Joined
-
Last visited
Content Type
Profiles
Forums
Events
Gallery
Everything posted by 69*Goat
-
 Spyder: Your pictures are great!!! They will definitely come in handy. I am going to stop in at my LHS today and pick up some grime, mud, dust and experiment with them tonight. I have a show tomorrow, and I am trying to get two finished up for it. The kit is the Modeler's Kit. It is ok, it comes with metal tail lights, Mirrors, Headlights. I was surprised to see these in the kit. These things were pretty bare when they were raced, I mean they had NO sponsor decals. Thanks for the pictures. Great looking build BTW. What color did you use for the line around the tire sidewall?
 -
This thing is a Big White Elephant, and I need to add some character to it. Do any of you have pictures of your weathered white race cars for reference?
-
I received a 1/24th scale Modeler's Chaparral 2D. I was surprised to see white metal headlights, mirrors, and tail lights. This thing will take no time to complete.

-
MODEL
-
I used the Zero "Bad Boys" yellow on my builds, and the paint does "Not" match the decals. The Yellow on the decals is borderline "Fluorescent" I did not notice it until I put one on, but at that point, it was too late to do anything.
-
Just a quick question to see if anyone here will be showing their work tomorrow at the contest tomorrow?
-
I am glad to have this one finished. I just need to get the Bad Boys finished for Saturdays contest.
-
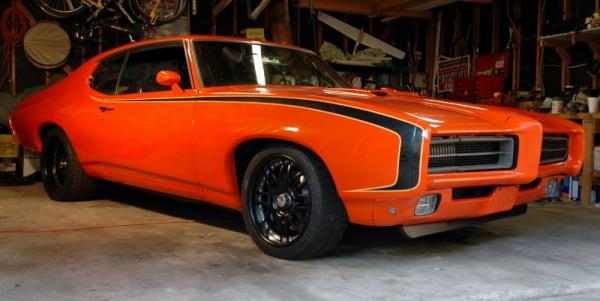
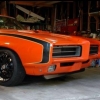
The one on the left is my daily driver....... The one on the right is my weekend warrior.............
-
The Bad Boys aren't too far behind.
-
Ron Fellows Interior
-
The Ron Fellows 2007 Sebring C6R is almost done.
-
Opinions needed please
69*Goat replied to 69*Goat's topic in General Automotive Talk (Trucks and Cars)
TS-13 is a Tamiya Spray Clear, I have seen it burn through decals. The 2K Clear is a two part Urethane Clear, which I think most everyone on here uses. I did use Micro-Sol to set the decals in place. I think that I am going to go ahead and put all of the decals on both cars and clear over them. -
Opinions needed please
69*Goat replied to 69*Goat's topic in General Automotive Talk (Trucks and Cars)
I did lay down a coat of TS-13 before I placed the decals on the cars. However, I DO NOT trust TS-13 to go over the decals.... I was going to lay a coat of 2K clear over the decals, but was worried about the scale appearance of the 2K clear. I have never used it before, but it looks to me like it may be too thick, if you know what I mean. Any tricks to getting the correct appearance? I am guessing sanding and buffing? -
CAMERA ADVISE
69*Goat replied to E St. Kruiser50's topic in General Automotive Talk (Trucks and Cars)
Dave: I use a Nikon D70s. It only has 6.1 megapixels, but it takes great shots(Don't use the ones I post here as examples).... I just purchased a new 10x magnifying filter that screws onto the lens, and it gets you right up close. I will have to break down at some point and buy a good macro lense. Just my $0.02 -
I am in the process of building both of the Bad Boy C6R's Corvettes. I have gotten all of the skull, and paint break decals on the cars. My question is this..... Should I apply All of the decals then clear coat, or clear coat over the skulls and paint breaks and then add the rest of the decals. I know that I will probably get a bunch of different answers based on personal preference, but on real 1:1 race cars the car is cleared, and then the decals are put on. I guess I am asking more from a contest standpoint. Yes the clear does blend the decals into the finish, but what do most judges look for? Opinions requested.
-
Hey guys; I thought that I would throw out a heads up to all of the Houston Area modelers who read this about the Model Mania Houston Show that is happening on April 4th 2009. I have attached a link to the info page. http://www.ipms-houston.org/ipms-houston.o...54/Default.aspx
-
Mike: It turned out pretty darn nice. Like Fujimilover said, "It's a race car, not a street/show car. I can't tell you how many kits I have in my closet that I have not finished because I did not like how they were turning out. I think we all share this flaw. Heck, I have re-painted the hood of the Ron Fellow's Sebring Vette 4 times now, because of my perfectionist attitude. RW
-
old model kit....... revell hot rod cobra street machine!
69*Goat replied to B_rad88's topic in WIP: Model Cars
It looks like you got the picture posting handled -
Well: I took some great pictures of the Ron Fellows Body on a 50% completed chassis.
-
I got the first initial coat of clear on the Bad Boy Vettes, and I placed two decals on tonight. I included pictures of the first paint scheme as per the SMS Bad Boy Decals. The instructions are incorrect in this area as you can see by the pictures that follow. I worked on the interior of the Ron Fellows car tonight. I still need to add CF to areas of the drivers office, as well as a few etched pieces.
-
Mike: It's looking very good. Remove the window net. Courtesy of Jim Drew...............
-
I'm saying model: The reason is........ Something just does not look right with the cover over the convertible roof.
-
The painting instructions that come with the Scale Motorsport Bad Boy Decals are "WAY OFF"........... When I get the back end of these things repainted, I will show the before and after pictures, so that no one makes the same mistake I did.
-
I got the two Bad Boy Vettes shot with Black and Yellow last night. I used Zero paint. I opted for the Zero Brand, because they color matched the Yellow to the SMS decals. I noticed this morning that the demarcation lines that the instructions show do not match up correctly with the way the decals are printed. I am going to have the touch up the top rear portion so the decals work correctly. Enjoy the pictures.
-
Tonight I filled in the incorrect rear wing locating holes, measured, marked, and started cutting the new slots in the correct location. I painted and assembled the brakes and wheels. I used Alclad II Semi-Matte Aluminum on the wheels. Not much progress lately, just cleaning up the bodies, and tinkering with different assemblies.


