JPL-ACE
-
Posts
146 -
Joined
-
Last visited
JPL-ACE's Achievements
MCM Friend (4/6)
-
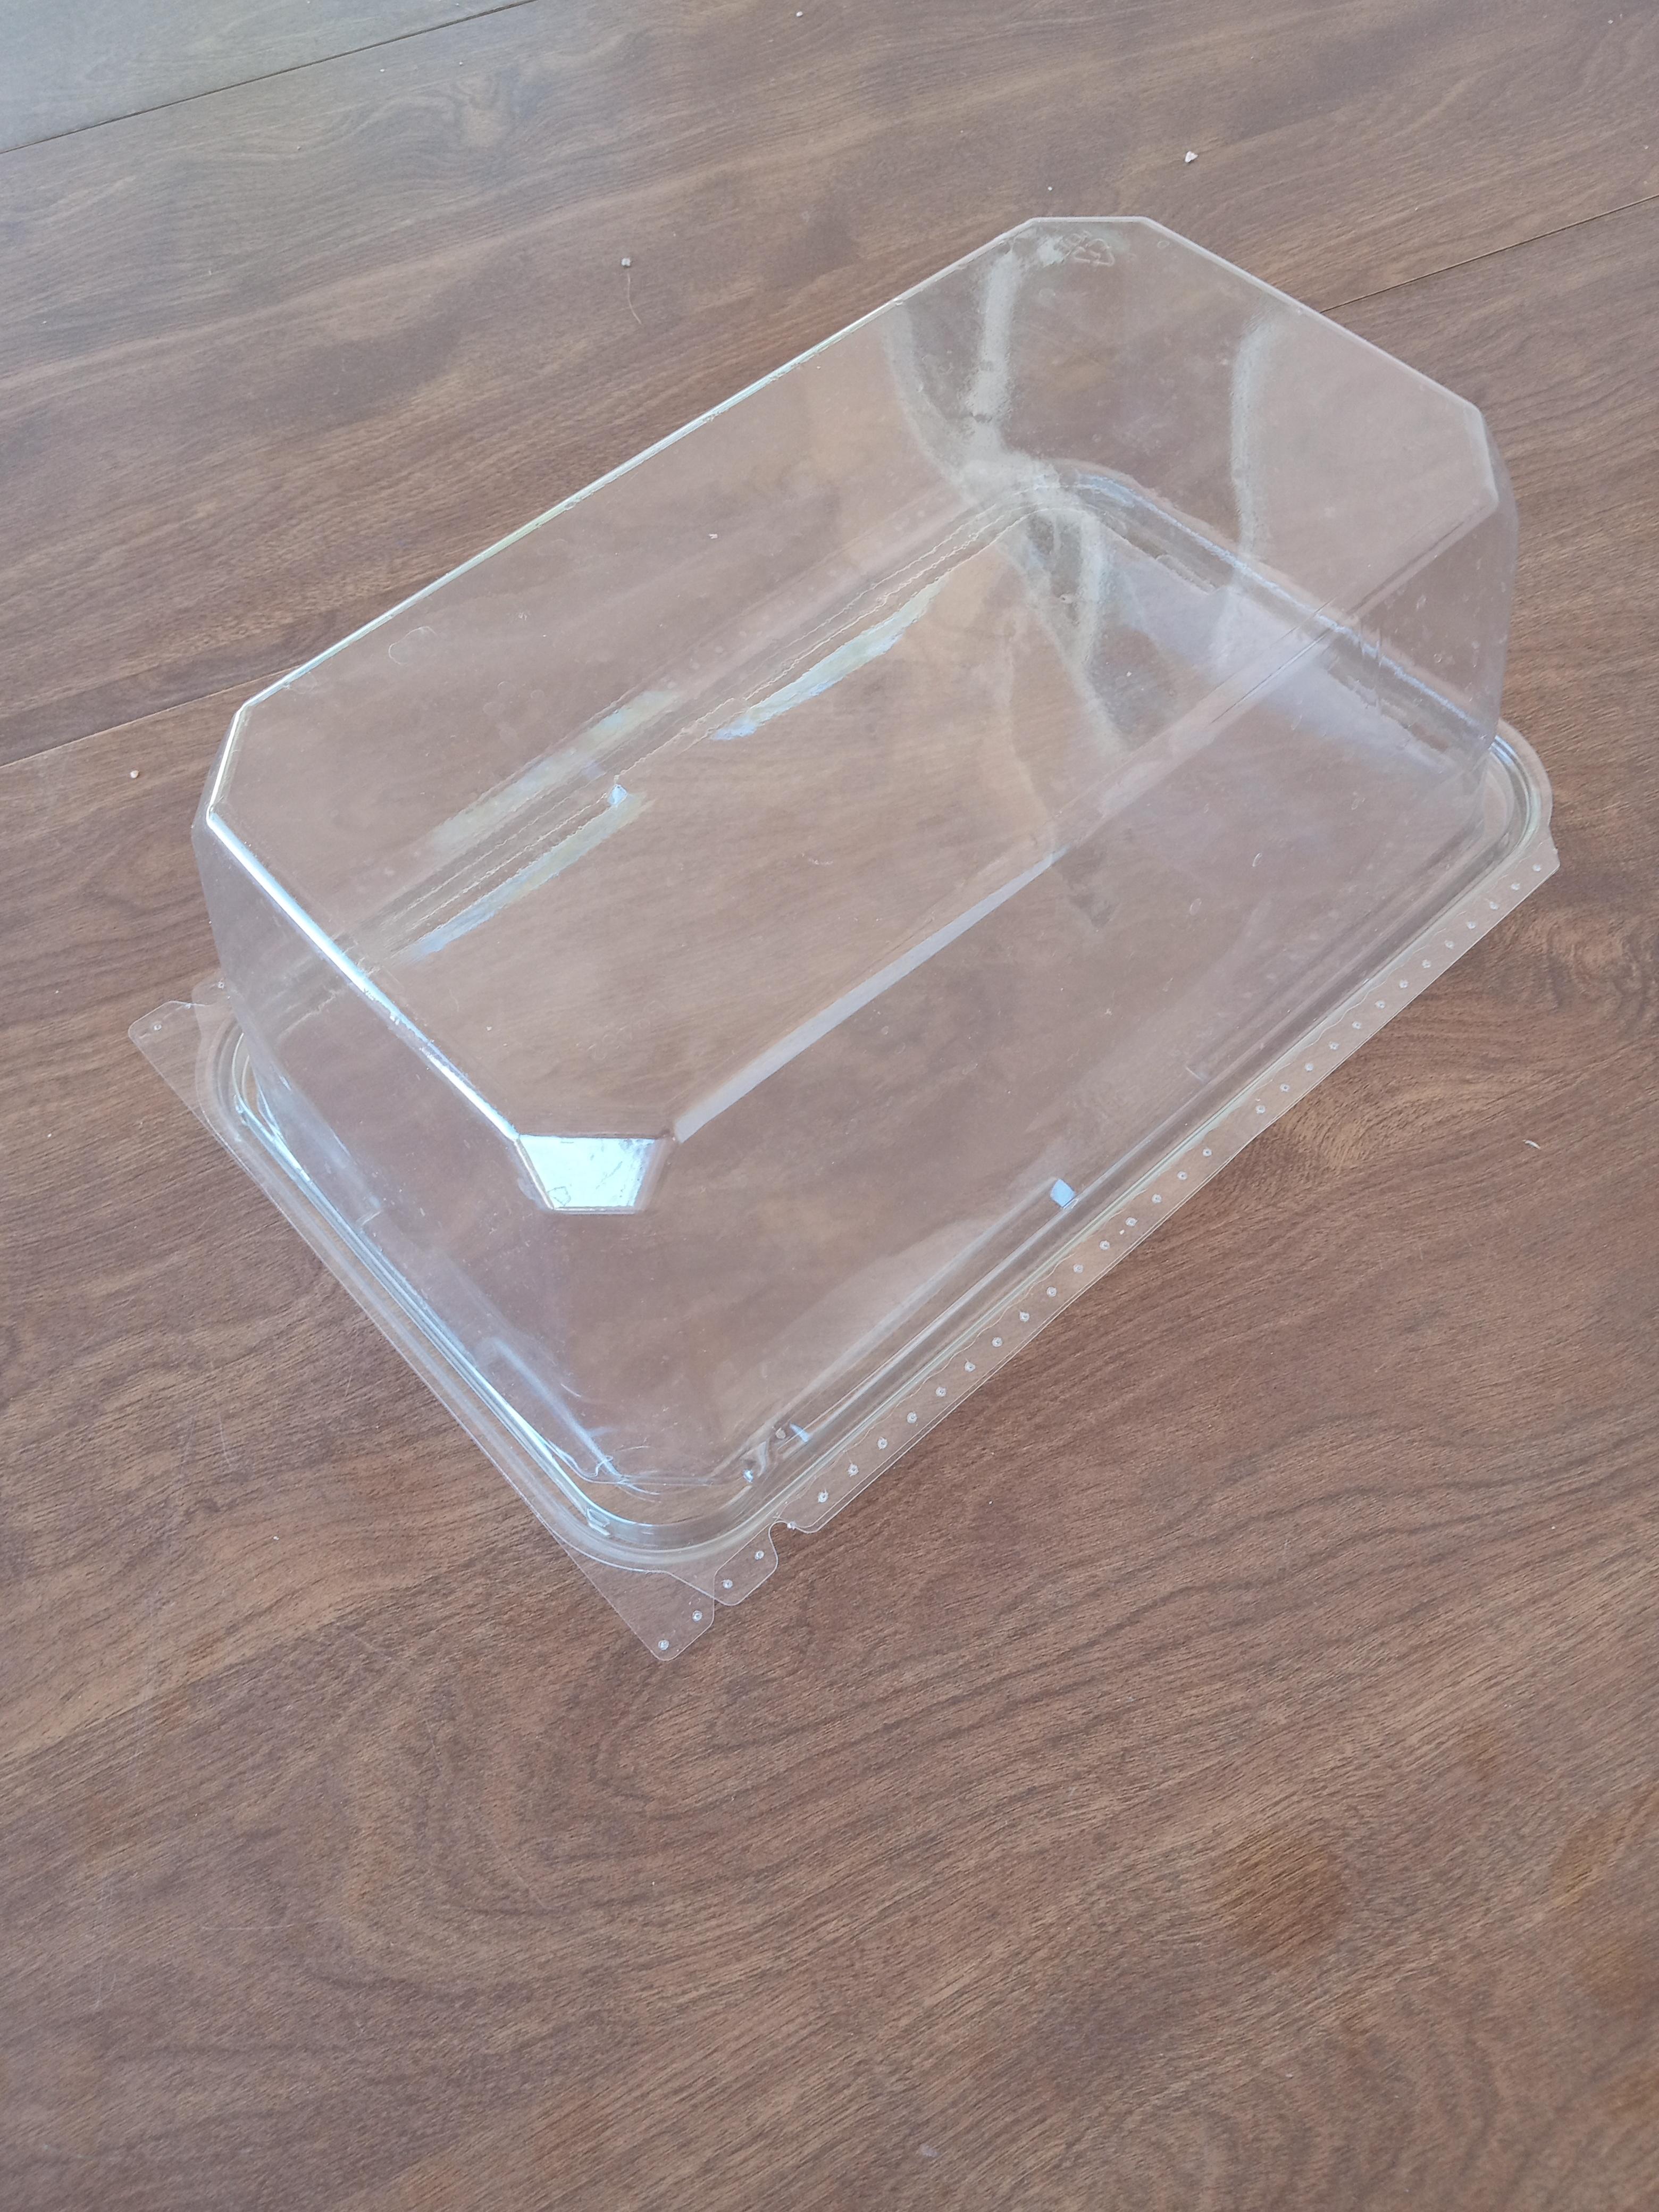
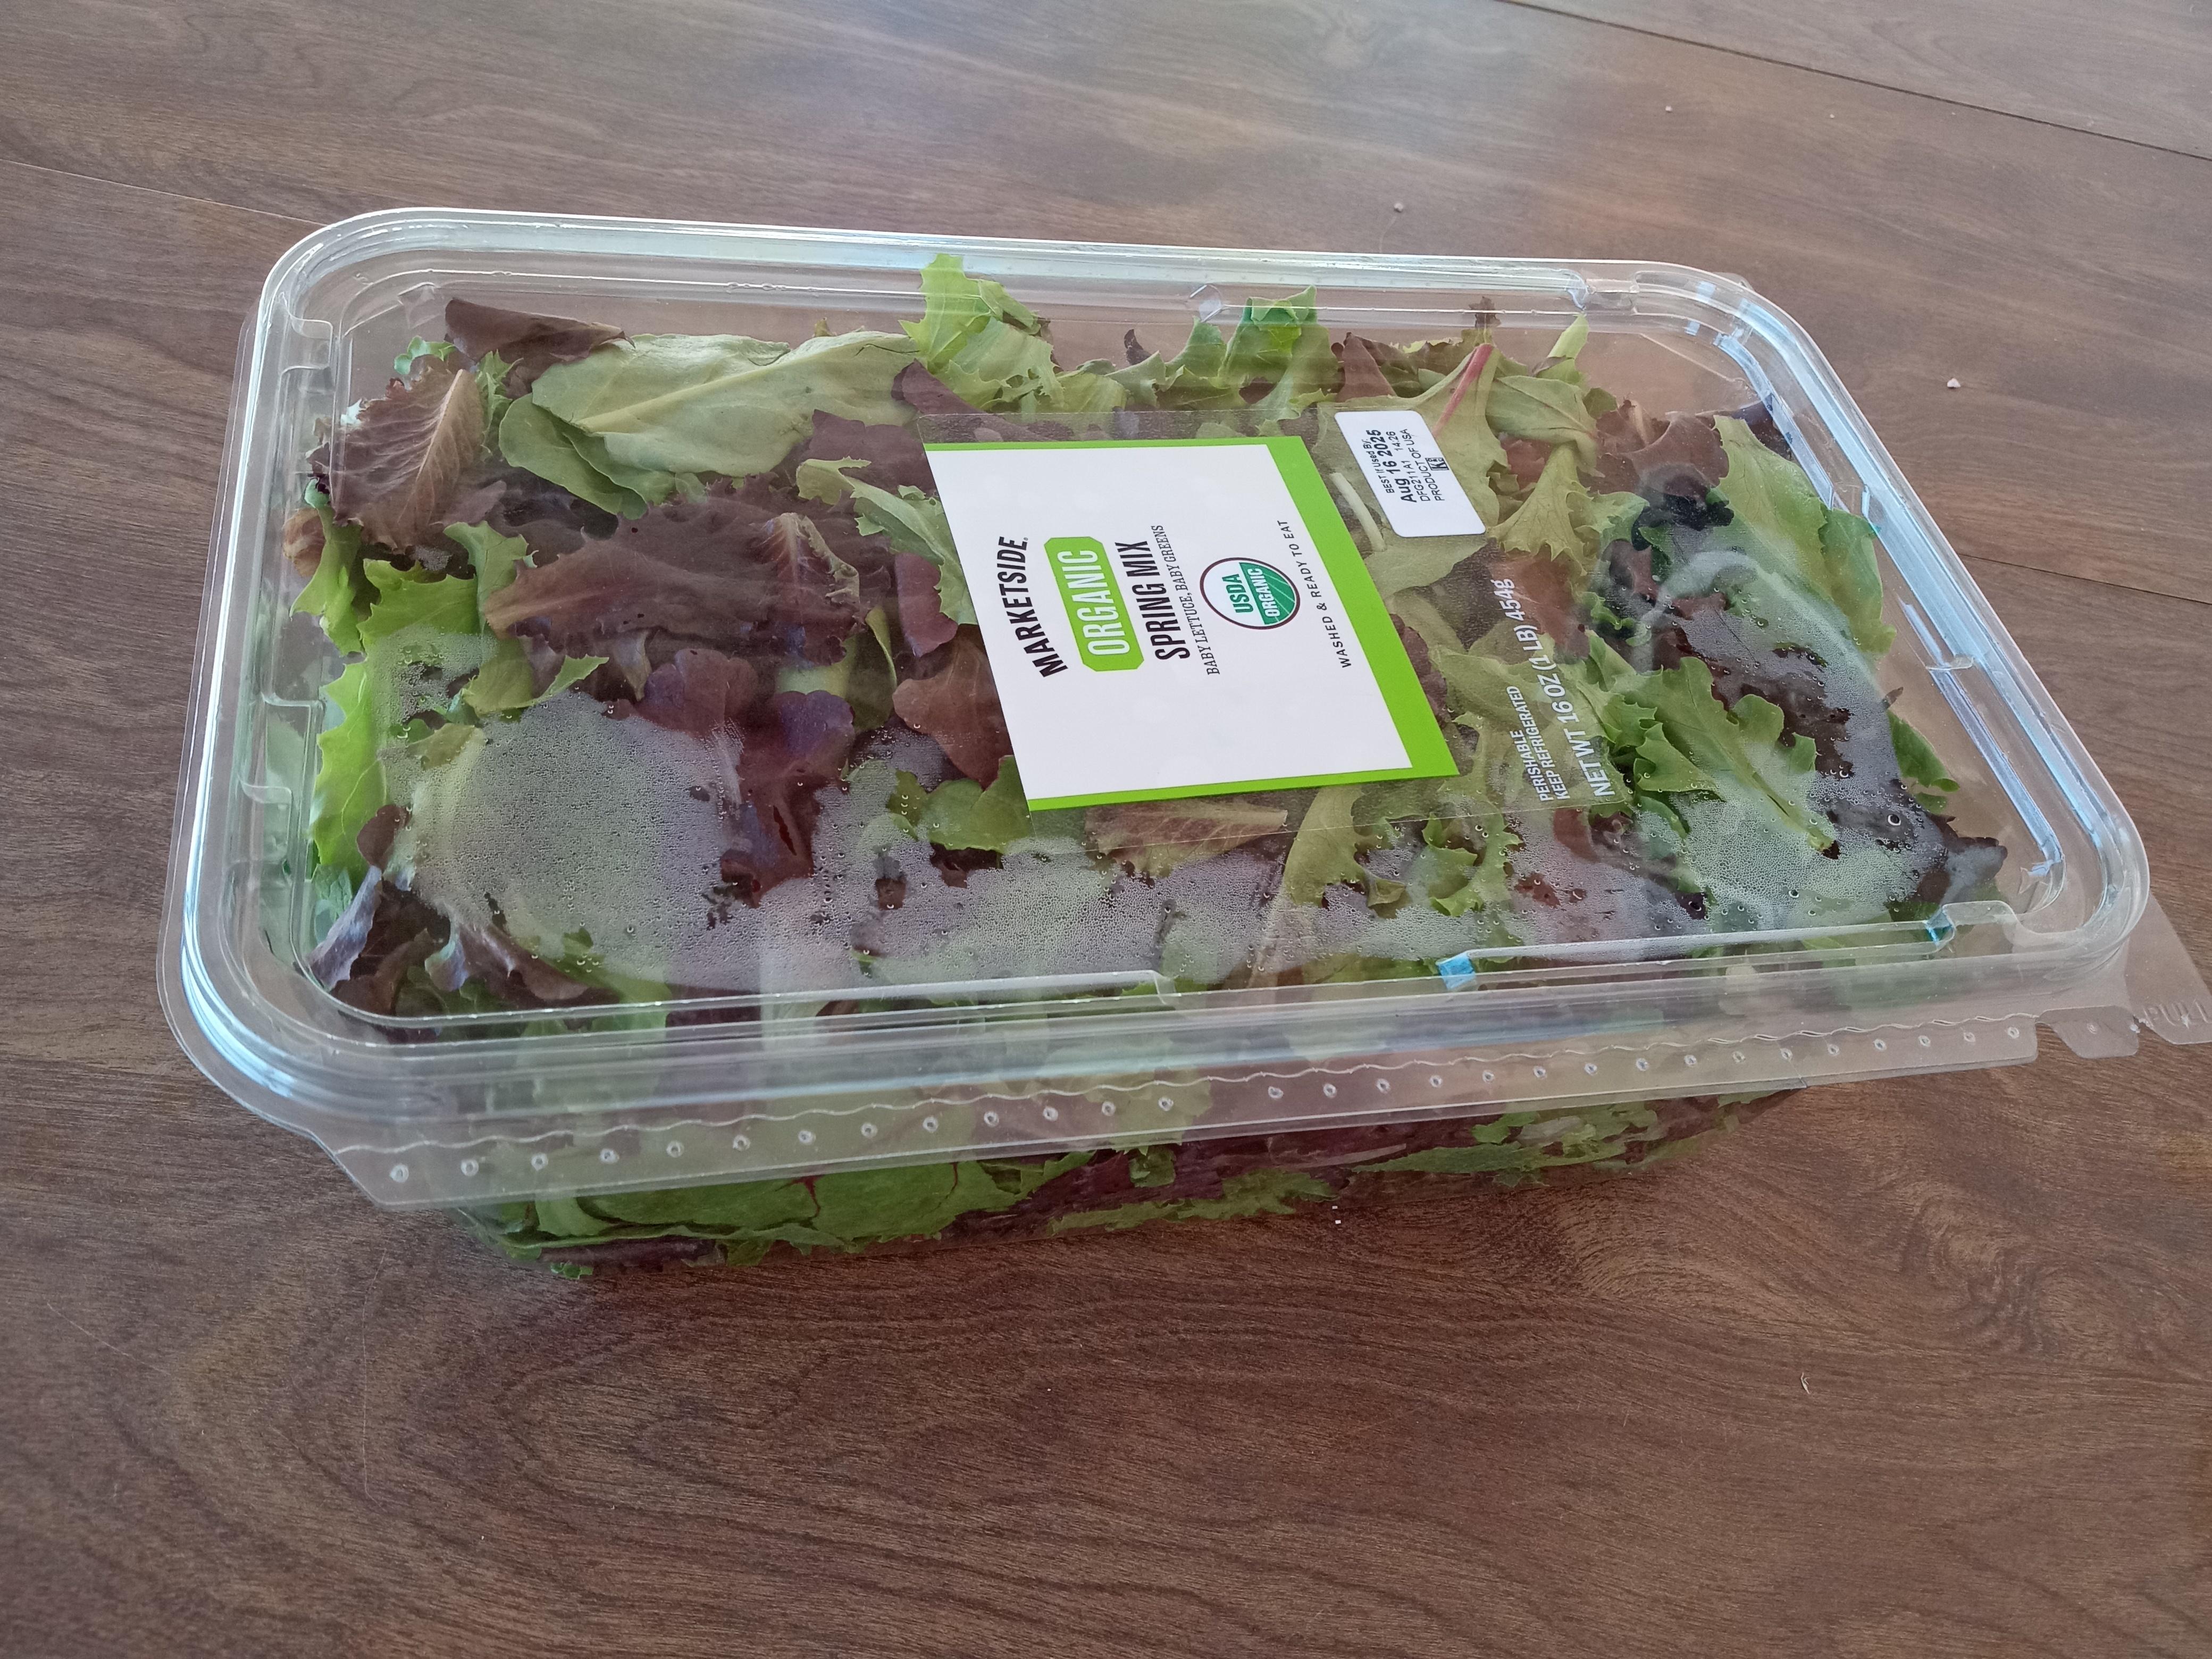
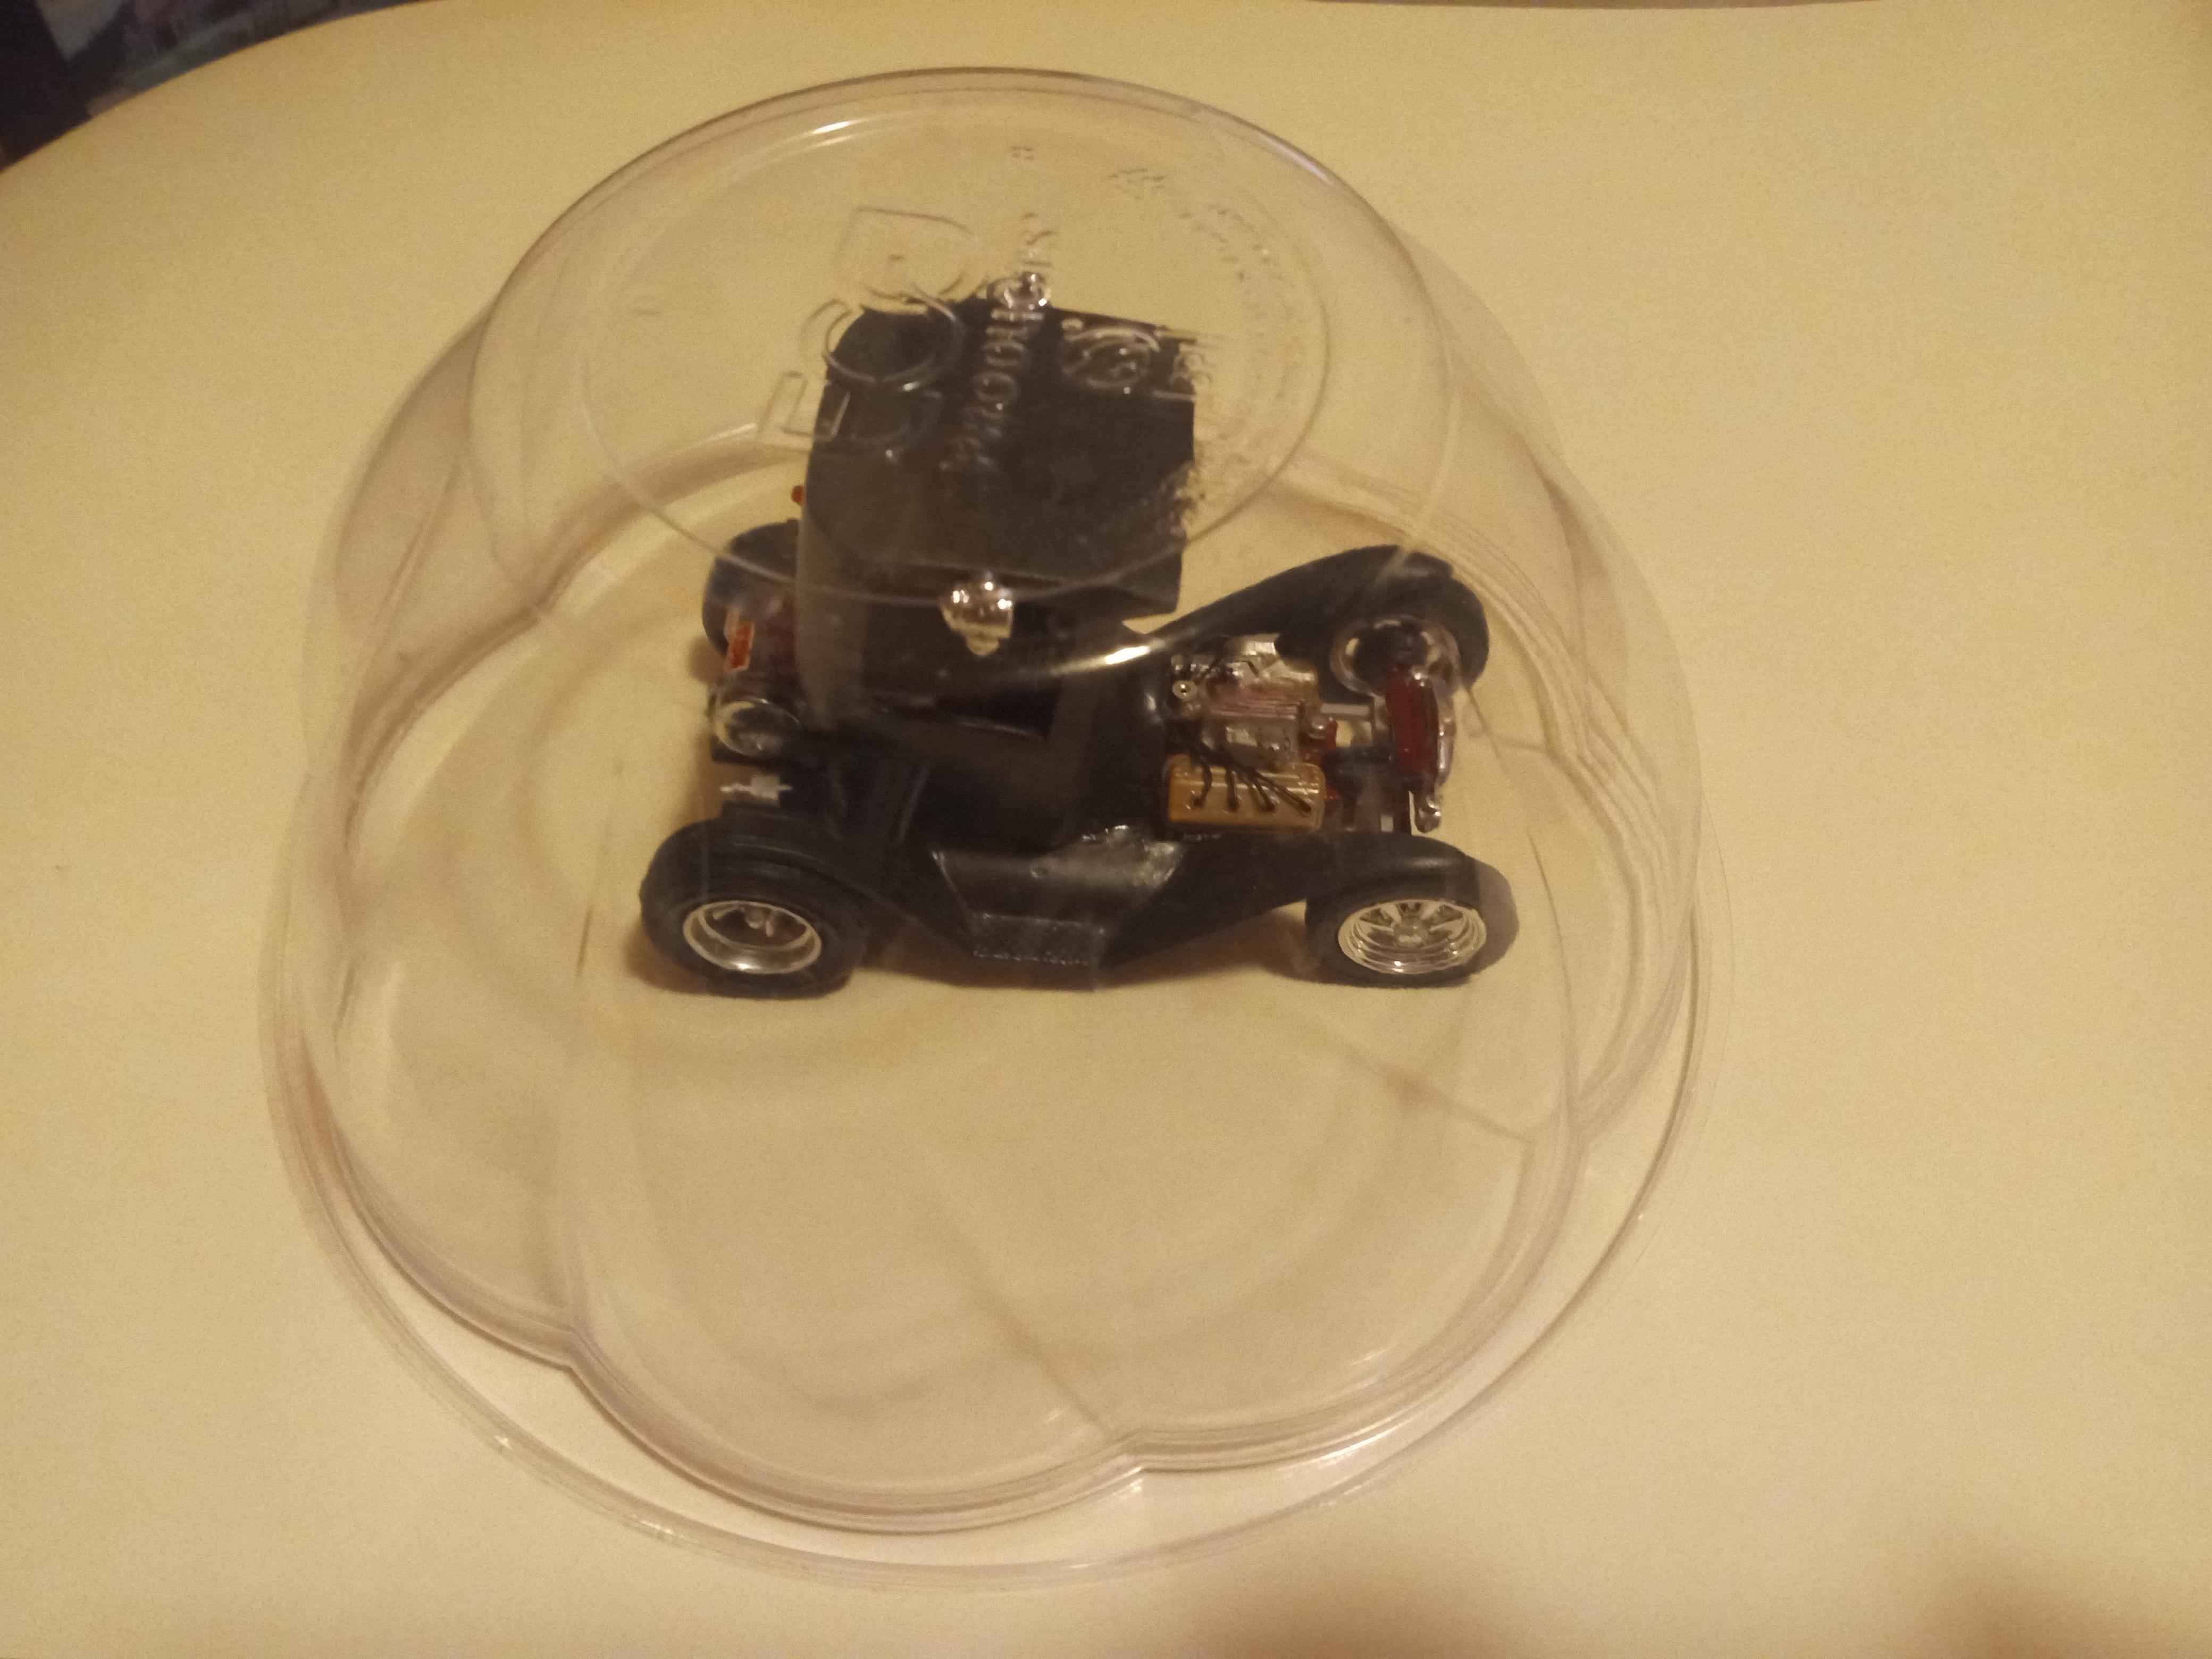
Living on retirement income sometimes means limited resources. And some people are just thrifty (spelled cheap?). I looked for some small, clear display boxes on Amazon and eBay and was shocked (as I usually am looking at prices after 70 some years). Out of my comfort zone. My alternative was from Walmart. Organic salad container with good price on mixed salad for $5, and I get the clear container just slightly bigger than normal 1/24 cars (cases). My photos make them look cloudy, but that is my bad photography. They are very clear. More clear than the windows in the Vette. And of course, they can be polished just like you polish your models. A little flimsy but not that bad. The bottom is removable. Not sure how widespread this item is in various Walmarts. Your mileage may vary. But the idea is shop around. I show the package as bought, peel off the label, pretty easy. As a bonus here is my latest finished Phonebooth T in another container. Not as cool, but good enough for now. I need to publish my finished T, but I haven't completed my Procrastination For Dummies yet. How I built it is in WIP, Phonebooth T

- 6 replies
-
- 7
-

-
- display case
- case
- (and 1 more)
-

Dishonest ads on the forum
JPL-ACE replied to JPL-ACE's topic in Forum News and Questions (formerly: How To Use This Board)
I think Duckduckgo might help some but consider this forum has a lot of us old guys (I'm 79) which are known as easy marks, often swayed by a pretty xxx and most who made it this far are at least financially secure. I.E., prime targets. I cant remember if ad blockers work here. Youtube wont play many (if not all) with them on. I don't actually mind the targeted ads if they are subdued and not scams. Asking a lot. Also, I am still using many google apps but as I said at the beginning of this post, "Google sure has changed." So has everything I guess. Thanks all the comments. At least we can still vent... politely 😞 -
Dishonest ads on the forum
JPL-ACE replied to JPL-ACE's topic in Forum News and Questions (formerly: How To Use This Board)
I do too. Click on the little ad symbol in the corner and report it to Google. At least it will feel like we are doing something 😉 -
Dishonest ads on the forum
JPL-ACE replied to JPL-ACE's topic in Forum News and Questions (formerly: How To Use This Board)
Thanks Les. I clicked on the ad symbol and google let me complain it is an inappropriate ad. I guess that is all we can do. Google sure has changed. -
Dishonest ads on the forum is getting worse. I just noticed a half page ad that just says "Click here to continue" or some text like that. Thats all. This is a blatant scam technique looking like part of the page or login. I don't know what the ad is as I sure wont click on it but I cant think of any legitimate ad like that. It does have the tiny ad symble in the corner so you can tell if you pay attention but that is pretty low allowing that ad. Just my opinion.
-
John, during writing this last post, I was thinking of mentioning Ed and Rat Fink work but thought it too pretentious of me. Thanks for the compliments. I very much enjoyed working on this. It was mostly spare parts or handmade. Good clean fun, curse words and all.
- 22 replies
-
- 1
-
-
- model t
- center door
- (and 1 more)
-
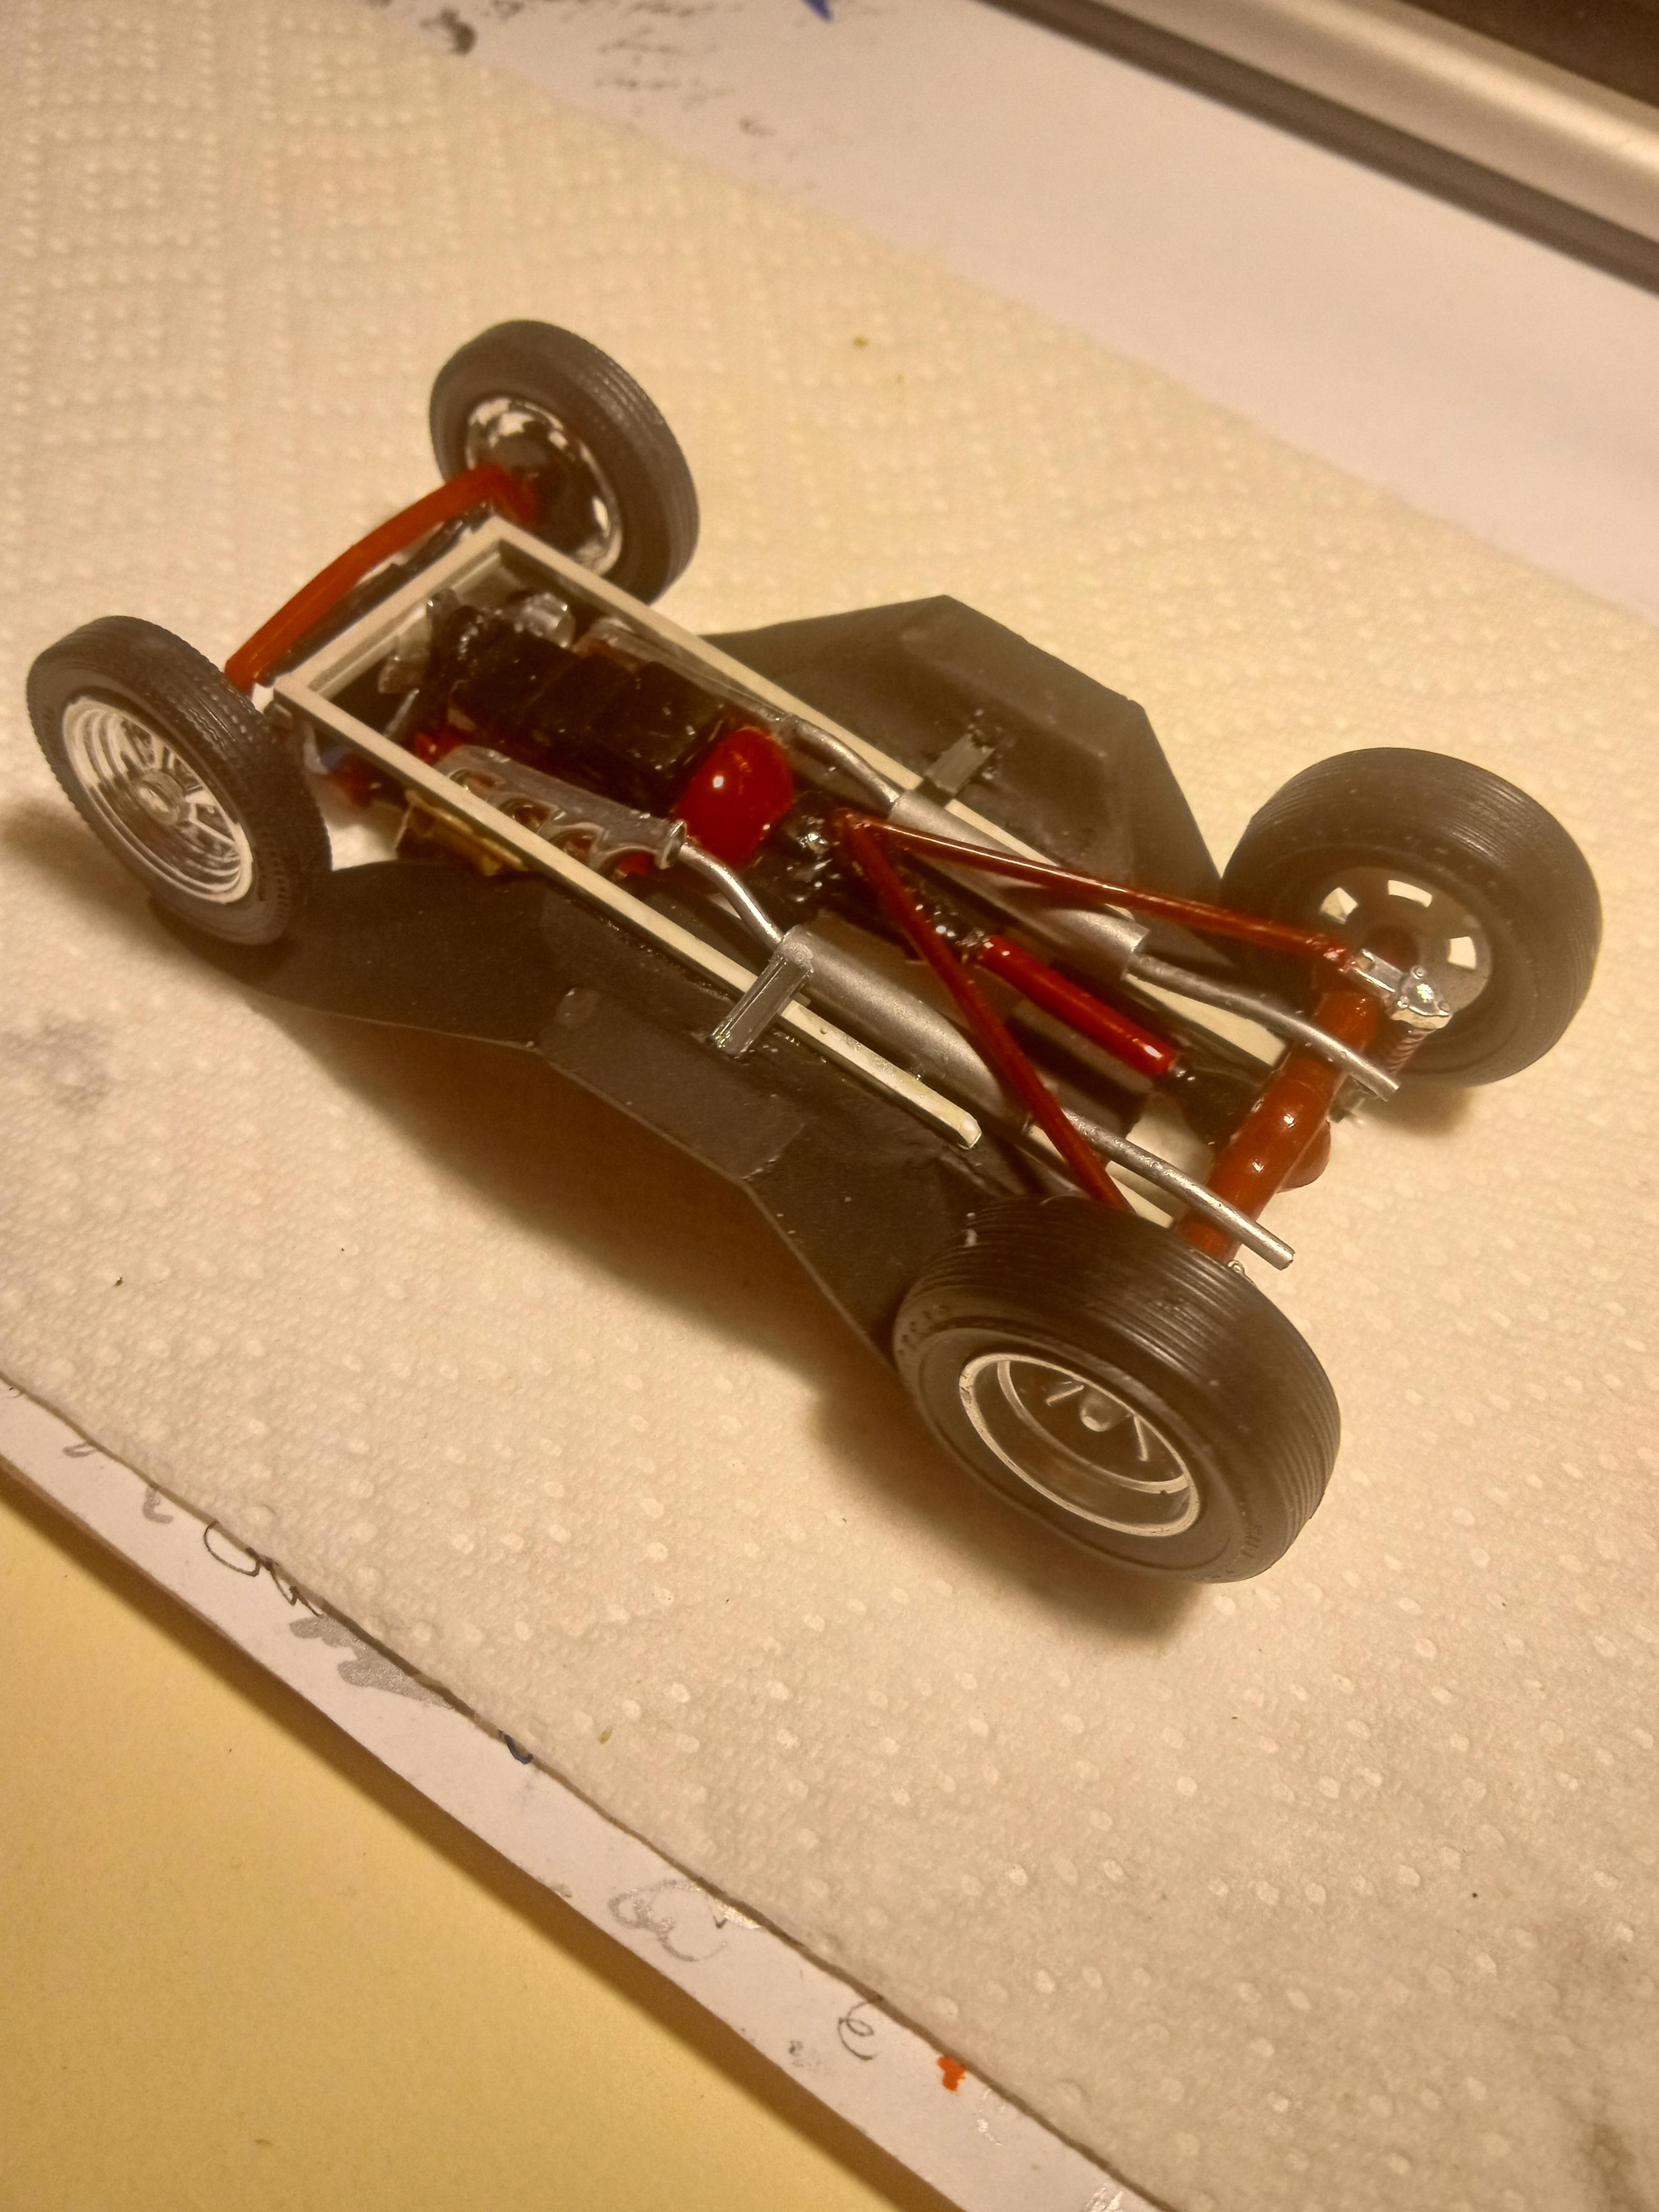
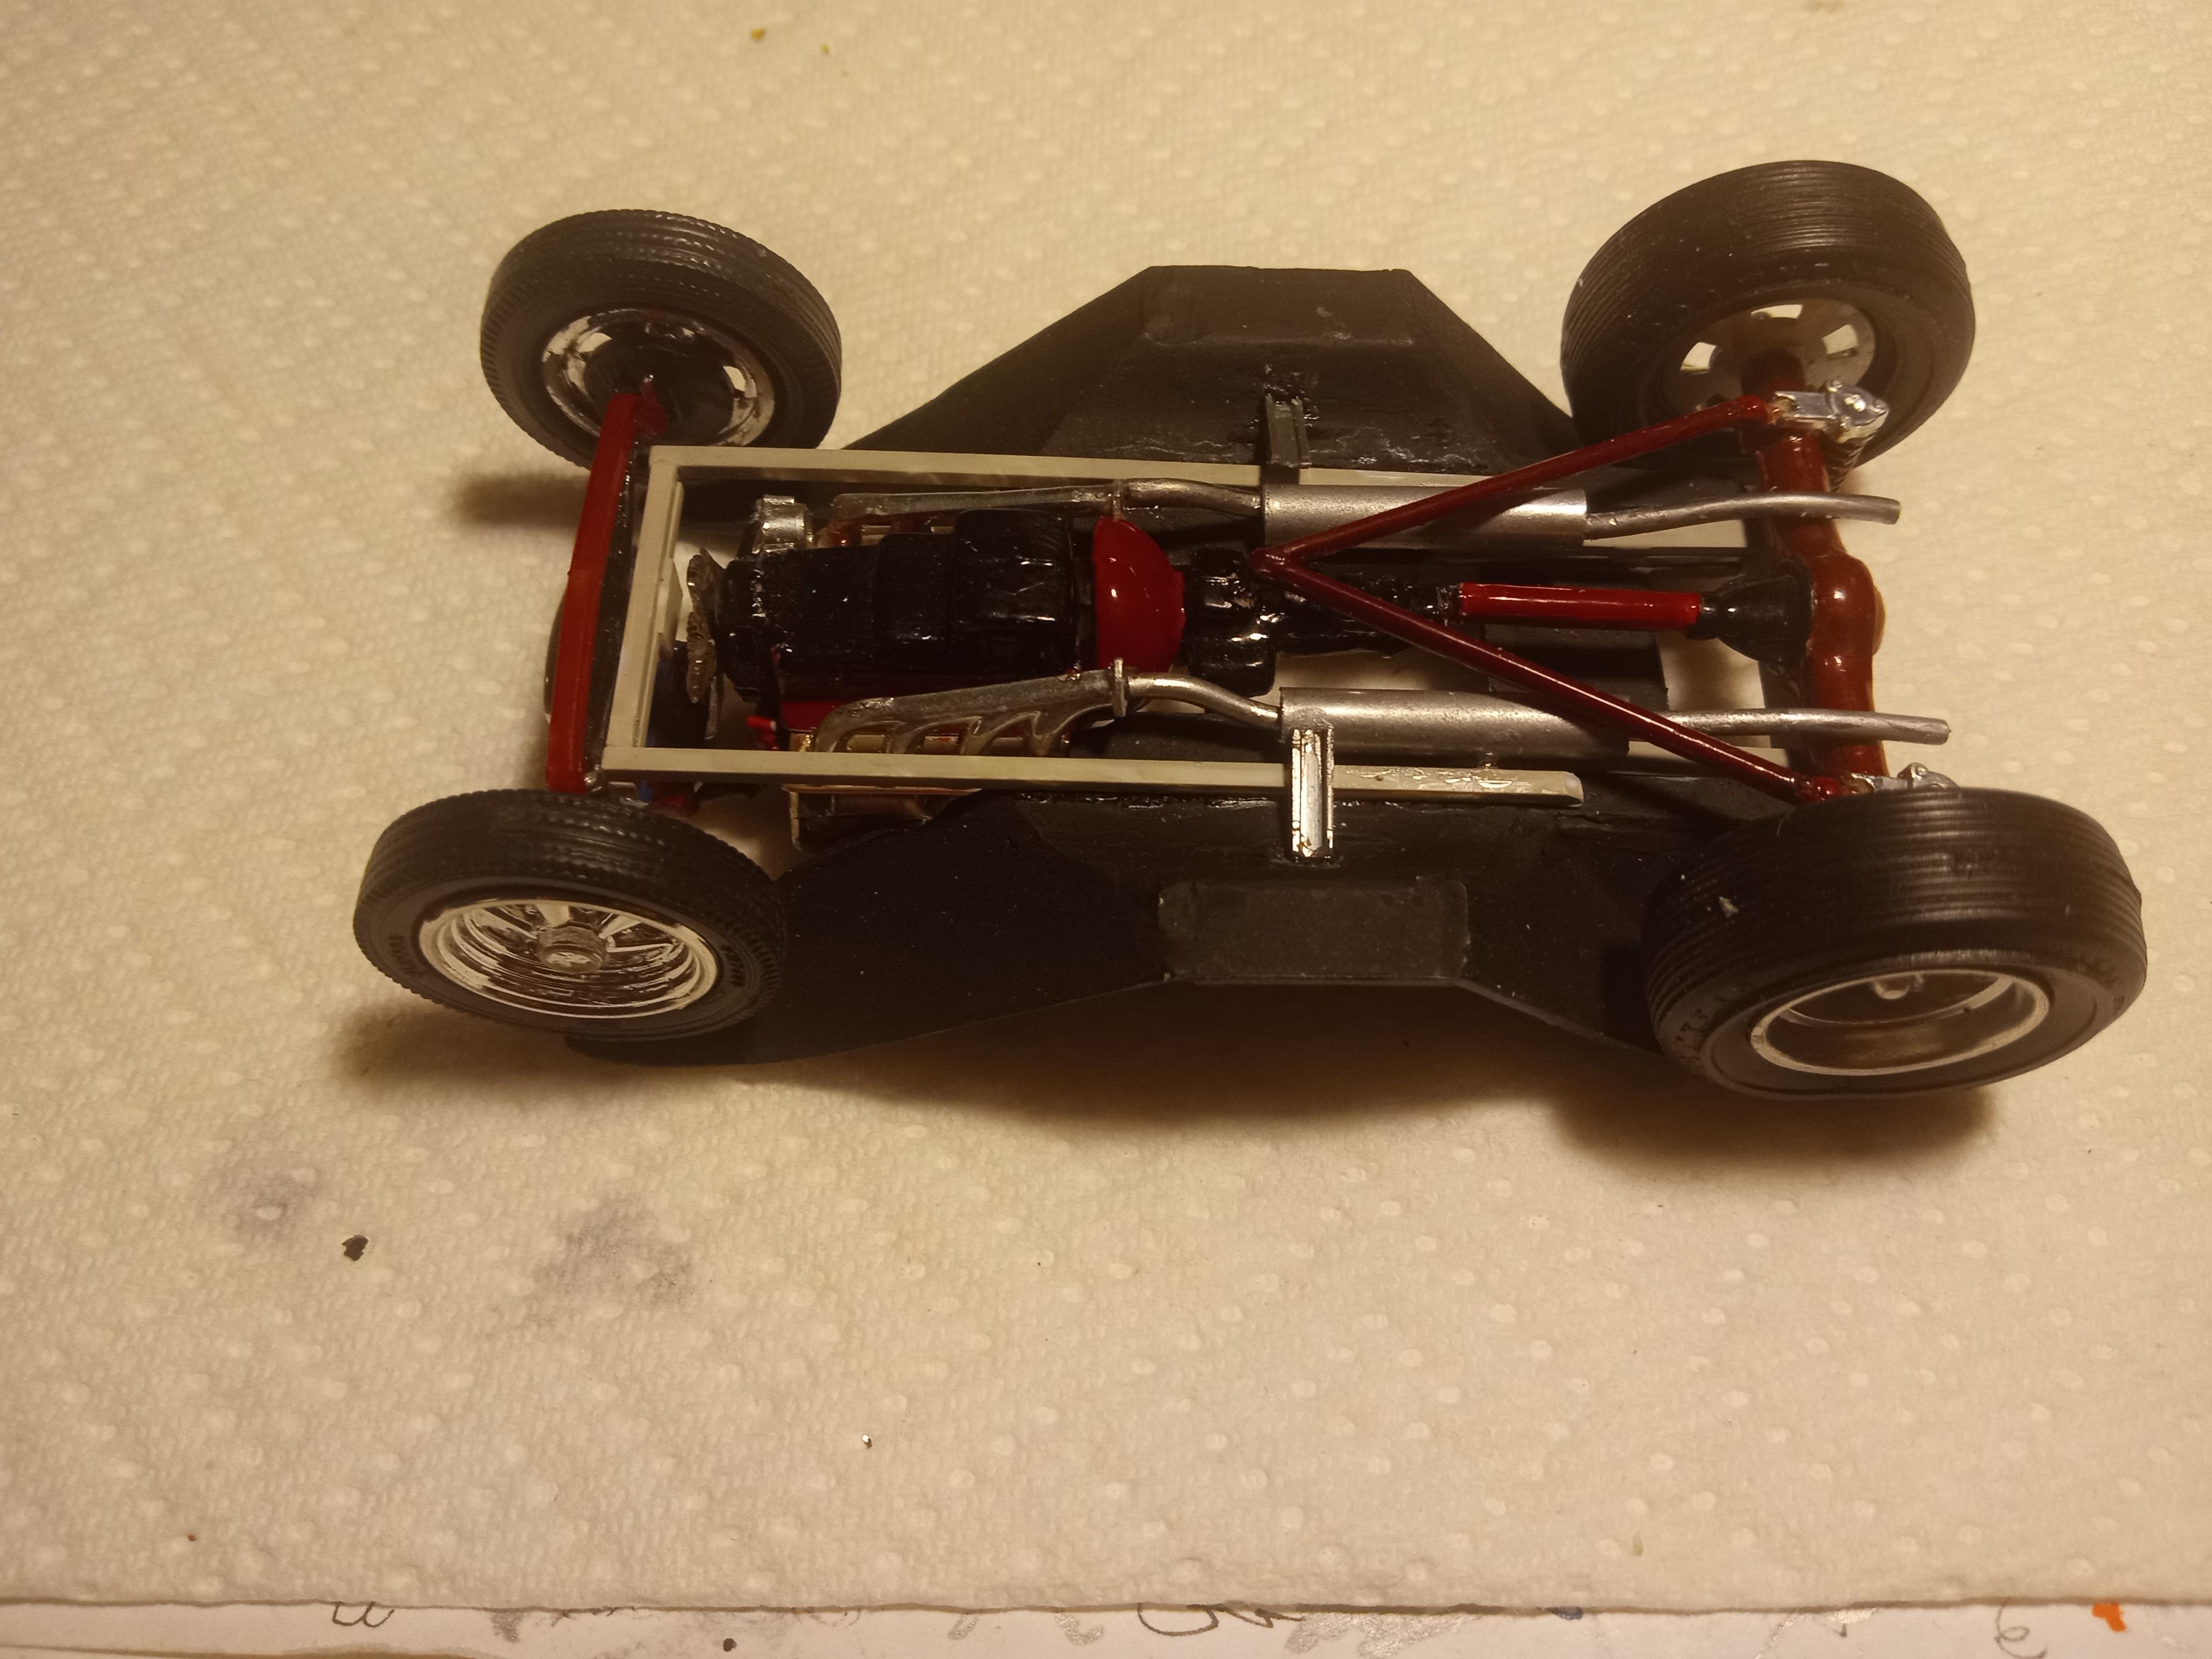
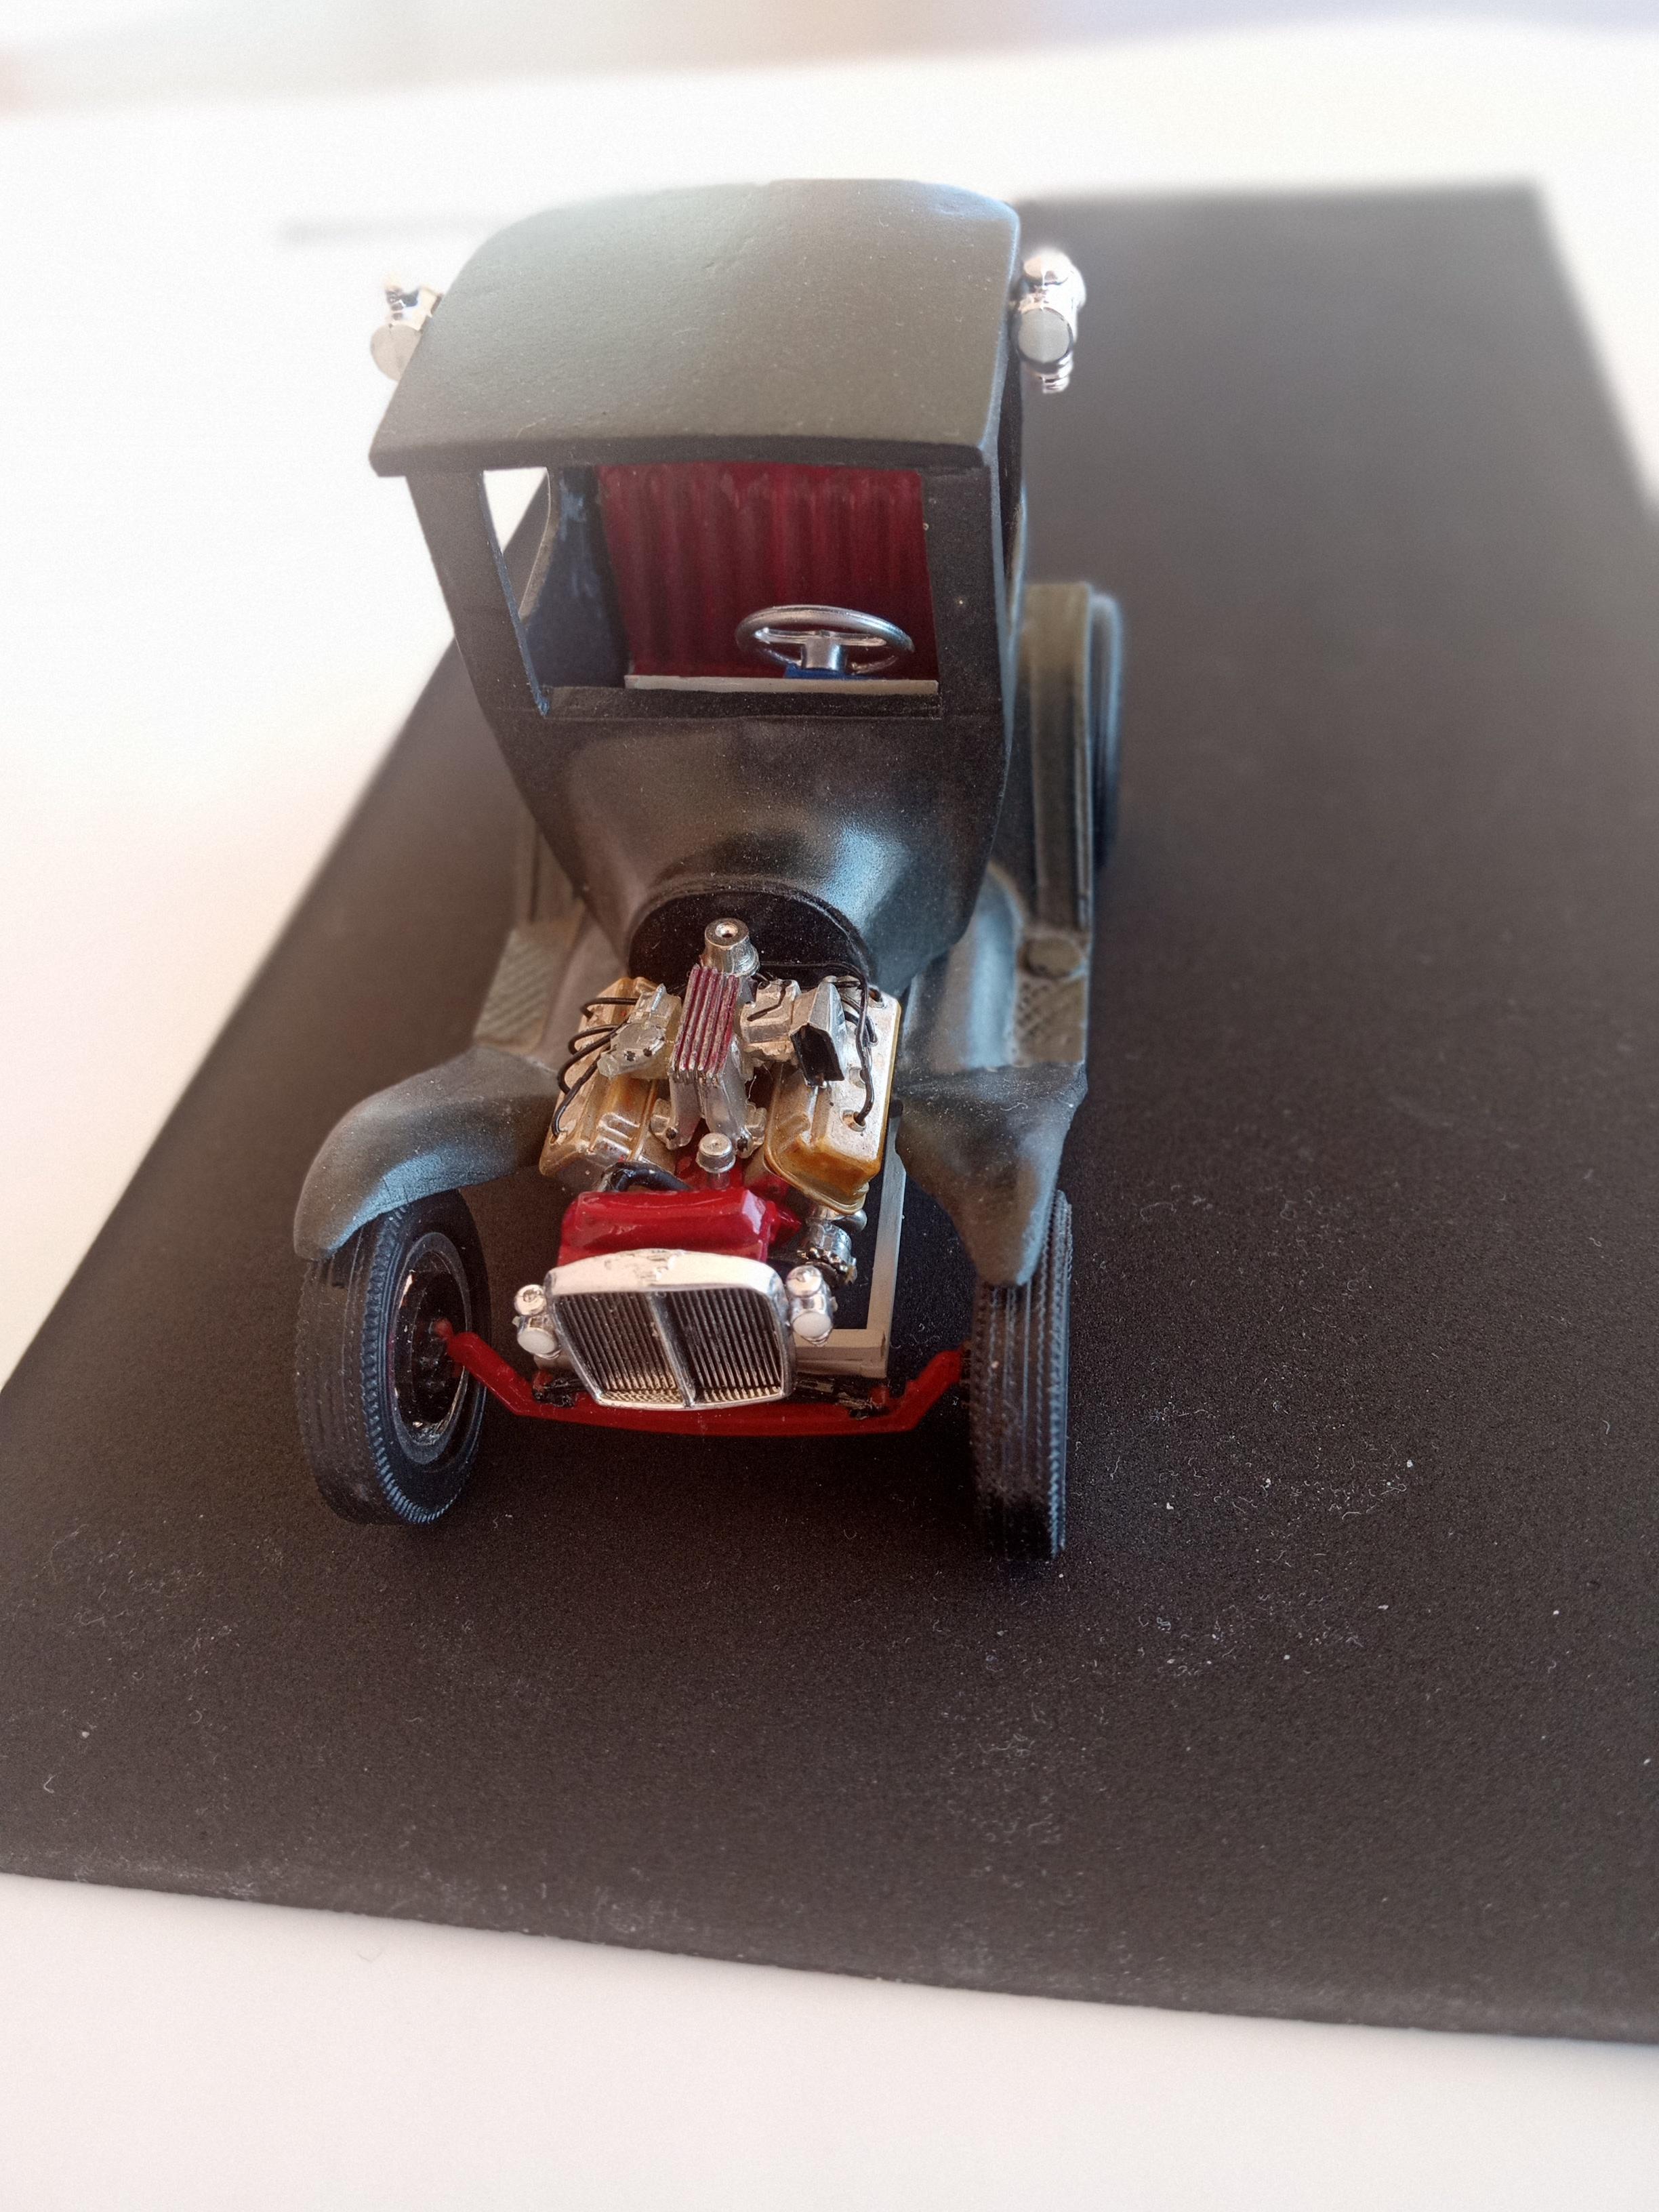
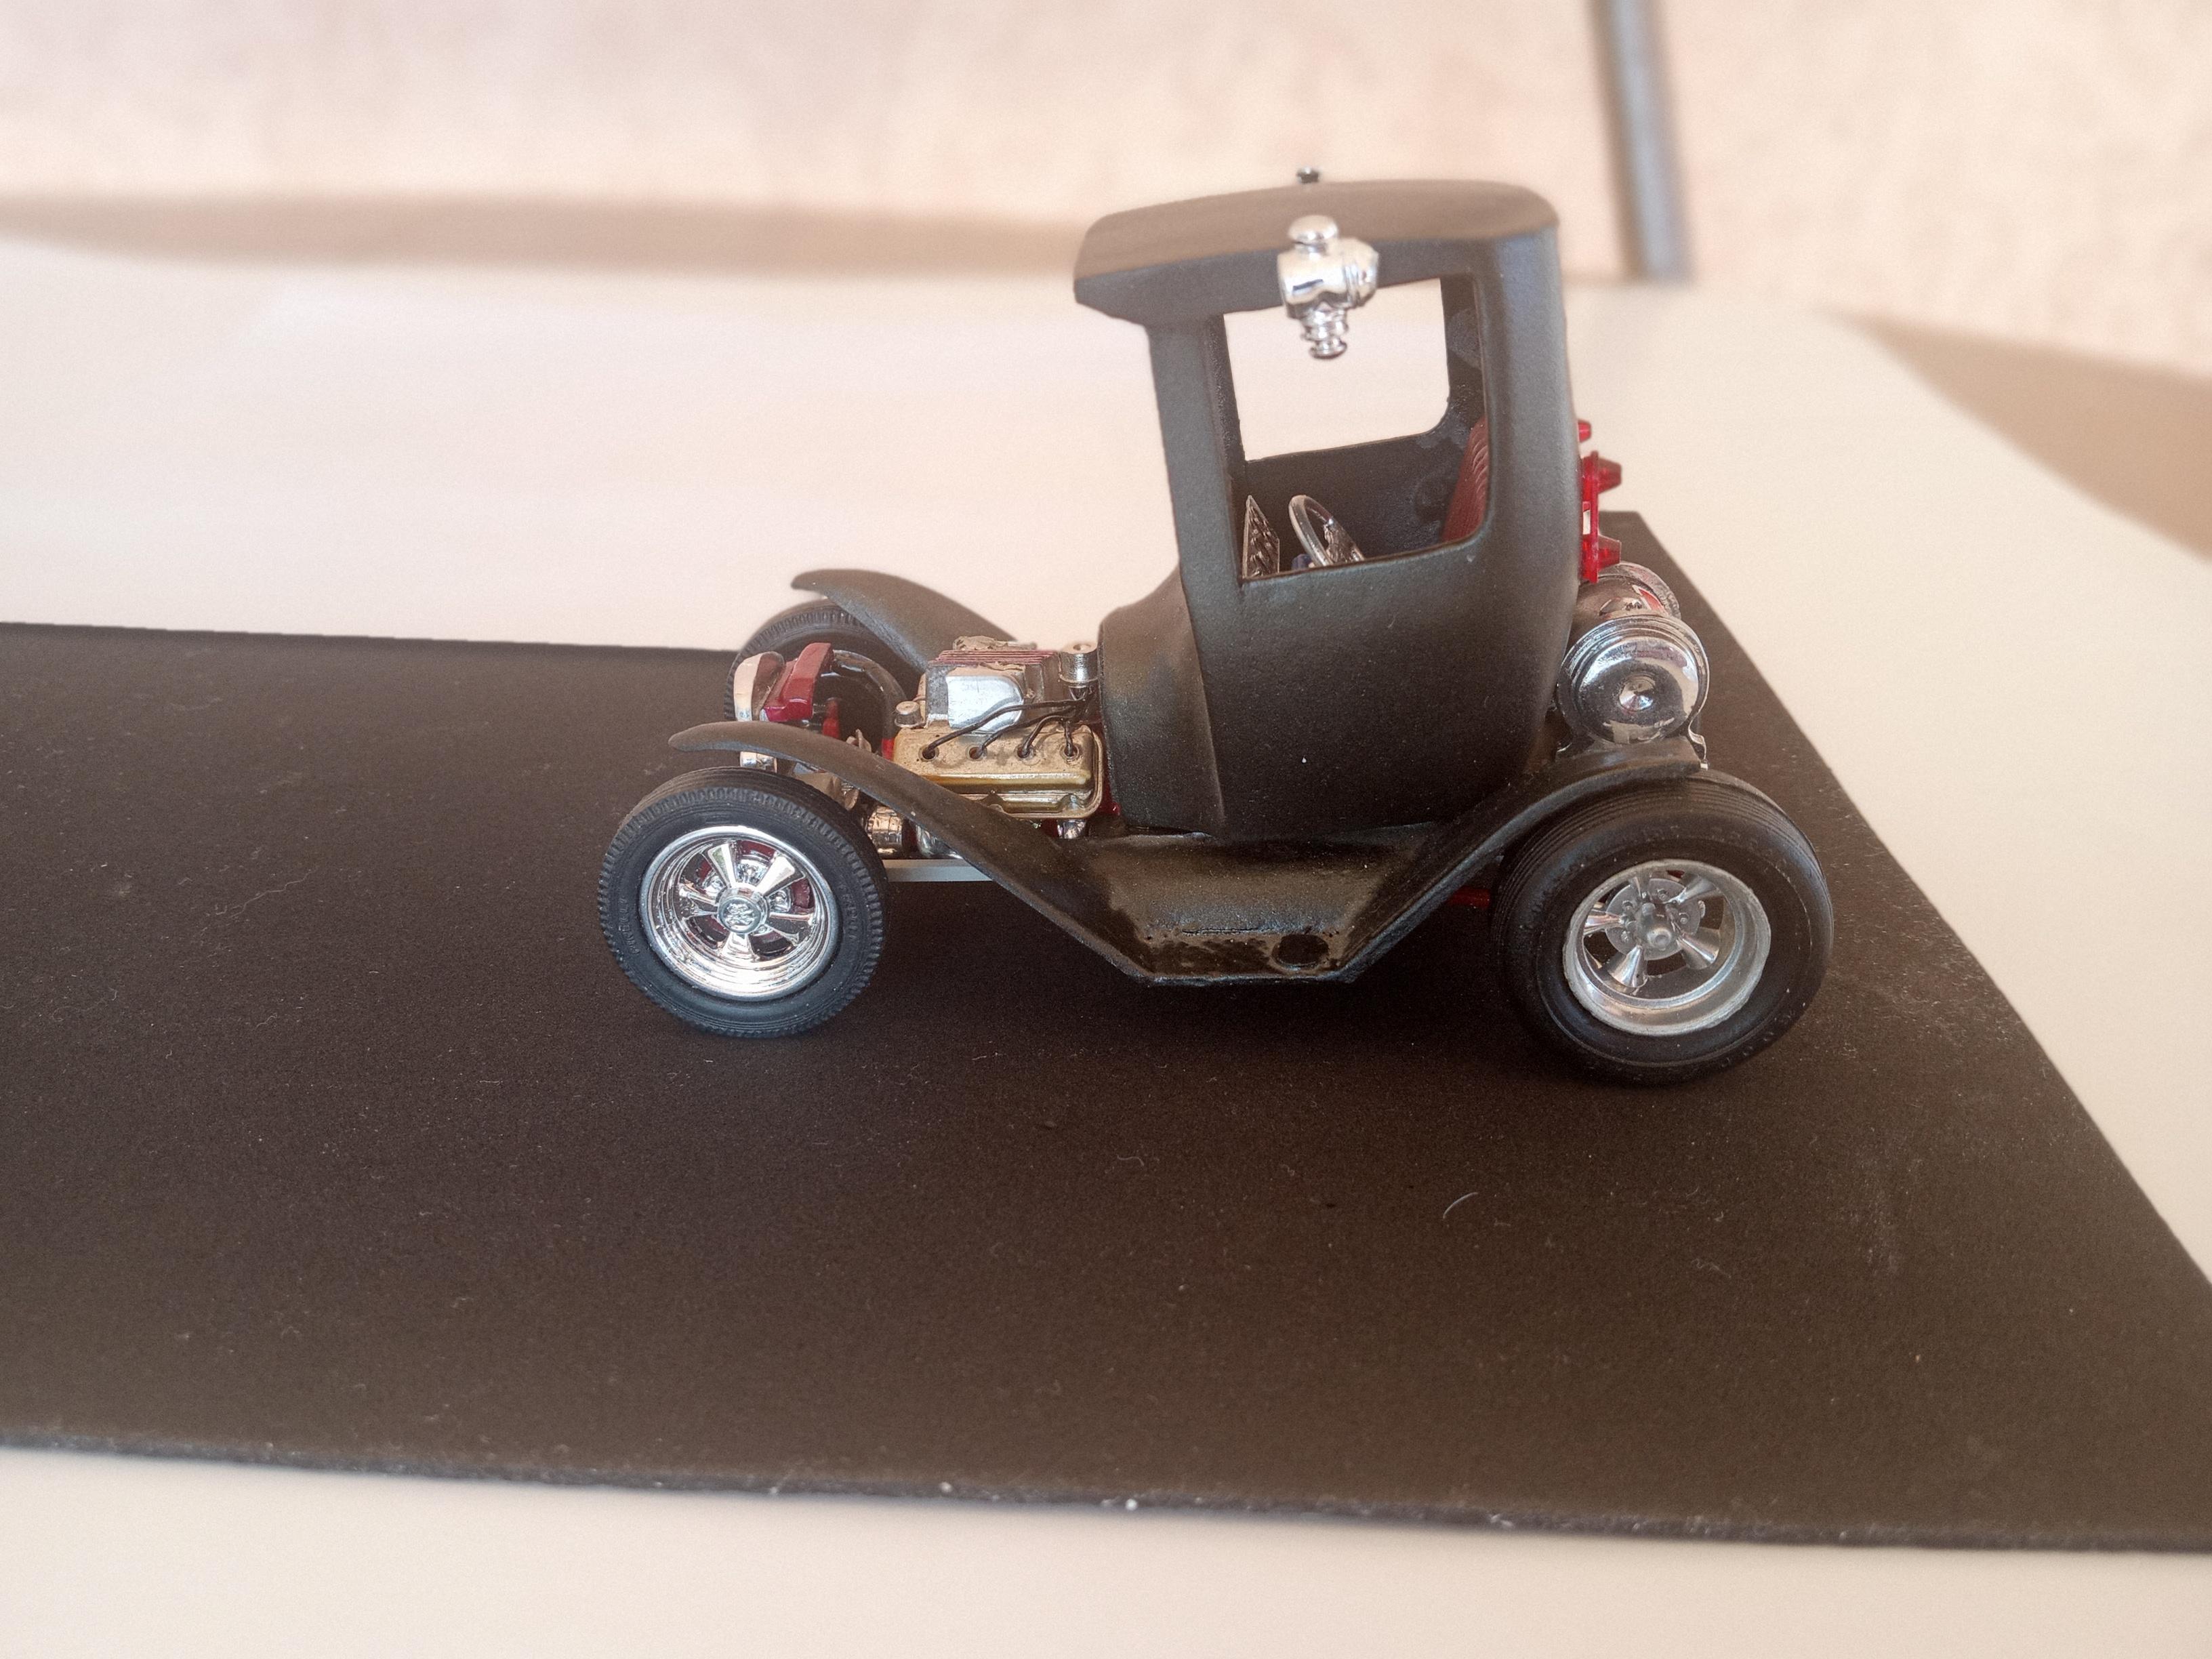
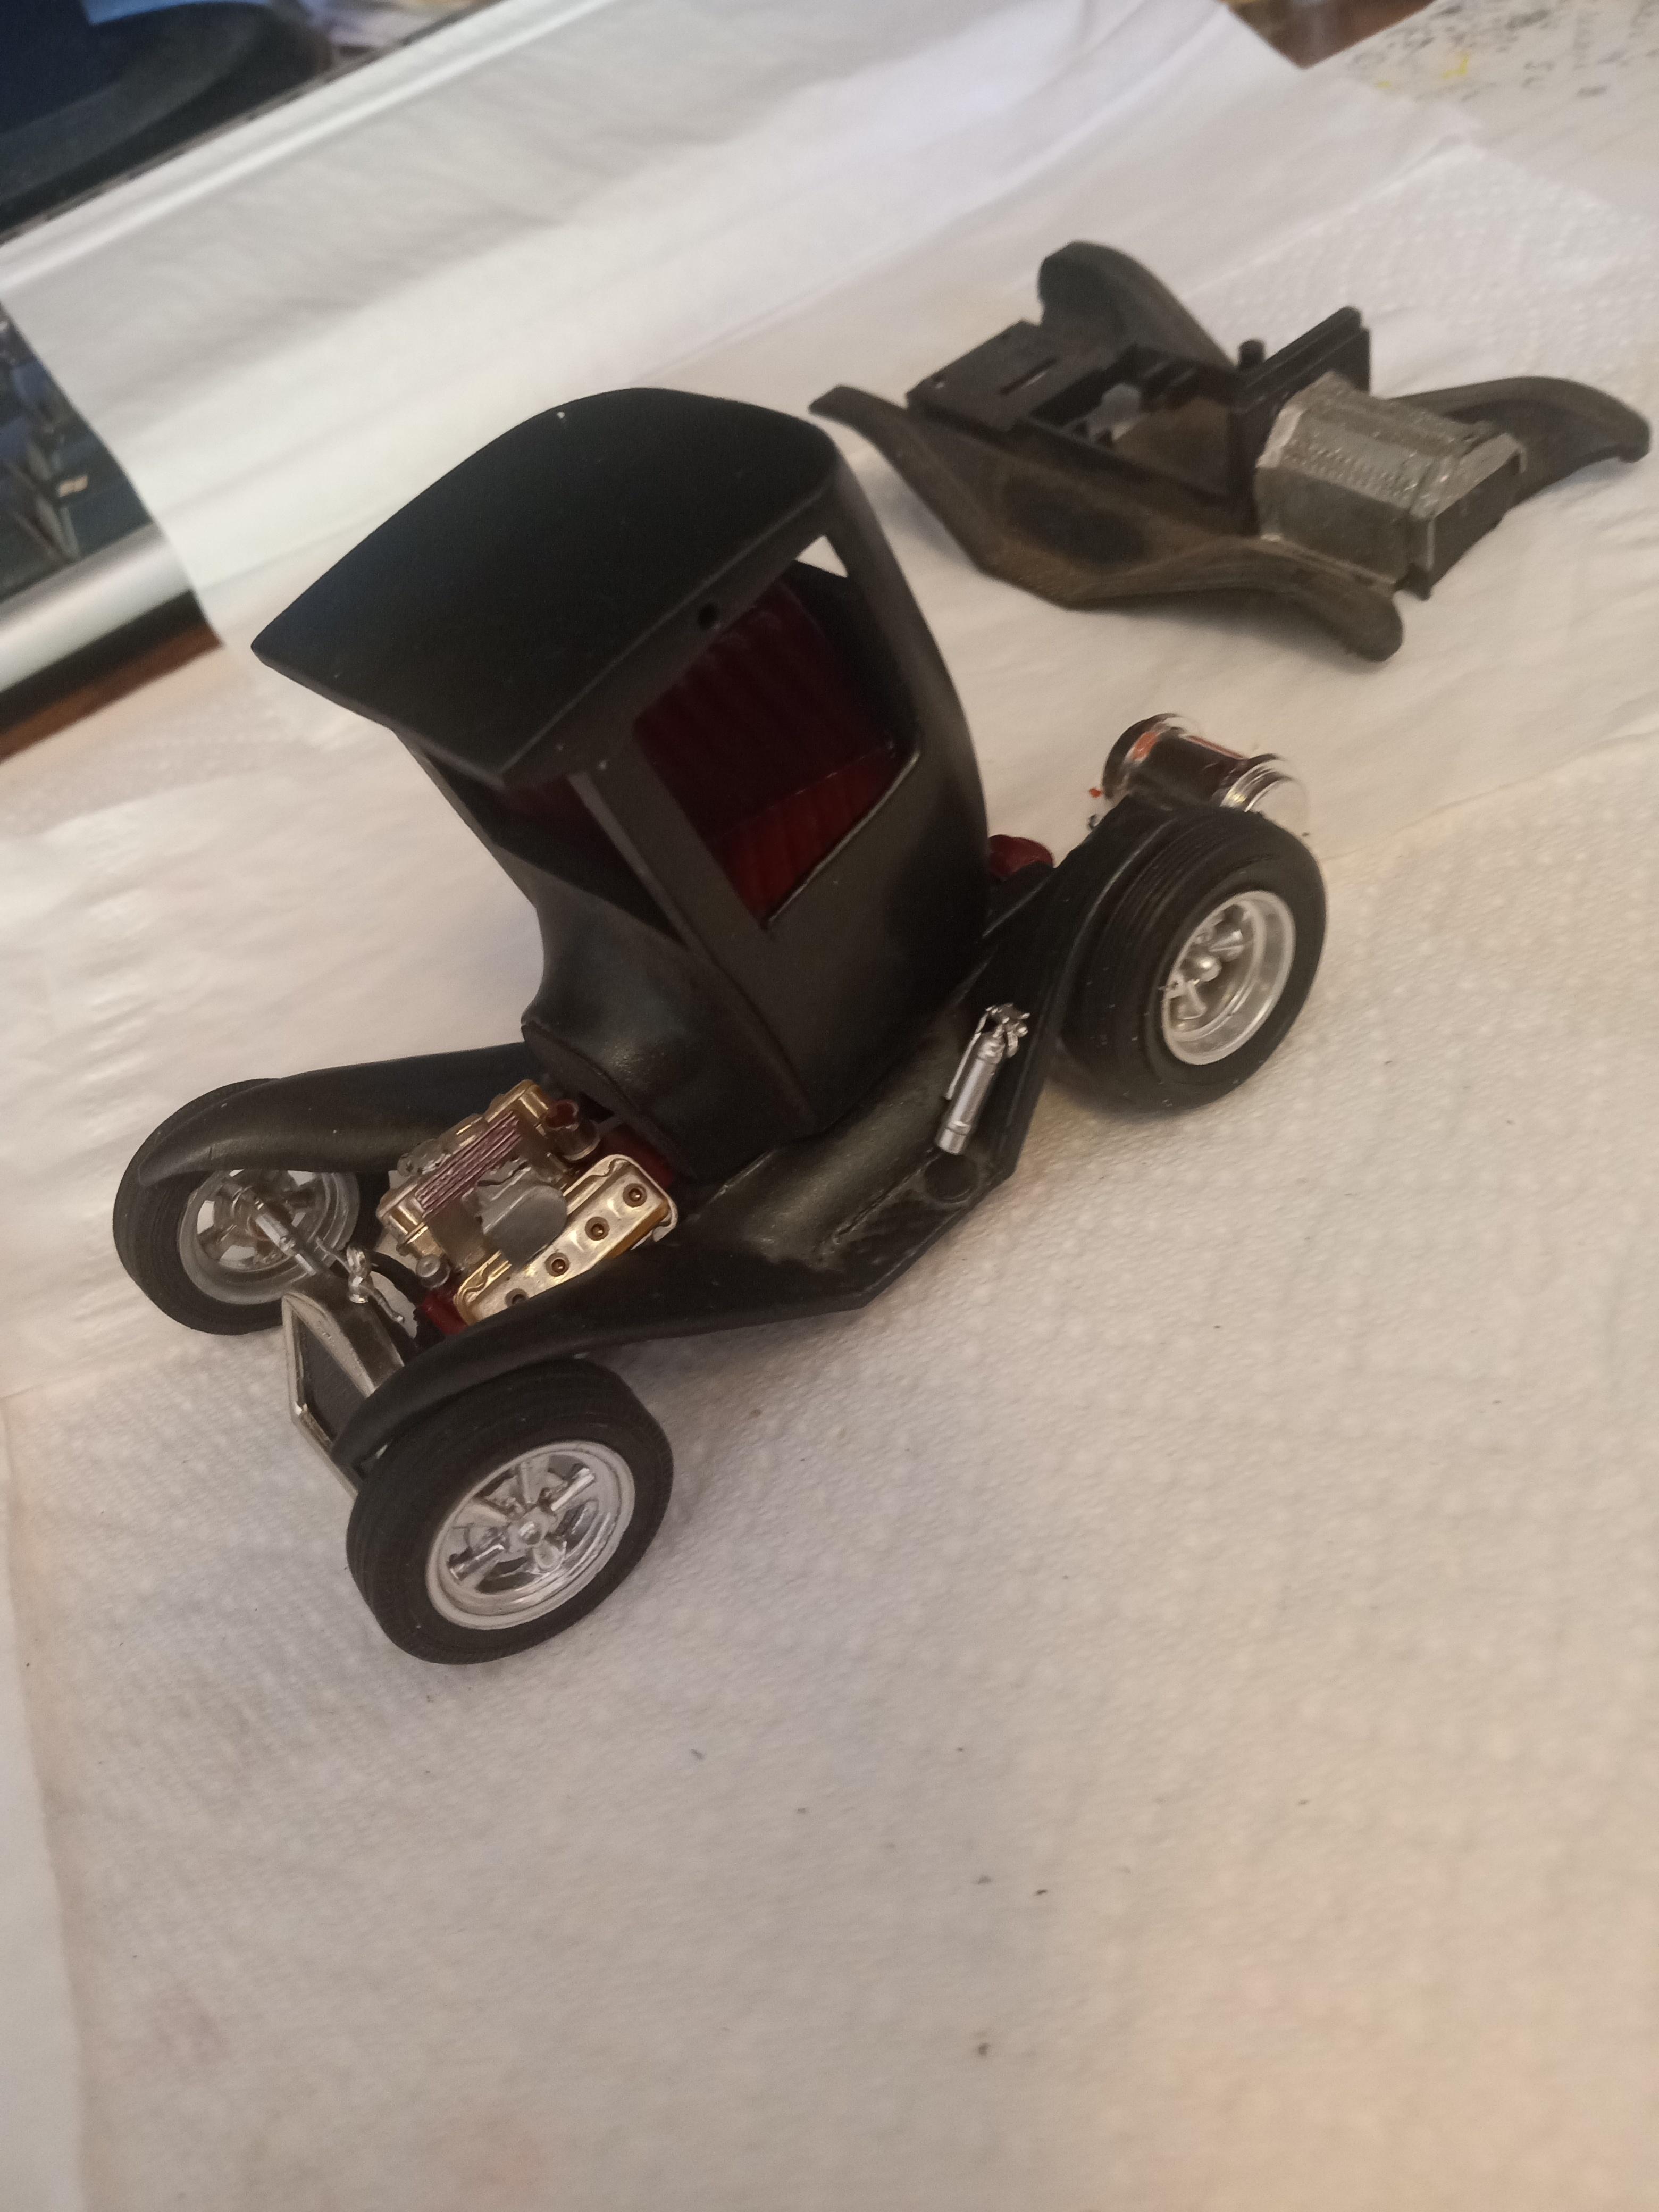
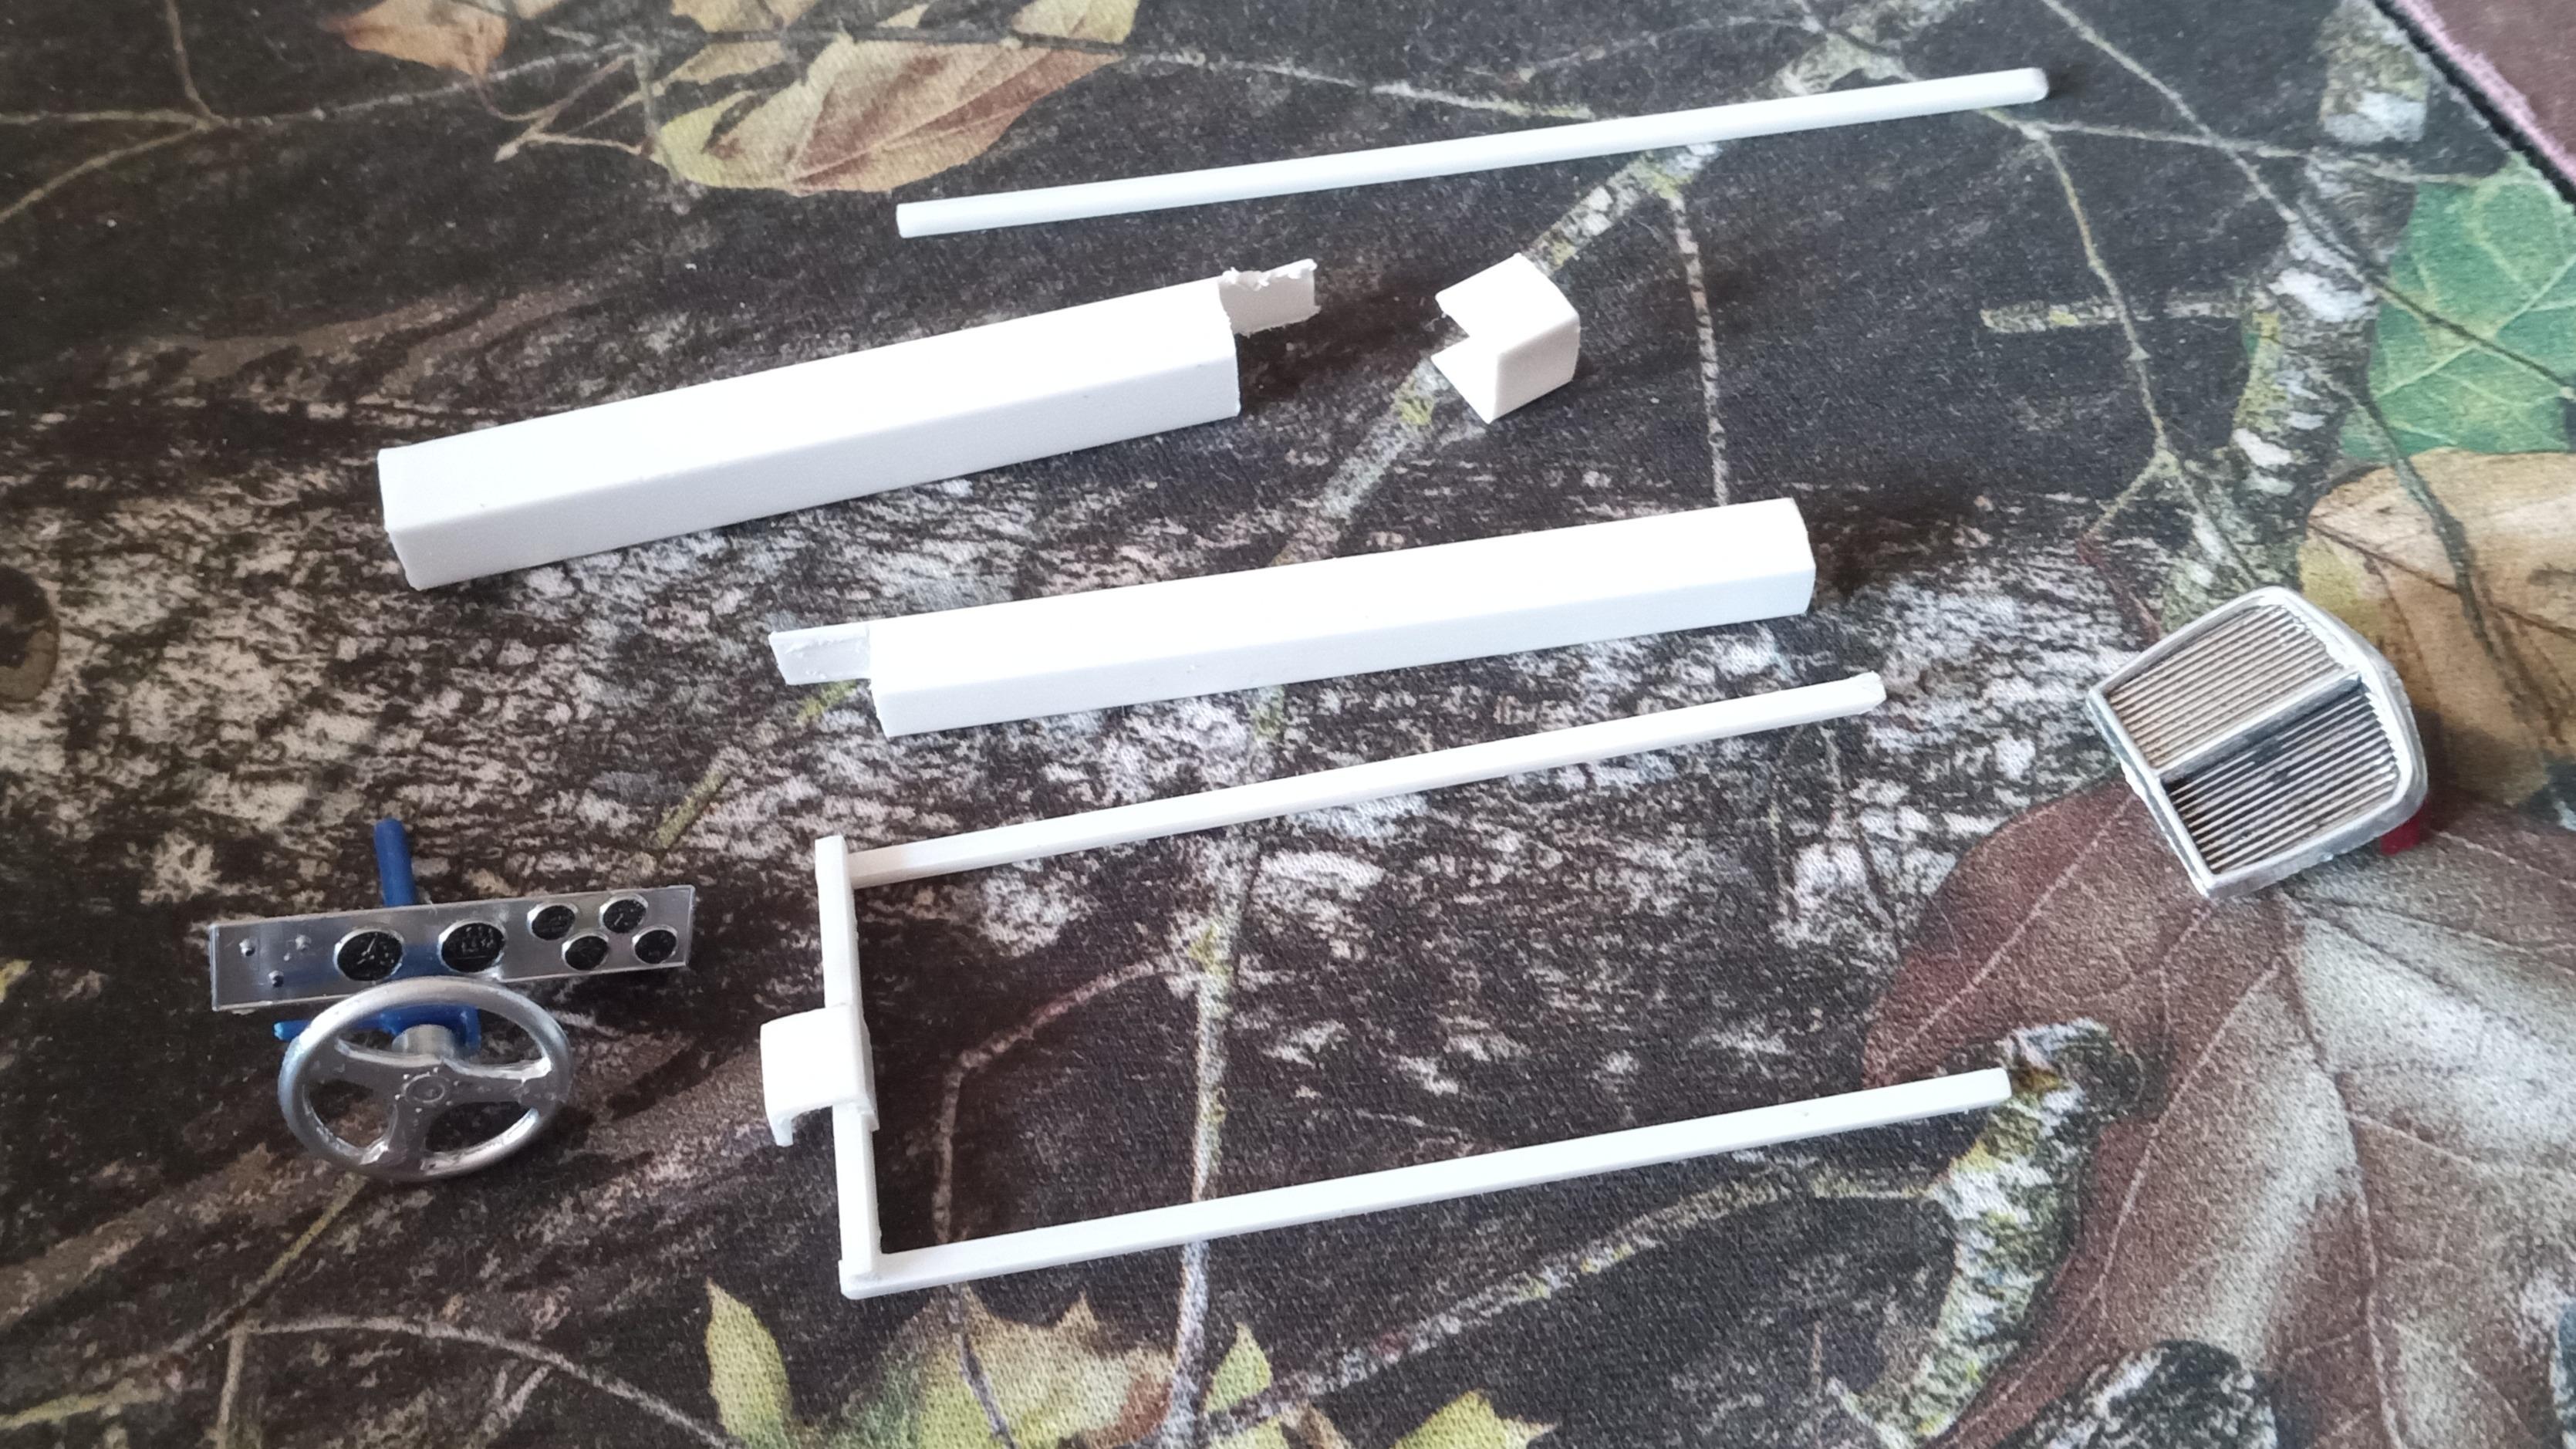
OK, I received some carriage lights from DJ (many thanks, DJ), and they are just what I wanted. See the Wanted forum if interested. Now for the finishing touches. Below are 3 views of the bottom of the T. Note the hand-made exhaust system. The frame subsystems are all glued into the fenders. The front axle is attached to the front frame as well as the radiator. See the separate parts in previous posts above. The rest of the views are finished T. Some things to note: the carriage lights (headlights) are on the roof AND on the radiator (front view). Kind of different. I think the engine wiring came out well, too. My 1st attempt that got finished (several abandoned tries over the year). The Hemi engine with early Corvette fuel injection (1957) is also a little different. I don't like the tail lights, but done is done. Mixing scales works for cartoons, so smile with me. Thanks for tolerating the slow pace of this project.
-
Since I have been retired for very many years, it is more like "blurry-eyed has-been". But it was fun while it lasted.
-
Results pictures...
-
Many thanks to DJ, I now have the carriage lights I want and installed them in the finished model. You can see the T on the final WIP forum, and I will publish it to the finished model forum soon. Search for phone booth T. Thanks all for the comments. This ends my request for help.
-
-
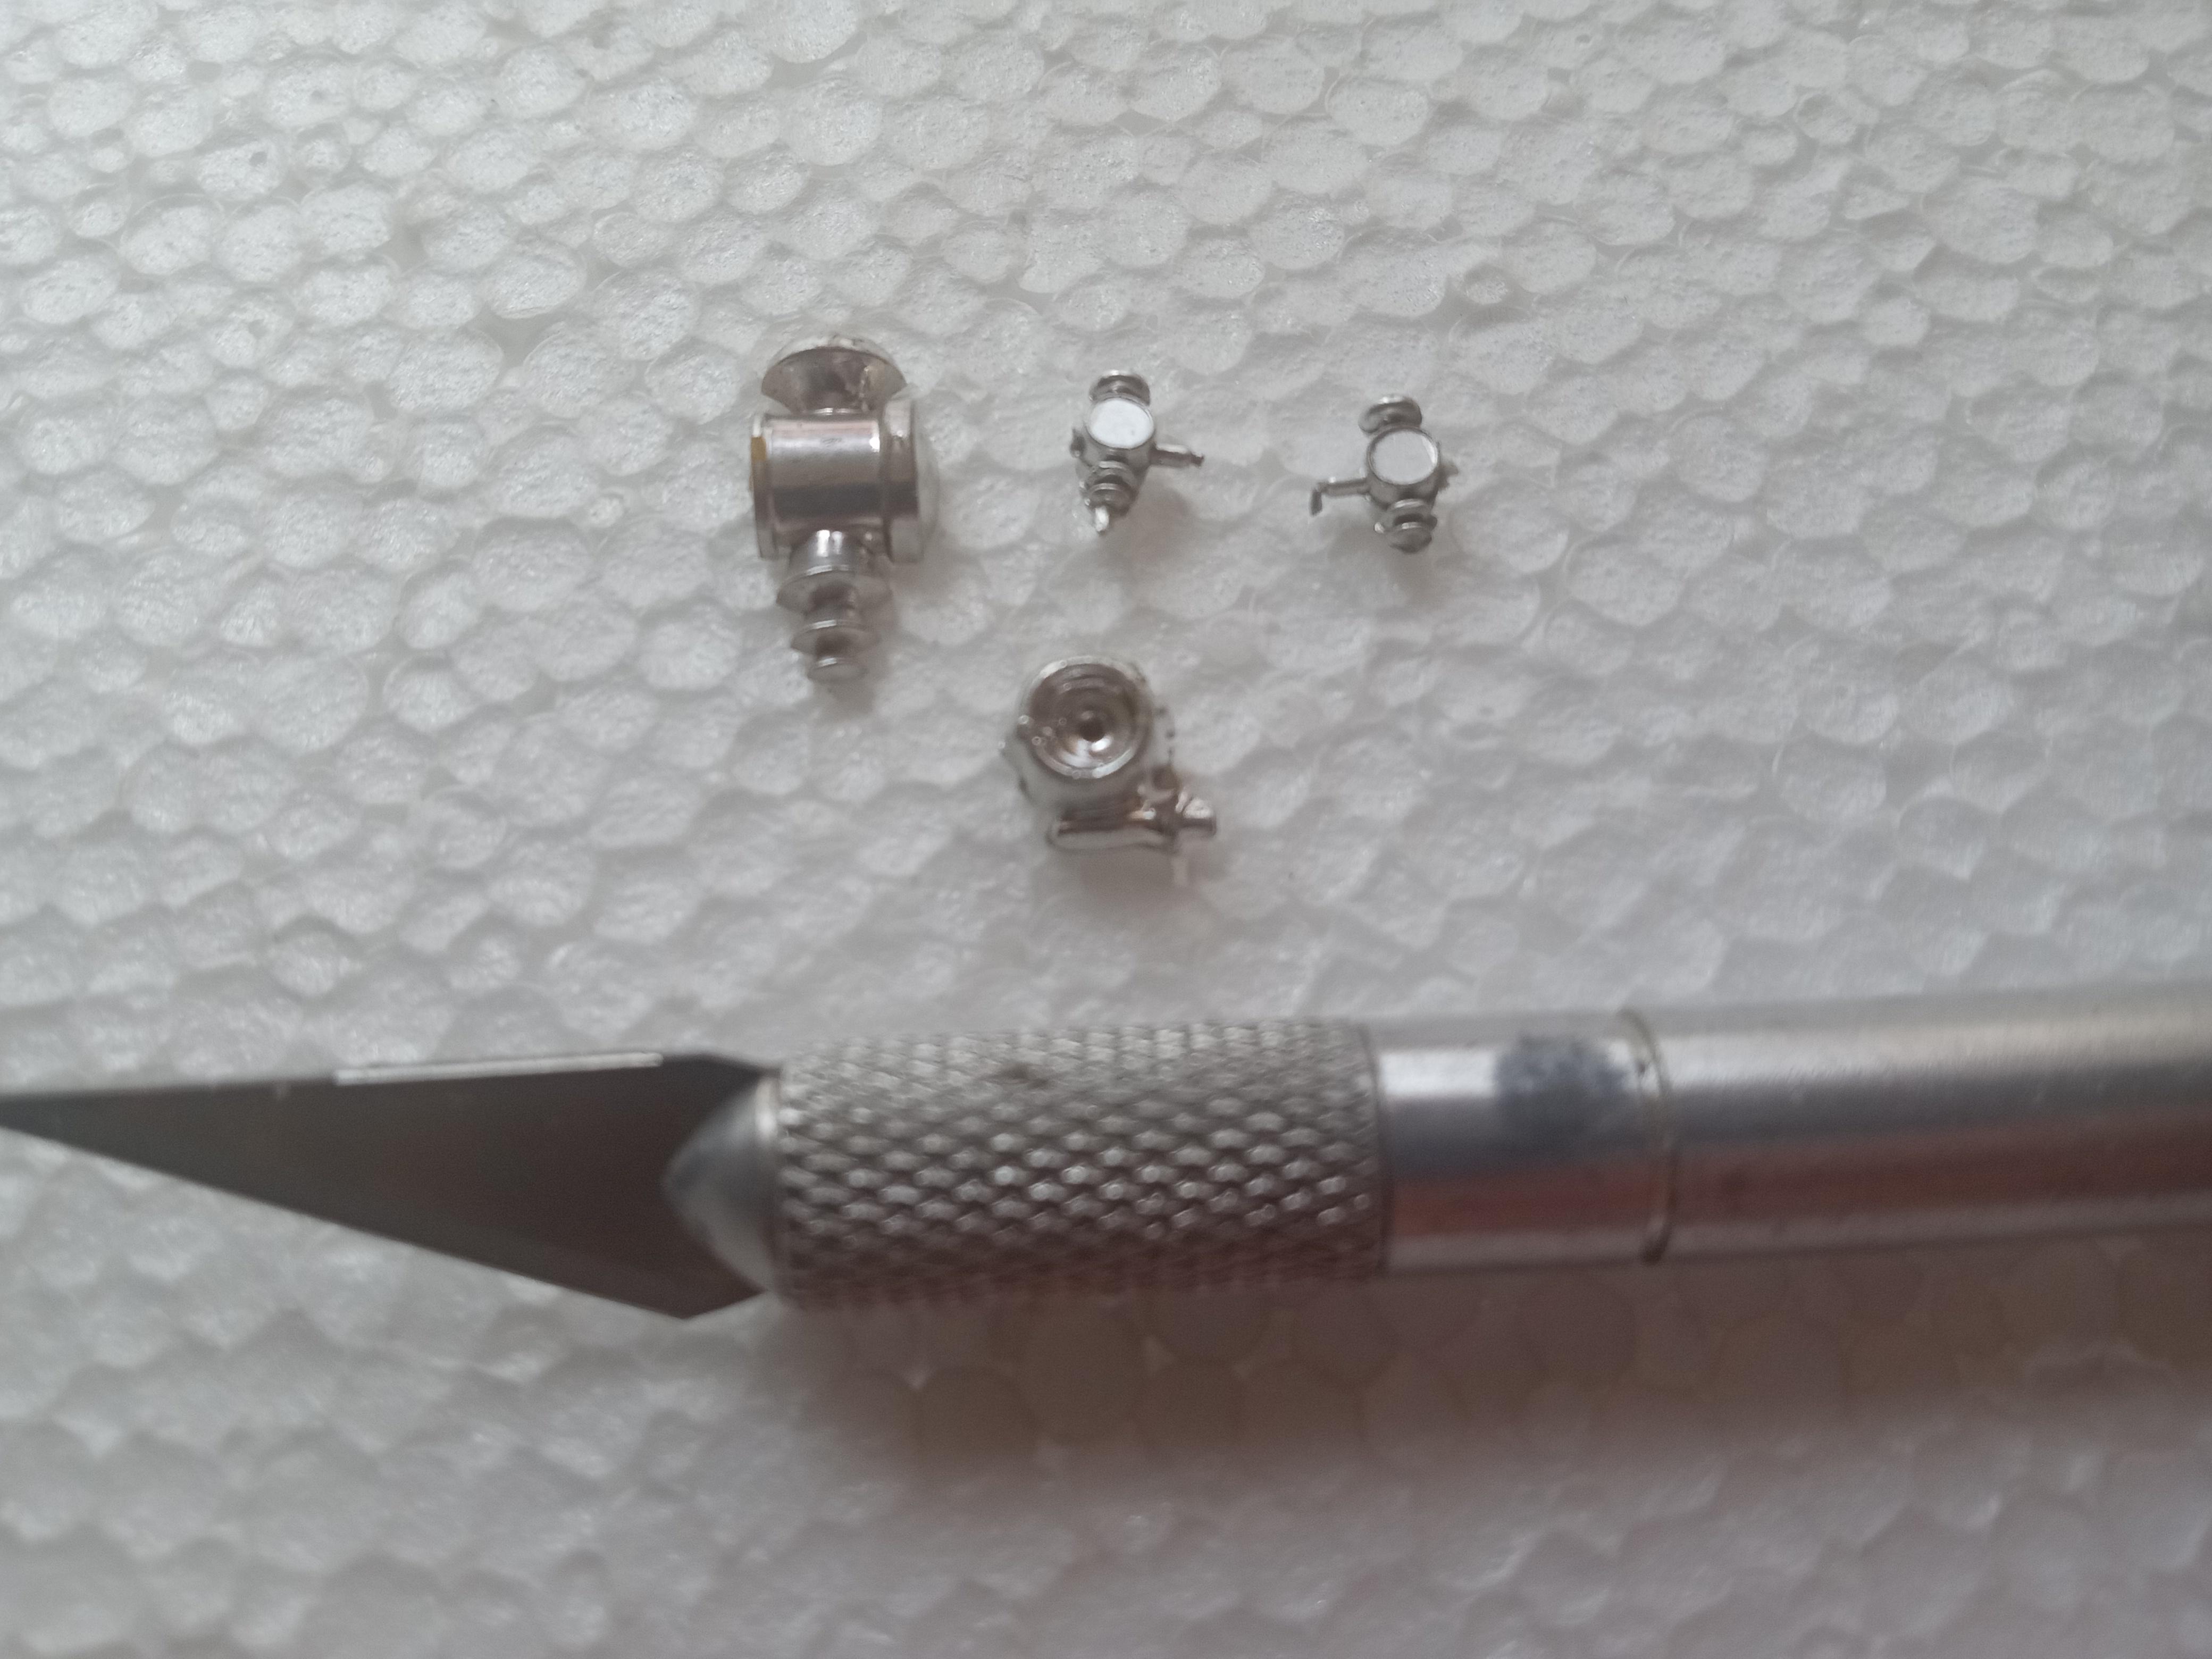
Thanks, guys, for the comments. Meatman: I put the Xacto knife in for reference, and the carriage light in between the "too big" and the "too small" lights in the pic is about right. I forgot to mention it. For the rocket scientists, the exact sizes (of the light lenses) are "too big"=0.226", "too small"= 0.093", and just right = 0.190" +/- 0.010". I love my cheap $10 caliper.
-
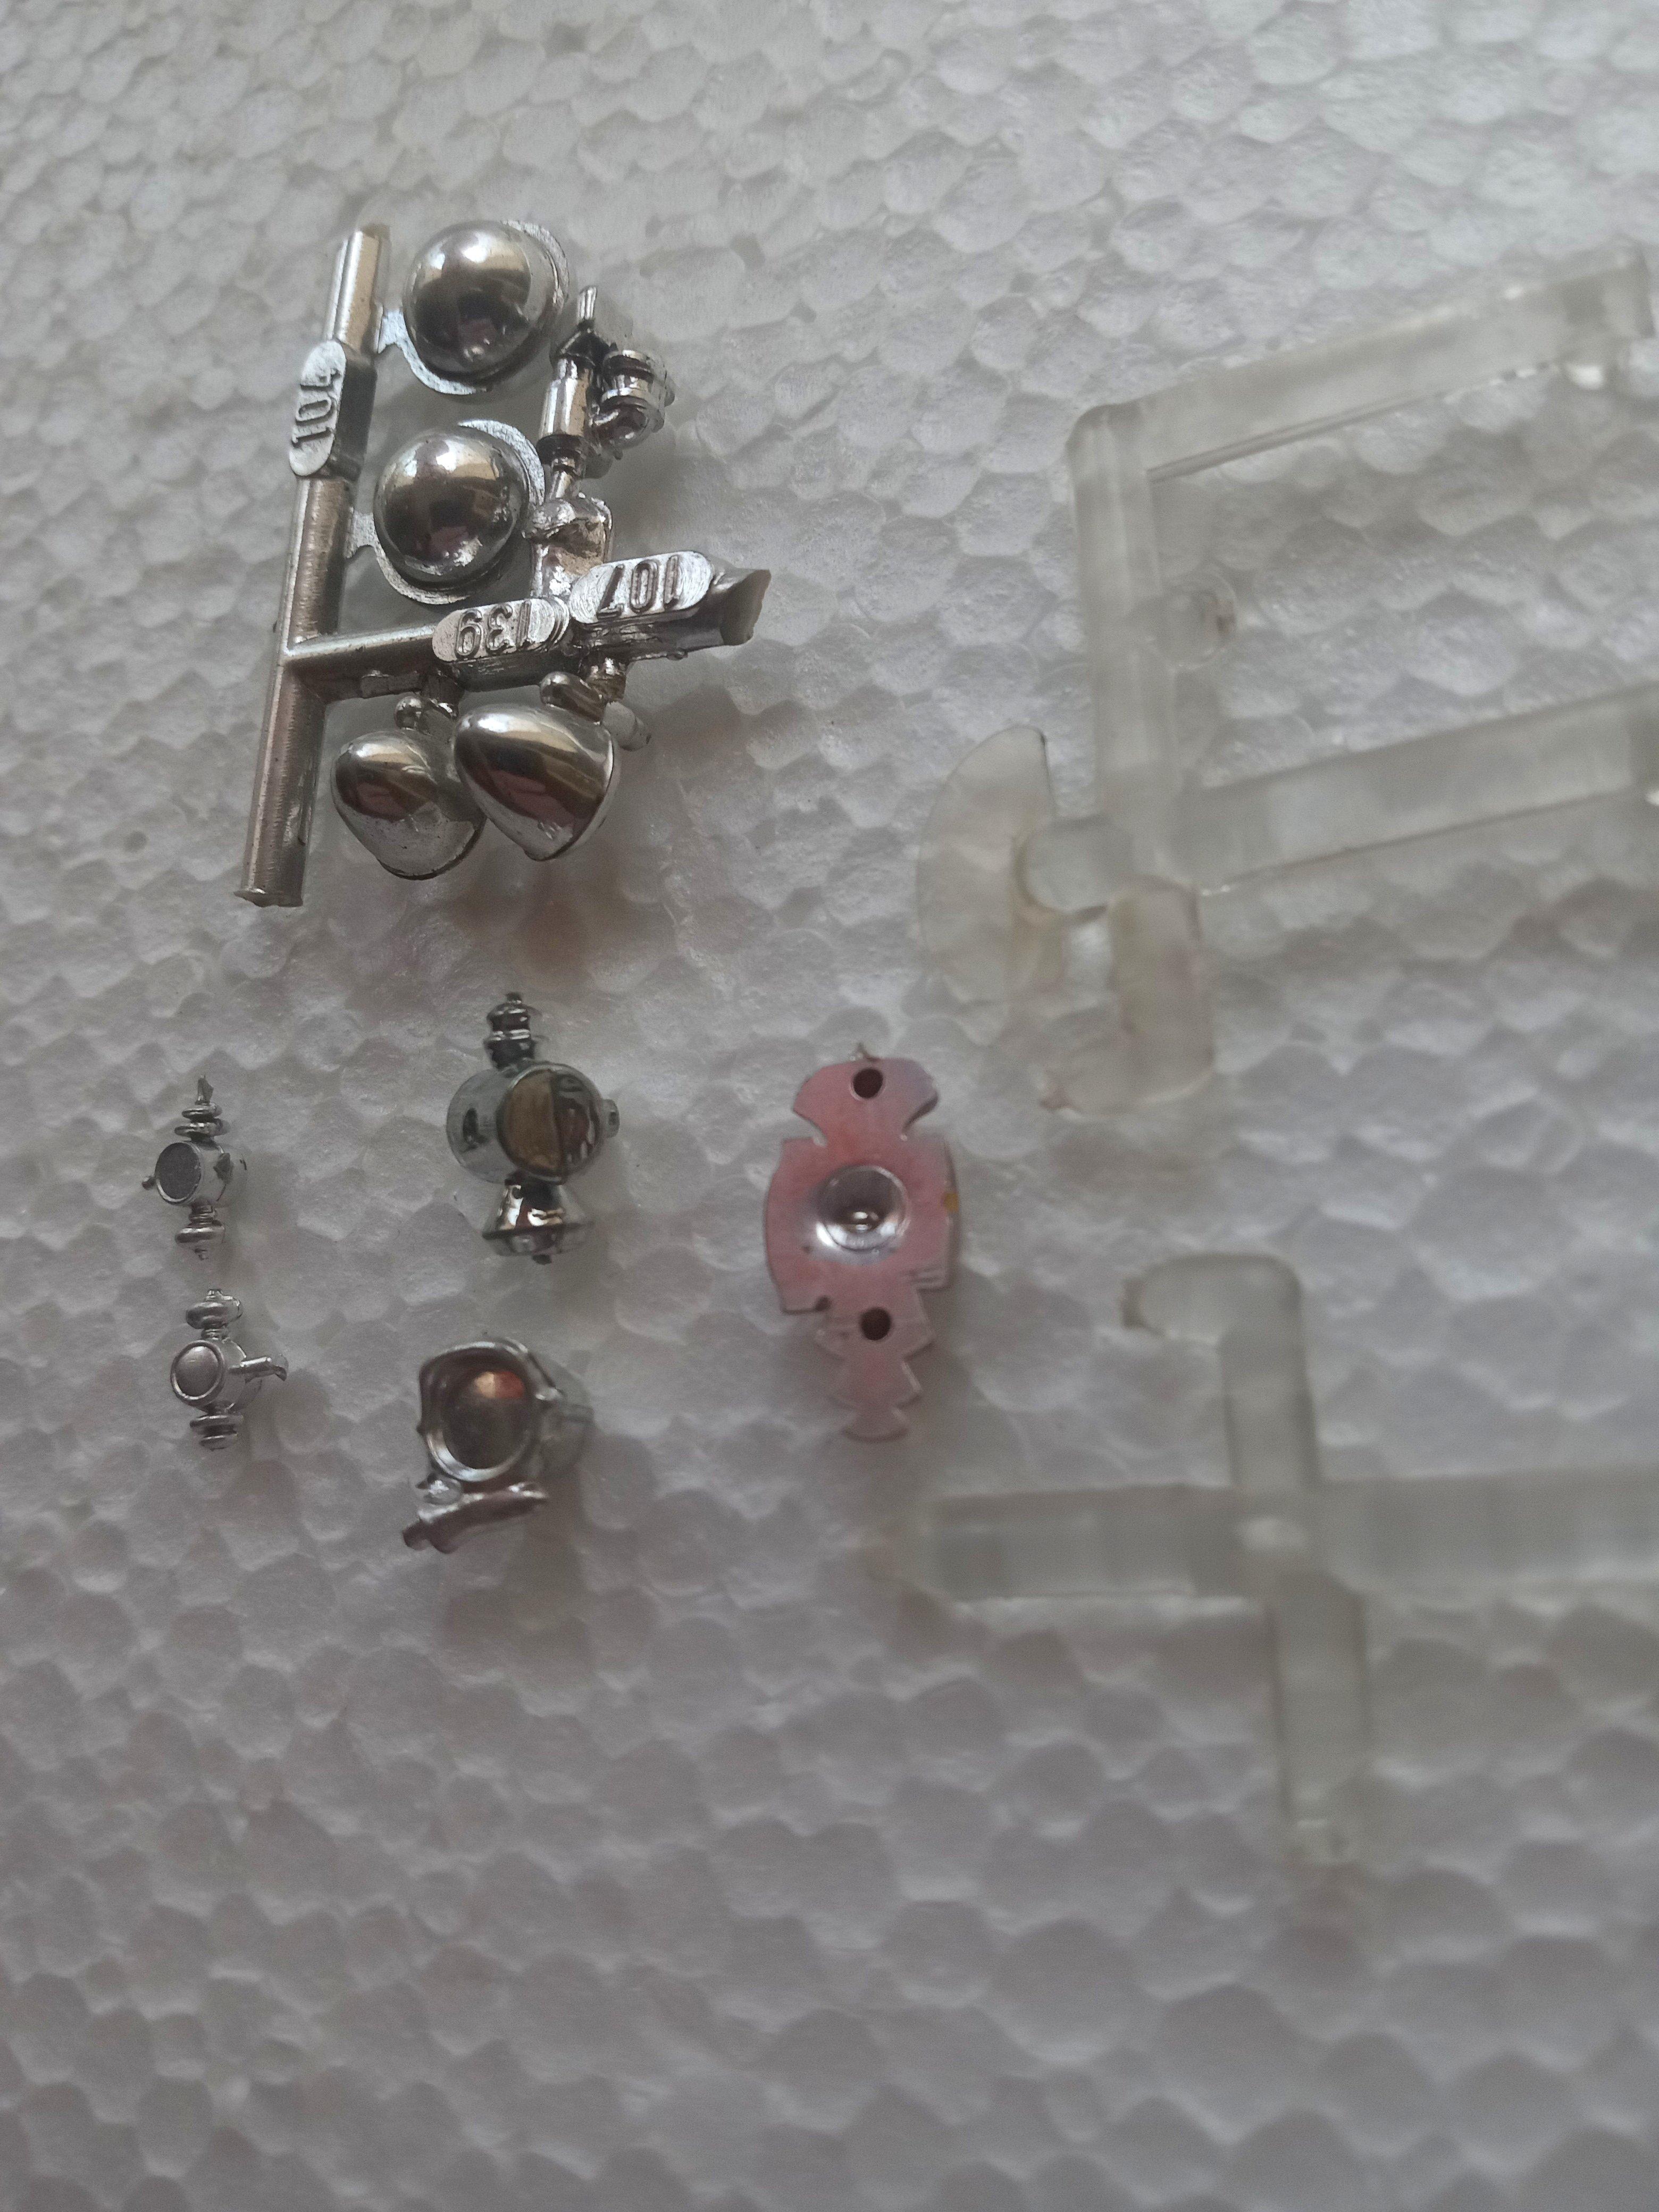
I am building a mixed-scale, humorous (hopefully) modified Model T that I call the Phone Booth T. It is in progress at the WIP forum (search for Phonebooth T). Below is a mockup pic for reference. My question here on the Wanted forum is about the "headlights". I thought it would be cool to put the headlights in carriage lights mounted on the top edge of the cab like in the old days. But I don't have any the right size. In the pics below are 2 that are too small and one (actually 1/2) that is too big. In between would be just right. Anybody got some available? As a backup idea, I could use the small ones mounted on each side of the radiator. I imagine they would be the tiny halogen lights some current cars have. Note the clear plastic tree fragments. I might make tiny lenses for the small carriage lights. As a final fallback position, I could put old school teardrop spotlights (shown in the pics), which I think would be kinda cool too. If not the teardrop, then the square ones but I can only find one here. So any comments or parts? -- Thanks, Gary My Website is 4freeideas.weebly.com Newest site is scalemodelcars.weebly.com
-
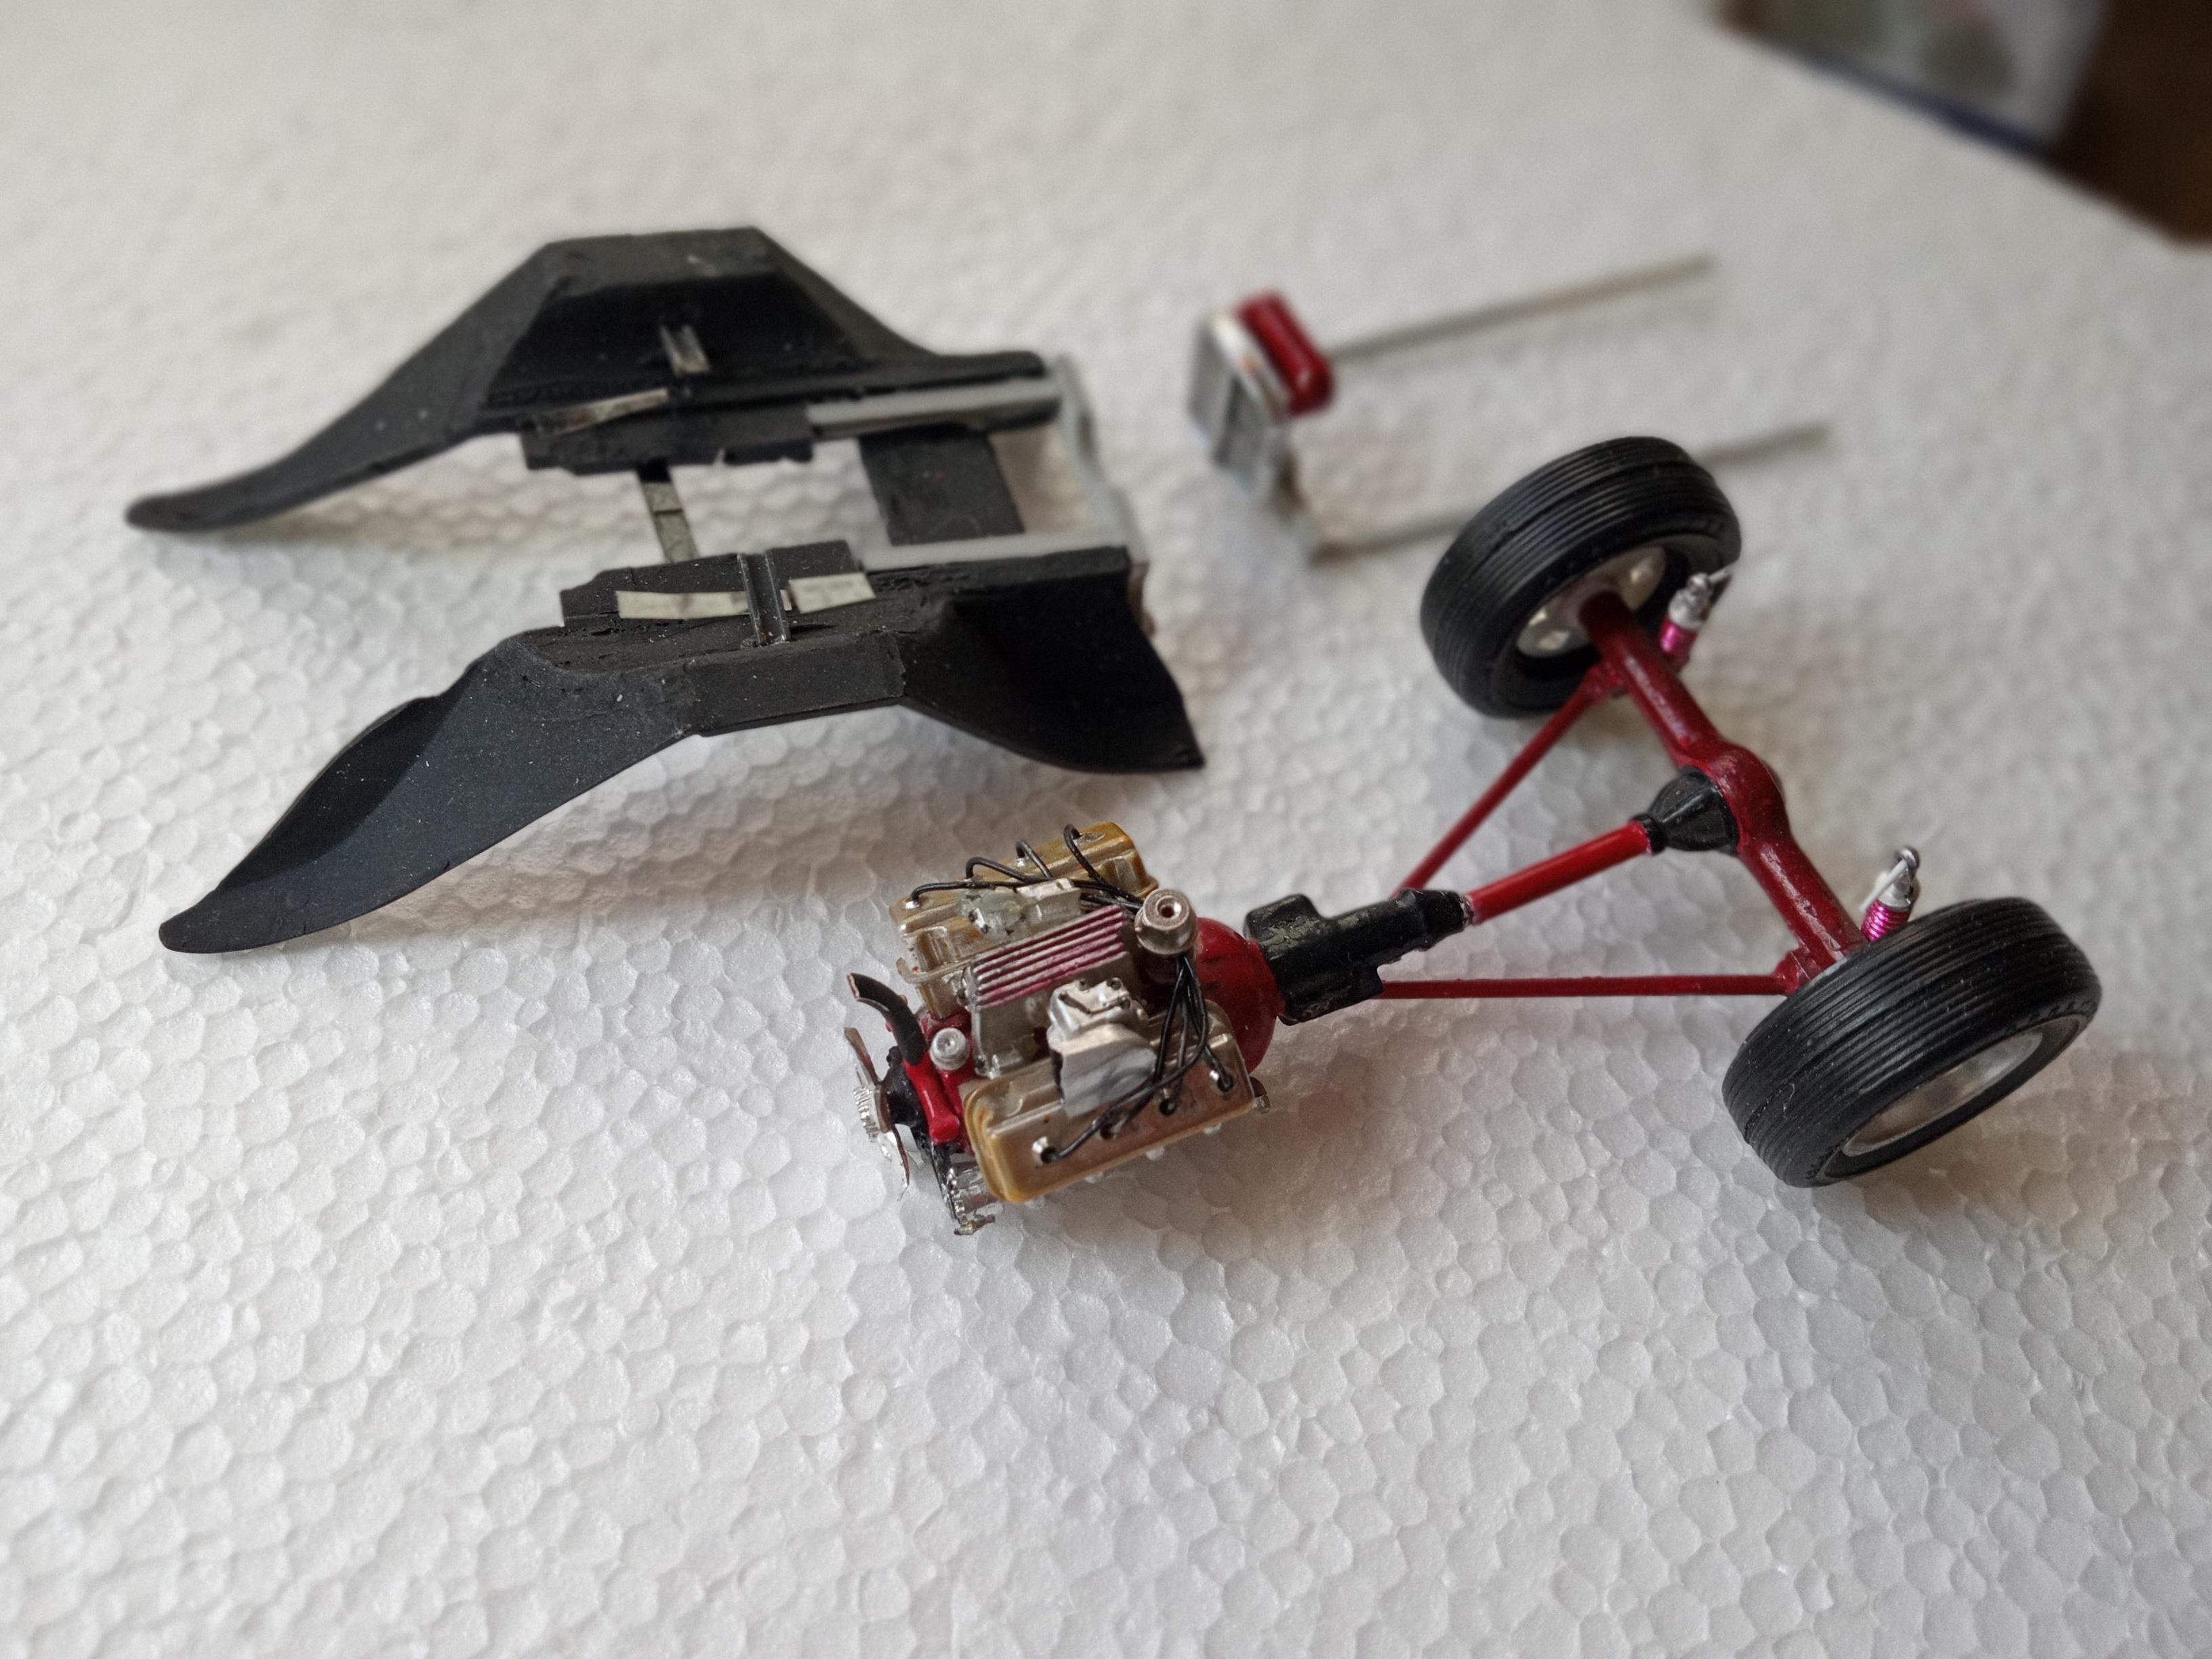
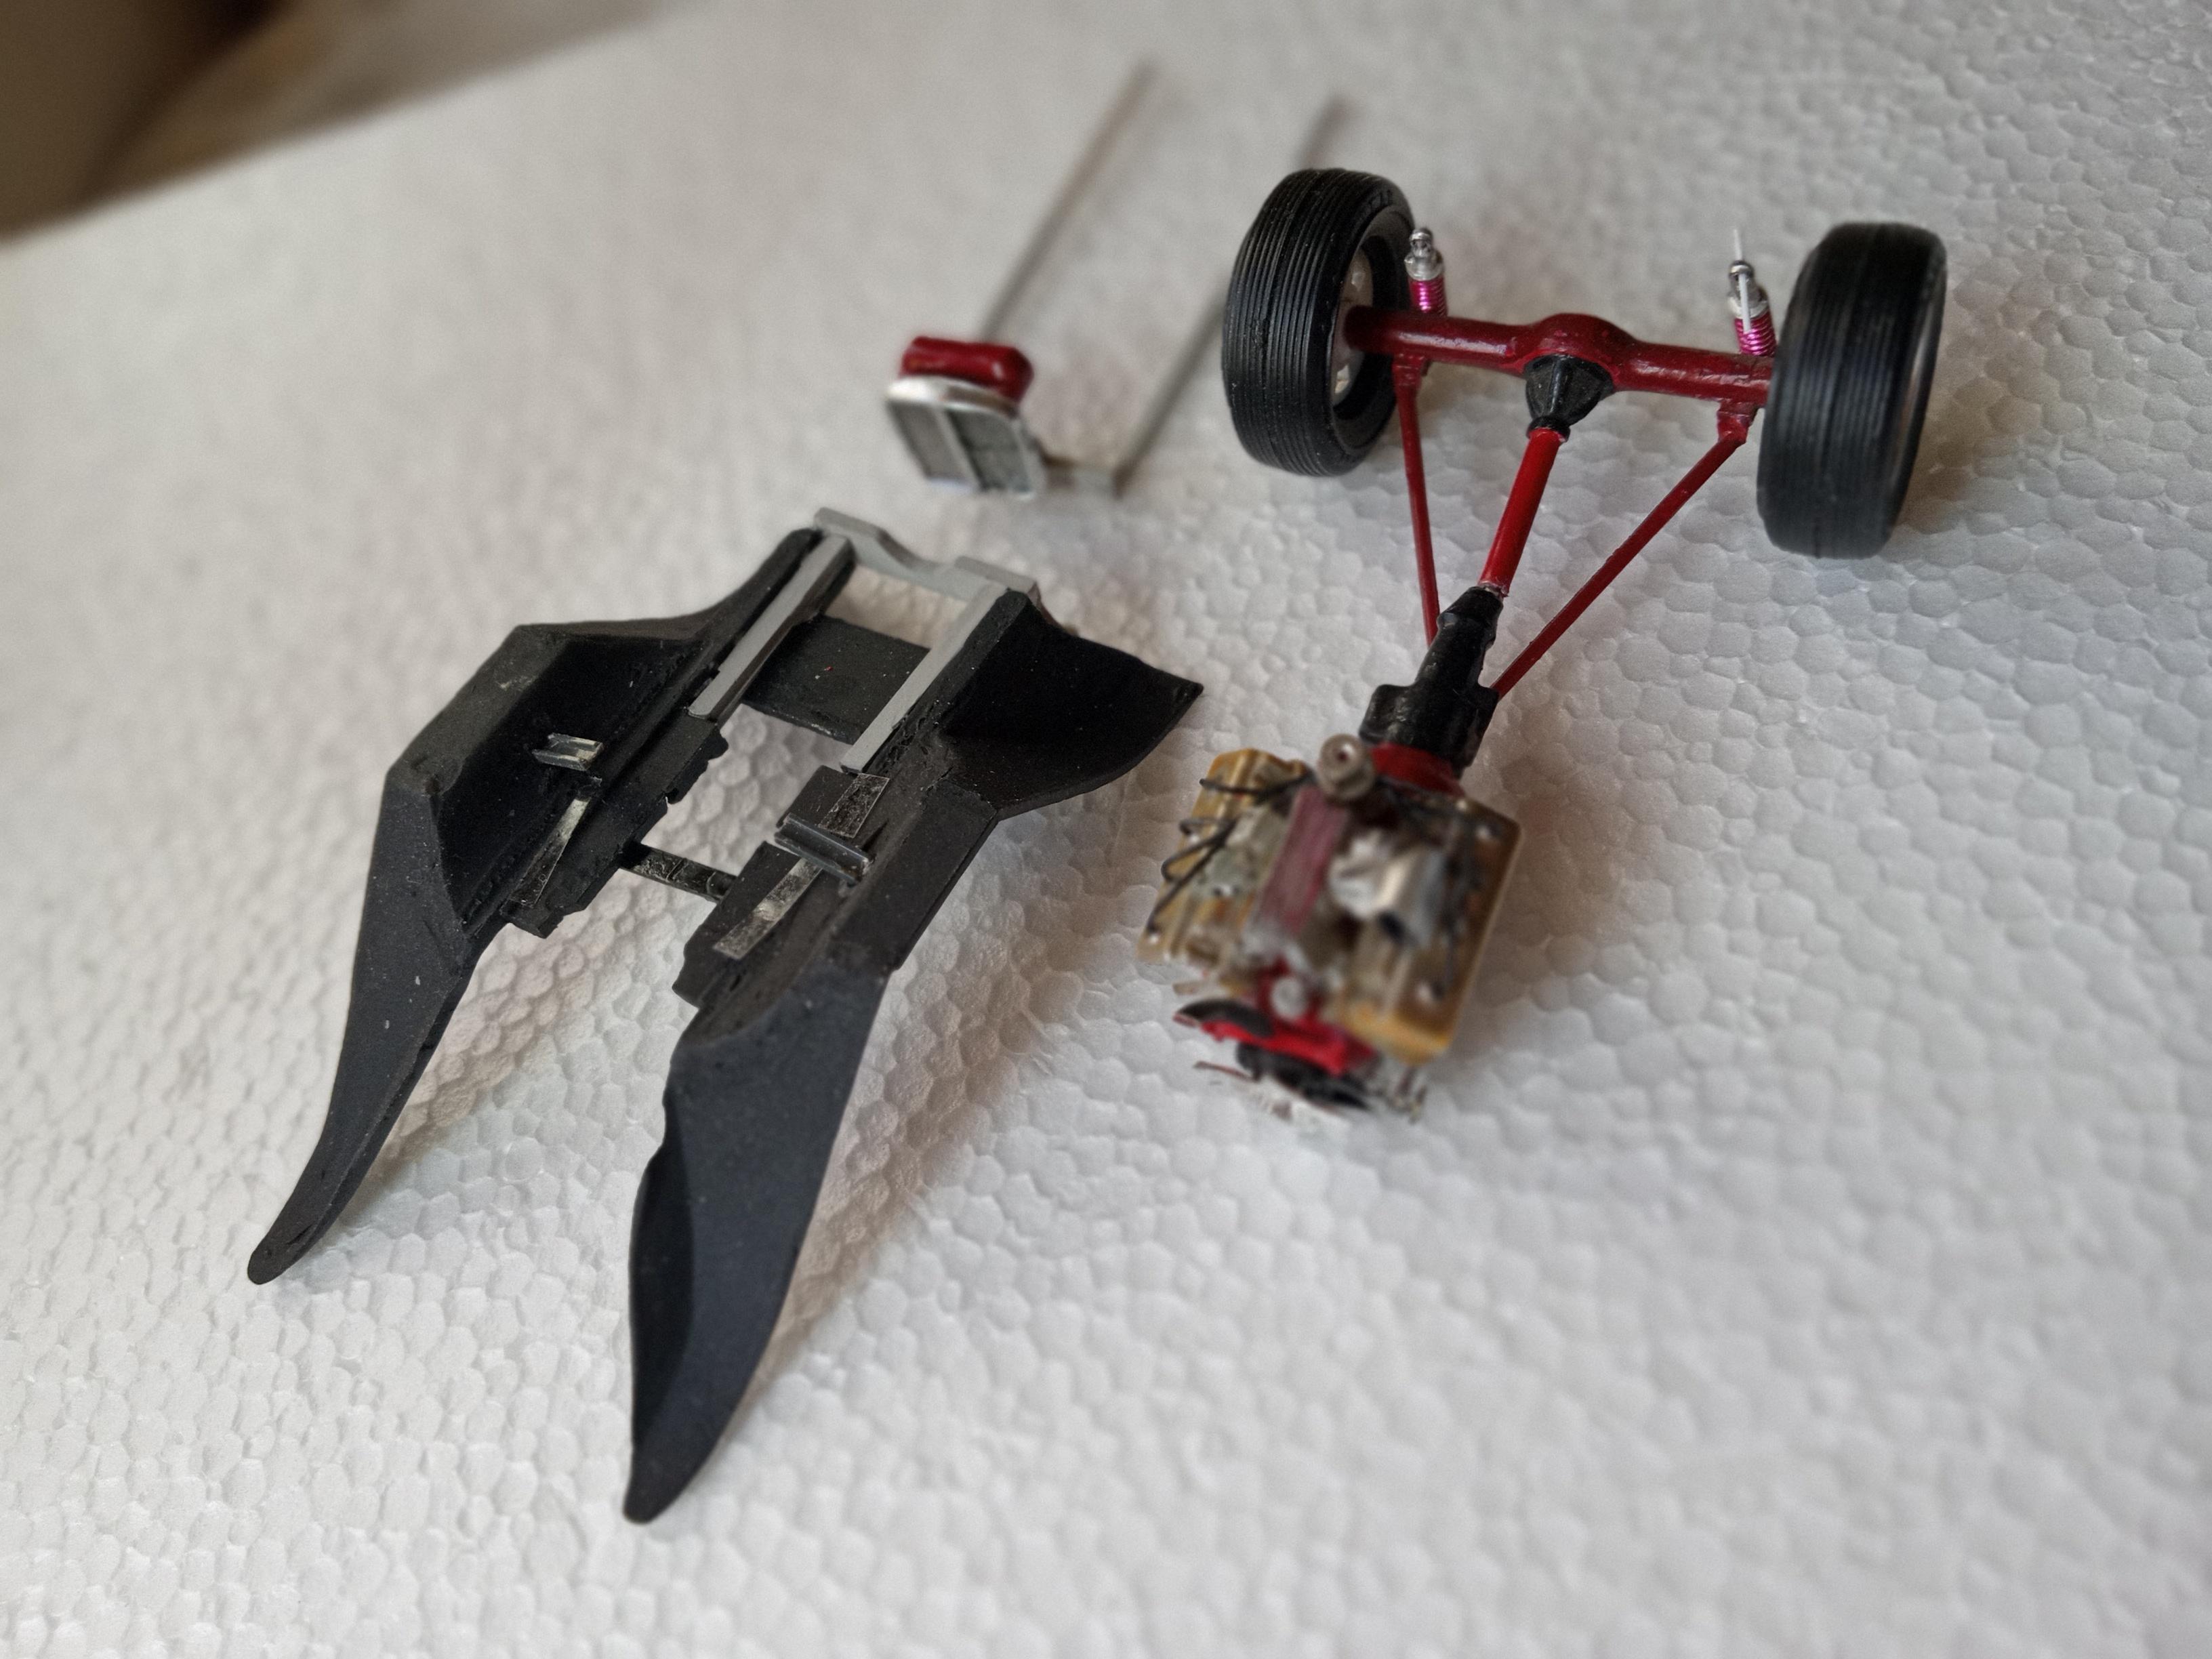
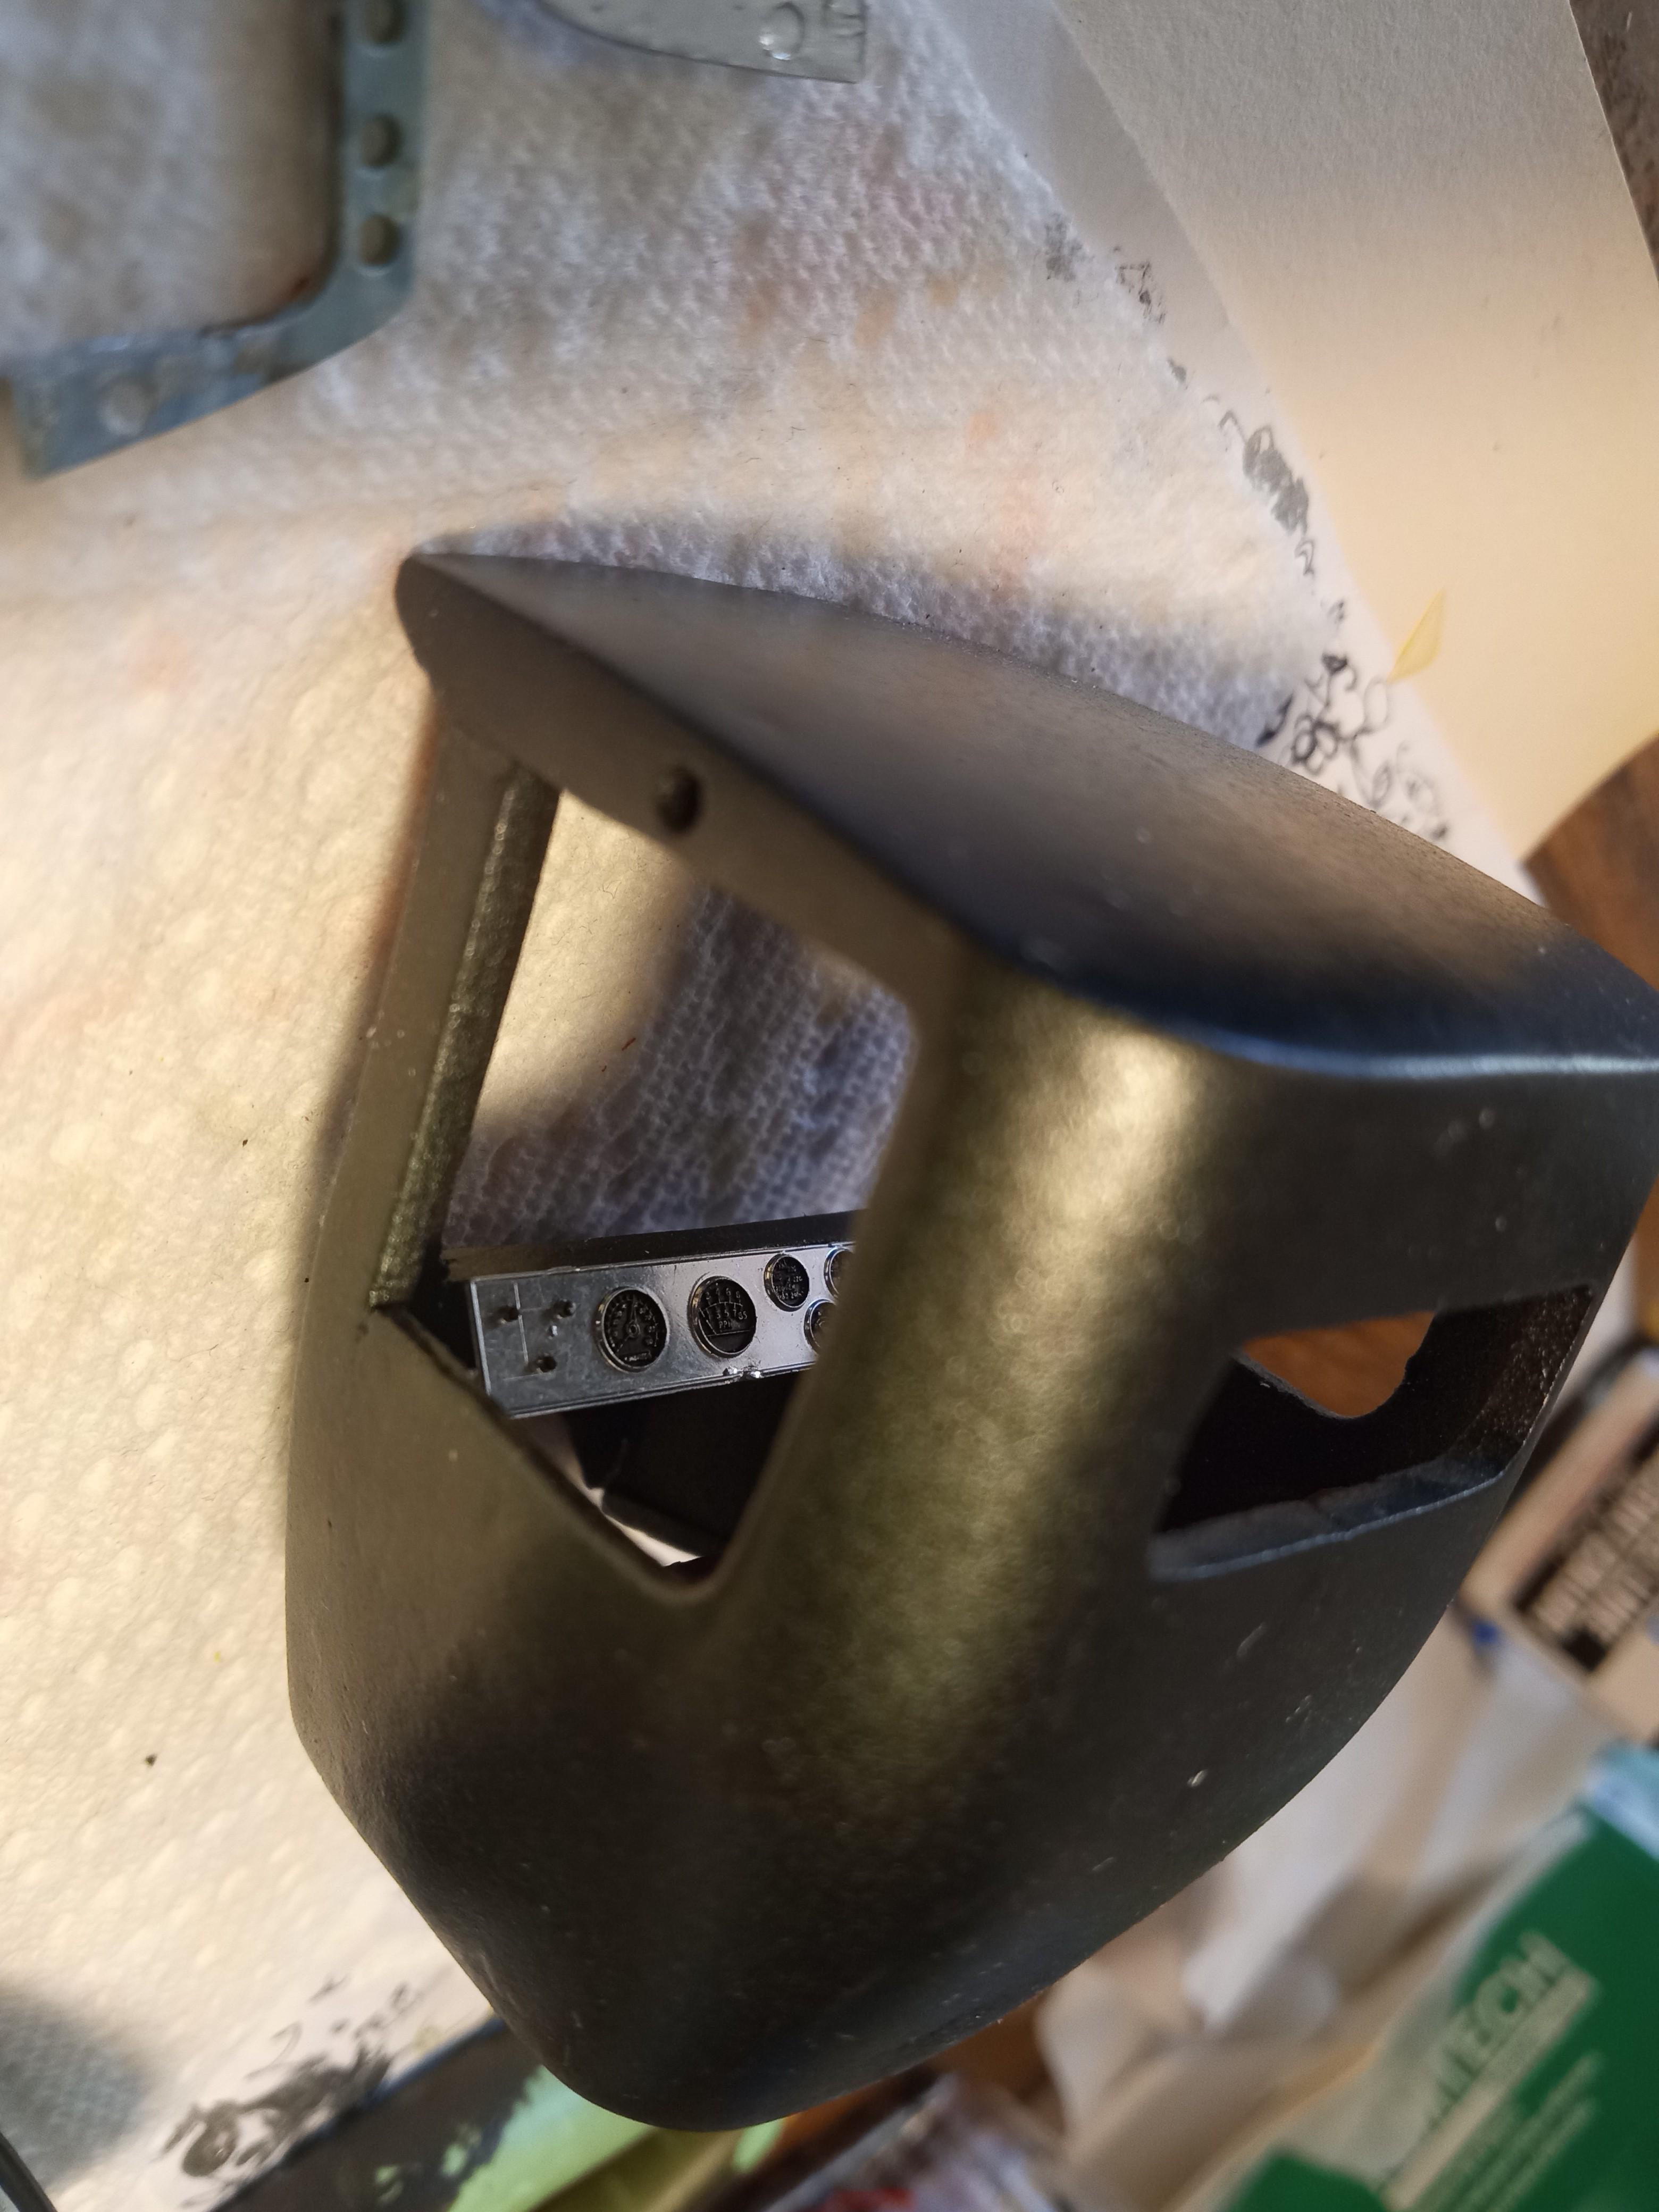
Nearly done now. A couple of views of the frame running gear and grill/radiator. You can see the engine plug wires. My first time wiring in a finished car. Sorry about some bluriness. Better views of the dash and grill in the next 2 pics. The Grill and front frame just slide together. Ready to glue the frame in and then glue the front axle to the frame. Top it off with the cab. Oh, and I have to make a short (1/16") extension to the radiator hose to the radiator. The final picture below is the carriage lights I found in my spare parts. One too-big (actually 1/2 of one) and a pair of too-small ones. I think it would be cool (or at least unusual) to put a light on each side of the cab for "headlites". Or I could put a pair of old time spotlights (I only have one) like in the old custom model kits. Does anybody have any comments (or parts?)? The knife is for size.
-
There is a model question forum that may help. I recently finished my Avanti and may I can help. search for 1963-2 Studibaker Avanti, add tag avanti