

GoodbuildNY
-
Posts
294 -
Joined
-
Last visited
Content Type
Profiles
Forums
Events
Gallery
Posts posted by GoodbuildNY
-
-
I’d be interested too
-
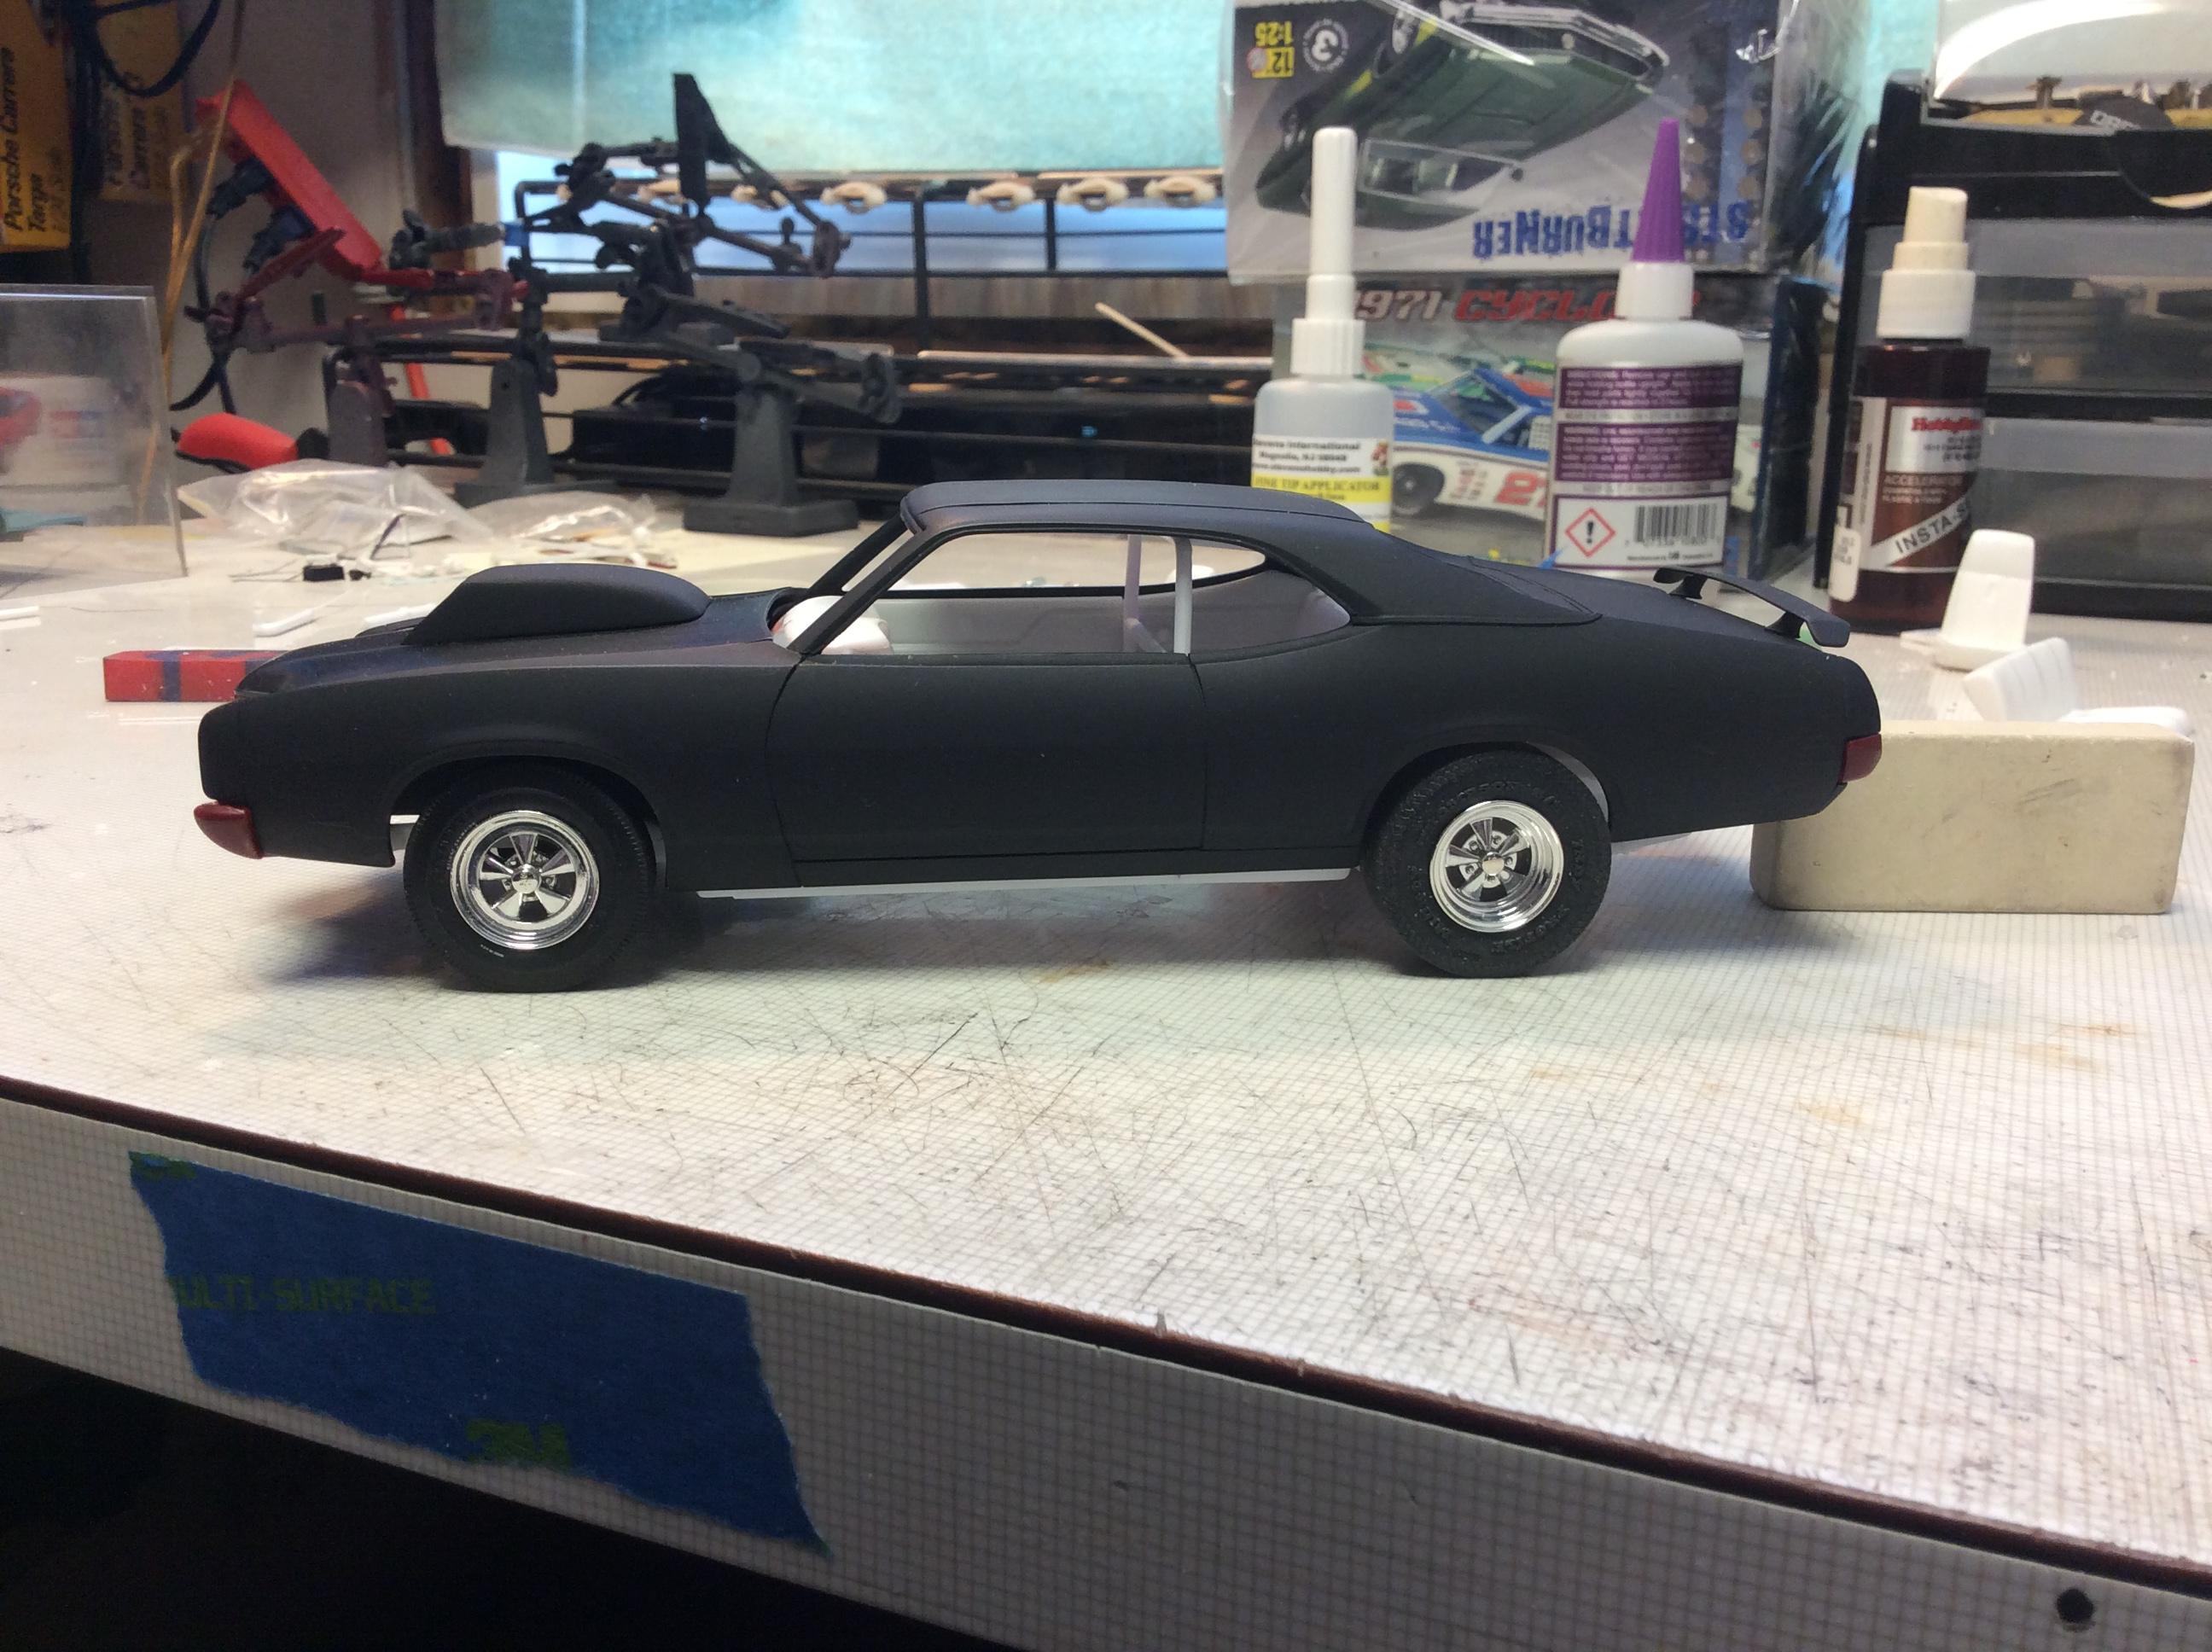
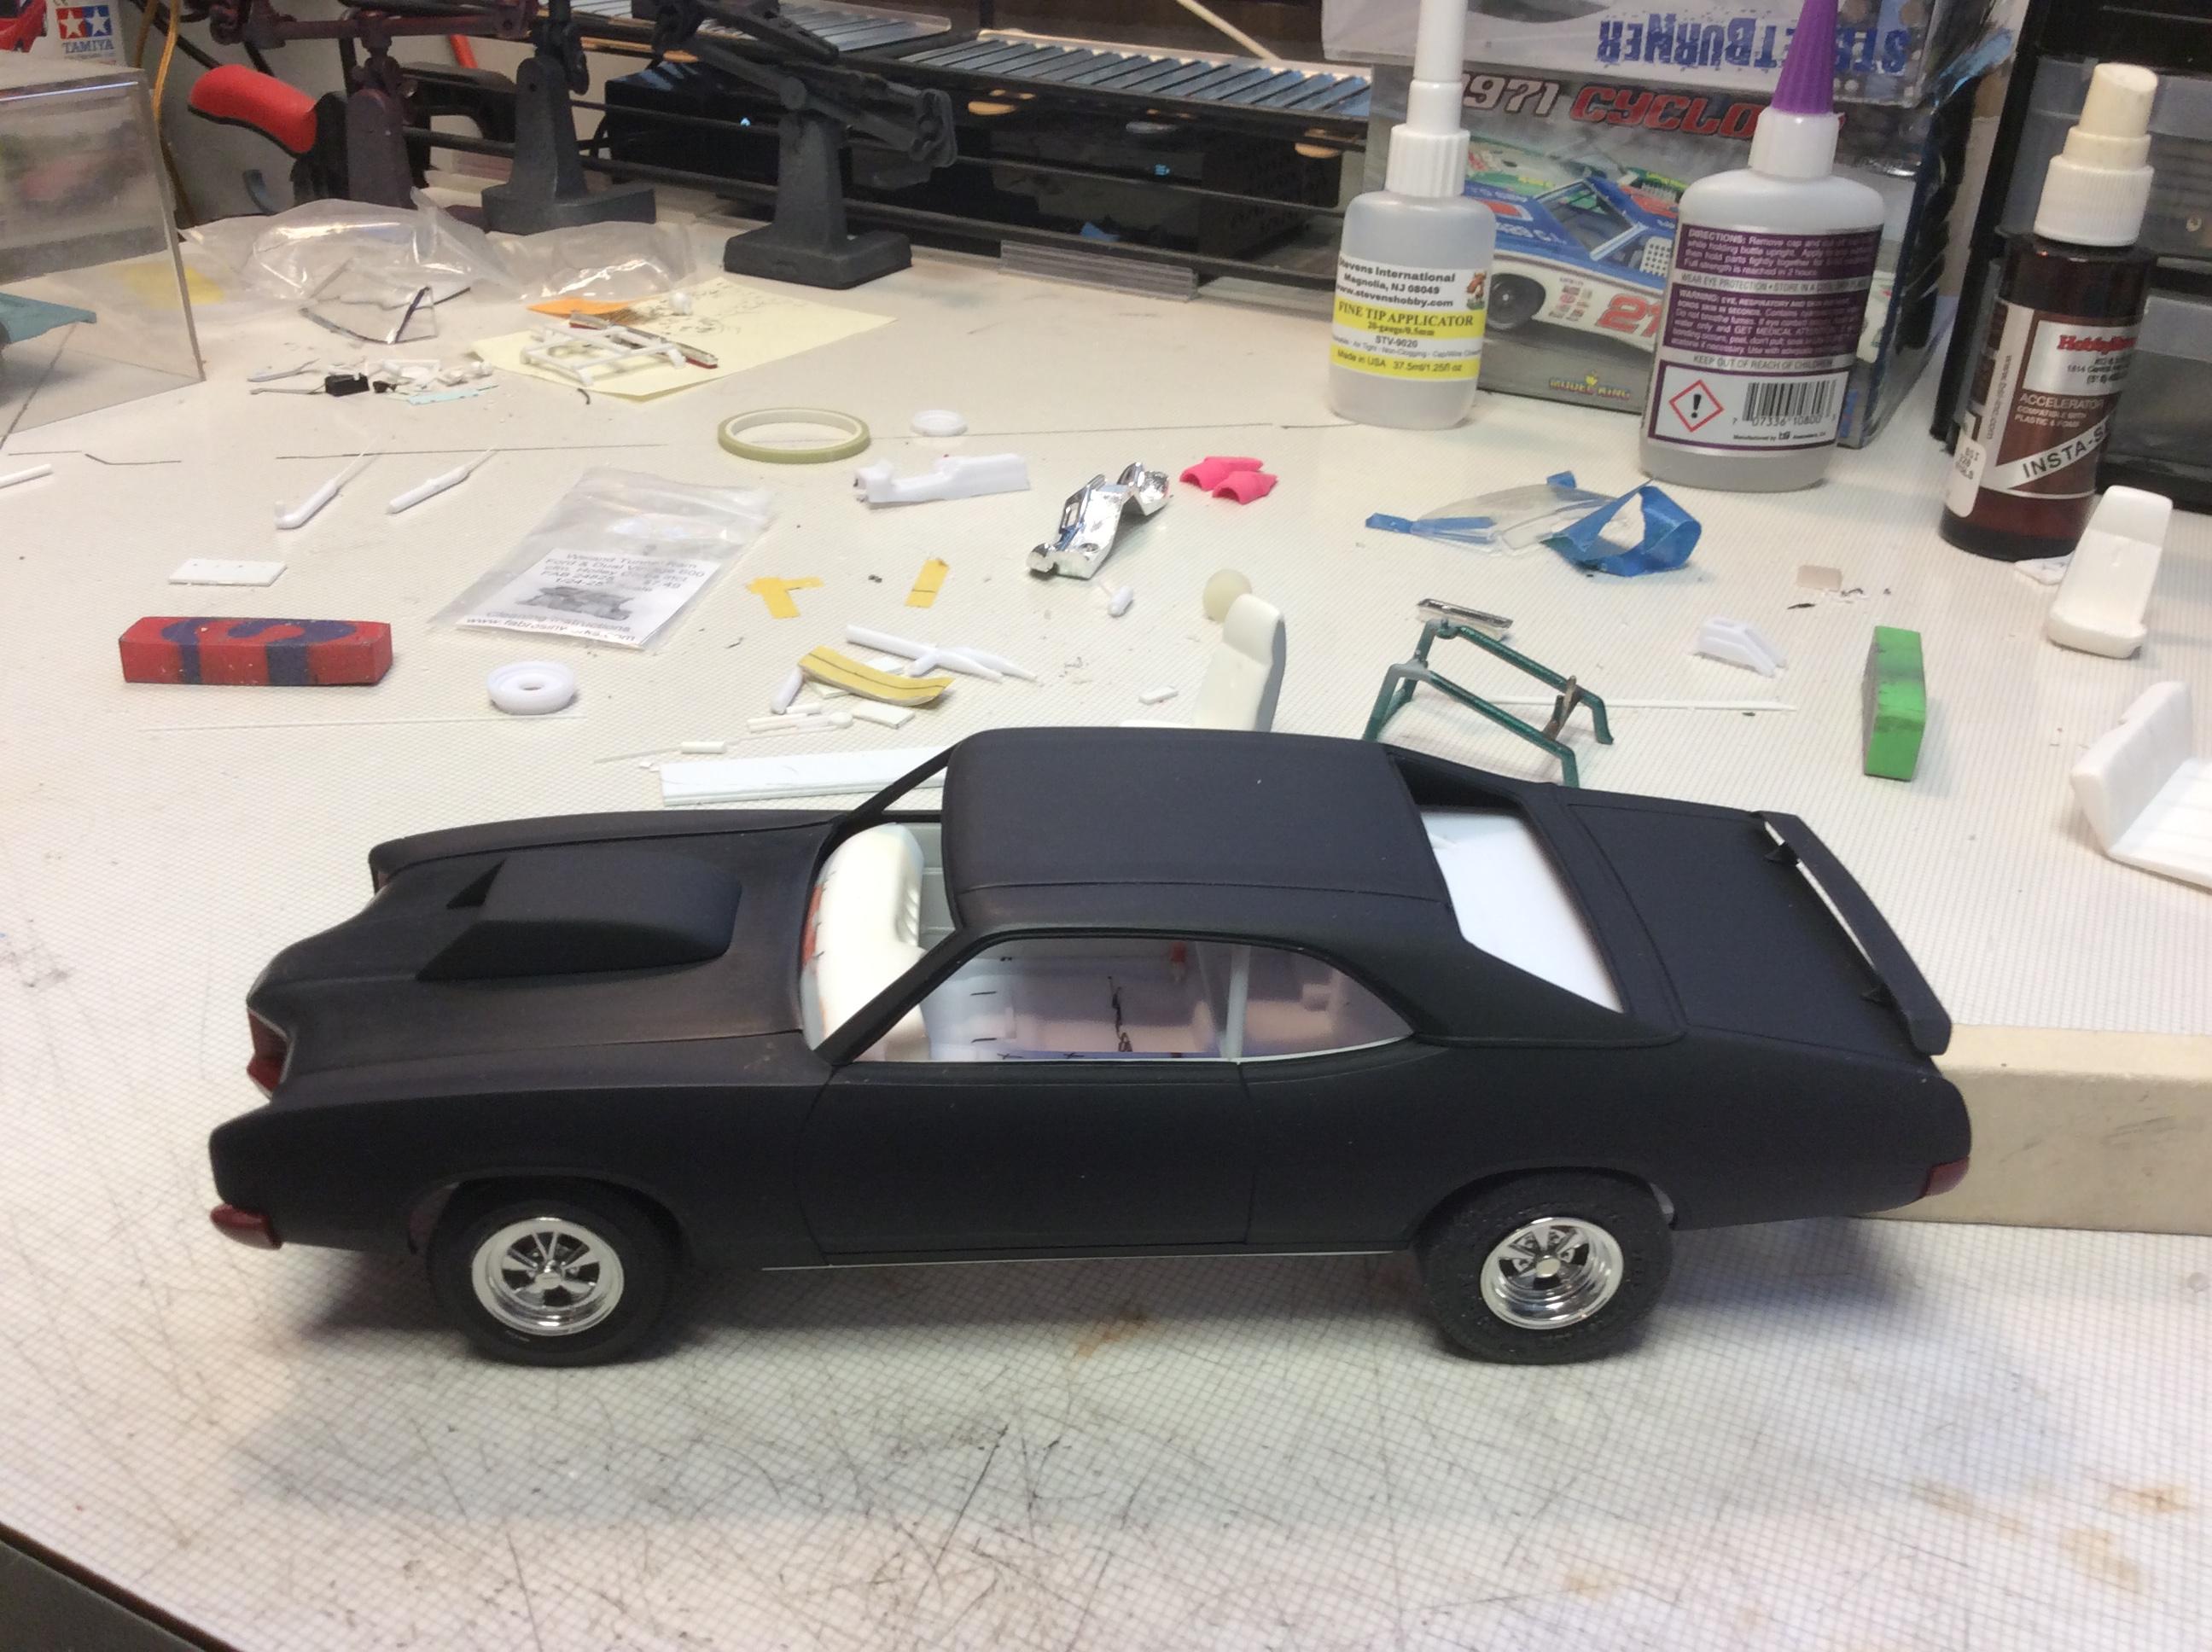
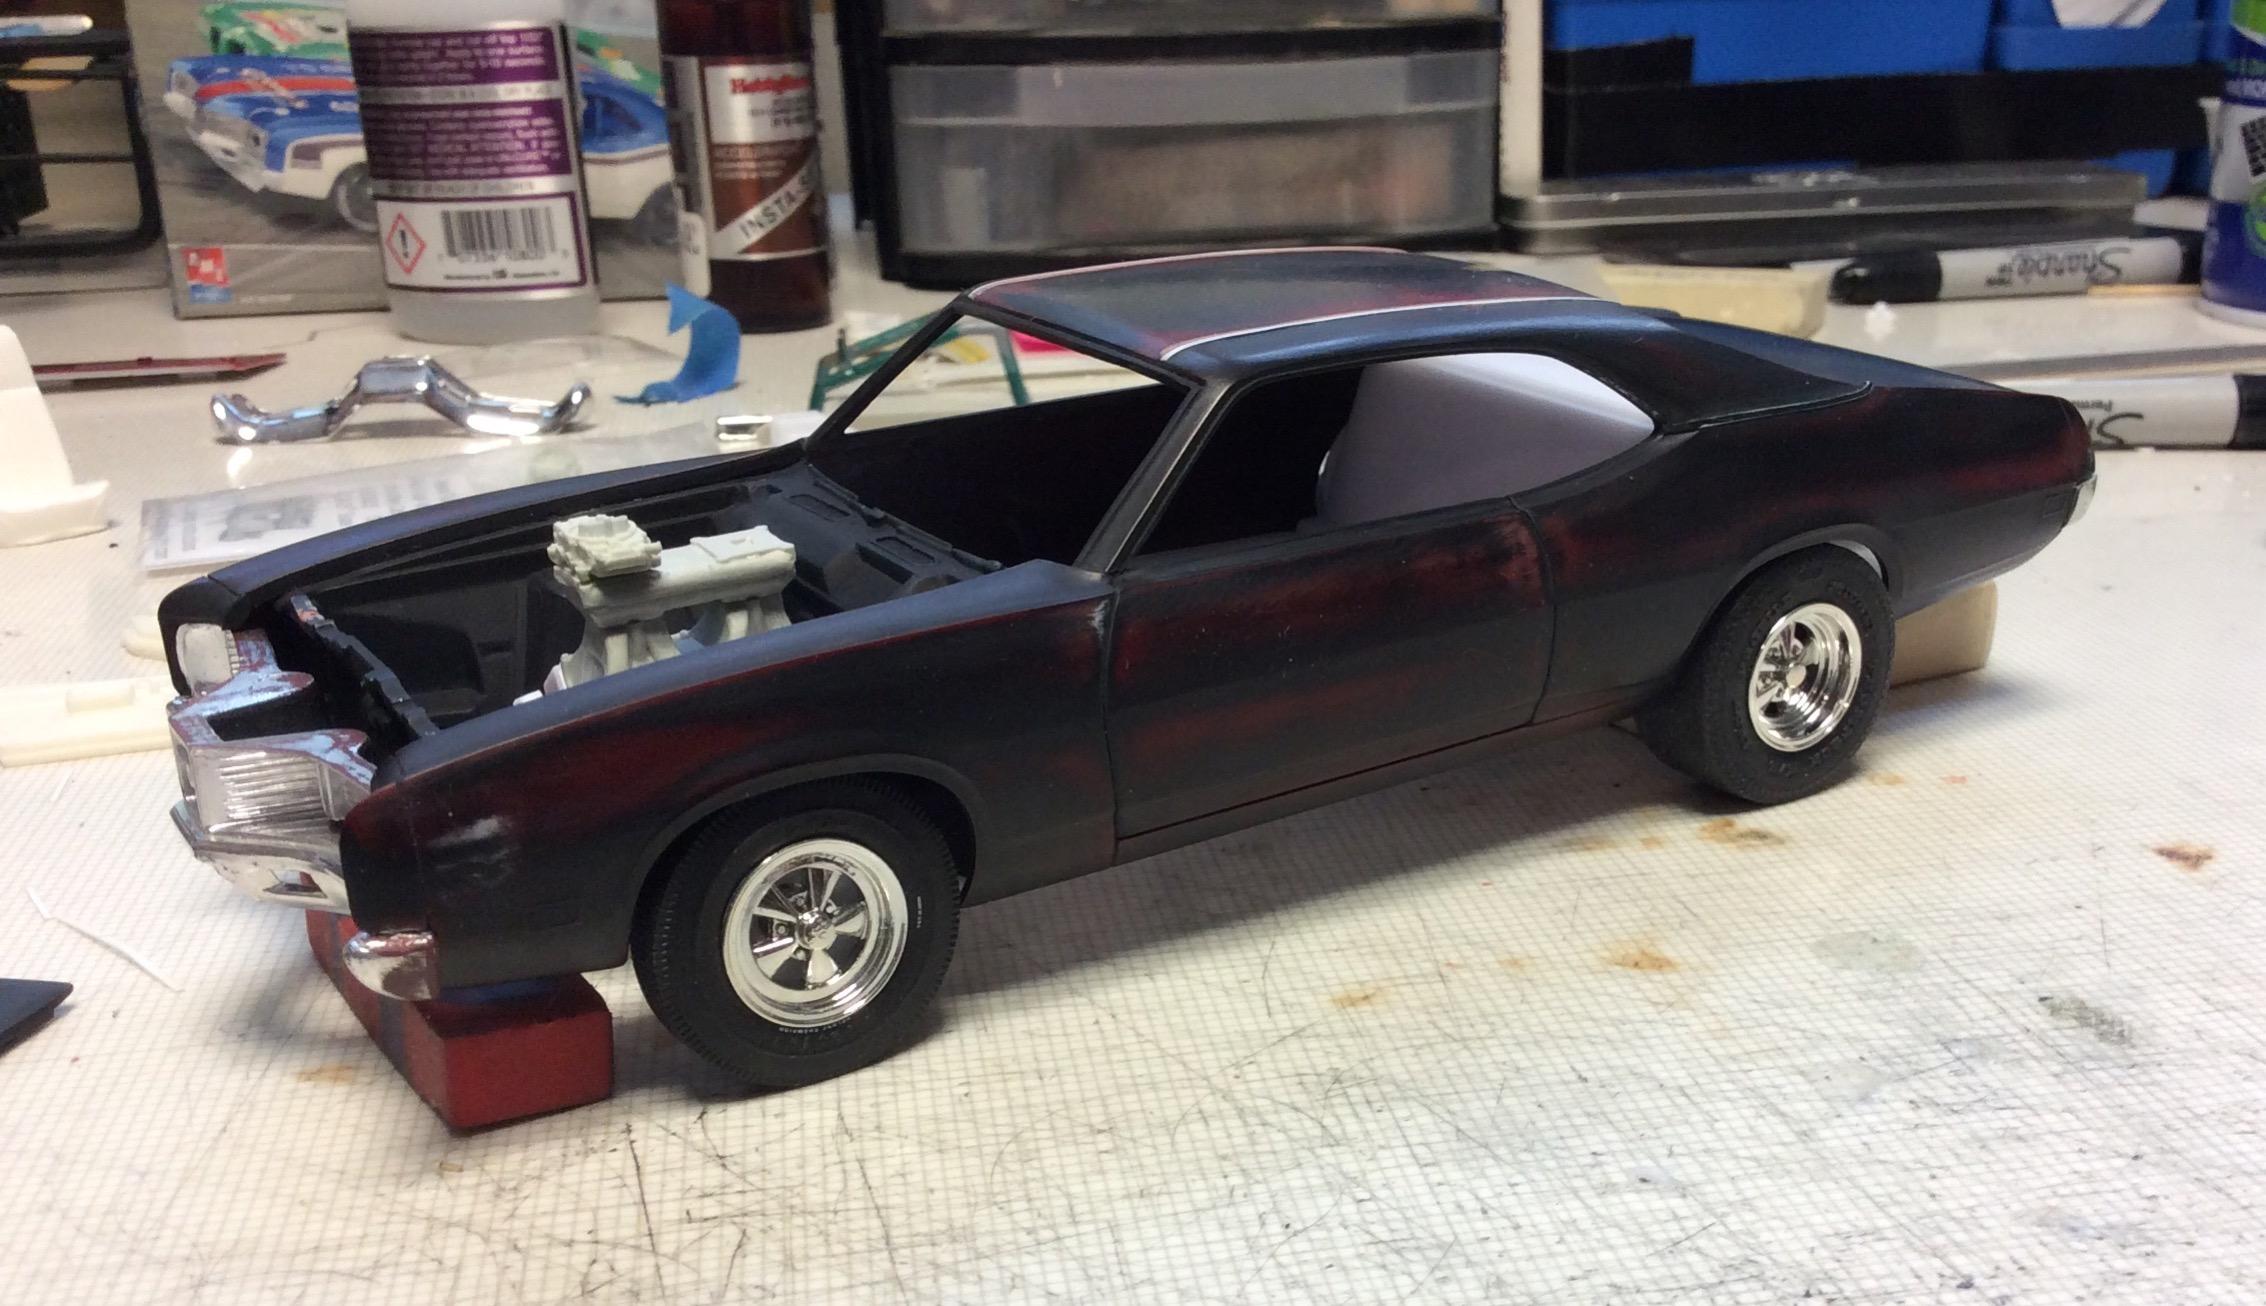
Made some progress on this one. Most fab/fit work as well as final mock up is done. I’ve started painting everything now. Comments and questions are always welcome

-
 3
3
-
-
I’ve ordered from them a few times and never had any issues. The orders came just as quickly as some orders I’ve received from state side companies.
-
Great job ! Looks amazing.
-
Very nice 👍🏻
-
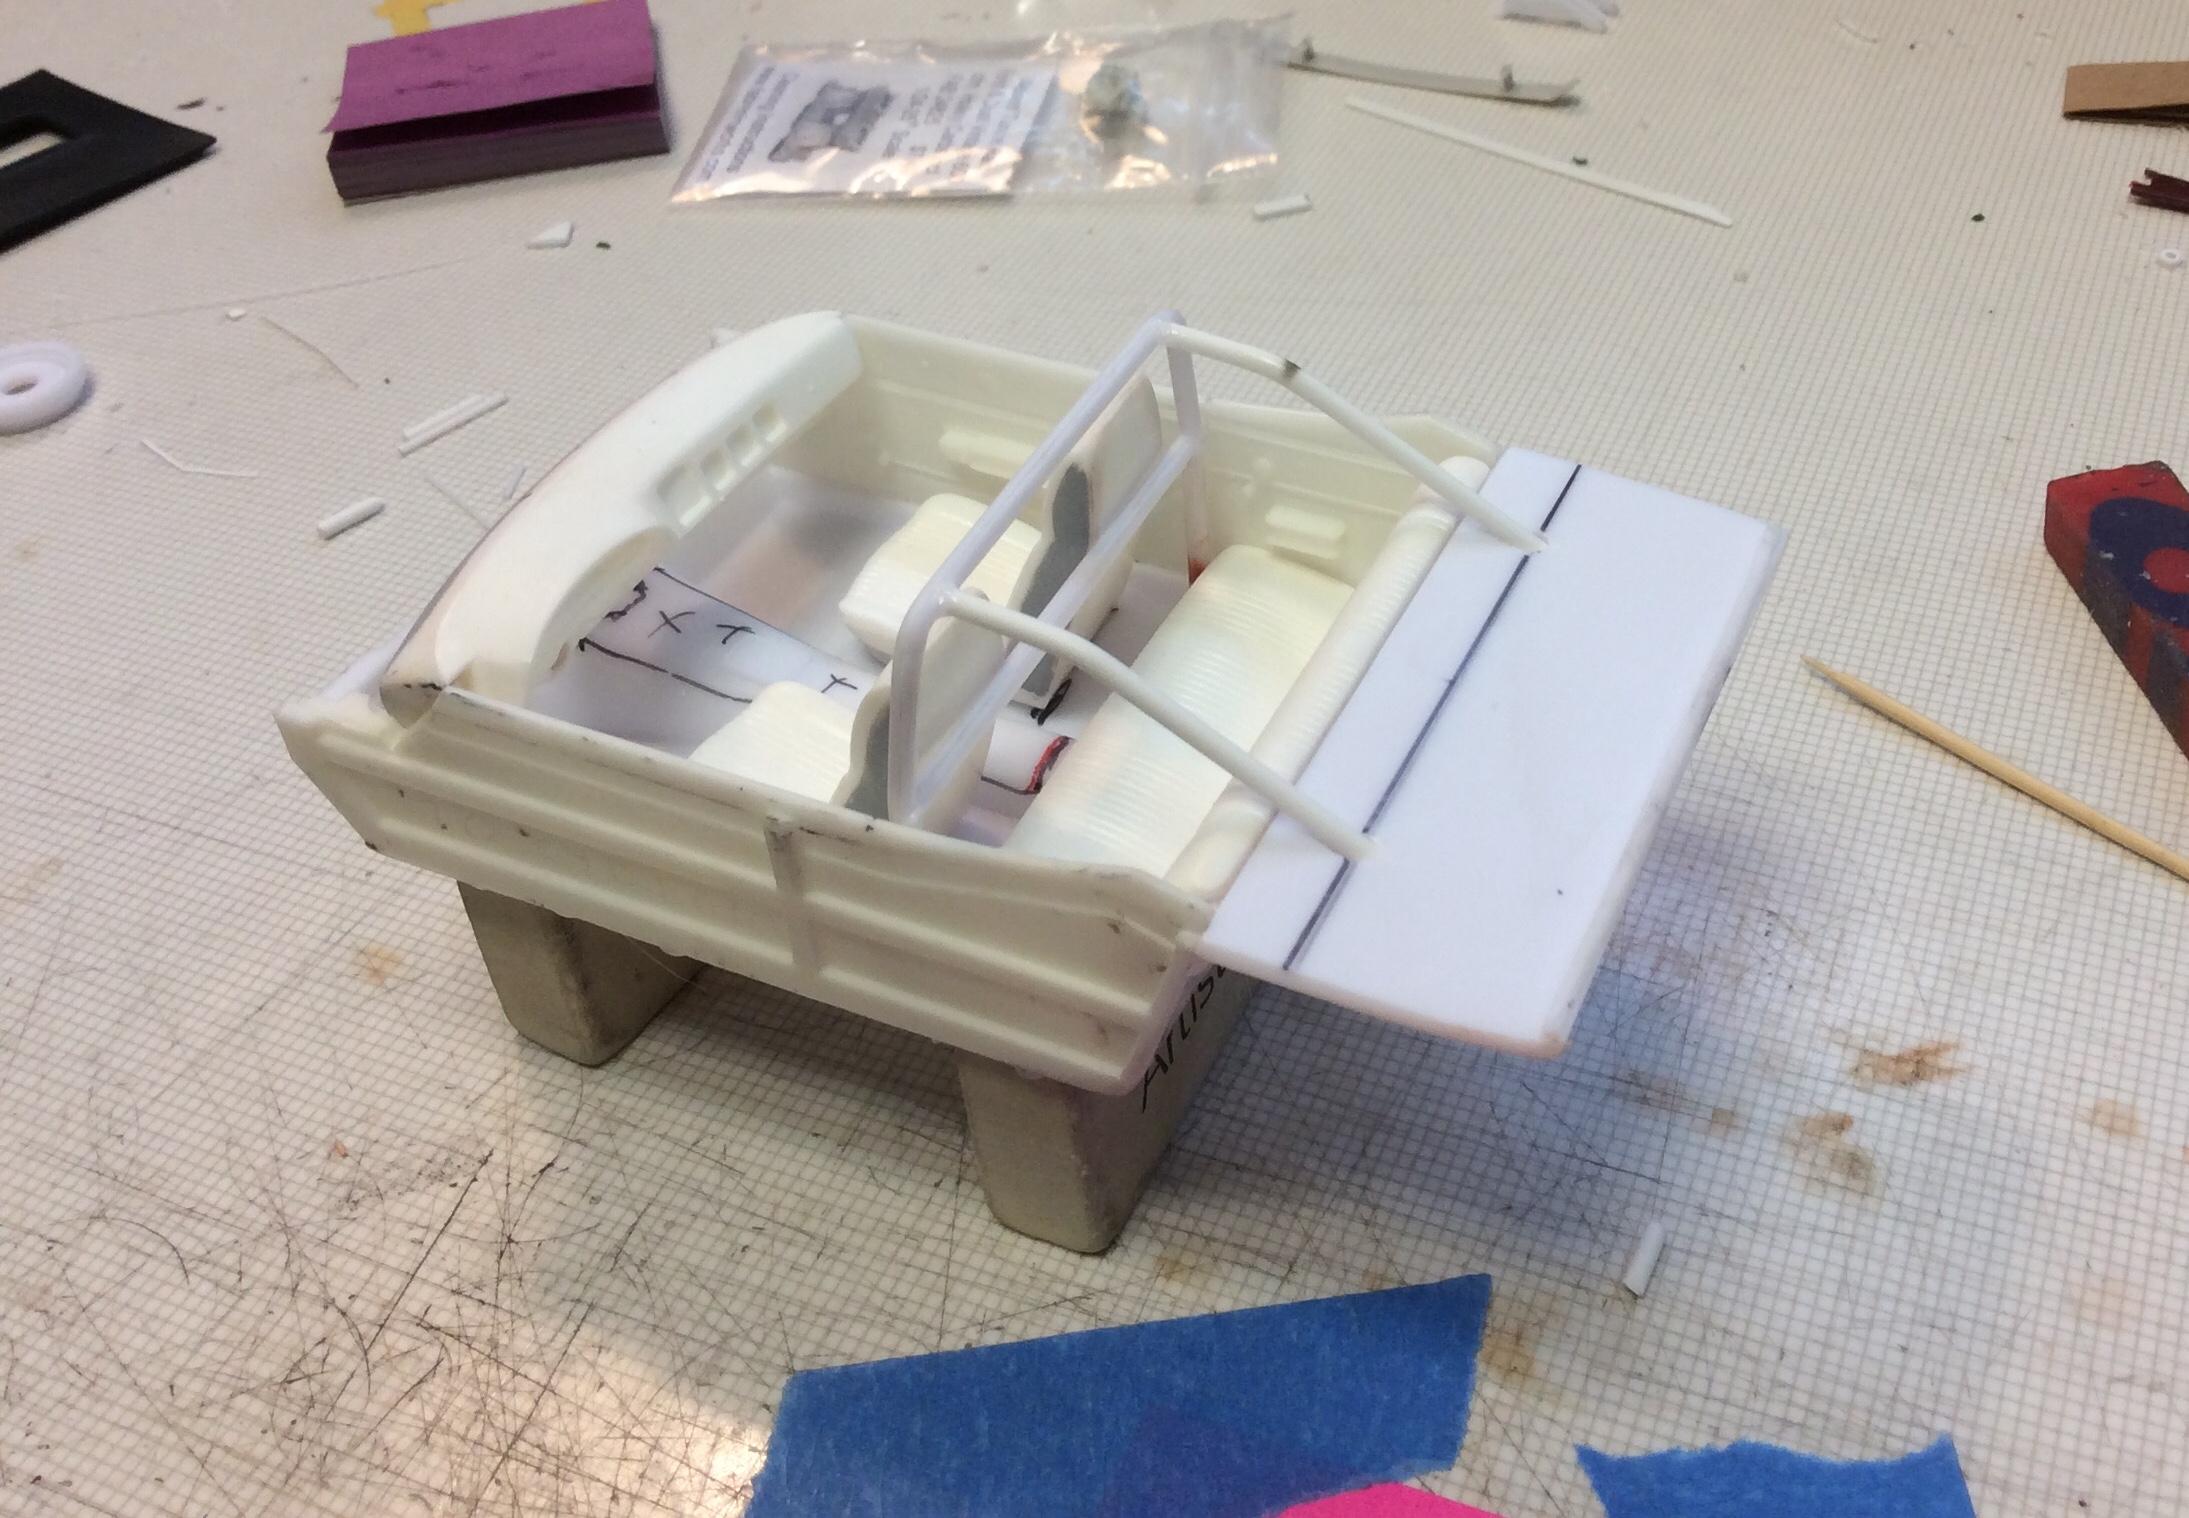
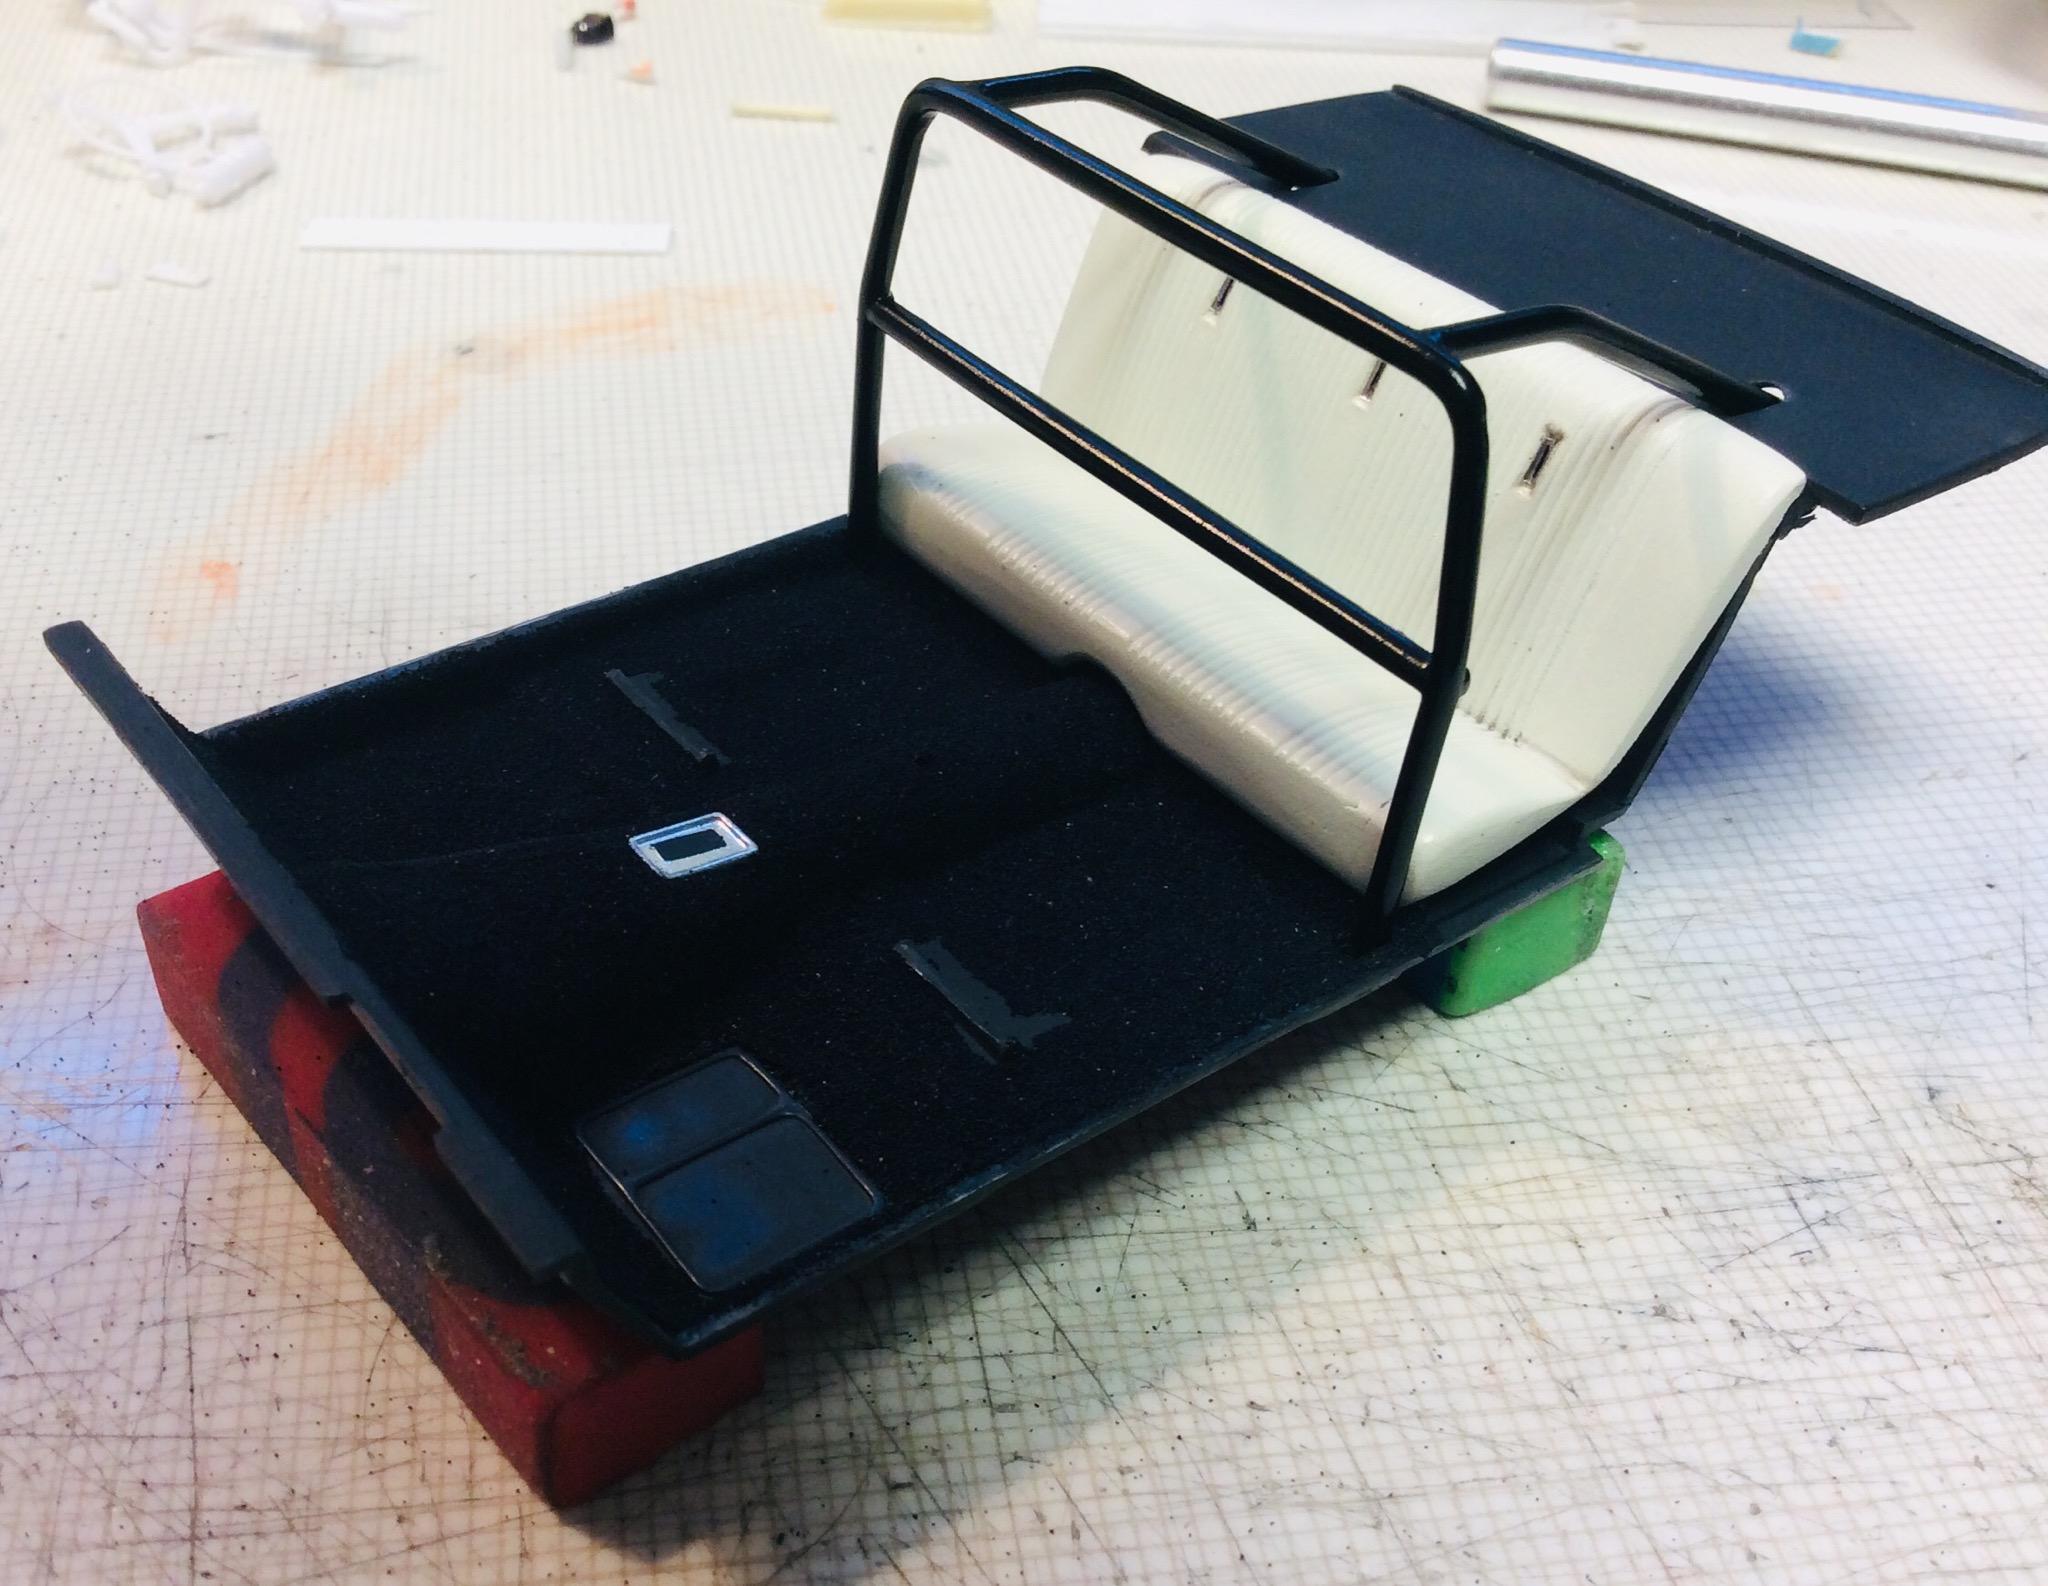
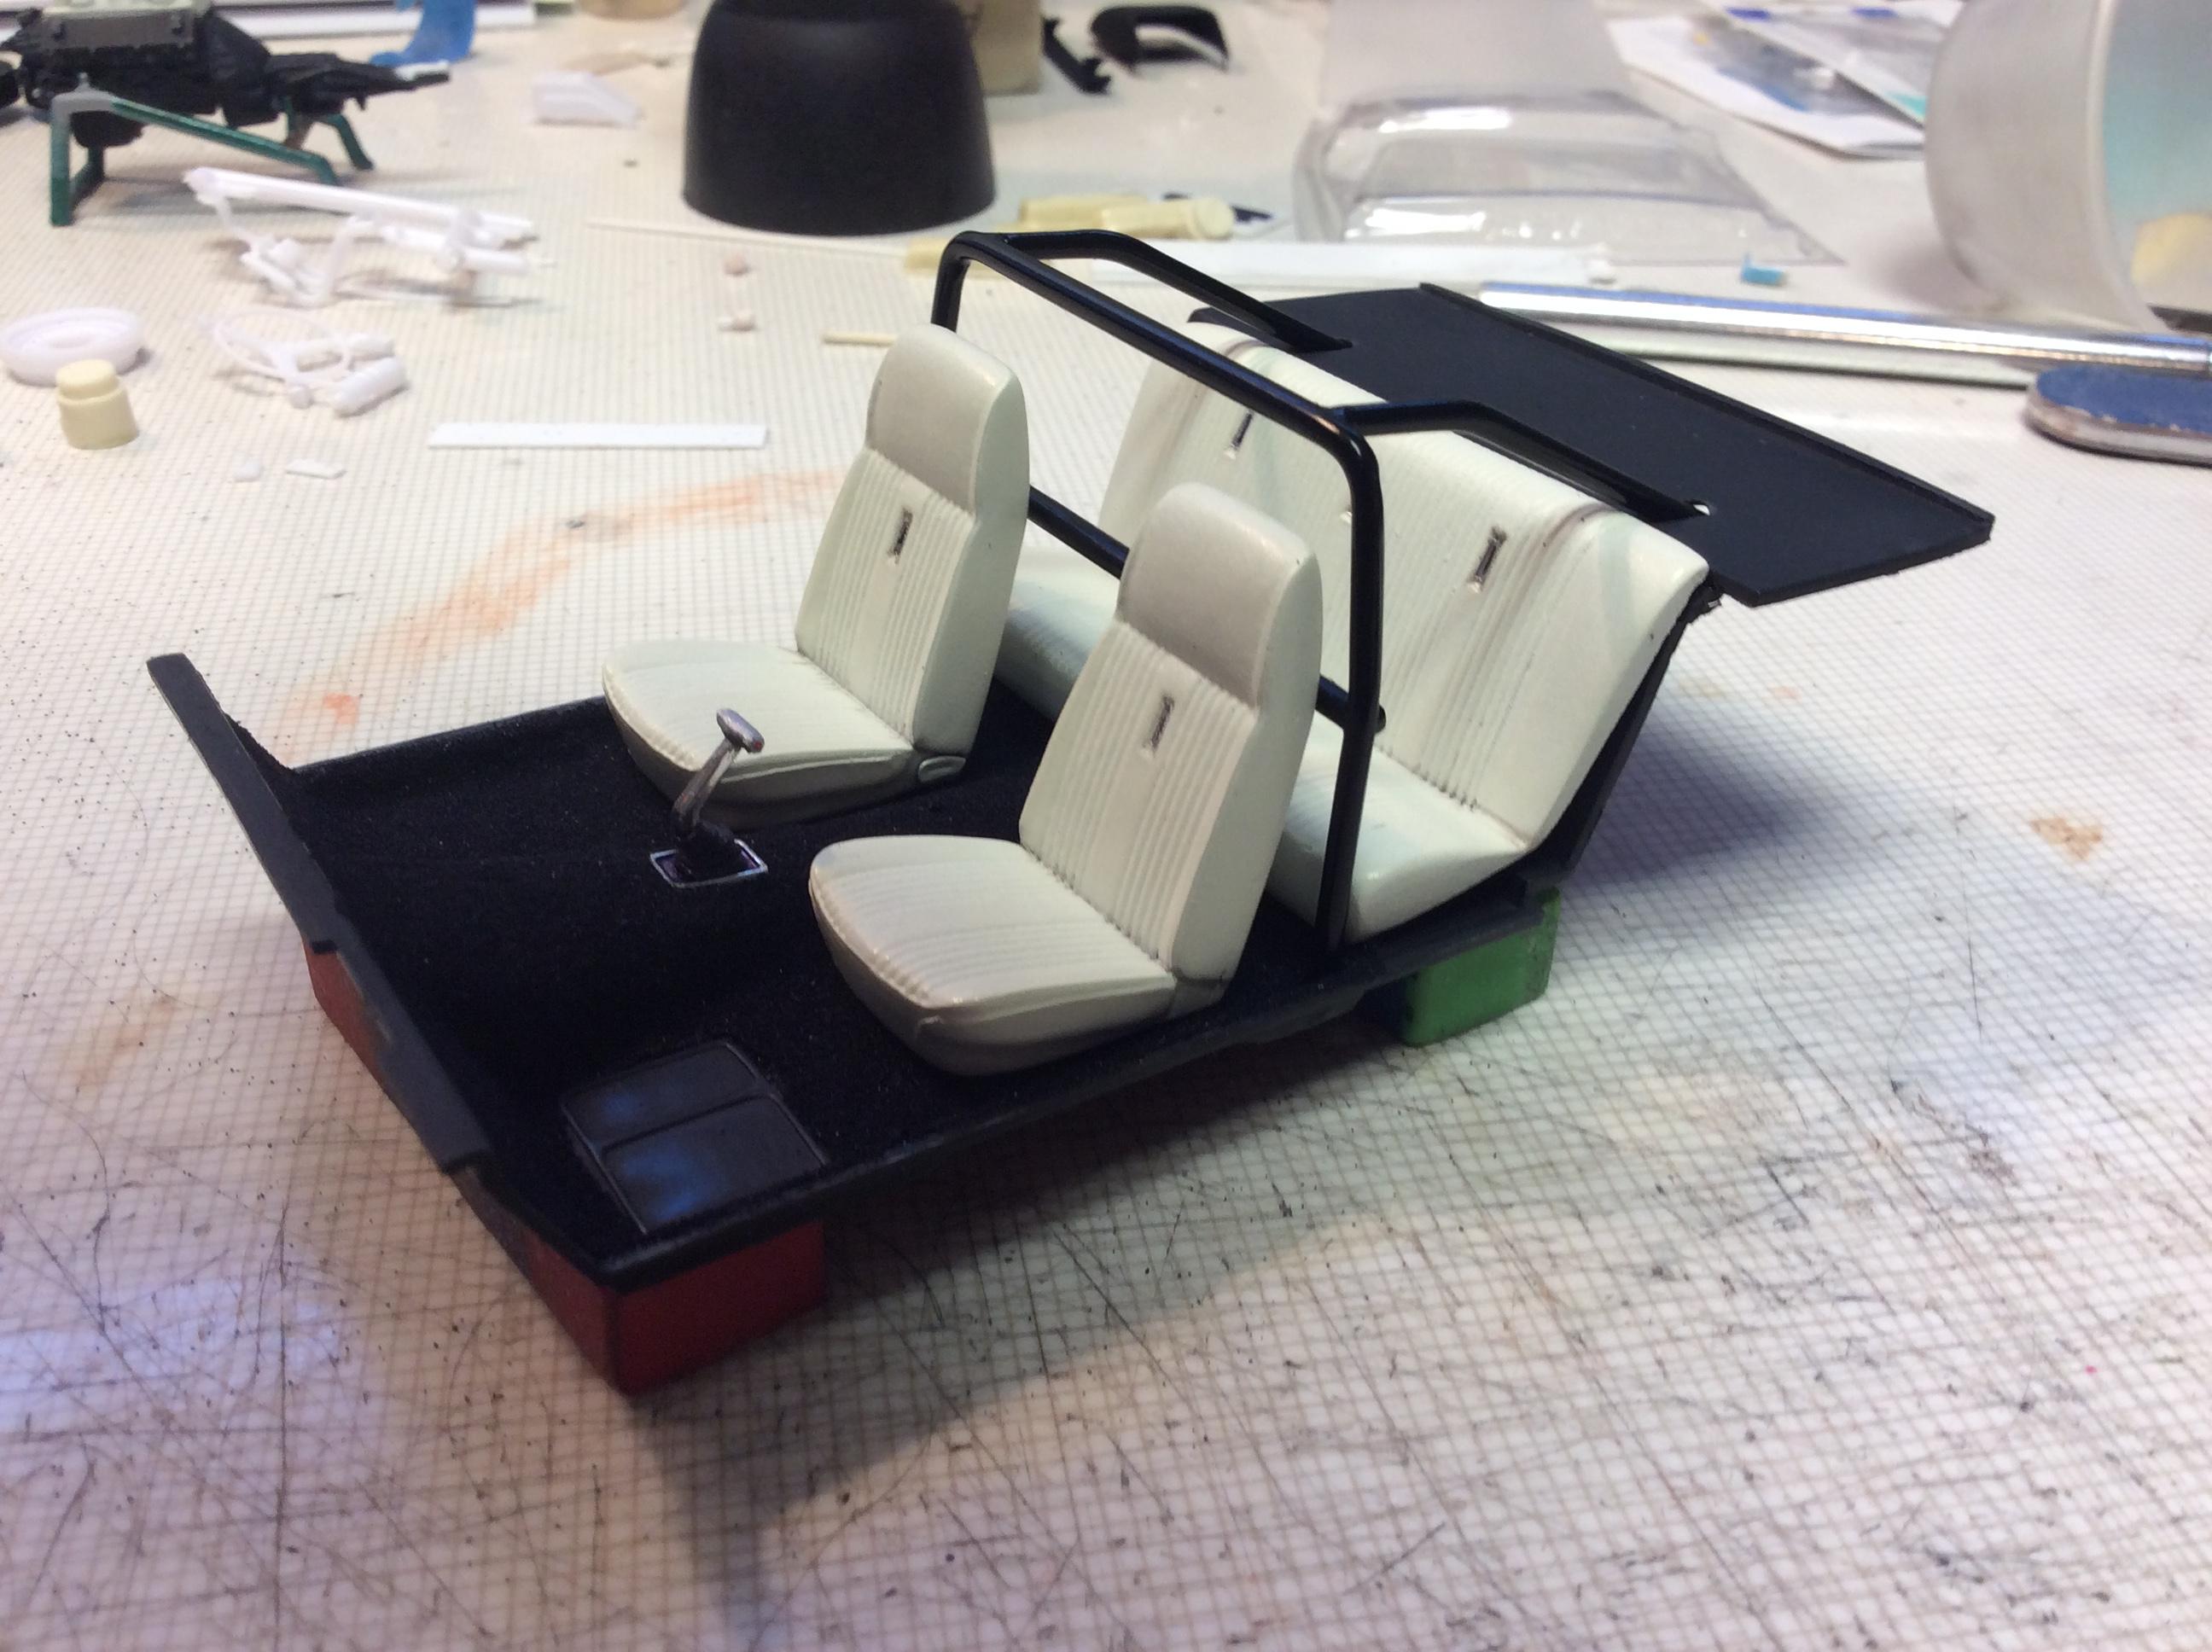
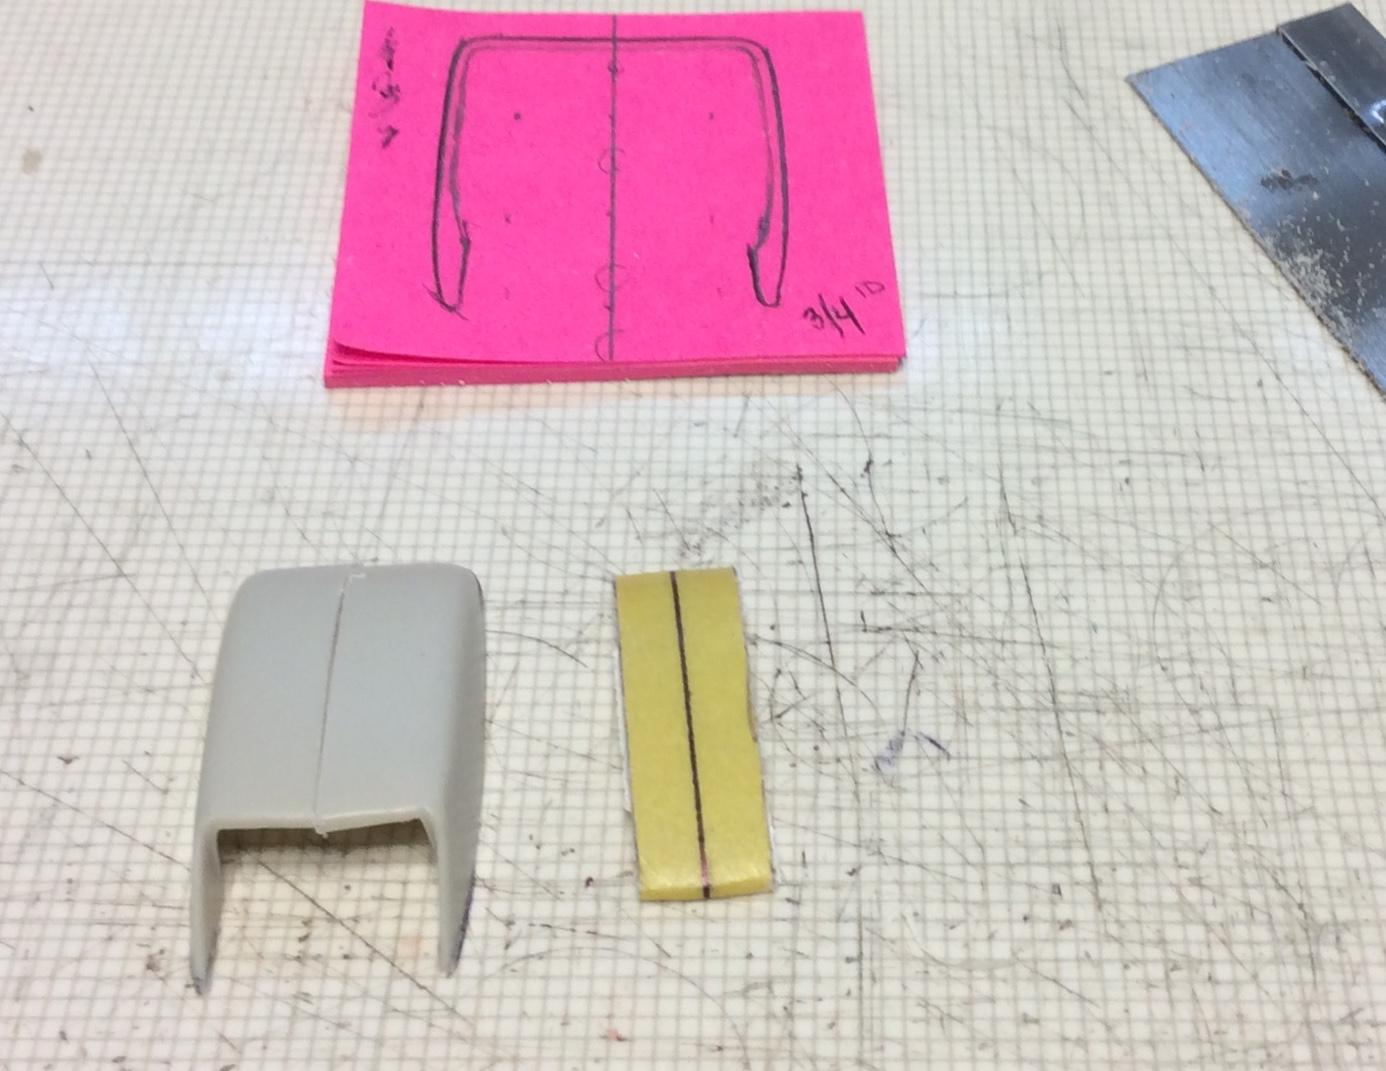
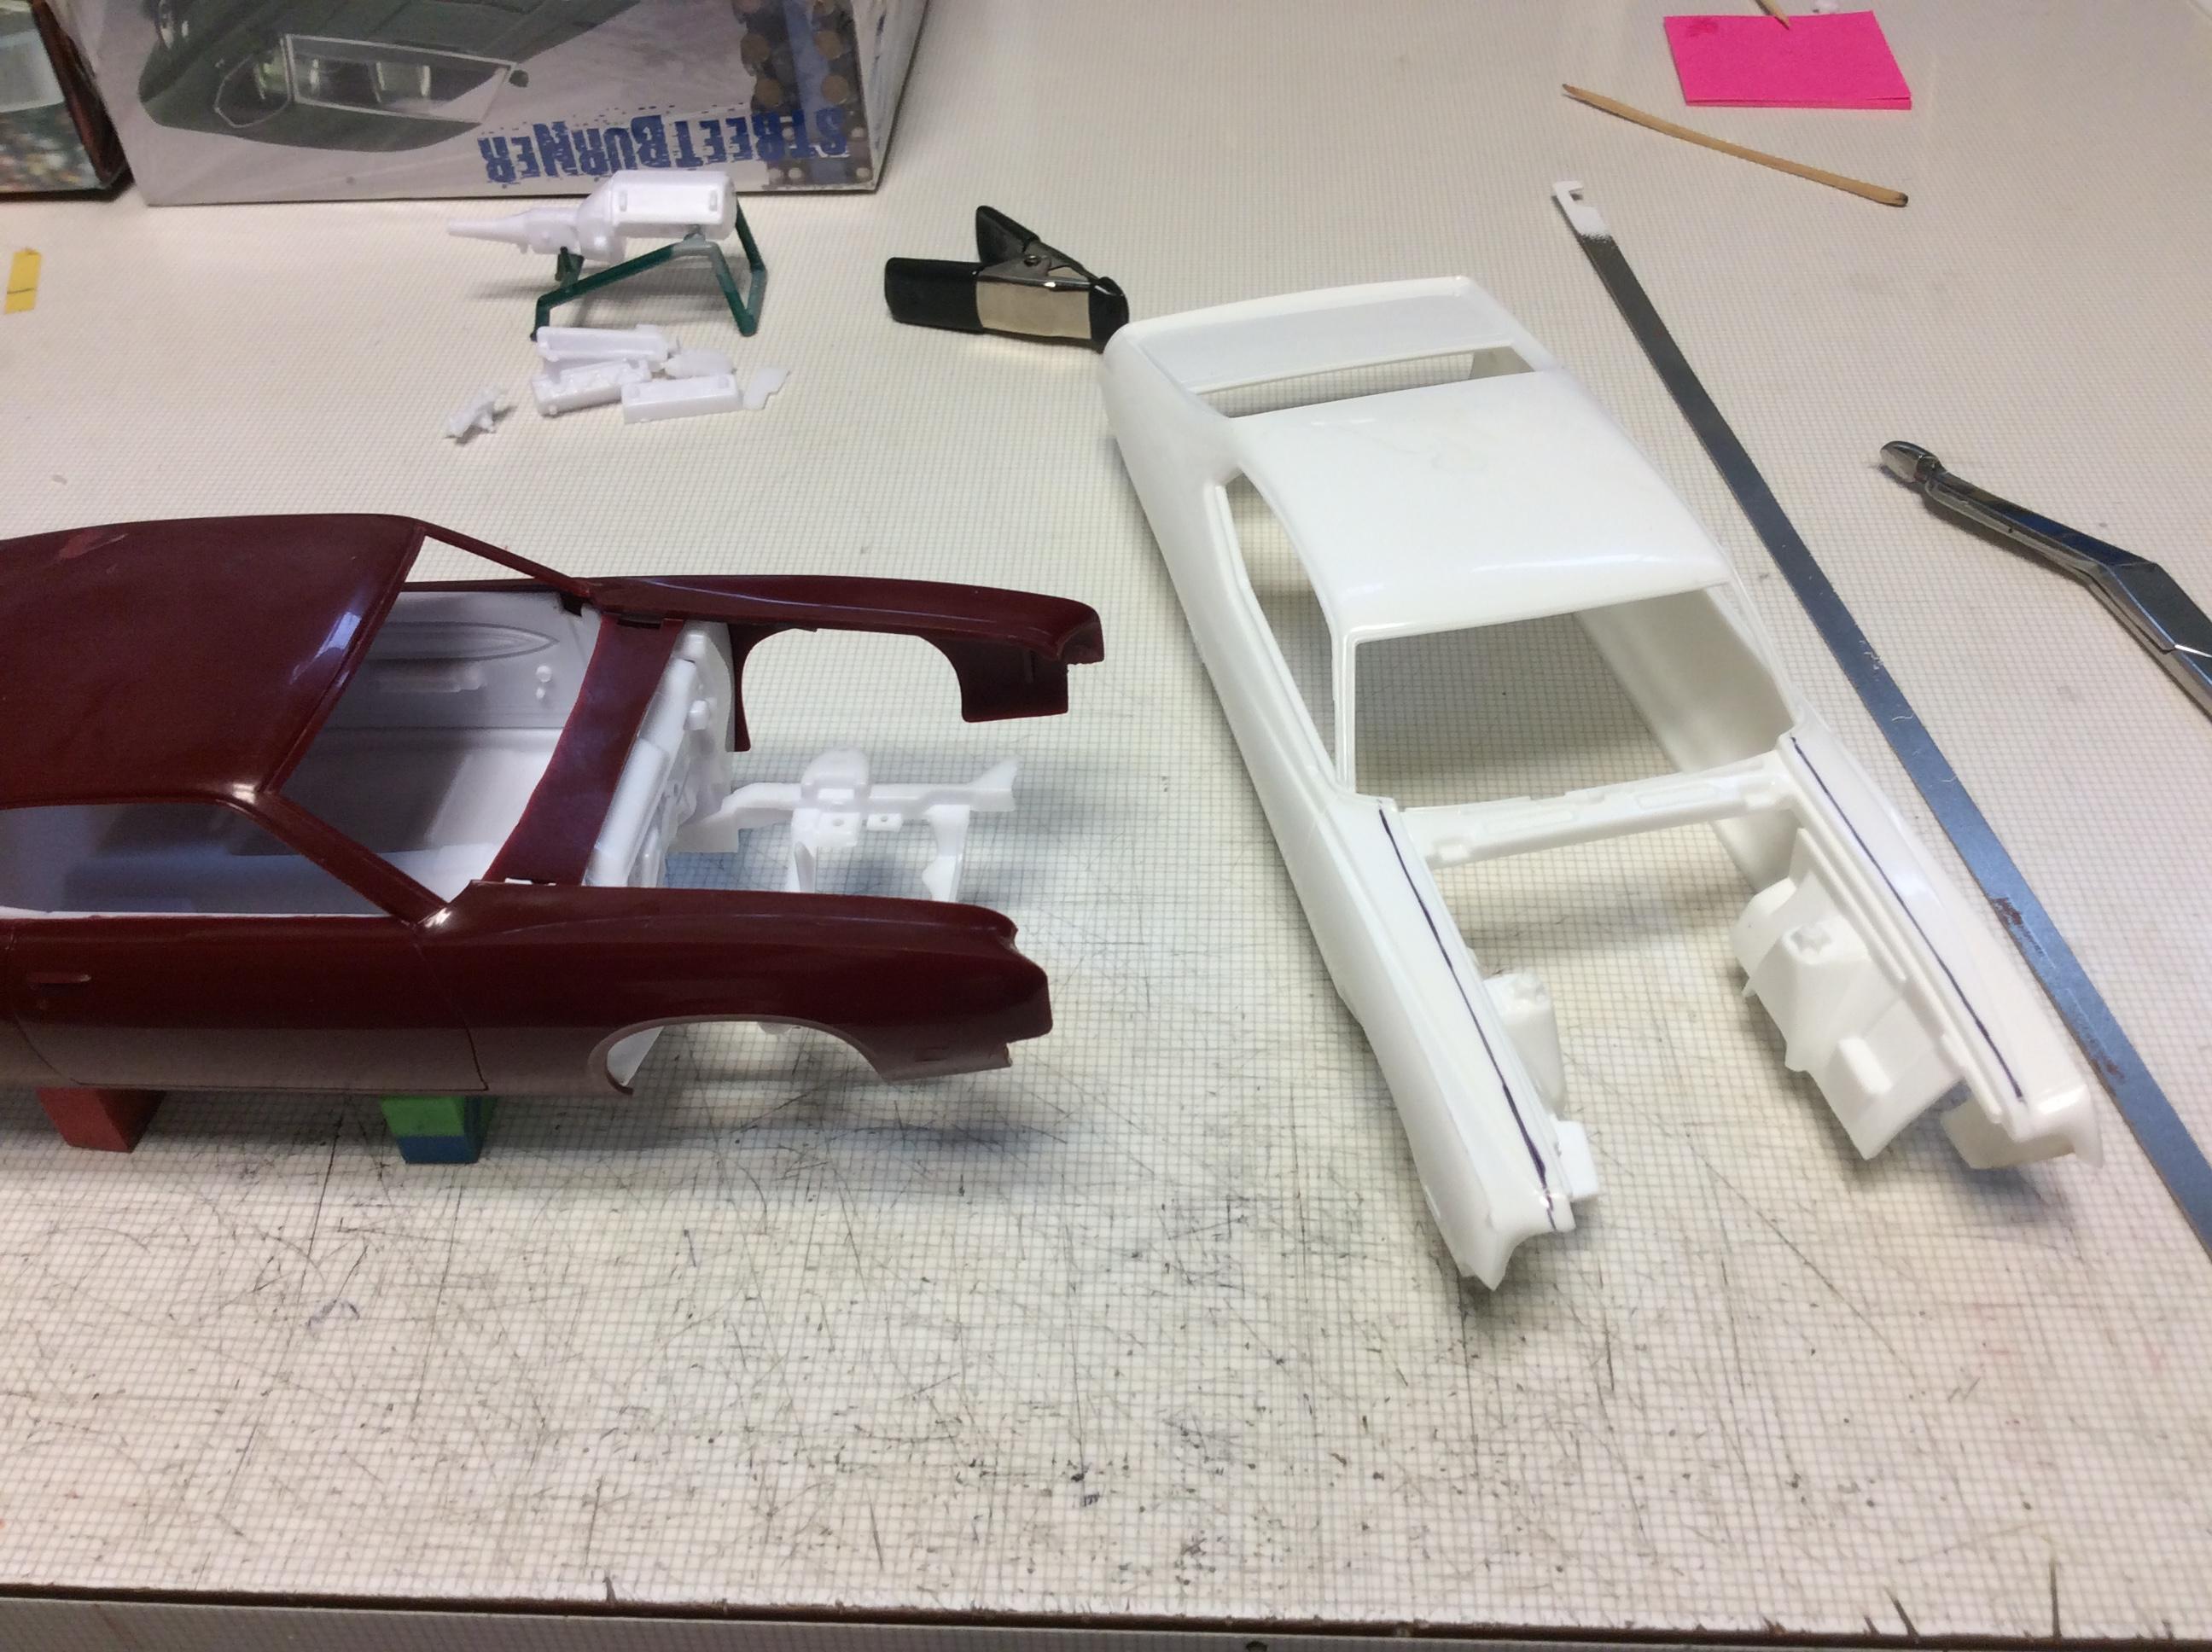
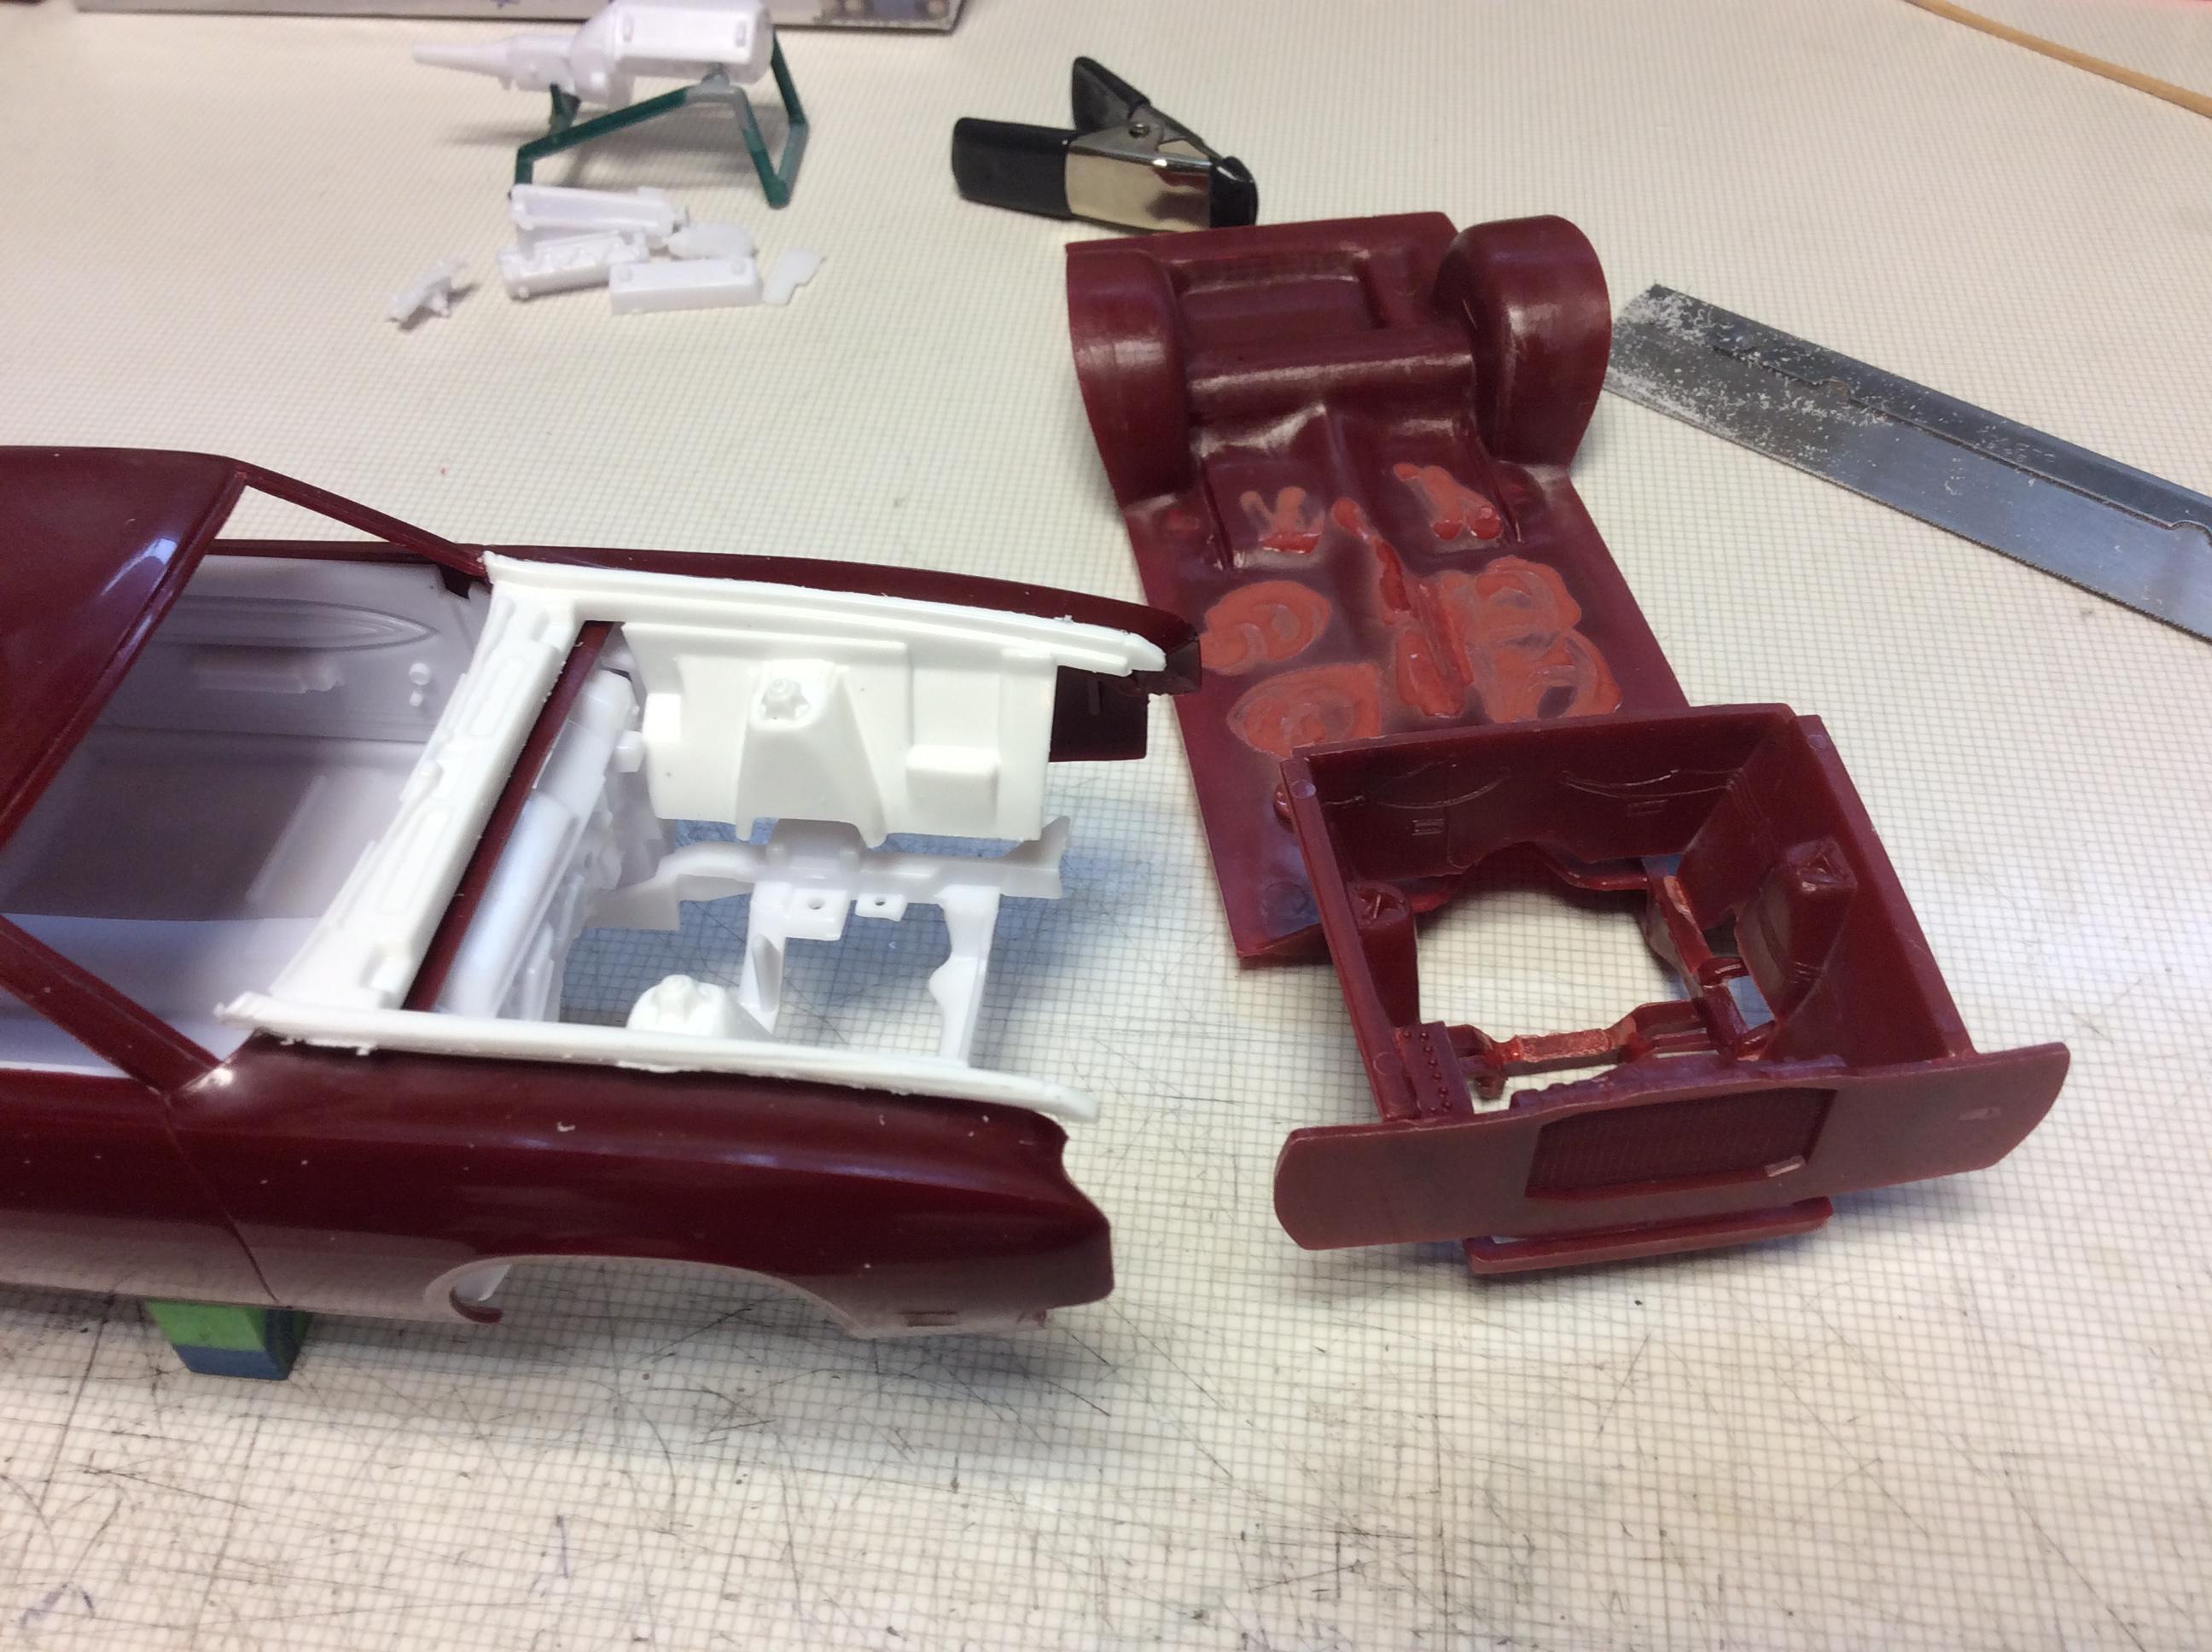
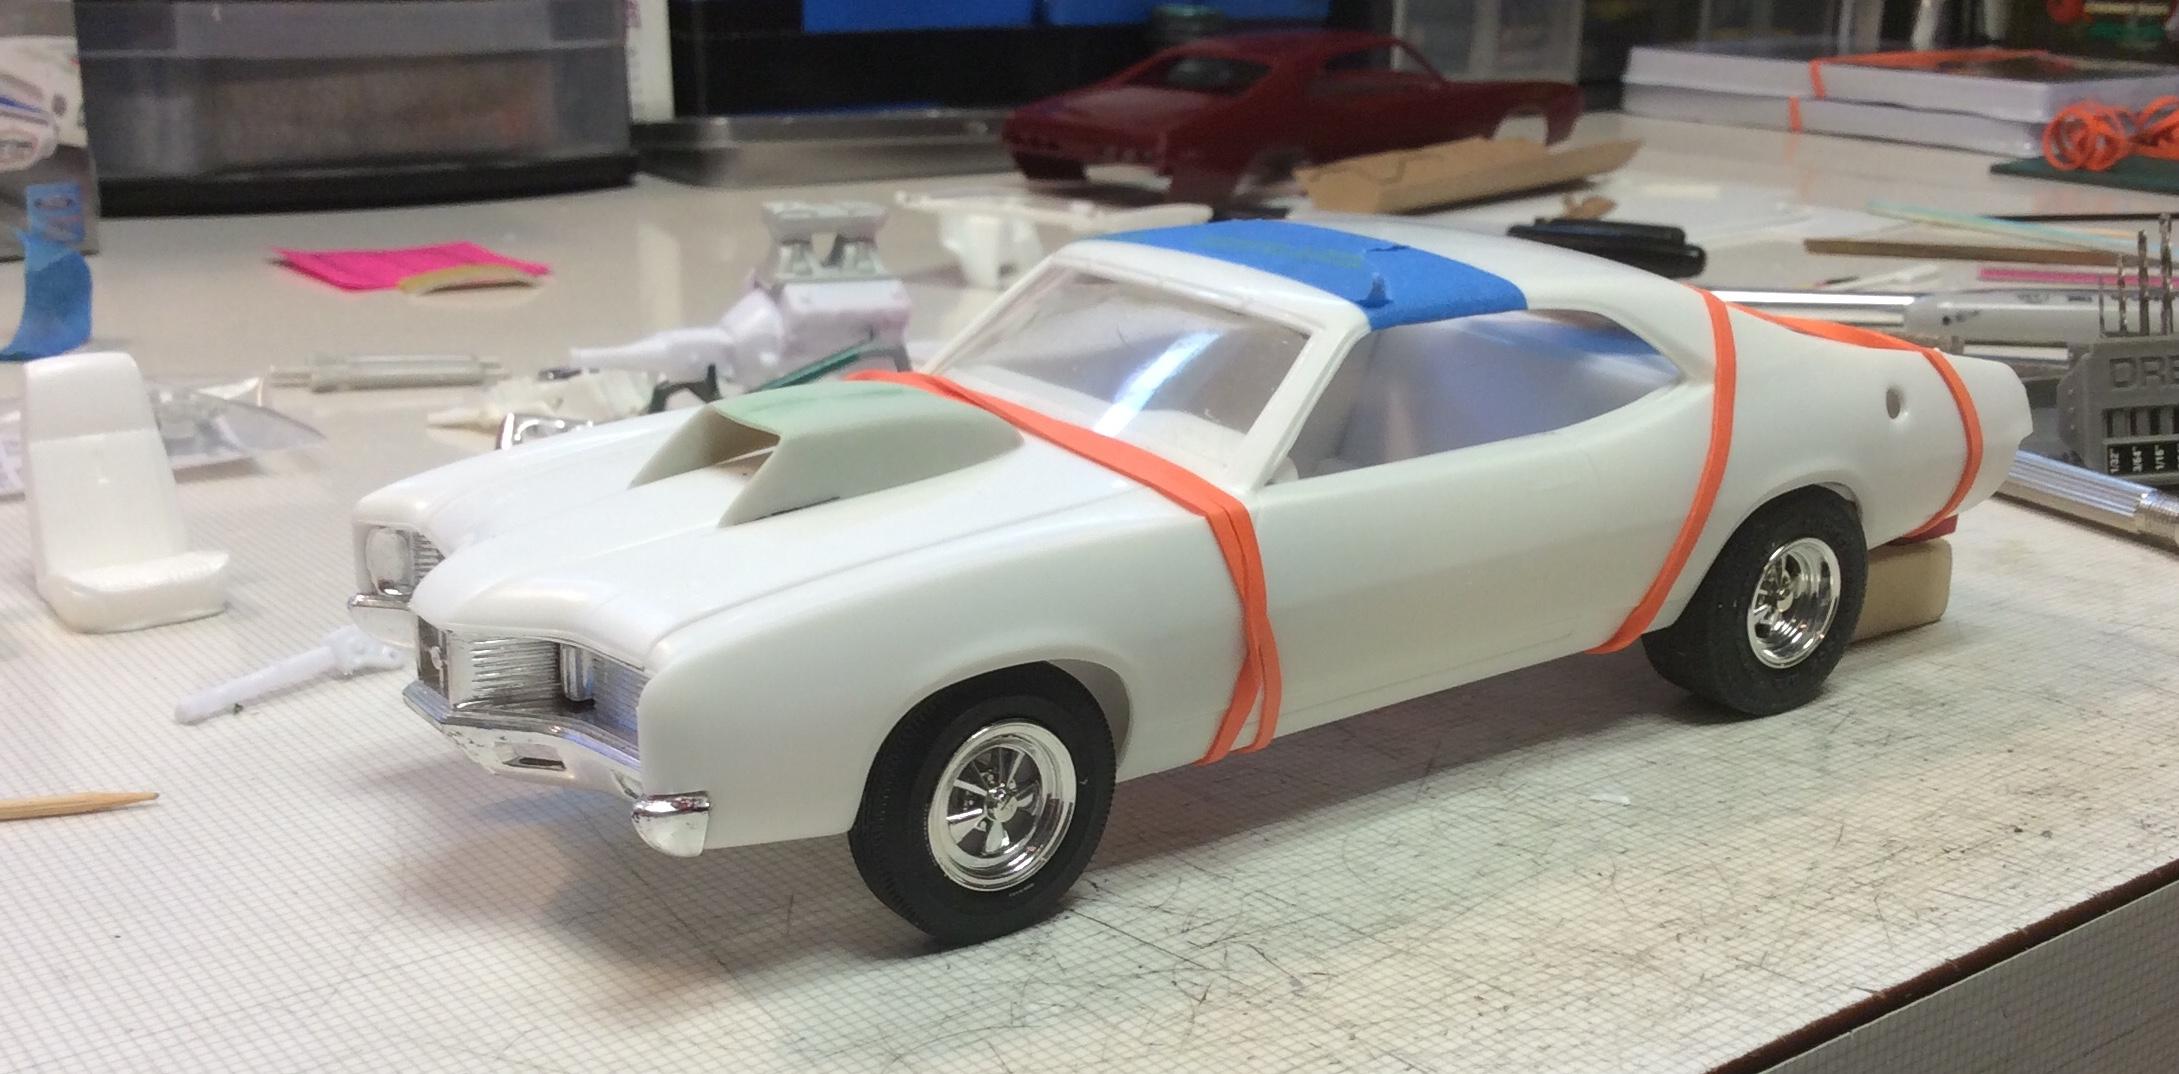
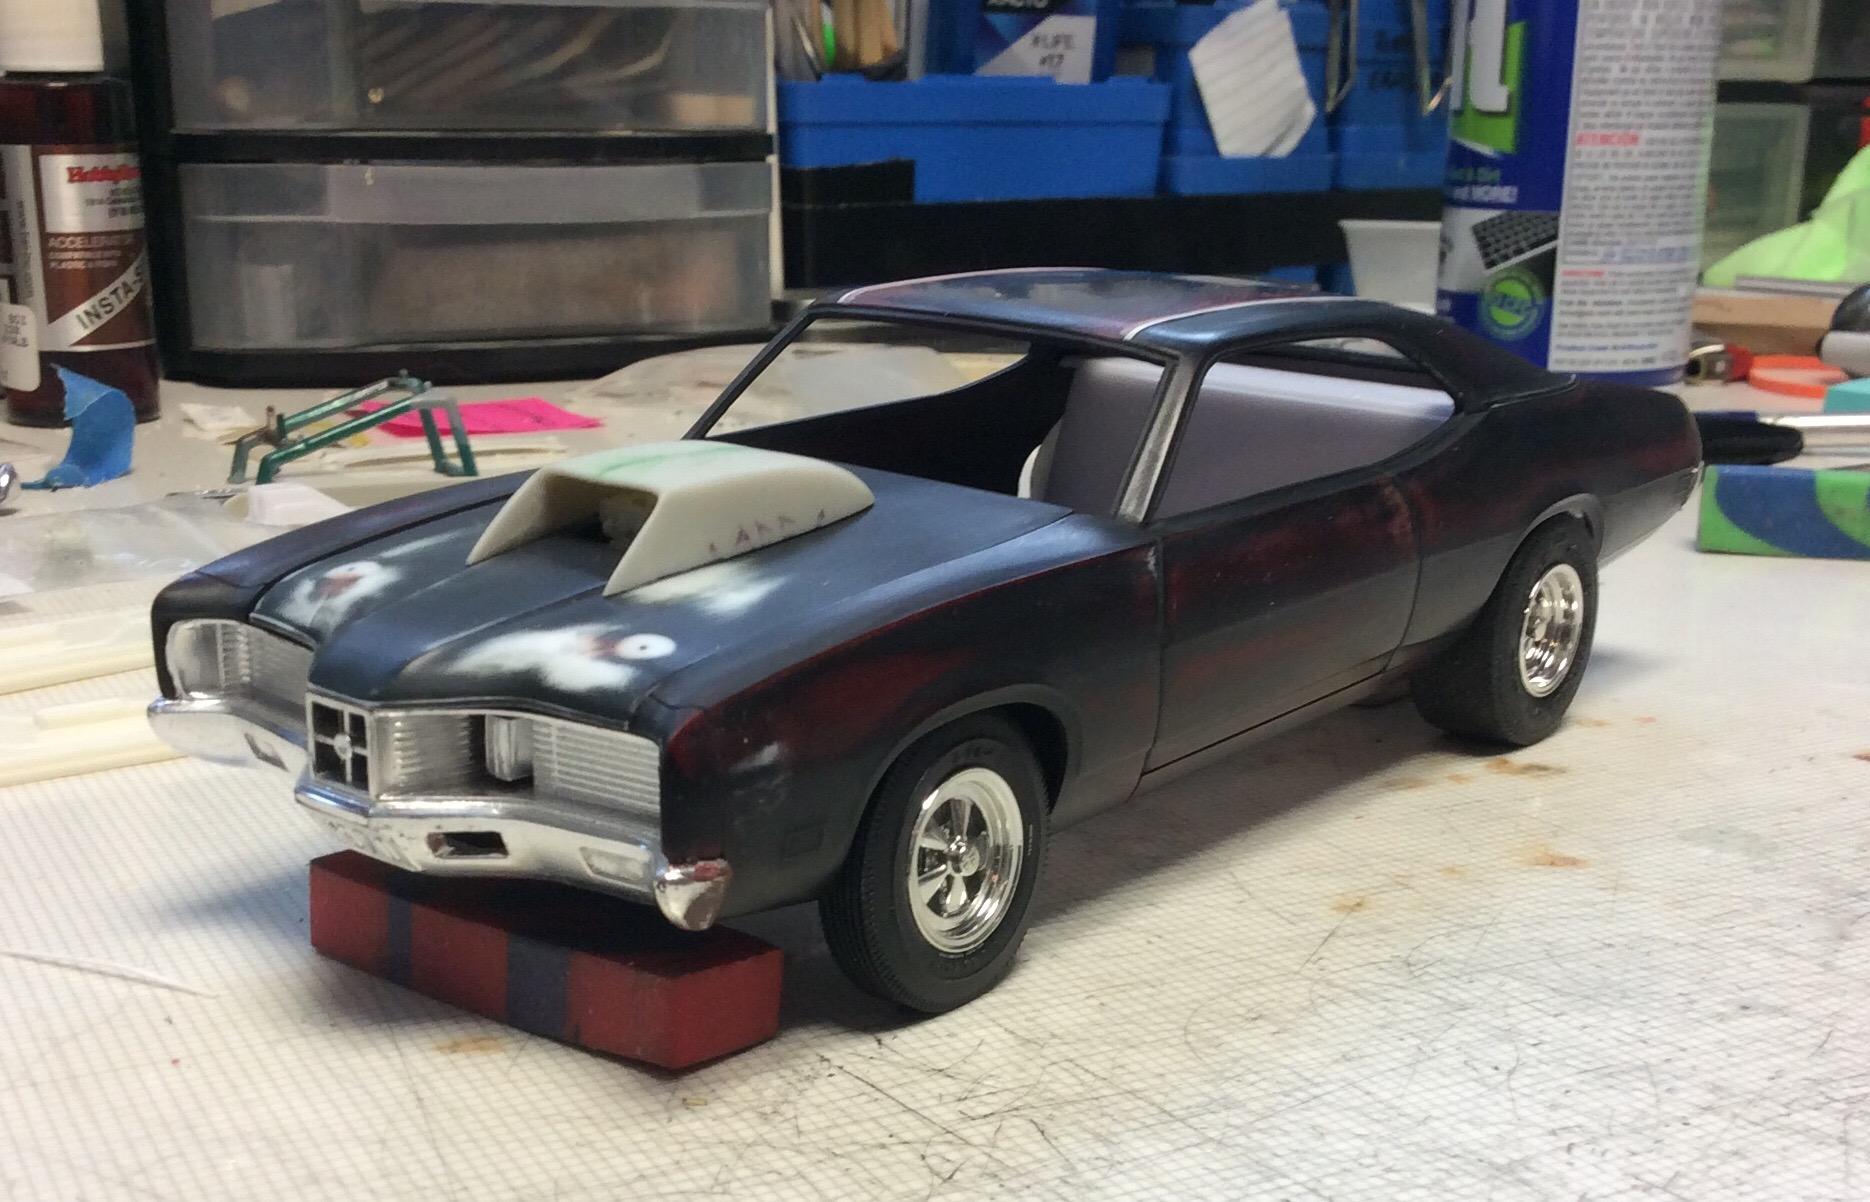
Hello all, so I purchased this built up on EBay for $20 or $30 ( can’t quite remember exactly) a while ago. It was fairly complete but I took it apart and threw the painted stuff into the purple pond. The plan came to me quickly.... not stock,not even day 2..... I’m going for that 6-7 year old muscle car turned into a nasty street machine... a “ day 6 “ theme. Go fast parts and mean look . It will have a tunnel fed 429 SCJ, cragars , black paint and a black vinyl top. I included a few photos showing what I started with and how it’s going. Used a couple other kits as donors ( Revell 70 torino & Amt 71 cyclone nascar kit ) as well as raiding my parts box and several parts from Missing link ( BIG thank you to missing link ! )
-
6
-
-
My cyclone restoration currently getting some bench time.....
-
5
-
-
I just want the hood scoop
-
On 12/13/2021 at 11:01 PM, showrods said:
Great build! Do tell...were you able to get the doors to open and close properly?
I never even attempted it with this build. This build was just a quick/ fun build and I didn’t really want to invest extra time in getting the doors to work well. Instead I focused more on getting the stance right and opening up the radius of the rear wheel openings. Wish I opened them more actually.
-
 1
1
-
-
On 12/9/2021 at 11:17 PM, unclescott58 said:
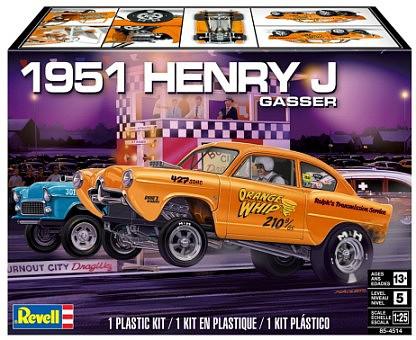
I don’t know how I missed this one when you posted it. A very nice Henry J. I have a love/hate relationship with this kit. I found it to be a pain to build when I tried building one 50 years ago. But, with the recent re-release, I’m going to try it again. Despite what my friends in the MCCM (Model Car Club of Minnesota) have to say about the kit. (None of it good.) I hope it turns out half as good as yours did.
Thank you for the compliment. It was basically same scenario for me. Built one back in early eighties when I was younger but wanted to build another now that My skills have gotten better some 30+ years later lol. Sure it’s a fiddly old Revell kit but I’ve certainly built worse and sometimes I enjoy the challenge of making it better. Definitely give it a shot
On 12/10/2021 at 7:10 AM, Zippi said:That's a good looking Gasser. This shows that a good looking model can be built from this kit. I've read all the negitive posts about the Henry J and still want one. I like Gassers and it's a Gasser. Looking forward to the challenge when this one hits the local hobby shop.

Thank you. I love gassers as well and felt I had to have a good looking Henry J gasser in the collection. Bad reviews/opinions aside, it can still present well.
On 12/10/2021 at 10:43 AM, ewetwo said:Really nice build.
Thank you
-
Welcome fellow NYer
-
My order has arrived and NO SURPRISE........ it looks awesome!! So worth the wait. Thank you Steve for all the work you did in making the master and thank you Ed for making it possible for the rest of us to have these parts. I did purchase a few other parts as well for future project. If anyone hasn’t checked out Ed’s other products I strongly recommend you do. Over the years I’ve purchased many other things ( chopped deuce, hoods ....etc ) and hands down some of the nicest out there on top outstanding customer service.
-
No models at the new Latham location.
-
33 minutes ago, ewetwo said:
There is a new Ollies opening in Latham, N.Y. on the 27th. So Anyone in that area. Check it out. Just a heads up. I Know when they opened the one here in Johnstown, N.Y. They had those kits.
I live close and plan on checking it out, I’ll let you guys know
-
Hart’s parts resin has flat hood. https://hartspartsresin.com/
-
On 9/17/2021 at 3:41 PM, Mr. Metallic said:
My storage process looks like this (in order of size)
Automotive or workshop style parts cabinet with drawers
Next level is i purchased the cheap food prep containers at walmart
Then the next size up is various sized Sterlite storage containers, mostly the "shoe" size, but I do have a few larger ones for bodies and stuff.
I second this method and they’re relatively inexpensive new ... even cheaper at garage sales
-
I’d love to pick up one of those Shelby convertibles but the site already says sold out. I keep missing it. 🙁
-
23 hours ago, baycolony said:
Thanks guys, and Mr Rutland, the 3d printer is a gentlemen out of the Ukraine named Dmitry who runs a Facebook group called DiOlex Productions. I found him through ebay where he sells some of his wheels and coordinated my order with him through FB. He does custom orders as mine was and was very reasonable. Check out some of his full 3d printed transkits while you are there. He is doing some pretty incredible stuff. My wheels were two different sizes (front and rear) and the detail is exact right down to the engraved "Shelby" insignia on the edges.
I don’t have Facebook but I can use a friends to try to get a hold of Dmitry. I’ve got 20x9.5 & 20x11’s CS66 on my 07 Shelby and want to do the same as you and build a replica of my car. I’ve got CS3’s on my 19 GT in the same size that I’d also like to replicate. Hopefully Dmitry can help out. What did you use for a source for tires ?
-
22 hours ago, StevenGuthmiller said:
Be patient guys.
Ed is digging himself out of a hole, but he has assured me that he is working as fast as possible to fill all of the orders for this kit.
Steve
Ed is a great guy and when I ordered he told the wait would be longer than normal. I don’t mind waiting ,as I said above worth the wait. Been great watching yours come along though.
-
Looks absolutely beautiful ! Nice work . I’m still waiting for my order but obviously WELL worth the wait.
-
Looks great ! What 3D printer did the wheels come from? Do they do custom orders? I’m looking for Shelby CS66’s and CS3’s
-
I’d like to know also. I’ve been waiting to build some of my trucks because I haven’t found a large enough case without a huge price tag.
-
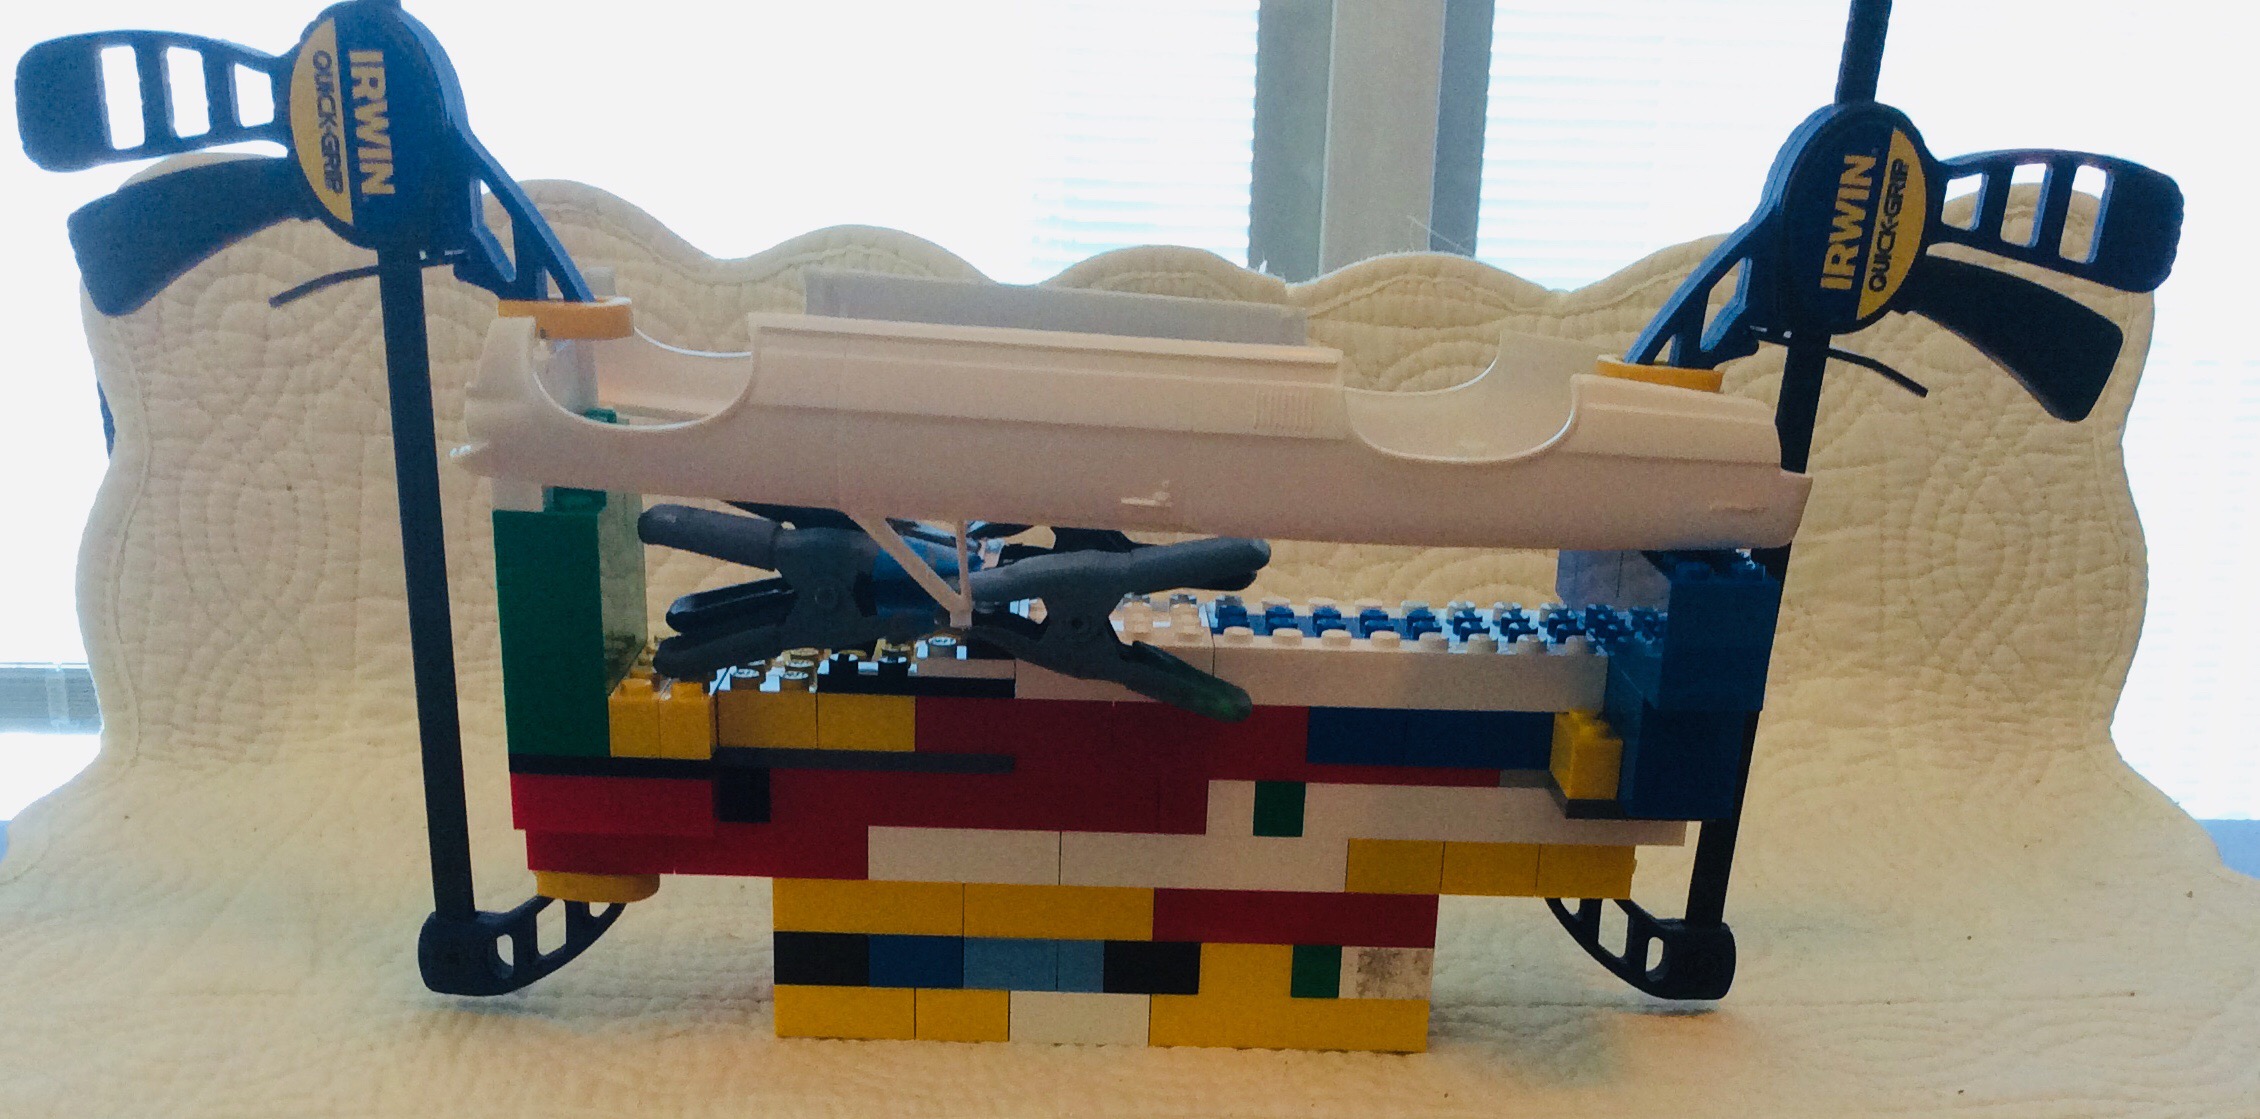
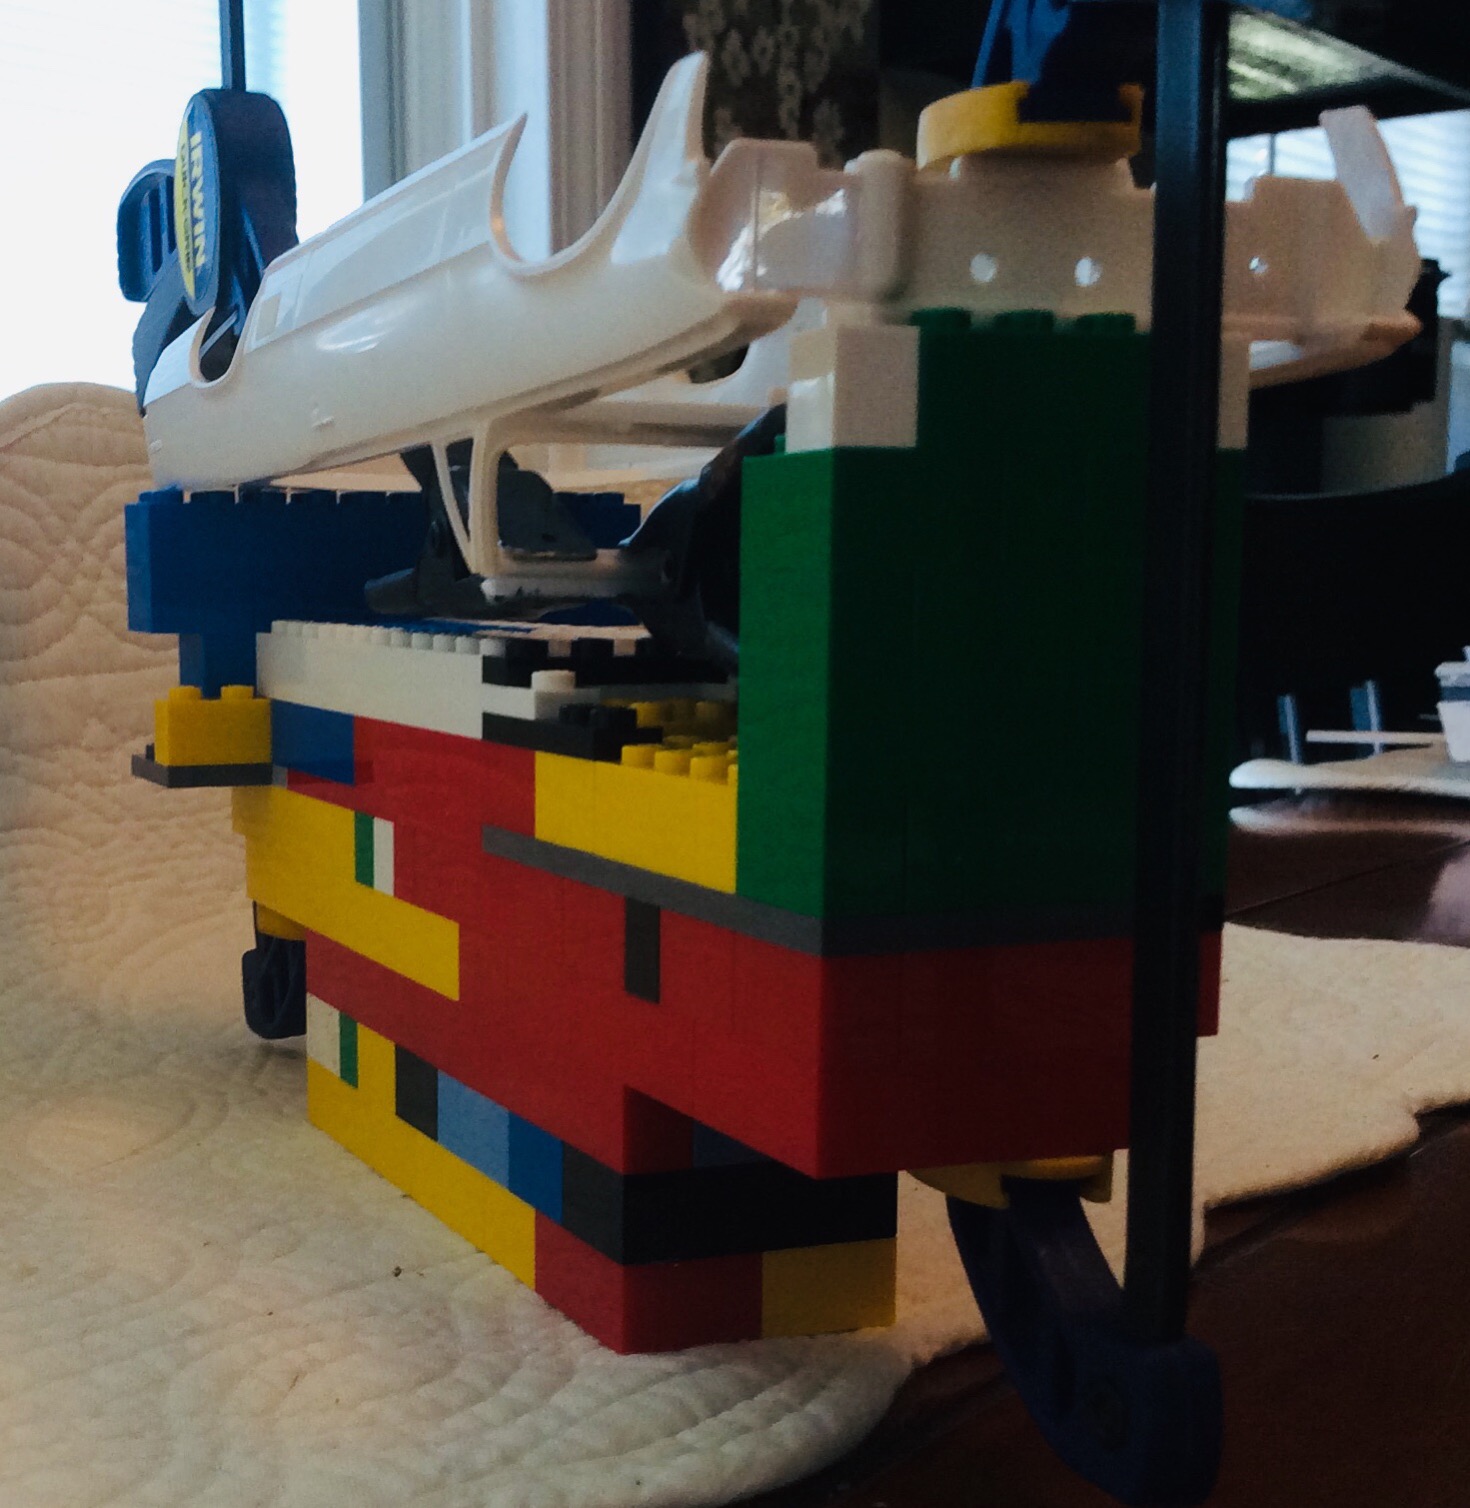
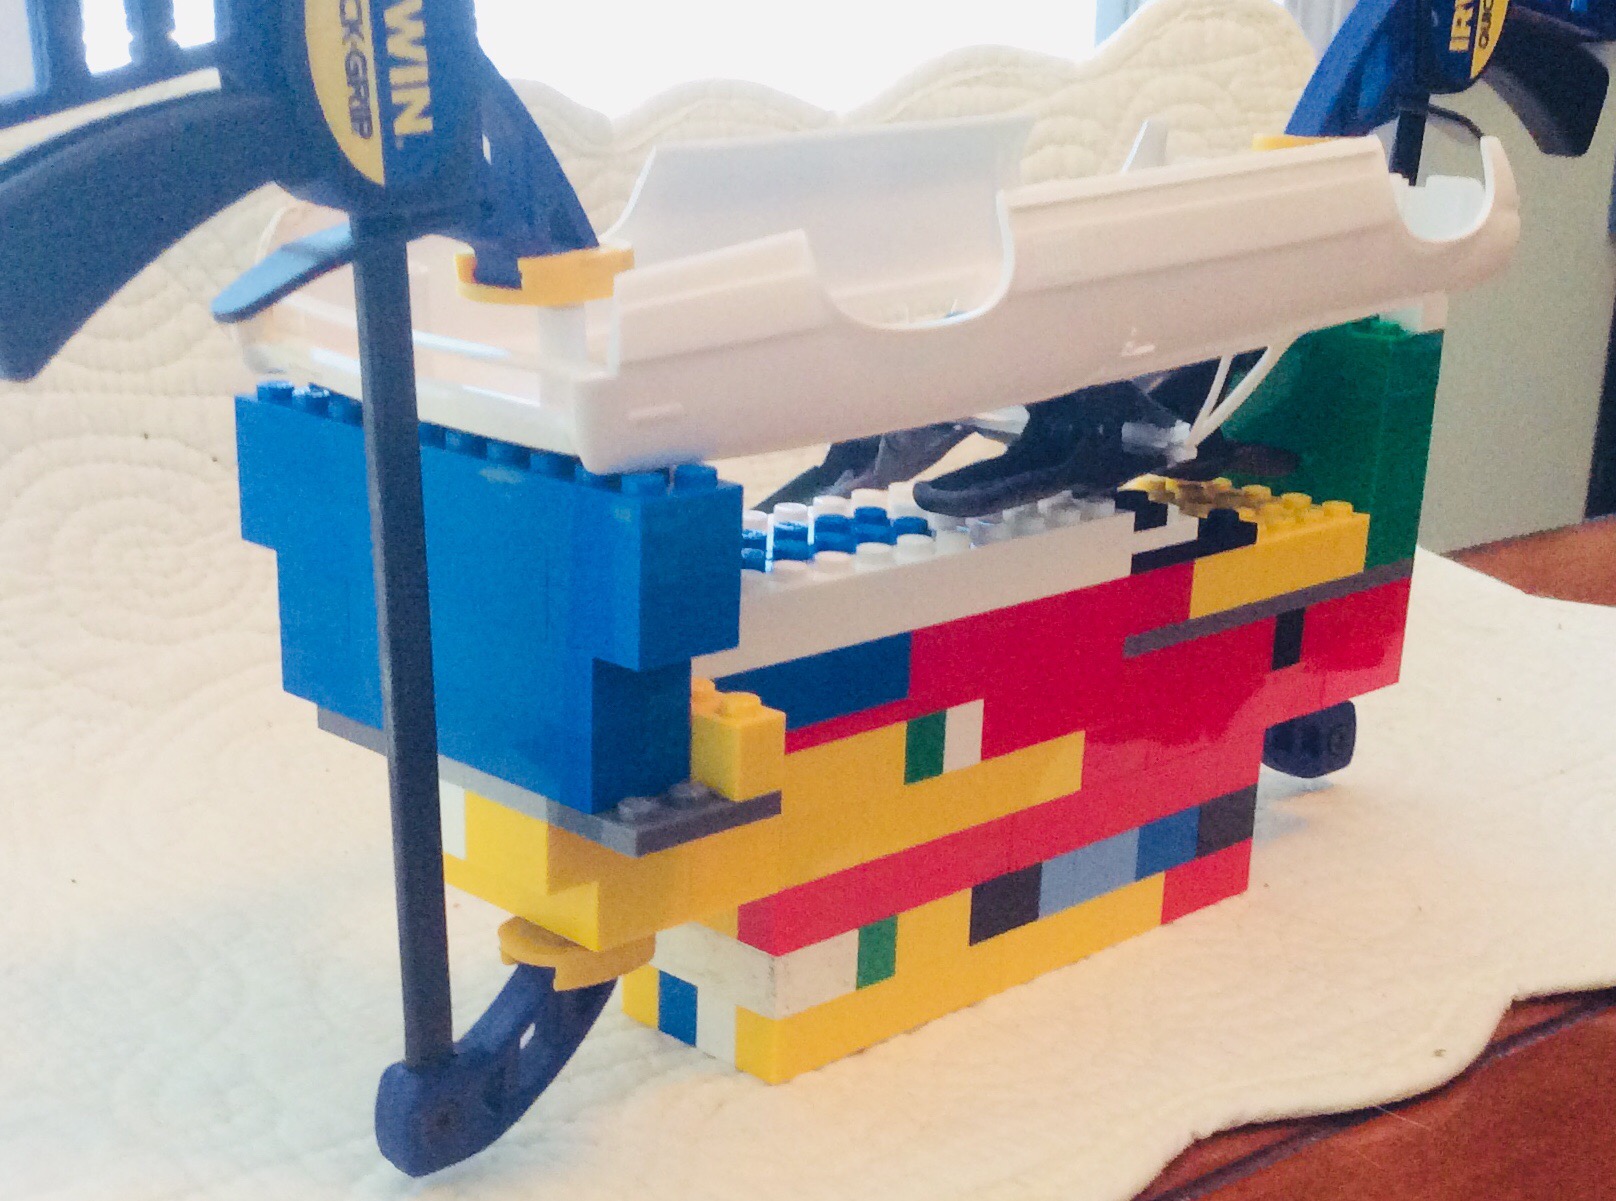
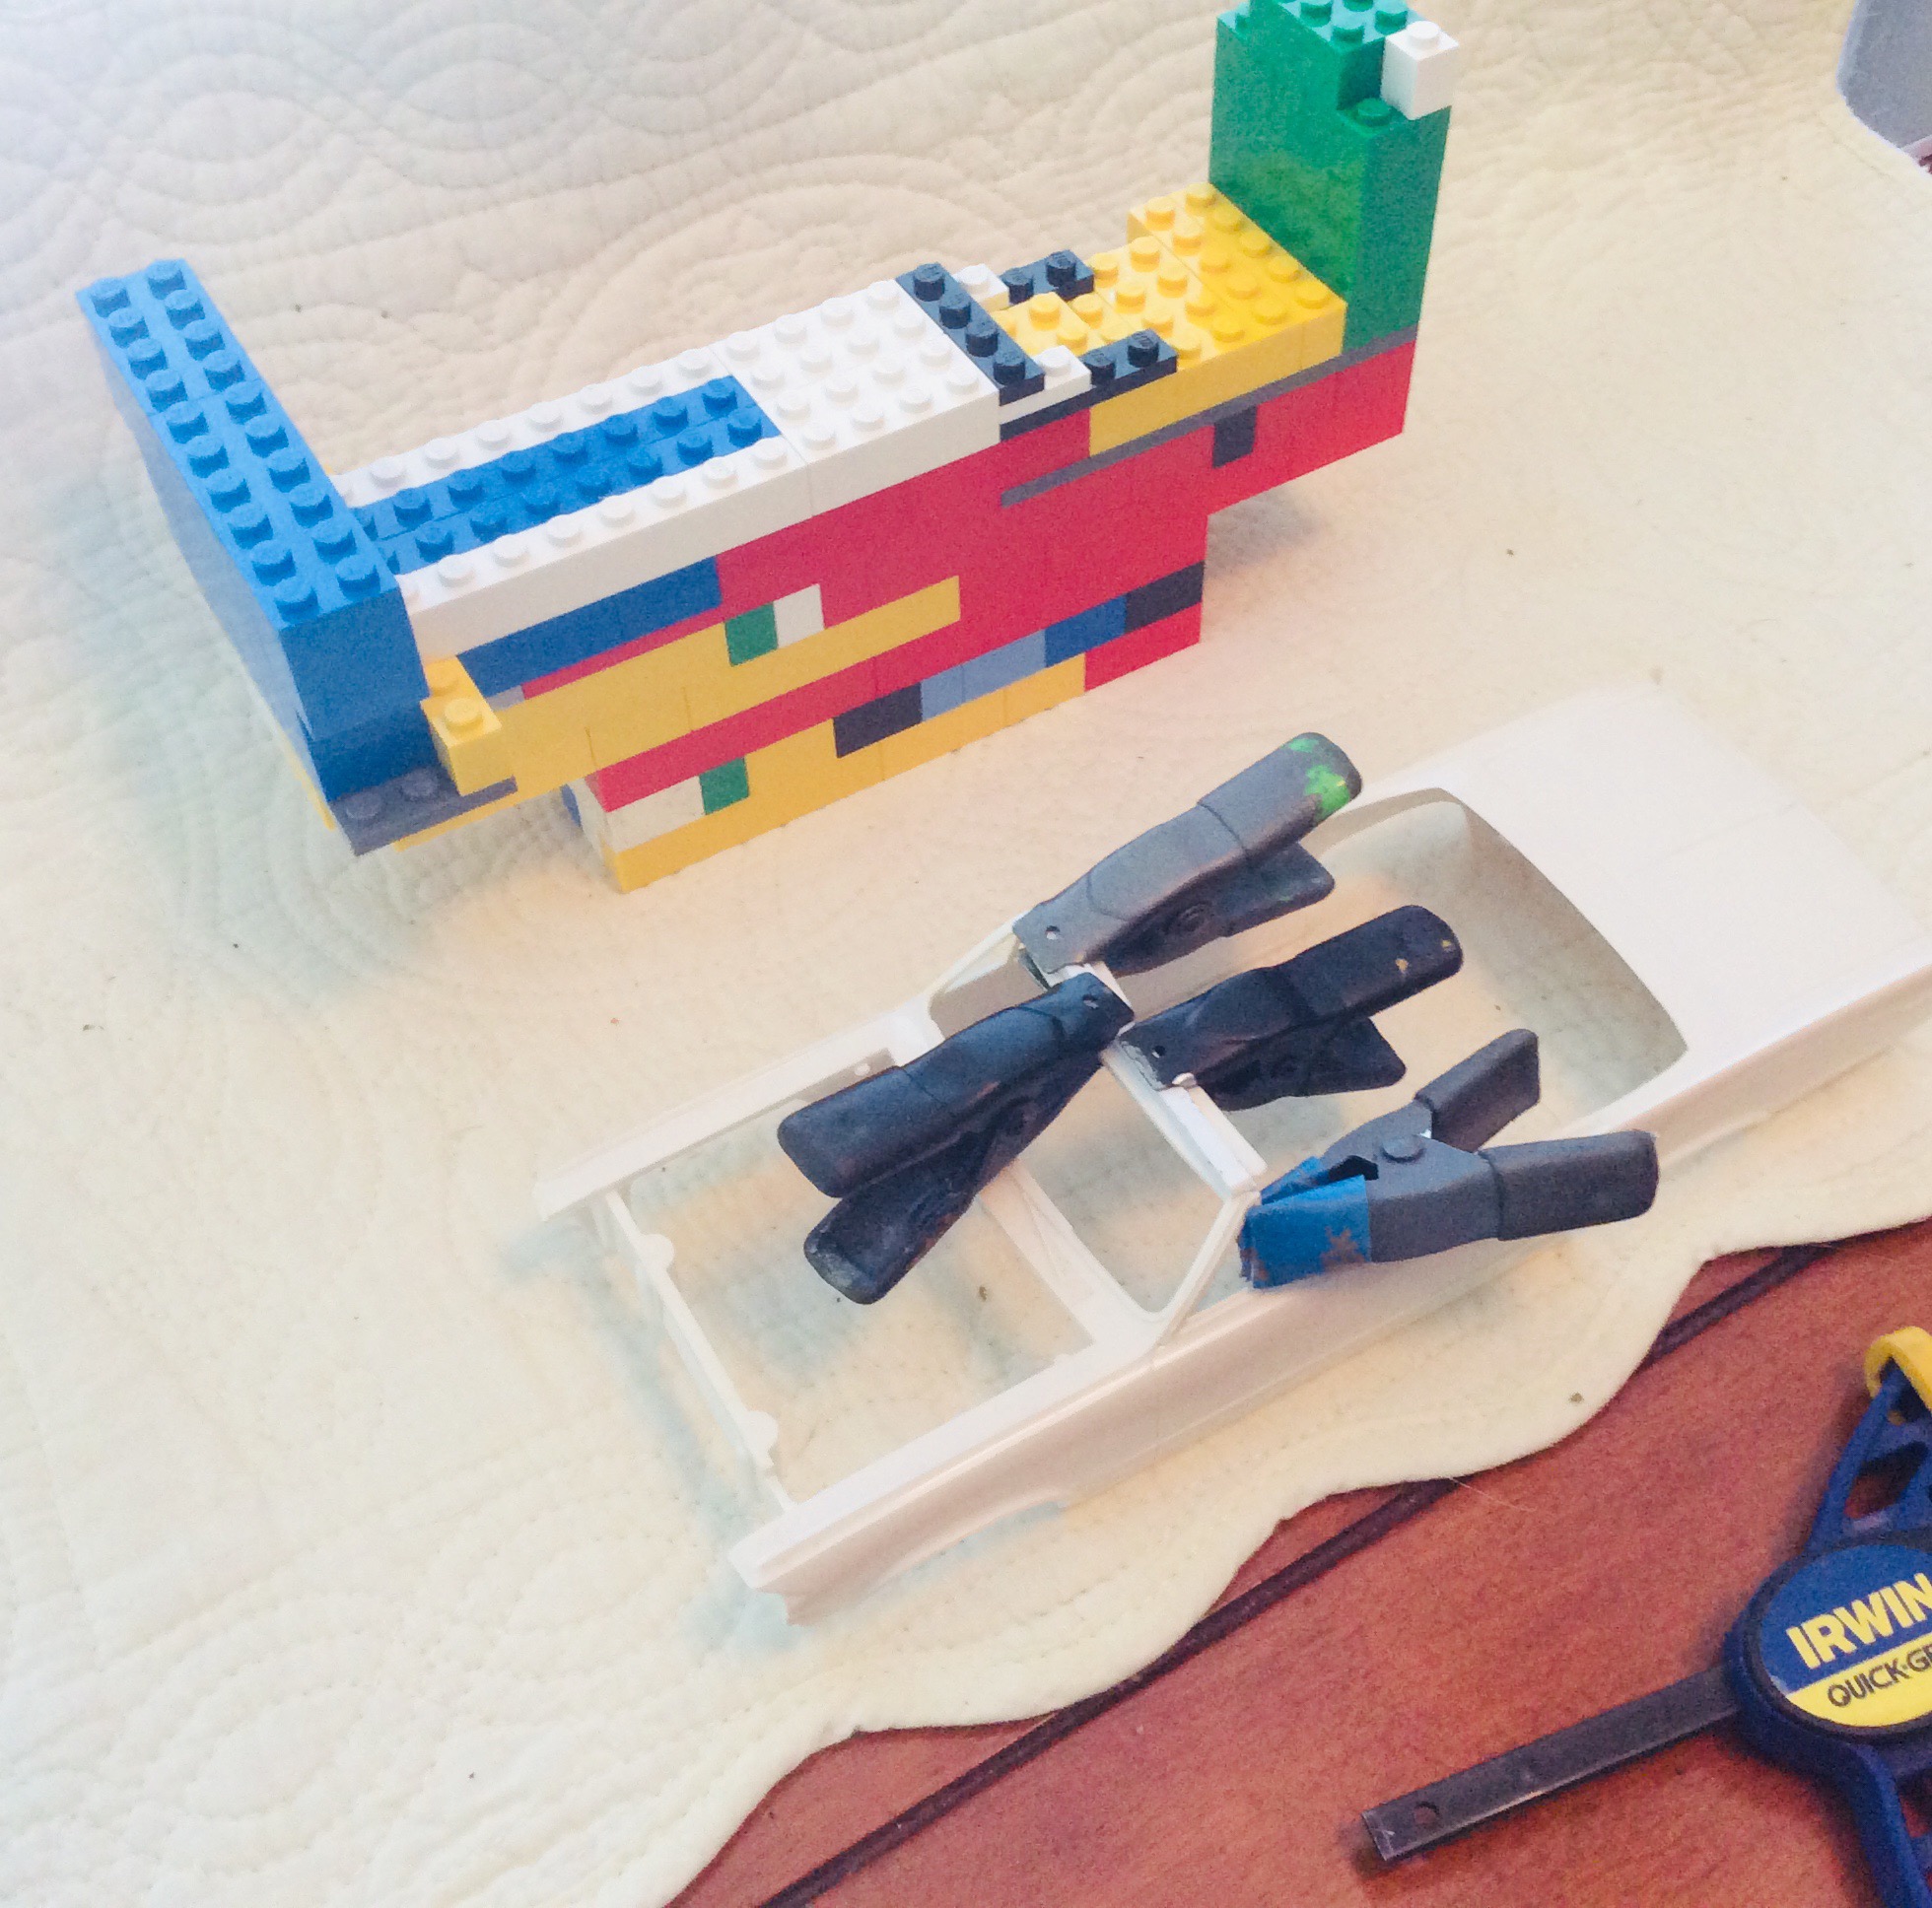
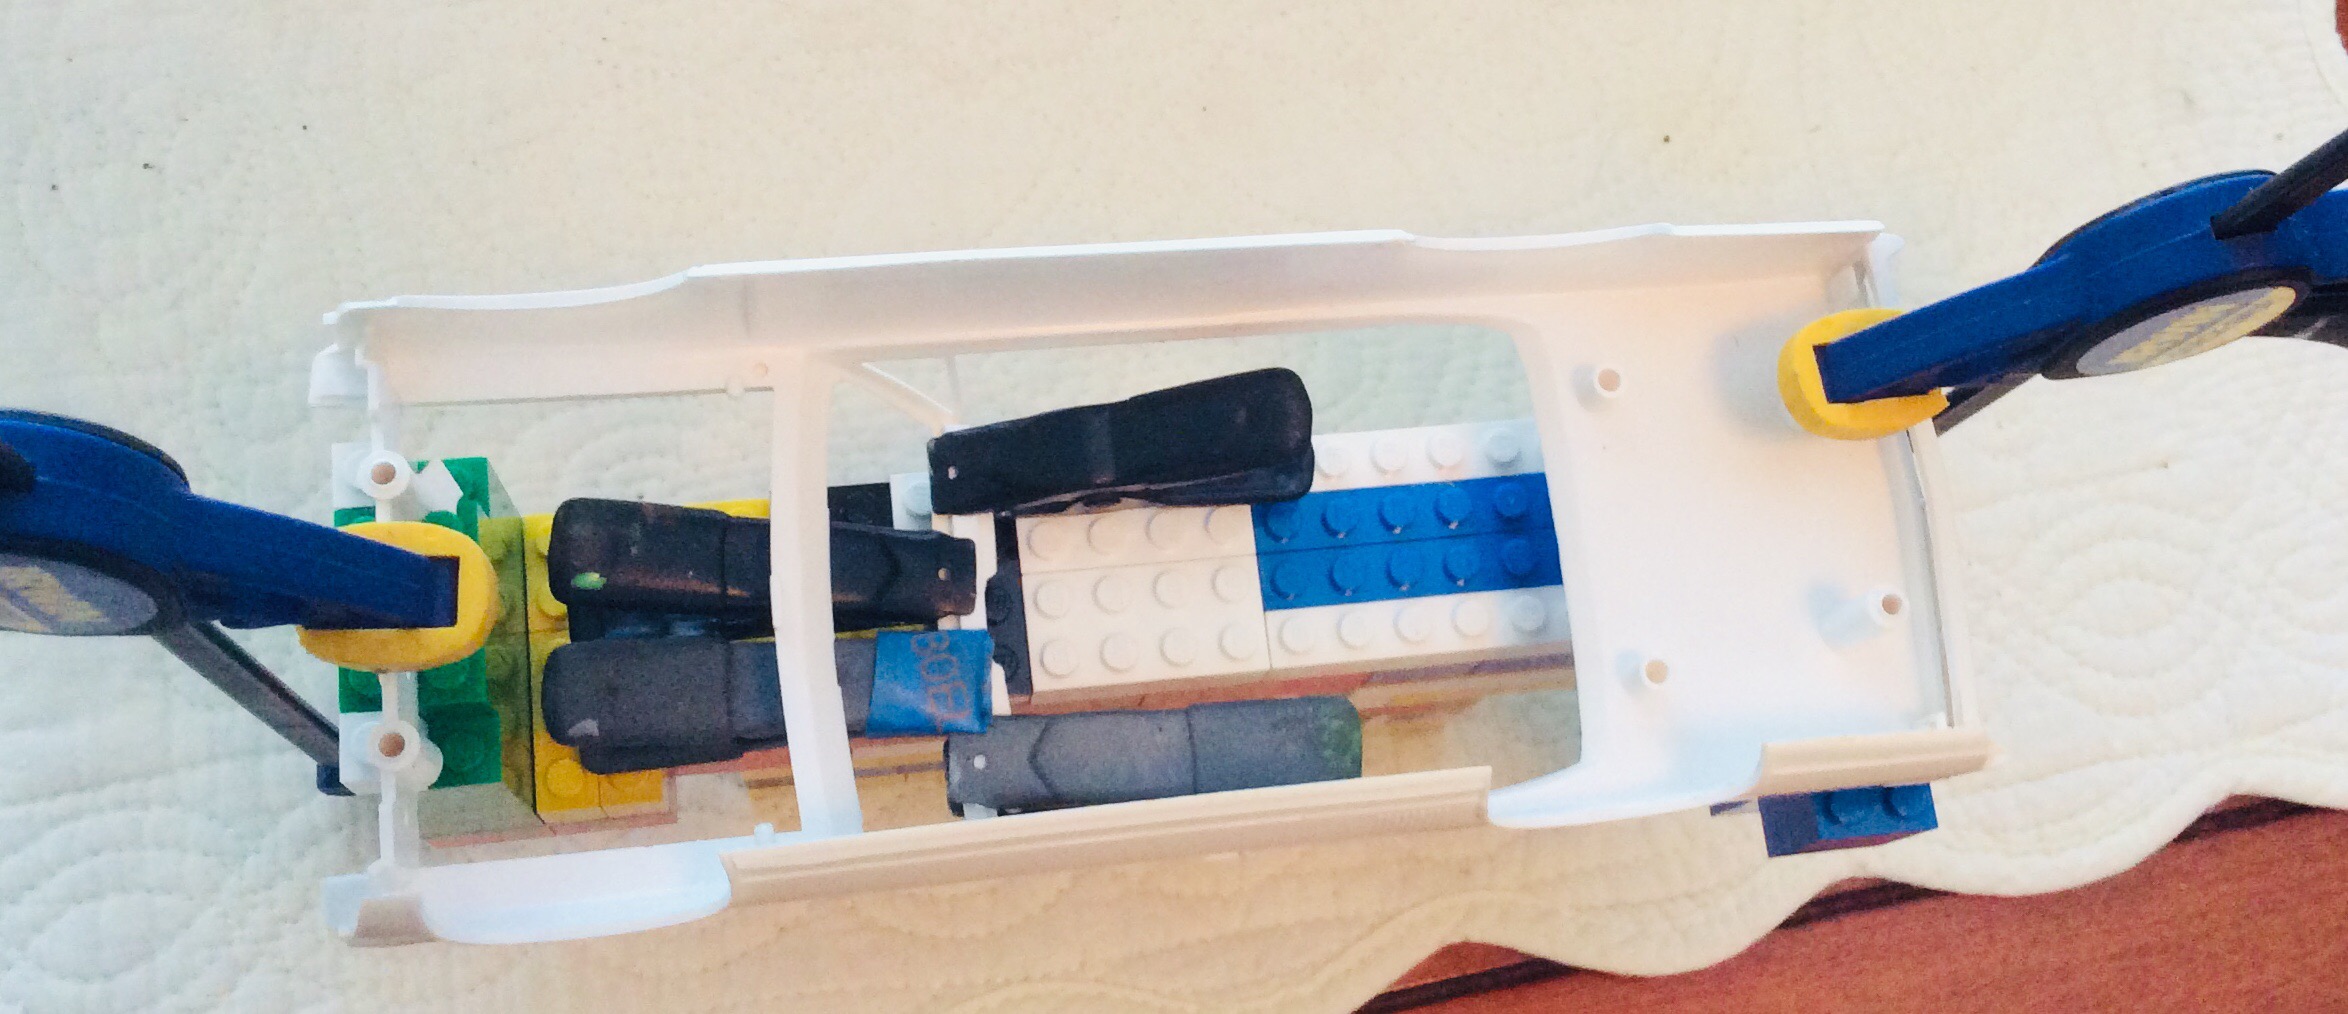
Sorry, forgot to mention that this 64 tempest body was warped pretty good and worse the windshield frame was crushed on the driver side although nothing broke. All problems have been fixed using the above method..... and patience.
-
I’m sure the subject of warped/ twisted bodies, windshield frames and frames has been discussed many times on here but I thought I’d take a moment to share my solution on here with everyone. If it’s been brought up before than I apologize in advance. Anyway here’s a few pics and brief explanation...
FIRST..... you must be patient. It’s takes up to a couple months to conform depending on the plastic. I went out and bought a big tub of a basic lego set. I assemble the legos to form a solid,even base to clamp the part to. When I’m happy with the contact points I clamp the part to the buck. Do not clamp it really hard as it could cause more warping or distortion. I clamp it until the part is to the point I want it to end up then go a tiny bit more. Next you’ll need a heat source. I have electric baseboard in one of the rooms in my house. I position the buck and part about 3 foot above the heater and leave it alone for at least a month. At that point I let the heat cycles from the heater do it’s thing. This method has worked for me EVERY time but like I said earlier it takes time. During the summer months this will likely not work for most as your heat will probably not be on. I save most of these repairs for the winter time for that reason. I would definitely caution against constant heat or putting the set up too close to the heat source. Hopefully this helps someone.


1990 Fox Mustang Hatchback
in Car Aftermarket / Resin / 3D Printed
Posted
I would love to pick one of these up. I had a 91 LX 5.0 that I’ve always wanted to build a model of. How or where can I pick one up ?