.jpg.ffffd6de7ec847b0c61e2096d0ad9616.jpg)
NZanglia
-
Posts
94 -
Joined
-
Last visited
Content Type
Profiles
Forums
Events
Gallery
Everything posted by NZanglia
-
.thumb.jpg.c4538b7b49e97f6c73cf035660a5985b.jpg)
"Bring Out Your Dead" Completion Build--ROUND 2 Is On!
NZanglia replied to Snake45's topic in WIP: Model Cars
Yup. Put me in for next round. too much to do to finish inside a week. Will give me a change to clean out my spraybooth area @Misha Goddammit i love those Porsches. I have the Big Jagermesiter Tamiya Kit to rebuild now that i have finally found the replacement glass and translucent tan fuel tank sprue. Built it maybe 30 years ago with my dad. So I plan on rebuilding it and giving it to him as a gift. Good times back then -
Trying to make something cool out of the AMT Rod-Rageous slammer
NZanglia replied to OldNYJim's topic in WIP: Model Cars
Nice work. The first photo looks more like a close up of a hot wheels car rather than a model kit. The re-work looks so much better. -
"Bring Out Your Dead" Completion Build--ROUND 2 Is On!
NZanglia replied to Snake45's topic in WIP: Model Cars
Im not dead yet!!!!!! I was sucked into a four month time vortex that was the renovation of my Sons bedroom that had a lot of underlying unseen issues to be fixed once the plasterboard was removed. Sadly during this period My son was relocated to my hobby space and everything was packed up. Just about set up again but not in time to gitter done for this period but will have to target the next one. The AMT 64 Mustang modified is back on the table. Will try and get pics tonight. The body and hood is painted. The hood polished and decalled awaiting a wax coat. The body is waiting for the clear to dry again. Polished a little too much and burned through the color in a few spots so had to fix that. Will look to polish and decal tomorrow night before moving on to painting the chassis frame and interior tinwork. -
"Bring Out Your Dead" Completion Build--ROUND 2 Is On!
NZanglia replied to Snake45's topic in WIP: Model Cars
Some nice progress from everyone. Even I got some more paint on plastic myself
-
Thanks larman. It's slow going with parenting and household chores taking most of my spare time but I'm happy with how everything is turning out.
-
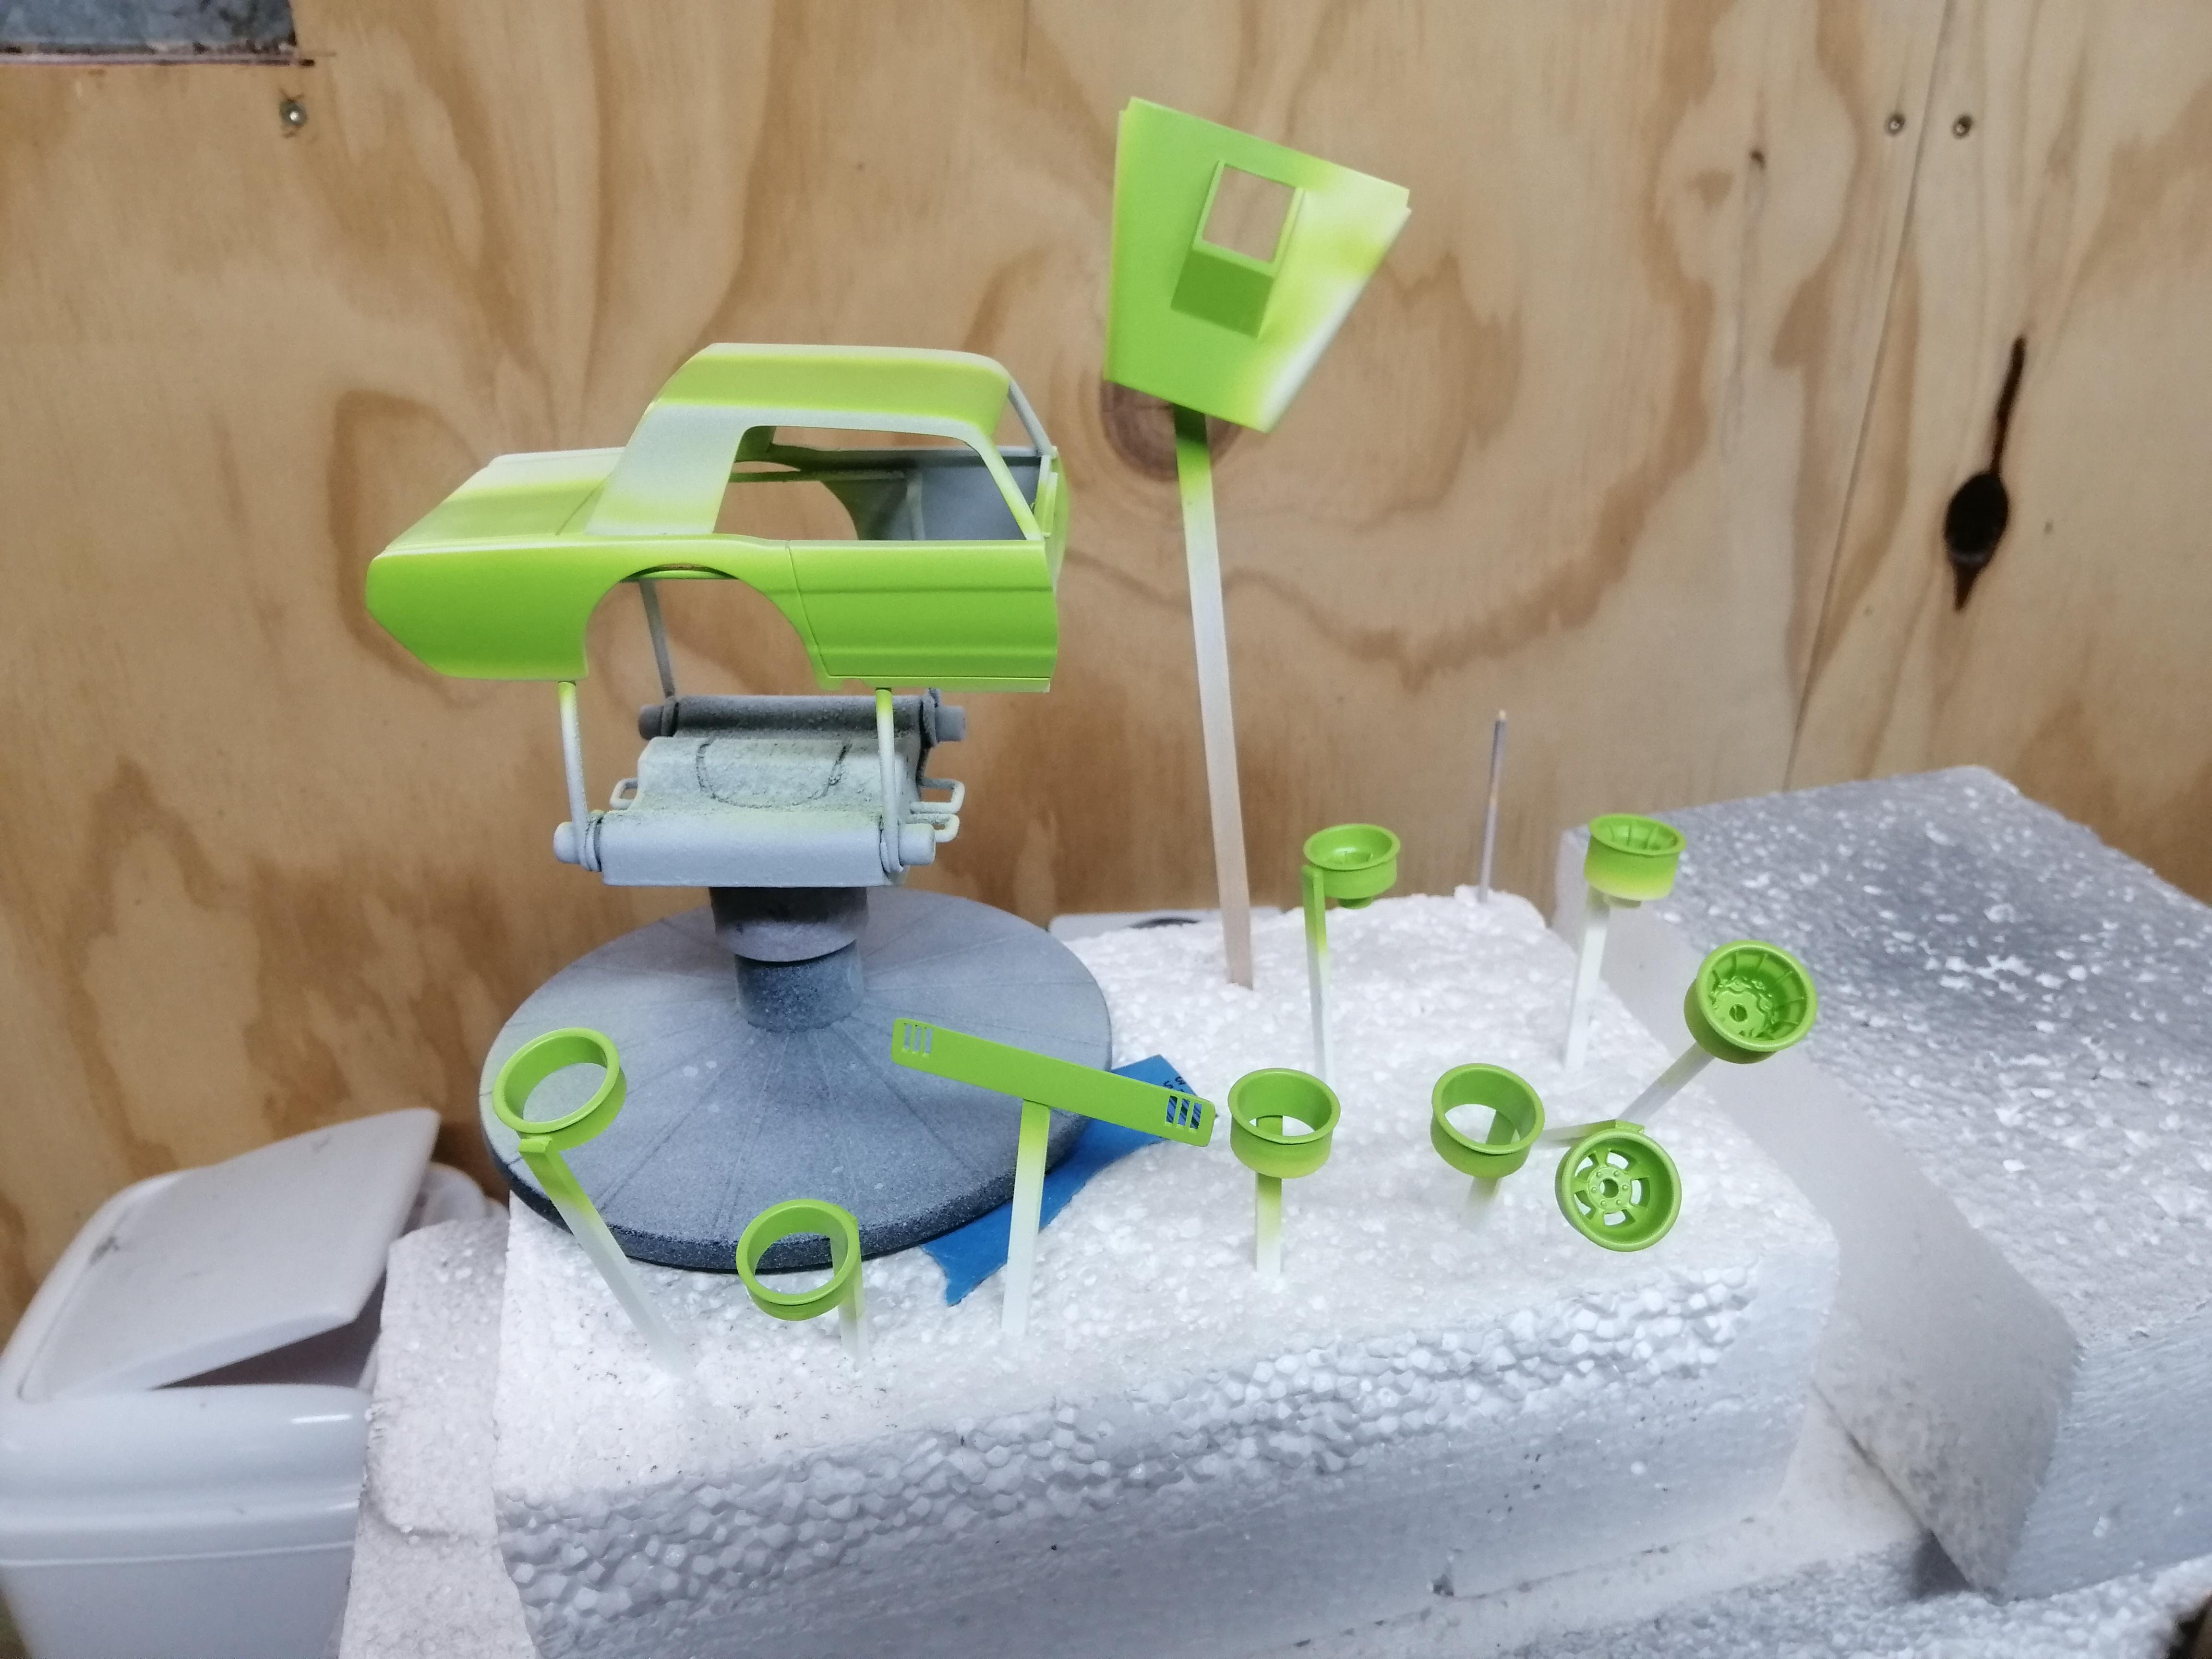
And today I got the rims and body panels covered in bright lime green. Once dry the body will me masked and the predominant colour gloss black will be layed down before gloss coating all parts.
-
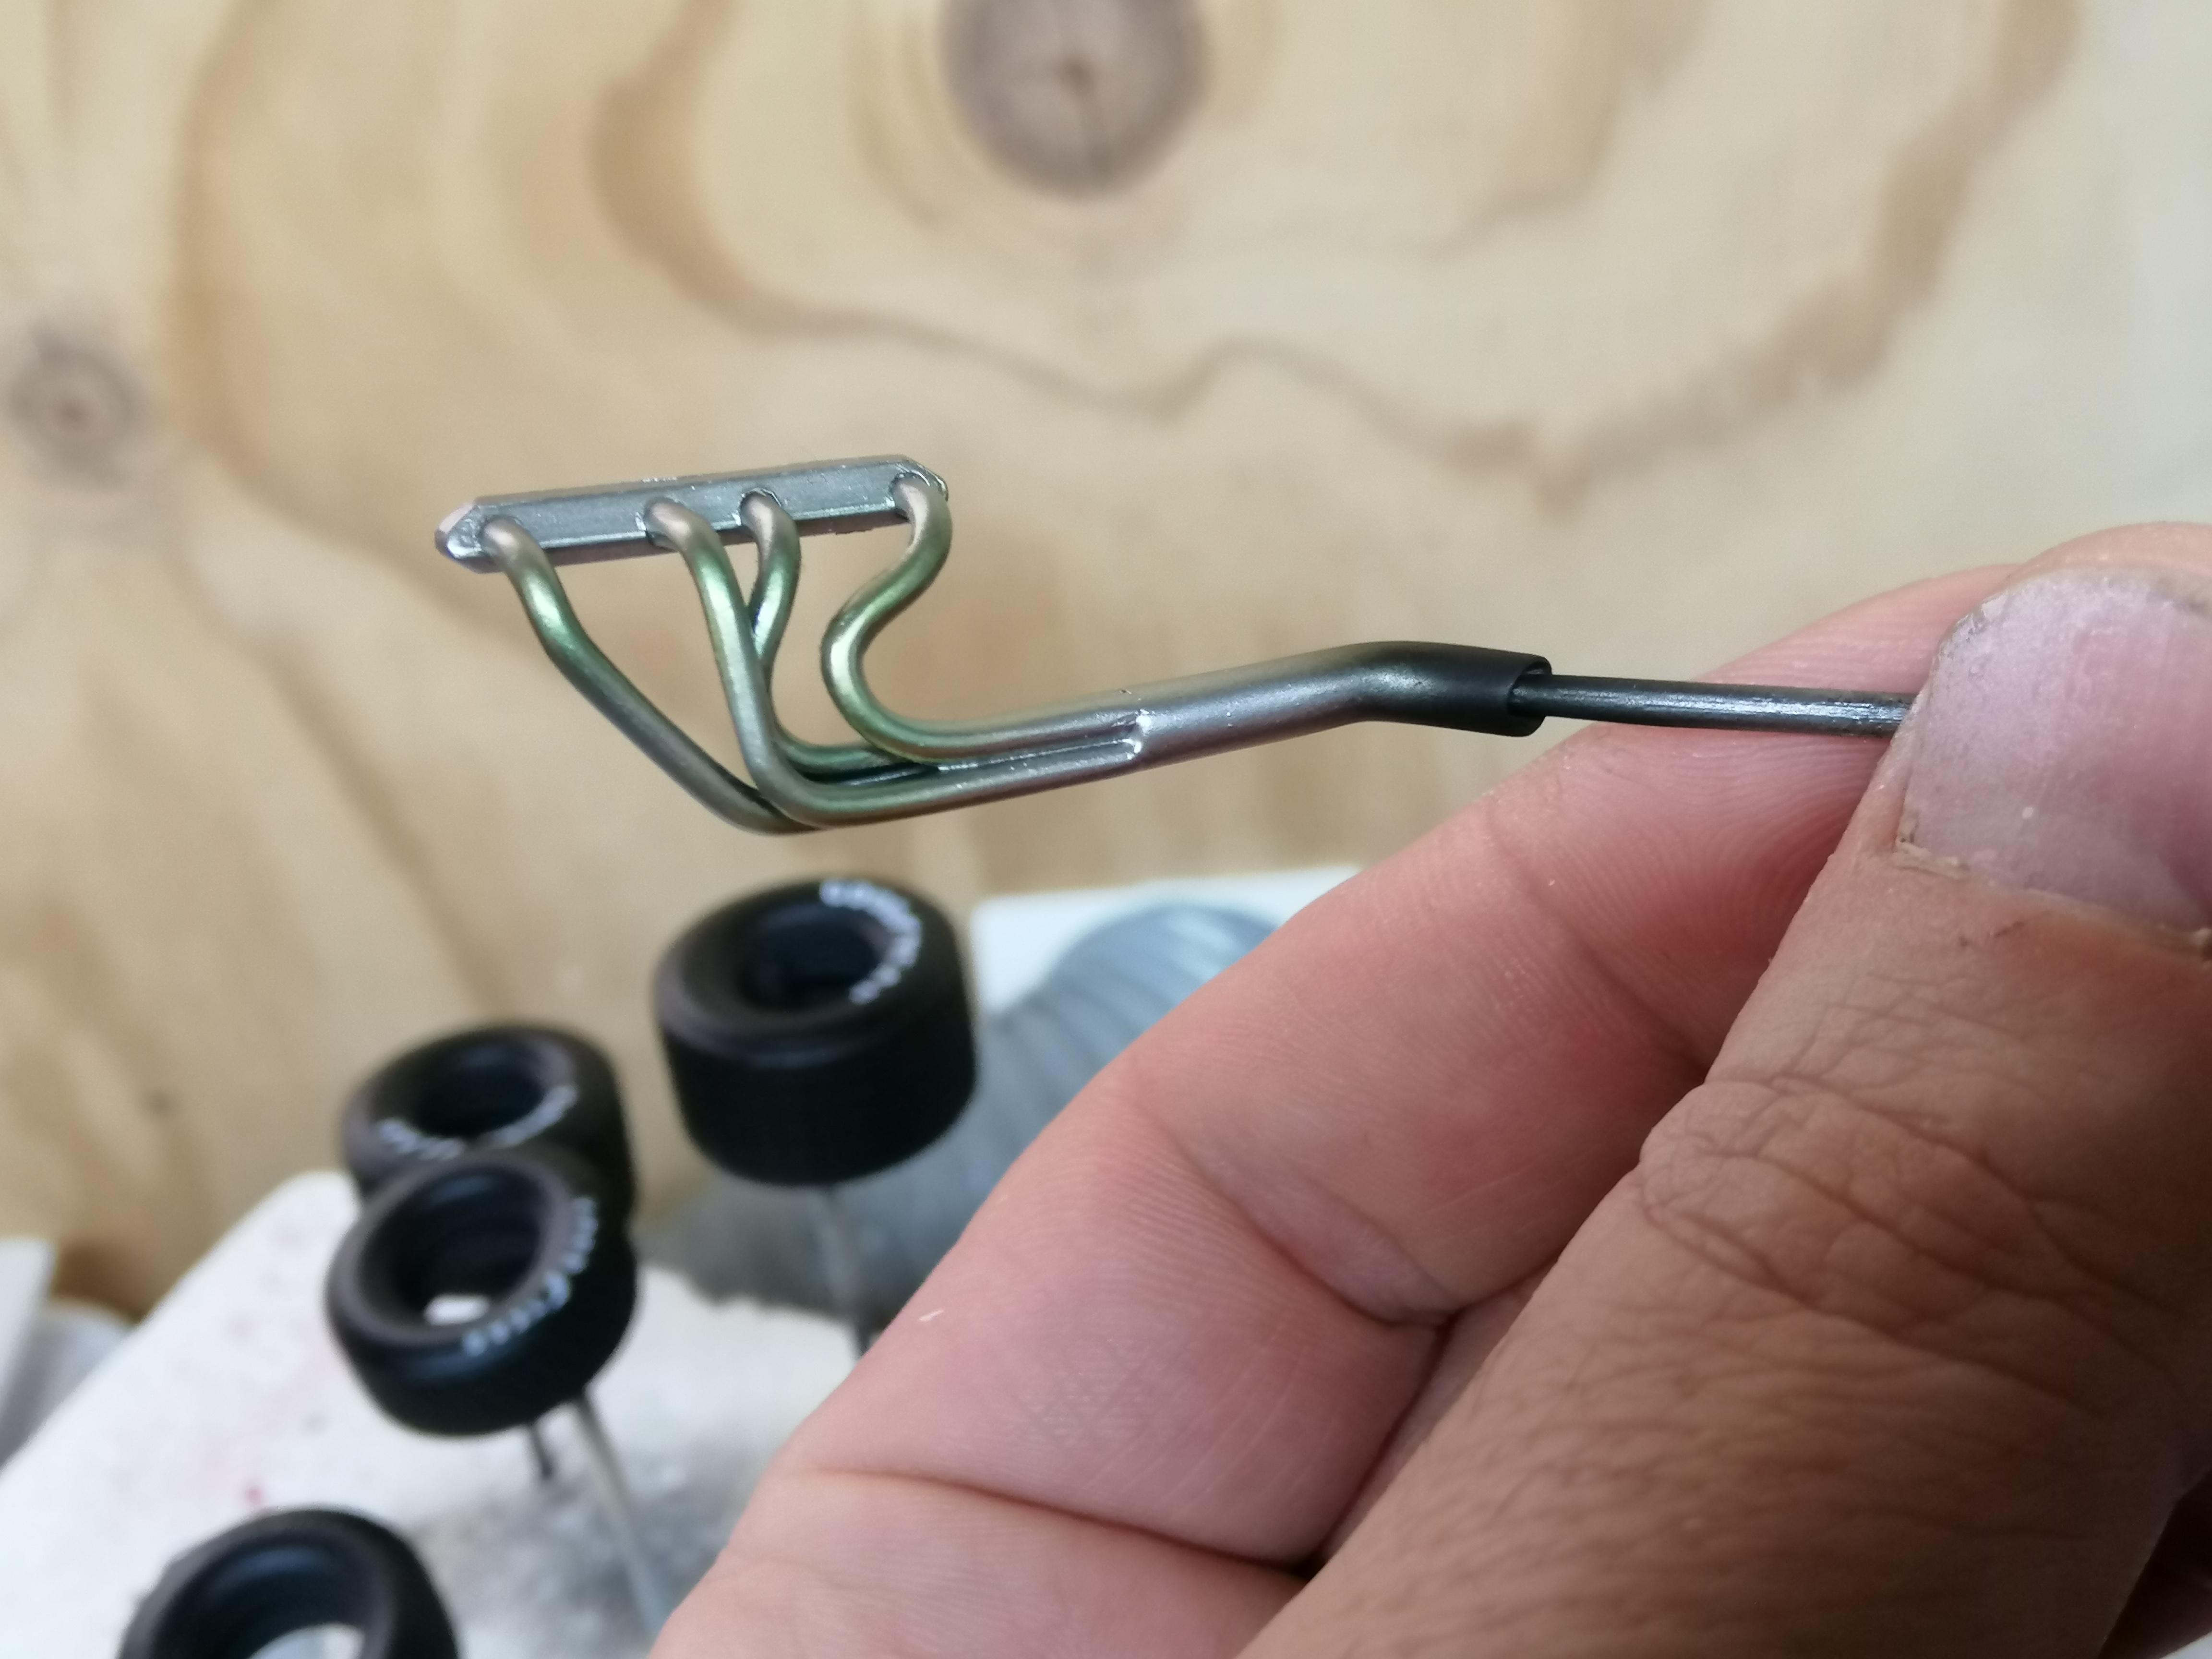
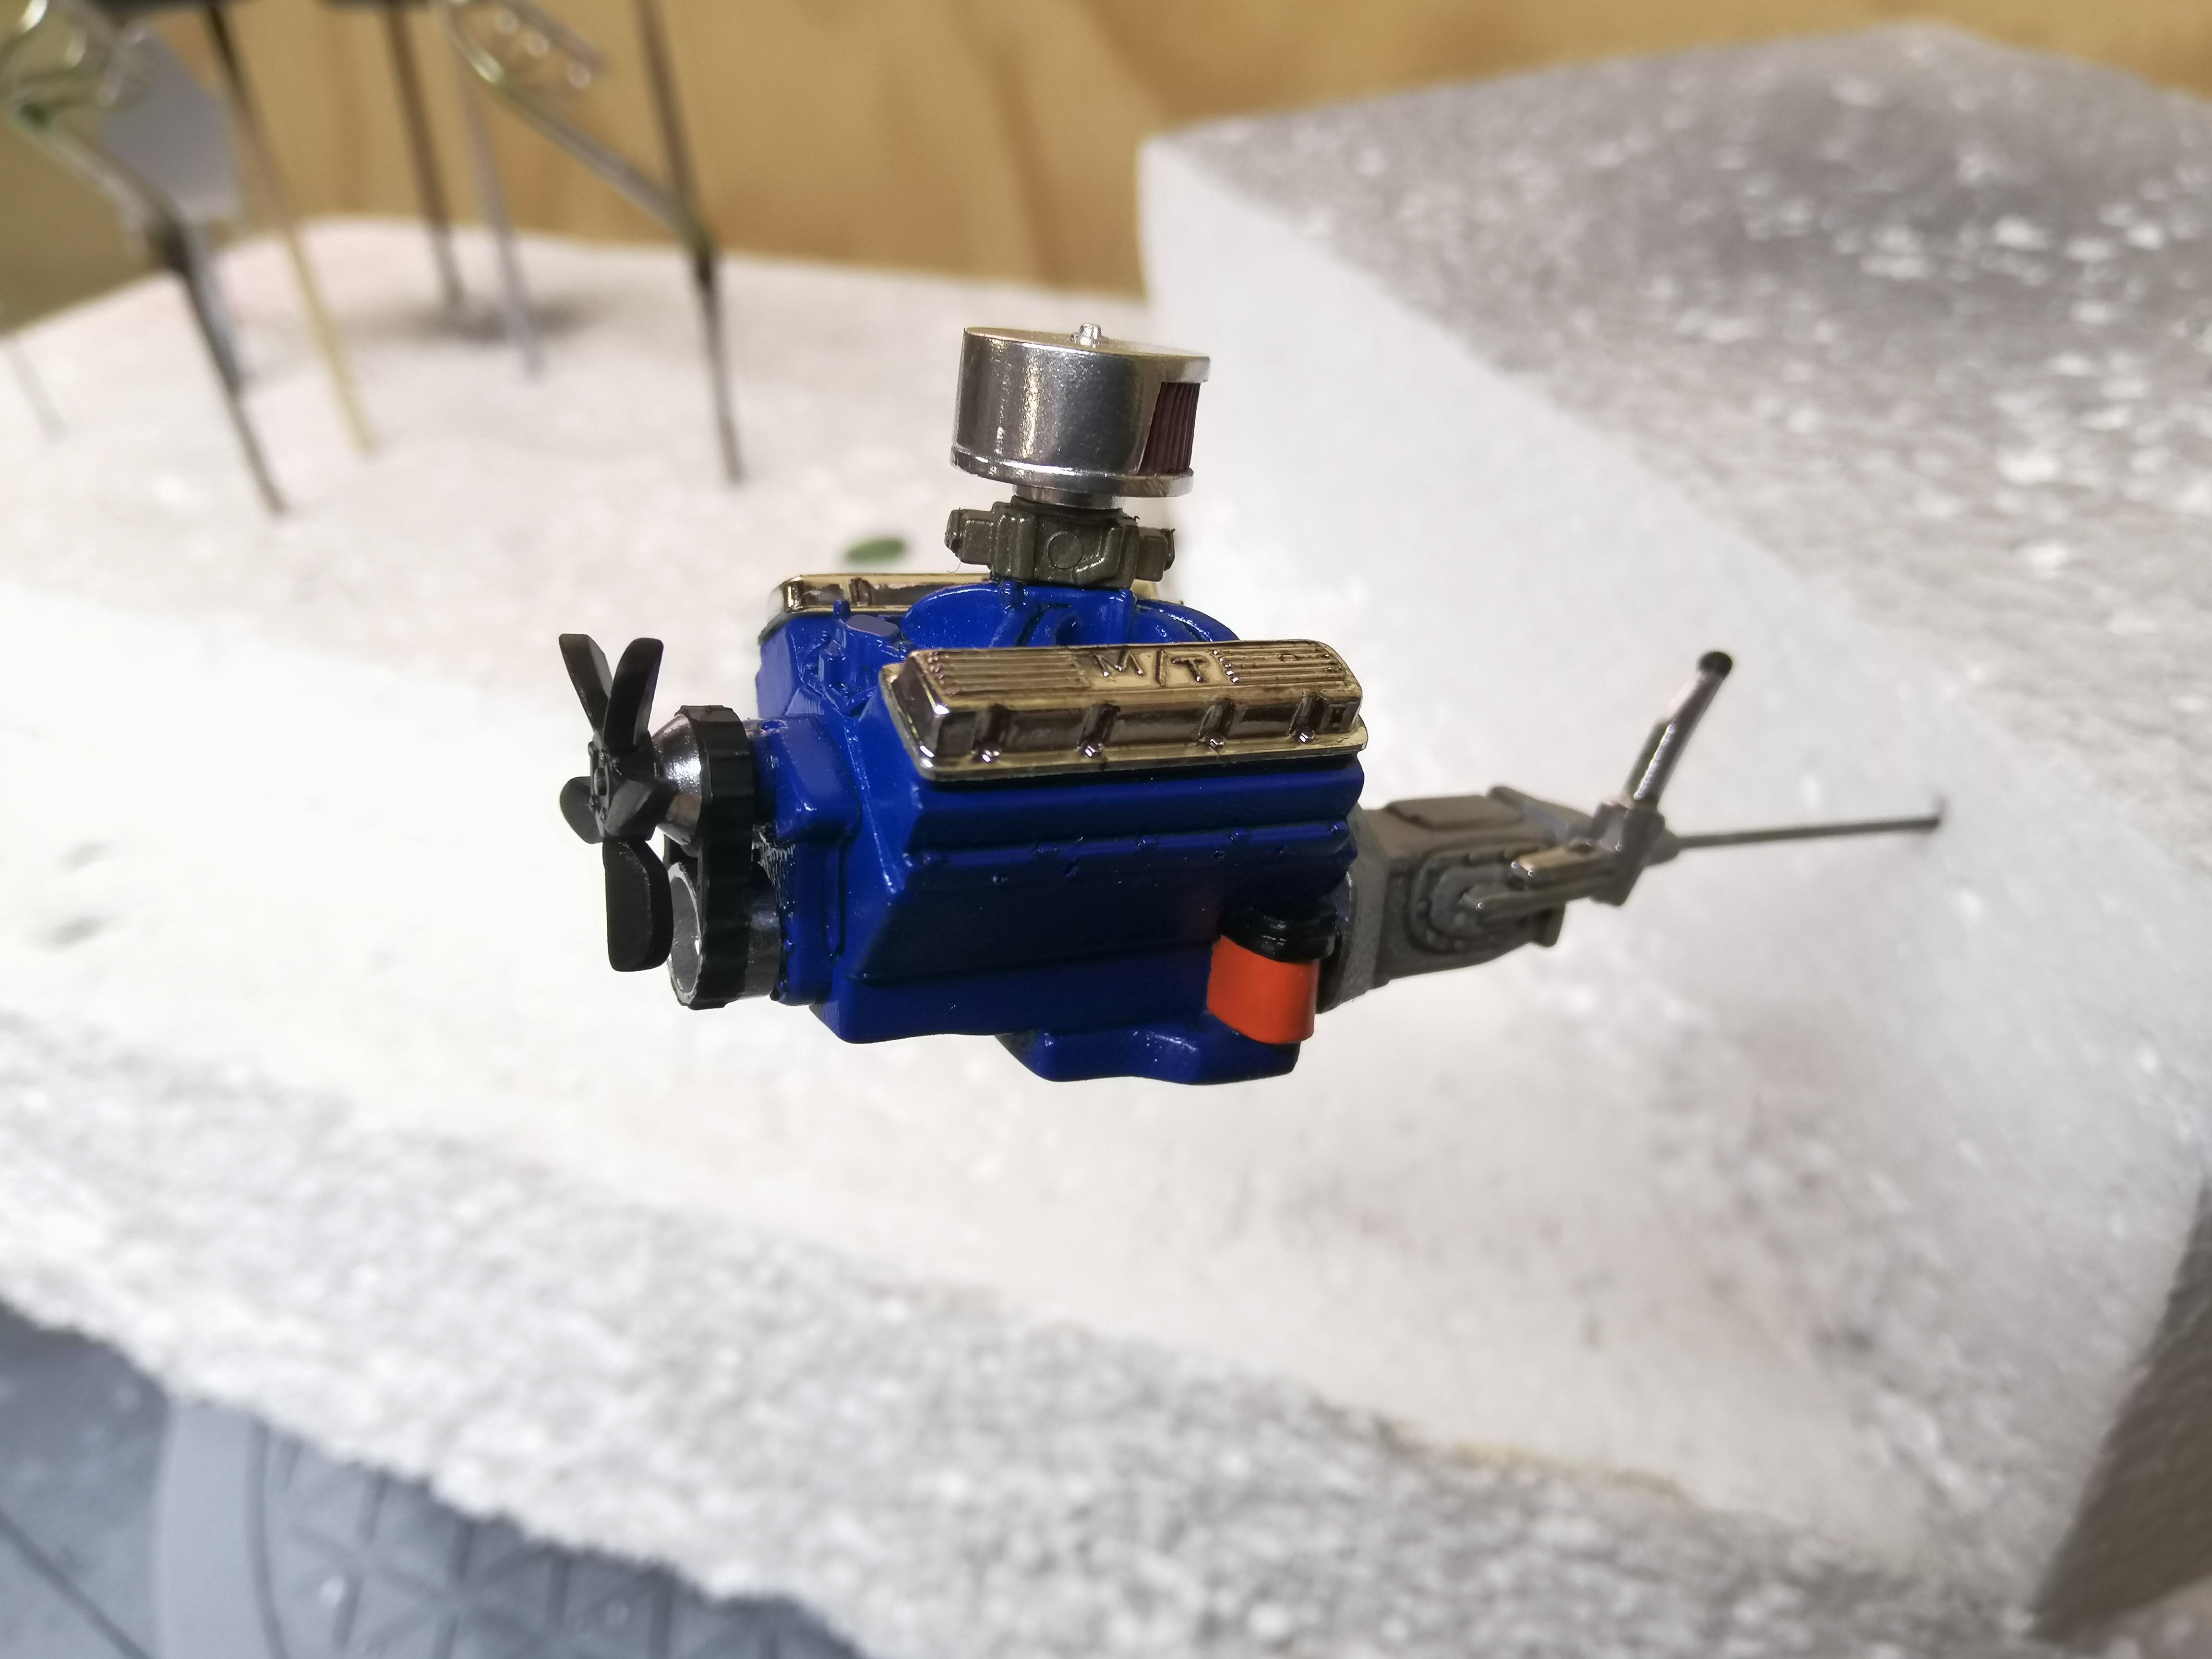
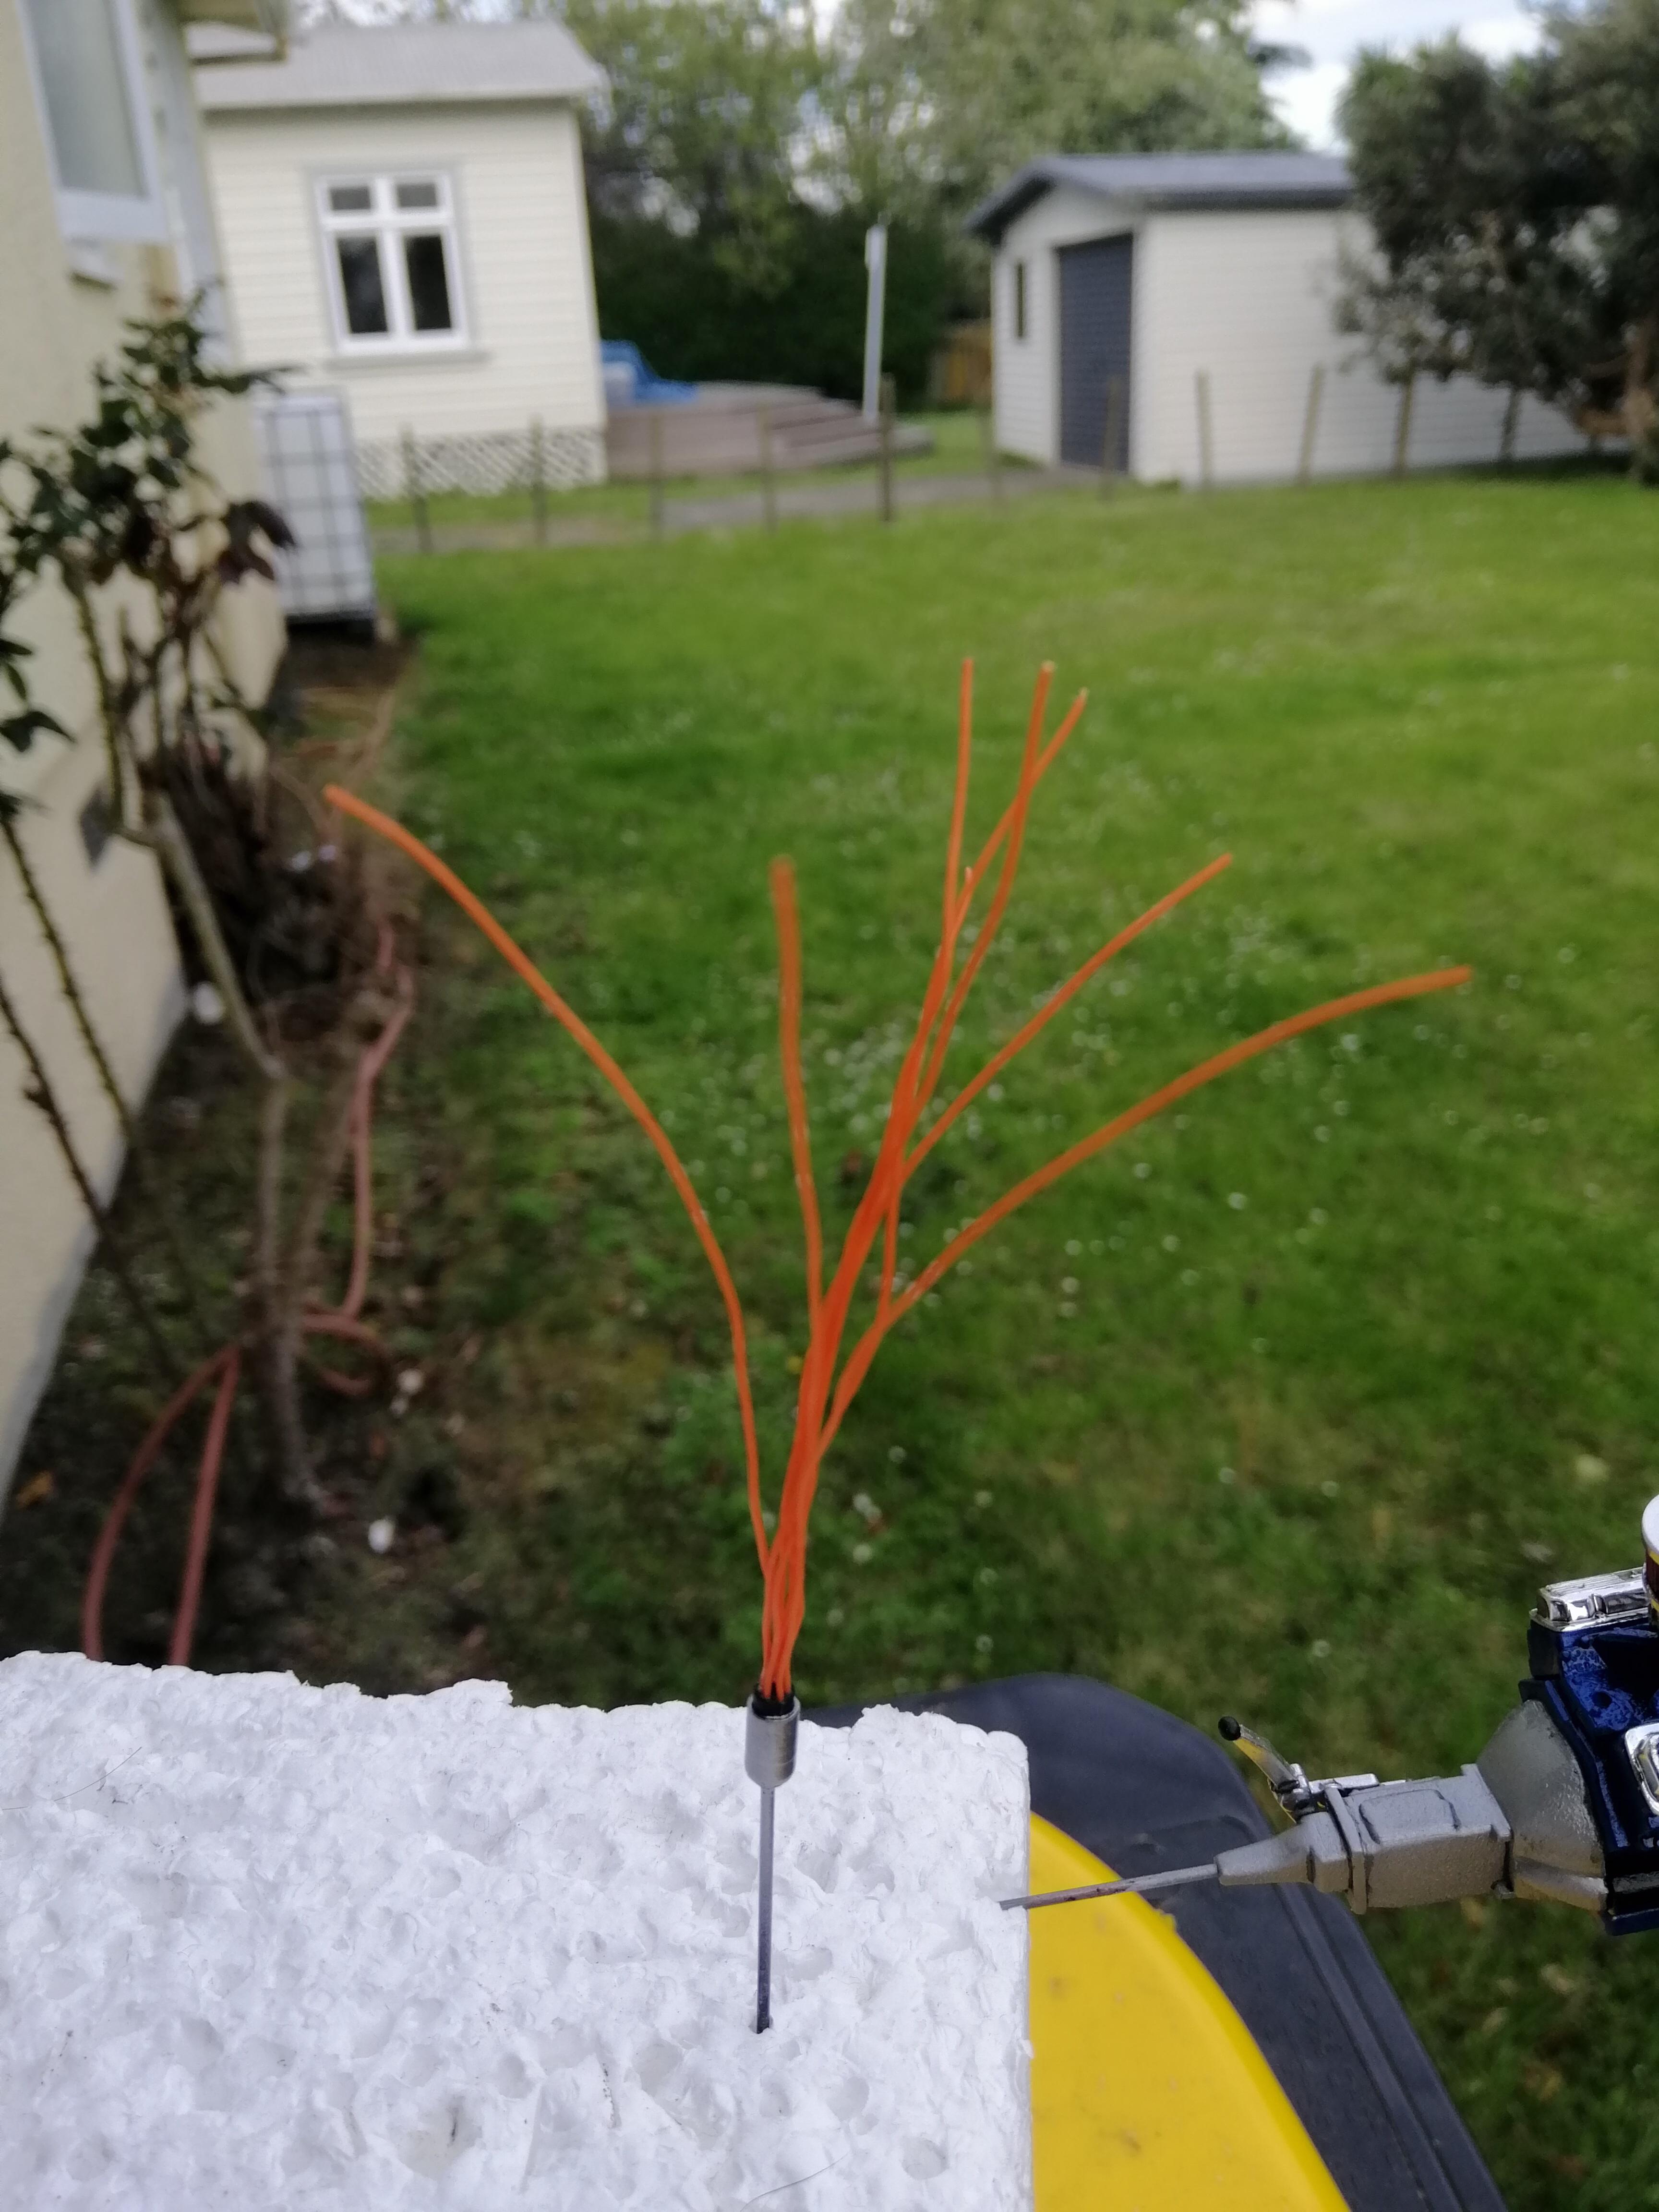
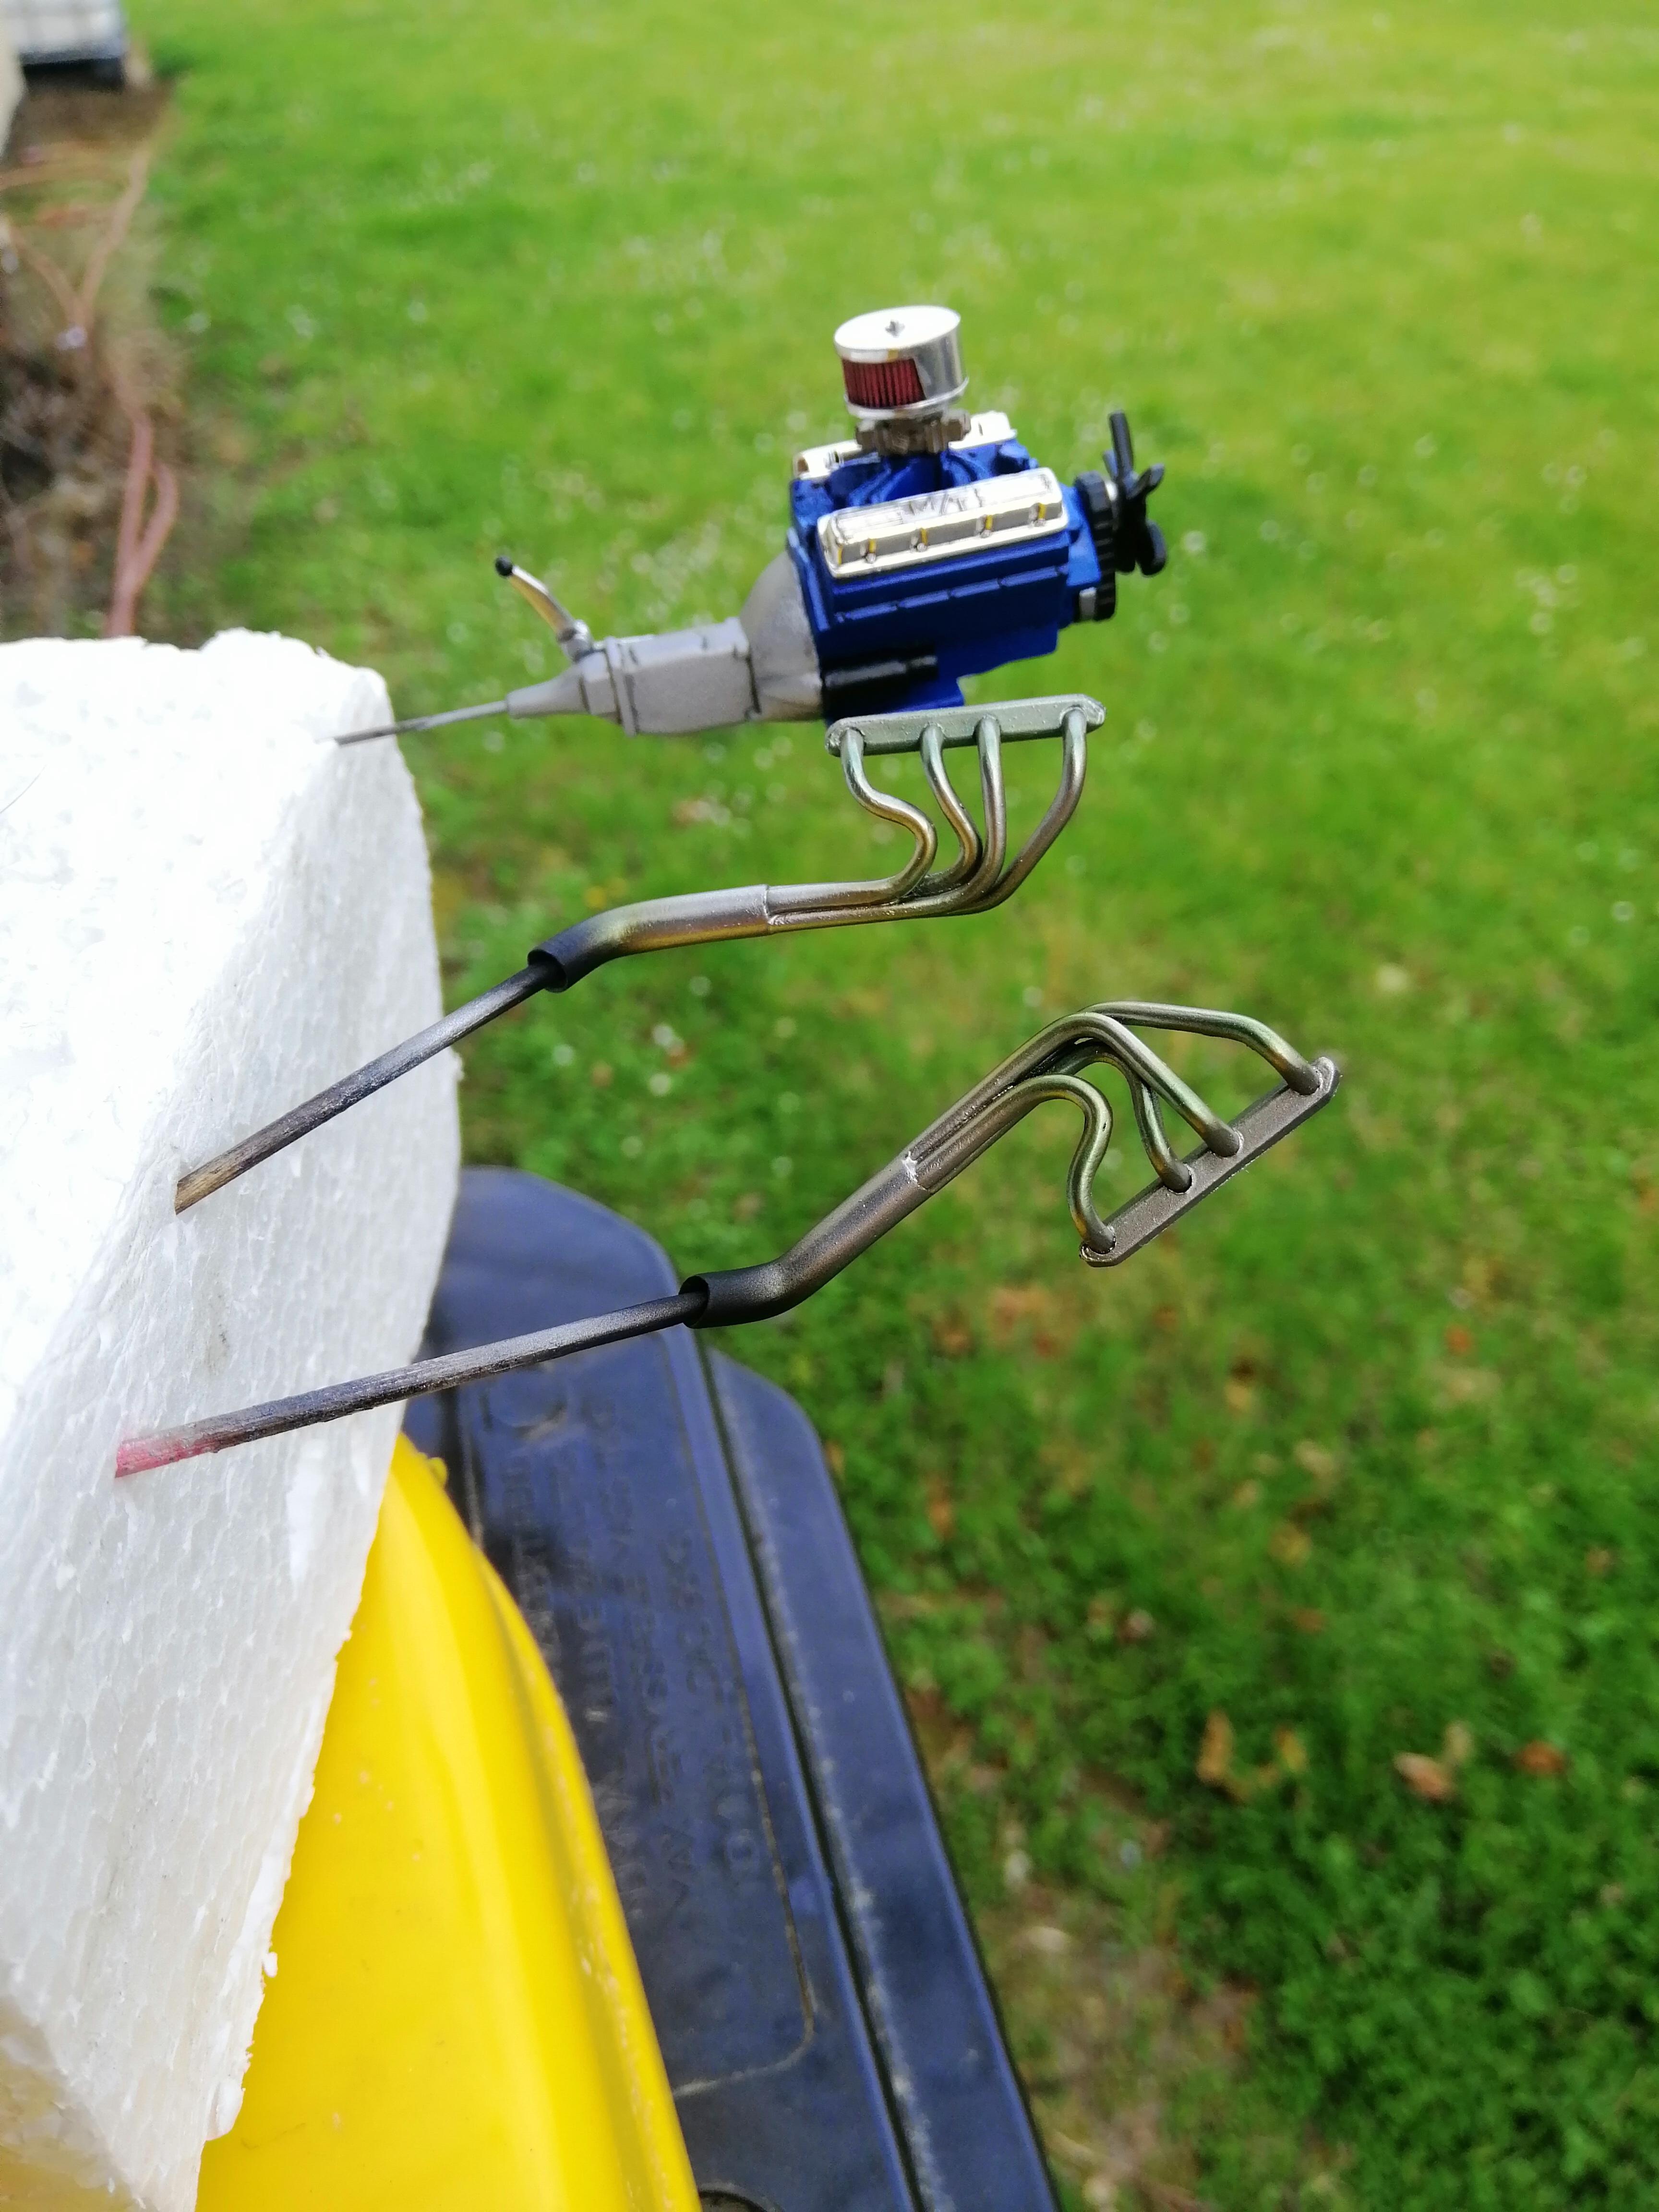
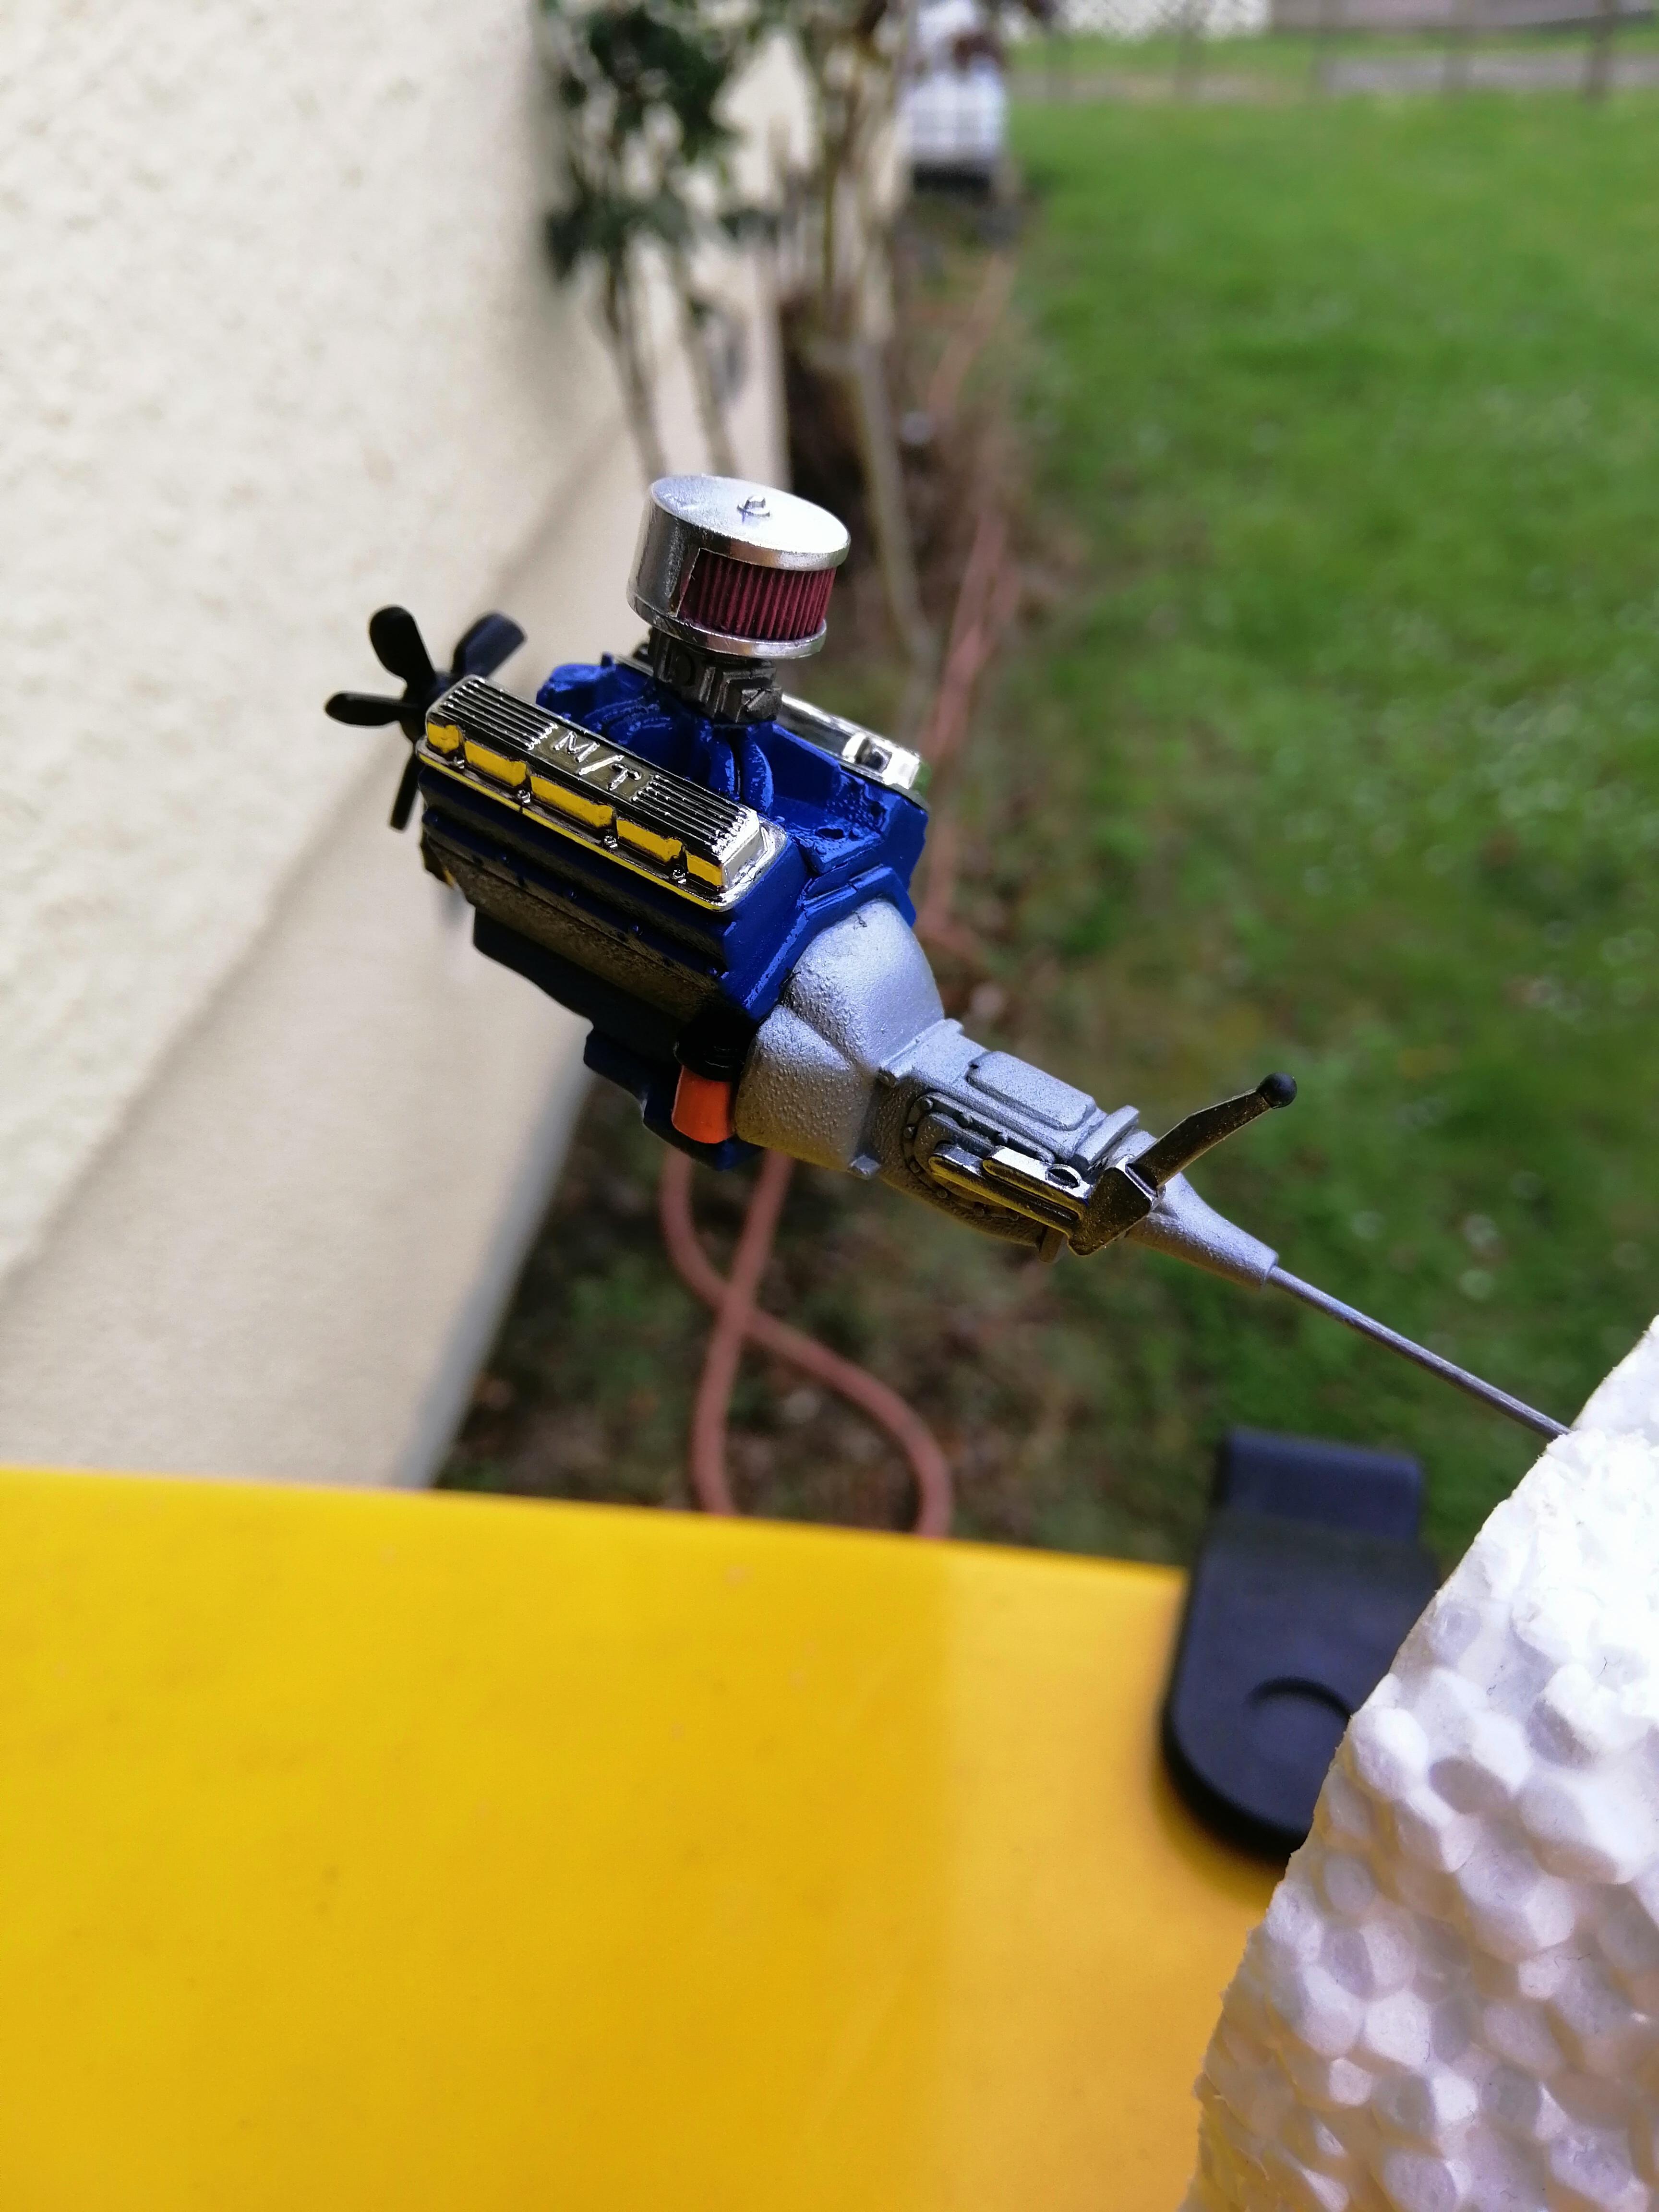
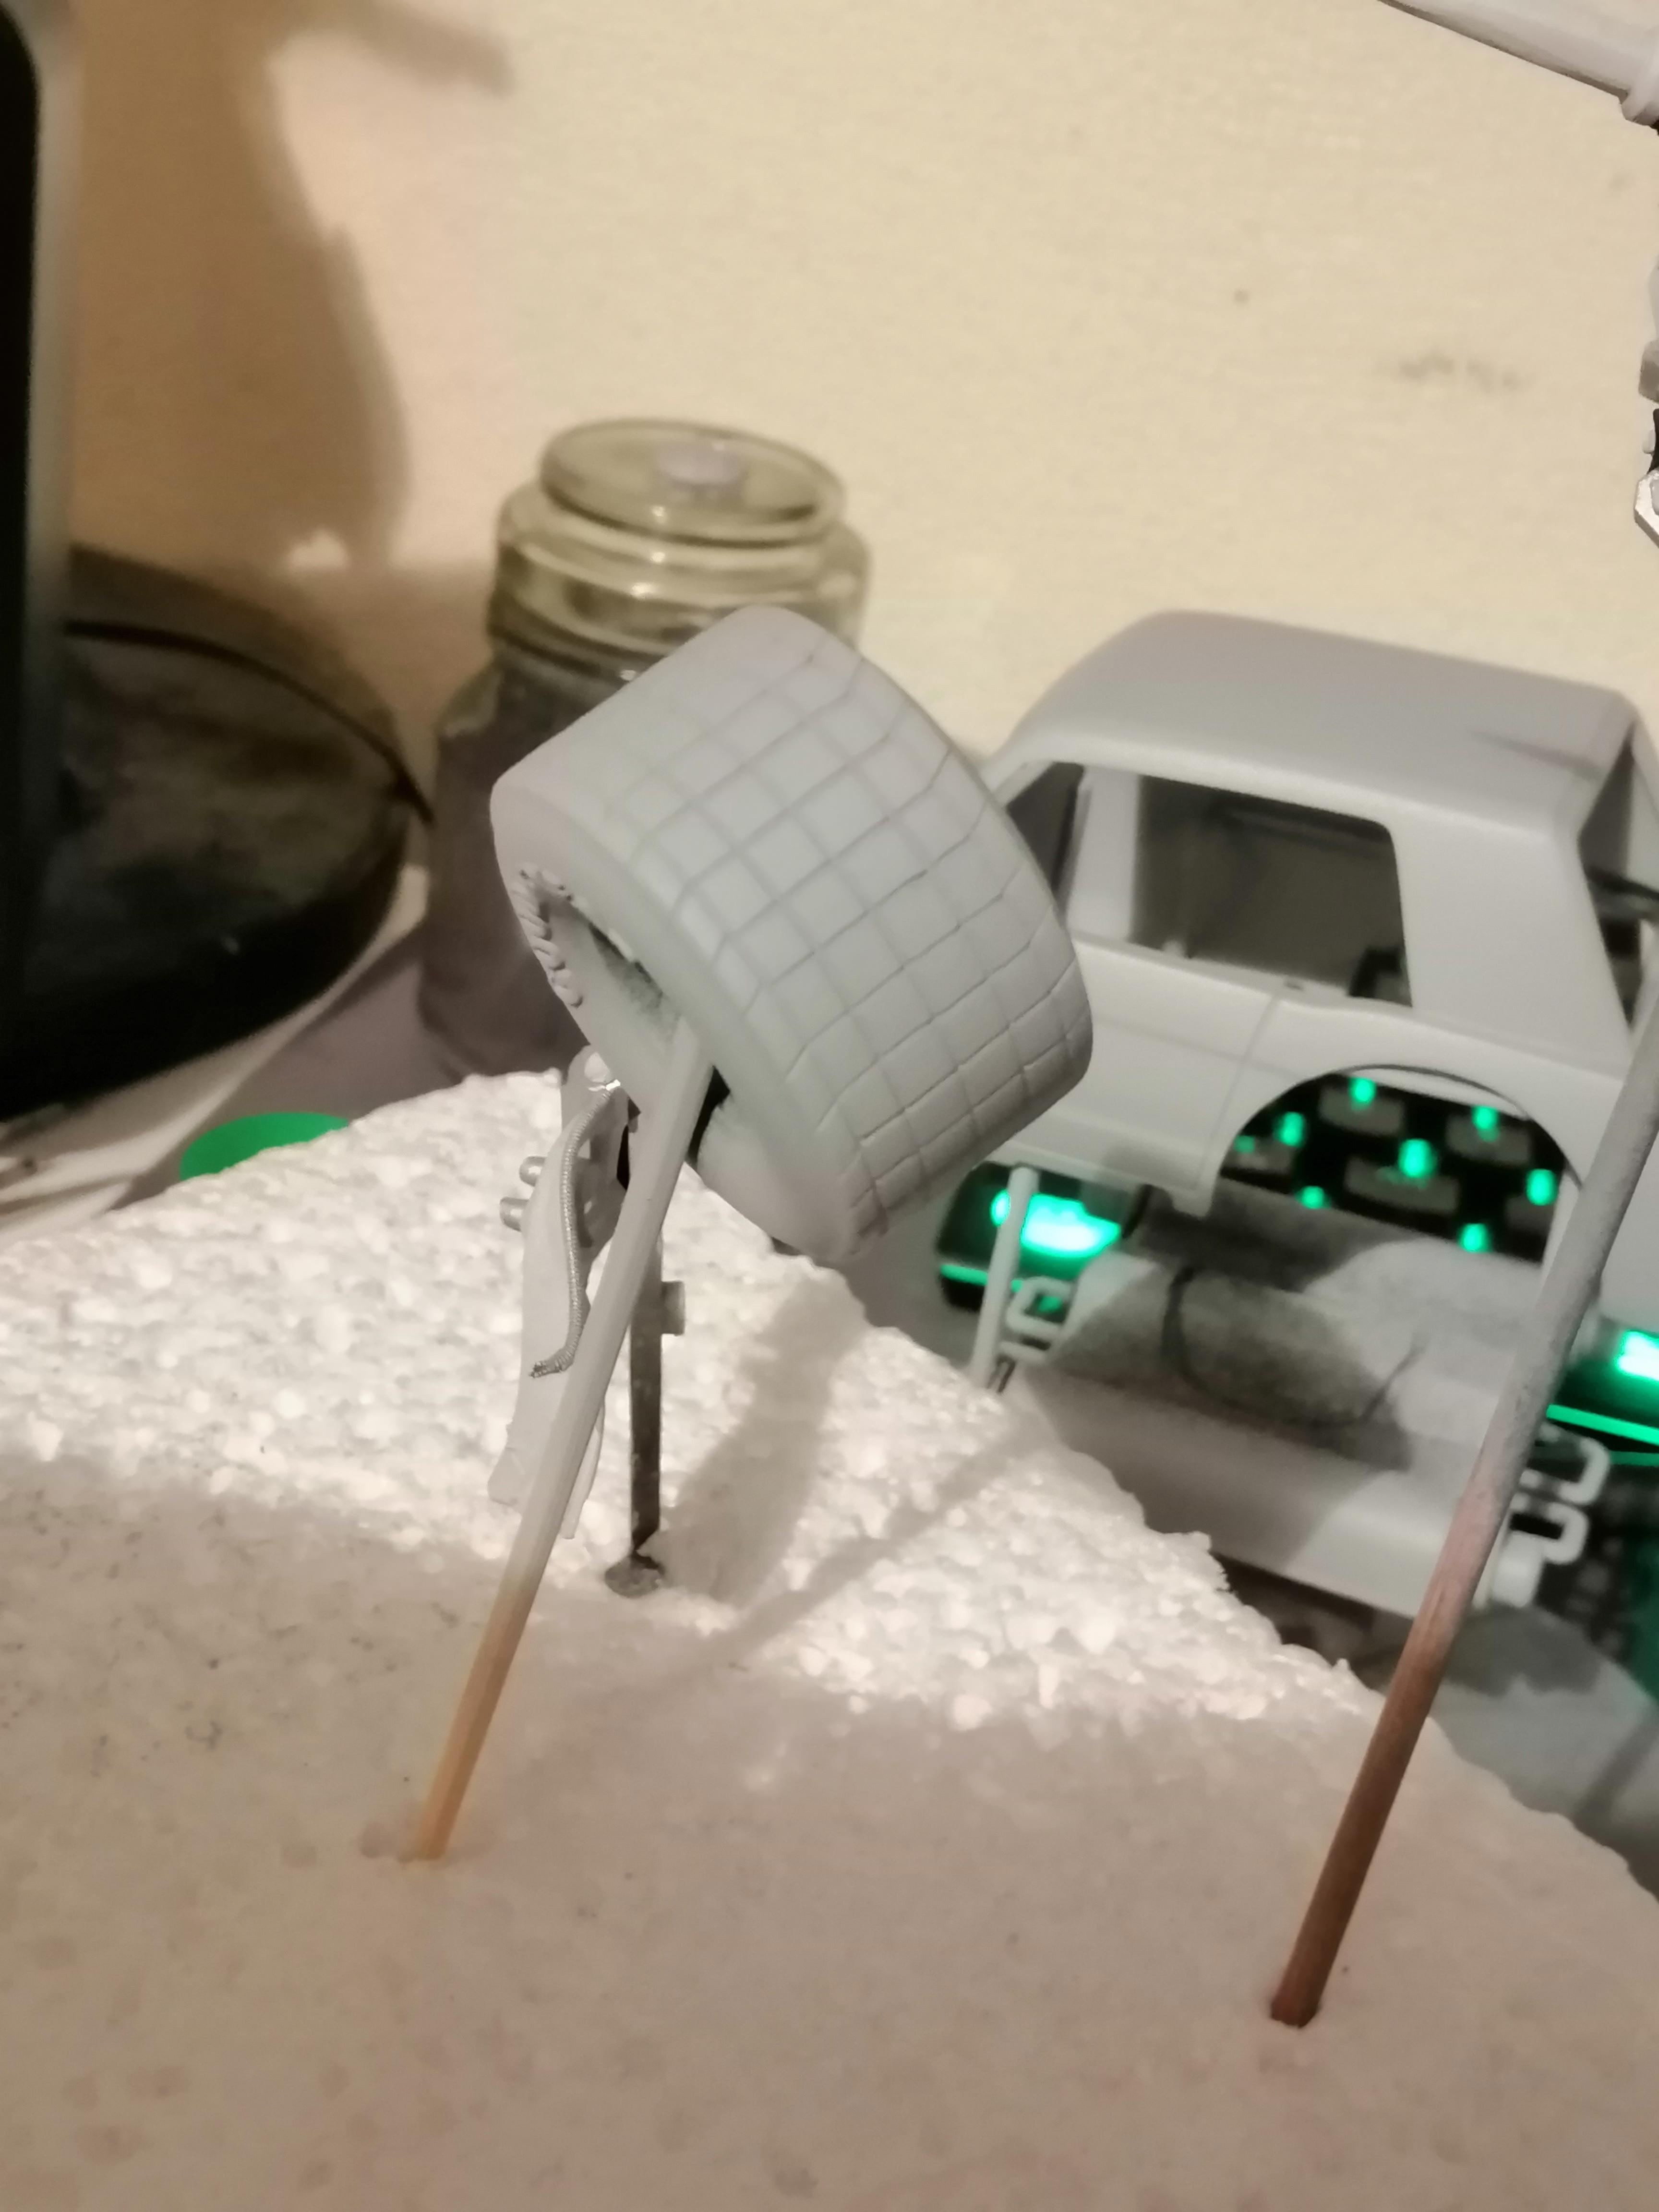
And here we have the photos of the painted tyres, magneto drilled and wired ready for installation, headers with slight heat discolouration and the engine
-
The aftermath of a painting session. More photos once all dry
-
"Bring Out Your Dead" Completion Build--ROUND 2 Is On!
NZanglia replied to Snake45's topic in WIP: Model Cars
Hope to post in the next day or two. I have the Tyres painted currently and the motor needs a bit more paint detailing done then its on to the body before the chassis. -
"Bring Out Your Dead" Completion Build--ROUND 2 Is On!
NZanglia replied to Snake45's topic in WIP: Model Cars
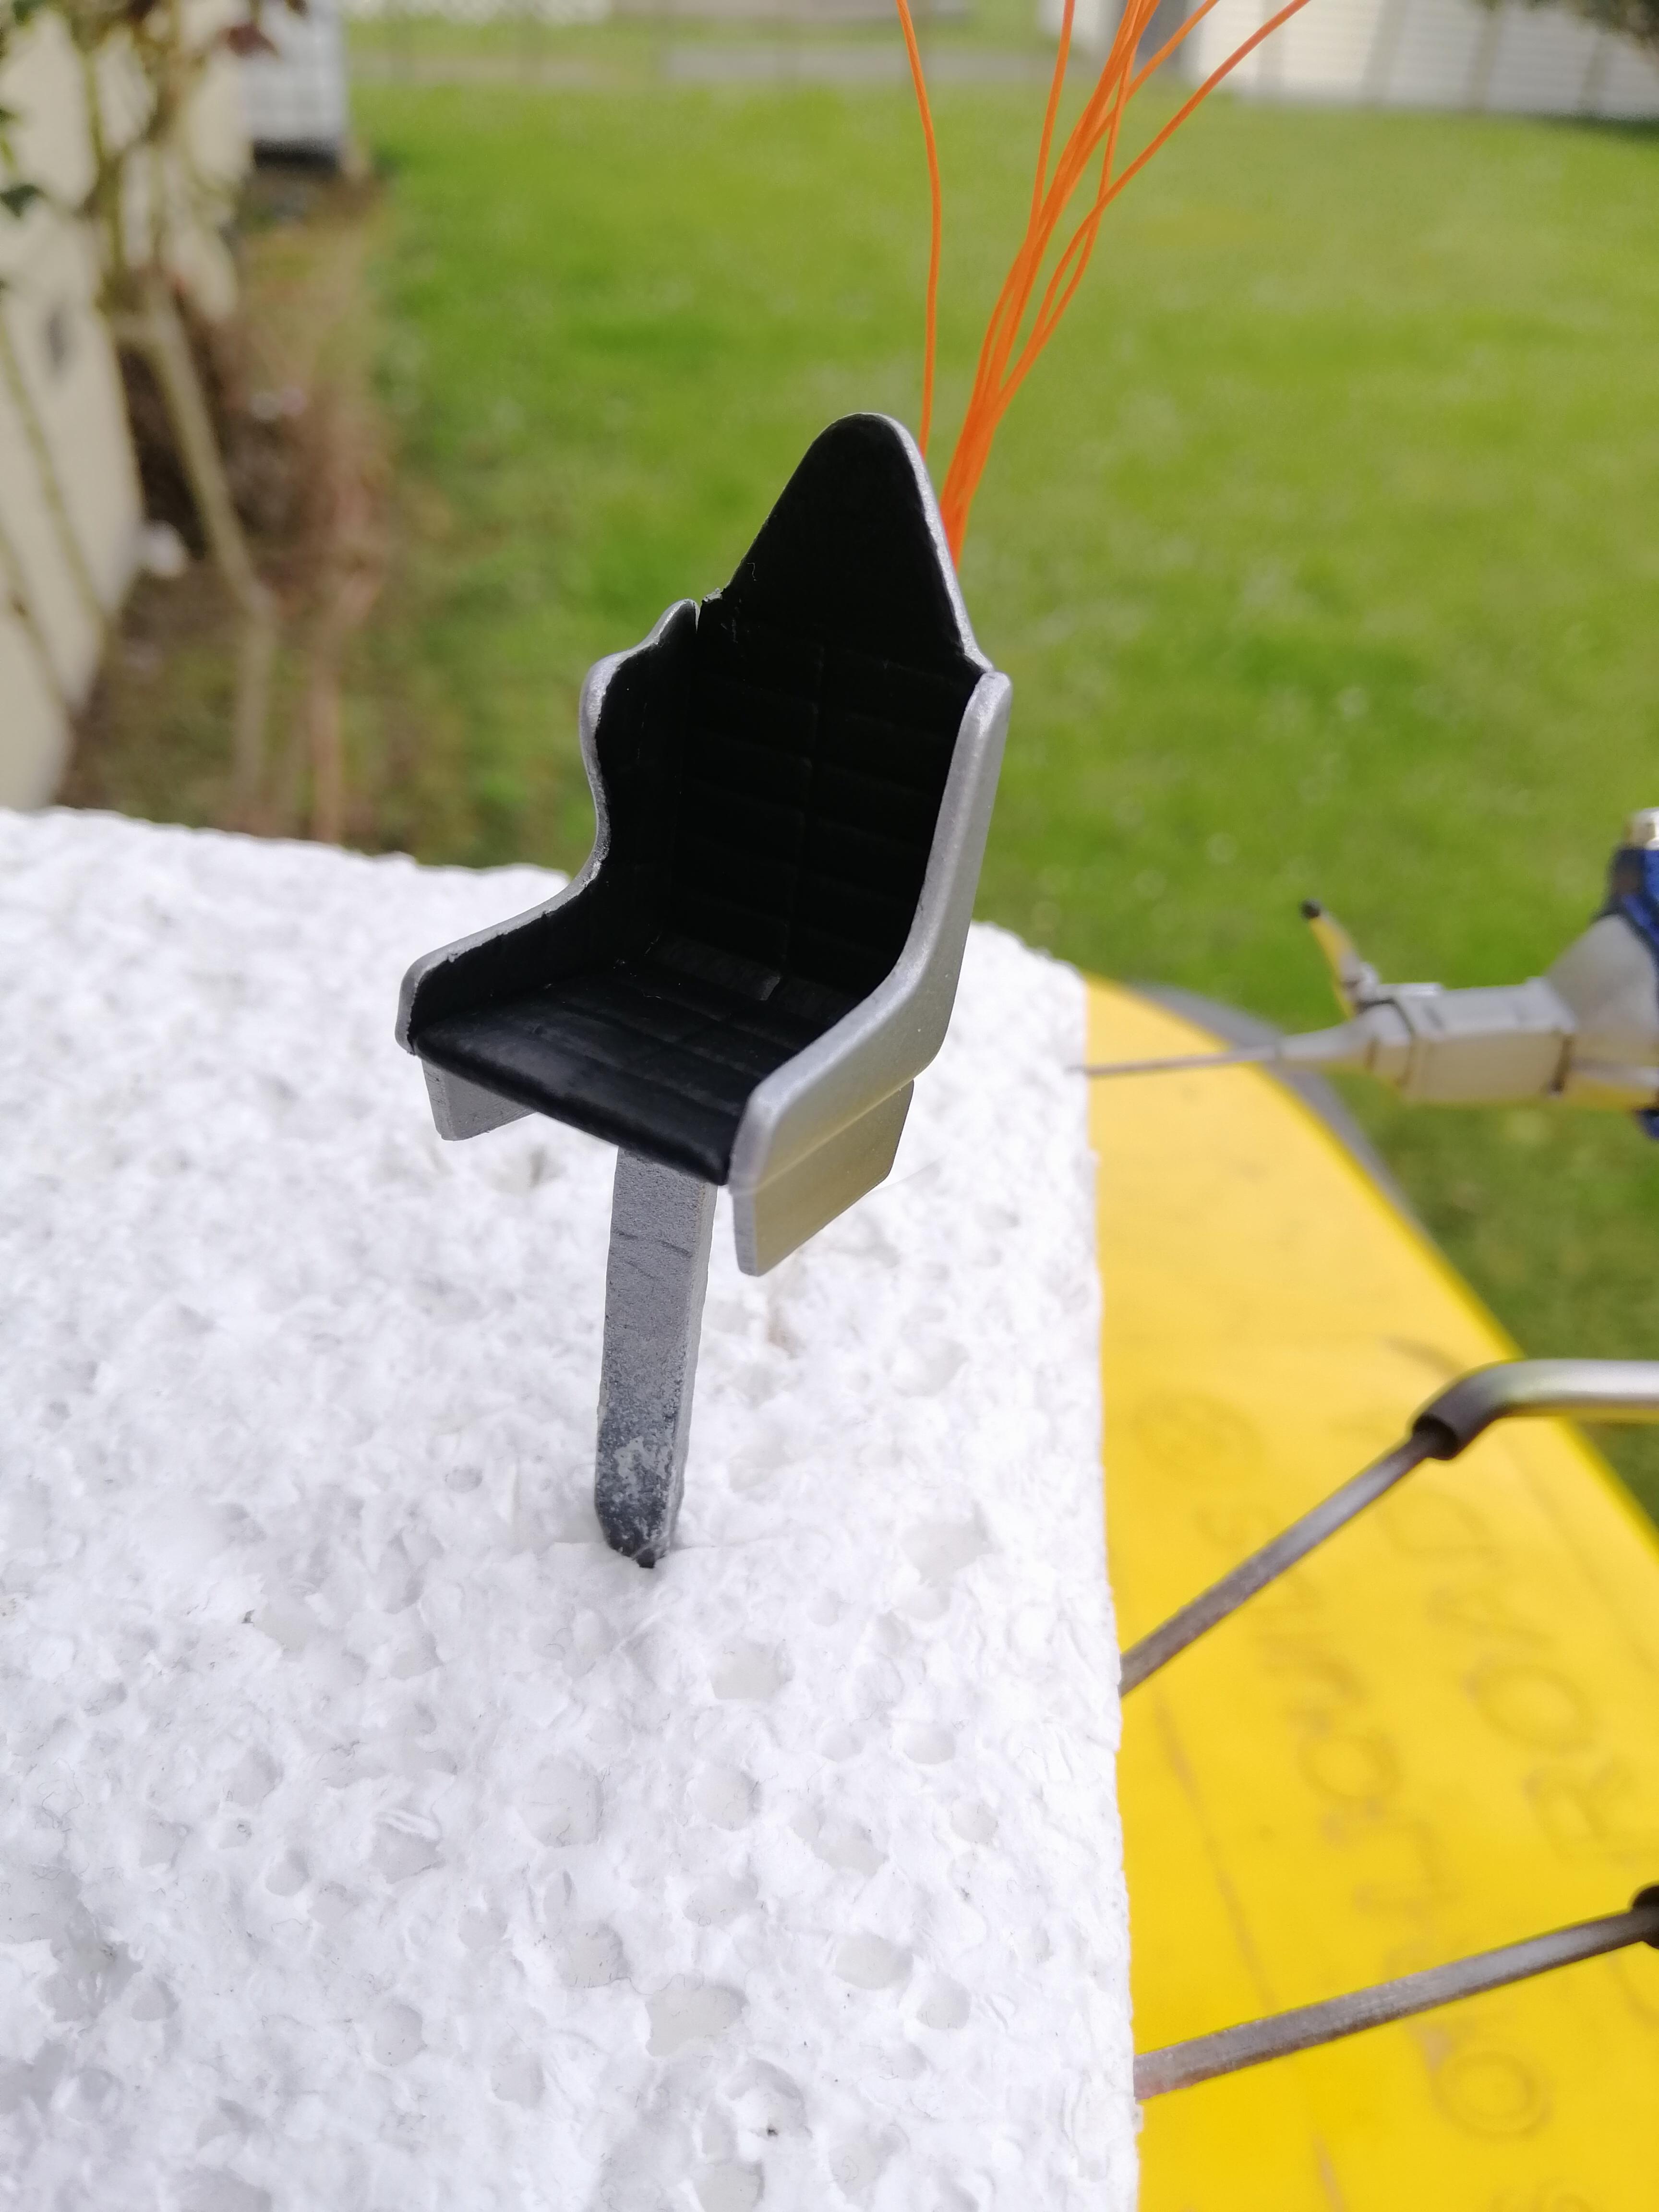
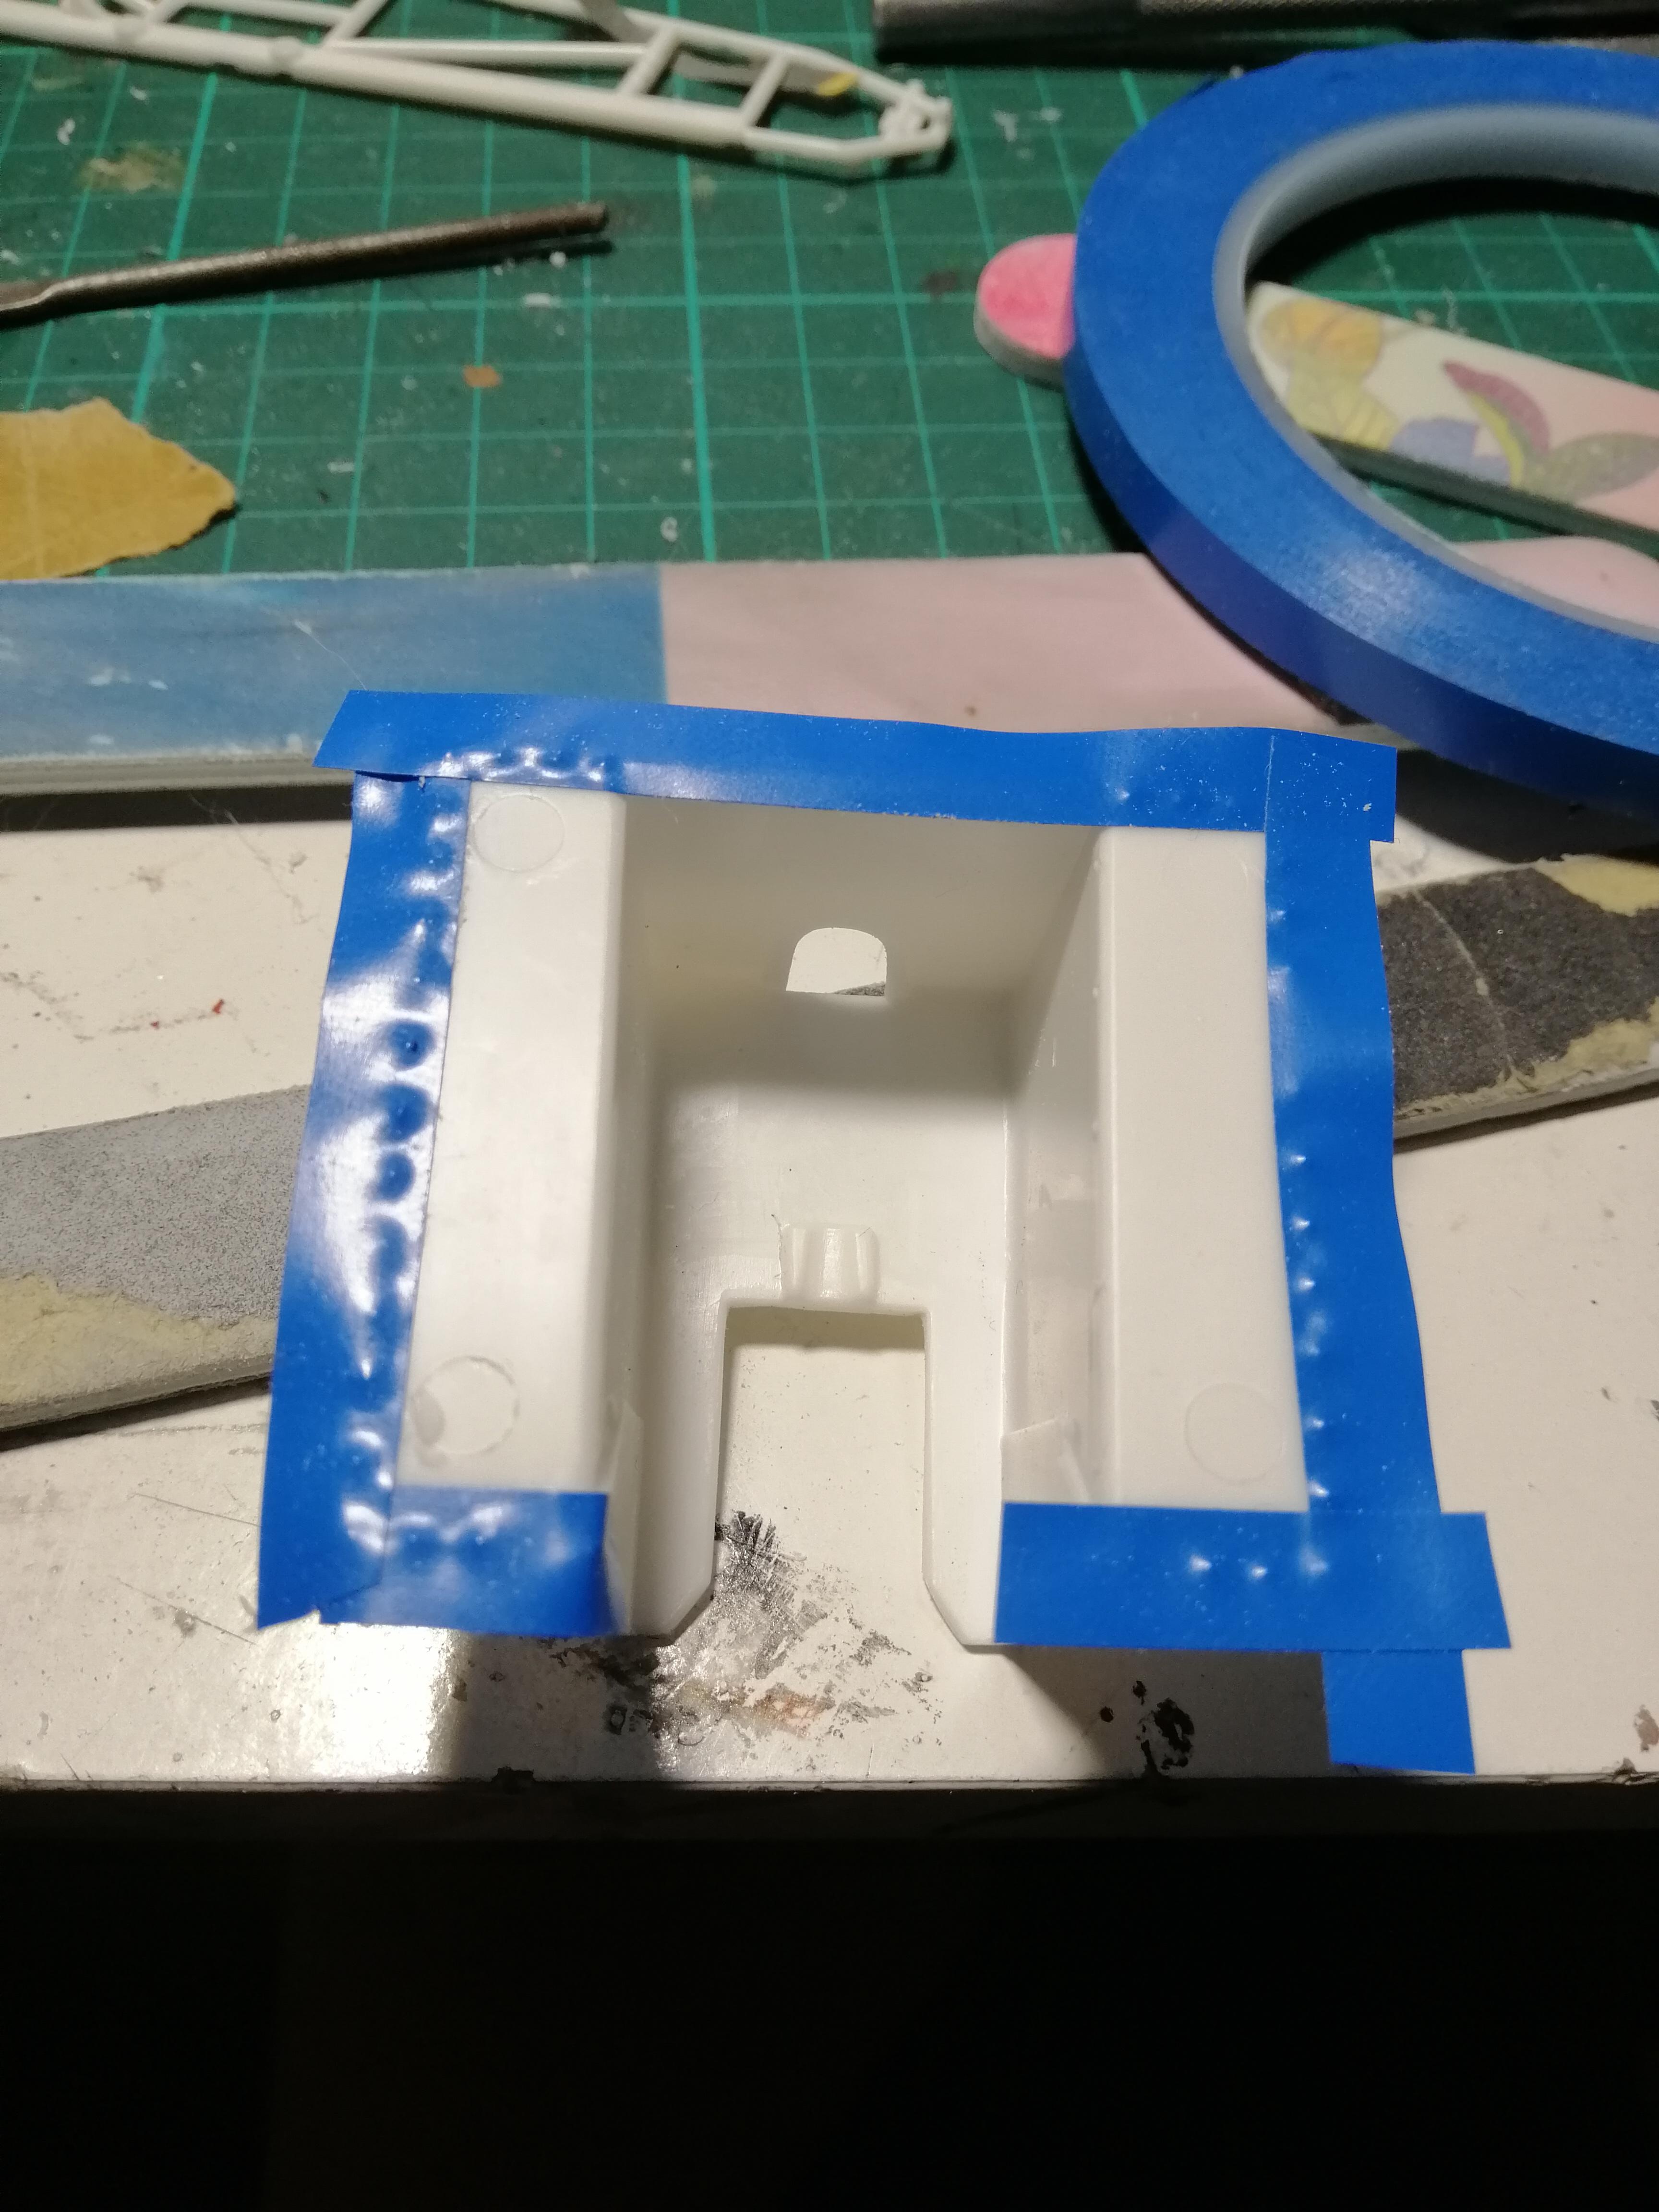
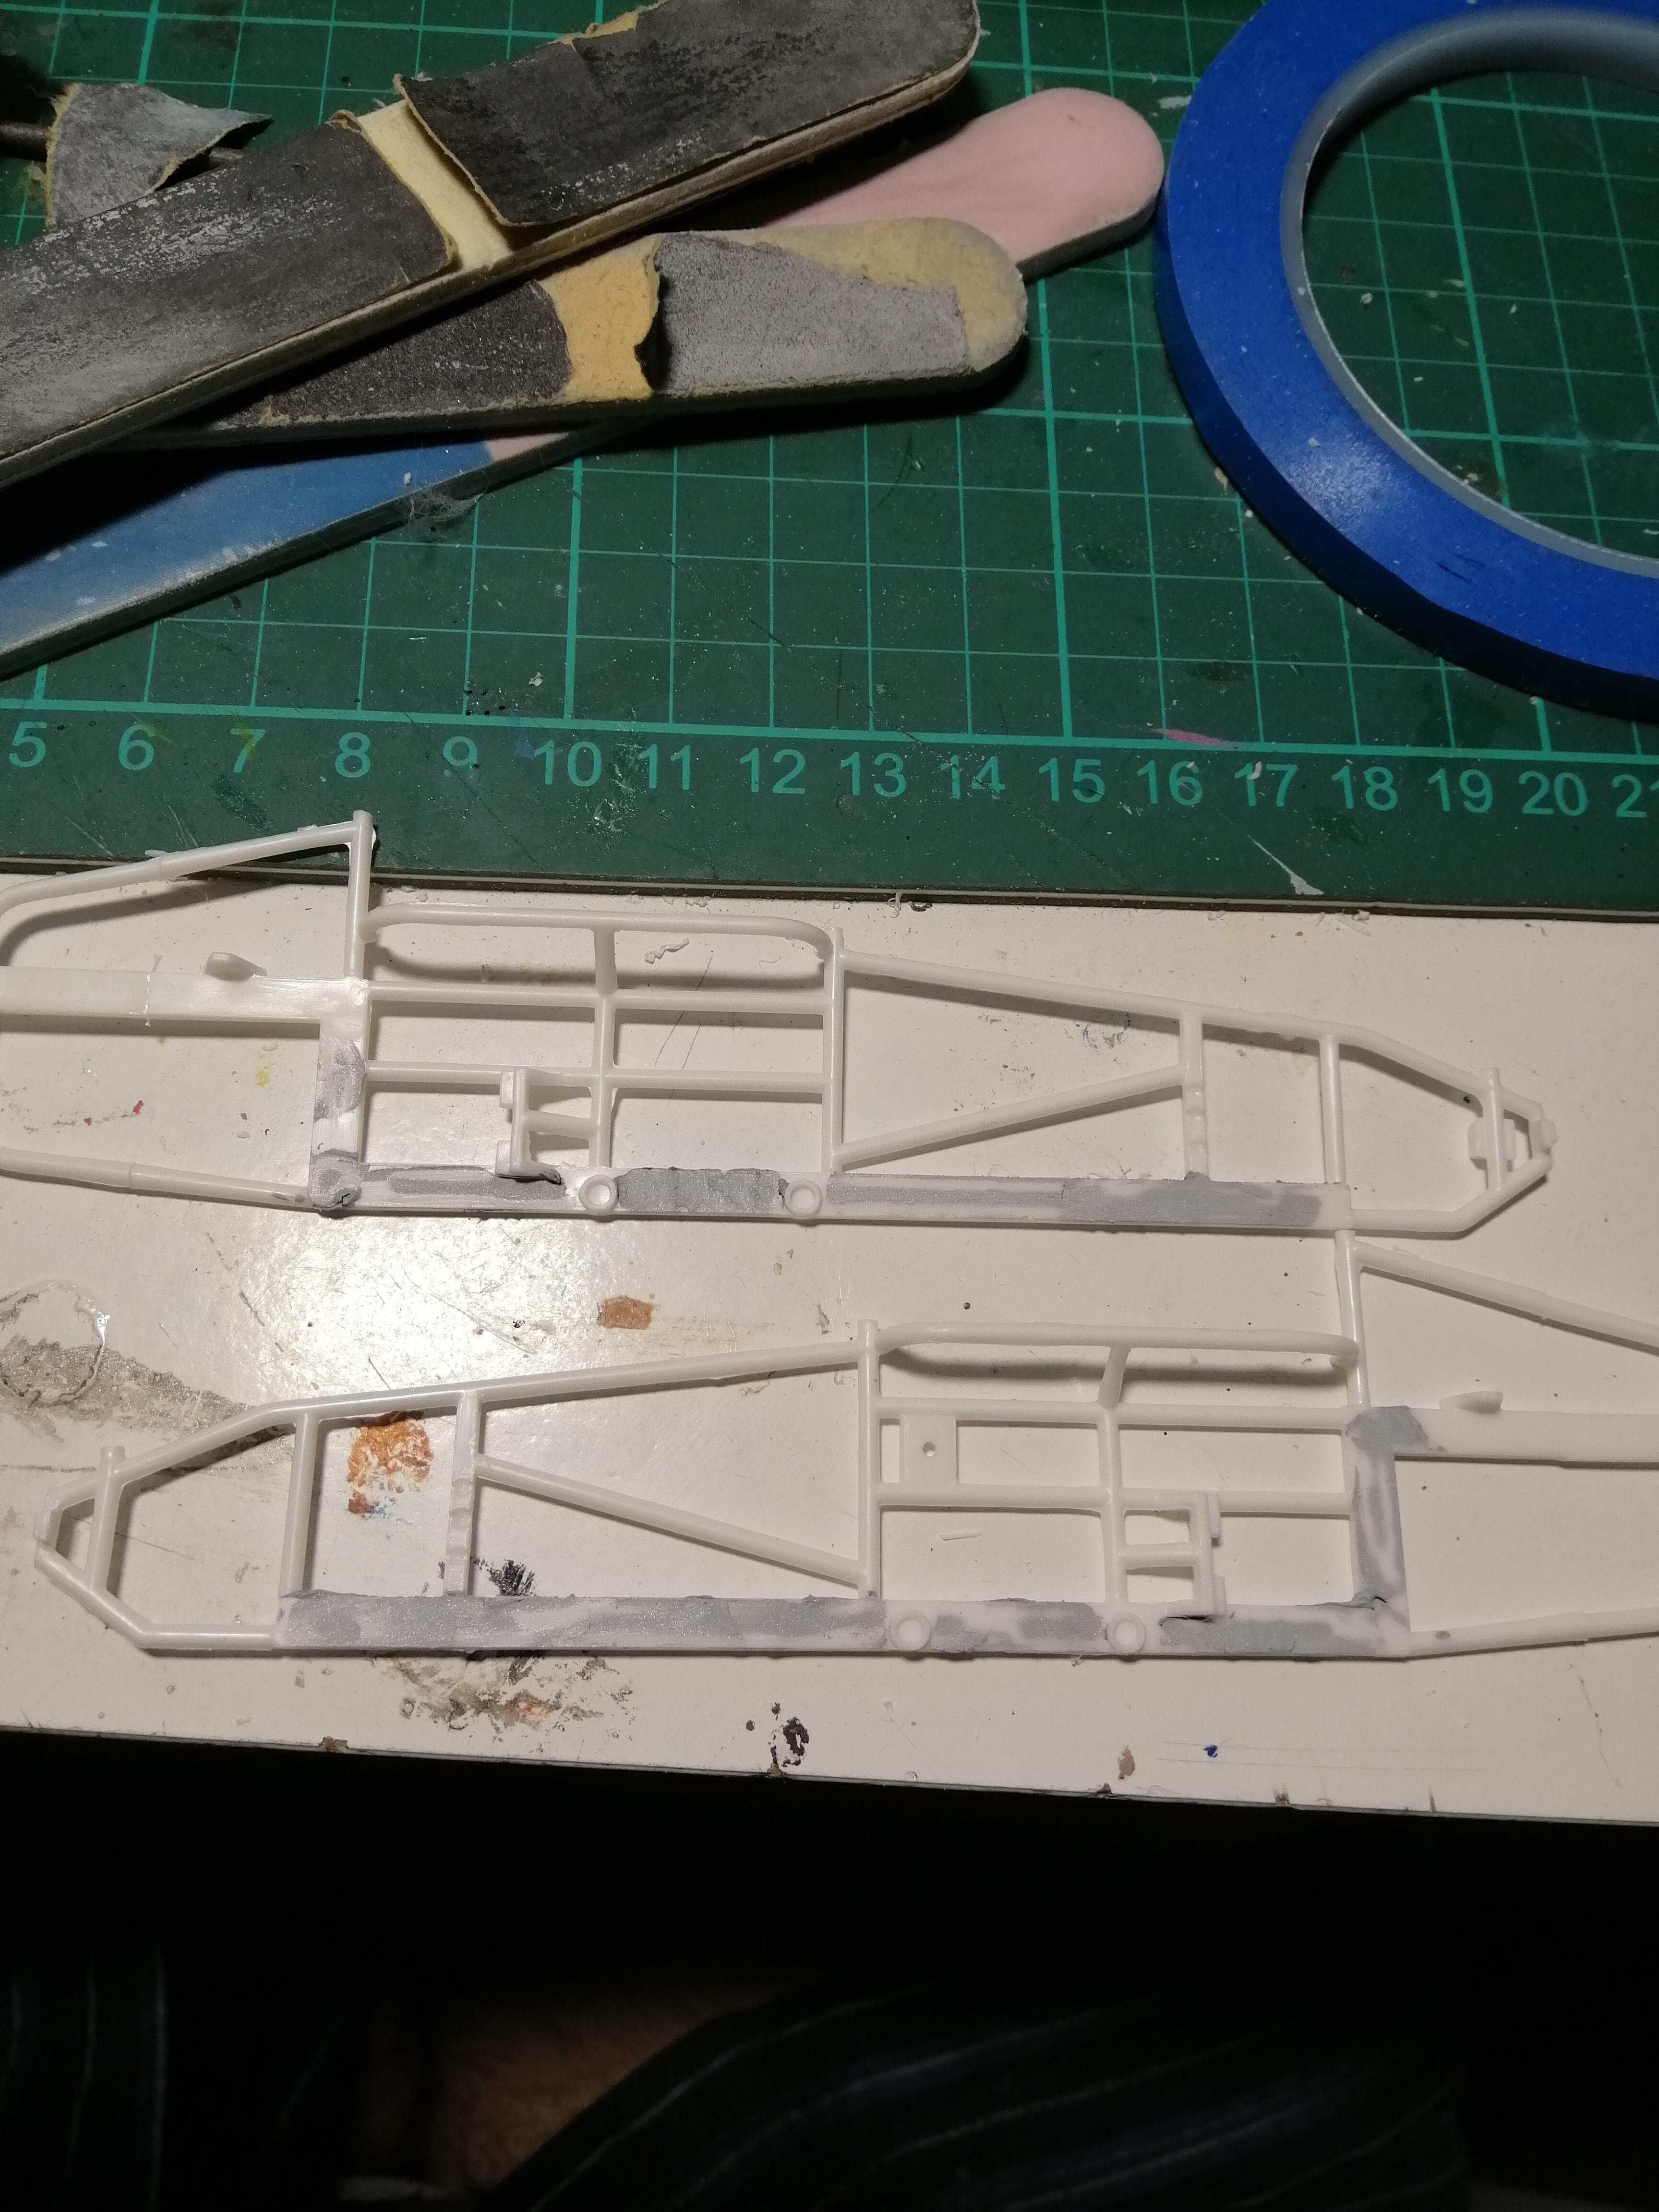
Now that the next round has officially kicked off. I've manage to assemble the chassis and get everything flash and ejector Pin mark free and washed ready to paint. Just ignition wiring holes still to drill out.
-
Finally, every part has been cleaned up and flash and ejector Pin marks removed. All Parts have been washed and ready for paint. Still Have to drill out the magneto and spark plug holes in the block. But otherwise all good to go. I will be painting it as ready to start a fresh season.
-
Thanks Draggon.
-
You not wrong Tarheel. Yup A bucket lad of that is required. and just as much again in cleaning up all the flash.
-
Just buttoning up the chassis with a few minor tweeks before it's ready to primer. Photos tomorrow.
-
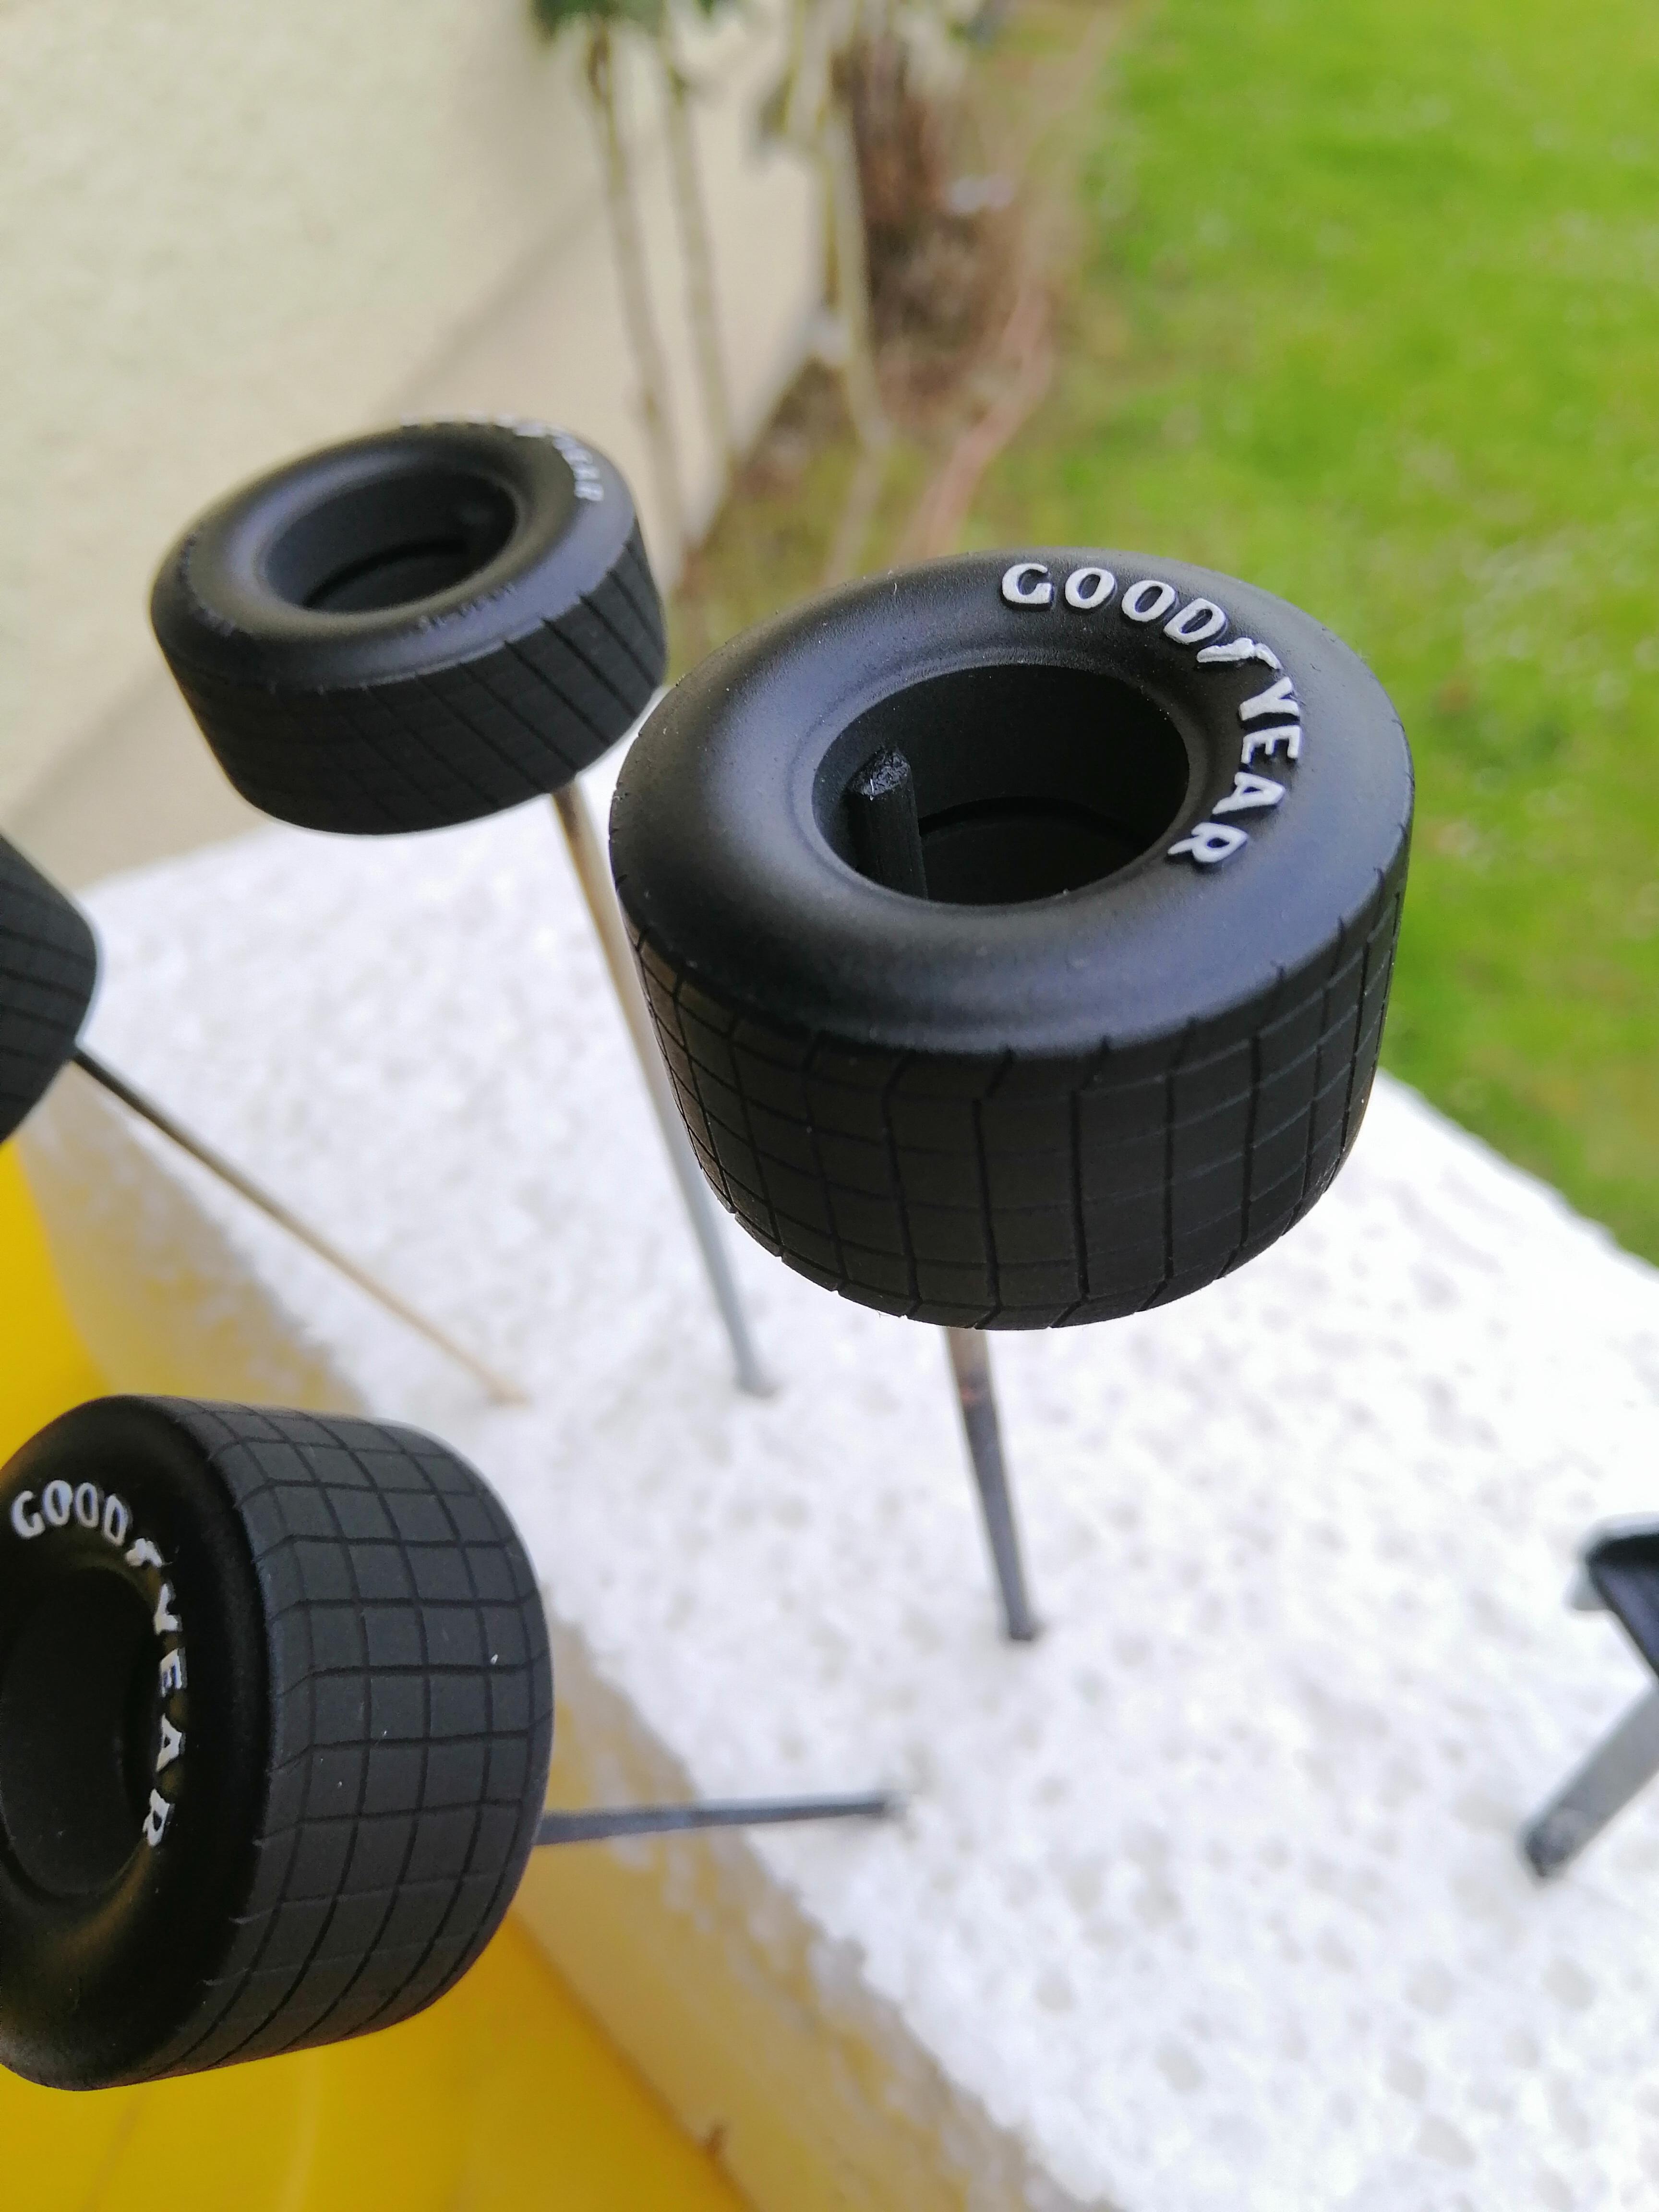
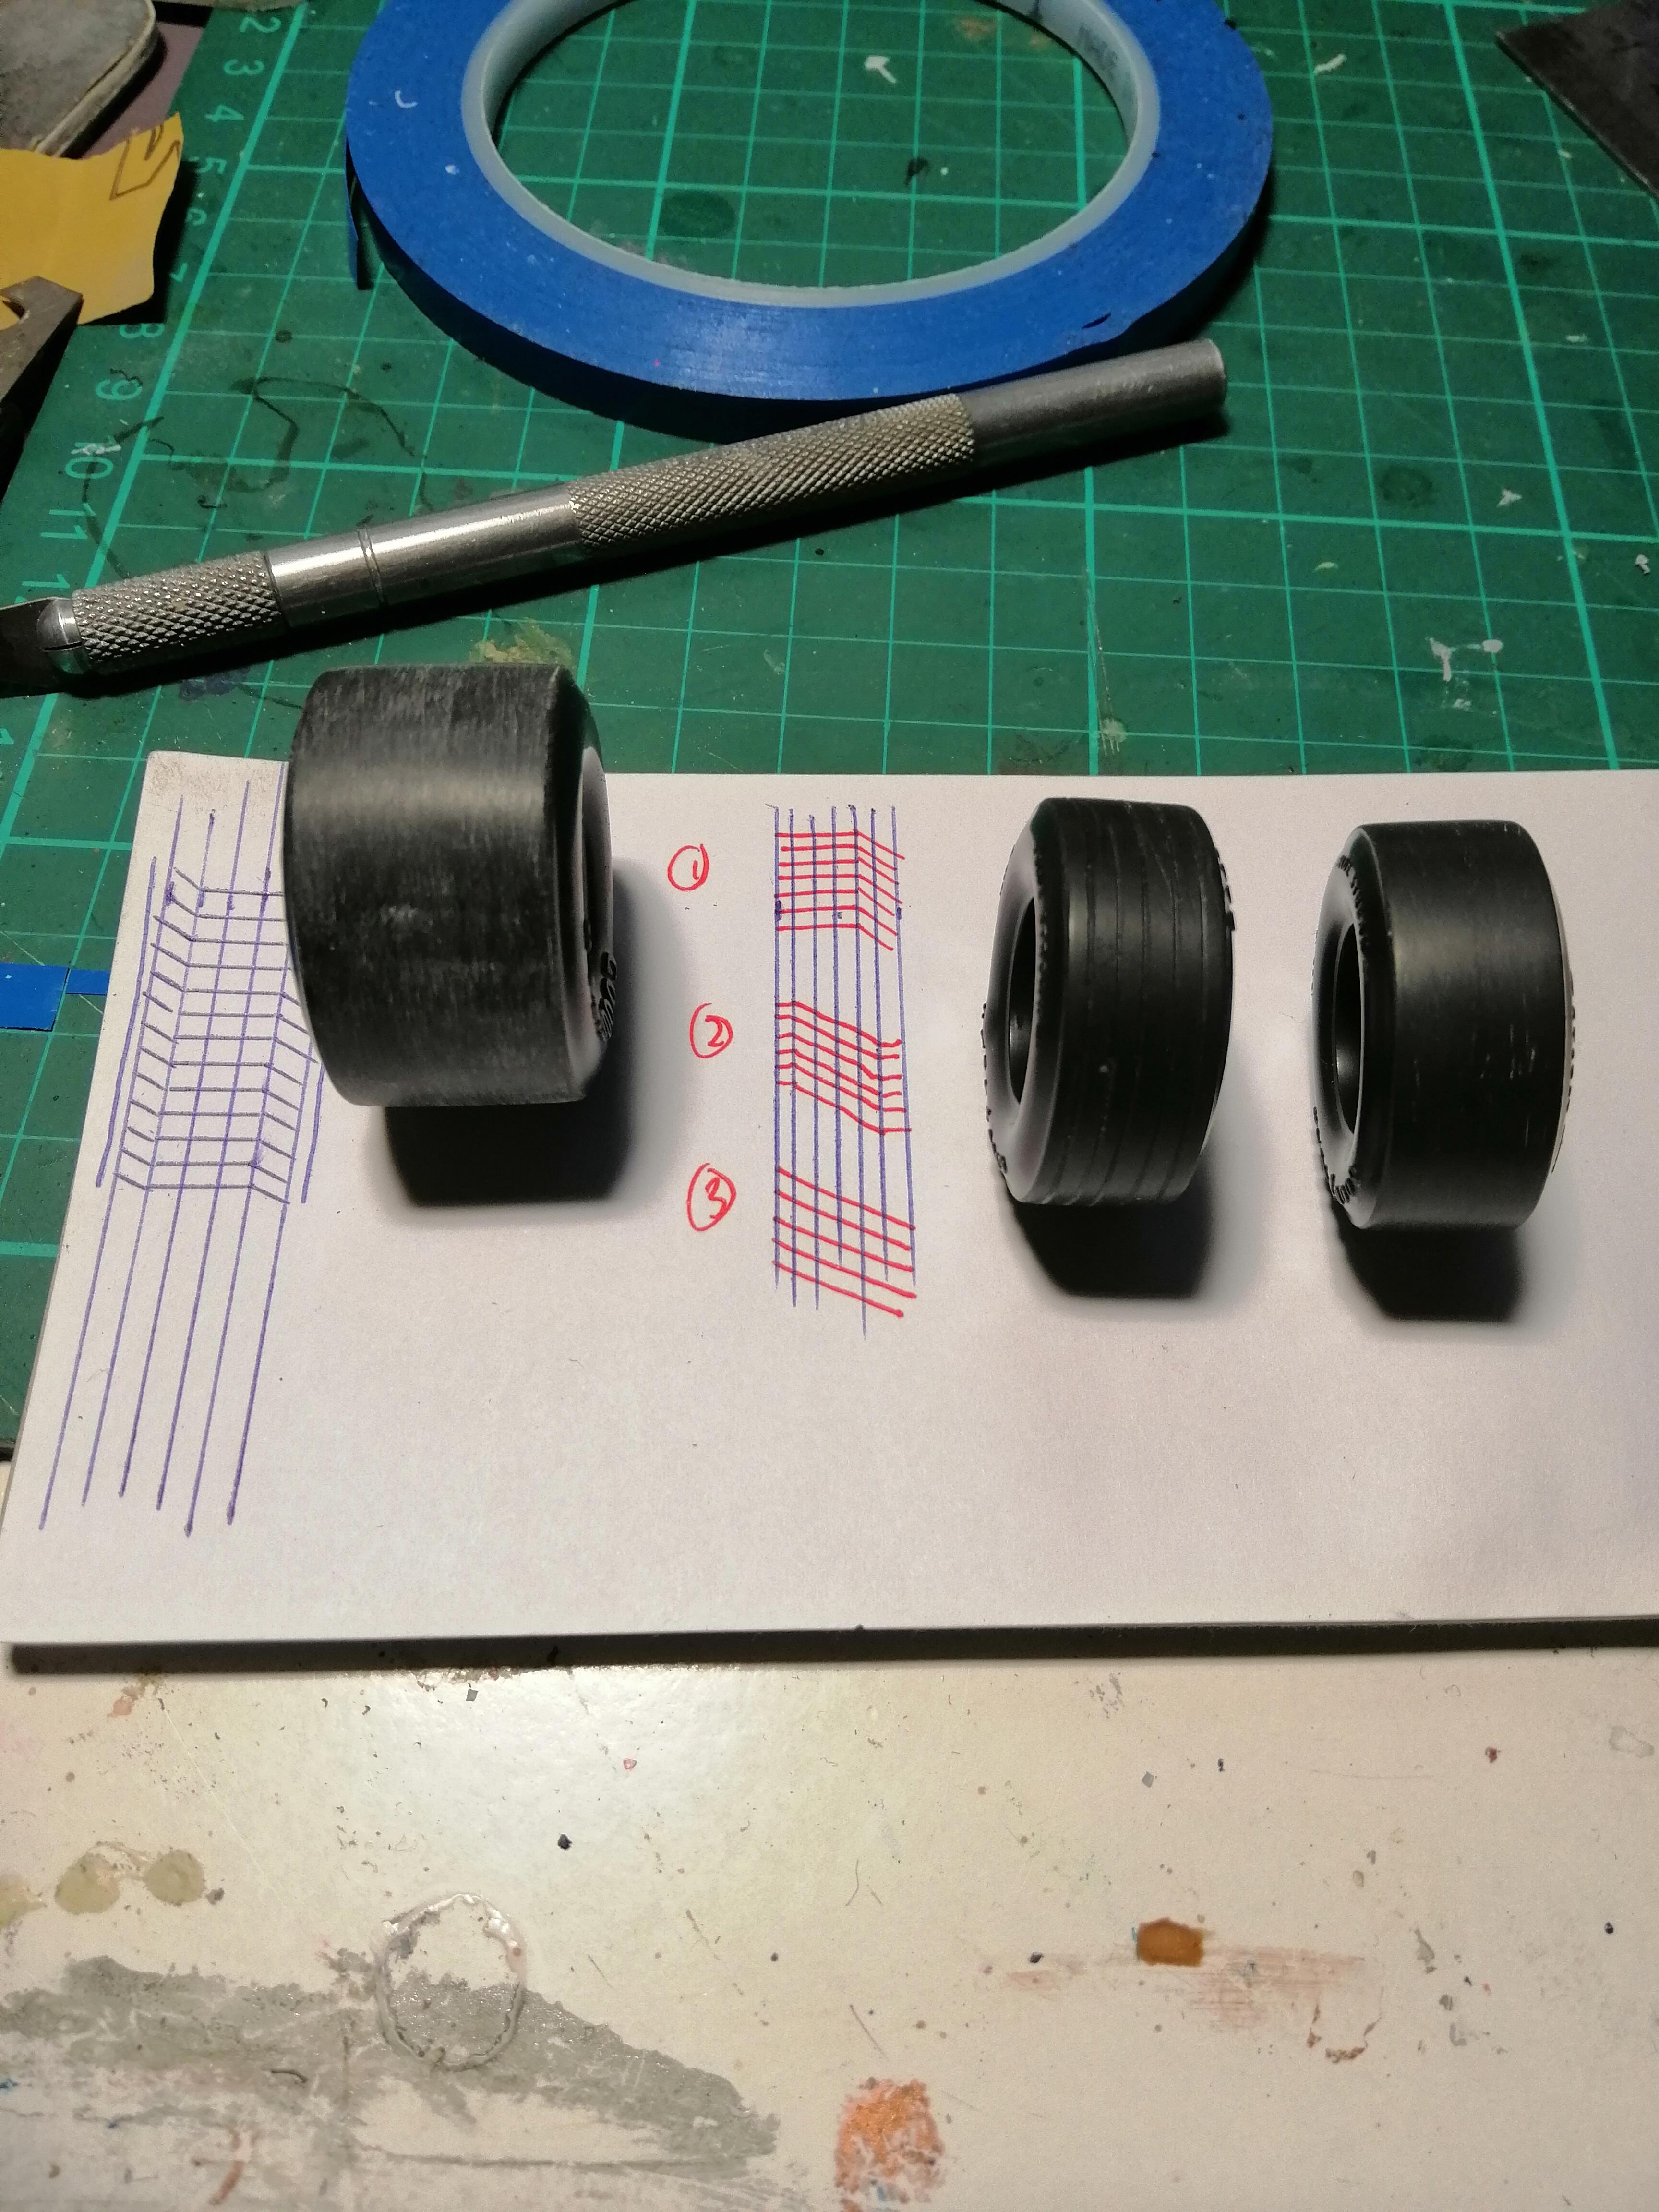
Seriously though. I did it in a 4 steps. 1. Sand the 2 part hard plastic tyres flat once thoroughly dried. 2. Measure the width of the tread and divide it by the number of radial lines required. Measure mark each radial line in turn around the circumference and join the marks with a 3M Pinstripping vinyl tapes trying to get it as straight and even as possible. Then run a 2nd layer around over the first. Use this as a guide edge to slowly and carefully scribe the radial grooves until deep enough. Rinse and repeat until all radial lines are done. 3 The tread pattern. for the front tyres i cut the 3m tape into 2mm ( 5/64") strips and triple layered them . I lined the first angled line and carefully scribed the grooves on both sides of the tape. The I "simply"moved the tape and lined one edge with the back of the previous groove and scribed the next line. And so on and so forth until I had gone around the whole tyre being careful to keep the angle the same. As I got nearer the end I tweeked it to make sure they lined up to the first groove. Several pieces of tape were used as it go covered in scurf from the removed of plastic from the groove. The rear tyres I went horizontal with 3mm ( 1/8") tape around the tyre staying within the outer most radial lines. I then went back around and scribed the angle lining up the corner on one side with the corner 2 rows up on the other side. ( will make more sense looking at the finished scribed tread ) And yes many colourful words were spoken everytime the scriber slipped. But that's How I did it.
-
Very very carefully
-
"Bring Out Your Dead" Completion Build--ROUND 2 Is On!
NZanglia replied to Snake45's topic in WIP: Model Cars
wow. everyone has been so productive over the past couple of days and all I've managed to do is get the Modified's chassis assembled. Side nerf bars glueing now. will post pics tomorrow -
"Bring Out Your Dead" Completion Build--ROUND 2 Is On!
NZanglia replied to Snake45's topic in WIP: Model Cars
beautiful colour combo and smooth paint work on the Monte -
"Bring Out Your Dead" Completion Build--ROUND 2 Is On!
NZanglia replied to Snake45's topic in WIP: Model Cars
Kit really does show its age. Ejector Pin Marks and Sink Marks galore. but really enjoying the challenge of bending it to my will. Dispite the copious amount of clean up required.
-
"Bring Out Your Dead" Completion Build--ROUND 2 Is On!
NZanglia replied to Snake45's topic in WIP: Model Cars
Got the holes on the rear plate to to represent muzzy tail lights. And stayed on track on finished the tread on the tyres
-
All tyres now done. On to the tail panel to have some tail light shaped holes cut out. Then it's time to get framed.
-
I have the two rear tyres done, but still insure of the front tread pattern.
-
"Bring Out Your Dead" Completion Build--ROUND 2 Is On!
NZanglia replied to Snake45's topic in WIP: Model Cars
I was up until 12:30am this morning scribing all the tread onto this rear tyre. Now I'm wheelly tyred. 1 down 3 to go.
-
"Bring Out Your Dead" Completion Build--ROUND 2 Is On!
NZanglia replied to Snake45's topic in WIP: Model Cars
That is one sexy hot rod. -
Trying to rescribe the hard plastic tyres to kinda represent hand cut dirt tyres. Rear tyres I think I have sorted but having trouble with fronts. I have 3 ideas but after opinions from those more in the know to what is close-is enough.