

EngineerBob
-
Posts
140 -
Joined
-
Last visited
Content Type
Profiles
Forums
Events
Gallery
Posts posted by EngineerBob
-
-
Great job capturing the look of your inspiration.
On 9/5/2024 at 3:25 PM, Hondamatic said:I used to only post my builds on Instagram, but they disabled my account for no apparent reason
That's funny, I also had my instagram account canceled with no explanation, even after contacting them. I think they don't want old people to be on there.
-
 1
1
-
-
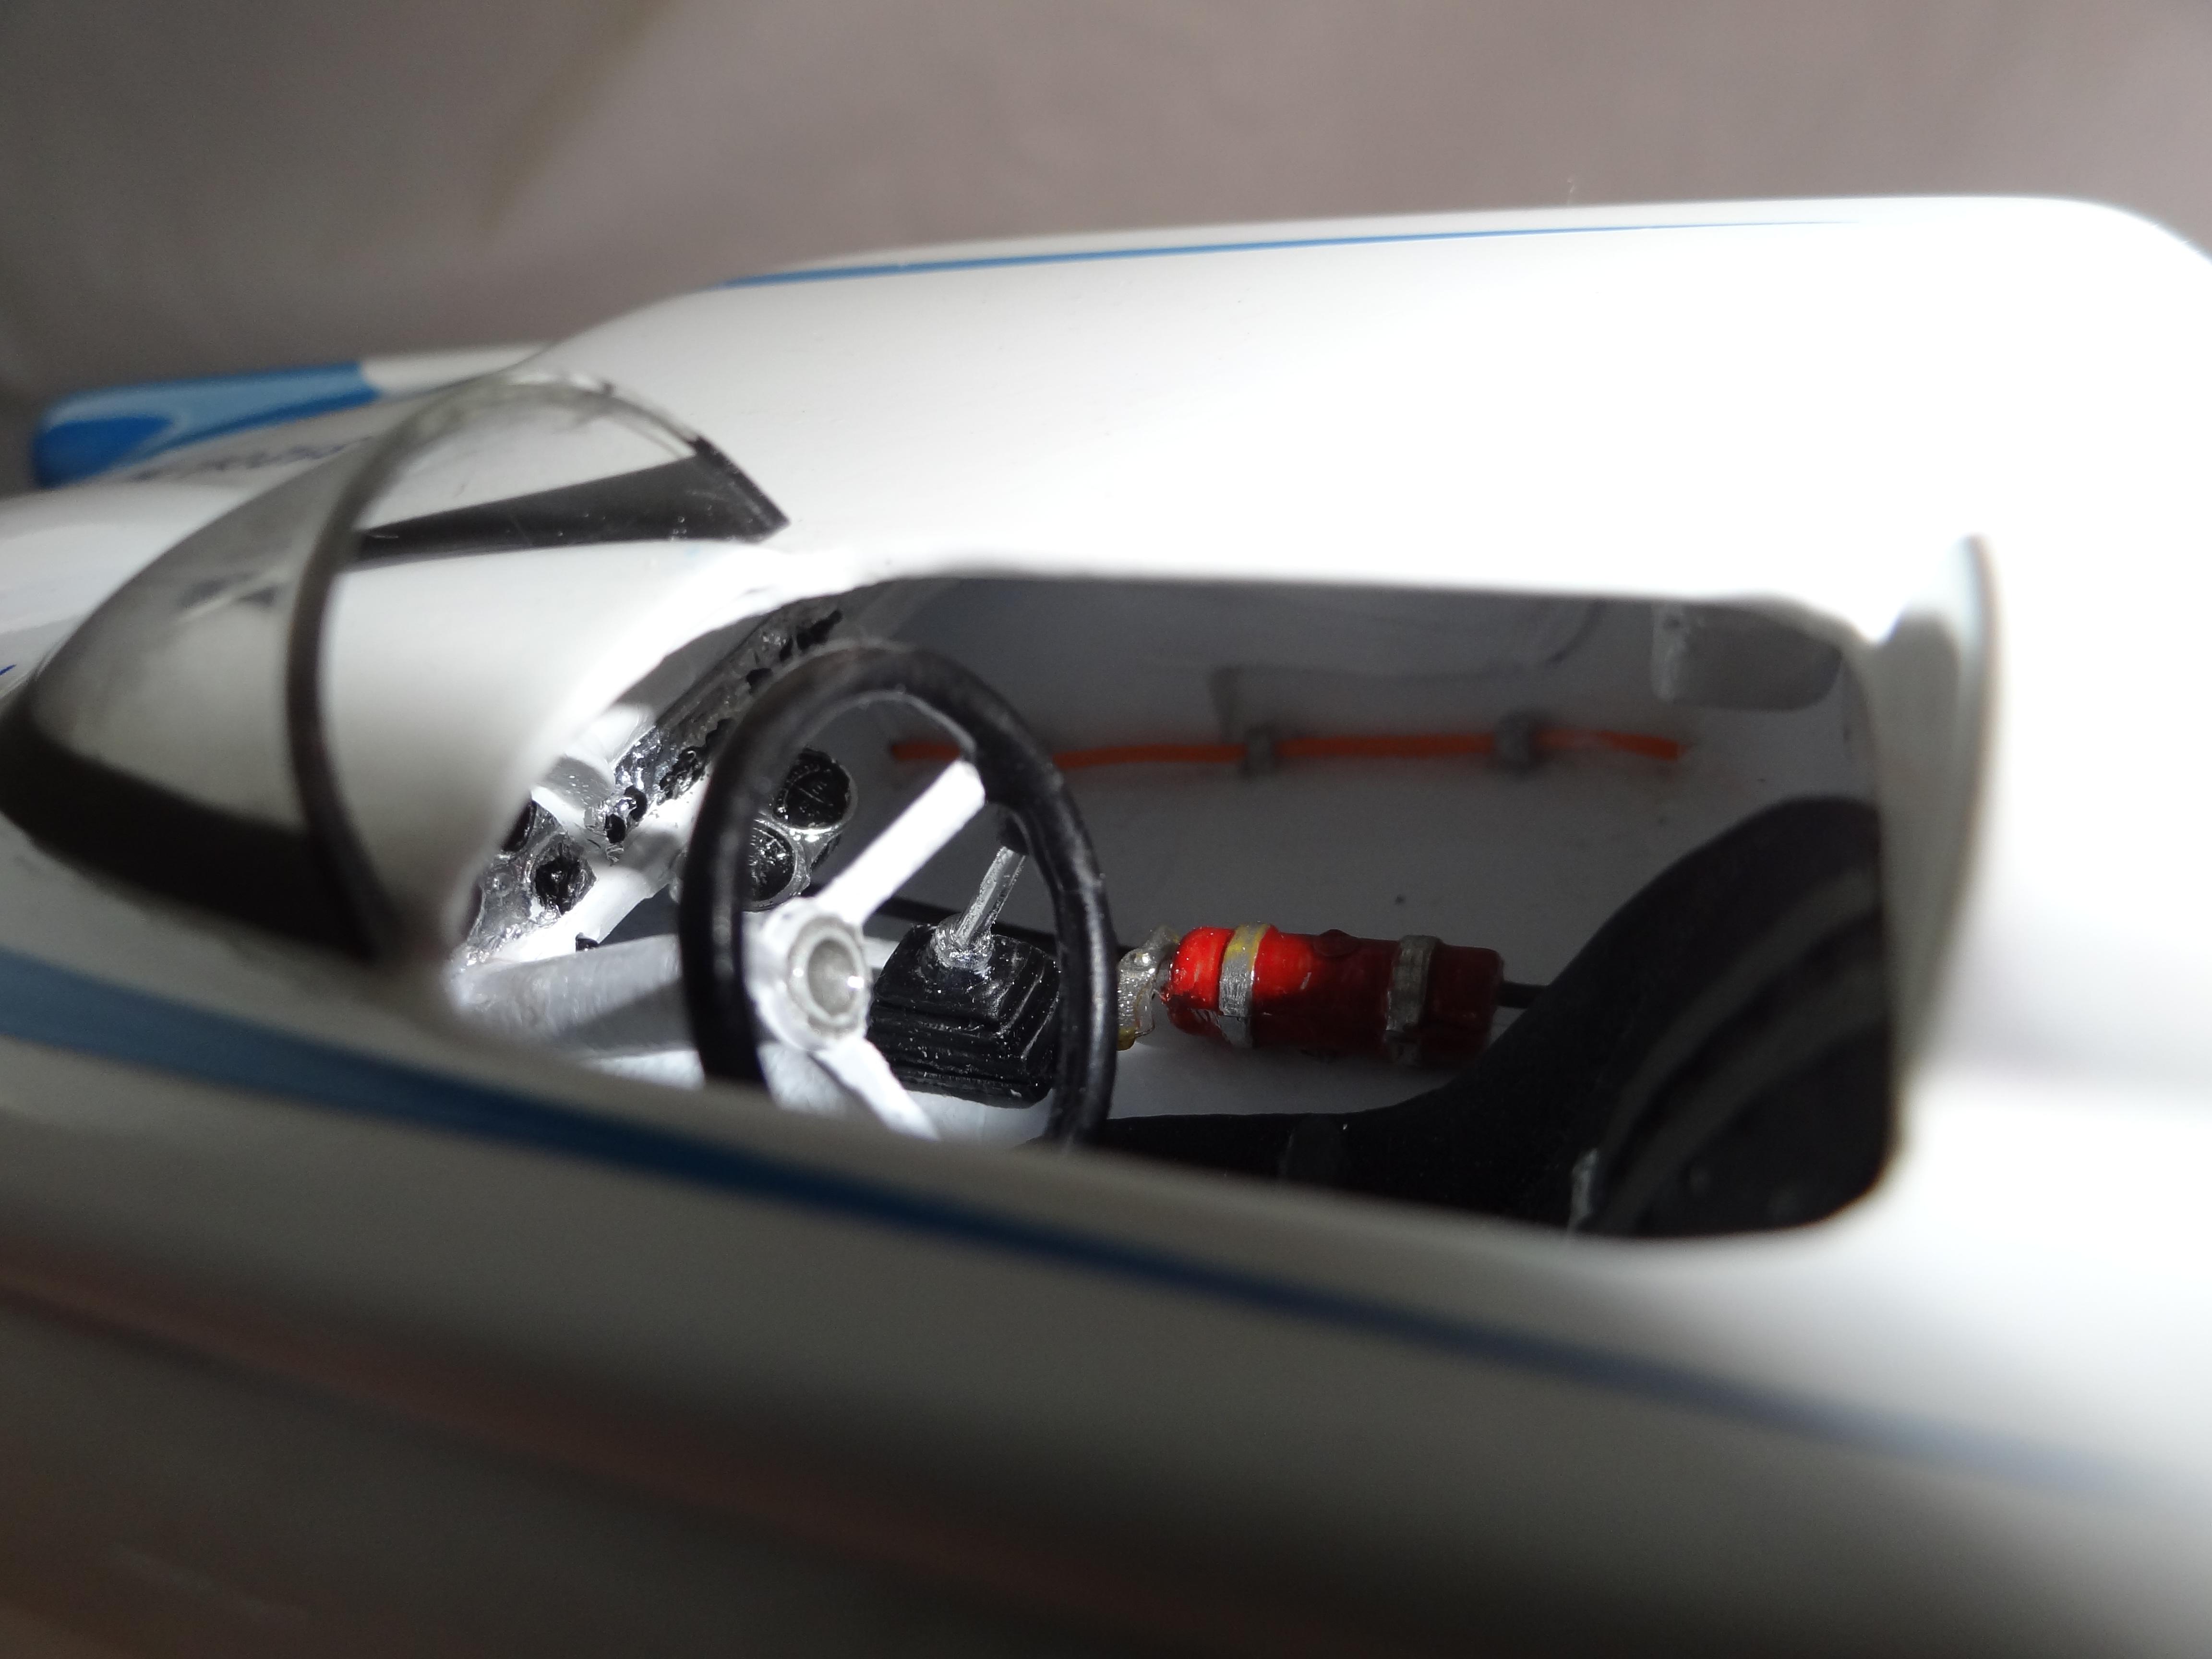
Very nicely detailed! I especially liked the fuel lines as well as the shifter.
-
 1
1
-
-
I also use liquid glues such as Bondene or Tamiya. I use styrene strips on the backside to aid alignment and to reinforce the joint. Take extra care with your cuts and make the seam fit as well as possible to provide the best possible glue surface. Use small pieces of styrene to fill any gaps. I also use sprue-goo in any remaining gaps or holes.
-
1
-
-
I'd try spraying the dash with clear paint (w/ appropriate gloss) and placing the vents on the dash when paint is tacky.
-
1
-
-
There are a lot of different putties available so, if you've had trouble sanding some, try a different putty that may be easier for you to work. A good product to use on a small divot such as yours is "sprue goo", liquid plastic cement mixed with small bits of chopped up plastic sprue. Being of the same material as your model body it will sand and finish the same once dry. Make sure you use sandpaper backed by a hard material so that you don't sand a bigger deppression into the roof.
-
18 hours ago, Tcoat said:
I have used printed pictures for posters, signs, and even water to good effect but the thought of using them as a whole shelf backdrop never even crossed my mind.
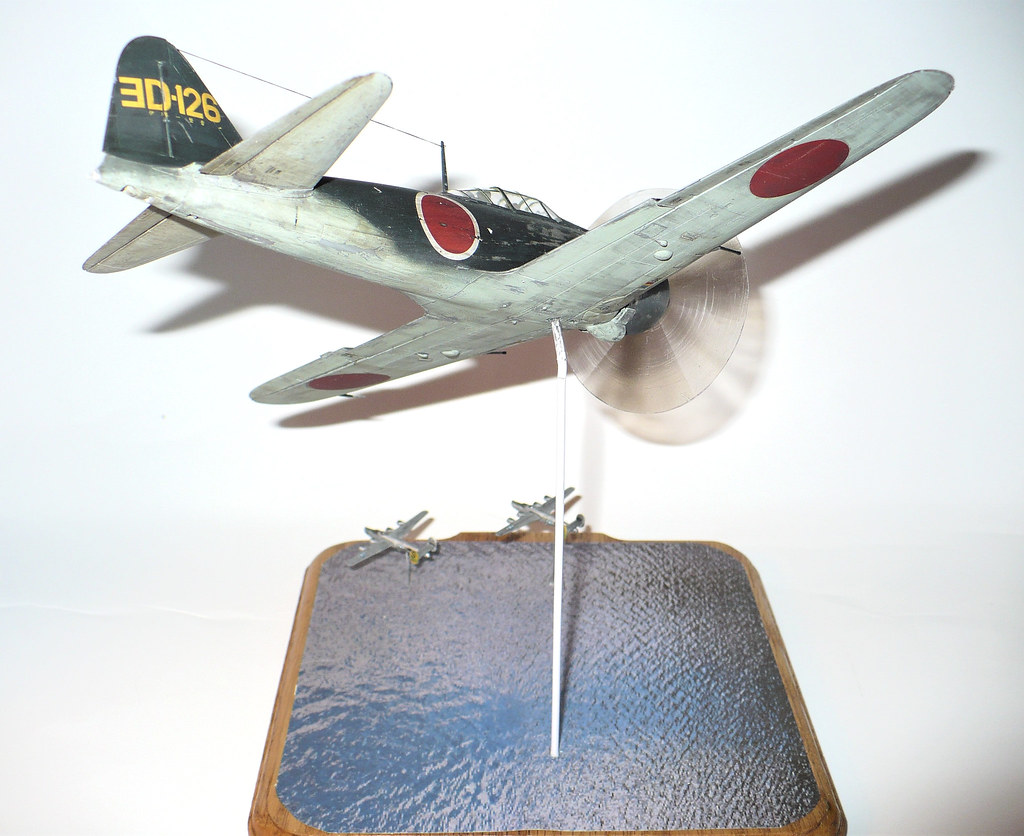
Just clear coated picture of the ocean. Even the "wave" texture is an optical illusion.

Perfect. So simple and effective!
-
On 12/7/2022 at 11:37 AM, Tcoat said:
That is incredibly effective!
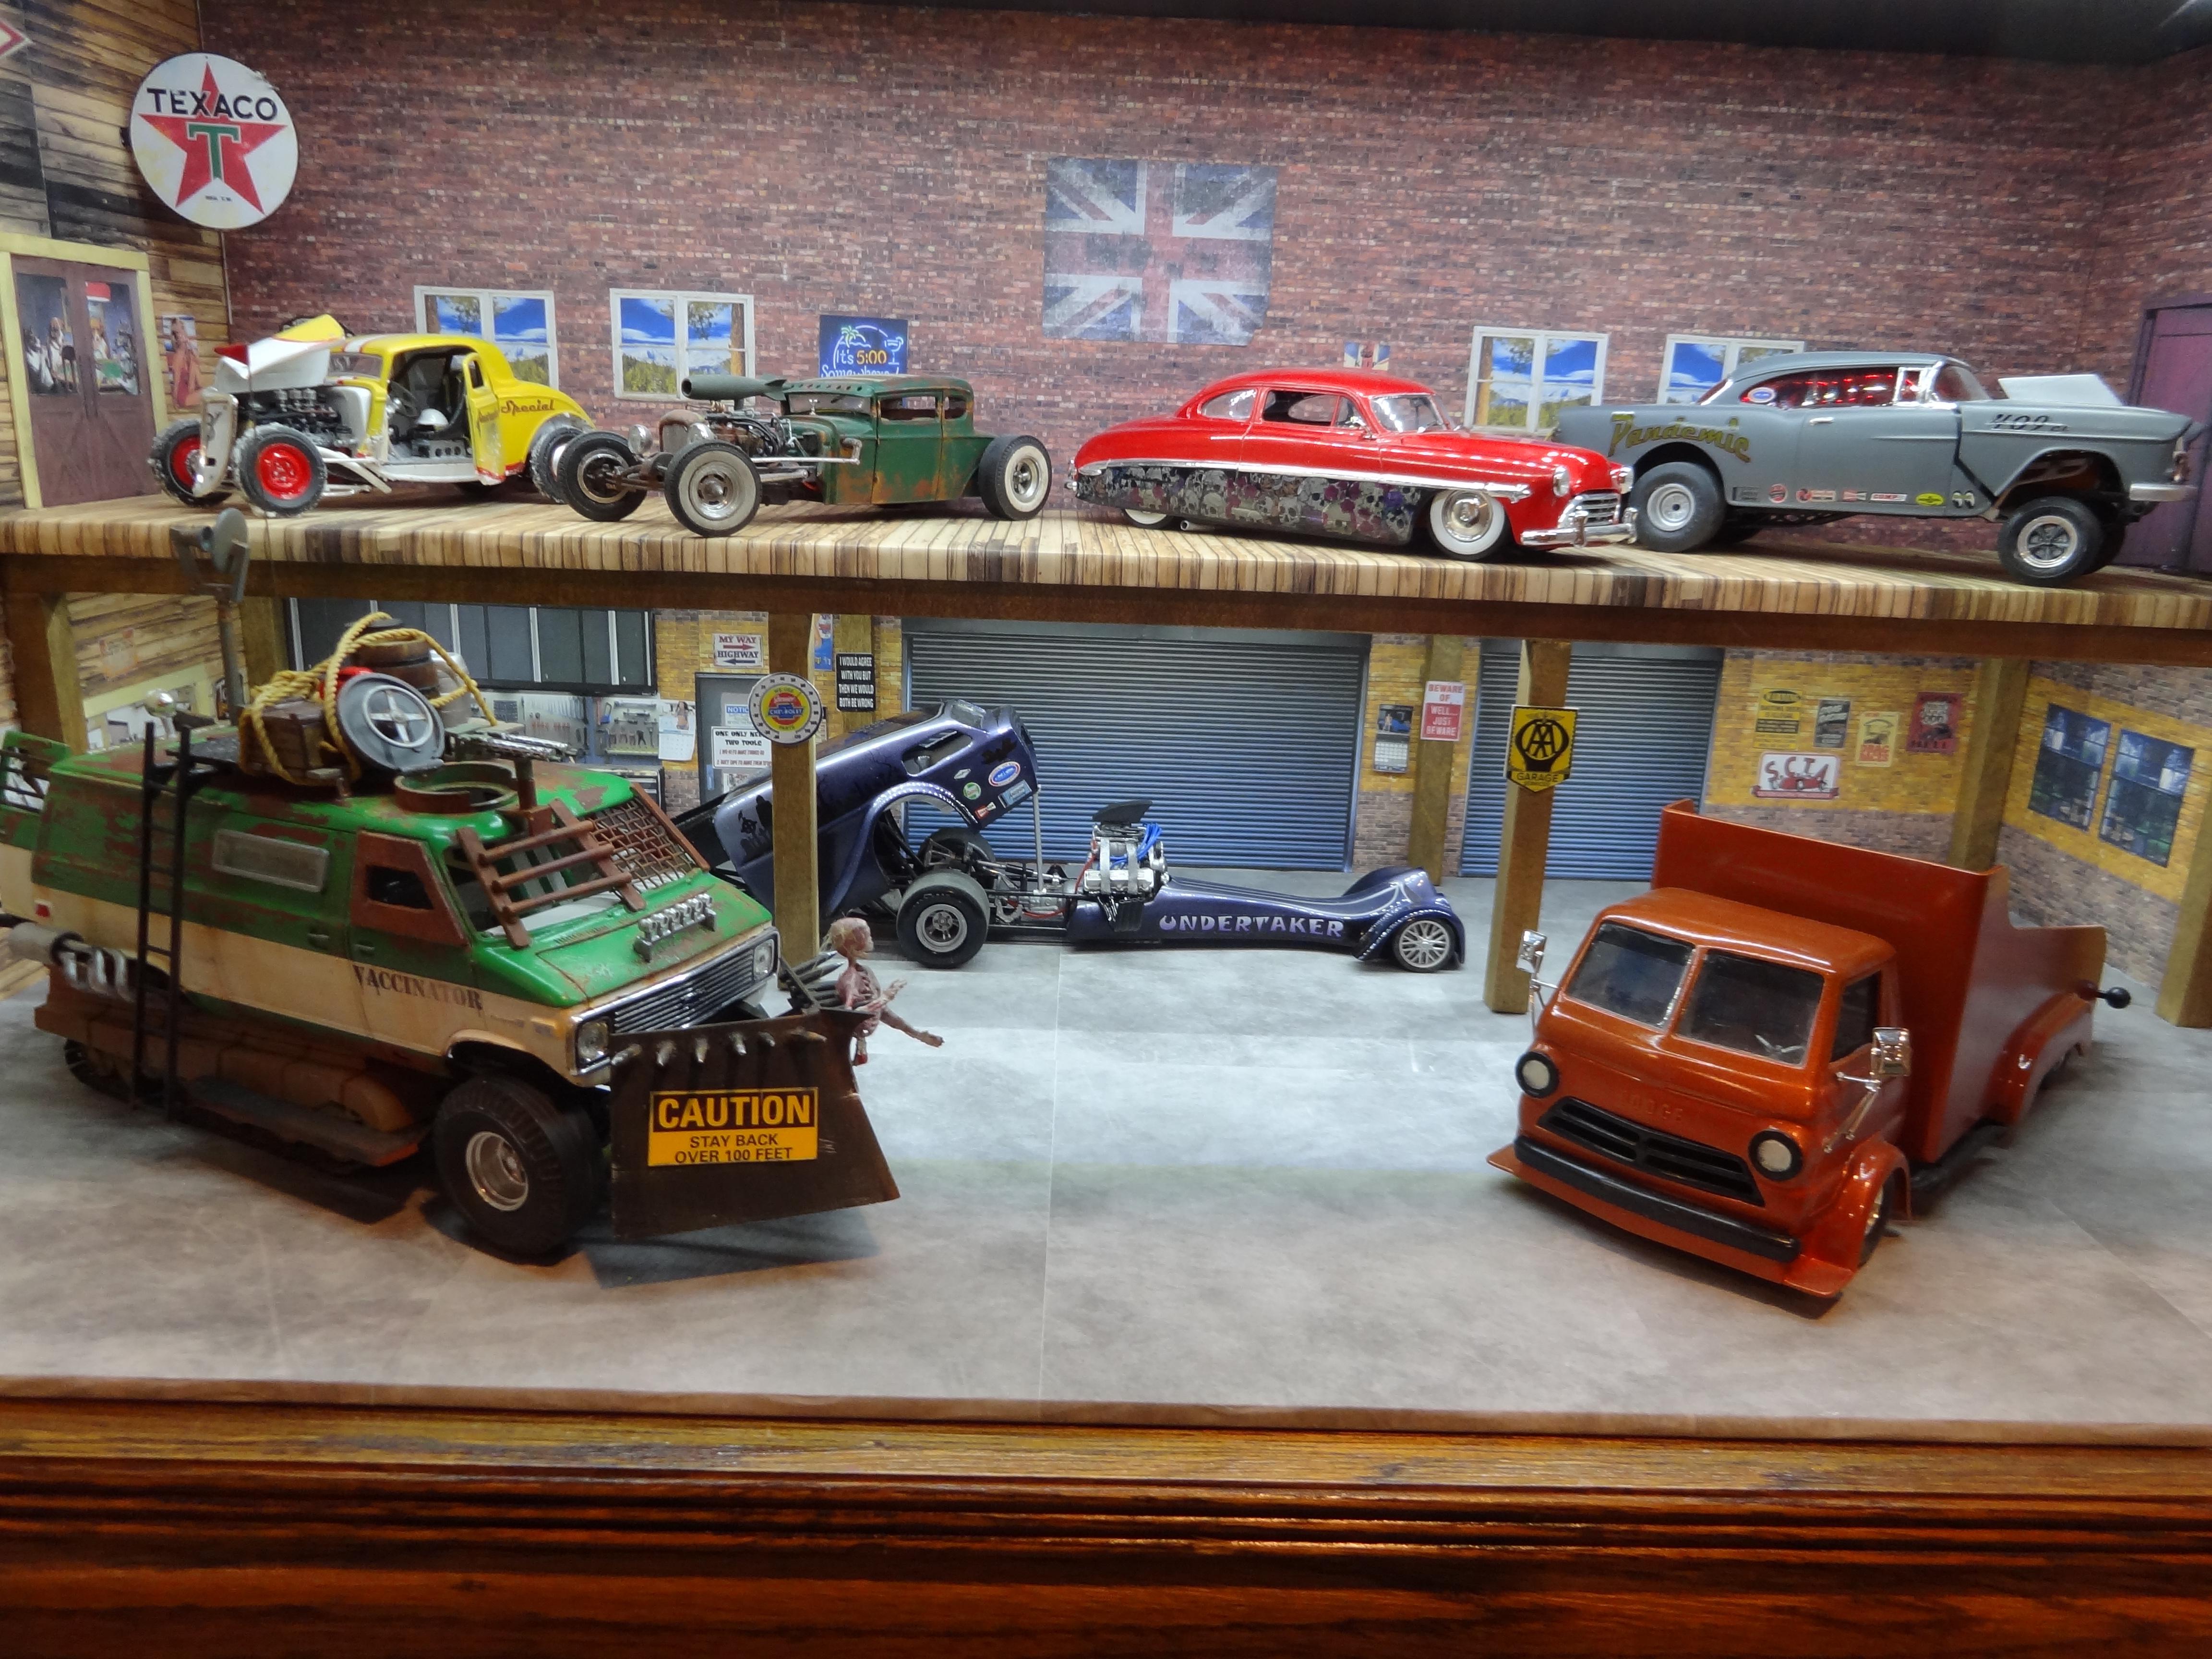
Thanks. It was very easy (and cheap). Everything except the wood beams was printed from images found using Google Image Search. Some very basic enlarging and cropping was done with MS Photo or Paint. Pics were spray glued to foam core board.
-
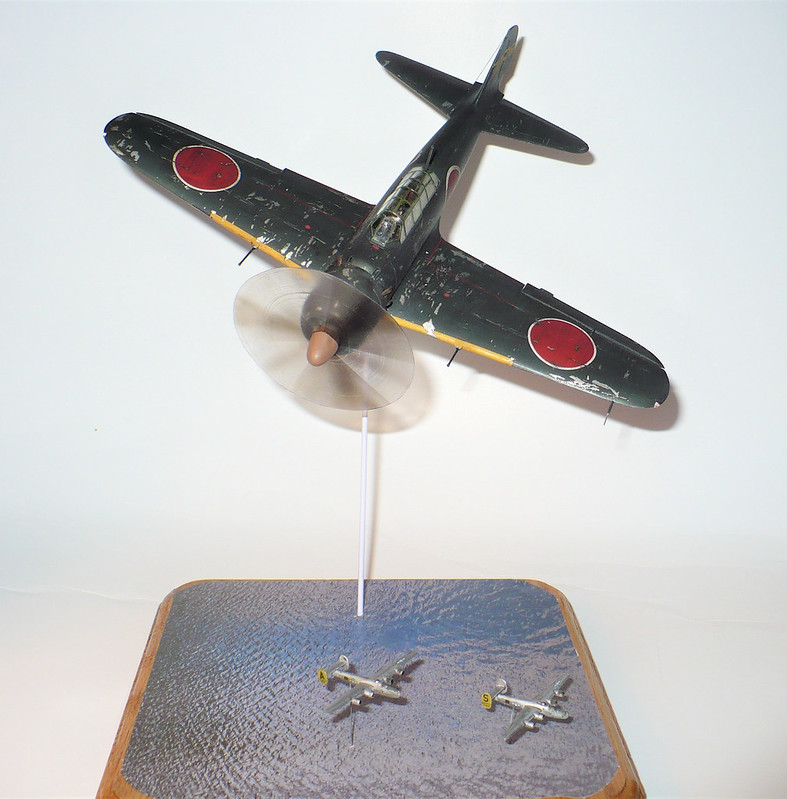
Not exactly a "diorama" but I used internet images printed on standard computer paper to create a backdrop in my display case. The method works especially well for scale posters, calendars, signs, window backgrounds, etc.

-
2
-
-
I used 3D Louver decals by Archer Surface Details from Teds Modeling and was very happy with the results
. Very simple installation and no body work required.
-
I look forward to seeing what it looks like after you've placed all of your tools and materials. Looks like a lot of specific sized holes.
-
Fantastic Kustom! The paint is perfection.
-
1
-
-
The "Iron Butterfly" title caught my attention 'cuz I like that band. I also happen to like Viet Nam era gun trucks so I really enjoy your model. Looks great and I'm sure it will look even better weathered.
-
13 hours ago, alan barton said:
Sensational. I have a black version from Hot Rod magazine on my to-do list. I will be coming back to this thread for clues!
Cheers
Alan
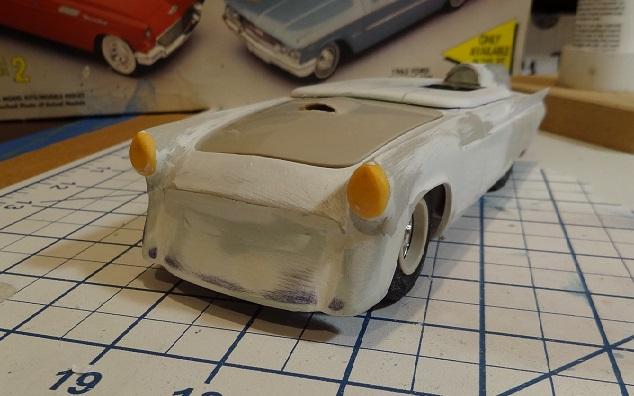
Thanks for the nice comments. Looking forward to seeing what someone else does with a Tbird kit.
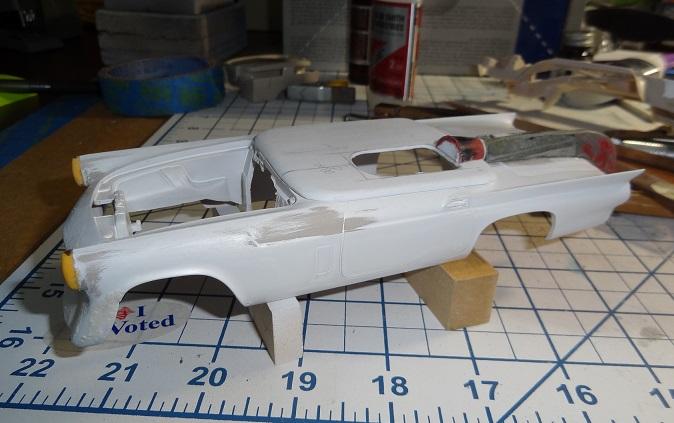
Here are a couple of W.I.P. pics to show some of the changes I made to this kit. Cut out the molded-in seat and added driveshaft tunnel and floor; used old airplane horizontal stabilizer as fairing/rudder; cut molded in exhaust.
-
1
-
-
Welcome back to the hobby. We can use more old-school kustoms on here!
-
1
-
-
Great kit-bashing/customizing! The styling changes really work well to make it swoopy while still clearly being a 57 Tbird.
-
I appreciate the nice comments. This was a fun build.
-
Love the scratch building and kit bashing. Good looking finished model.
-
1
-
-
18 hours ago, Ace-Garageguy said:
Very nice. Reminiscent of the '57 Mercury Mermaid too.
Thanks All for the kind words. This was a fun one to modify. I had never heard of the Mercury Mermaid. You've got to love the ingenuity and experimentation back then.
-
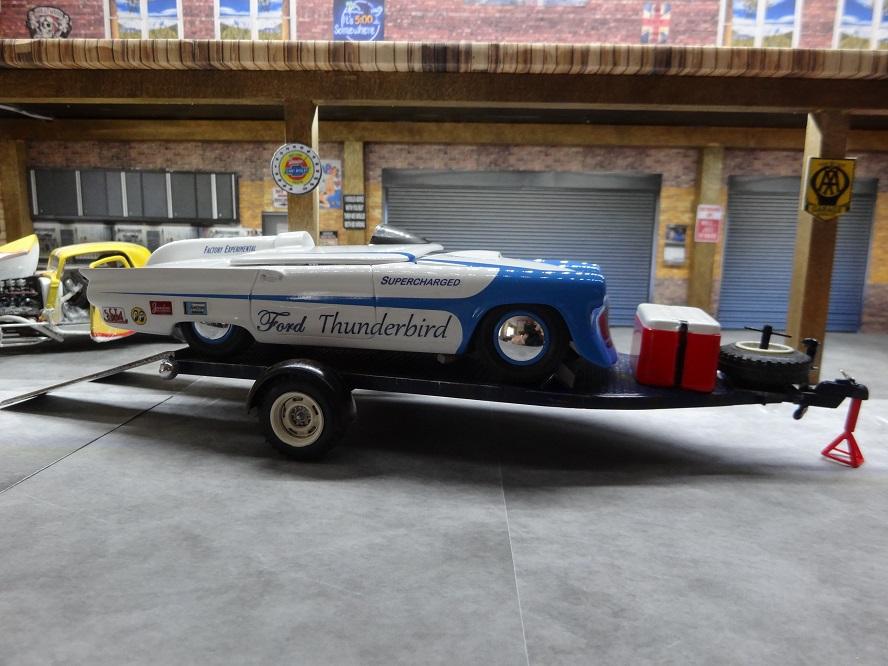
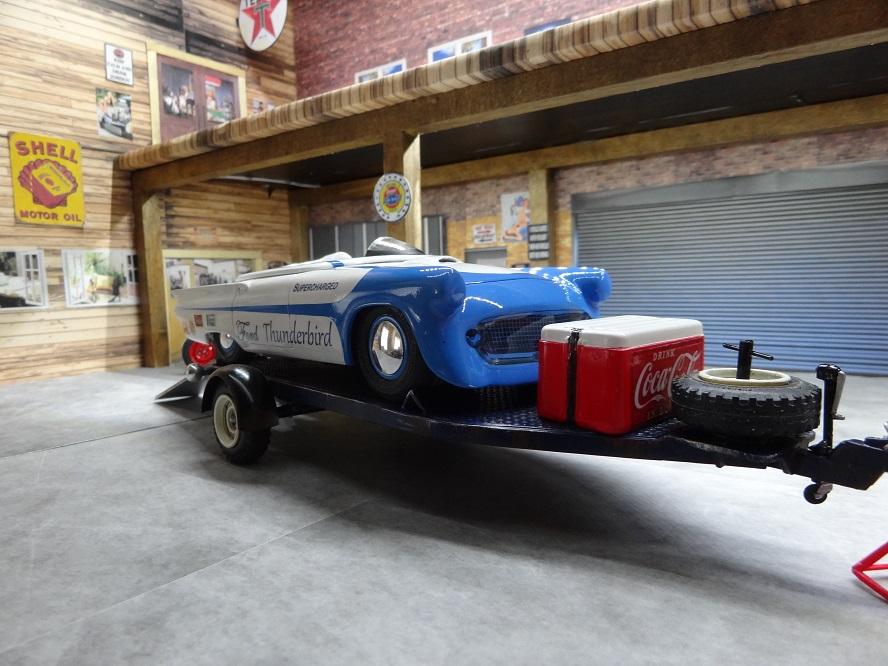
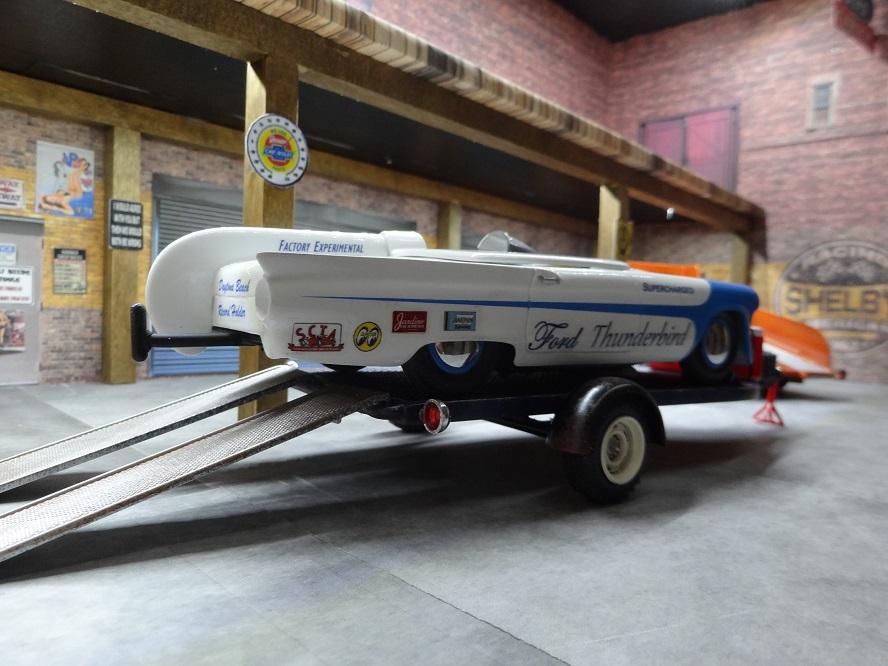
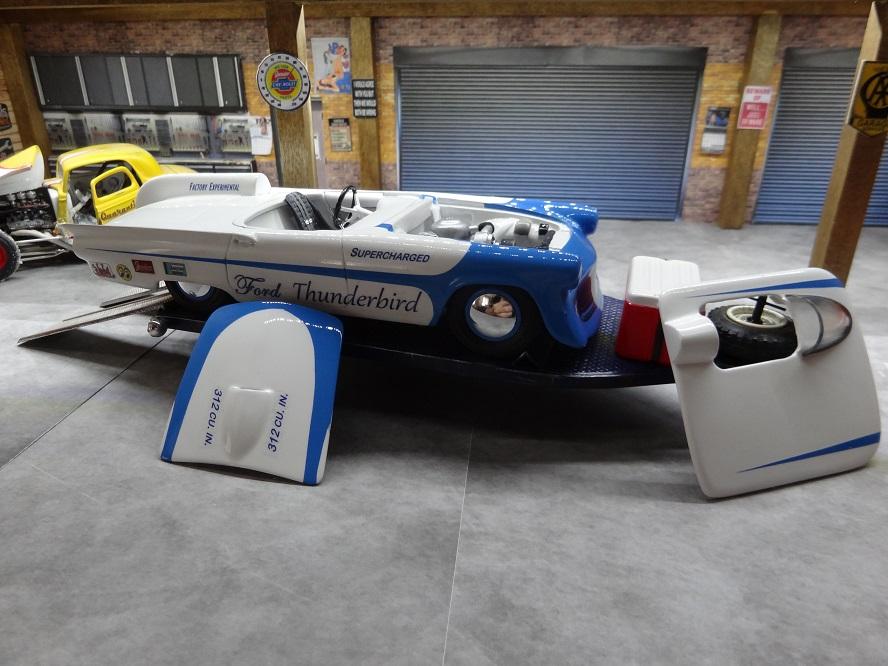
Hi All. I just finished my version of a supercharged 1957 Ford Thunderbird Land Speed Racecar. My version is inspired by Ford's Battlebird and modified for land speed trails at places like Bonneville and Muroc. The model is based on the AMT/ERTL kit. I created the front end from the back end of a '34 Ford fenders and roll-pan and scratch-built the tonneau cover. I scratch-built the McCullough supercharger from left over misc parts. I kept it simple by not detailing the molded chassis and even still used the metal axles. By the way, the vintage-style trailer is a modified race-boat trailer from a Bronco combo-kit. I hope this inspires more kit bashing and customizing. Enjoy.
-
4
-
-
Top notch work integrating that roof onto the convertible body.
-
WOW, that's got to be the most authentic looking weathering I've seen. Great job!
-
I too grew up in SoCal in the 50's-60's, didn't make it to Lions but went often to Irwindale and OCIR. I loved the variety of cars and ingenuity of the local independent racers.
-
3 hours ago, Vintage AMT said:
Super cool build. Any pictures of how you raised the front end?
Thanks
Glad you appreciated the build. I wanted to capture the '60s altered wheelbase look and this Galaxie model is what I had to work with. I don't show my models so they only need to look cool on a shelf. This model did not have very much chassis detail to work with so I took the easy route to achieve the stance I wanted. I cut loose the "A arms" and simply added styrene strip spacers to get the front end height. After I glued in place the raised A arms, I drilled and glued in pins in the "spindles/uprights" to hold rims (I put the pins in the rims with tires and used them to scratch/mark the drill location for each spindle). This allowed me to fine tune the ride height.
Here's the before chassis follwed by the spaced front end:
-
1
-
1
-
-
Thanks for the kind words. Finishing the Galaxie gave me some energy to finish a couple more models. I'm to the paint stage for Bonneville racer and body work stage on an Austin-Healey replica so I'll post something new soon.
.JPG.060a422ad68823e5443b0bdef6517ce6.JPG)


.JPG.d347e07dae80621fd57913a3fb180e9f.JPG)
.JPG.324b4662ba8dff422d3492754b84d852.JPG)
.JPG.9b27c2dbf29f5e367a88286140b2eb55.JPG)
.JPG.36a030b7fb2d0607857d71244d679981.JPG)
What Are Some of Your Favourite Kits That You Built?
in Model Cars
Posted
Great looking kit-bash of a cougar that should have been. Check out a real-life fastback Cougar that's currently winning at the car shows: