

EngineerBob
-
Posts
140 -
Joined
-
Last visited
Content Type
Profiles
Forums
Events
Gallery
Posts posted by EngineerBob
-
-
12 hours ago, FredRPG said:
I like the Airstream camper, where is it from?
I would also like to know where to get that trailer/camper?
-
Welcome to the forum. Nice job on those models! They definitely don't look like a first-timer built them.
-
Beatiful! Extraordinary body mods and the ability/access to getting chrome plated parts really takes it over the top.
-
CountryJoe, as DaveG mentioned a "boss 427" is a relatively modern Ford 351 small block engine stroked to 427 cu in while the 427 FE is a vintage big block engine which came in a number of different cu in sizes. If you have accurately scaled engines then the FE should be physically larger on the outside even though they are both 427 cu in. If you want a physically large Ford engine then consider a Boss 429 (the hemi-head version) or a 427 SOHC, they both have big blocks but very large heads. Or if you really want to be large and different then try a vintage 331 hemi with six carbs on a log manifold.
-
5 hours ago, FLHCAHZ said:
Fantastic body work and creativity. Really Superb!
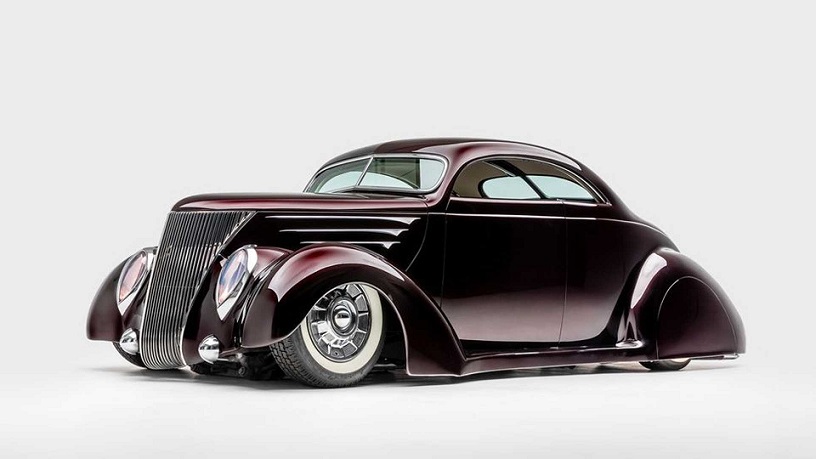
Thanks. Initially, I was going to make a more traditional competition coupe (like this:
 ) but I couldn't not use the Willys front end and then I had to have a body in the middle and then I got creative.
-
10 hours ago, JollySipper said:
Hey, Grant man.... If that's what you're into, you'll really enjoy looking at this build by our own Impalow...
He's gotten as close to a Dore build as I've ever seen!
OMG, that model is fantastic. Thanks for pointing it out. I can't compete with that though!
-
1 hour ago, doorsovdoon said:
What a cool build, love all the detail. Great looking ratty paintwork, very nice.
Thanks. It was fun to do a paint job that you couldn't really mess up, just keep adding layers to cover any mistakes instead of starting over on some of my previous shiny paint jobs.
-
1 hour ago, JollySipper said:
..... or some of Rick Dore's builds, like the Crimson Ghost....
and Slow Burn would be awesome to build........
I couldn't agree more! I think Rick Dore is the best builder of hand-built, full-kustoms out there. Any of his cars would make a great model kit. Now that you got me thinking about it, I may have to put a Rick Dore style build on my list of future models to do. His sweeping enclosed pontoon-style fenders would be interesting to try and duplicate.
-
14 minutes ago, carbuilder1950 said:
Thanks @EngineerBob (Grant).
Some people just have an inate ability for this kind of thing. Kind of like a mechanic friend who can fix anything. Guys a genius. I'm by no means a genius, but sculpting model cars has always been pretty easy and pretty fun. It's sort of a natural artistic thing. I used to restore 1 to 1 cars, build street rods and customs many eons ago. Did a lot of body work, so some of this probably came with that.
To answer your question, I use either multi-levels of tape stacked on top of each other as a pattern for shapes on compound curves, or I use Evergreen plastic as patterns for mostly flat shapes , especially those that need to repeated on both sides. The rest is just eyeball work that seems to work pretty good with a set of digital calipers. I make everything with a sharp edge, clean and crisp, and then use several grades of sandpaper to round things off to get the right look. It just takes time and a pretty good eye, and it usually comes together pretty good.
Never perfect, but it's usually good enough, like this Buick.
I do a lot of measuring and pencil line drawing too.
Anymore question, I'll be more than happy to answer.
Thanks for the info. One of your pictures shows you using styrene sheet as a pattern, great suggestion. Do you make a custom shaped sanding stick to get such crisp lines?
-
I'm sorry to say that I passed over this topic when I first saw it since a '20s classic car doesn't interest me but, wow, I love the scratch-building and theme that you've done so far. Your description and photos are full of good advice for any modified model. Thanks for posting.
-
Wow, I've always loved fastback body-style kustoms but yours takes it to a whole other level. Great job combining parts to get the look you wanted. I'm especially blown away by how clean your created body lines are.
What tools and/or methods do you use to get such crisp sculptures?
-
7 hours ago, misterNNL said:
Very creative and well done. I really like that front clip hung way out front !
Thanks. I probably made the most changes from the starting model on this than any of my previous models and the shape ended up pretty much matching my vision.
You can see here the yellow is the original 33 Willys.
-
1 hour ago, gman said:
Dat's da bomb!
(sorry, had to say it)
Cue the rimshot "ba-dum-tssshhh".
-
6 hours ago, Koellefornia Kid said:
Nice rat! Like the Hudson engine and that air cleaner!
Thanks, it's all about being different with a rat rod.
-
3 hours ago, deuces wild said:
You might want to look into the Revell '62 Impala 2'n1 kit.... I think it has an oval air cleaner.....
Good call, thanks for the info! I just did an internet search and both the '62 Impala 2in1 and the '62 Impala 3in1 have the same oval finned air cleaner (it's technically for a two 4-barrel set-up rather than a single 4-bbl but pickers can't be choosers; maybe I'll put two 4-bbls on my wife's car
") ). There'd be some good kit-bashing parts left over with either of those kits too.
). There'd be some good kit-bashing parts left over with either of those kits too.
-
 1
1
-
-
8 hours ago, espo said:
If you can't find a kit with the air cleaner you are wanting consider scratch building one. The air cleaner in the picture looks like you could use a couple of oval shaped pieces of flat plastic. This you could shape into the desired shape. The ribs on the top could be represented with some very fine stripes of plastic stock. The air filter element could be made out of several different materials. I suggest looking for anything that is thin and can easily be bent to shape. Look beyond the normal modeling products and look around at different product packaging and even shipping protection products. My wife doesn't through anything out before asking if I can use it for modeling. Bonus is that you will get to point to the air cleaner and say "I made that".
Gotta admit that it didn't even occur to me to try and make one from scratch; thanks for the idea. I'd still like to know if there is a kit with one, which would be easier for me.
-
I'm sure that with so much encyclopedic knowledge that there is on this site someone can point me to a kit that has an oval finned air cleaner similar to this one (doesn't have to be chrome since it will be painted black)?
For the first time ever I'm going to try to accurately model a real car, my wife's hot rod ( as opposed to more fantasy cars I usually work on).
-
1
-
-
Great looking model! I love to see such well executed kit-bashed models.
-
Thanks, slusher. Unique and not out of the box is what interests me the most and, based on ideas I've gathered from this Forum, I've been confident enough to try more complex kit bashing.
-
4 hours ago, espo said:
Very creative. I guess the Pandemic has had an effect on all of us. I like the rear tracks and the details of the interior and the hatch with the machine gun. This would make a good prototype for the next Mad Max franchise as well. I like all the little touches you notice the longer you look at the pictures.
Thanks for noticing. I had finished and had plenty of small details that only showed up from 12 inches away, but, once I took the close up pics I realized I could have put even more detail in if I wanted to get carried away (maybe on the next one).
-
On 7/20/2021 at 6:50 PM, spencer1984 said:
Very cool! What did you use to make the waffle-pattern armor over the side windows?
The armor was left-over diamond plate from a parts-box trailer floor that I cut up (probably the Daytona Transport Truck).
-
18 hours ago, Claude Thibodeau said:
Hi Grant!
Very clever mash-up. Exactly the kind of outrageous experimental dragster that excited the crowds in the late sixties. Bravo!
CT
Thanks, CT. That's what so fun about modeling, some random idea popping up in your head and then you get to make it a 3D reality (sort of).
-
If you can view the image on your monitor at least around 4-6" square (viewed at 100%, not an enlarged screen view) and it's not pixilated then it will print at small scale just fine. I look for images that are approximately 800 x 800 pixels on an image that is about 6" square on my screen but that varies based on the original image size. In Google image search you can use the Tools to choose the image size that you want to look for. You can choose 'large' and be sure that the images will have plenty of definition but simple block letter type logos don't need to be as high quality to start with.
-
I've made my decals just by pasting desired hi-def photos onto a blank Word document. Word has more than enough tools to manipulate images for decal use. Then, using the rulers in the margins, I shrink the photos to an approximate size and print a test on plain paper. Cut out the paper 'decal' and hold next to your model to determine how much, if any resizing you still need. On the Word doc decal sheet I make a copy of the decal that I'm resizing and place it next to the original so I have a reference to see how much I need to increase or decrease the size. Once I get all of the decals the desired size I delete all of the un-needed and wrong size images. I then size the Word doc to 4" by 6" with very small margins and group the decals to waste as little decal paper as possible. Cut a sheet of decal paper to 4x6 and print at your best or highest quality printer setting just as you would a photo. Good Luck.
 ) but I couldn't not use the Willys front end and then I had to have a body in the middle and then I got creative.


Need easy way to simulate tuck and roll.
in Model Building Questions and Answers
Posted
I used scale siding to sorta simulate tuck-n-roll but I didn't think it was very realistic. My model was more of a curb-side and I tinted the windows so you could mainly just get a hint of texture inside; worked fine for that. I'd suggest trying to find a different kit interior that you could adapt to your '58; besides it was a custom car so it wouldn't have to be exactly '58 Chevy.