The Creative Explorer
-
Posts
1,996 -
Joined
-
Last visited
Content Type
Profiles
Forums
Events
Gallery
Everything posted by The Creative Explorer
-
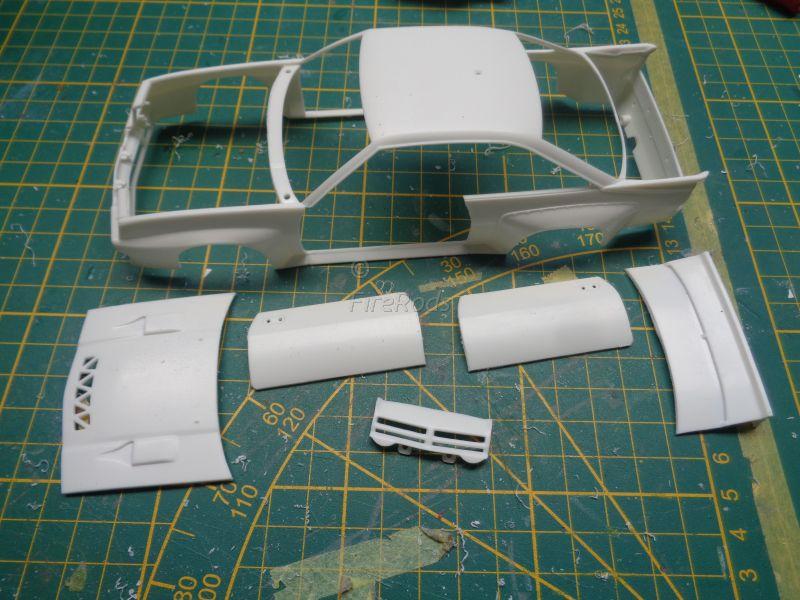
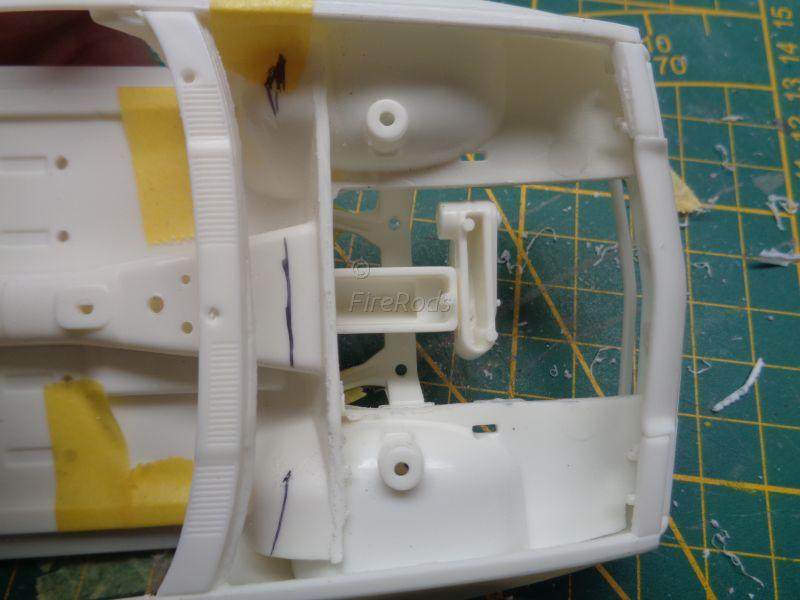
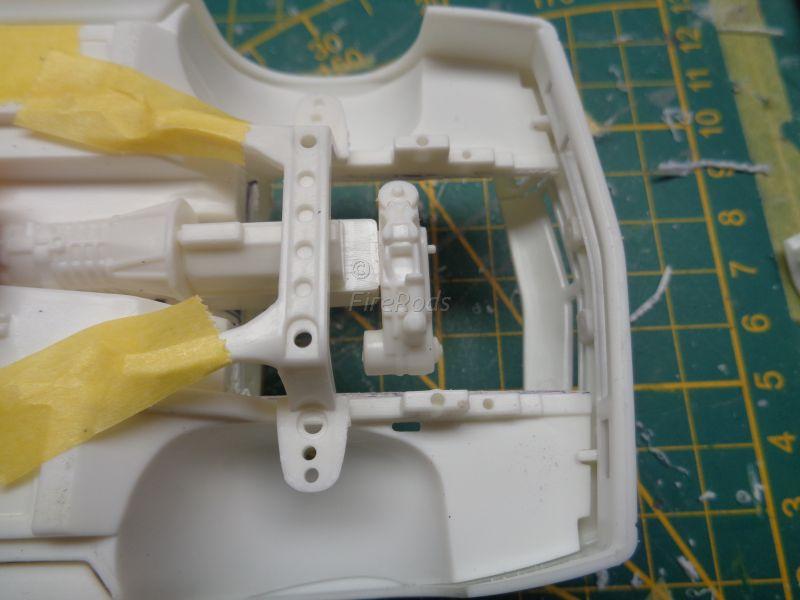
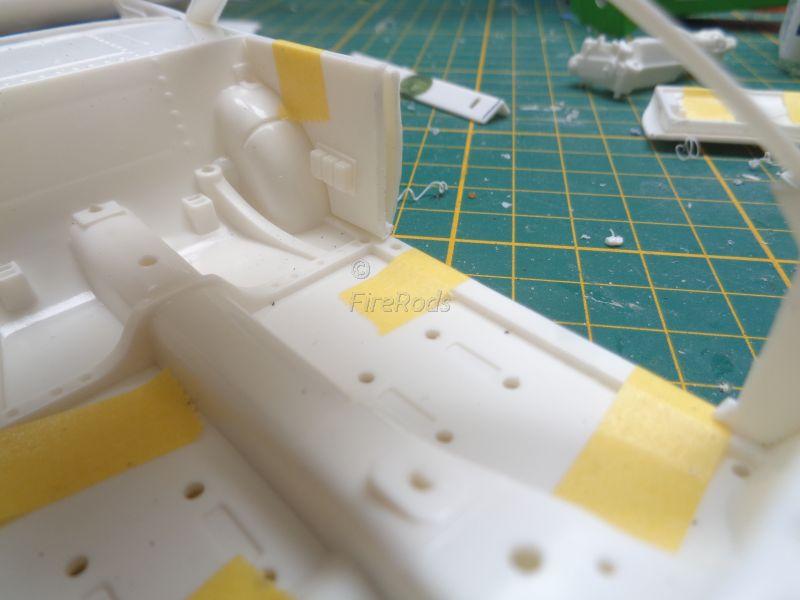
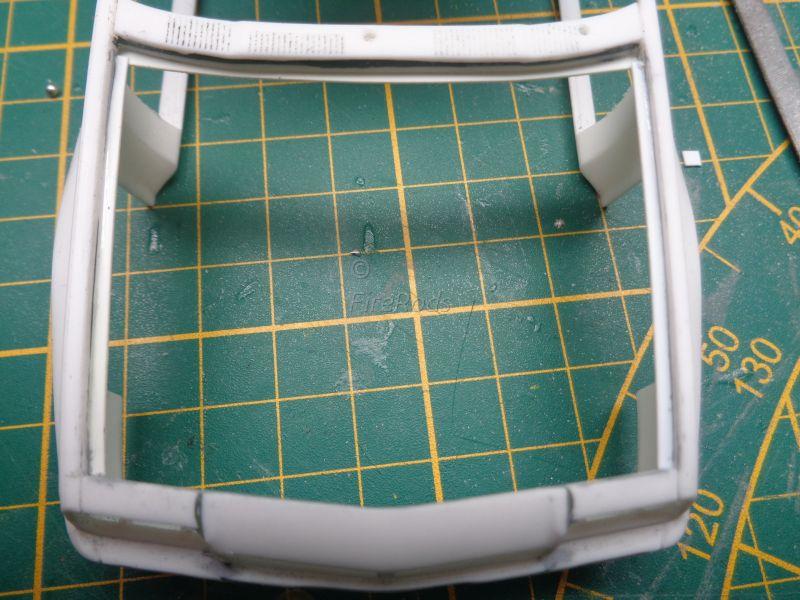
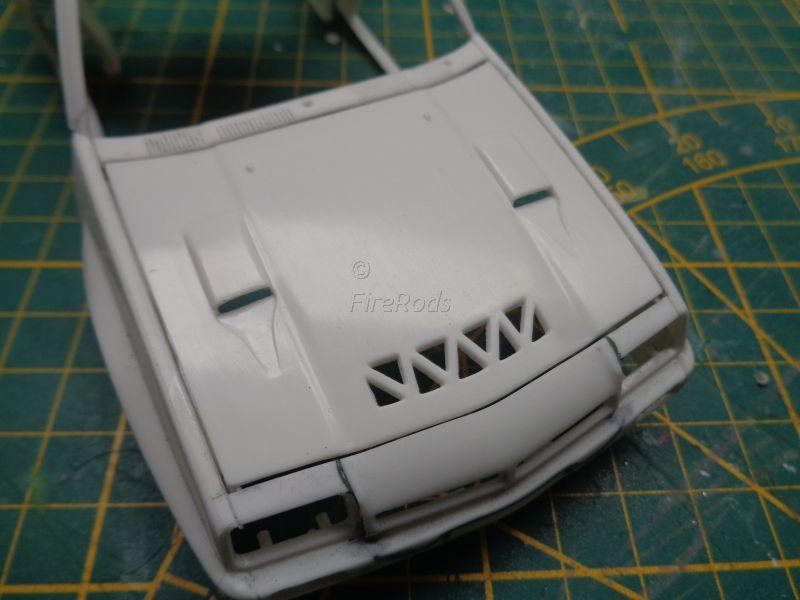
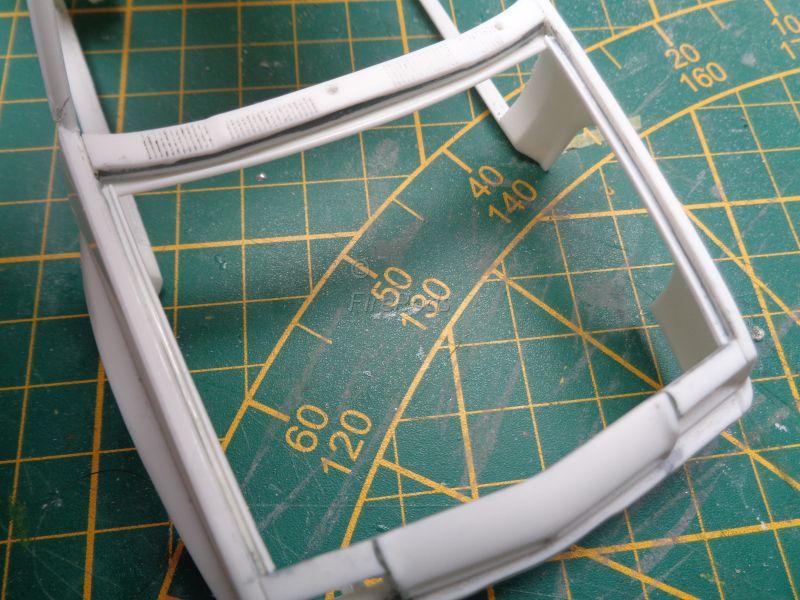
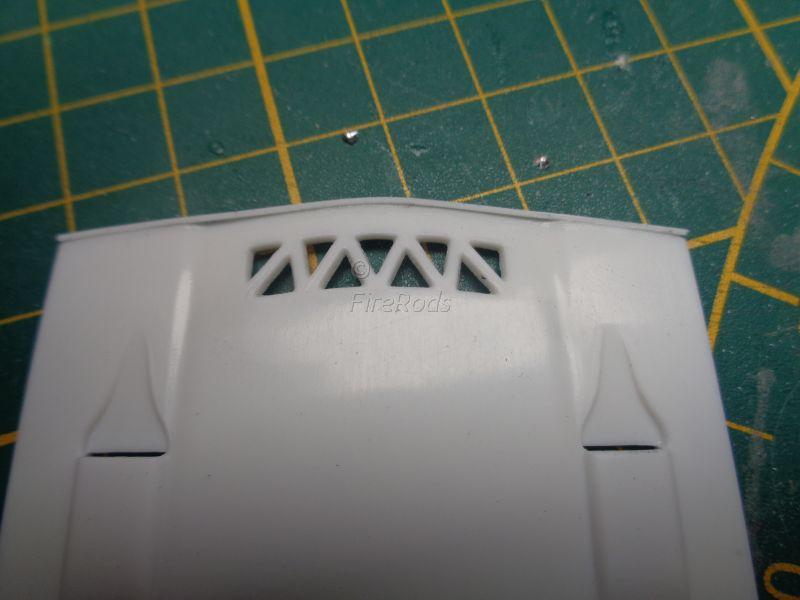
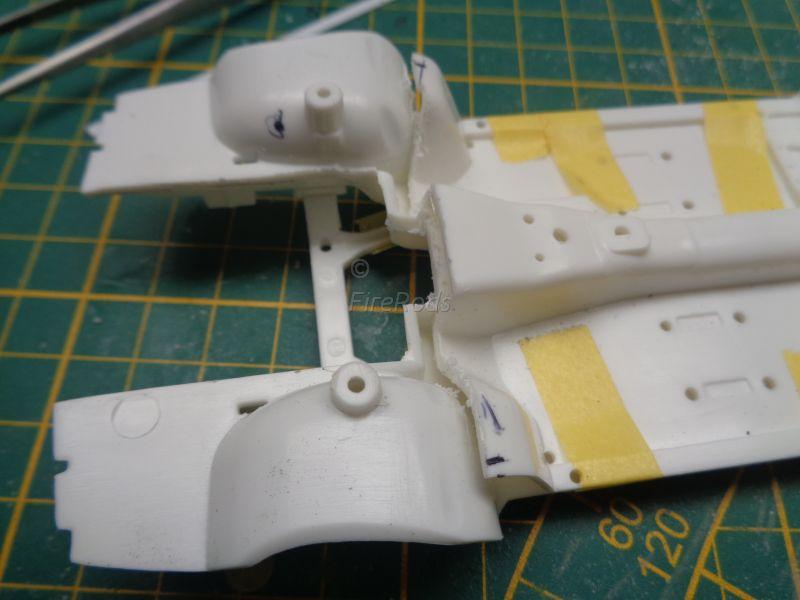
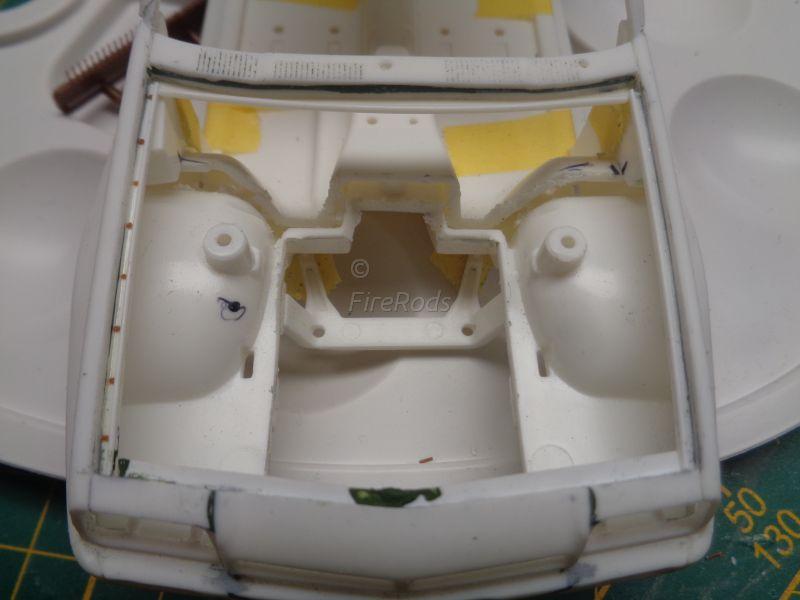
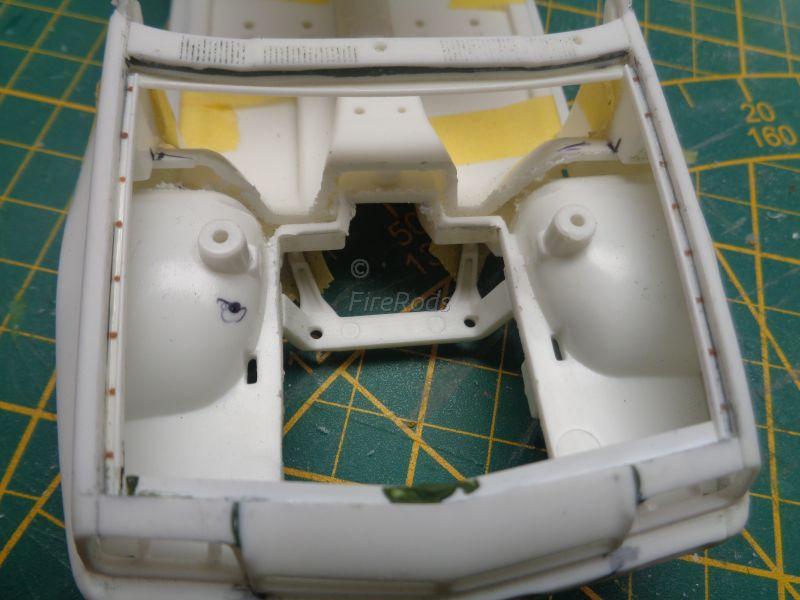
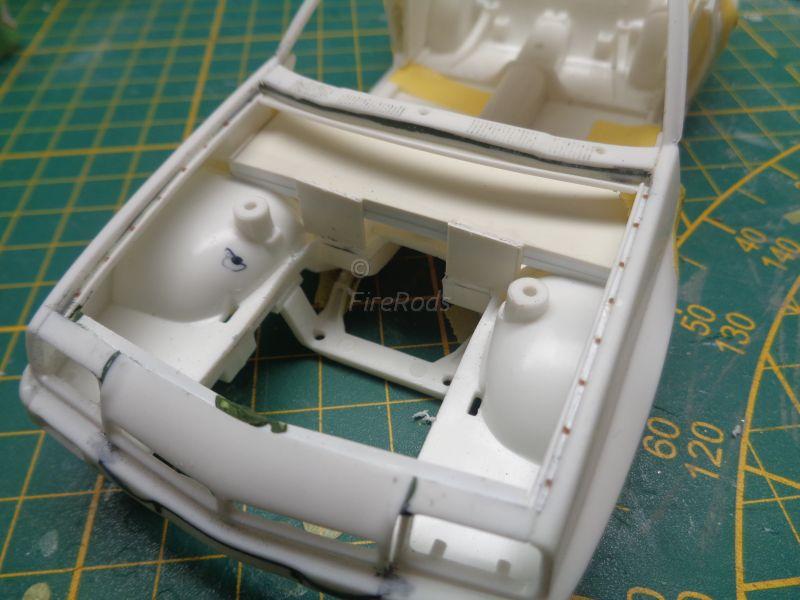
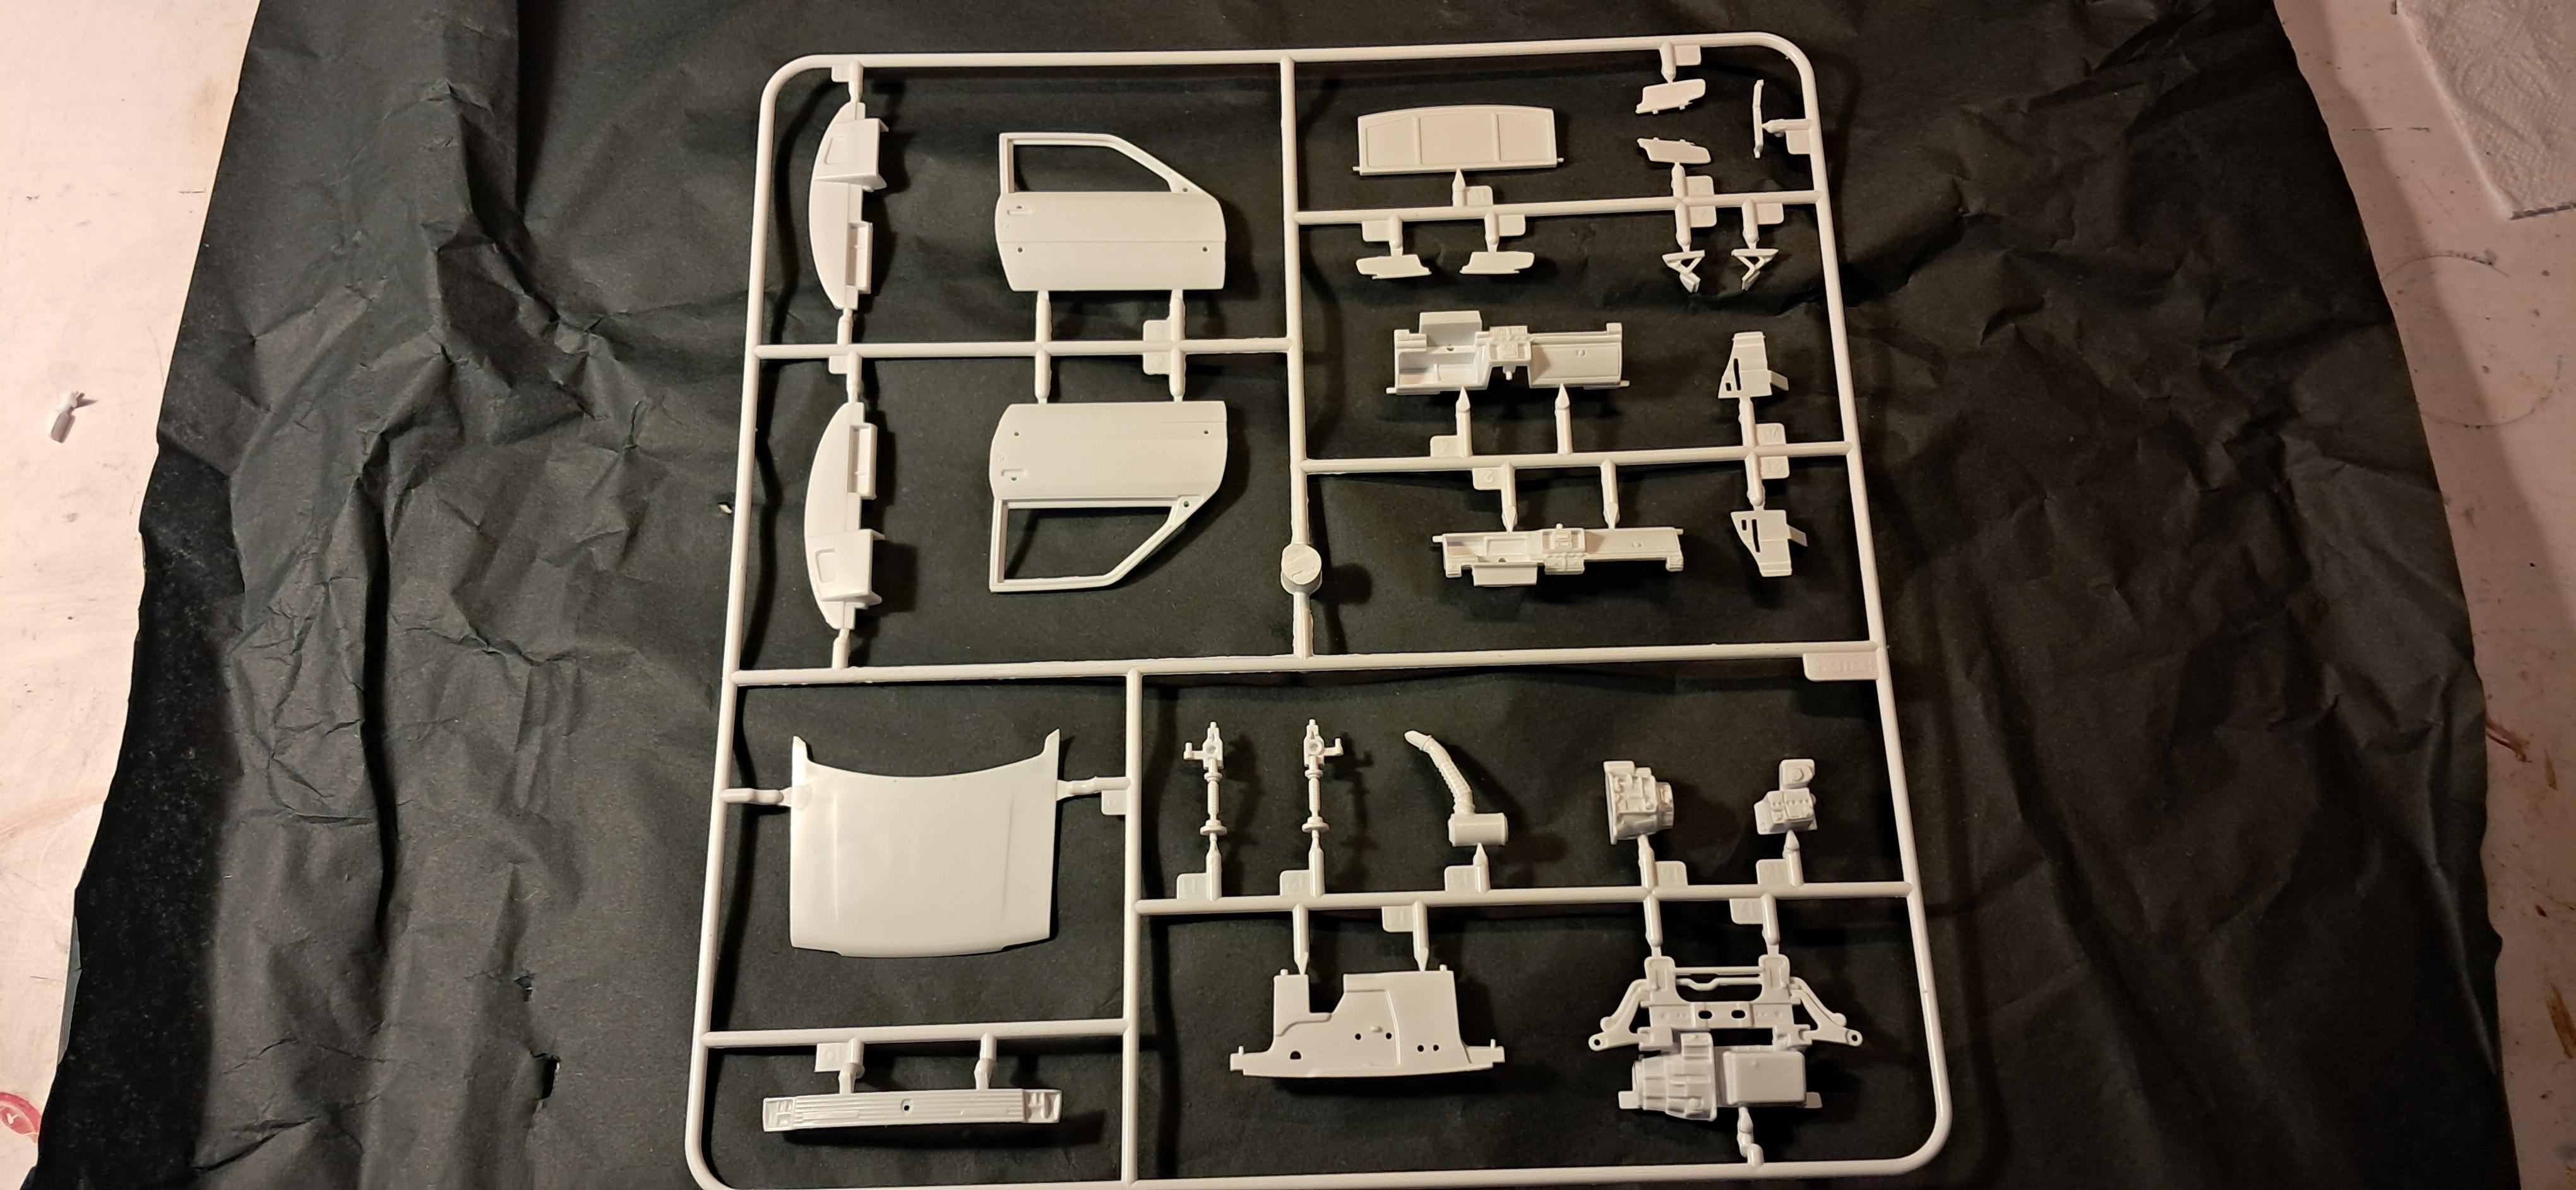
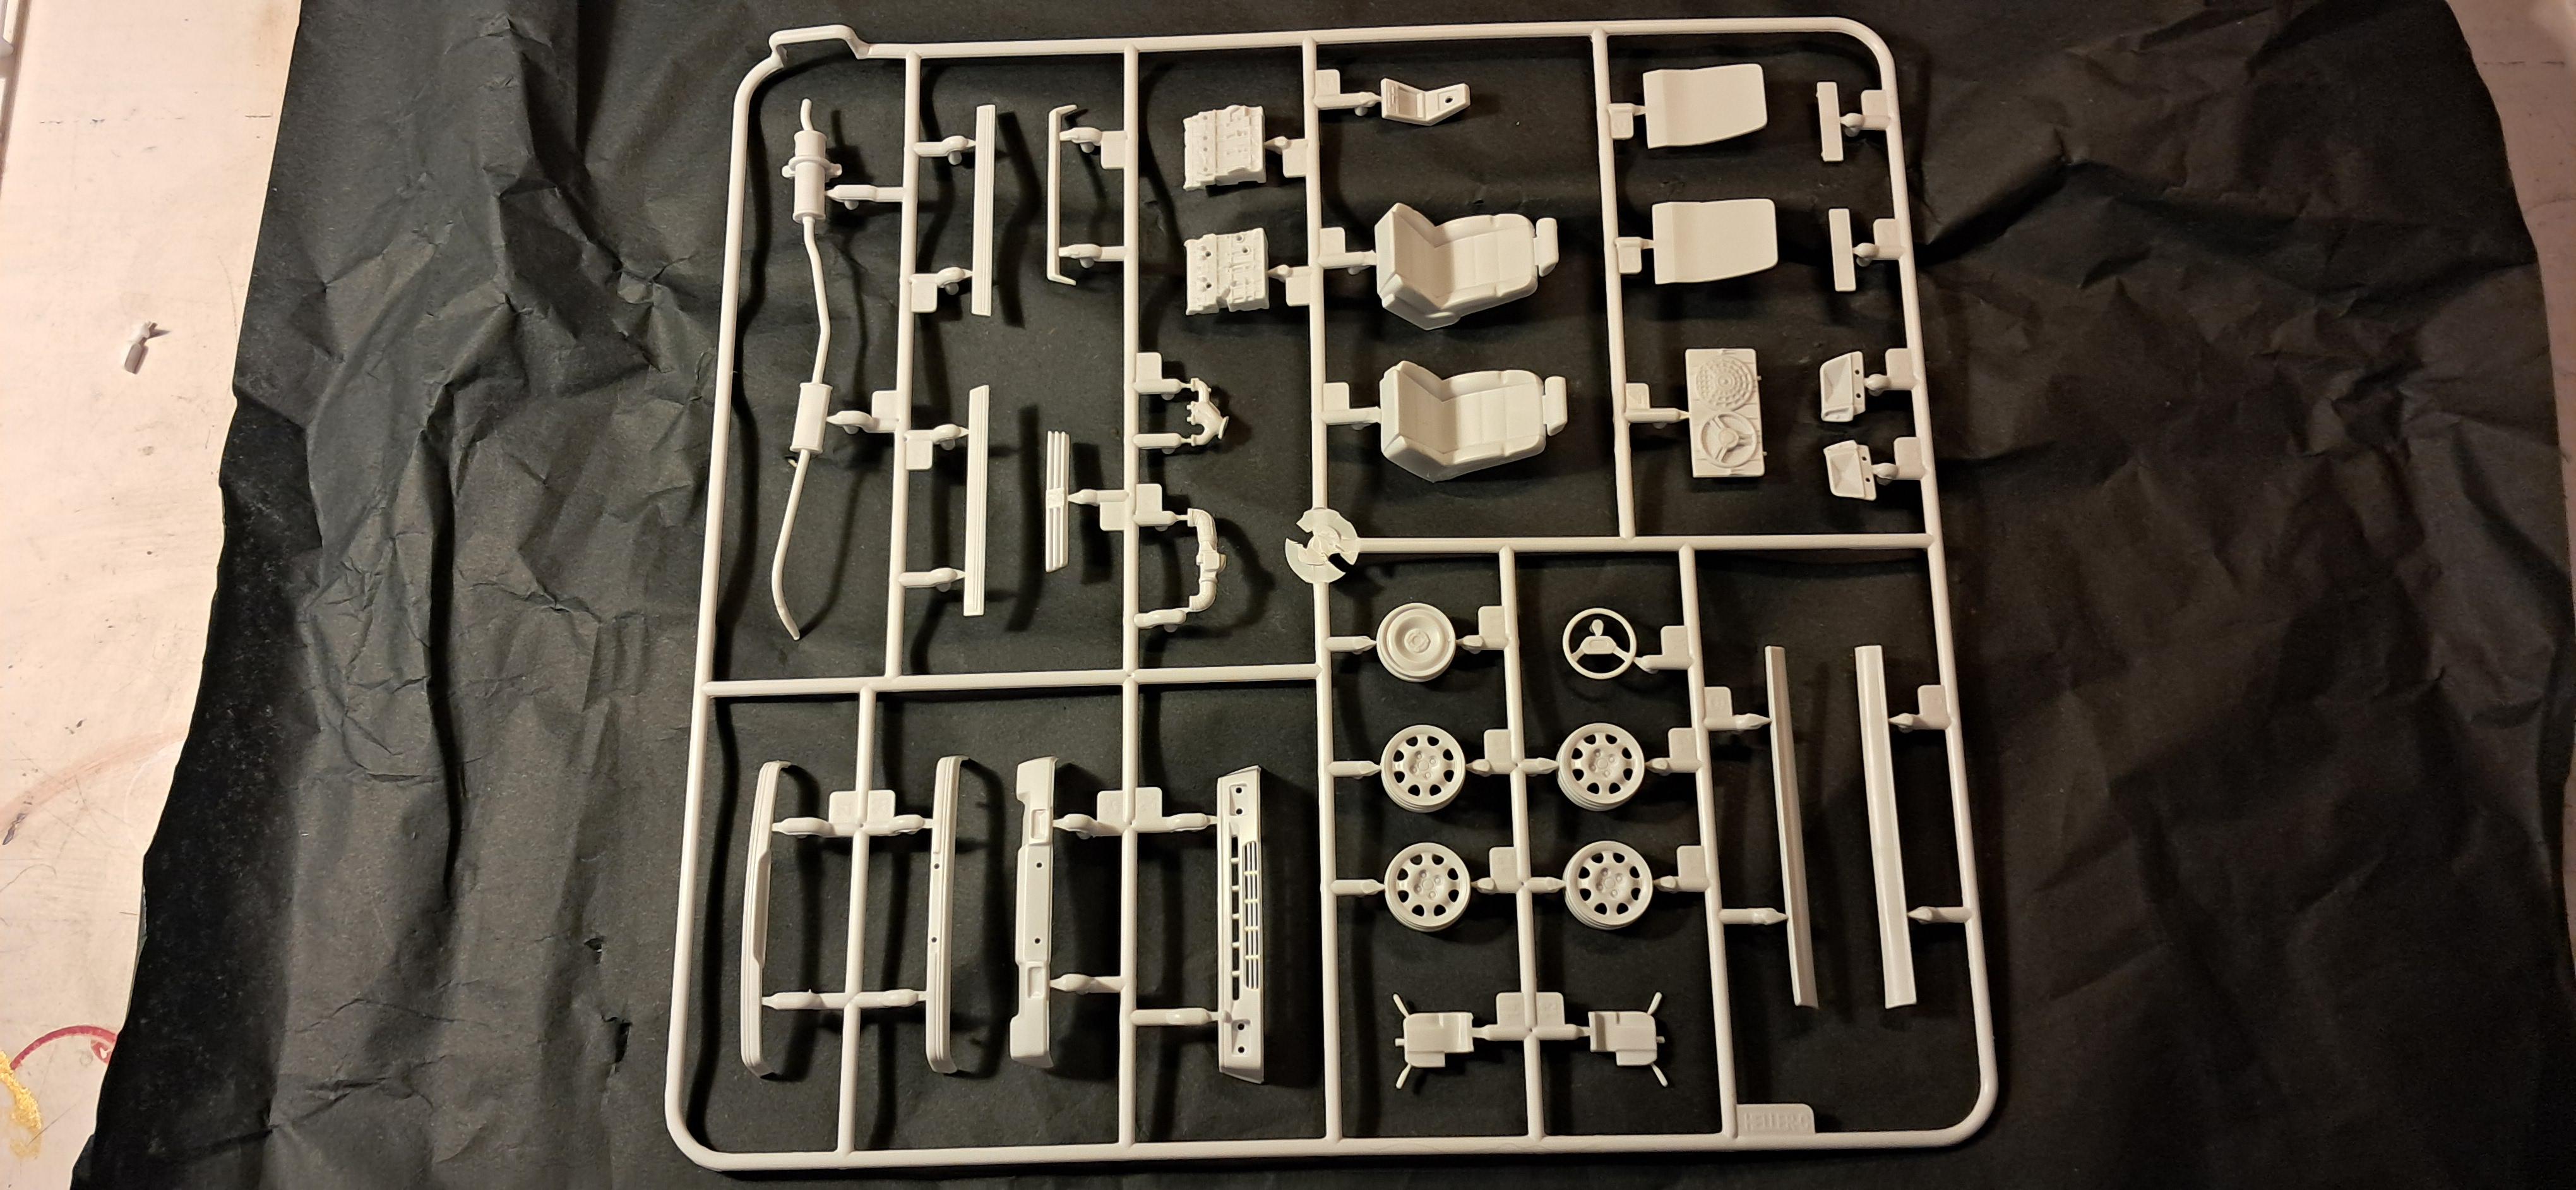
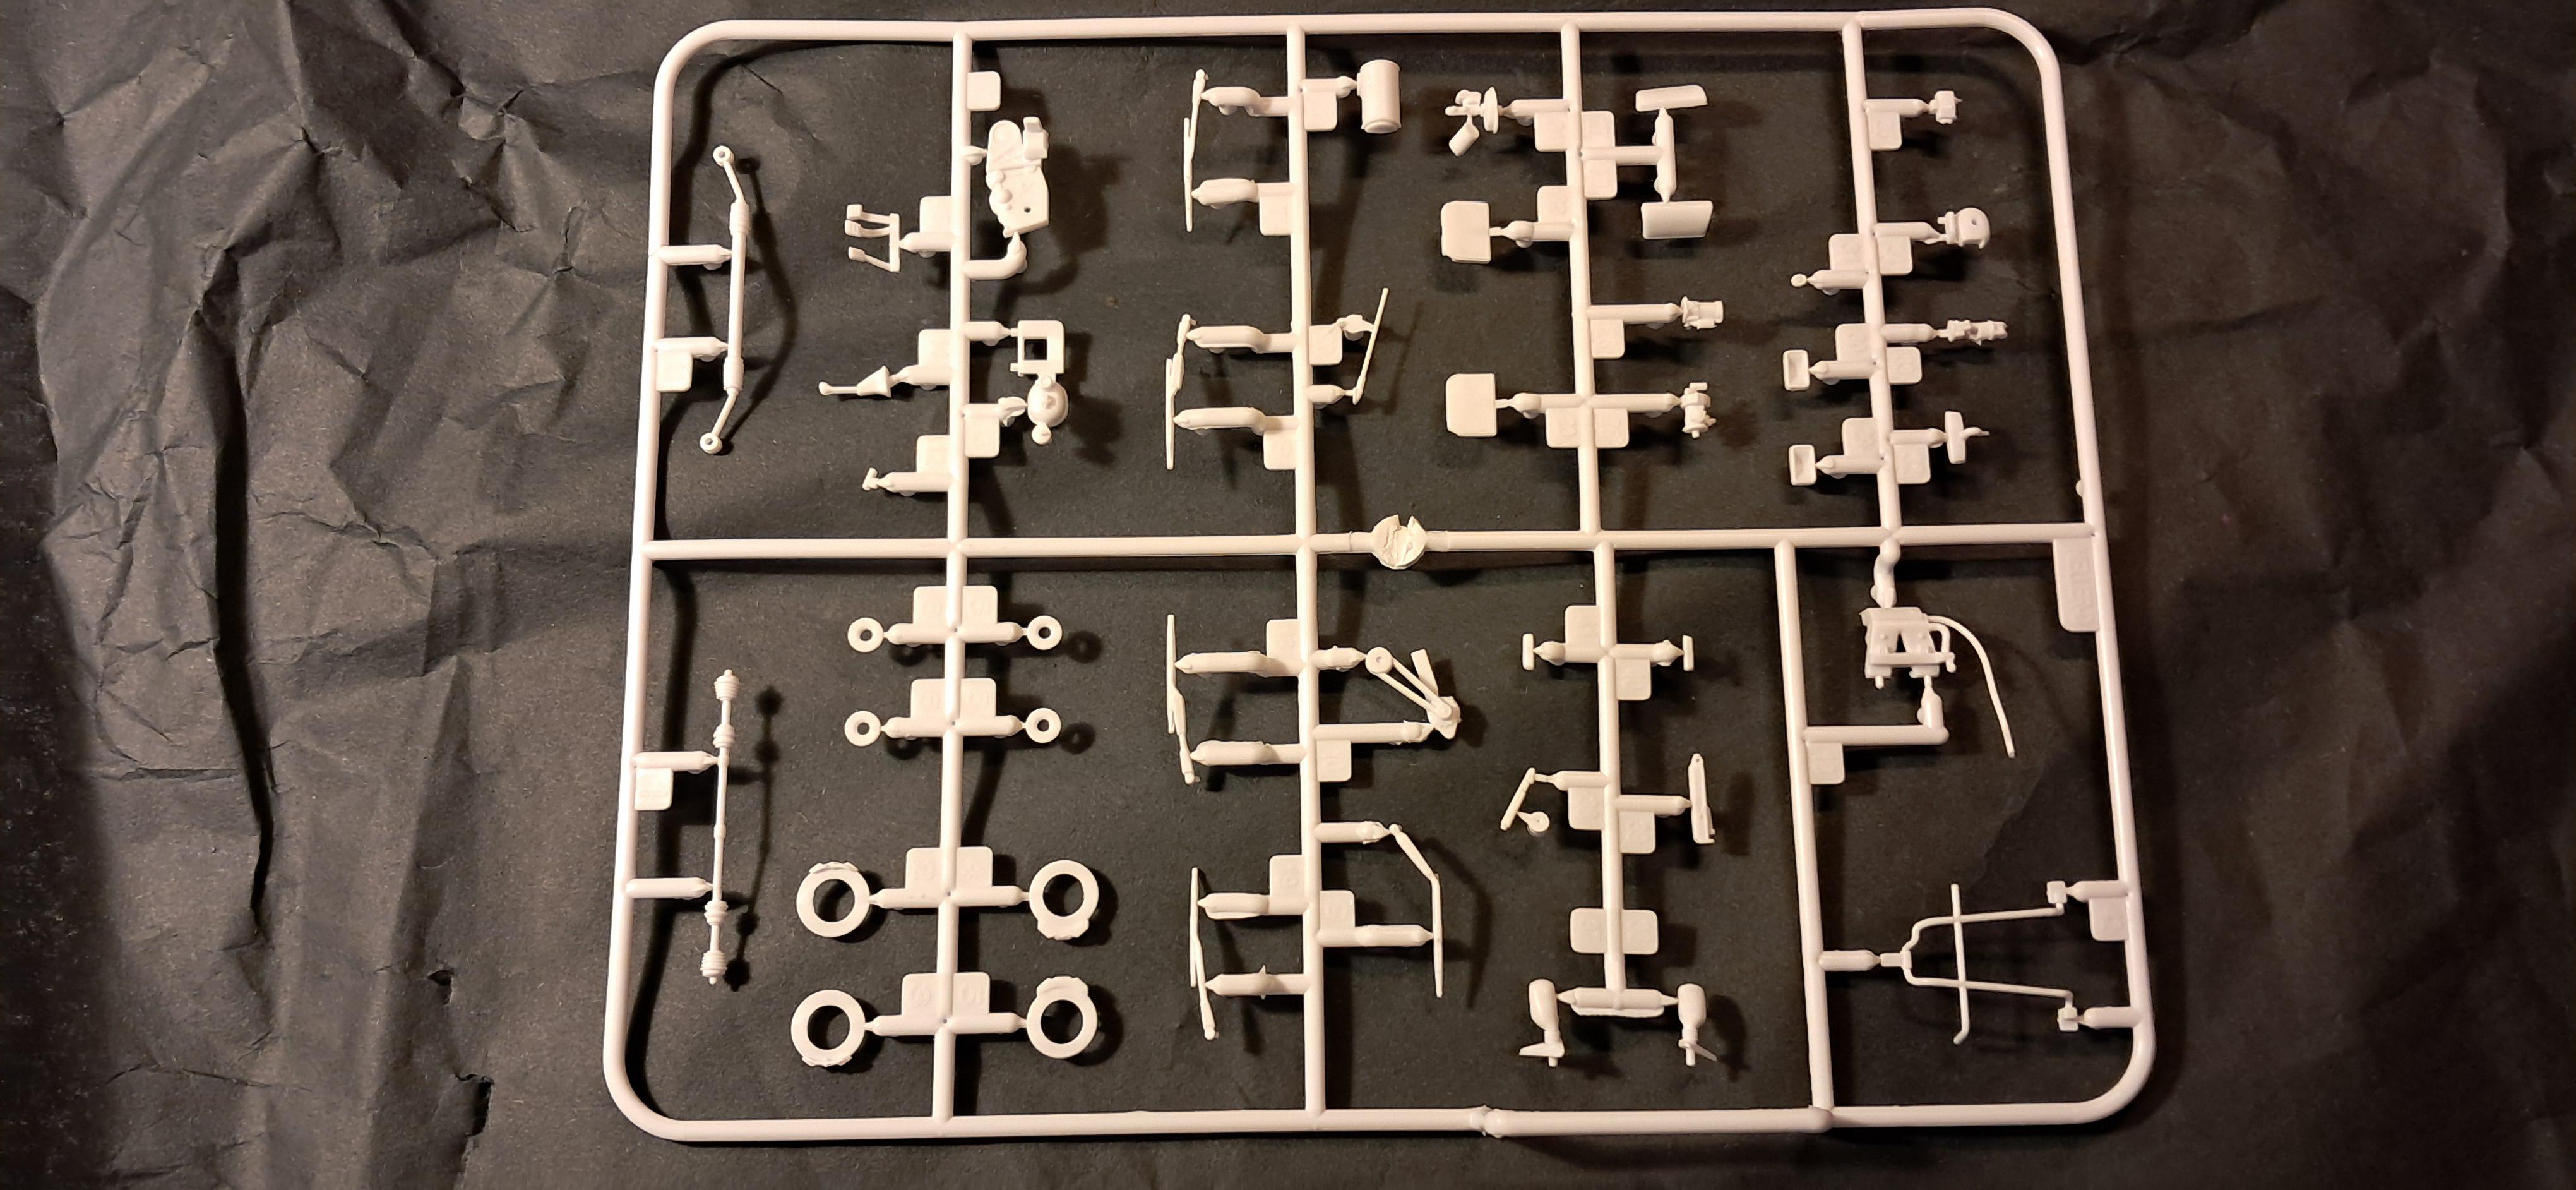
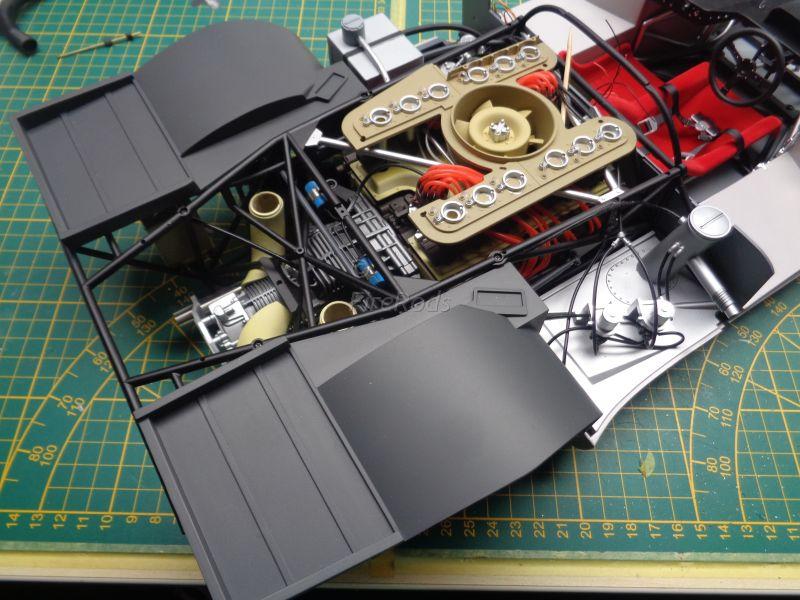
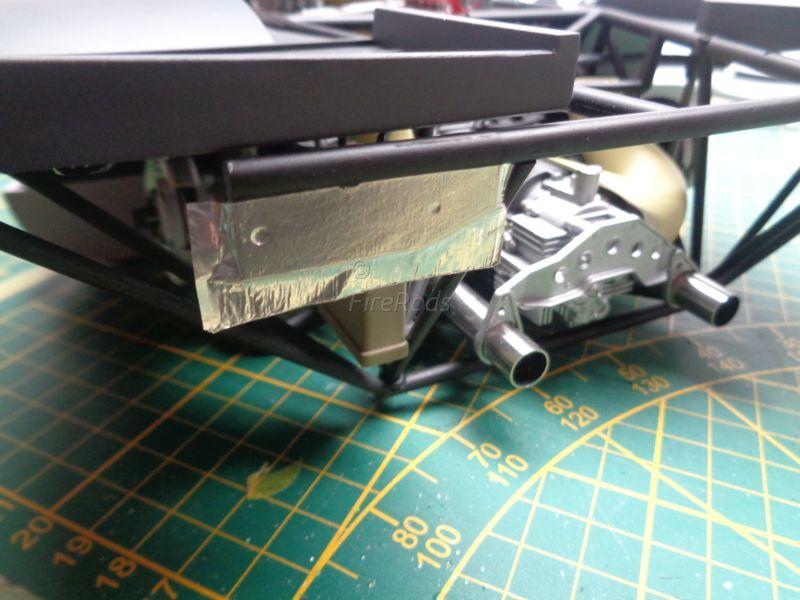
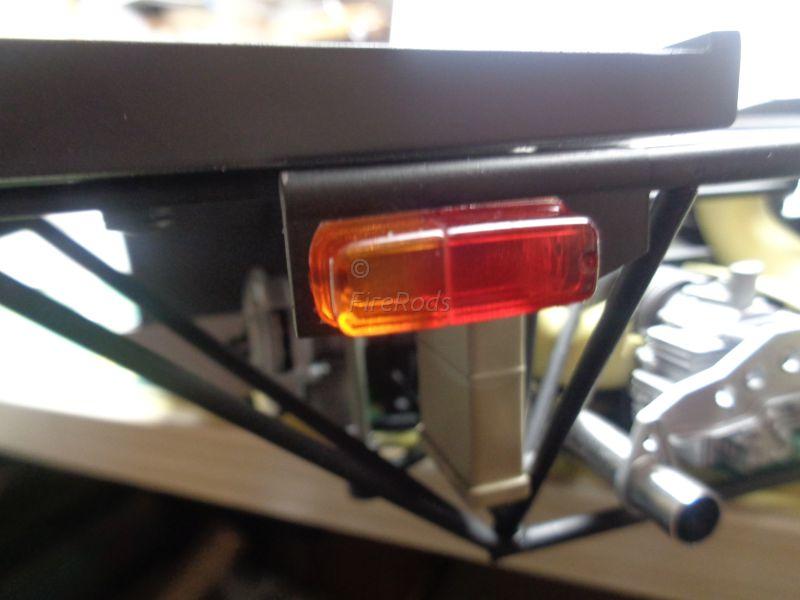
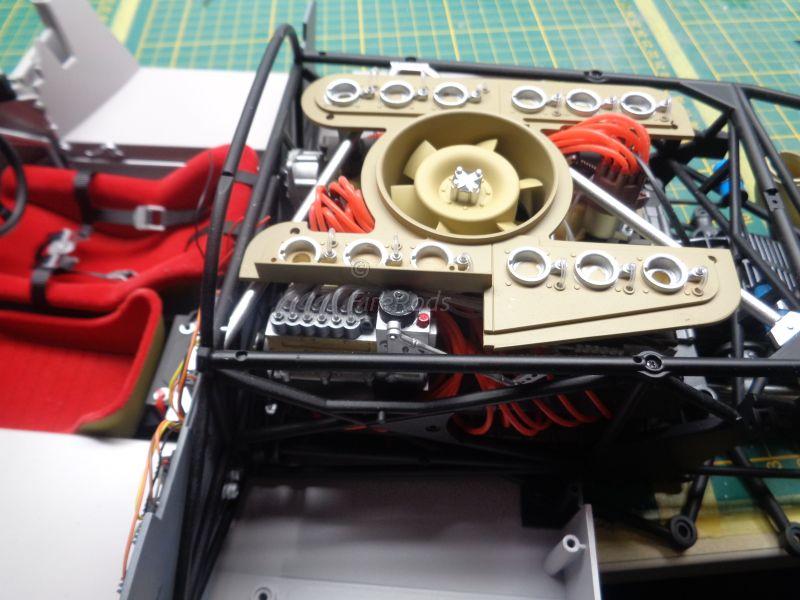
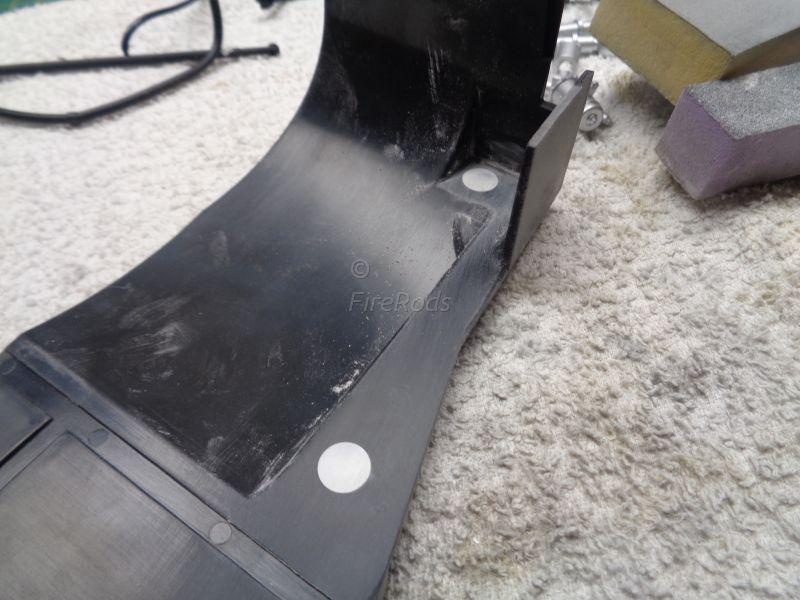
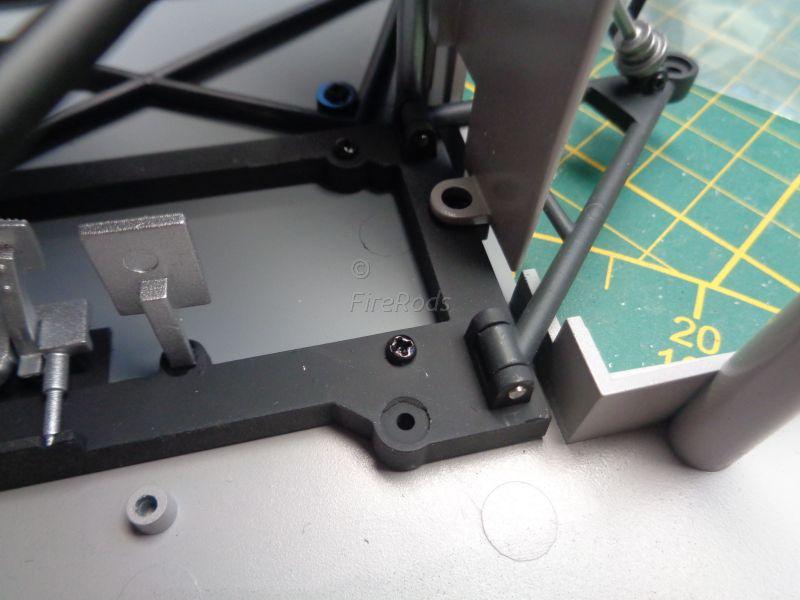
 After doing a lot of 'quickies' the last couple of years, I had the desire to go deeper again and wanted to make a full-detail. Something I did many years ago, but stopped probably due to time-restraints and wanted to finish something once in a while. I thought the BelKits Opel Manta would be a good candidate, it is full-curbside and will be quite the challenge to make it full-detail. It is also engineered in the CAD-age, so the fitment out of the box is good and helps me get me back in the saddle. So far, I have cut the whole thing open and see from there where to go and what to do. At the moment, I am working on the engine bay and on the rear-compartment. The enginebay got its raingutters, weatherstripping and fender bolts. I started on making a firewall and have to figure out what the best way would be for hinging, as there is little space under the scuttle panel.
- 1 reply
-
- 4
-

-
Issue #227
The Creative Explorer replied to charger74's topic in Model Cars Magazine News and Discussions
Well, after 2 weeks still no reply from Modelcarsmag nor a magazine. Just send them a reminder. -
Looks well executed
-
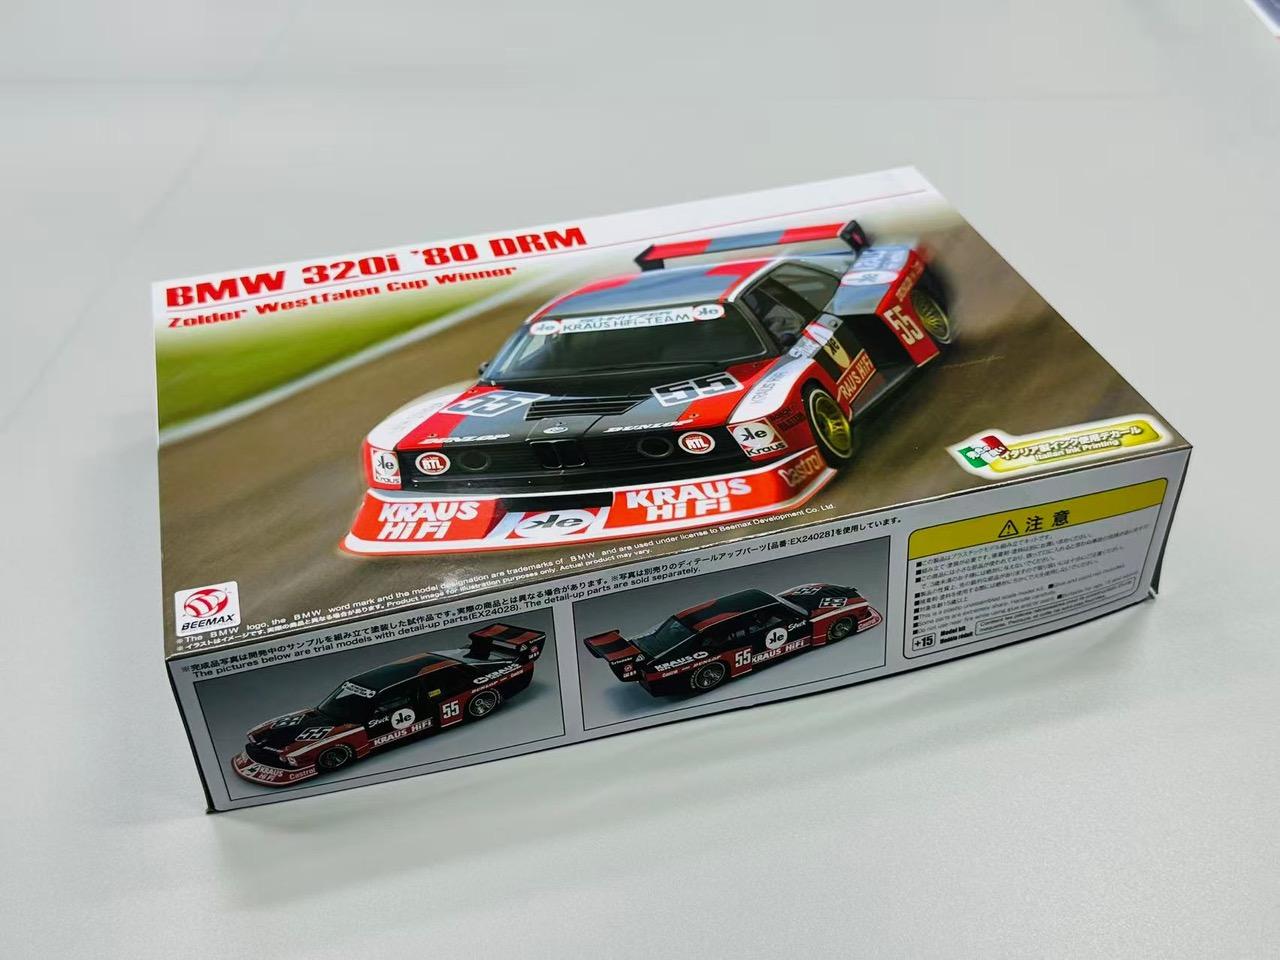
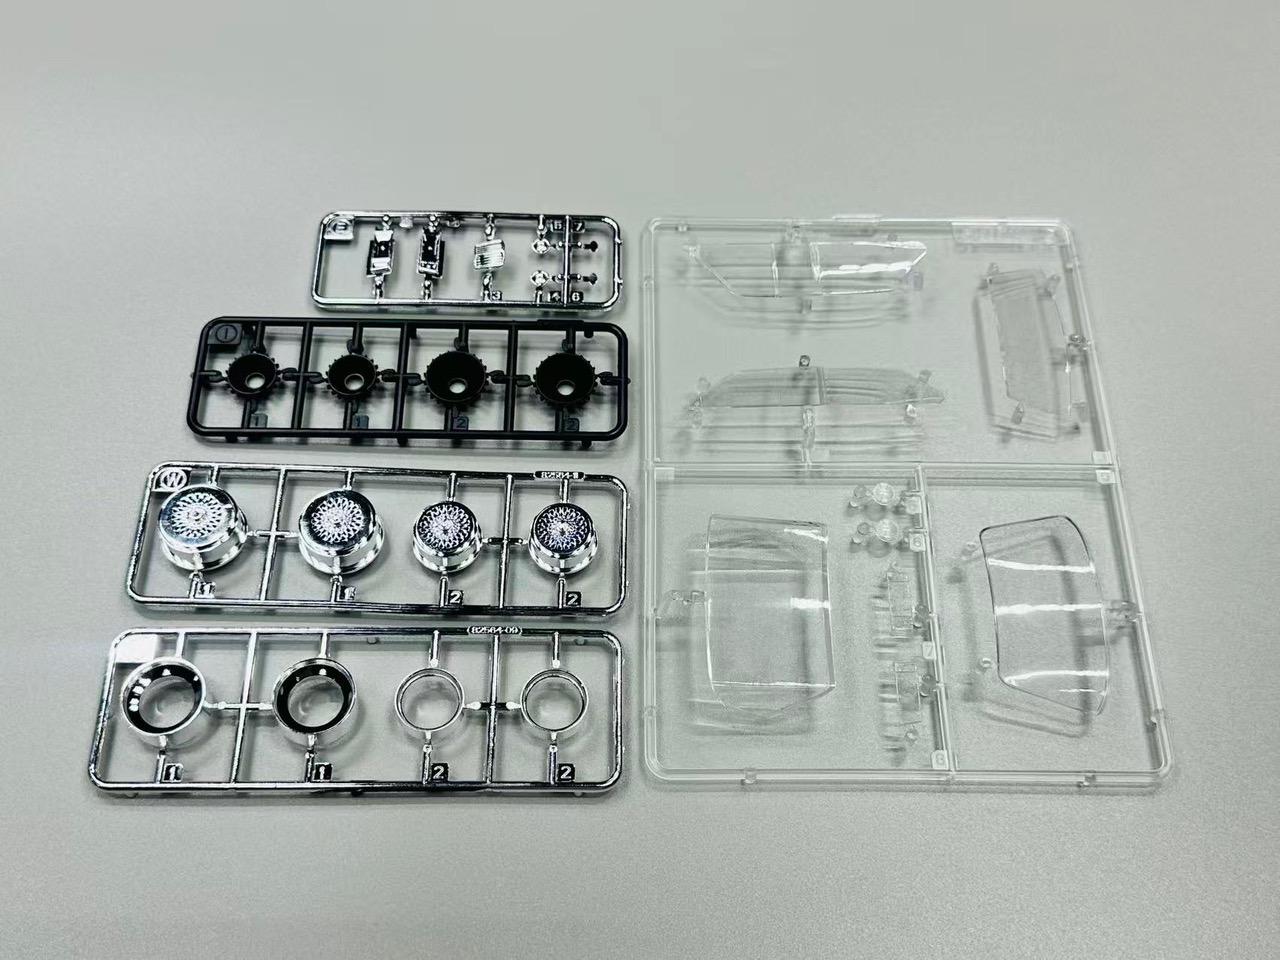
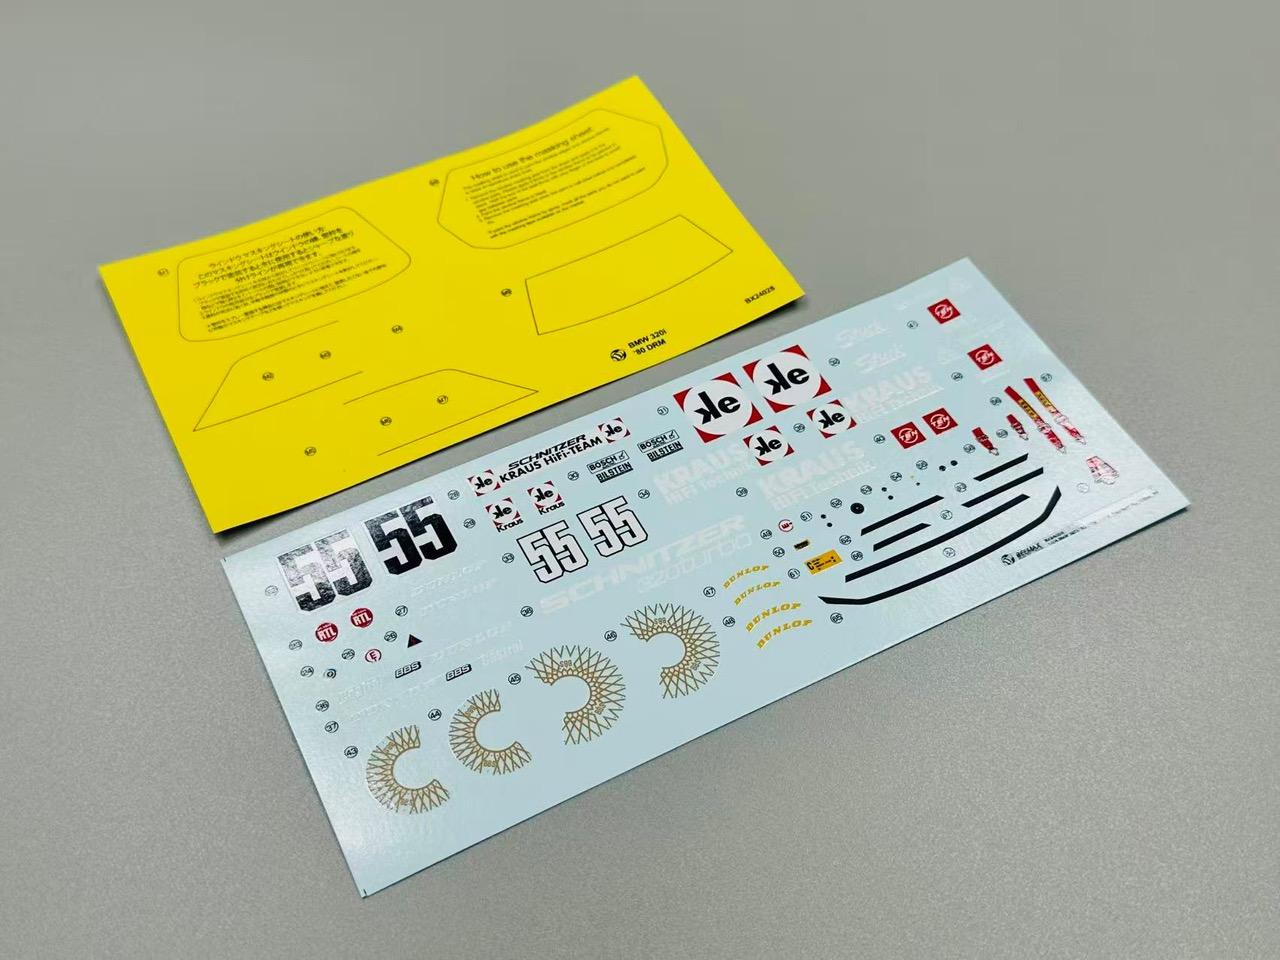
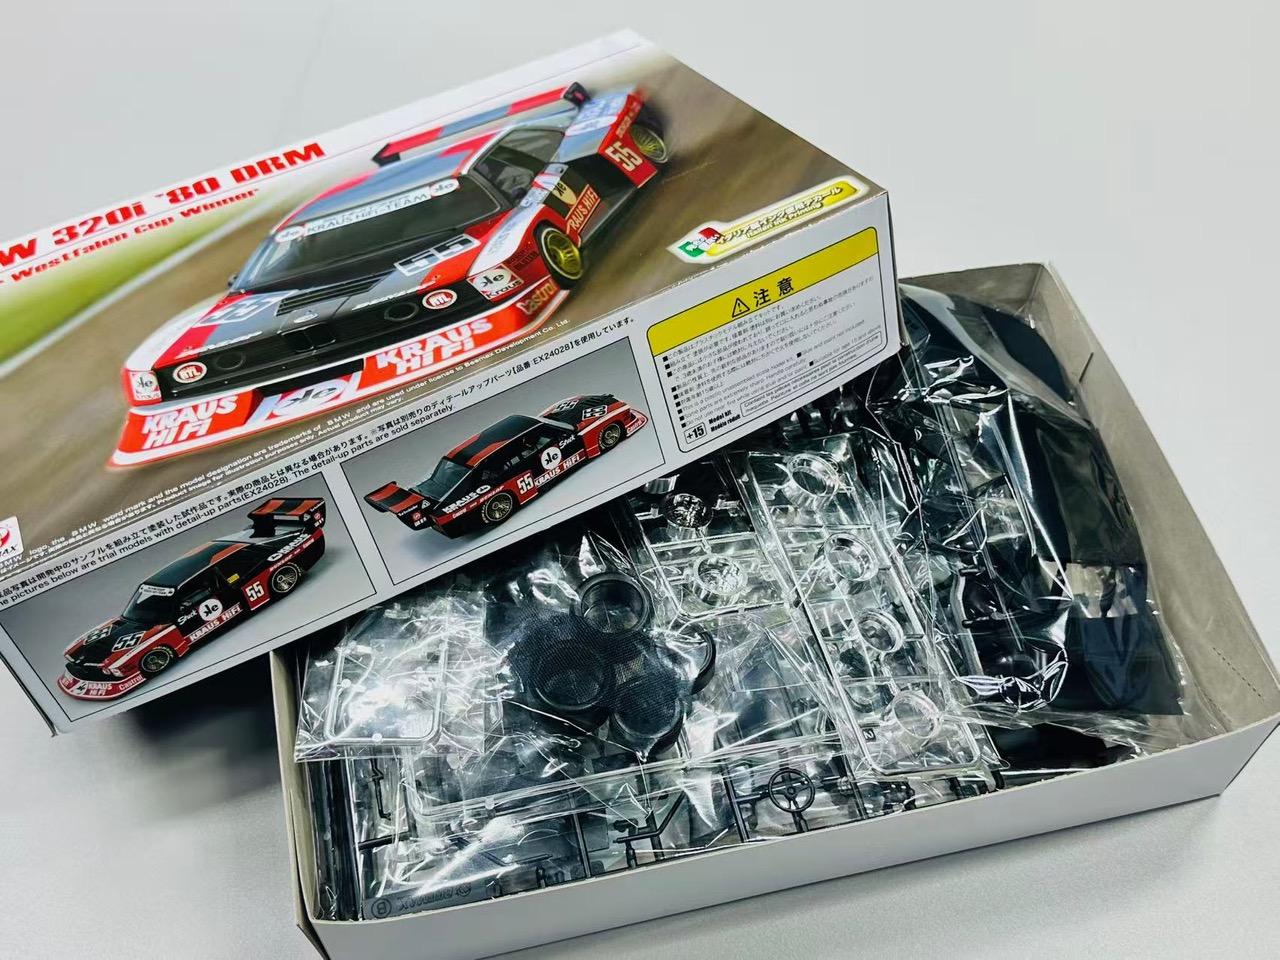
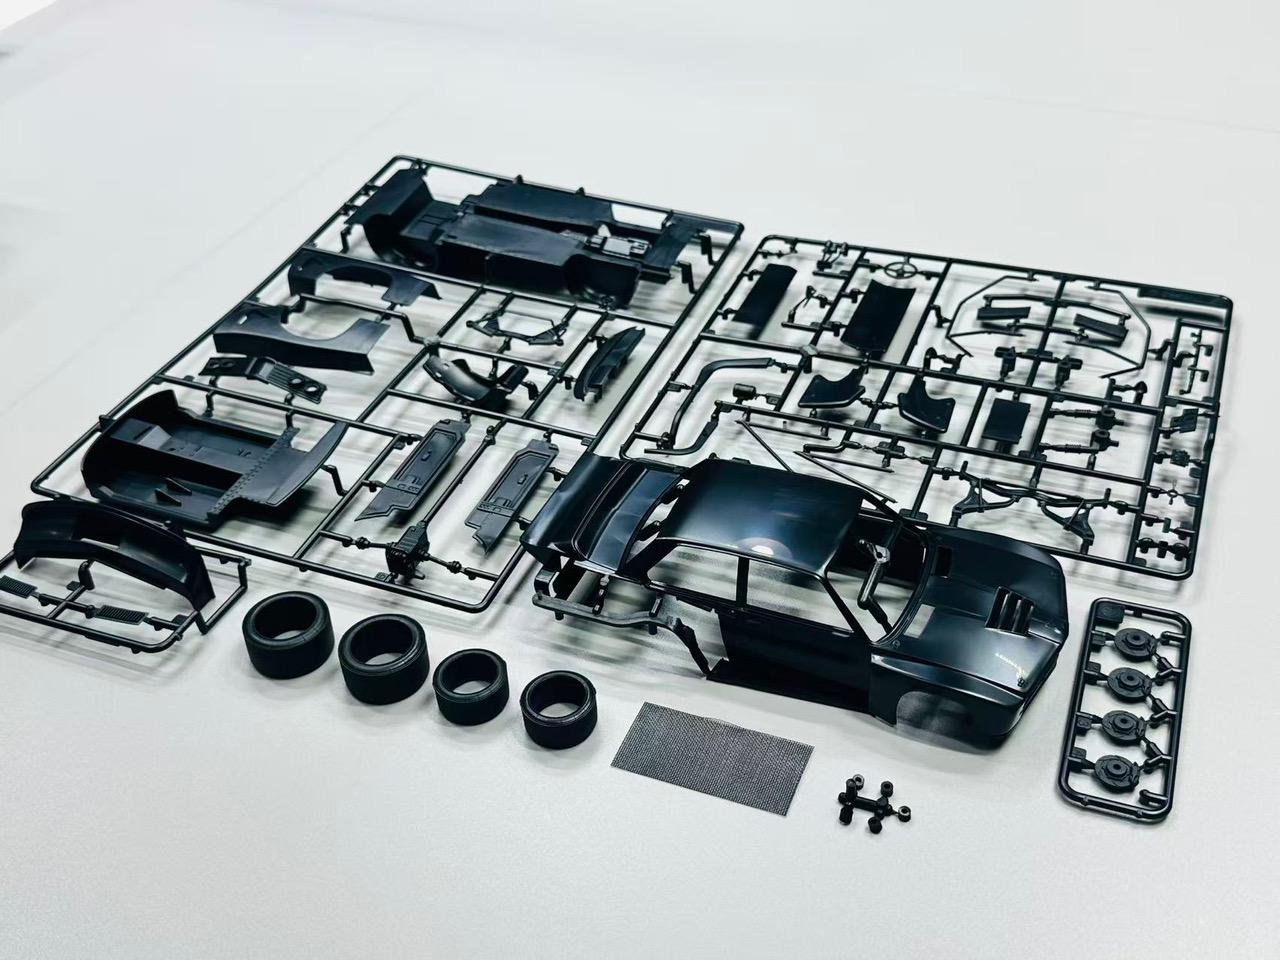
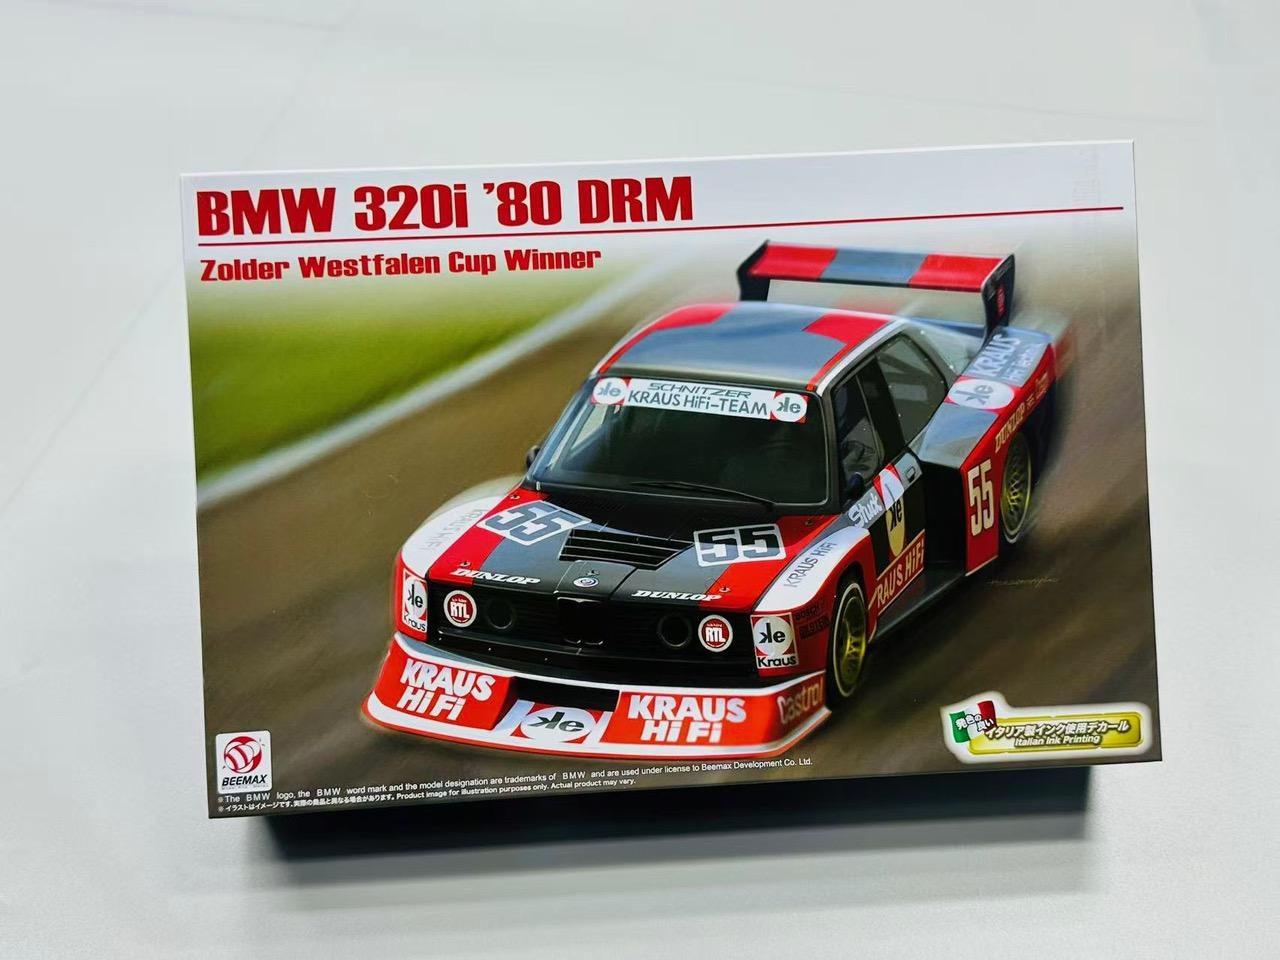
I was given a set of pictures of the upcoming release of the 1/24 BMW 320I. Not sure if been posted here yet, but here you go.
- 1 reply
-
- 4
-
-
Issue #227
The Creative Explorer replied to charger74's topic in Model Cars Magazine News and Discussions
Following up question; After how long should I consider that my e-mail has not been processed? It has been a week now and no answer as per today. By no means I am in a hurry, but do would like to receive my copy :-) -
Issue #227
The Creative Explorer replied to charger74's topic in Model Cars Magazine News and Discussions
Question, after how long should I consider my magazine to be missing? I know that being in The Netherlands takes (a lot) longer, but shouldn't I have received it by now? I see that Sweden received it more than a month ago. -
Thank you!
-
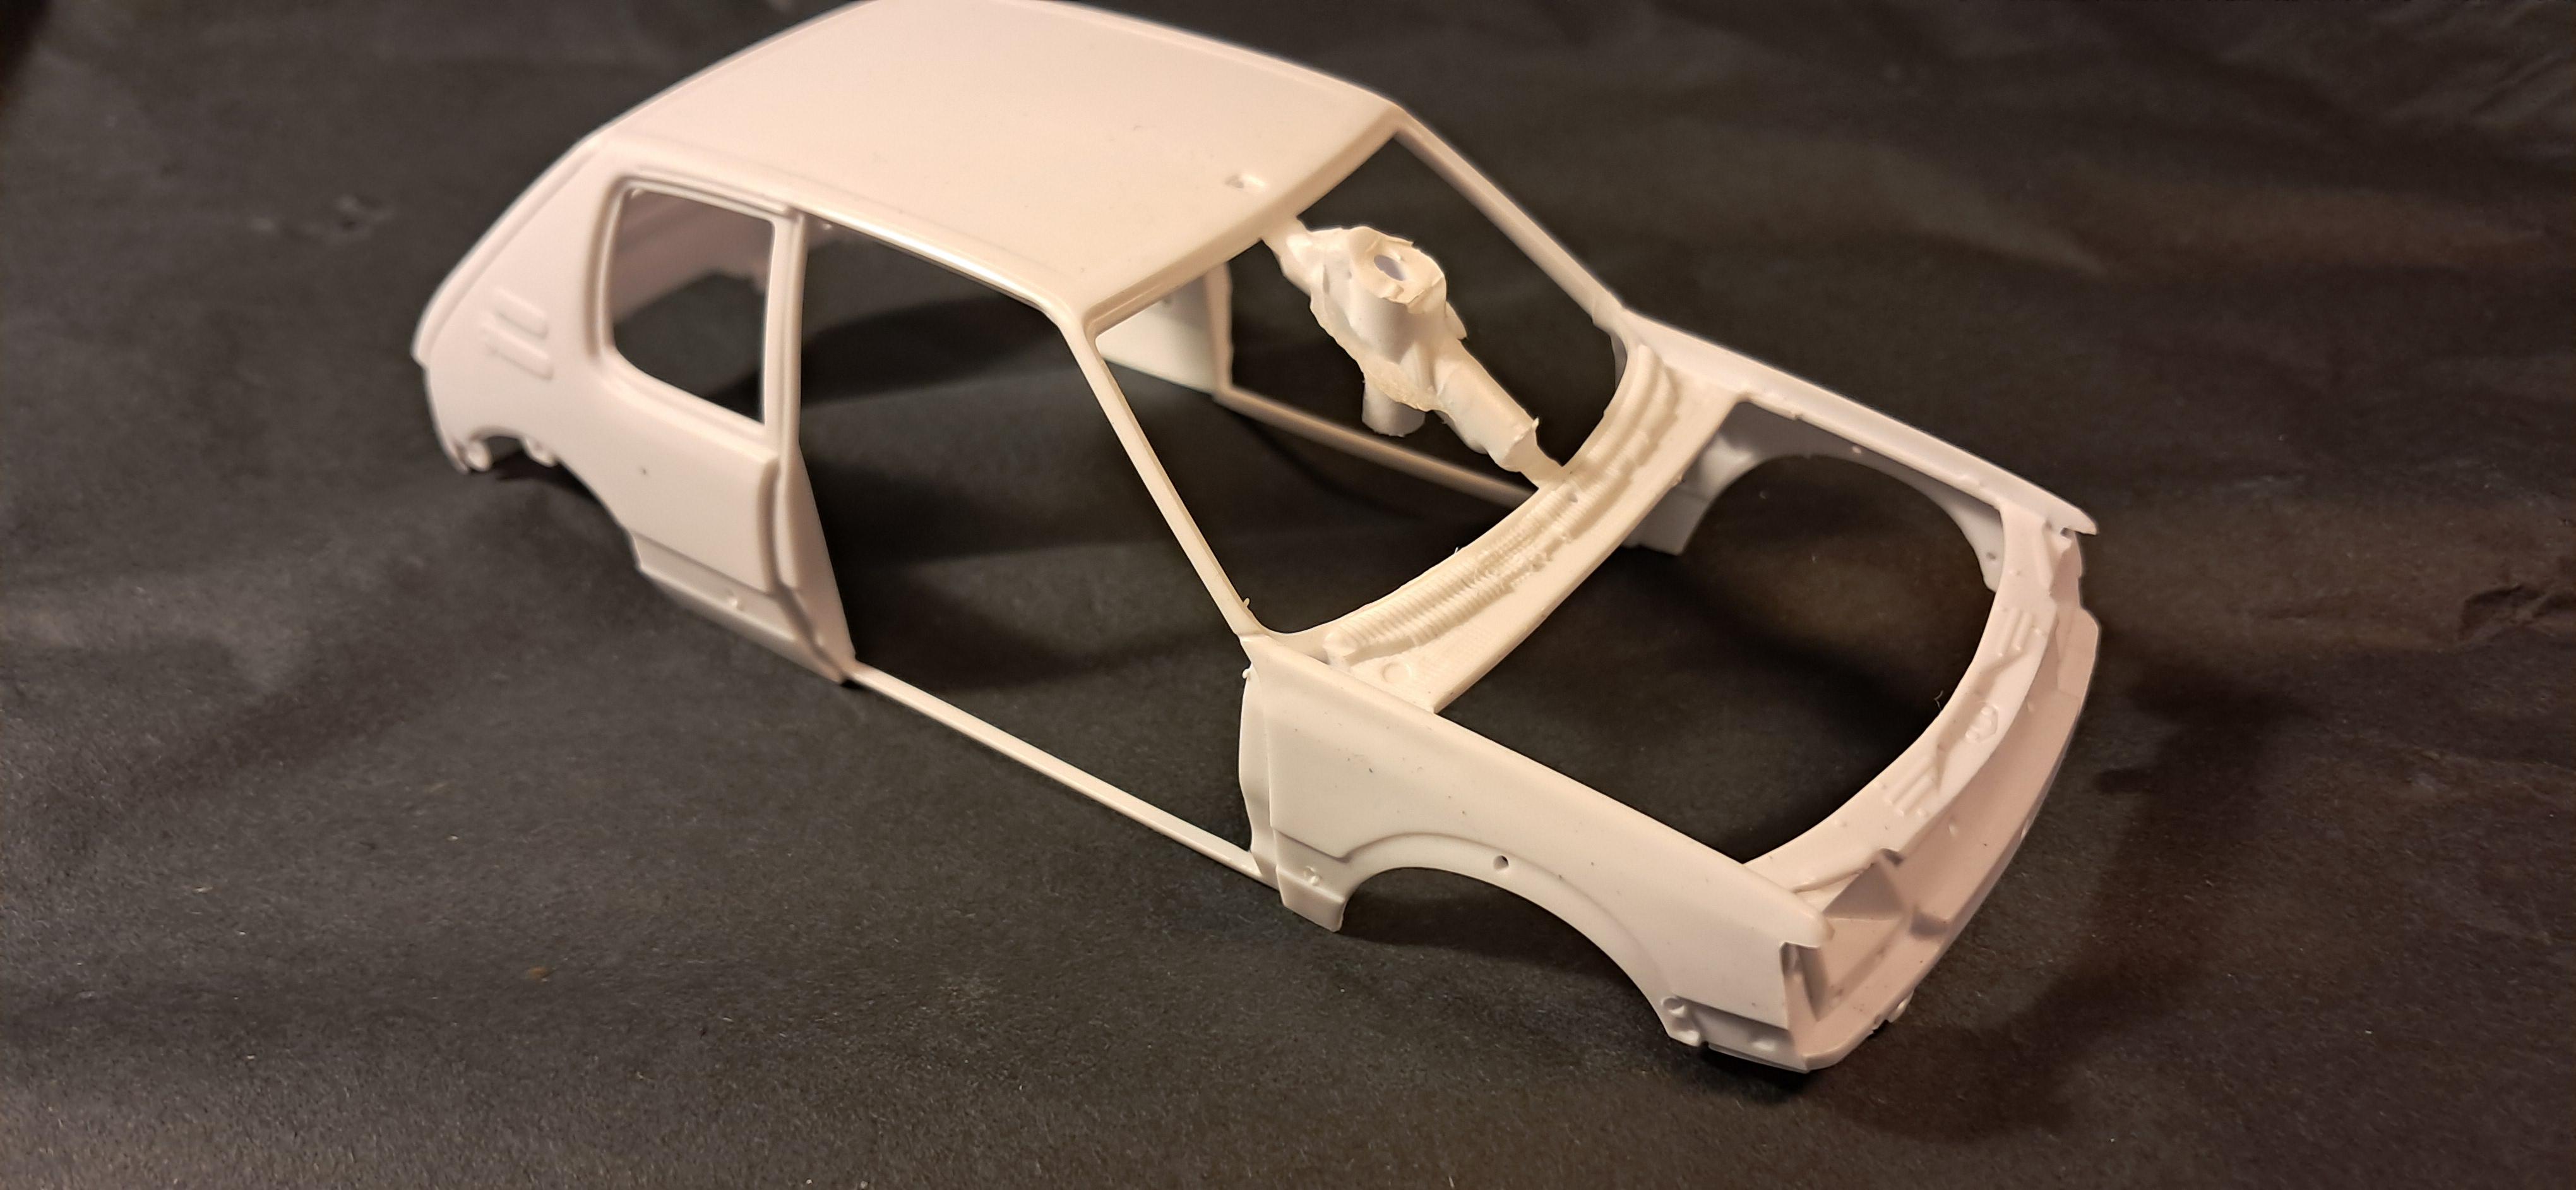
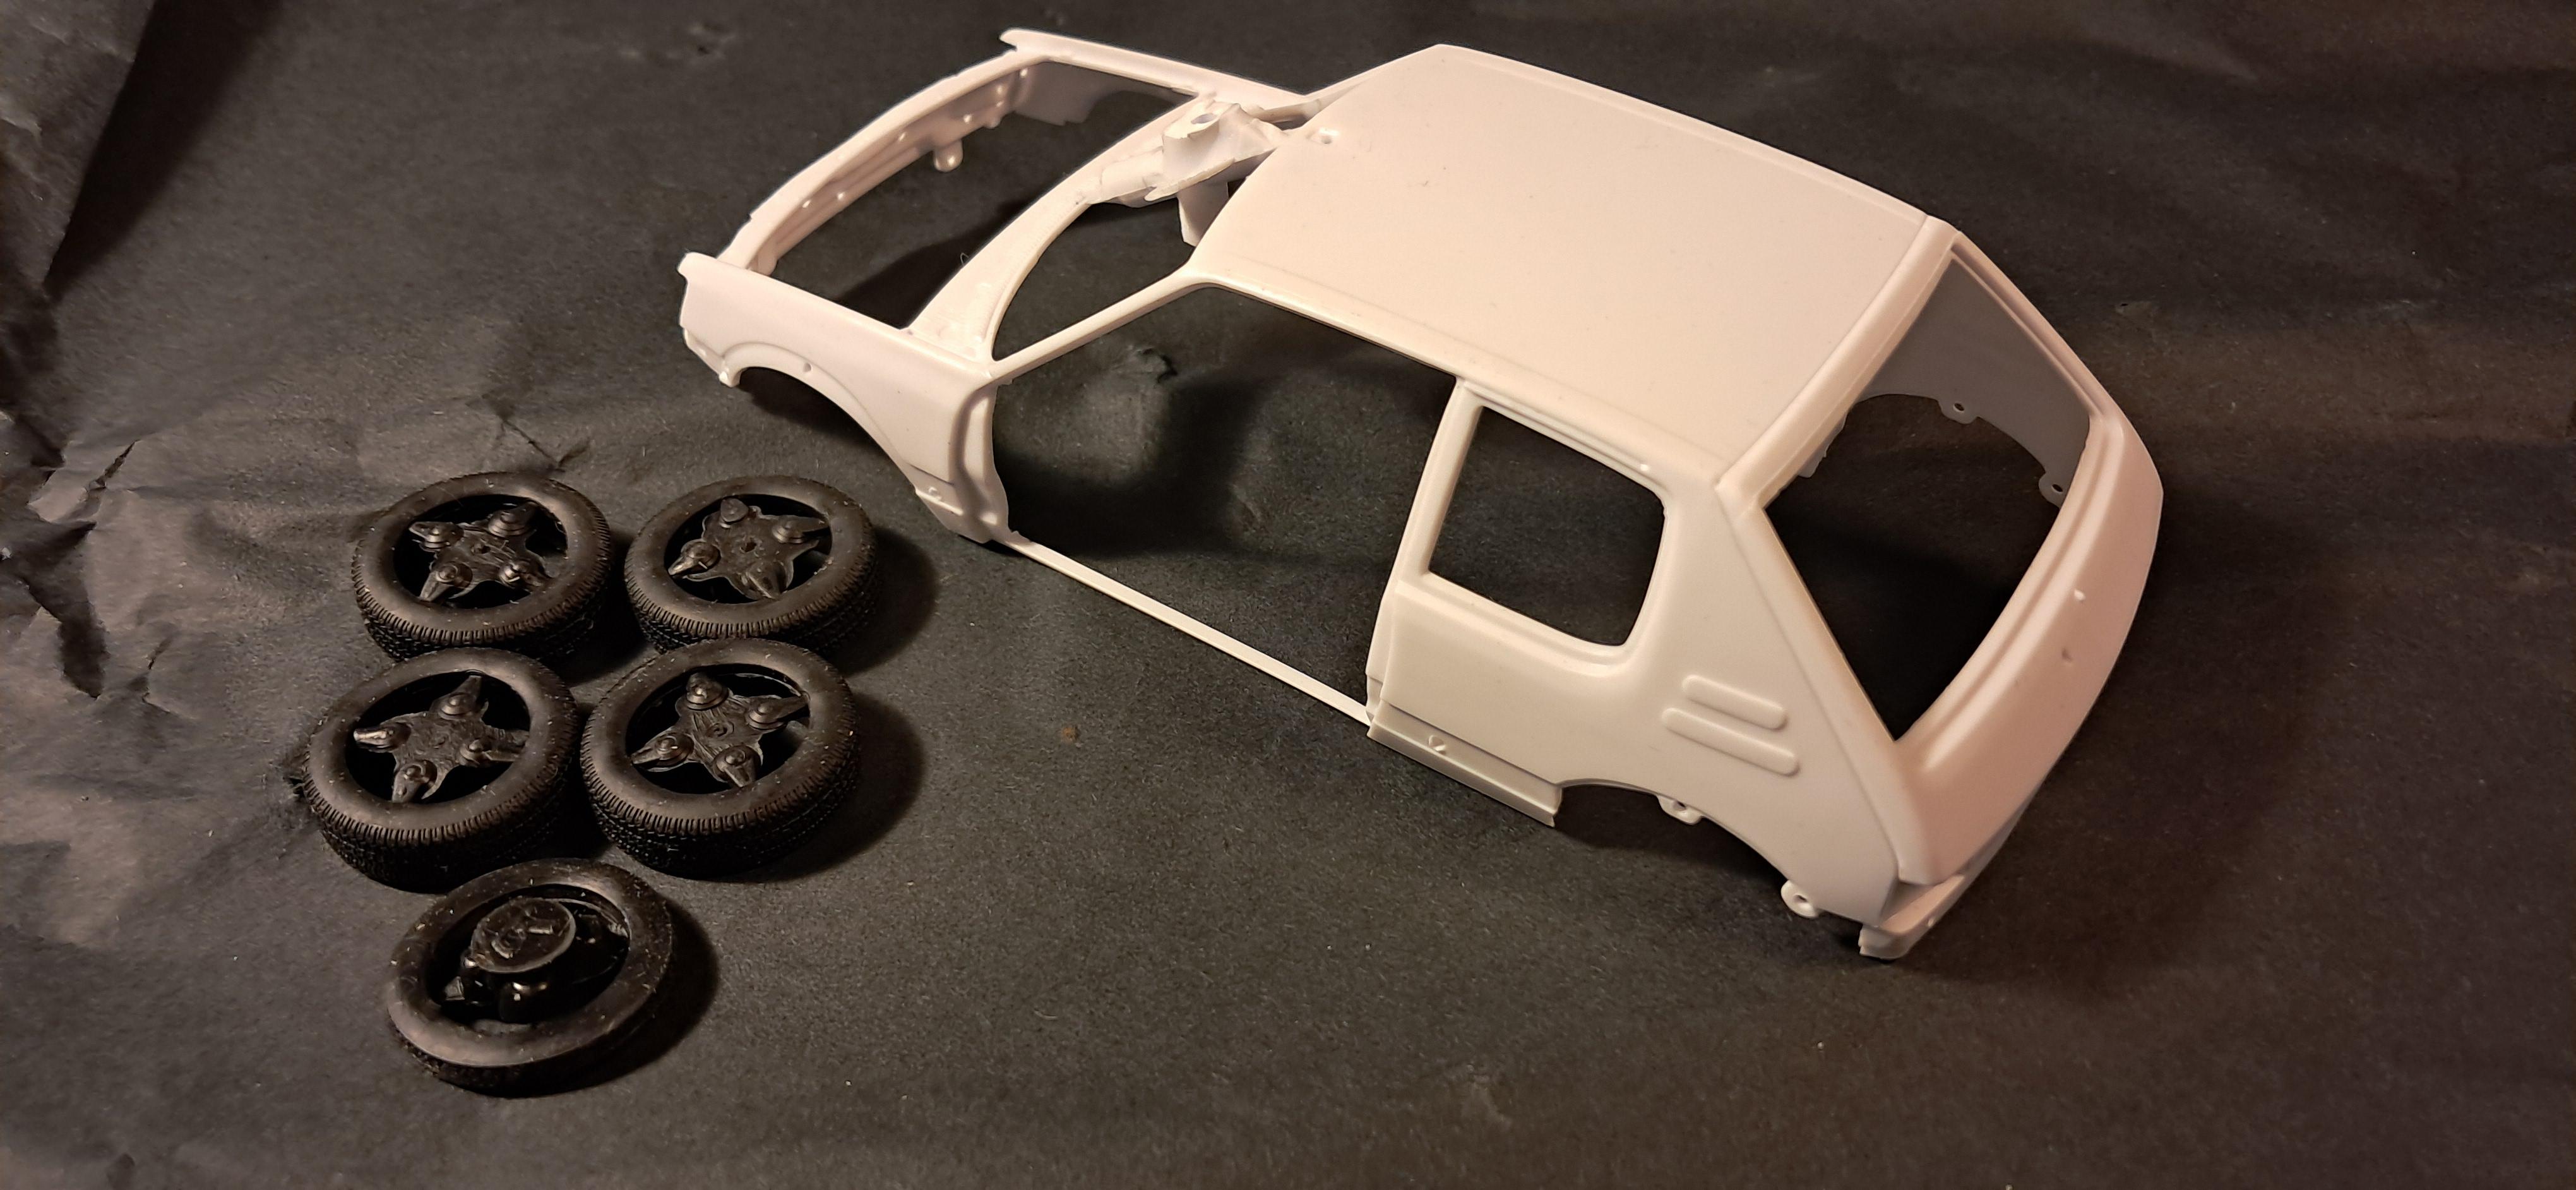
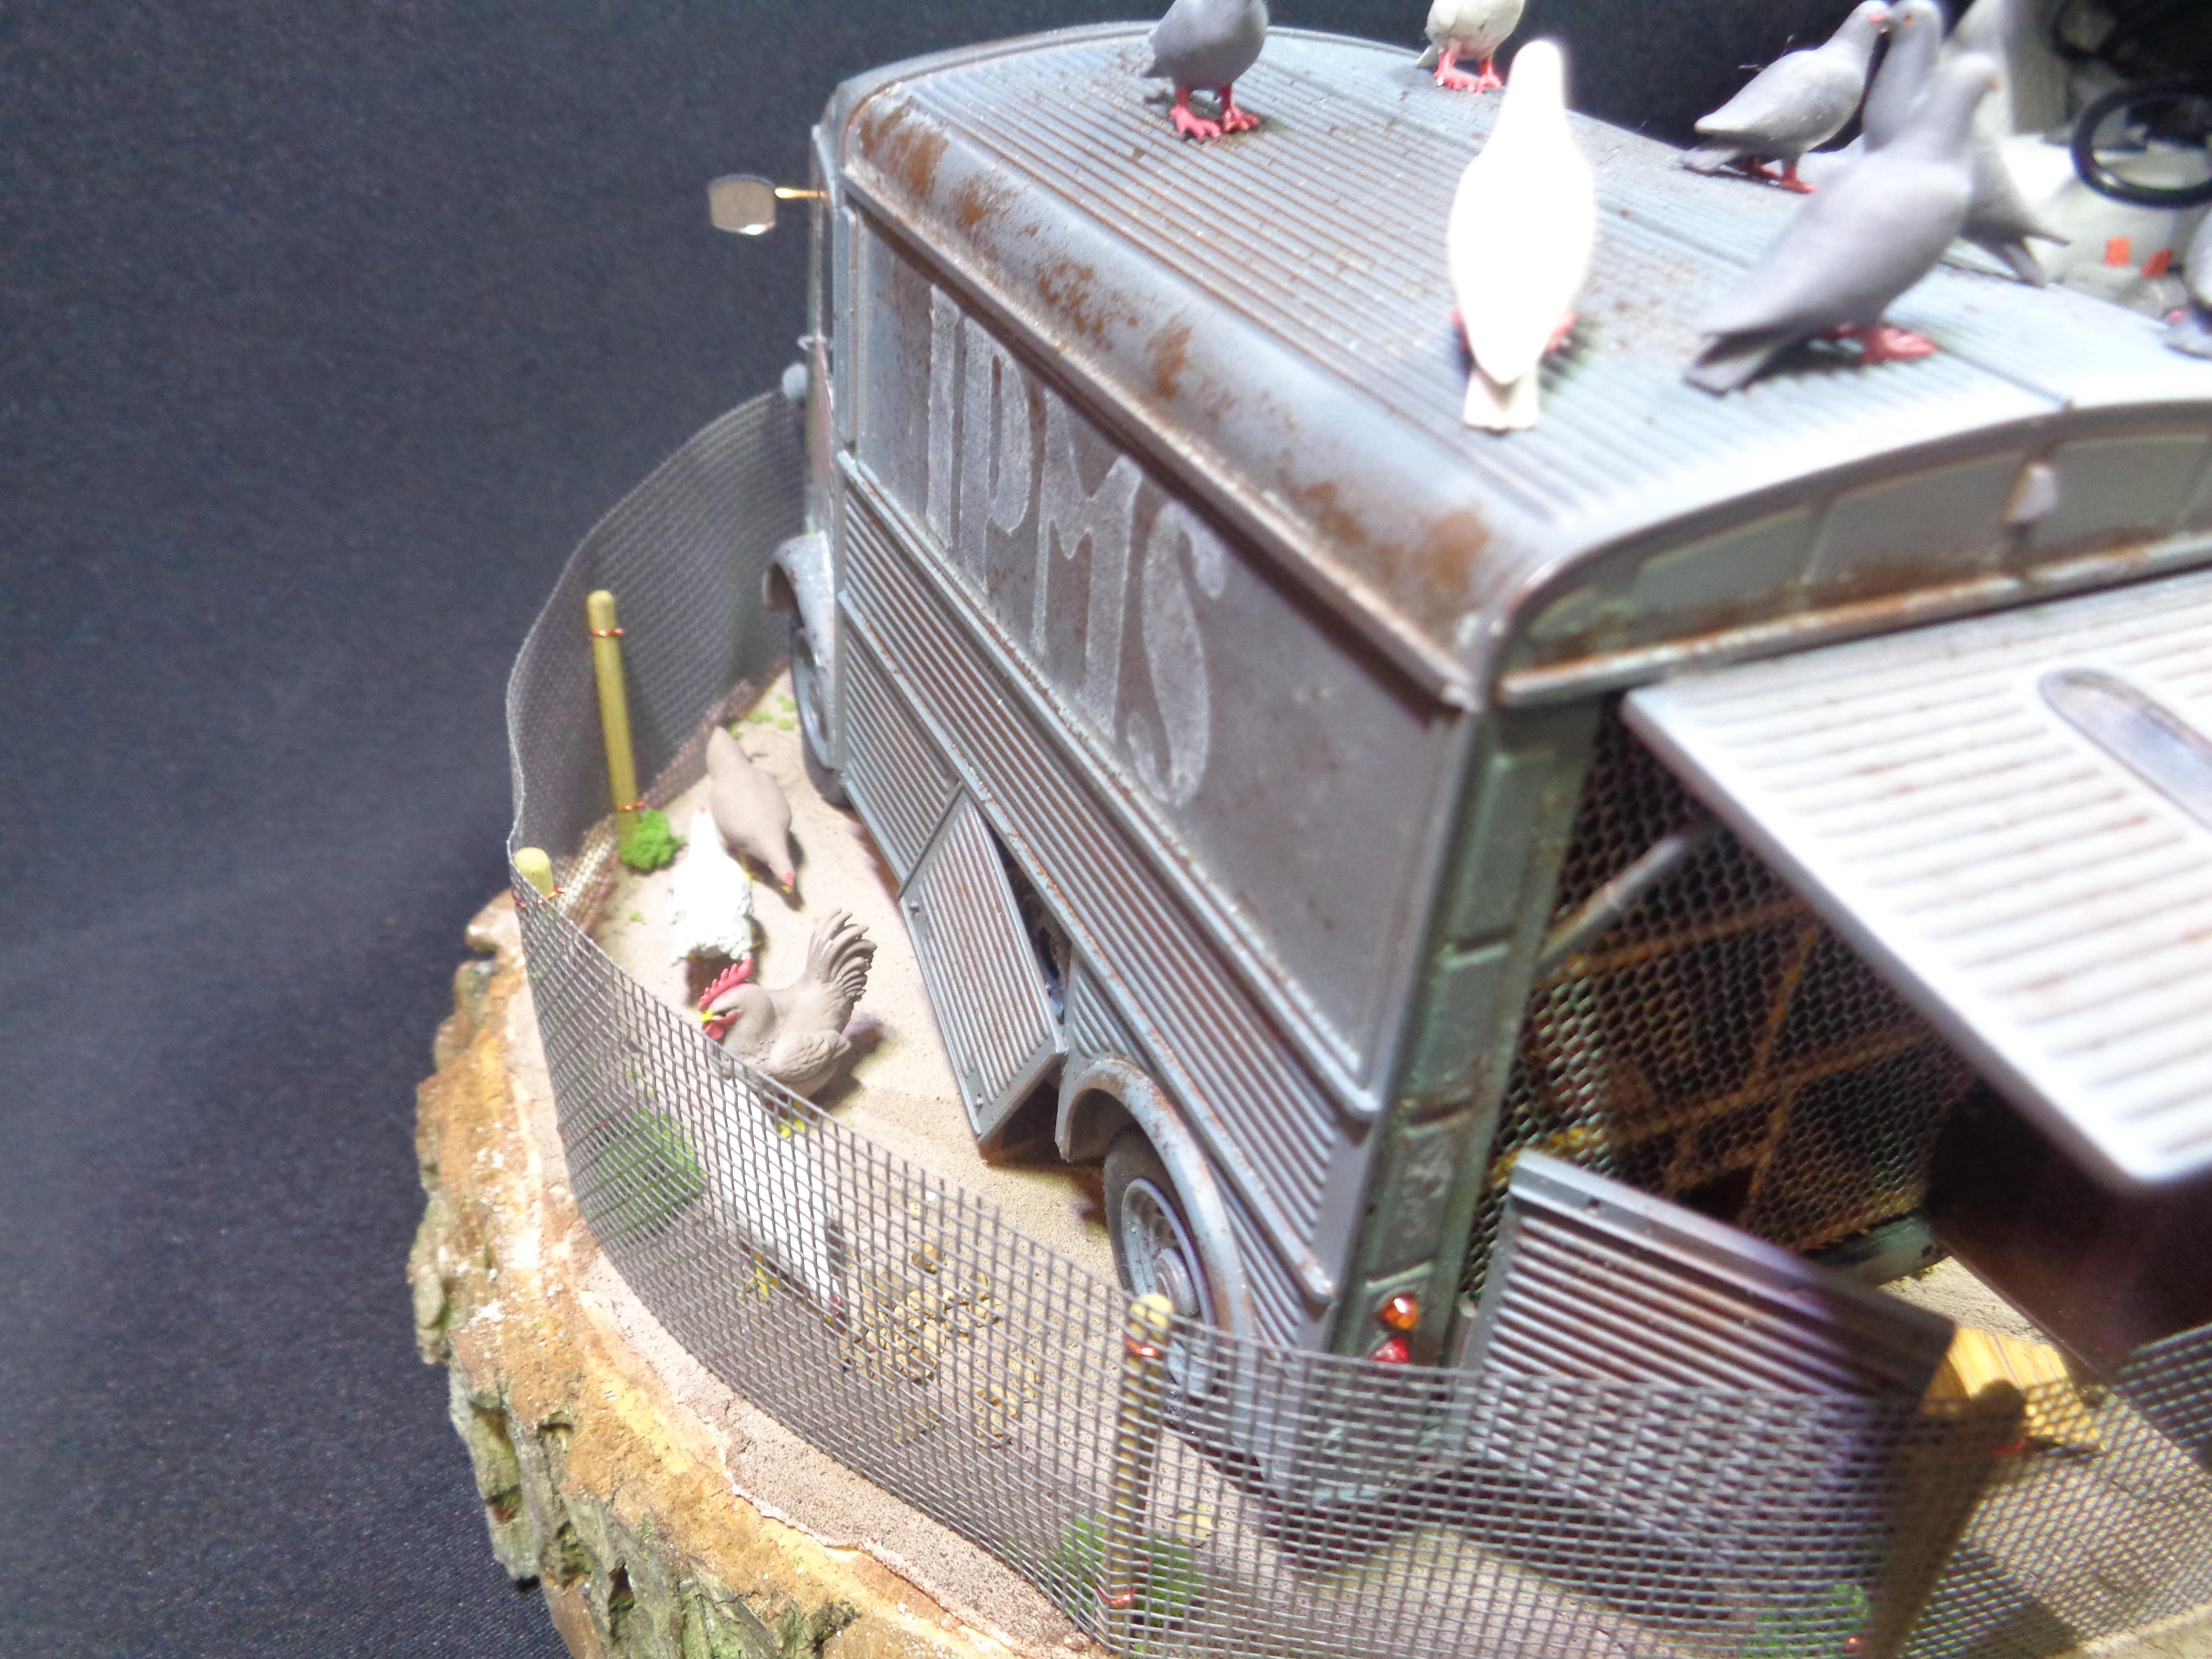
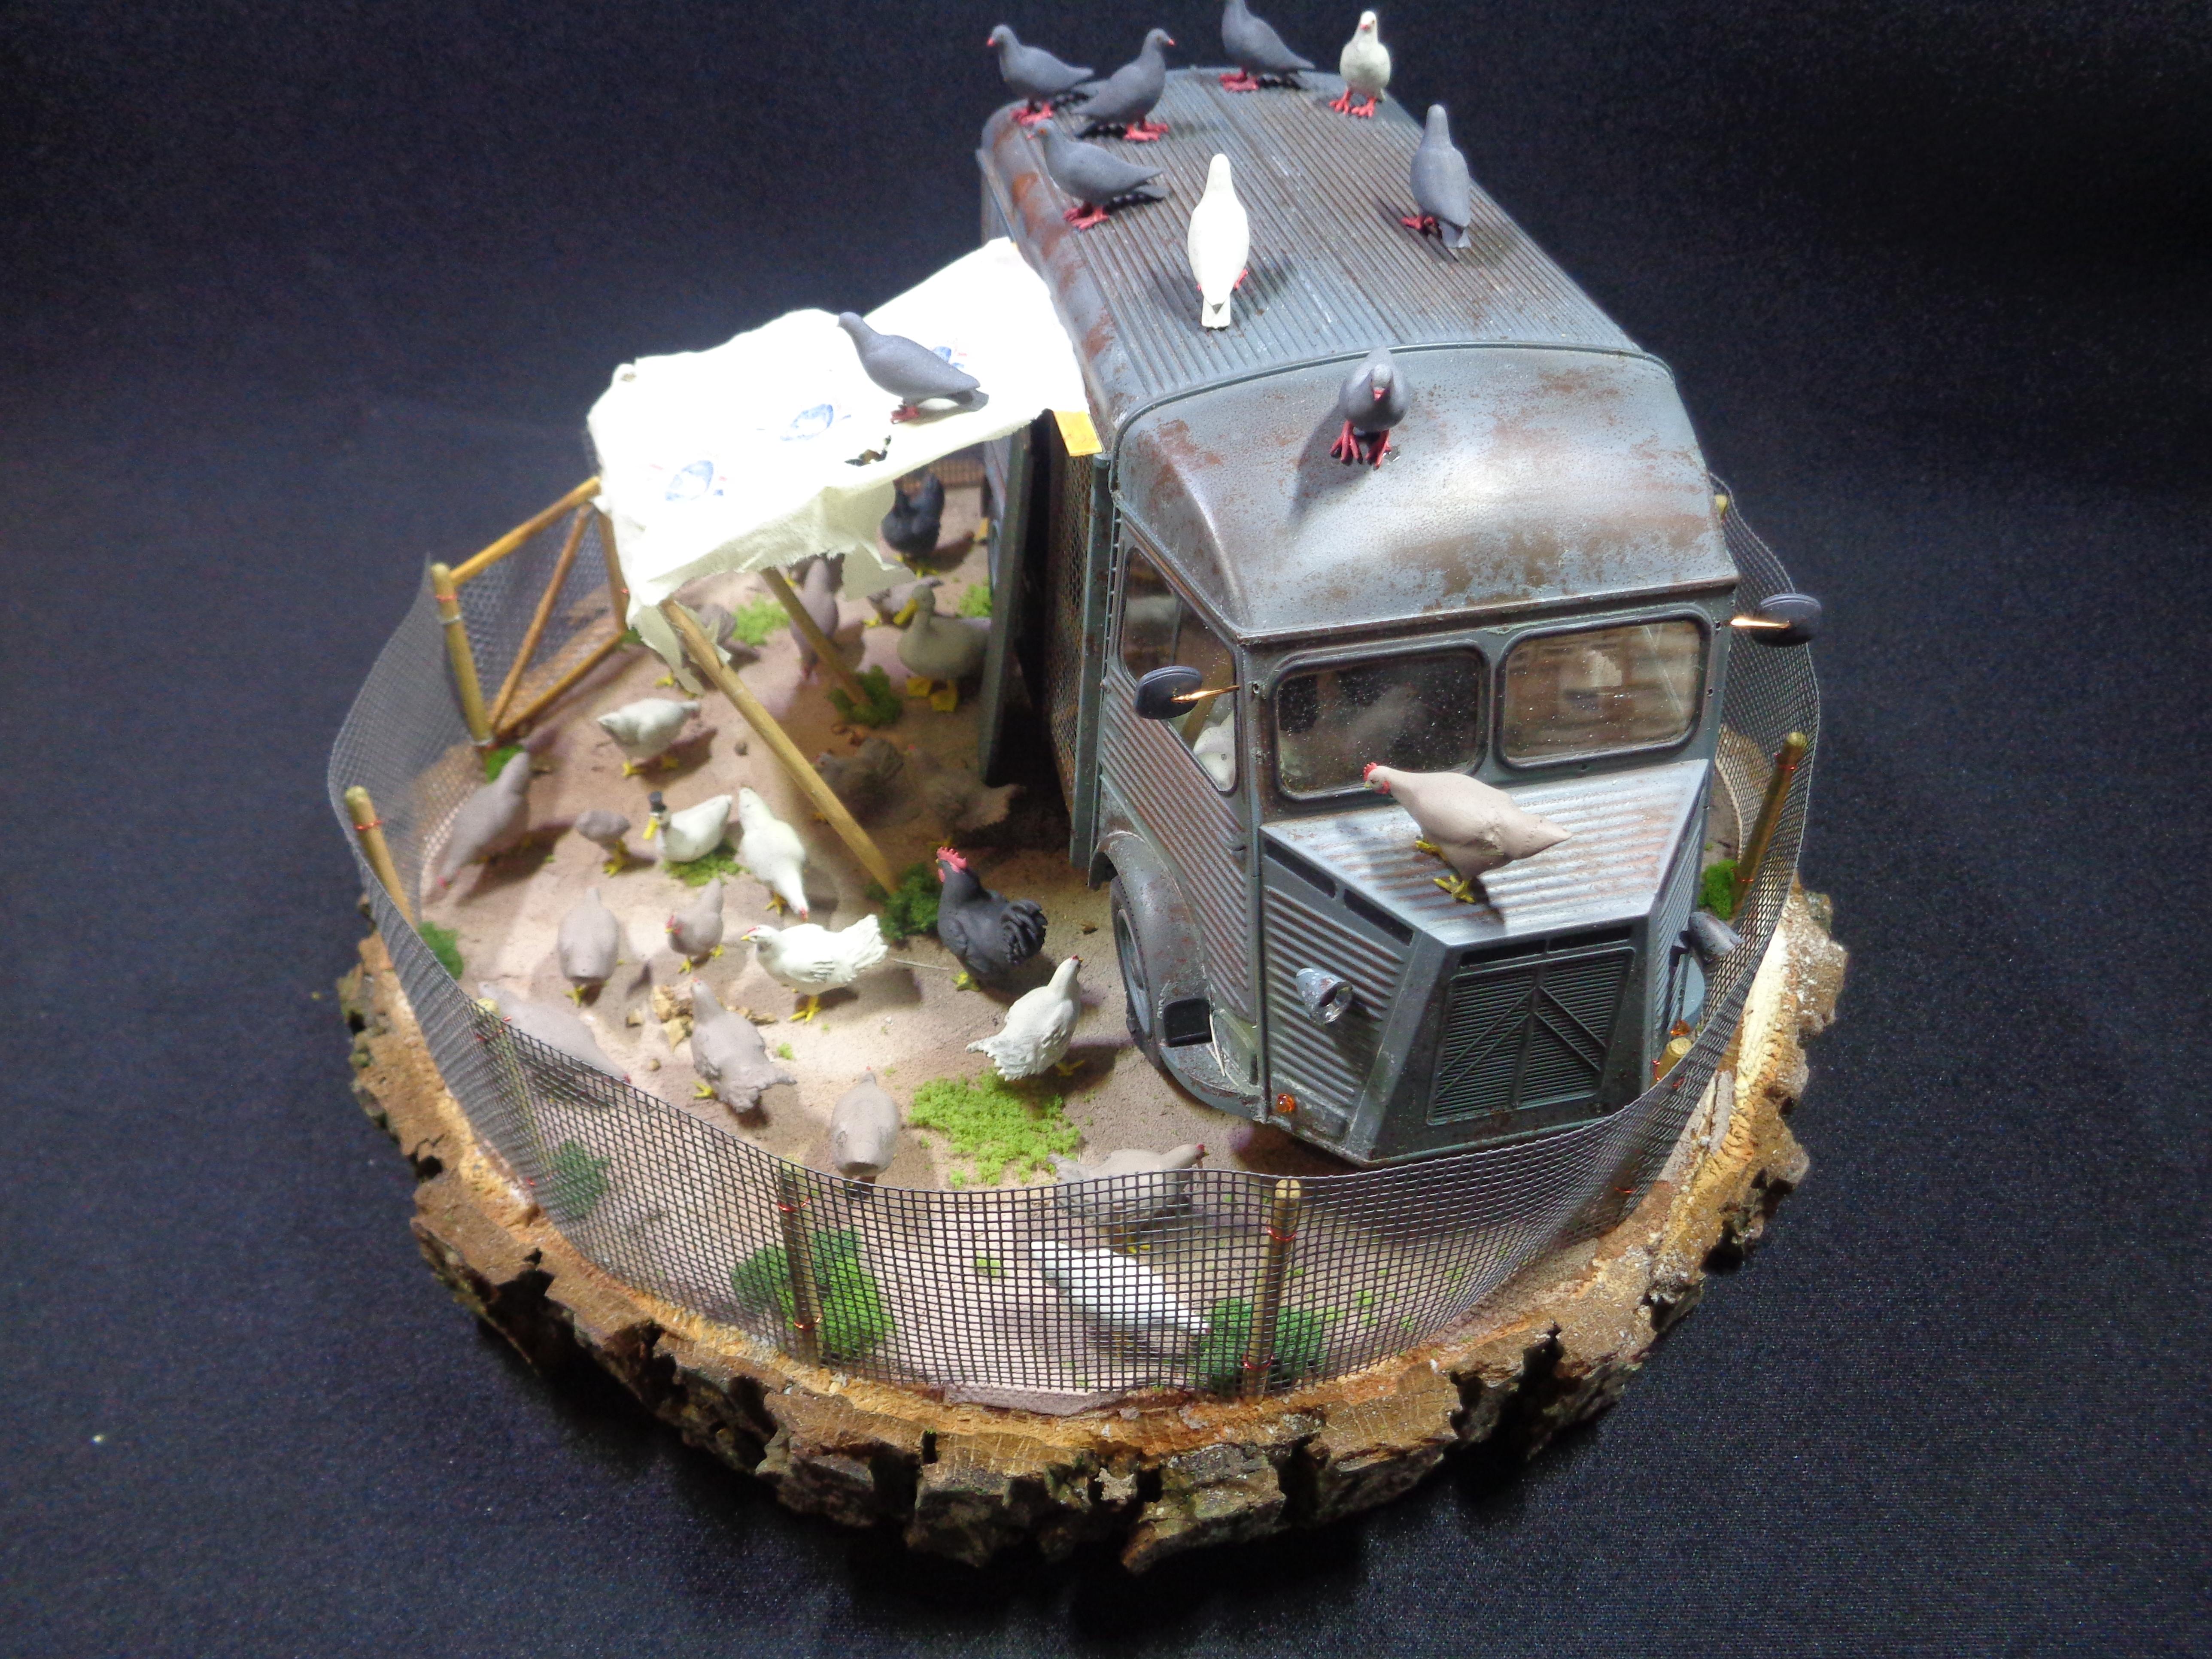
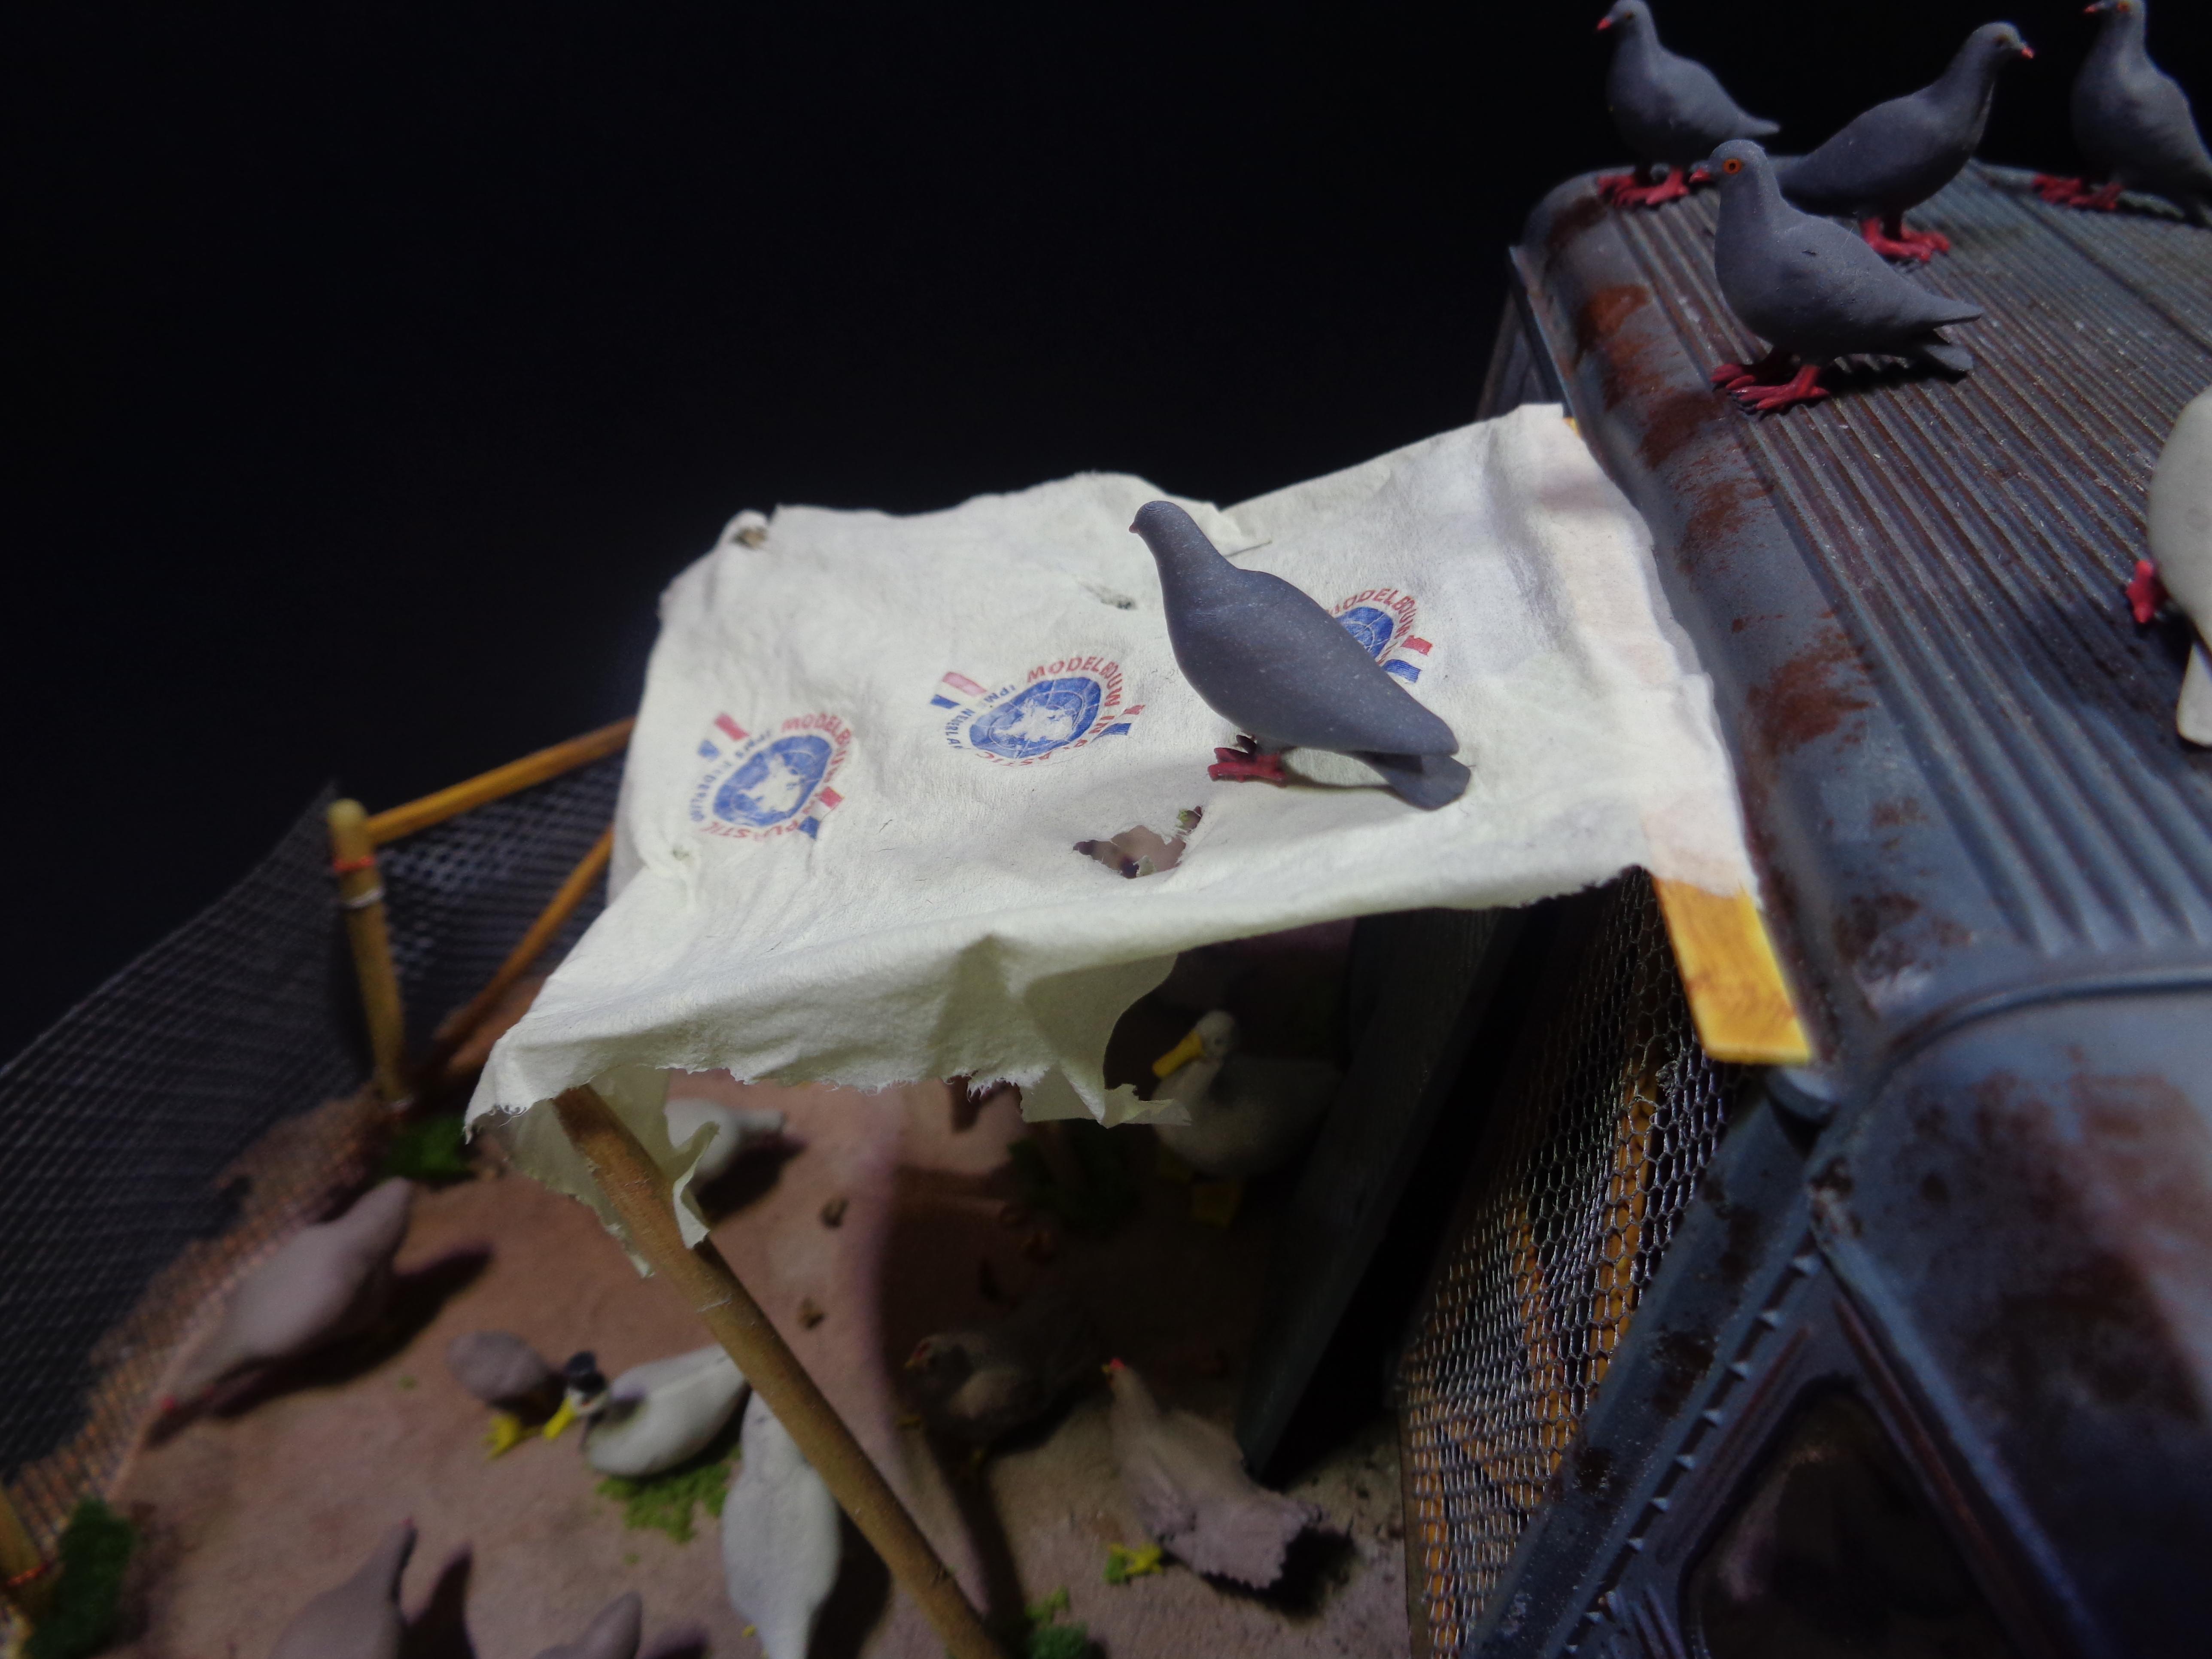
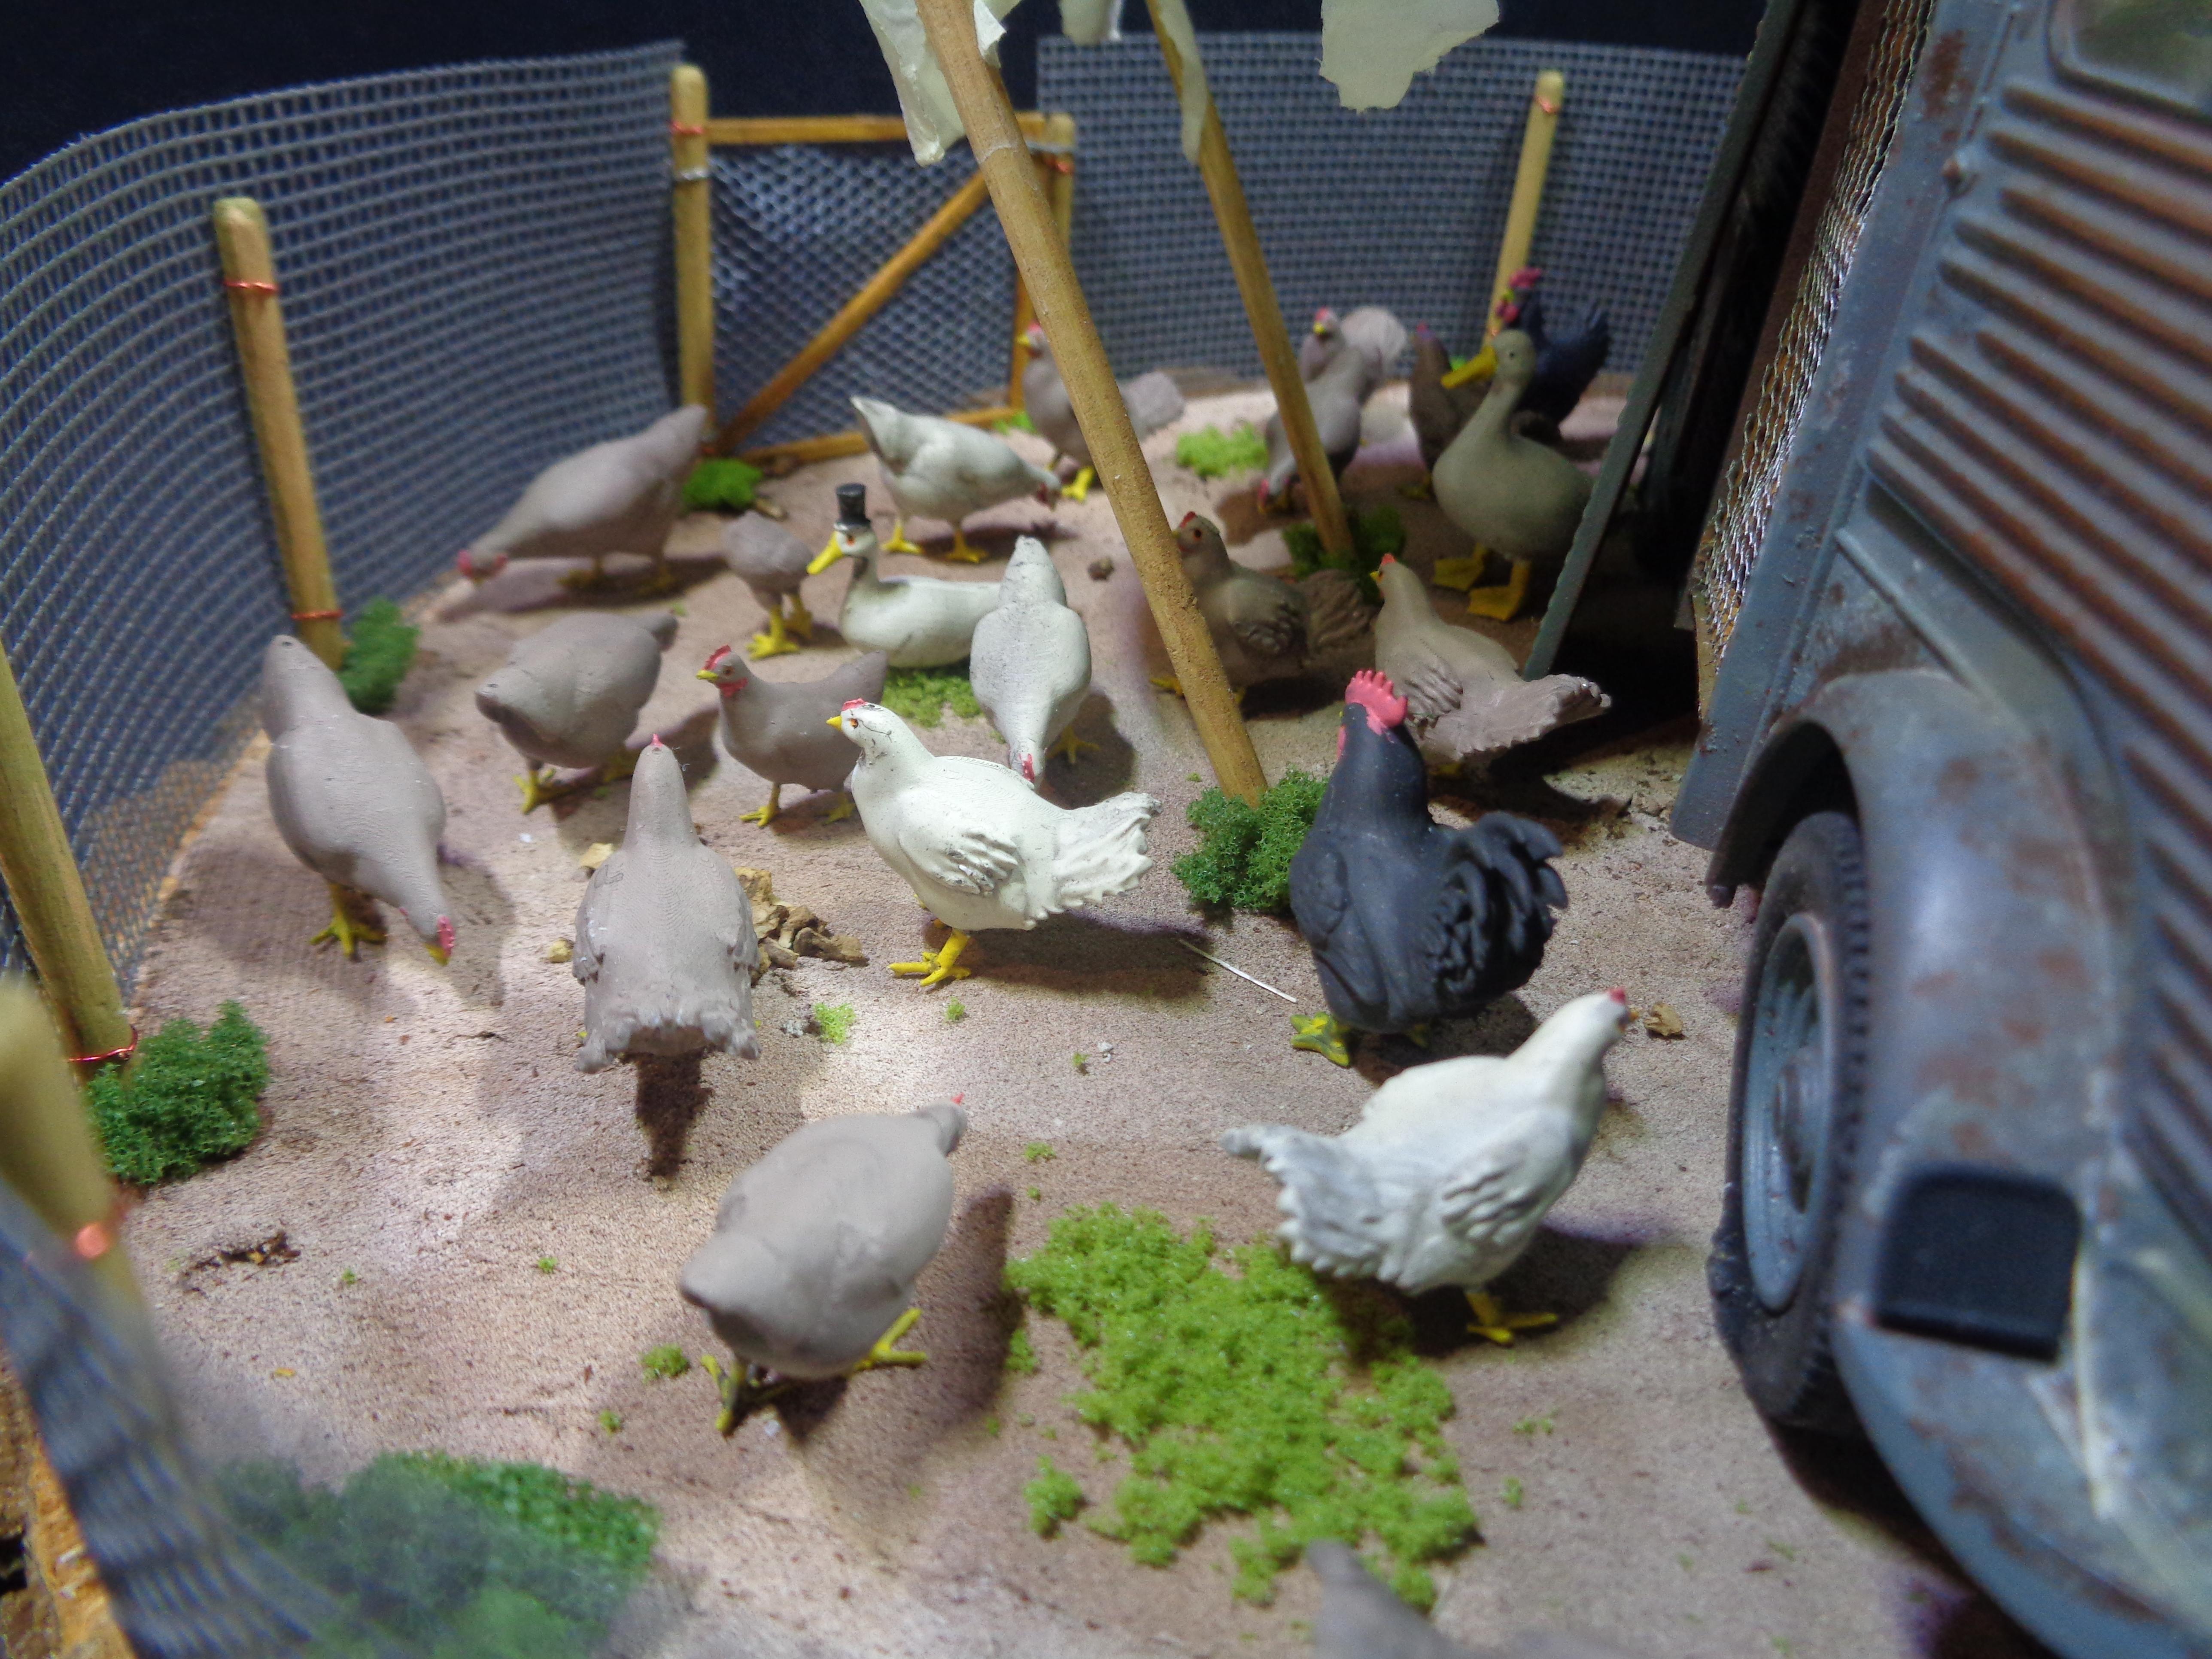
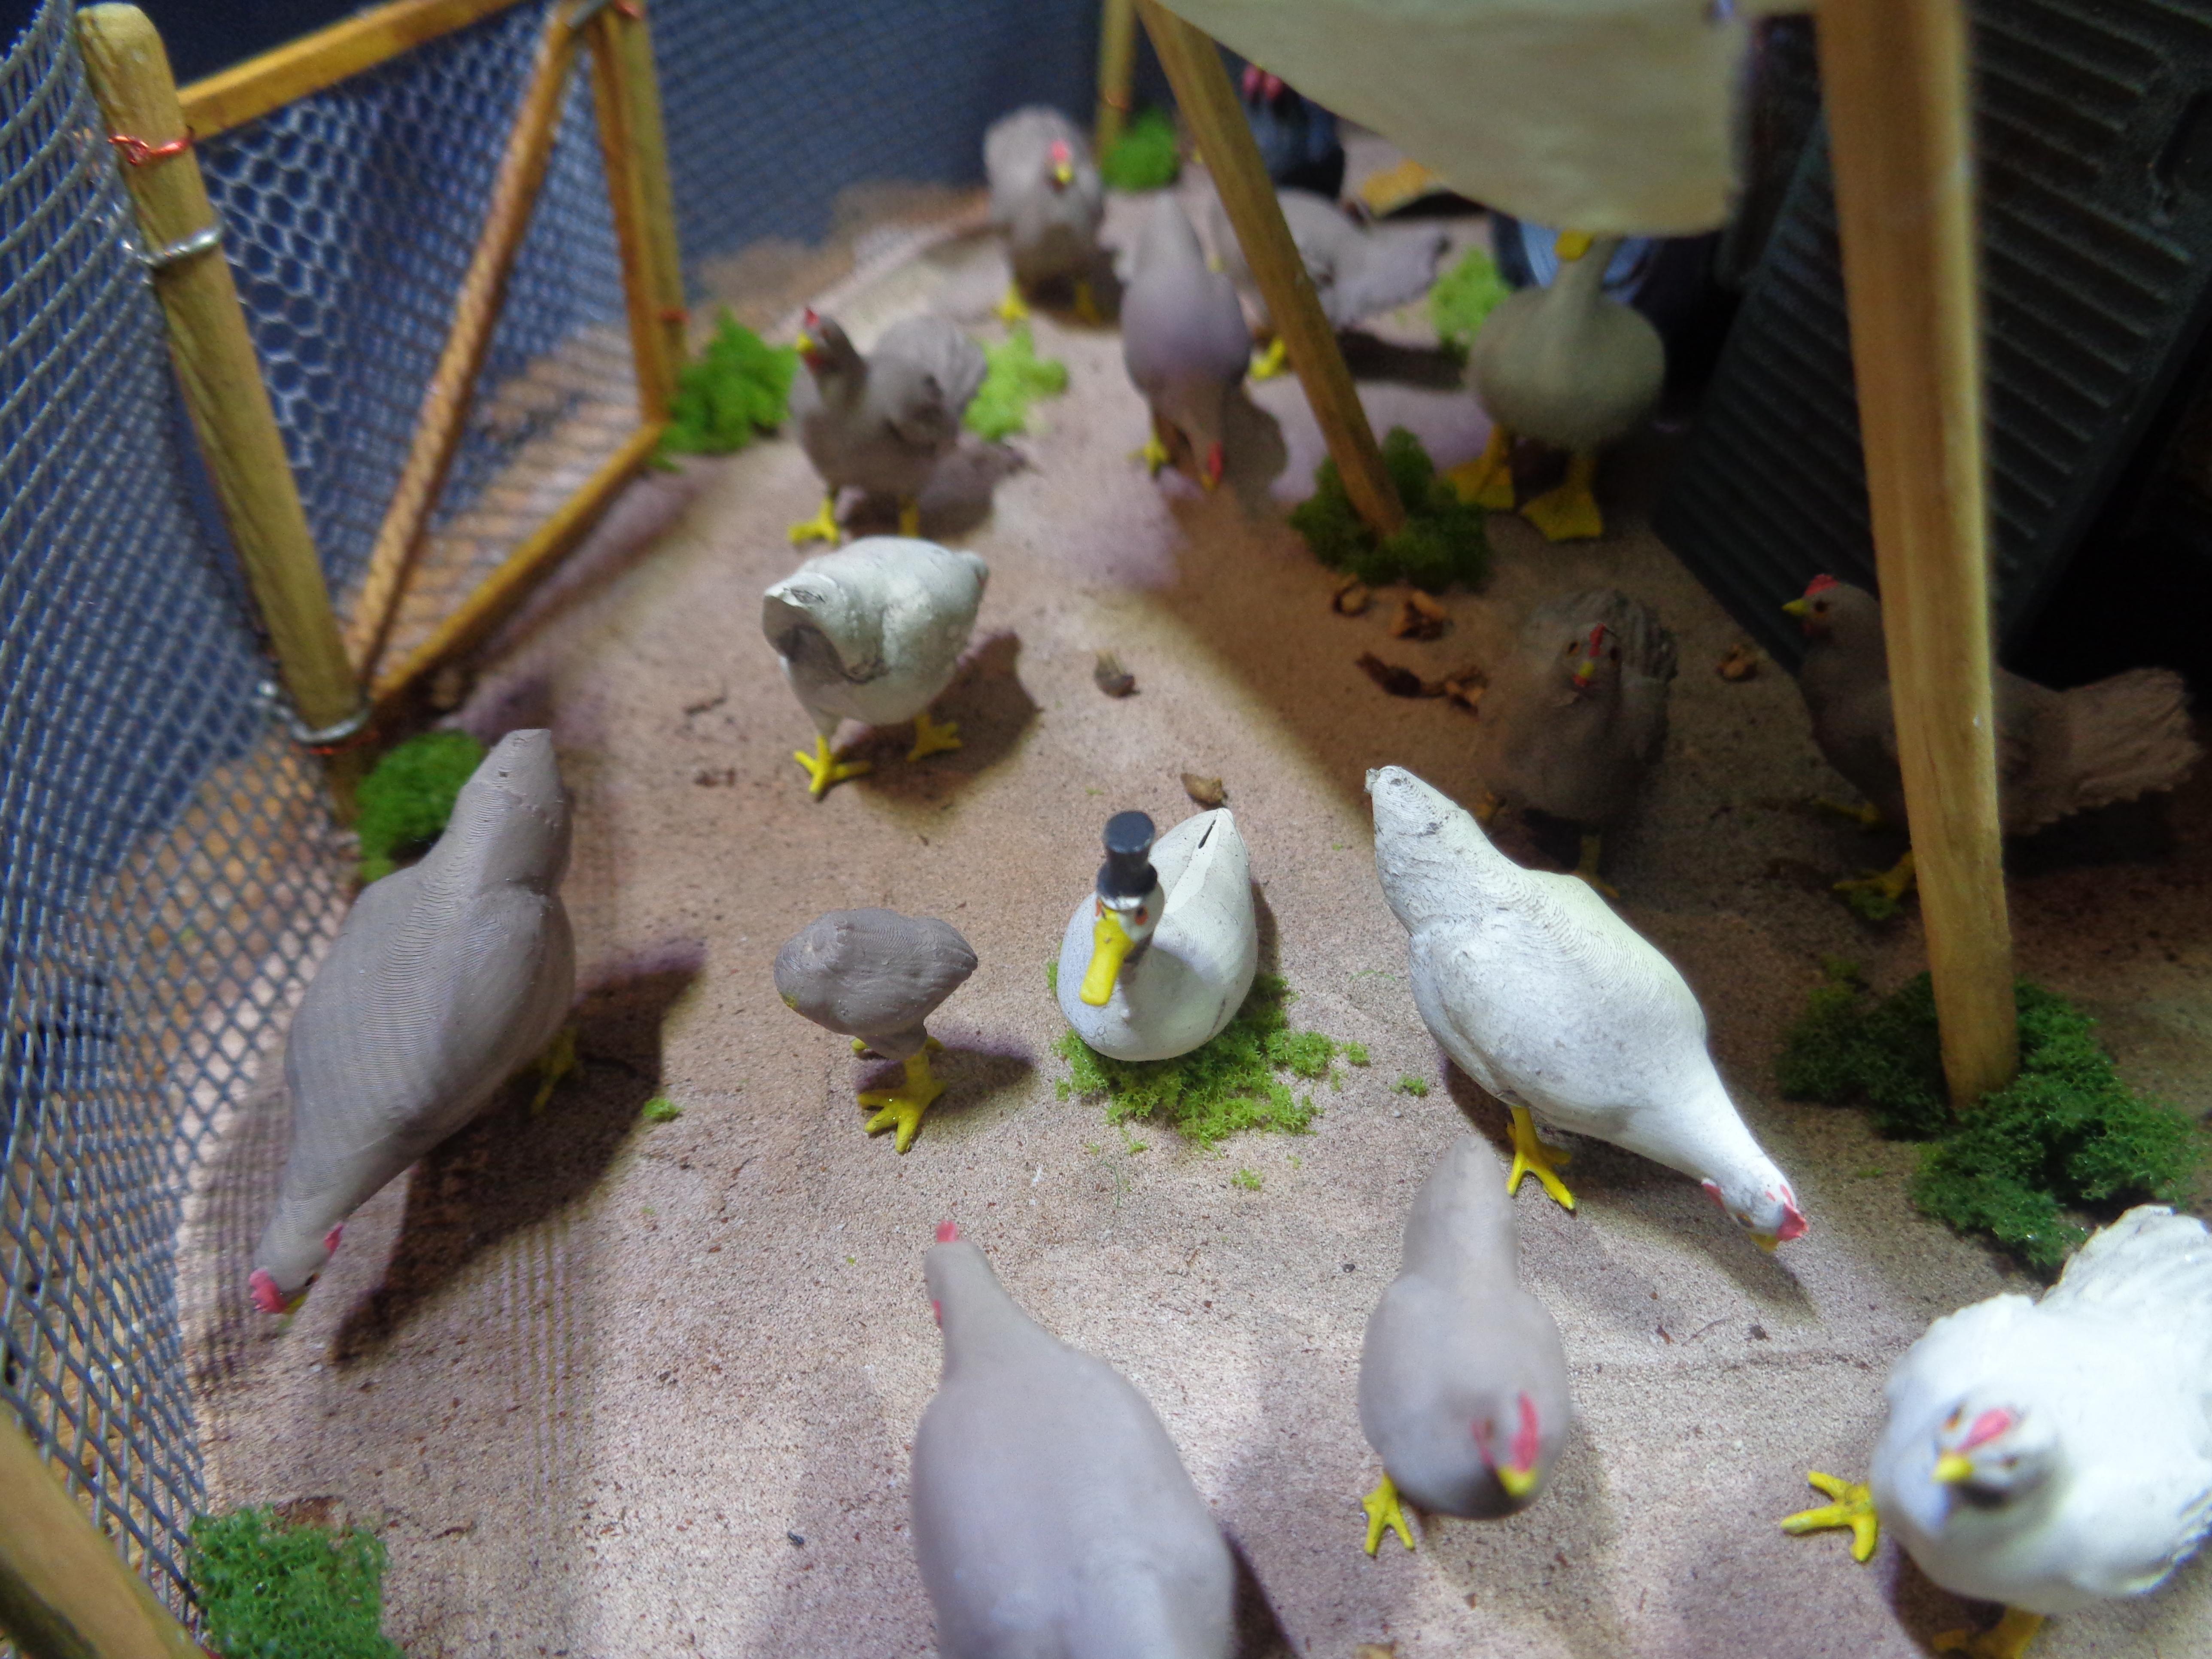
This was a project that was put together and then slumbered. Until there was a groupbuild from the Dutch IPMS chapter and I went a different direction with it. Normally I build shiny vehicles, not muddy, rusty or with a diorama. But at some point it hit me, the HY-van had to be a chicken coop, so a diorama had to be made as well. I wasn't expected it, but I actually had fun. Normally I can't be focussed enough for the final detailling and leave it at that, but now I kept going and even painting the 80 chickens wasn't that bad. Overall it was a fun project and even though I took it serious with all the different techniques, I also had to hide a few jokes in :-). I just had to haha. The kit is from Heller and is not bad at all, the molded in glass is an annoyance, but so be it, it worked for this project. . . . . . . . . . . . .
-
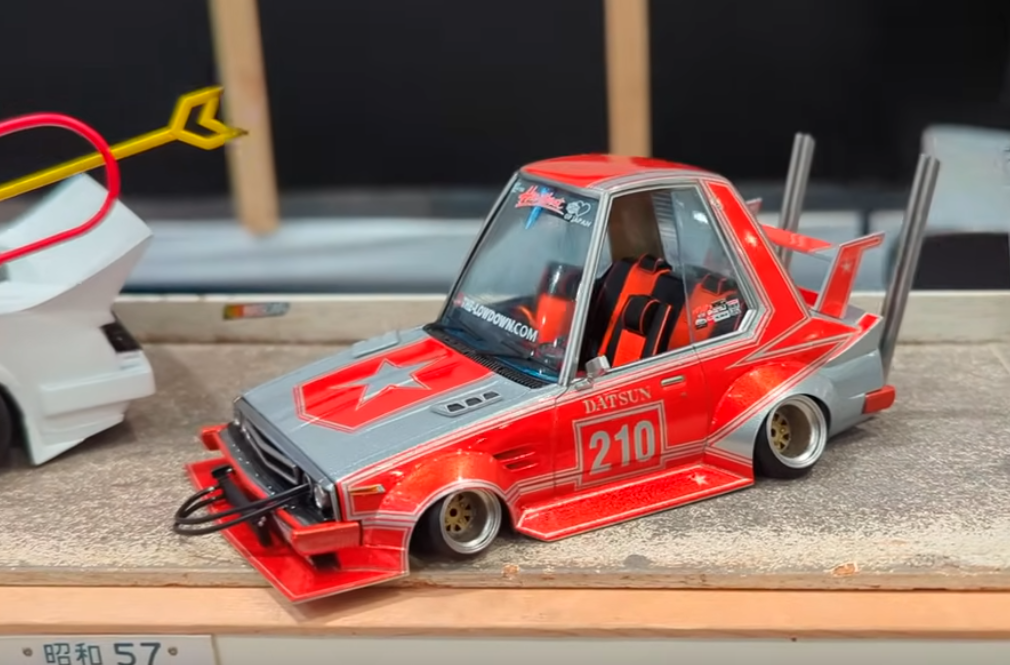
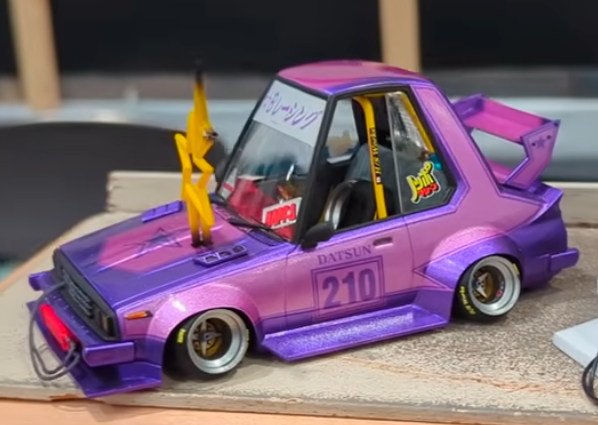
I was looking for a video of the 2025 Shizuoka modelshow and found a video that I partially watched in 2024. What I liked from that video were a couple of Japanese Bosozoku cars in Egg-plane style. It reminded me somewhat of those Neko Works cars, but these are more modelkits than those Neko Works. I have been trying to see if they are available from somewhere, but I am affraid these might be a stock-modelkit and some labour-intensive scratchwork to get them in these proportions. I hope that I am wrong, because I really dig them and want to get some, they seem fun, wild projects to do.
-
-
-
-
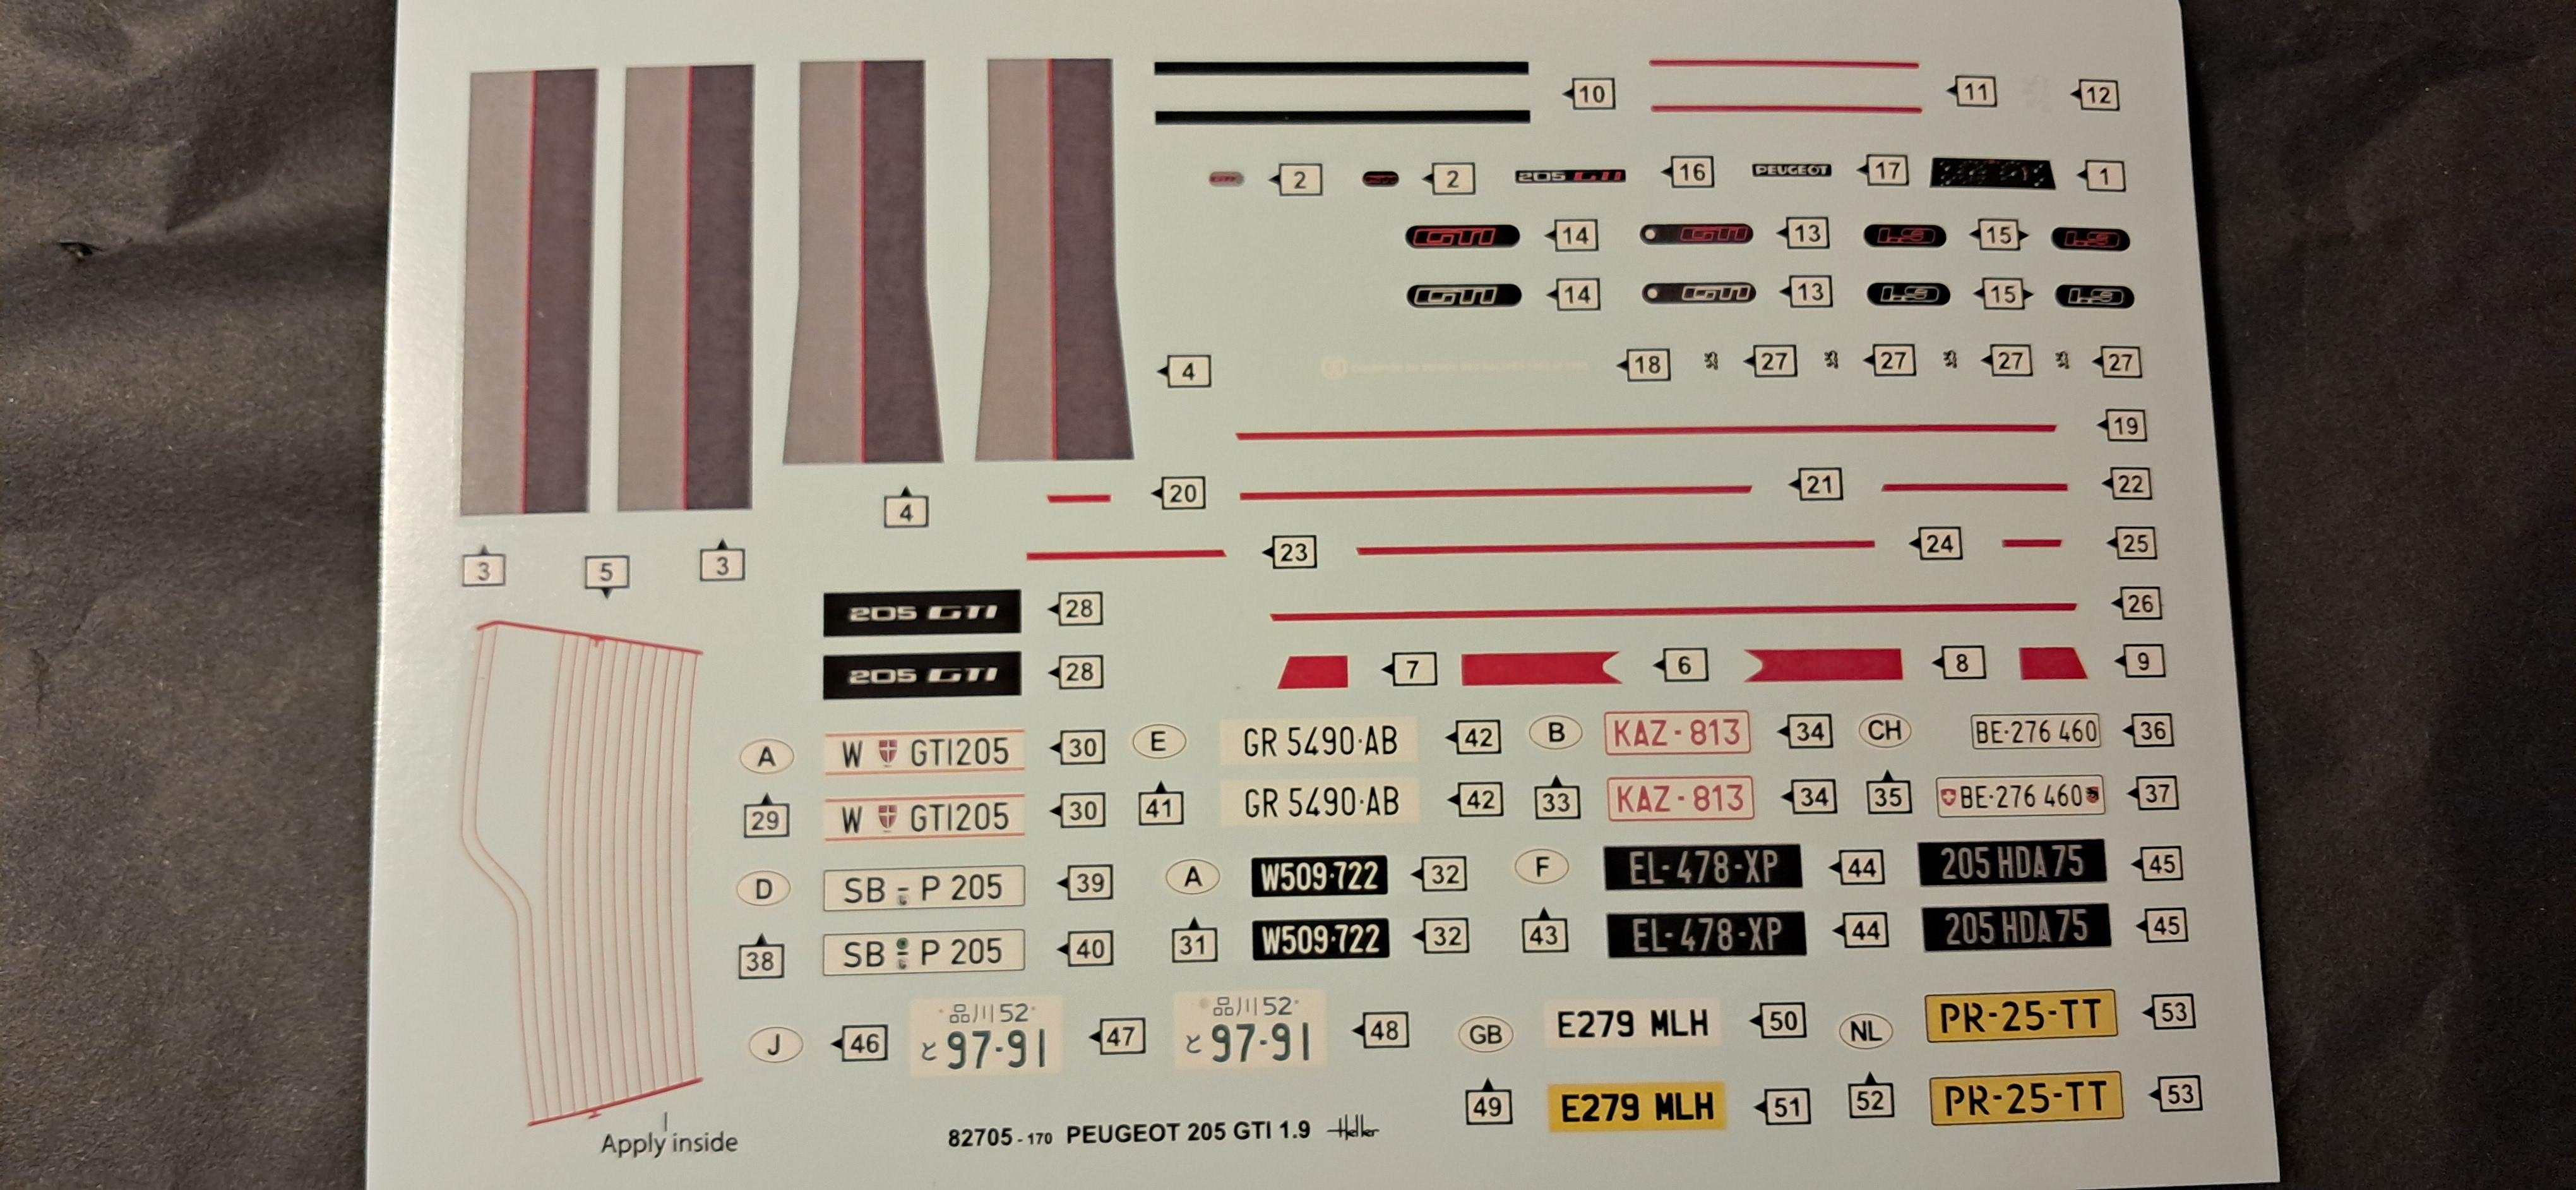
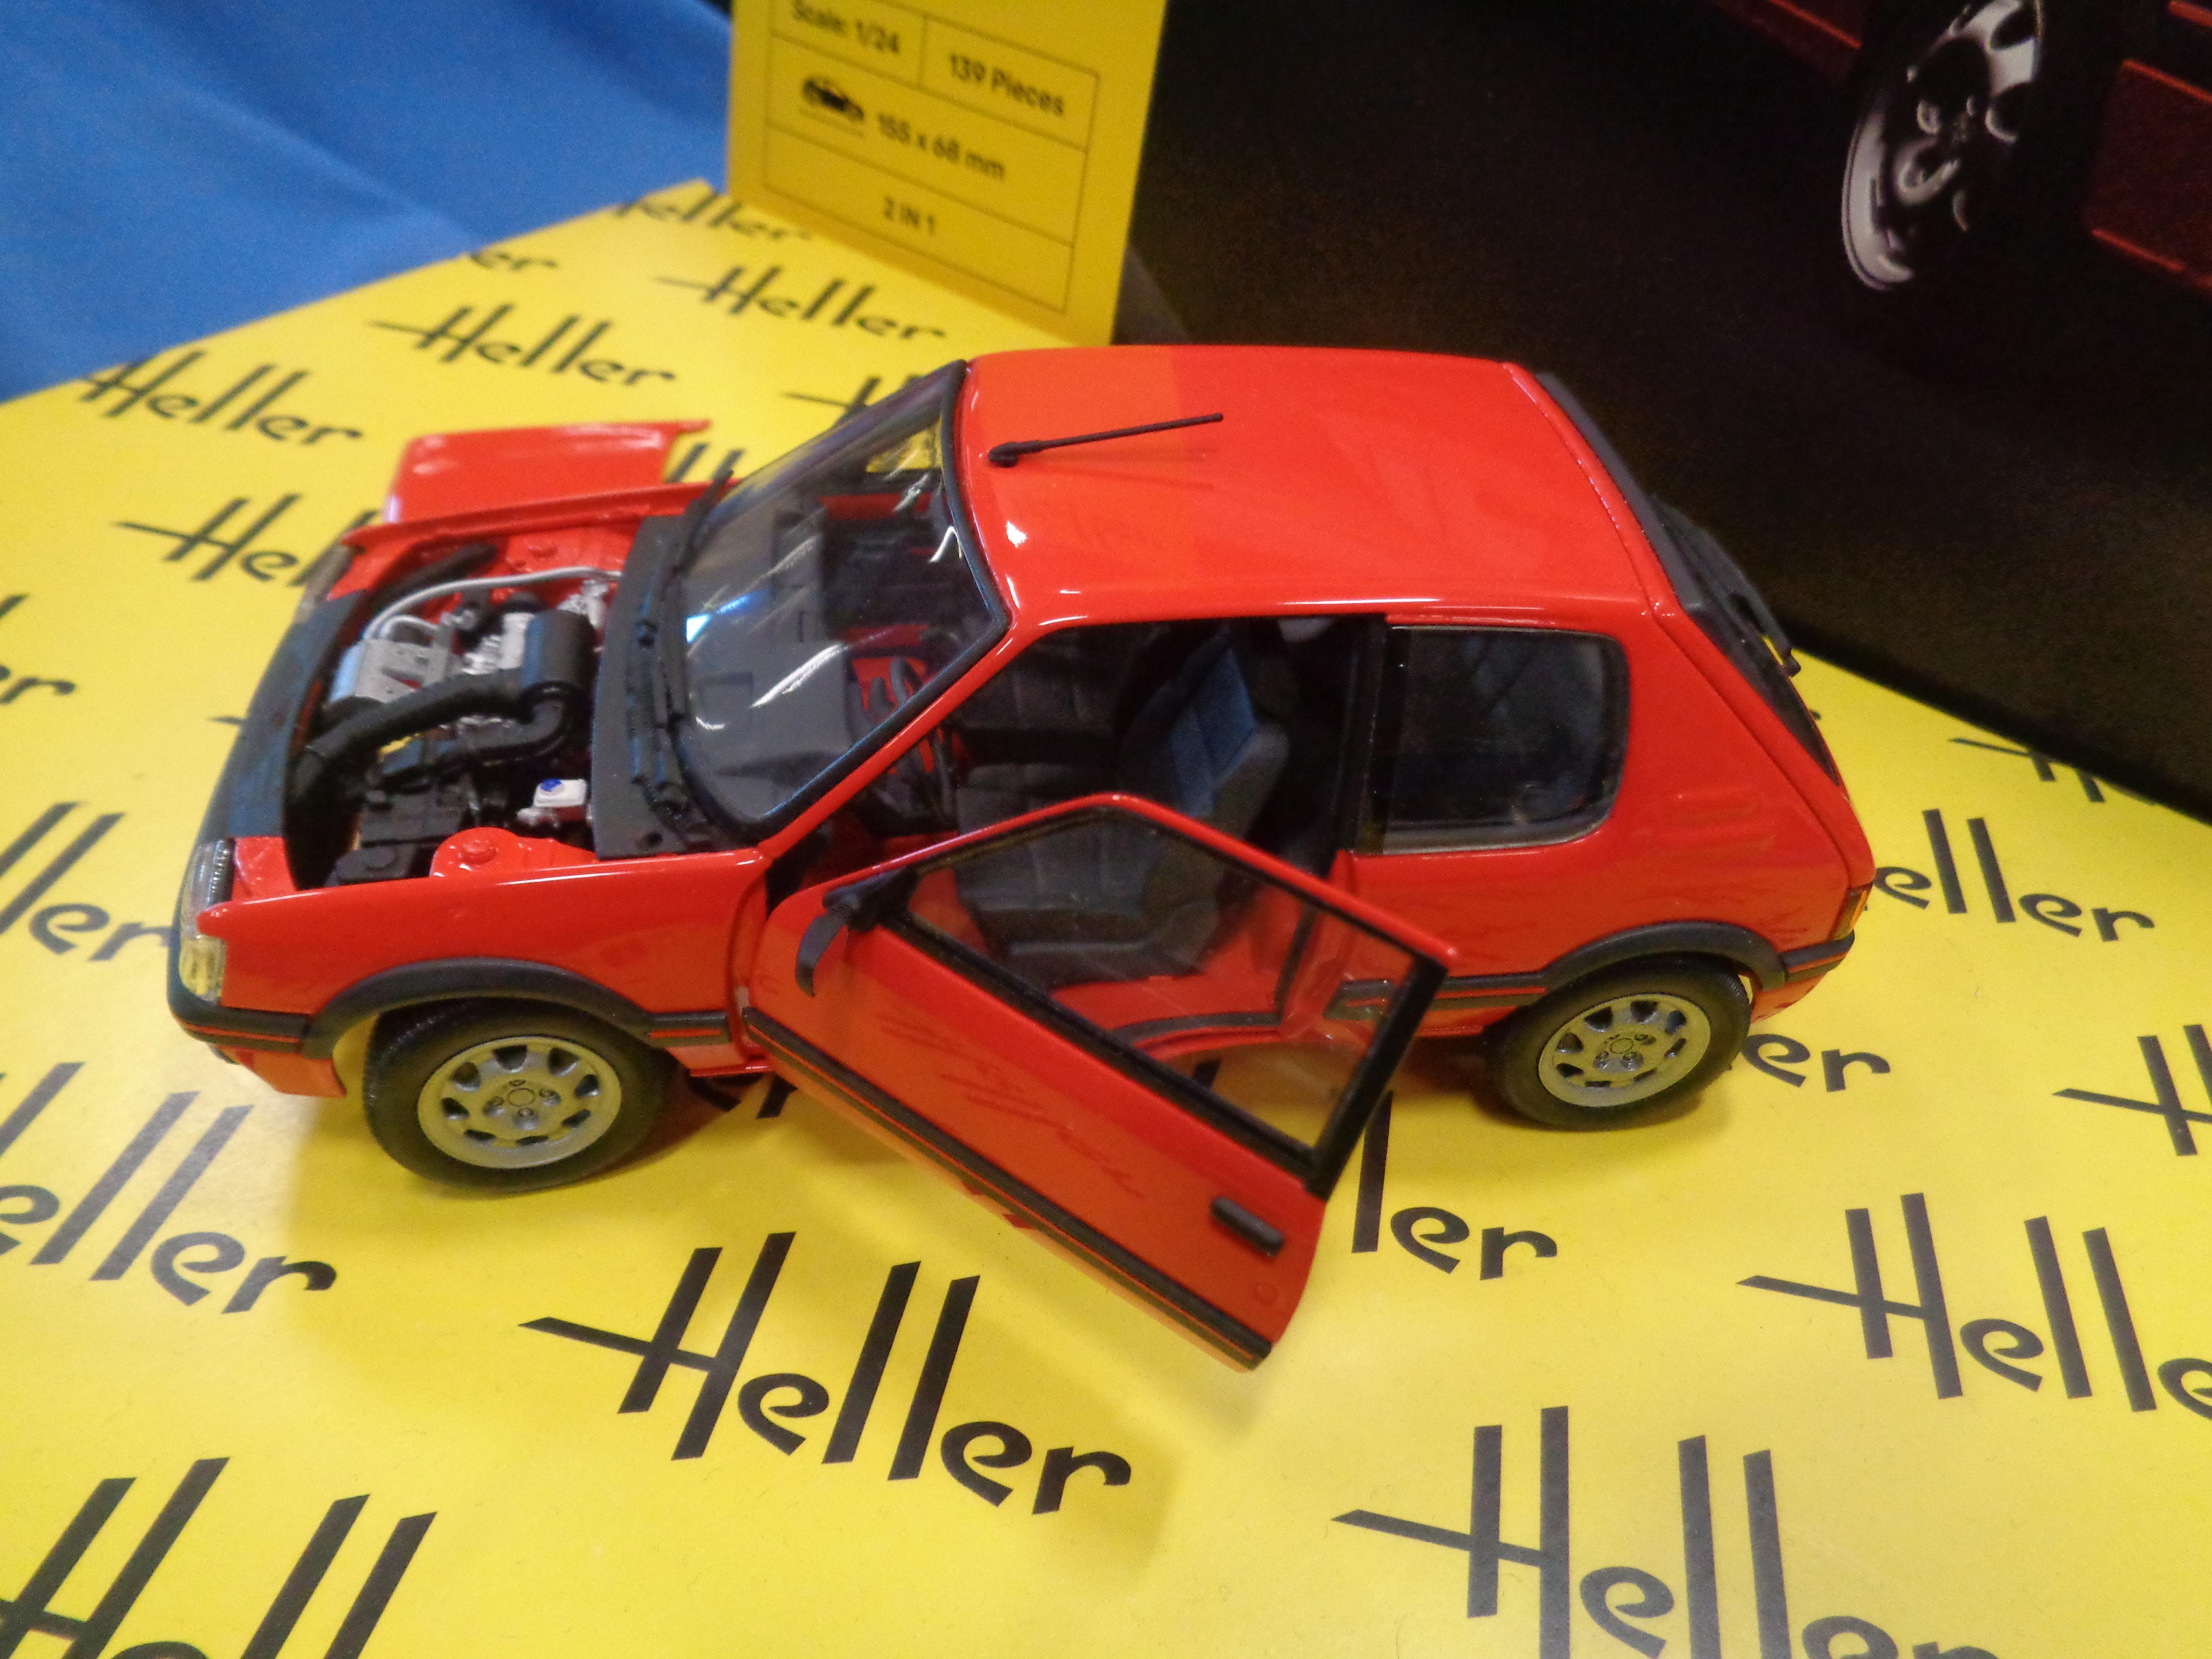
I was at a Belgian modelshow last weekend and ran accros the 205 from Heller.
-
In the preview catalogue, it is announced as a new-tooled 1:24 kit. So, no 1/12th unfortunately
-
No, there isn't any.
-
I saw this picture on the Facebook page of Italeri. Is this a hint of what is coming up? The Stratos is a new 1/12 release after their 1/12 Delta. So, might be this a new 1/12 announcement for next year? I would hope so! It would be awesome and I personally would get me a few.
-
I painted the surround of the taillights black, which resembles the rubber seal. I wish the car had the inner works in the taillights, it looks bit empty this way. The spare wheel is not bolted down, I think it should've been. The screws are too long and they were the shortest. So, multitool to the rescue and made them shorter. I think the belts should've been longer and bolted down to something, I superglued them now to the inside of the sparewheel. And for now, masked the doors in order for airbrush the windowtrim black and the inside of the door grey-ish.
-
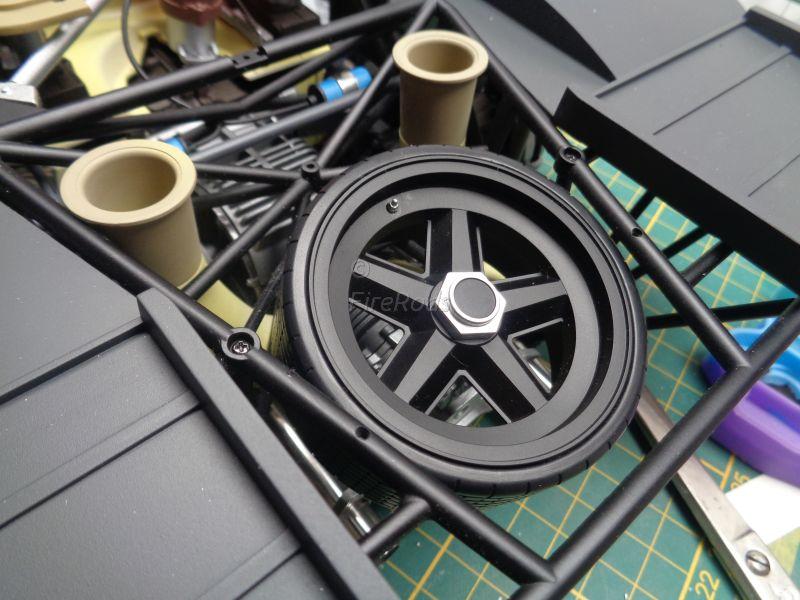
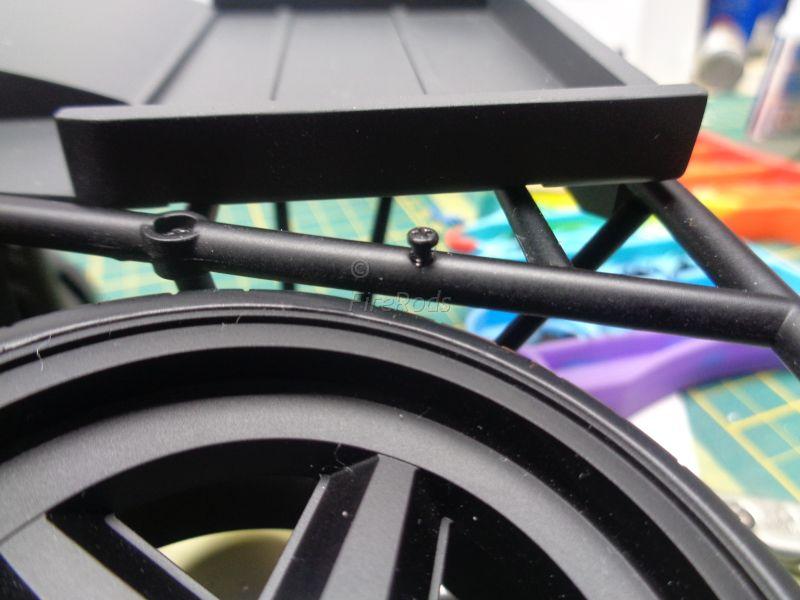
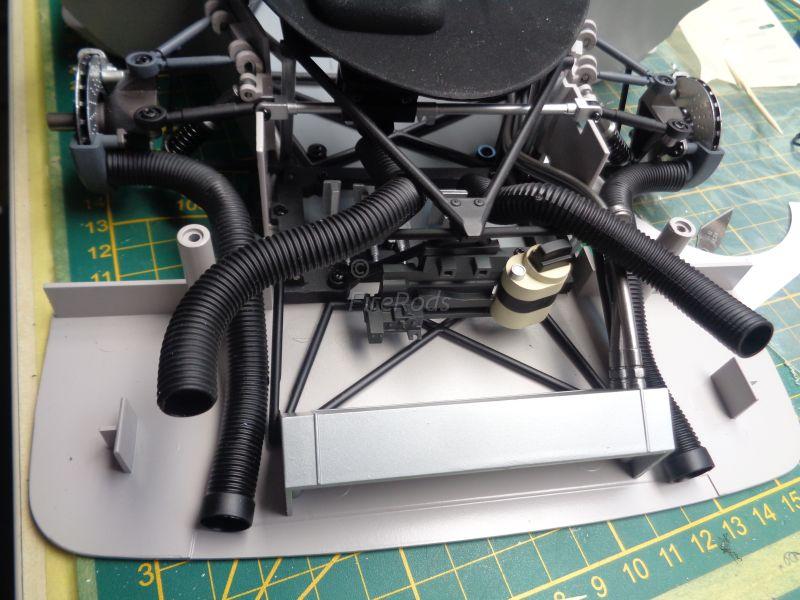
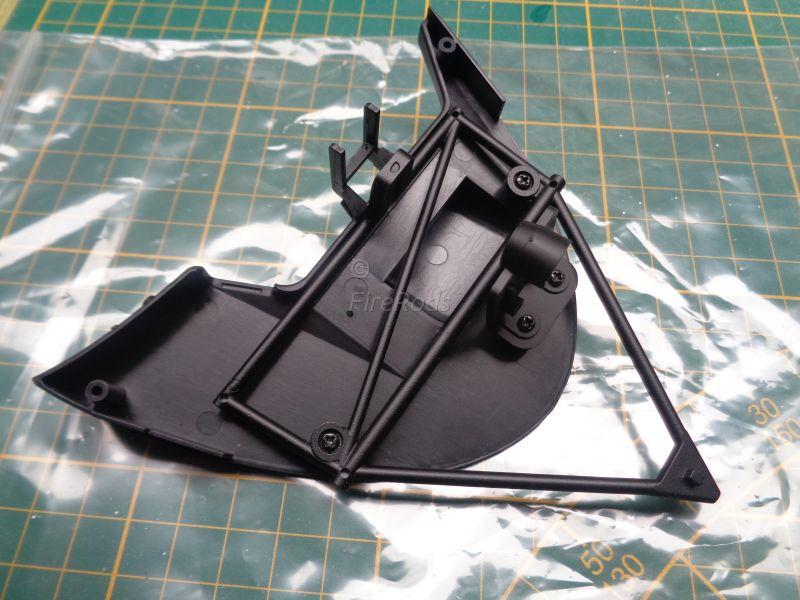
Hard to see, but in picture 19, TU-4 80mm is difficult to place, and when in place it is too short for it to sit nicely Next frustration, getting the stabiliser through the frame: Impossible. I loosened the top frame and tilted the X-frame forwards in order to create space for the stabiliser to pass and turn. And finally it is there. The hole for this screw is too big, it does not catch. I tried a M1.6 screw, but that was too small. So I used a small dot of superglue to hold it in place. Re-threading was necessary, but some places were easier to reach than others. Another frustration, getting this stabiliser into place. It had to be pre-assembled according to the manual, but it is impossible to place the subassembly in place as the stabiliser can not make the turn. Best is to let it off and assemble after the subassembly is attached to the frame. Another frustration; the screw hole for the fender is locate underneath this box! I managed with prying to get to the screw. To add a bit more realism, I added BMF to the frame for the taillights It will reflect light and makes it more realistic These frame bars had to be forced into position
-
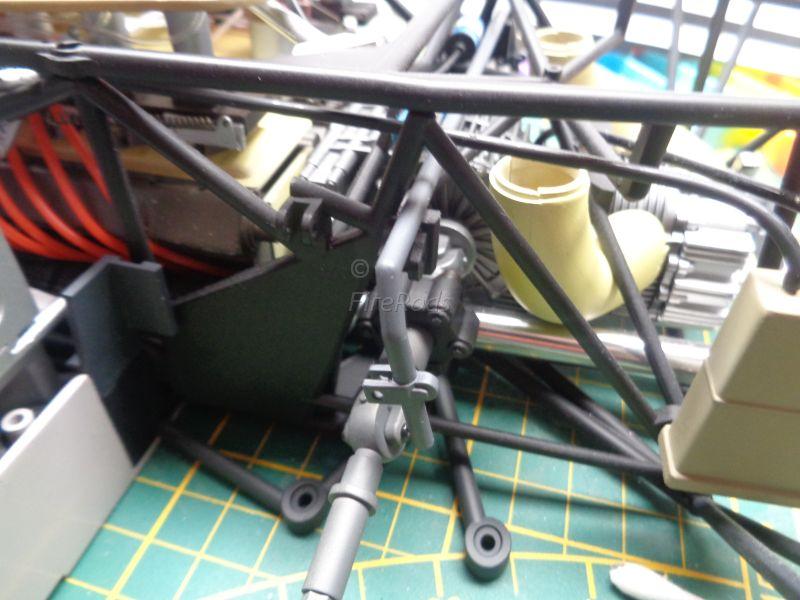
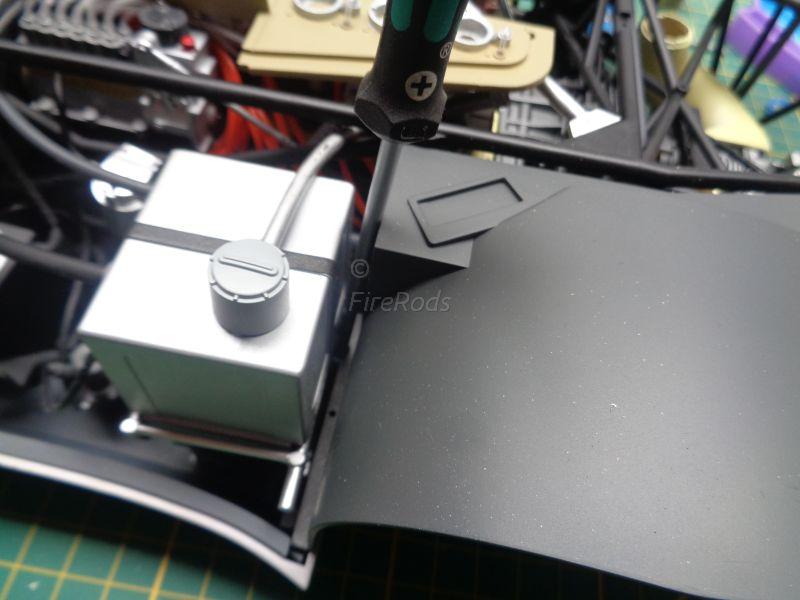
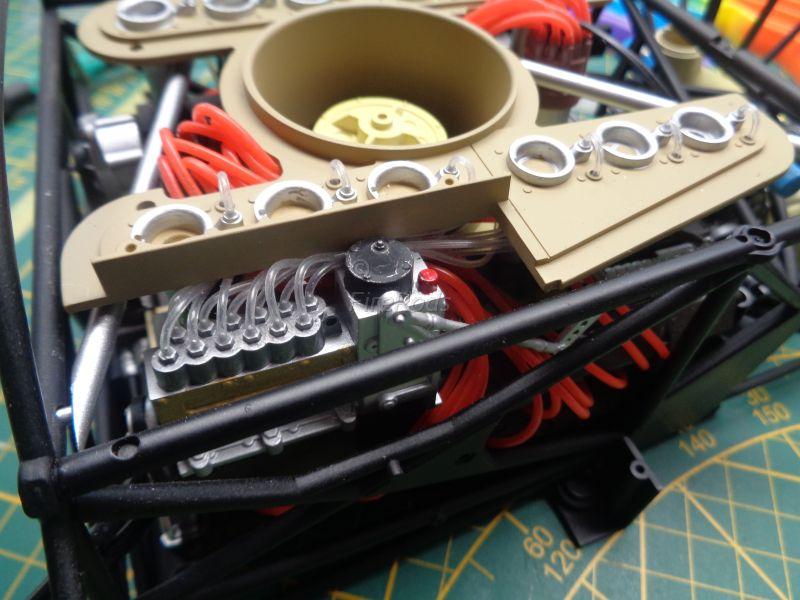
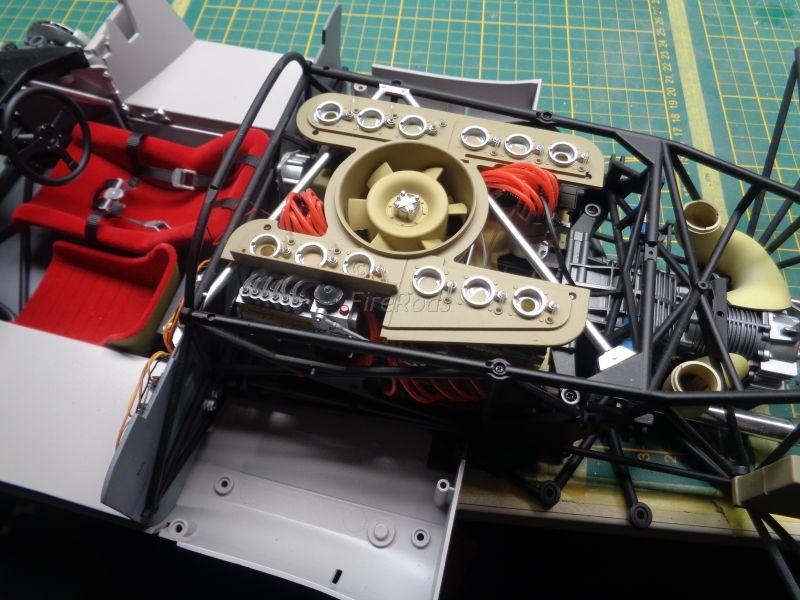
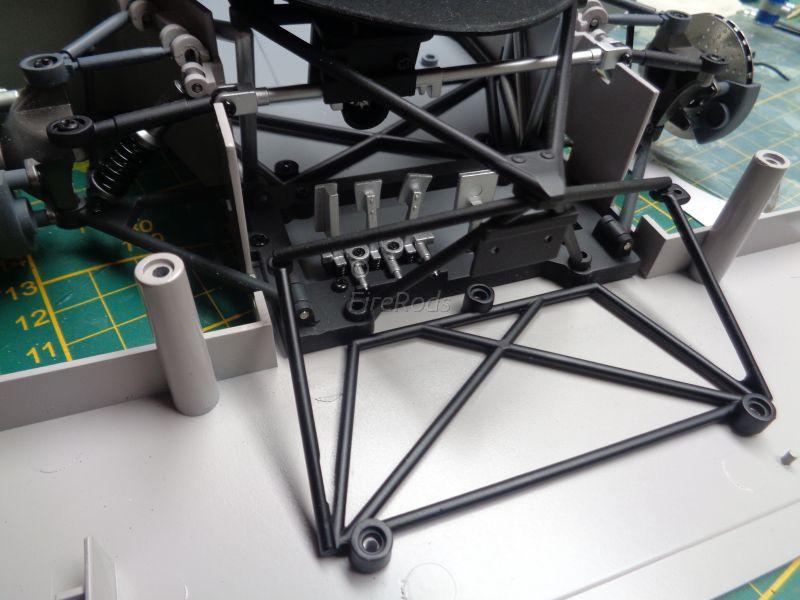
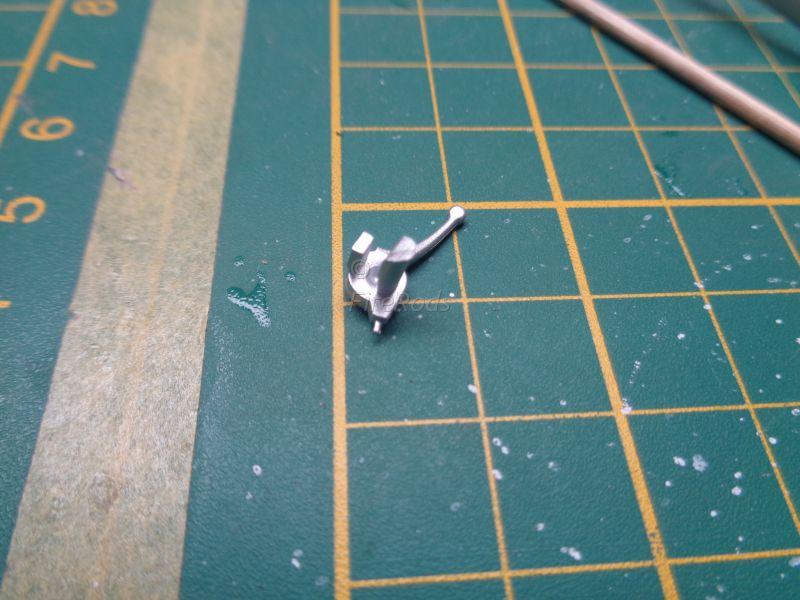
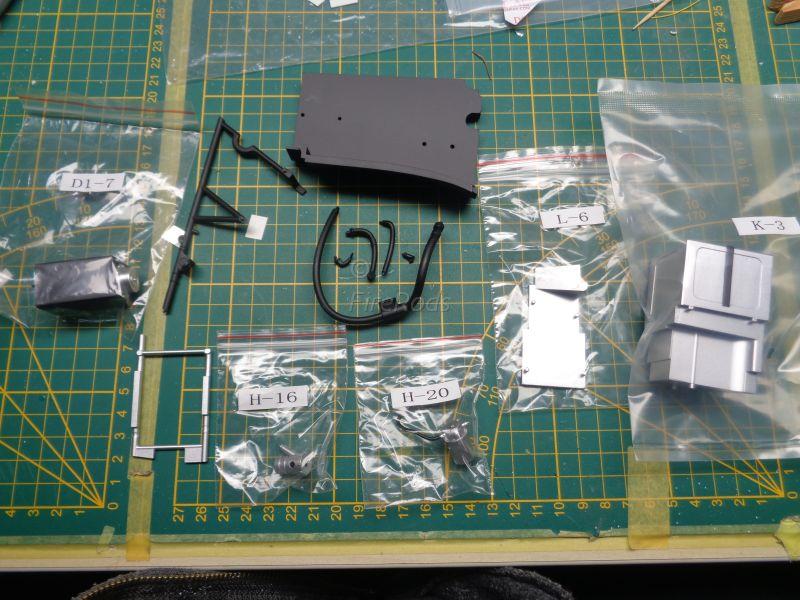
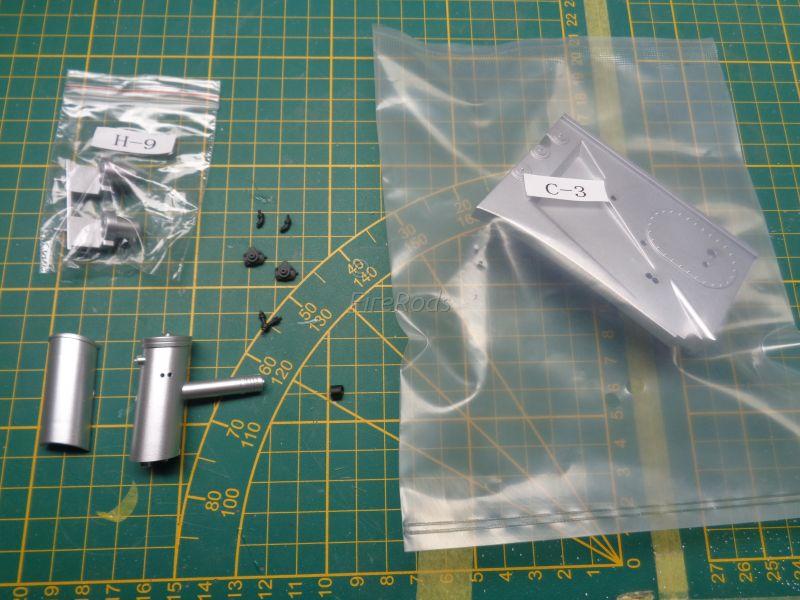
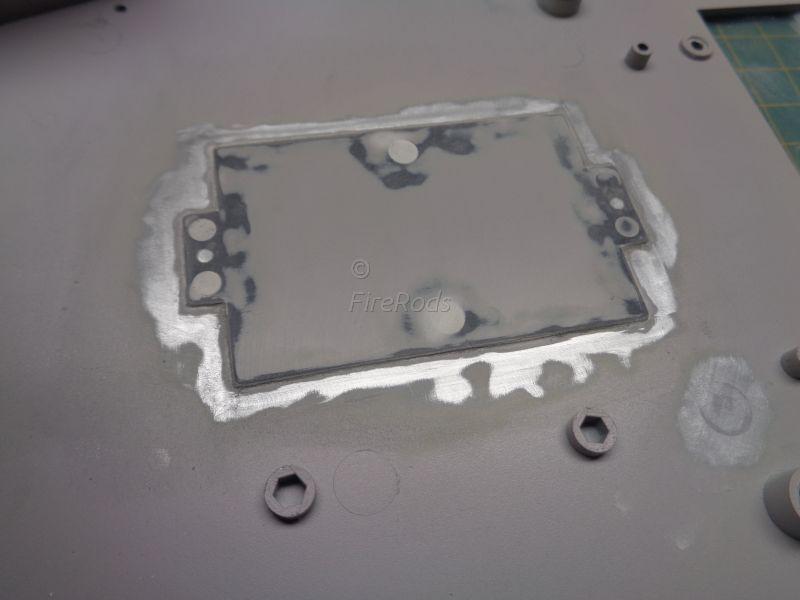
Time flies by and so does the progress, even though I was busy with a modelshow and personal stuff last past weeks. The further into the build, the more the joy disappears and frustration appears. I still love the kit and it's details and looks. But the the build-order should be revised for a less frustrated build. Some parts can't be installed without disassembling parts or re-do parts. Don't get me wrong, I love puzzles and challenges, but it has to be doable. We start with painting parts again. I added the metal frame to the box Later on, these parts will be a pain in the buttocks, trust me. After airbrushing the part, I painted the inlet parts silvery metallic and added the clear tubing. From some 3M material, I cut a strip and stuck it on the box. This subassembly is ready, pay attention that part H-20 is not attached to something and is loose for now. This is one of those frustrations, in order to get the coolant hoses attached, the subassembly has to be assembled and put into the engine bay, the box should be removed in order to add the couplers to the firewall and then the coolant hoses can be attached. When that is done, the box can be glued in place again.
-
I have to disagree, categorically :-). Yes, there are many differences between the kits, hence the Monogram simplified tooling. However, if you look at the Imai/Bandai tooling and compare to the Monogram tooling, you can see that they share (some of) the tooling, It can be best seen in the plastic parts. The sprues have mostly the same parts and sprue-lay-out. The body was retooled and so was the hood, as it was a complicated one-piece. Monogram did change the tooling for a cheaper/easier to produce 2 part hood. The Agora is also nice, but I just like to put the Monogram E-type together, it is just a fun kit without breaking the bank a bit too much. (I have 3 build, 2 in progress and 8 in stash 🙂 ).
-
Revell bought the moulds from them and simplified a few things, but in essence, it is the same kit as the Revell/Monogram.
-
Oh yeah, and filling....
-
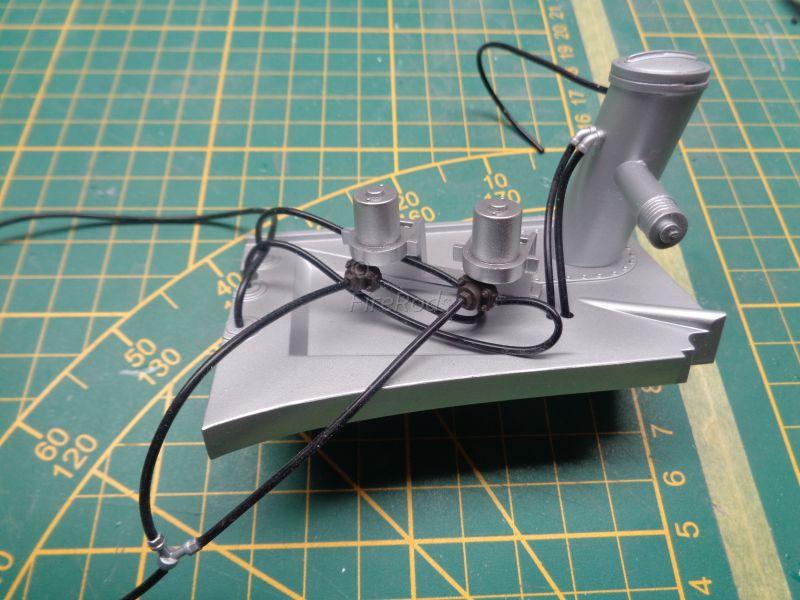
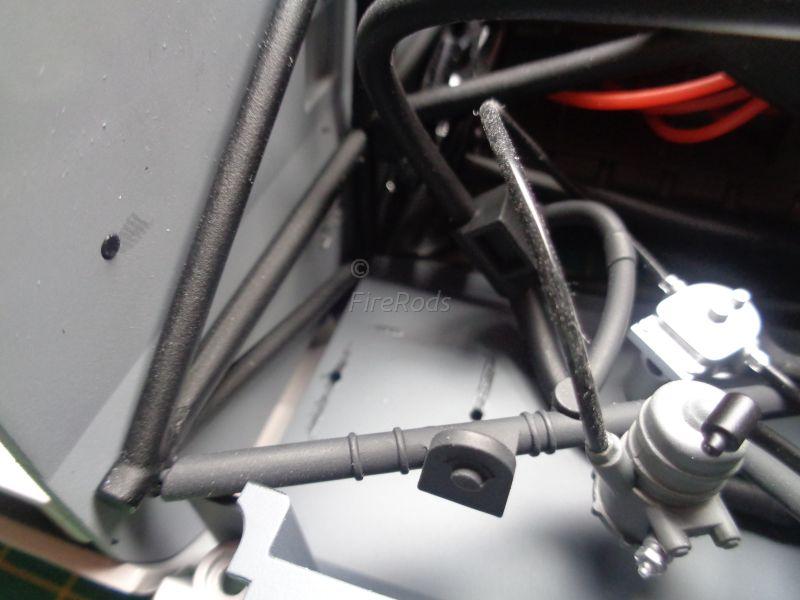
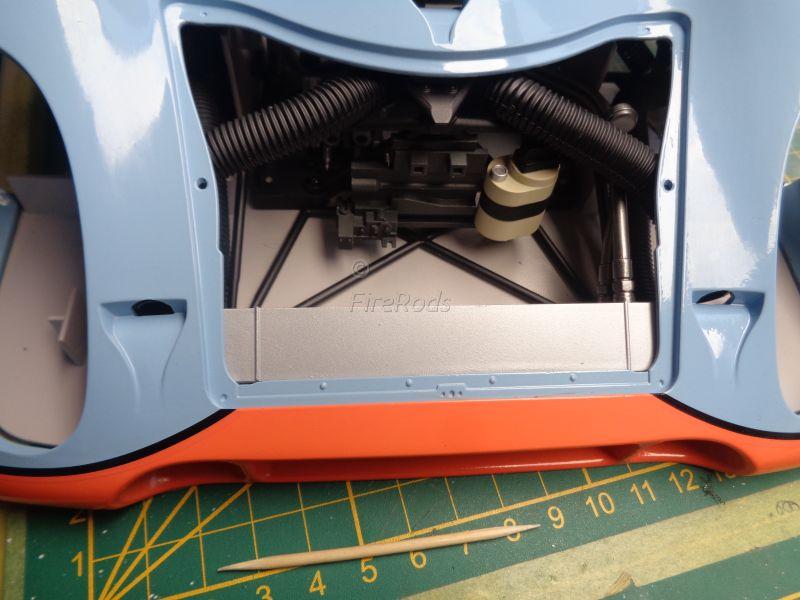
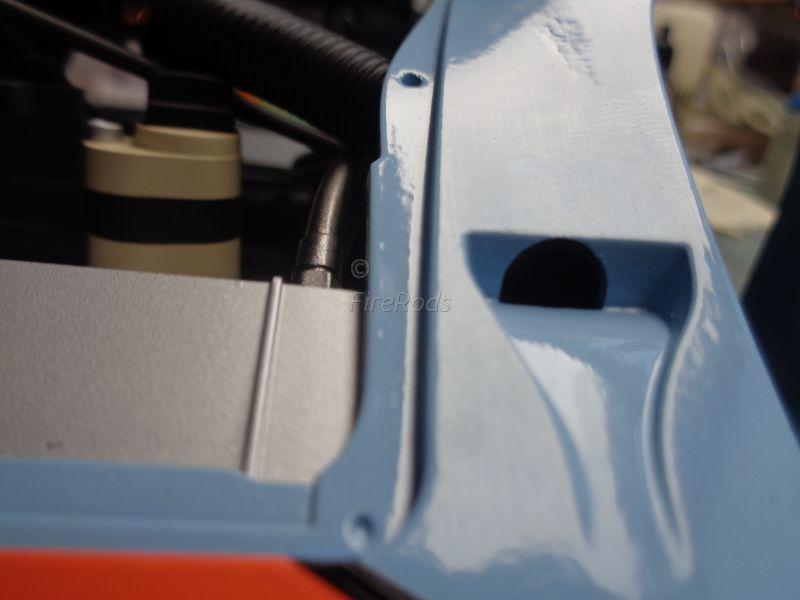
And added a bunch of wiring. Whilst the firewall is drying, I worked on the front end and assembled more of the chassis. This was a very unclear part for me, the upper air-ducts. The set that goes to the disbrakes makes sense, but the ones for the interior doesn't. At some point, I got the body and added that on top of the chassis to see what the routing could be, since the manual couldn't tell me. This is how I think they should be. The body is not in place, therefore the hoses are a bit pointing upwards. When the body is in place, it should be ok. Make sure you cut of the tab of this part. And back to sorting, sanding and painting....
-
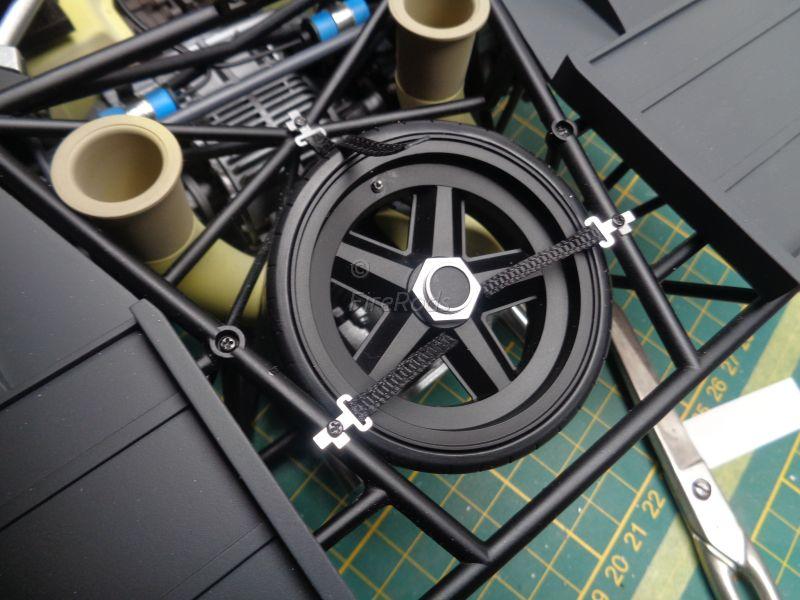
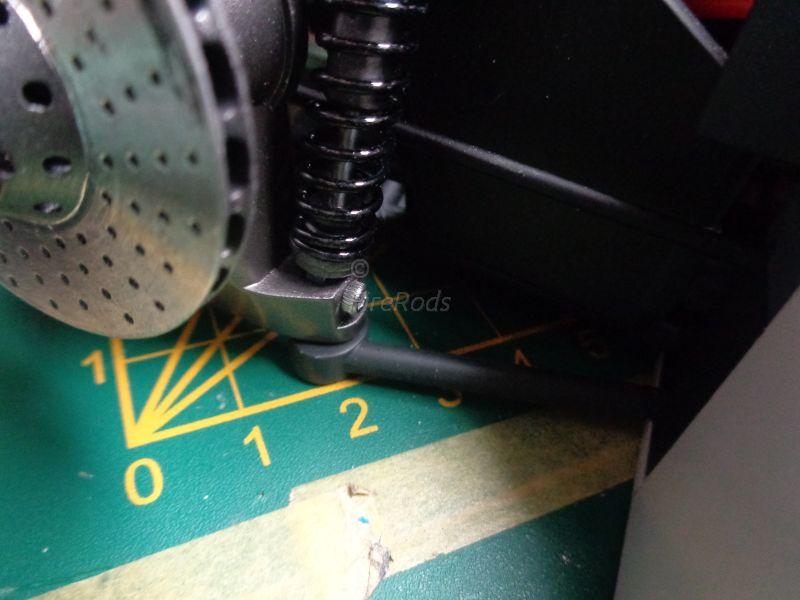
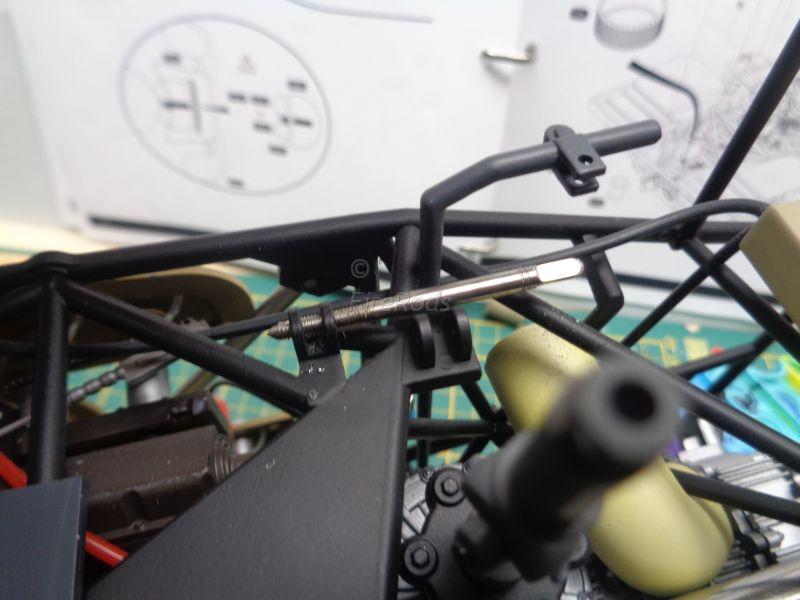
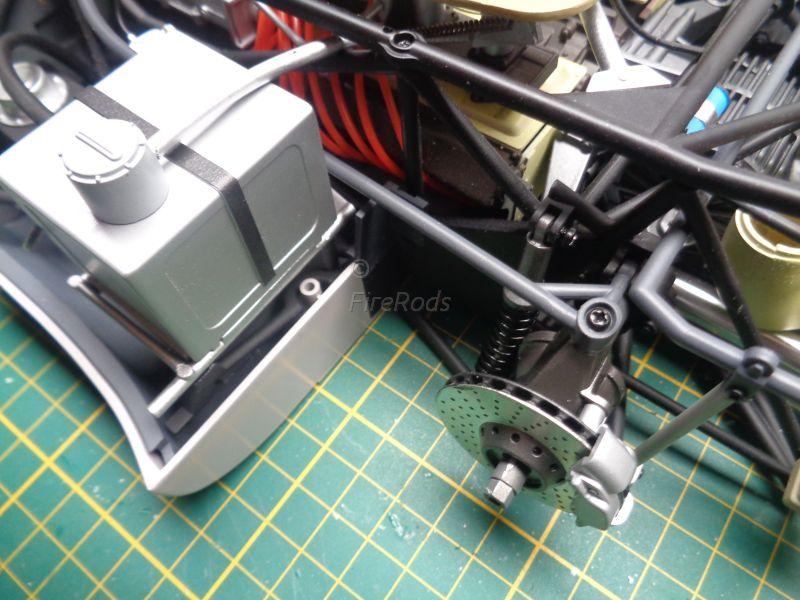
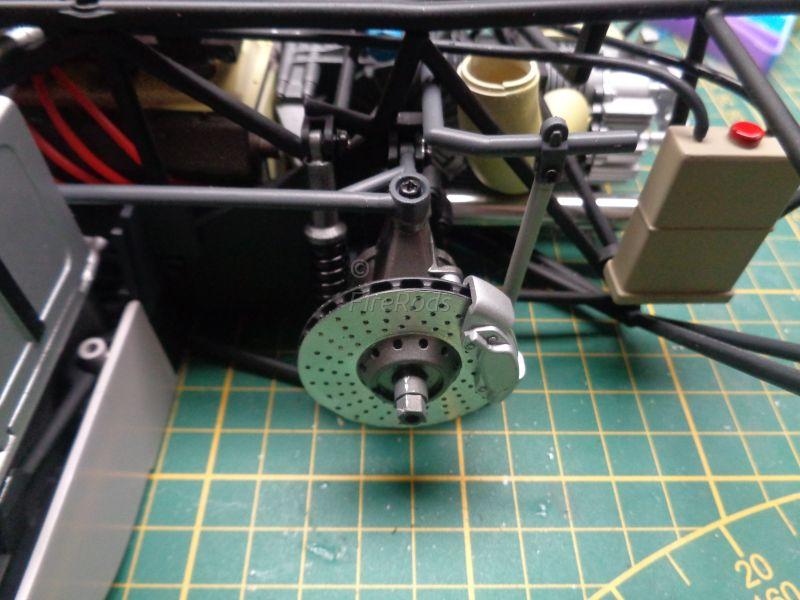
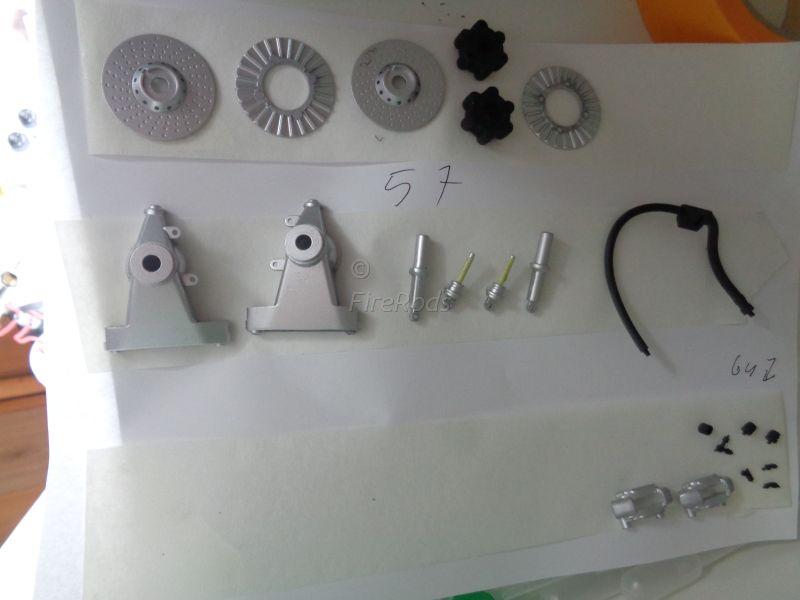
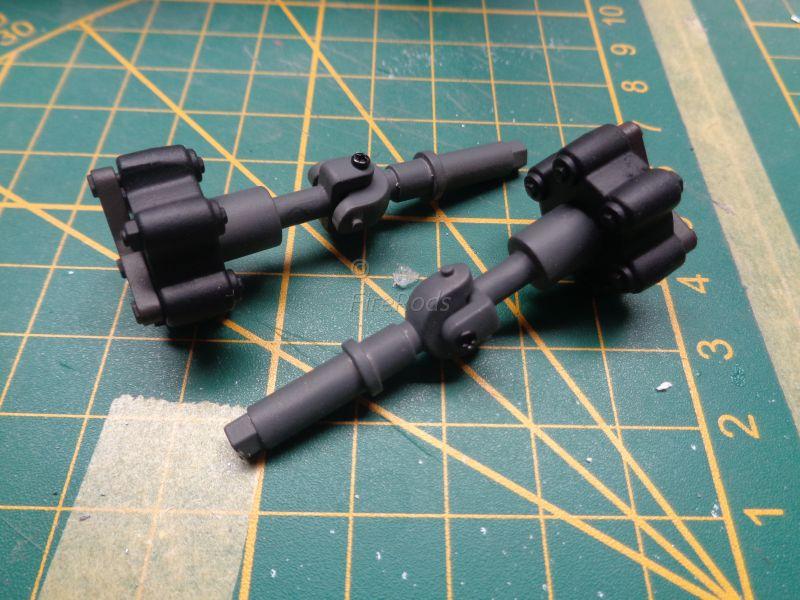
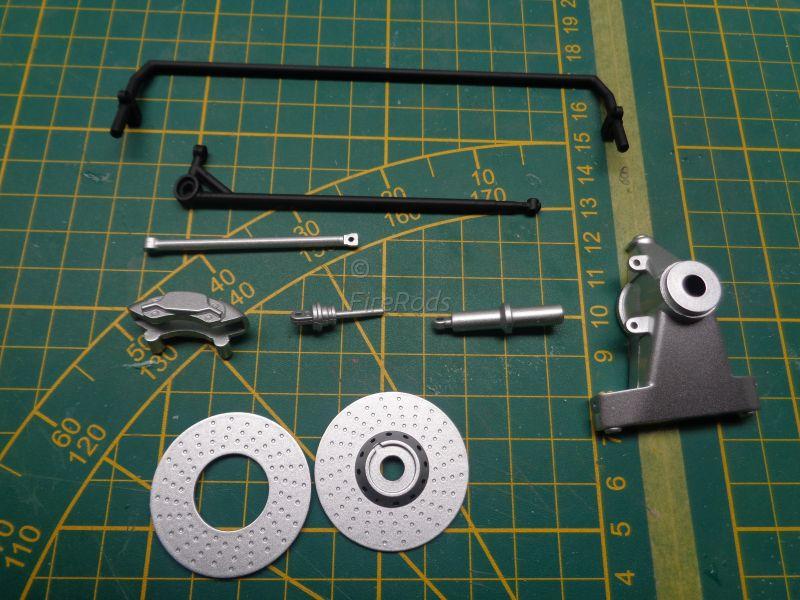
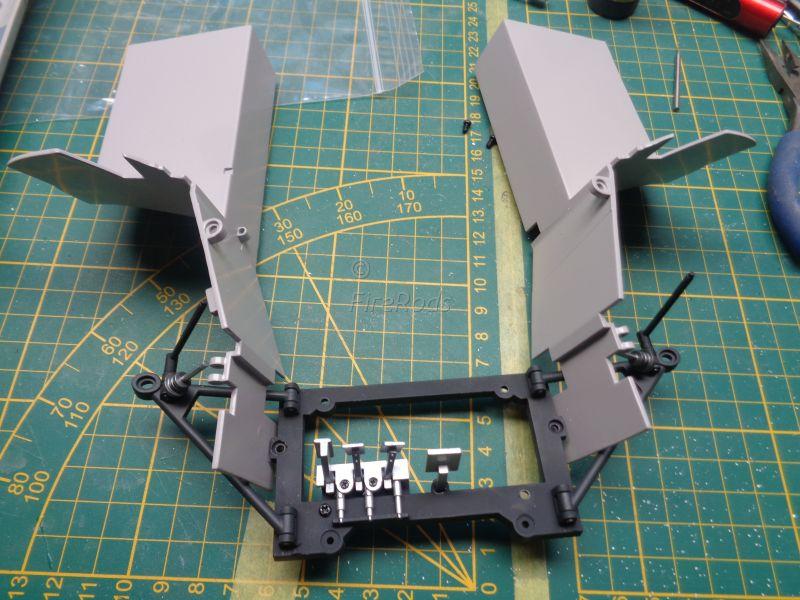
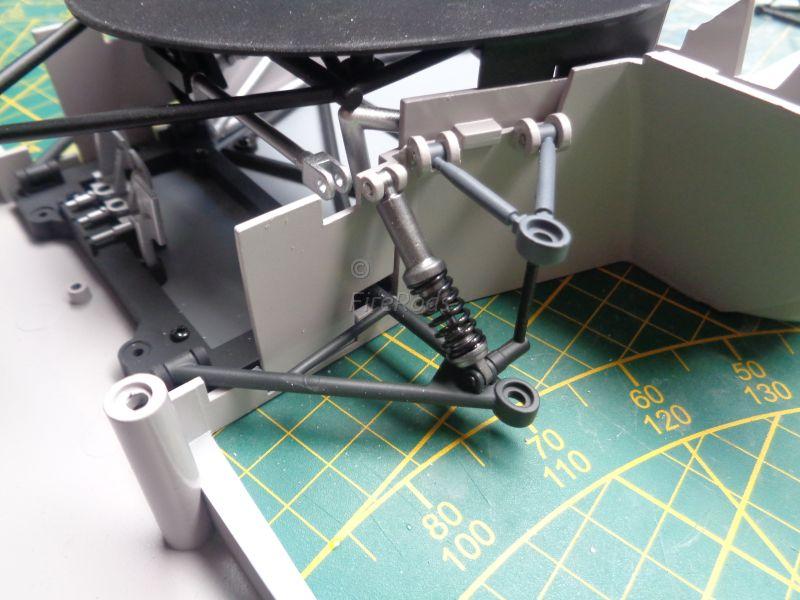
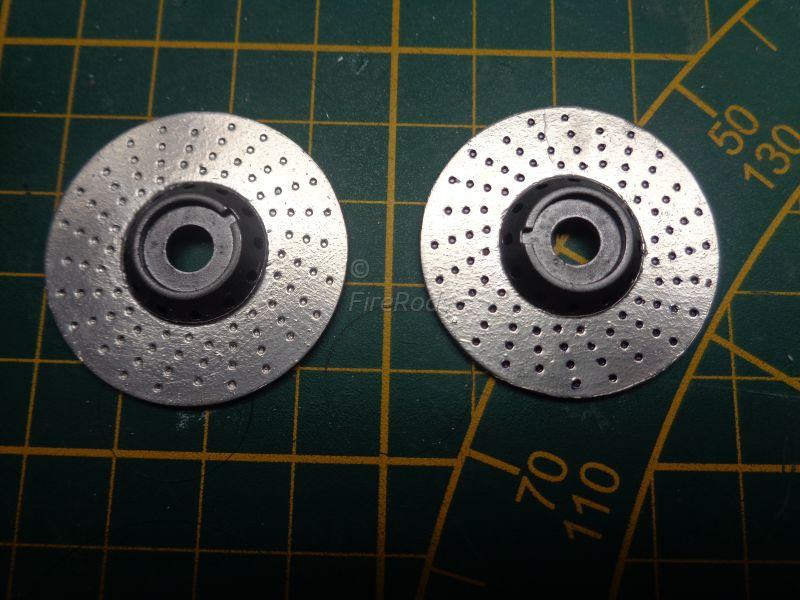
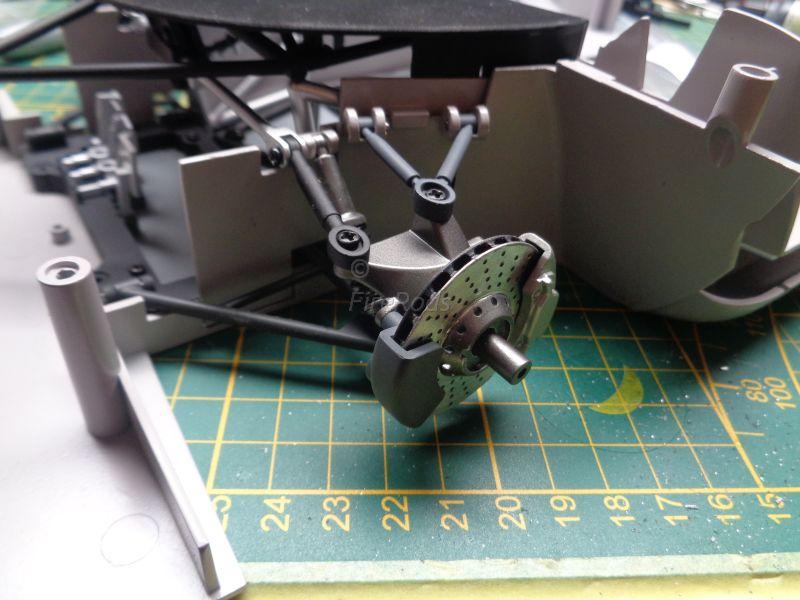
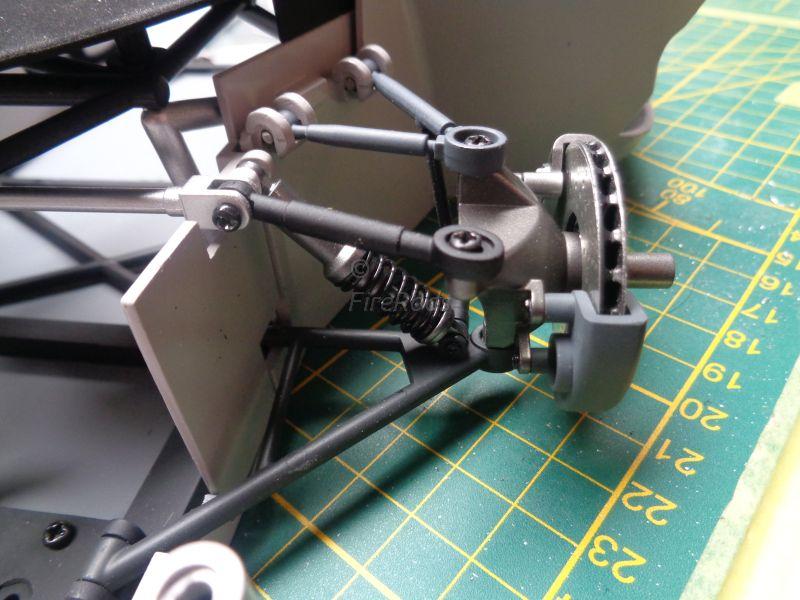
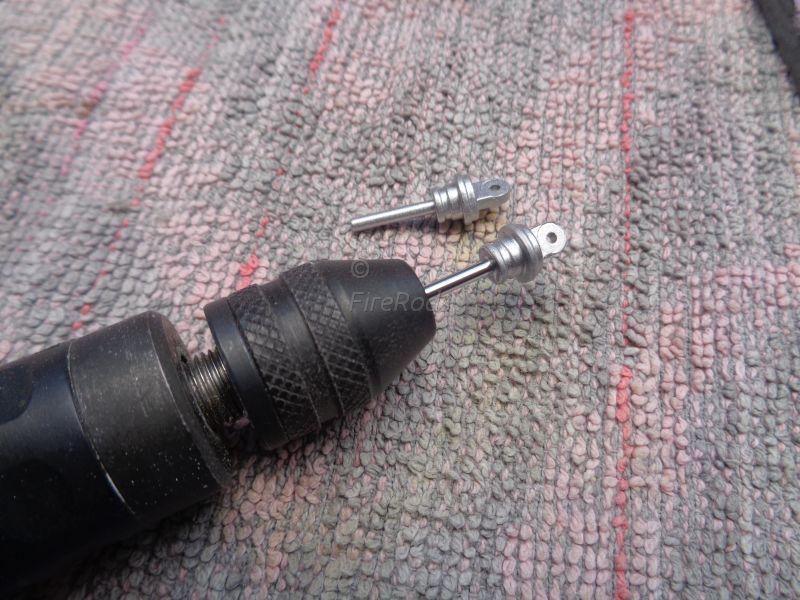
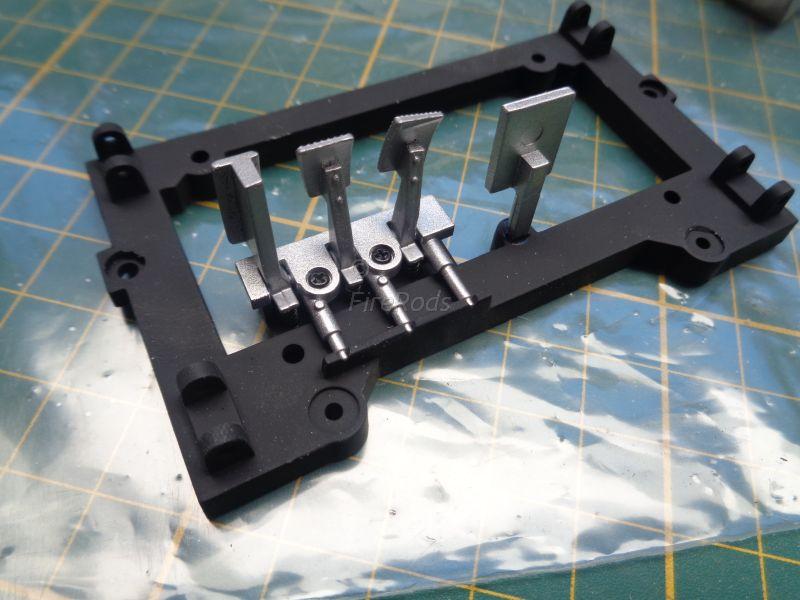
According to the manual, the assembly of the pedalbox is in a early stage. You have to add the suspension arms later on after the cockpit is installed. This seems to be very difficult to do this later. I figured out a alternative method, where the arms can be installed easily while still be on the workbench. I dissassembled the dashboard again I got the pedalbox and suspension arms and fitted them loosily between the sidepanels. I attached the dashbard back on and then added the assembly to the chassis. What I like to do with discbrakes, is to add a layer of BMF to the disc, burnish that into place, put it on a rotary tool and lightly scuff the disc. This will give it a realistic discbrake look. Left is after the rotary tool and right is before. And yes, I noticed I switched the discs between left and right ? I added a bit of BMF to the cooling-ribs
-
a (3?) weekly update. This one took a little bit longer due to preparing for and attending to the Scale Model Challenge weekend and the final races at Assen a week later. Because of that, there was less time to model and not a lot to show for a update. However, I am posting a new update. The kit is a joy to work with and goes along nicely, the only unclear part was the airducts, but that will come later. First I am off to sanding parts again... and paint ofcourse. What I like to do with the shocks, is to polish the metal rods. It gives them a chrome appearance. Before and after Since the firewall is visible, I took some time to fill the ejector pin marks. The dashboard comes pre-flocked, therefore it is important to keep it very clean. Even using a clean piece of plastic was not enough to prevent dust in the flocking. Not all paint was applied even from factory, fortunately, it will not be very noticable when assembled. I find this a strange part in the kit. I haven't been able to figure out why this panel is in the interior. The real car didn't had it and it does not seem to have any function in the kit. I filed the stubs and filled the seems and pin-marks to make it less visible. Pins have to be used when attaching the suspension arms, I figured out that the holes needs to be pre-drilled to 2mm in order for the pins to go in decently. I glued the springs to the plastic part, before adding the pedals.