Ceaser_Salad
-
Posts
327 -
Joined
-
Last visited
2 Followers


Recent Profile Visitors
3,216 profile views


Ceaser_Salad's Achievements
MCM Avid Poster (5/6)
-
I GOT SCAMMED! I was looking for a 1967 mustang, and I got a message from an account here on MCM by the name of Ellin Jack. They provided me an email to contact their friend who had a mustang kit. Pecker Stone was the name of the contact, and through email we came to an agreement. Payment was via paypal for $55 CAD. After some back and forth, they gave me a second paypal email to send my money to. Once I sent it, someone who didn't speak english messaged me asking why I am sending them money, and then refused to send it back. DO NOT TRUST THIS ACCOUNT. ELLIN JACK AND PECKER STONE ARE SCAMS! Paypal denied my request for reimbursement due to the setup of the transaction. Be careful of who you email, what they ask for and what you send. If anyone knows anything about this, please let me know.
-
It is under consideration. Wanted to see what was up for offer first.
-
Thanks guys, Tony, I had painted everything all together initially. It was a touch up that made it a different tone, as I had to paint over a little thumb print I had made. I am hoping that my next build won't need a repaint so everything remains the same color. The first paint job I had done on the car had ended in one solid color, then I had to touch some spots up on the side. That resulted in different tones of blue showing up, so I repainted the whole thing again, muffed up the hood and added a layer or so to the hood to cover up.
-
Hi all, Looking to see if anyone has a 67 mustang (fastback, 350, 500 whatever). Looking for canadian only specifically Ontario, I cannot afford cross border shipping. Please lemme know
-
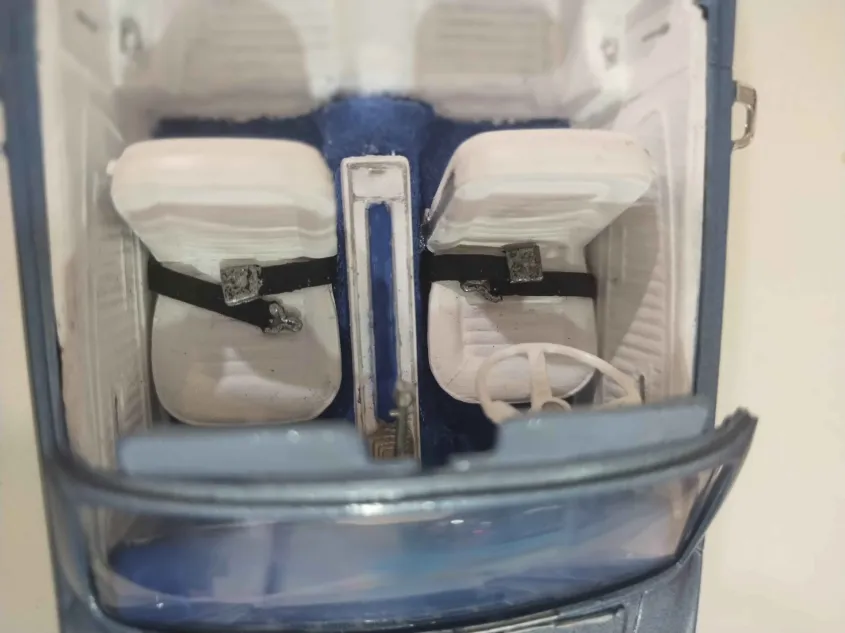
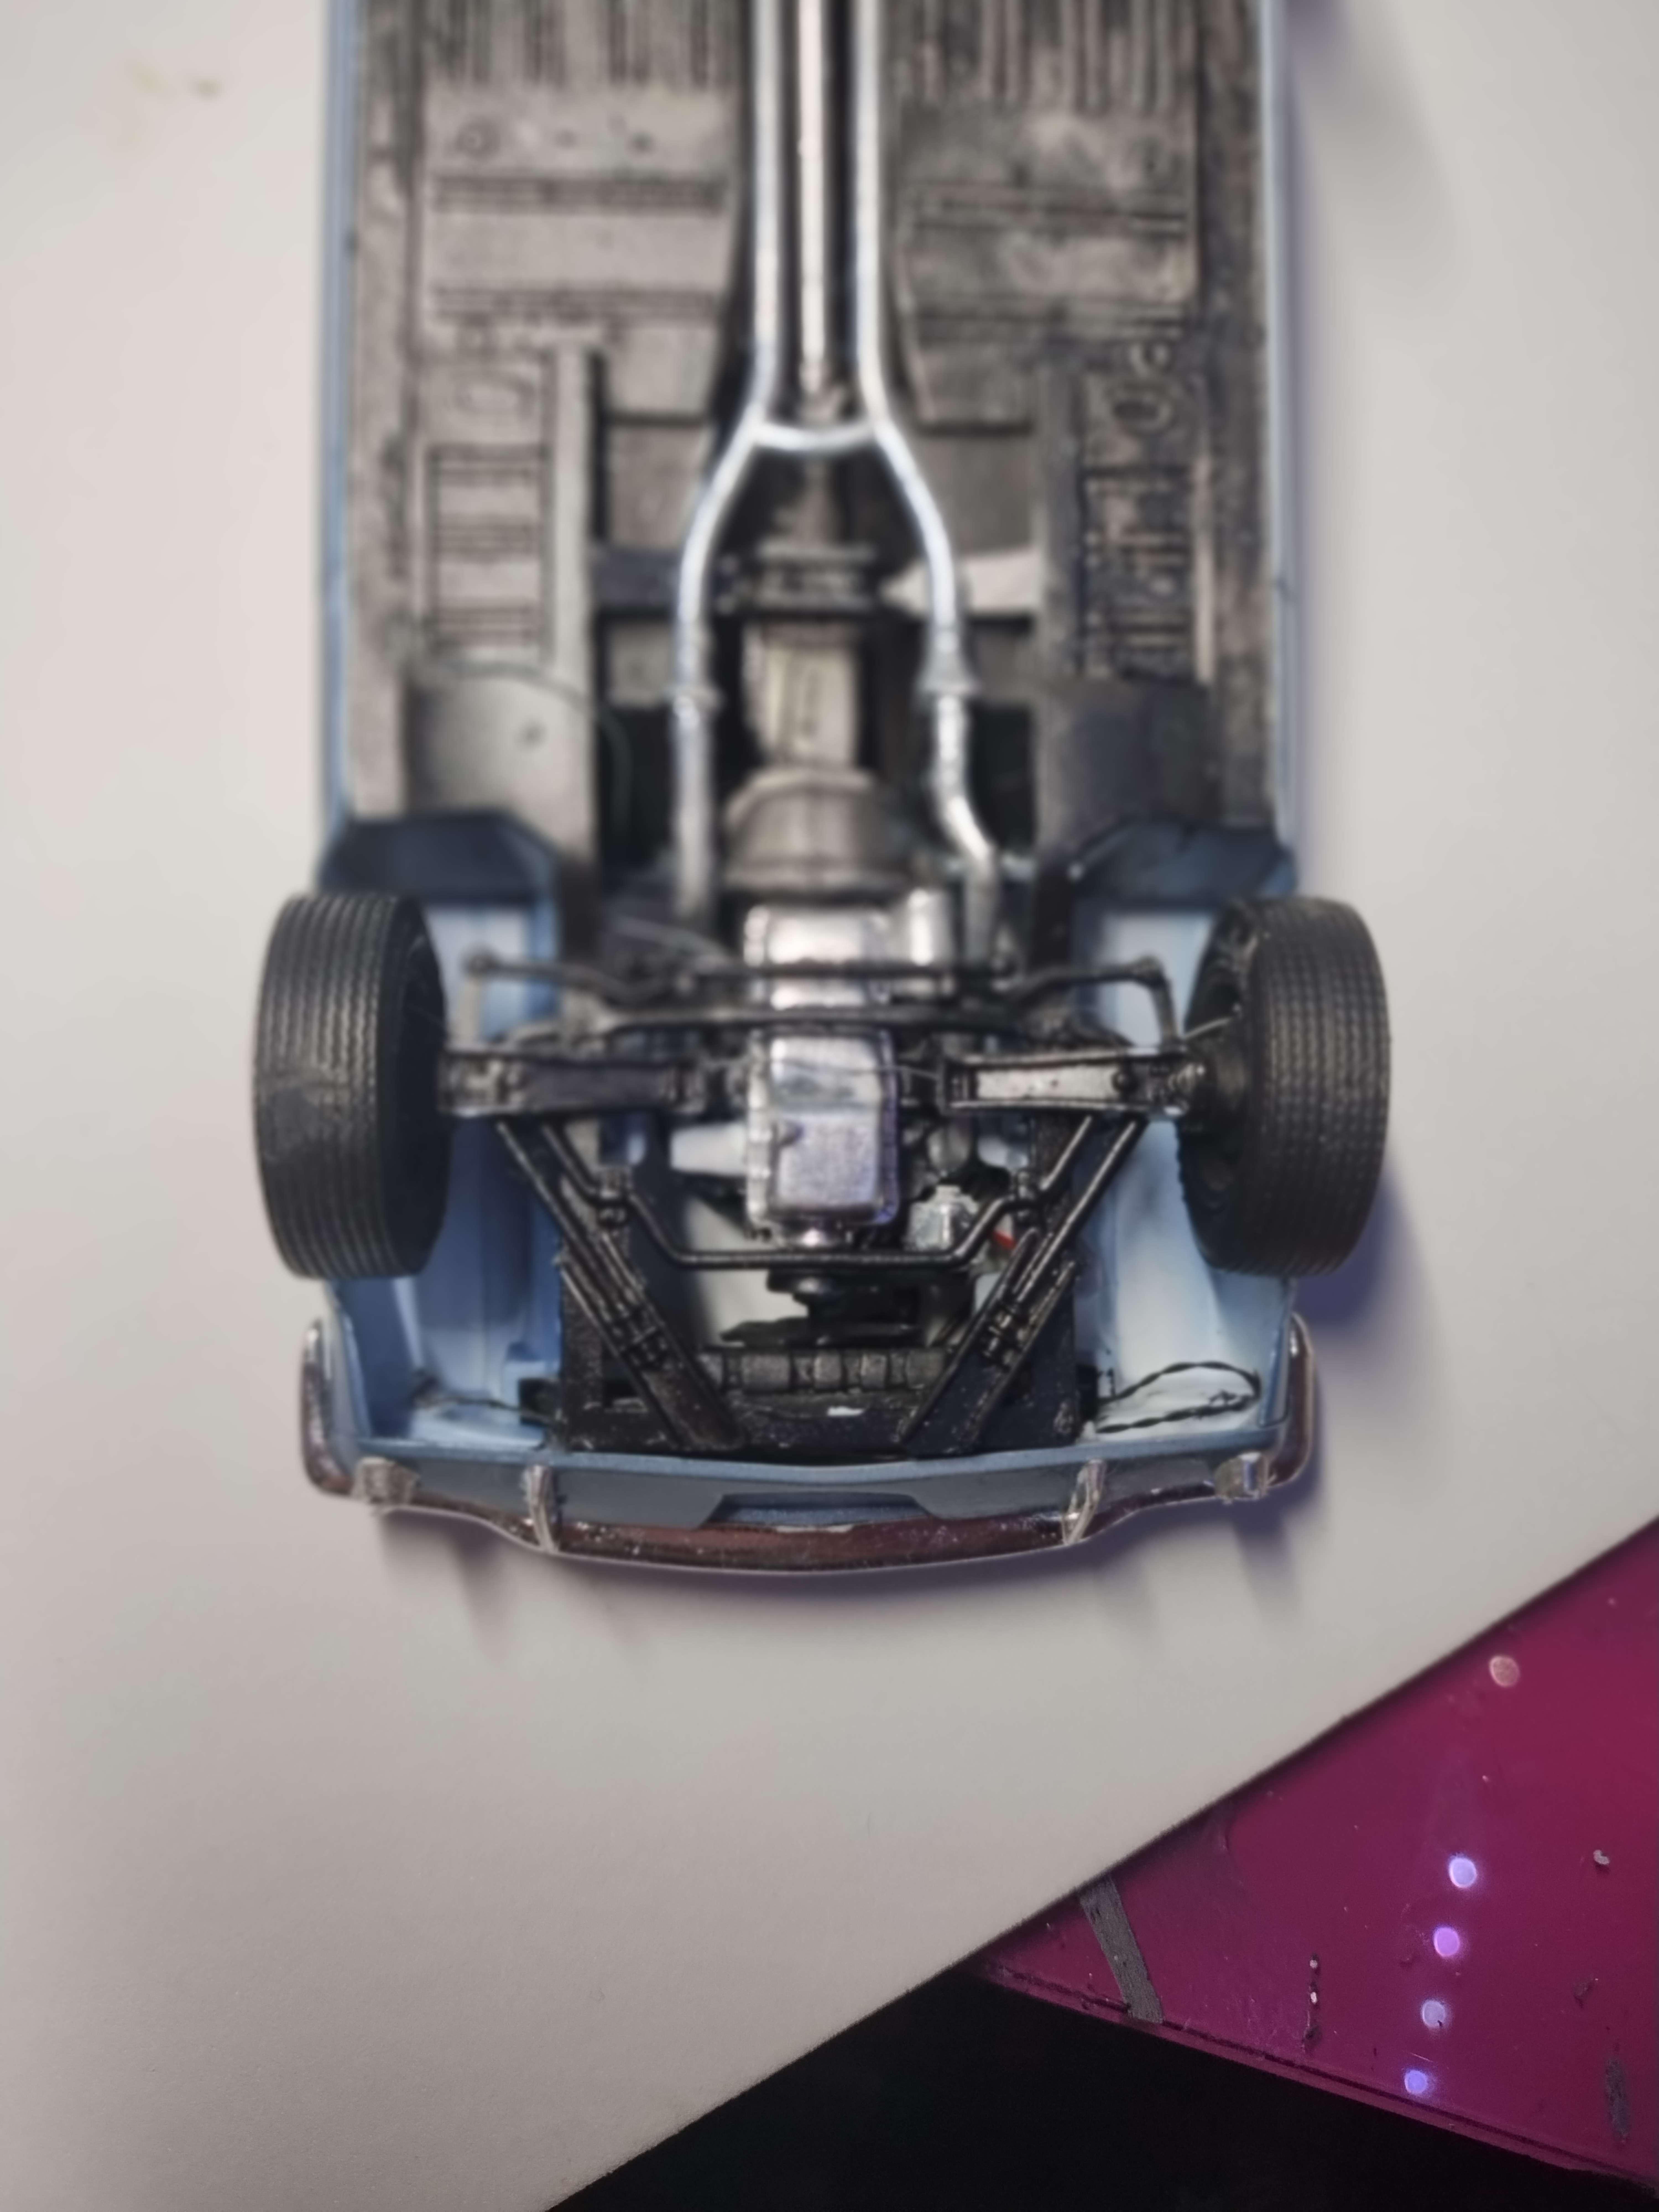
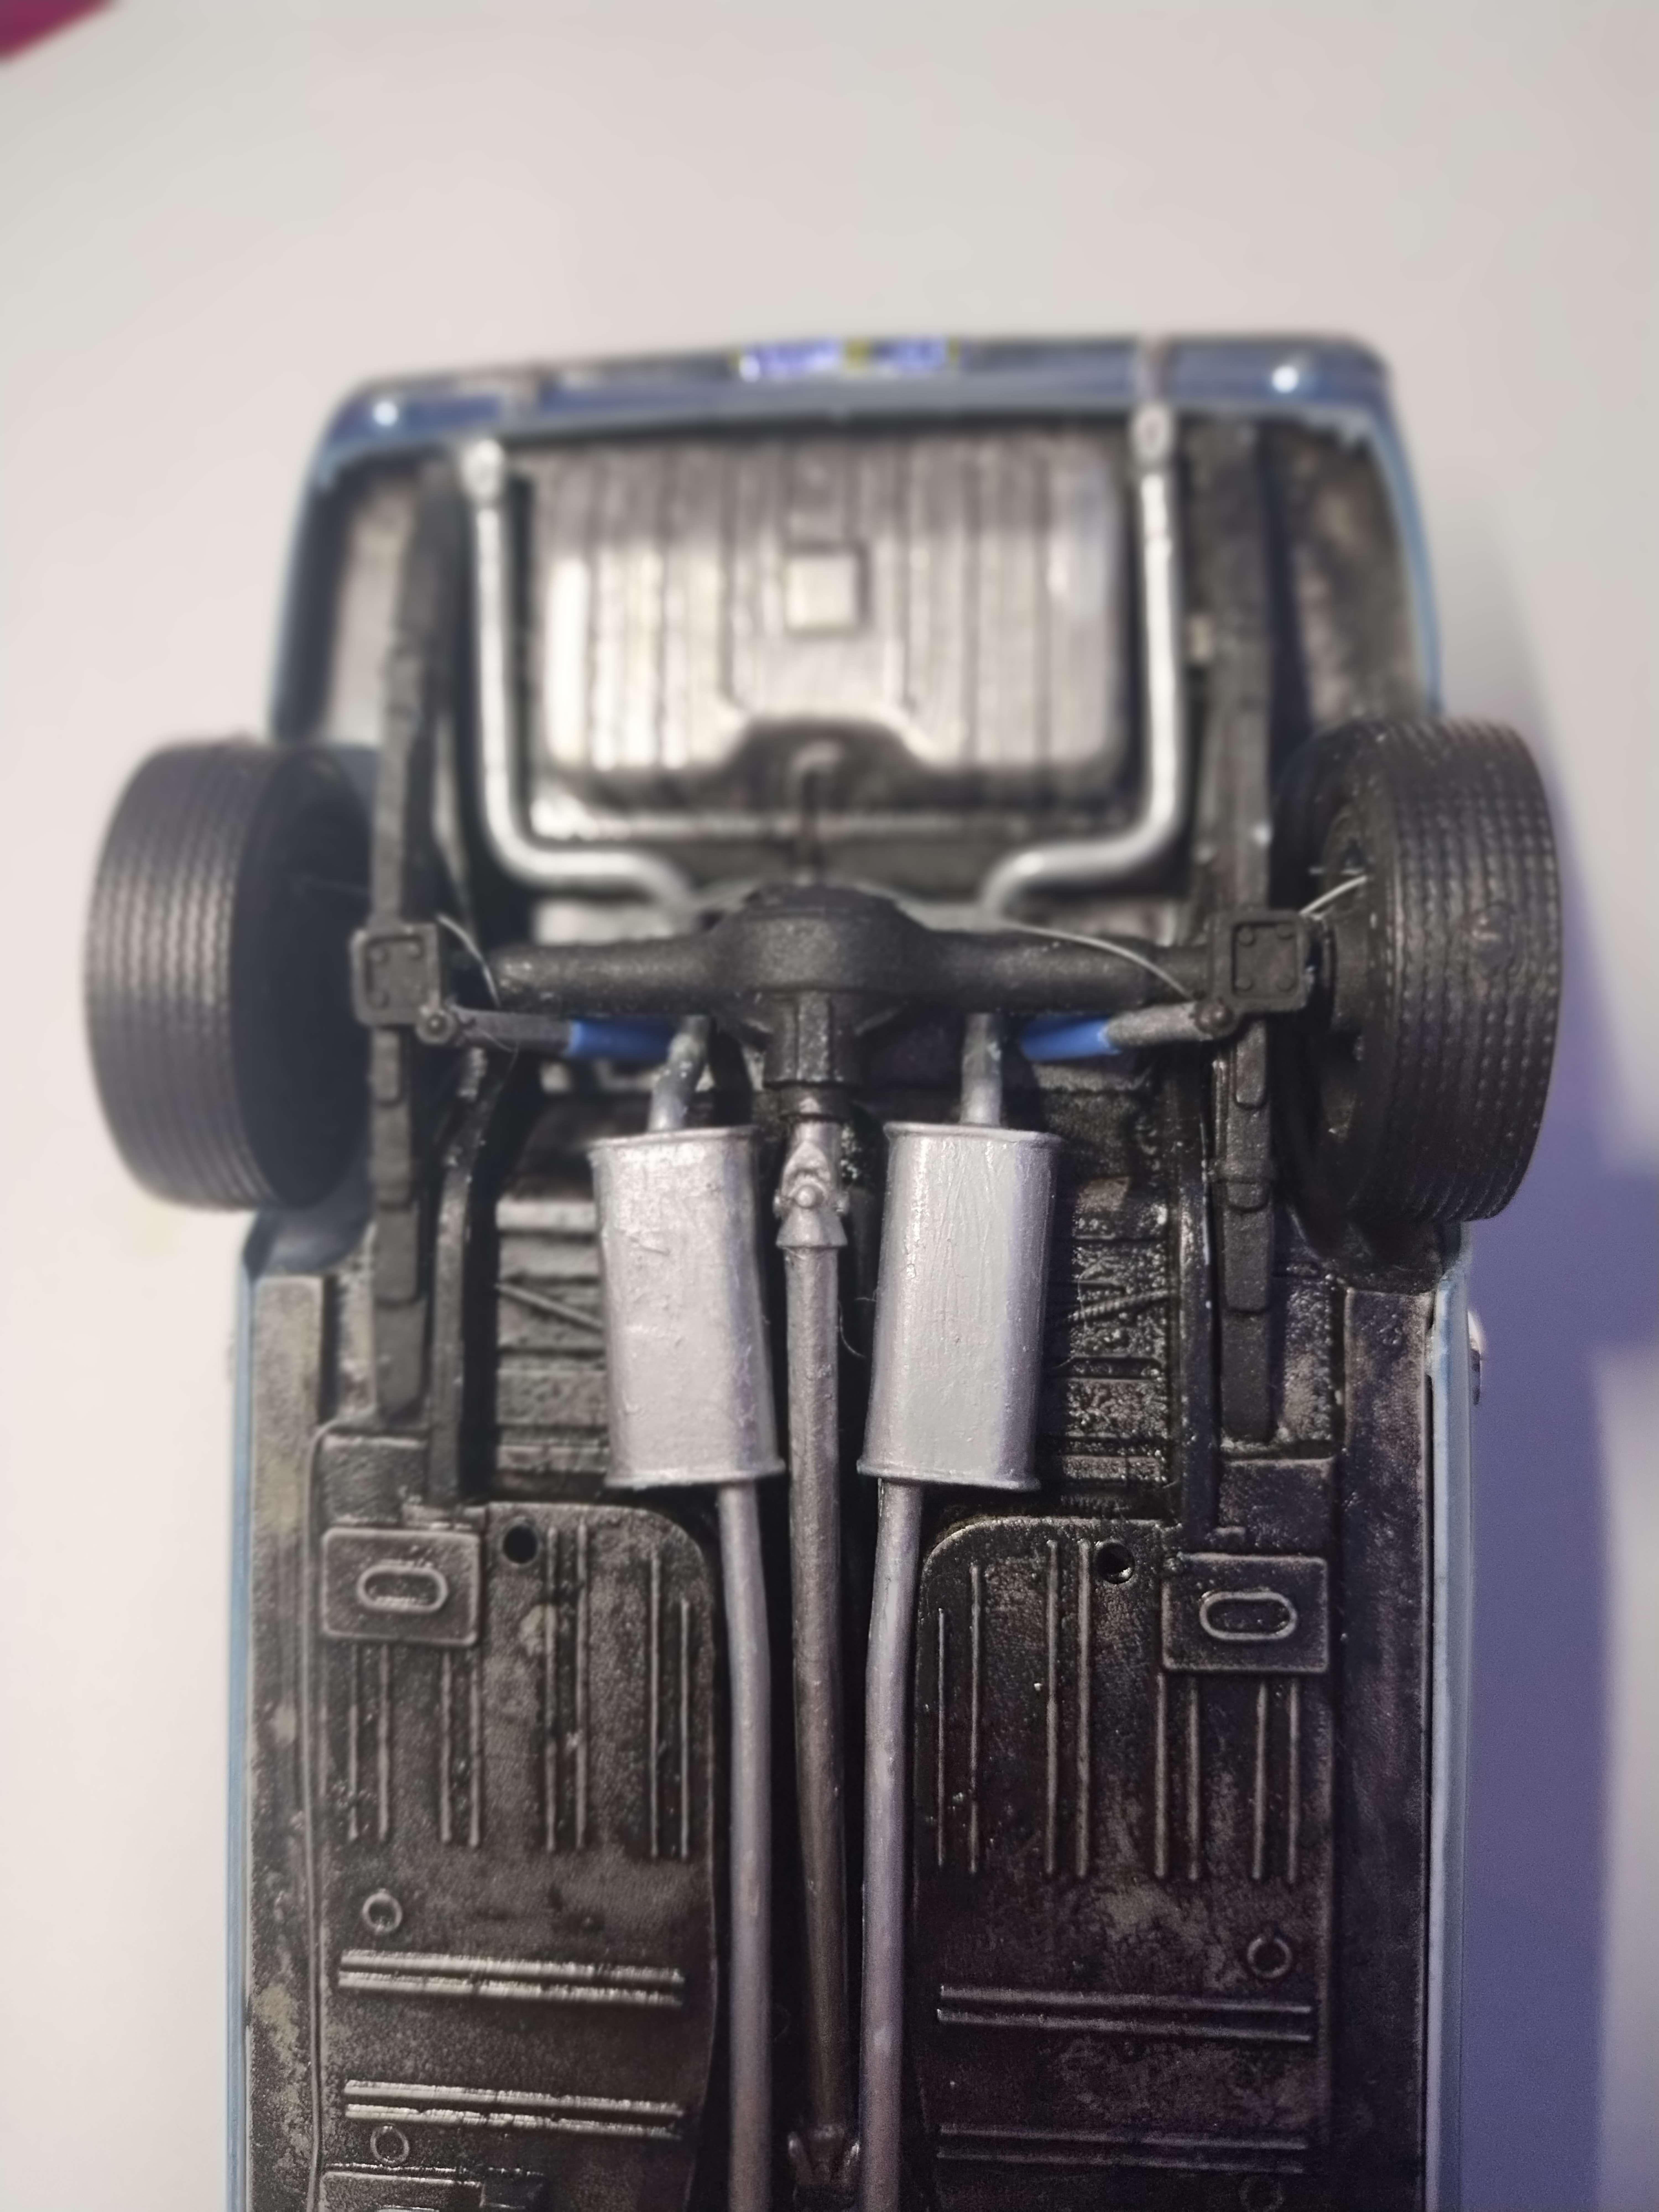
Forgot to include images of seatbelts and engine bay:

-
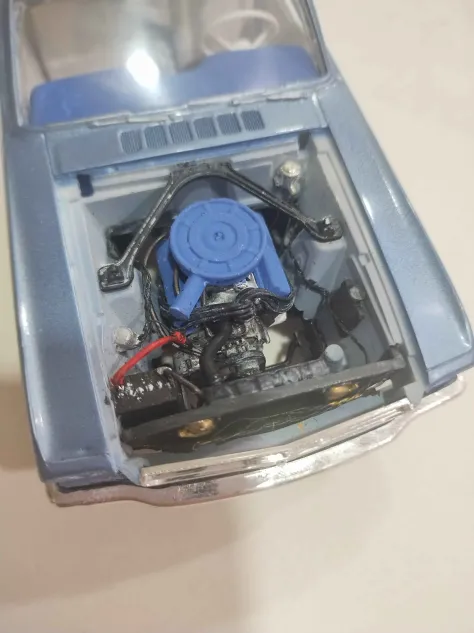
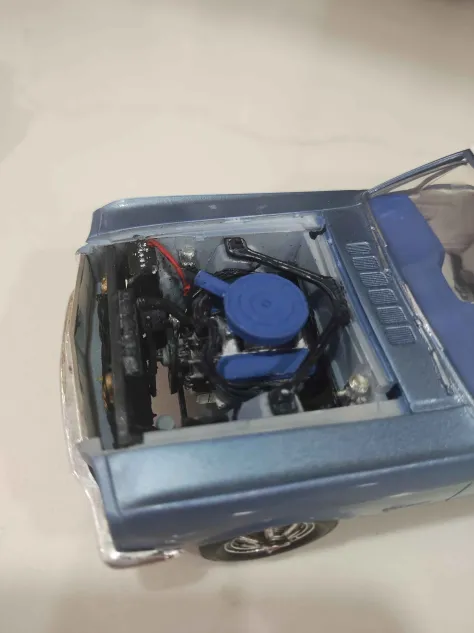
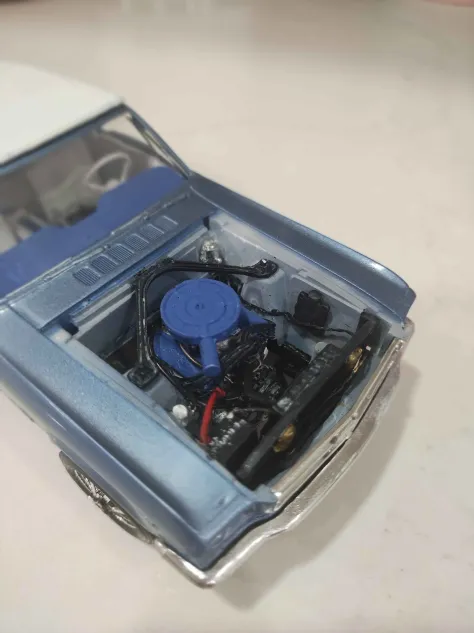
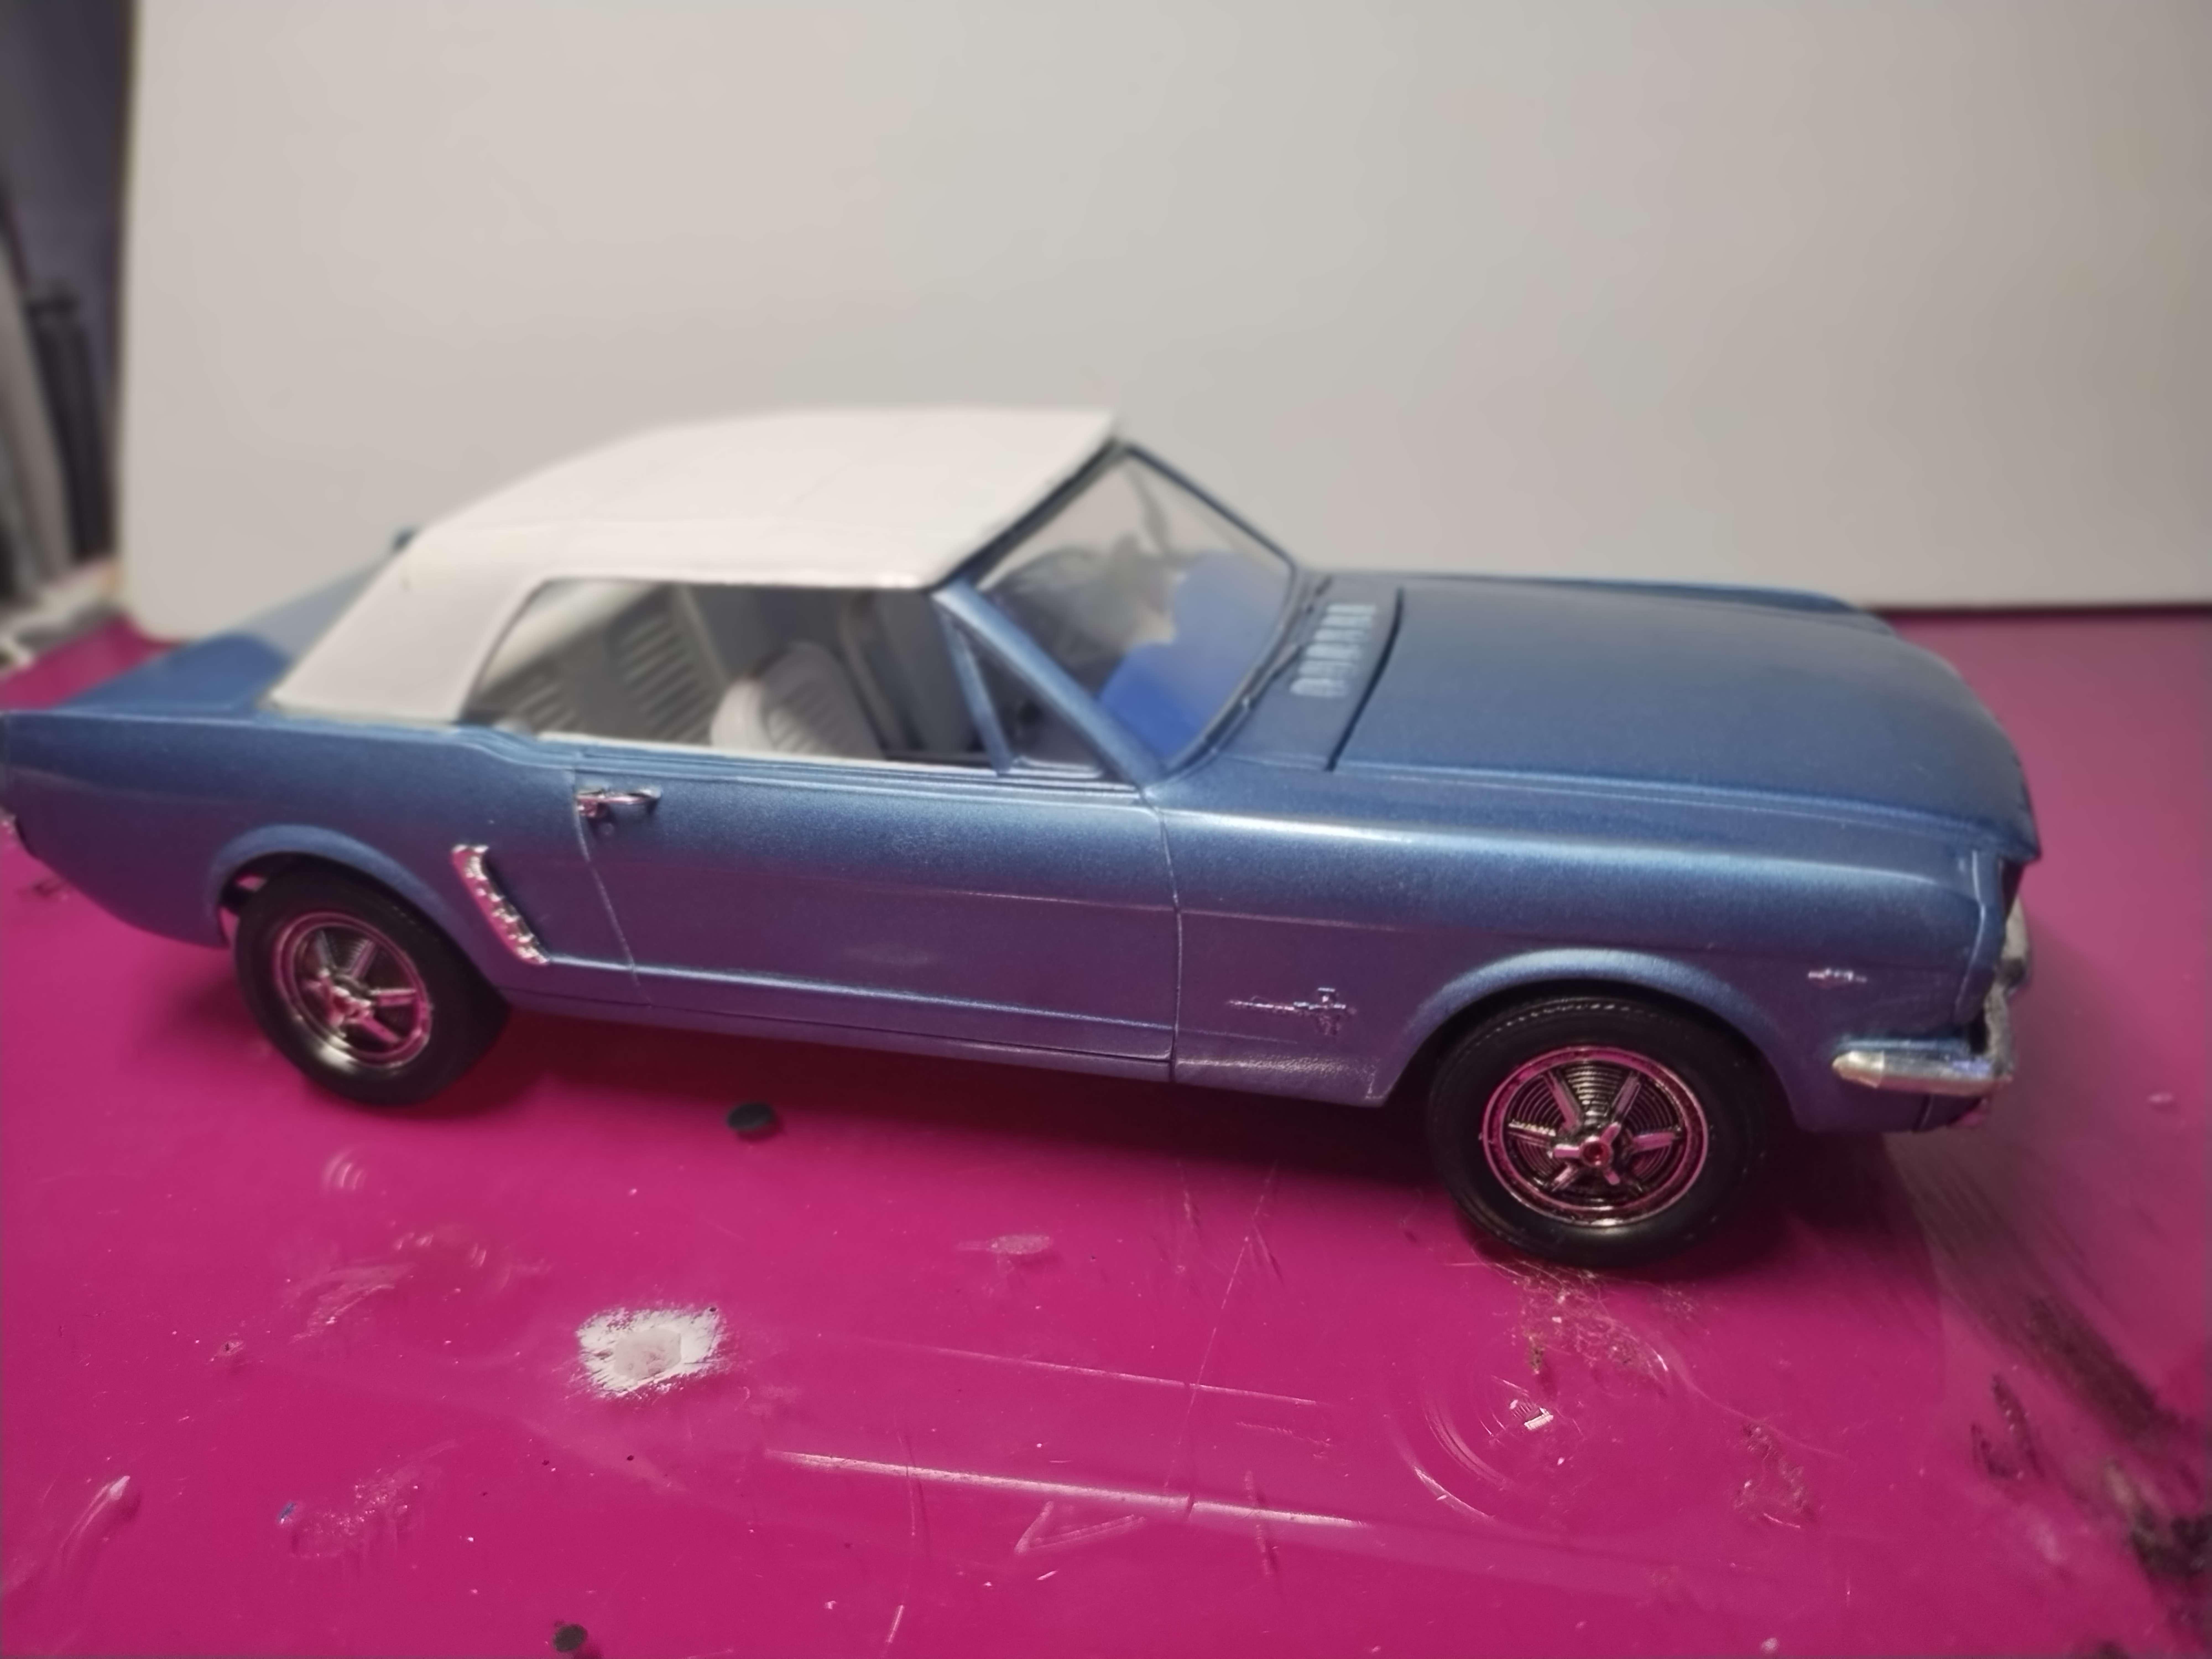
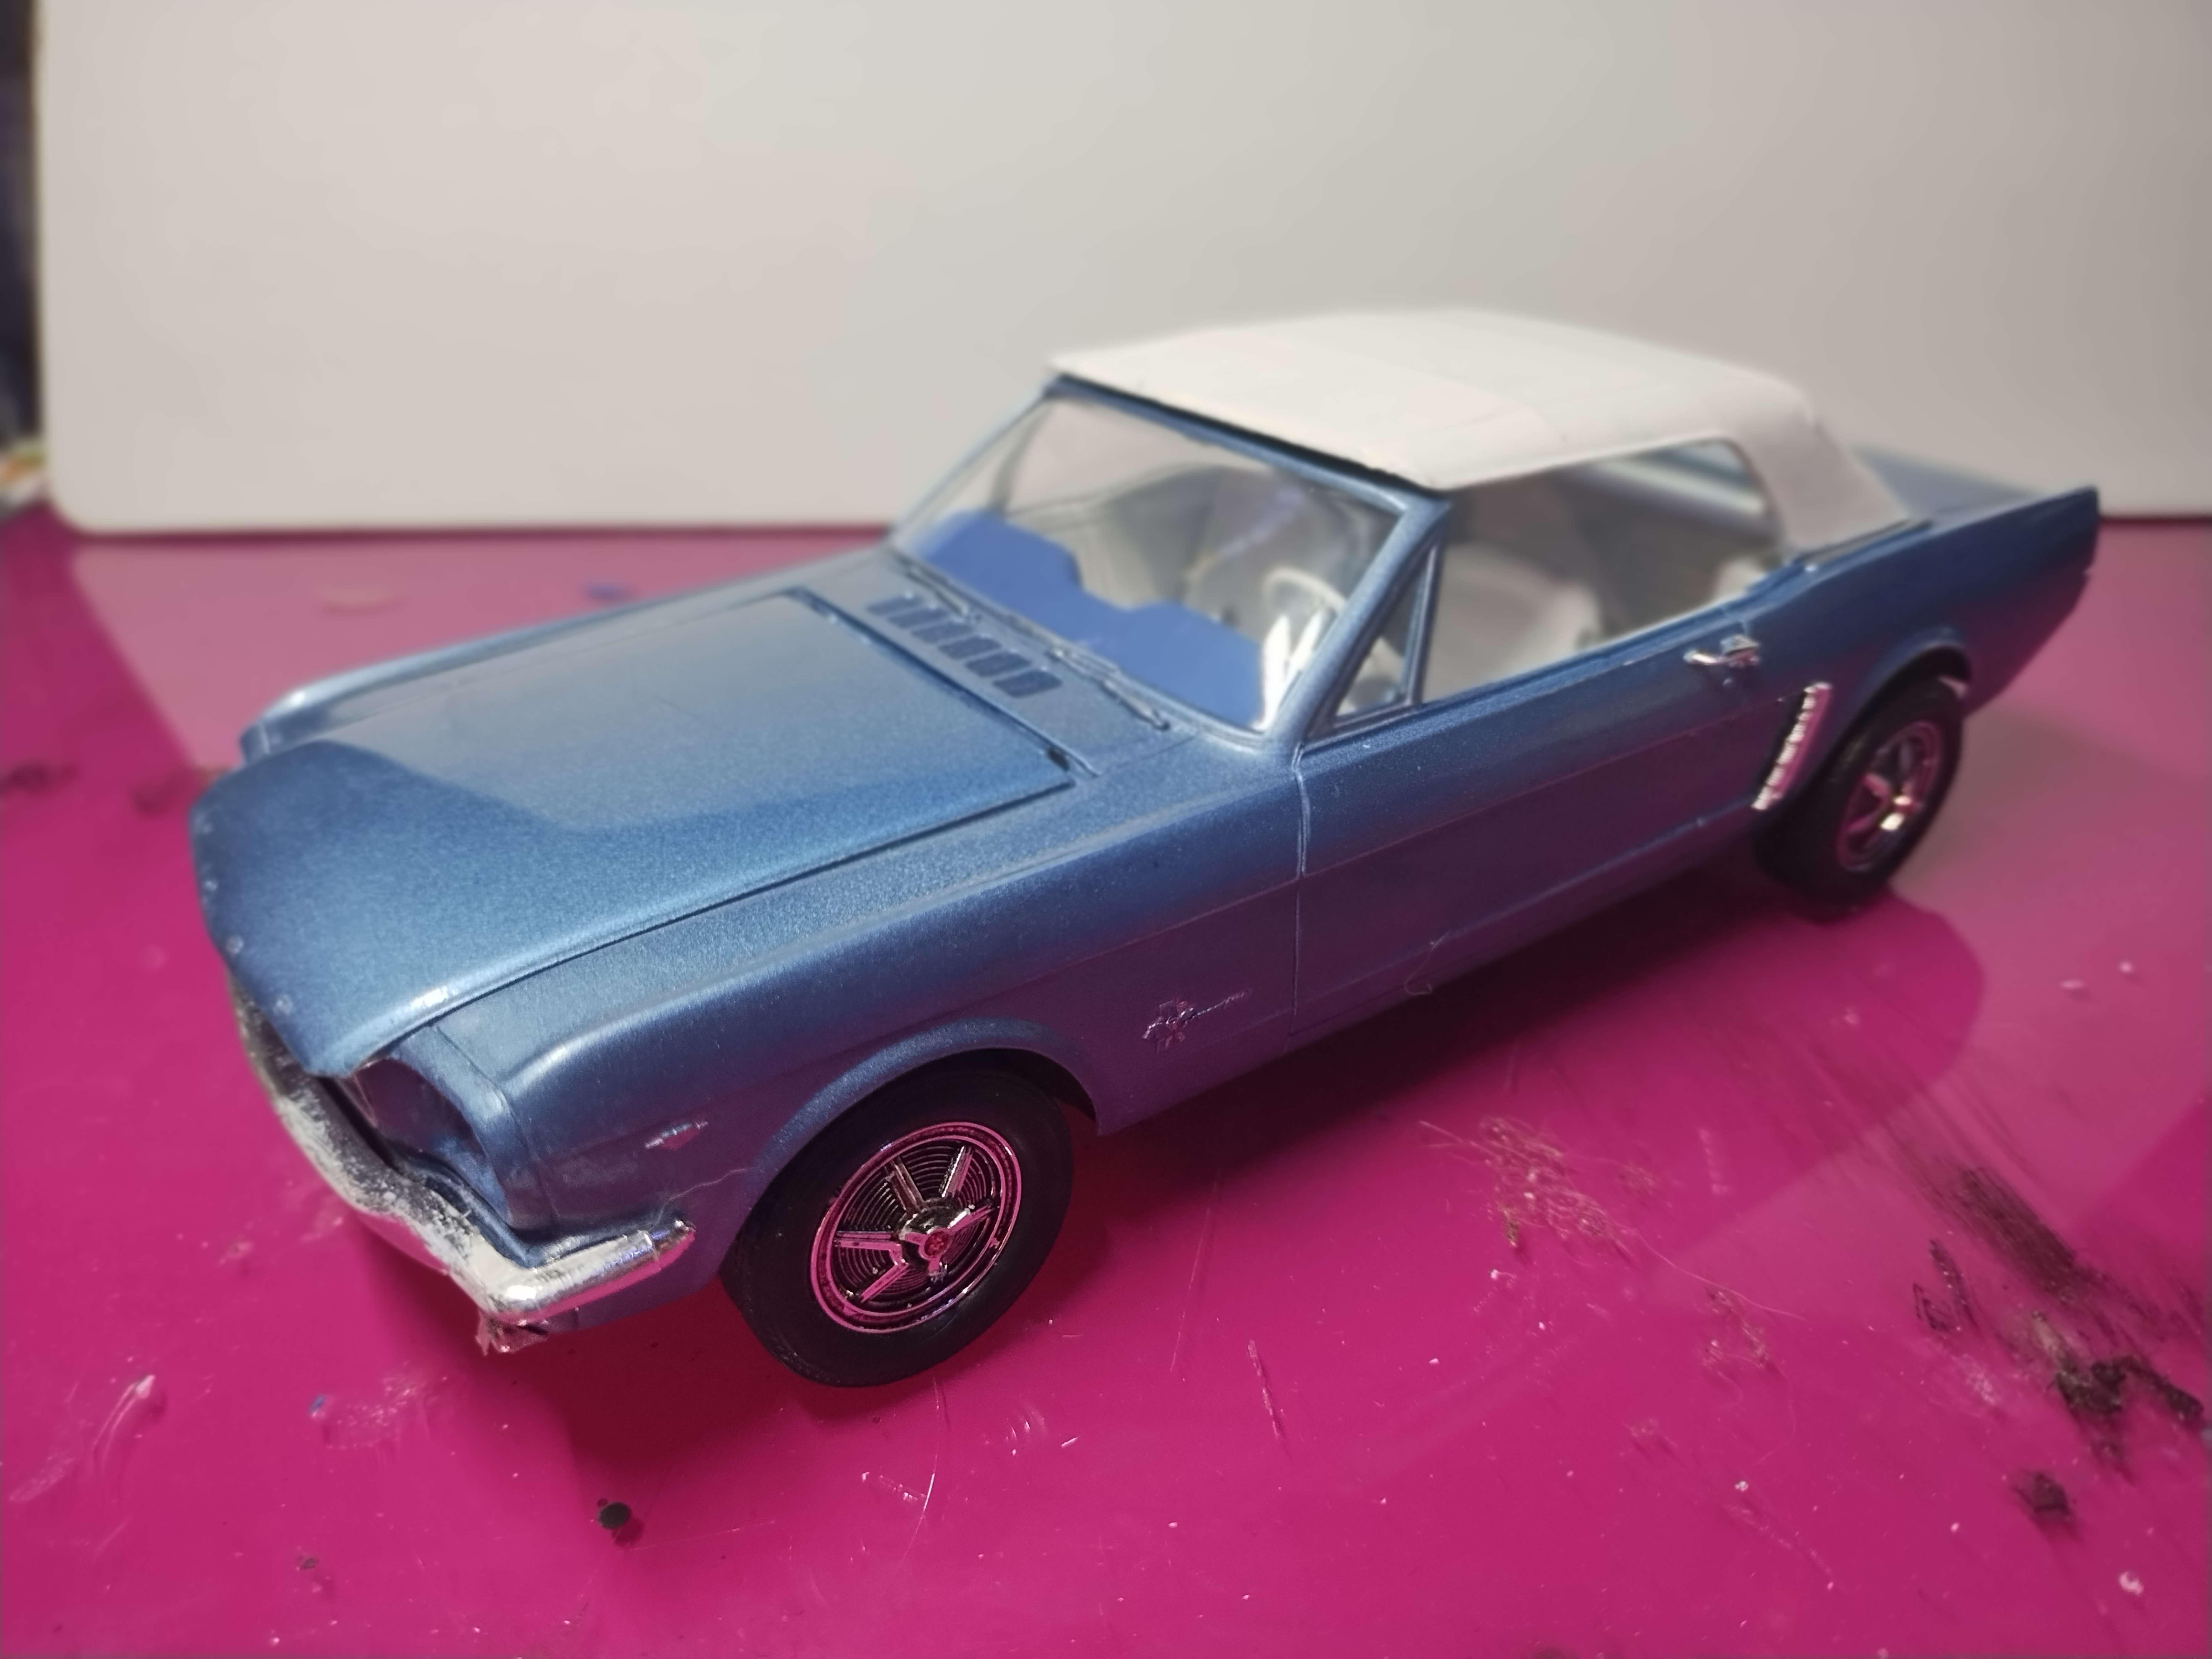
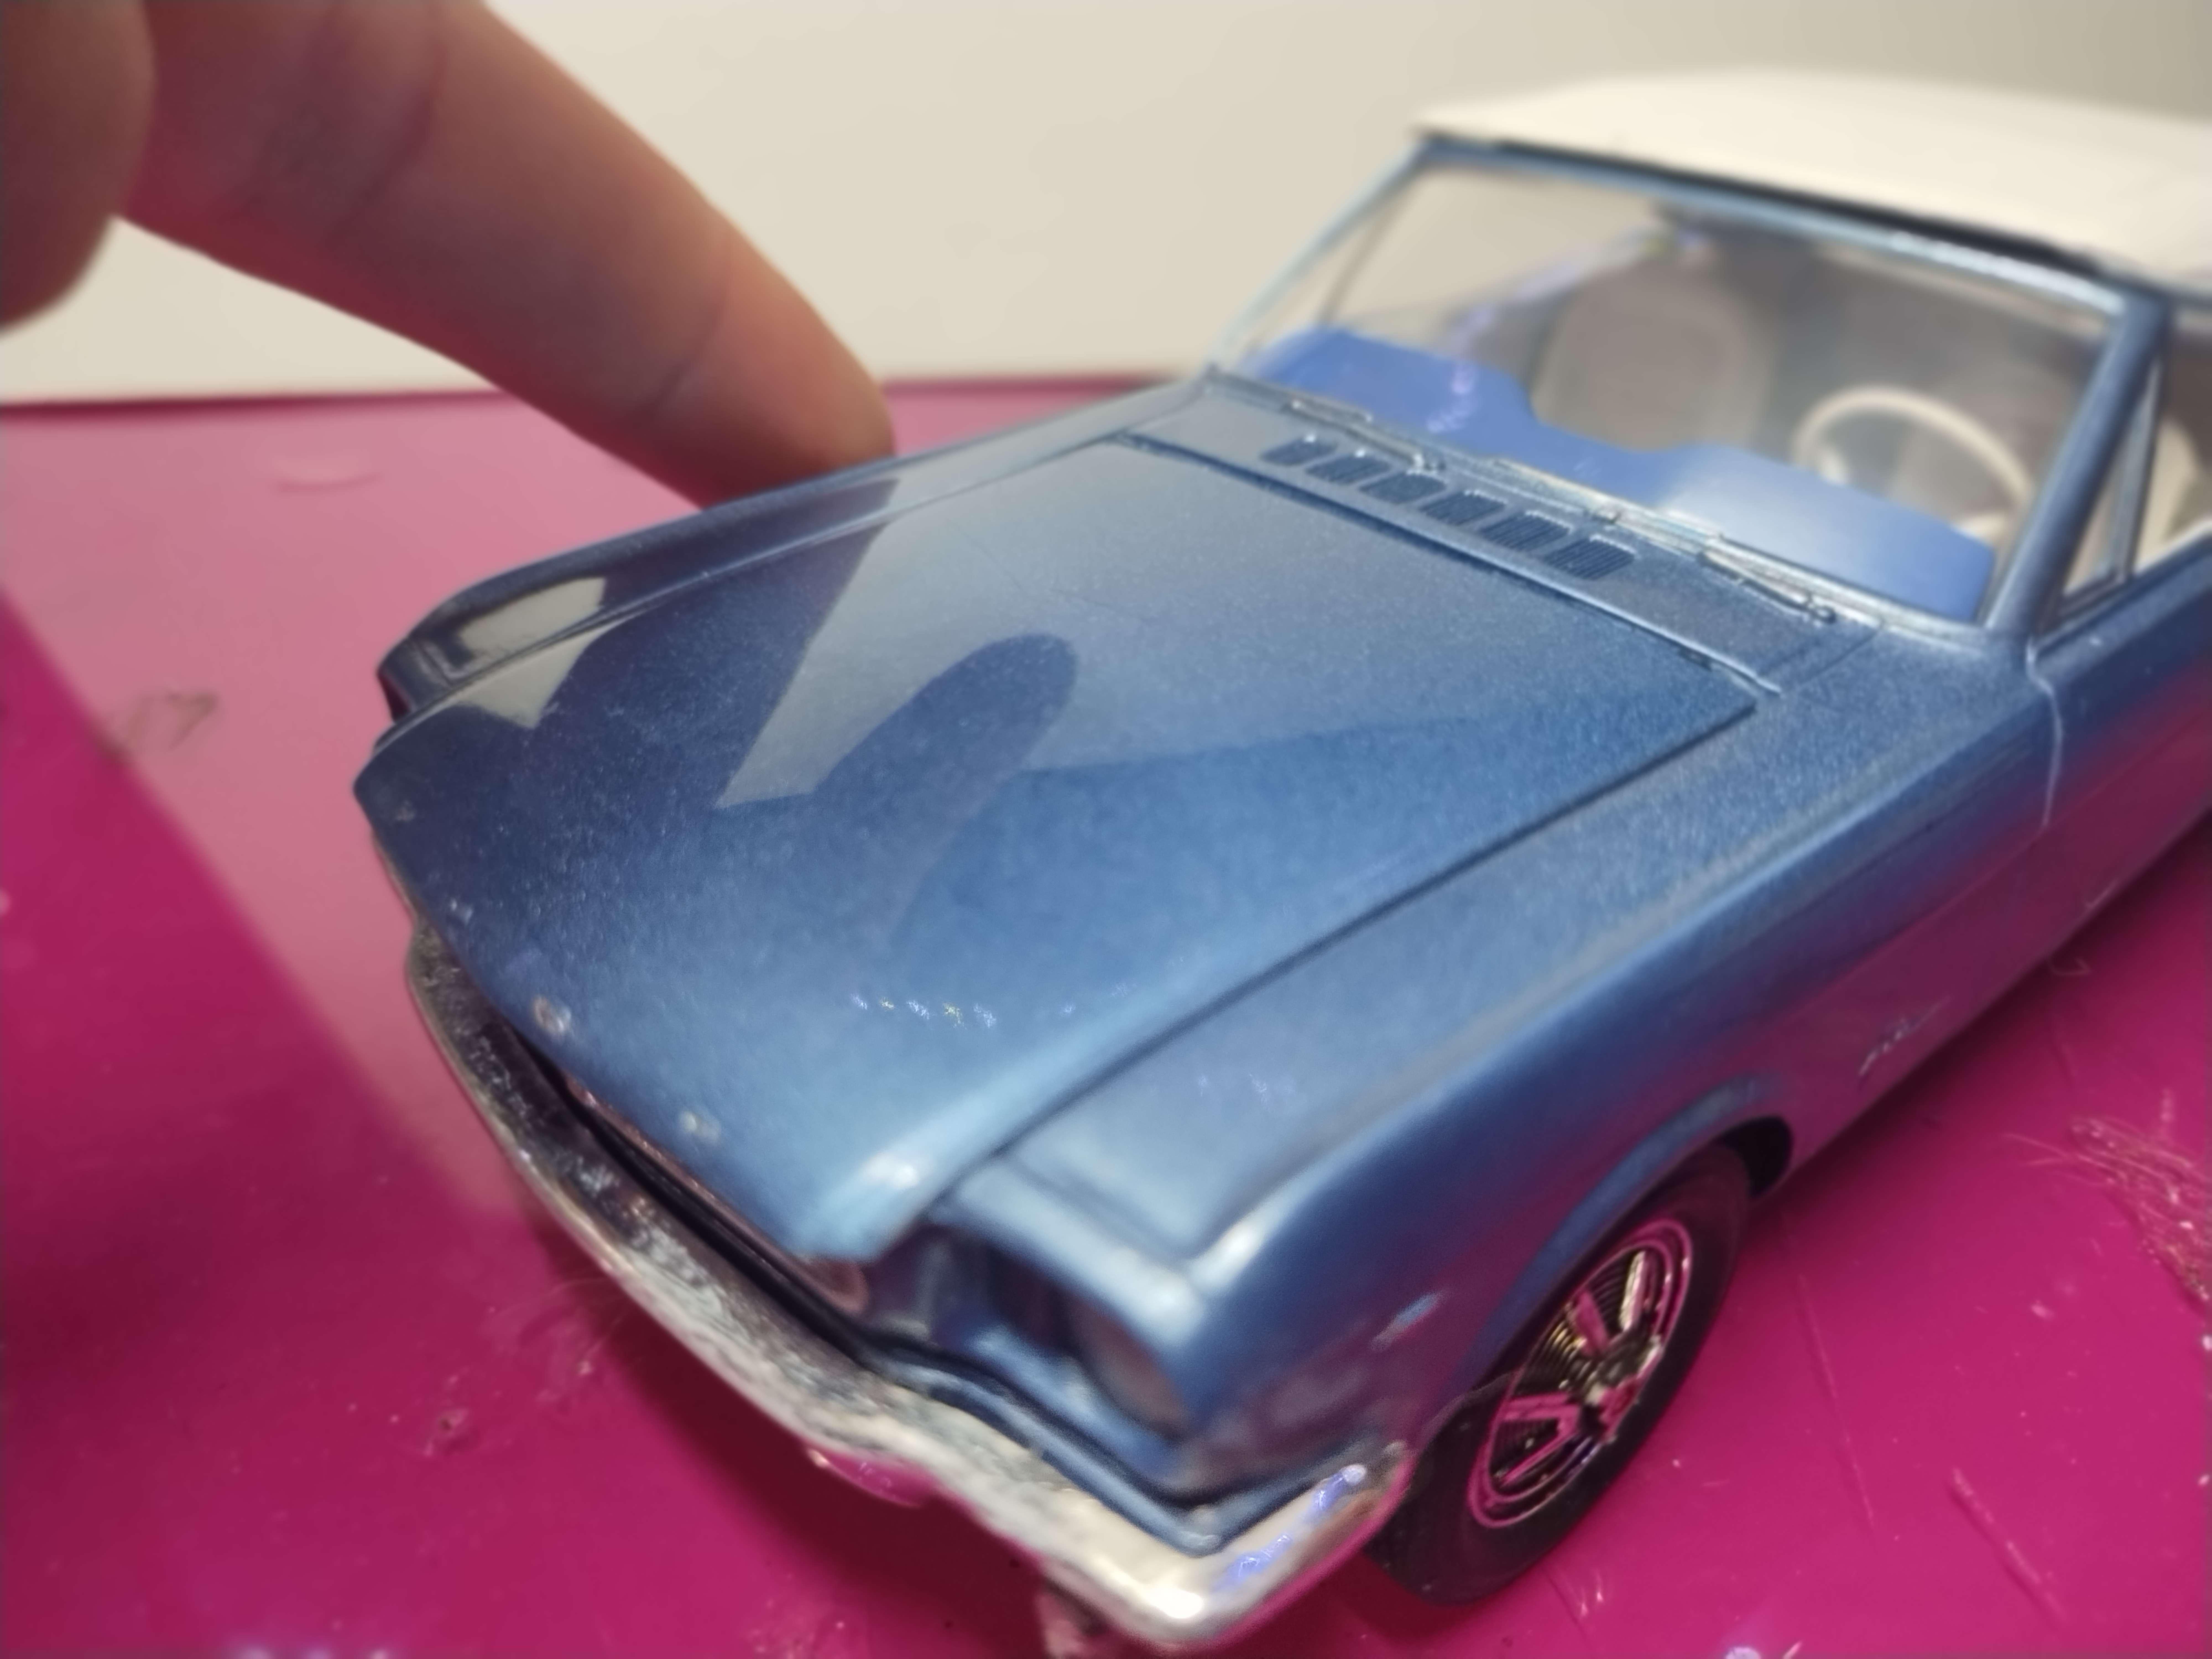
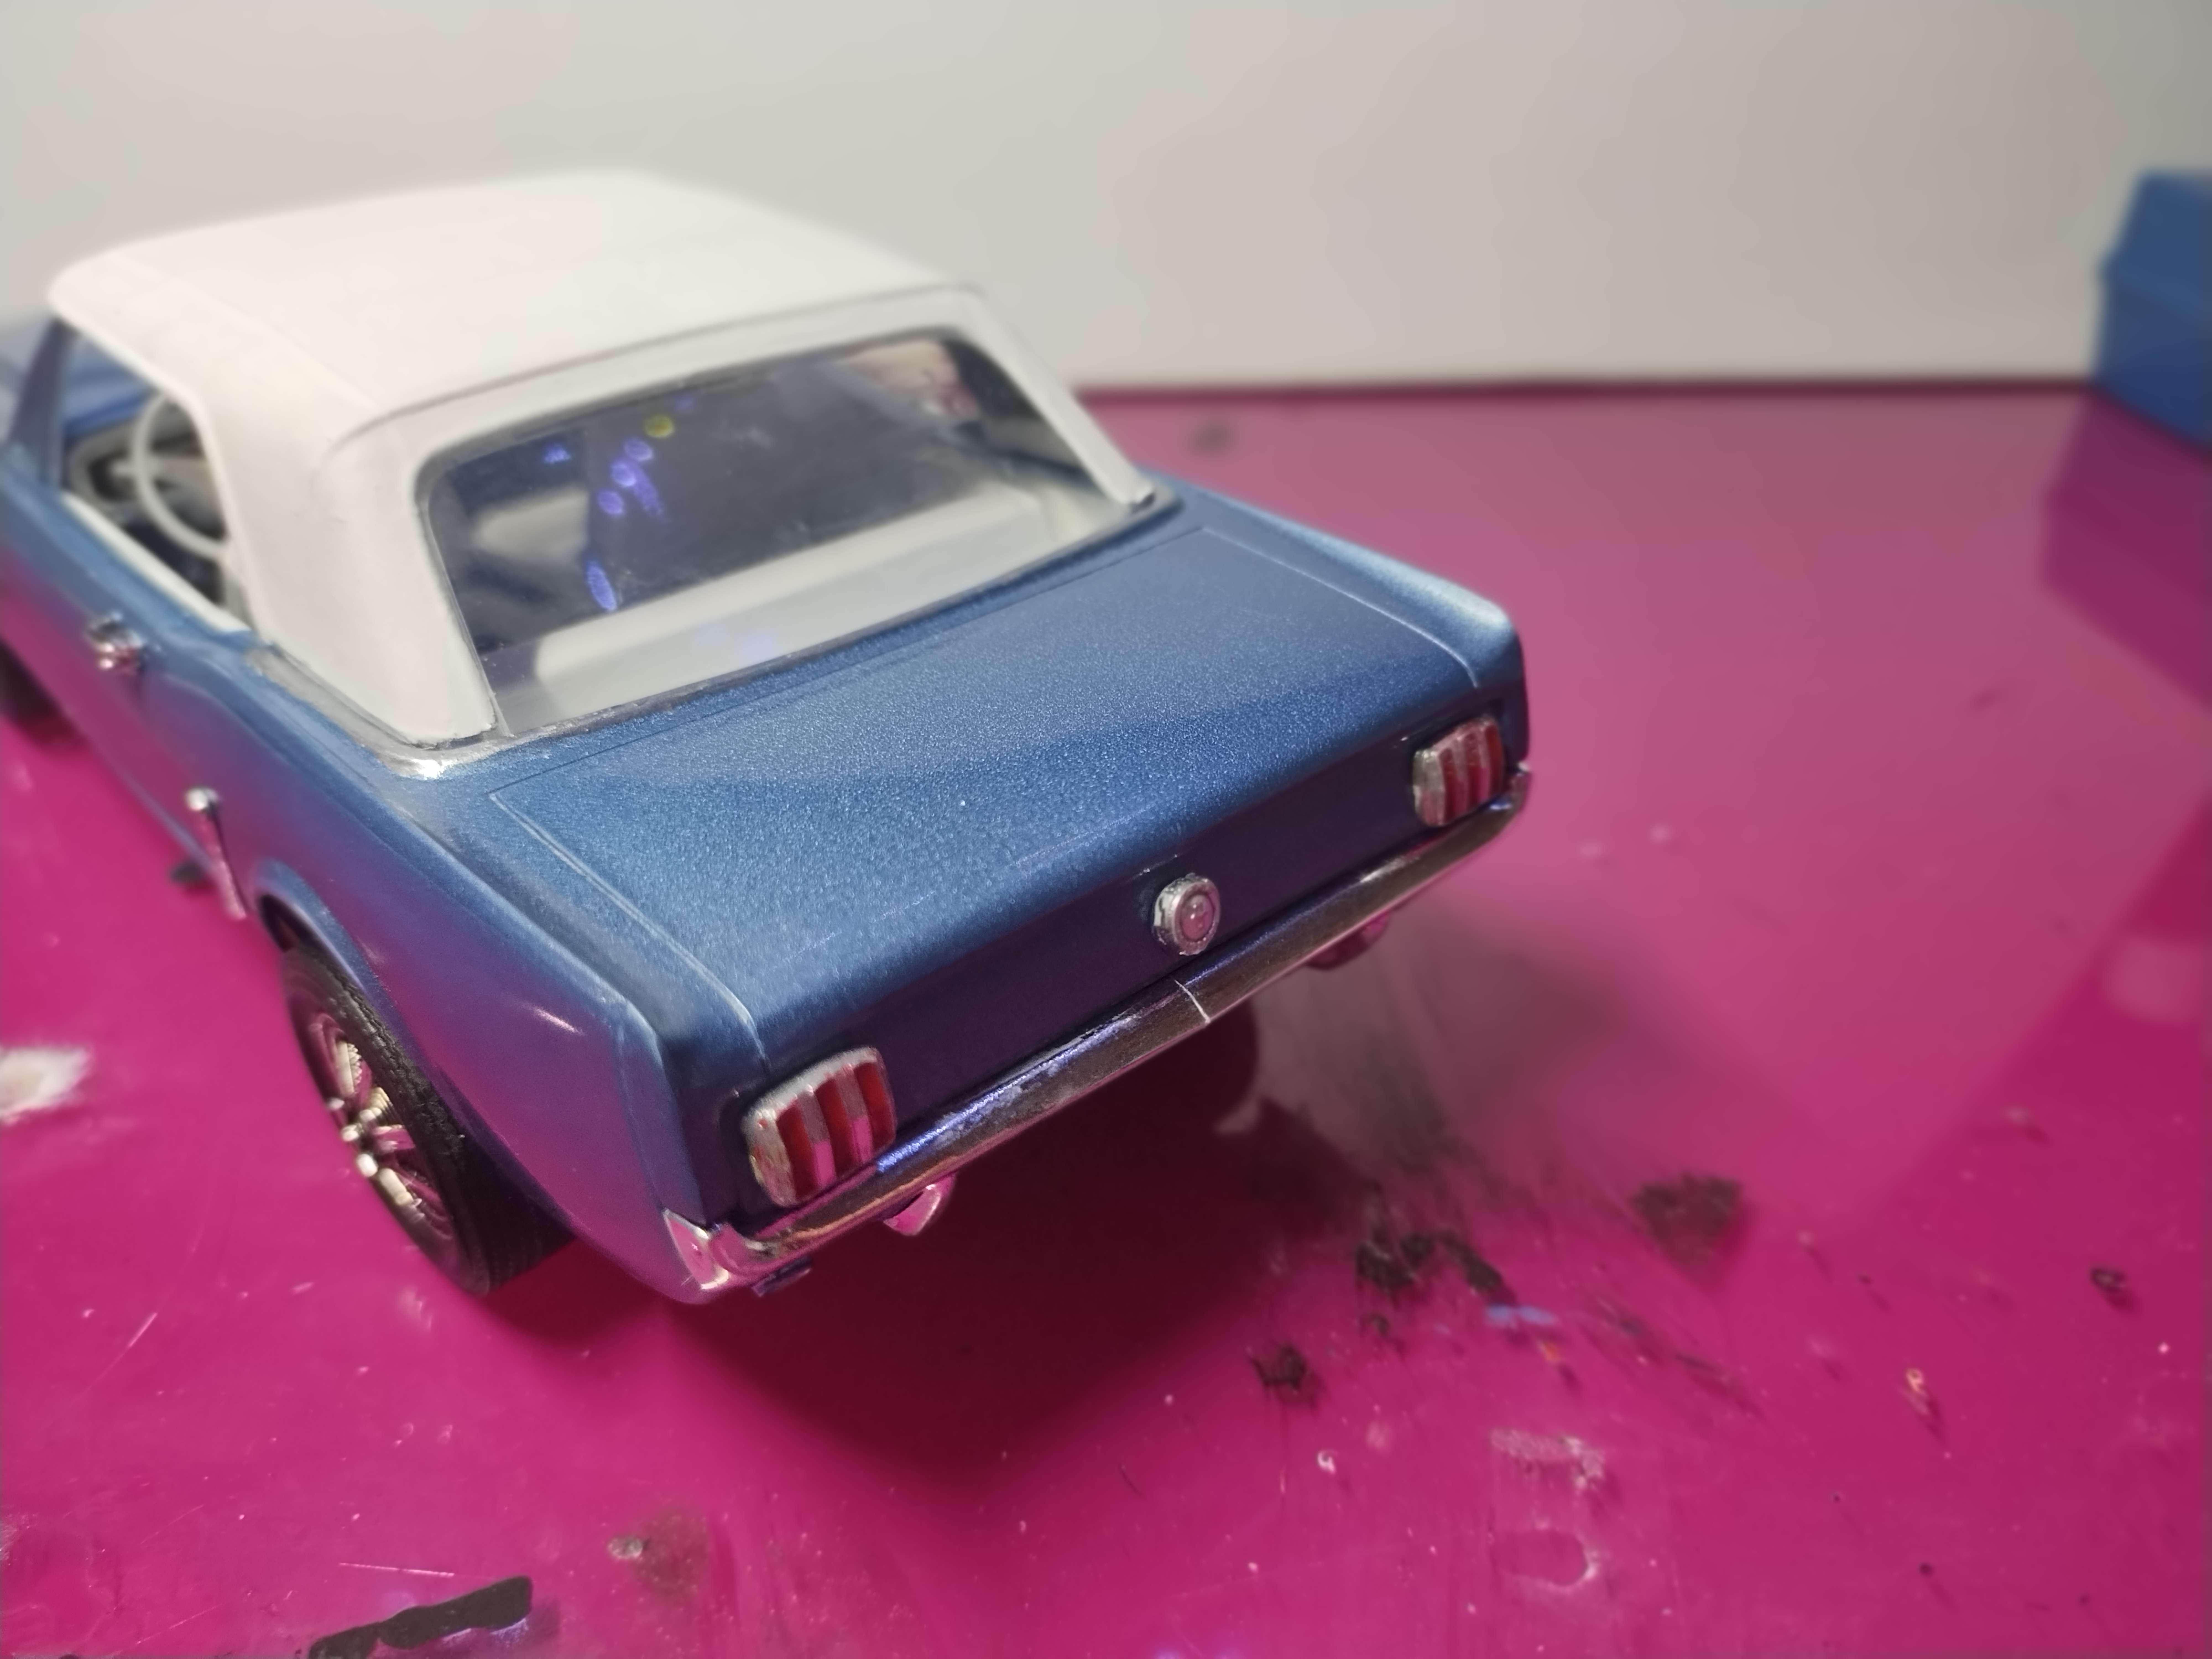
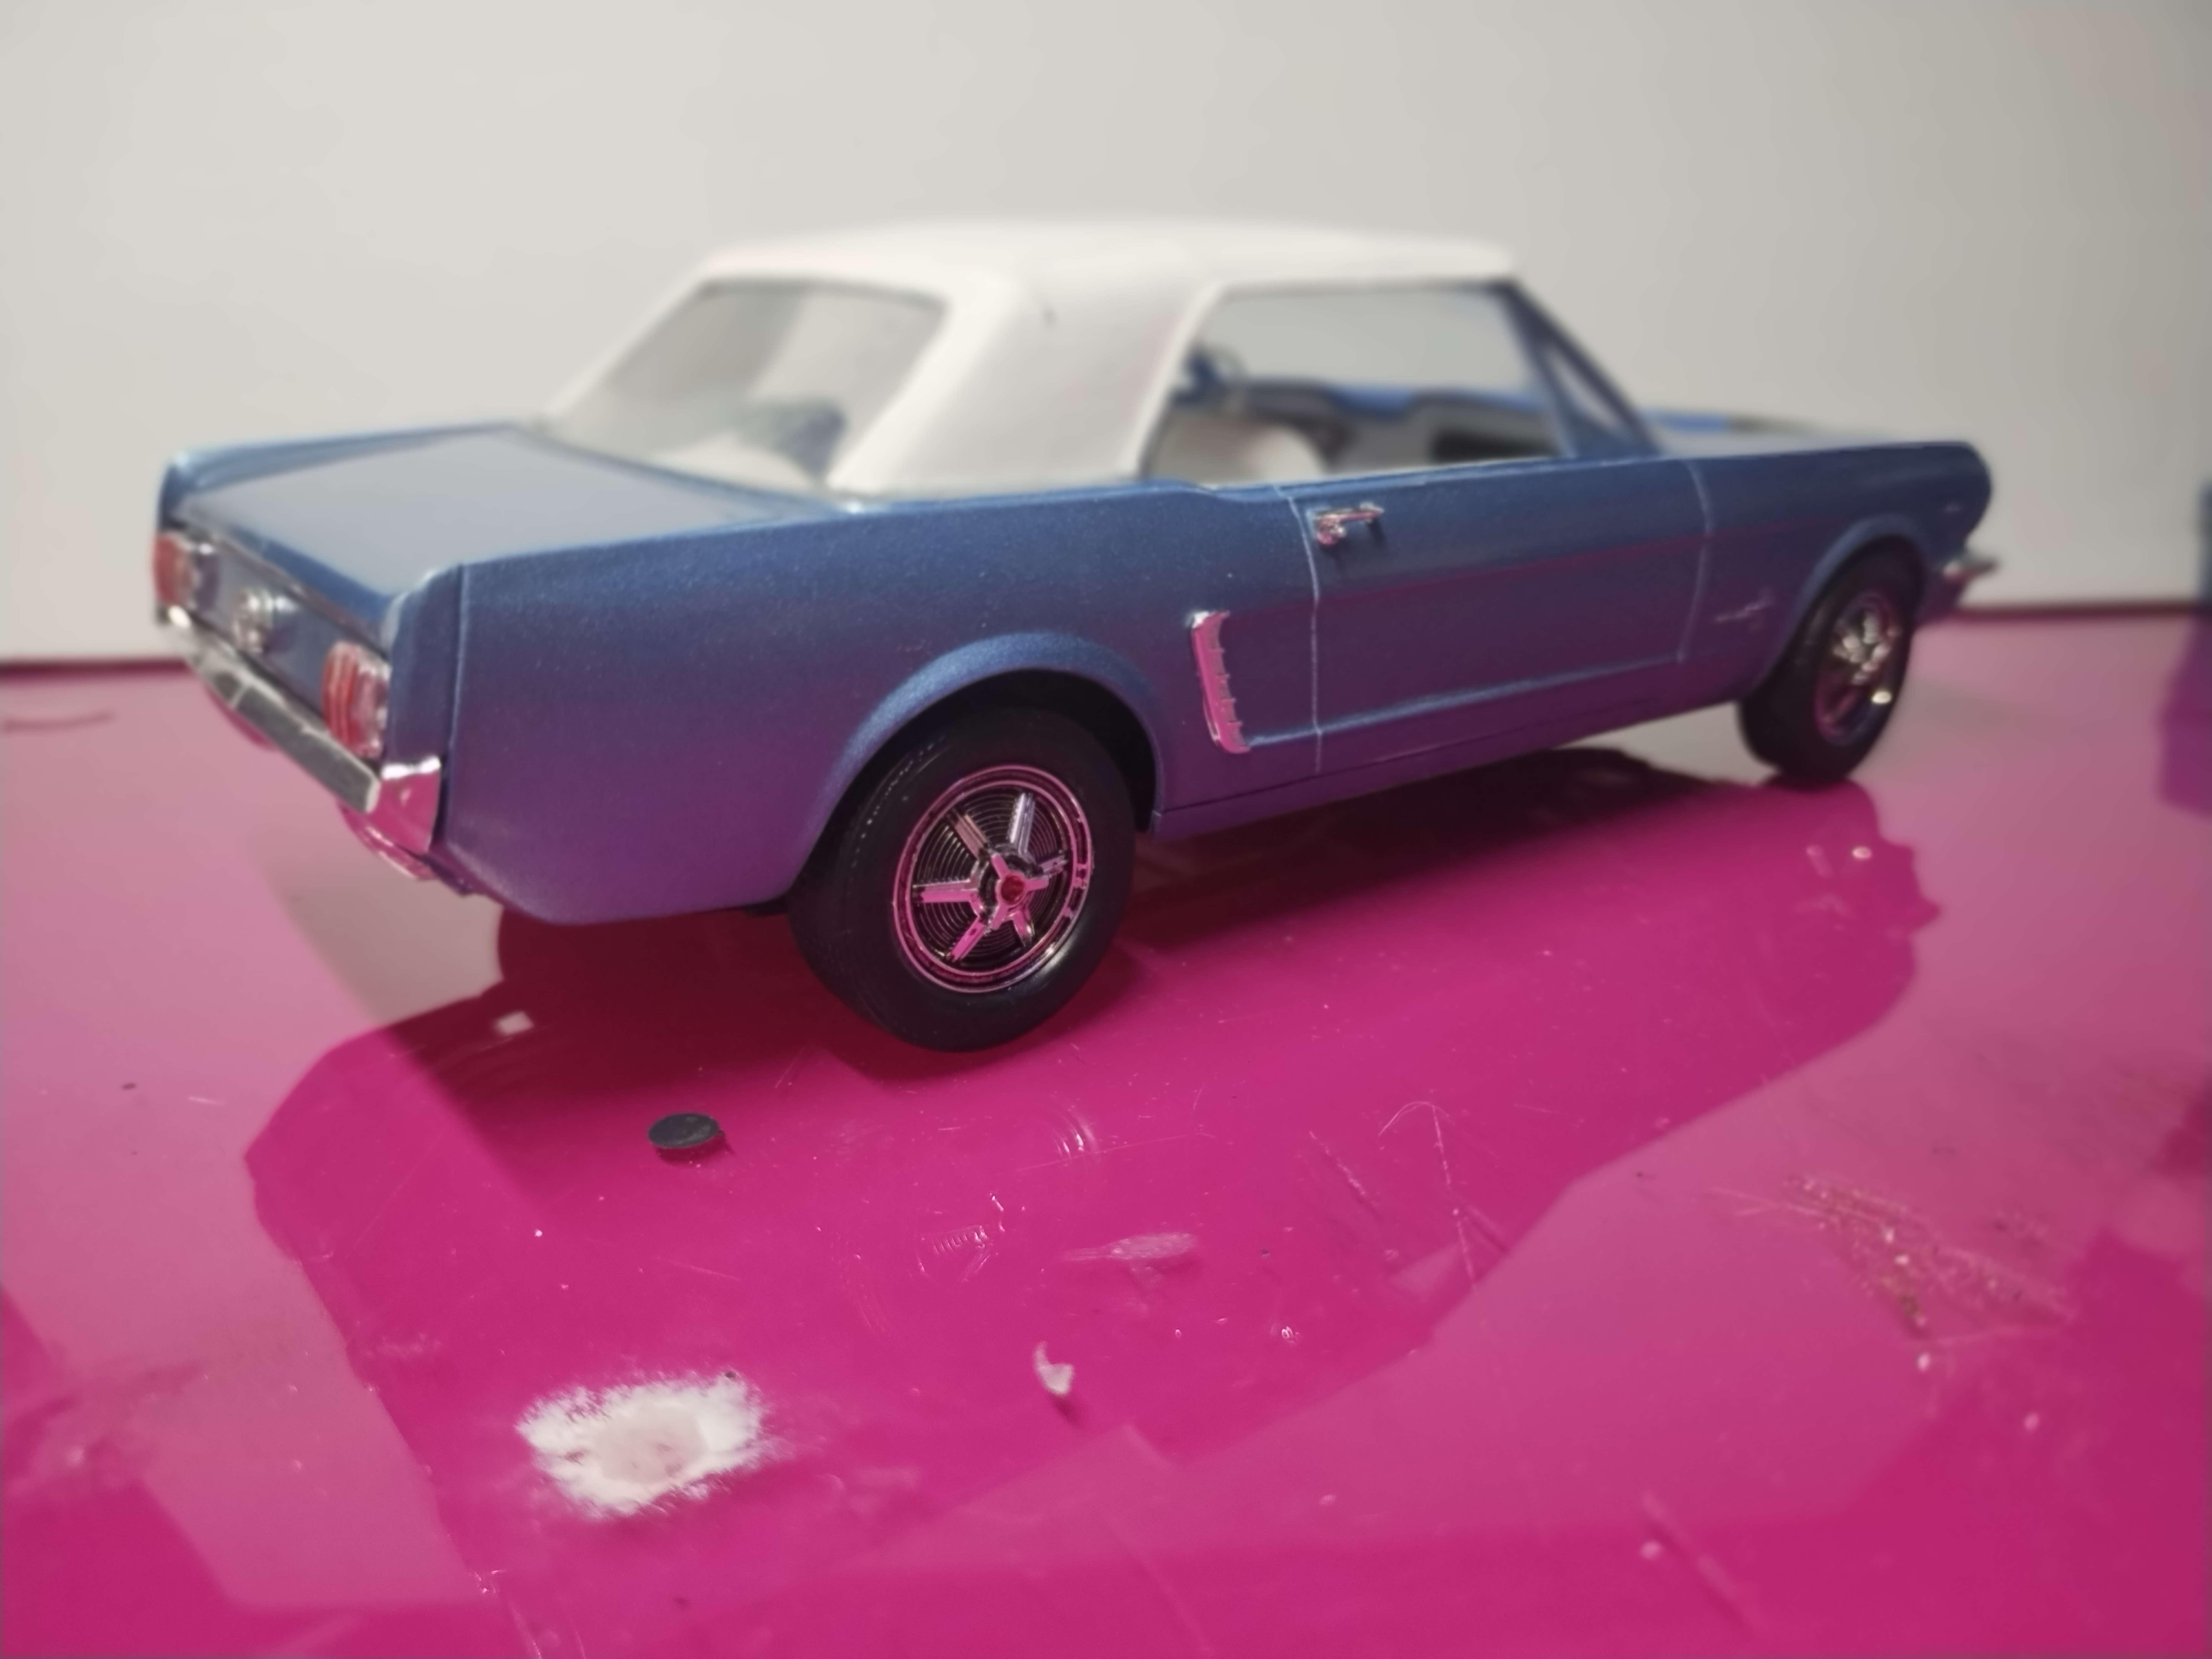
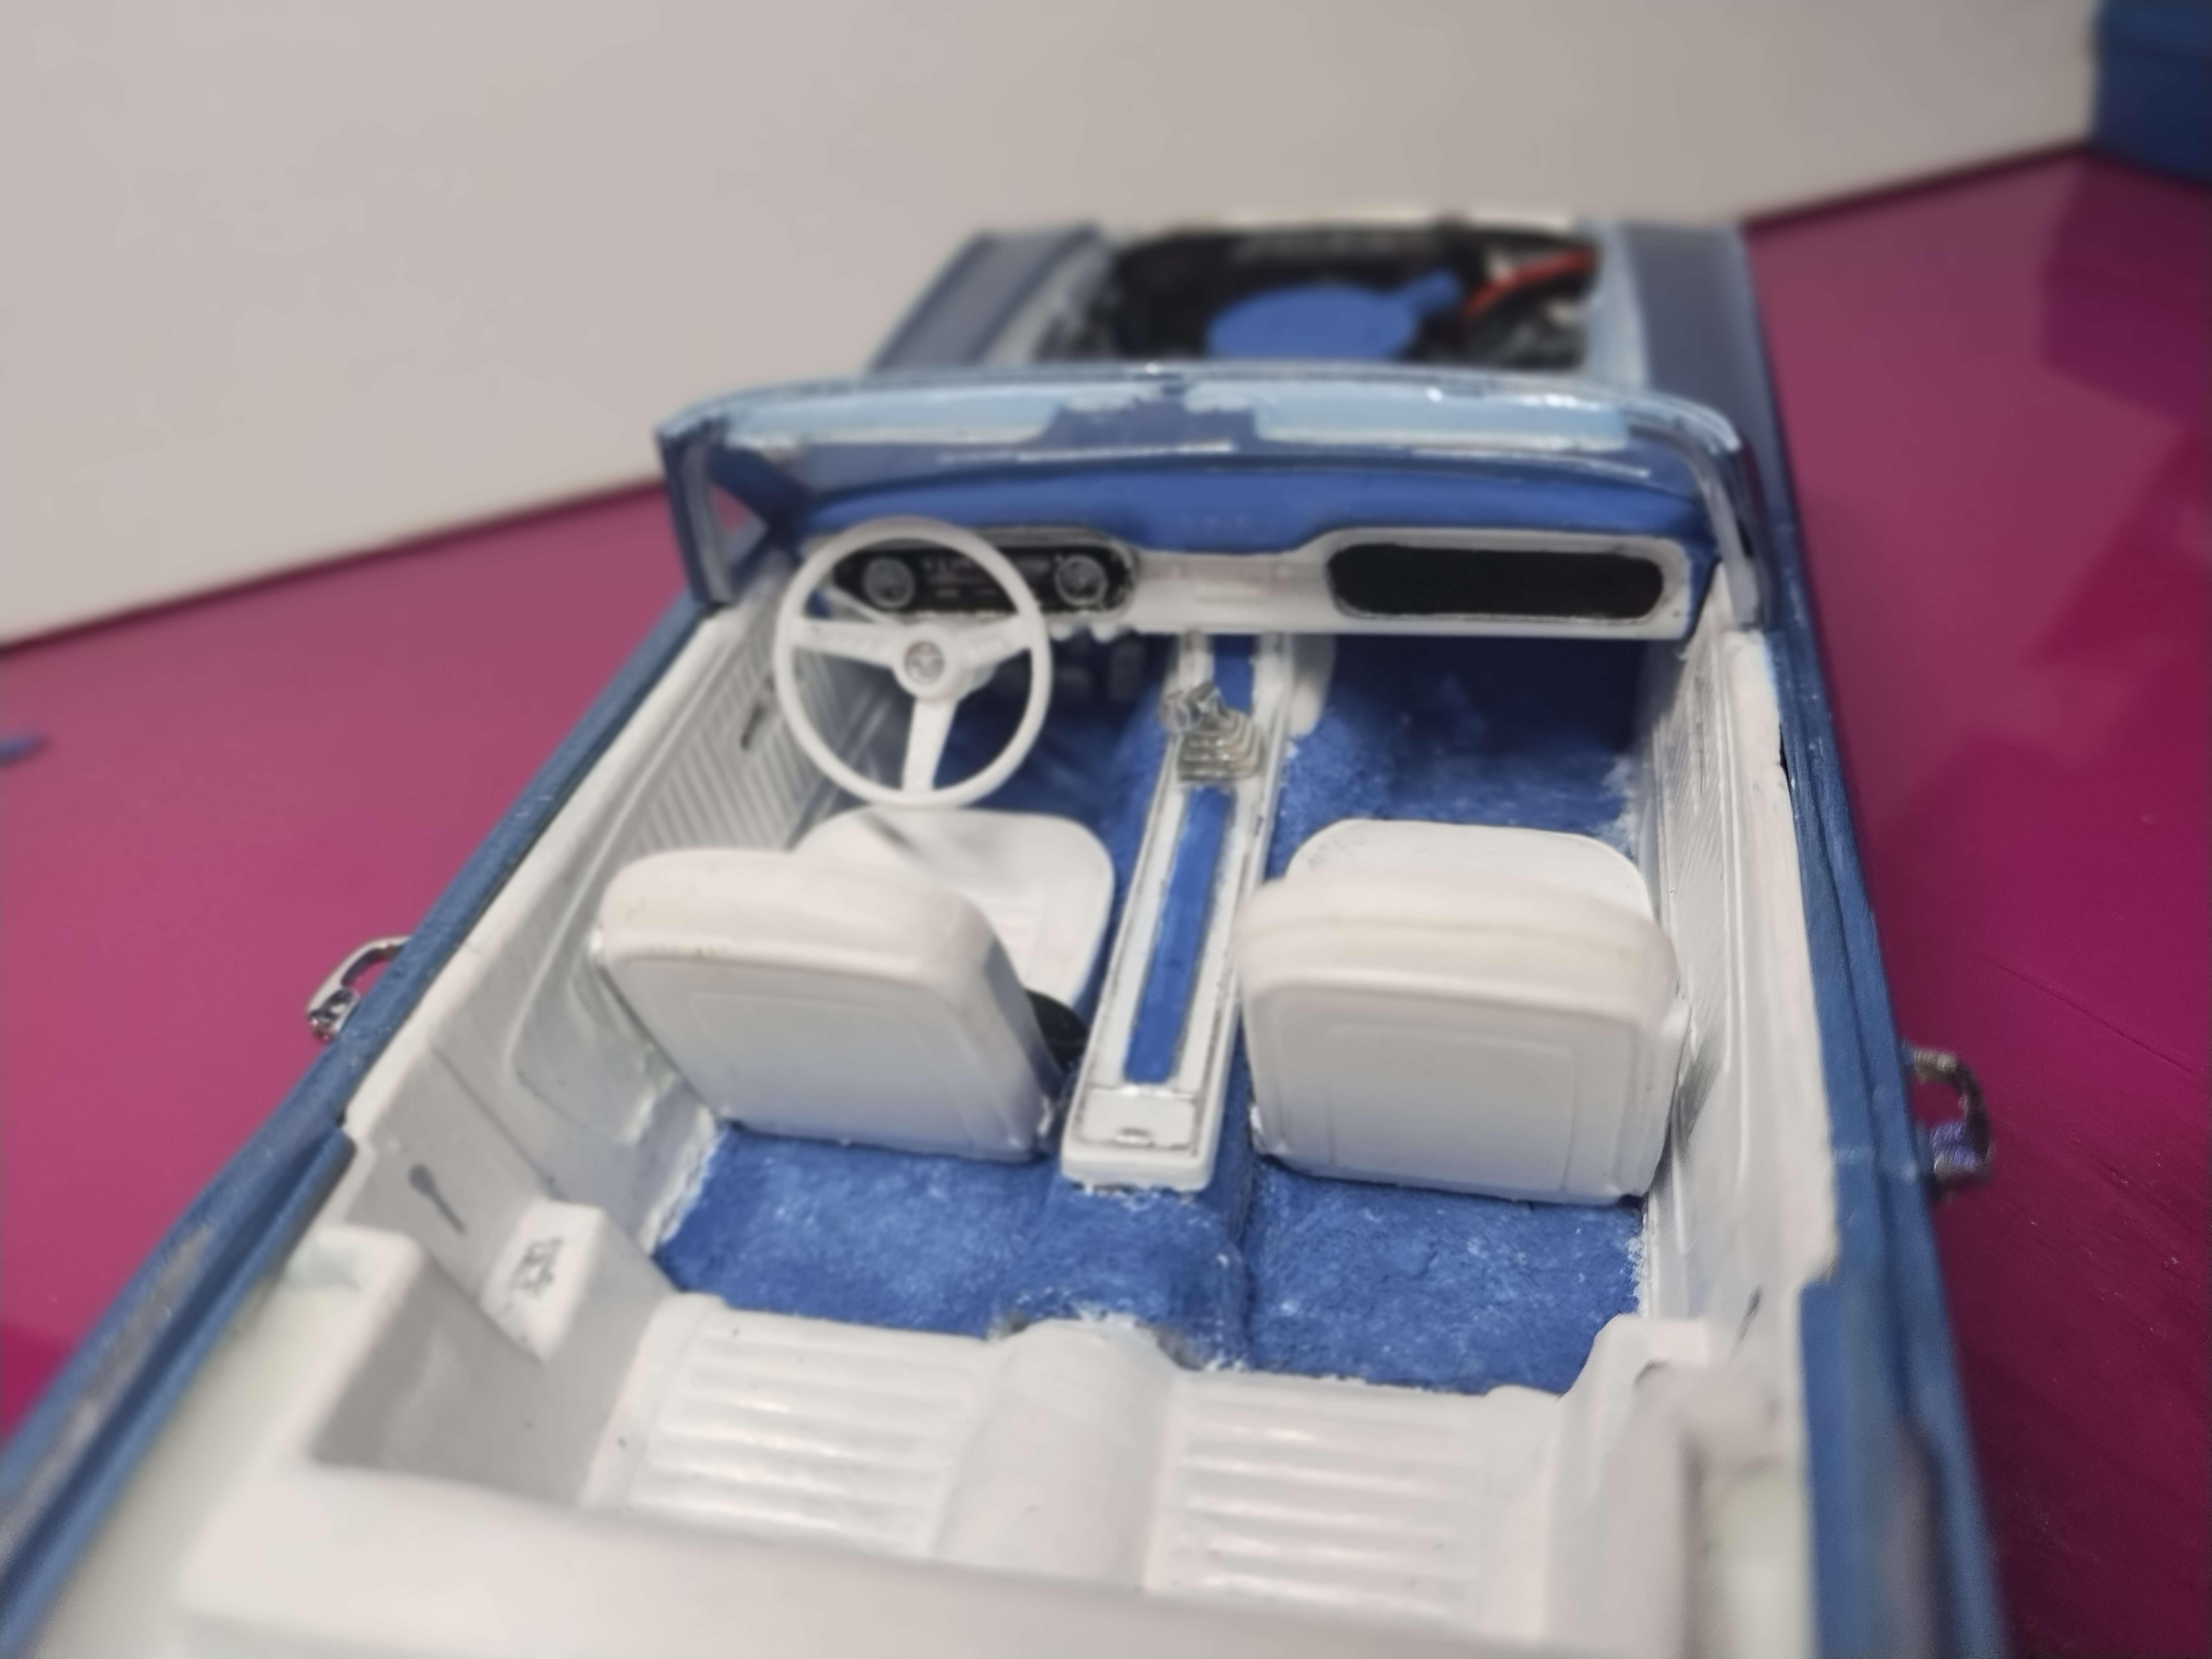
Hi all, Finished this one up last night. Repainting took a toll, the hood is a couple shades darker than the rest of the body, and there is a little cracking around the front edge on the driver side. Overall, I am happy with the outcome. The added brake lines and engine wiring adds a little interest, if not crude. I used ak metals xtreme metallic blue on top of AK filler primer with an automotive spray clear coat (which oddly was the cheapest spray clear in canadian tire...) Polished out it looks quite nice, so this is going to be my go to clear for cars now. I want to do another convertible in the purple AK metal that I have. I want to keep adding detail and getting better at adding realism to my models, so any feedback is helpful. The liner I made from some felt, as well as the carpet on the floor. Seat belts and buckles are made from wire and layer of masking tape.
-
Perhaps ChatGPT is cheaper upfront, but every single prompt wastes a good amount of water. No real price on that. Sweet build!
-
Hi all, This is a compilation of posts made on another forum (SPAM). Further posts will be made first person, I hope this all makes sense. Thanks! Oops I did it again... It's been a minute, hi again. I have been working stupid hours and haven't really had a minute for modelling, but I got this 'stang from marketplace which really inspired me to get going. This is the pace car kit, monogram I believe. I don't have pics yet, I will post some later tonight. So far the body is painted and polished, a nice shade of blue, yet to do chrome or trim/badges. Engine is wired, exhaust is painted. Suspension needs work. I want to do a white or grey interior, as I am doing a white top. Thoughts? Maybe white with blue accents. Here are my late pictures: I wanted to experiment with making a full wire harness for most the electronics I can find. I am following these diagrams, starting with the tiny white thing at the end which I hope to make look properly like the starter relay. More updates: Engine bay wiring harness has been started, you can see where the line hooks up to the headlights and horn Thanks guys! Some updates: Positive and negative battery wires added, water bag, horns are painted, I have started on the brake lines. chrome needs some touch ups. I corrected the wires to be black, from the grey there were before. Silverado had mentioned that they are wrapped in electrical tape, so i painted them black. I have to finish the soft top, do the chrome around the base of it, mirrors, headlights, the cross brace for the engine bay, Engine bay complete, next stop is repainting some body parts due to... oopsies... No hope separating the body, soooo I just did some taping and sprayed right on top. I fixed it! for the most part, there are two finger marks that appear on the surface, only one of which I am going to care about. The one on the hood is very visible to the human eye, I had a hard time capturing it on camera, so I circled the area in the photo. The one on the side on the door panel is less noticeable, but I did have some splotching on the opposite side, shown in pictures. Clear, polish and re-chrome and I am done!
-

Pantera Question
Ceaser_Salad replied to Ceaser_Salad's topic in Model Building Questions and Answers
For clarity: this is what I am referring to: Seems like the best option would be to just use styrene as suggested. I don't have a 3d printer as of yet, but if I did I would just reprint the entire rear lid to add the scoops. thanks everyone for the info, keep adding on. the more the merrier
-
Pantera Question
Ceaser_Salad replied to Ceaser_Salad's topic in Model Building Questions and Answers
thanks for the info. Best bet then I guess to model them would be to take from a lambo? I will have to do some looking around for 70s-90s lambo parts and see what looks right. If anyone else has information, pls do add on. -
Pantera Question
Ceaser_Salad replied to Ceaser_Salad's topic in Model Building Questions and Answers
My bad, but yes the rear scoops. Apologies ? -
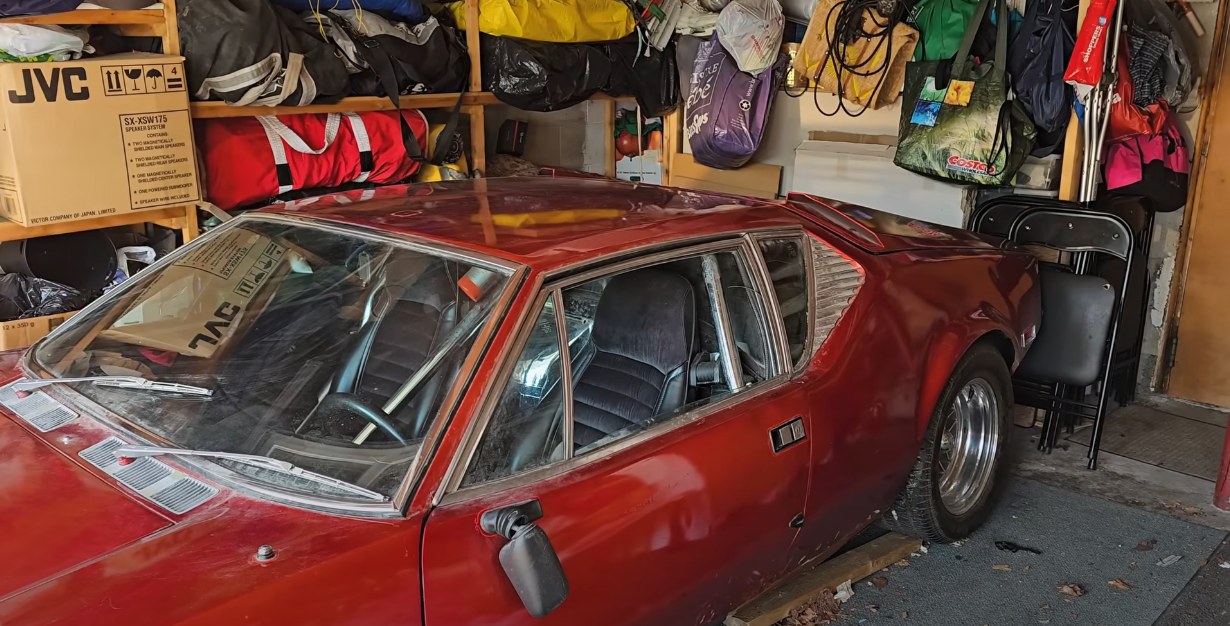
Hi all, For those that know Panteras, I wanted to know if the rear hood scoops shown on this 1971 Pantera are custom, or factory stock and if there are model kits that depict this version of the Pantera. I snapped this from a youtube video from Vice Grip Garage. Let me know,
-
420
-
I have this kit, and I used the engine in a build I am doing currently. Does anyone know what that engine is and if there are any reference pics? Thanks
-
That's fantastic! Great work.