Giovanni La Rosa
-
Posts
61 -
Joined
-
Last visited
Content Type
Profiles
Forums
Events
Gallery
Everything posted by Giovanni La Rosa
-
Hi Ed, I am very happy that you appreciate my 312 P! Hello, Giovanni La Rosa
-
Hi Andrew, good job ! The second photo seems to have a Yoshida painting in front of you !!!!! Hello, Giovanni La Rosa
-
Hi Pierre, Thanks for your comment ! If you need modeling advice or suggestions, contact me, I will be happy to answer you. Ciao, Giovanni La Rosa
-
Hi Stephen, thanks for your words of appreciation! Ciao, Giovanni La Rosa
-
Hi David, I'm glad you like my 312 P, but I assure you that live it is even more beautiful and amazing! Ciao, Giovanni La Rosa
-
Hi Bill, thank you for your comment ! Ciao, Giovanni La Rosa
-
Hi Andrew, yes, I have the UMI (Quatermann) 166 Mille Miglia Barchetta and, also, the Model Cars (Japan magazine kit limited edition) 166 kit. Ciao, Giovanni La Rosa
-
Hi Jim, thank you for yours nice words. Ciao, Giovanni La Rosa
-
Hi Larry, thank you for compliments. Ciao, Giovanni La Rosa
-
Hi Bruce, thank you ! Ciao, Giovanni La Rosa
-
Hi Philip, Thank you for your congratulations. It is a pleasure for me to share my works with you. Soon, ciao, Giovanni La Rosa
-
Hi Andrew, Thanks for your comment ! Yeah, I heard what happened to Paul Fisher and I'm very sorry. I still have, to build, several kits of him and also many of those of UMi (M. Quatermann) which, since it is said, many bear the signature of Paul. Thank you again, Ciao, Giovanni La Rosa
-
Hi Helmut, I thank you for the compliments that, made by someone like you who knows about racing cars and modeling, make me even more happy. Thanks again , Giovanni La Rosa
-
Hi Thomas, congratulations on your Lola T 70! She is beautiful! The thing that I liked most is the painting of the bodywork; excellent shade of green and perfect degree of gloss for a car of that era. What paint did you use? Did you clear above the decals? (from the photos I can not understand it). Thanks in advance and congratulations on the conversion. Hello, Giovanni La Rosa
-
Hi Helmut, could you tell me the store where you bought these two models? Thanks, Giovanni La Rosa
-
Hi, I am very happy that you like my Ferrari 312 P. Thank you very much everyone. Ciao, Giovanni La Rosa
-
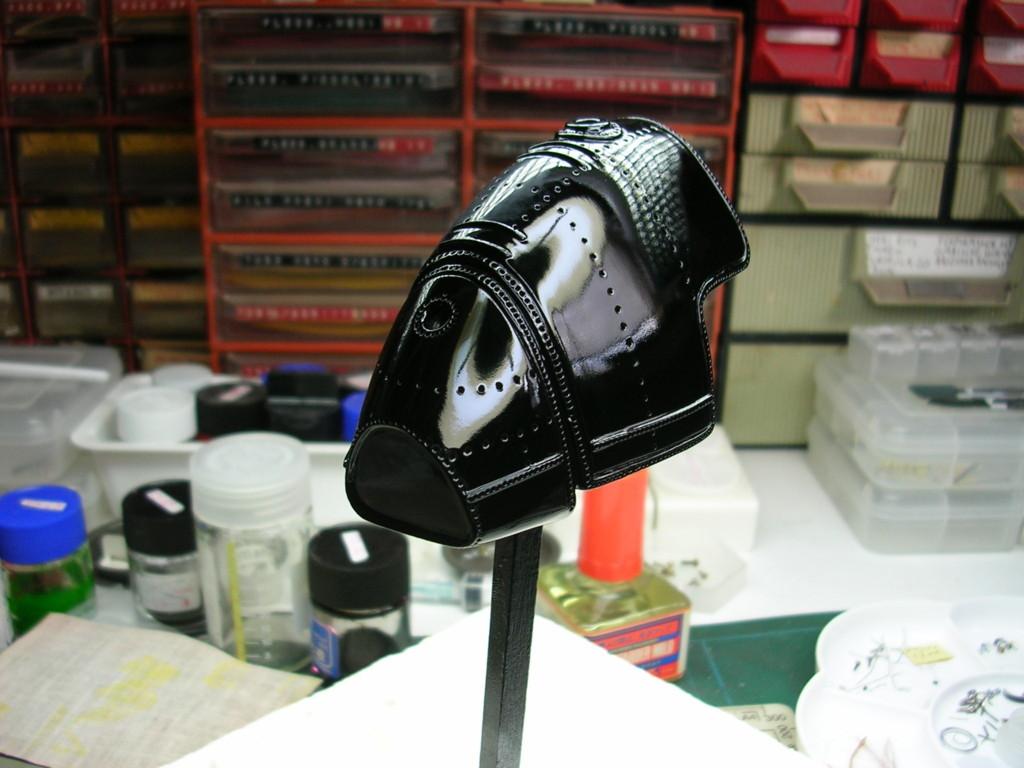
Hi everyone, Attached, photos of my Ferrari 312 P model, Brands Hatch 6 Hours version from 1969. In my opinion, the 312 P is the most beautiful and elegant Sport Prototype car of all time. I have also included a card that summarizes the most important changes and additions made during the assembly. Greetings, Giovanni La Rosa FERRARI 312 P Brands Hatch 6 Hours 1969 Base kit : FISHER (U.S.A.) BODY PAINTING : Tamiya TS 8 Italian Red (can decanted and sprayed with airbrush) FRAME : Alclad II Chrome INTERIOR COCKPIT : Tamiya TS 30 Silver Leaf RIMS : Testor’s Gold TIRES : Humbrol 85 Coal Black + Microscale Satin RIVET used : Adlers Nest and Scale Hardware FRONT HEADLIGHTS Completely rebuilt with Sakatsu chrome parables and Modeler’s lenses. The screws on the plexiglass shell are taken from a set of F1 Specialties photoetched. REAR LIGHTS Supplied in the kit in printed resin, they have been replaced with red and orange lights of Tron Accessories. EXHAUST Also these, supplied in the resin kit, have been replaced with brass tubes and painted in Tamiya Matt White. ROLL BAR Rebuilt with brass rod , replaces the resin in the kit. SEAT BELTS Made with fabric of the american company Model car Garage and completed with photoetched set of the Fisher same, sold separately, wich also includes the wings (placed on the front nose) and the spoiler (placed on the rear hood), necessary for the realization of the 6 Hours version of Brands Hatch # 60 from 1969.The Fisher set include also the rear hood closing handles and other details. RIMS Painted with Testor’s Gold , they were completed with the balancing weights , made with nichel plated rod and strips of Bare Metal Foil and the inflation valves of the Sakatsu TIRES Also supplied in resin, they were painted with Humbrol Coal Black 85 and completed with golden wheels and Firestone writings by Fred Cady decals; all sealed with a hand of trasparent Microscale Satin. BODY Painted with the Tamiya TS 8 Italian Red decanted and sprayed with airbrush , it was finished with the Tamiya TS 13 Clear , also decanted and sprayed, followed by polishing with Micro Mesh abrasive papers. Many missing decals have been added on the sheet supplied by the kit and placed above the Clear. AIRSCOPE It was excavated to give depth to the air entry hole. FUEL FILLER CAPS AND VIEW MIRROR Painted with Alclad II Chrome and the mirror was made with DC Fix “Mirror” film. NOTE The Fisher kits are very essential, but they have a correctness of exceptional lines that, together with the integration of the missing details, perfectly makes the idea of the real car.

-
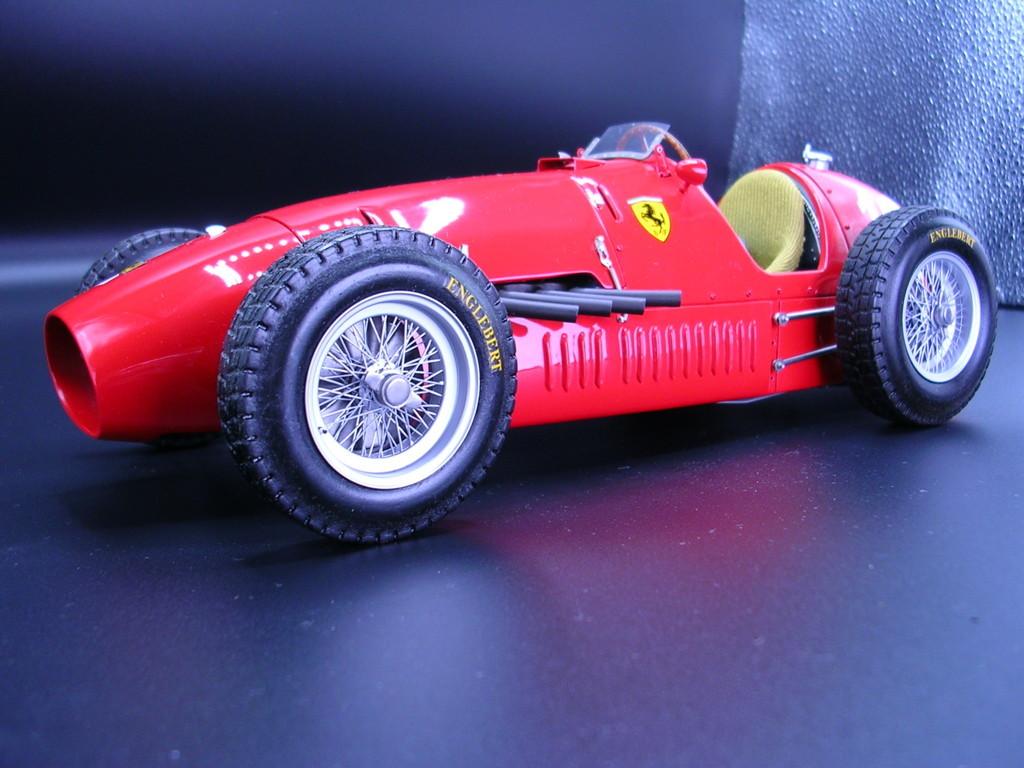
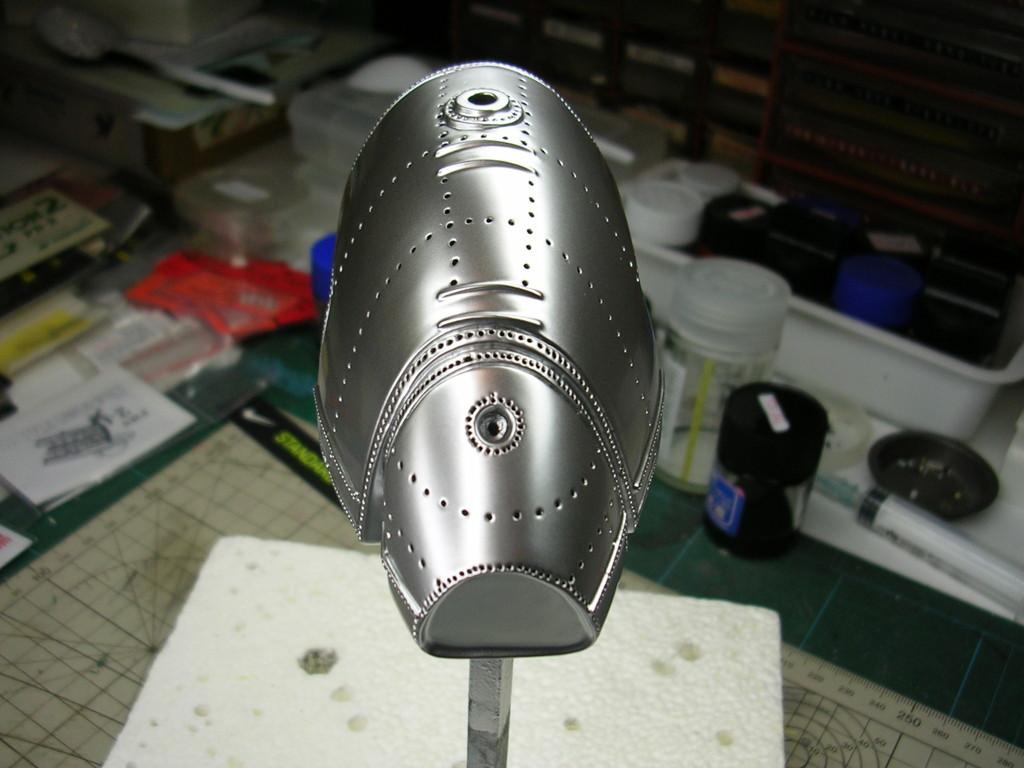
Hi everyone, attached, I am sending you a card that lists the main modification and painting works that I have done for the assembly of the Ferrari 500 F2 in 1/12 scale. Regards, Giovanni La Rosa
-
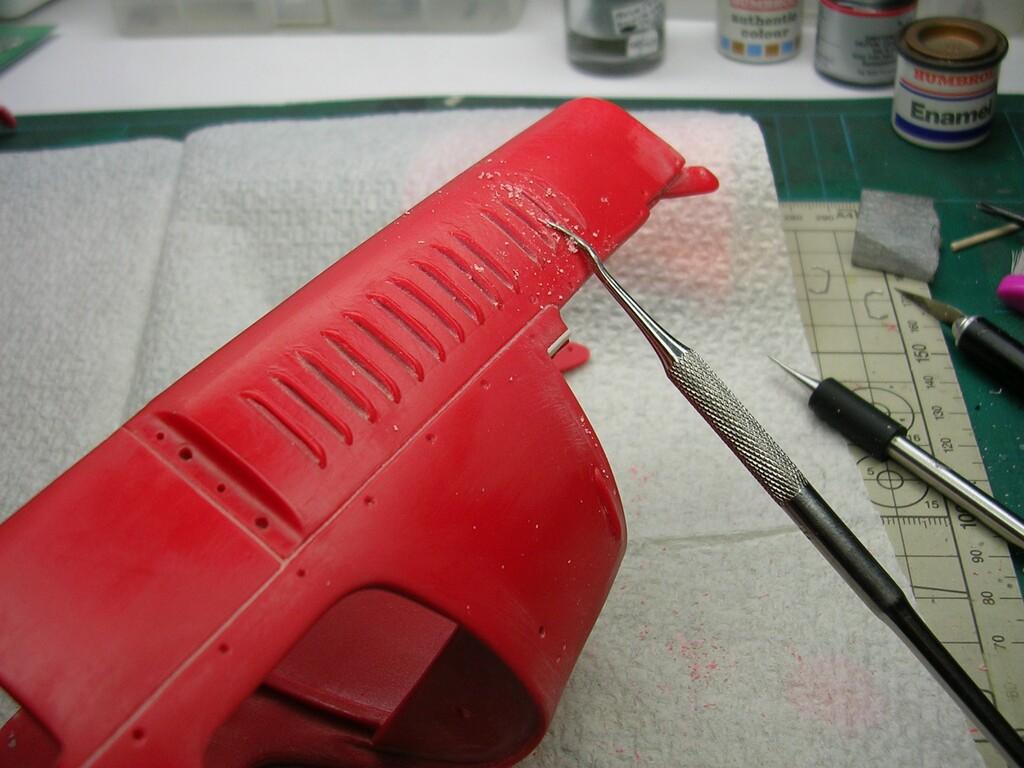
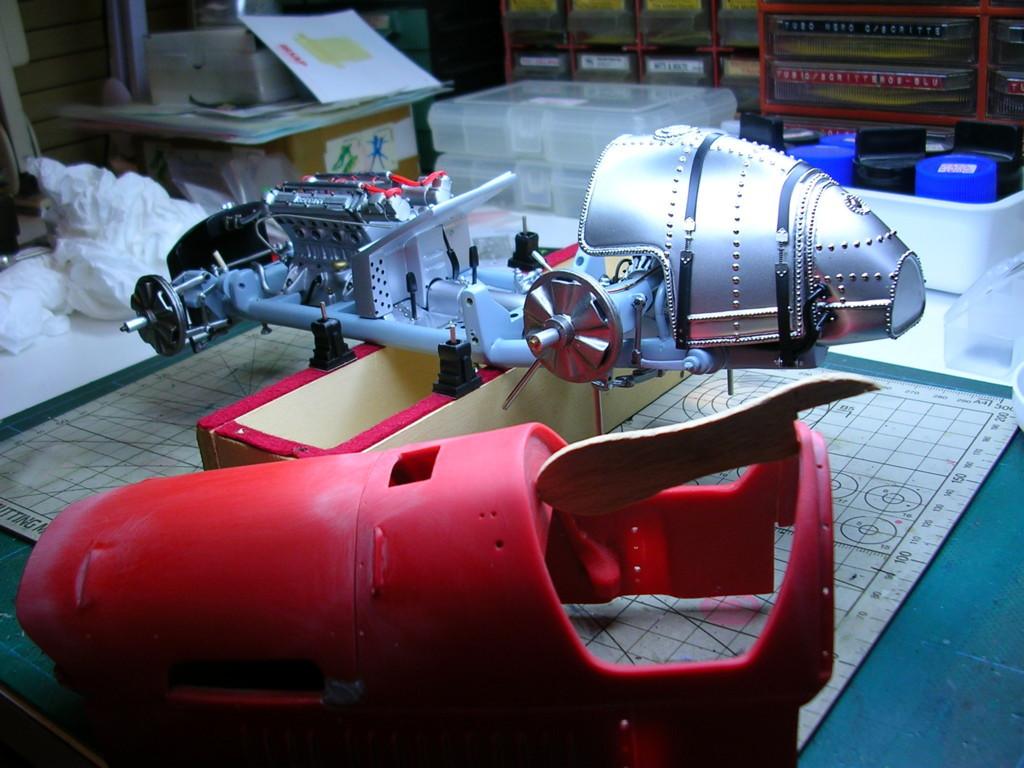
Hi Phil, thanks for your appreciation on the 500 F2! To tell the truth, the starter kit was not very precise especially in the assembly of the bodywork. In fact, it took me a long time to line up all the parts of the body with the hot hair dryer and modify them to make them fit together in the seams. I am attaching some photographs of the processing stages. Ciao, Giovanni La Rosa
-
Hi Noel, thank you for your compliments ! I attach other photos of the 500 F2 Ciao, Giovanni La Rosa
-
Hi Philippe, I am happy that you like the Ferrari 500 F2! I enclose two other photographs relating to the petrol tank, placed behind the driver and which required a lot of effort on my part as regards the painting and the positioning of the rivets (about 750, of various sizes) on its surface. Hello, Giovanni La Rosa
-
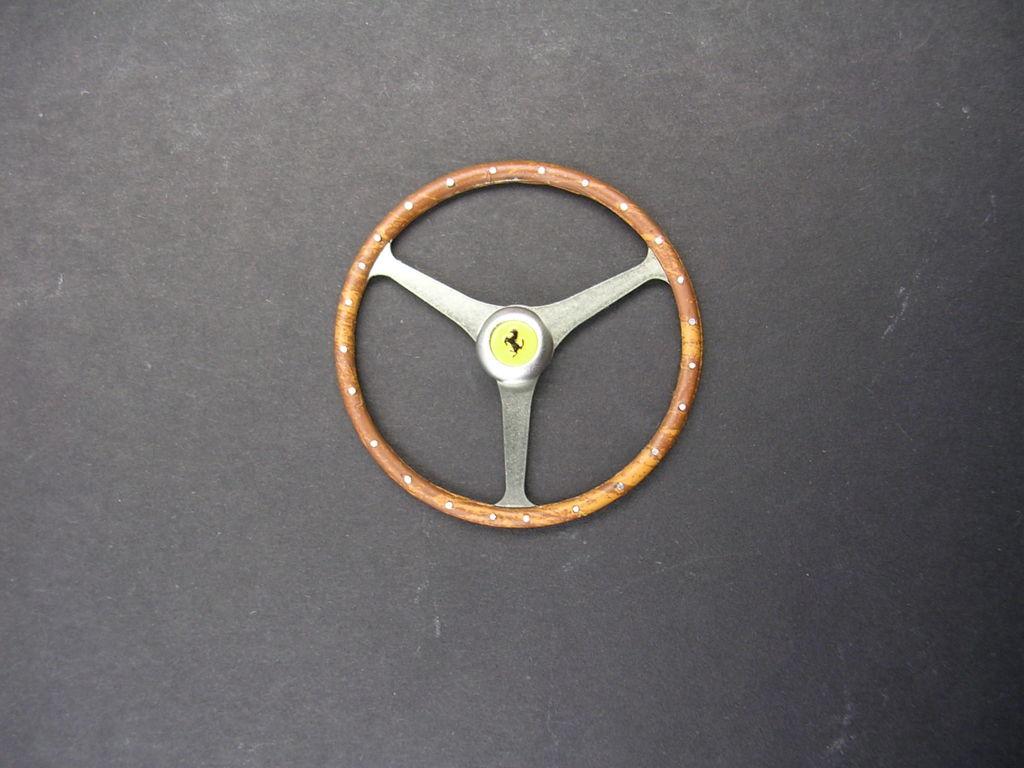
Hi Peter, thank you for your nice comment ! Enclosed, steering wheel pictures. Ciao, Giovanni La Rosa
-
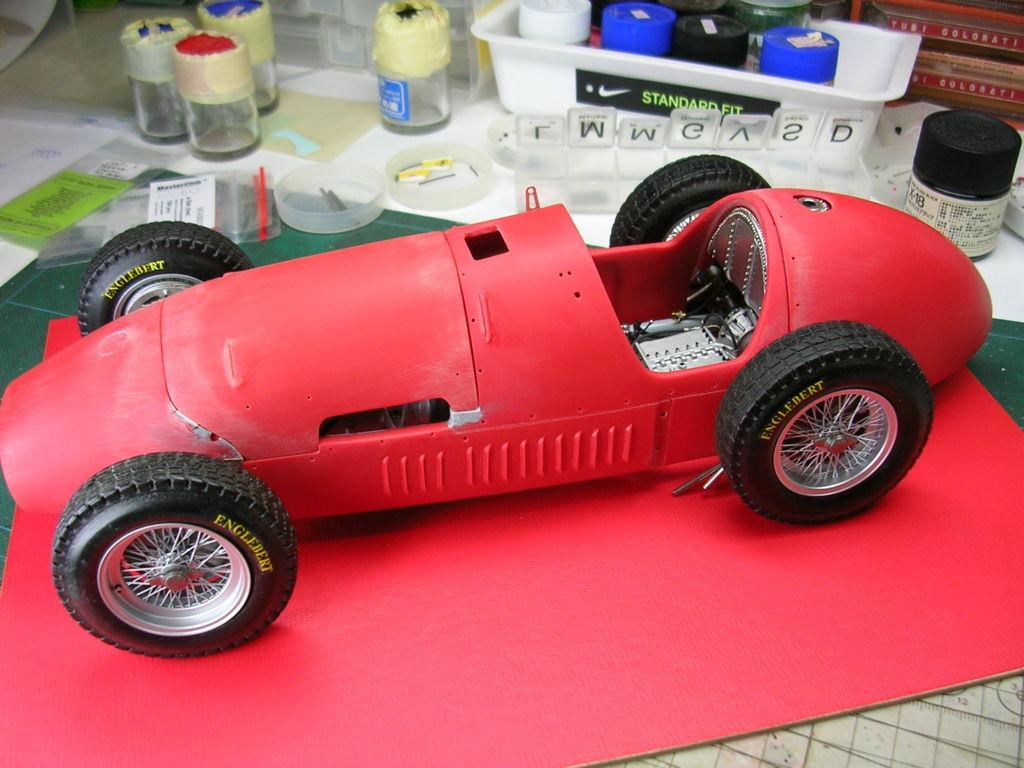
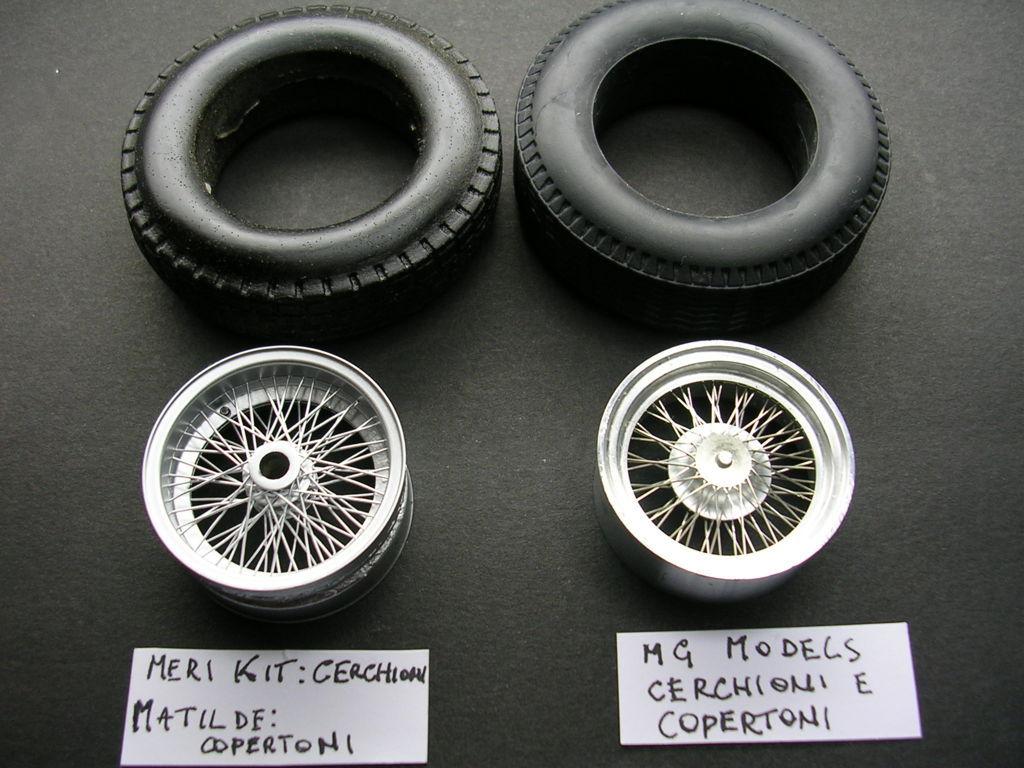
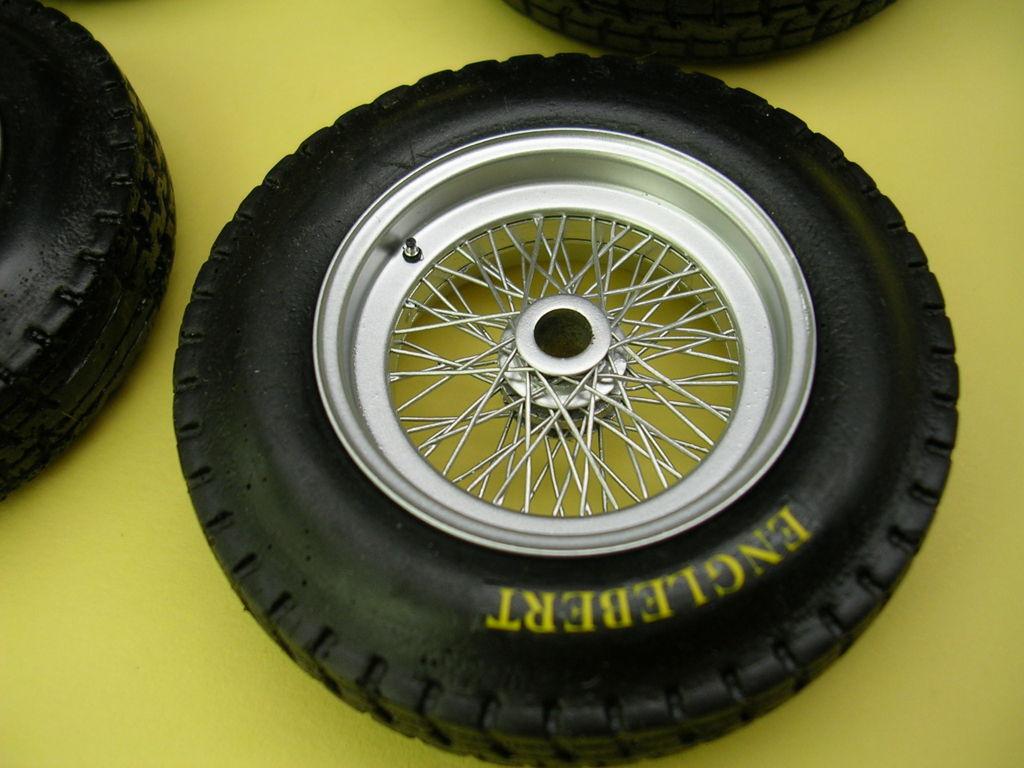
Hi Rich, I know the Revival kits indeed, I should have one to assemble (I don't remember if it is the 1952 500 F2, short exhausts, or the 1953 500 F2, with long exhausts, the same as the one you posted). Now post some photos relating to the wheels in which it is possible to see the modification made in the wing nuts to insert the wheel fixing nut, the difference between the rims and tires supplied in the MG Model kit and those I replaced using the brass rims that Meri kits, an Italian manufacturer of 1/43 kits and accessories, produced years ago and the tires supplied to me by Matilde Model, another Italian aftermarket, with a more correct shape and similar to the original Englebert. Greetings, Giovanni La Rosa

.JPG.e882d0d53a142c174e9d024c6148e631.JPG)
.JPG.63f2cd7e4d4ecb37cc0ab6db5d763fad.JPG)
.JPG.433cc6987af0e54ba29a10358657acde.JPG)
.JPG.5c8d7405a2073ec4284ec04869b3419b.JPG)
.JPG.b8b89da33c885be20d85ad7c132c16a0.JPG)
.JPG.60789c51bbc7bf285a19604b7cee6637.JPG)
.JPG.a87eda0c4ad6c333c4755041de9be70d.JPG)
.JPG.4359d21b0512436d958647df27577cd6.JPG)
.JPG.ad1dc7ad5d07bb14a7a64f4aab6d7afb.JPG)
.JPG.53d18ba1fddc4348de6e685cc76f70dc.JPG)
.JPG.752d3d6adb759ac423ffc6697aae81e1.JPG)
.JPG.15749f7b280ee140e6a2cca22b2edccb.JPG)