BadJuju
-
Posts
81 -
Joined
-
Last visited
Content Type
Profiles
Forums
Events
Gallery
Everything posted by BadJuju
-
I'm interested in building a 27' flatbed semi trailer in 1/25 scale to go behind a Ford C-900 COE tractor, since I don't have storage room for the longer trailer kits I see on the market. What kit would folks recommend I use and shorten: the AMT expandable? The Moebius 48' cambered? Any others? Are there posts folks remember where such a conversion has been done? I haven't found anything with my searches. Thanks in advance for your help!
-
What AMT C-600 for a car hauler ?
BadJuju replied to 57peppershaker's topic in General Automotive Talk (Trucks and Cars)
For example, see the 1st photo in this link: It made me wonder if there's room for stock fuel tanks behind that compartment, and if so, how they're filled. By the way, I think Tim's articles are in issues 188 & 189, and I haven't been able to locate any copies. -
Dr Jay, On these haulers, where were the fuel tanks? Behind those storage areas just aft of the front wheels? If so, how did they rig fuel fillers? Thanks in advance for sharing what you might have learned! Garry
-
What AMT C-600 for a car hauler ?
BadJuju replied to 57peppershaker's topic in General Automotive Talk (Trucks and Cars)
Superb, Tim - thanks! Since most photos of 1:1 C-series hauler bodies have what look like storage compartment doors there, I assumed those had unique fuel tanks vs, say, the box trucks. Maybe they were fuel tank access doors. -
What AMT C-600 for a car hauler ?
BadJuju replied to 57peppershaker's topic in General Automotive Talk (Trucks and Cars)
Big boy motors! For a C-800+ race car hauler, what does one do for the fuel tanks? I can't find Tim Boyd's article anywhere. -
What AMT C-600 for a car hauler ?
BadJuju replied to 57peppershaker's topic in General Automotive Talk (Trucks and Cars)
Ralph, do you recall the exact issue numbers? -
Potential Kitbash: Moebius ramp truck & AMT C-600
BadJuju replied to BadJuju's topic in Model Building Questions and Answers
Thanks, A. J. I'd wondered that. Clearly the C-900 city box plus LN-8000 hauler kit bash is the best bet for a bigger truck, as others have done. I've just been jazzed by the C-series recently, remembering them from my youth. Likely I will just build the Moebius F-350 for a little over 1/3 the price of the kit bash idea. If so, I'll likely swap on a pre-'67 cab I have on hand. I like that style better. -
Has anyone researched how well the ramp bed from the new Moebius kit might fit any of the AMT C-600 chassis? I know another alternative is to use the ramp bed from the AMT LN-8000, and the city delivery C-600, but I like the simpler look of the Moebius unit, and its leftover cab & frame would be more to my liking to use on some TBD future project.
-
Has anyone channeled a Revel '37 Ford pickup?
BadJuju replied to BadJuju's topic in Model Building Questions and Answers
No idea, sorry. I'm not a Fotki poster. I can't access it right now, either. -
Has anyone channeled a Revel '37 Ford pickup?
BadJuju replied to BadJuju's topic in Model Building Questions and Answers

-
Has anyone channeled a Revel '37 Ford pickup?
BadJuju replied to BadJuju's topic in Model Building Questions and Answers
UPDATE: progress on the interior sectioning, scratch transmission tunnel, firewall, & pickup box side skirts & roll pan.
-
Has anyone channeled a Revel '37 Ford pickup?
BadJuju replied to BadJuju's topic in Model Building Questions and Answers
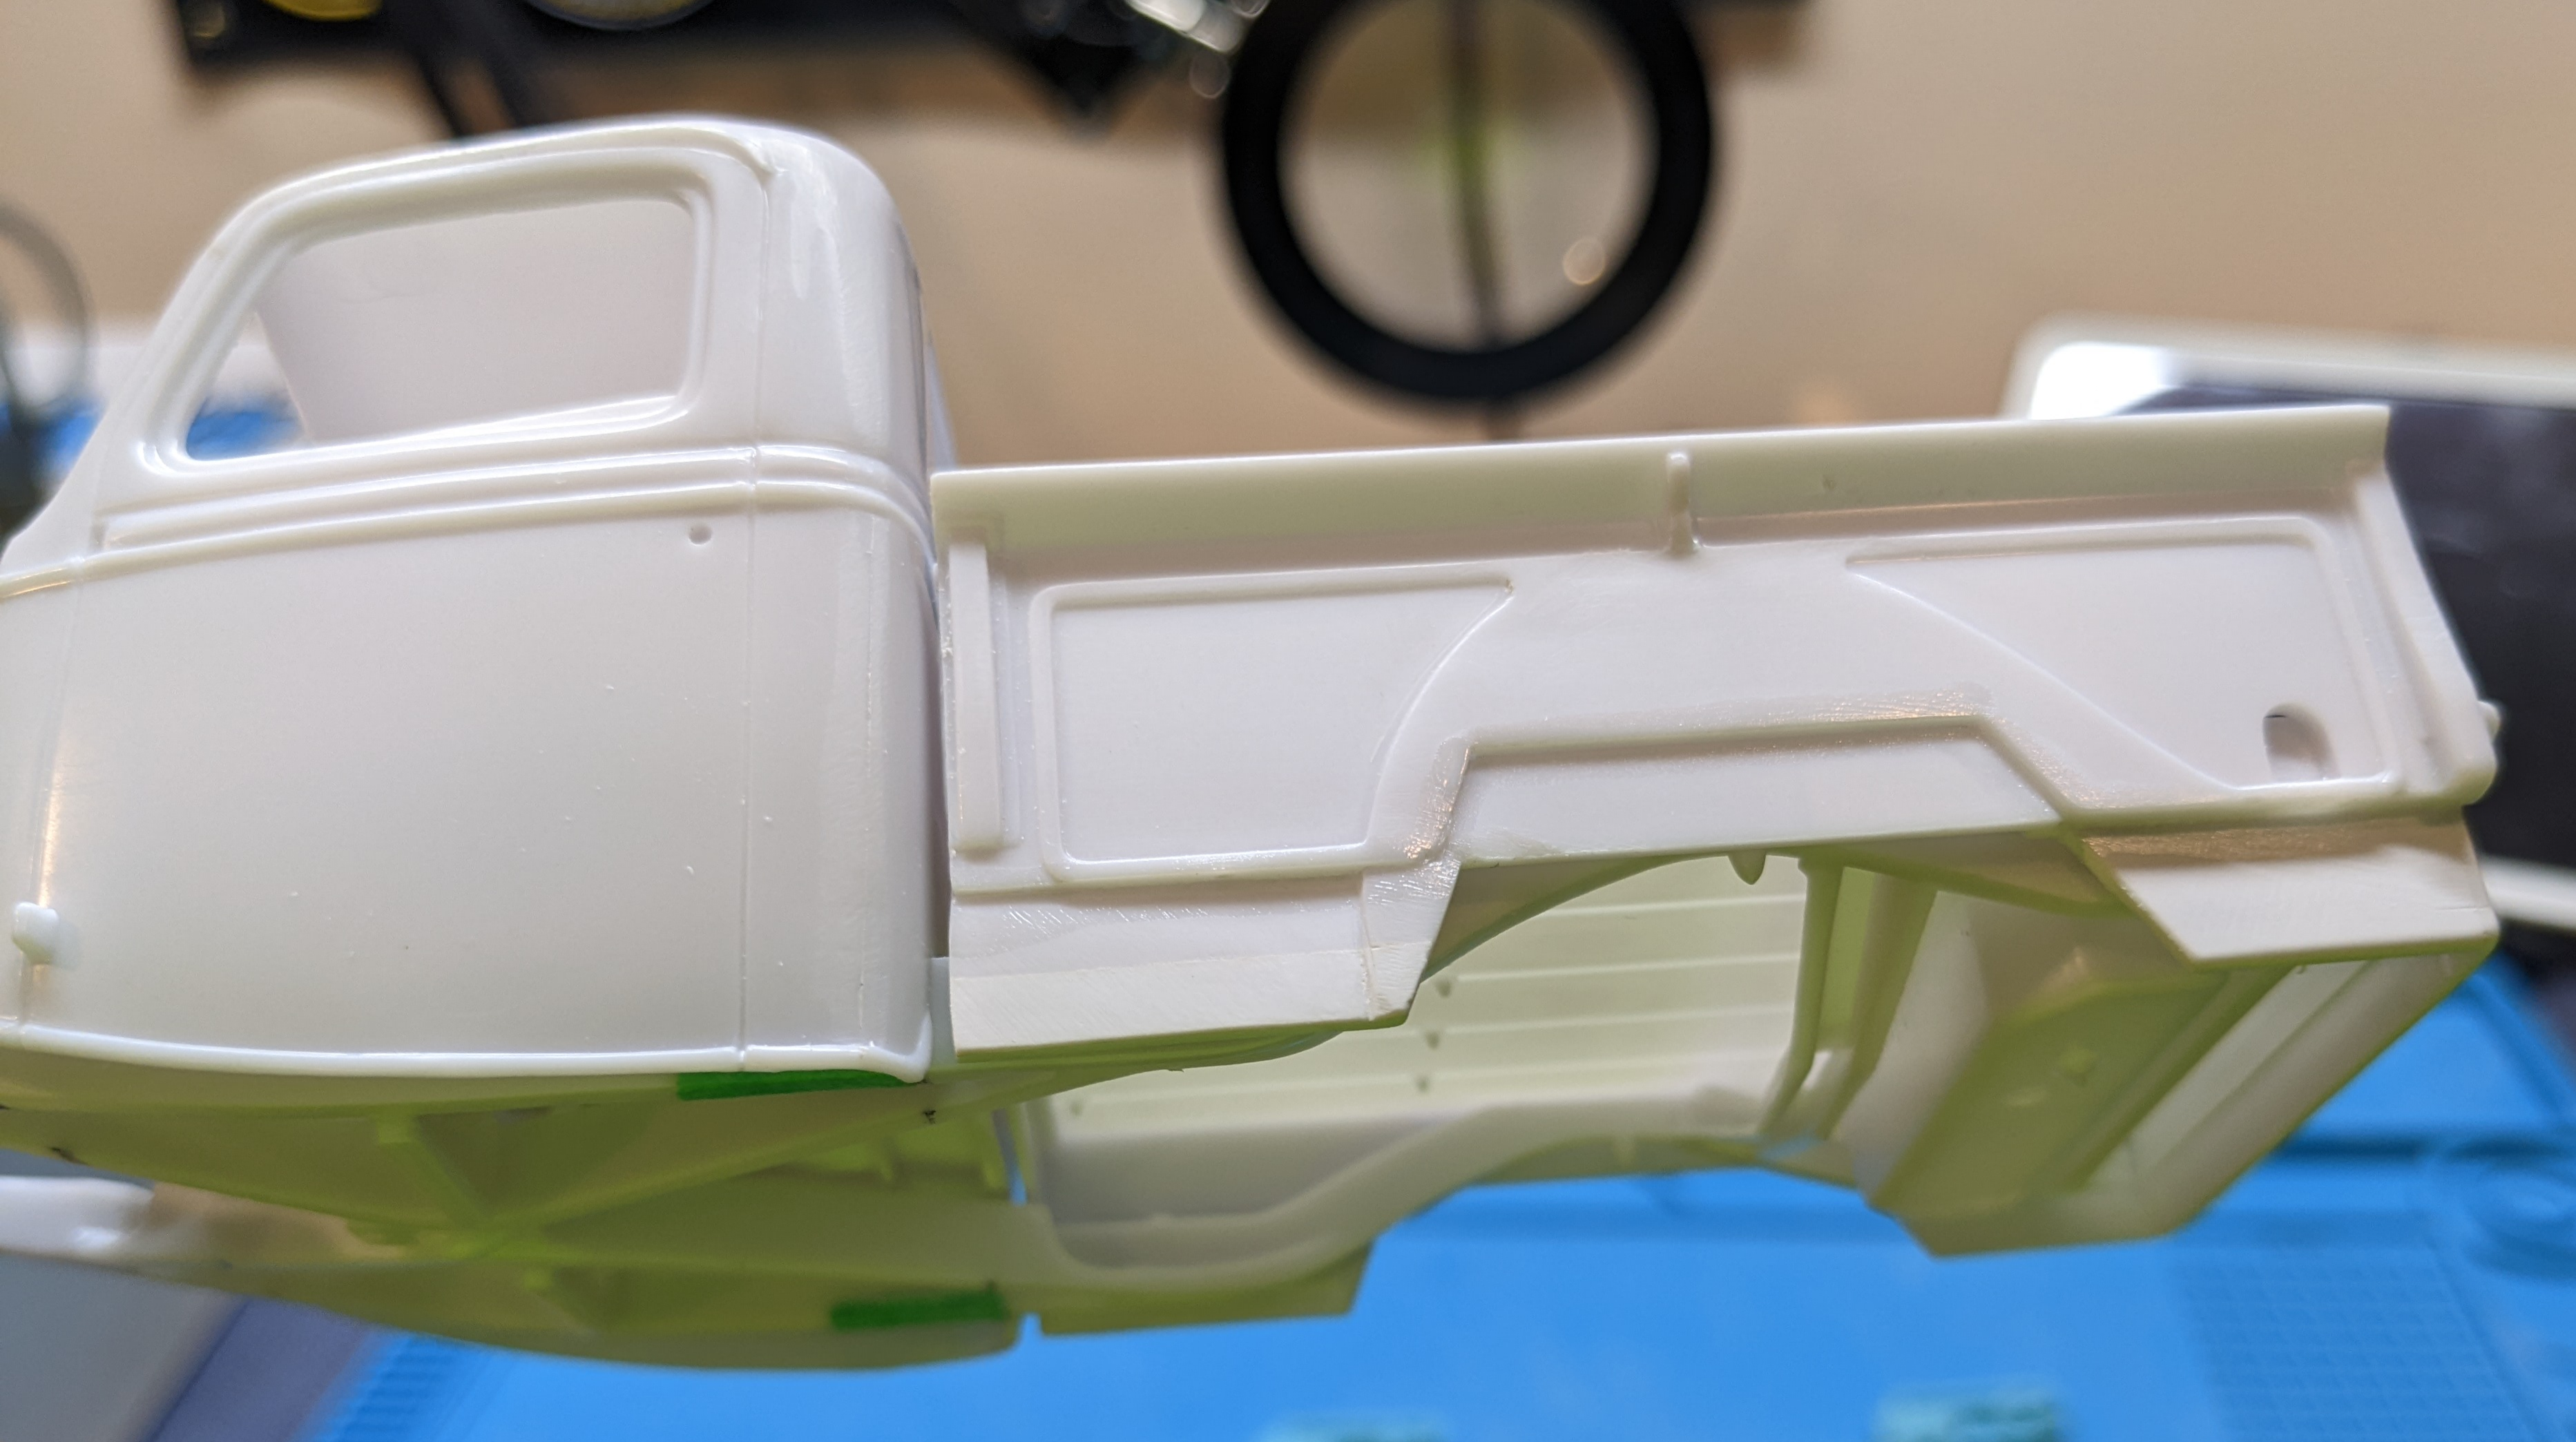
I've been chipping away at this, along with 3-4 other projects. The customized firewall is nearly done. I've made mistakes there that have created extra work. I've sectioned the interior & scratched most of the trans tunnel. The firewall must be completed so I can size the front of the trans tunnel to fit. Once all that is done, I'll work on chopping the top. I've never done one before. I have a Flintstone chopped cab as a backup. It needs a LOT of cleanup if I need to use it. If so, I'll cut it at the cab molding lines and mate it to the lower with the customized firewall. I tried to keep the firewall separate, which was leading to the errors I mentioned, so I ended up gluing it to the cab. I've lowered the bed front wall a bit & am scratching the rear roll pan & bed side skirts, but not channeling the bed. I'd like the bed top rail to align with the cab side molding. When I finish the firewall I'll post an update. Thanks for your interest! -
Has anyone channeled a Revel '37 Ford pickup?
BadJuju replied to BadJuju's topic in Model Building Questions and Answers
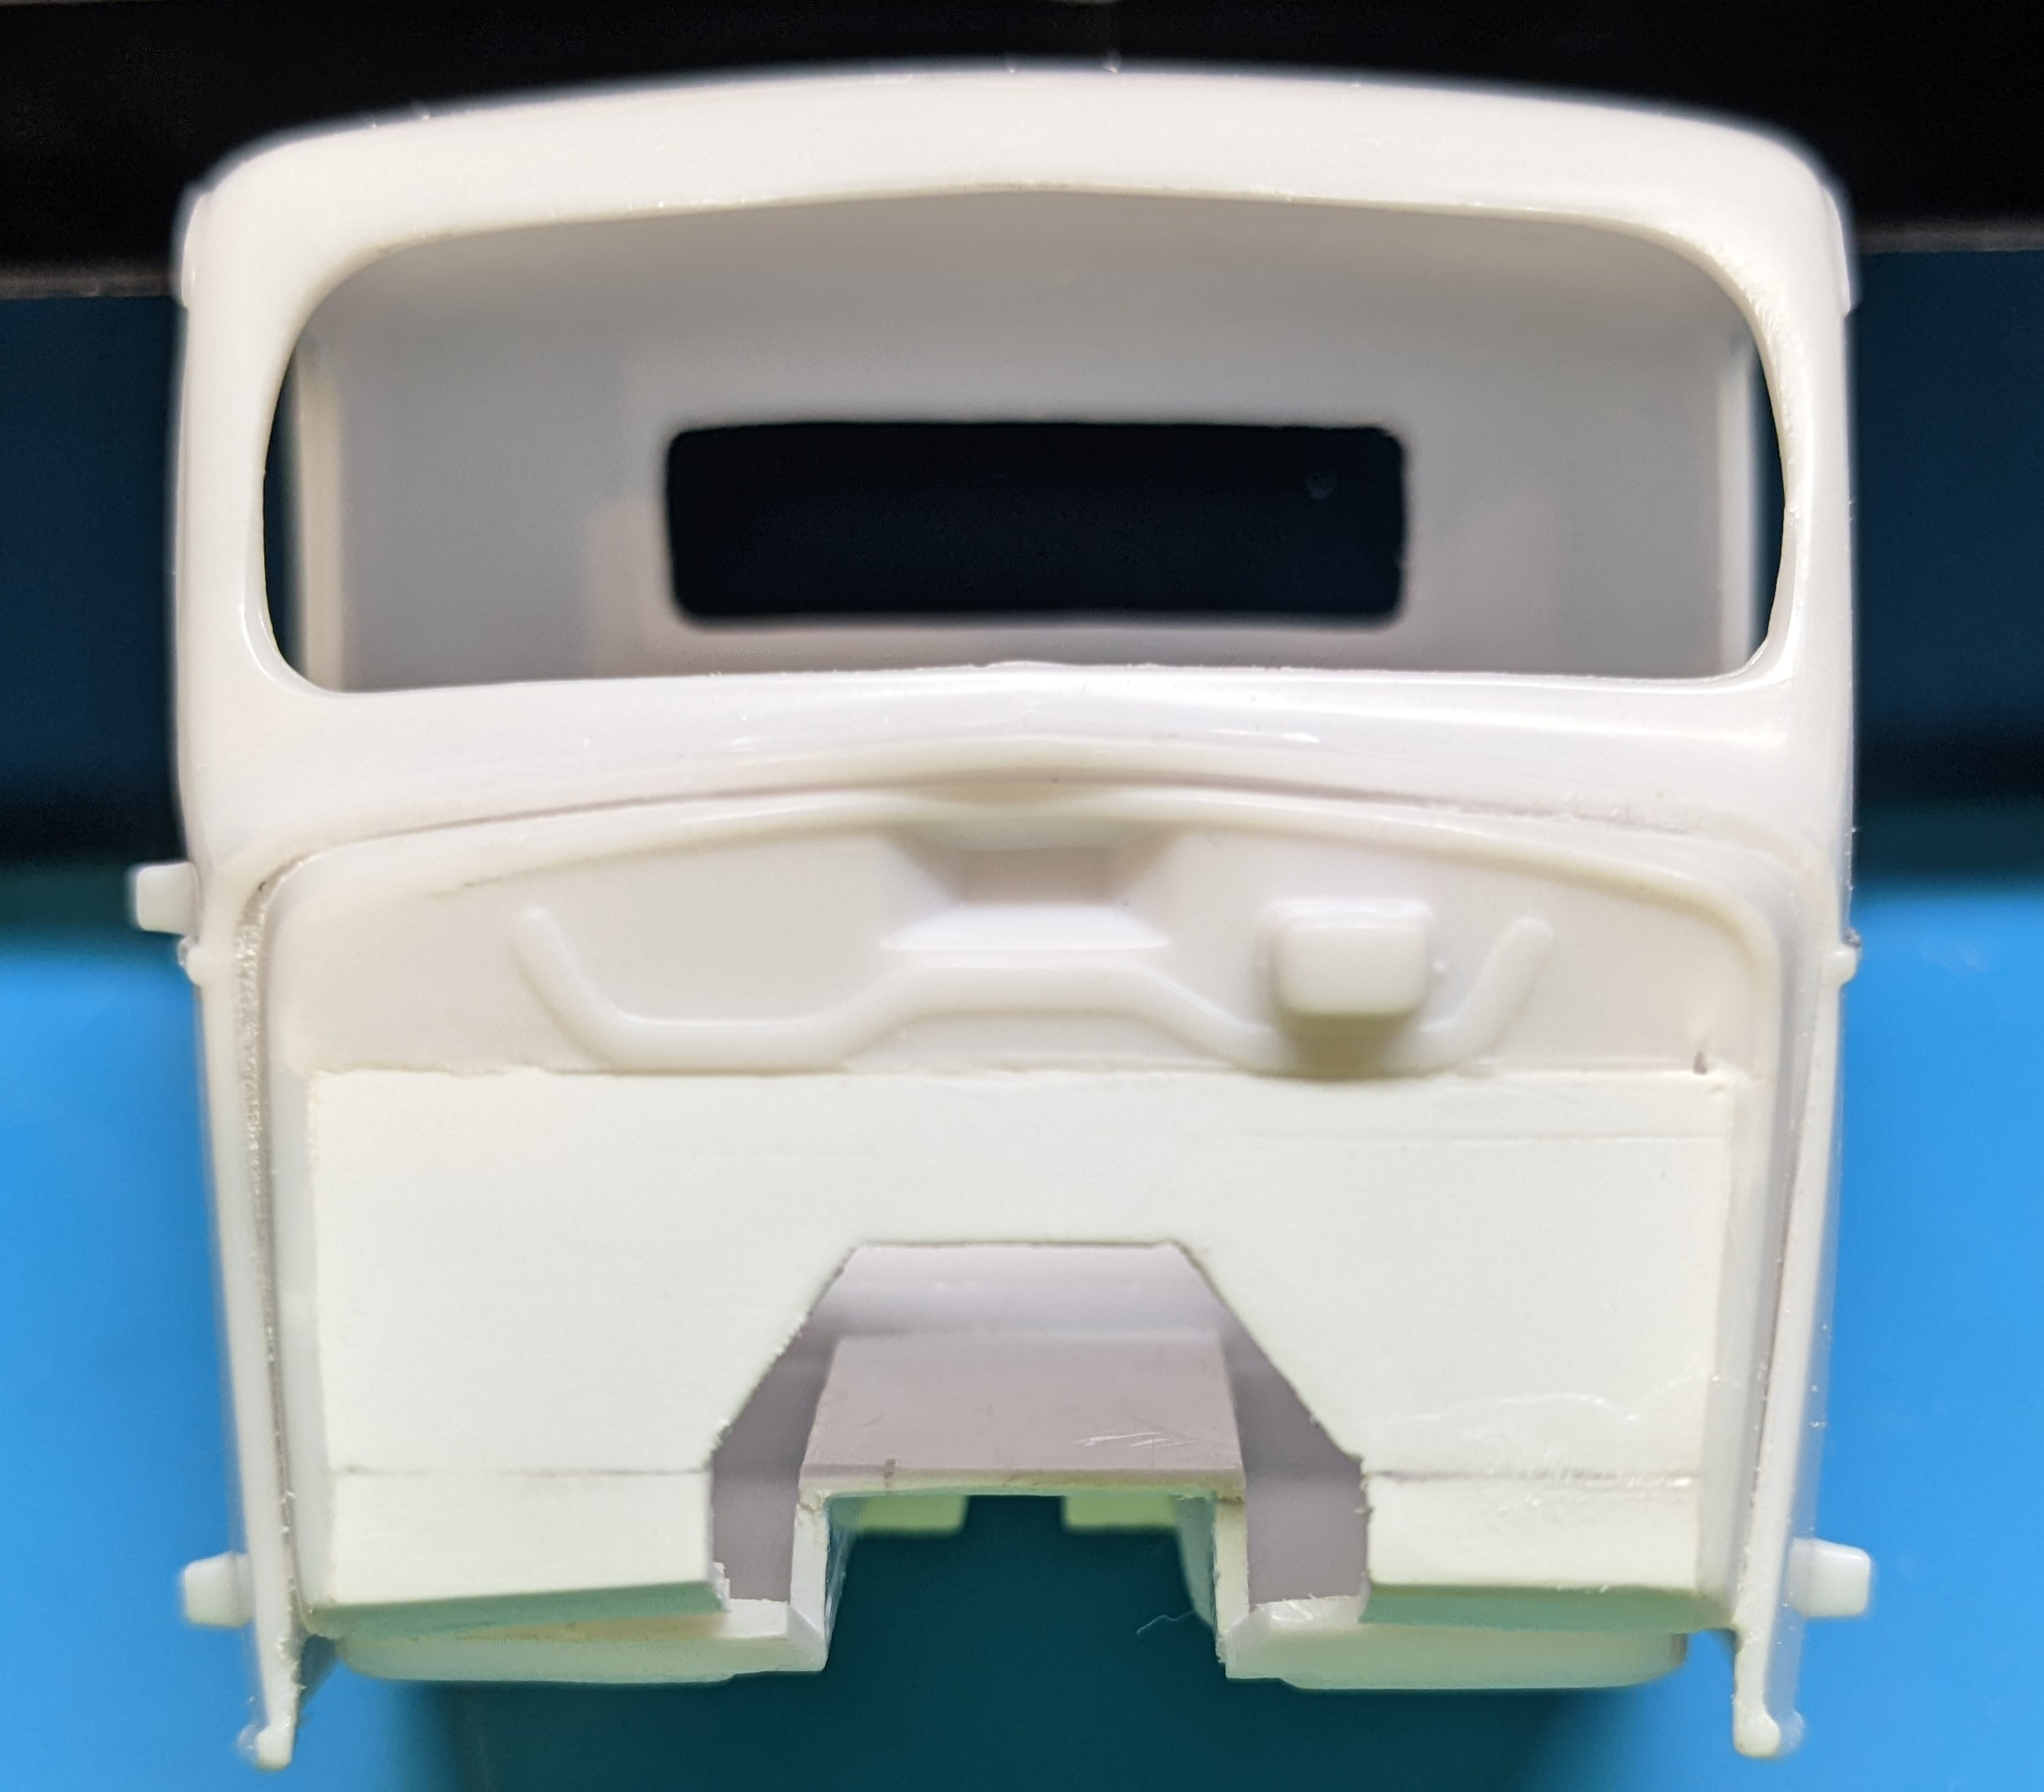
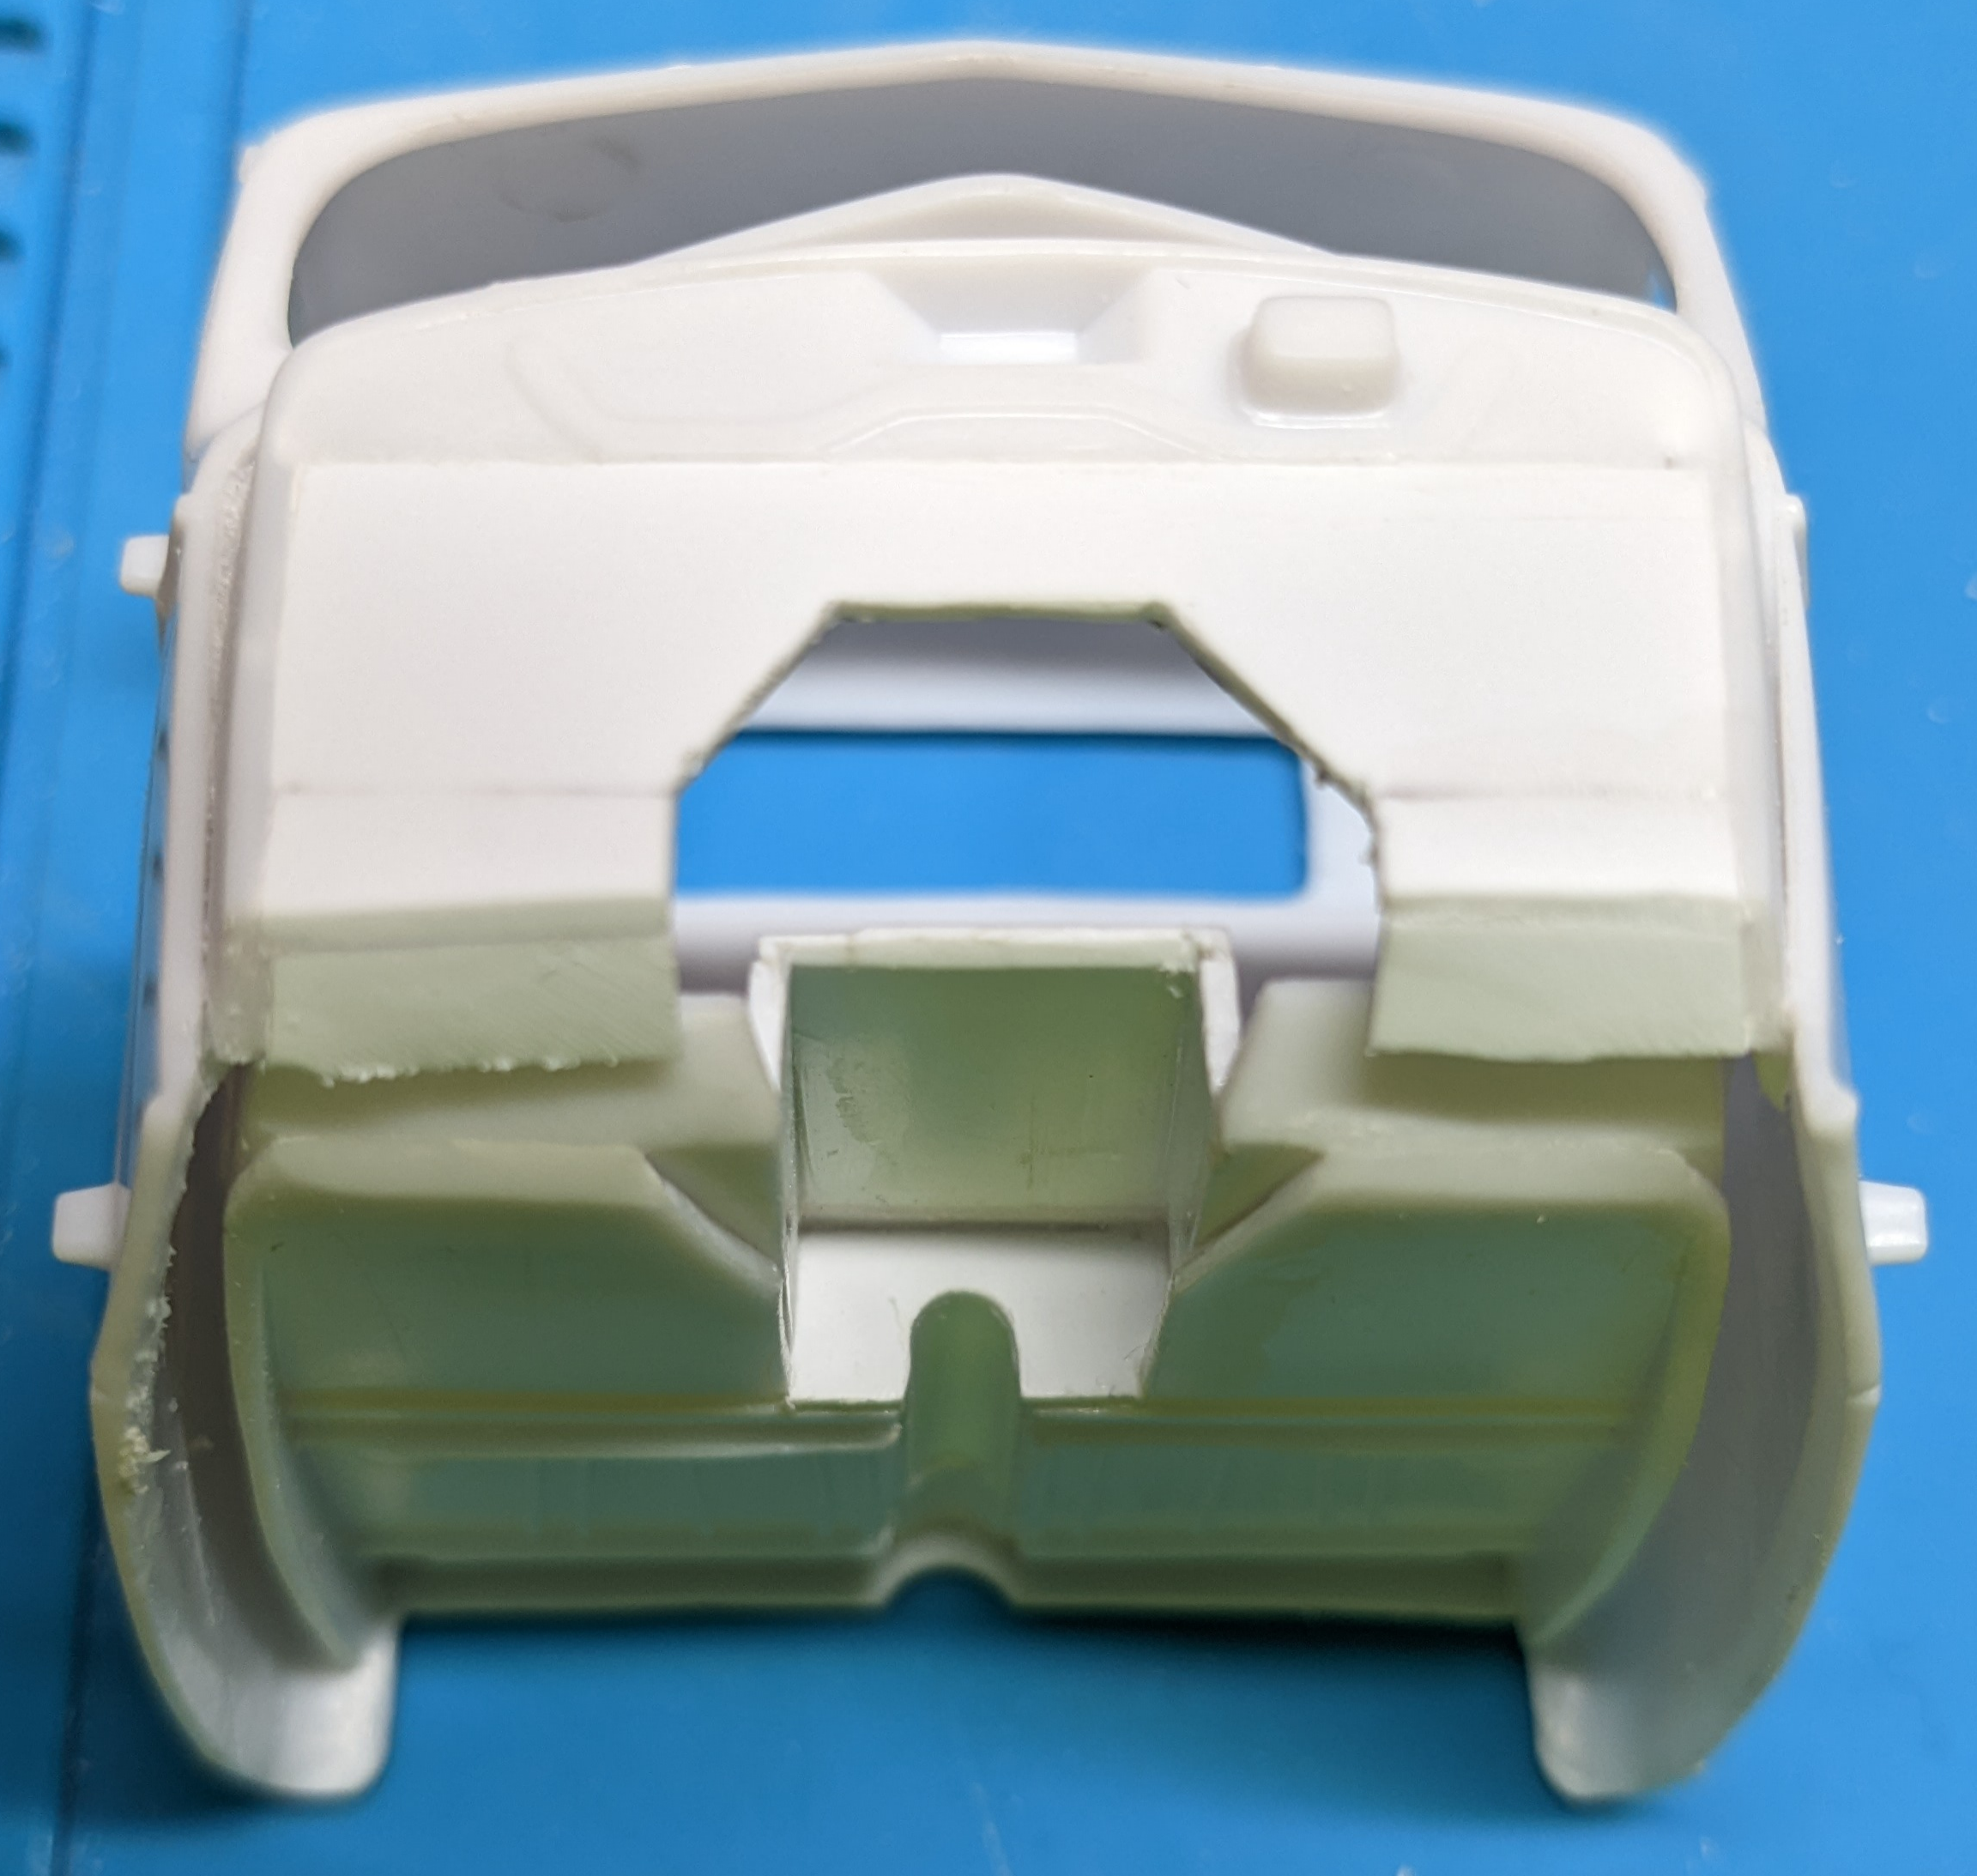
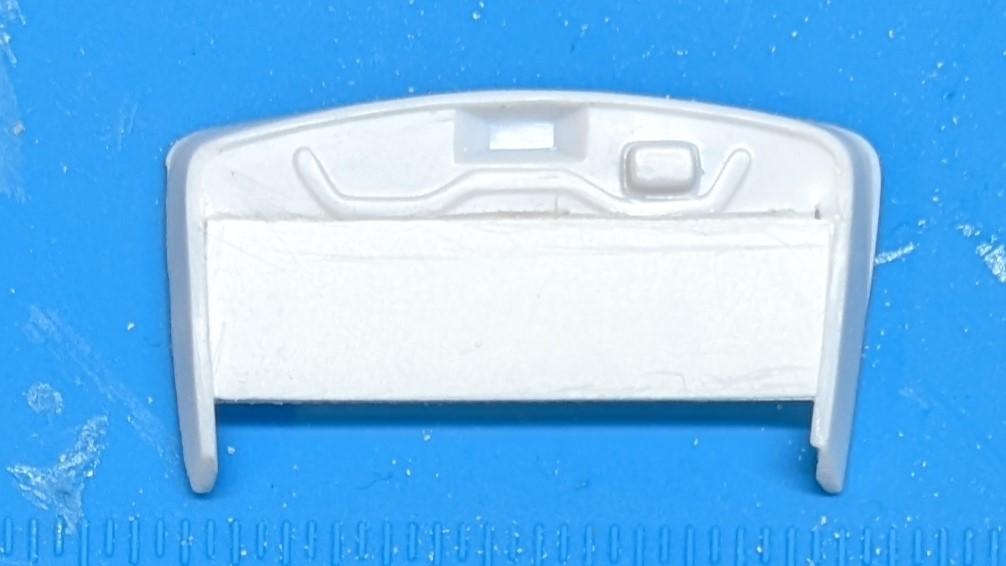
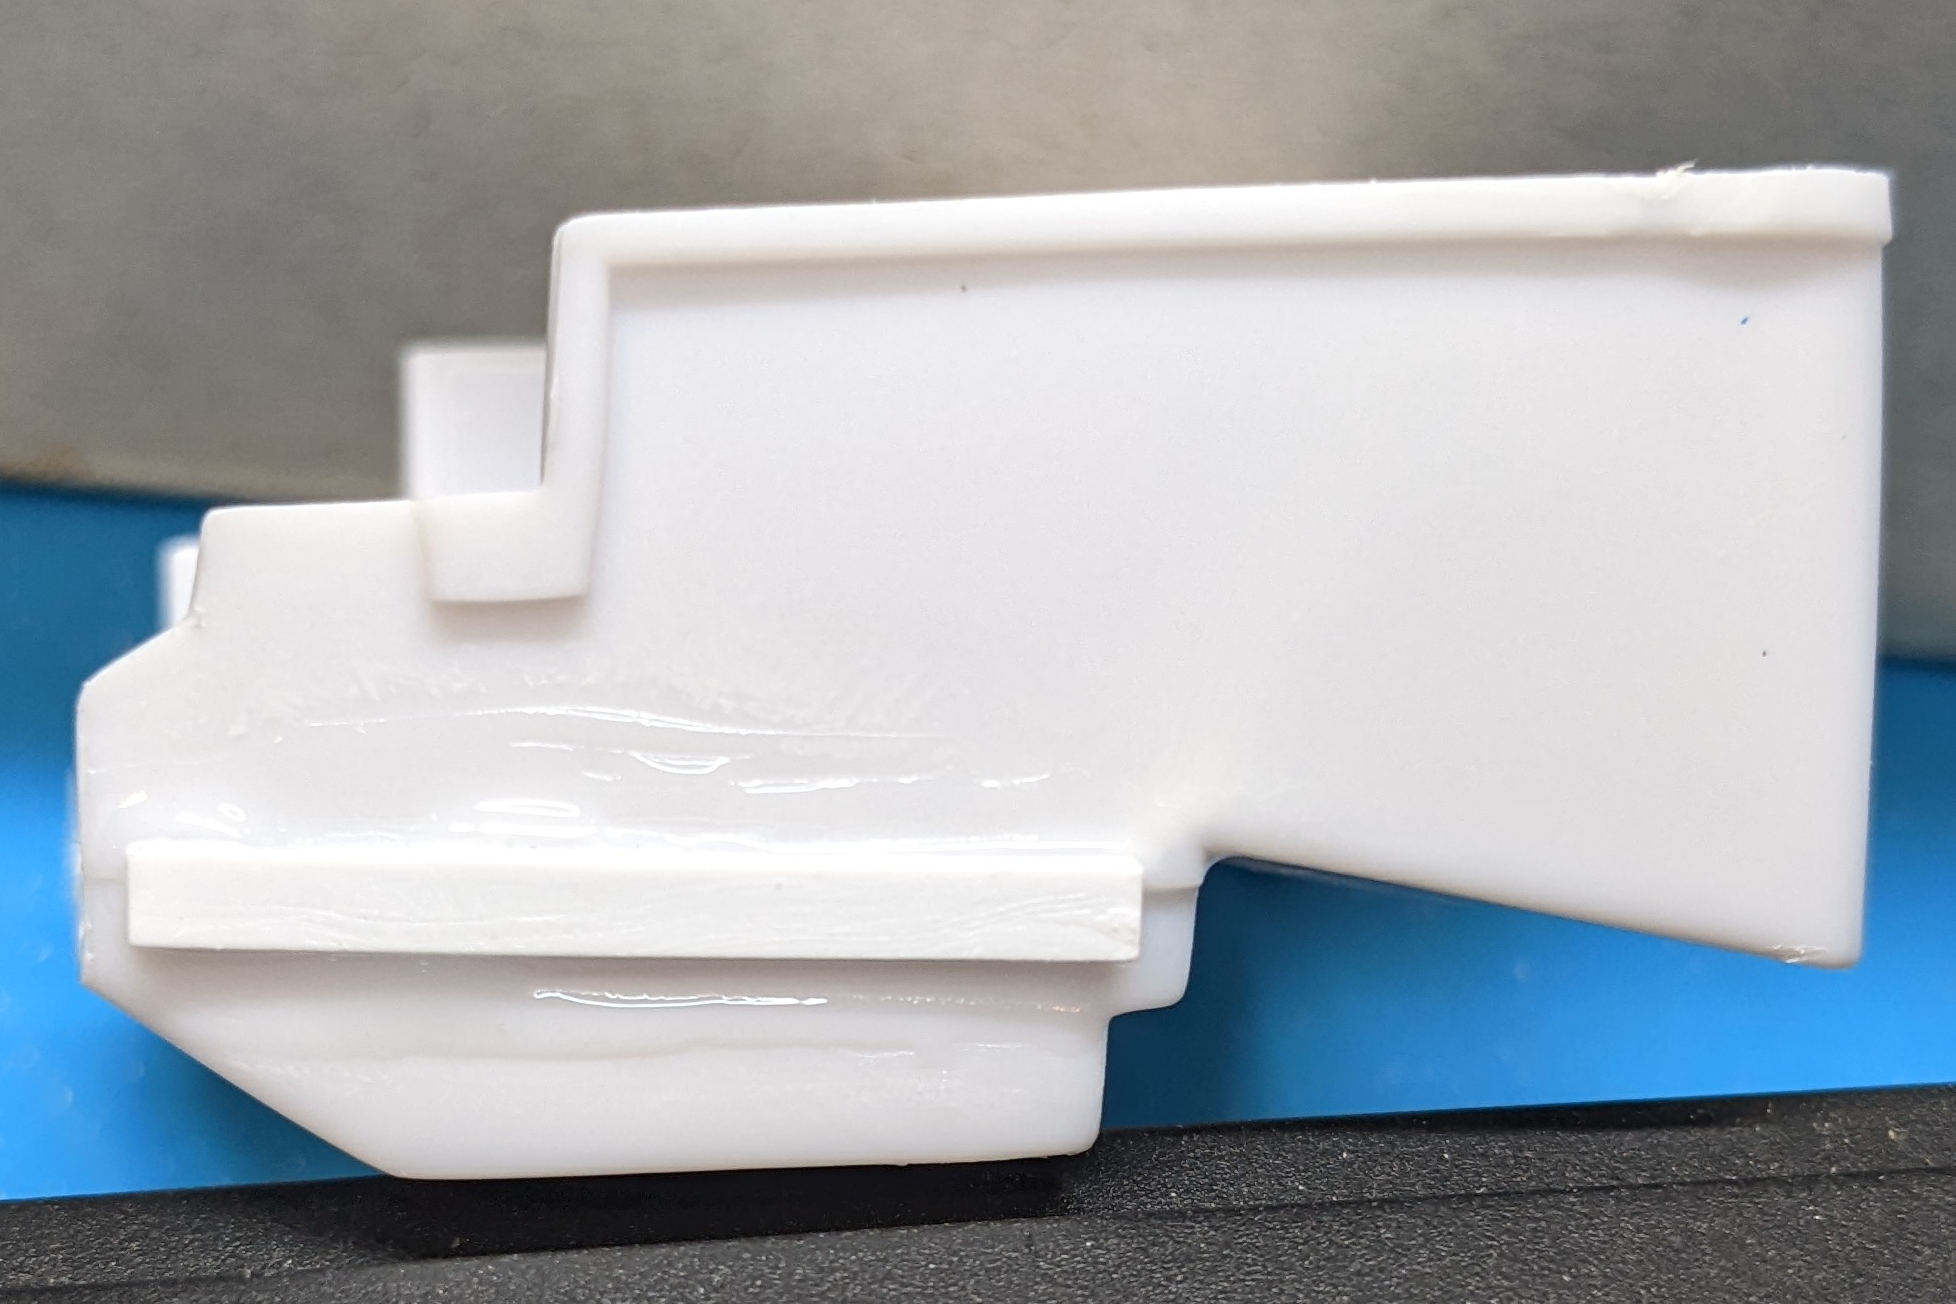
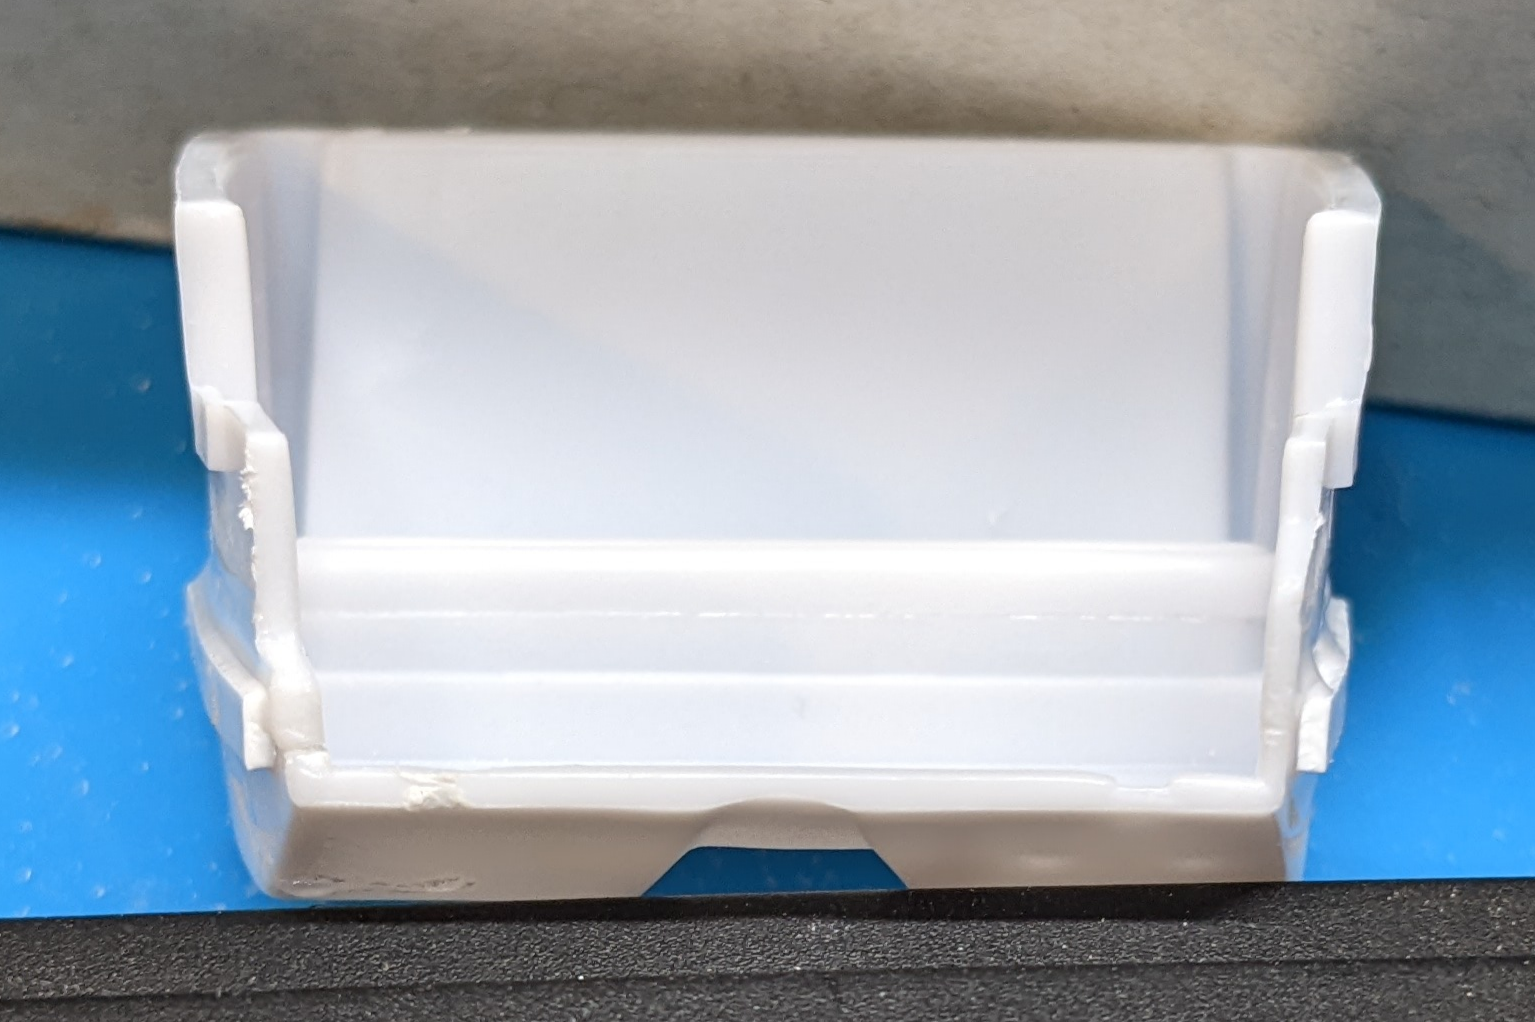
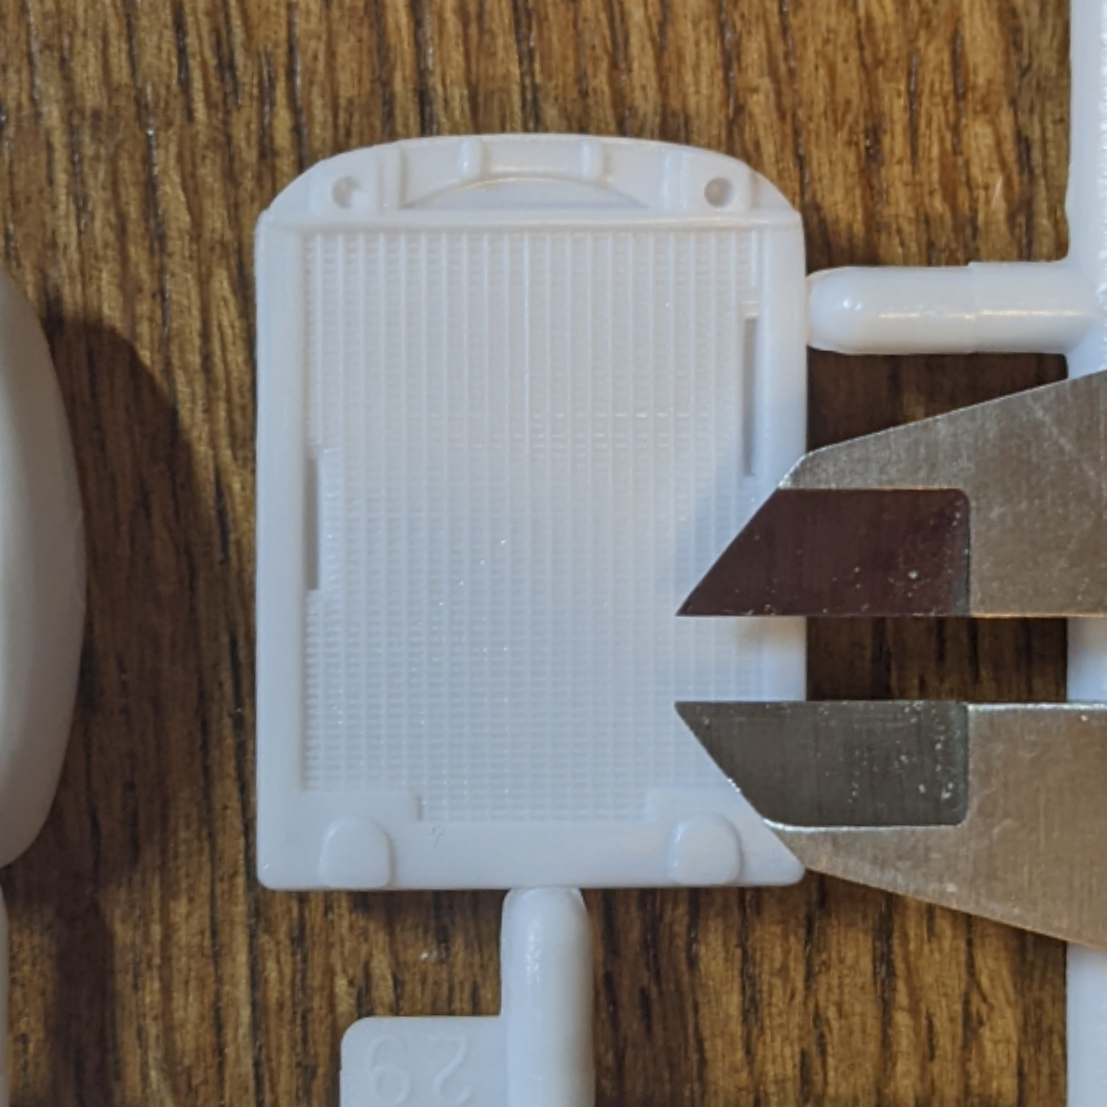
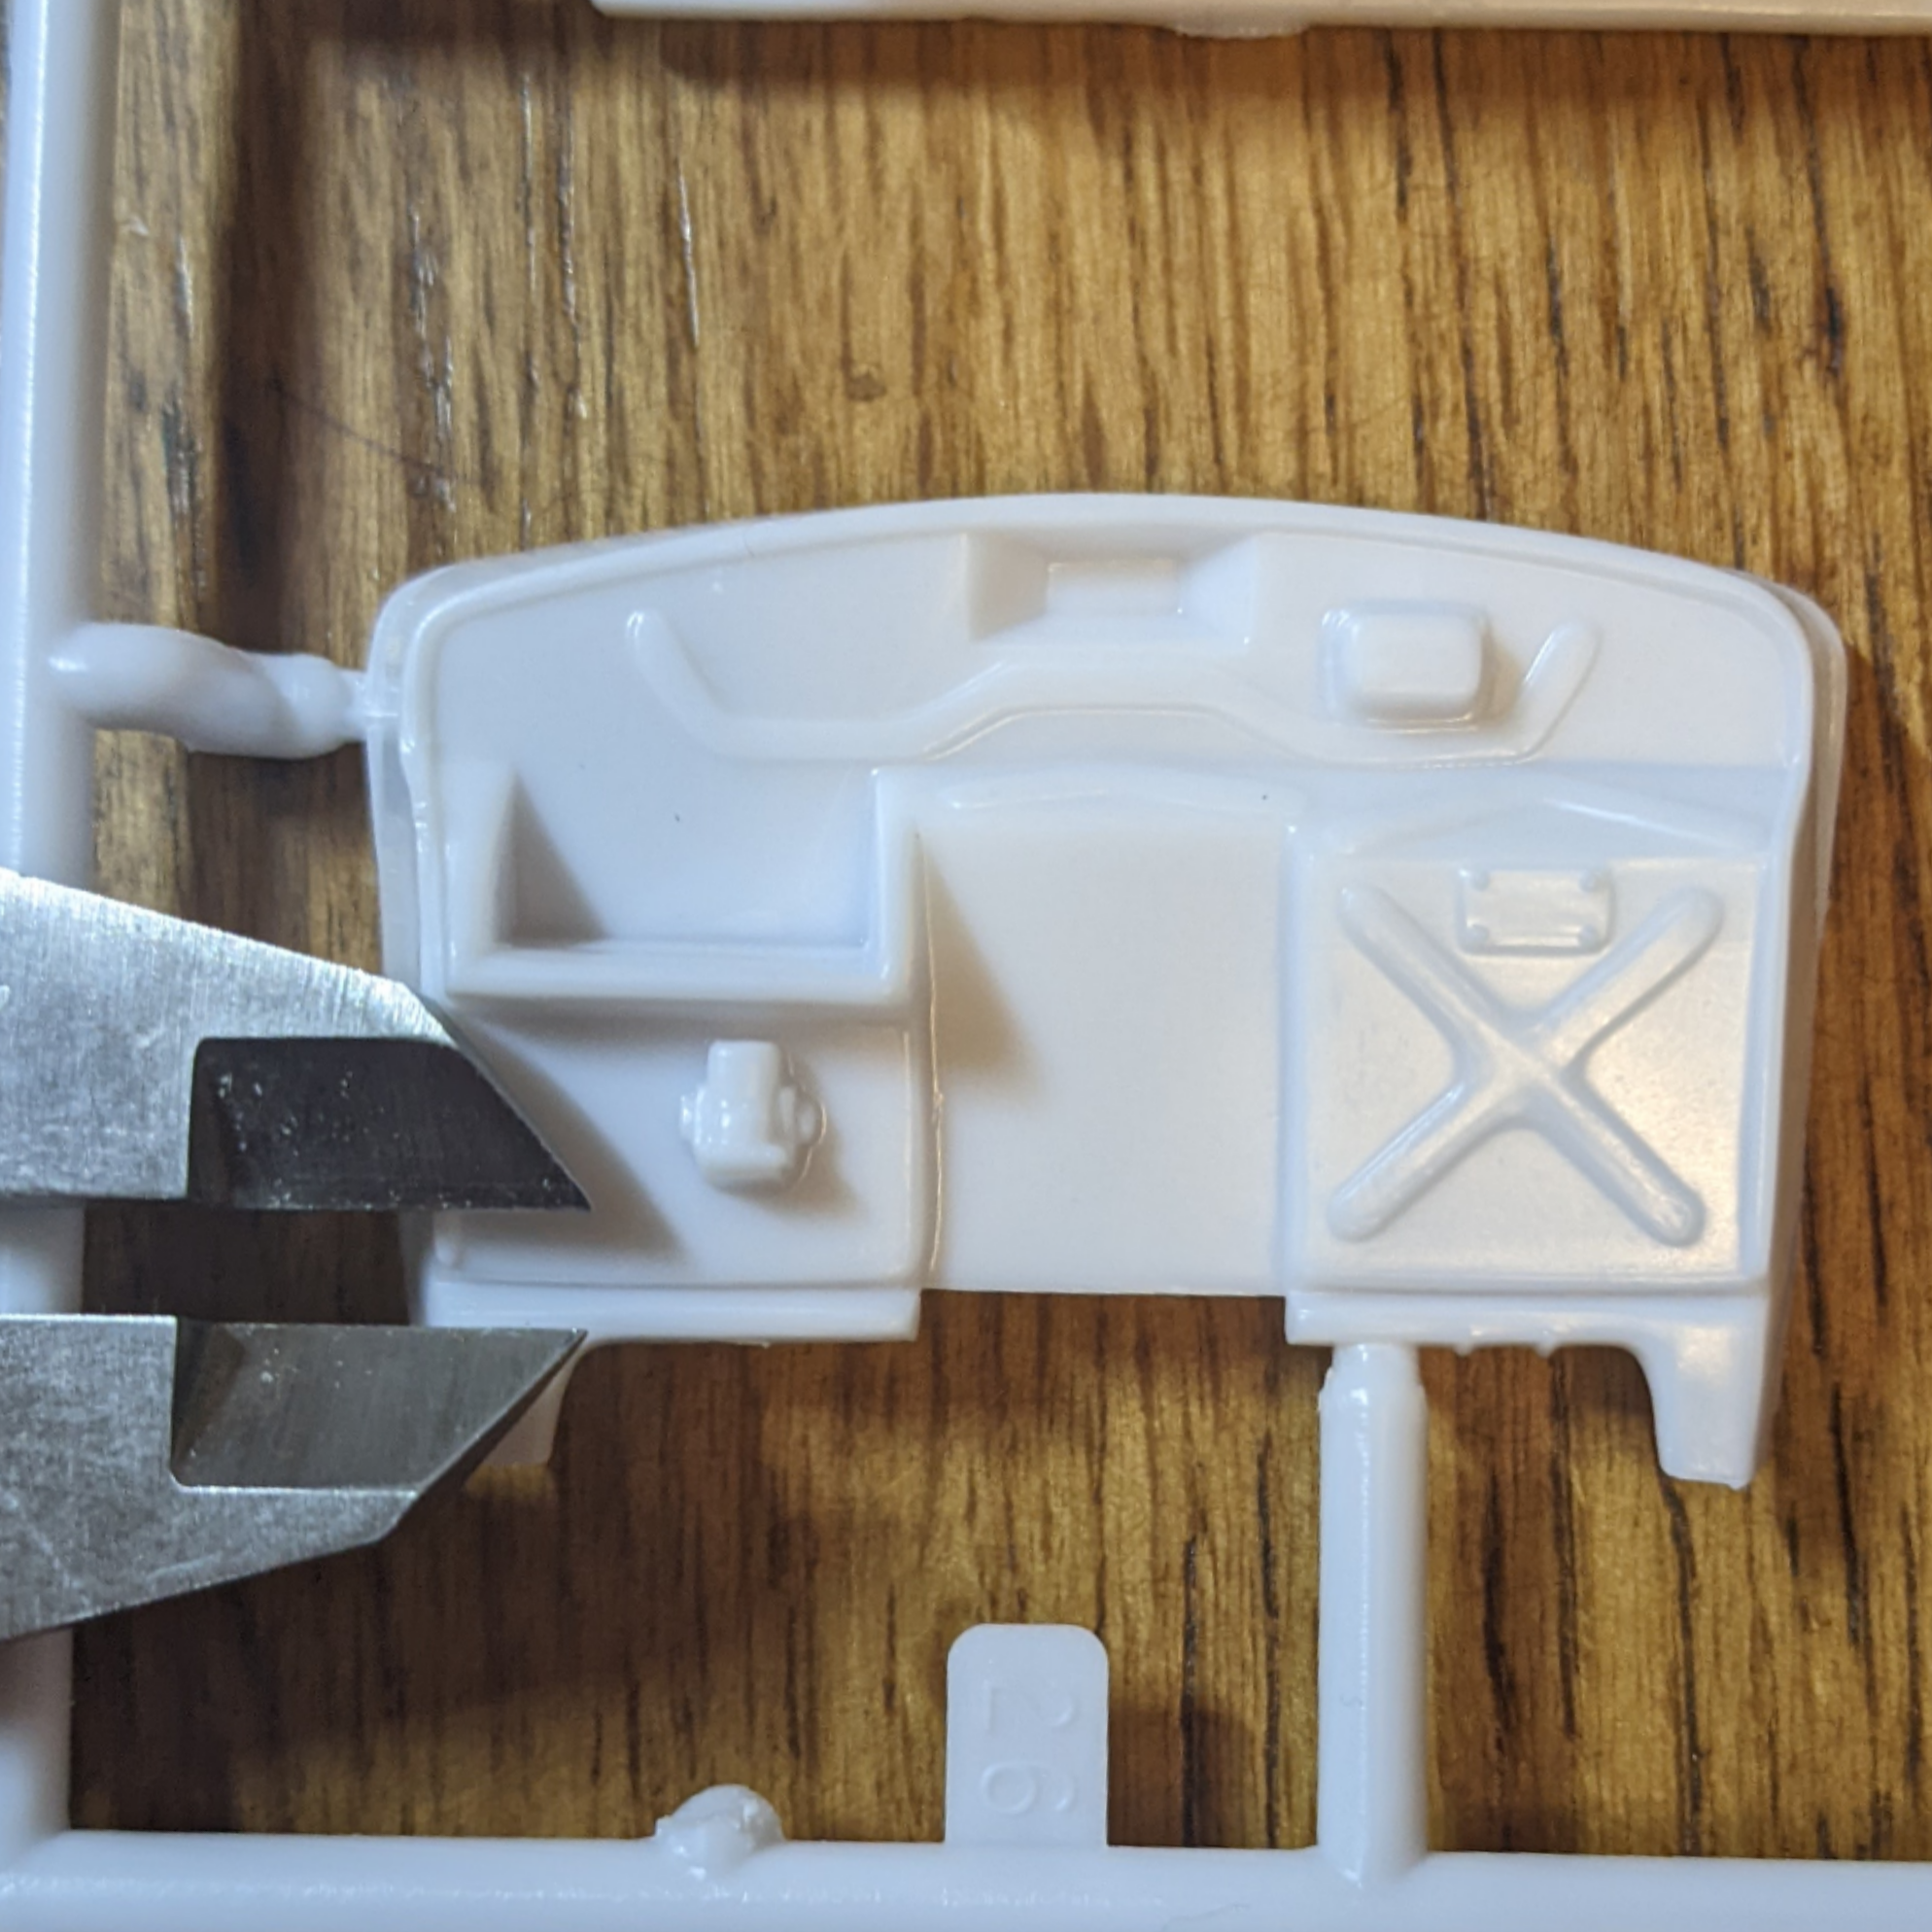
UPDATE: By using square tube stock I have on hand, I raised the transmission to where the motor is nearly level and declared "close enough". It didn't result in much more surgery so far: scratched a driveshaft tunnel extension (1st photo below - split on-hand tube stock and super-glued), and widened the cutout in the toe board (2nd below, parts jostled a bit out of position laterally). The rest of the tunnel cut was needed anyway. I'll have to relocate the brake & clutch pedals, and dive into the parts box for a new accelerator (original molded-in detail went with the wider toe board cut). Next step is to scratch the tunnel from styrene sheet. I'll then mock the axle & driveshaft to be sure it all aligns, and mod as needed. I'll perhaps have to notch the bottom of the cab back, as well. Finally below is the WIP of the modified firewall. I used a razor saw, X-acto knife, and file to cut away the existing part, and added a sheet styrene flat panel. Not shown is I reinforced the flat panel with a styrene strip across the top, cemented the panel with Bondine on 3 sides, and then added super glue over all that for strength. I'll need to cut away some in the lower center, to clear the bell housing, then putty and sand the joints. I'm thinking what to do with the battery, since I want to keep the firewall clean. I don't think I can "fake it" by saying it's unseen under the seat (wouldn't fit). I doubt I can fit it under the pickup box, since I'm not raising its floor. One idea is to add a utility box inside the front of the pickup box, with a partition for the battery and some tools, and an opening lid ... more work than I want to do. More to come ...
-
Has anyone channeled a Revel '37 Ford pickup?
BadJuju replied to BadJuju's topic in Model Building Questions and Answers
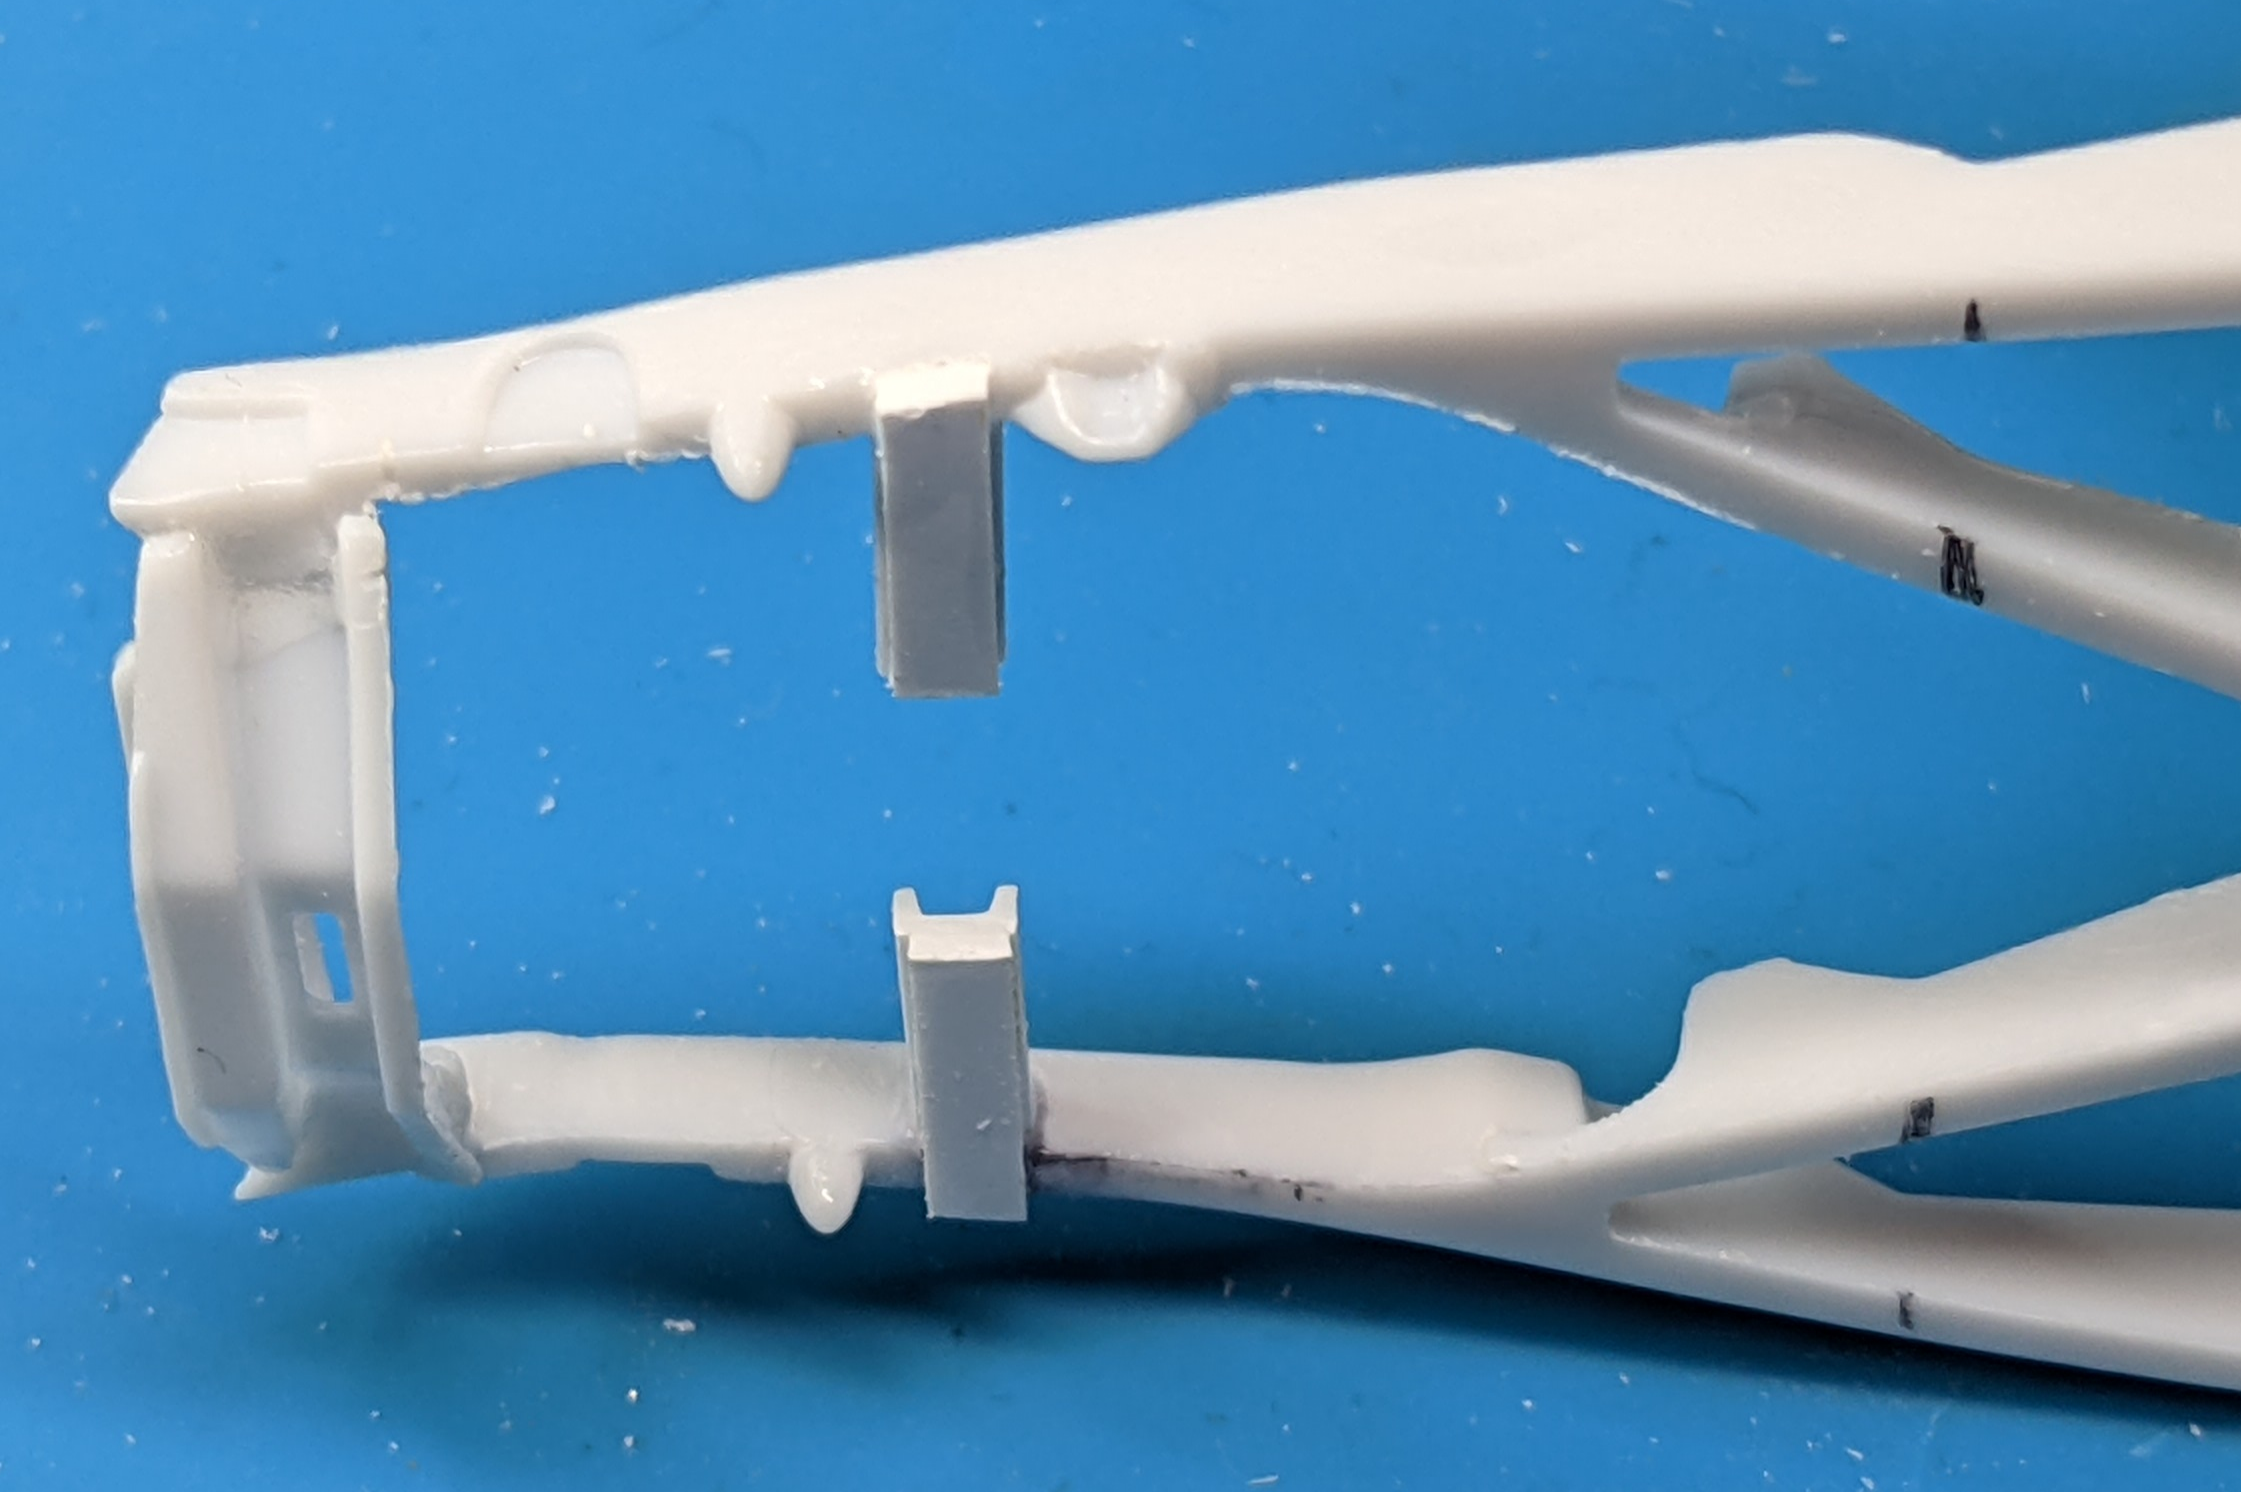
UPDATE: I scratched the motor mounts from styrene u-channel, reinforcing the joints with styrene strip, all cemented with Bondine: Then I did some clean-up on the frame rails. There are one or two sink holes that need to be filled yet. The motor mounts have it located where I can fit some over-frame headers. I'm in the process of filling the header locator holes, since the ones I'm using would leave those exposed. If I leave things as they are, the motor will sit a bit nose-high, which minimizes how big the scratch floor tunnel will be. What do folks think: should I raise the transmission so the motor is level, or leave it as it is? Please share your thoughts. I also cut away part of the lower floor to clear the trans. I did extra here in case I decide to lift the trans to level out the motor. I see I also need to reshape the port side taper for symmetry. Next, I sectioned the interior 3+ mm. This is my first time ever doing such, and there is a seam you can see inside that I might have a devil of a time trying to remove. I won't let perfection be the enemy of good enough. It will depend on how visible the seam is once I test fit everything after the roof chop. I reinforced the joints with styrene strip, all joints being first cemented with Bondine, then adding a layer of super glue for more strength, since I still have the tunnel surgery to do. Then I removed the 3+ mm from the cab rear. Test fitting shows the cab is a little lower than I wanted (the photo angle here is off; see how the body is actually below the frame rail on the far side). Oh well! Another note regarding the front axle location: if I flip the axle/spring assembly around, with the axle forward, I get 8mm more wheelbase, for a total lengthening of 15mm. I'll mock that up and decide which I like better. I'll be showing the mock-up in the next update. In either case, I need new radius rods, which will have rear mounts on the outside of the frame rails, rather than at the transmission cross member. There's no need to Z the frame for lowering, since the reissue hit has a marvelous optional drop axle. Thanks for looking and for your thoughts, especially regarding the motor angle (nose-high or level). Stay tuned...
-
Has anyone channeled a Revel '37 Ford pickup?
BadJuju replied to BadJuju's topic in Model Building Questions and Answers
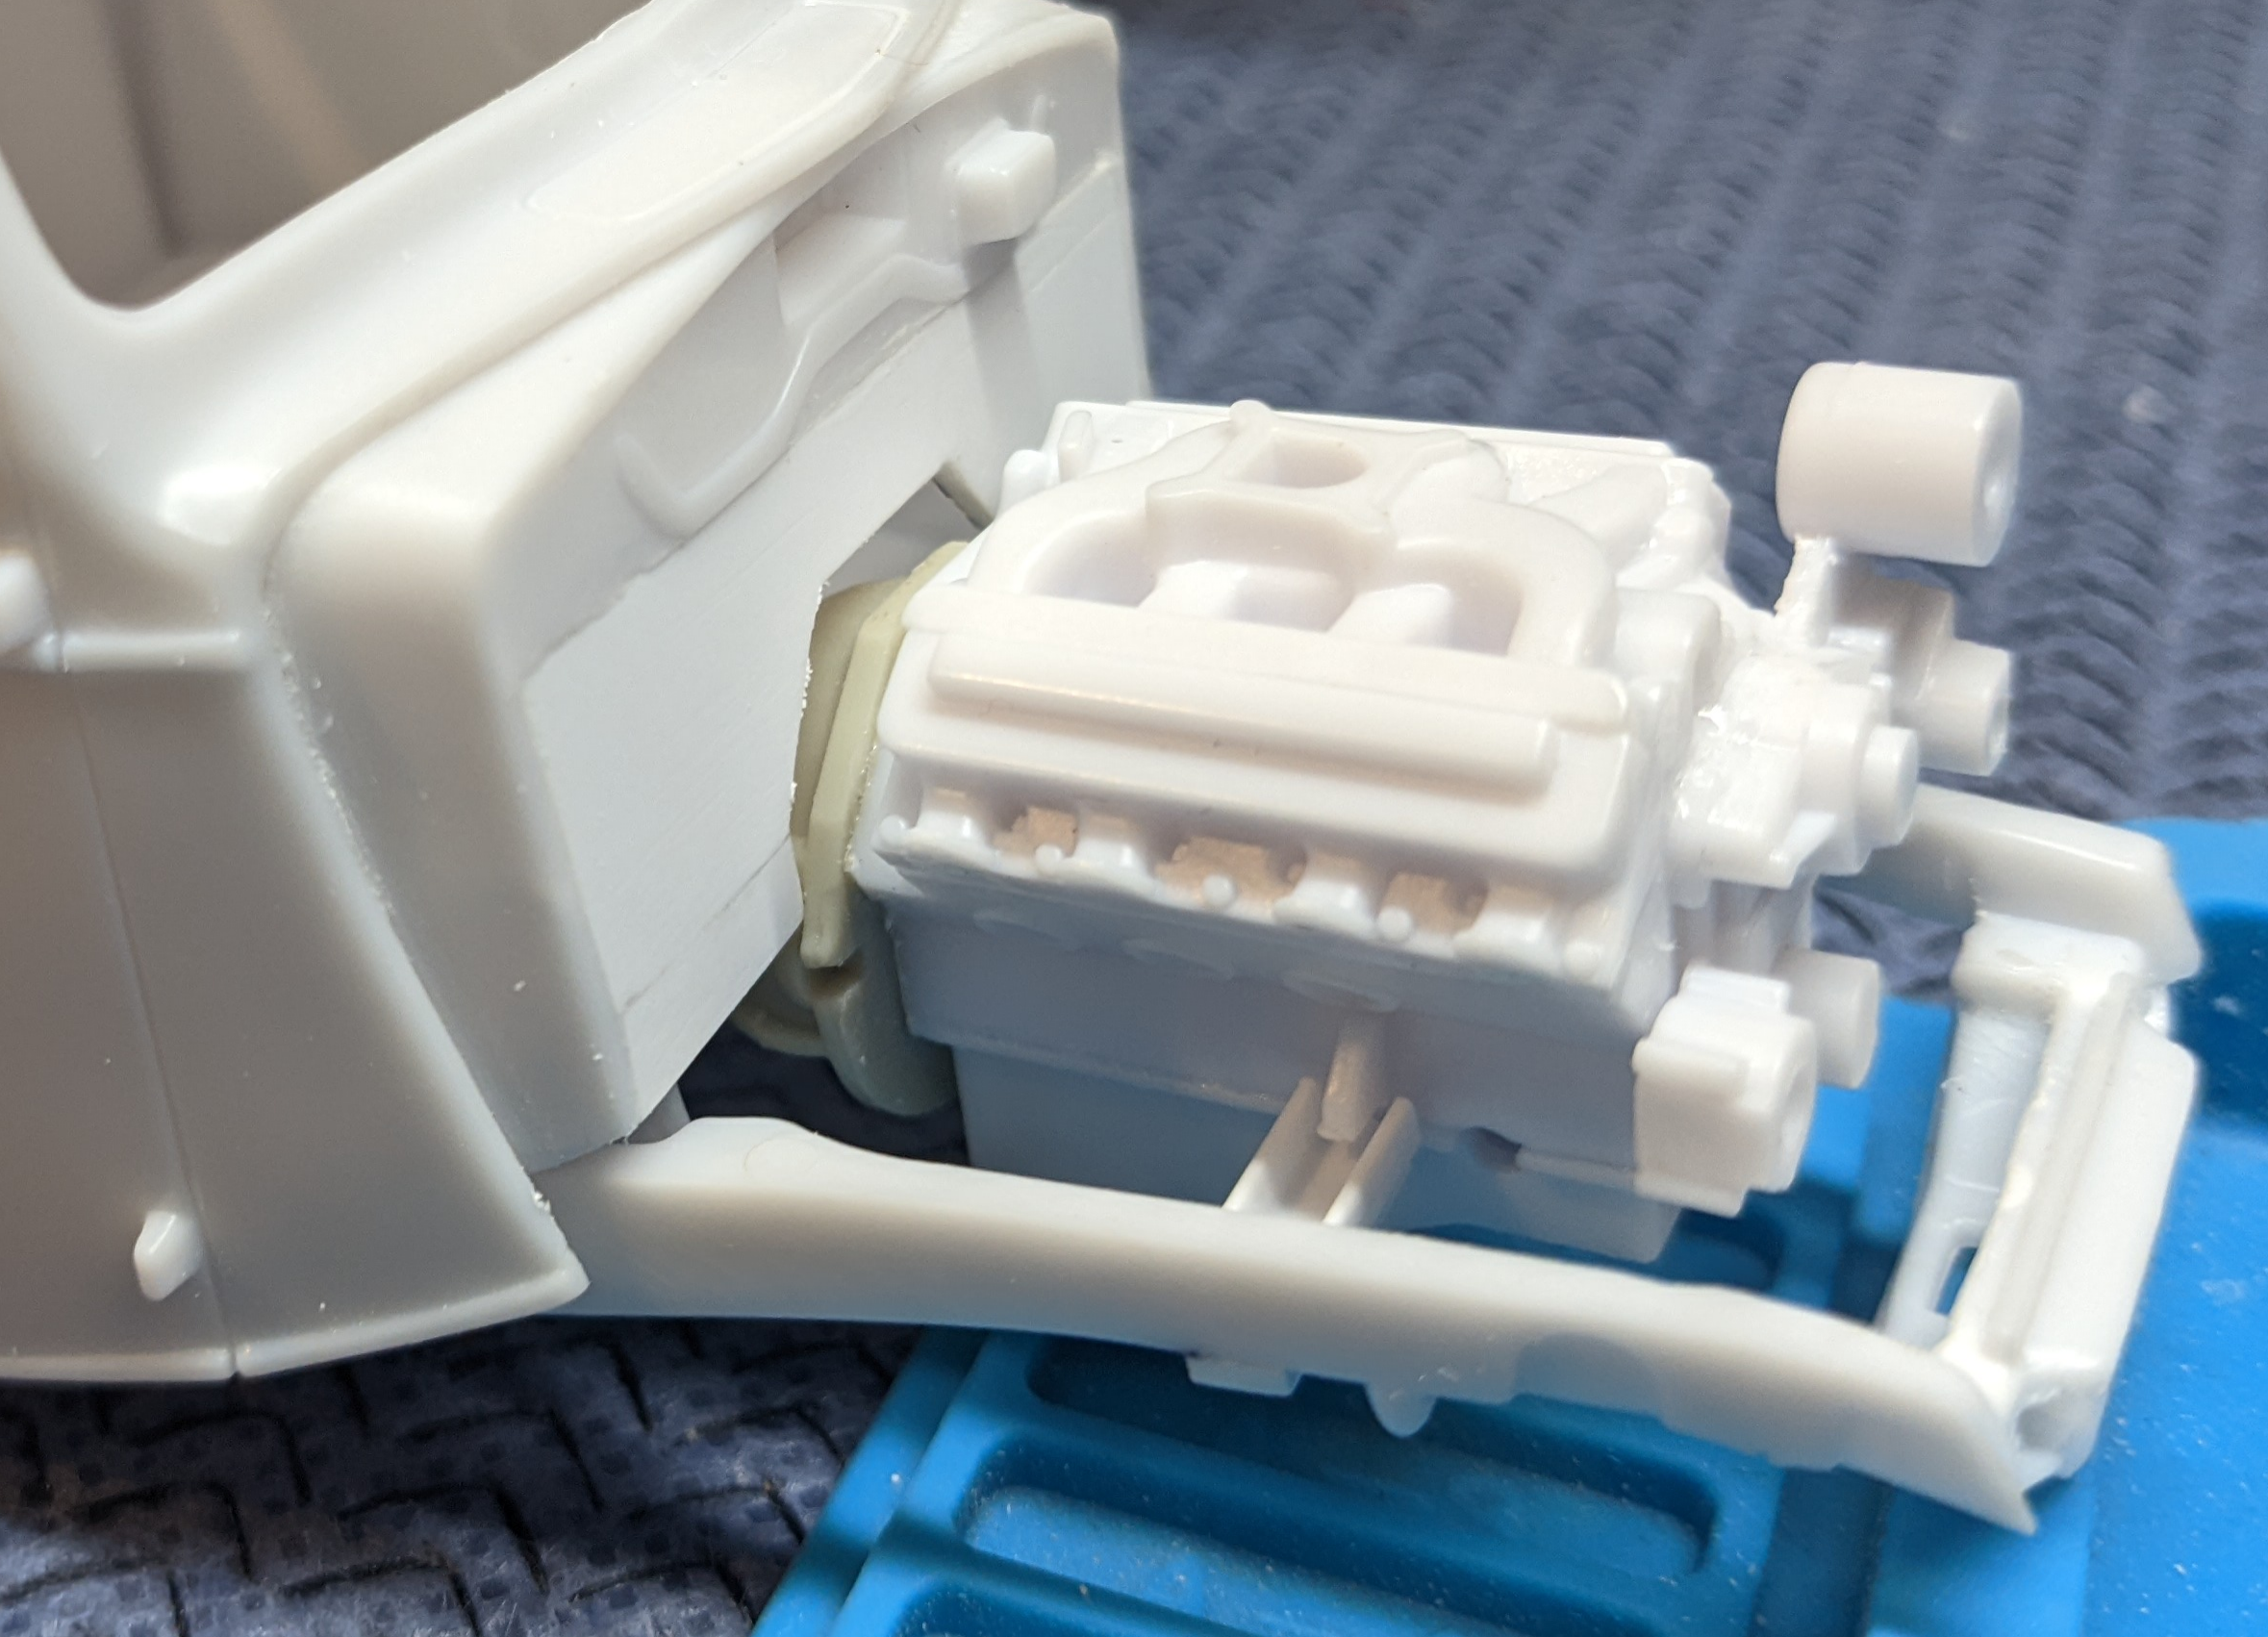
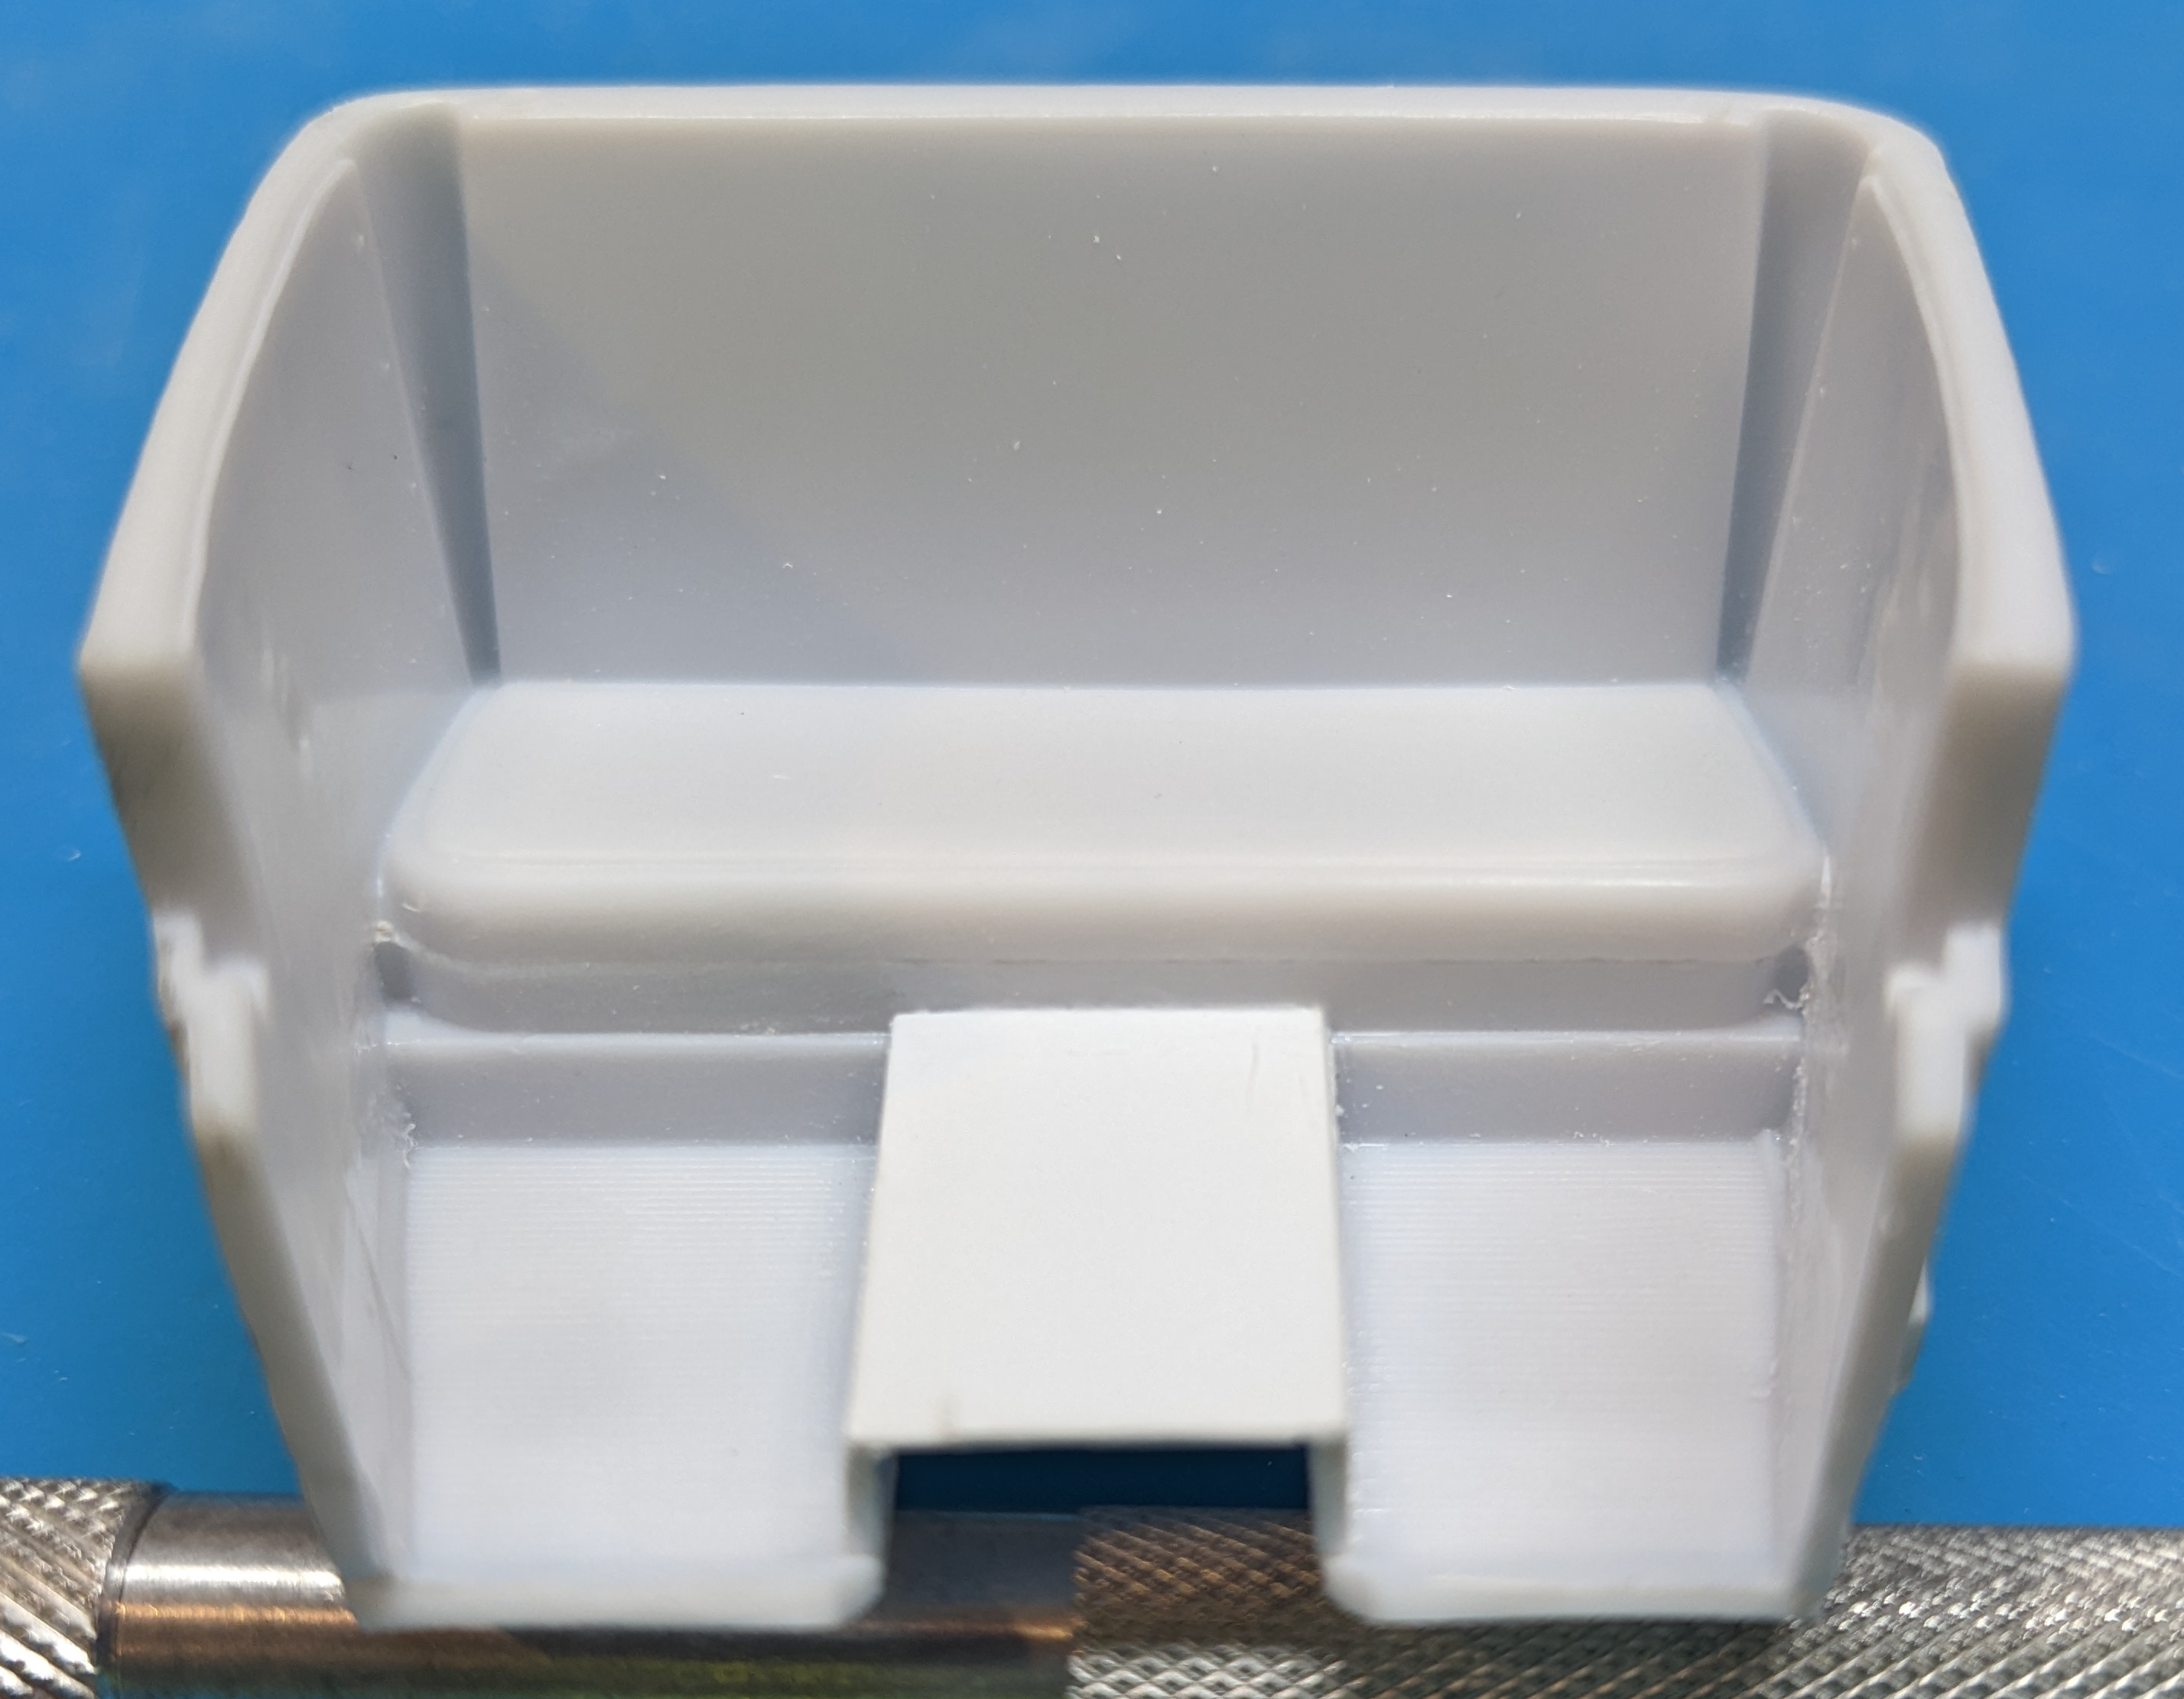
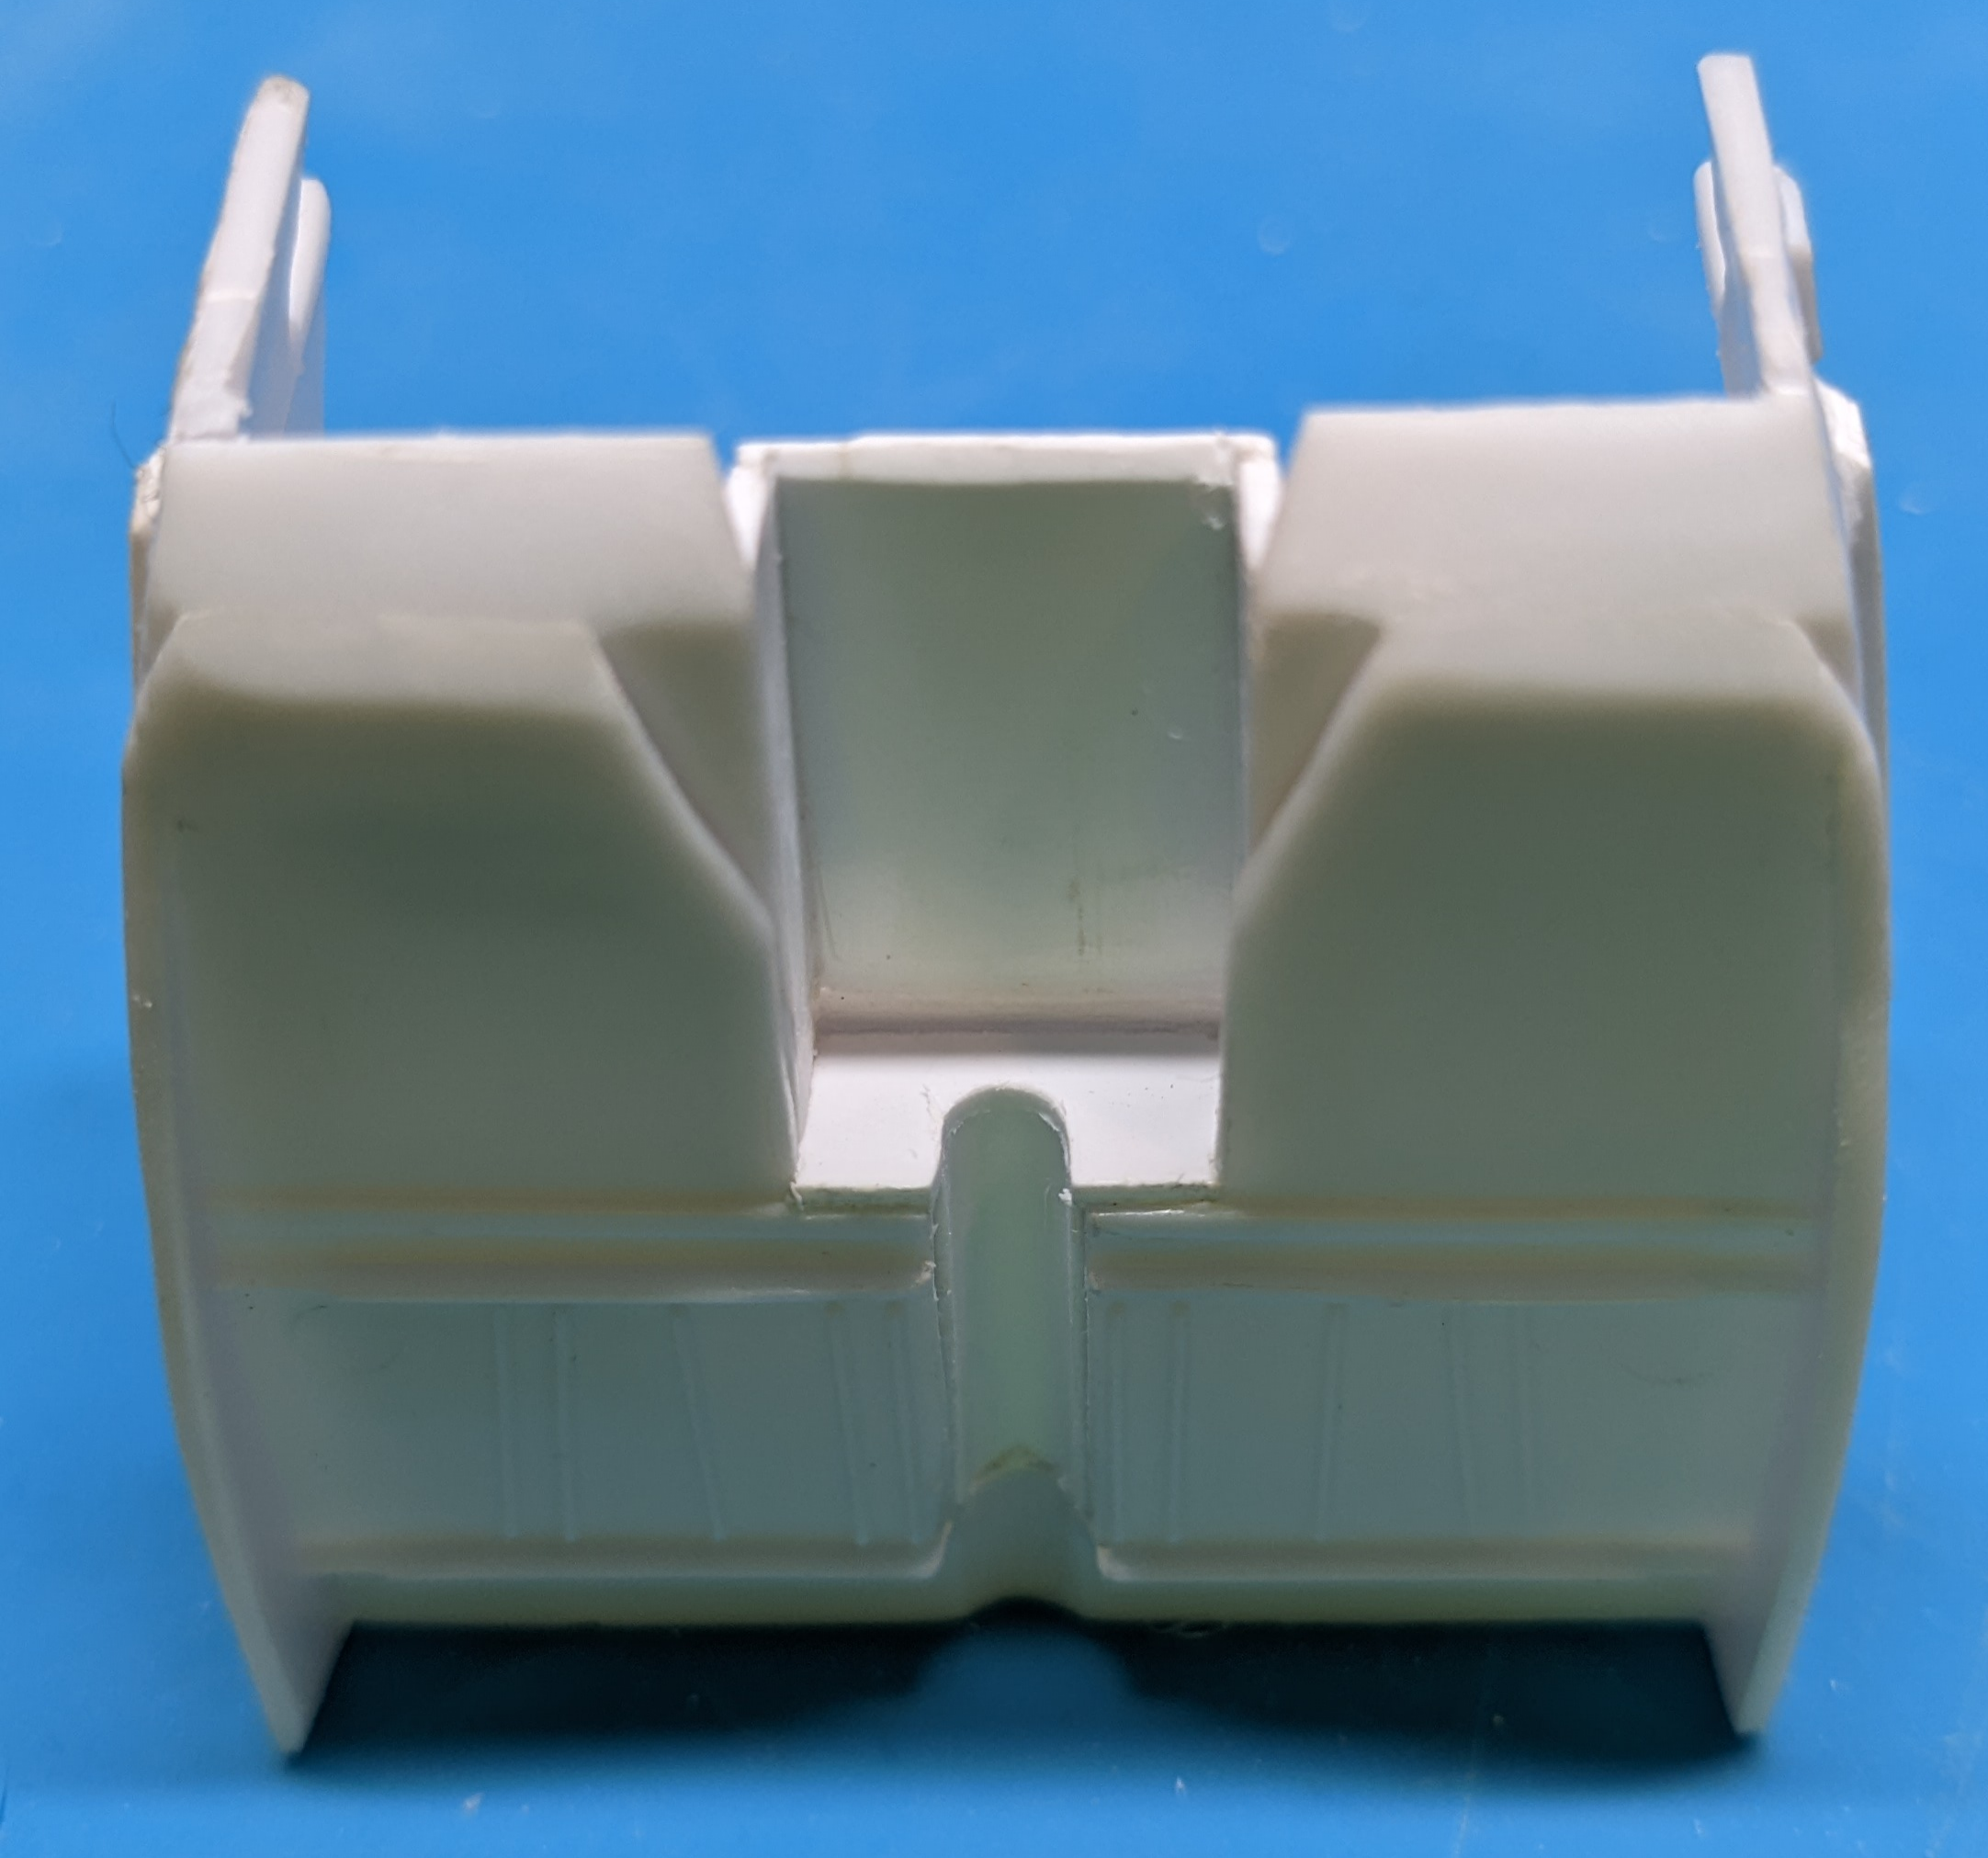
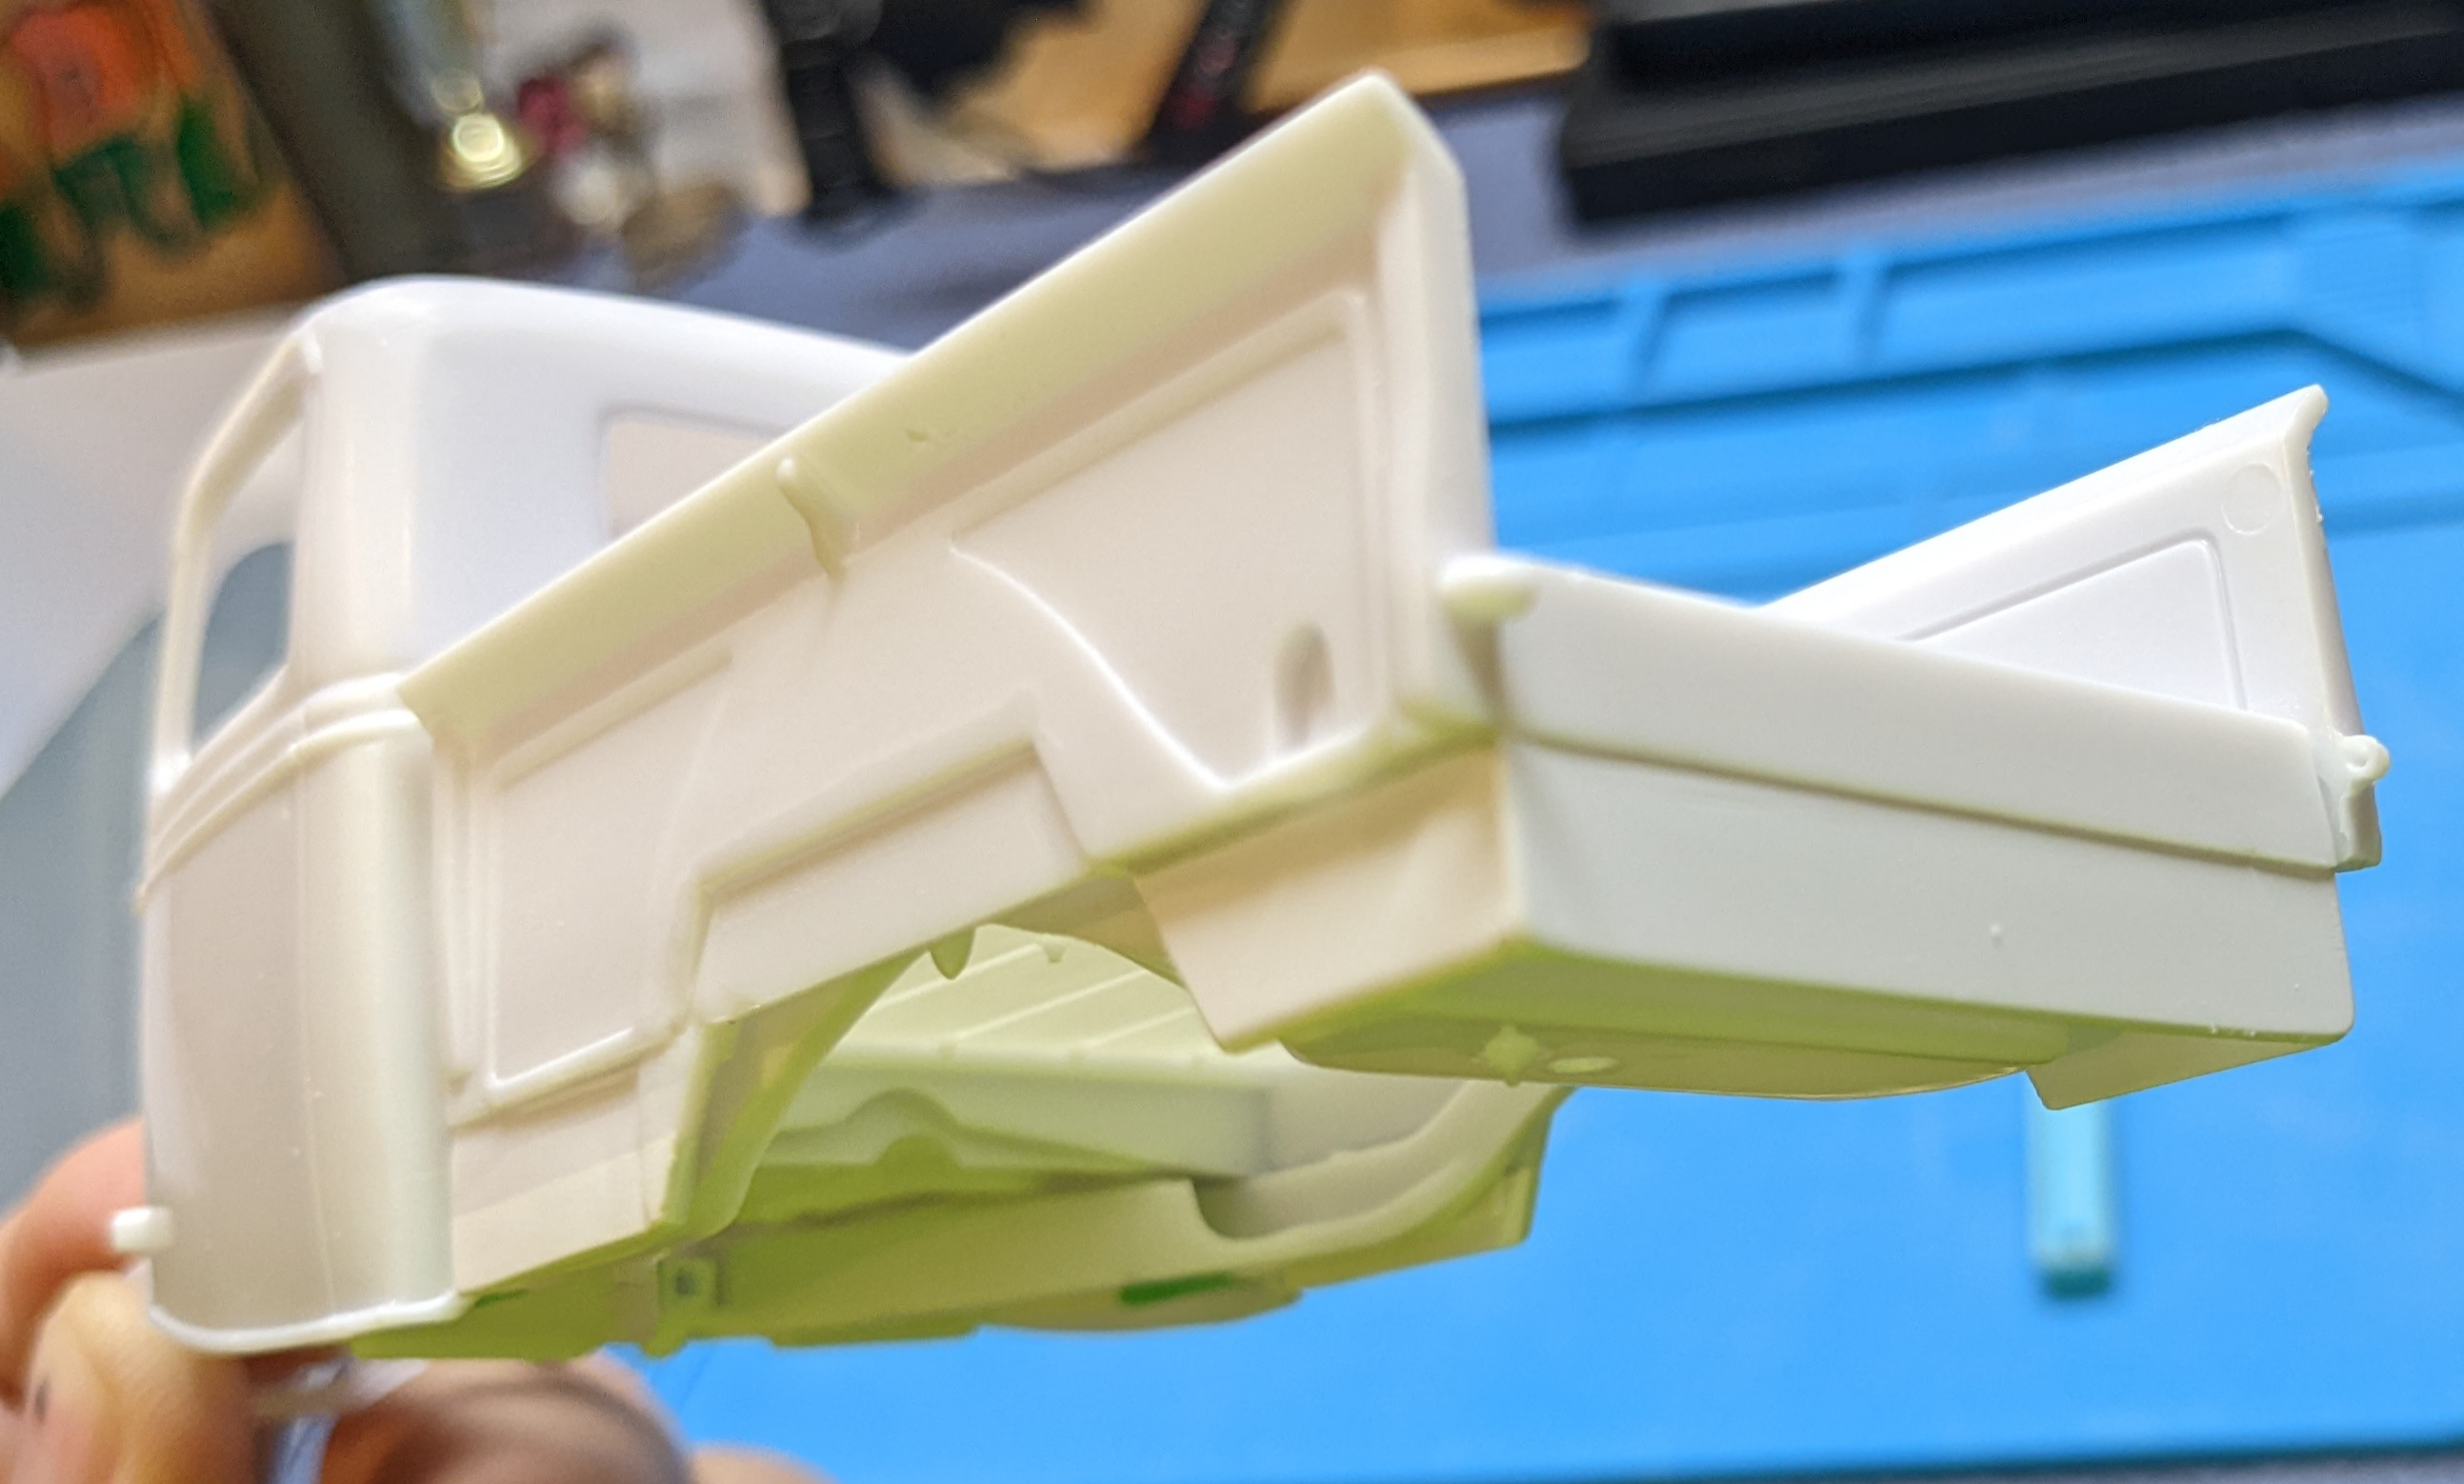
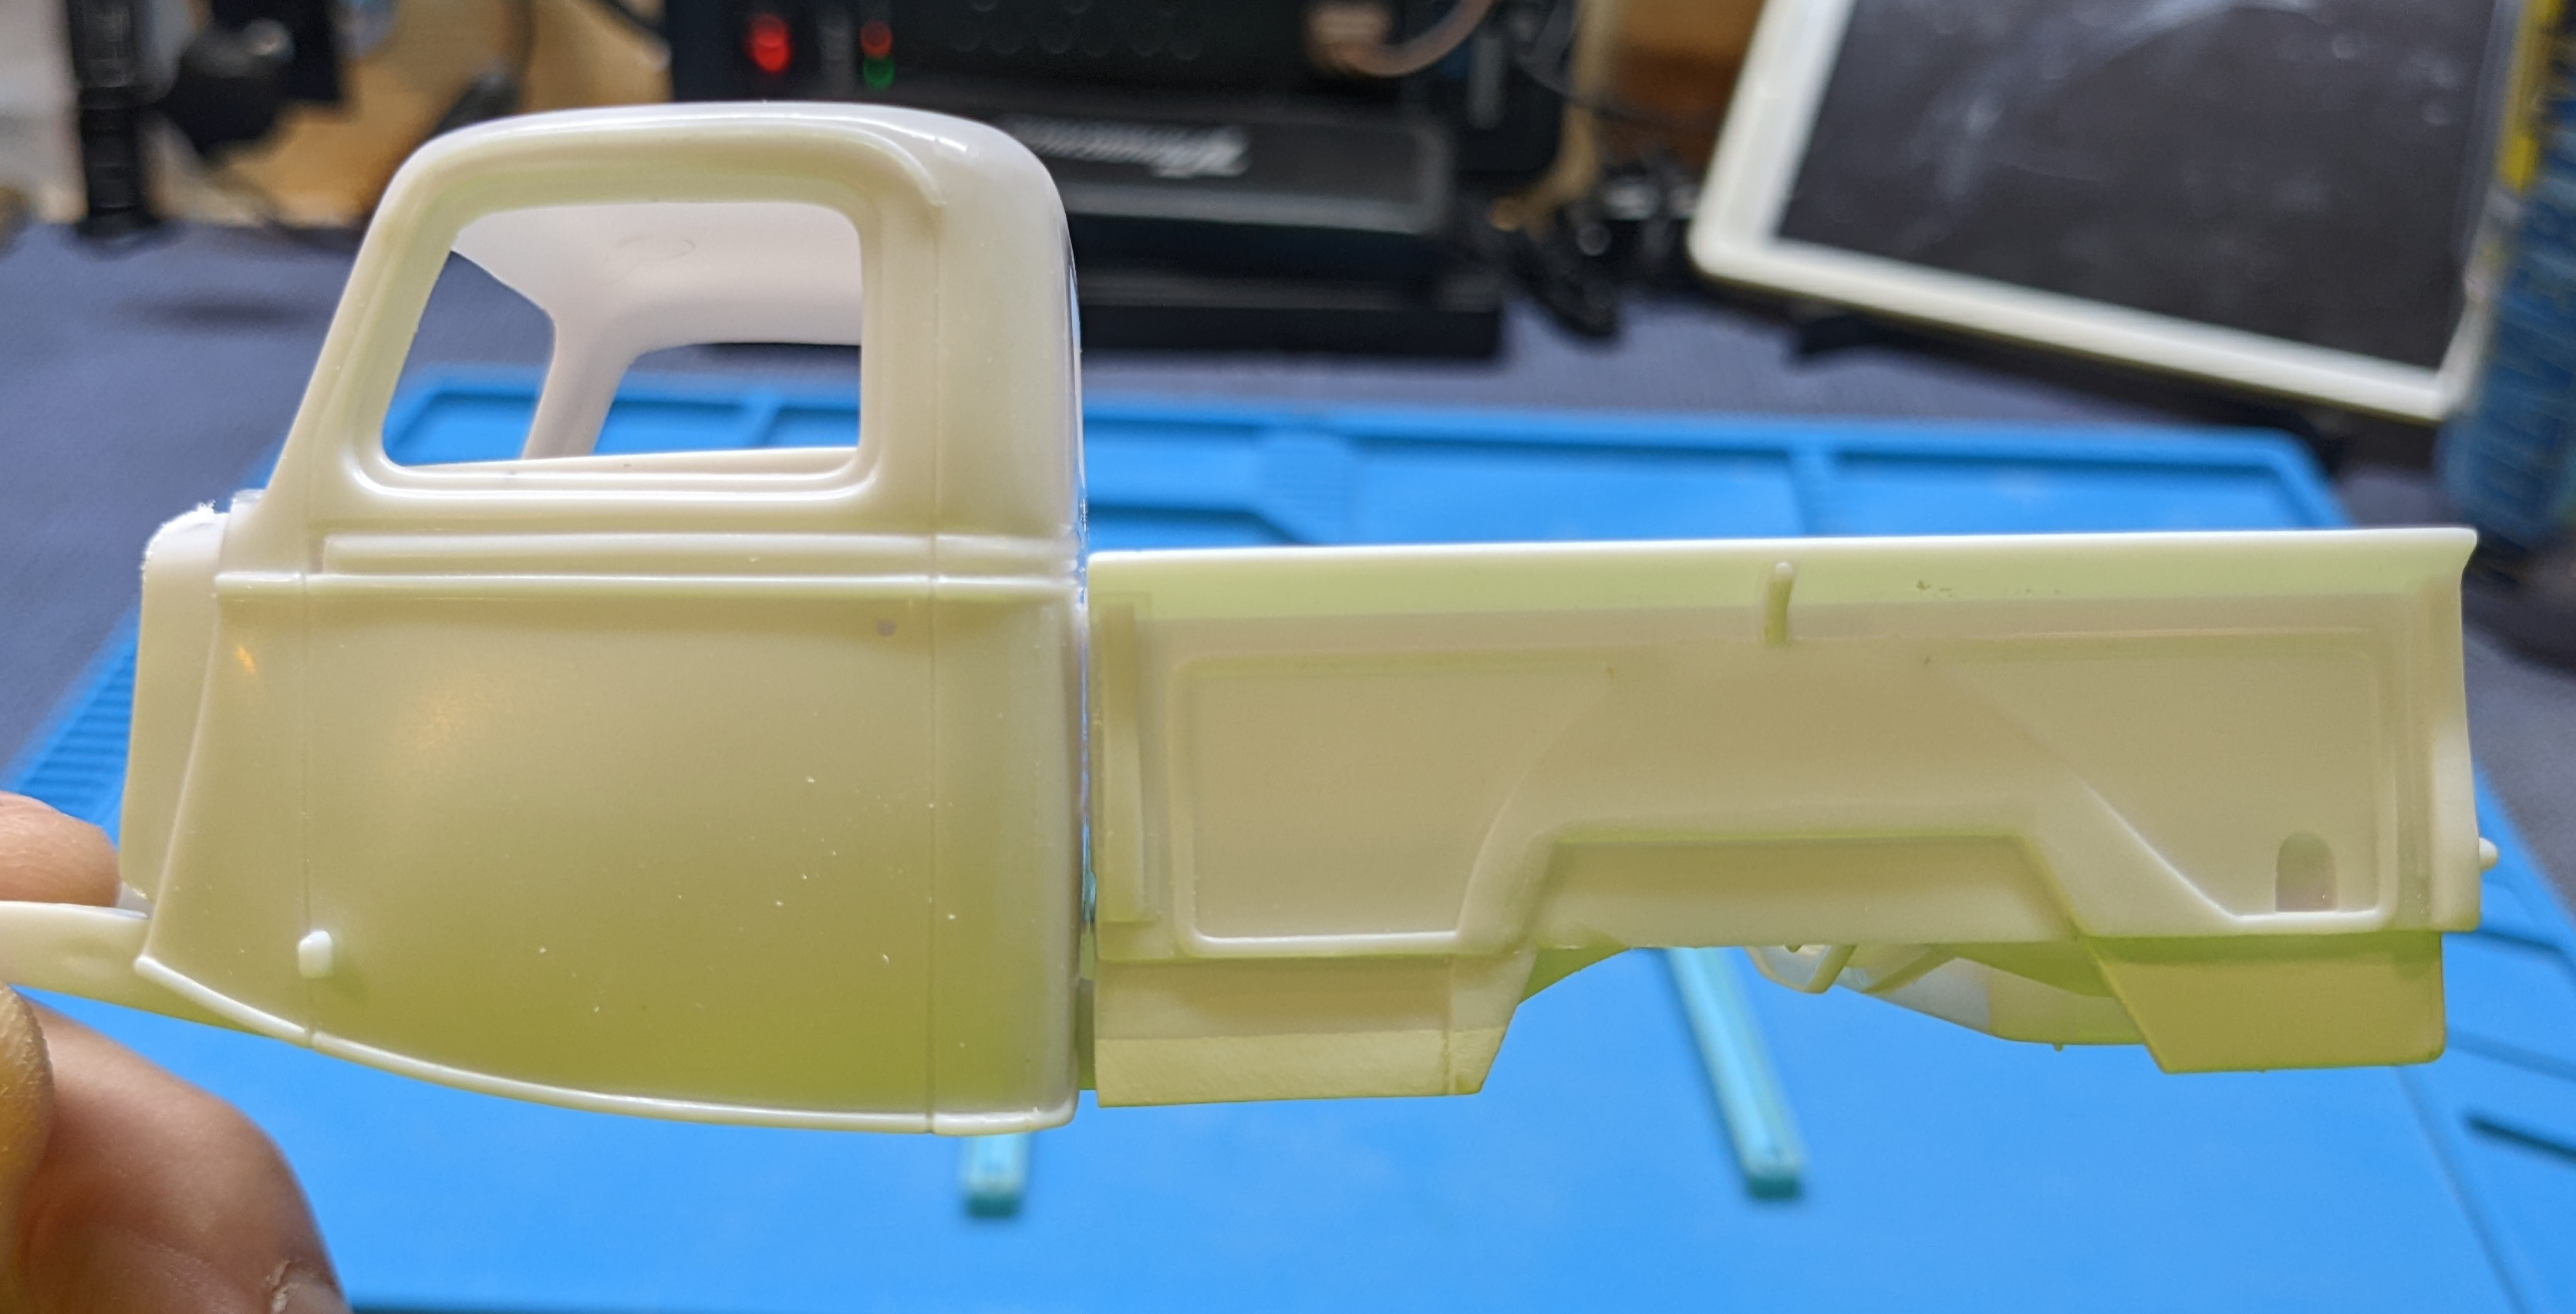
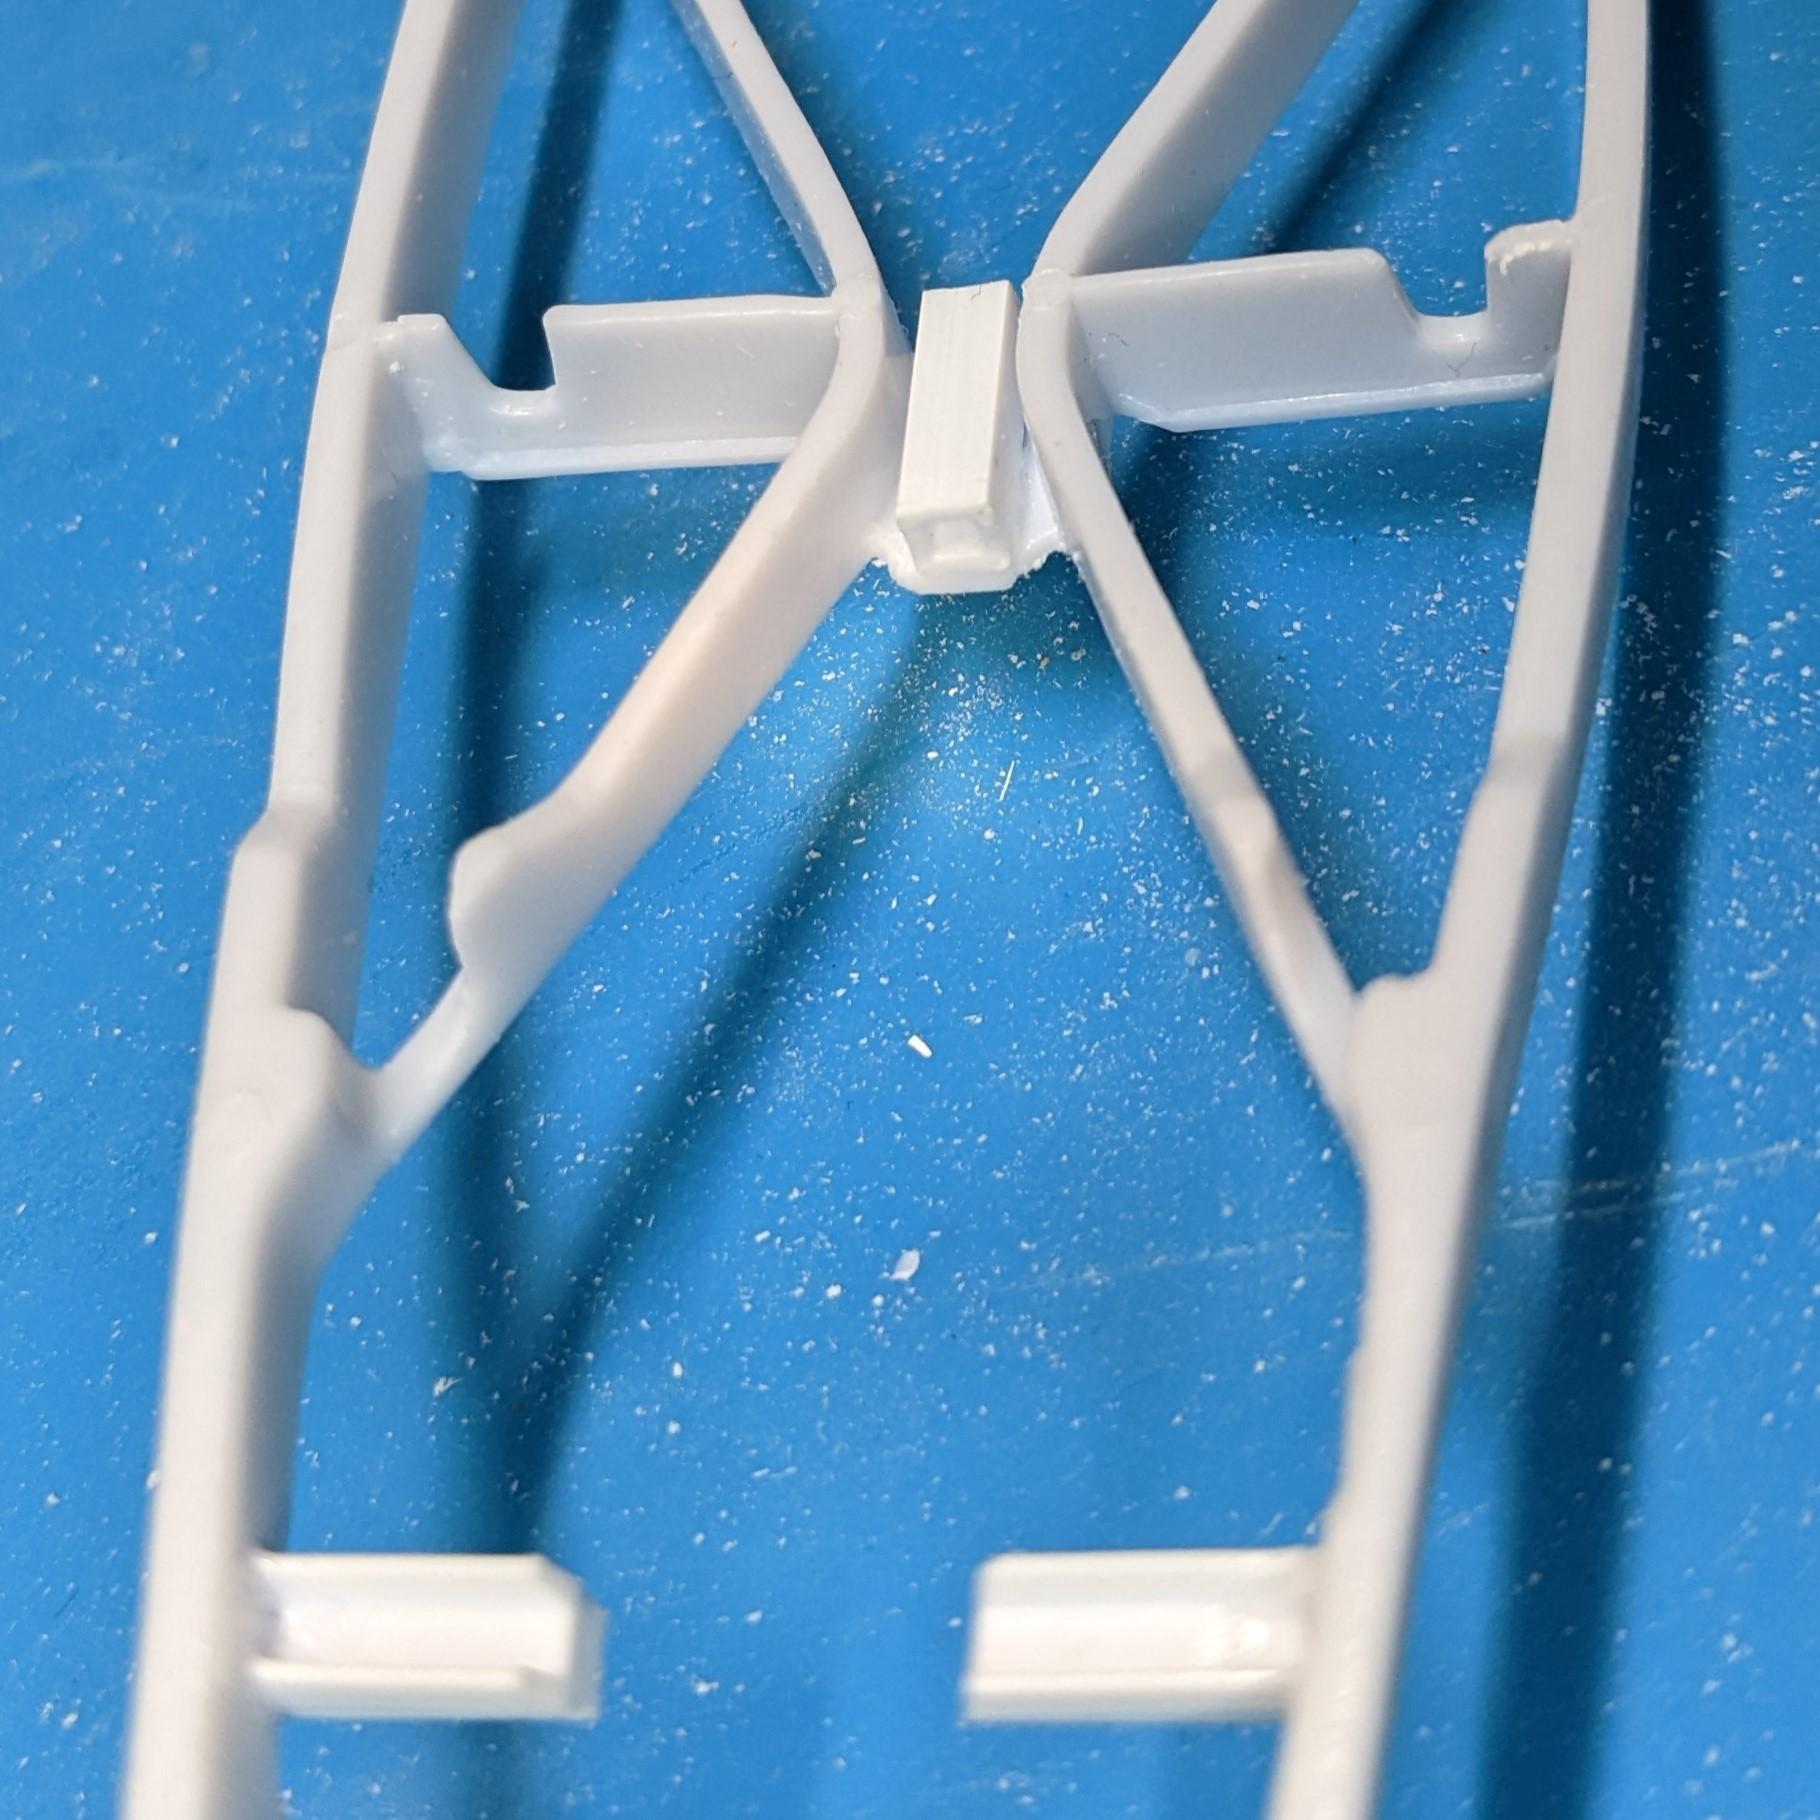
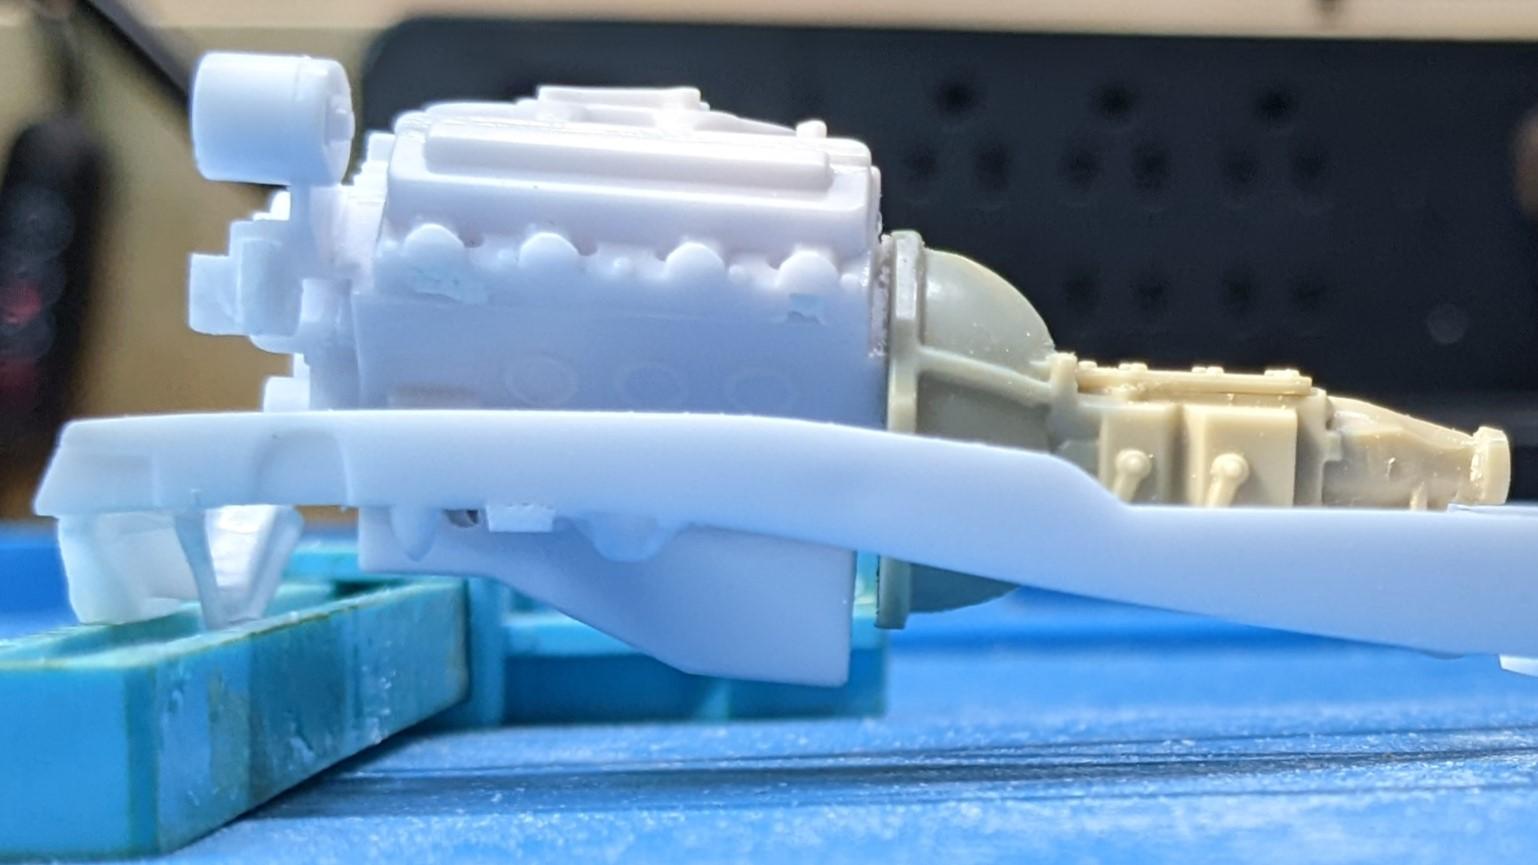
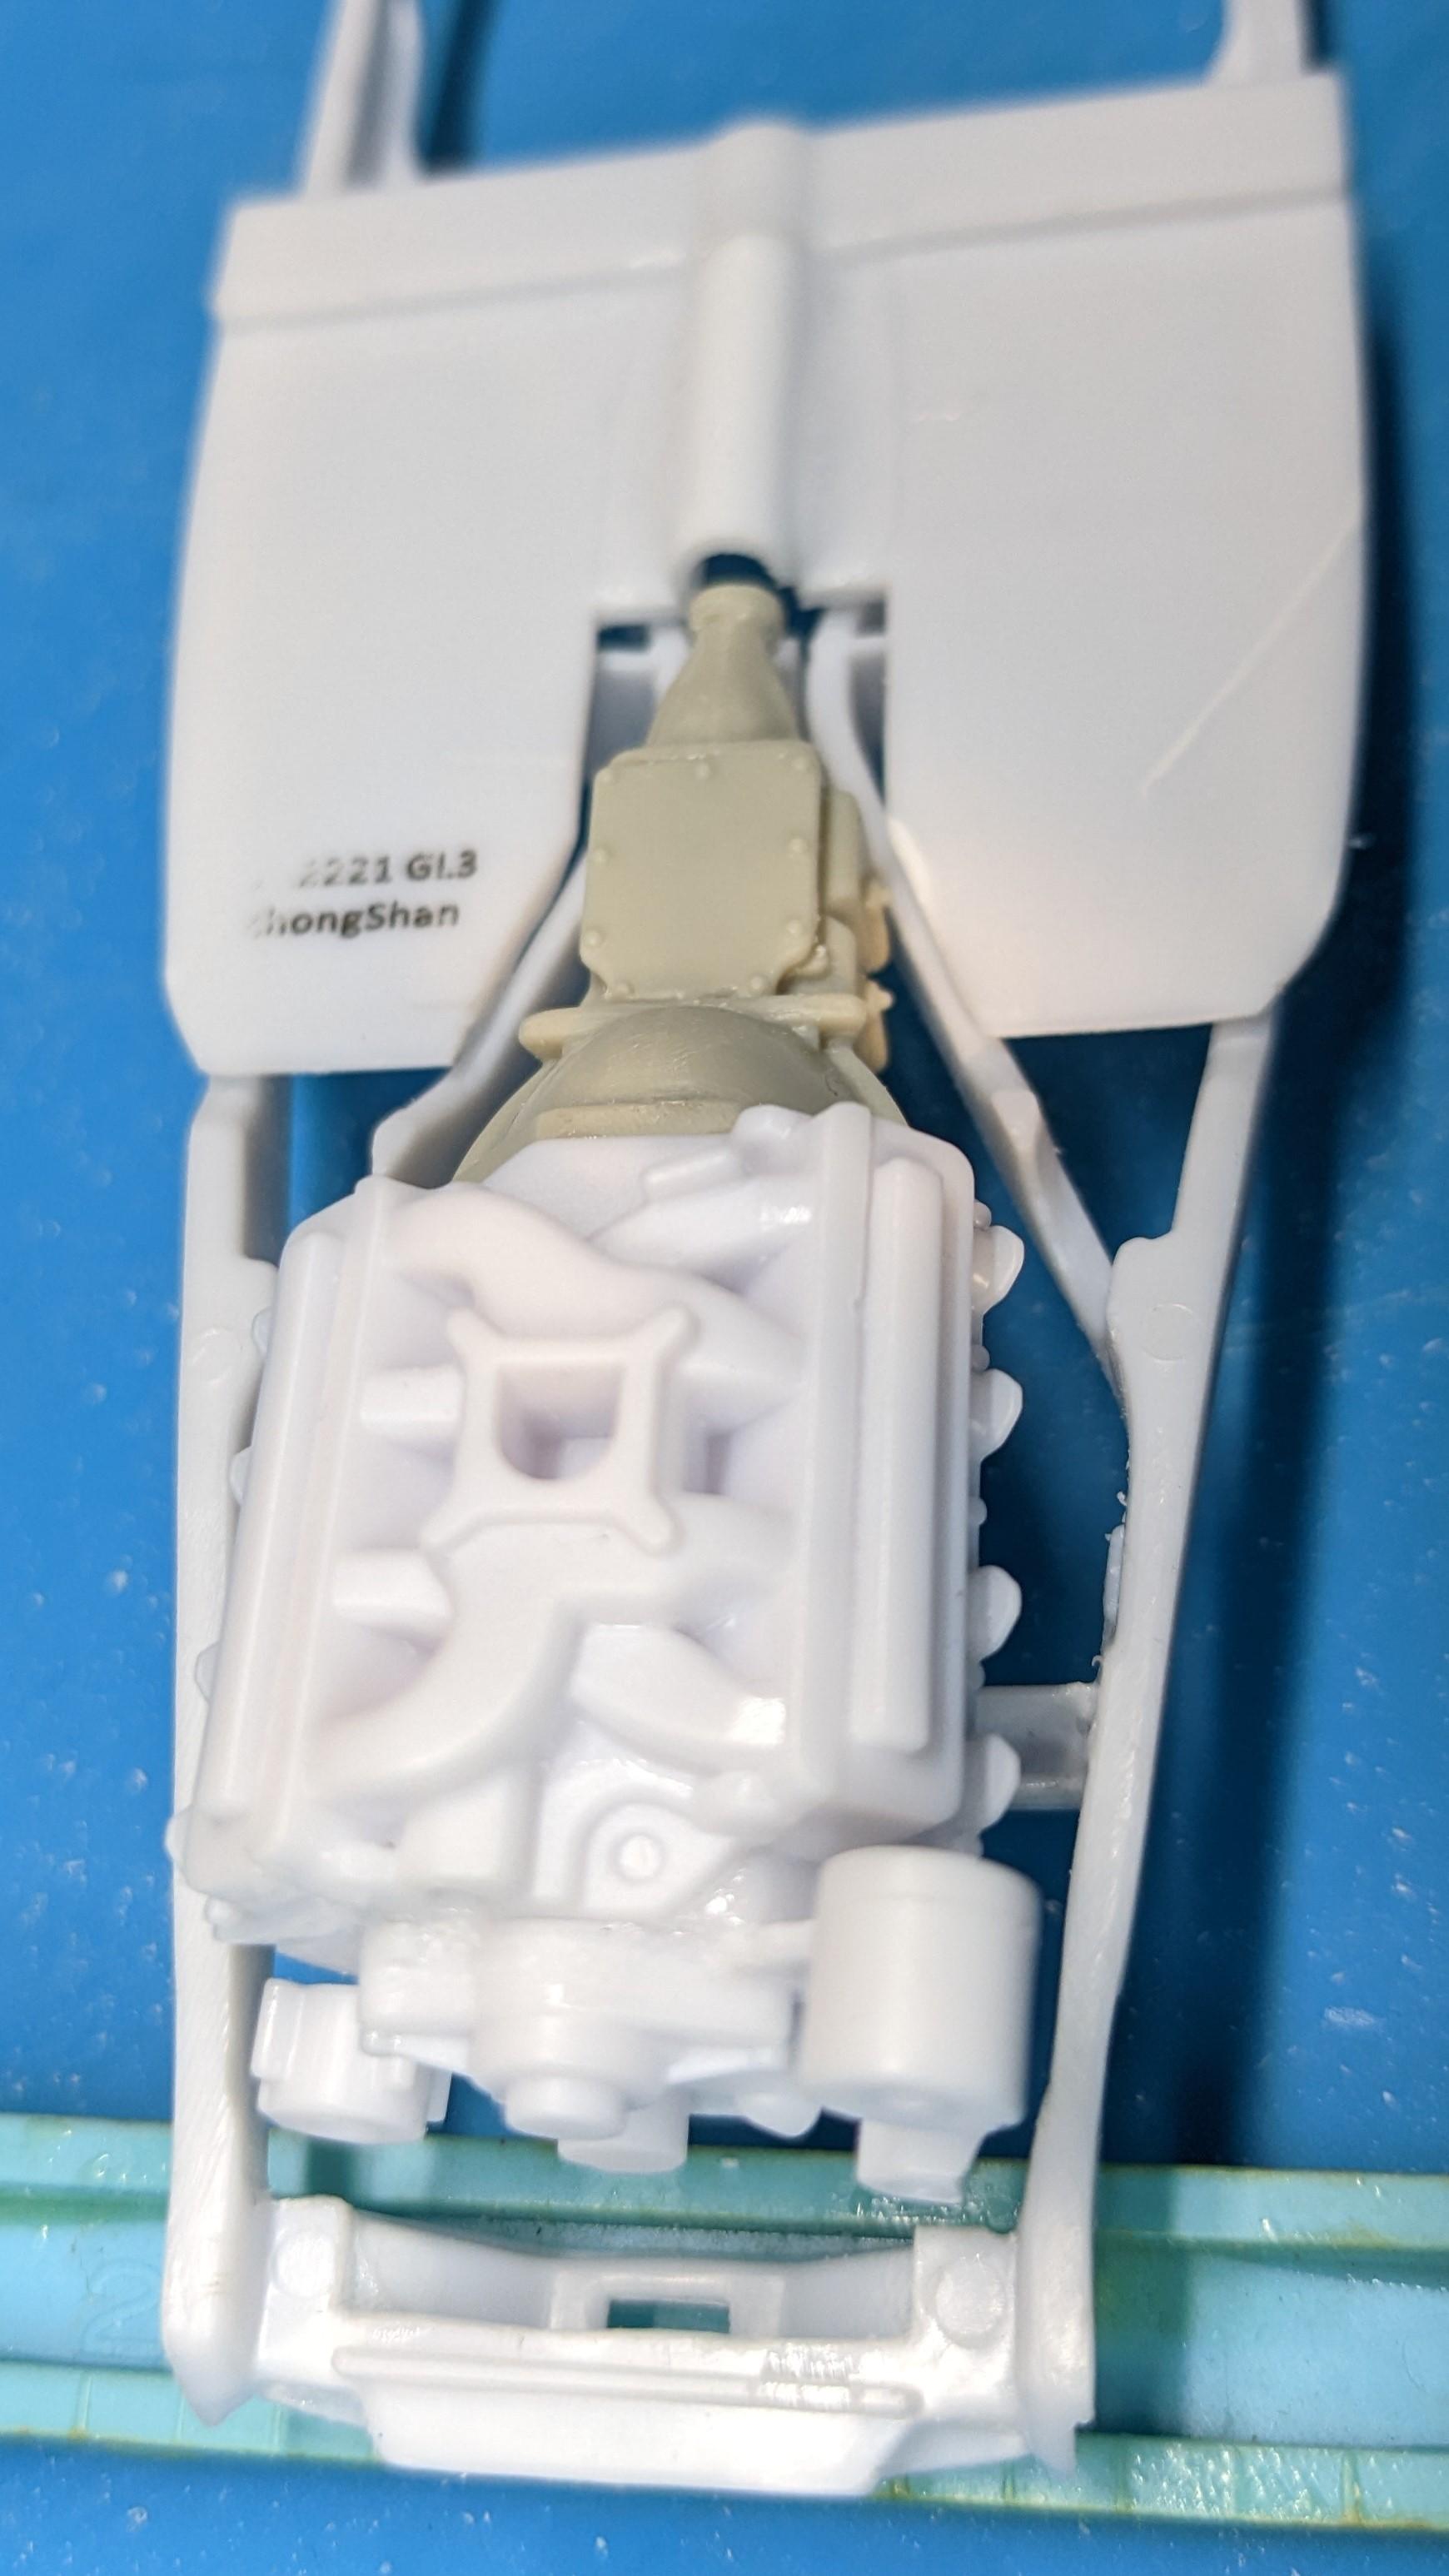
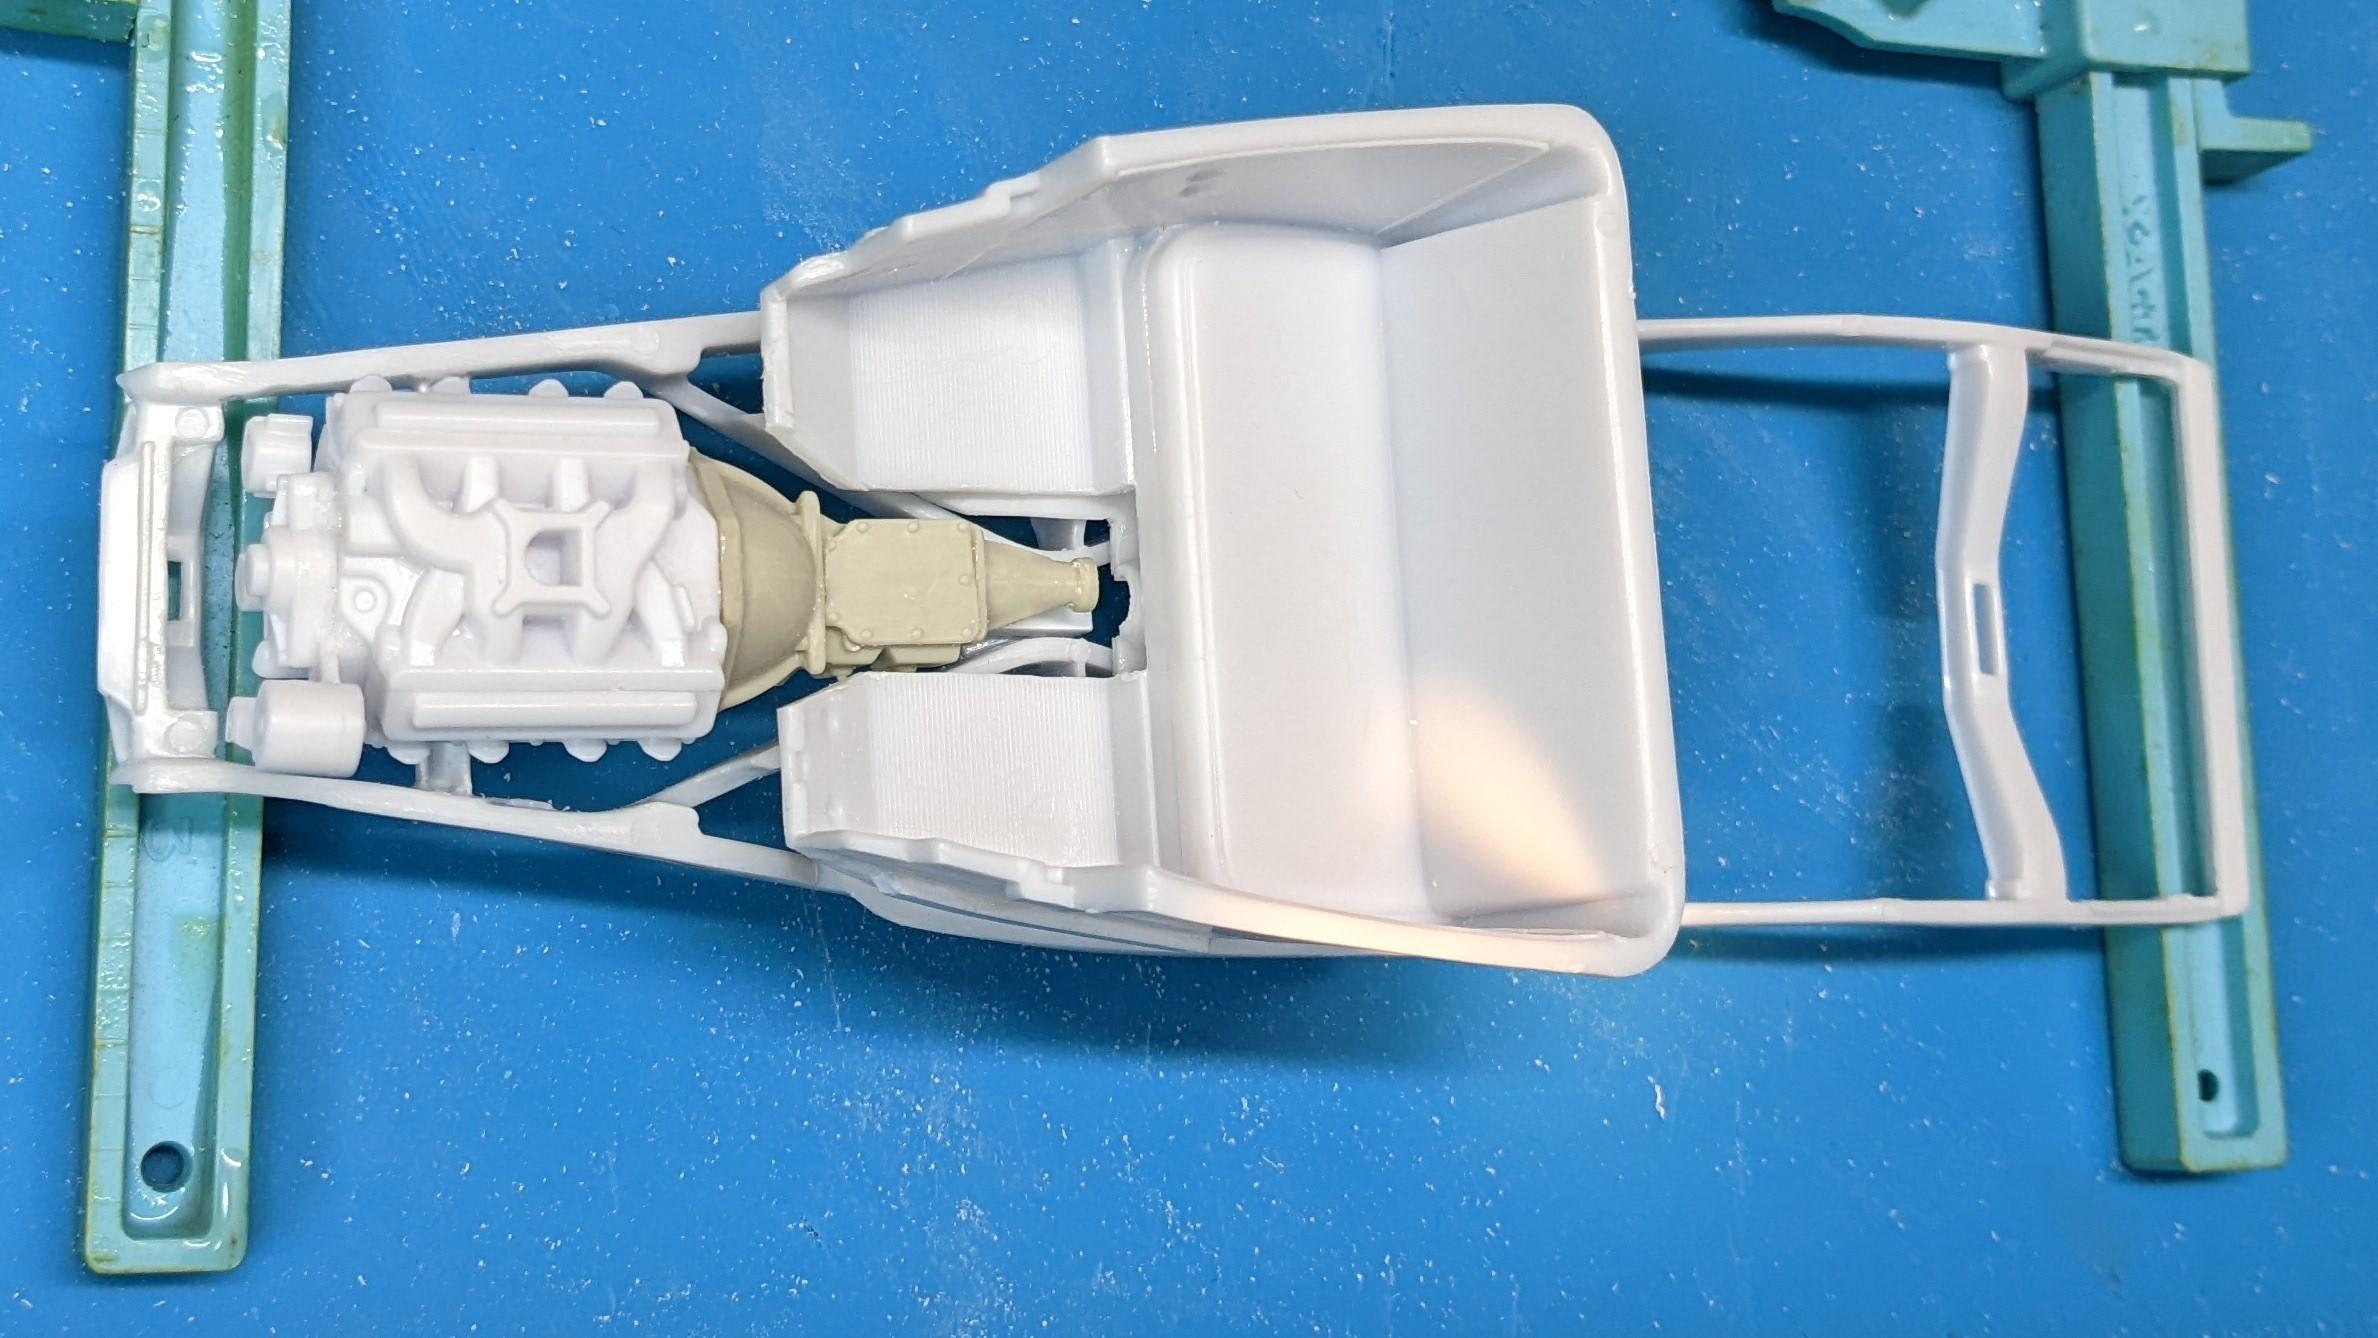
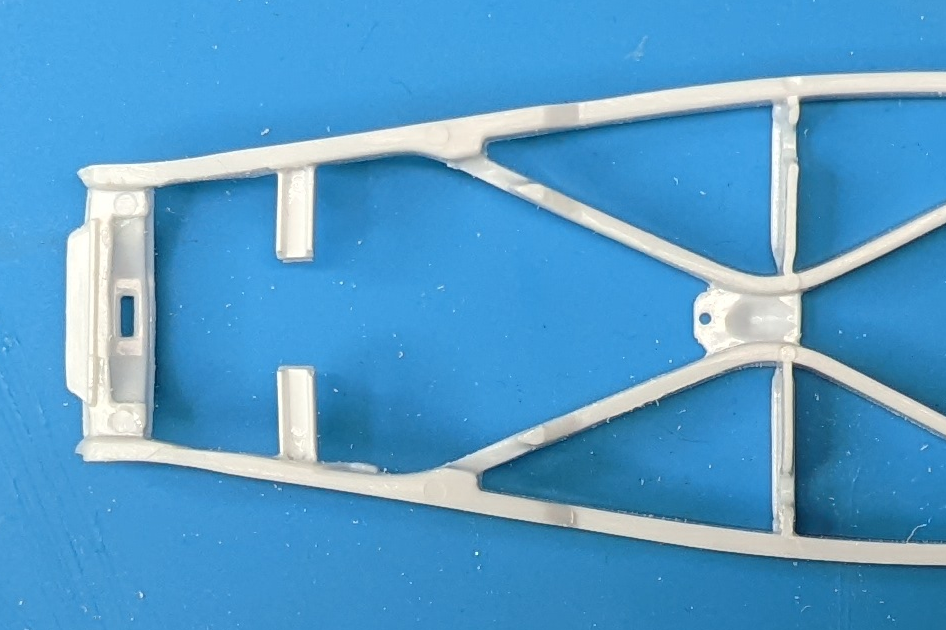
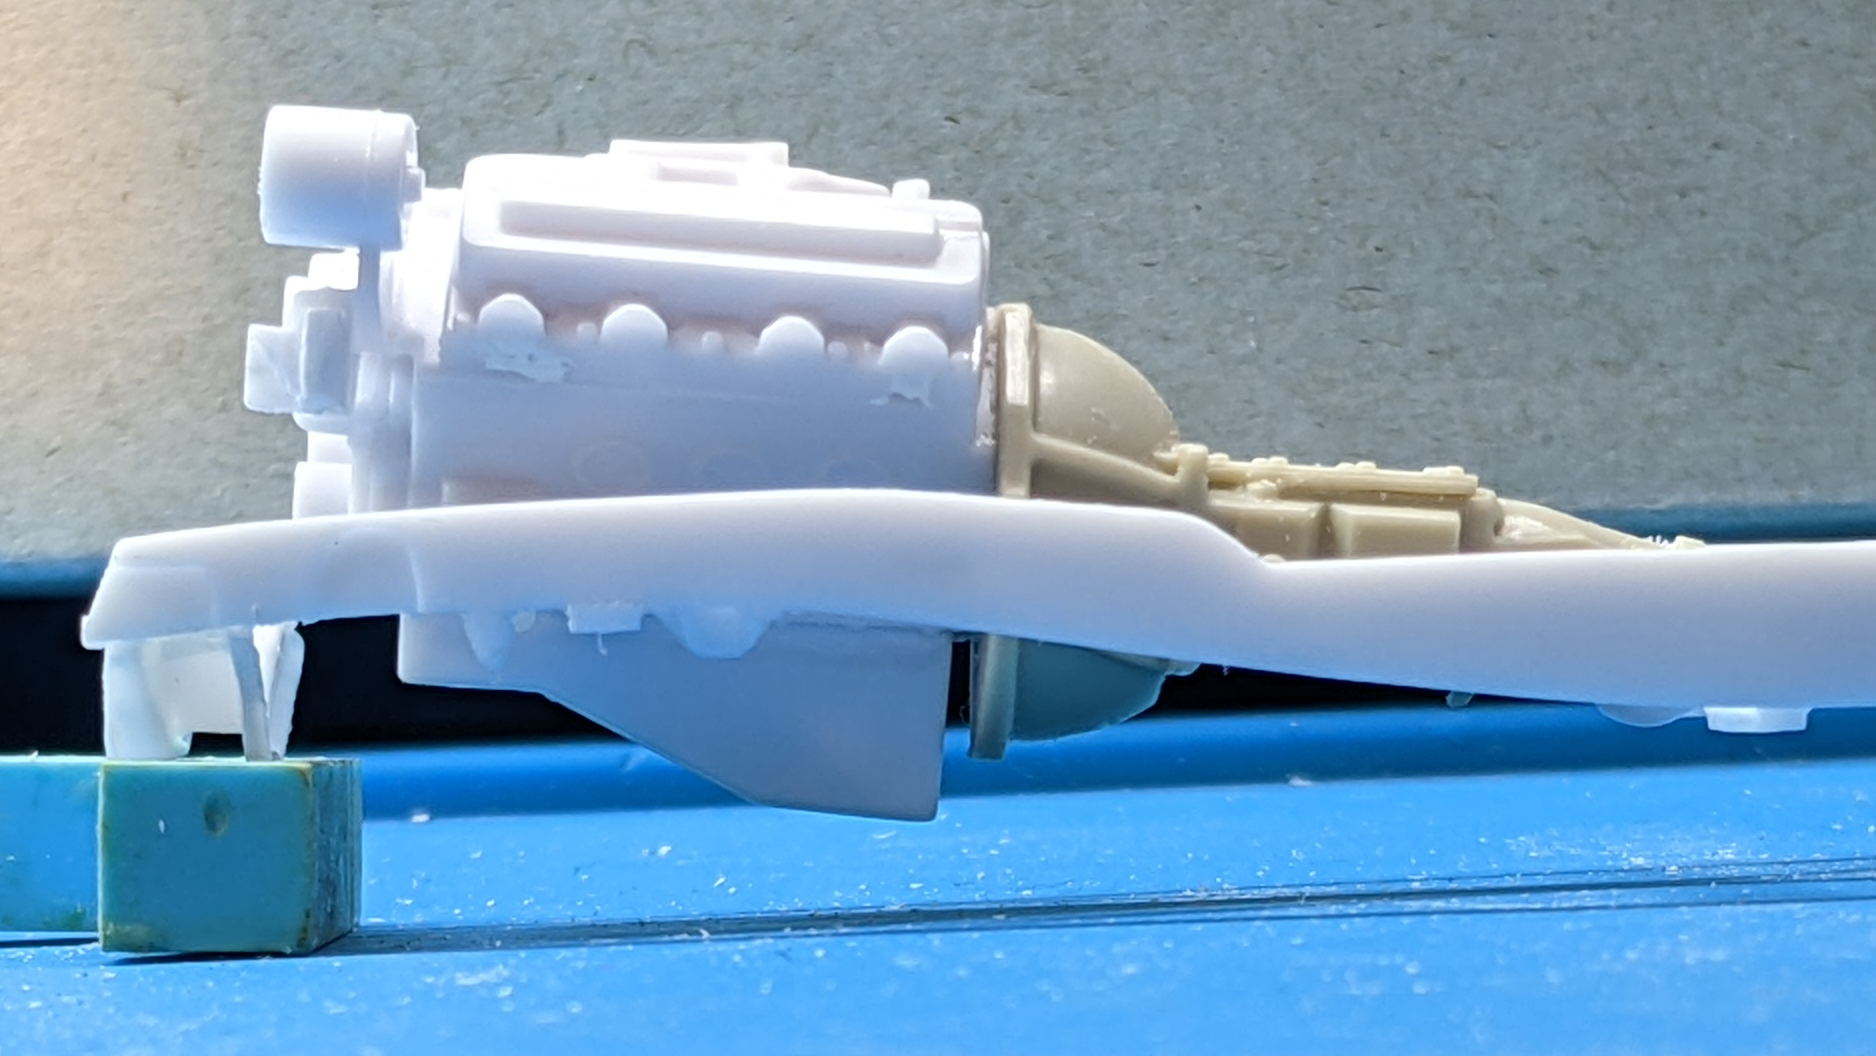
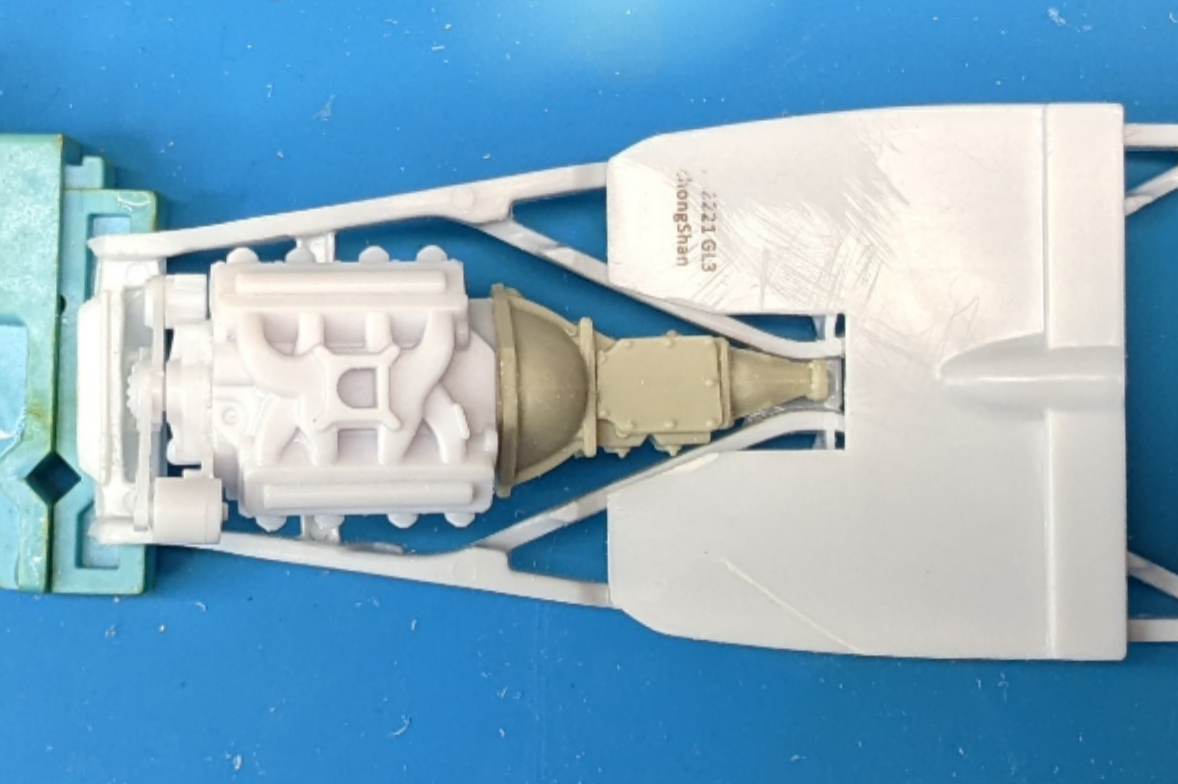
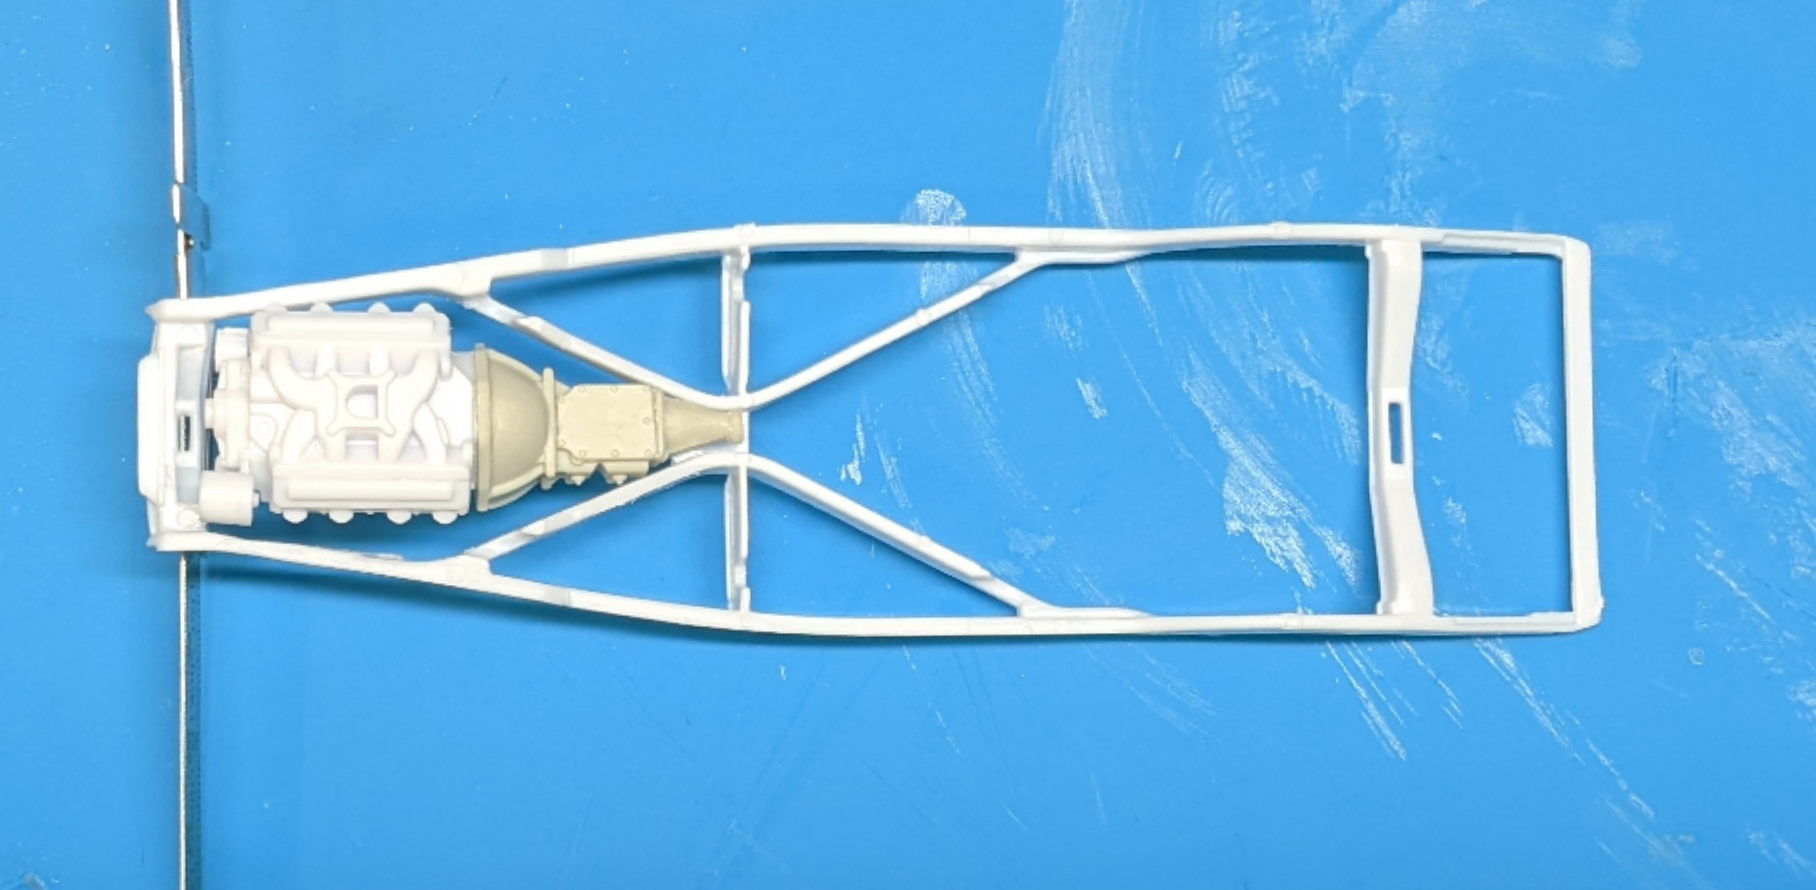
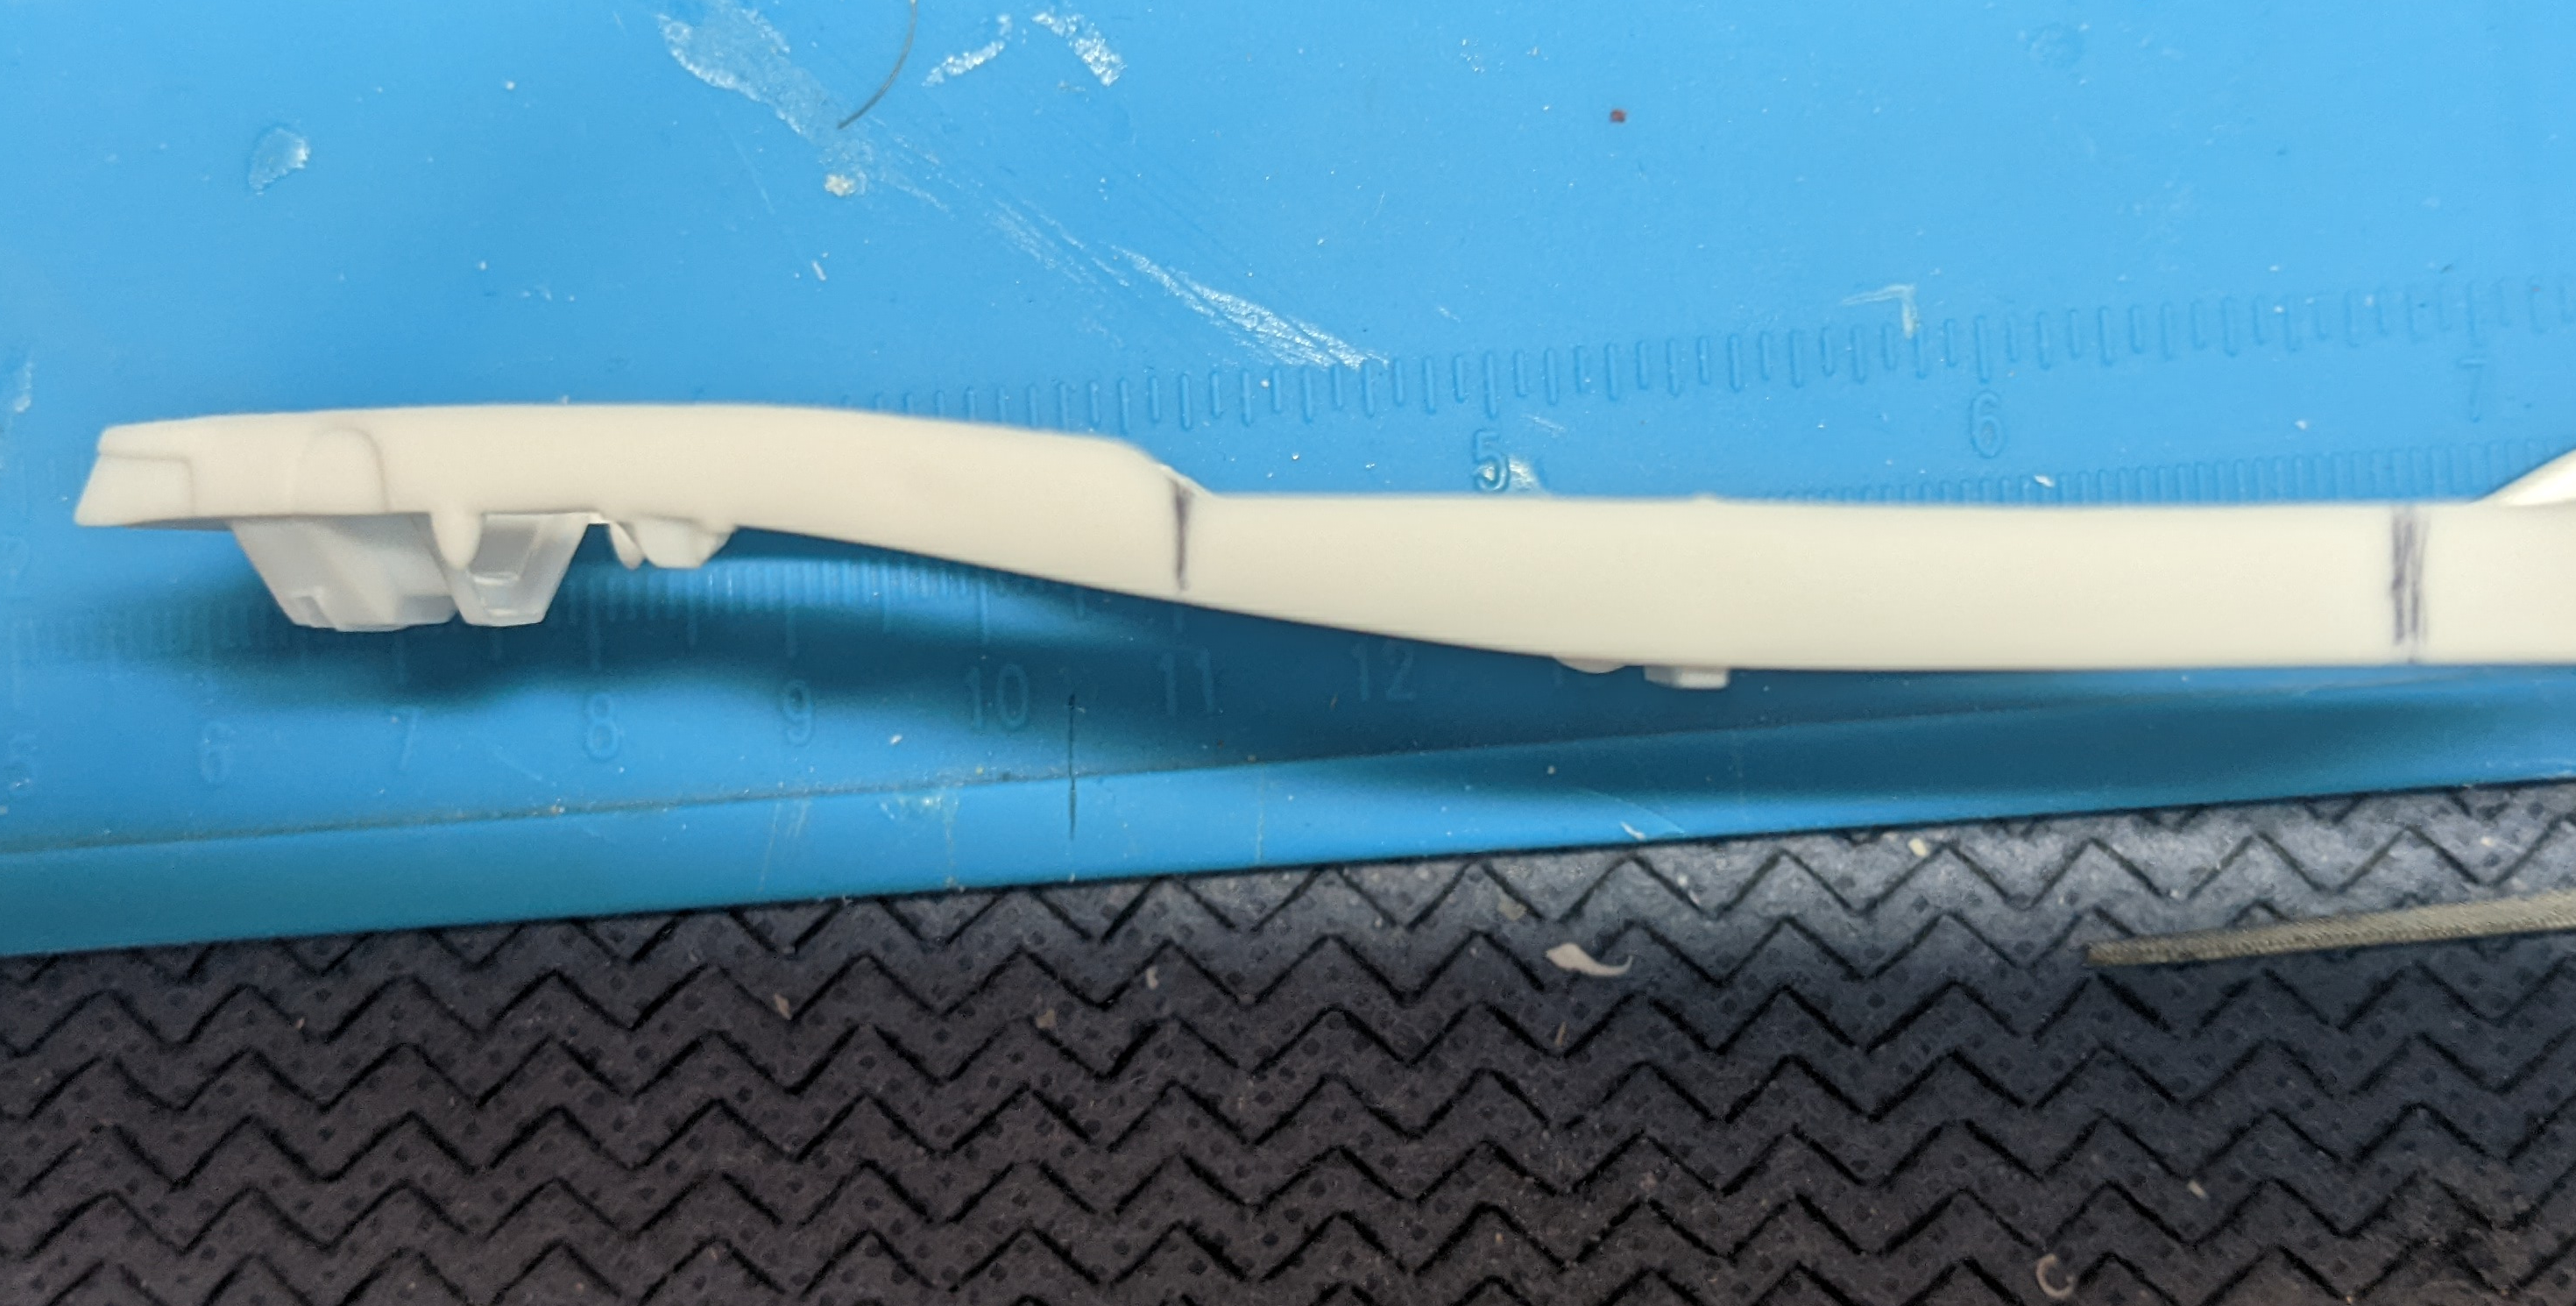
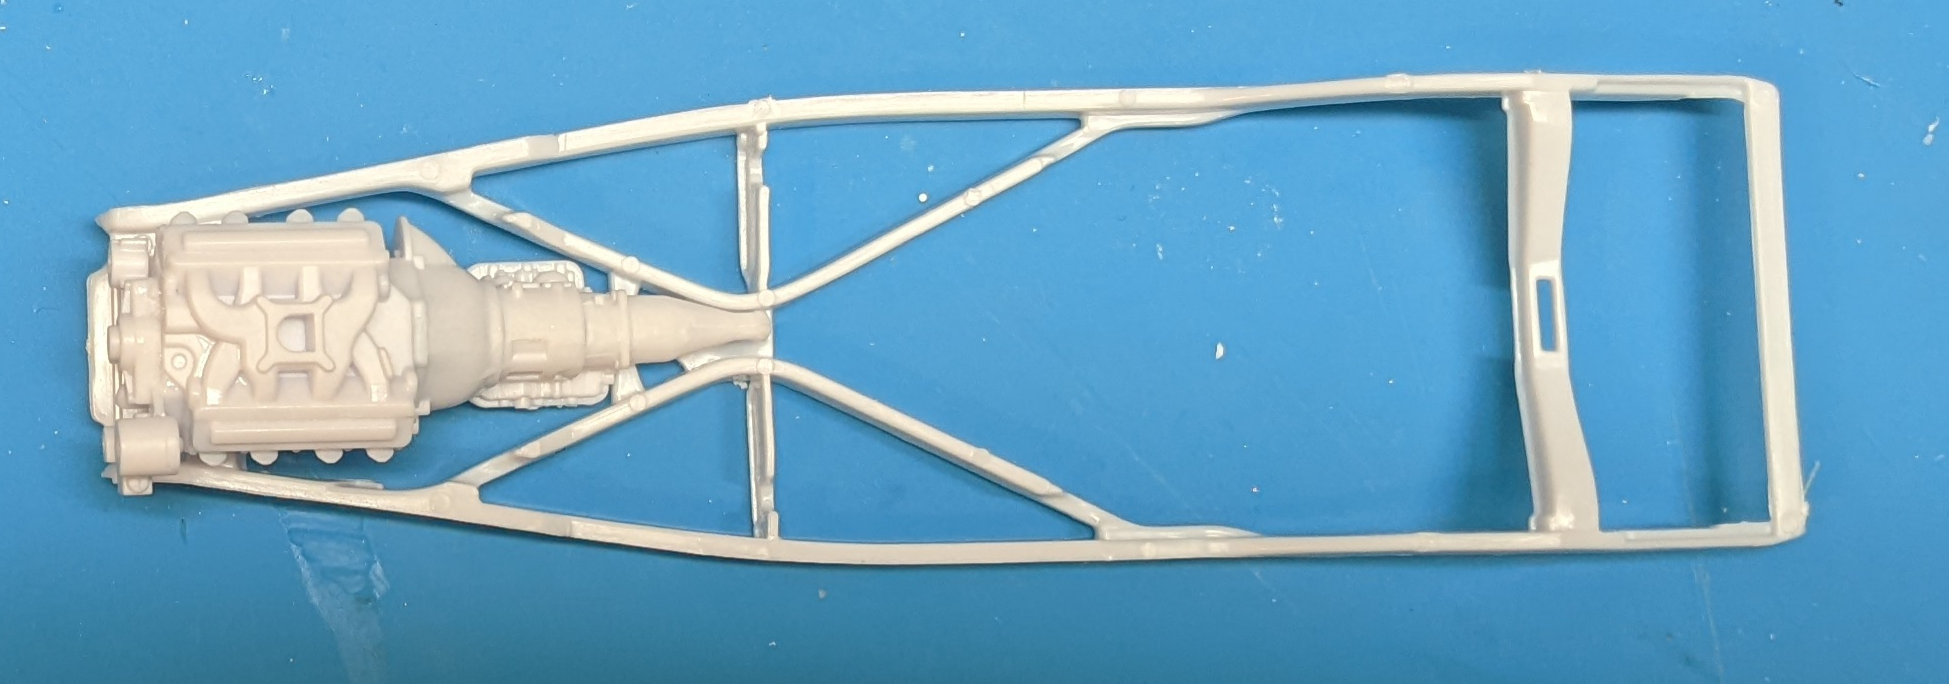
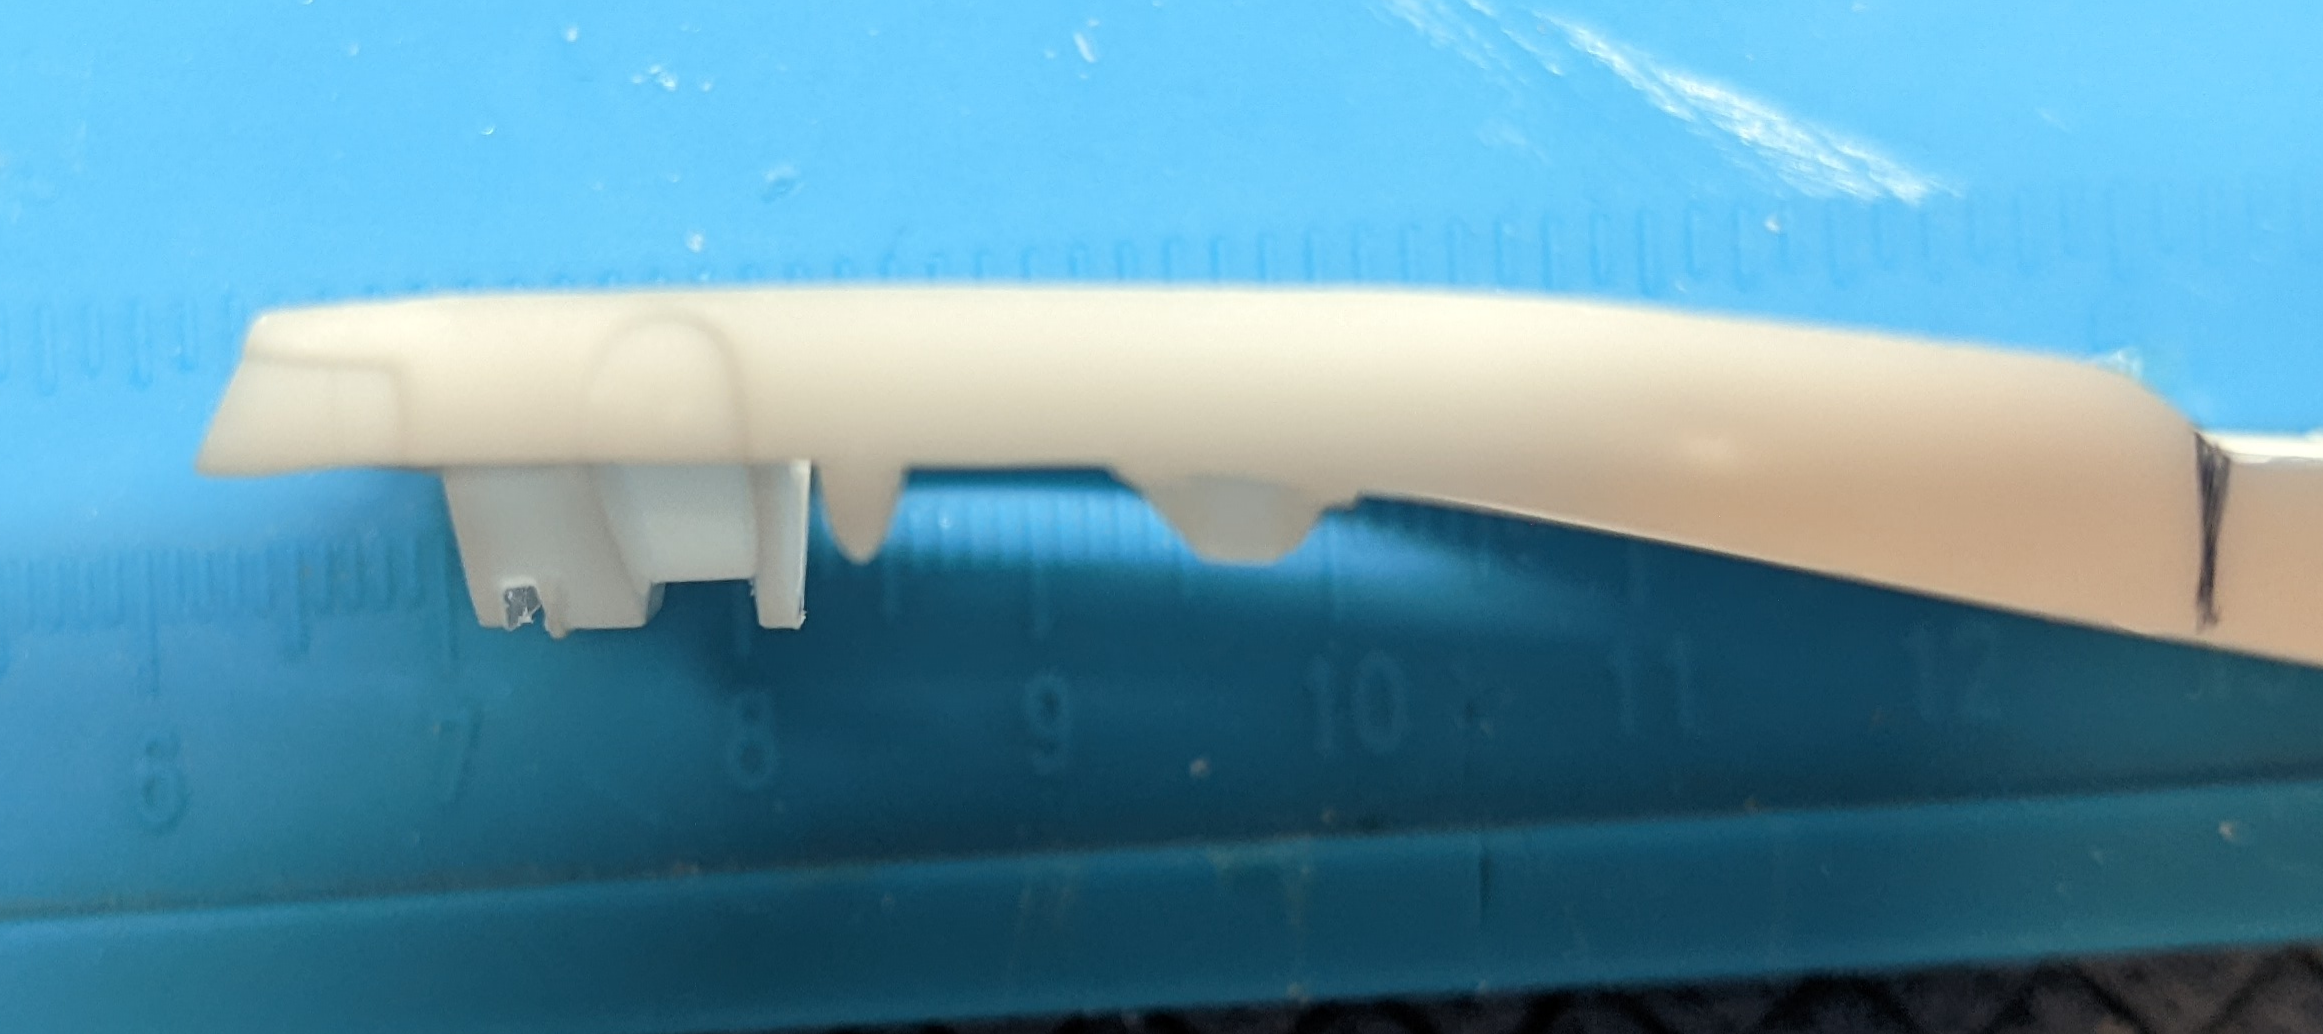
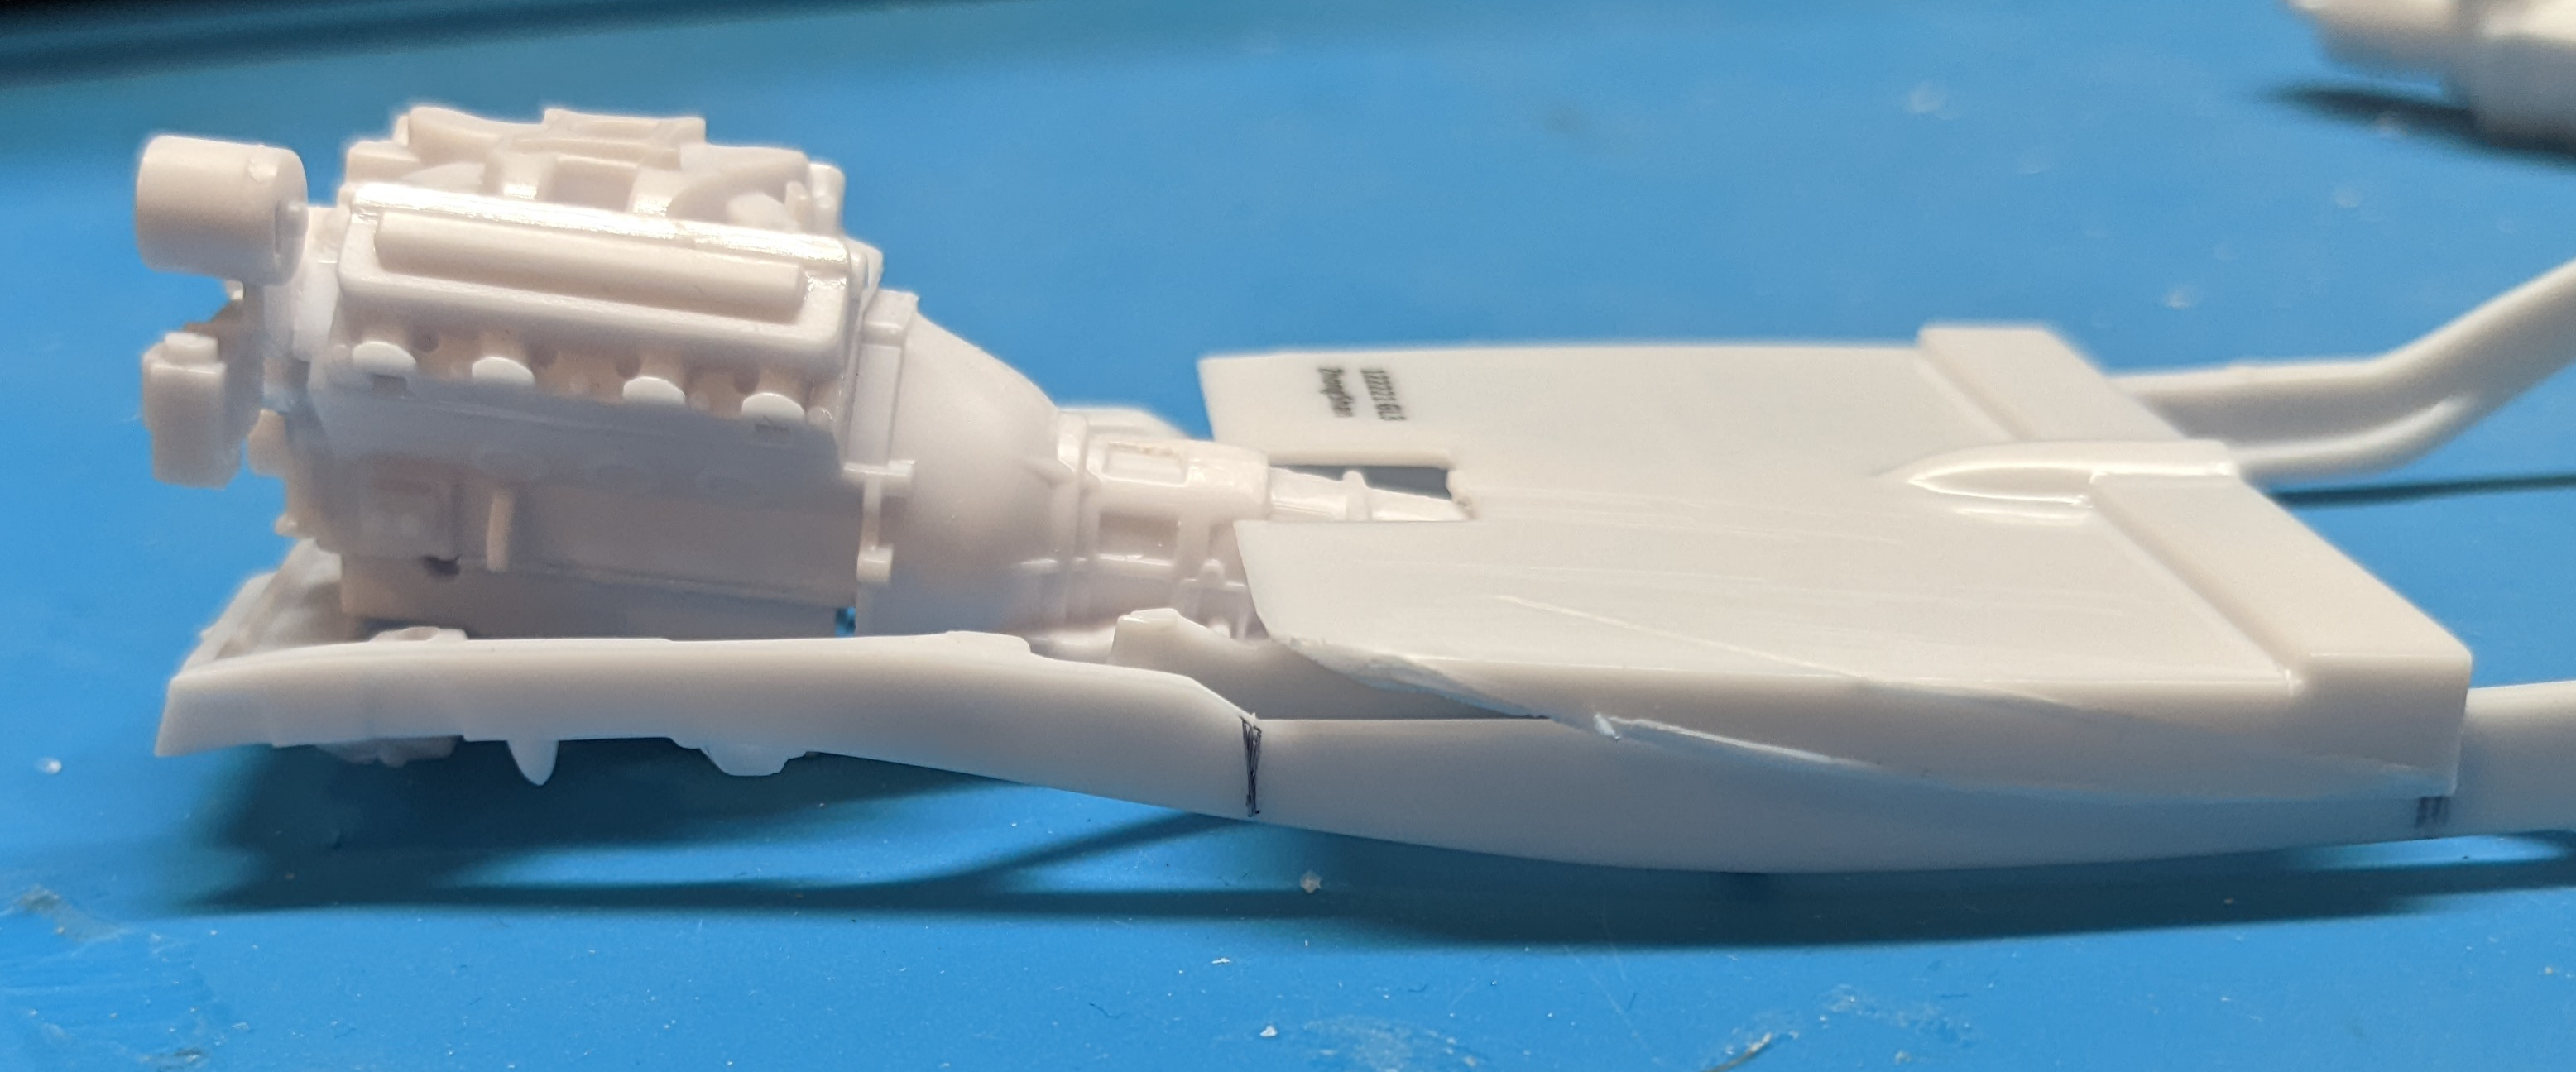
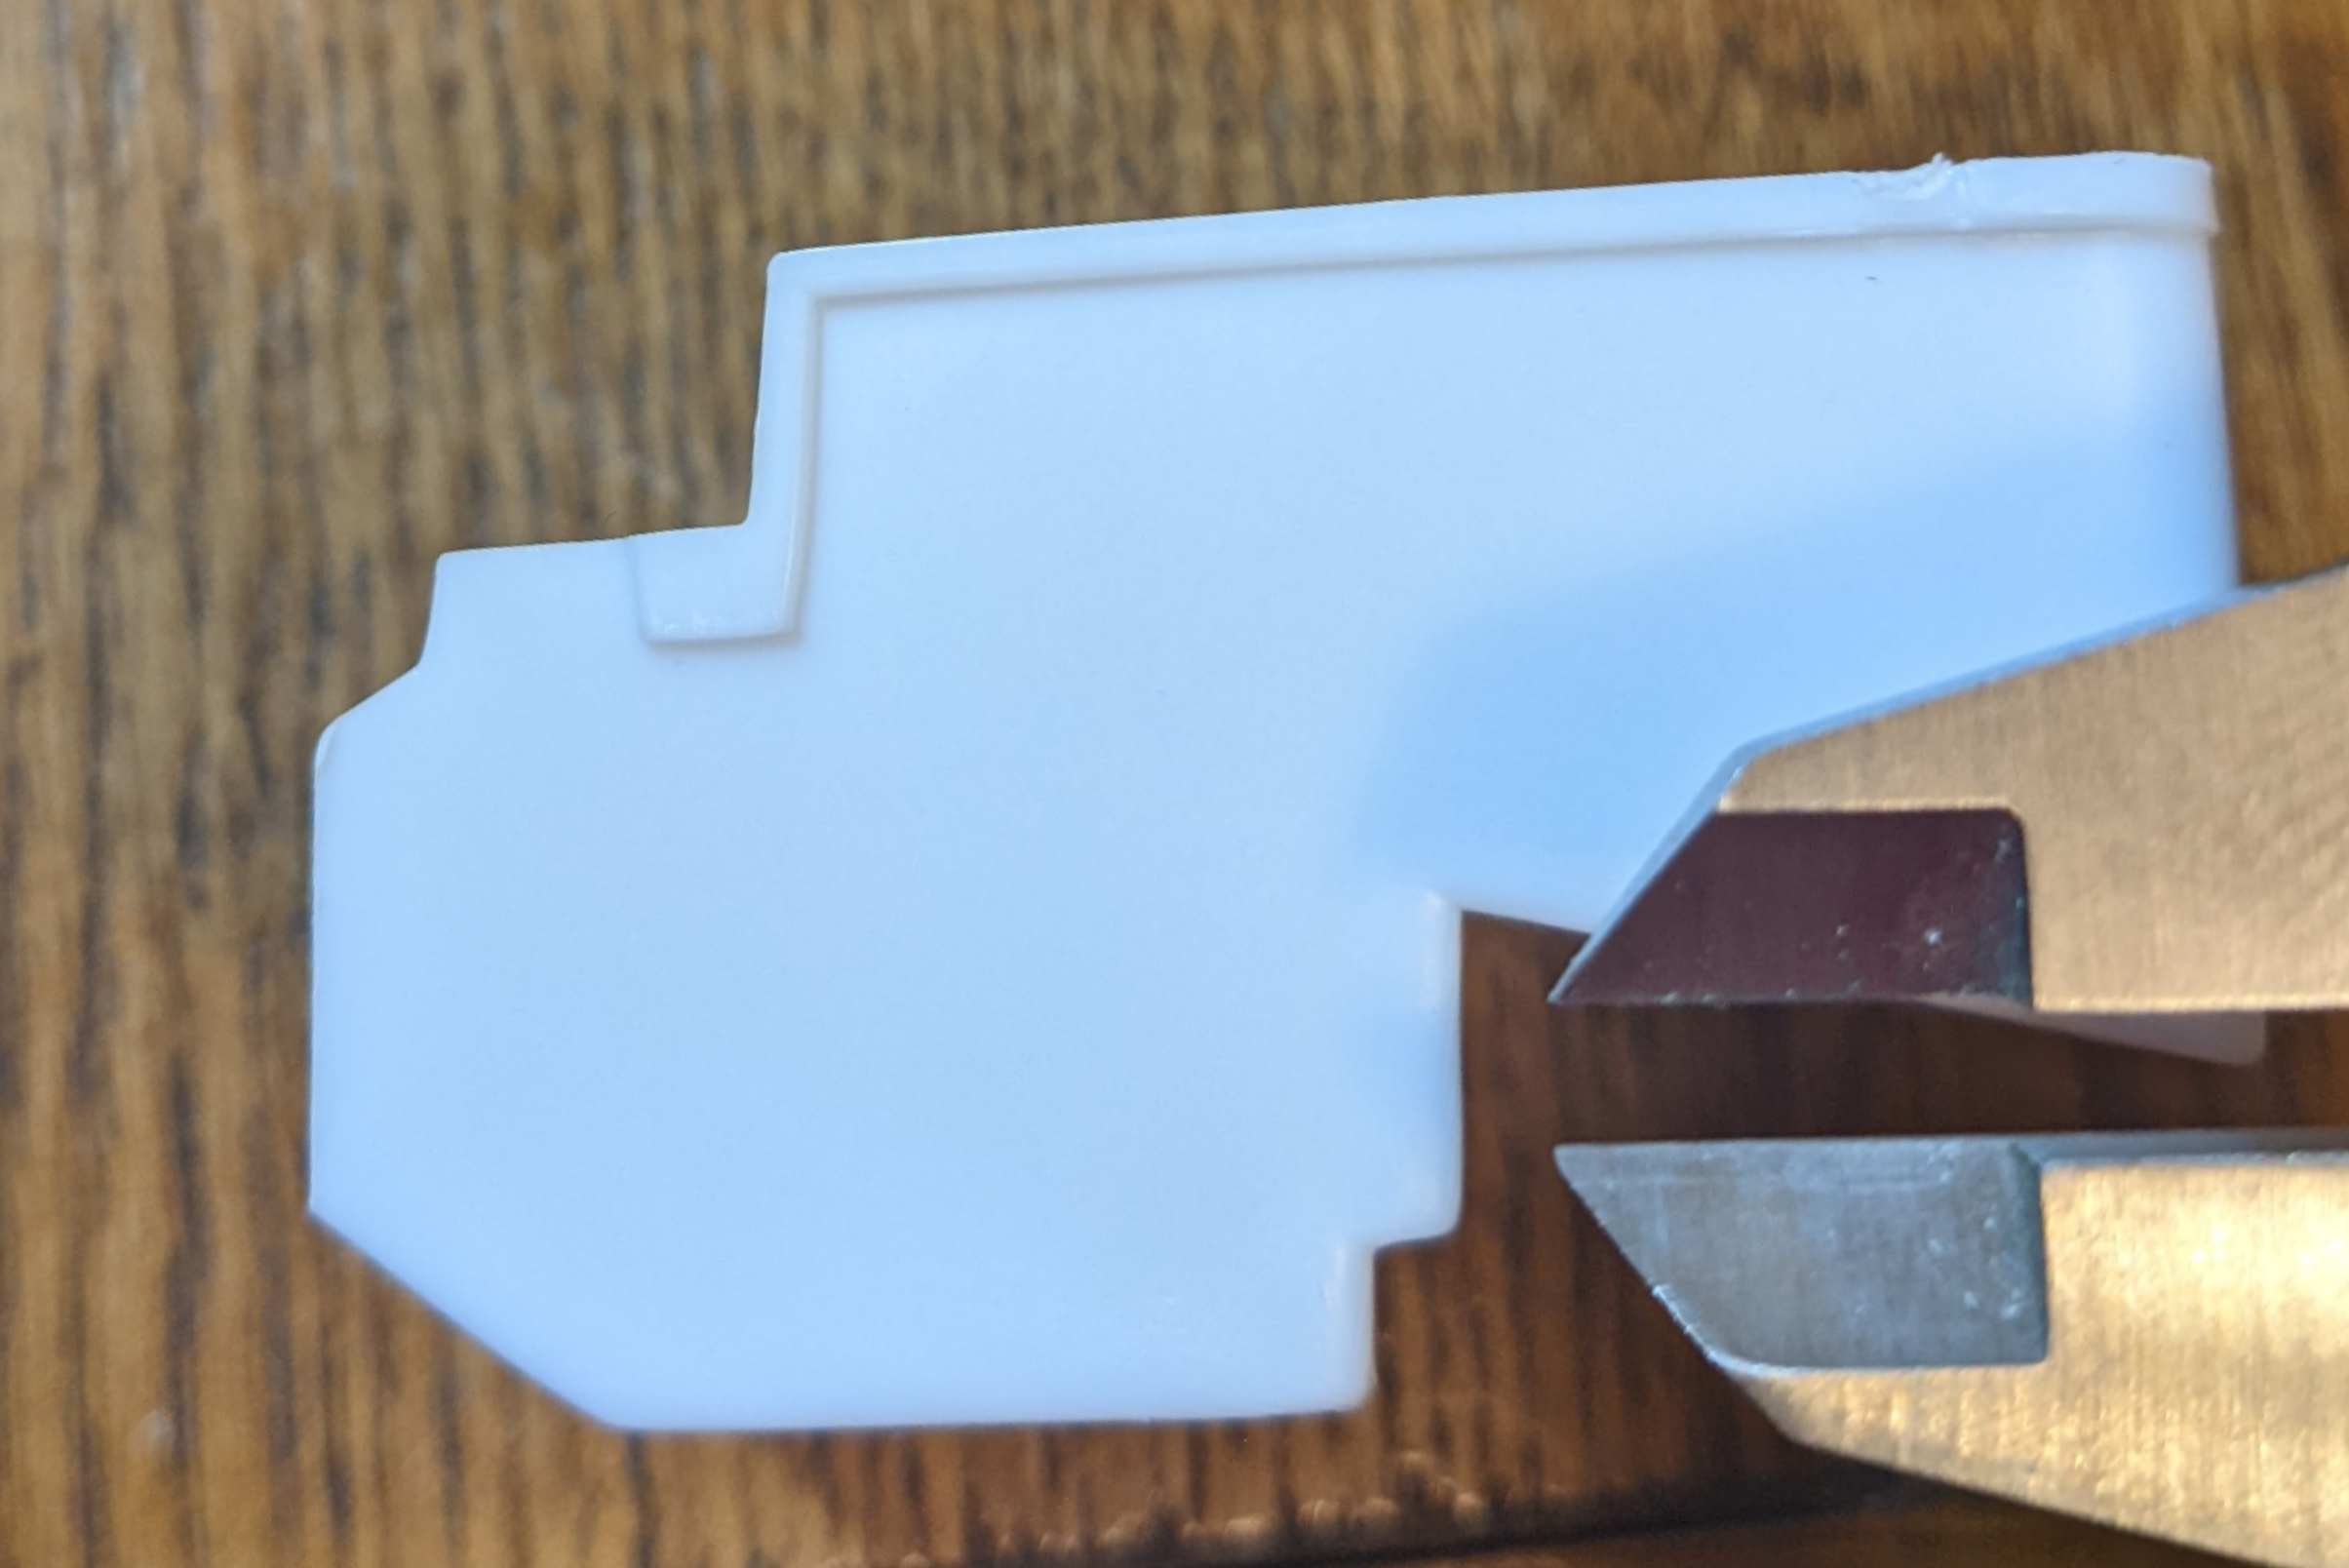
UPDATE: Thanks a million to Plowboy for the transmission tip! I cut off the auto unit from the Roush V8 & mated a Moebius F100 FE manual. Then I trimmed down parts of the trans rear end to fit inside the x-brace. I'll still need to trim the driveshaft, but the FEAD front aligns with where the flathead distributor front was. Now the frame length and radiator fore-aft position are unchanged, and I can use the '37 hood! The FE trans is taller than the flathead's, so tunnel & floor work will be needed. I carefully cut out the suspension cross member, to relocate it forward. I also shaved off the flathead mounts, so the cross member fits flush below the radiator support, which was trimmed to be a rear-facing U shape, clearing the new FEAD. Top & bottom photos of the result, without the power train, are shown below. The front axle moves 7mm forward (vs the previous approach's 8mm), achieving the Deuce-like proportions I sought. The modern V8 oil pan is deeper than the flathead's, so I'll need to have a look at ground clearance in setting the motor height & fabbing the new mounts. Clearance for over-frame headers also plays into it. This work will be done next. Then I'll scope how much the tunnel & floor must change.
-
Has anyone channeled a Revel '37 Ford pickup?
BadJuju replied to BadJuju's topic in Model Building Questions and Answers
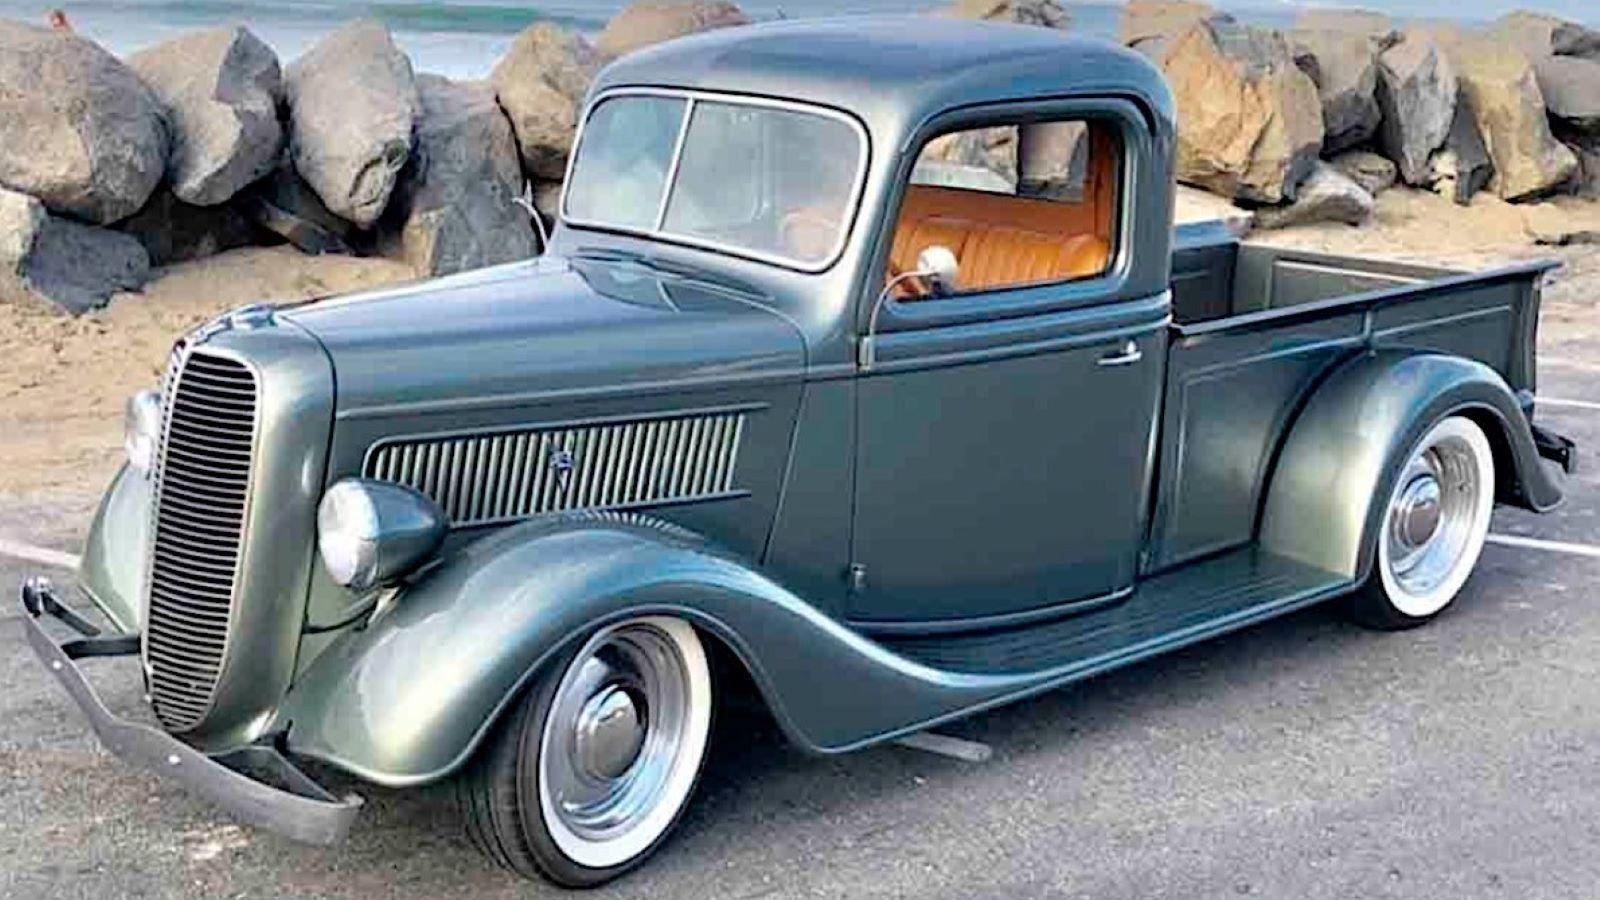
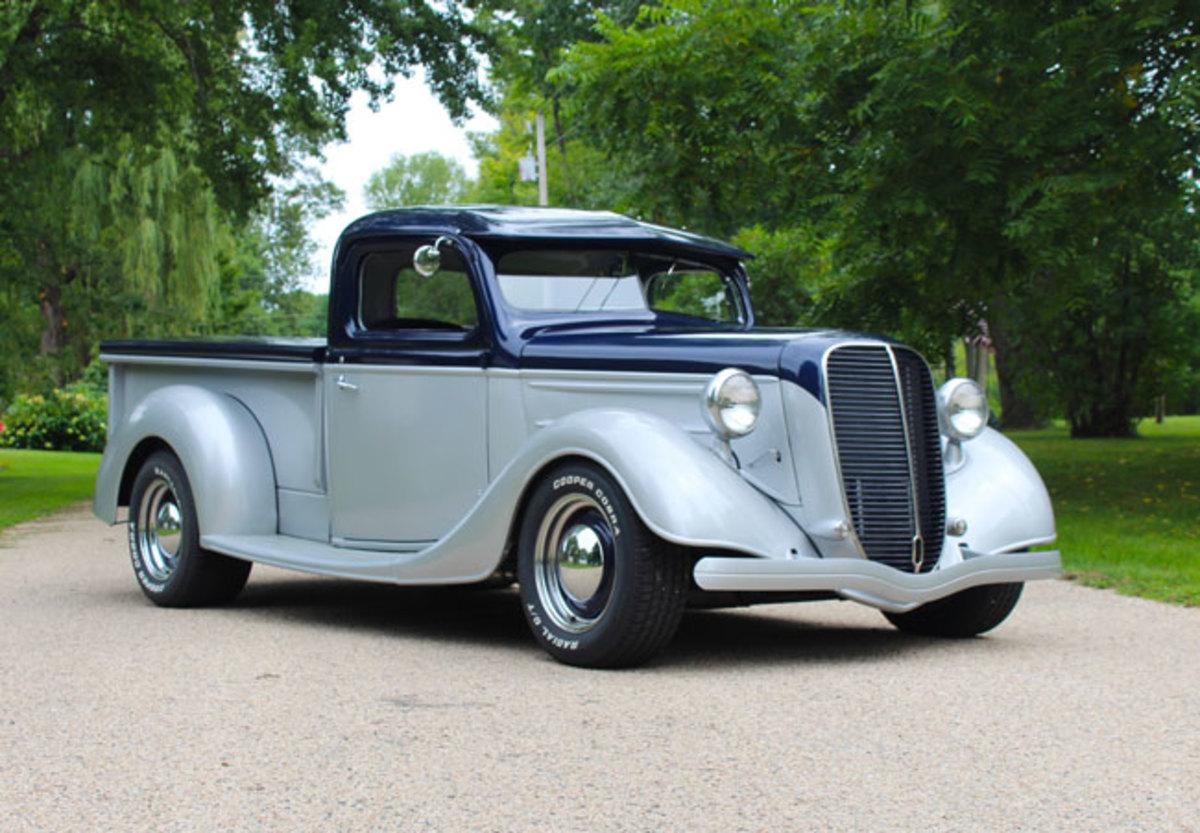
I think mimicking a fender-less Deuce is what I'm after: upswept lower body edge merging with the frame line, and front wheels ahead of the radiator. That's how yours looks, but with a stretched, Deusy-like mean cool to boot! Now, with fenders on, I think I'd just leave the body alone, use the kit lowered suspension, and update with wider wheels & tires, as per these 1:1 examples.
-
Has anyone channeled a Revel '37 Ford pickup?
BadJuju replied to BadJuju's topic in Model Building Questions and Answers
Well, I really like yours, and many 1:1 photos I've seen with the fronts pushed forward (see red ones I posted above). Thanks for the tip about mocking up the cab and engine together. I'll definitely do that before I do any frame cutting. I will also look for a manual trans to swap...maybe one from a Moebius '66 F100 kit I have. -
Has anyone channeled a Revel '37 Ford pickup?
BadJuju replied to BadJuju's topic in Model Building Questions and Answers
I started cutting. I separated the front fenders & running boards from the cab & box floors. Here I marked the cab floor location before cutting, and scored the tops of the frame rails so I can see them after painting. I had to do this step because there are no positive locating features. The angled step in the frame lines up to the front of the cab floor. I'm using the Revell Foose '56 F-100 engine & trans. It's a Roush Ford big block. Instead of doing major surgery on the frame x-brace, and since I wanted to move the front axle forward anyway, I'm sitting the engine & trans as shown. To do so, I trimmed off the trans locating tab that was just aft of the trans pan. This assembly extends 8mm forward of where the flathead reached, so I'll need to lengthen the frame rails accordingly. I'll also need to shorten the driveshaft. Dimensions on that when I reach that point. I'll lengthen the frame rails with styrene inserts just aft of the front suspension cross member. Ahead of the x-brace, I'll spread the frame rails under hot water to provide for the resulting additional taper, thus preserving the cross member width. The cab floor and interior tunnel will need modification to fit the trans (see below how it doesn't sit flat on the frame). Again, more details when I cross that bridge. The engine & trans will sit flat once I extend the frame, so I'll do that before determining how much surgery will be required on the floor & tunnel. Scratch engine mounts will also be required. Not shown is that (so far) my estimate for the channeling seems to be about right. Can't verify that until I get the floor & interior to sit flat. Since the radiator must also move forward, the hood needs to be longer. I may mostly solve things by laying back the radiator shell, like Plowboy did, since its top needs to be lower in order to align with the channeled body anyway. Another approach would be to use the longer '38 hood & '38 shell, both of which come in the kit. That hood is 11mm longer, so I'd be lengthening the frame another 3mm for that approach. I don't like the '38 grille, though. We'll see. Different radius rods & coolant hoses will also be required. Stay tuned! I will keep the updates here, instead of the WIP area, to keep the thread all in one place. Or maybe I can find out whether the whole thread can be moved there.
-
Good to know!
-
Has anyone channeled a Revel '37 Ford pickup?
BadJuju replied to BadJuju's topic in Model Building Questions and Answers
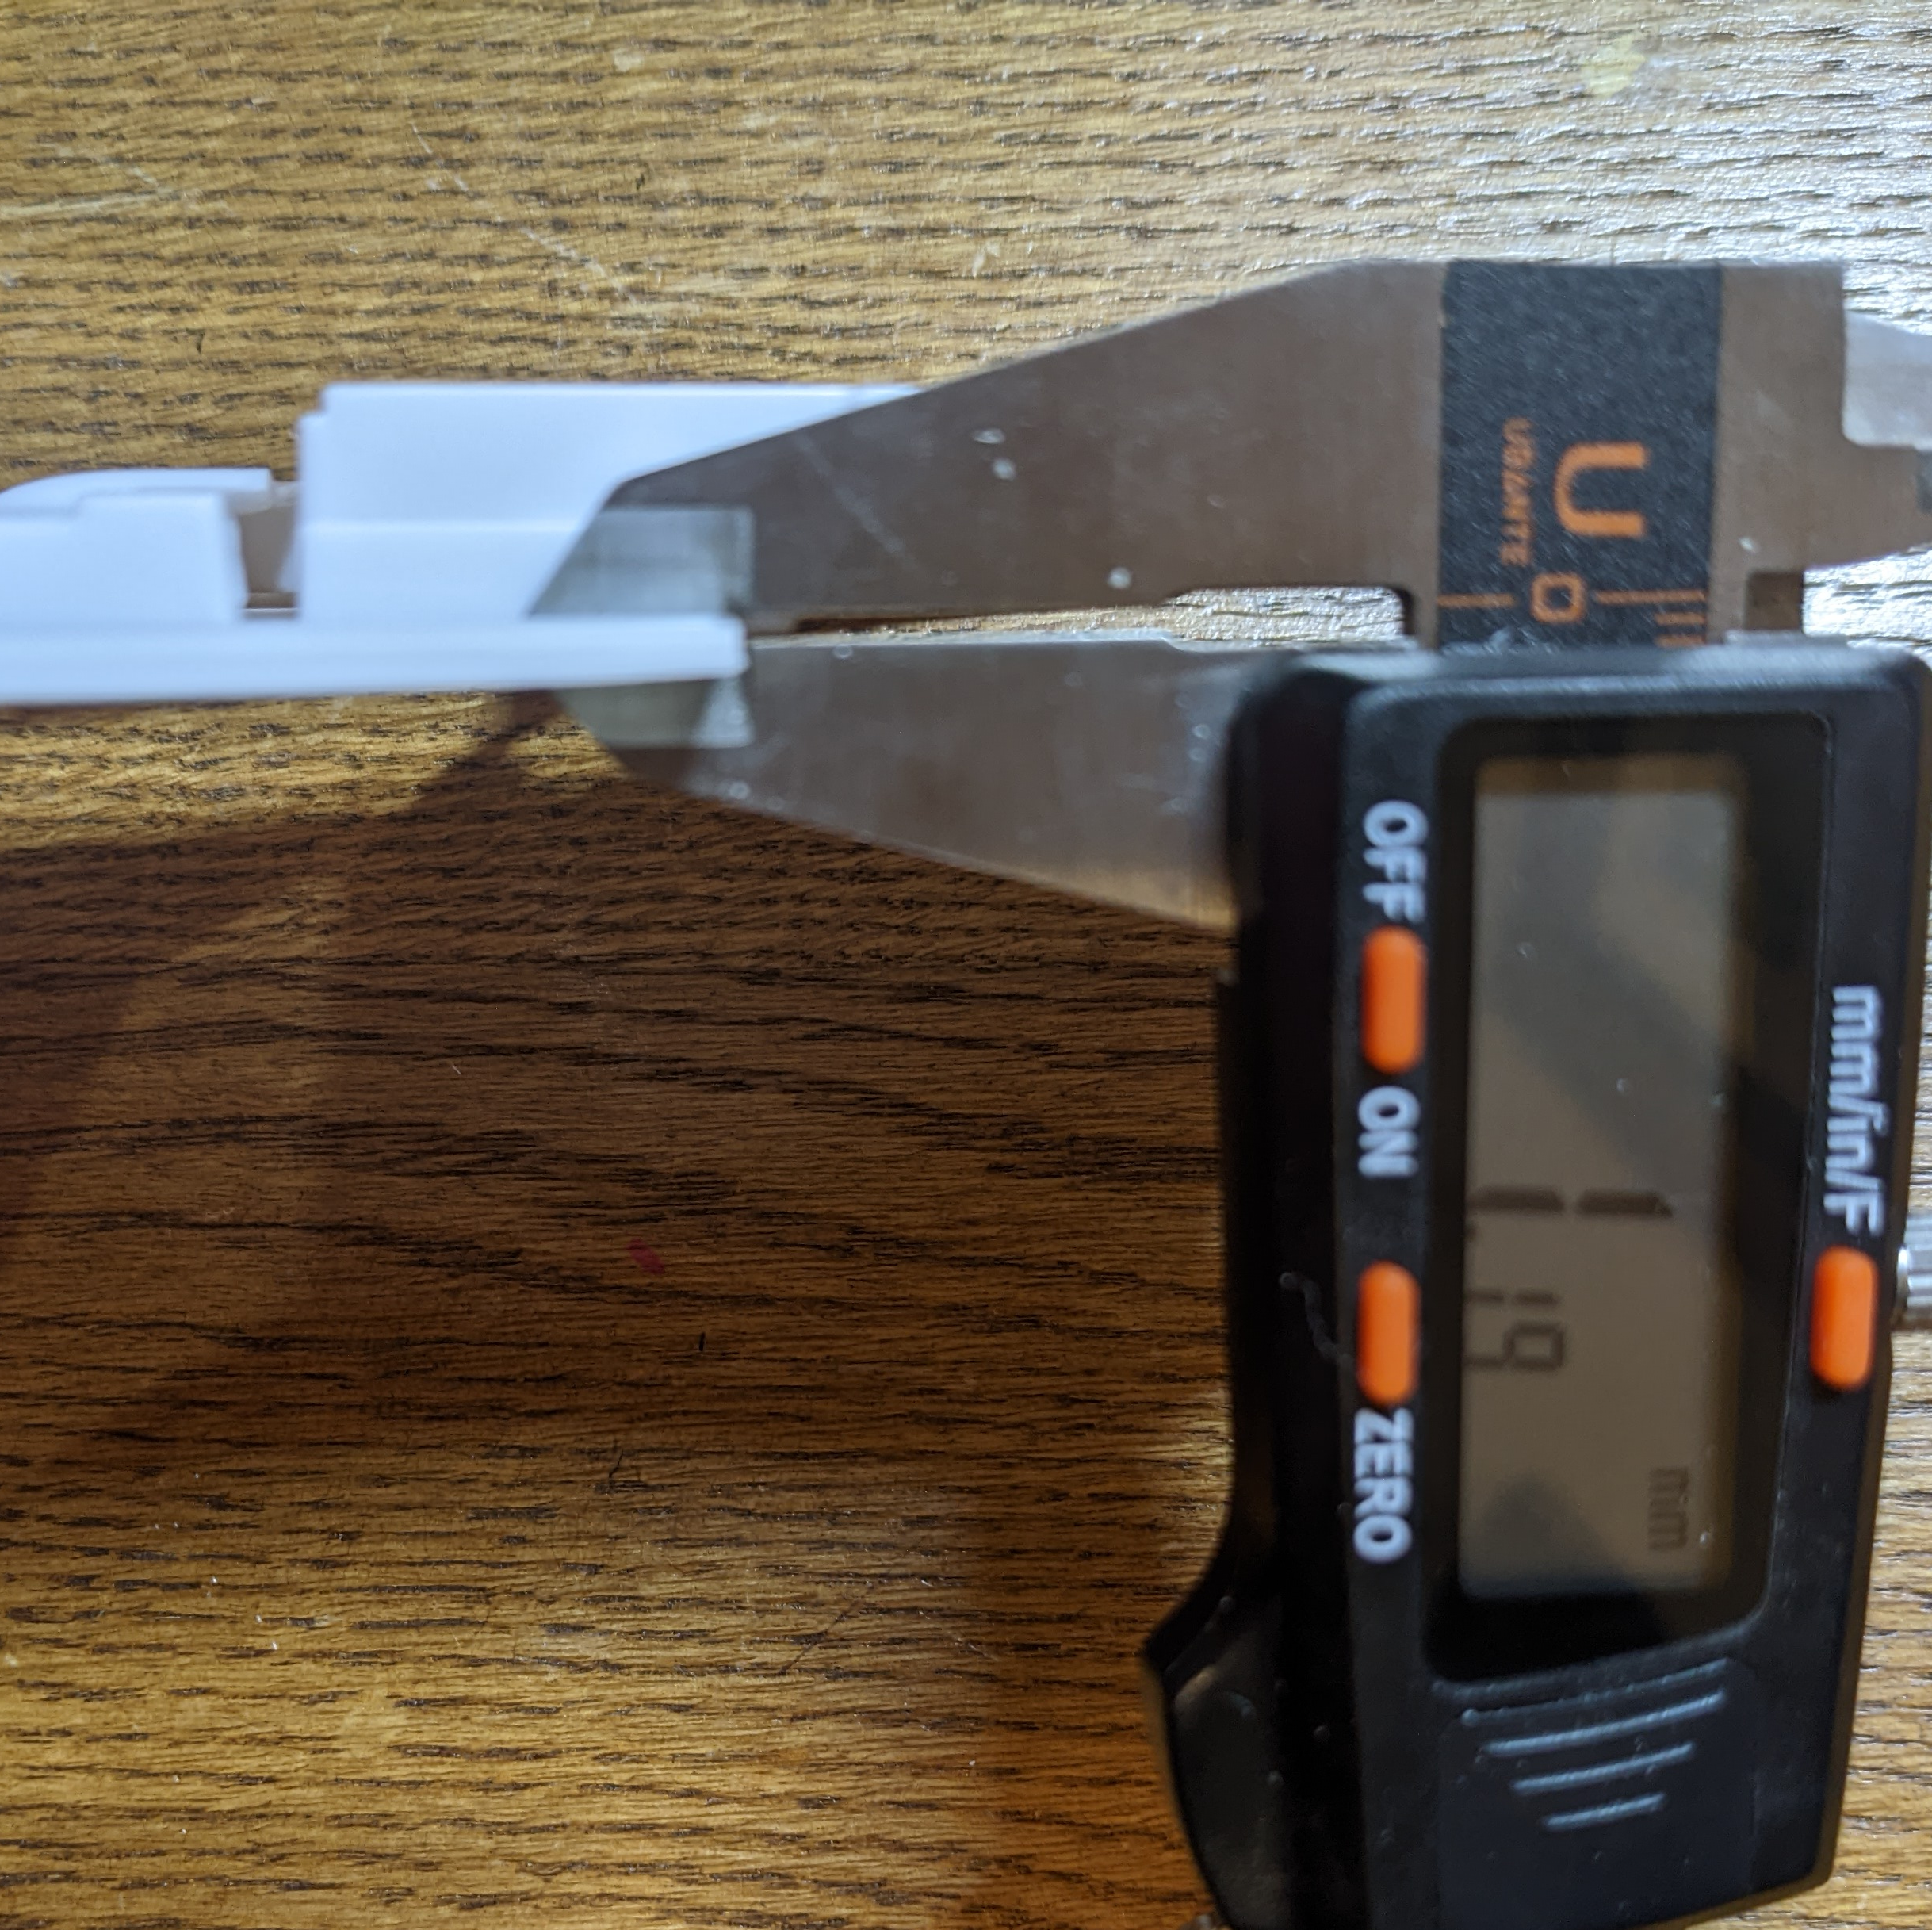
I measured from the top of the cab trim to the top of the box side. It's between 3.2mm and 3.8mm, depending on how well I can see the top of the trim. So I'll be able to line them up about perfectly with my planned 3.2mm cab channel! I'll only have to lower the front wall of the box, down to the height of the tailgate top, in order to see the whole arched cab trim.
-
Has anyone channeled a Revel '37 Ford pickup?
BadJuju replied to BadJuju's topic in Model Building Questions and Answers
Super work, Roger! It looks like you only had the stock front axle, and so, Z-ed the frame, too. Since the 2 in 1 kit I have has the drop axle, I'll just have to extend the front horns and crossmember. I went and bought another kit, too, so I can build one with the full hood and get that nice arched curve up front, a la that 1:1 example I showed earlier. -
Has anyone channeled a Revel '37 Ford pickup?
BadJuju replied to BadJuju's topic in Model Building Questions and Answers
Wow! Thanks! -
Great tip!
-
Has anyone channeled a Revel '37 Ford pickup?
BadJuju replied to BadJuju's topic in Model Building Questions and Answers
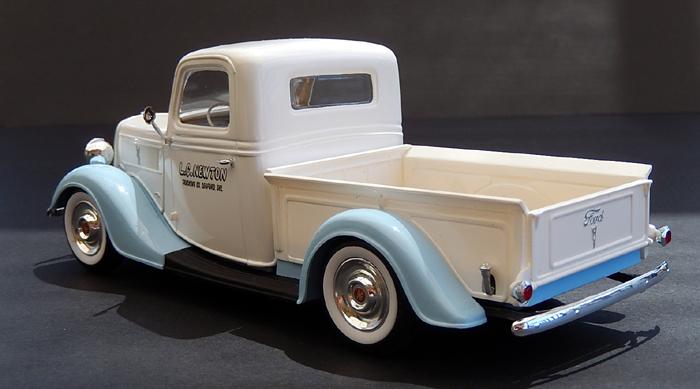
Thanks, Plowboy! I'll have to learn how to post to the progress section. Also, one more thing I love about your build is moving the front axle forward. Do you recall what you did there? One mistake: In thought the stock position of the box relative to the cab had its top in line with the cab side molding. It does not (see photo of another's completed stock truck below). I'll take more measurements next time I have it out and post an update. Maybe I don't need to section the bed after all.
-
Has anyone channeled a Revel '37 Ford pickup?
BadJuju replied to BadJuju's topic in Model Building Questions and Answers
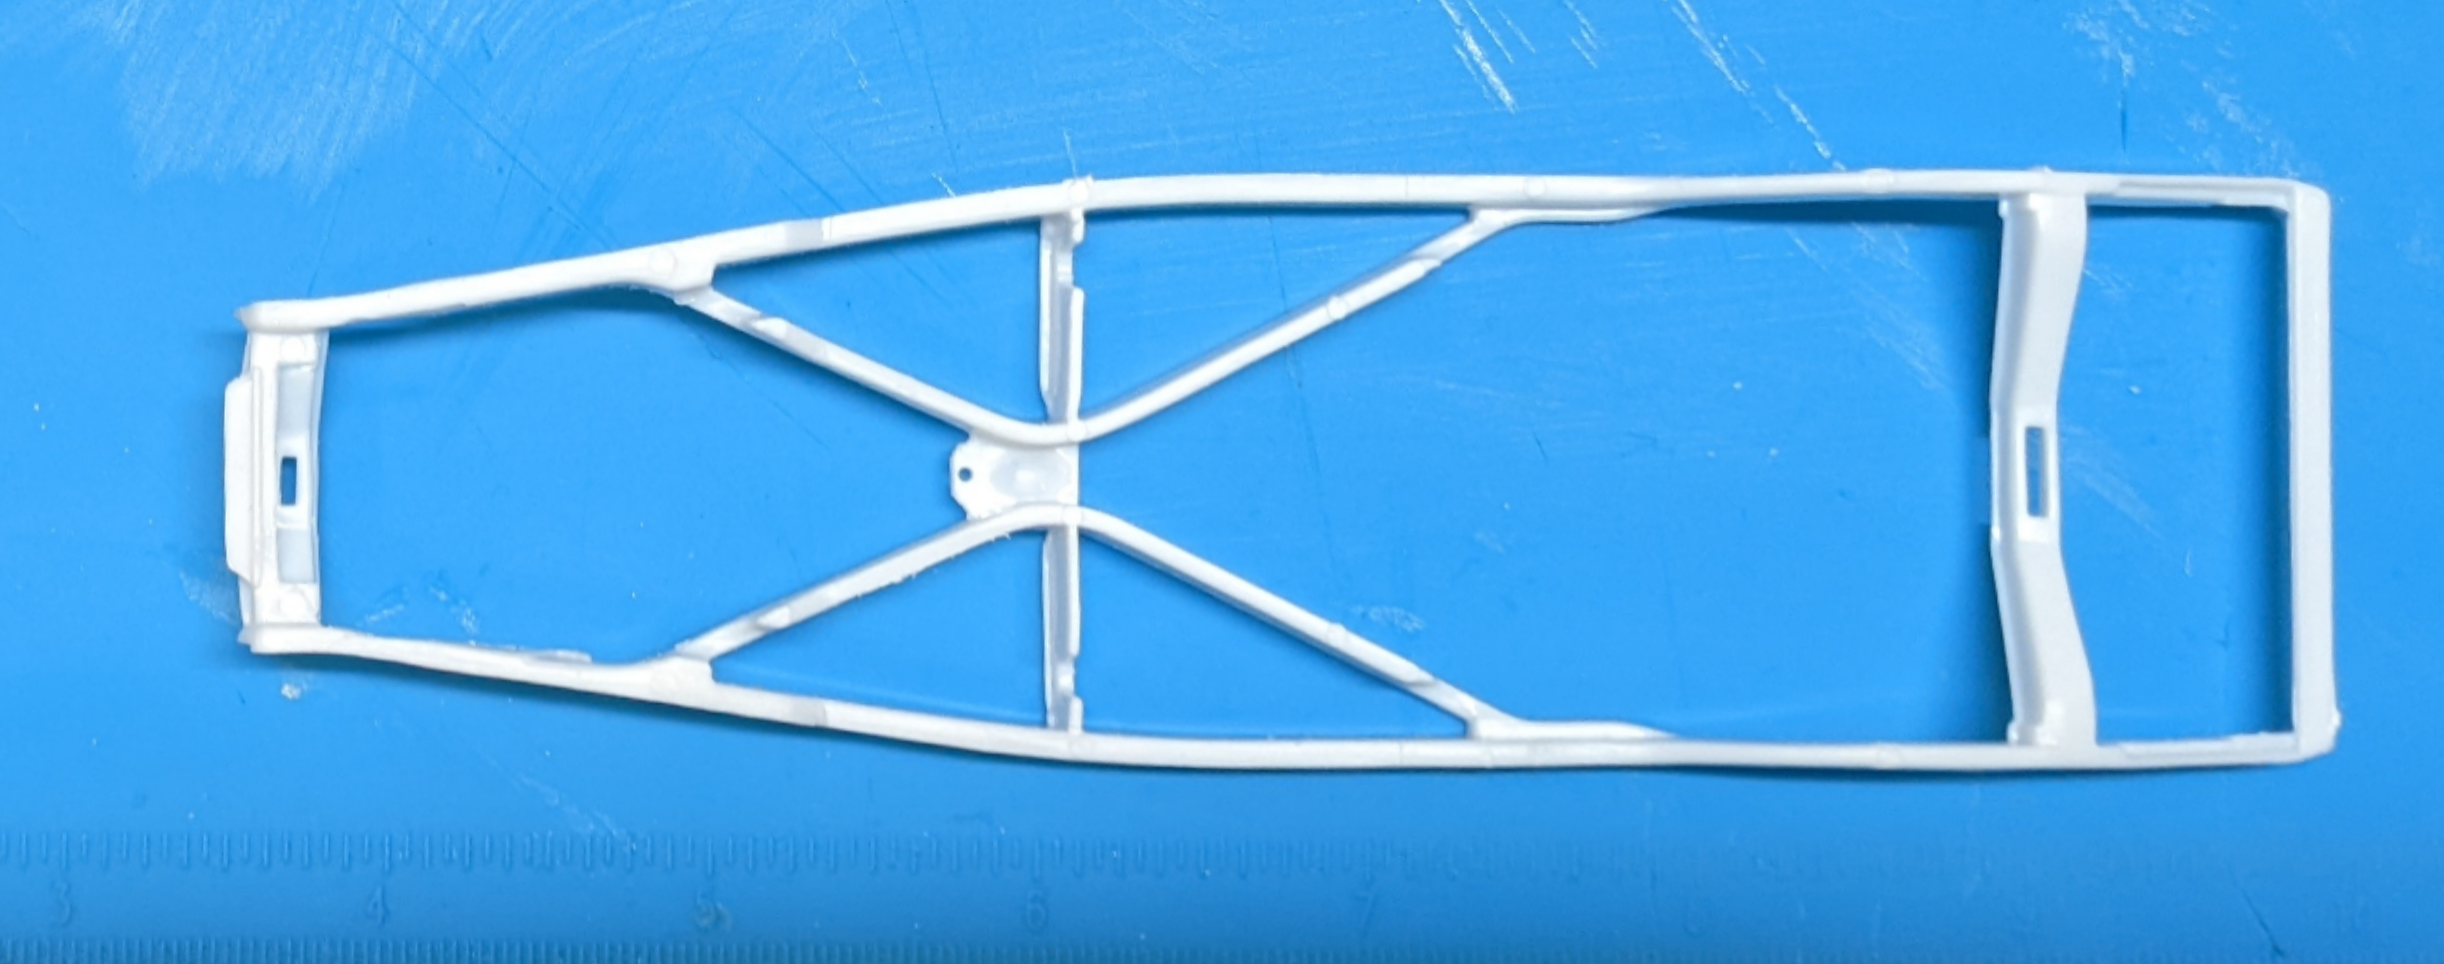
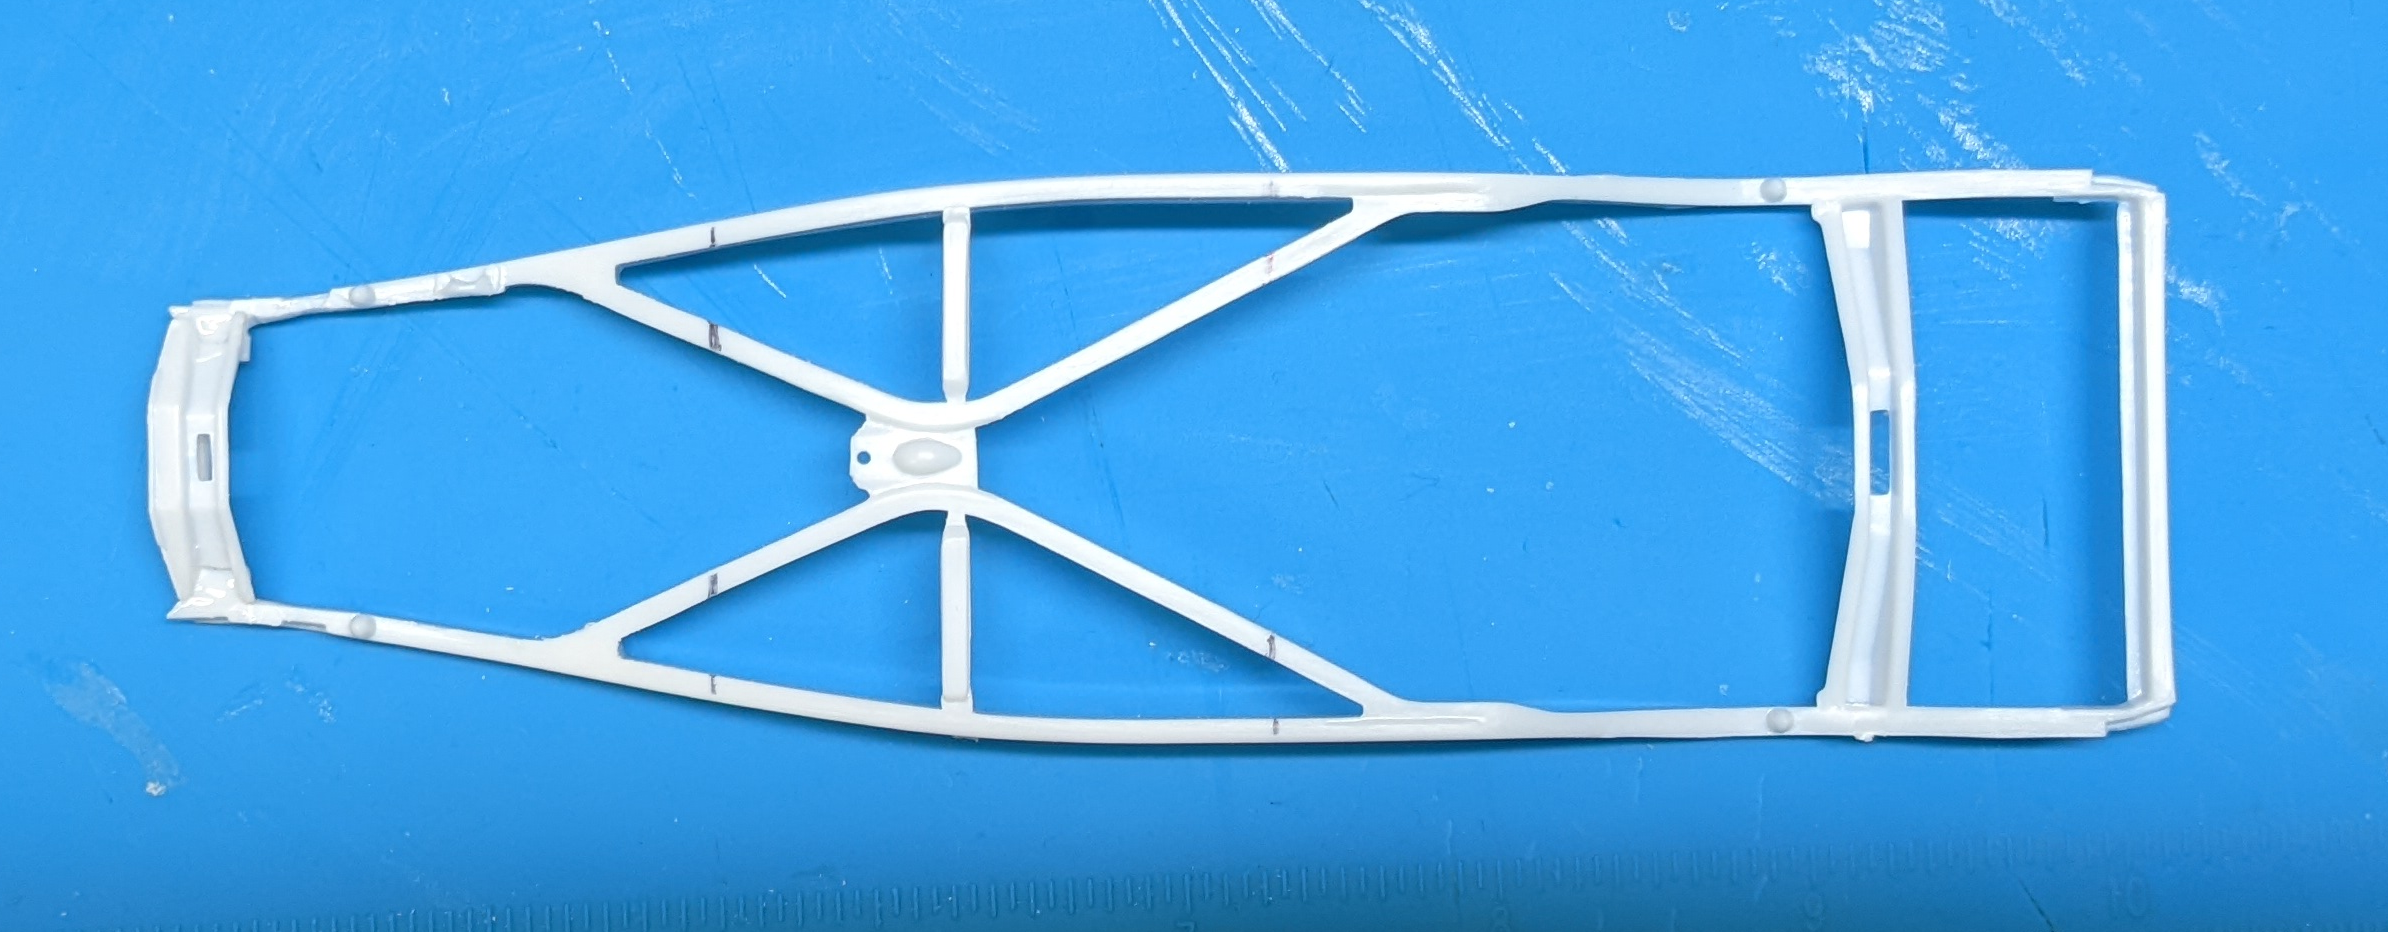
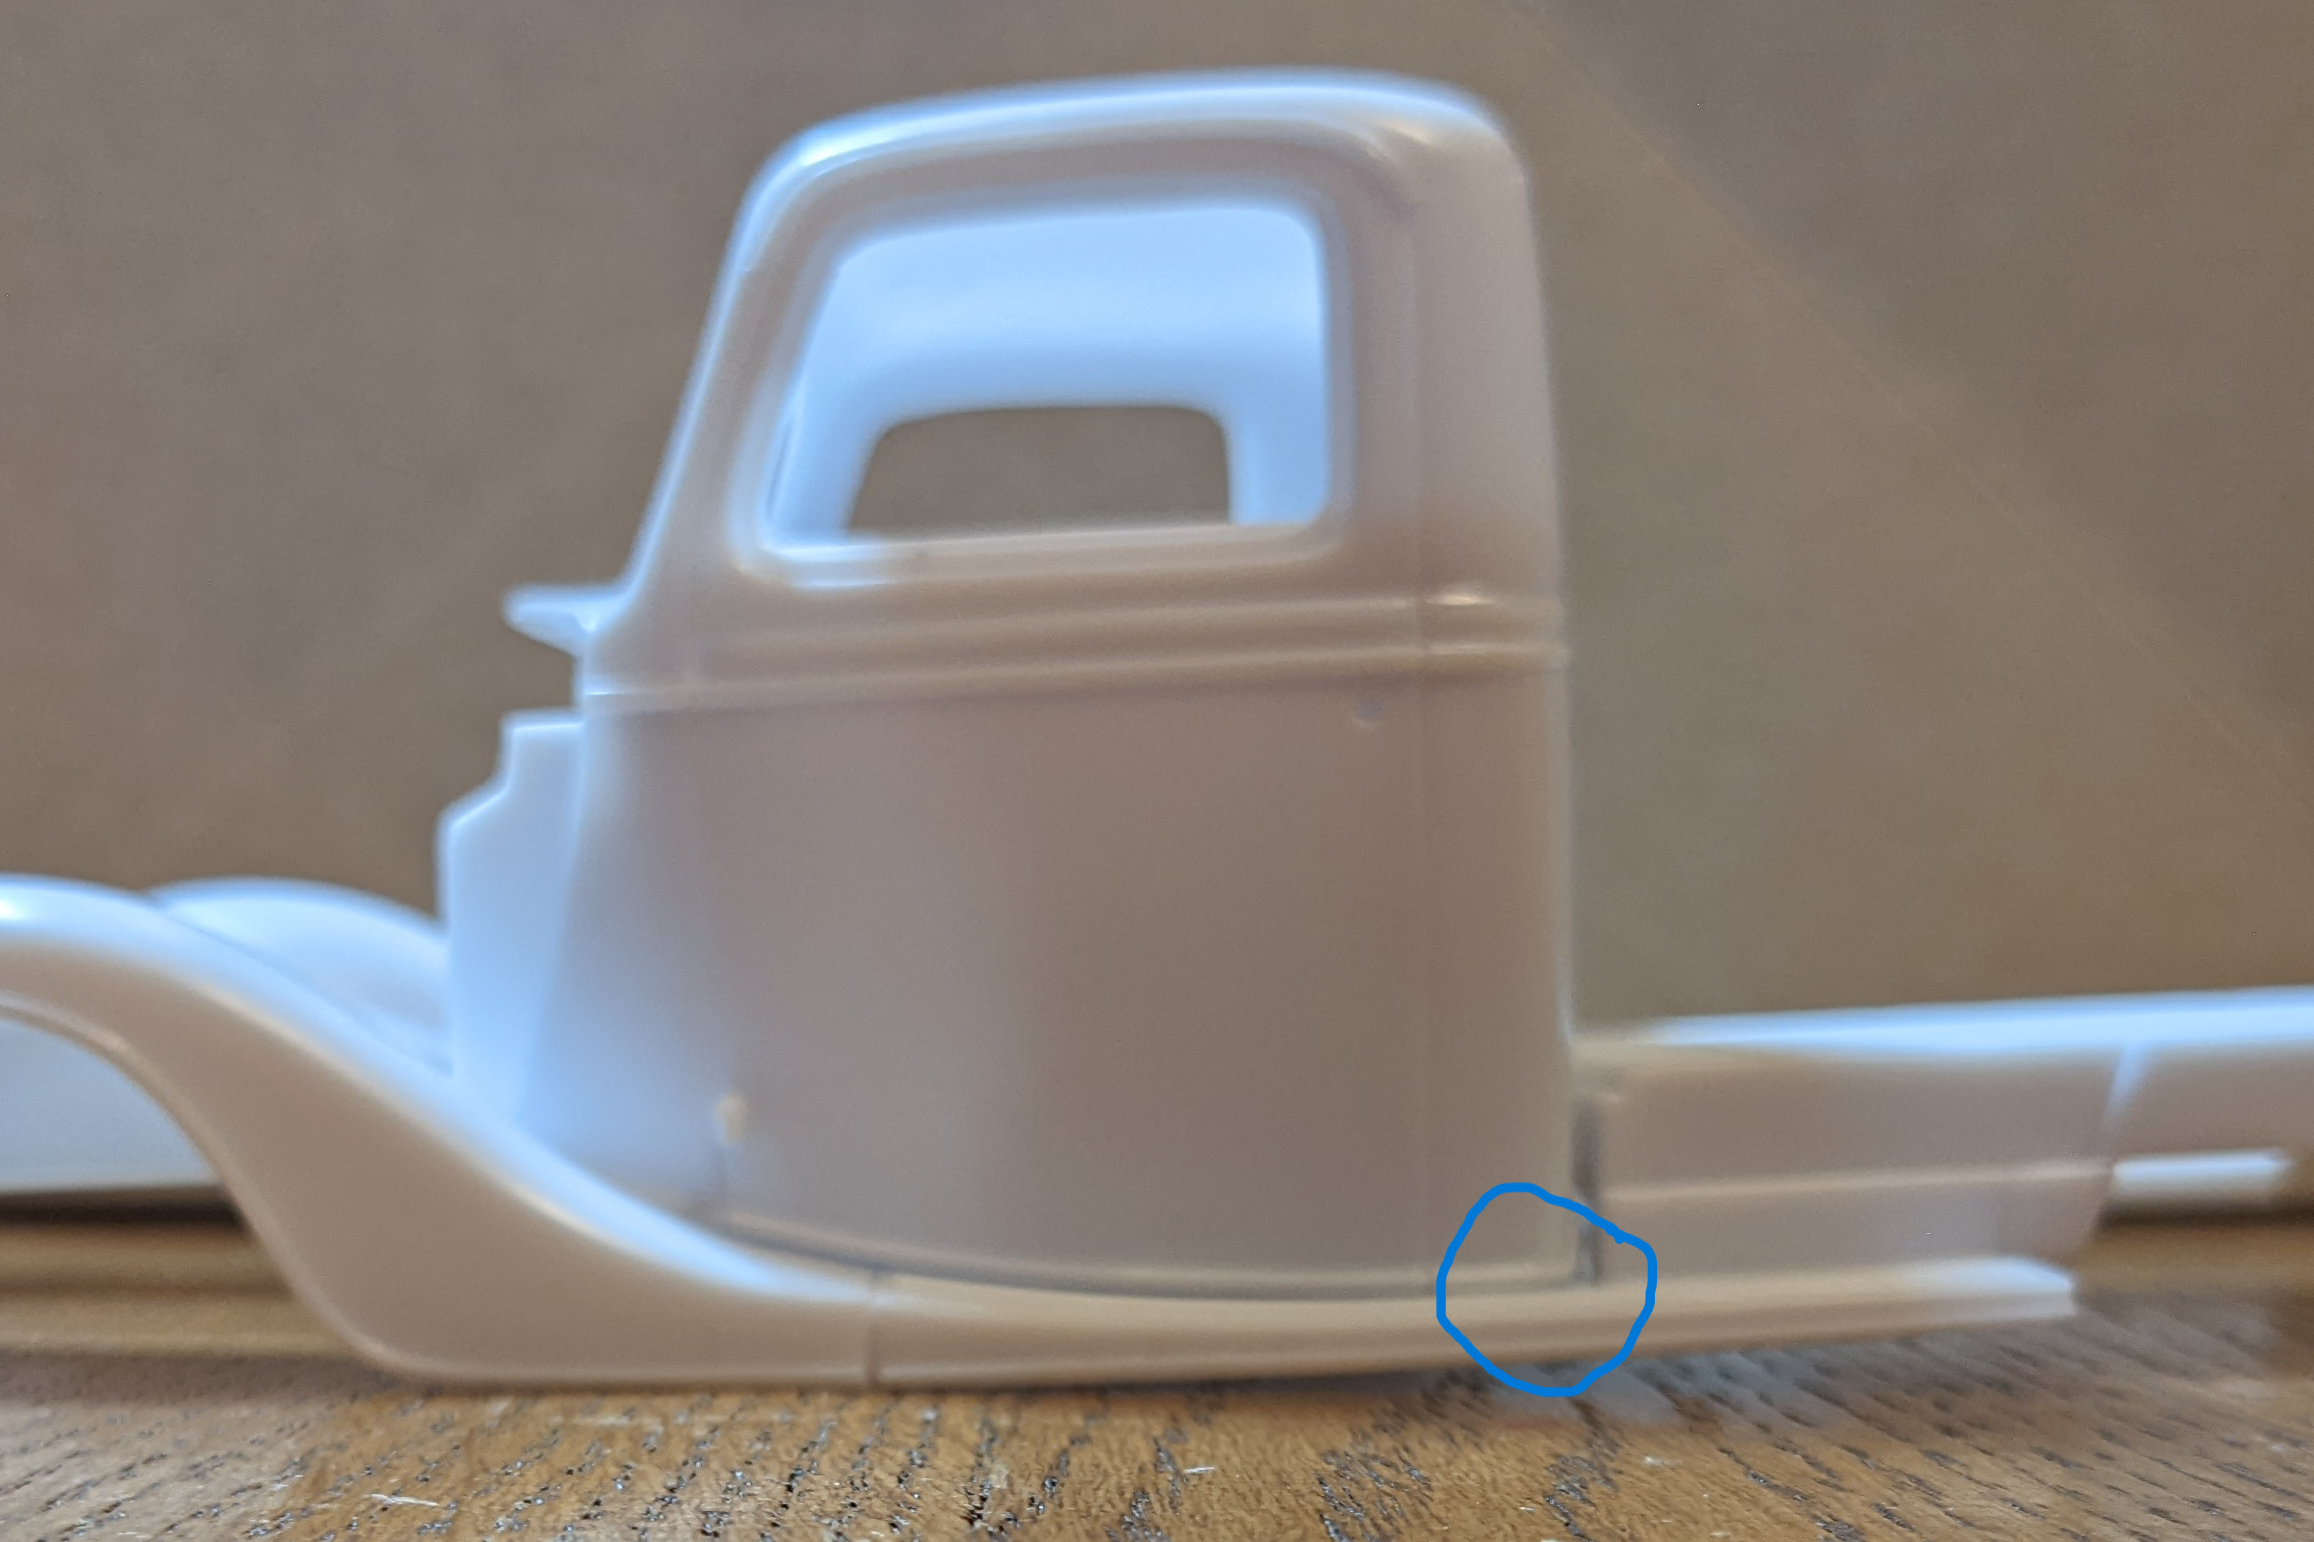
Got the reissue today. Here's what I've learned about how much I want to channel the body. I want the rear corner of the cab to be flush with the bottom of the frame (circled below). Going forward from there, the cab will sweep up, revealing more and more of the frame. This juxtaposition would remind me of an exposed Deuce frame, with its curve that matches the fender curve. The edge of the cab does come down partway over the frame. When I remove the running board, I'll also have to remove its thickness from the floorboard lip that also goes down partway over the frame, to keep it flush to the bottom of the cab. The vertical thickness of the running board is shown below as ~1.2mm. The frame goes down below the bottom of the running board by ~2mm, before the running board thickness is removed, as shown by the arrows below. So it means I'm looking to channel the body by 3.2mm. Using 3mm masking tape as a guide, and allowing for the kerf of my razor saw, should be a good approach. Here's what that looks like at the back of the cab. On the box sides, it would look like cutting off this, If I want to keep the top in line with the molding on the cab. I'd need to fill in and cut a new fuel filler hole on the driver side. If I leave the box alone, it will obscure the molding on the back of the cab, but not go above the window. I've seen it done both ways on photos of 1:1 subjects. It's aesthetics vs keeping the box stock and at full capacity. Either way, I'll add a "skirt" and roll pan to the bottom of it to align with the cab bottom. I'd choose to section the radiator as below. Shortening the fan shroud and water pipes by 3.2mm off the bottom appears to be no problem (no photos). Either a parts box electric fan or adding a scratch belt and pully to the FEAD is required to lower the fan appropriately. The radiator shell would need to be lowered 3.2mm, as well. That work is a long way off yet, and I'll show it when I cross that bridge. Here's what it would look like to take the same amount off the bottom of the firewall. I'd also remove the parts that extend below the upward curve of the cab. Again, I may go with a modified, cleaner and flatter firewall, a la Plowboy. This photo shows it would be easiest to remove the height from the front portion of the interior, only affecting the area below the seat cushion. I'll also be looking into the possibility of using intrior parts from a Revell '37 Ford convertible donor kit I've been robbing for parts in other builds (as mentioned above). I've decided to chop the cab 3mm (~3" in 1/25 scale) up in the glass area. In so doing, I'll be tilting the A pillars to the rear. I'll show that when tackled, as well. Thanks for looking in and I hope this topic is useful to those who have, or are looking to buy, this kit and modify it similarly. More to come as I actually start the surgery!