GlueSniffer
-
Posts
48 -
Joined
-
Last visited
Content Type
Profiles
Forums
Events
Gallery
Everything posted by GlueSniffer
-

Temporarily gluing panels in place?
GlueSniffer replied to GlueSniffer's topic in Model Building Questions and Answers
Glad to know that either works! I have plenty of BSI CA glues but USPS seems to have been holding my Tamiya extra thin 45 minutes from my house for 4 days now ?♂️ So you had to graft the roof on? Guessing it was a Camaro roof on a Firebird Convertible? Either was that looks like one precise fit! -
Temporarily gluing panels in place?
GlueSniffer replied to GlueSniffer's topic in Model Building Questions and Answers
What a spectacular build! I had to look through the whole build because just looking at it for the information I was seeking was not enough! The raw aluminum technique looks awesome! Thanks for sharing your method! -
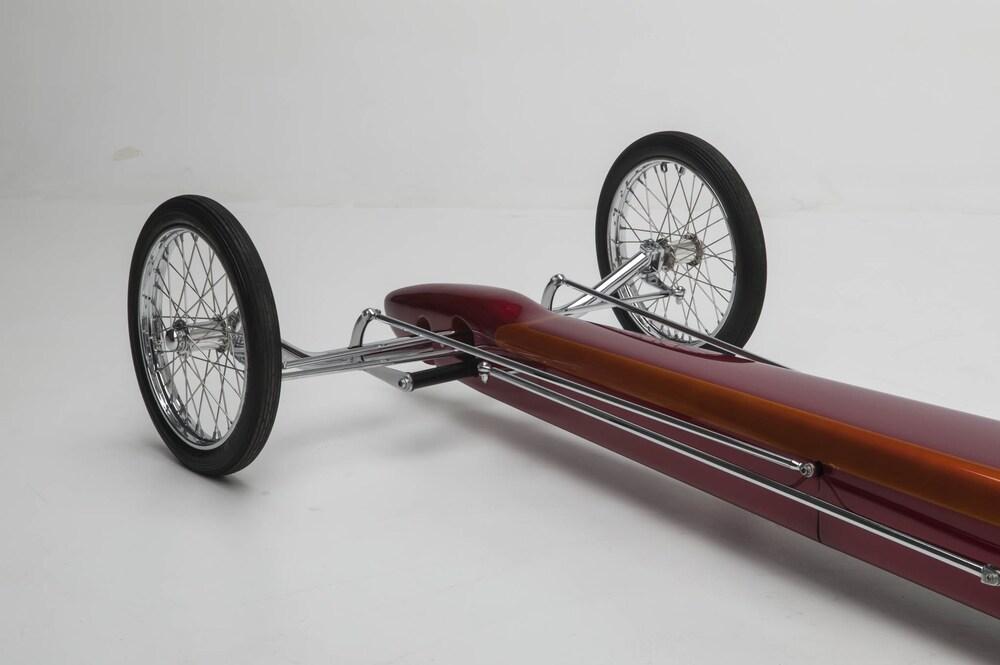
I’m looking for a solution for holding body panels in place while fitting, leveling, and body working them. I.e. I’m building a dragster and it’s body is comprised of 5 separate pieces. Dragster bodies because their shape always seem to be a little twisted right out of the box. So a lot of sanding and fitting is necessary for a great finally result. This question applies to other cars, not just dragsters (hoods, trunks, doors) that need to be leveled with the body better. Is there a certain type of glue or technique you guys use to hold the panels in place while sanding them or body working them together that is sturdy enough and easily broken free once the body work is done? I’m guessing a drop or two of CA glue would do the job but can be broken free and cleaned up before paint since it doesn’t melt the styrene. Just curious if there is trade secrets or tips to doing this that I don’t know of! Thanks!
-
Tom Hanna inspired front engine AA/FD build
GlueSniffer replied to GlueSniffer's topic in WIP: Drag Racing Models
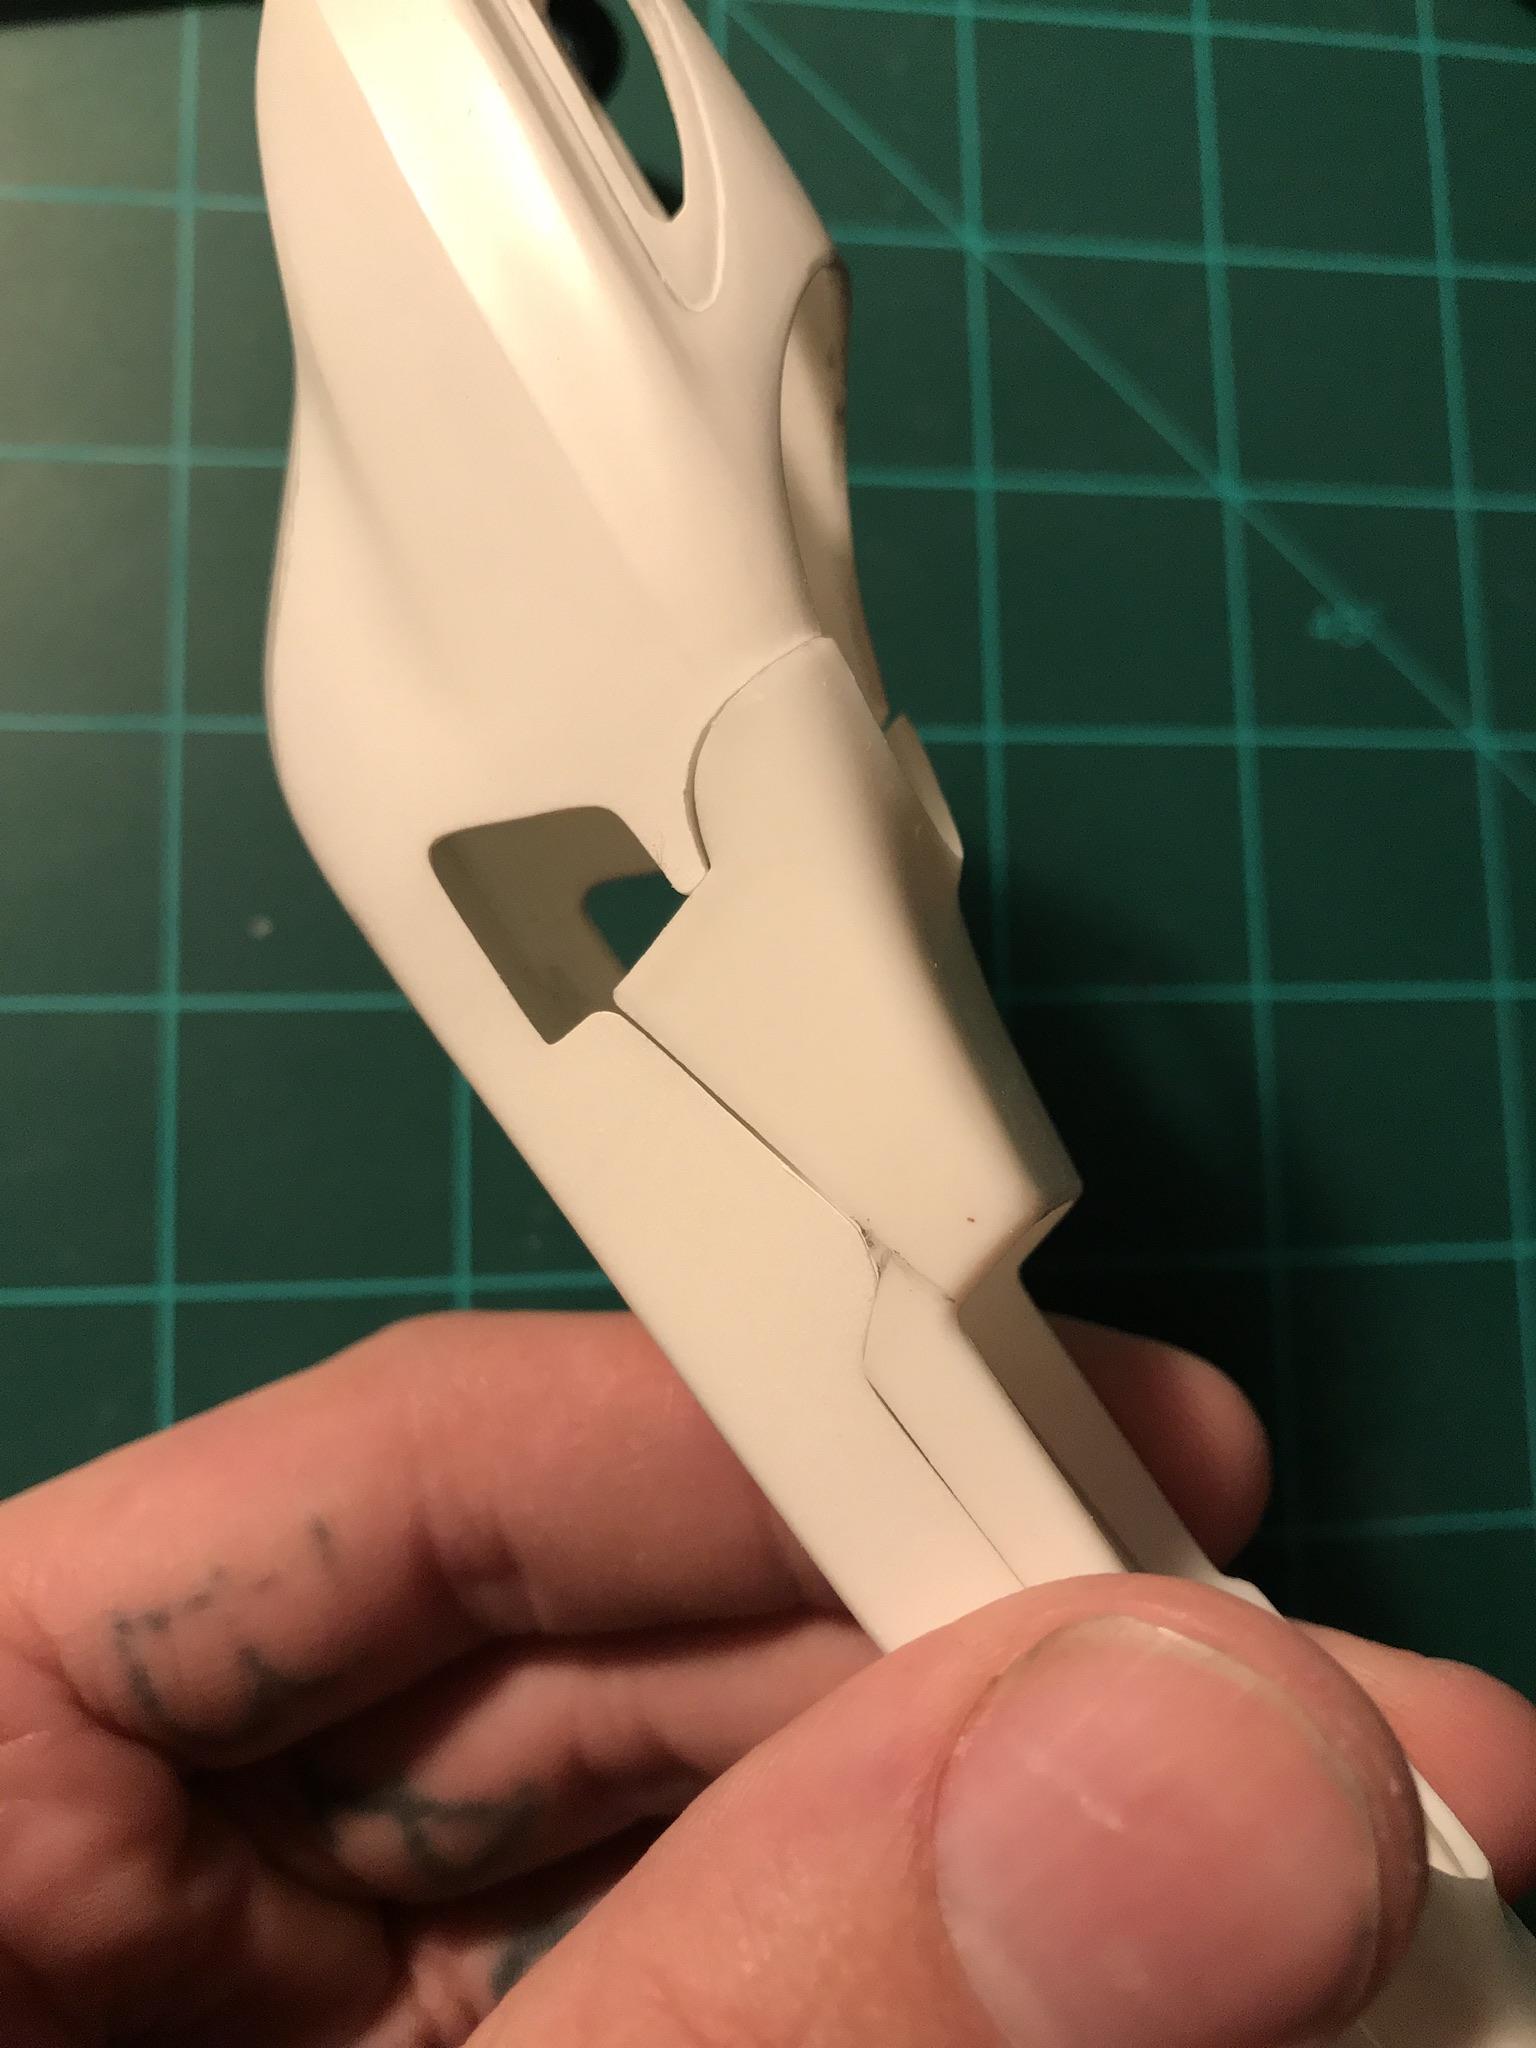
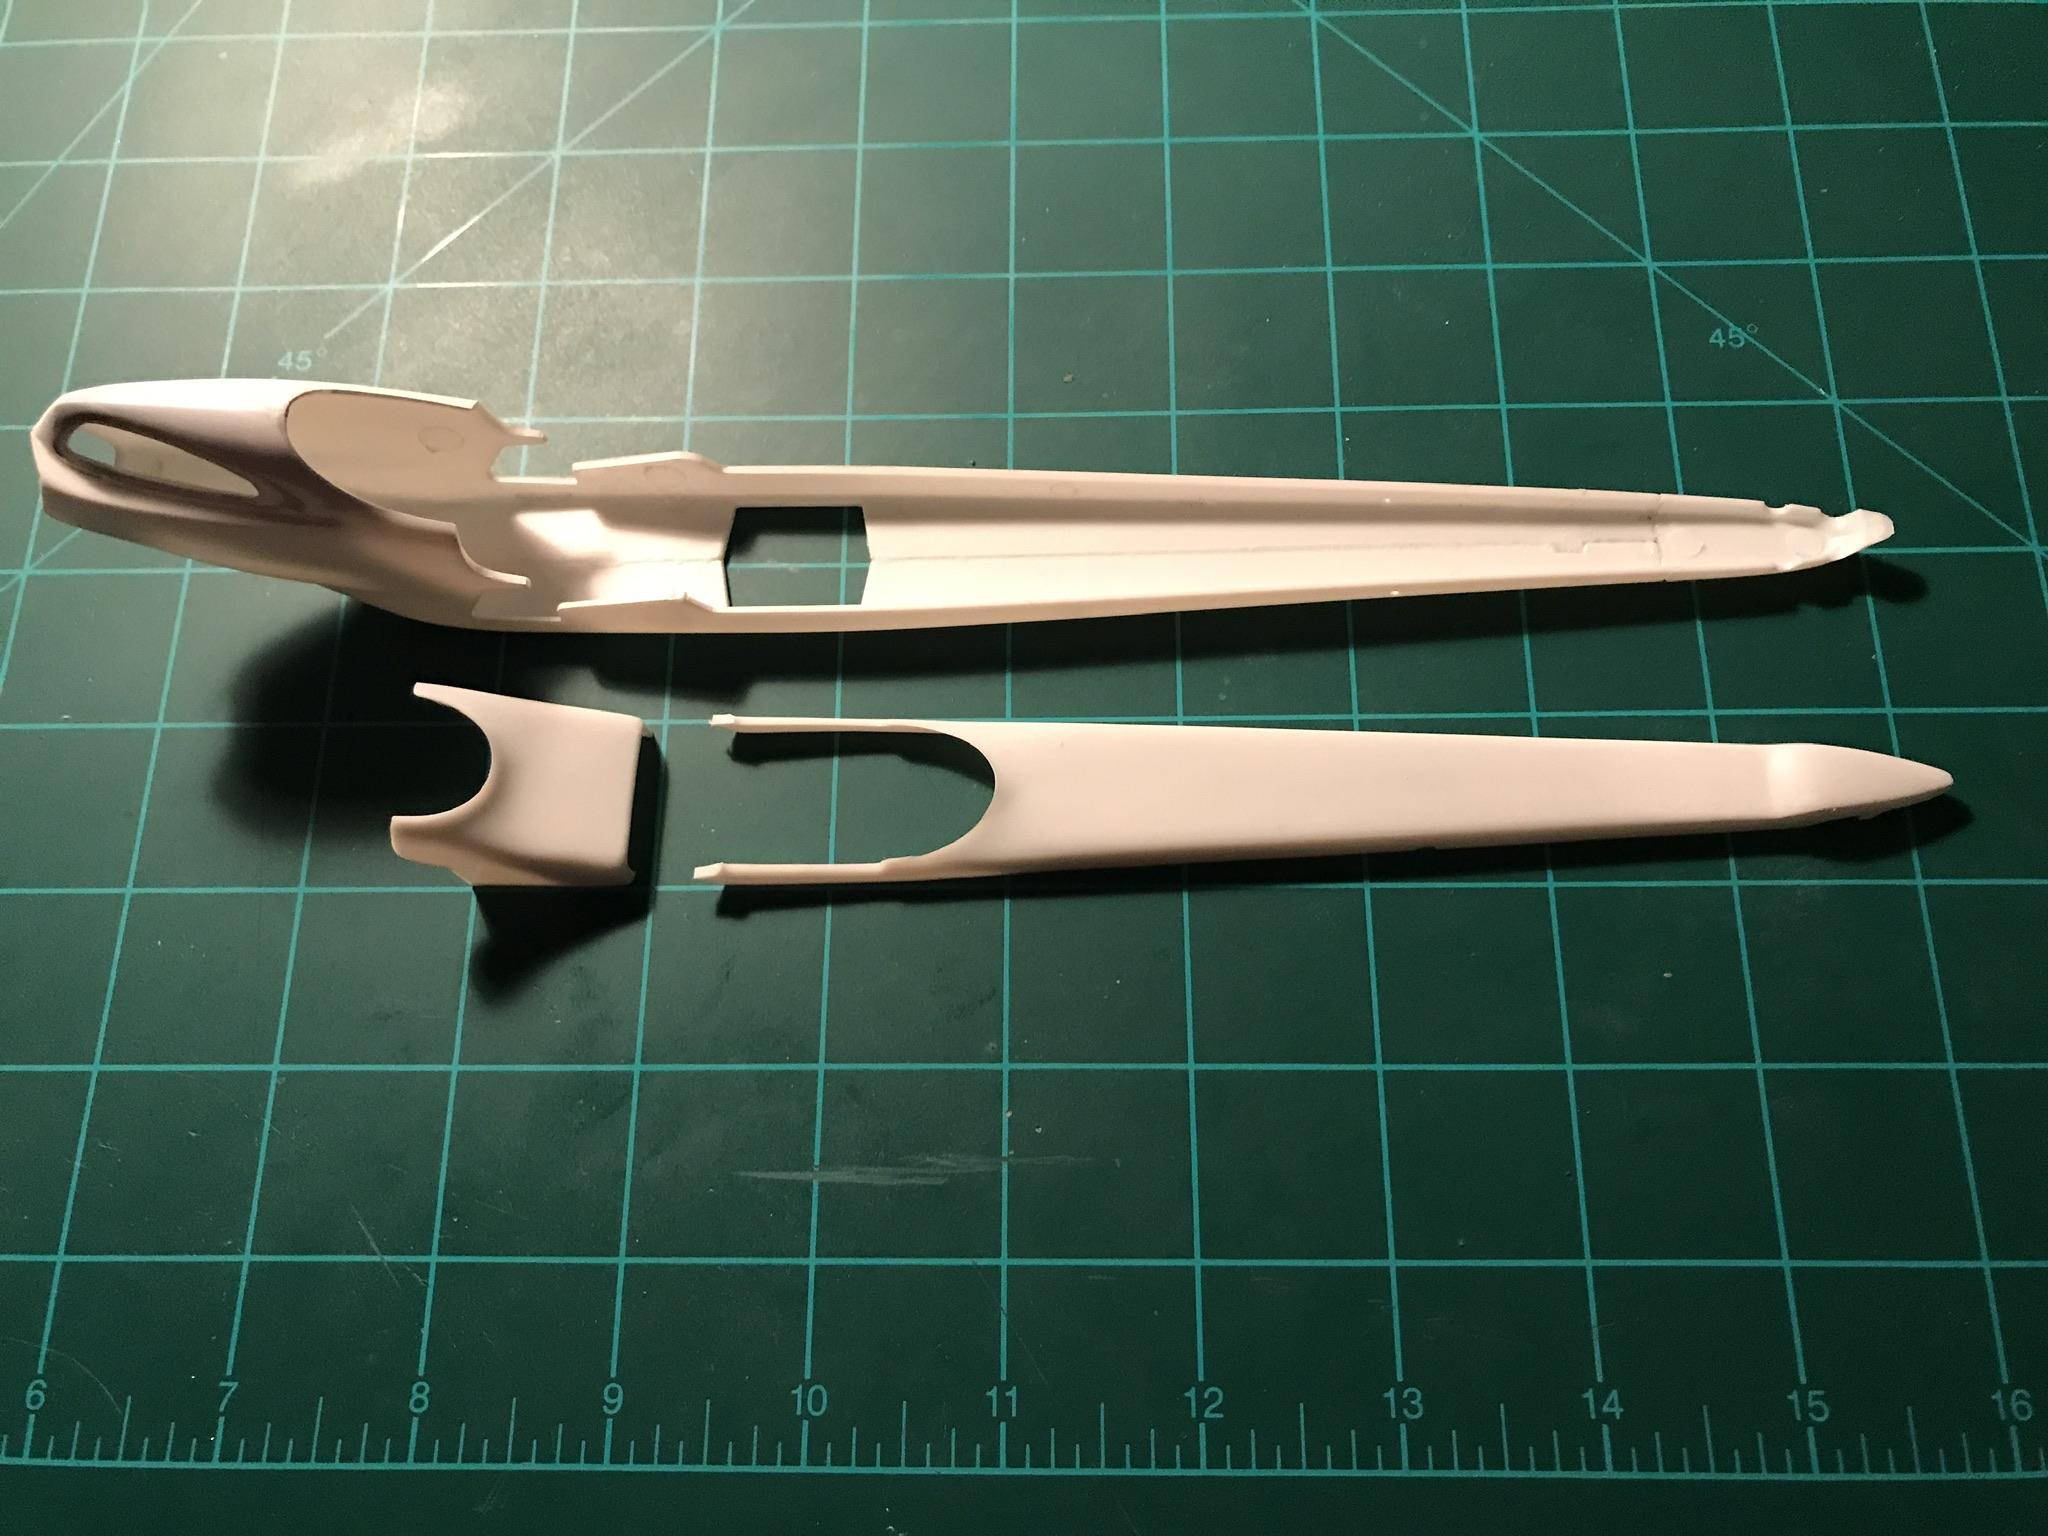
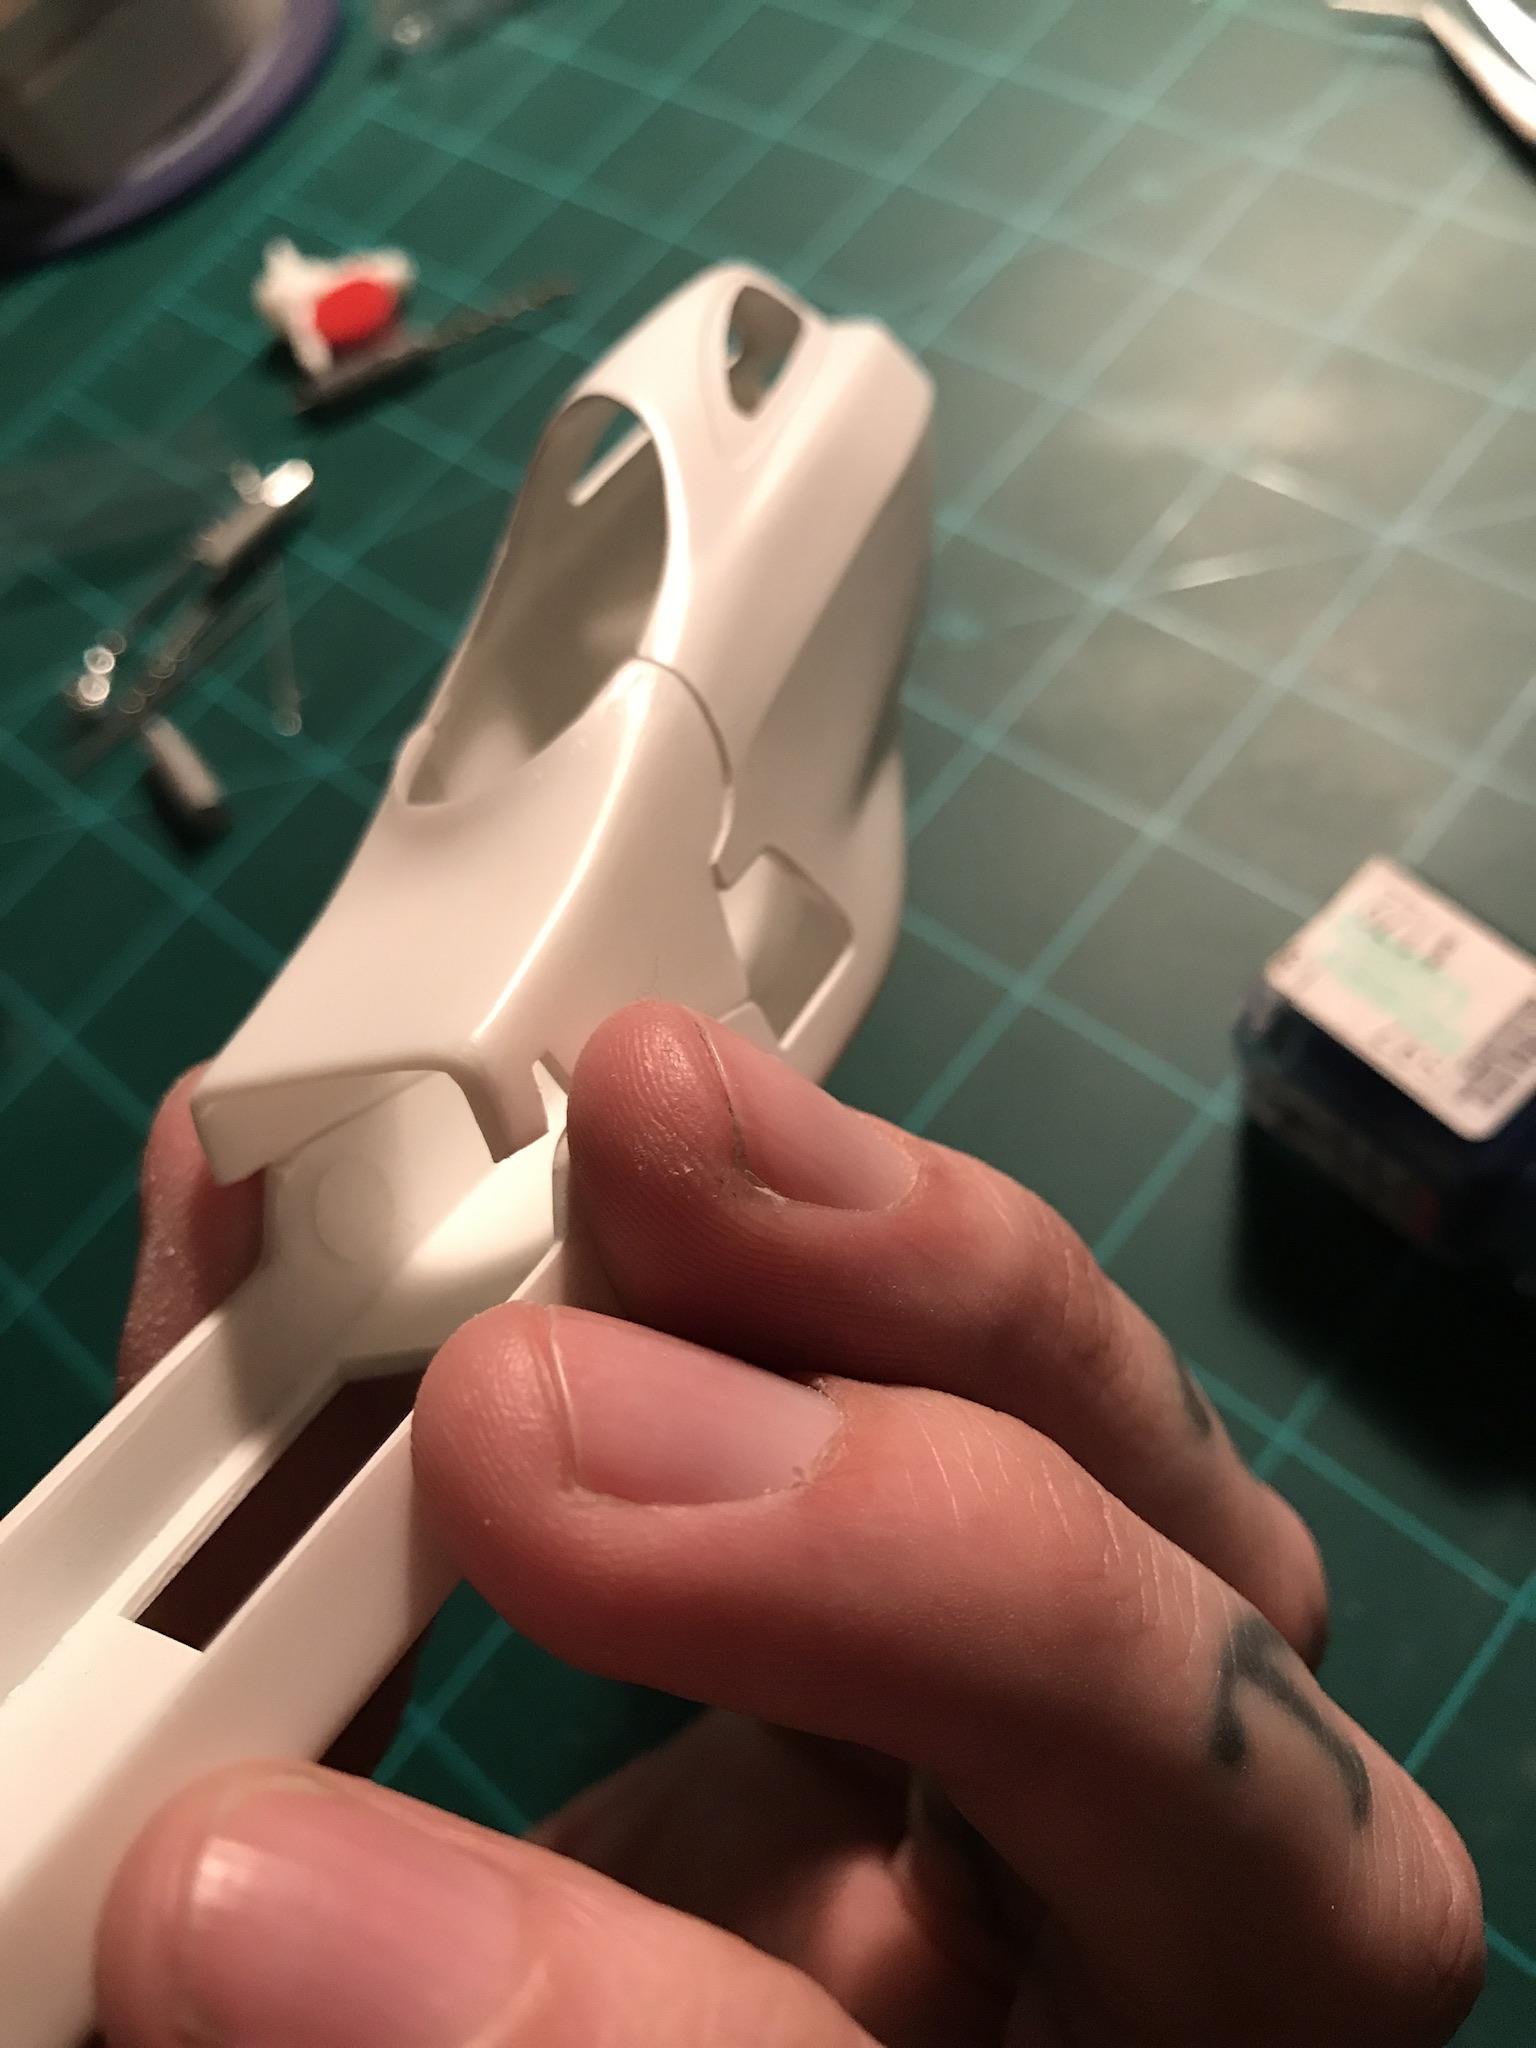
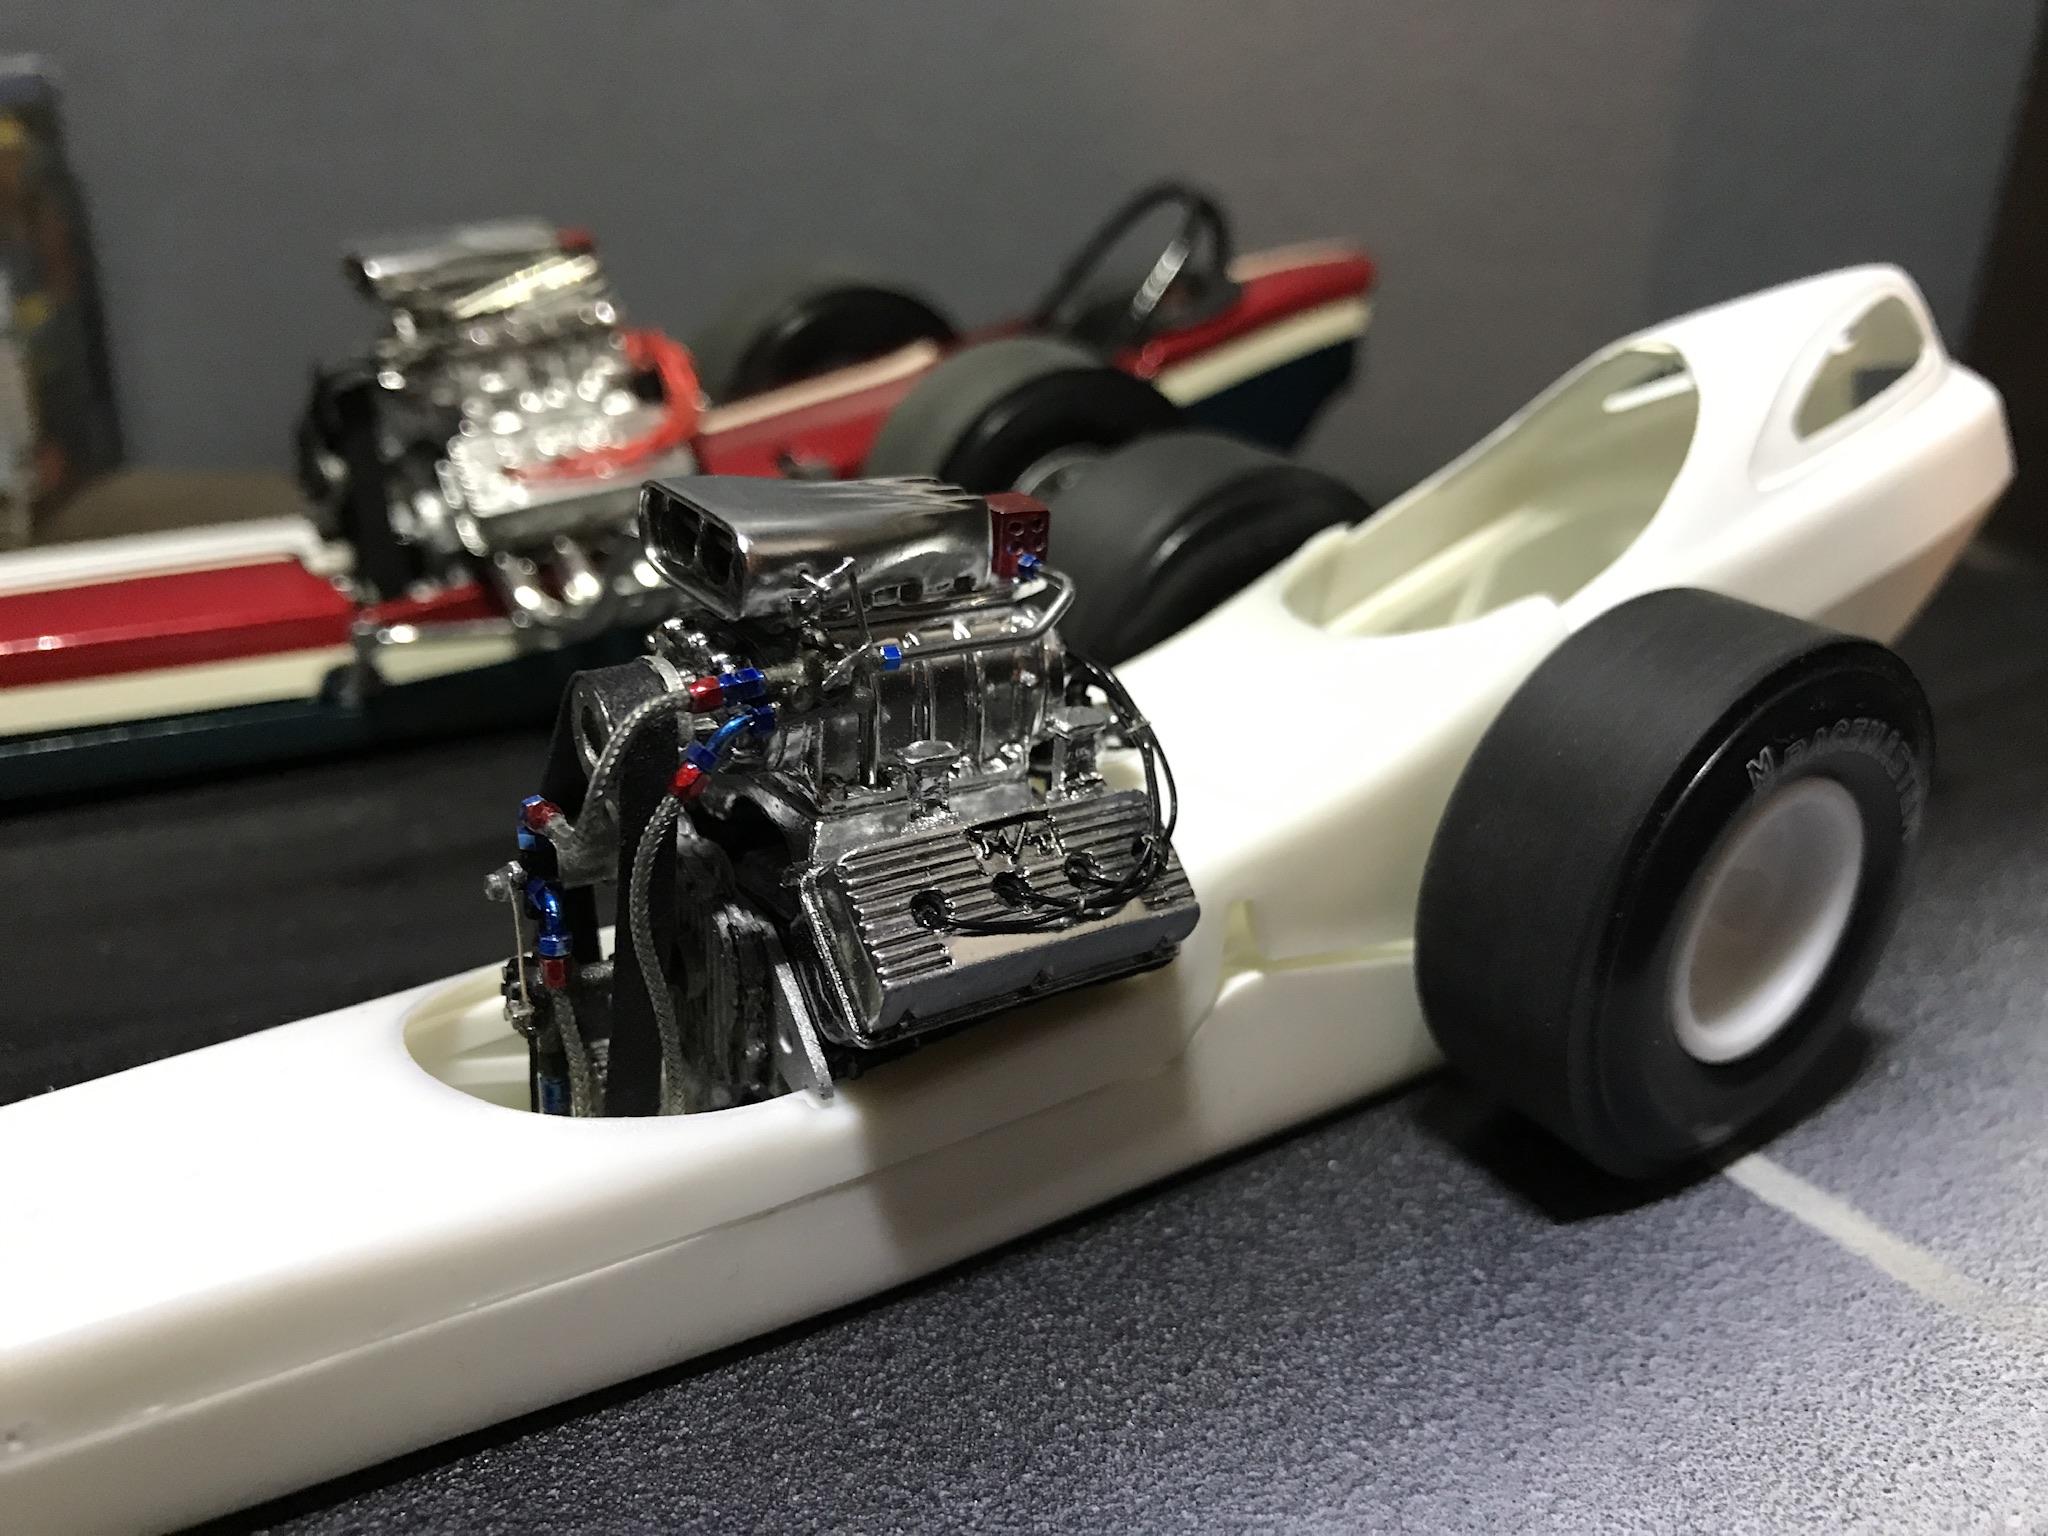
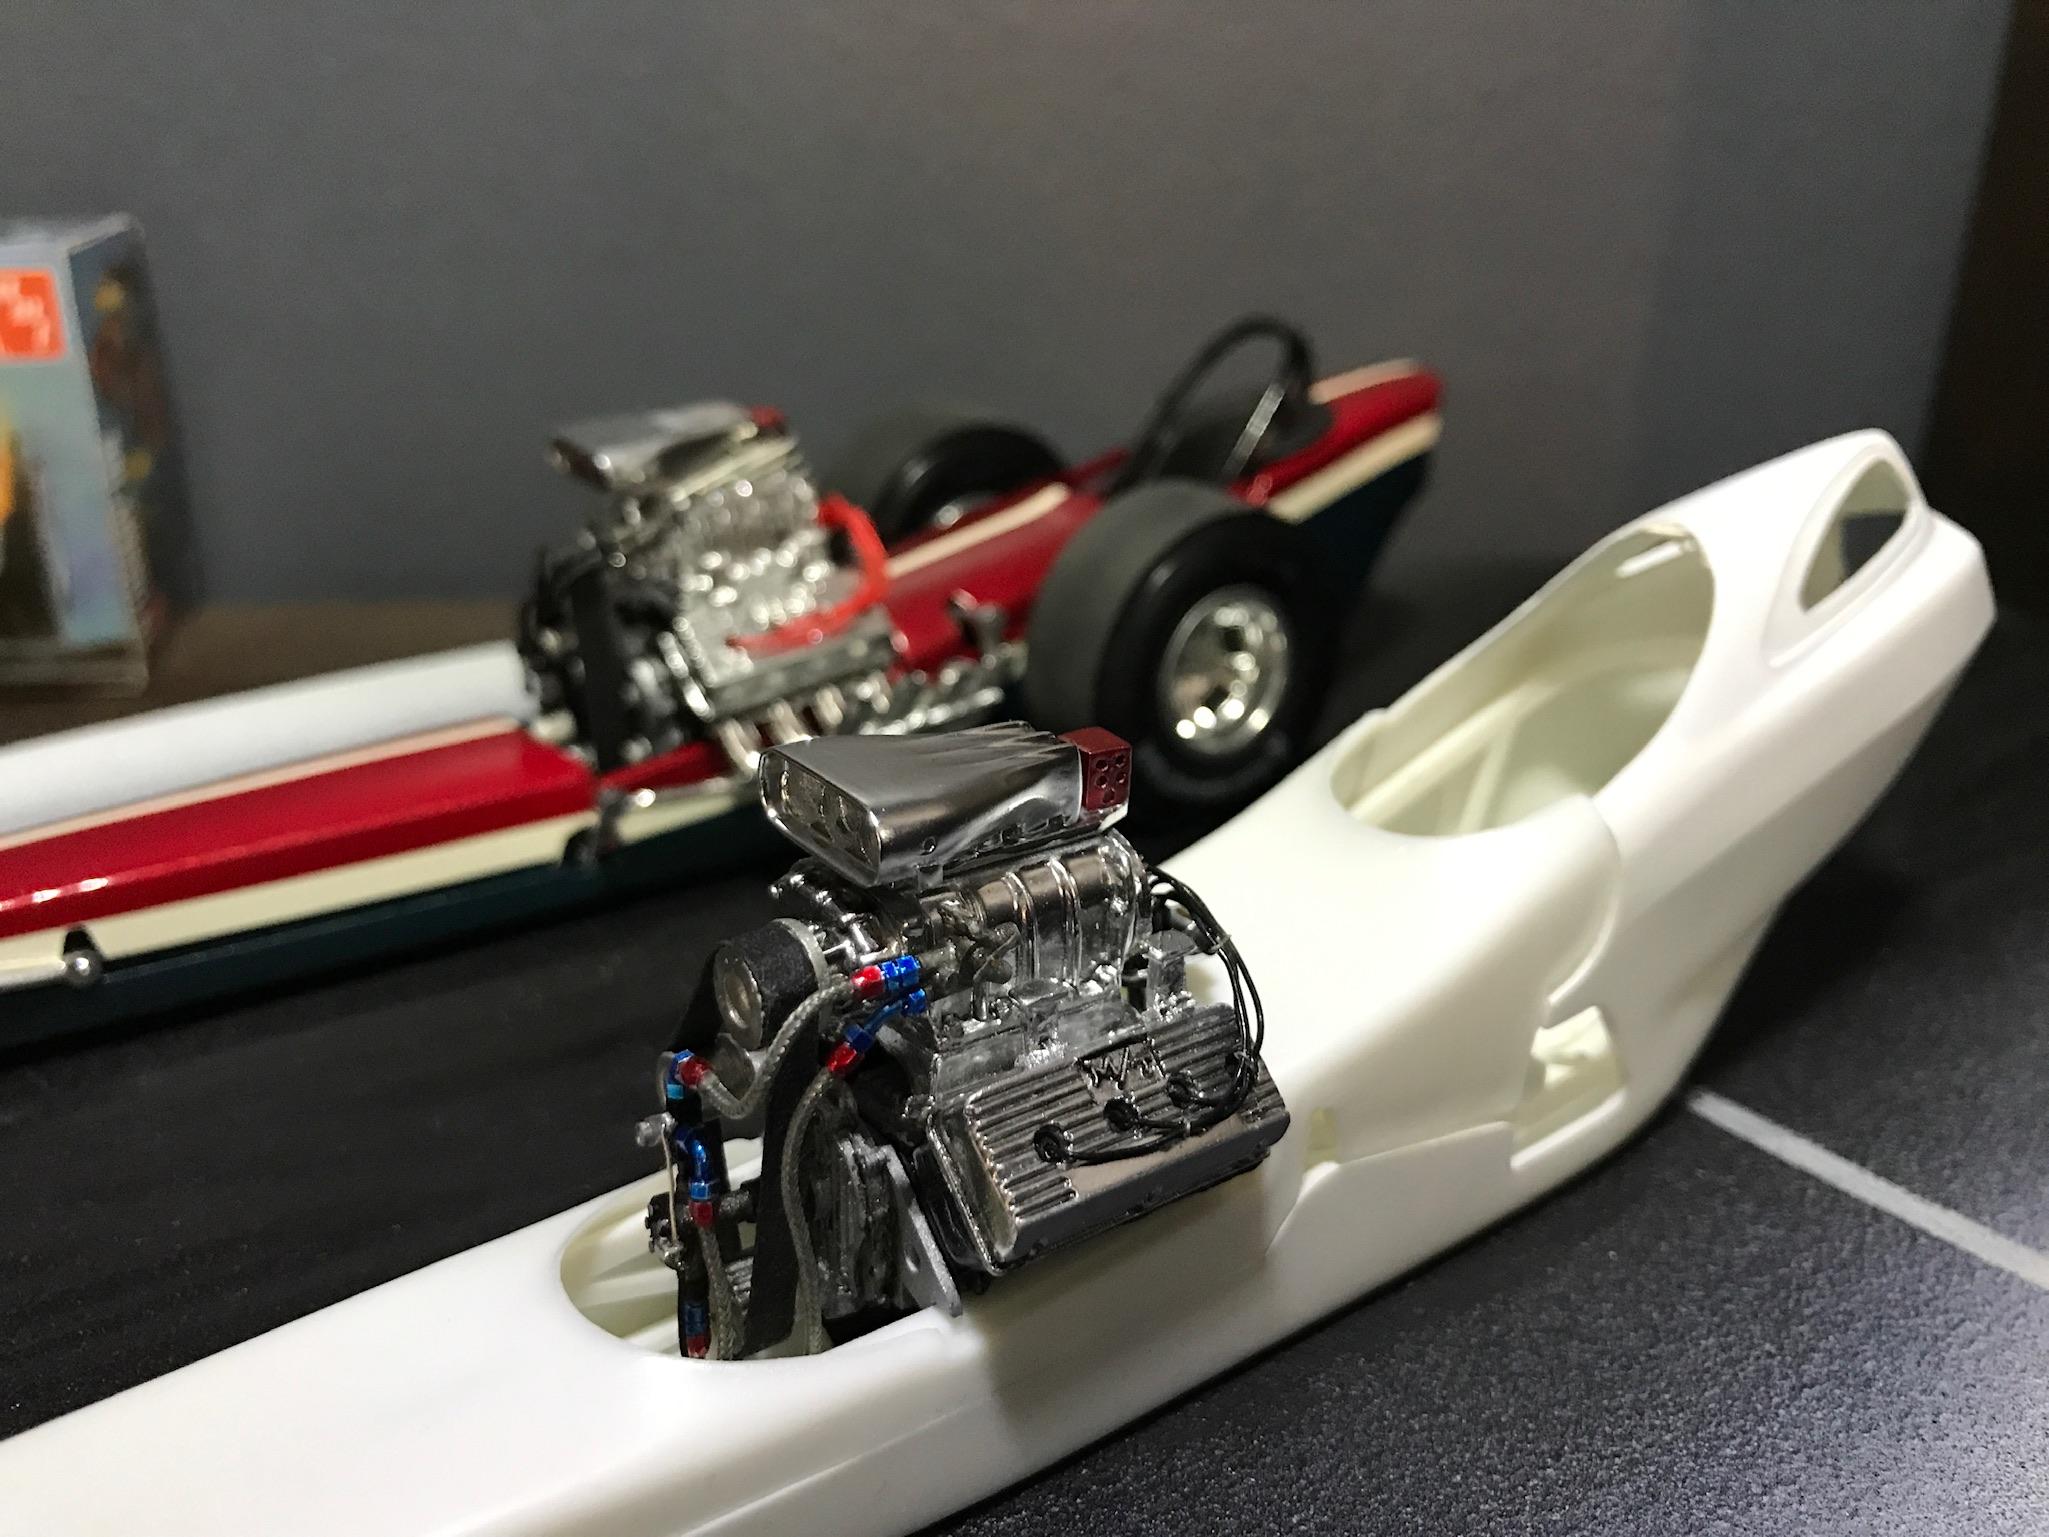
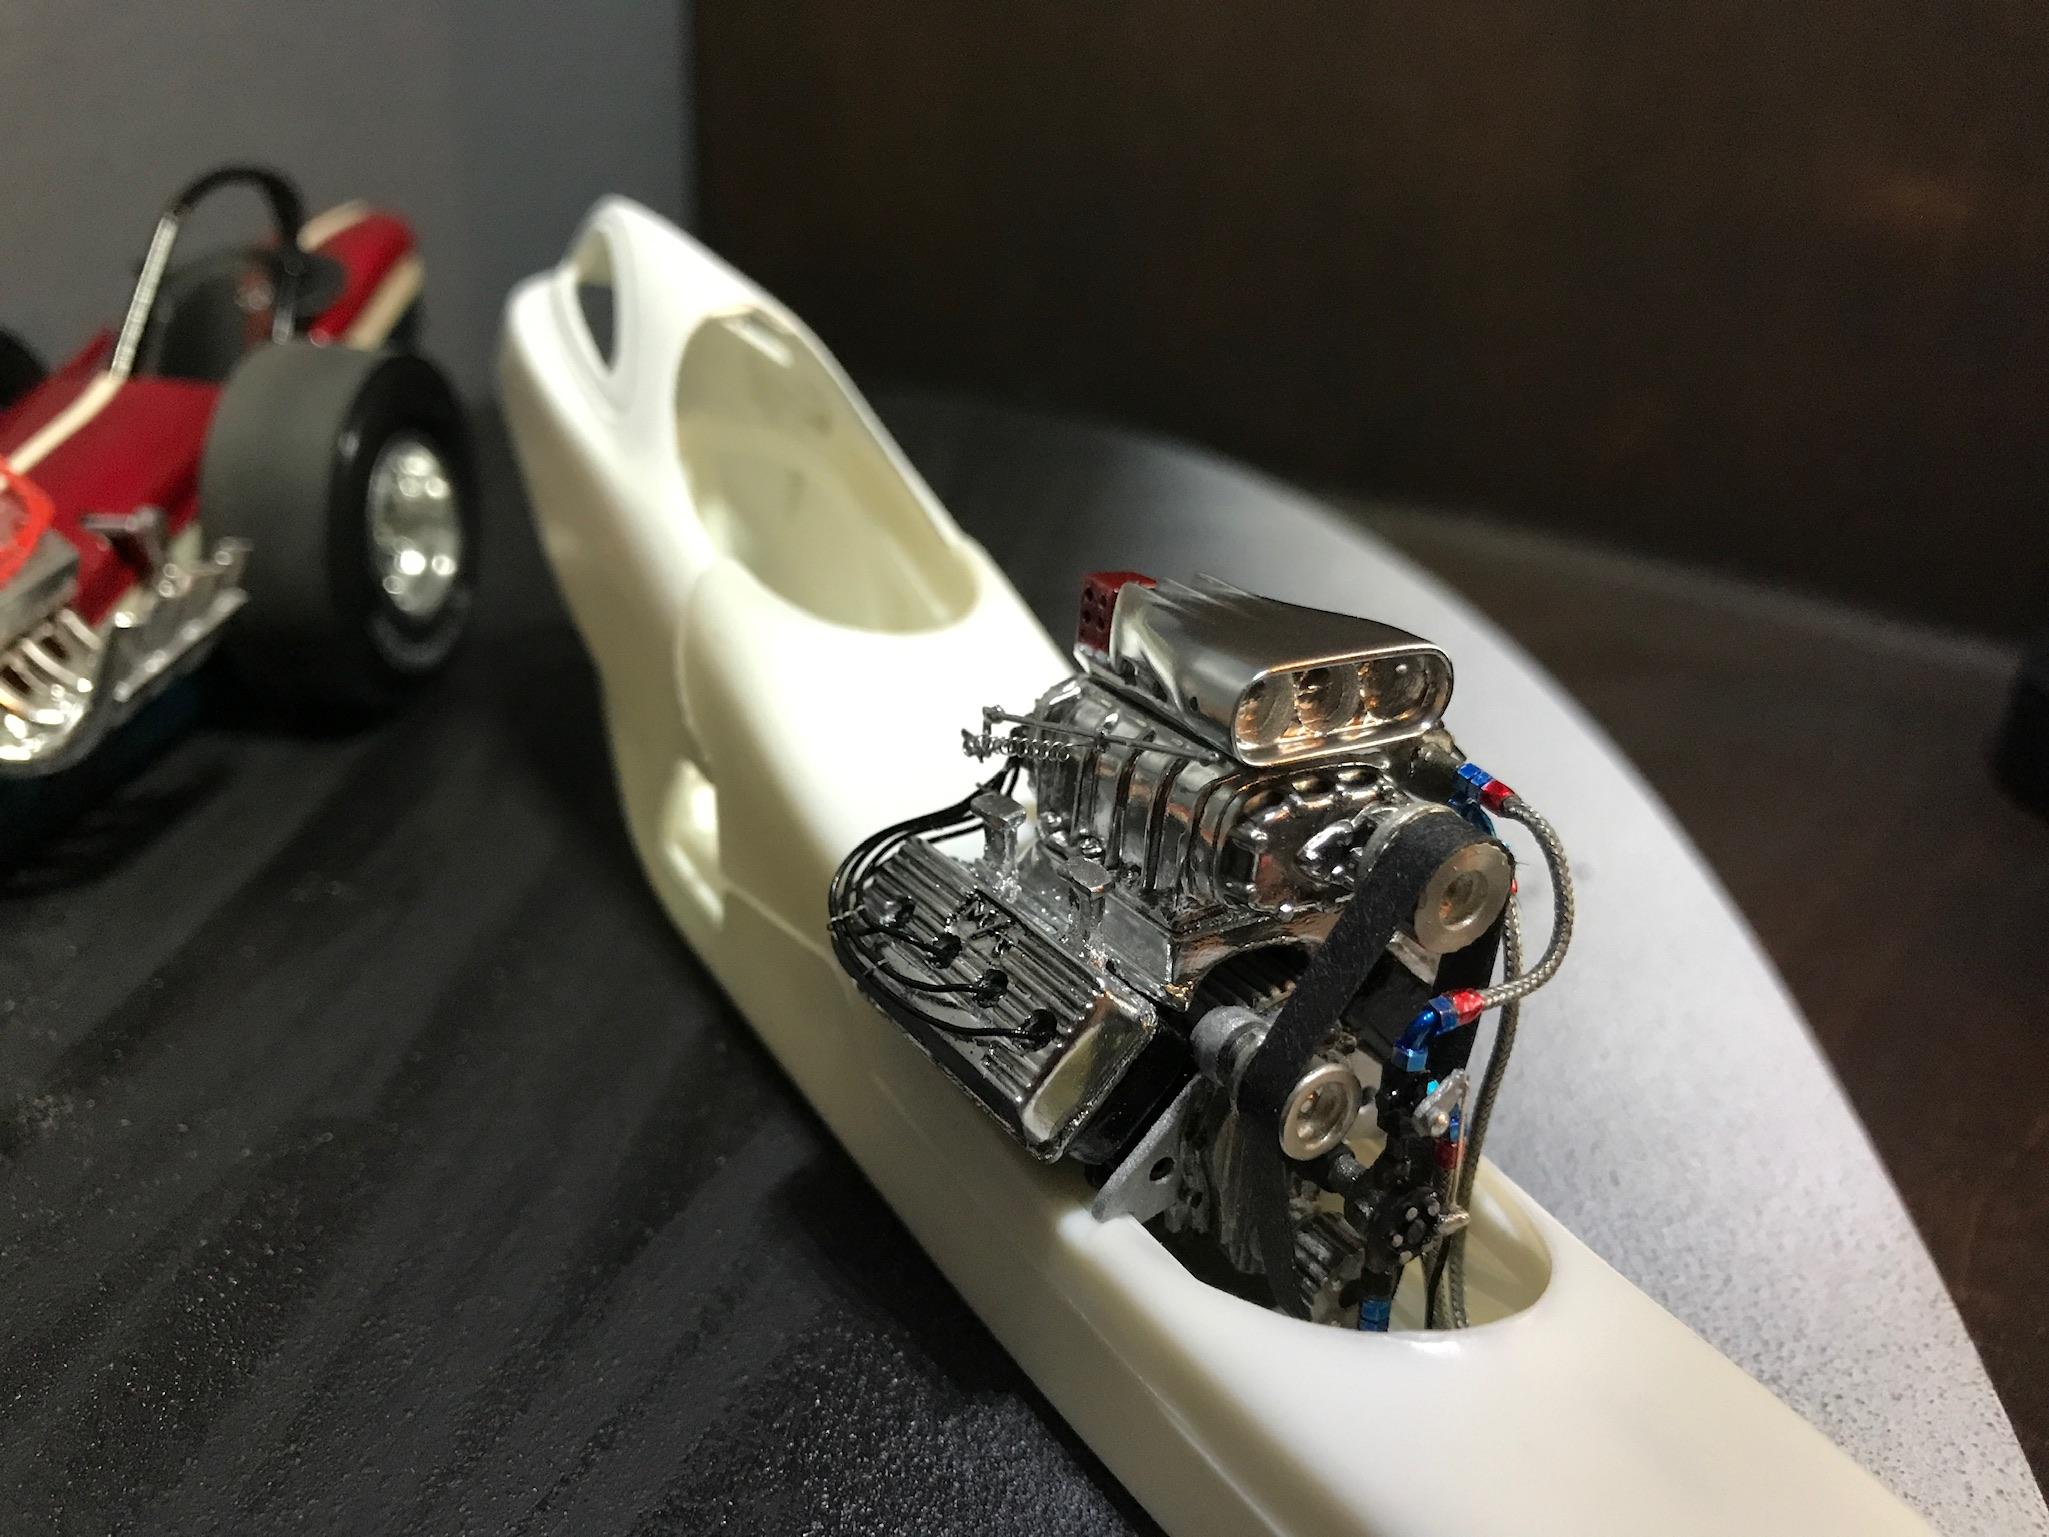
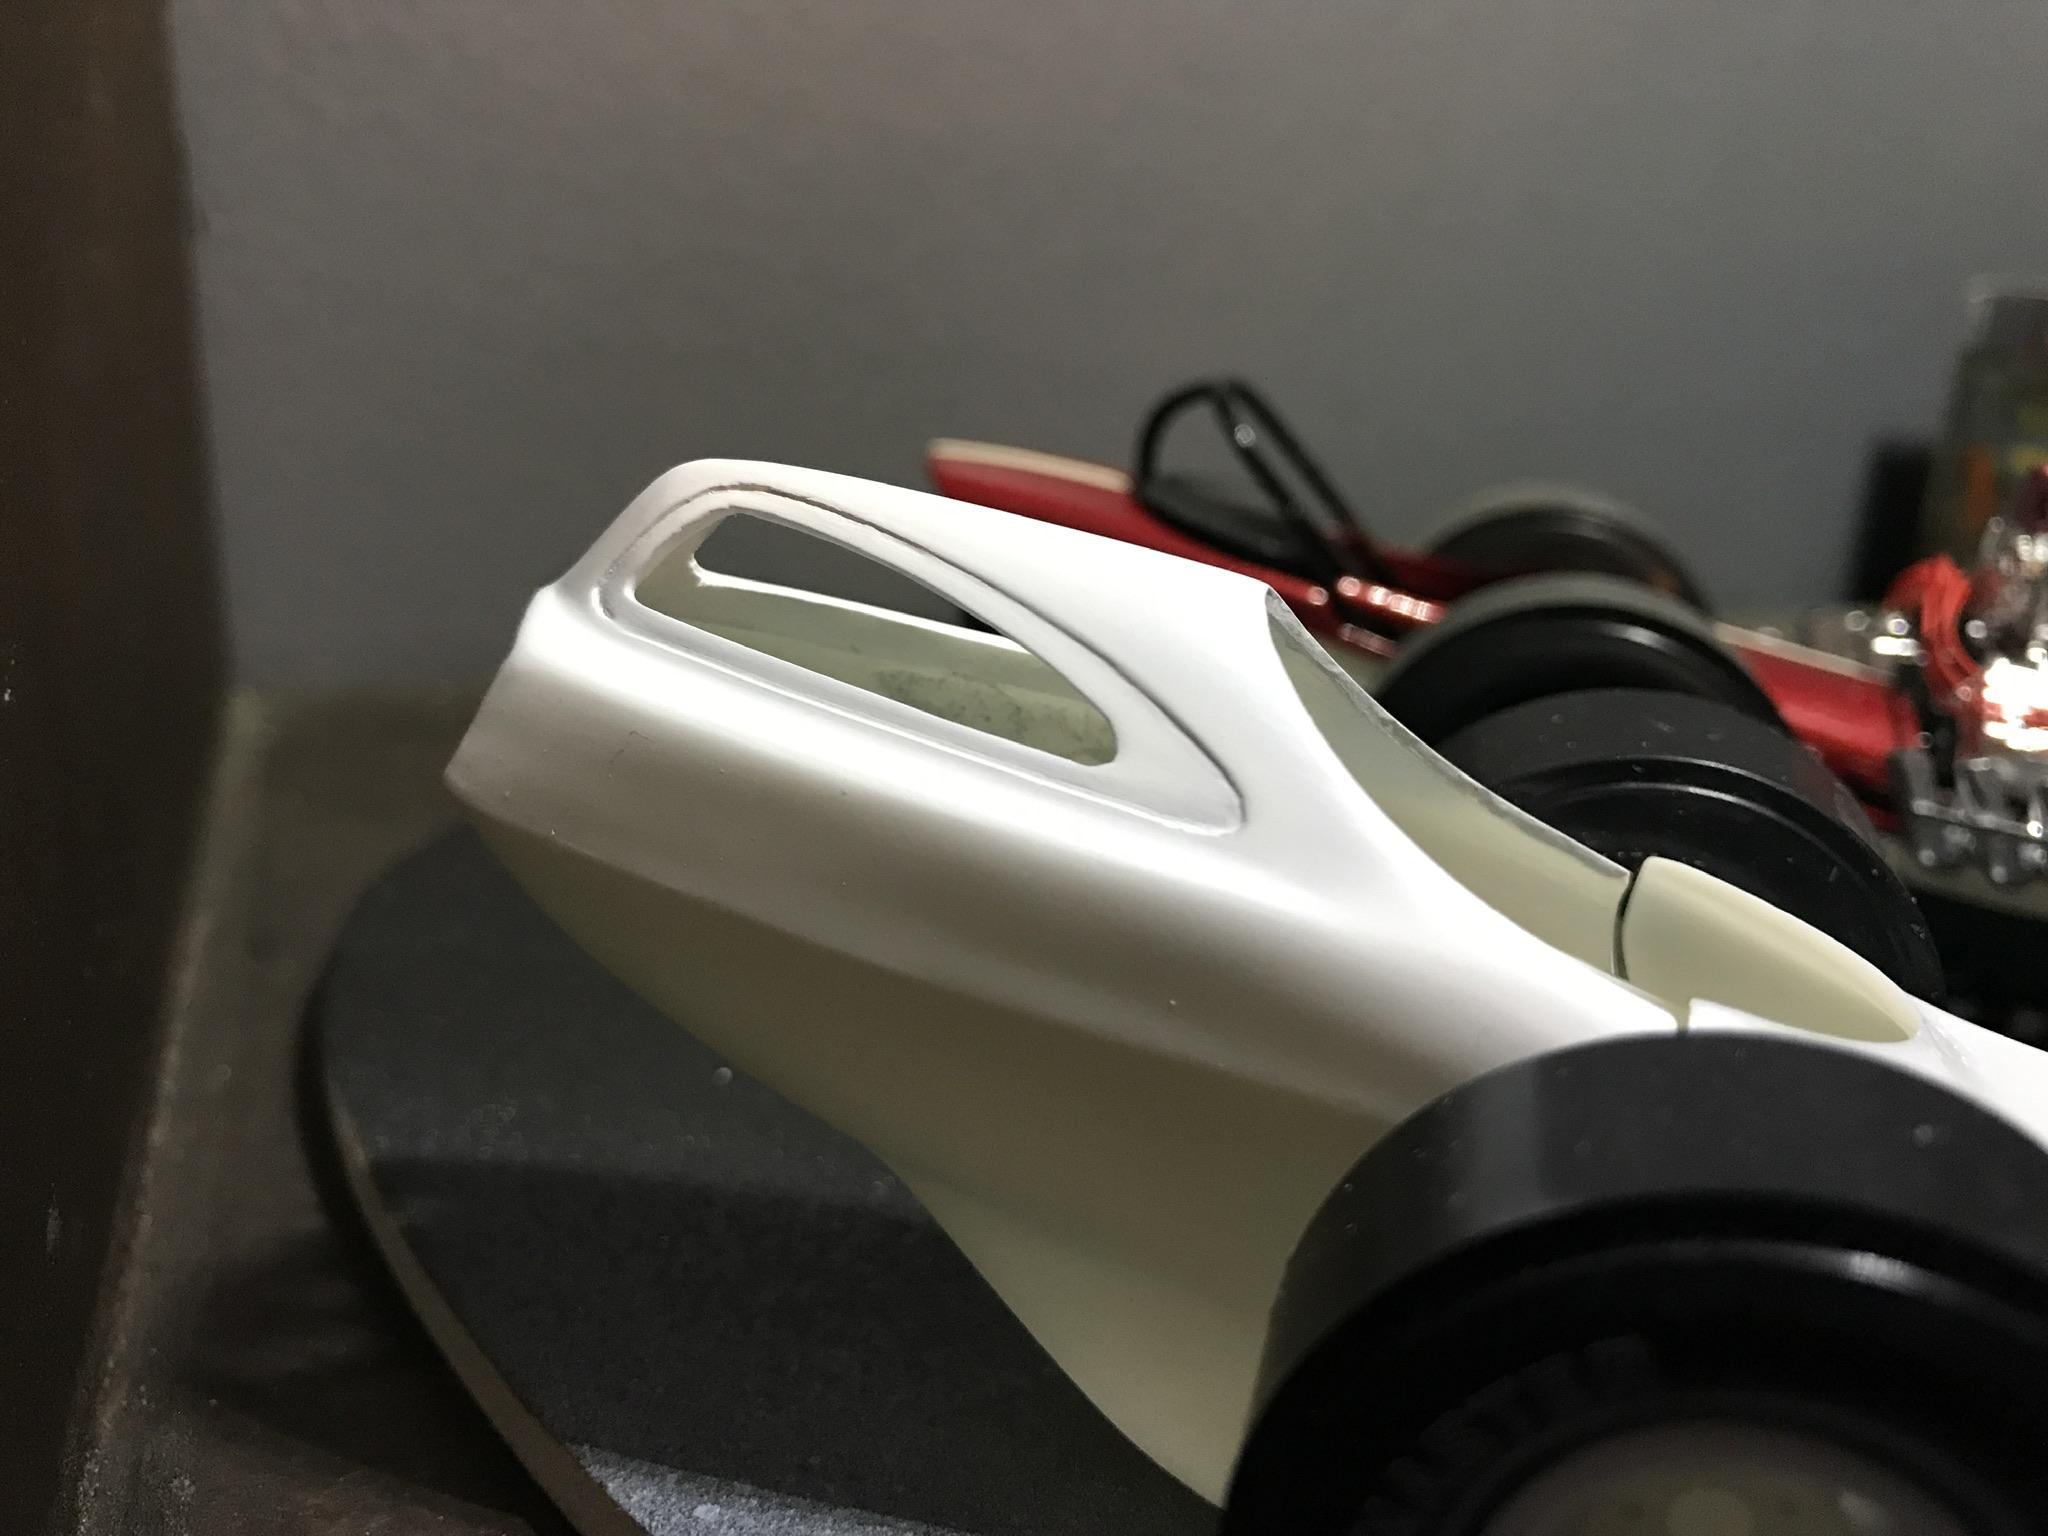
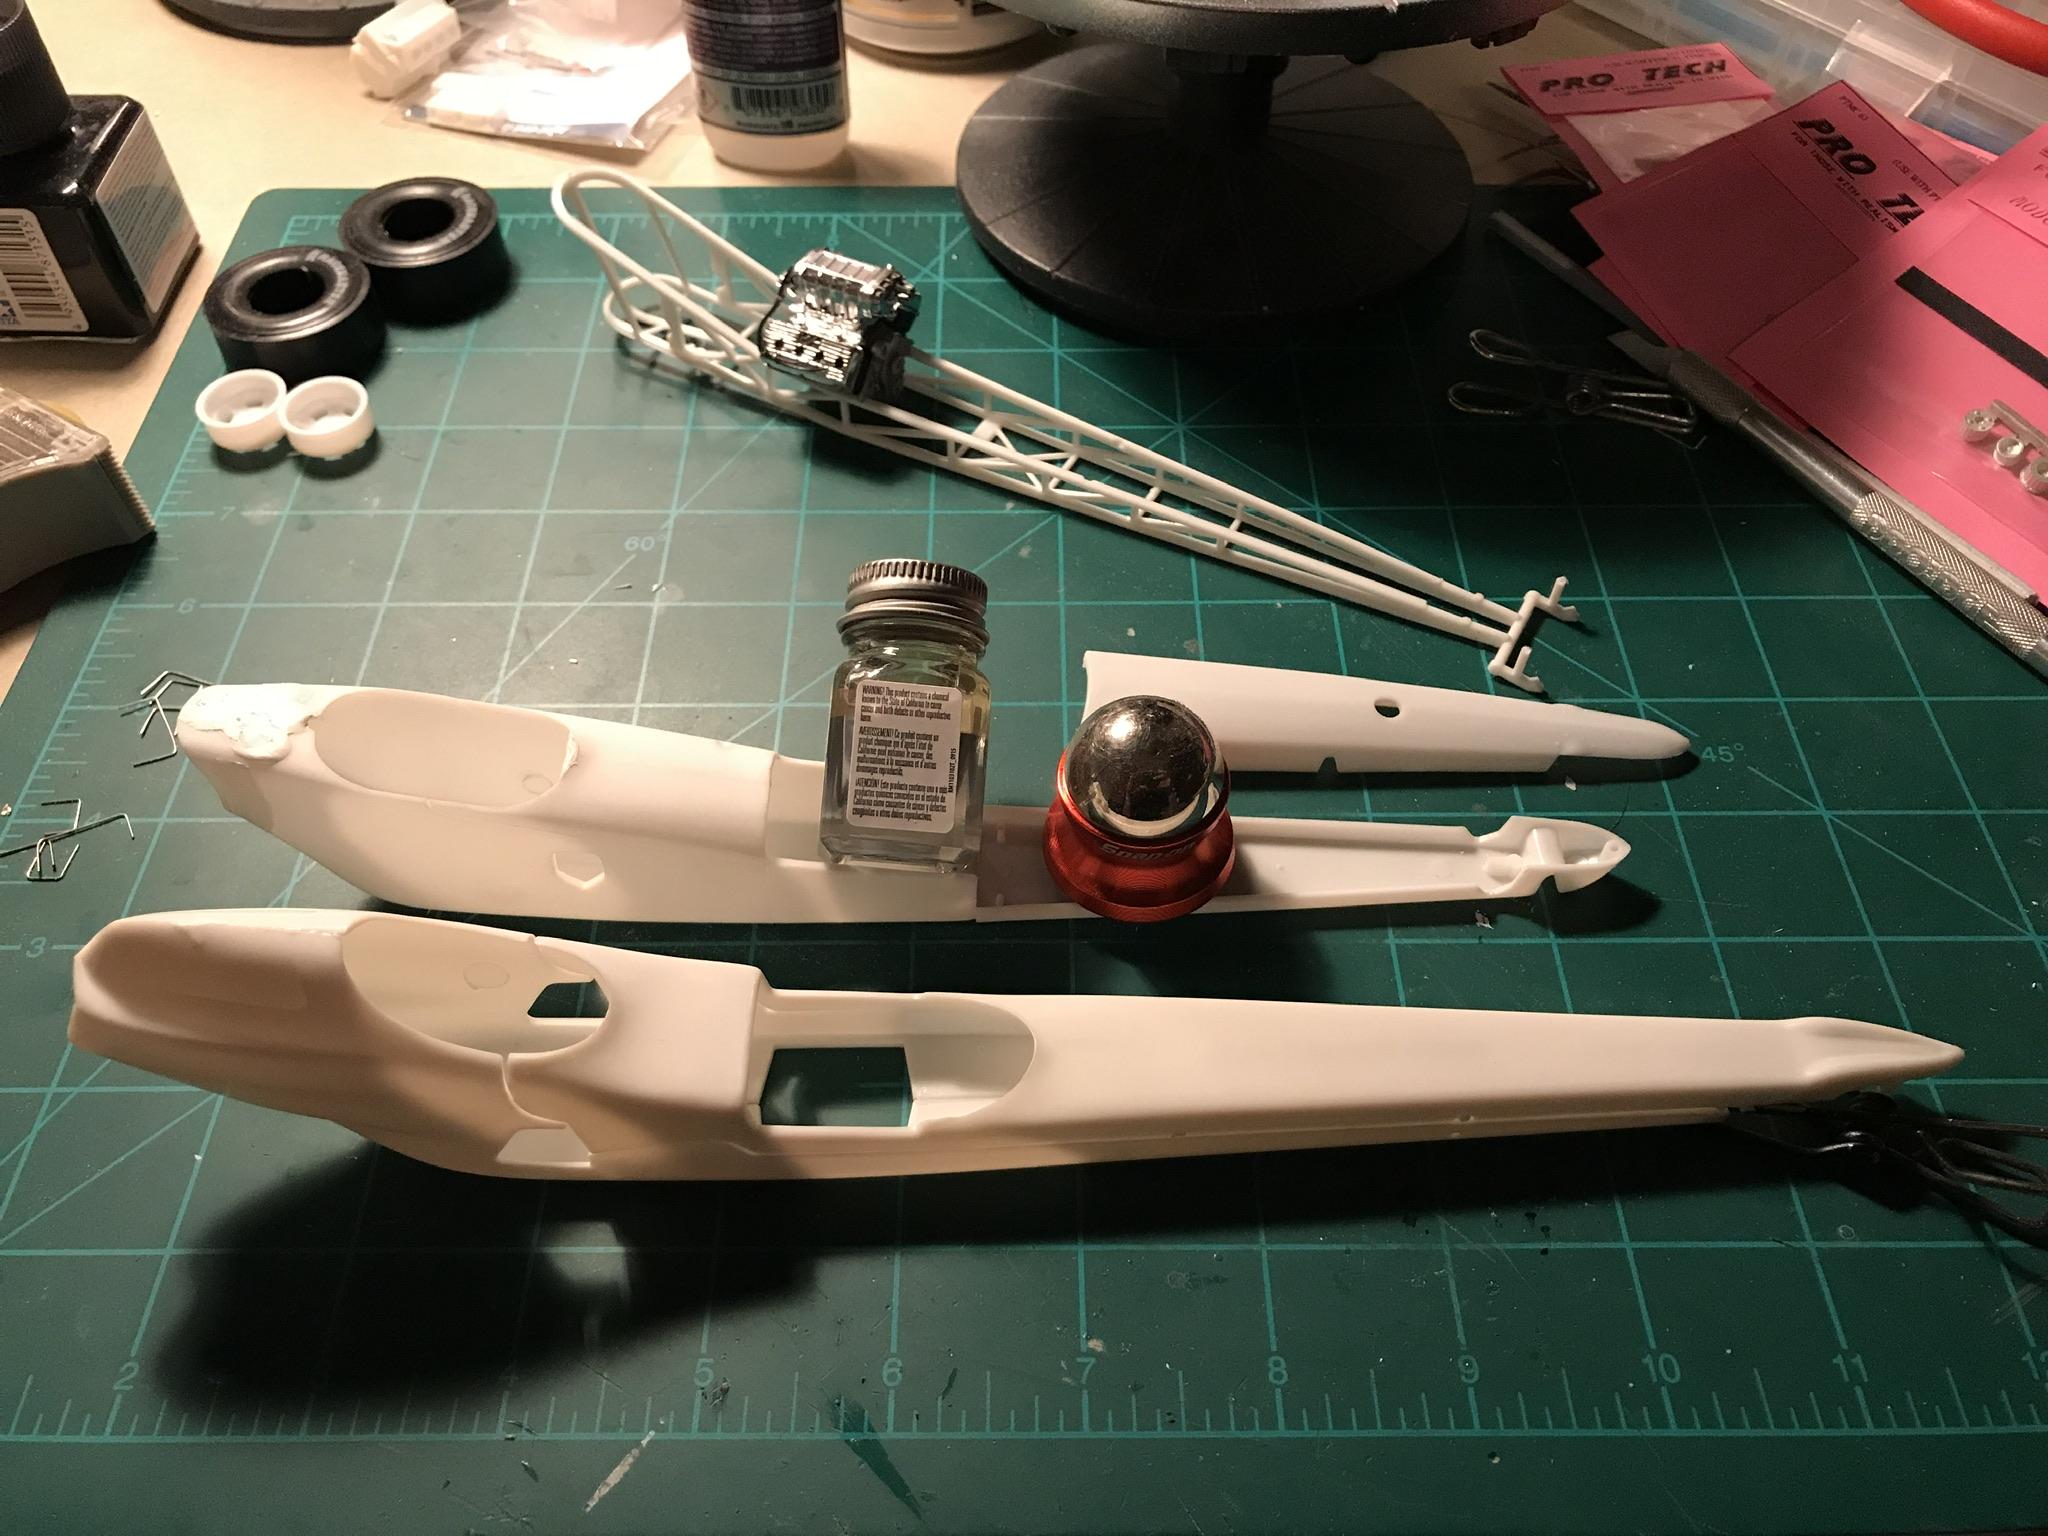
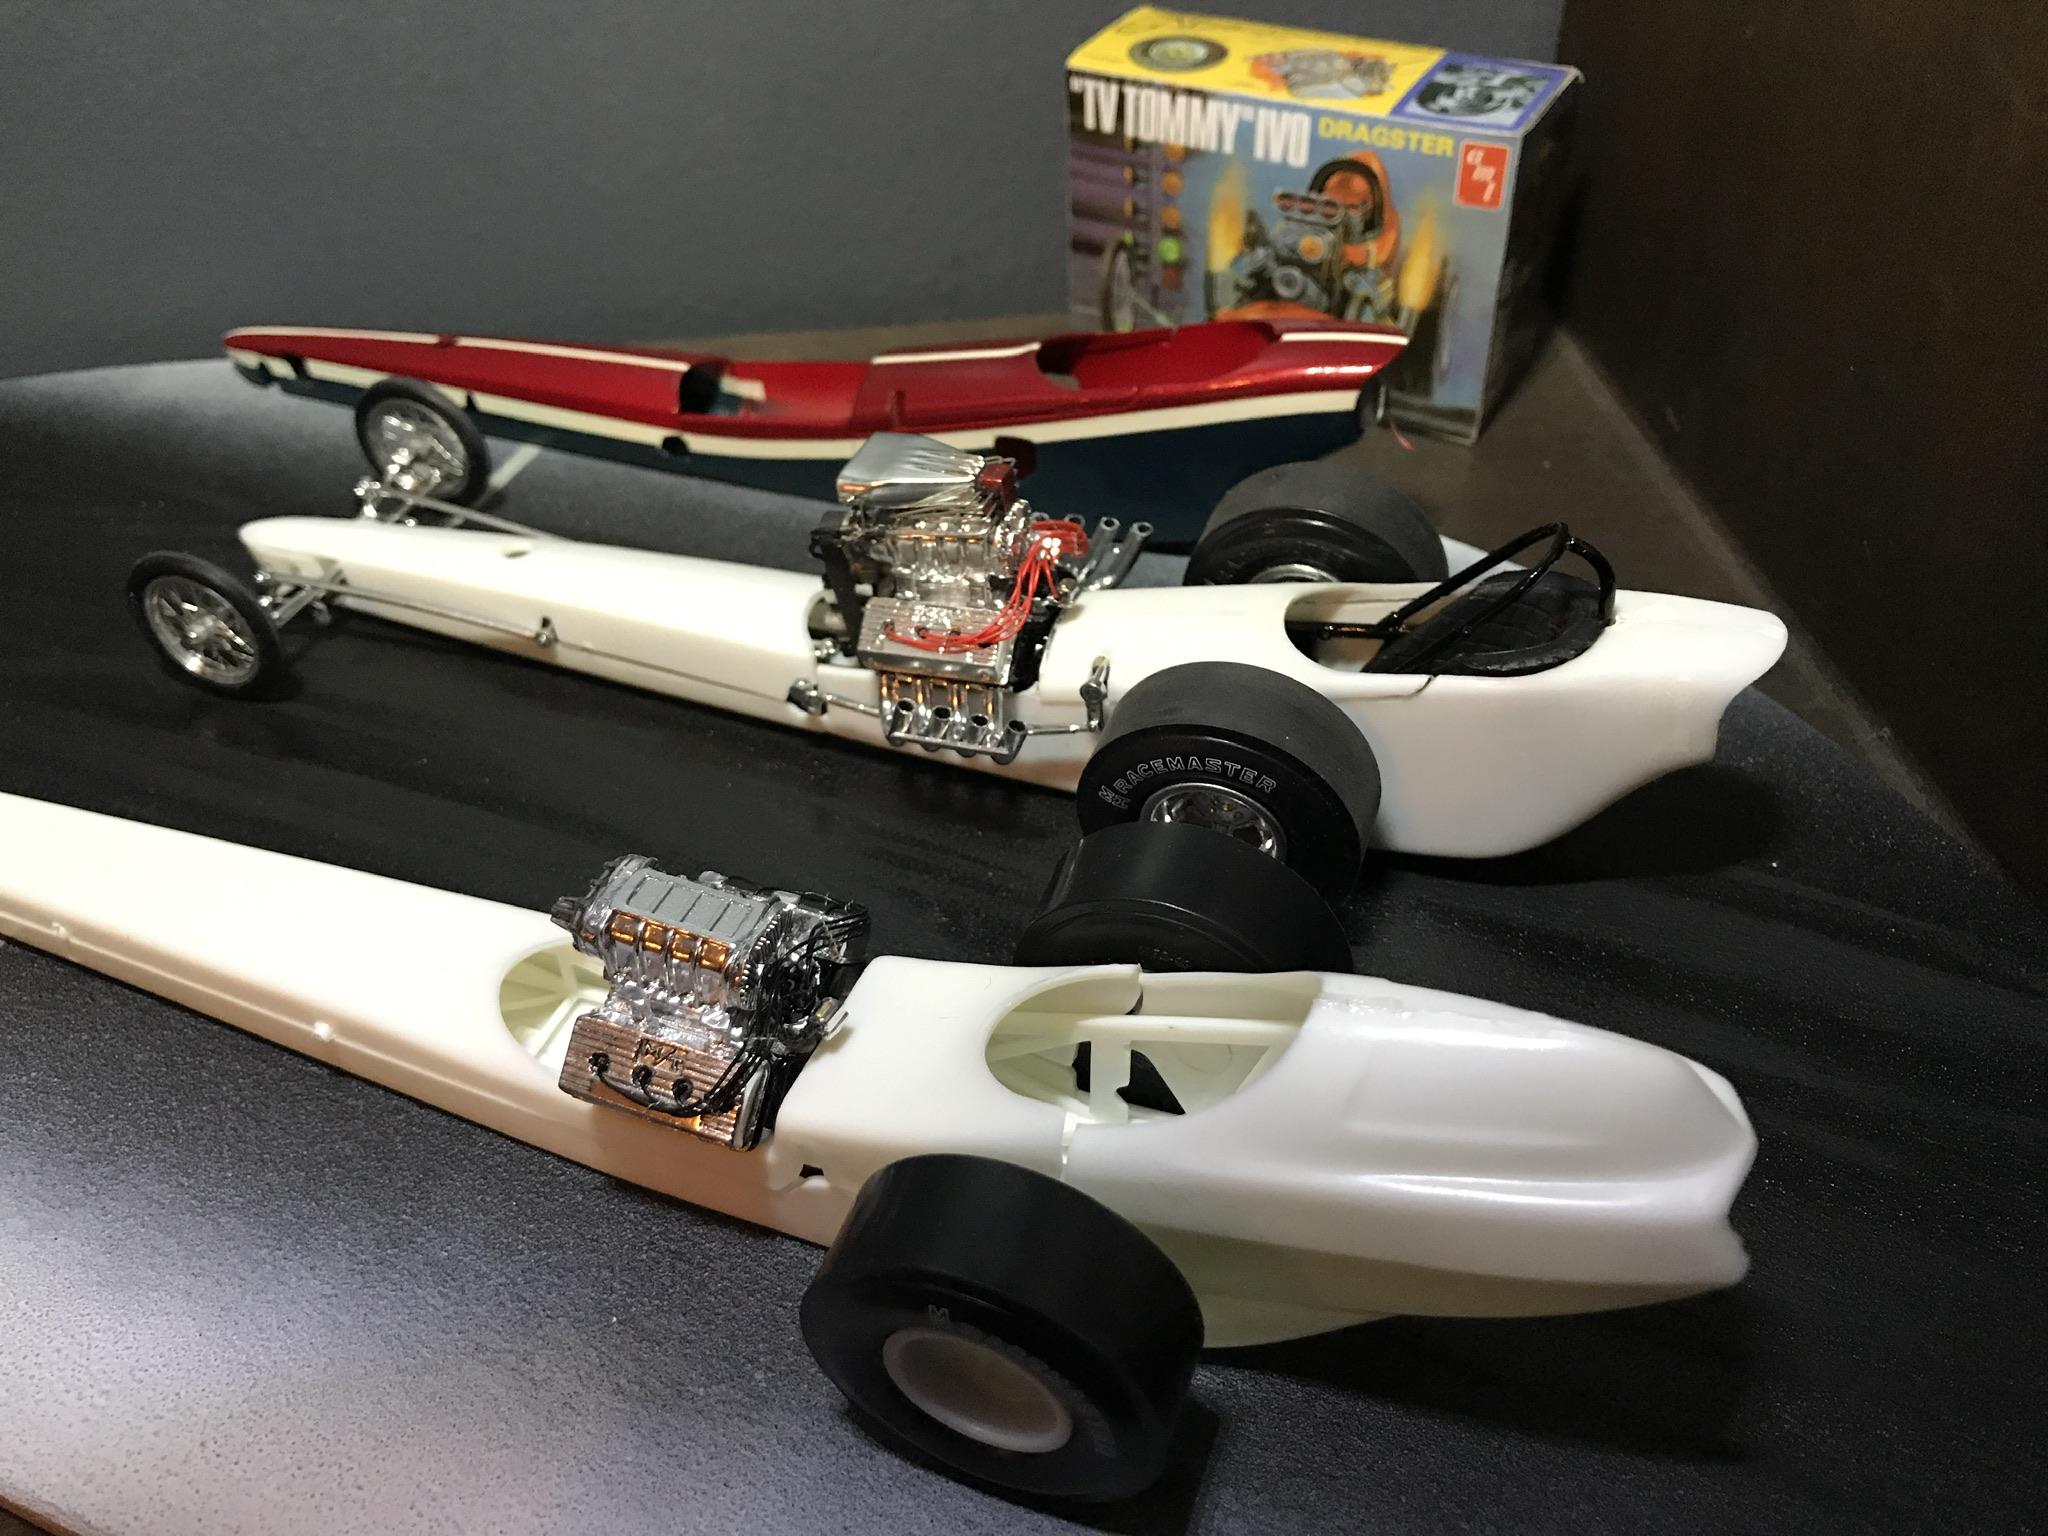
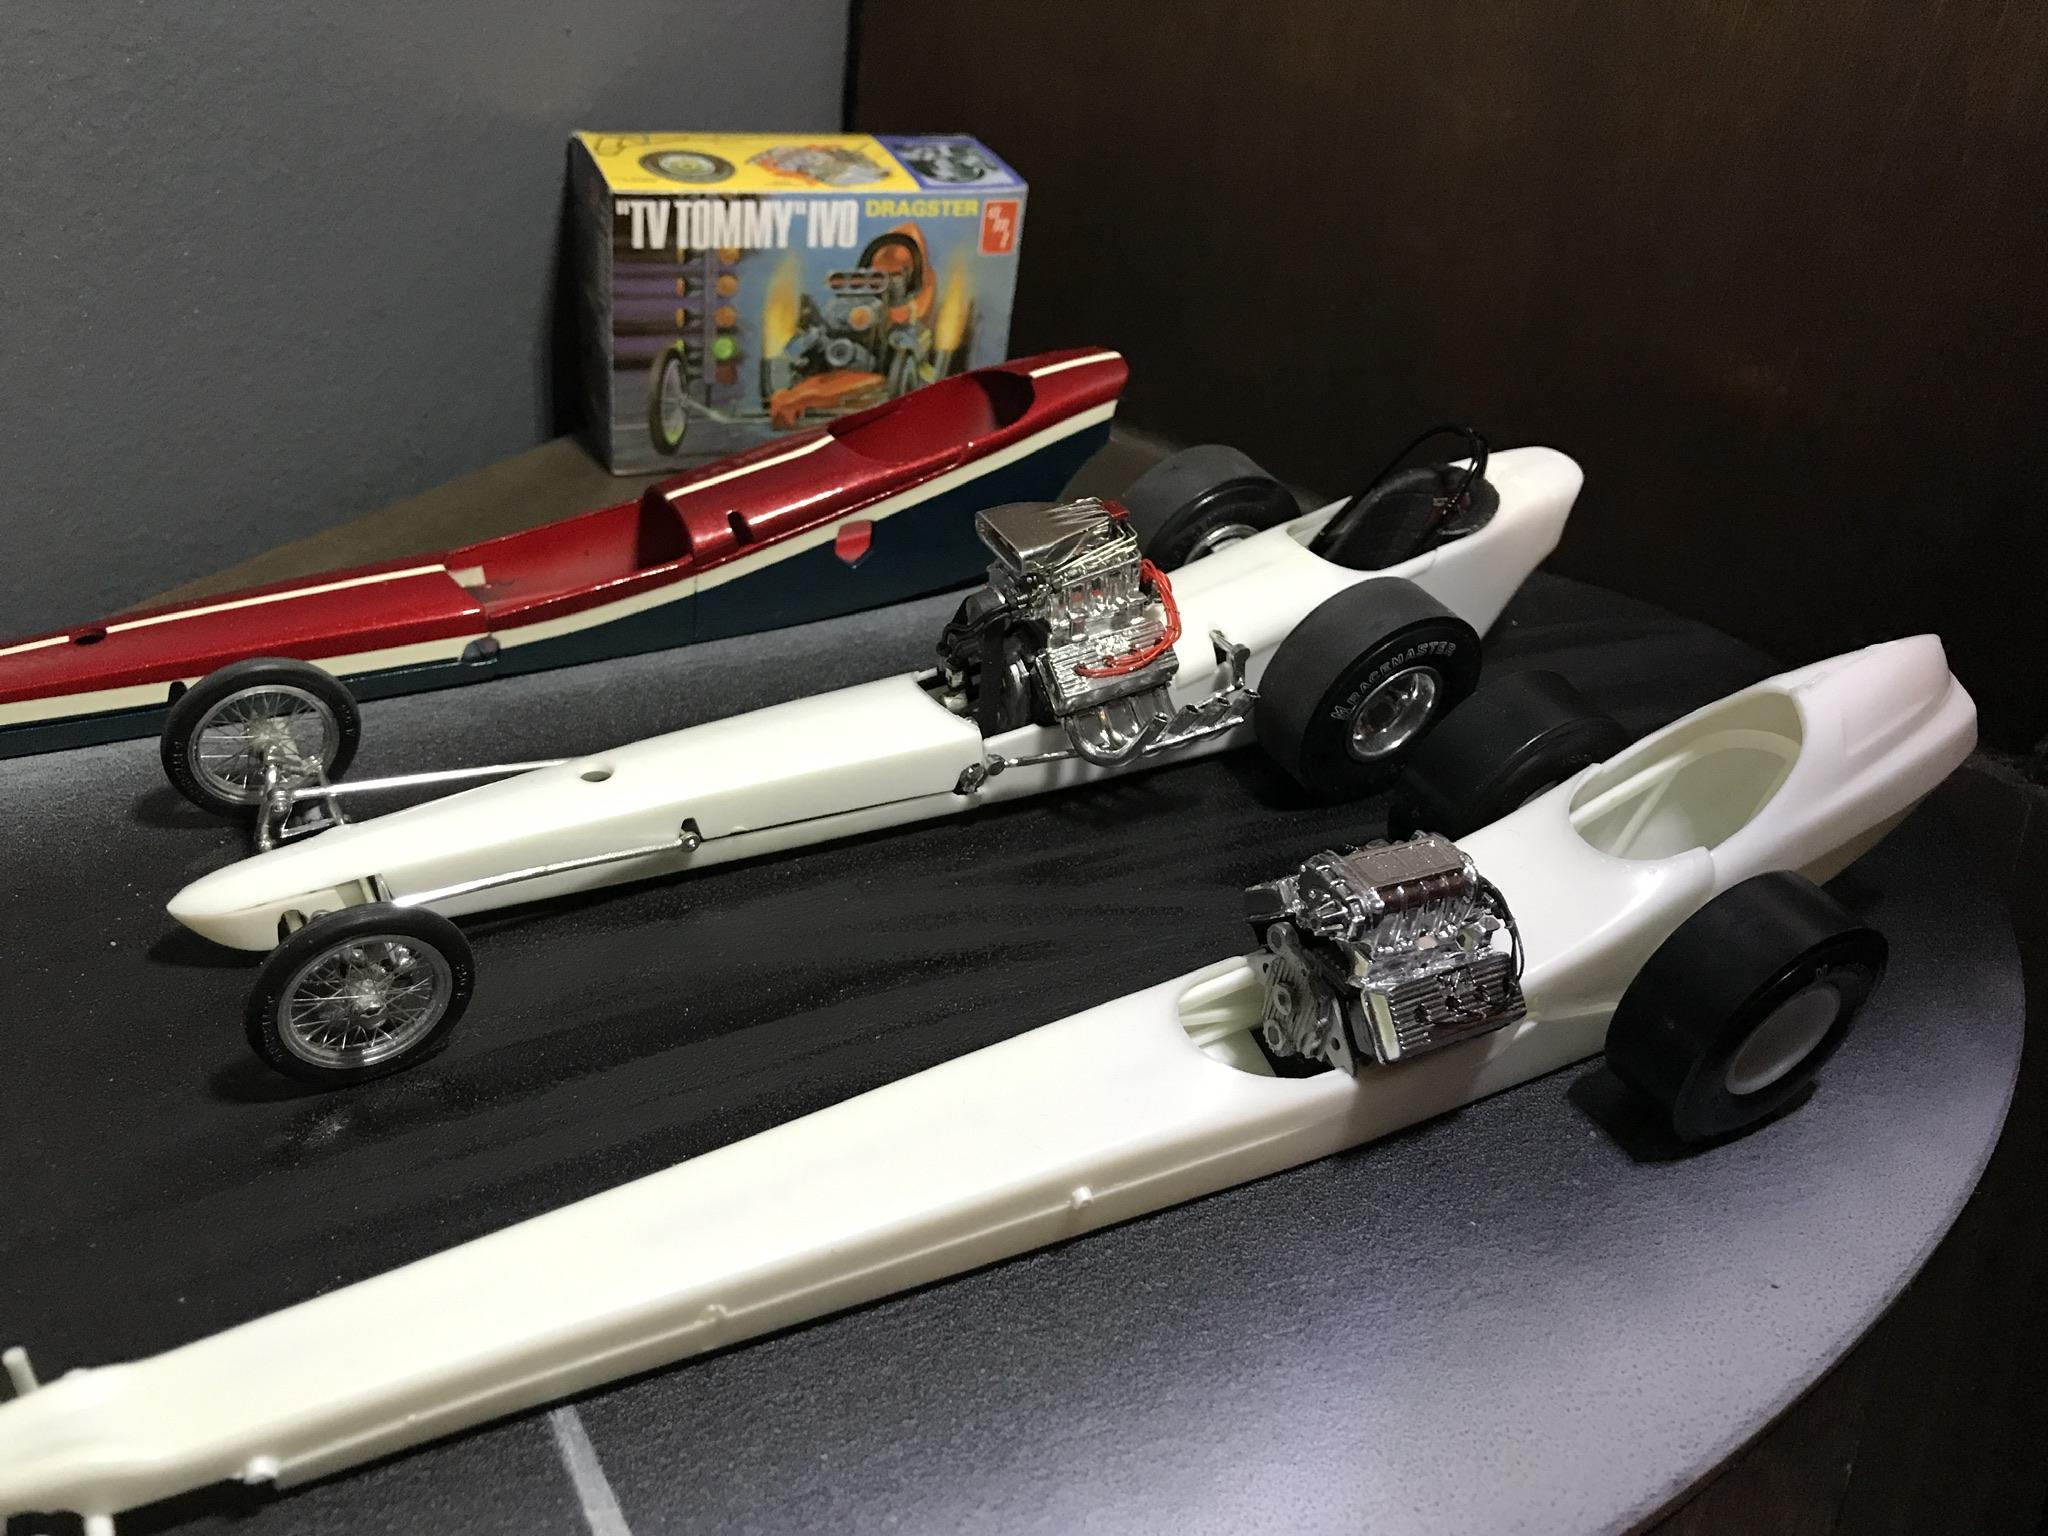
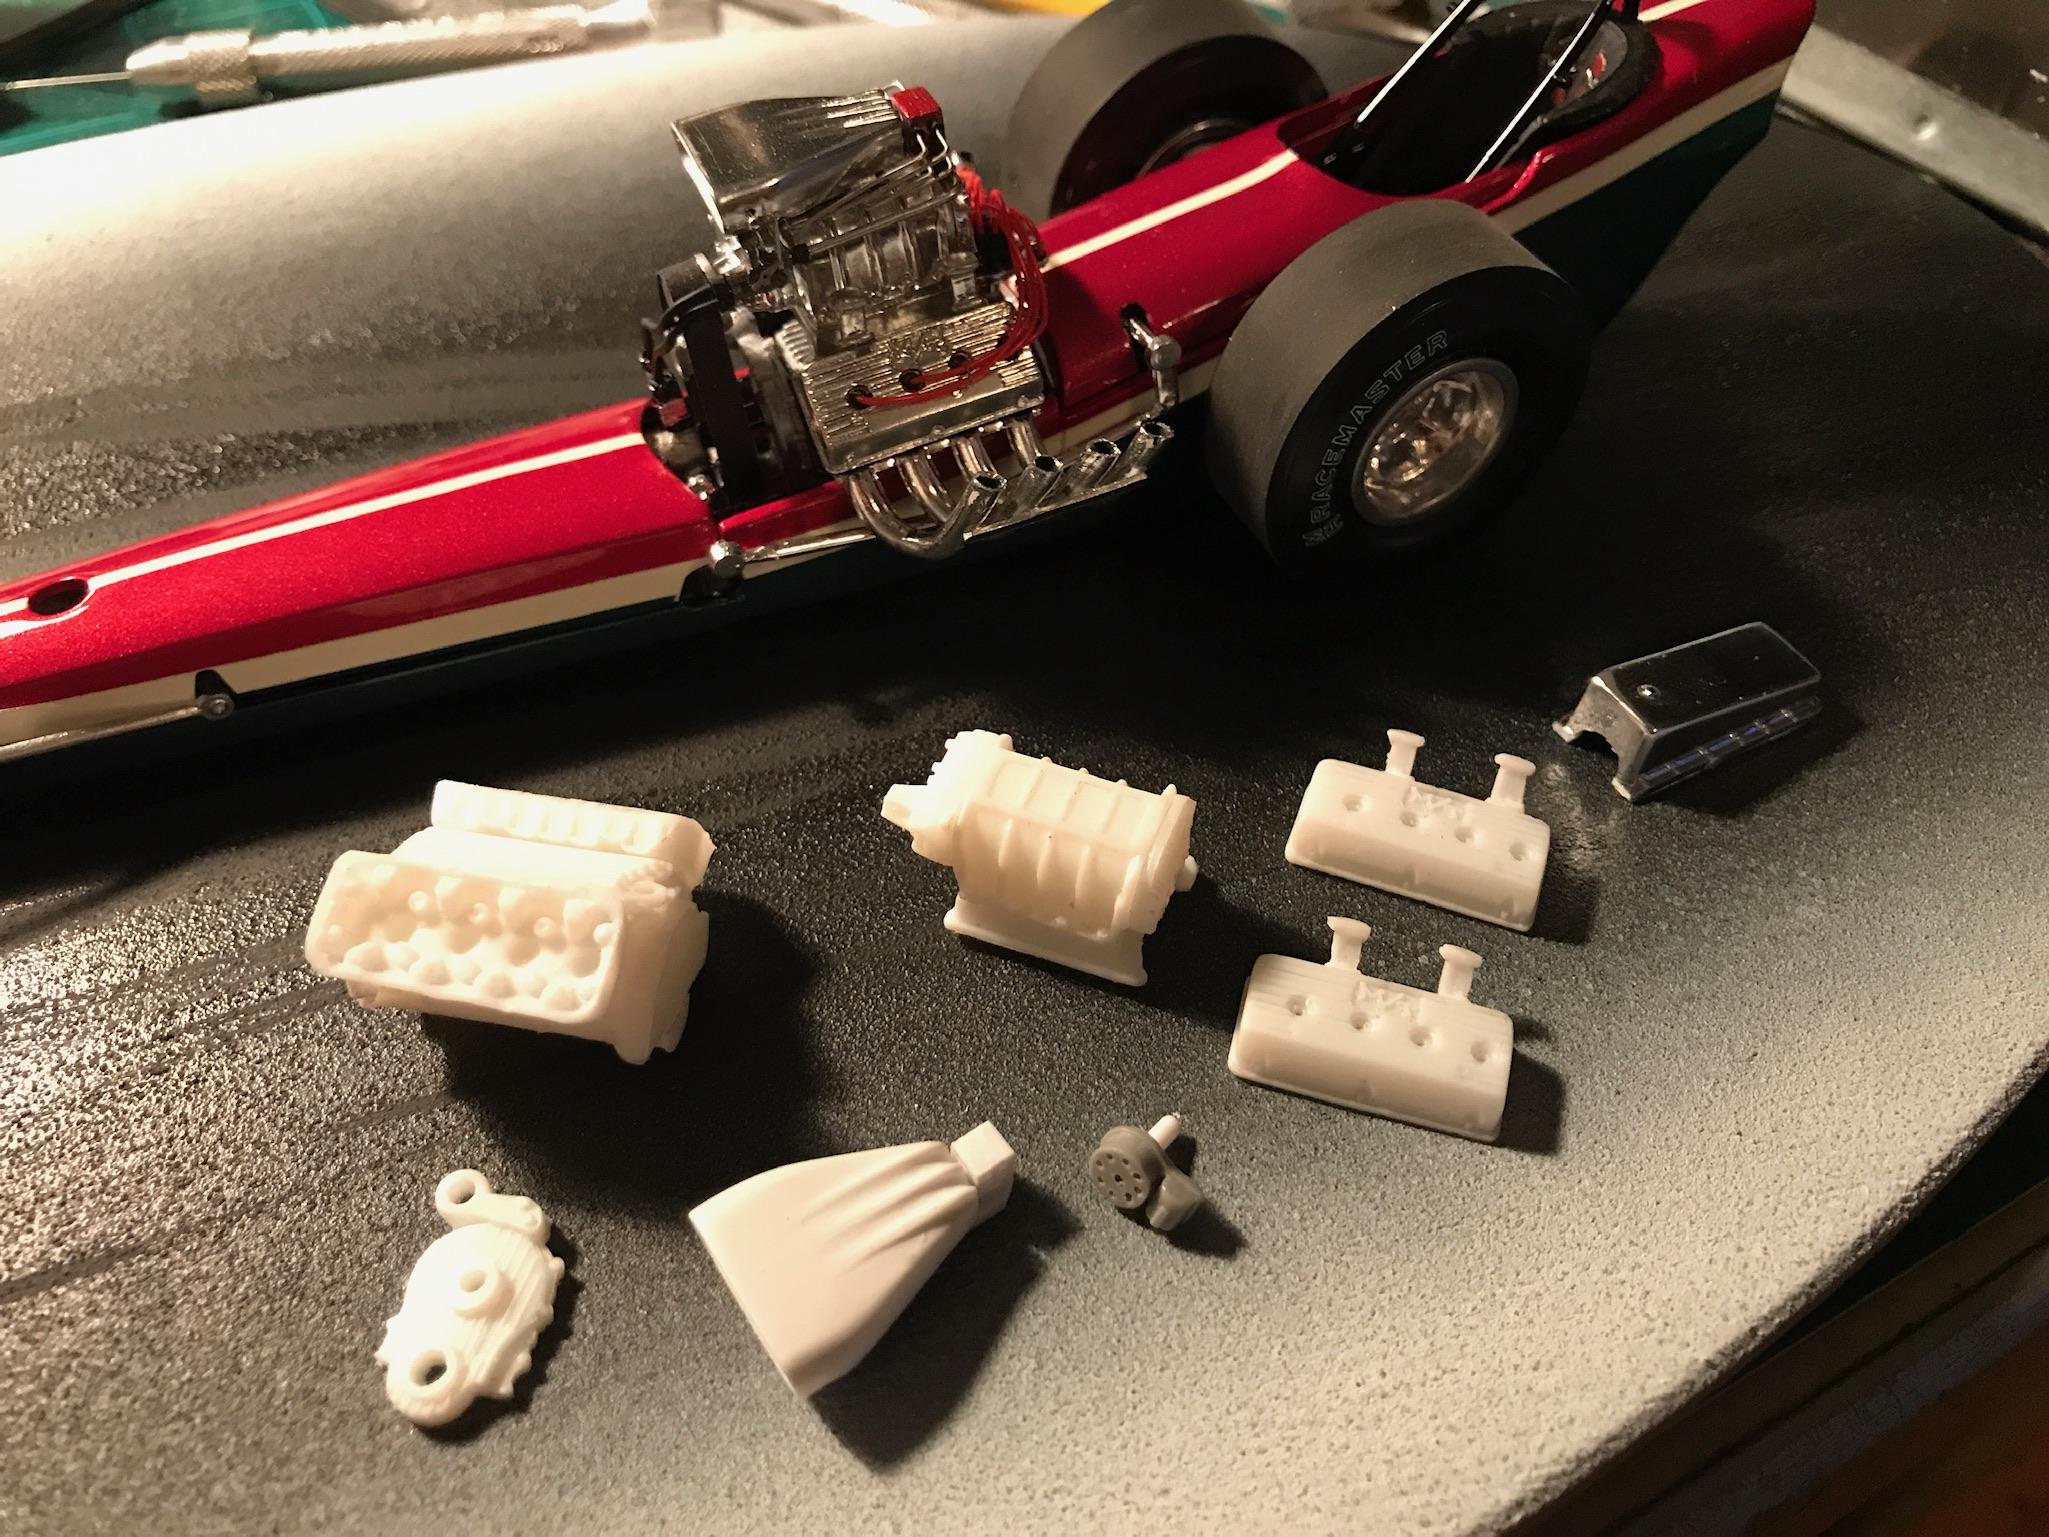
Began really addressing some of the body issues and making improvements. One thing I changed was the nose. The Ivo body has snake head sort of shape. I filled that in to make it more like the Hoover body. The cowl and nose did not fit the body very well. Something I found with my Ramchargers kit, separating the cowl from the body and nose really aids in making for a better fit as well as a better final assembly experience. With the part cut, the chassis can be almost completely assembled and body installed post. The cowl took a lot of bending and tweaking to get it leveled. Between filling, sanding, priming, sanding, and priming again I began scratch building the front axle from 3/32 brass tube. The axle mounts on the frame were in some serious need of thinning out to get them more to scale. They were about 1-1/2” thick plate steel ?
-
Tom Hanna inspired front engine AA/FD build
GlueSniffer replied to GlueSniffer's topic in WIP: Drag Racing Models
Thank you again! Always nice to have more sources for great parts! -
Tom Hanna inspired front engine AA/FD build
GlueSniffer replied to GlueSniffer's topic in WIP: Drag Racing Models
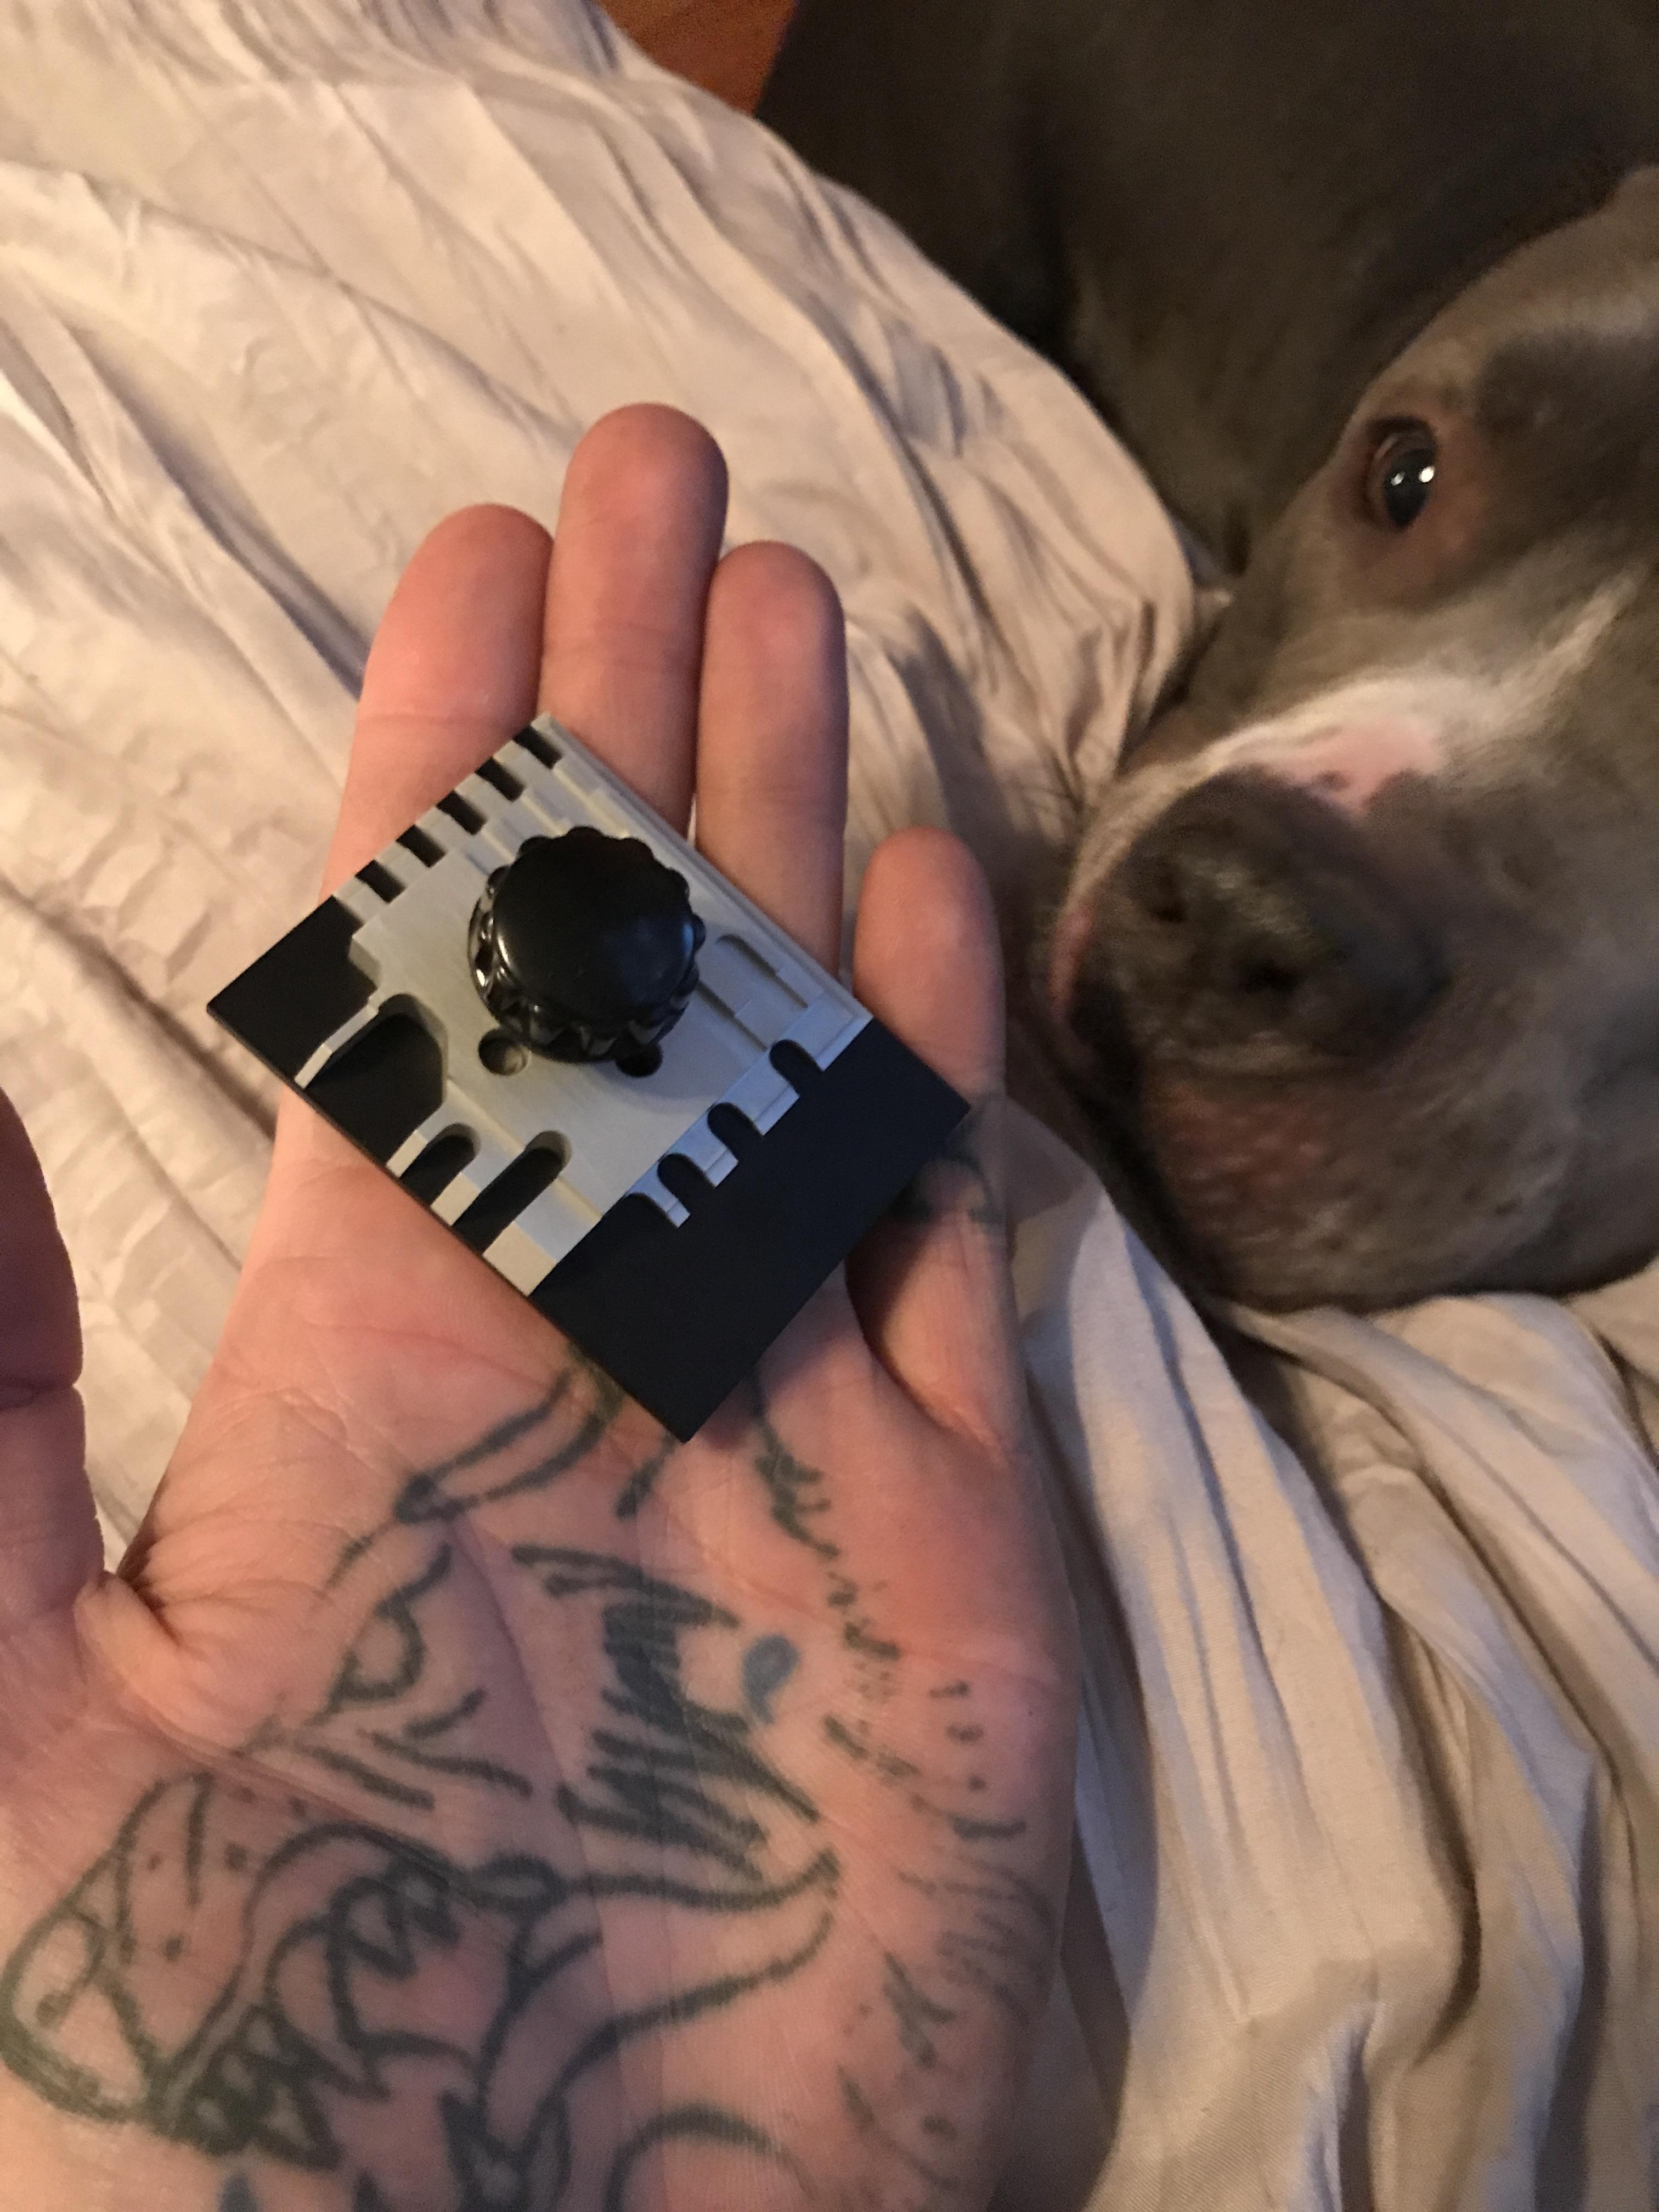
Engine is ALMOST done. I took a few days off. Fuel valve is attached, linkages are done, butterfly valves and pivot rods, fuel inlet line. I was short a few compression fittings so just waiting on those to do the injector lines. Also got this cool photo etch bending fixture from the Small Shop (I hate bending windshield wiper arms.) My pup approves!
-
Tom Hanna inspired front engine AA/FD build
GlueSniffer replied to GlueSniffer's topic in WIP: Drag Racing Models
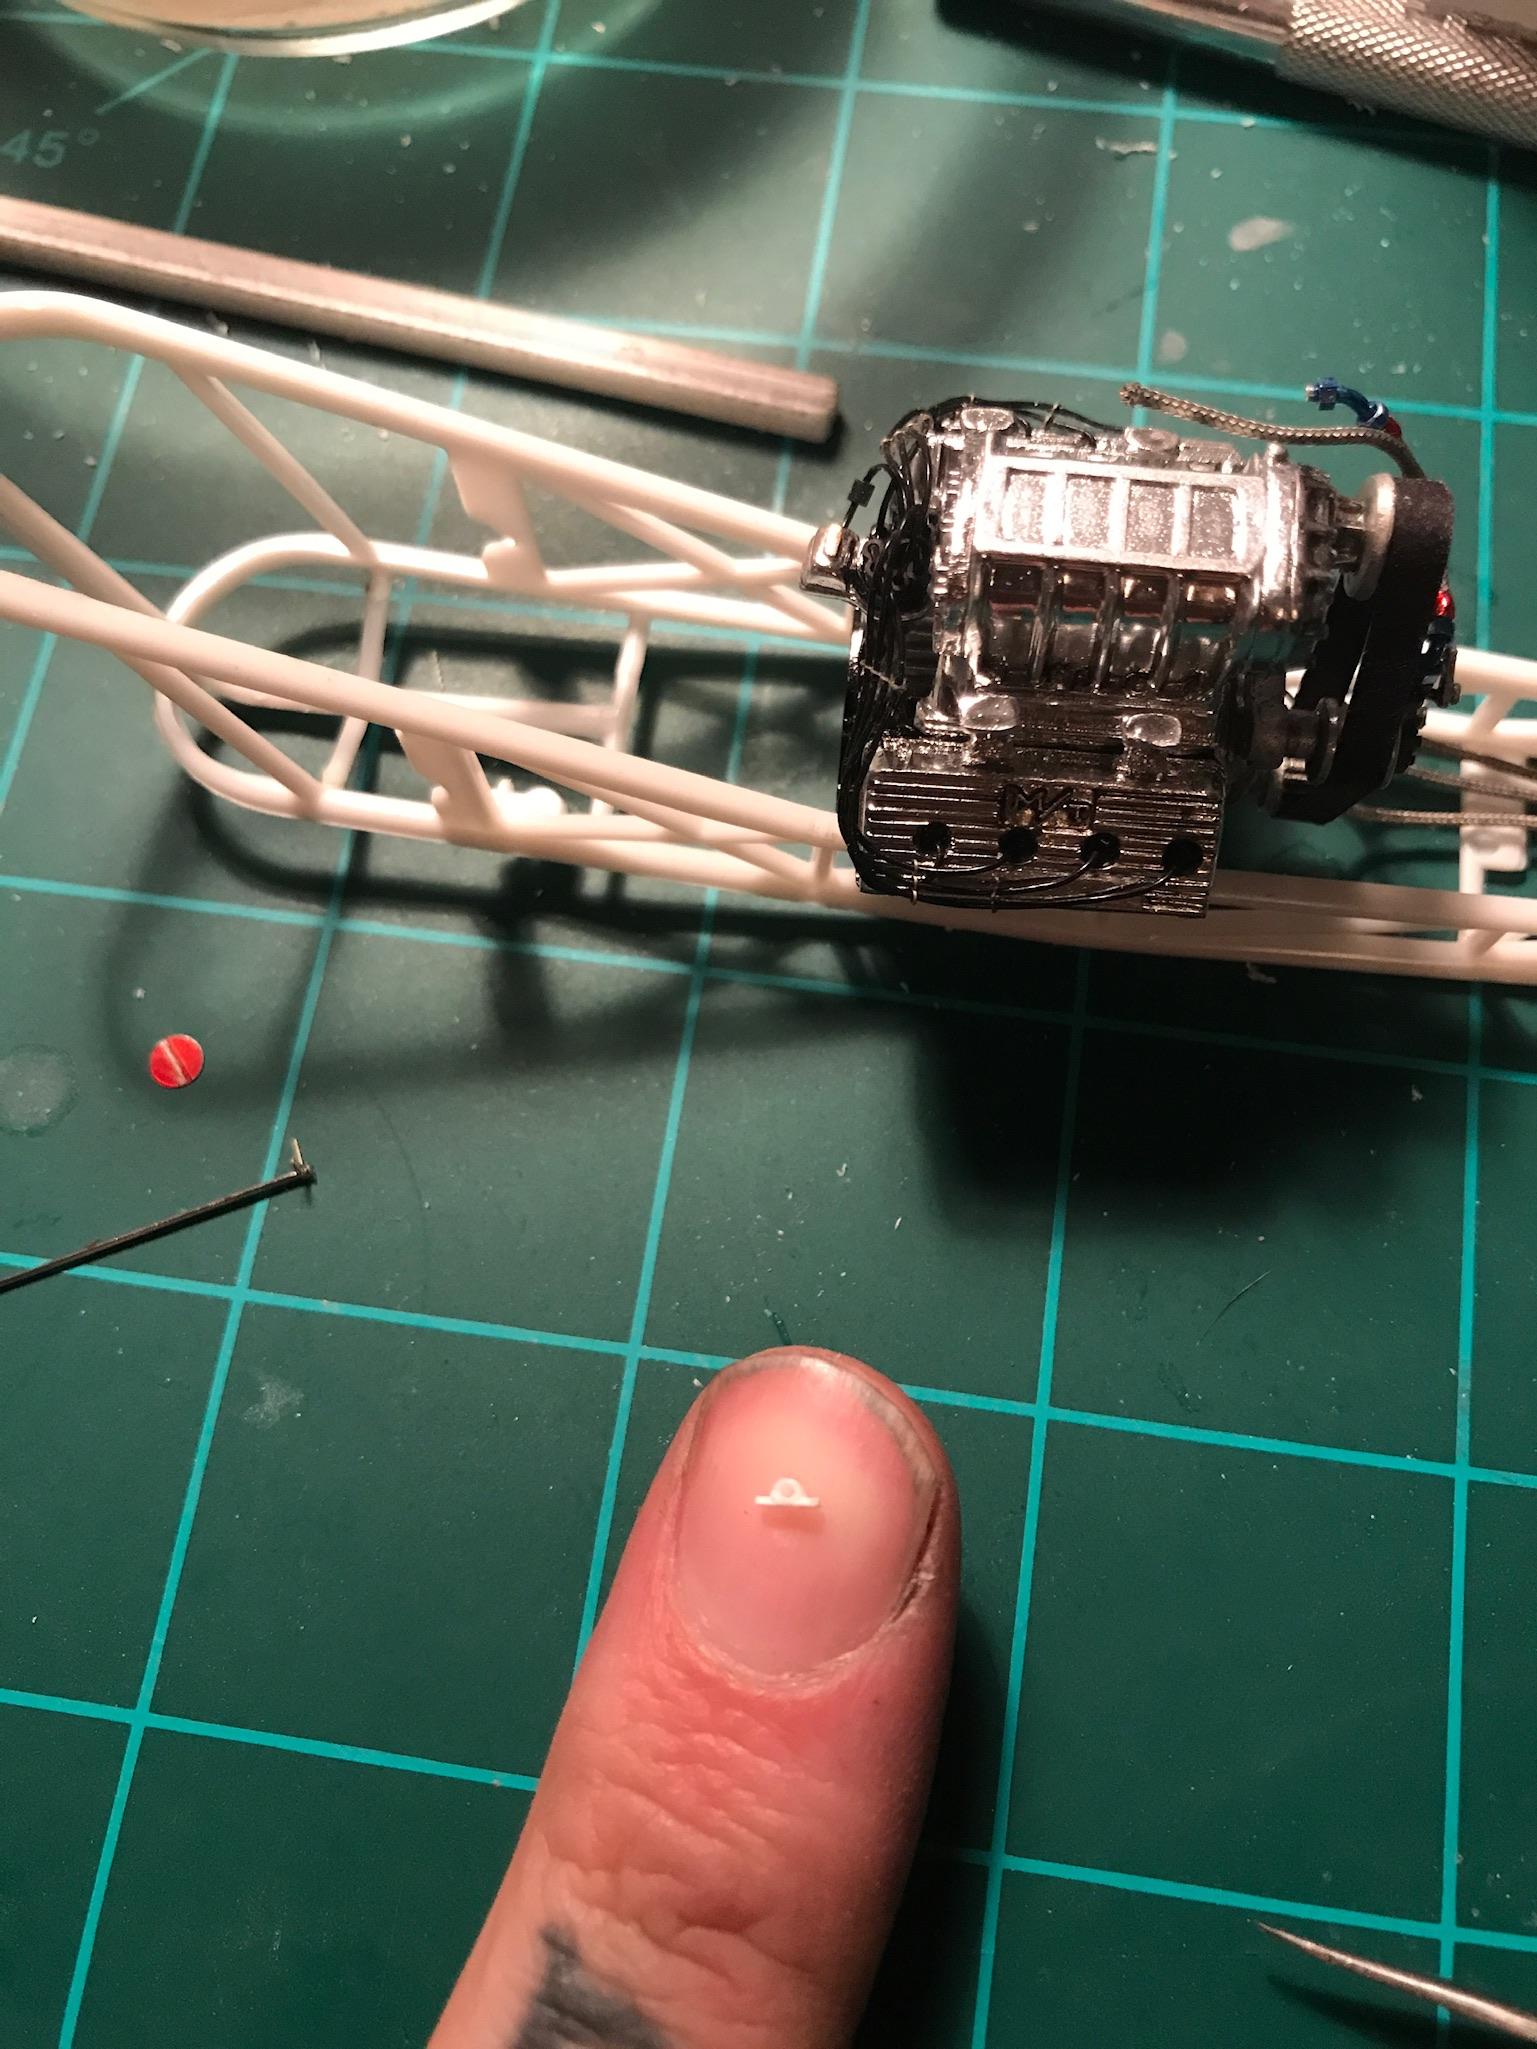
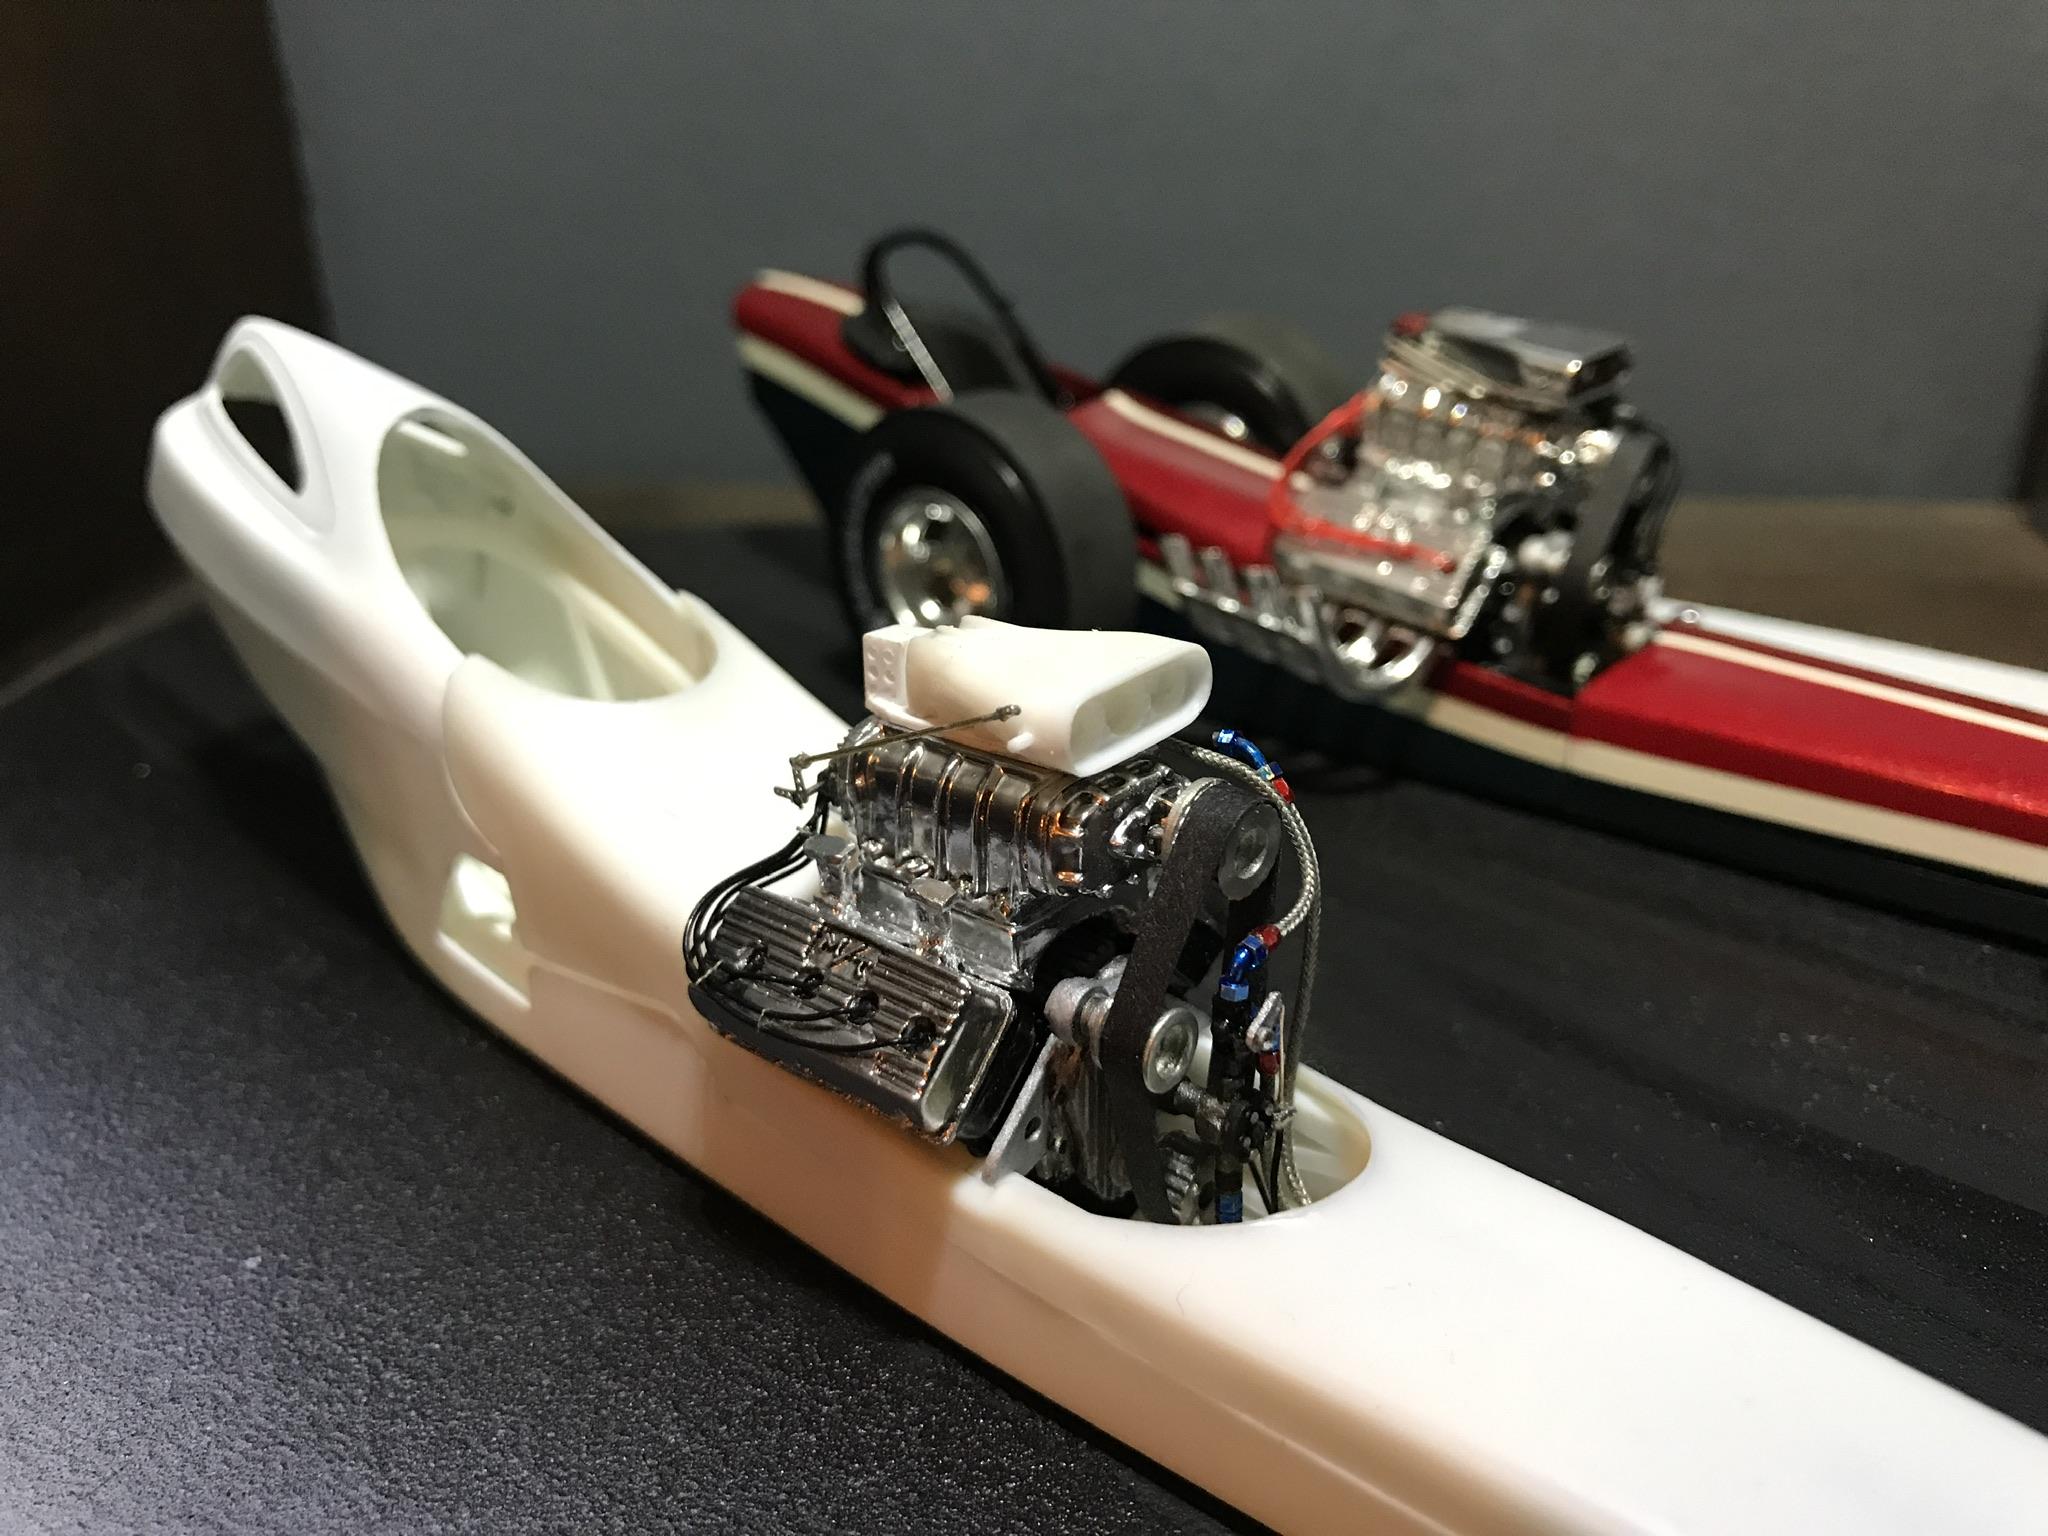
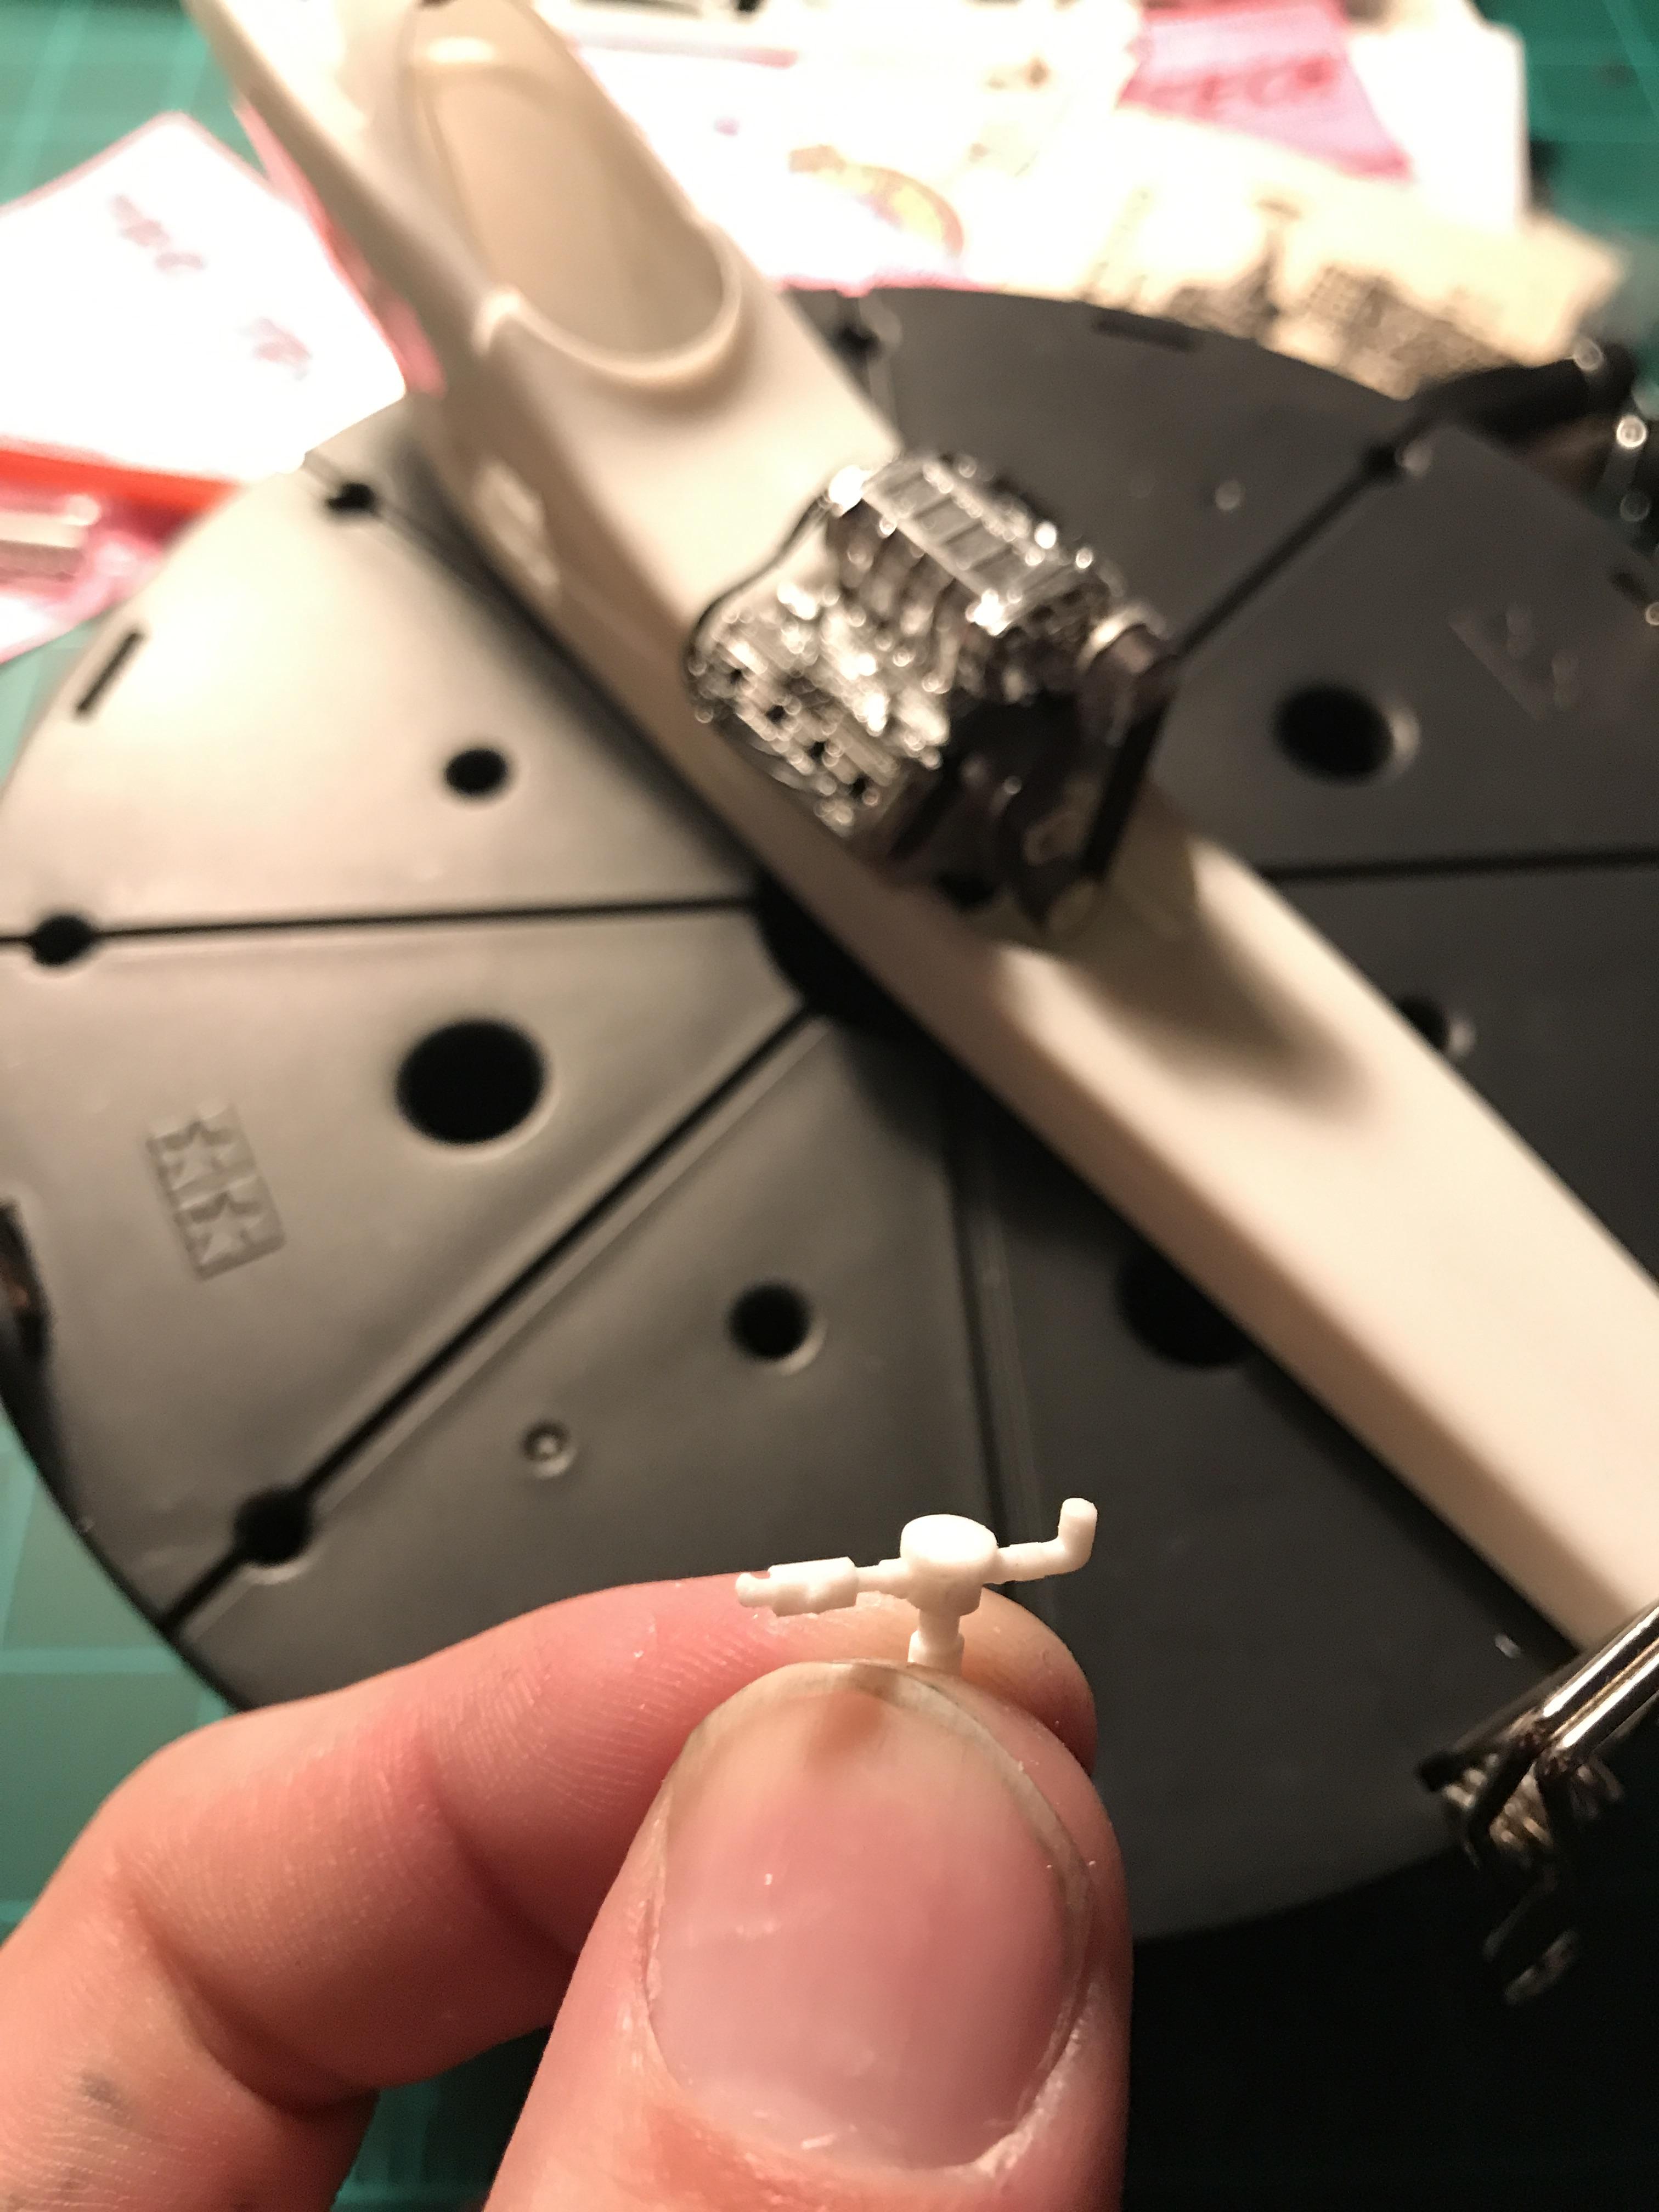
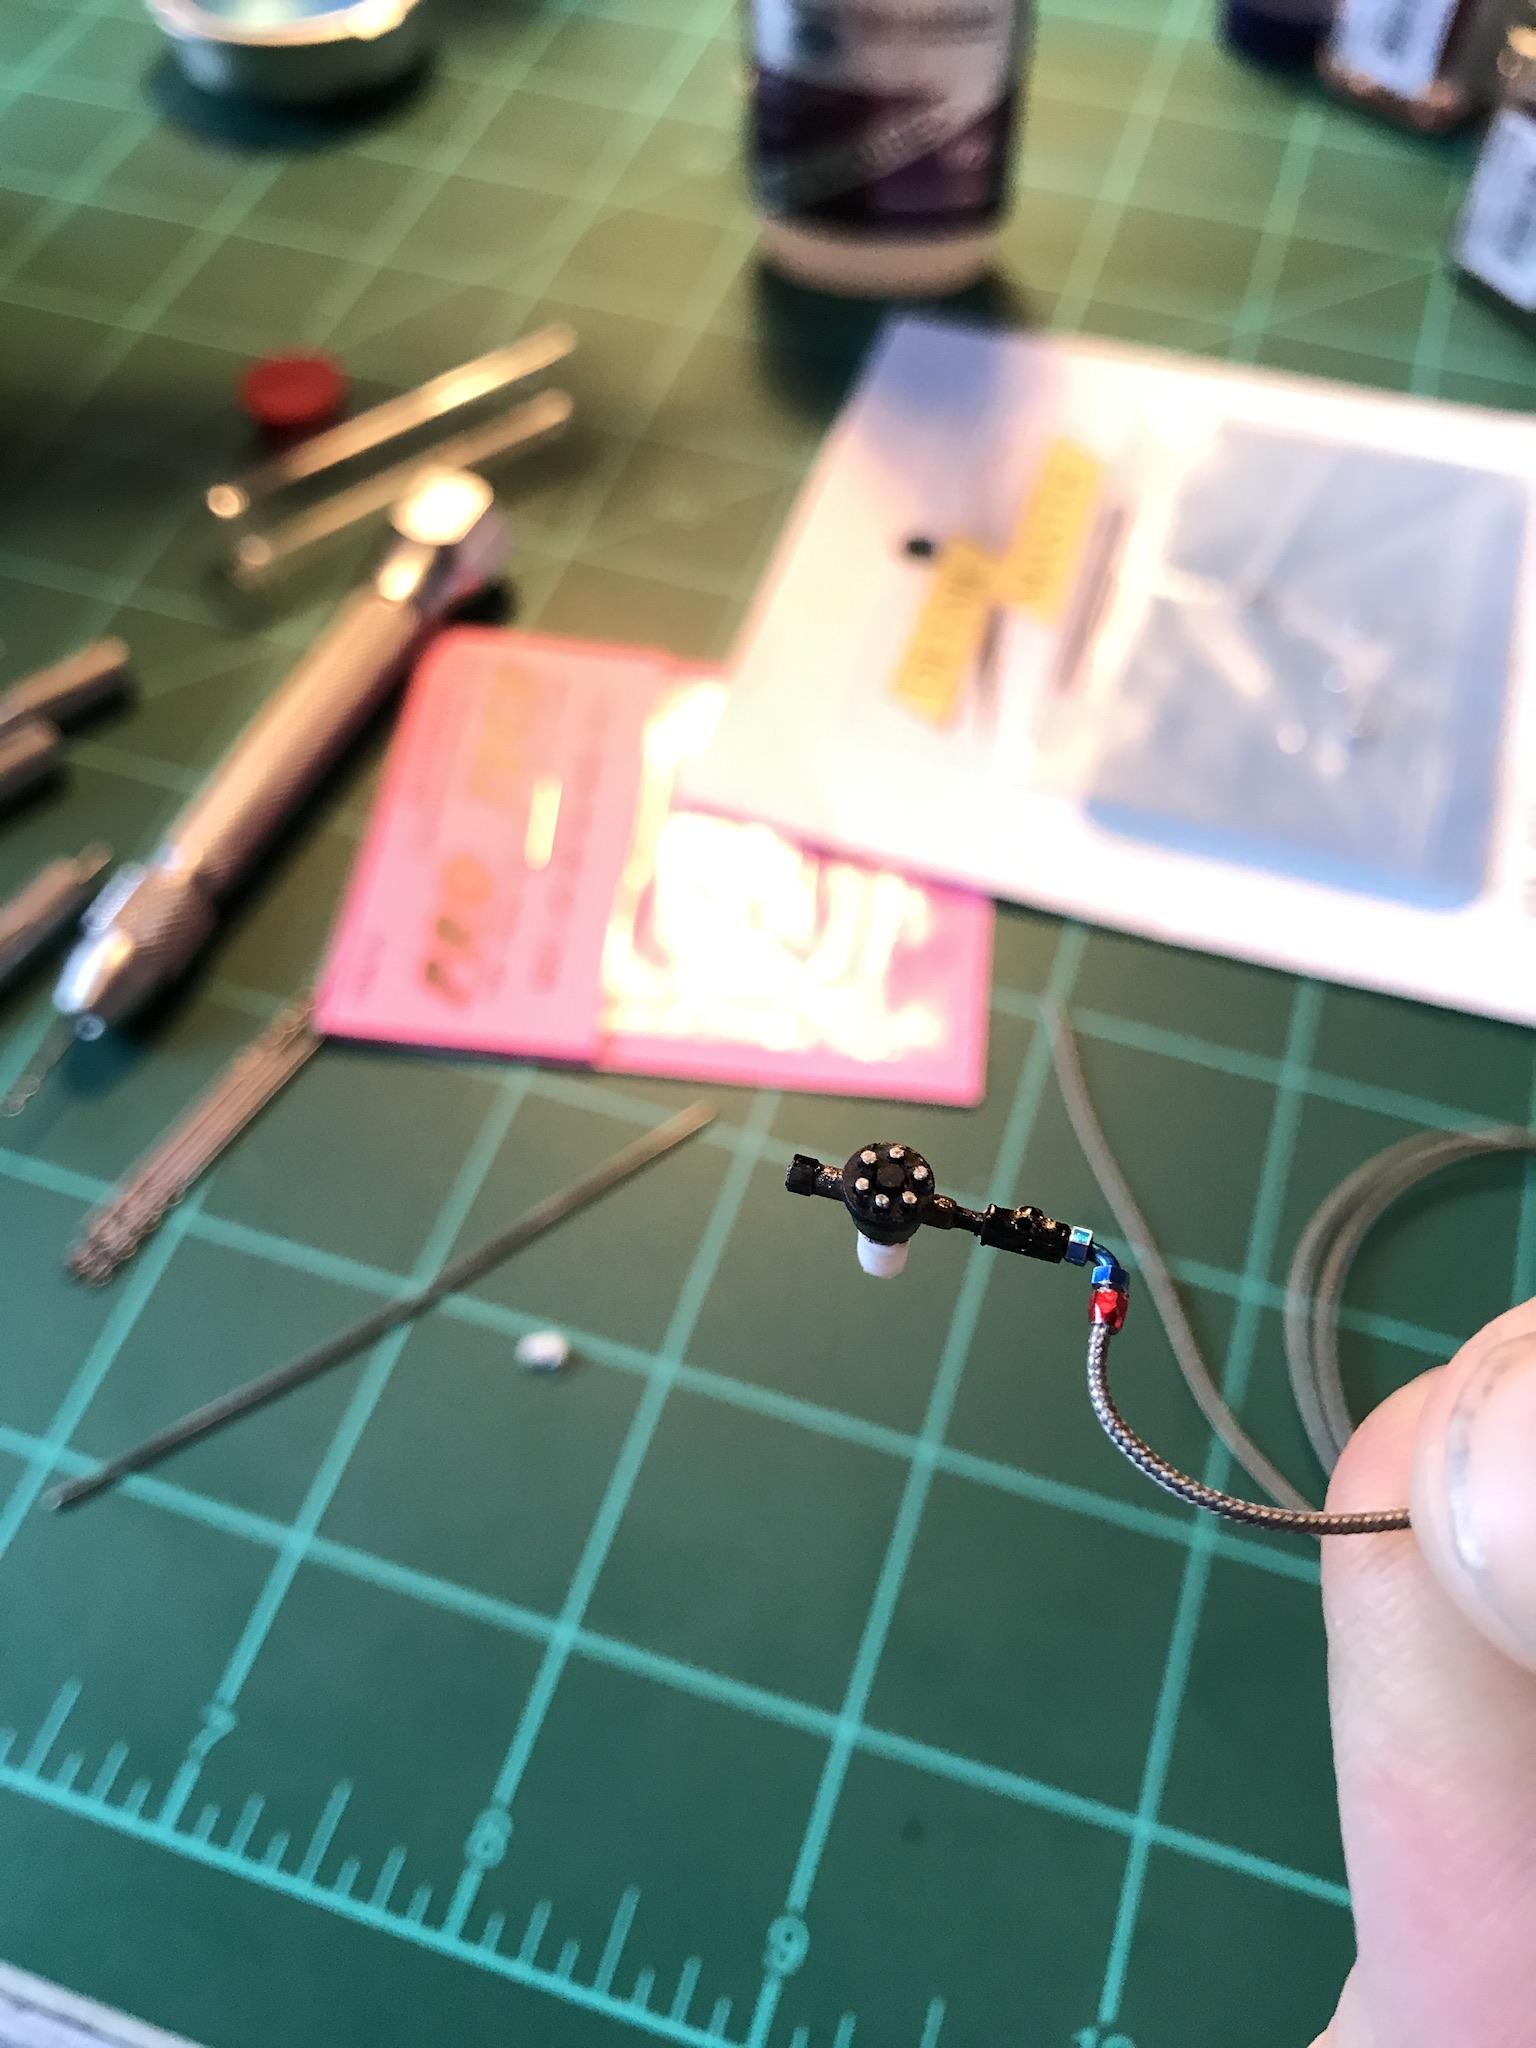
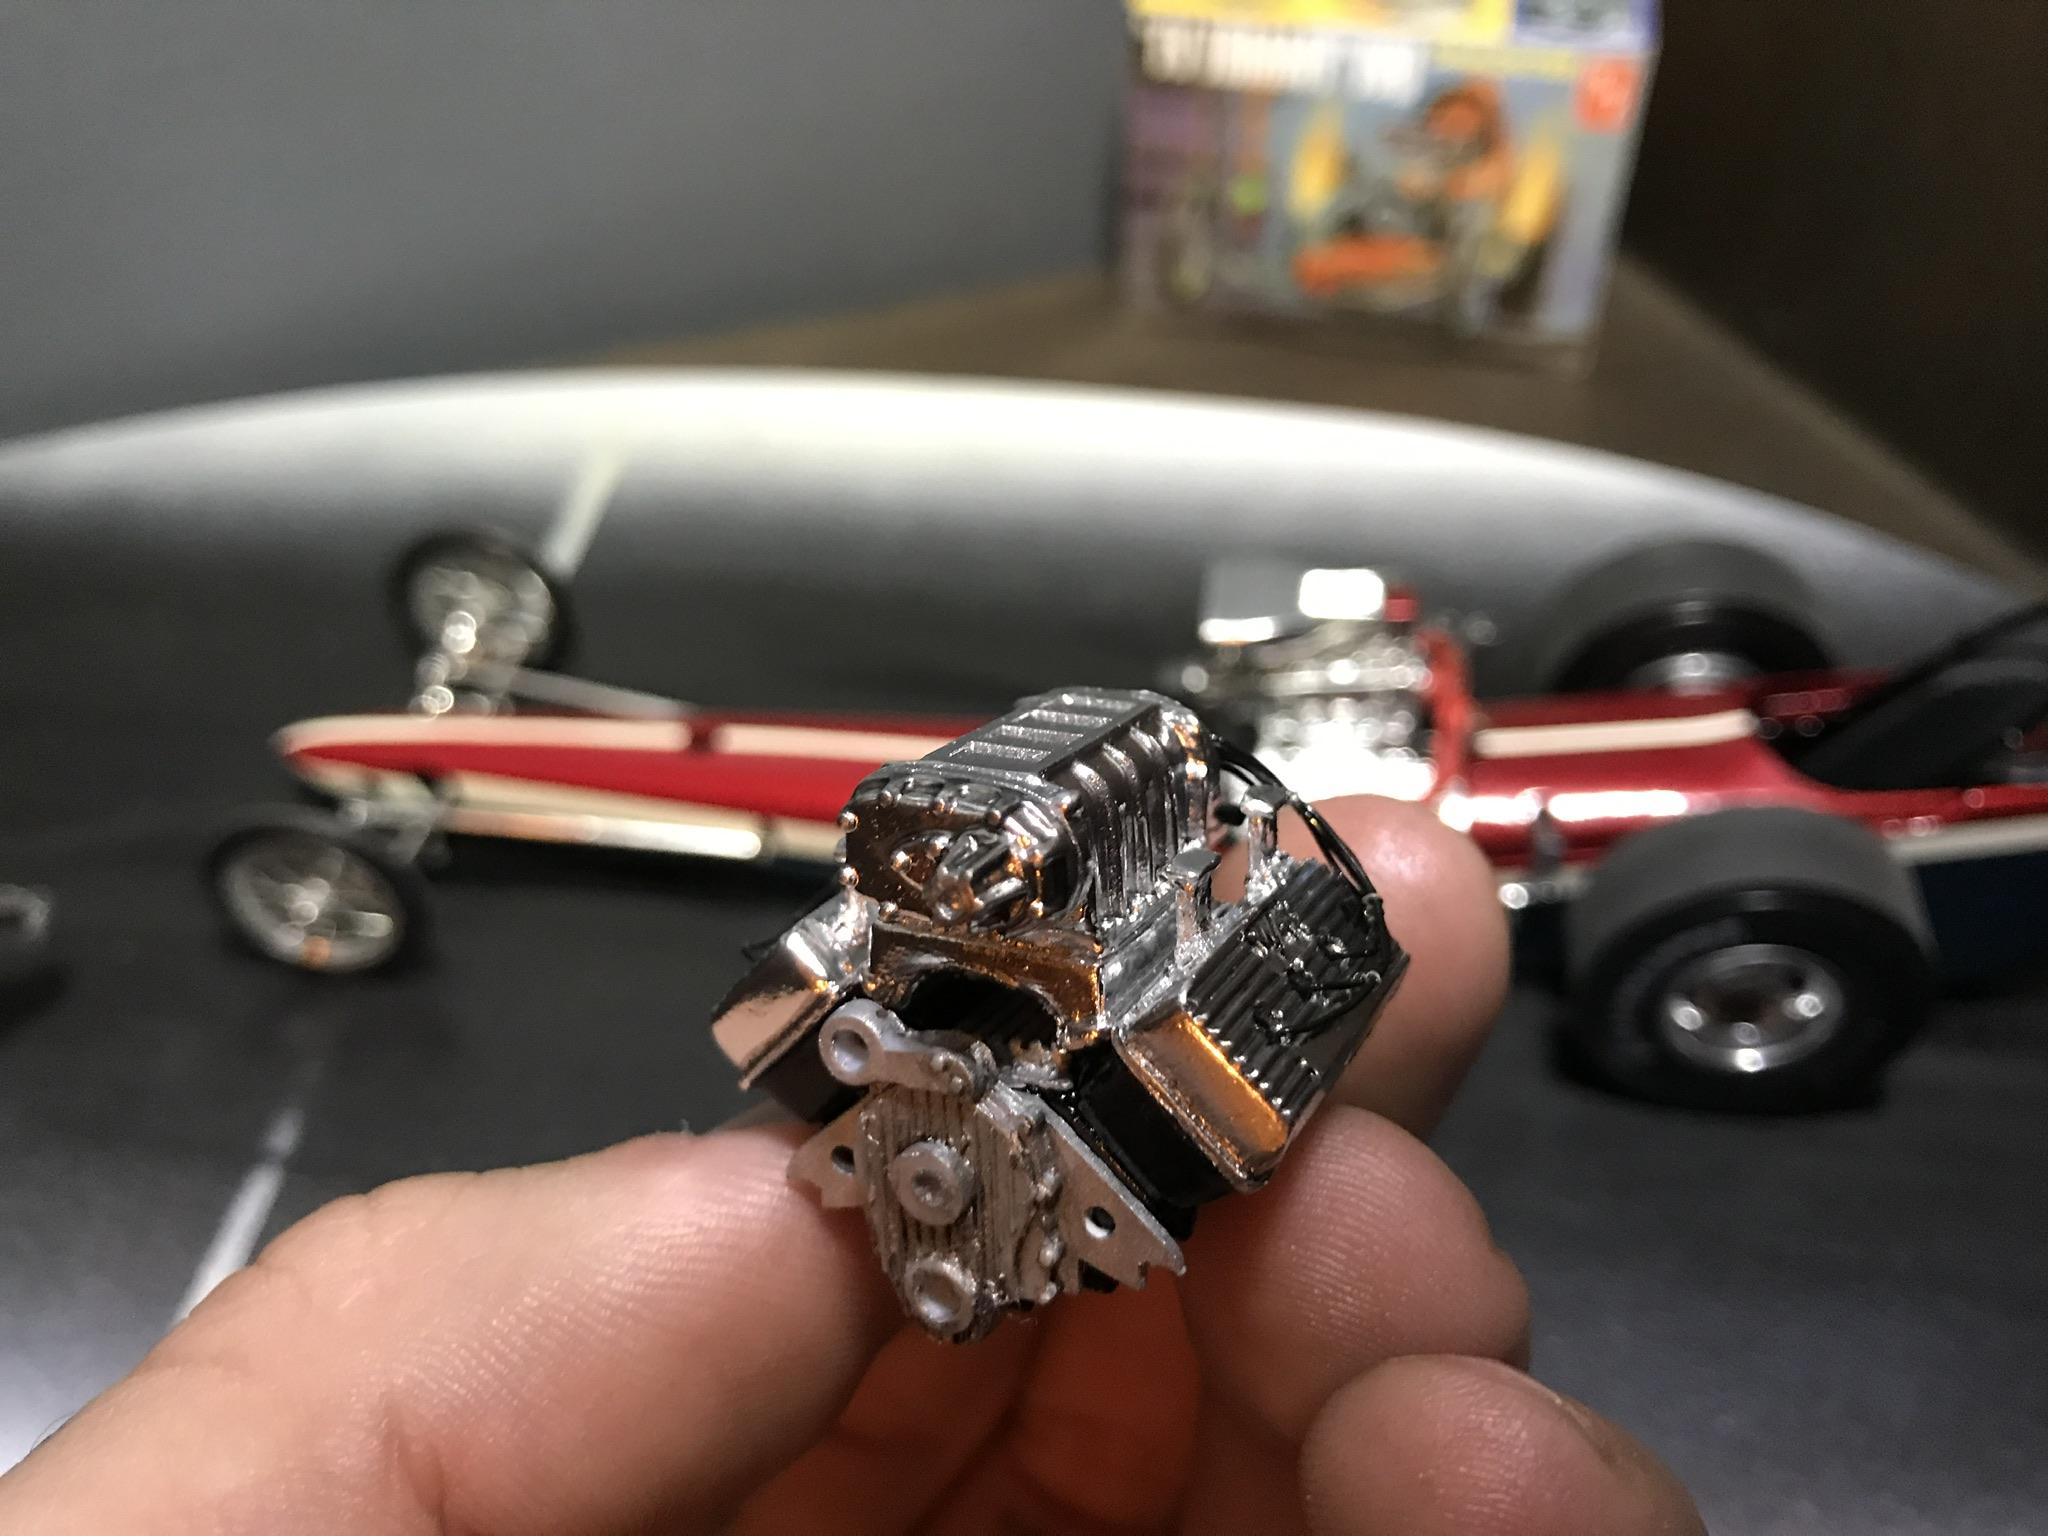
The end is in sight for the engine build! Yesterday I built the fuel valve from scratch. Only took about an hour since I scratch built one for the other dragster. Painted it up with Duplicolor cast iron that I keep in a jar. Has a few scratches on it from the tweezers as I glued on the fuel lines but they aren’t visible to the naked eye. Today I shot the new bug catcher with Molotow and I am happy with the results and discovered a happy accident. Me in my rush to get the scoop on, I used a hair drier to speed up the drying. I was directly blowing at it instead of making a hot box. It caused it to blush slightly, but evenly resulting in a more polished aluminum look instead of the mirror chrome look. Works for me as it should be polished not chrome. All that is left is to glue on the valve, injector plumbing (already bent and test fitted) put the throttle plates in and a few linkages and it’s on to the front axle scratch building! The last 2 photos are the smallest parts I have ever dealt with / made next to my filthy pinky nail after a 10 hour shift. Throttle linkage ends made from photo etch on 0.016” brass rod and the linkage pivot made from styrene.
-
Tom Hanna inspired front engine AA/FD build
GlueSniffer replied to GlueSniffer's topic in WIP: Drag Racing Models
Much appreciated! Those wheels look incredible don’t they? I could never build another dragster without them! Those wheels and some spark plug wires are all most out of the box dragsters need to make the kit look incredible. Well worth the money! As for your compliments about my attention to detail, I find just keeping calm and being as patient as possible goes a longer way. I wanted to throw this engine across the room trying to glue on the fuel shut off cable ? -
I love every aspect of this car!!! Awesome build!!!
-
Tom Hanna inspired front engine AA/FD build
GlueSniffer replied to GlueSniffer's topic in WIP: Drag Racing Models
Thanks for the info!! The Monogram one was a 2 piece that needed a lot of clean up. That dragster looks incredible!! Great work! Engine looks fantastic! I think a 1/16 build is needed in my future! -
Tom Hanna inspired front engine AA/FD build
GlueSniffer replied to GlueSniffer's topic in WIP: Drag Racing Models
From my understanding, Revell bought Monogram right? I didn’t have any Revell kits around with this part. I do have one from a Monogram/ Model King Tom McEwin Mongoose FED. That’s the one on the other 392 in the other dragster in the background. That’s not a bad scoop. It doesn’t fit the Detail Master (small) butterfly valves though. It’s a bit too small and doesn’t have the fuel valve mounting boss like the Calnaga. But I’m only assuming we are talking about the same part but I could be totally wrong as I’m not very experienced -
Tom Hanna inspired front engine AA/FD build
GlueSniffer replied to GlueSniffer's topic in WIP: Drag Racing Models
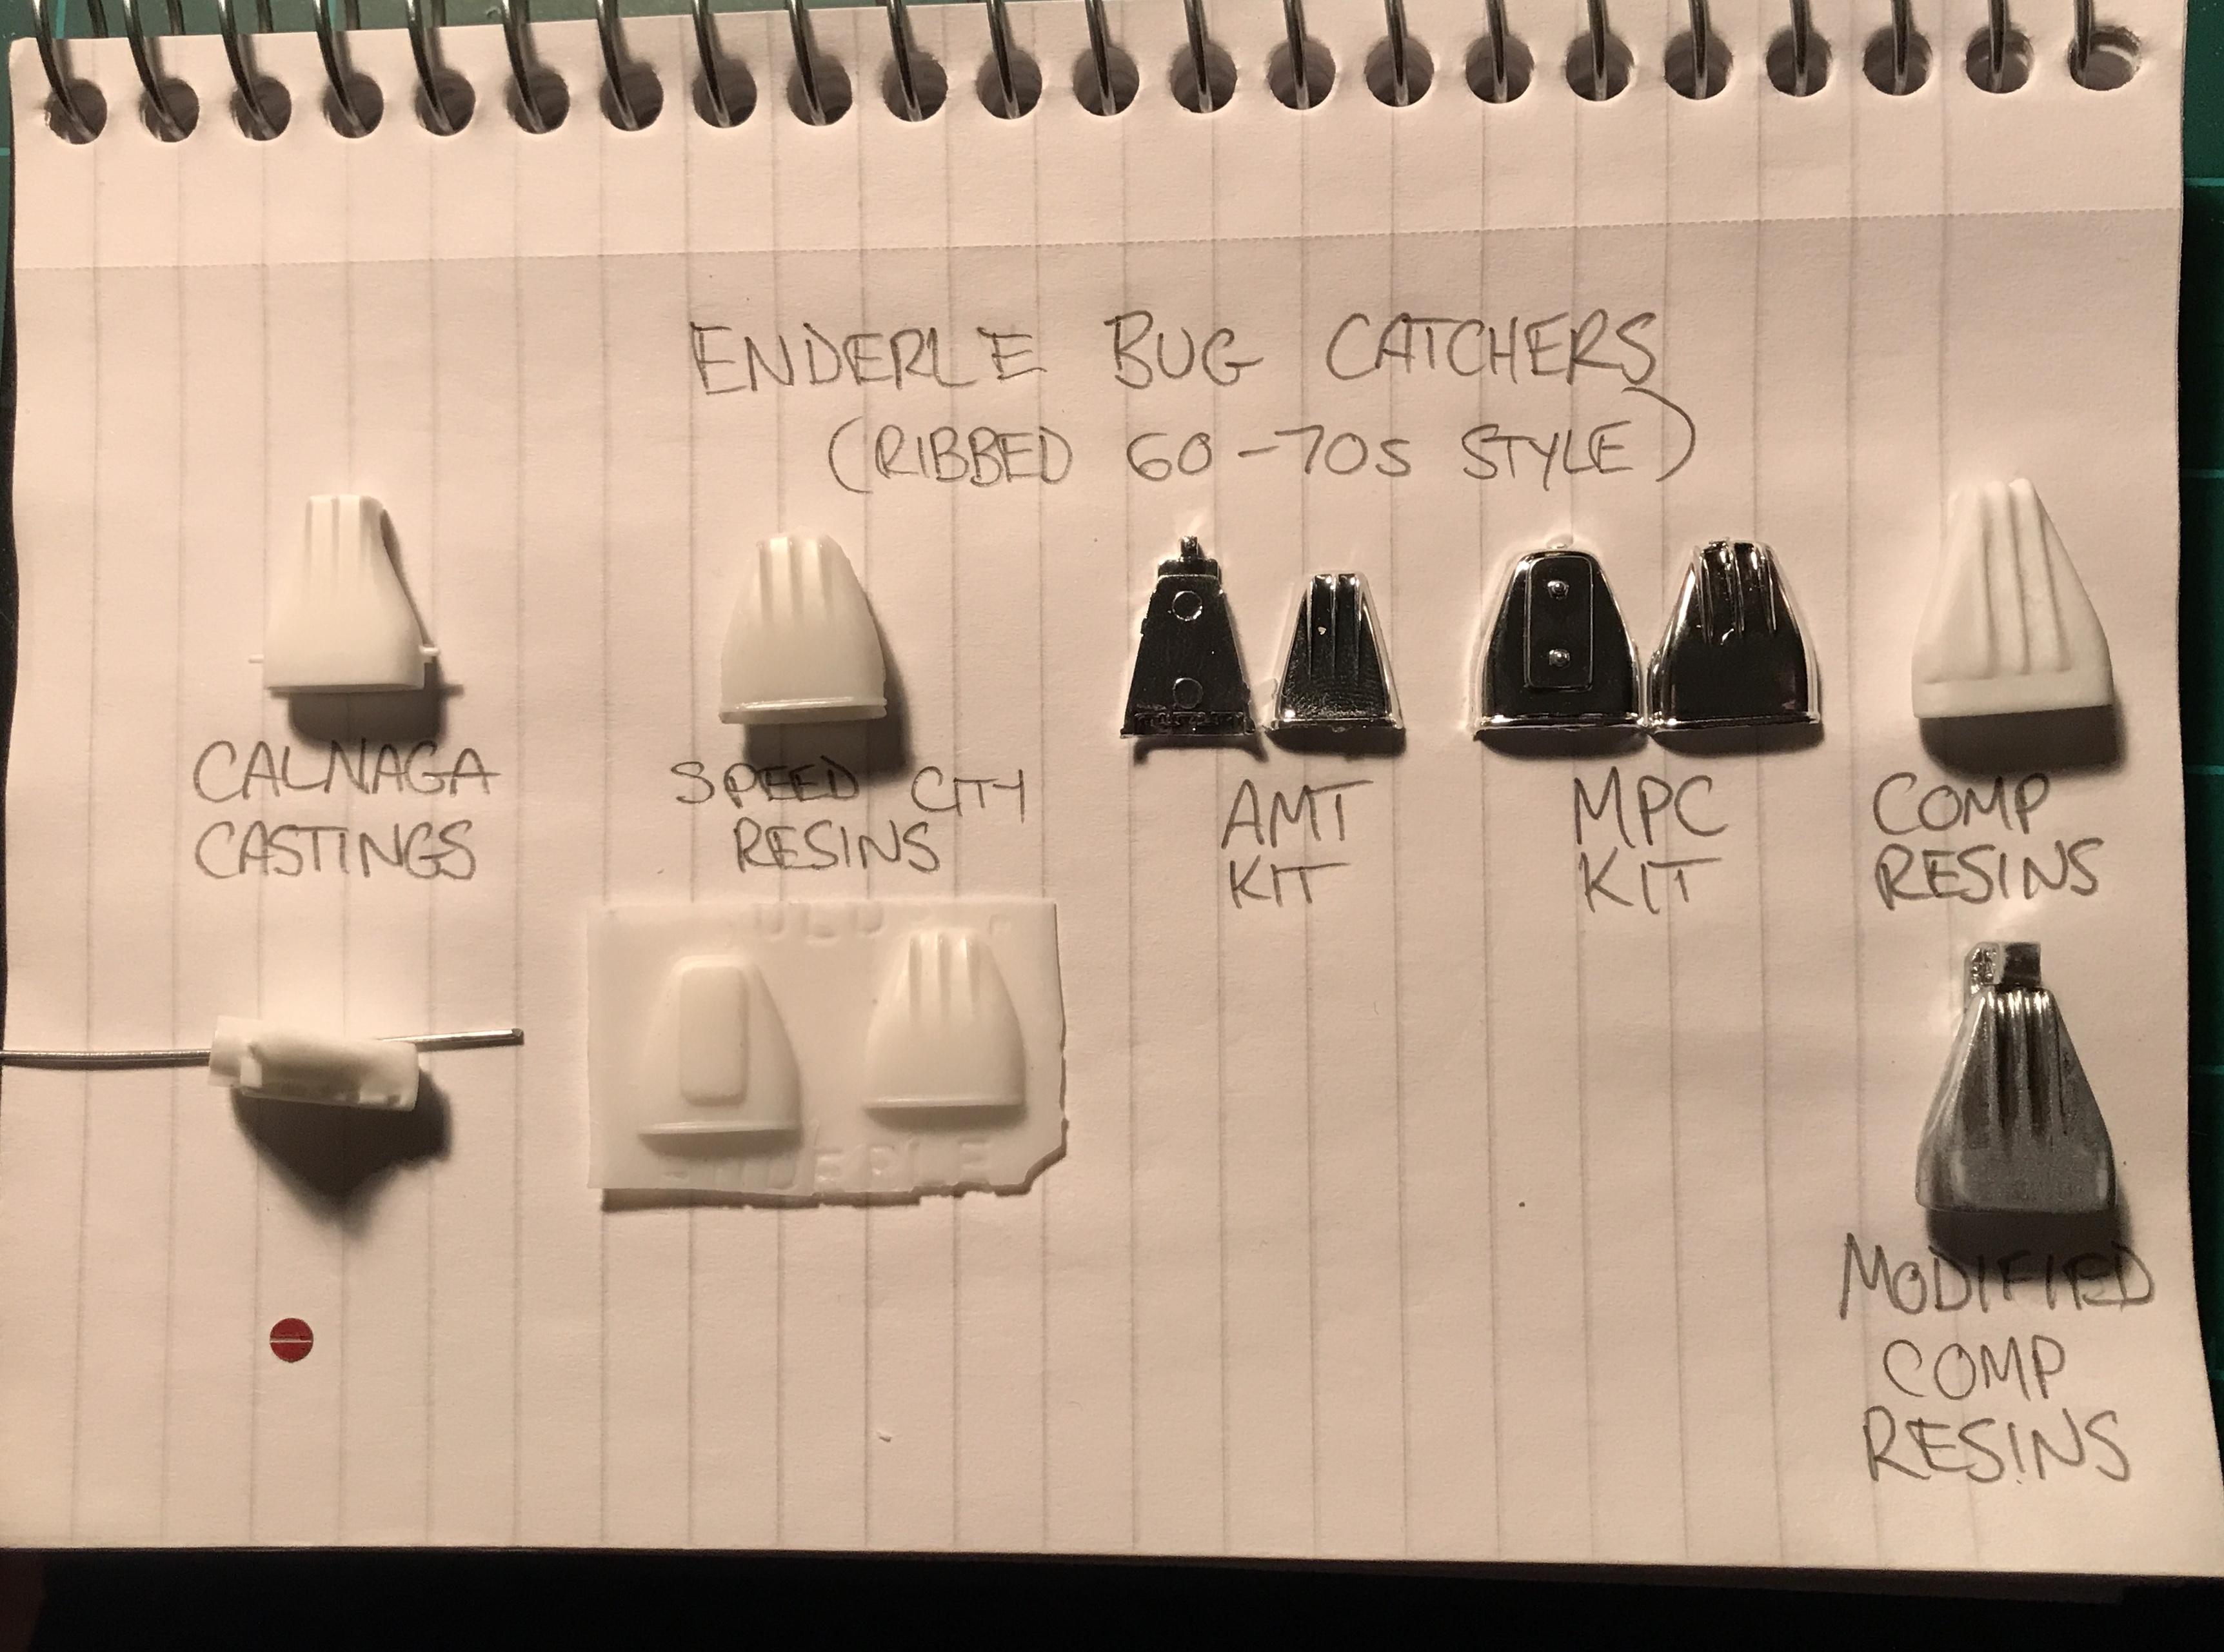
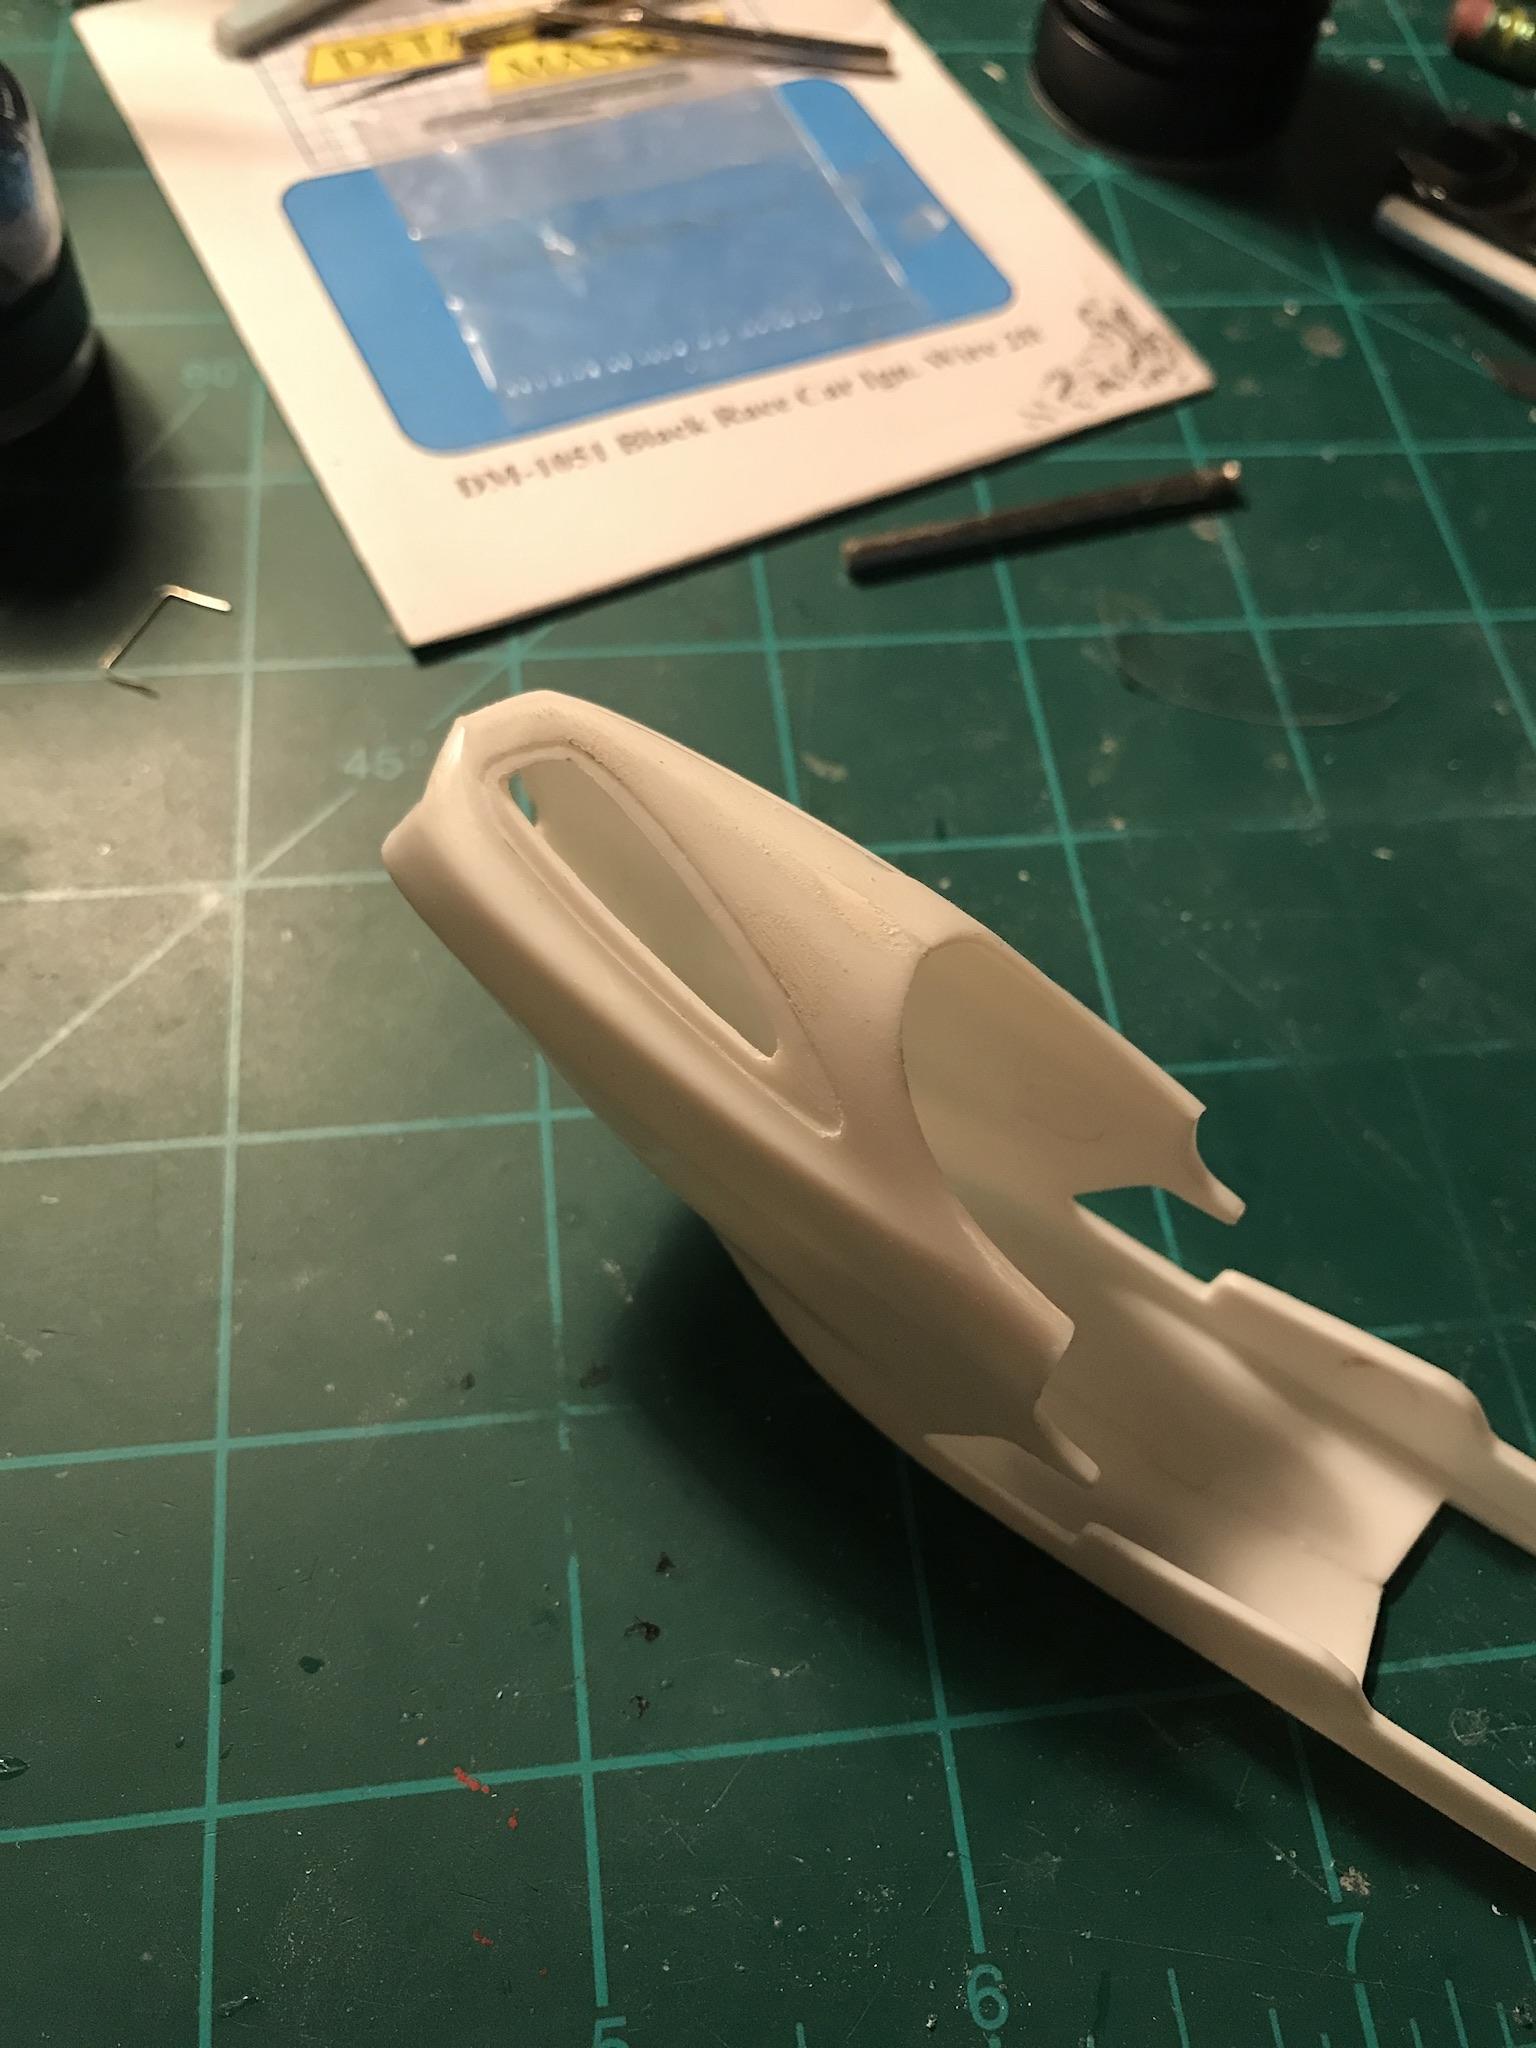
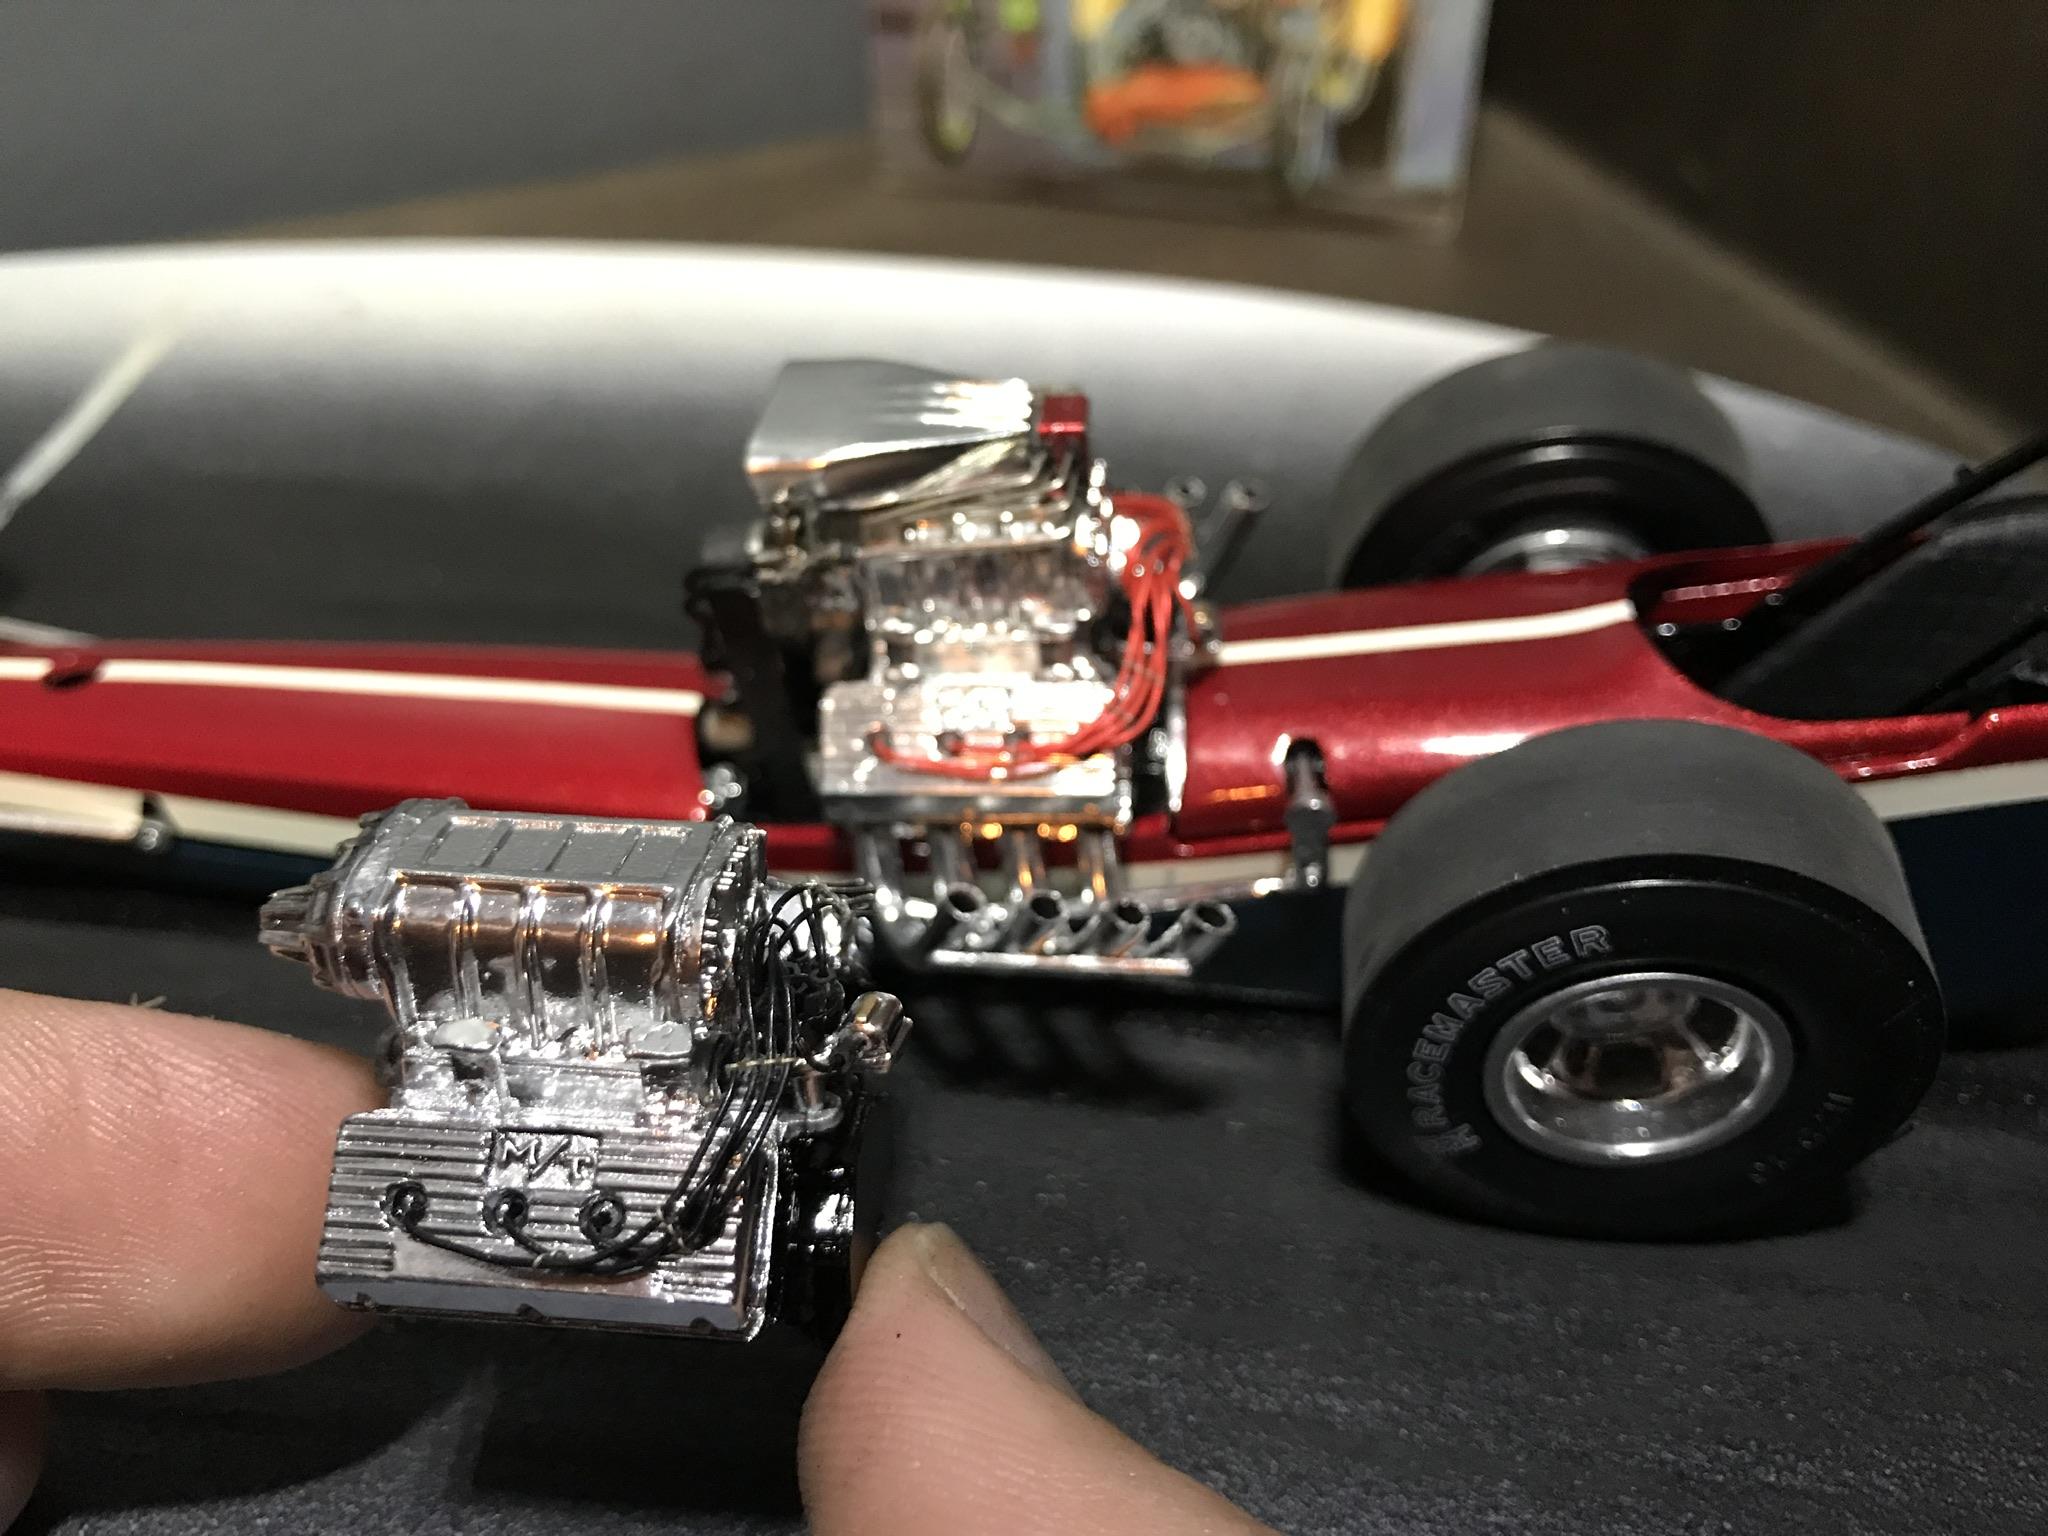
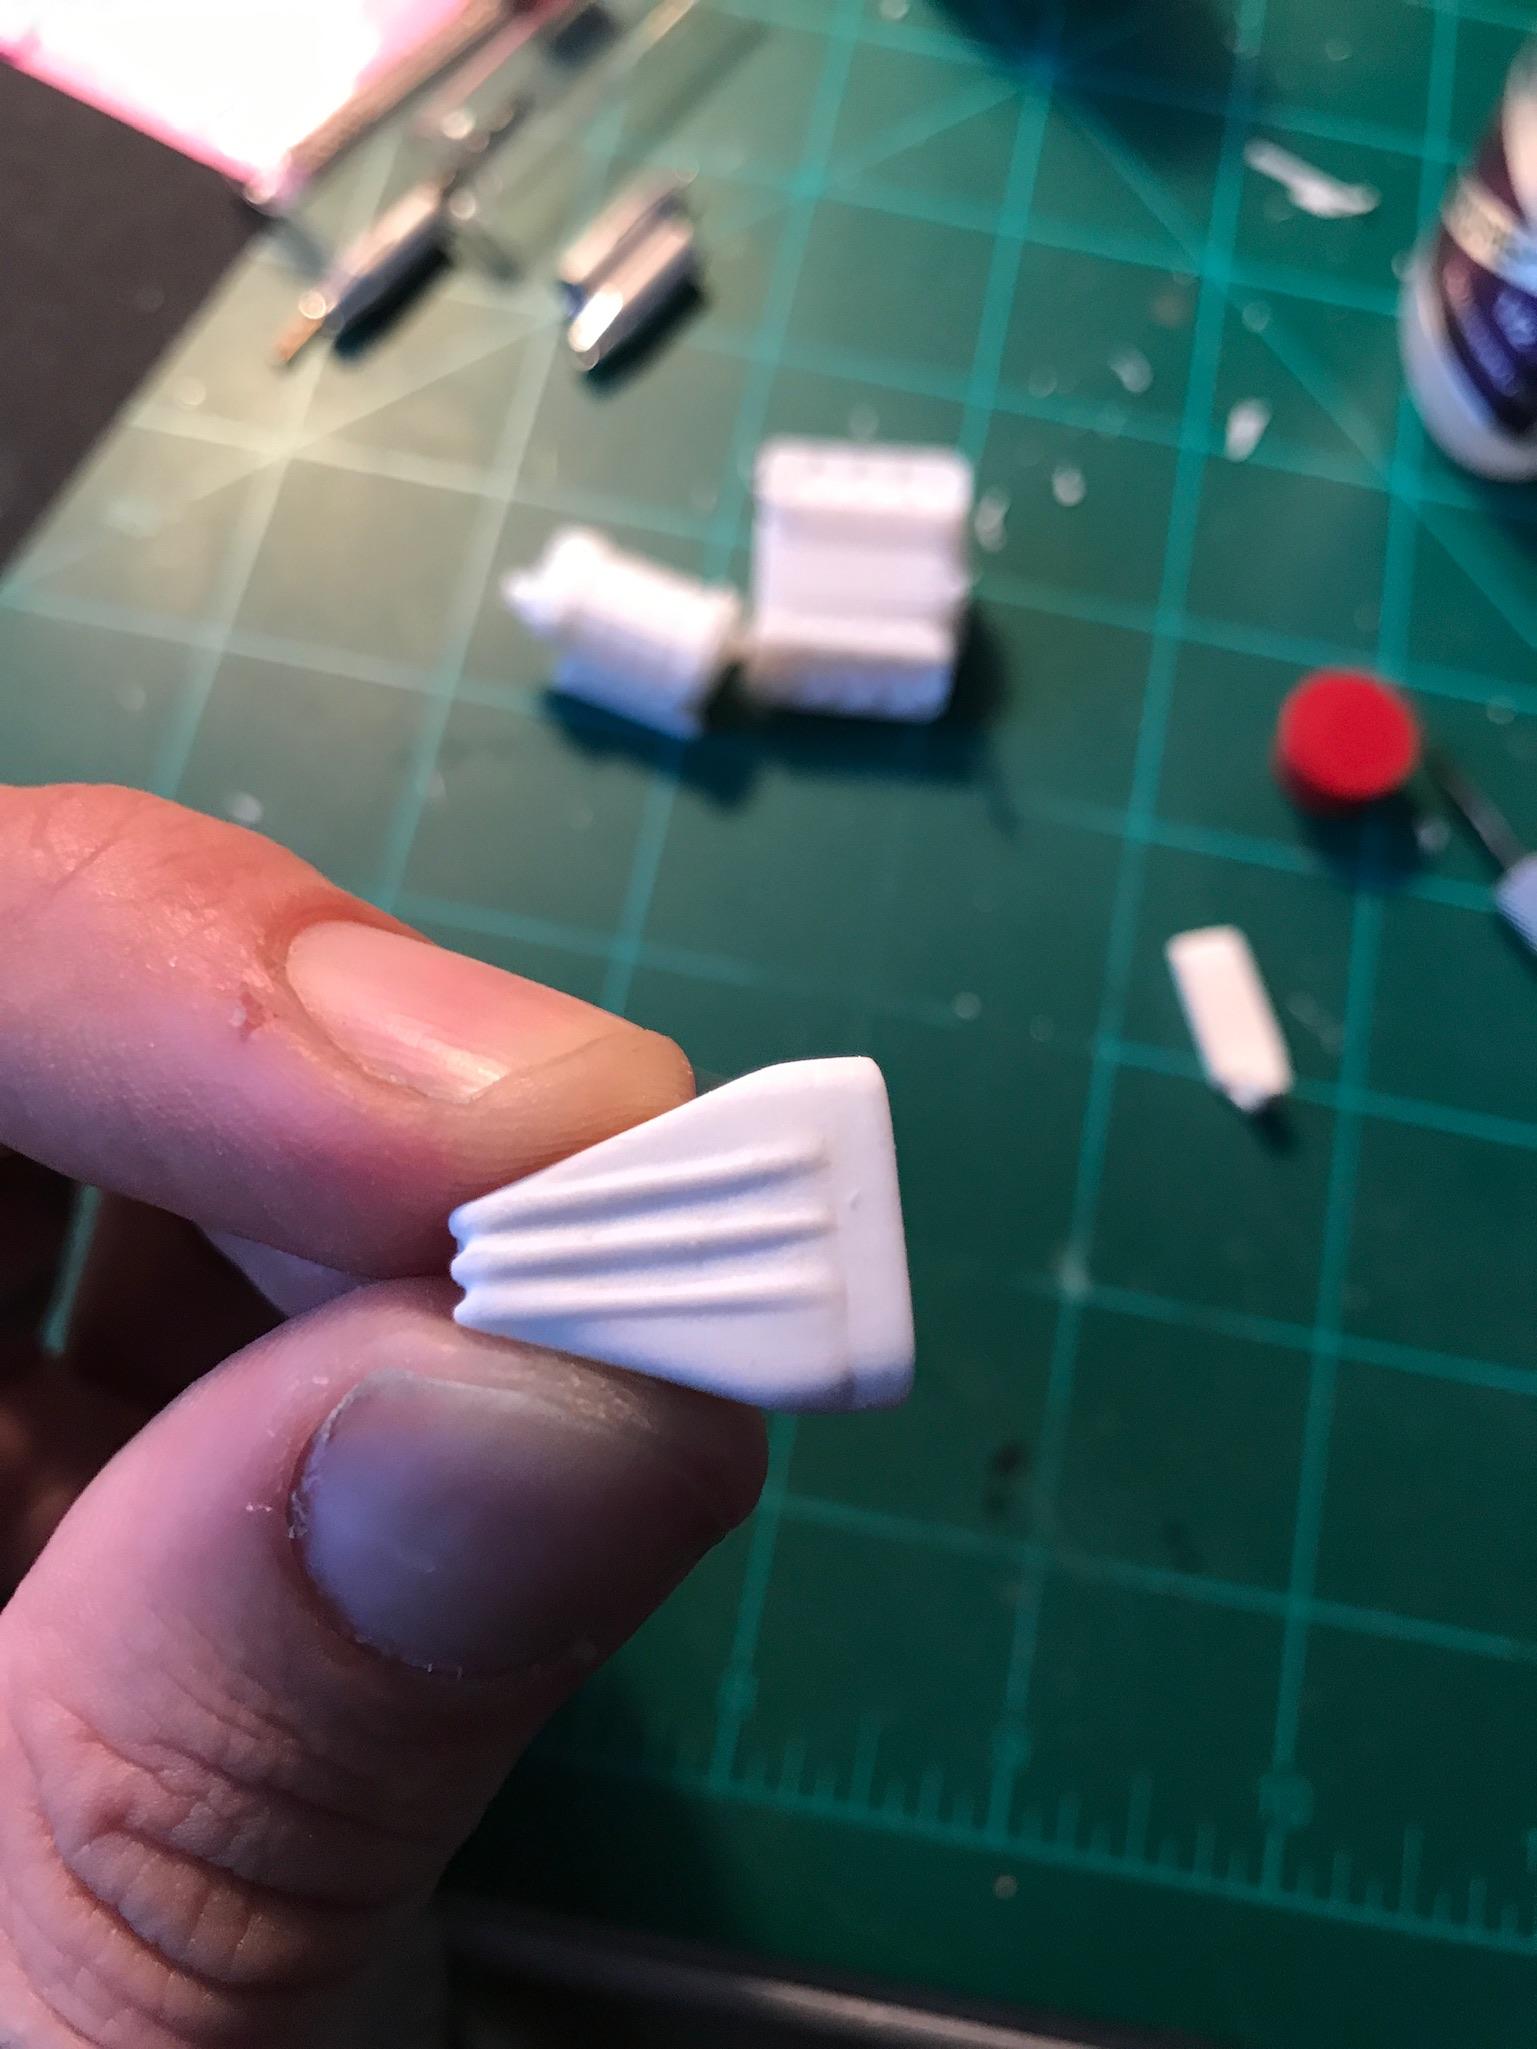
I have been putting in a little time on this project each night, even if just 30 minutes. I was able to get both of the plexiglass openings finished up and some white primer dusted on. I’m about 95% happy with them. The body will be set aside now for more engine work and begin the chassis. Since the last post, I had finished the fuel pump. I added a cable to the fuel 3 way fuel shut off valve. My dissatisfaction with bug catchers continued until I was messaged a lead to Calnaga Castings. Finally a good Enderle ribbed bug catcher!! I have bought tons in hopes of finding one with the right proportions and this is as good as it gets! Plus it has the mounting lug for the flow valve! I made a little comparison photo to show just how wildly wrong or different most of the other Enderle scoops are. That’s not to bash any of the other companies, they all have their own look, I just knew exactly what I wanted and the Calnaga scoop has it. Bought a few other bits for other projects as well. Big thanks to Tim Boyd for the lead! Scratch built another injector plate. Made a pivot bracket for the throttle linkage. Started making the rods for the links, by far the smallest parts I ever made, the rod ends. Next up is to make a fuel flow valve, get some chrome on the scoop, finish plumbing the fuel system, a few more parts for the throttle and that should finish up the engine with exception of the exhaust headers. Which of course will be scratch built.
-
Tom Hanna inspired front engine AA/FD build
GlueSniffer replied to GlueSniffer's topic in WIP: Drag Racing Models
I have looked through about 40-50 aftermarket sites, and have come up empty handed for decent mechanical fuel pumps. So time to modify the kit supplied one. Drilled .020” holes, added styrene rod for bolt heads. .050” for the center detail. Made a fuel shut off valve that will have a cable running up to it. This was my first time doing braided AN hoses and fittings. Very happy with the results. Next to make the Enderle fuel flow valve for under the bug catcher. Cast pulleys from Pro Tech, filed and spun by hand on scotchbrite. Had to grind the blower snot a little and extend the pulleys a bit to make it all line up. Now back to the body for a bit. Waiting on a different bug catcher ?
-
Tom Hanna inspired front engine AA/FD build
GlueSniffer replied to GlueSniffer's topic in WIP: Drag Racing Models
To play off the nickname “The fishbowl” that Tom Hoover’s car had, instead of a wood panel, I am opting to put tinted “plexiglass.” My dragster is going to be bright metallic blue instead of red, so the “plexiglass” will be tinted blue in true 1960s fashion. Here is one of the windows roughed out. I used the orange two-tone on the original as a guide to be a bead detail around the windows.
-
Tom Hanna inspired front engine AA/FD build
GlueSniffer replied to GlueSniffer's topic in WIP: Drag Racing Models
Not a ton of progress, but any step forward is good in my book. I’m also re-bodying my MPC Ramchargers Dodge I built for a Christmas contest (not keeping it Christmas themed as I’m just not that into Christmas) but it did take 1st place and win $100. So both bodies were glued up last night. The Ramchargers Dodge had all its modifications finished tonight and most of the bodywork completed. The Ivo dragster is going to need its fair share of bodywork as well. I have been using the Tamiya body putty I actually like the stuff. But I’m looking for a good way to seal it after sanding with a primer that can be brushed on and sanded. I have used Tamiya Surface Primer by brushing it on, but it shrinks… A LOT. And over a long time. It will still be shrinking a week later. I don’t want to use a spray, so I can keep it localized to the body worked areas and not lose detail in others. I can always spray something into a cap and brush it on if needed. I just would like to avoid masking all the time. Any recommendations??
-
Tom Hanna inspired front engine AA/FD build
GlueSniffer replied to GlueSniffer's topic in WIP: Drag Racing Models
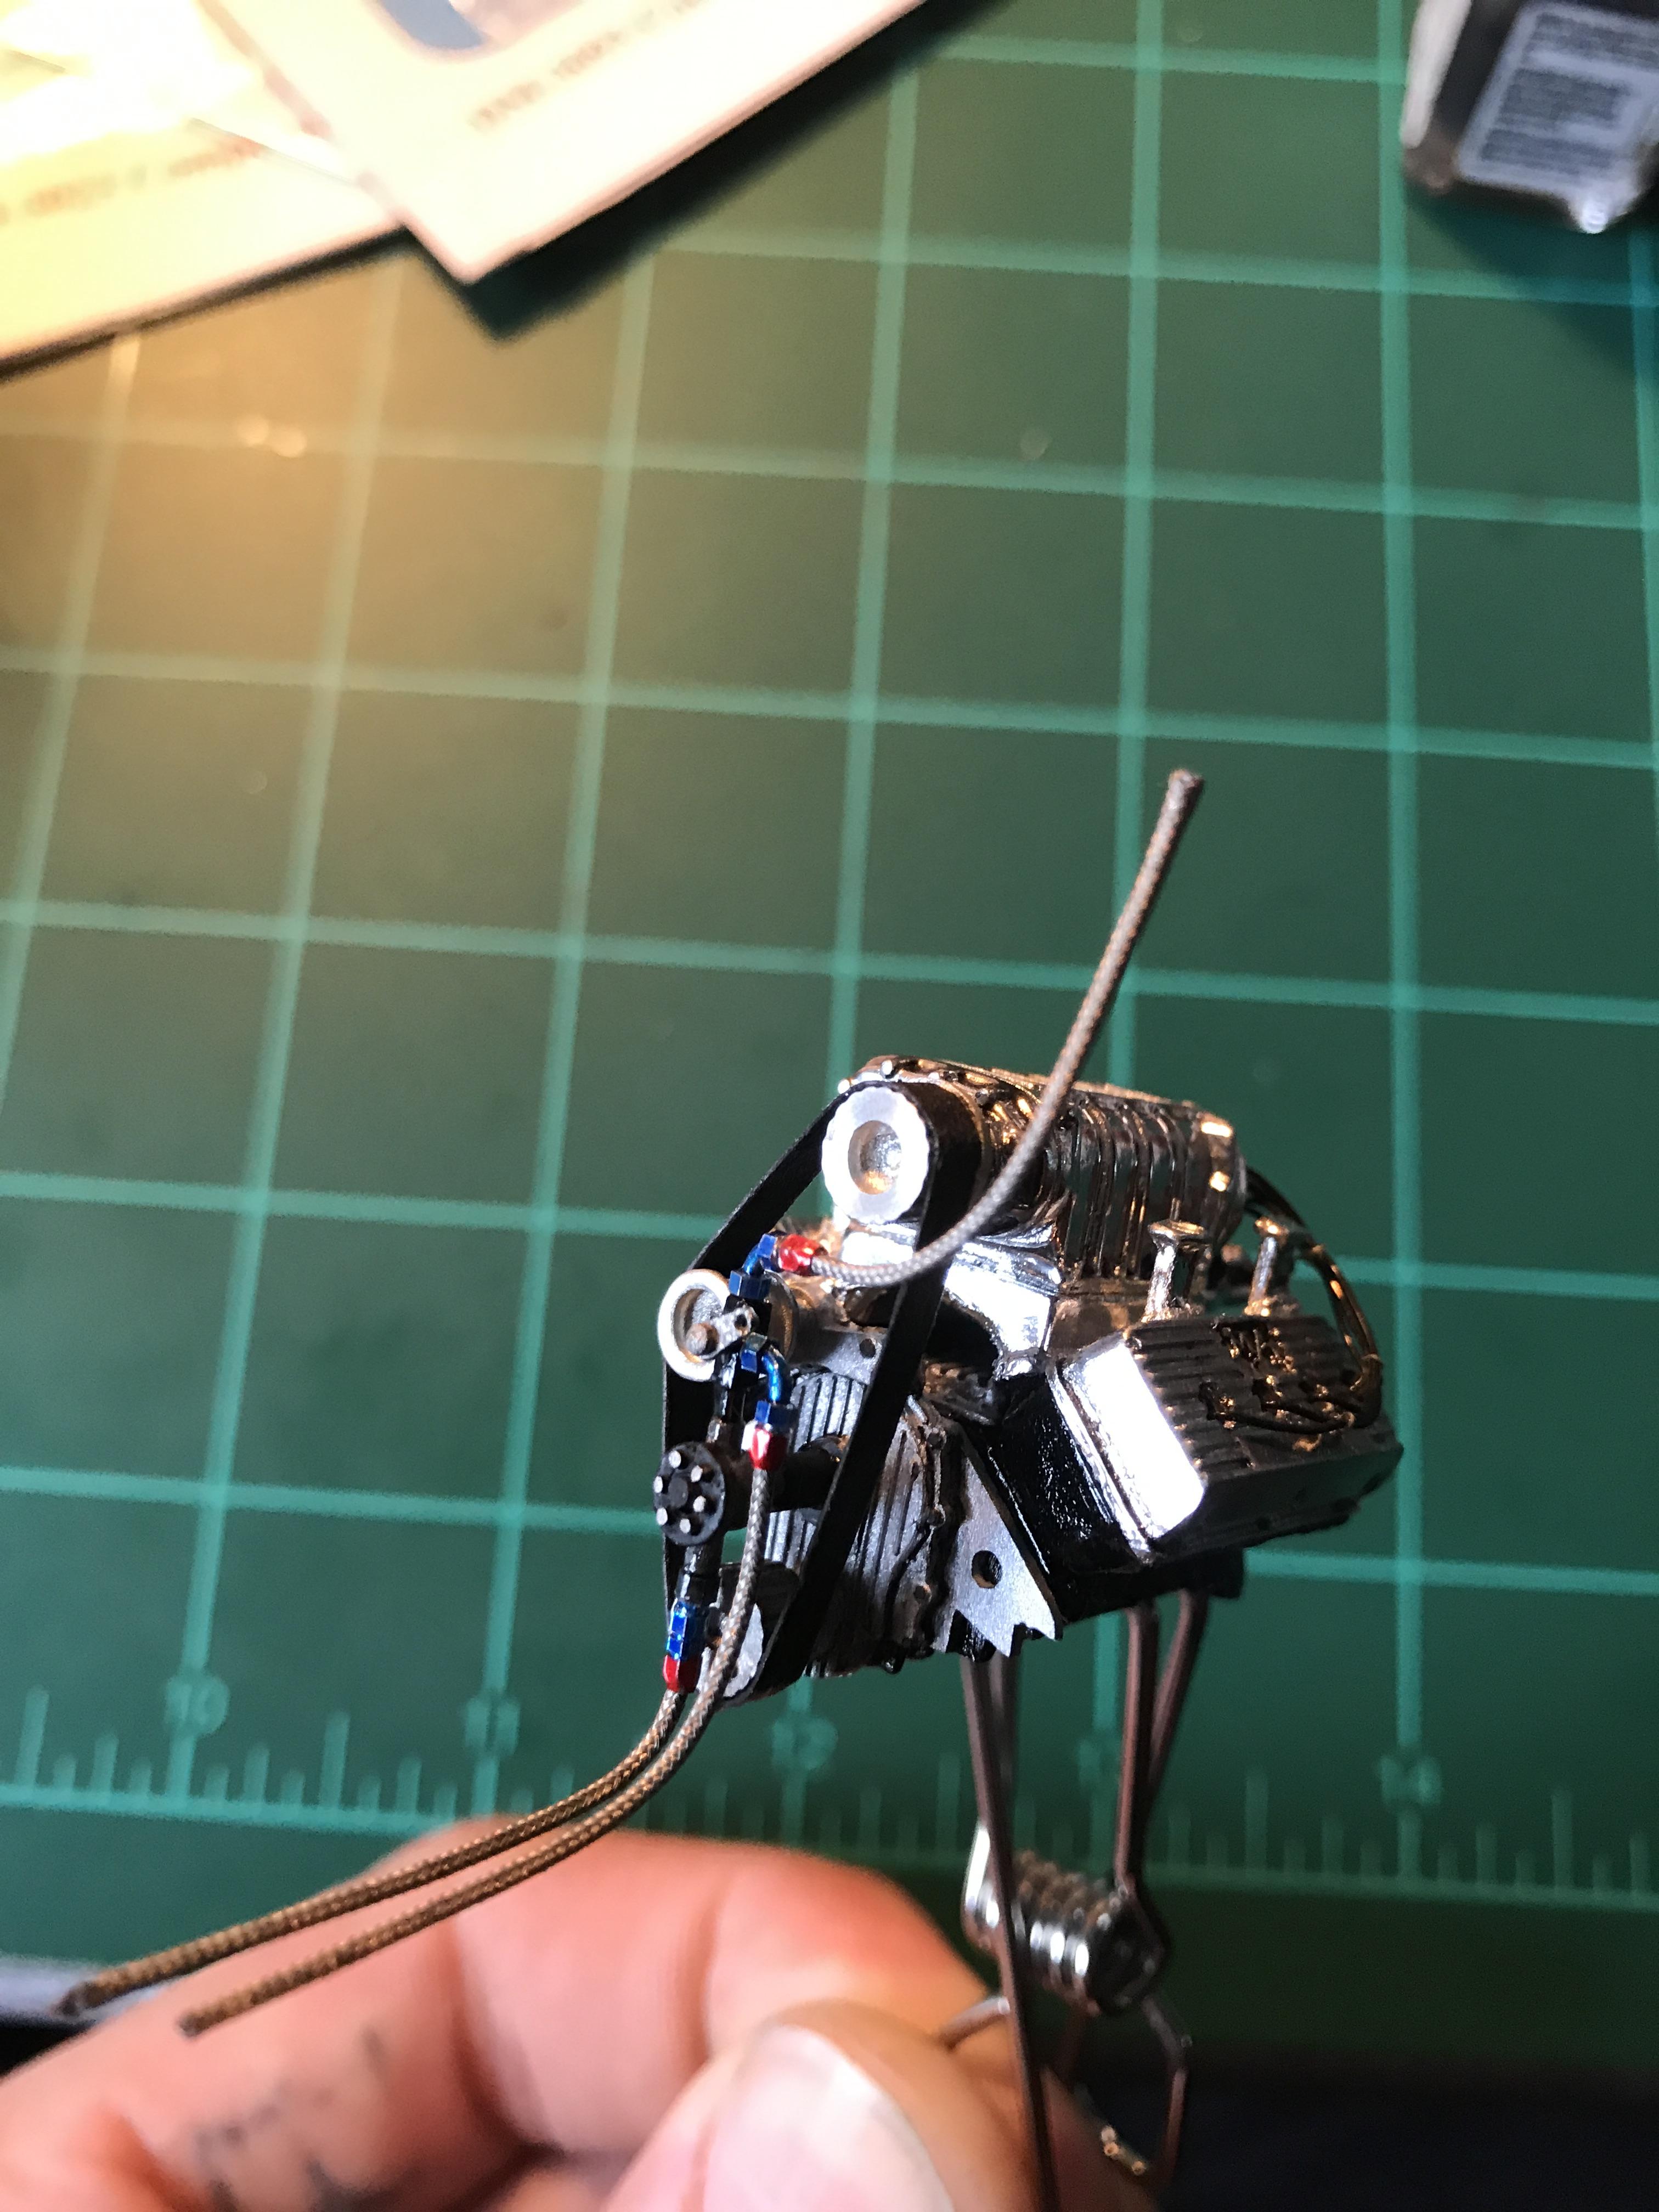
Pulled out the airbrush this afternoon and sprayed the engine with PPG base coat black and the rest of the parts with Molotow. Made a front engine plate as well. Timing cover I wanted a cast aluminum look whereas the blower and valve covers I want to look highly polished. Took a real gamble and tried black washing it. It’s real easy for that to look ever done in my opinion so I went as sparingly as I could. Black plug wires since I’m still undecided on the paint colors still.
-
Tom Hanna inspired front engine AA/FD build
GlueSniffer replied to GlueSniffer's topic in WIP: Drag Racing Models
Started assembling the engine today. Lots of scraping, filing, sanding and fitting. Most of it was reshaping the bug catcher to look more accurate and sharpen up the ribs. Also removed the butterfly rod so the photo etched parts could go in place. I had a injector base plate but I wasn’t happy with it, it was slightly warped or misshaped. So I scratch built one today. The Moon valve covers were also a no-go. They were about 1-1/2 scale inches shy on the cylinder heads. So I’ll go with my trusty Mickey Thompson ones. I could fix the Moon ones but to me, it’s not worth the effort for such a minor difference. Tomorrow morning I’ll pull out the airbrush and get some paint on the engine and spray some Molotow on the blower, bug catcher, and valve covers.
-
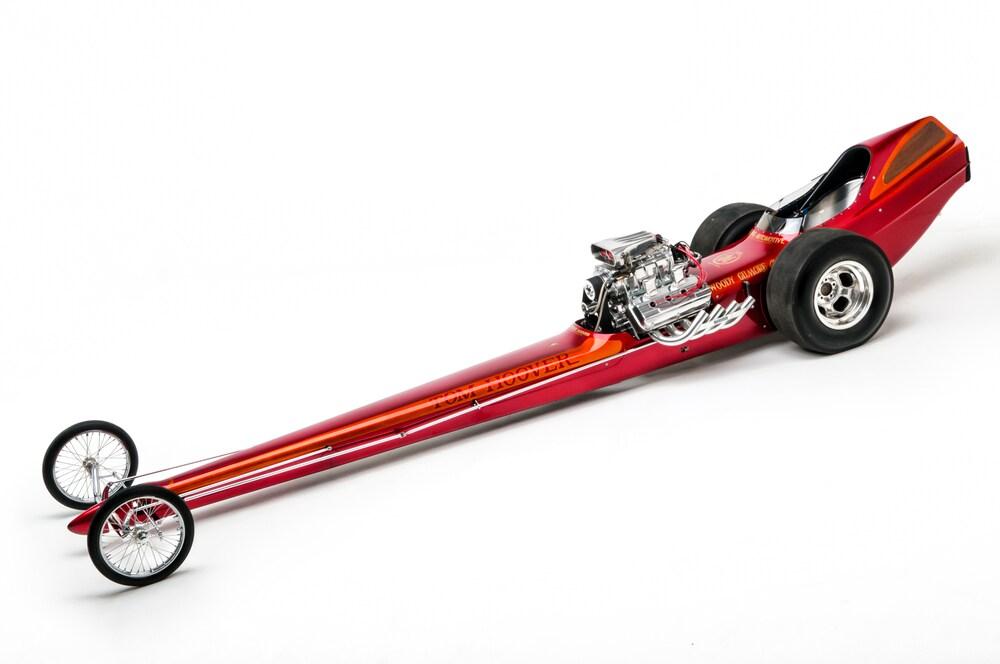
This was a build that has been on my mind for a few years. I have always had a love for the hand shaped aluminum full body dragsters of the mid 1960s crafted by Tom Hanna, more so the masterpiece that is the restored Tom Hoover FED. This new project is not going to be a reproduction of that car, but my own version of it as if it were my car. Initially, I was looking to build this car a few years ago but had no luck finding a base kit that was anything like it. So I thought I was going to have to scratch build the body and my skills weren’t quite there yet so I put the idea on hold. Fast forward to a month ago I started looking again and came across a AMT Round 2 TV Tommy Ivo FED kit on Modelroundup. The box art hid the gorgeous lines of the car for a smoky burnout picture instead. So I may have overlooked the kit years ago. It was a little more expensive than anything I had ever bought that was not a vintage kit but worth it to me for the body alone. Most of the kit will be going into the spare parts box. I will be scratch building the front axle and steering components, engine mounting plate, the Enderle fuel valve, and most likely the fuel pump as I have not found one aftermarket yet. I’ll be ditching the poorly detailed 426 Hemi for a better resin 392. I just about have everything in the parts pile to start! A short list of the parts going into this build: Speed City Resin 392 Hemi. SCR GMC 6-71 blower. SCR timing cover, brake rotors/ Airheart calipers from the FC parts pack. SCR 16” Halibrand deep mags Tires from MPC Ramchargers AA/FD, MH Racemaster rears I believe are actually AMT, and 17” Perelli fronts. Front wheels are 1/24 from Miniscurtraitzing. They fit the 17” Perelli perfect. Pro Tech blower pulleys, Cirello magnito, braided hoses. Compresins ribbed bug catcher. This is the only 60s Enderle scoop that I have found that looks the correct scale, has the right proportion and fits the Detail Master photo etch blower detail set. Compresins Moon valve covers (breathers from SCR M/T covers) Detail Master compression / AN fittings MCG Butterfly wheel, Dzus fasteners, seatbelt hardware Looking forward to putting the kit on the bench right now!
-
That garage build out is awesome!!!
-
I see that Duster with the 340! My real life car is a yellow 67 Dodge Dart with a built 340! Same yellow!
-
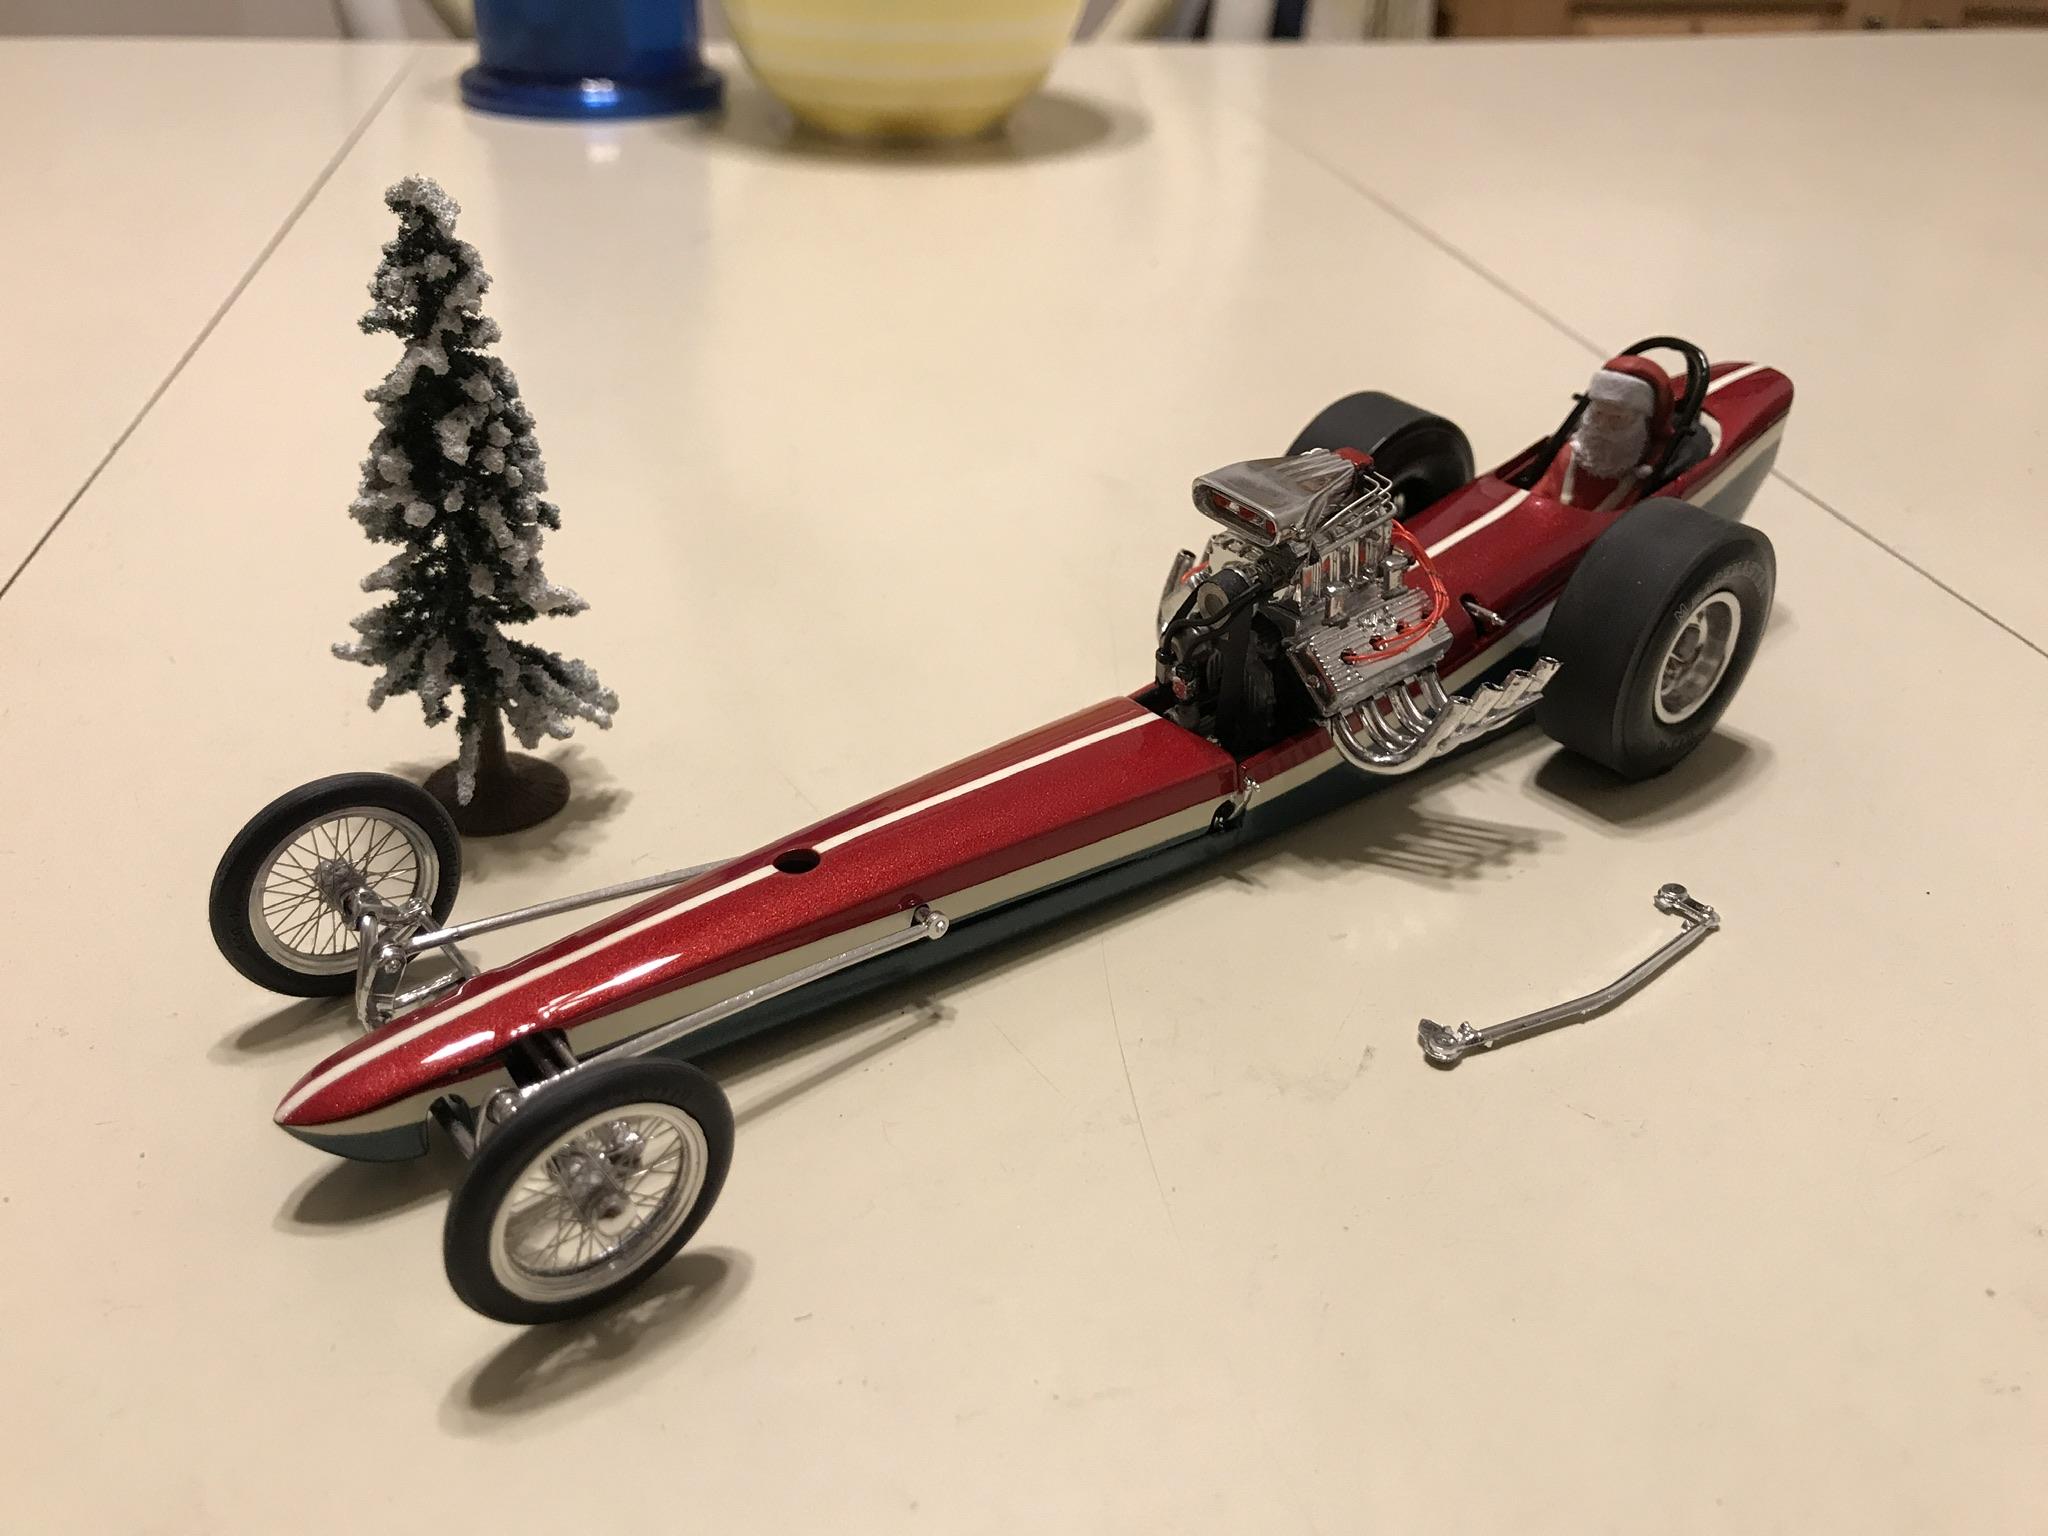
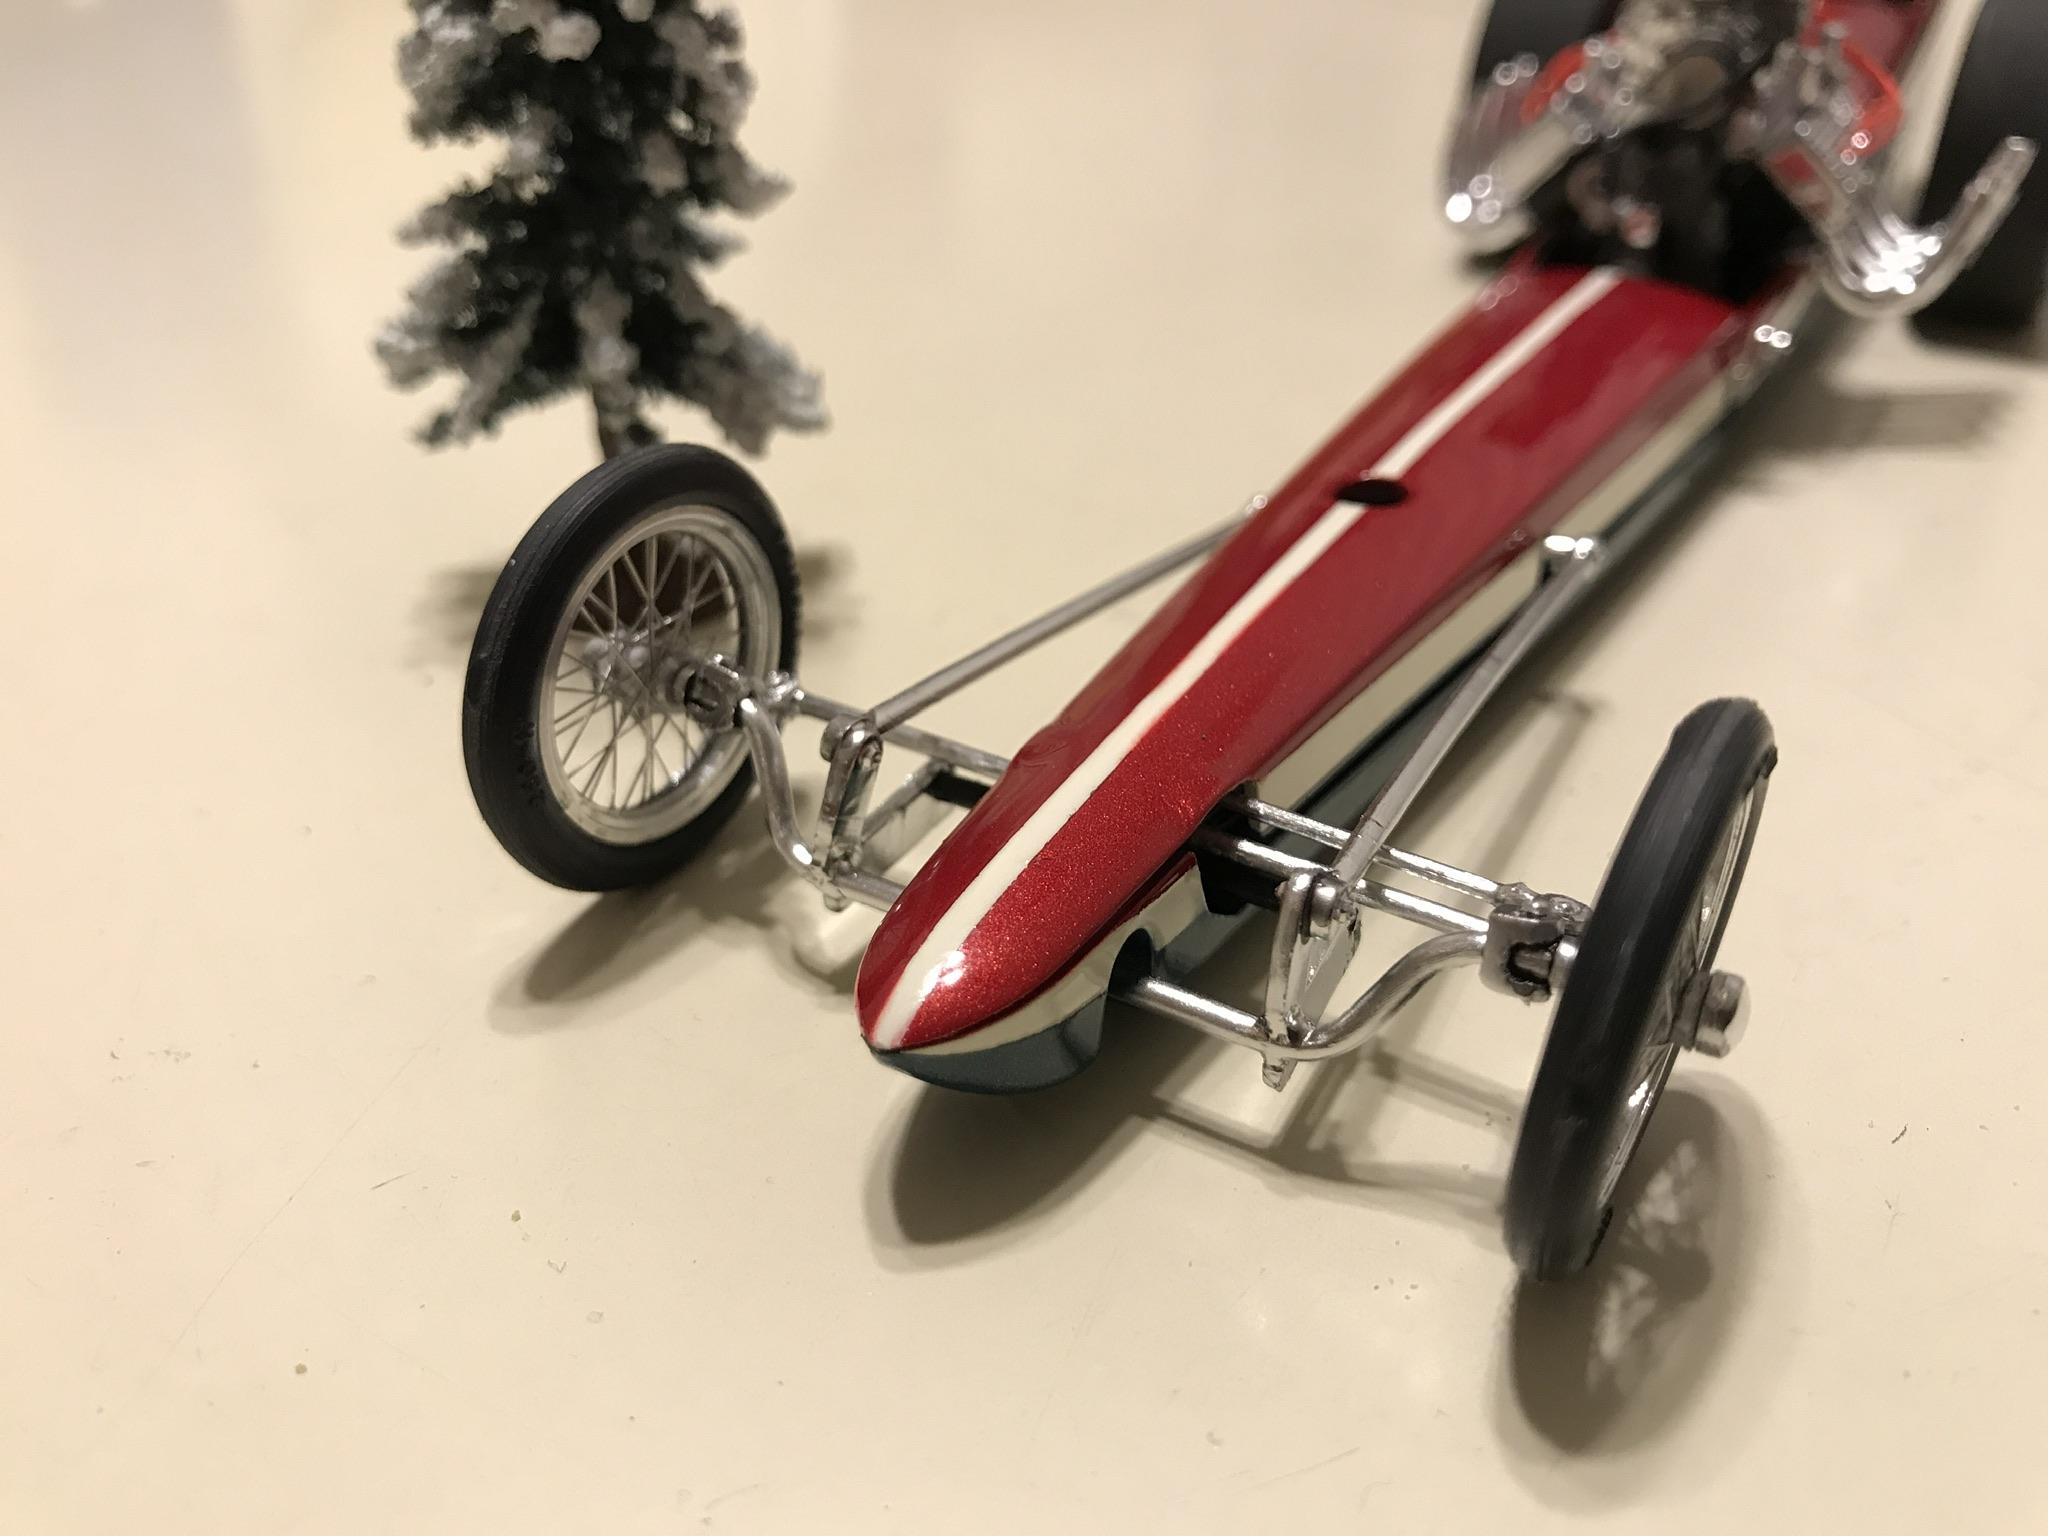
That bluing is exactly what I meant by the hobby has all sorts of stuff that I didn’t know about or didn’t exist 20 years ago! Sure I could have done that with Duplicolor or Dykem layout fluid, but the Alclad hot metal colors worked awesome as does the Molotow chrome paint! Thank you so much for the kind words! As for the dragster, the Enderle fuel injection was all scratch built. 8 injector pipes, 1 main feed to the manifold block. Scratch built the flow valve off the bug catcher too. I just painted the car this afternoon, so it’s going back together right now. has a Speed City Resin 392, GMC 6-71, scratch built axle and steering links. It’s for a Christmas contest at work so it got painted red, white, and green. I stuck a Santa head from Iceman Collections on a driver body haha. Still have some parts to glue on, make and some dust to wet sand and polish out of the paint.
-
Thank you! I’m looking forward to anything I may learn here or even offer any help with my knowledge of paint or just general car questions. Ideally I would like to give as much as I take!
-
I loved building models as a kid, but here I am again in my 30s playing with them again. I work as a sheet metal fabricator and shop foreman for a high-end antique car restoration shop. But I don’t get to keep all the cars for myself. I joined in hopes of finding some harder to find parts that I have had no luck finding or don’t have the energy to scratch build. i just completed my first model in 20+ years. The Revell 2-1 1929 Ford Model A. I did a bit of kit bashing, added some after market parts. Experimented with some newer products the hobby how has to offer vs 20+ years ago. Has a early Hemi from a Moebius 1955 Chrysler 300 kit, some parts from a Lindburg 1964 Dodge 330 kit, some photo etch, home made stuff, stretched the frame 5”, used the front frame horns from the highboy option and PPG paint. Currently working on my second project, a MPC Ramchargers FE AA/FD. Scratch built front axle, a lot of resin parts.