
Frankiebe
-
Posts
32 -
Joined
-
Last visited
Content Type
Profiles
Forums
Events
Gallery
Everything posted by Frankiebe
-
Hello Here is a Strato Bench Seat for this Camaro http://www.ebay.com/itm/351260042135?ssPageName=STRK:MESELX:IT&_trksid=p3984.m1555.l2649
-
Hello Check out this auction on EBay http://www.ebay.com/itm/351254259728?ssPageName=STRK:MESOX:IT&_trksid=p3984.m1561.l2649 Frank http://www.ebay.com/itm/351254259728?ssPageName=STRK:MESOX:IT&_trksid=p3984.m1561.l2649
-
BUFFCON 31 Plastic Model Contest Knights of Columbus Club 2735 Union Rd. Cheektowaga NY, 14227 See the attached PDF for complete show info.
-
Model Car Show in Western New York
Frankiebe replied to Frankiebe's topic in General Automotive Talk (Trucks and Cars)
Its been a while since I was at Fulton, If it's on a Saturday I could take a ride down. -
Model Car Show in Western New York
Frankiebe replied to Frankiebe's topic in General Automotive Talk (Trucks and Cars)
I am in the Buffalo NY area. If were to have a show it would be in Marilla NY during the Marilla car show in July. The Watkins Glen show was a nice show when I went there about 15 years ago, not sure what the status is now. -
Any one interested in seeing a Model Car Contest and Show in Western New York. If there is enough interest we may consider putting one together. Give me your input, if you would like to see a show in Western New York. Frank B.
-
Any one interested in seeing a Model Car Contest and Show in Western New York. If there is enough interest we may consider putting one together. Give me your input, if you would like to see a show in Western New York. Frank B.
-
Hello All Just finished up the master for a Dual Master and Power Brake unit in 1/25th Scale. I will be making the mold this week. Anybody out there looking for parts, I'll be casting some up by next week. I also have some other parts I'll be making. I'll be getting a list together of everything I'll be doing. Let me know if there is anything you are looking for. Frank B
-
need some help
Frankiebe replied to superhornet1015's topic in General Automotive Talk (Trucks and Cars)
What kind of decals were you looking for, I have some experience working with CorelDraw send me some reference material to see what I can do. -
Welding or soldering diecast metal
Frankiebe replied to sjordan2's topic in Tips, Tricks, and Tutorials
For welding or soldering diecast metal or aluminum try looking at www.alumaloy.com they sell welding rods that work with a propane torch. Saw a TV ad on it, looks like it works pretty good. -
Hello All Well here we are three years later, I have been slowly picking at this project, and here to post some updated pictures. I am almost embarrassed to post anything because this project is taking so long. I have had other projects in between and also started resin casting some of the parts for this truck. Resin casting was always in the back of mind to try, and come to find out its not that hard to do after all. You just have to plan your molds so you can pour good parts.

-
Merry Christmas to everyone, Well here is teh lasted update on the marathon build. The past year I have working on making some molds for the scratch built parts I have made for this truck. So far I have done the hood, engine, rear axle, and some parts for other club members. I have attached some photos of the progress so far, I hope to finish this sometime soon.
-
I heard the same thing that Tenex7 is back on the market. What I heard was they could not get bottles. I guess they have the issue resolved, so you should see it back on the shelves at your LHS. Talk too you soon.
-
1962 Issue of Big Daddy Roth's Outlaw
Frankiebe replied to bigskybob's topic in Tips, Tricks, and Tutorials
Hello. Nice Kit. I just built this kit over the summer. It was a 1994 Re-Issue printed on the box. Check your box to make sure its original. The 1994 decals were a bit tough to put on even though they were relitivly new. The older decals are probably brittle and will fall apart in the water. The decals are the main thing with this kit. Frank B
-
Hey Mike Thanks for the tip. I got a sheet of 1/32 basswood cut it into strips and stained it so it looks like oak. The chrome strips are going to be Evergreen I beam shapes, sprayed with Alclad Chrome. This will be my first experience with Alclad. Should be interesting, with more experiments. I decided to go with HOC Candy Apple red. The past experiments were close but a little too much trouble to get the color I was looking for.
-
My experience with the Red Putty, yes it does separate over time. If you keep changing the position of the tube every so often it usually keeps it sort of mixed up. What I like to do is squirt some into a 3/4 oz jar and keep capped off when not in use and if its starts to get thick I add a few drops of Lacquer Thinner to thin it out a little. If you forget about and it dries out to almost hard, just throw it out, it can't be saved with thinner. I tried to save some one time and it never spread out on the surface properly. As far as the 3M Blue Putty you can get it at any Automotive Paint store or Carquest. The Blue Putty has a very smooth consistency and sand very easy after its thoroughly dry. I let it dry over night and rough sand with 320 grit. The blue putty has some different ingredients which includes clay and talc. The Red putty I use just has Talc. Either of the putties I use only very thin skim coats, just to fill minor imperfections.
-
Hello All Anyone have experience with 3M Acryl Blue Spot Putty. I usually use a the plain jane red spot putty. Some one suggested using the blue putty, its a bit more expensive but it may be worth it. Let me know what you like to use for spot filling small imperfections in your body work and describe your results. Thanks any help would be great! Frank B.
-
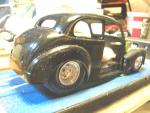
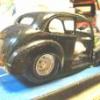
I failed to tell what was done to this project. First was a chopped top experiment on a box less kit just to see if I could do it. That came out good, and it went from there. Next was the hood, I took a pie cut out to lower the nose. The next idea was to French the headlights, tried a couple things and nothing looked right. Chuck Nickter from our club suggested a brim of a hat over the top, something like a 57 Chevy. I said ok, that sounds good, I had an old body I could cut up, so off came the headlights. Now what do I do with the rest of the body? The pick up box looked small for the cab, so what if I used the rear quarters from the 57. With a little work I was able to fit that up to the back of the cab. I also added a flat sheet to make a triangular character line going from the wheel well to the rear of the quarter. Now for the running boards, lets use the originals with a little smoothing and some additional material to make everything even. I added some material to the bottom of the doors to make those go strait down to running board. And that's where we stand today, lets see what the future brings. This whole project went by the seat of my pants, when I started I never envisioned it would look like this. Frank B
-
Eelco You have a very interesting piece there. Thanks for the input, my piece was planned on the front grill to be chrome, with wheels and headlights, not sure what I am doing with the window frames. Also I saw a build with the center moulding on the hood shaved off, as of right now I still have mine on. If I left that on it would probably be chrome. Frank B
-
Hi Riz Roll cages are generaly 3" in Diameter in real life. So if you scale it down to 1/20th it would .150 on an inch rod you would need. Take 3 and divide by 20 and you get .15. Frank B
-
Hello All This project has been going on for over 2 years. Wow time sure flies. There were other projects in between that always seemed to push this aside. We made significant progress since the last post many moons ago. Recently I thought I was about ready for paint and now these little repair jobs are popping up. On the chopped top the two back posts cracked, (the ones I didn't reinforce :-( also another crack showed up on the rear bed panel fixed that today. The paint I was thinking of was Candy Apple Red, its going to be my own custom mix. Tests I have done had satisfactory results. Here are a few pictures to check out the progress.
-
I heard a rumor that Tenex was pulled of the market. Has anybody heard anything please let me know.
-
I heard a rumor that Tenex was pulled of the market. Has anybody heard anything please let me know.
-
Hello All, Just wanted to share some pictures of my first finished model in almost two years. I have a some others in the works which some how go on the back burner while I get involved with these challenges. Let me explain, back in April our group sponsored an IPMS Northeastcon. I purchased a few models, not knowing what I was in for. When I attended our meeting after Noreastcon I was informed that there was build off challenge to complete a purchased model from the show by the August meeting. At first I did not want to do it, then I was convinced to go ahead with the project partly being dared and called a chicken. I thought, I have three months what the heck. The first two months I was unable to really accomplish anything because of prior commitments. Then with a strong push to finish, I was able to complete the project about a half hour before the August meeting. Nothing like cutting it close to the wire. Now you ask what was the motivation? Anyone who did not finish will present a five dollar gift card from Horton's Coffee Shop to the winners. Lucky for me there were only 2 out of the 18 that did not finish saving me $80.00 and gaining me $10.00. Frank B Western New York
-
Hello Mike Thanks for the input. I also have the Ambroid on my bench. It works good on certain things, I use it primarily for tacking large parts in place if I can't hold it place to use the Tenex. Ambroid also seems to leave film after it dries. It forms a strong bond when cured. Its like anything, I use a variety of cements depending on the application. Frank B


