JNordgren42
-
Posts
51 -
Joined
-
Last visited
Content Type
Profiles
Forums
Events
Gallery
Everything posted by JNordgren42
-
WIP: Custom AMT 1:25 1964/65 Chevy El Camino
JNordgren42 replied to JNordgren42's topic in WIP: Model Cars
Thanks! It was a huge hit with my father in law. He said it's the best present he's ever gotten. 😊 And yeah, the base is a great option for 24/25th scale cars. -
WIP: Custom AMT 1:25 1964/65 Chevy El Camino
JNordgren42 replied to JNordgren42's topic in WIP: Model Cars
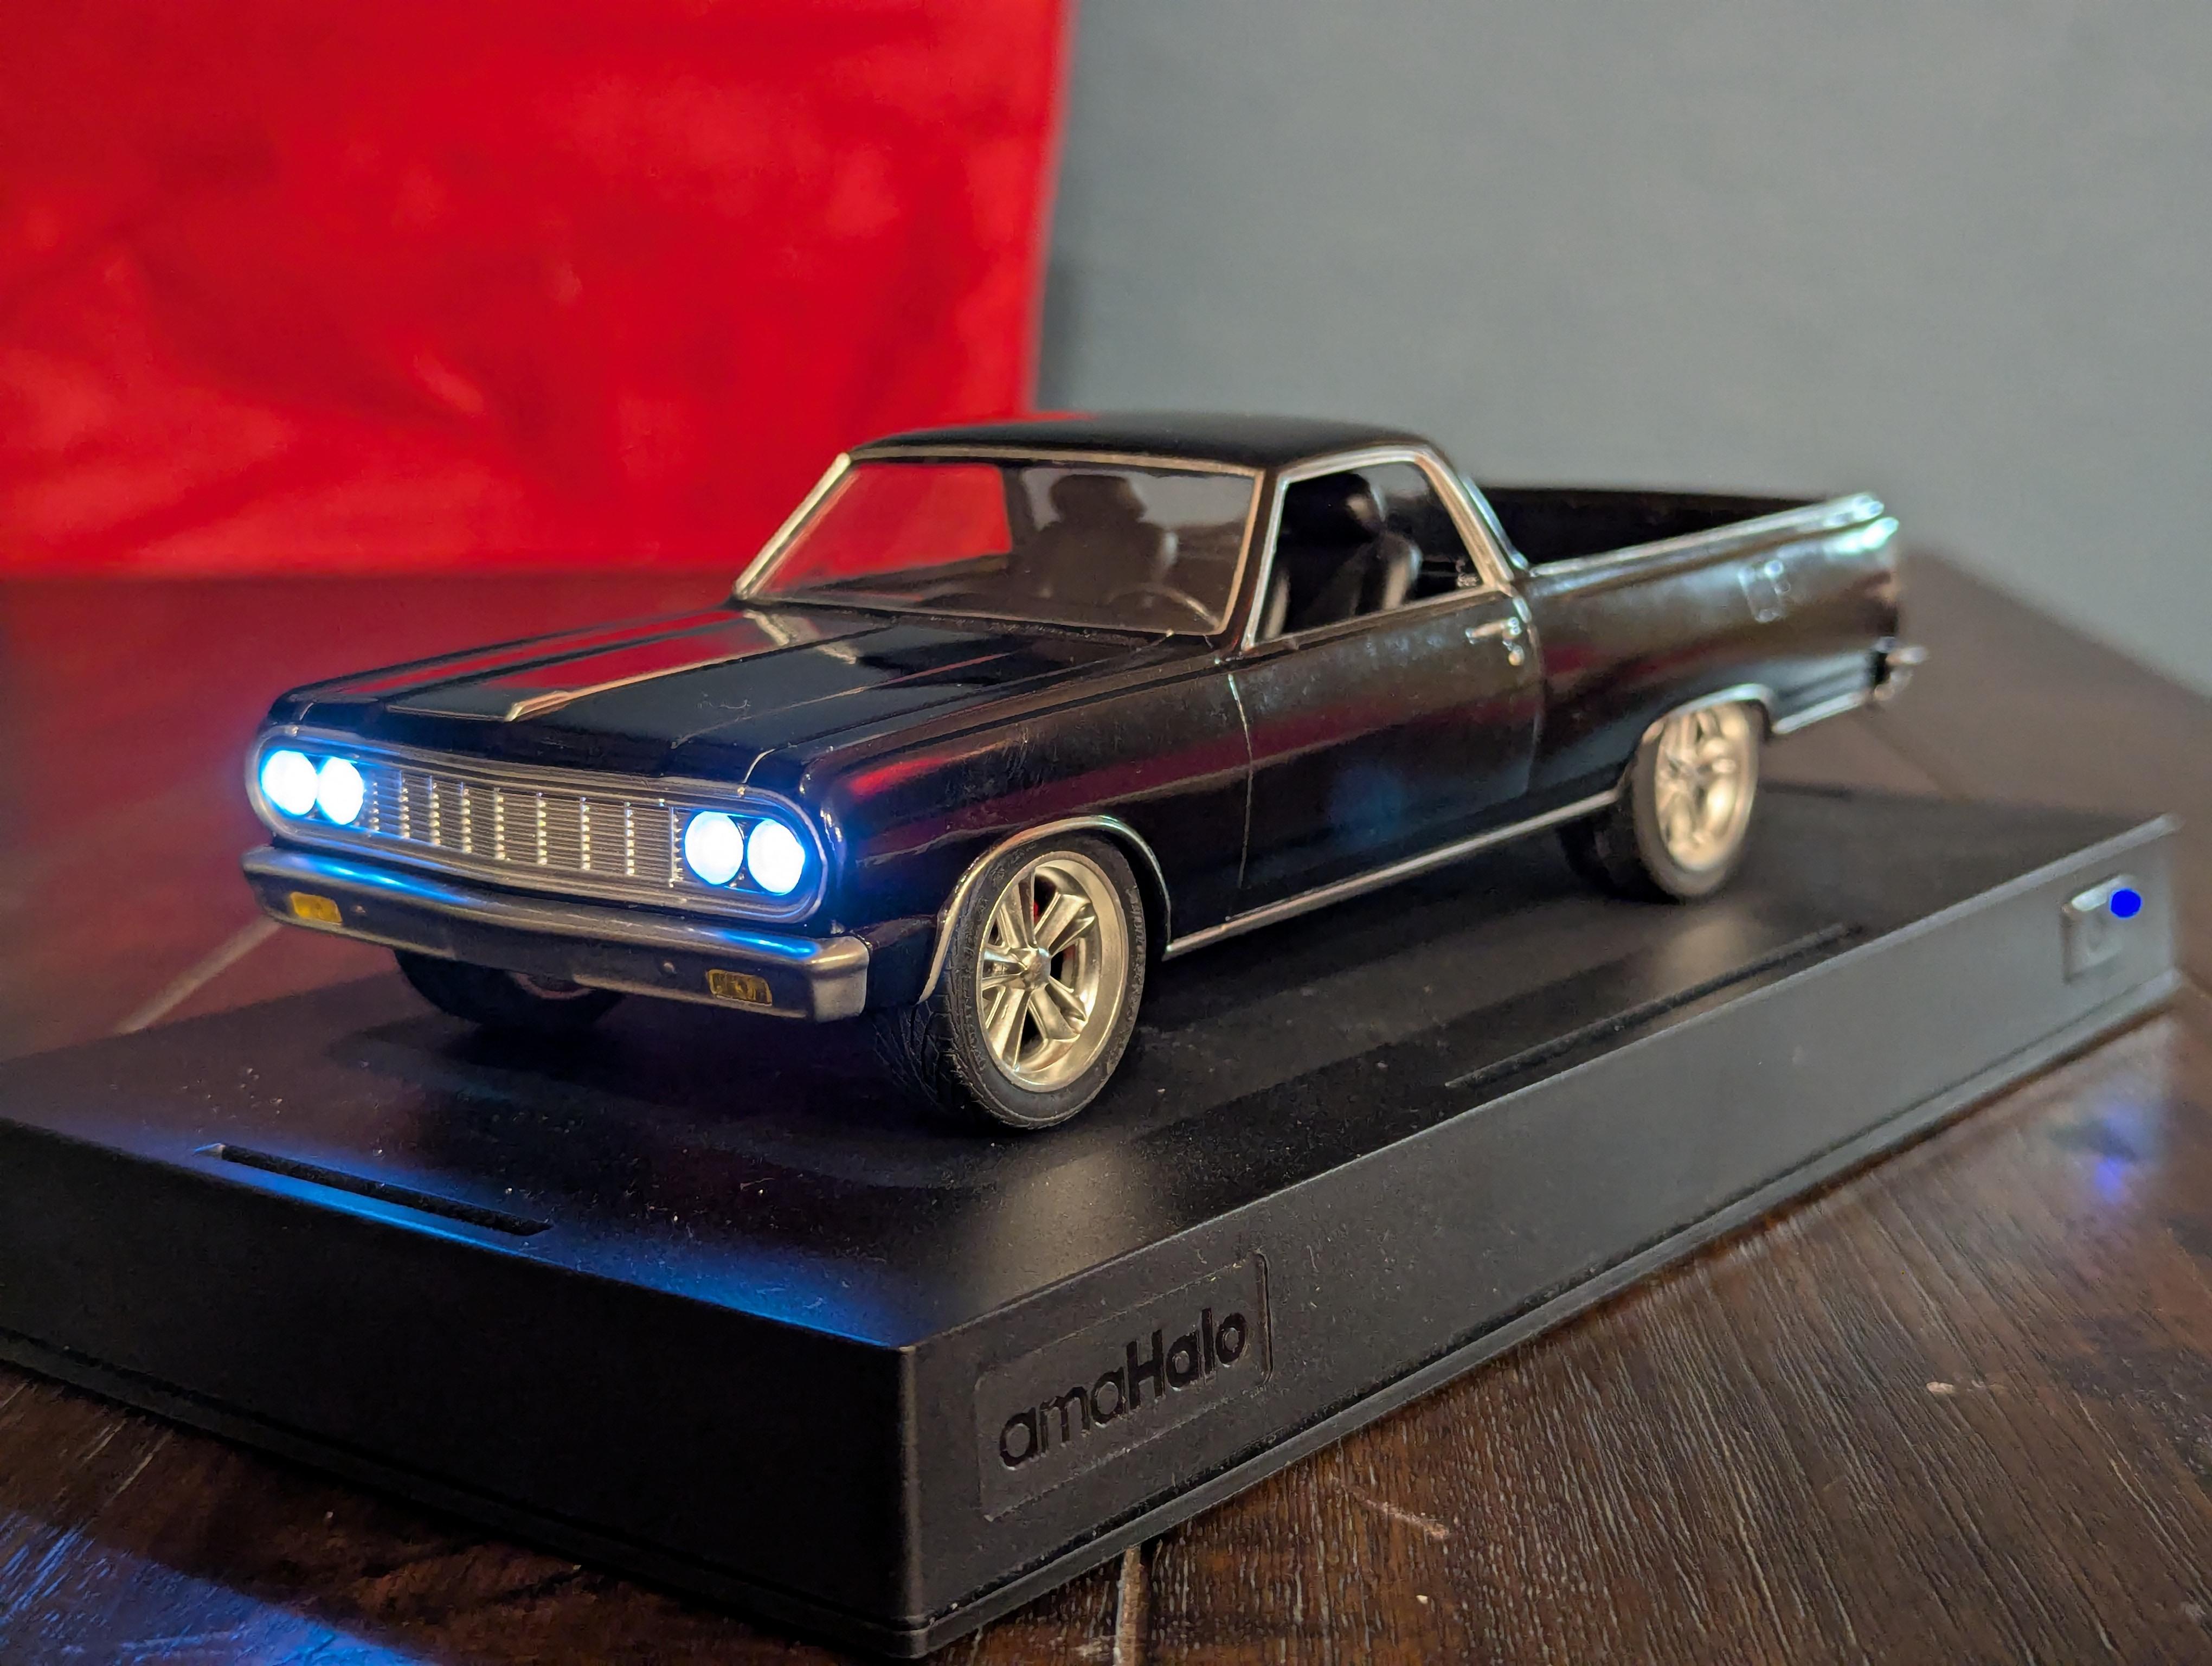
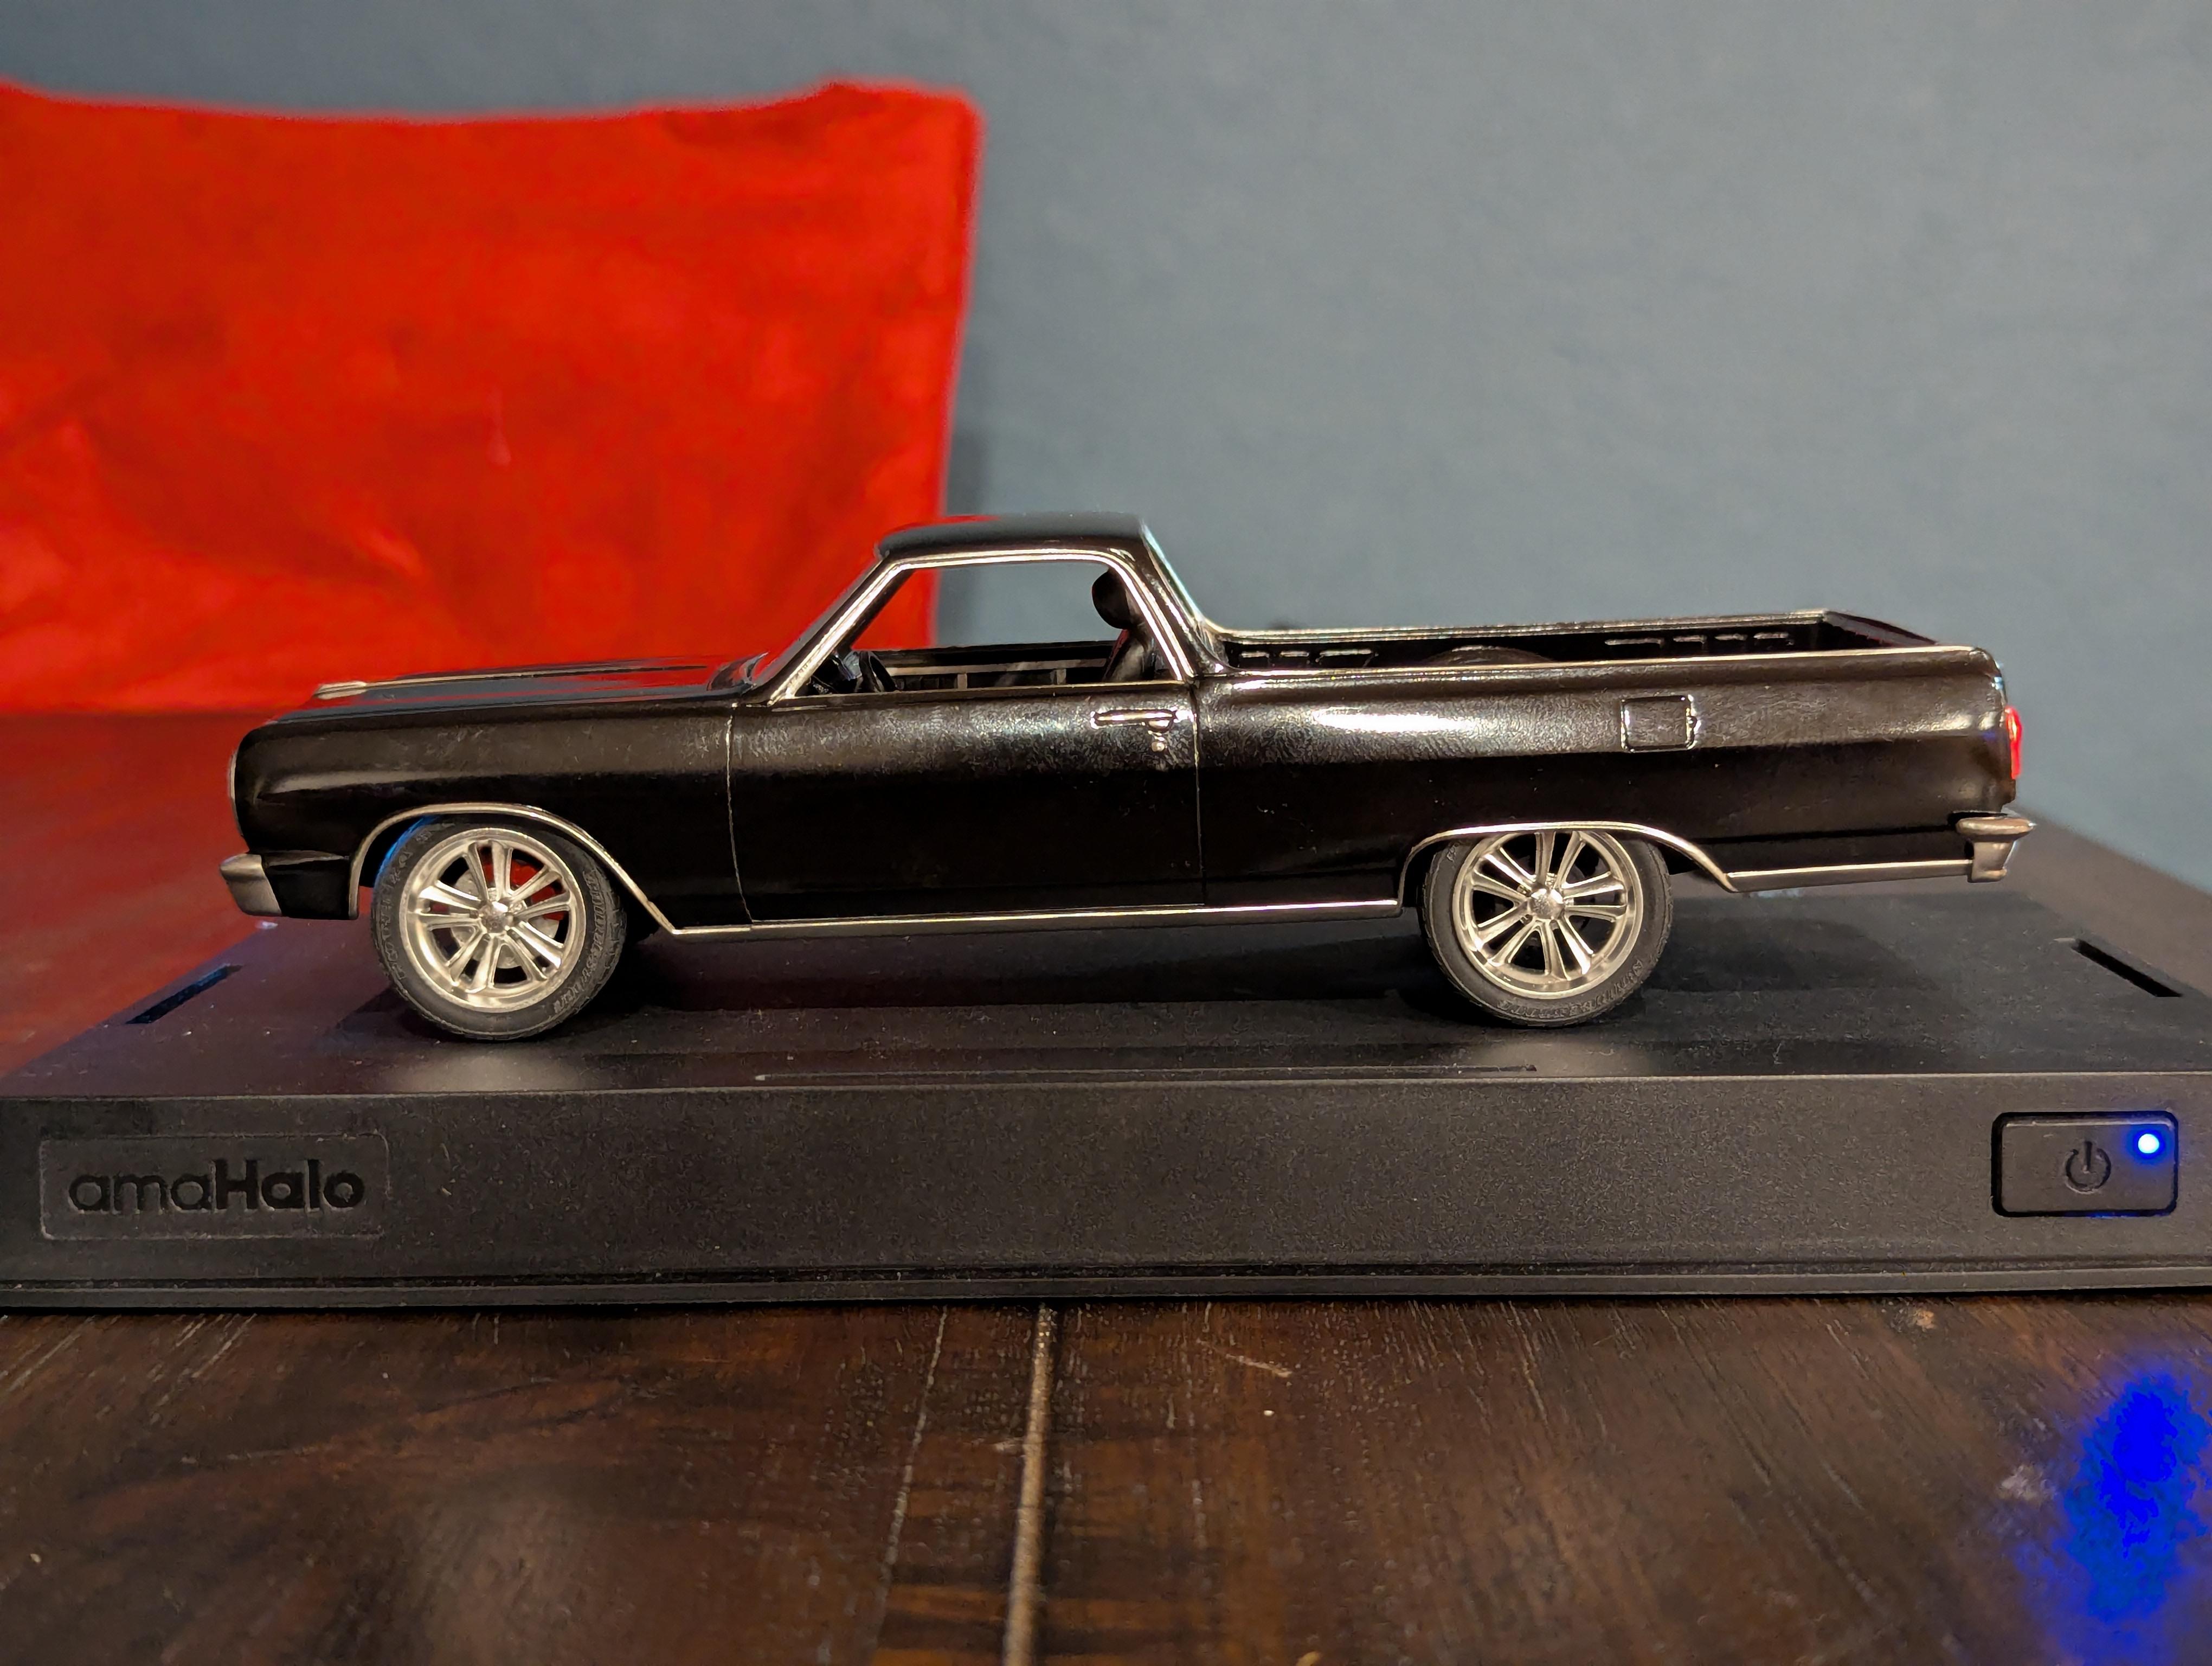
It's 99% done and good enough to wrap up for my FiL to open today. I need to finish painting the mirrors and badge, but everything else is done. I'm super happy with how it came out.
-
WIP: Custom AMT 1:25 1964/65 Chevy El Camino
JNordgren42 replied to JNordgren42's topic in WIP: Model Cars
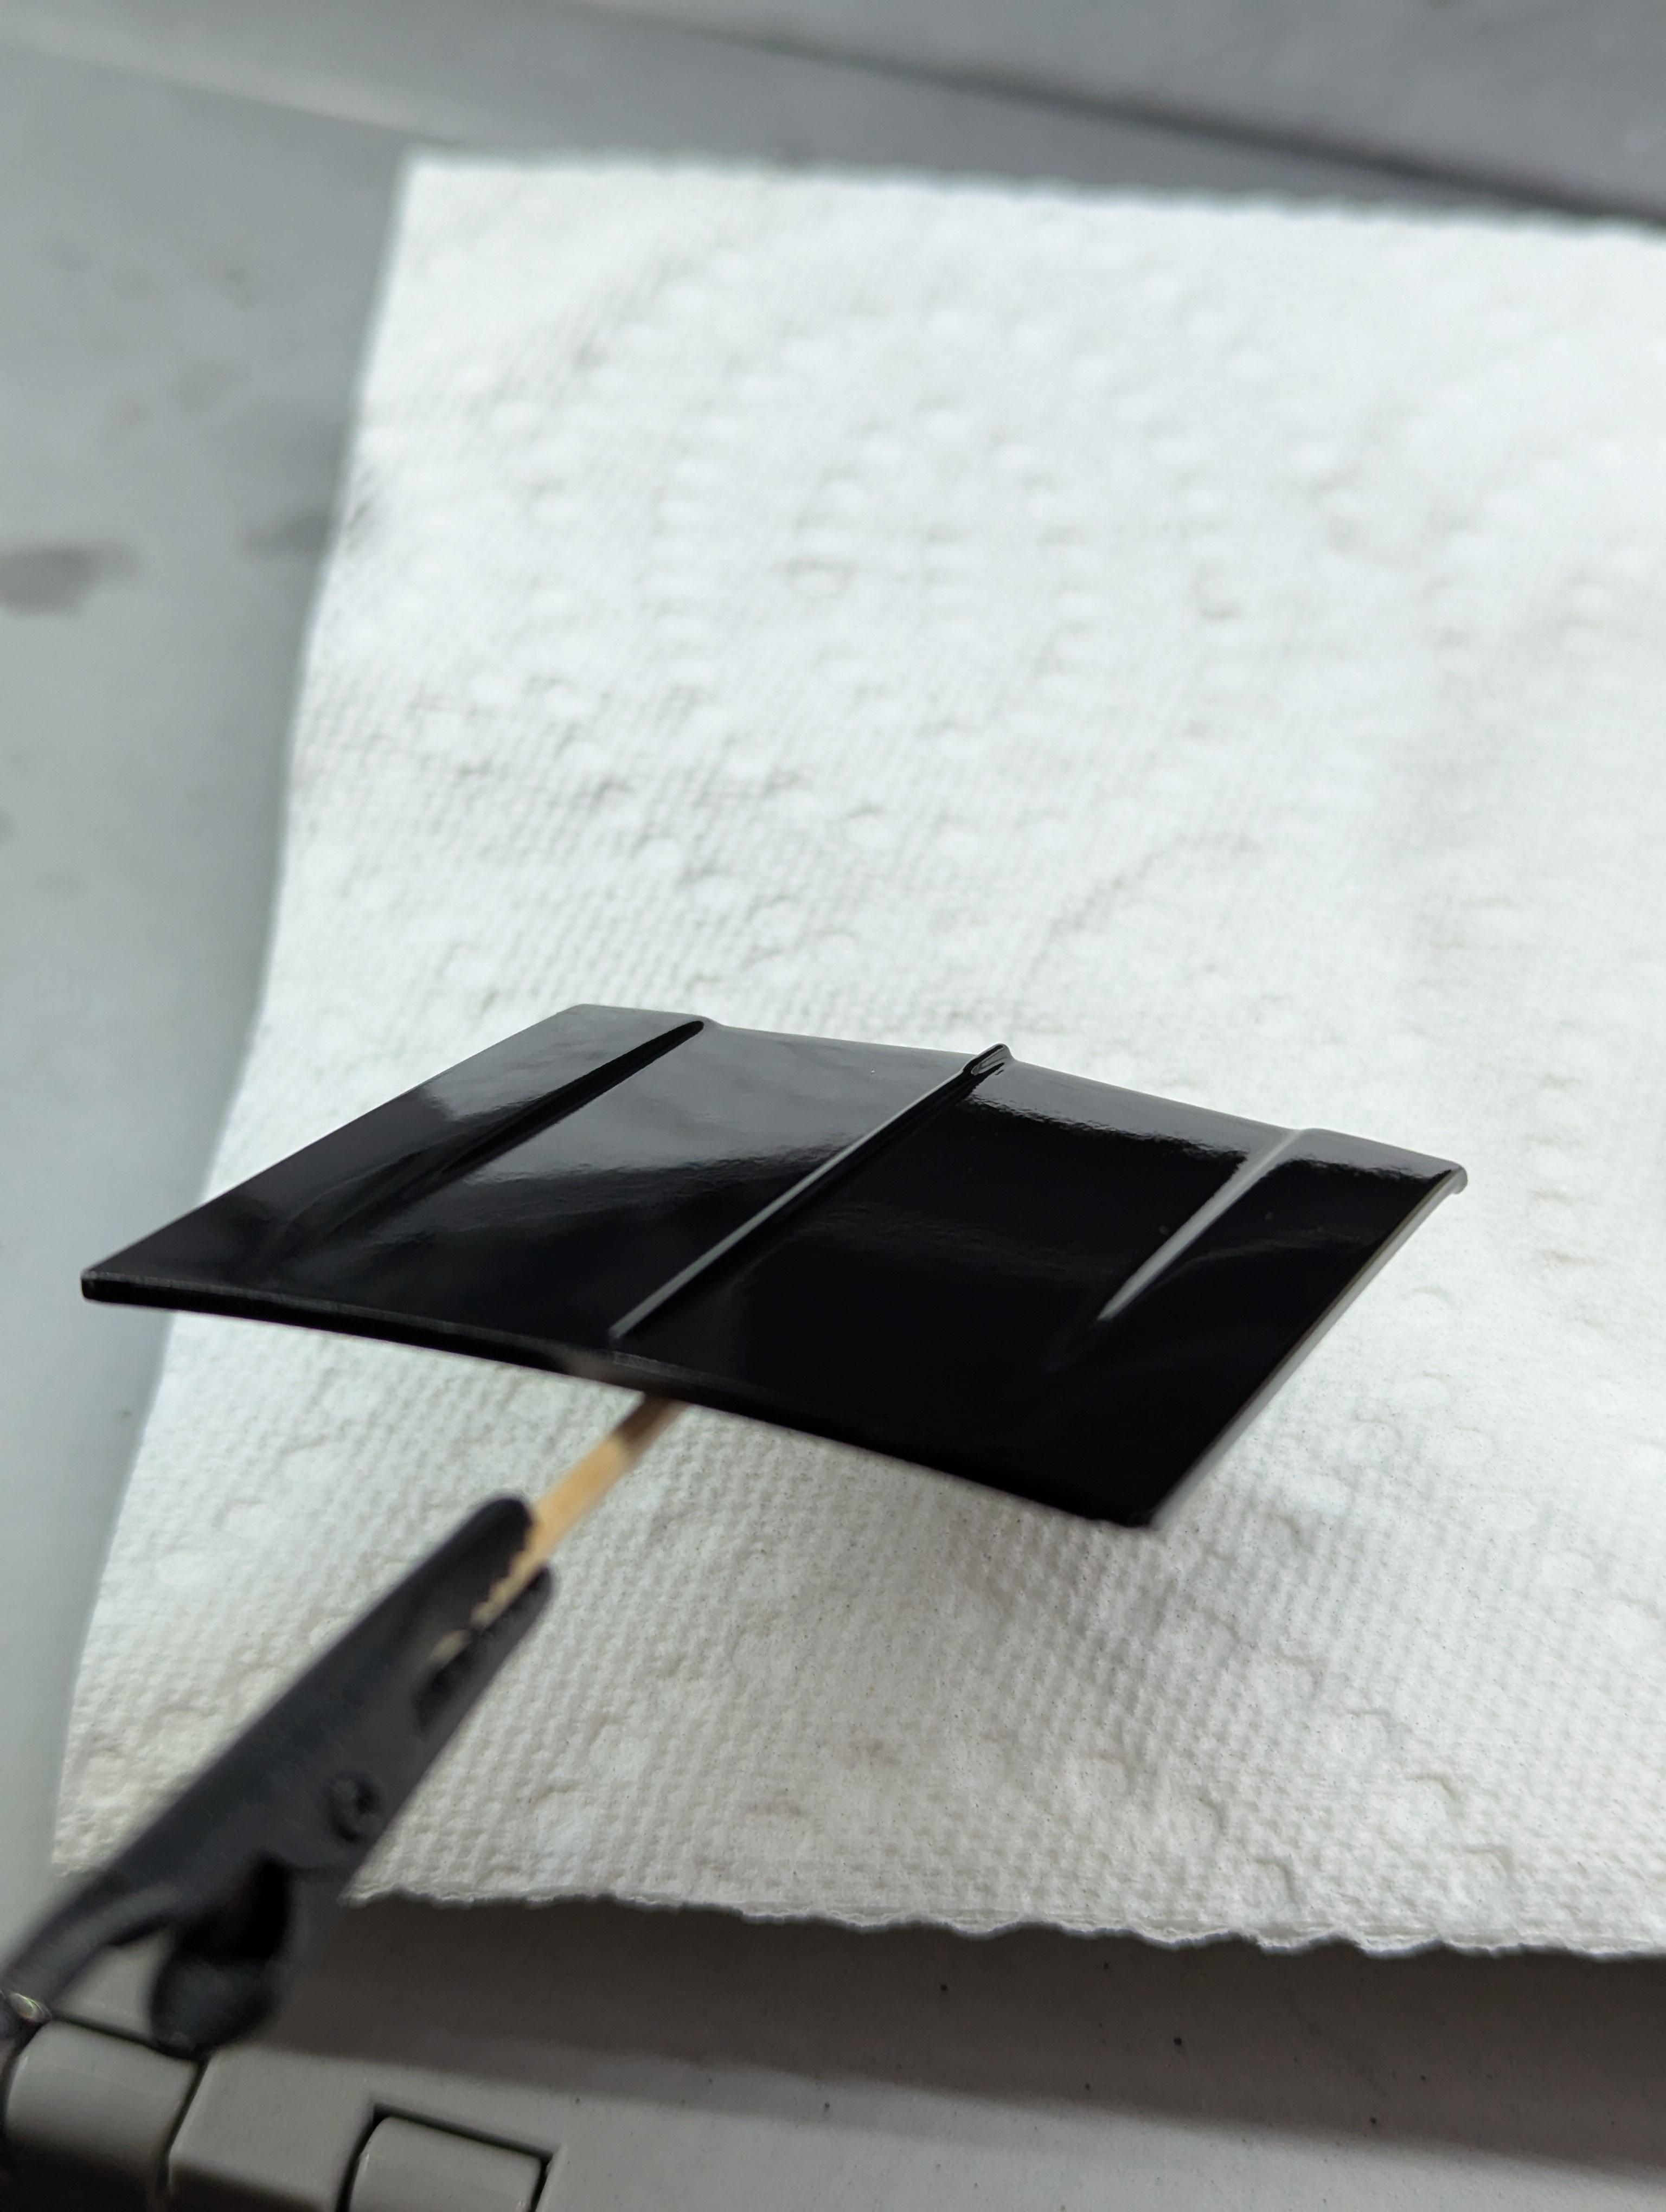
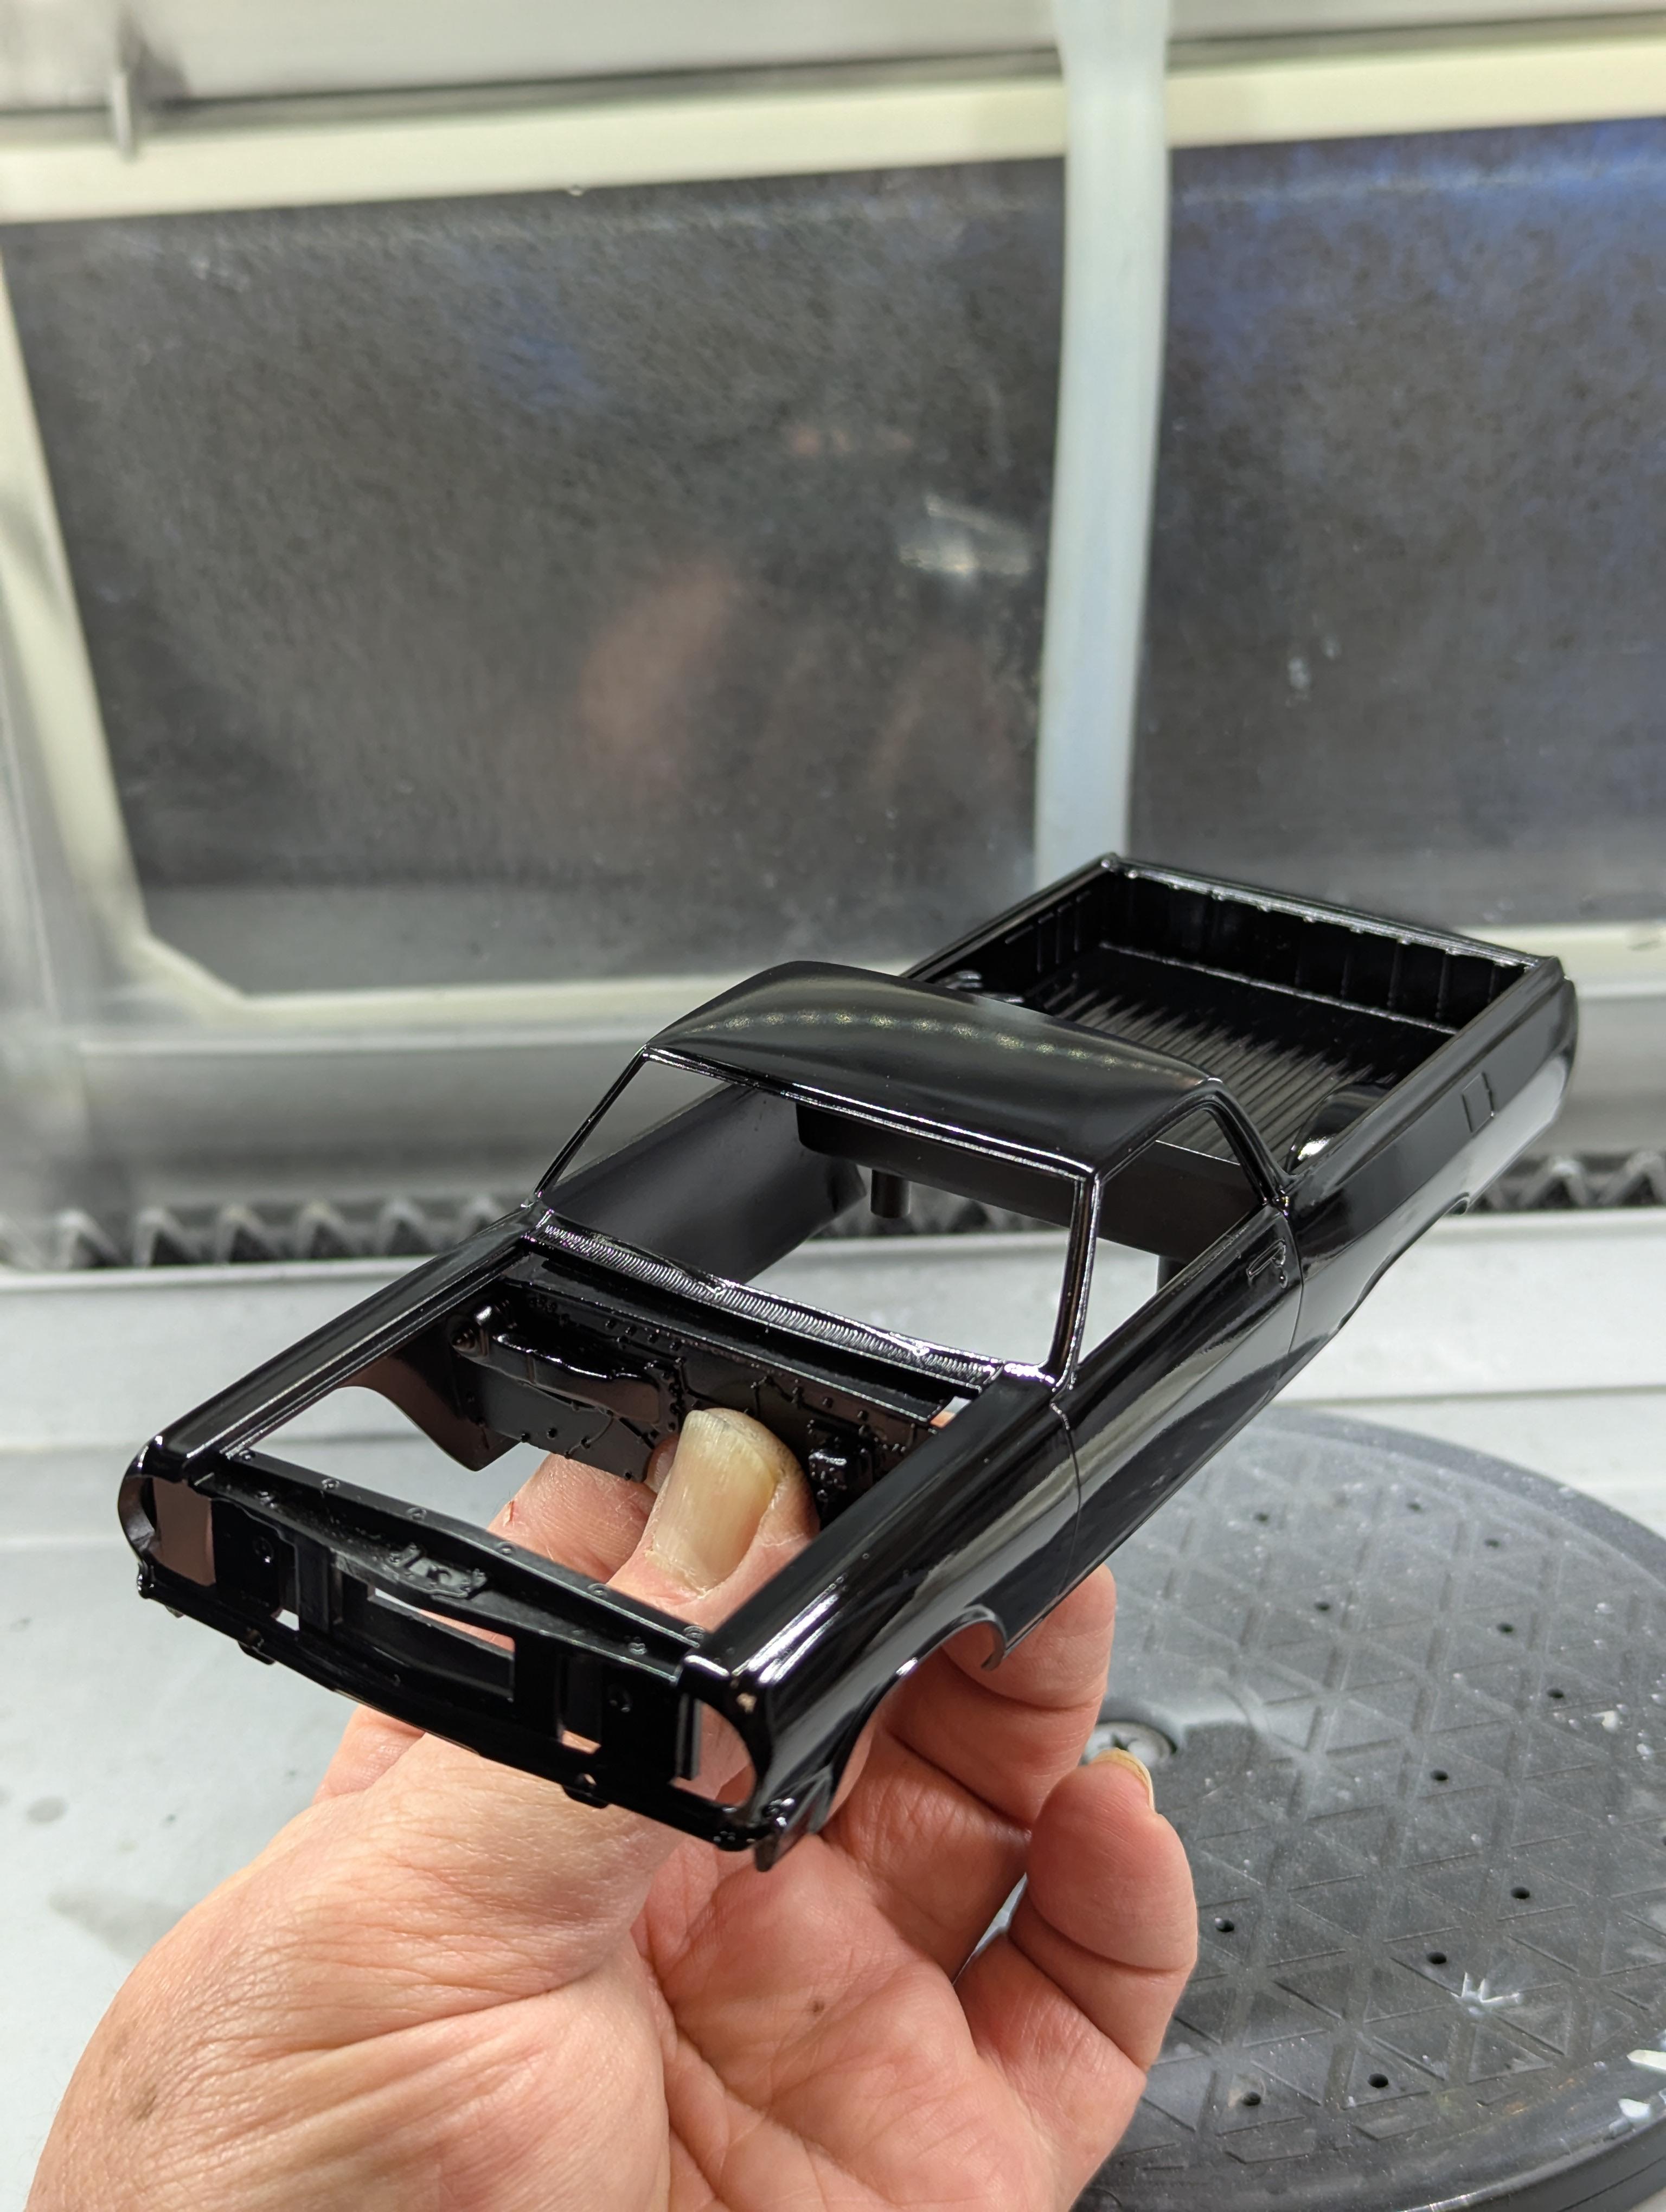
The finish line is in sight, I got all of the trim masked and sprayed with Alclad bright chrome. I did forget to spray the trim spear on the hood, so I'll have to give that a quick shot of paint tomorrow. I also got the mirrors and display badge successfully printed and I'll get those painted as well. Then it's just final assembly and touch ups.
-
WIP: Custom AMT 1:25 1964/65 Chevy El Camino
JNordgren42 replied to JNordgren42's topic in WIP: Model Cars
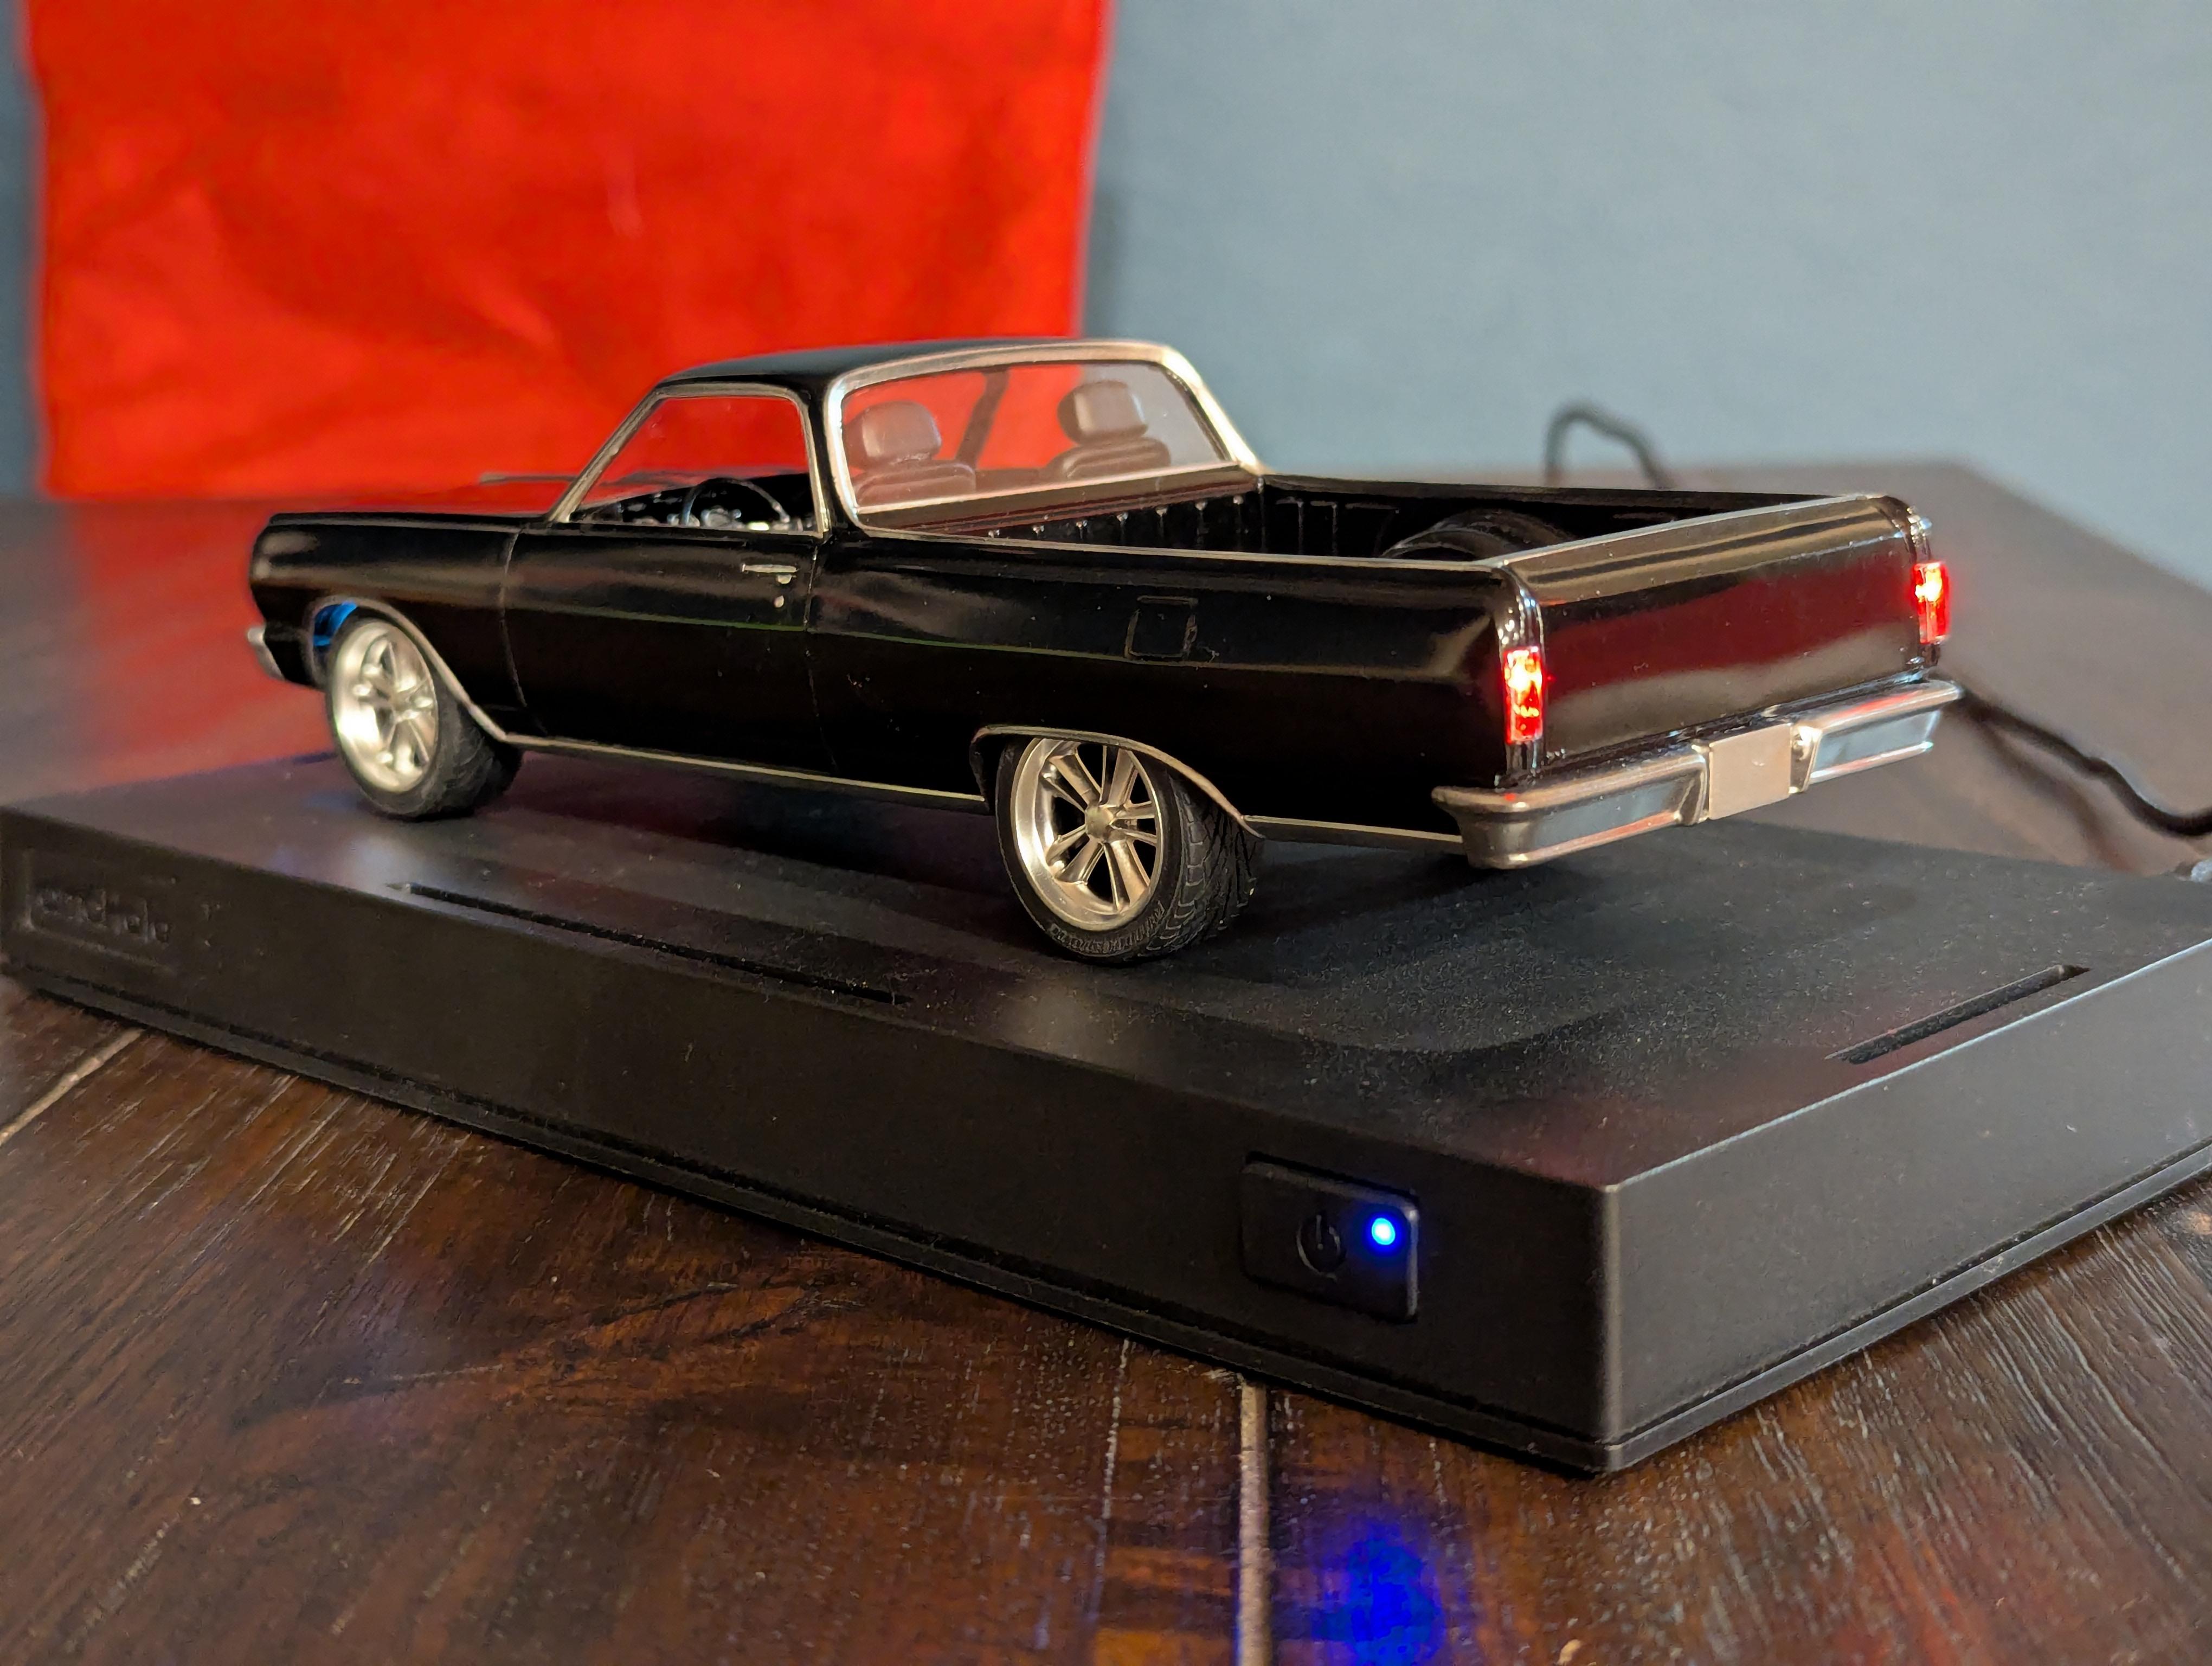
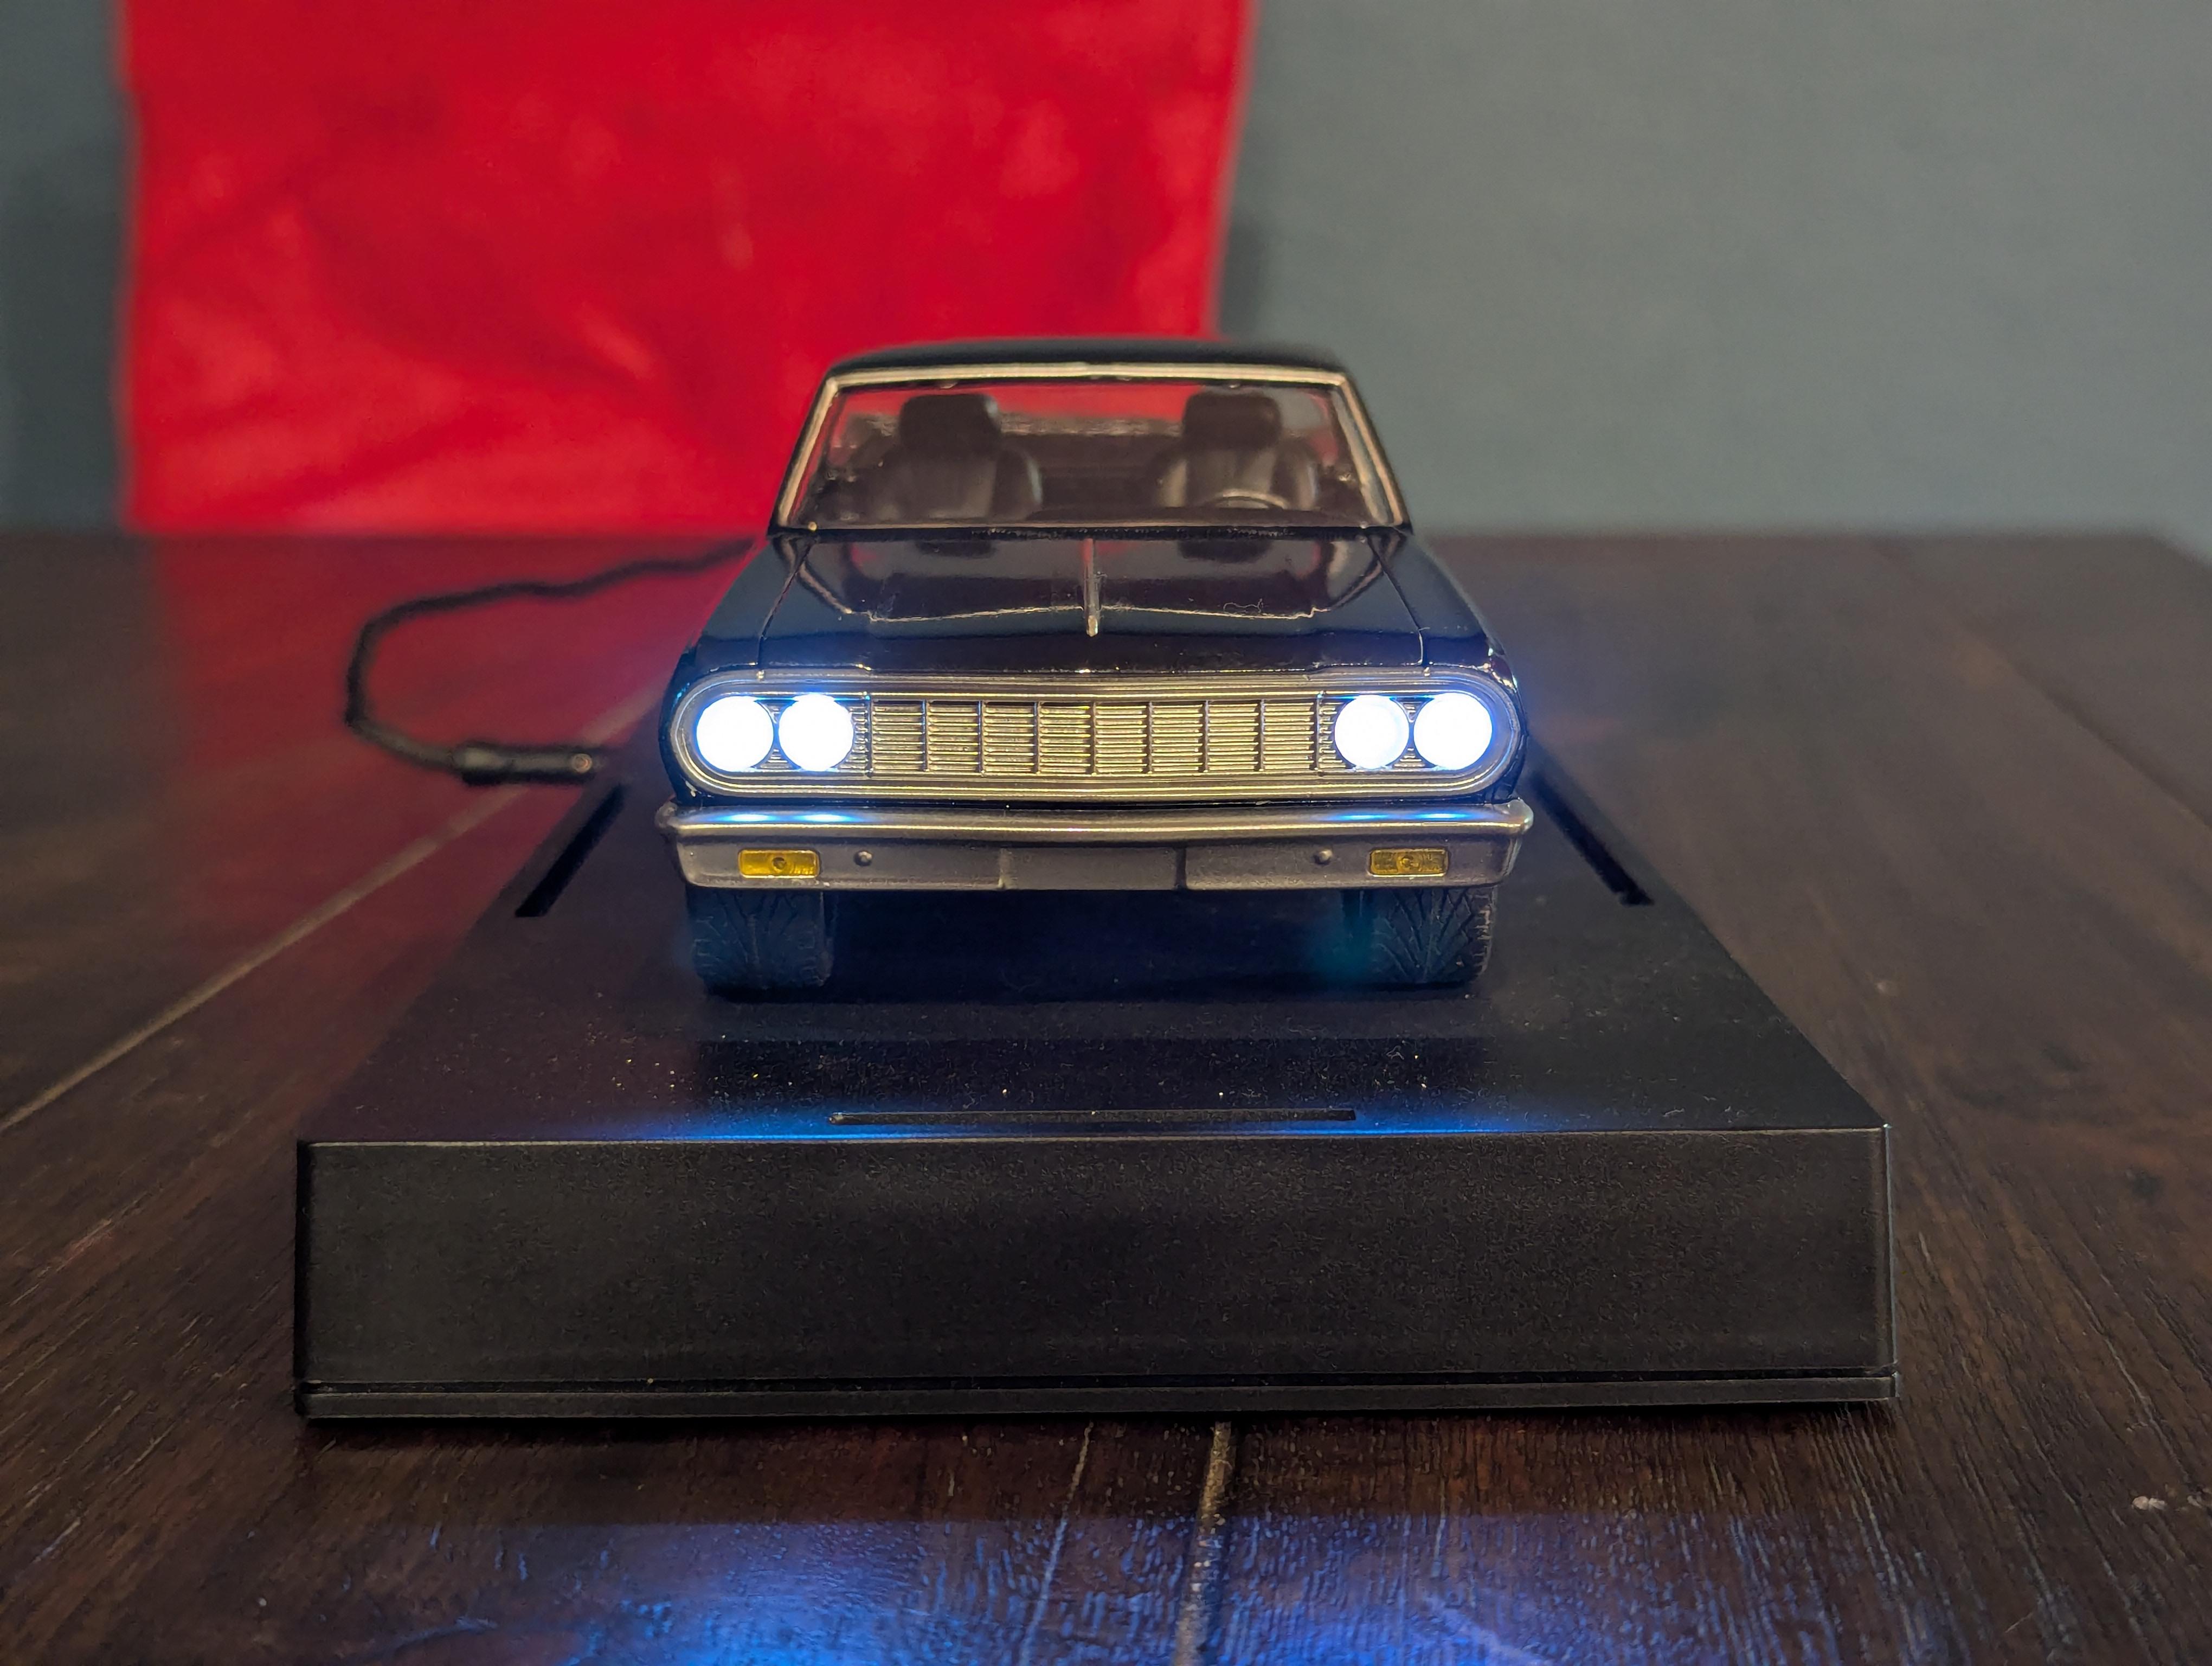
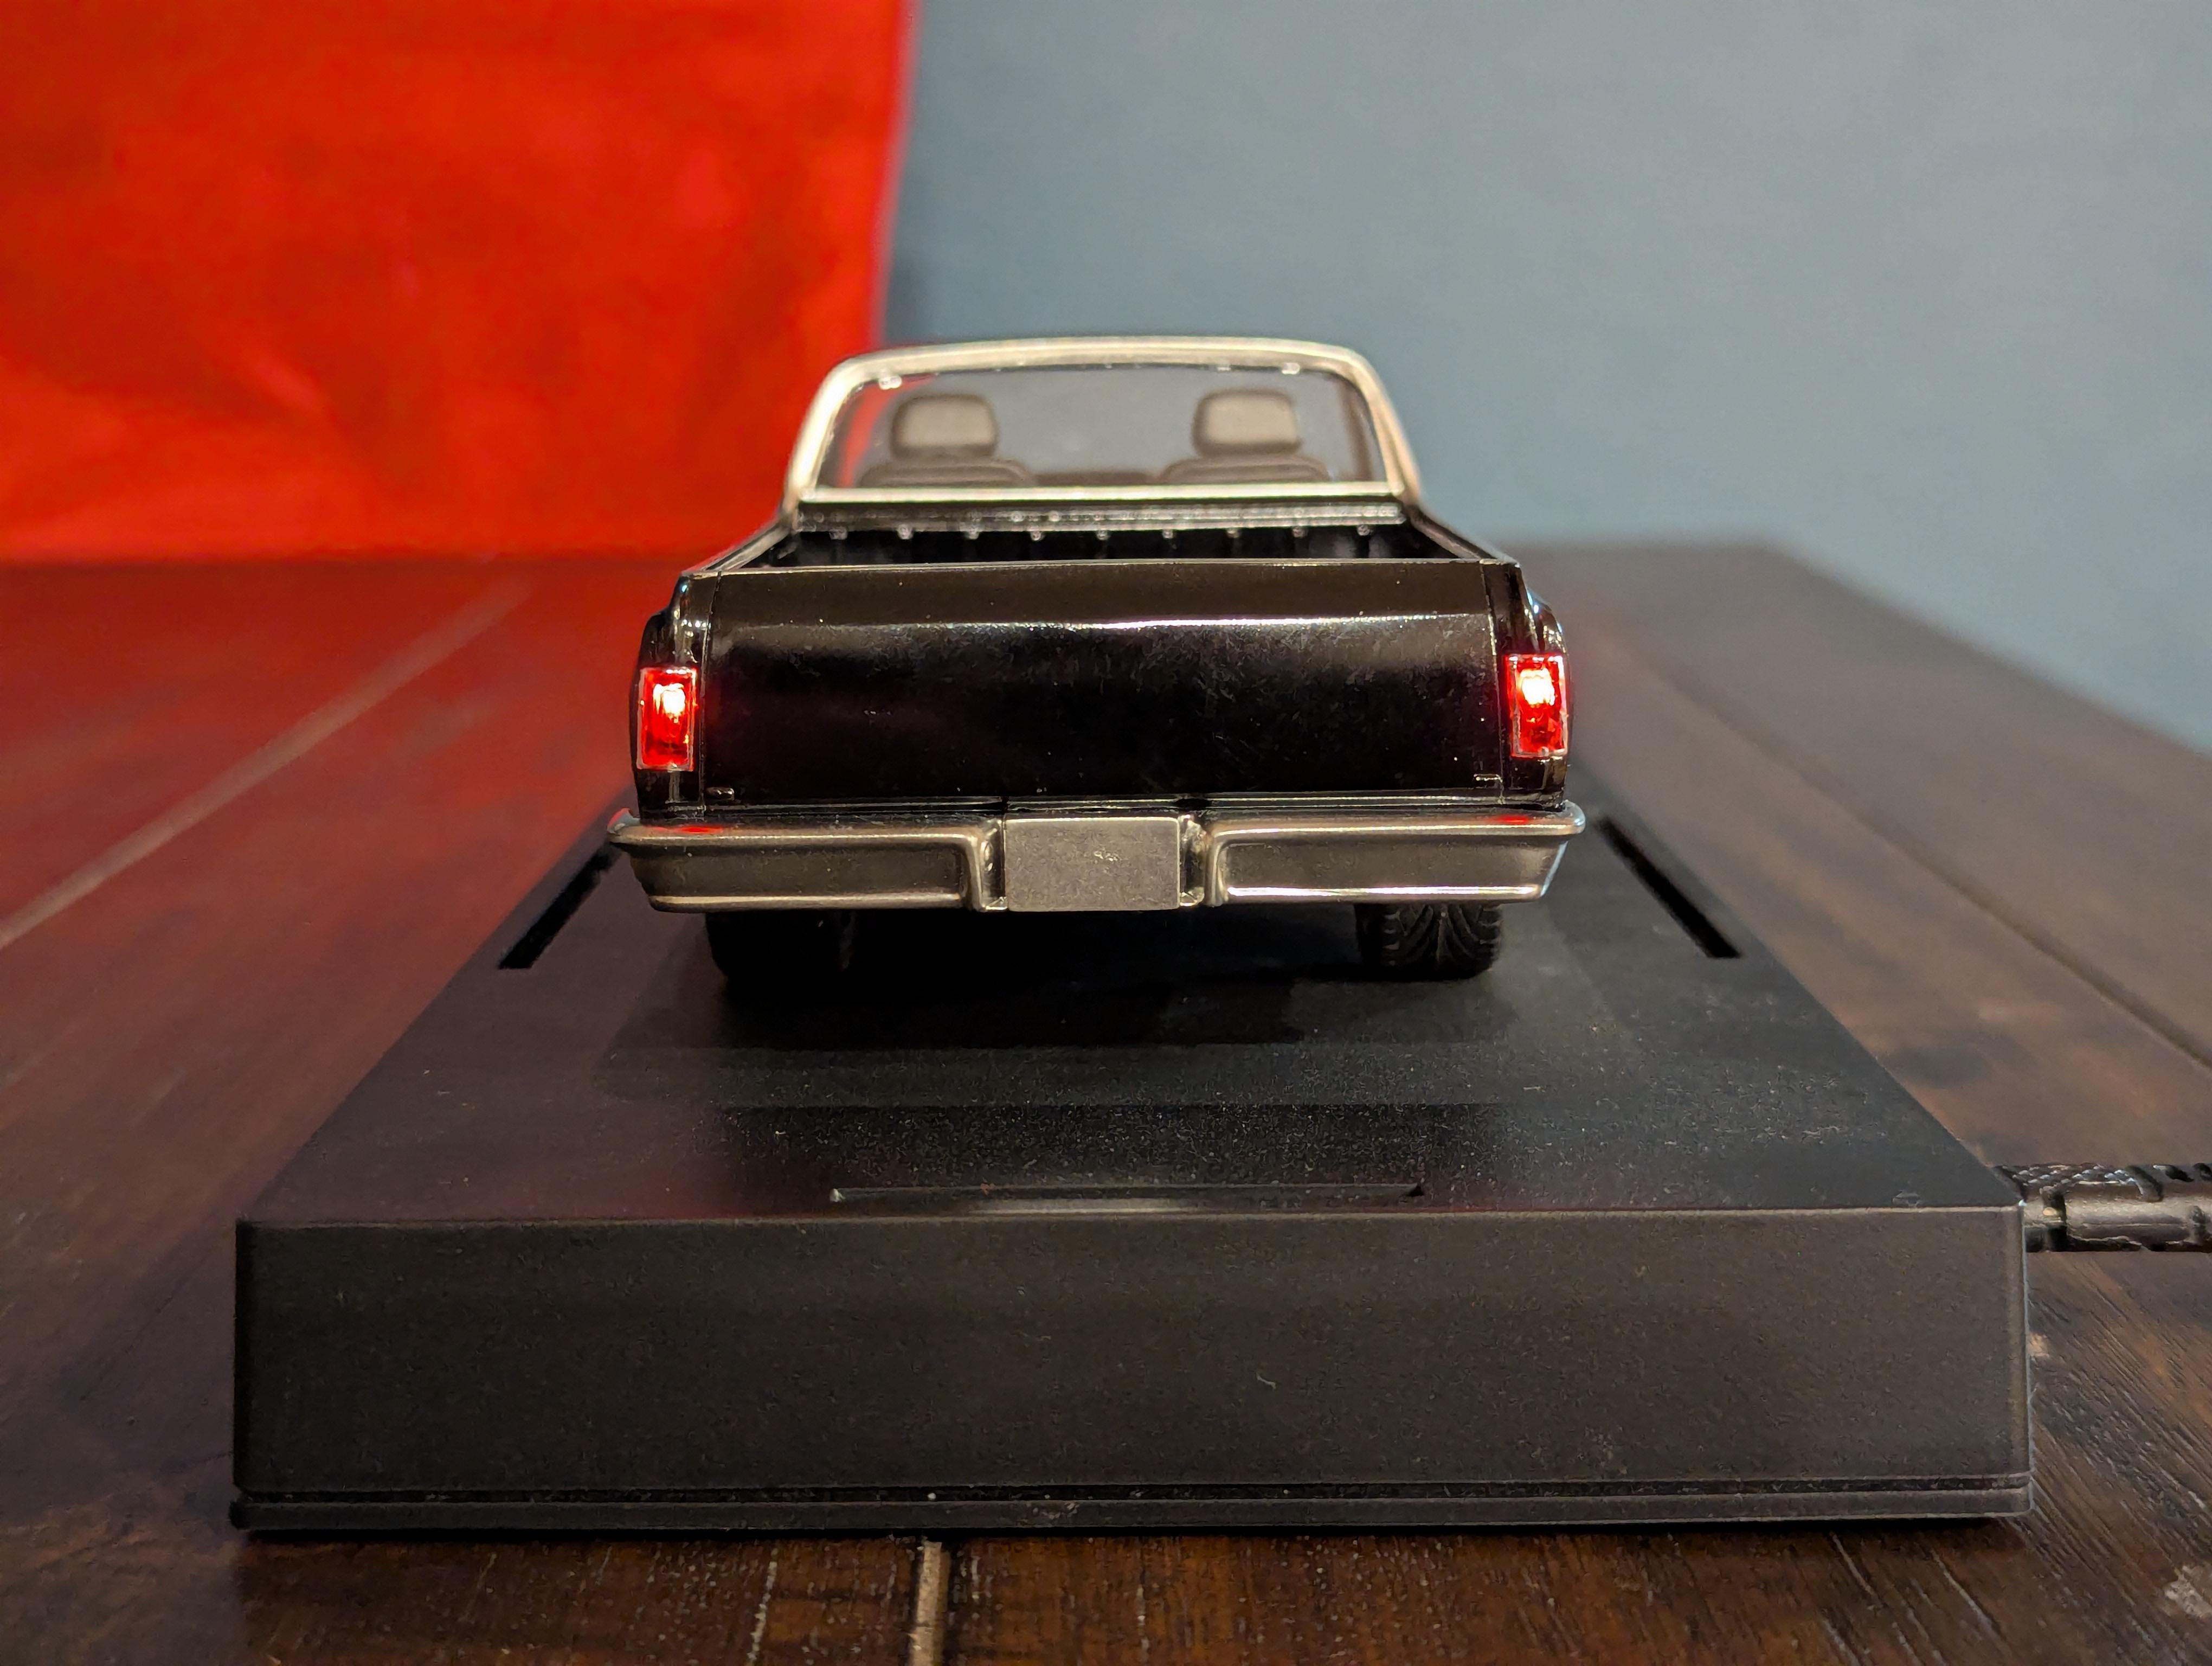
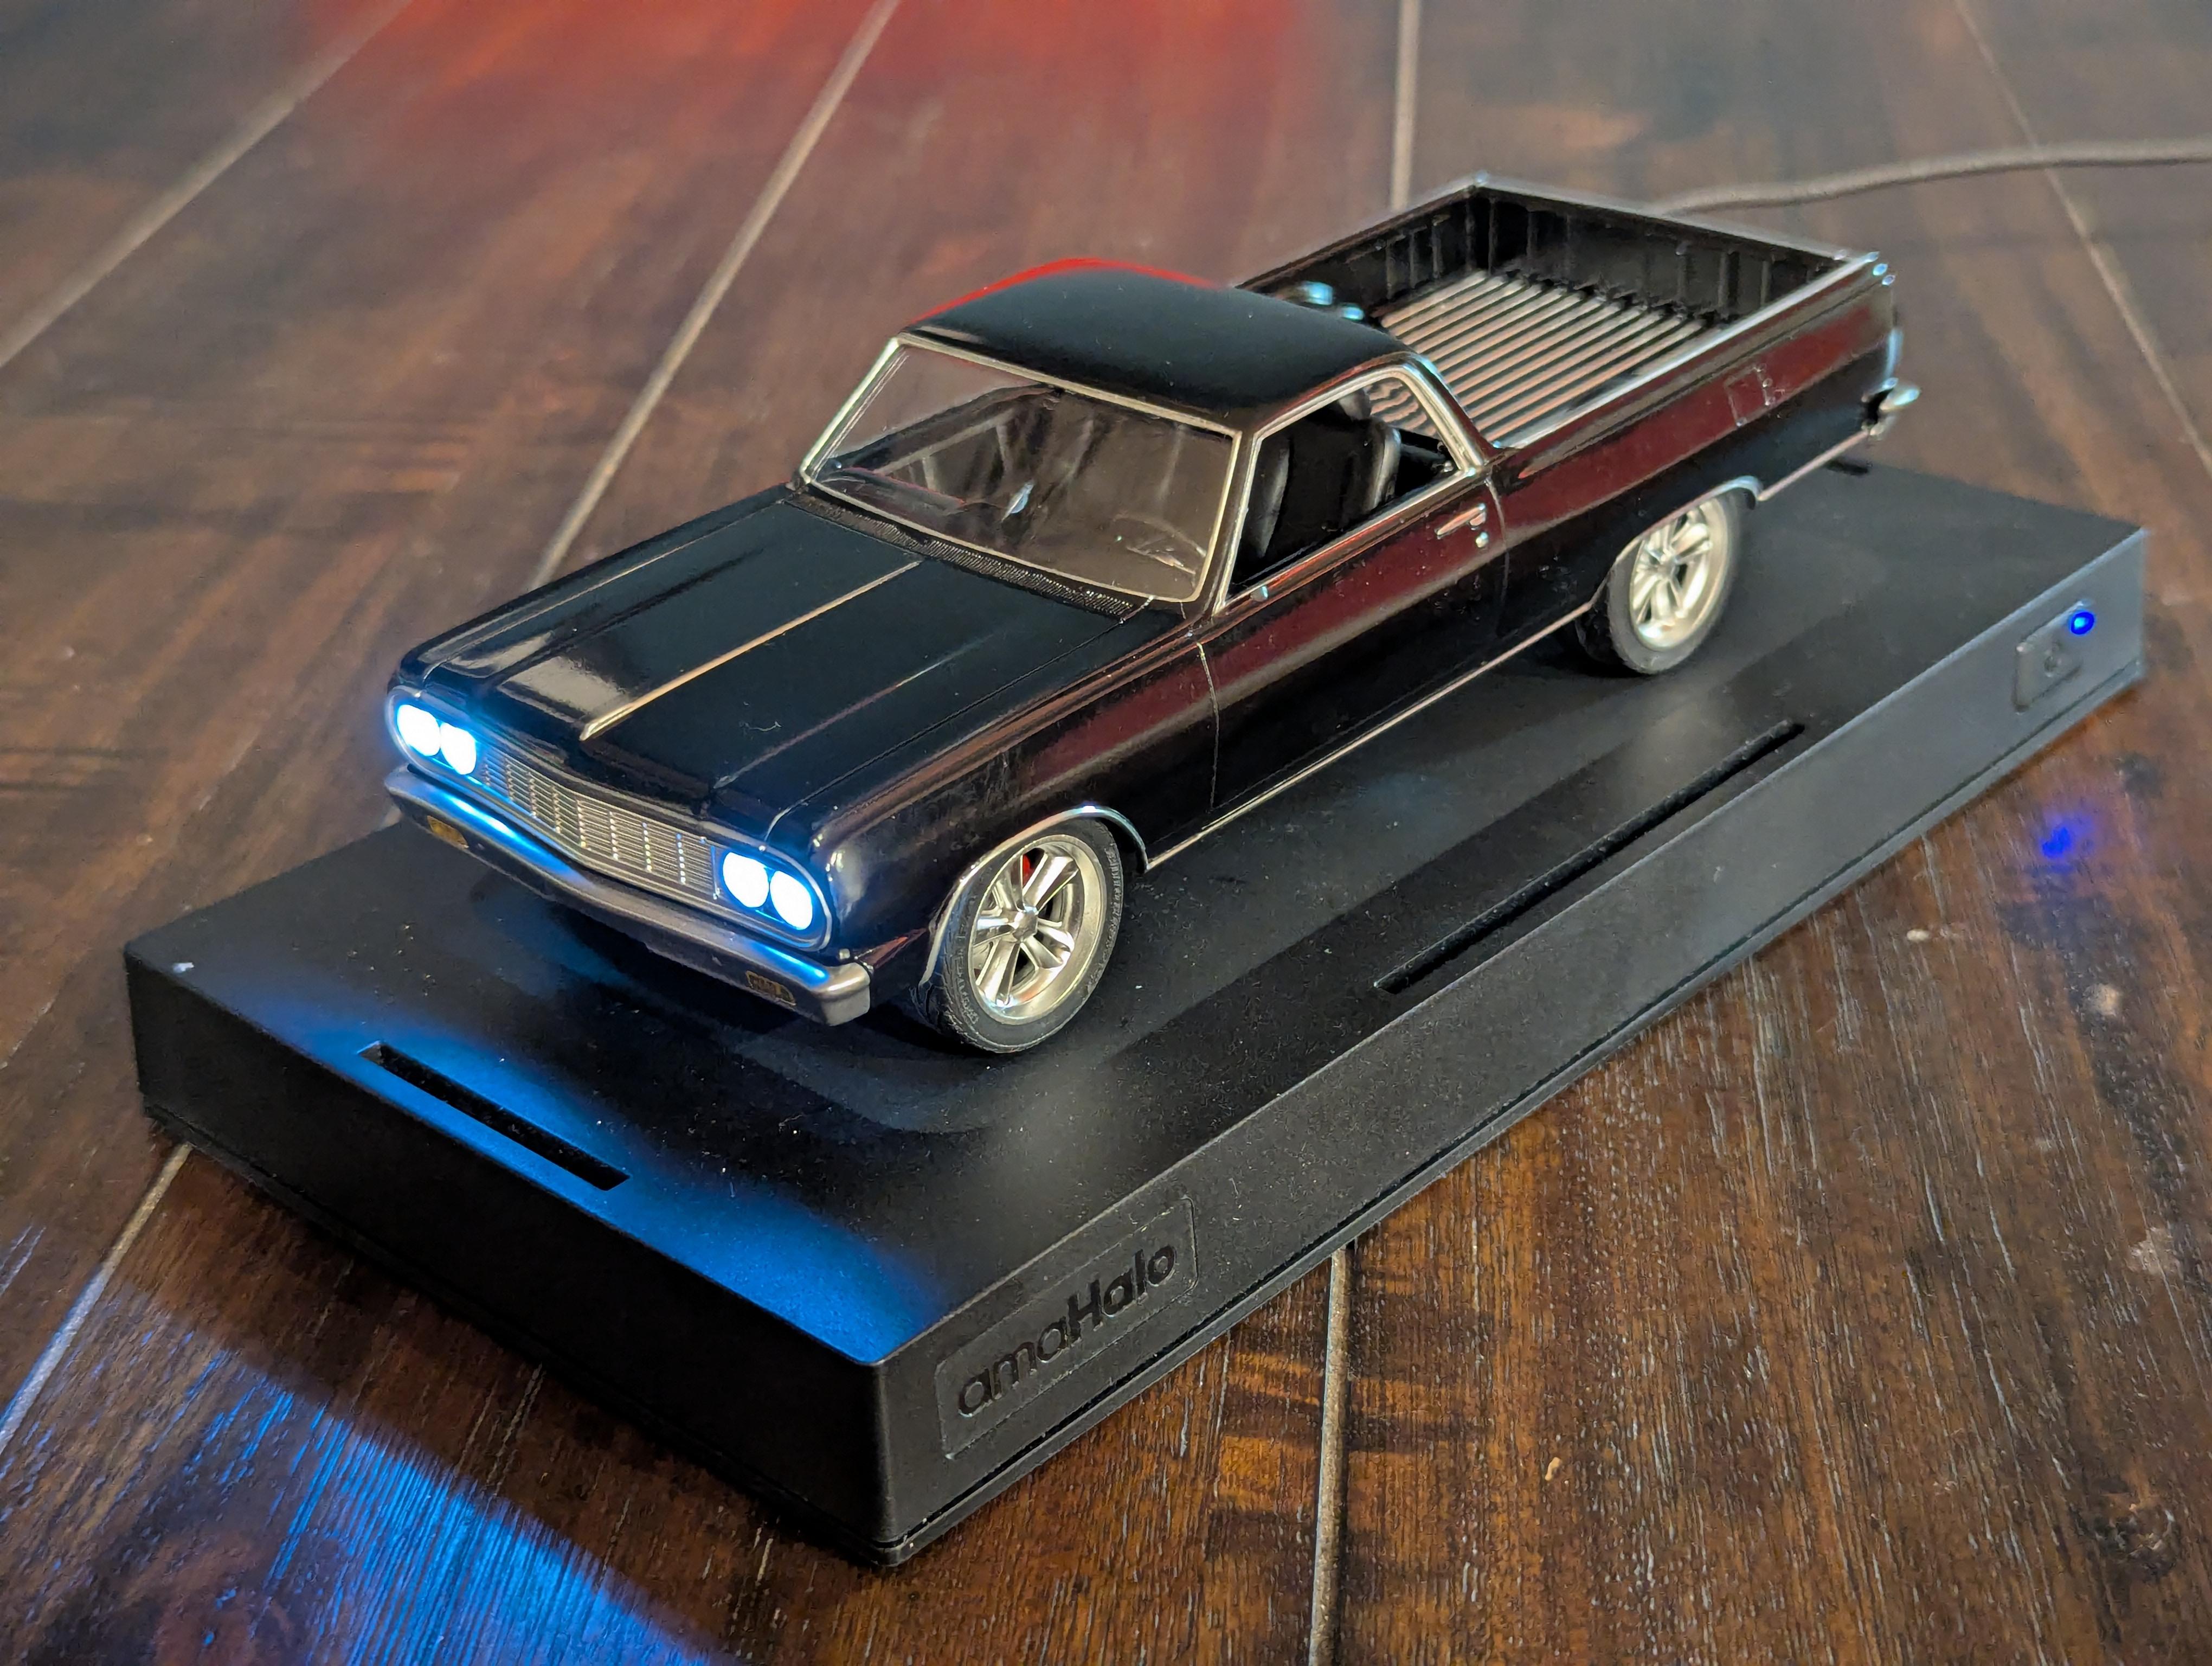
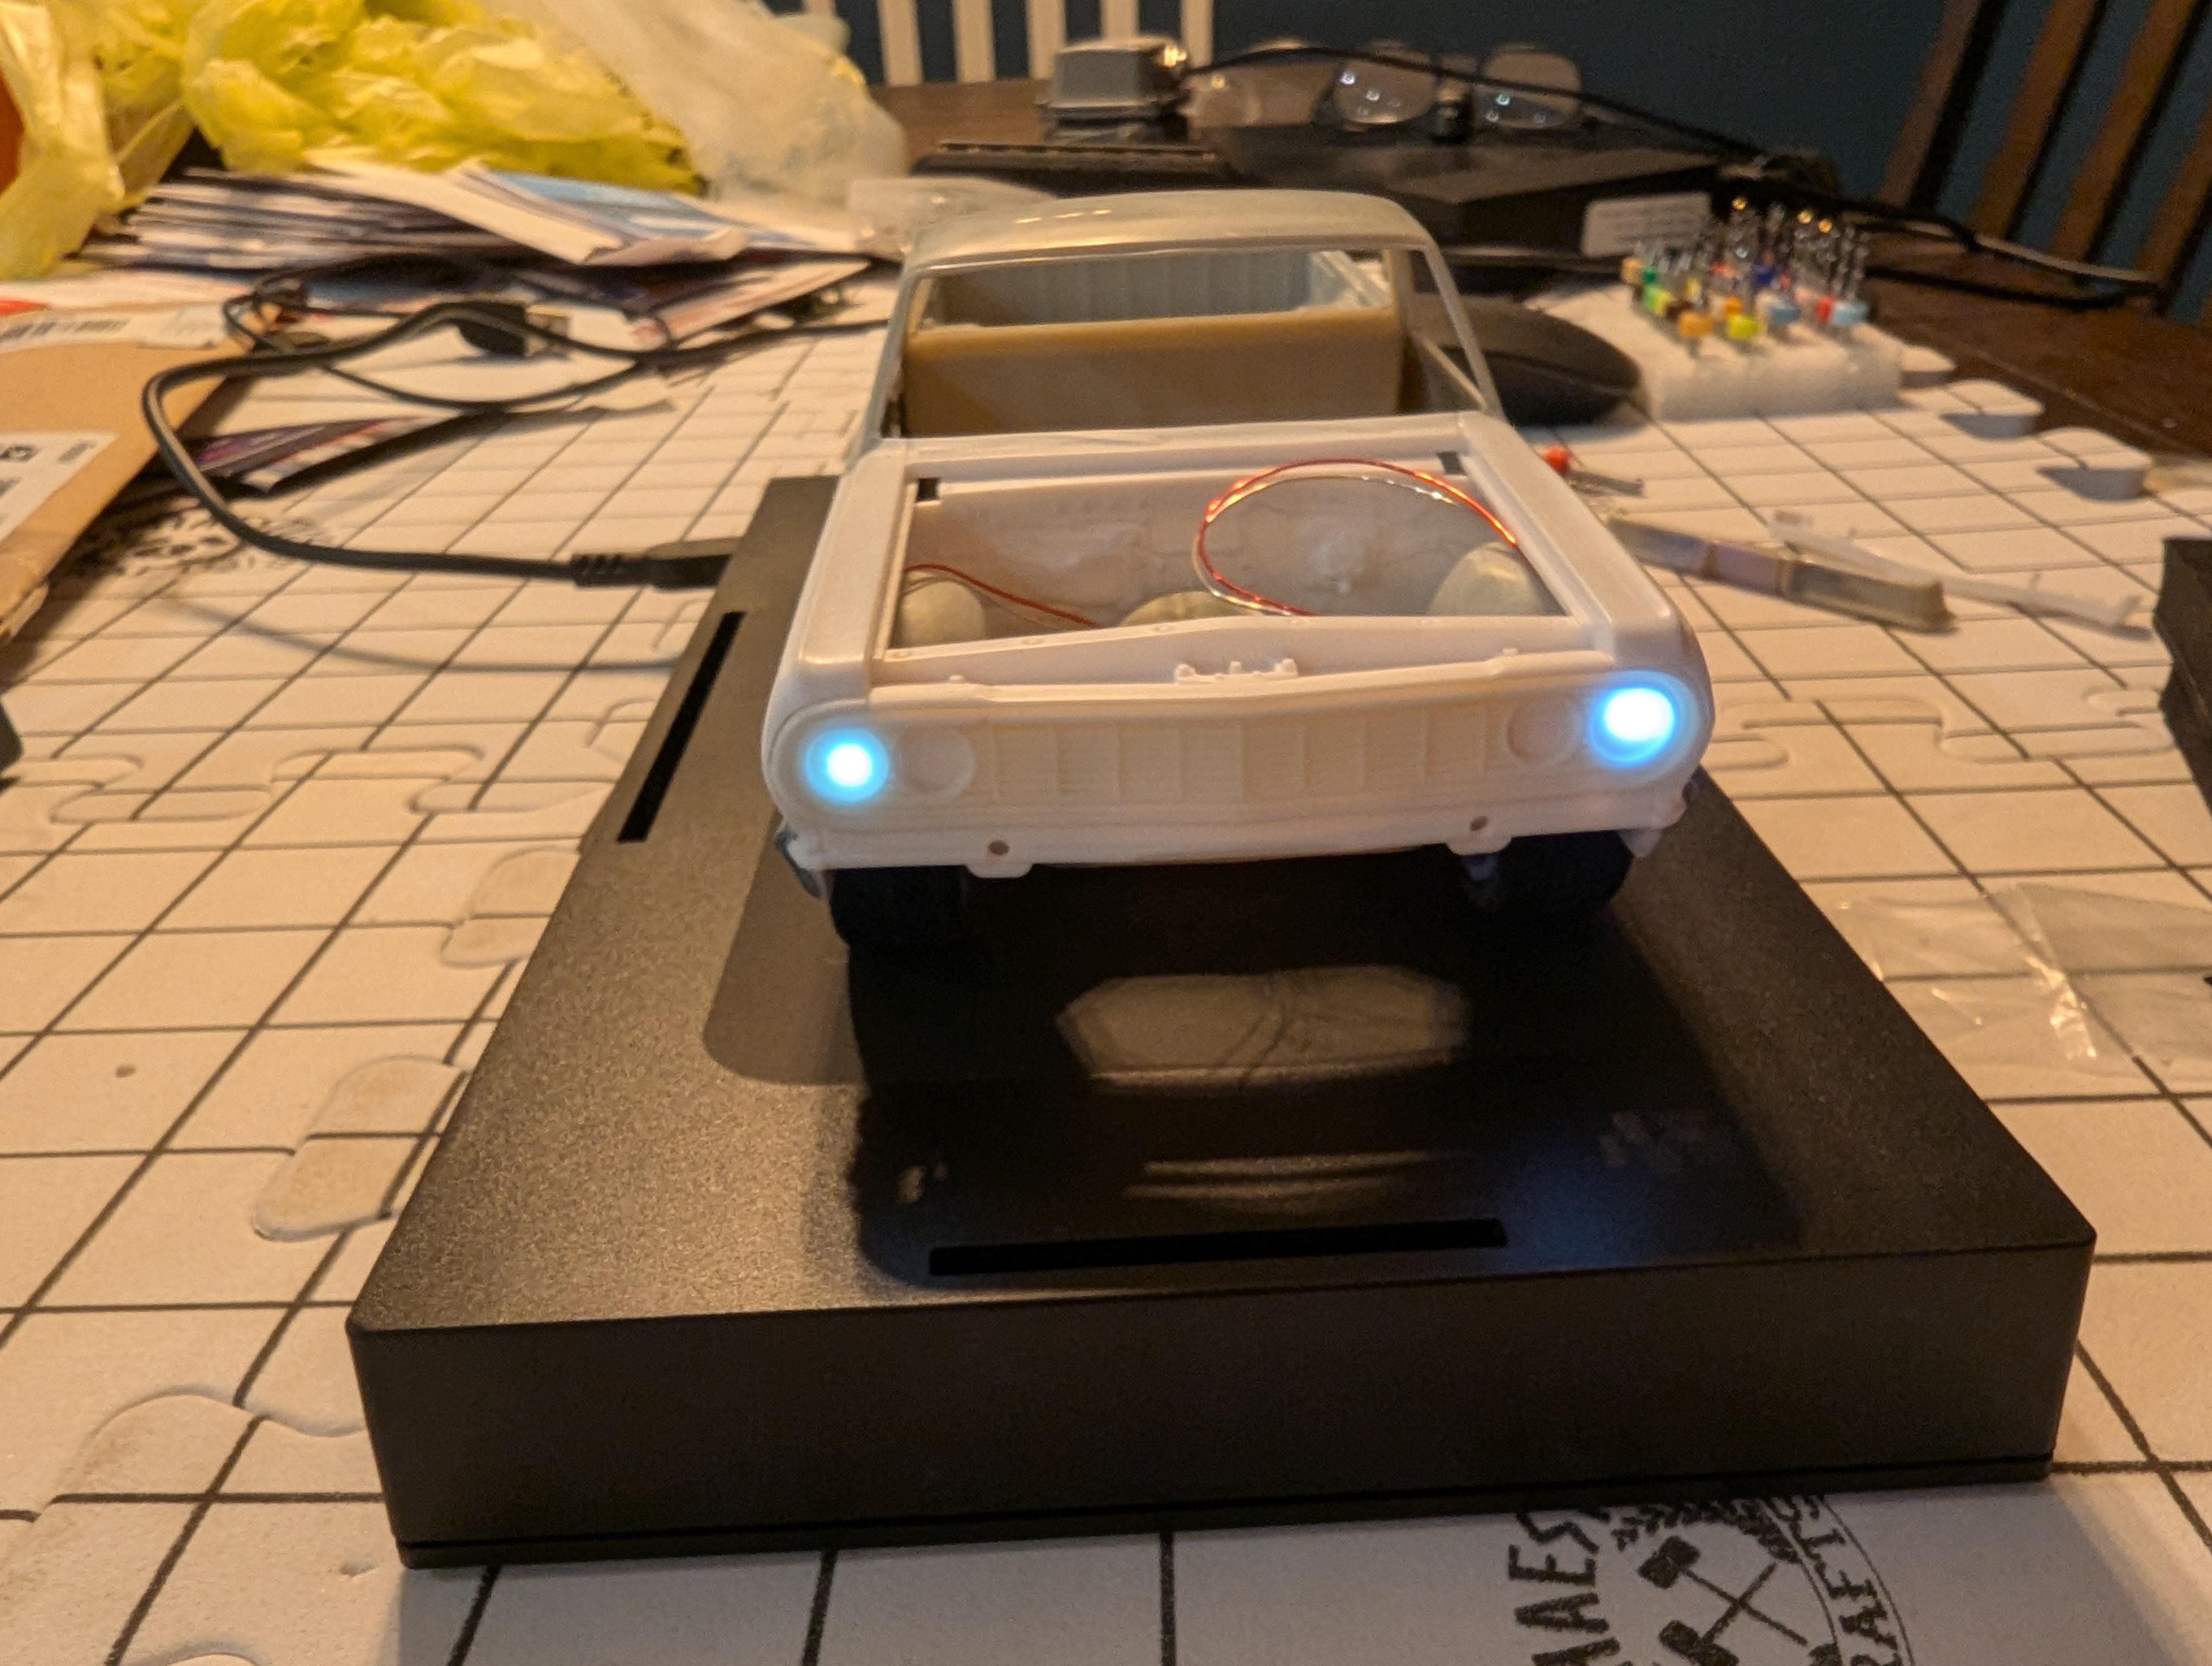
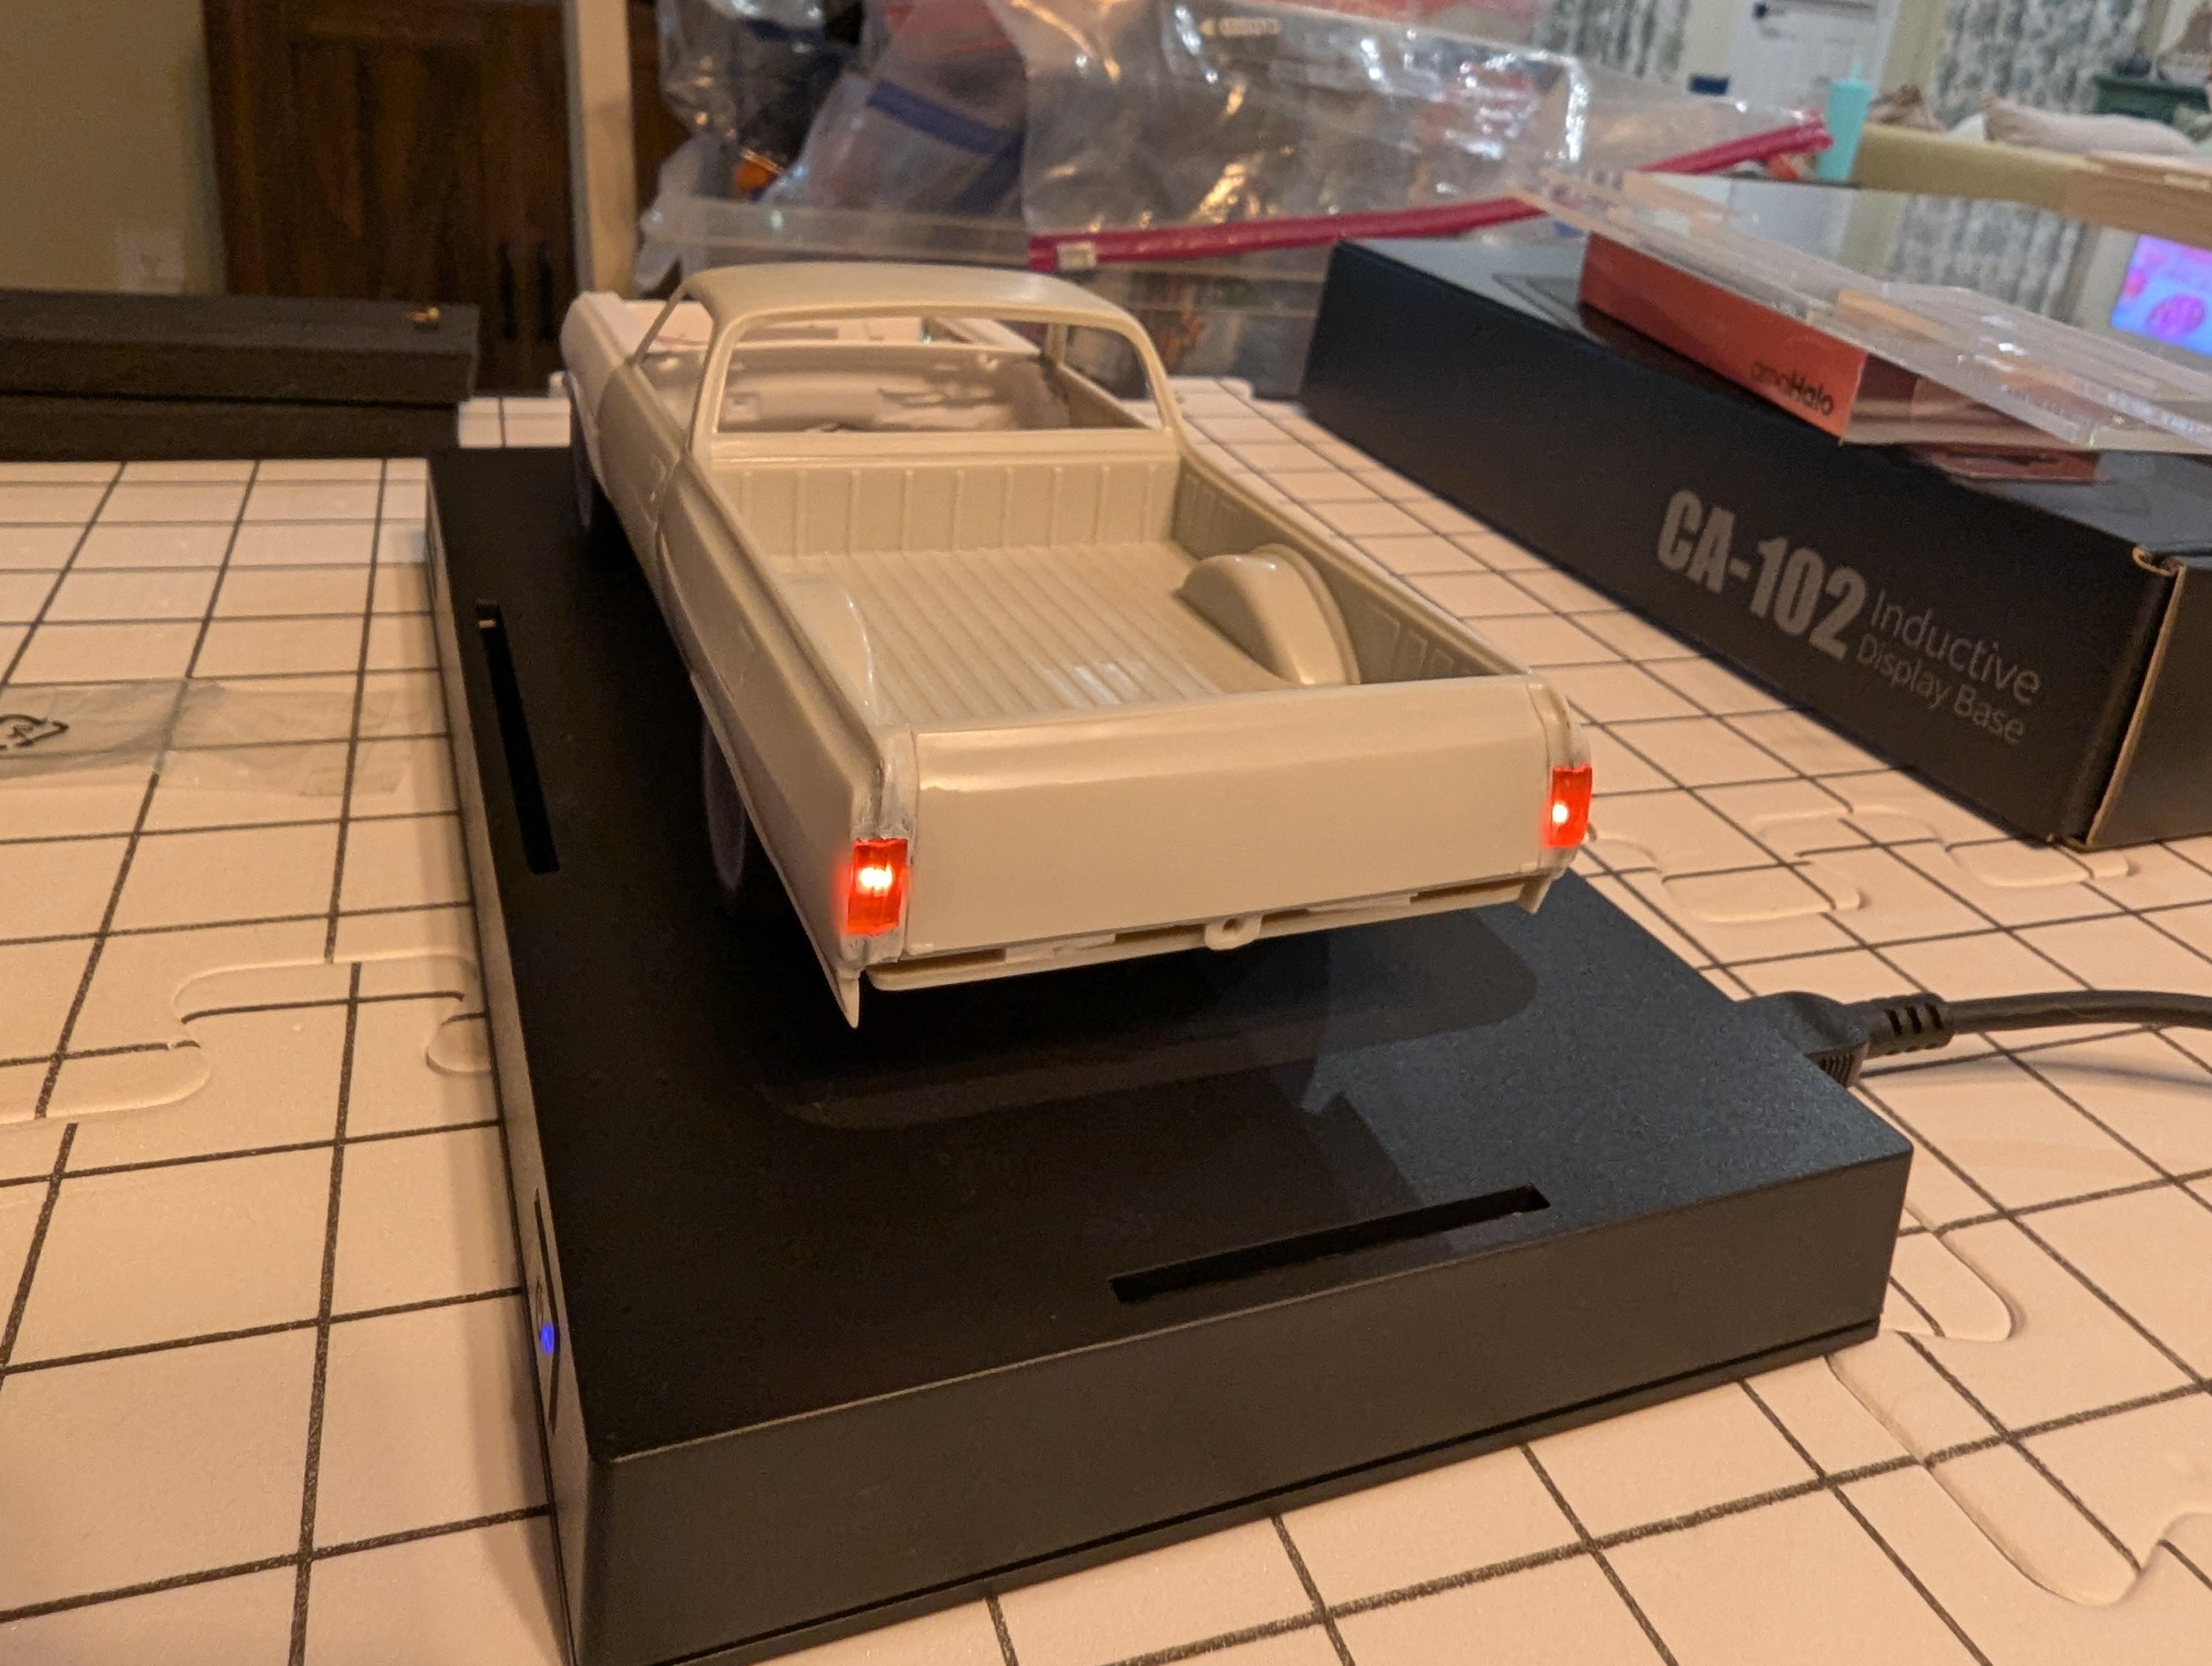
Correct. The setup works without a physical connection between the model and the base. There are definitely limitations in brightness and how far the LED induction coils can be from the base, but it's an excellent solution for cars. The LEDs having a short length of wire and not being placed directly on the induction coils helps with placement and range issues too. -
WIP: Custom AMT 1:25 1964/65 Chevy El Camino
JNordgren42 replied to JNordgren42's topic in WIP: Model Cars
It's been a while since I last posted, but I'm closing in on getting it finished. I finally decided on a lighting solution, I went (relatively) simple and found a display case that has a built in capacitive wireless power coil and capacitive LEDs. I also finished up the body work and have moved on to painting. I've got the gloss black in a place that I'm happy with it and I'm going to start on the chrome. I am also finishing up the CAD work on the custom mirrors which are the last bit I need to print. It's going to be right up to the wire but it should be done for Christmas. PXL_20241221_154420682.mp4 Testing the base and light install:
-
Wavecrest is a fantastic show. If you've gone frequently, you probably saw my mom's '41 (it was metallic sky blue with all natural finished ash wood and a dark blue top), as well as my dad's '50 Buick Roadmaster Estate Wagon (deep candy green with ash and mahogany woodwork, it's a stunner and hard to miss). They were both very involved with the SoCal Woody Club. Back during the 2007 Wavecrest show, one of the club guys paid for me to go up in a biplane ride from Palomar airport to get some aerial shots. That was a blast.
-
Amazing work! My mom had a '41 so they'll always have a special place in my heart.
-
WIP: Custom AMT 1:25 1964/65 Chevy El Camino
JNordgren42 replied to JNordgren42's topic in WIP: Model Cars
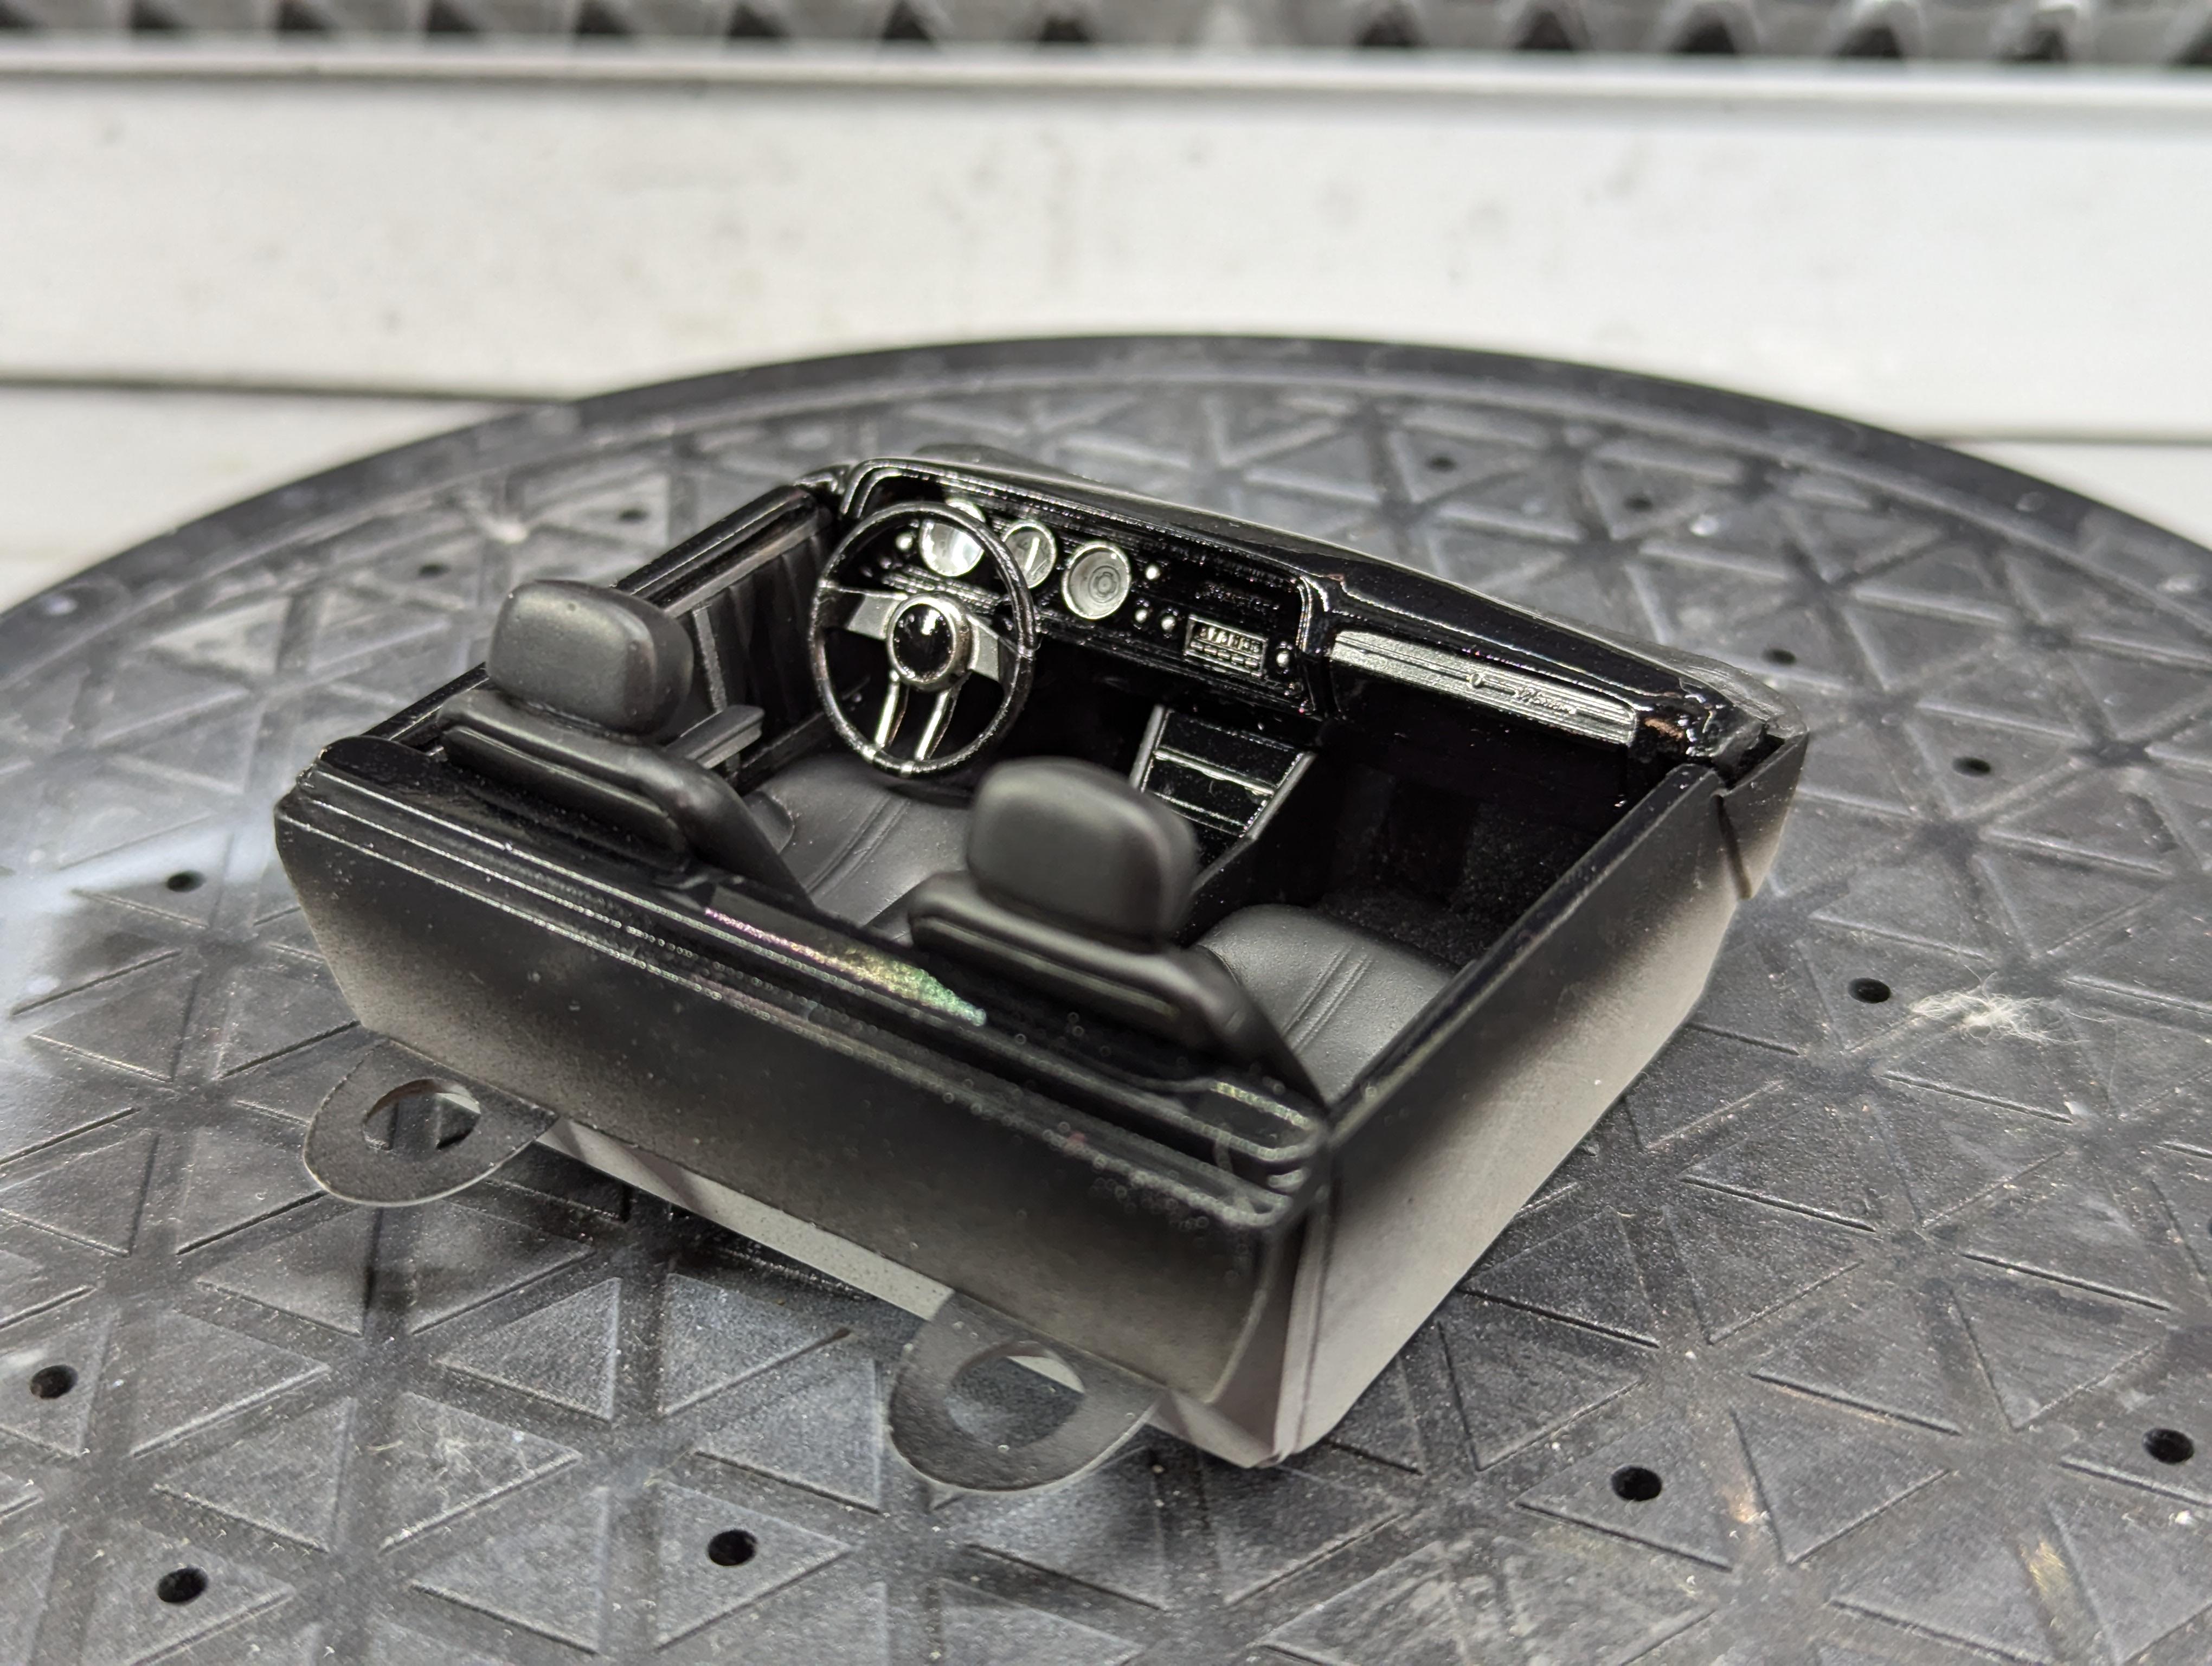
Thanks! The leather is just straight Gunze Mr. Finishing Surfacer 1500 Black. I sprayed it on as the primer coat and was shocked at how perfect it looked. I decided that putting anything else over it probably wouldn't look as good and just left it alone. -
WIP: Custom AMT 1:25 1964/65 Chevy El Camino
JNordgren42 replied to JNordgren42's topic in WIP: Model Cars
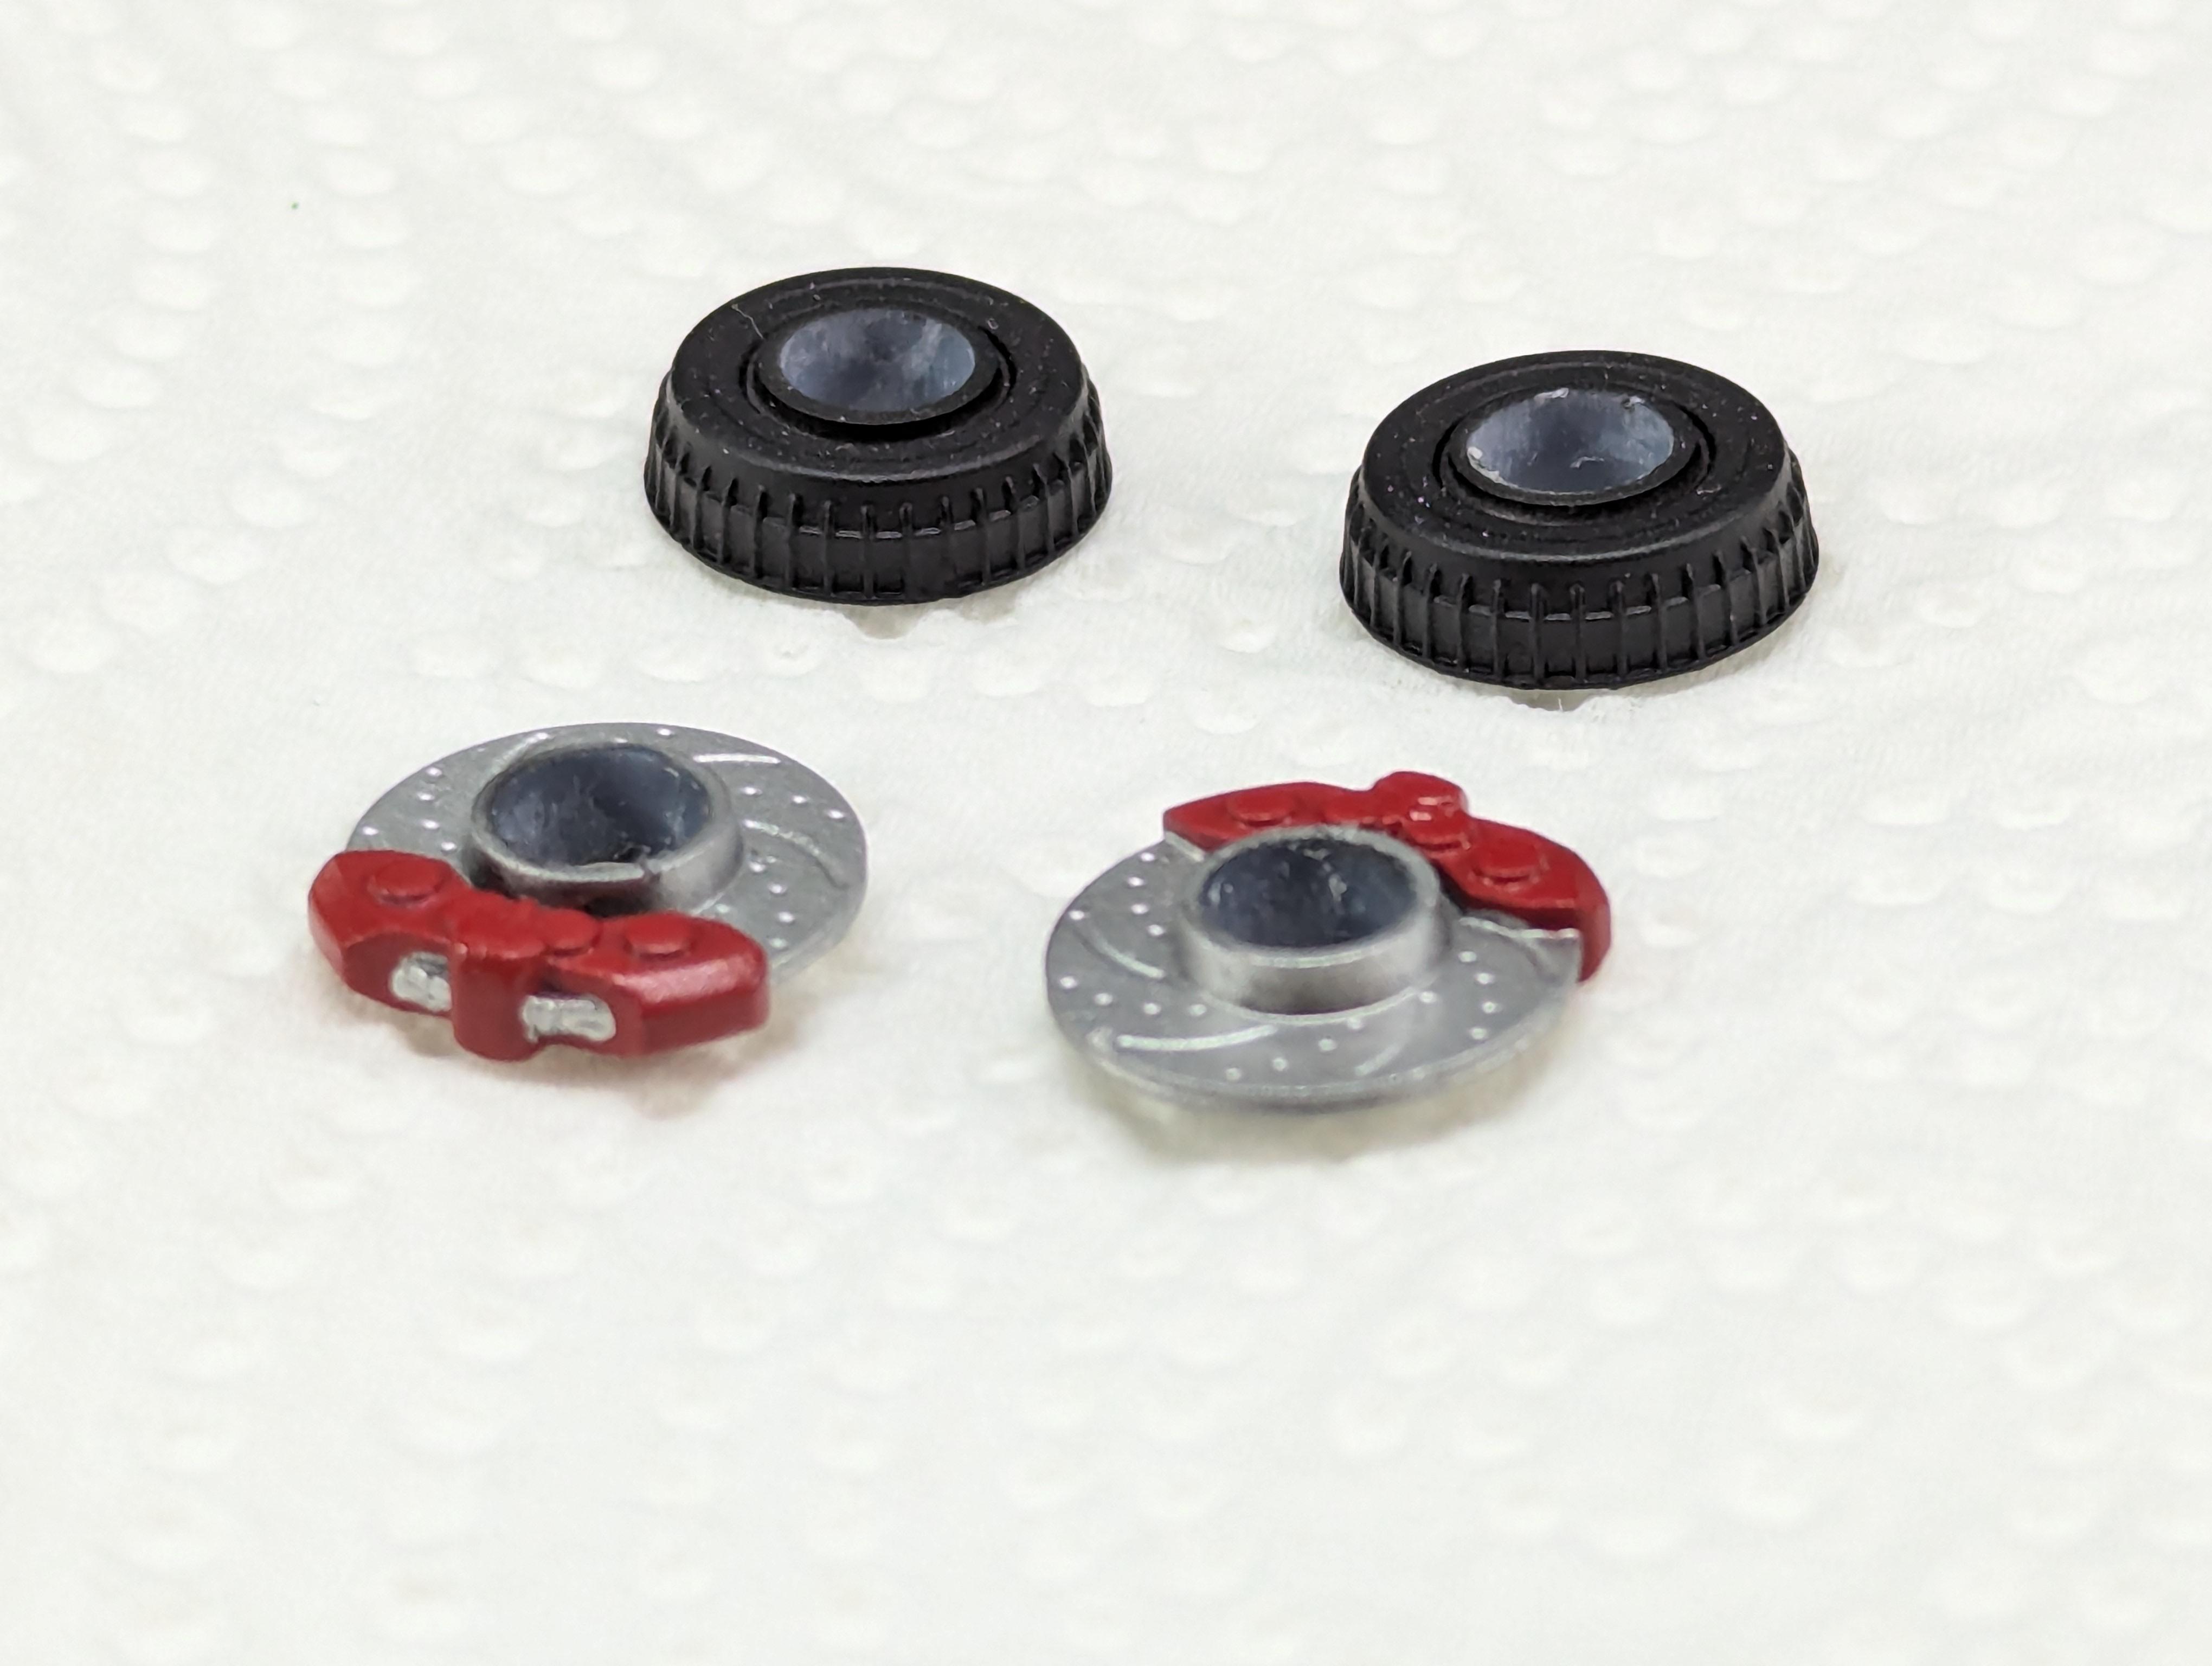
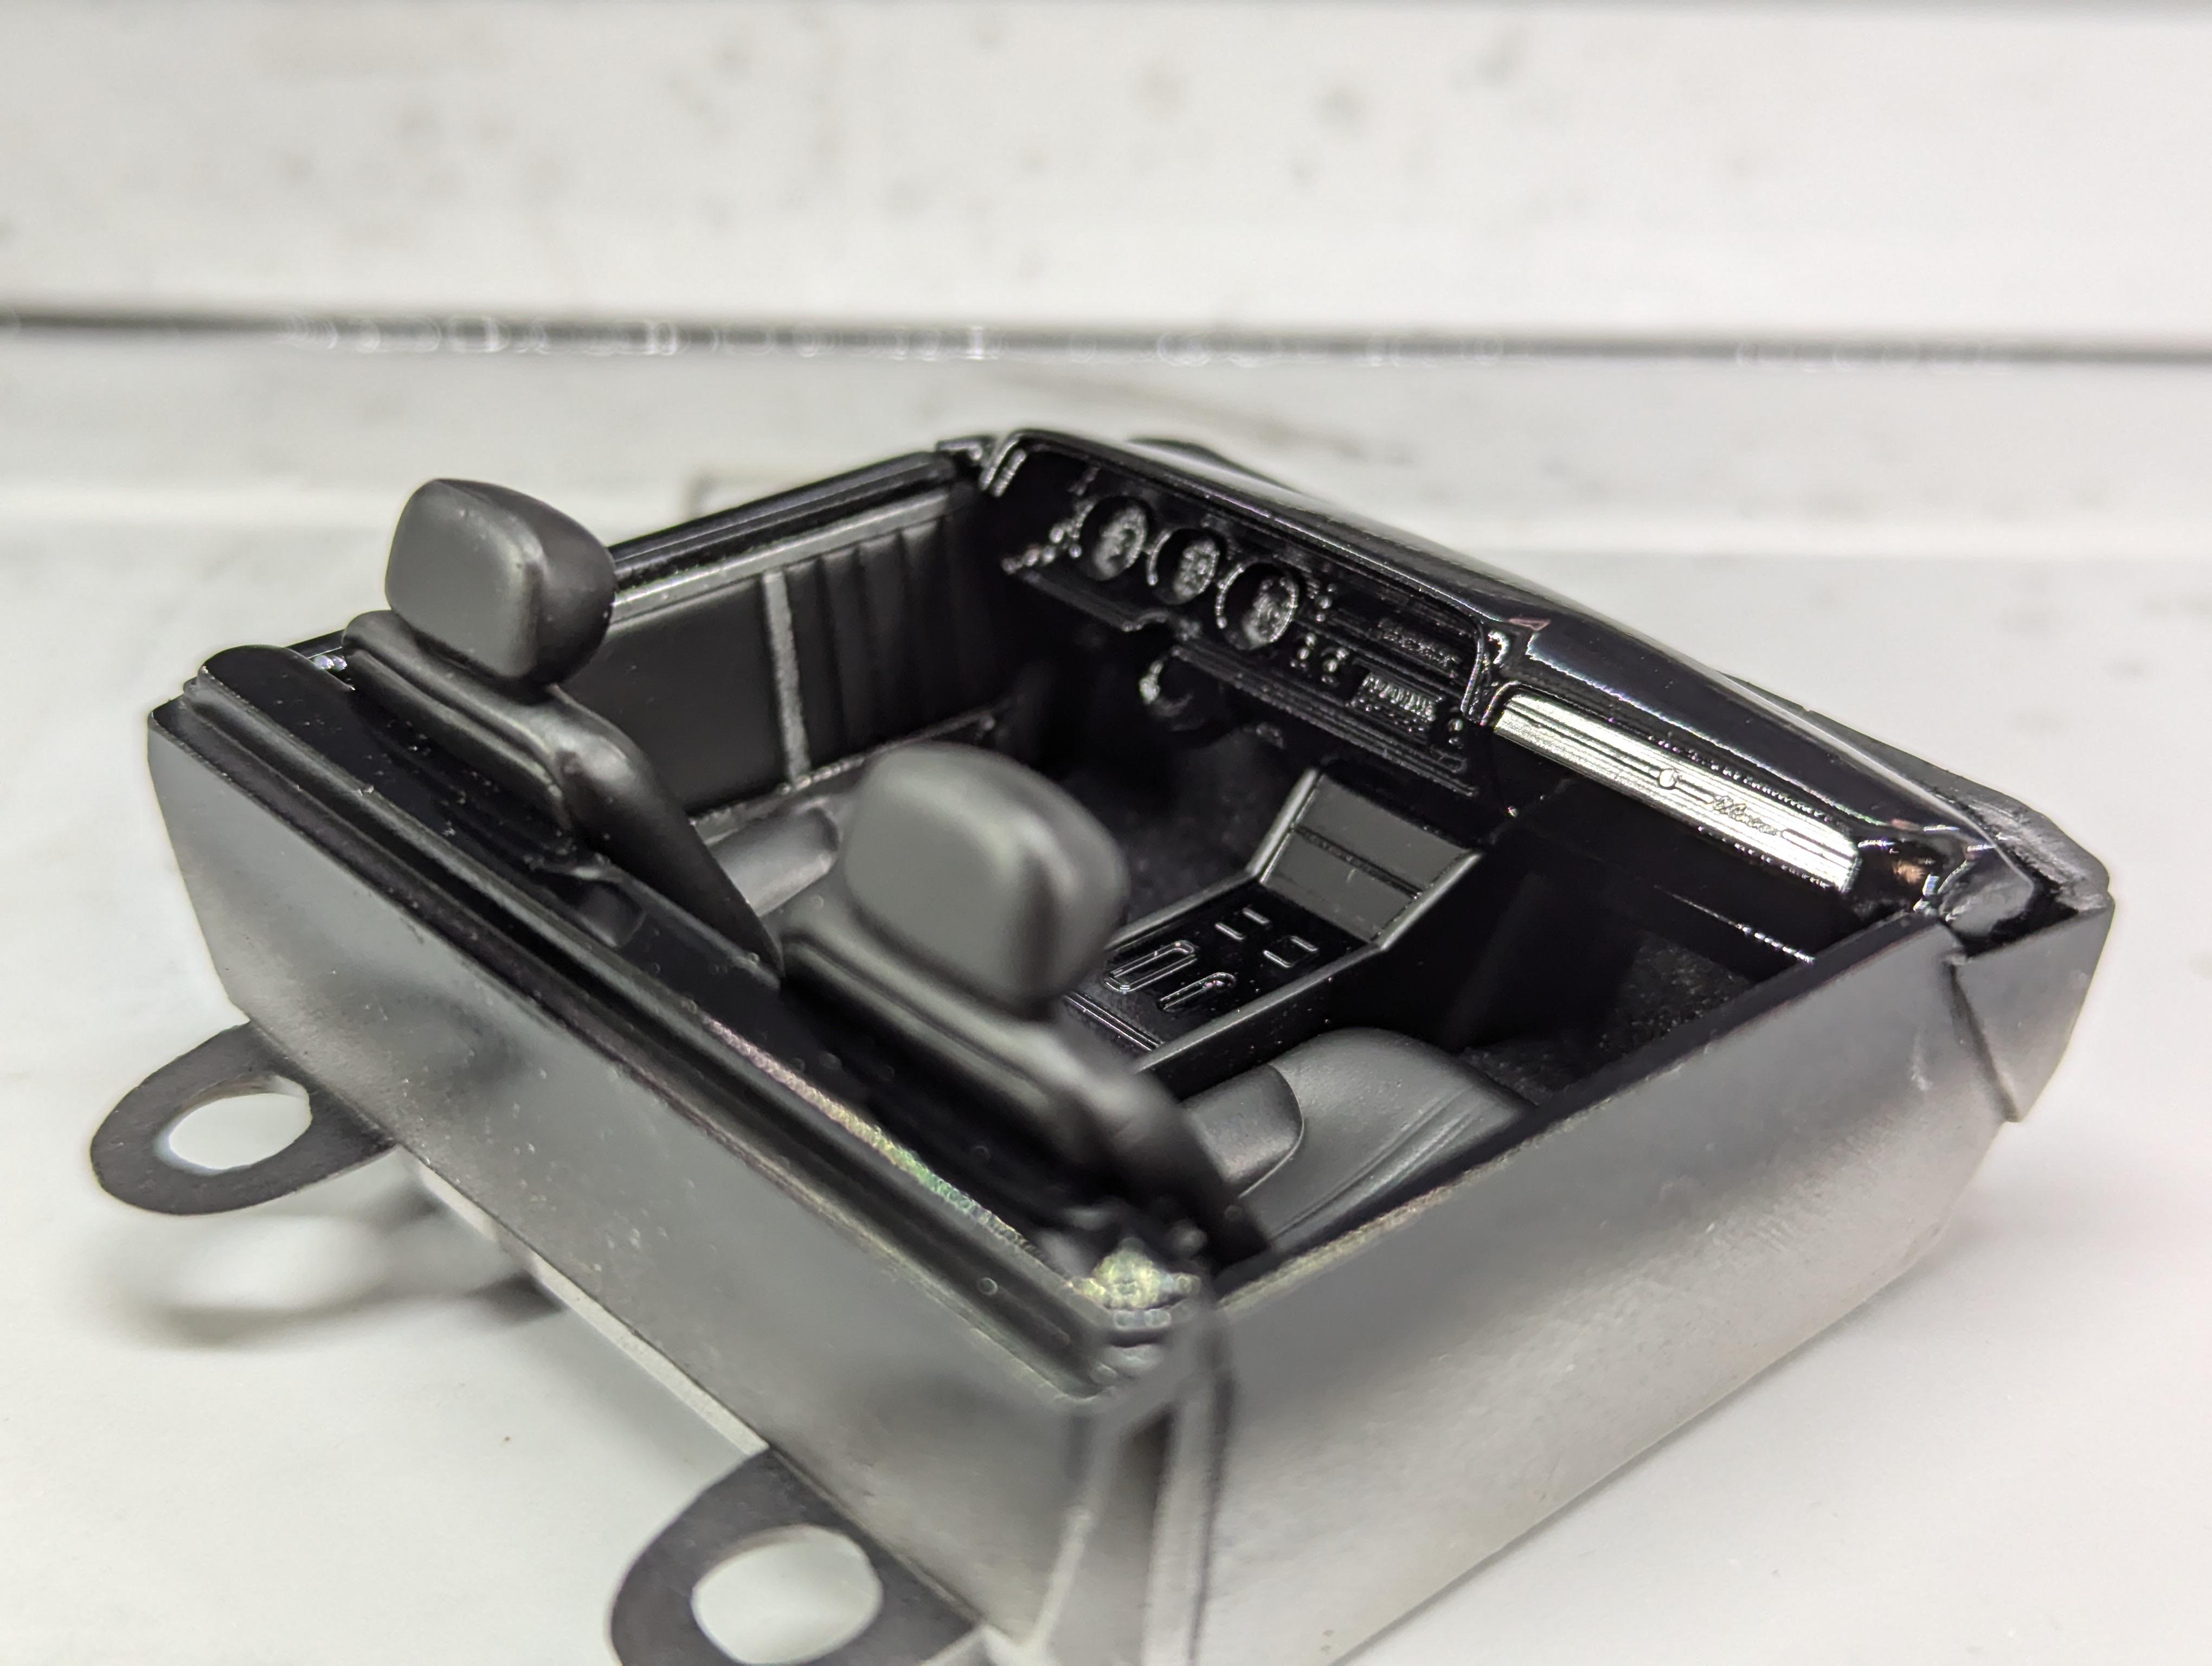
I'm essentially done with the interior with the exception of some minor touch ups and I'm really happy with how it came out I added 3D printed armrests, and I'll also probably pick up some photo etch handles and pedals before I do final assembly. I also got the brakes painted, black for the rear drums and silver discs with red calipers up front. Now to move on to getting the bodywork and frame sorted. PXL_20240921_193144643.mp4
-
WIP: Custom AMT 1:25 1964/65 Chevy El Camino
JNordgren42 replied to JNordgren42's topic in WIP: Model Cars
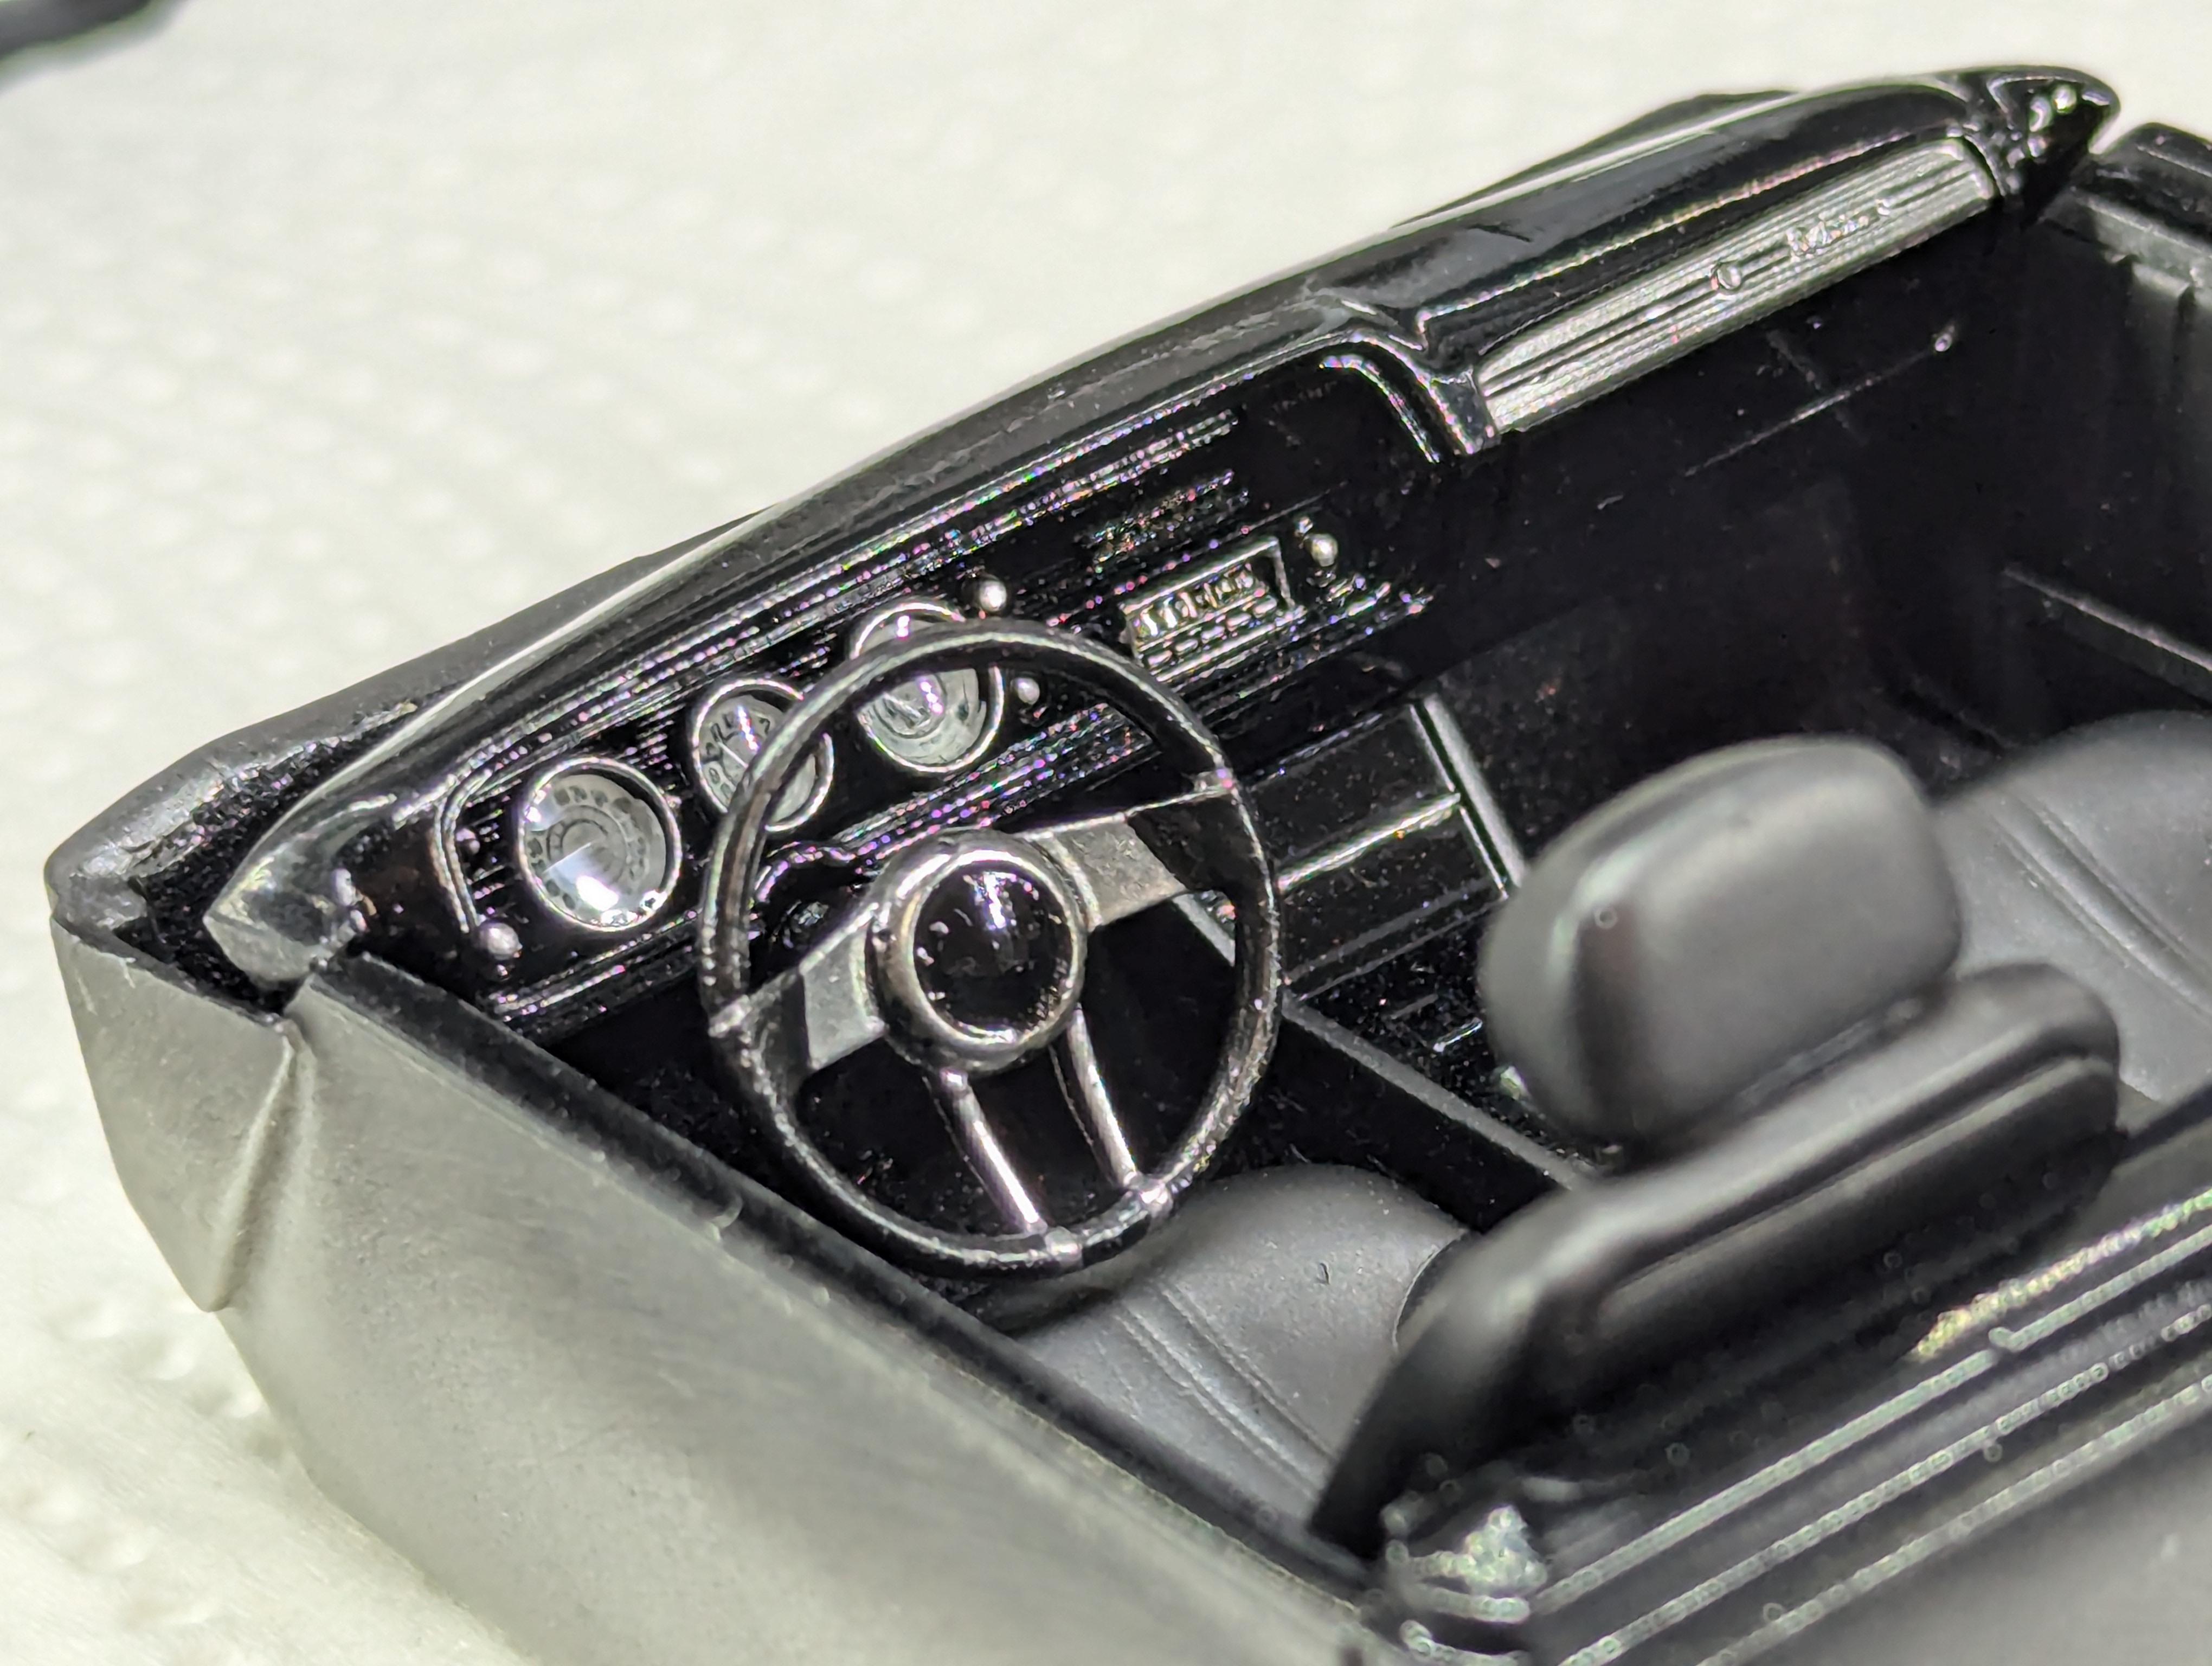
I got all of the airbrushing done on the interior and it's coming along great. I also laid down some black embossing powder for the carpet. I ordered a fine tip Molotow chrome marker for the detailing and I'll finish it up once that arrives. Turntable video. PXL_20240903_011932905.mp4 Tub without seats and dash.
-
WIP: Custom AMT 1:25 1964/65 Chevy El Camino
JNordgren42 replied to JNordgren42's topic in WIP: Model Cars
Thanks guys! -
WIP: Custom AMT 1:25 1964/65 Chevy El Camino
JNordgren42 replied to JNordgren42's topic in WIP: Model Cars
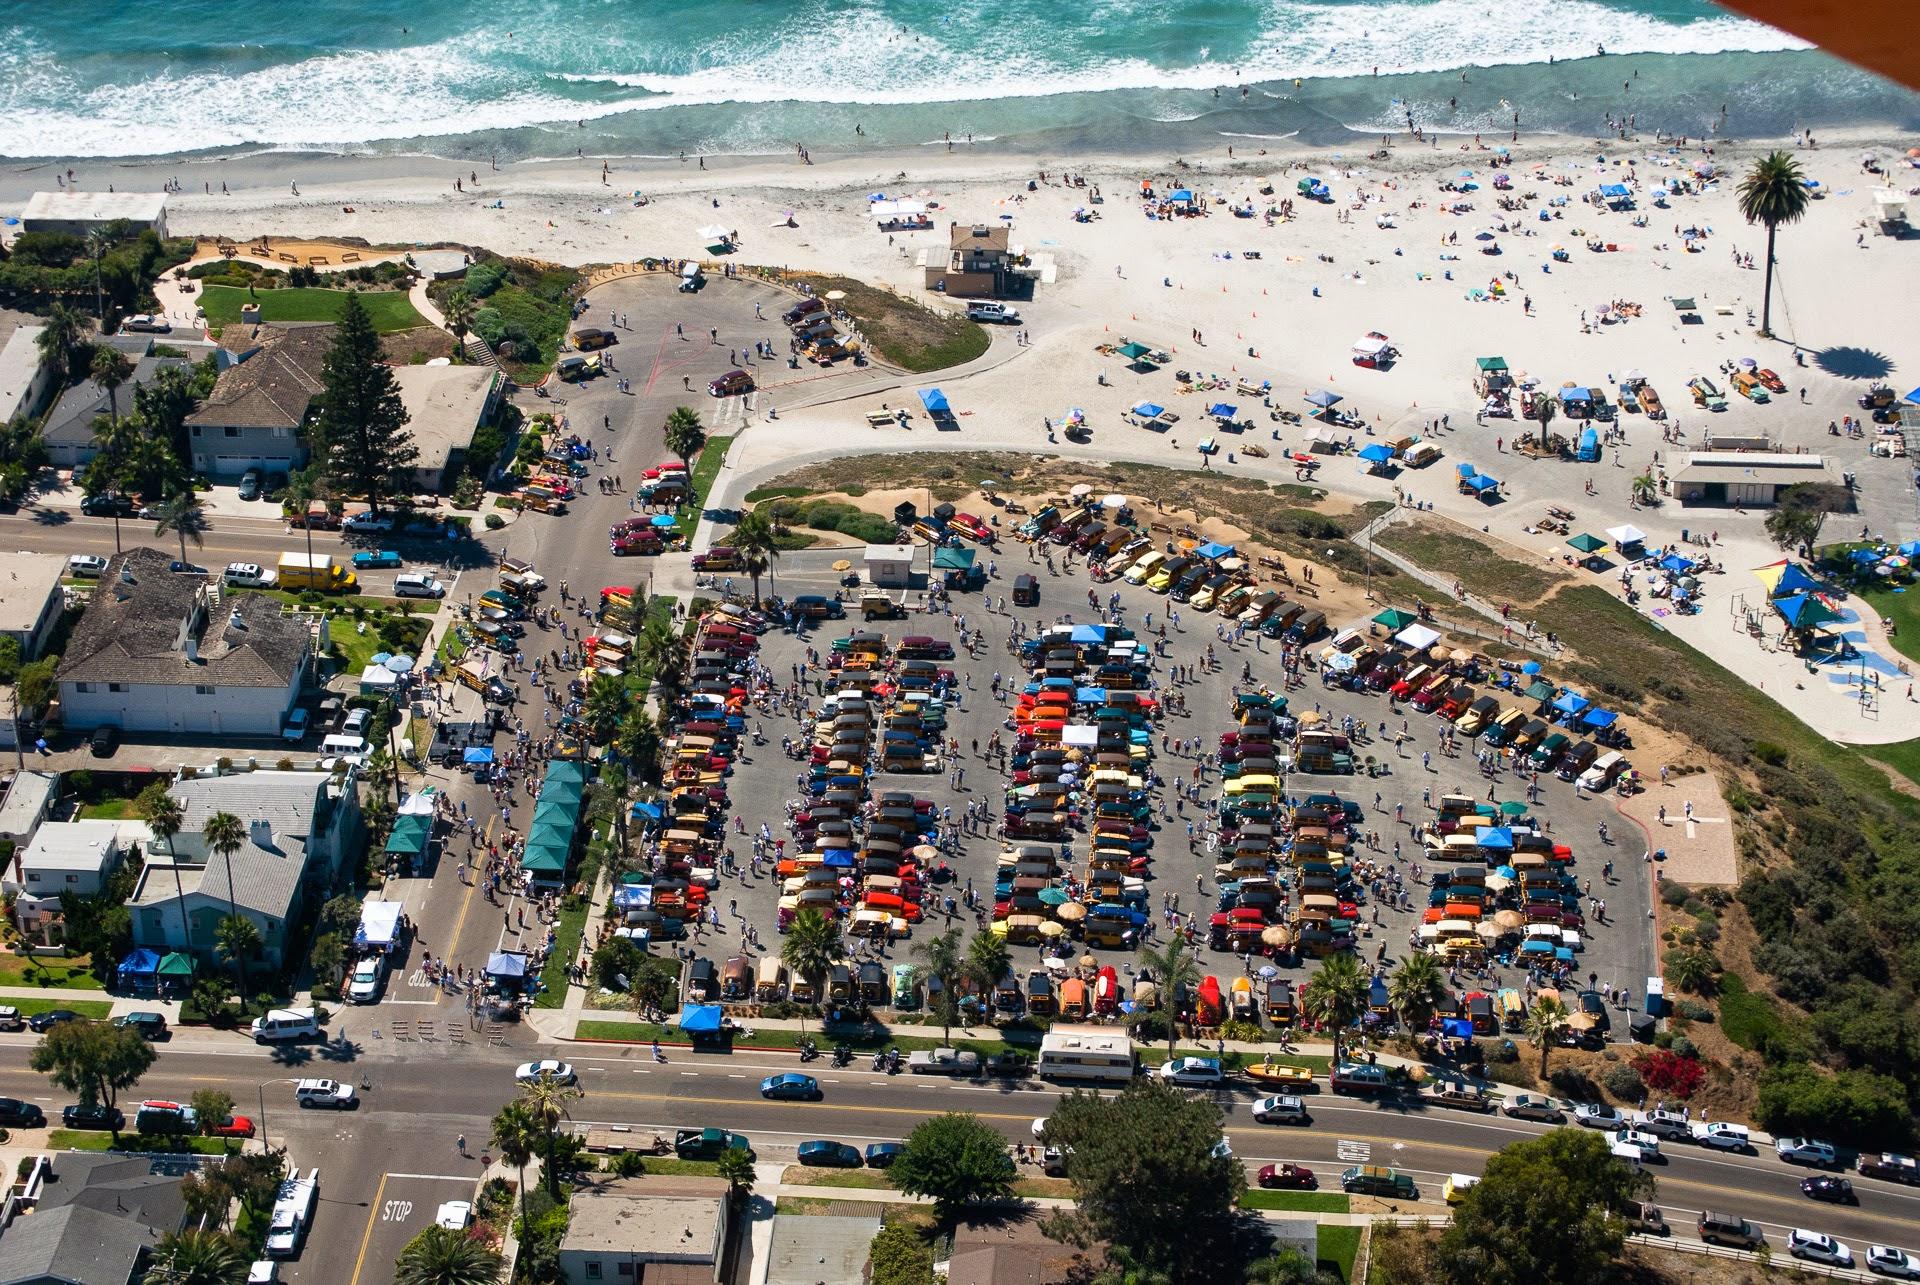
And... It has paint! I put a coat of primer on the interior parts to see where they're at, and I'm super chuffed. As it does, the grey primer showed me what needs a little attention, but it also unifies things and really helps it to meld. A little judicious sanding and another coat of primer, and I'll be ready to start putting some actual color on it. ? Interior tub. I couldn't be happier with how my scratch built details came out. Test fit with the dashboard and resin parts.
-
Thanks! Thanks! It's still a good watch. And there is some interesting reading about how they got it filmed. And also some scandal about it, the CAG of the air wing apparently vastly undercharged the production company for the flight hours. The high viz Jolly Rogers scheme is still my all time favorite. I just added a Hasegawa 1/48 VF-1S Valkyrie from Macross and plan on doing a little reverse inspiration and using actual USN VF-84 markings instead of the Skull Squadron markings that come in the kit. I thought about doing forced perspective but I think I can get a fairly dynamic pose without it (not that I have much choice at this point ?). They won't have a separation that's at all realistic, but I think it will still look good.
-
WIP: Custom AMT 1:25 1964/65 Chevy El Camino
JNordgren42 replied to JNordgren42's topic in WIP: Model Cars
Thanks! I can't wait to get some paint on it. A coat of primer always brings things together (and lets you know where there's work to be done). -
WIP: Custom AMT 1:25 1964/65 Chevy El Camino
JNordgren42 replied to JNordgren42's topic in WIP: Model Cars
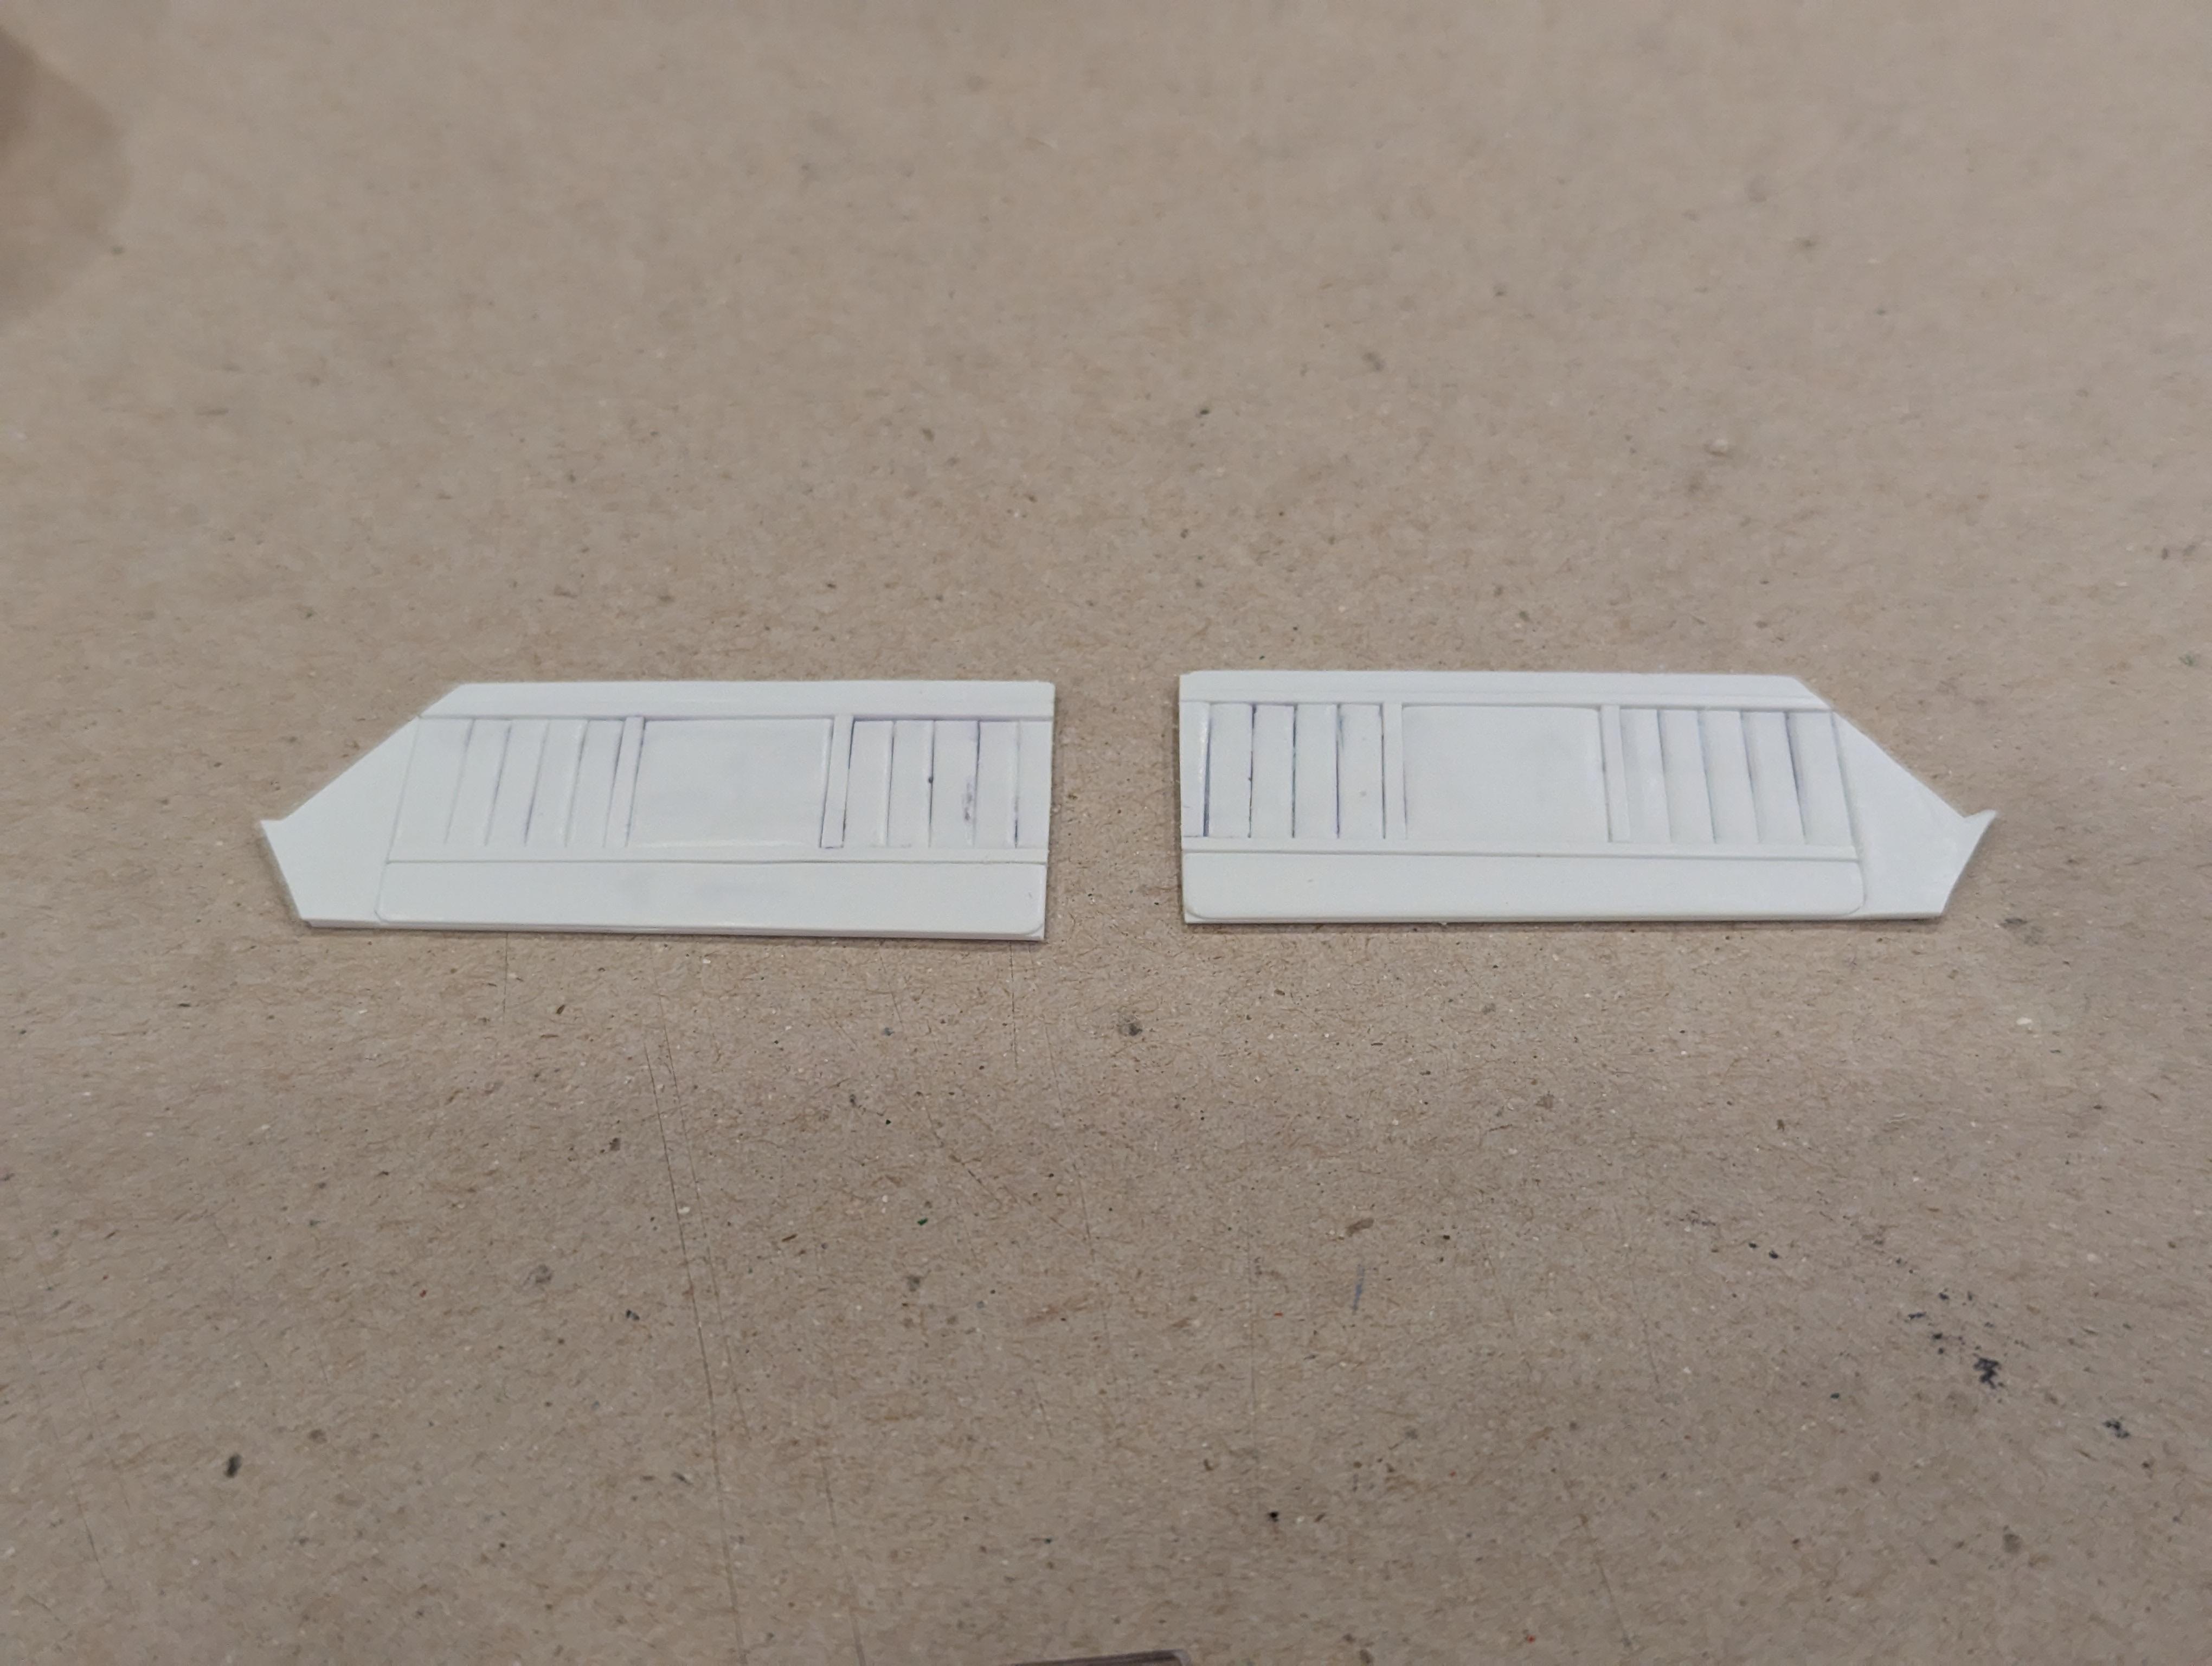
I finished the second panel skin, glued both of them in, and did a final interior test fit. A little filing in some of the corners, and I'll be ready to start throwing some paint on it. All of the bits for the passenger side door panel cut and sanded to shape. Driver and passenger side skins. Everything fits together really nicely!
-
WIP: Custom AMT 1:25 1964/65 Chevy El Camino
JNordgren42 replied to JNordgren42's topic in WIP: Model Cars
Yeah, the UV gloss is too thick for finely detailed parts. I did have luck with some moderate thinning with Gunze Mr. Leveling Thinner (lacquer based). I'm going to see how far I can push it and still have it cure. I also plan on experimenting with lacquer and possibly enamels, I'm pretty sure it's possible to get it to adhere to a paint finish. Modo makes a set that has what I'm sure is the same type of pigment powder that goes over a gloss black lacquer base. Unfortunately Modo doesn't have U.S. distribution anymore (which is a shame,because I love their primer), so I haven't been able to get.my hands on it. But with some perseverance, I'm sure I can figure it out. -
WIP: Custom AMT 1:25 1964/65 Chevy El Camino
JNordgren42 replied to JNordgren42's topic in WIP: Model Cars
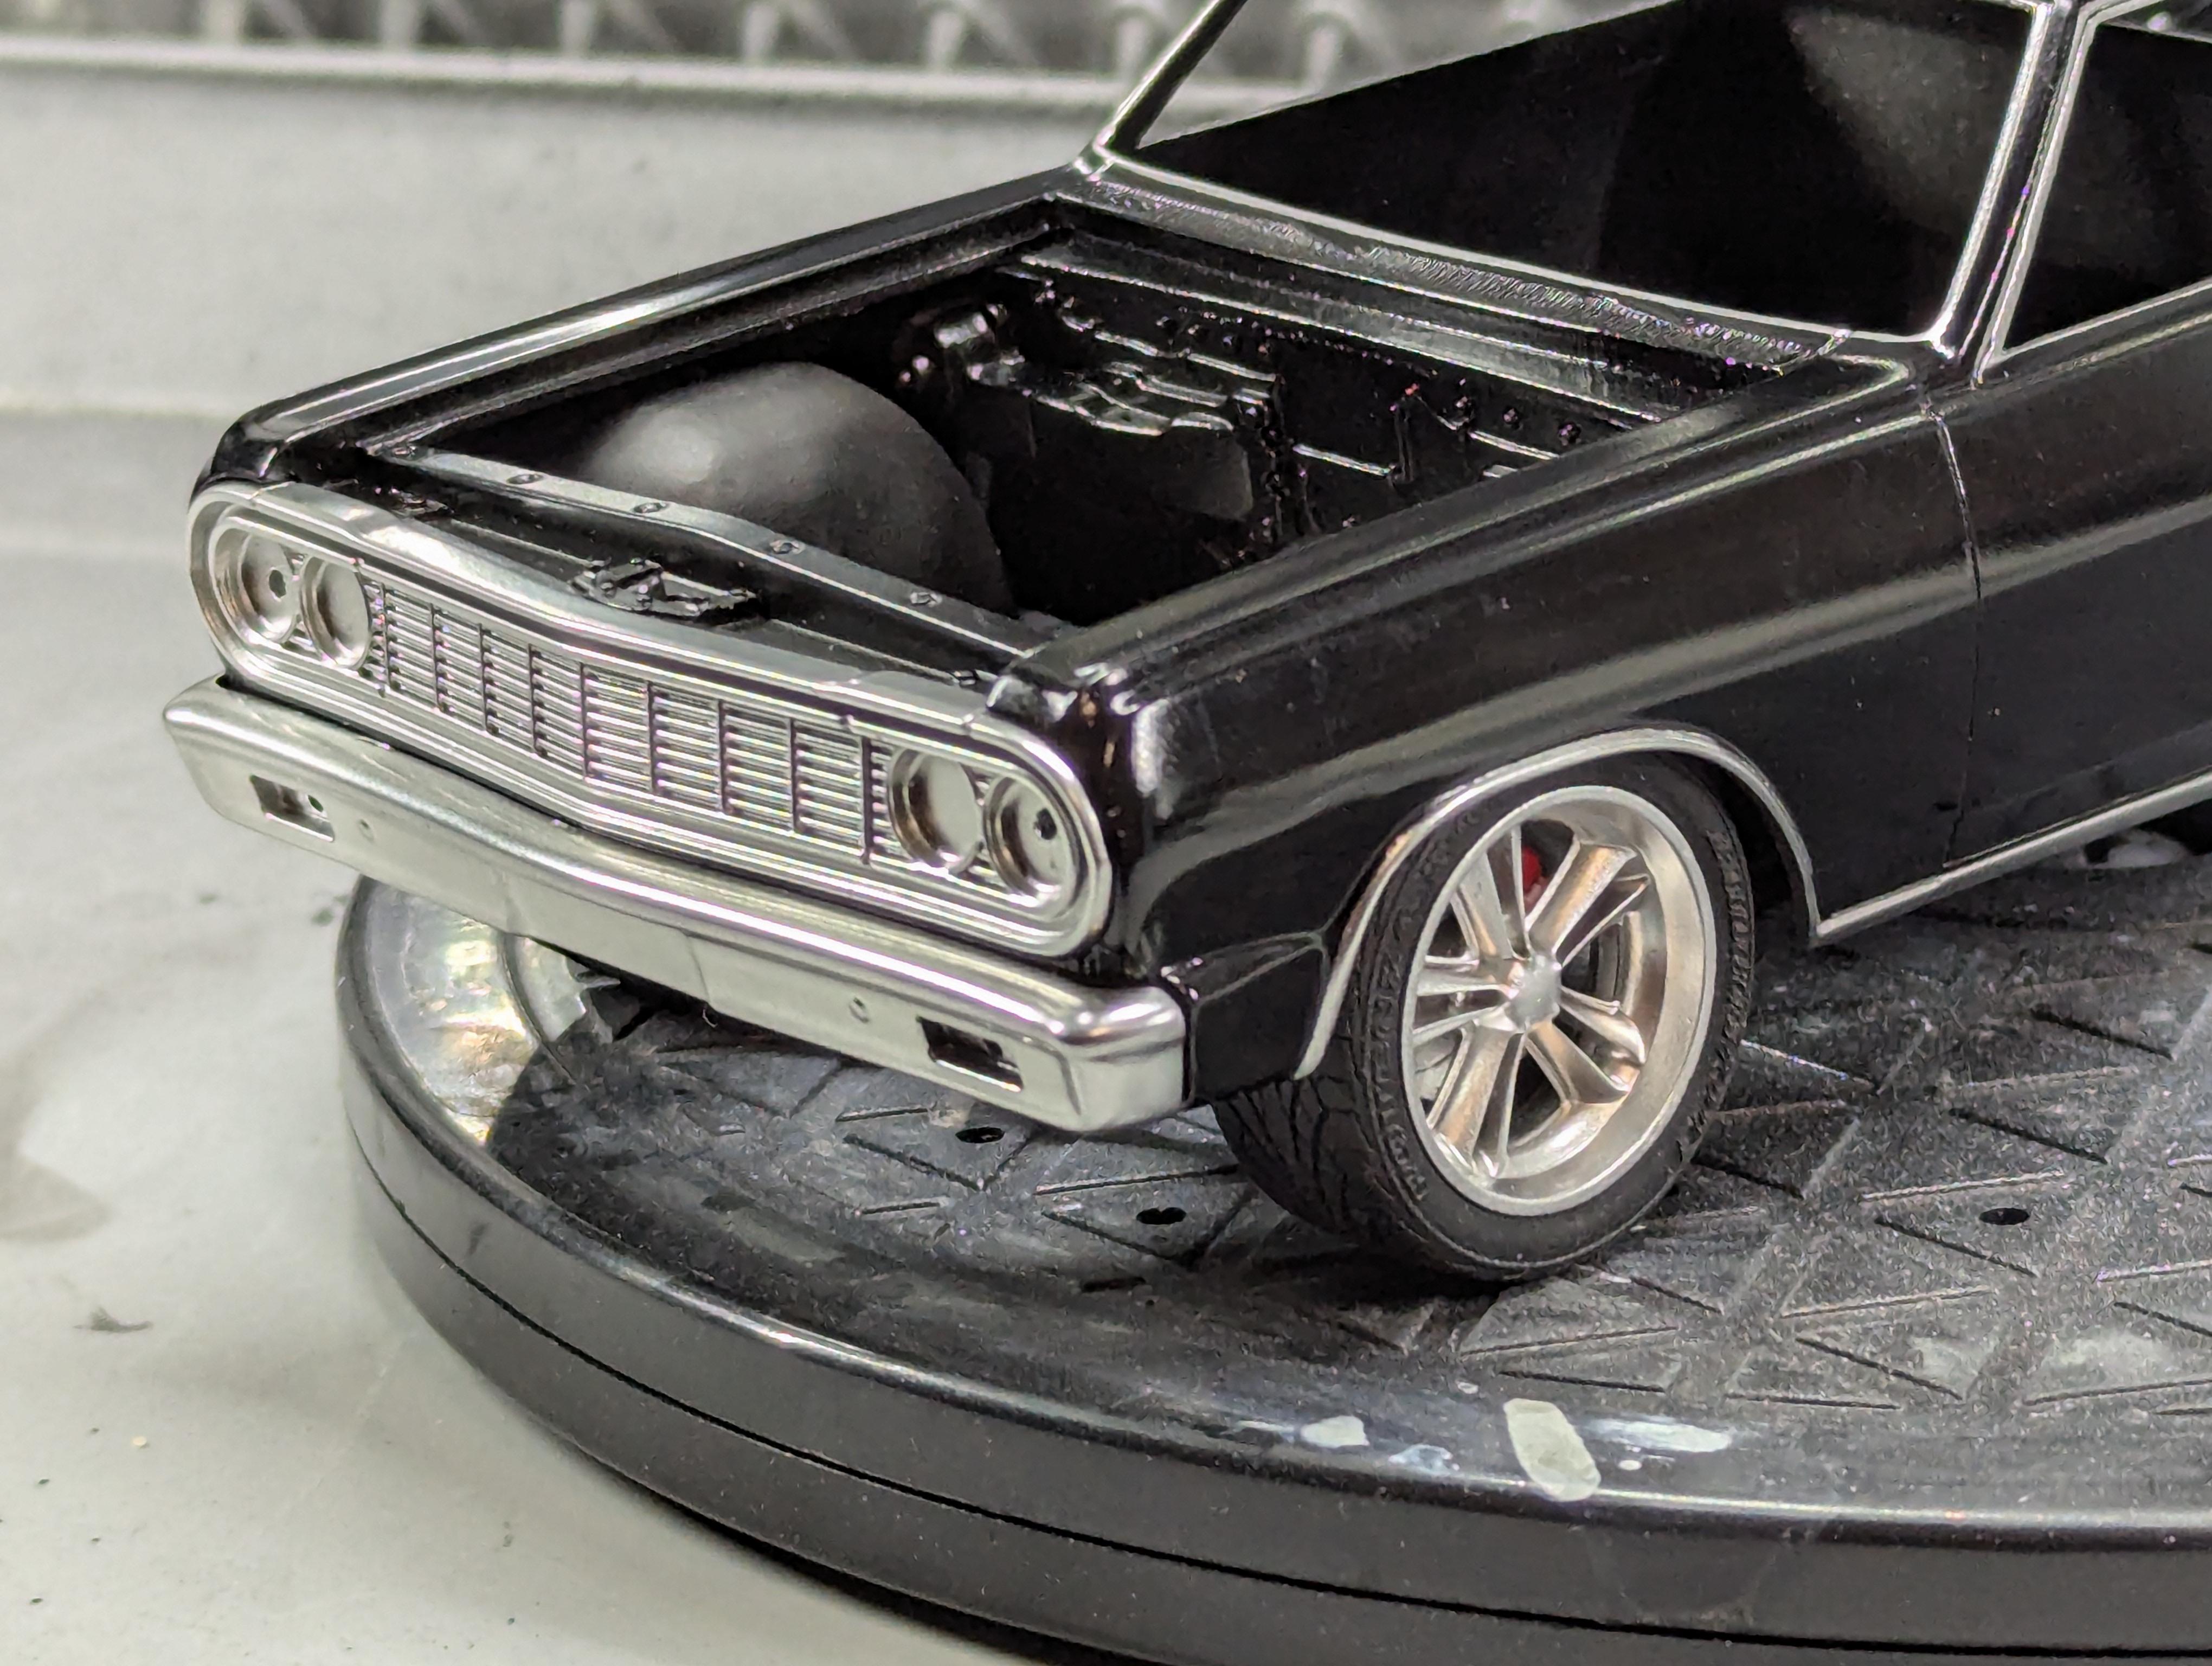
Thanks! Thanks! Interesting story, my in-laws were down at our house last weekend and I was talking to my FiL about the car. It turns out I was mistaken, it's a full '64, but he liked the '65 tail lights and rear bumper better so he used those instead. They also have a '64 Malibu SS convertible that was my MiL's daily driver for a long time. I may pick up another Malibu kit and chop the top off after this one is done. ? -
WIP: Custom AMT 1:25 1964/65 Chevy El Camino
JNordgren42 replied to JNordgren42's topic in WIP: Model Cars
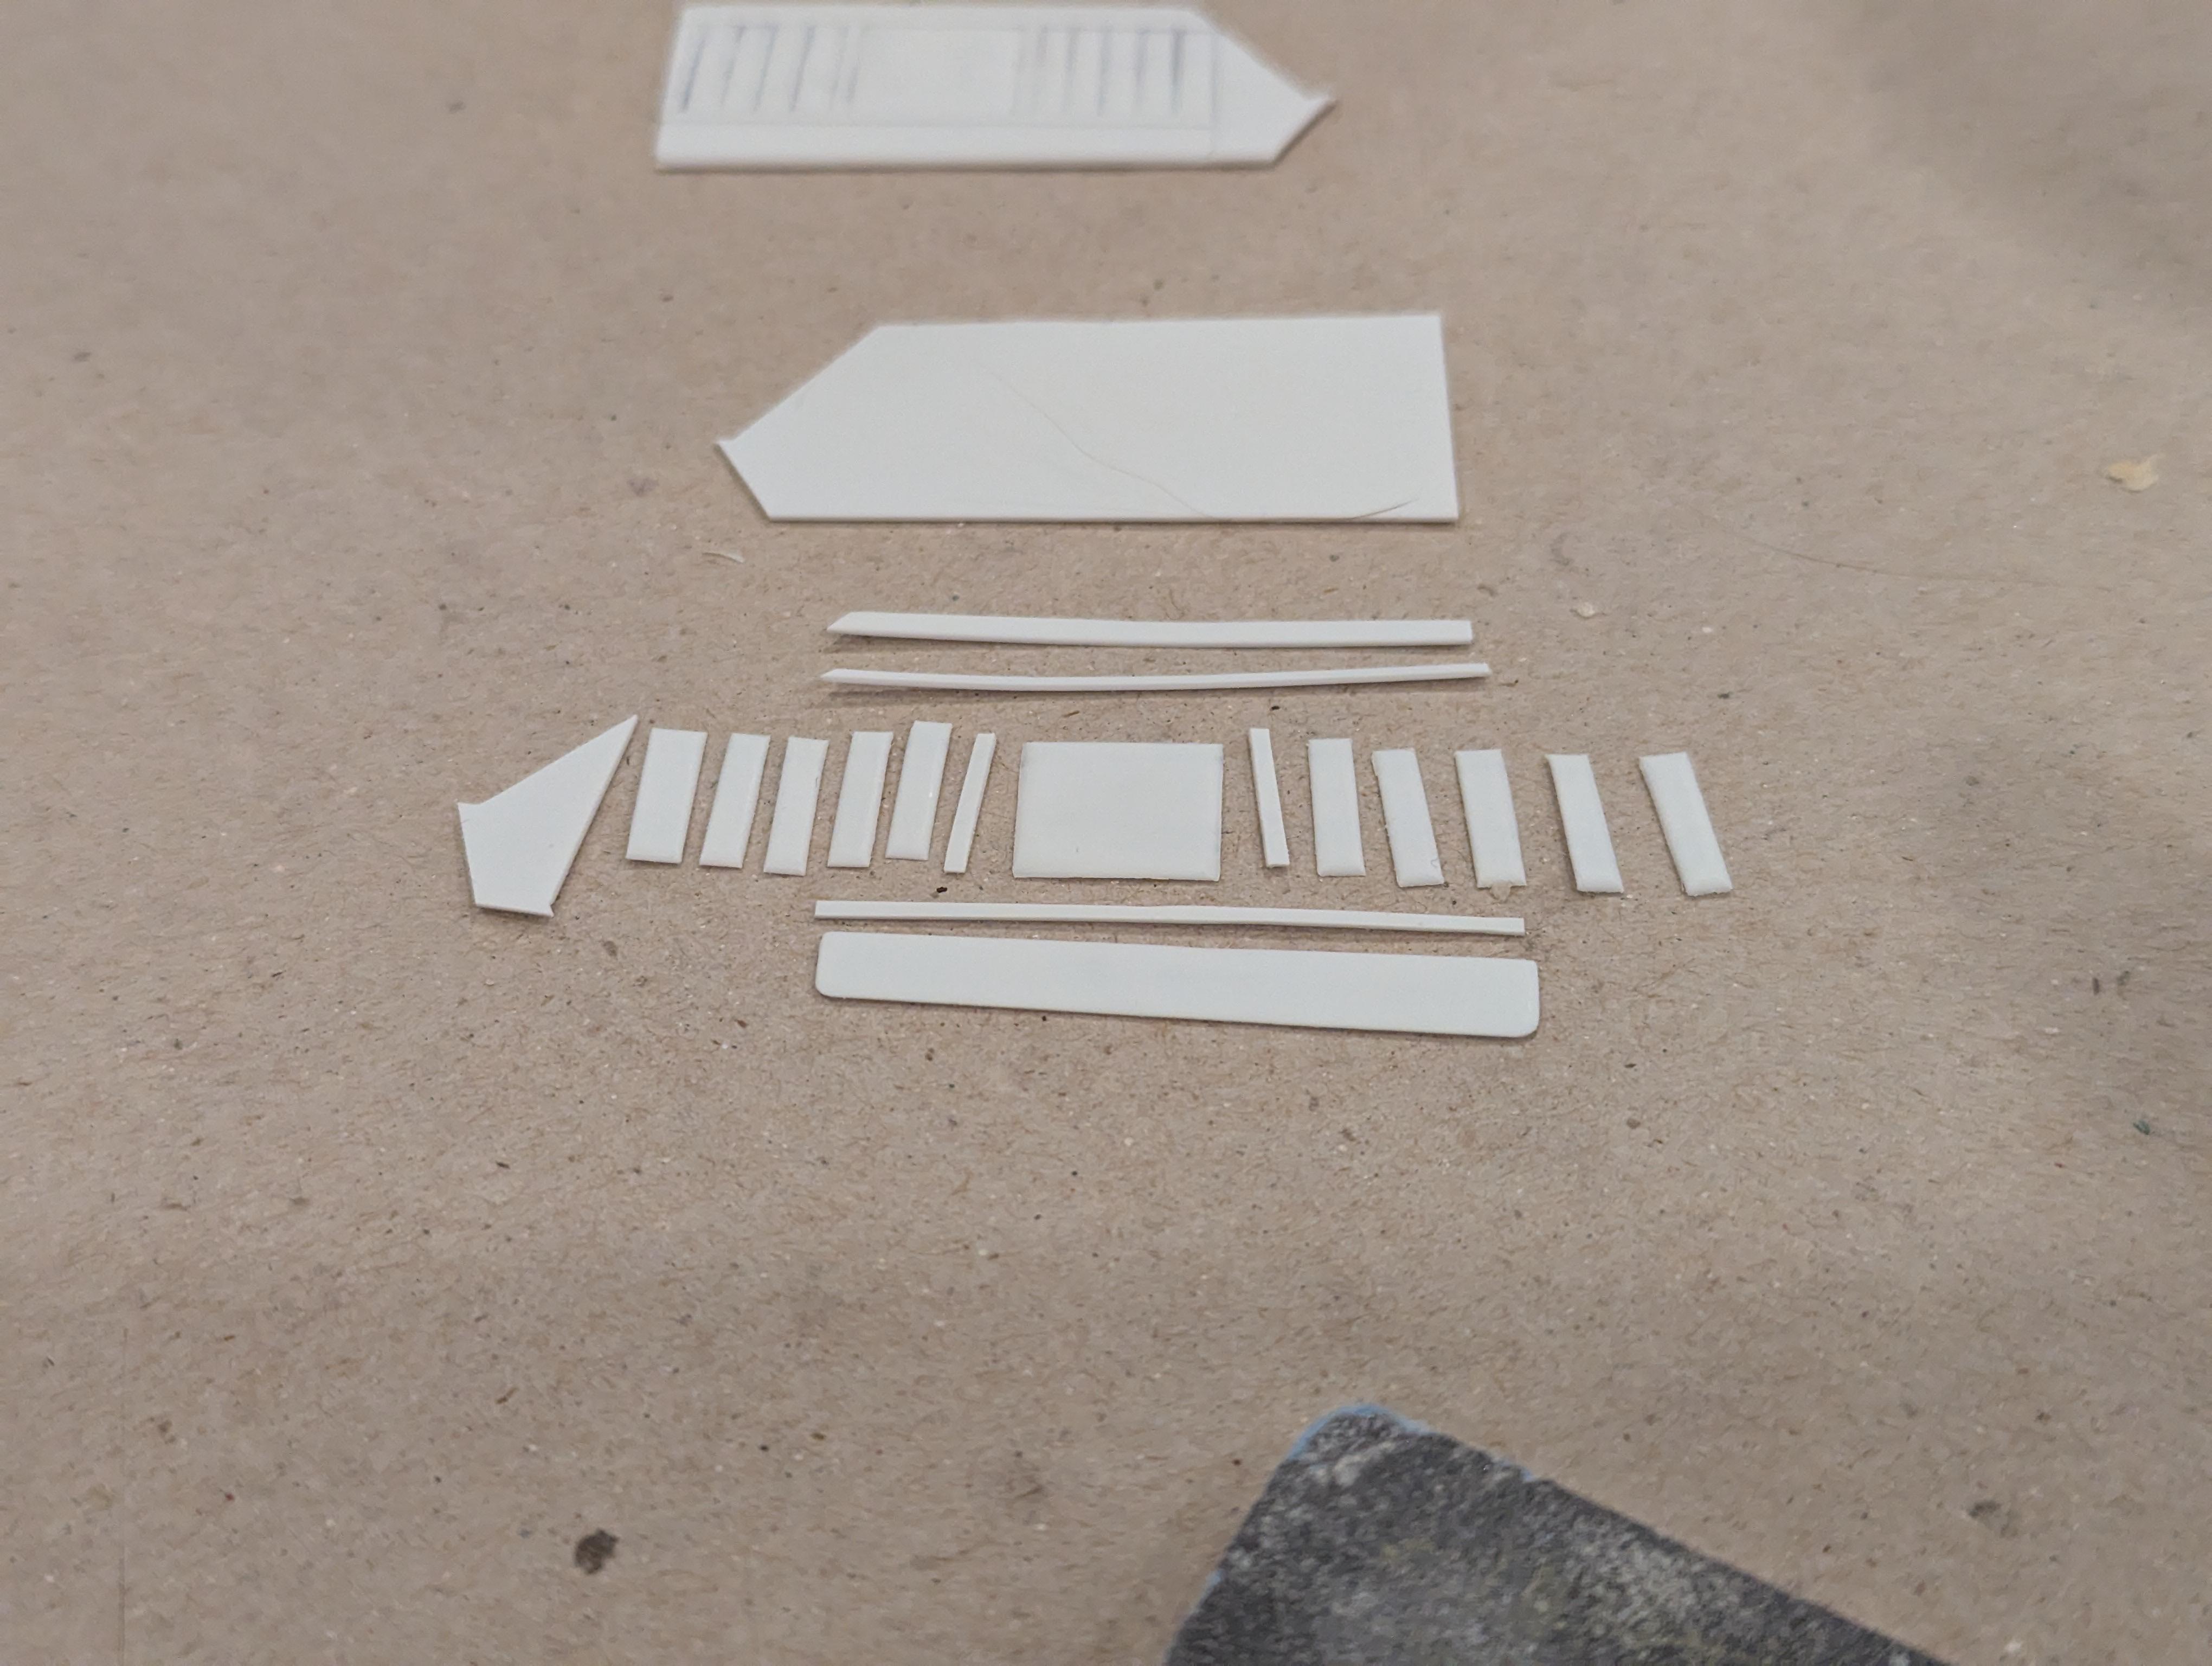
I guess I'm just a glutton for punishment. After thinking overnight on the door panel skins, I decided I didn't like how the scribing was coming out and I'm taking a different tack. Instead of trying to make them out of a single sheet, I cut out all of the various upholstered panels and trim pieces and sanded all of the edges down to a nice profile. I then carefully glued them all down to another backing piece. I'm super happy with how it came out, now I just need to do it all over again for the passenger side.
-
'57 El Nomado
JNordgren42 replied to customline's topic in WIP: Model Trucks: Pickups, Vans, SUVs, Light Commercial
Fantastic work! I have the same case of NSBS (No Stock Builds Syndrome ?), I spent the day scratch building a new detailed rear cabin bulkhead (that will barely be visible) on my '64 El Camino. -
WIP: Custom AMT 1:25 1964/65 Chevy El Camino
JNordgren42 replied to JNordgren42's topic in WIP: Model Cars
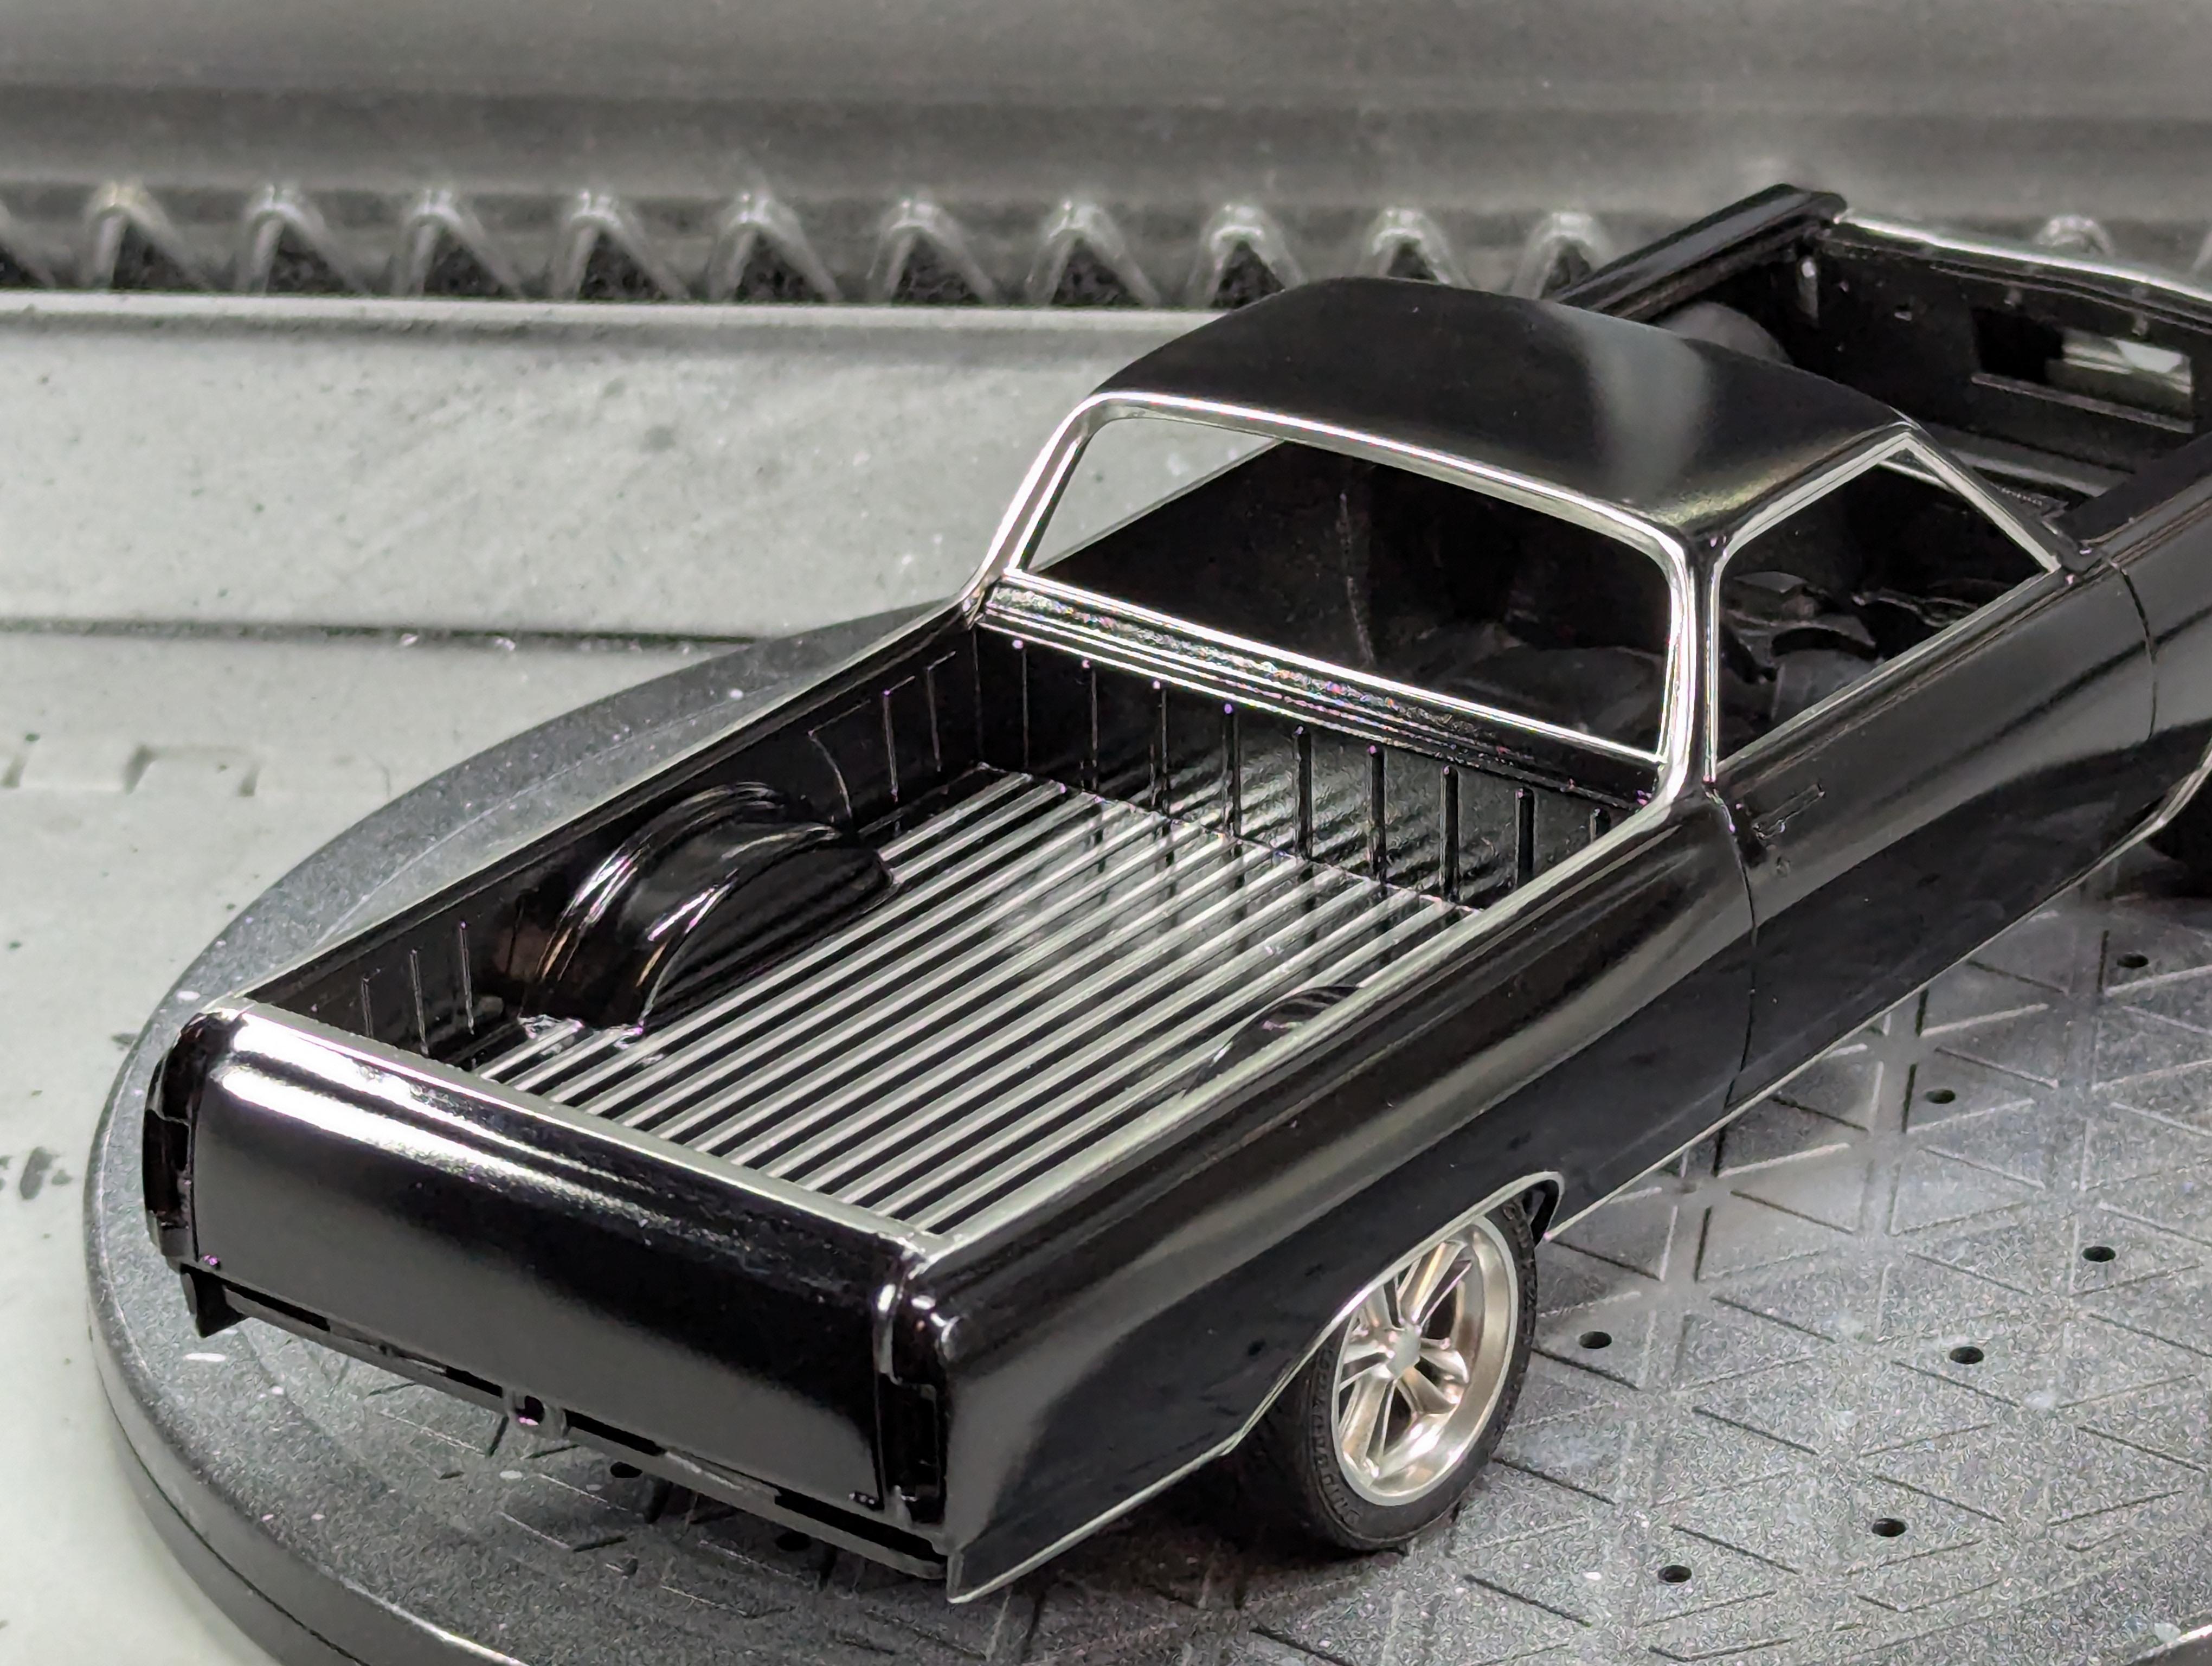
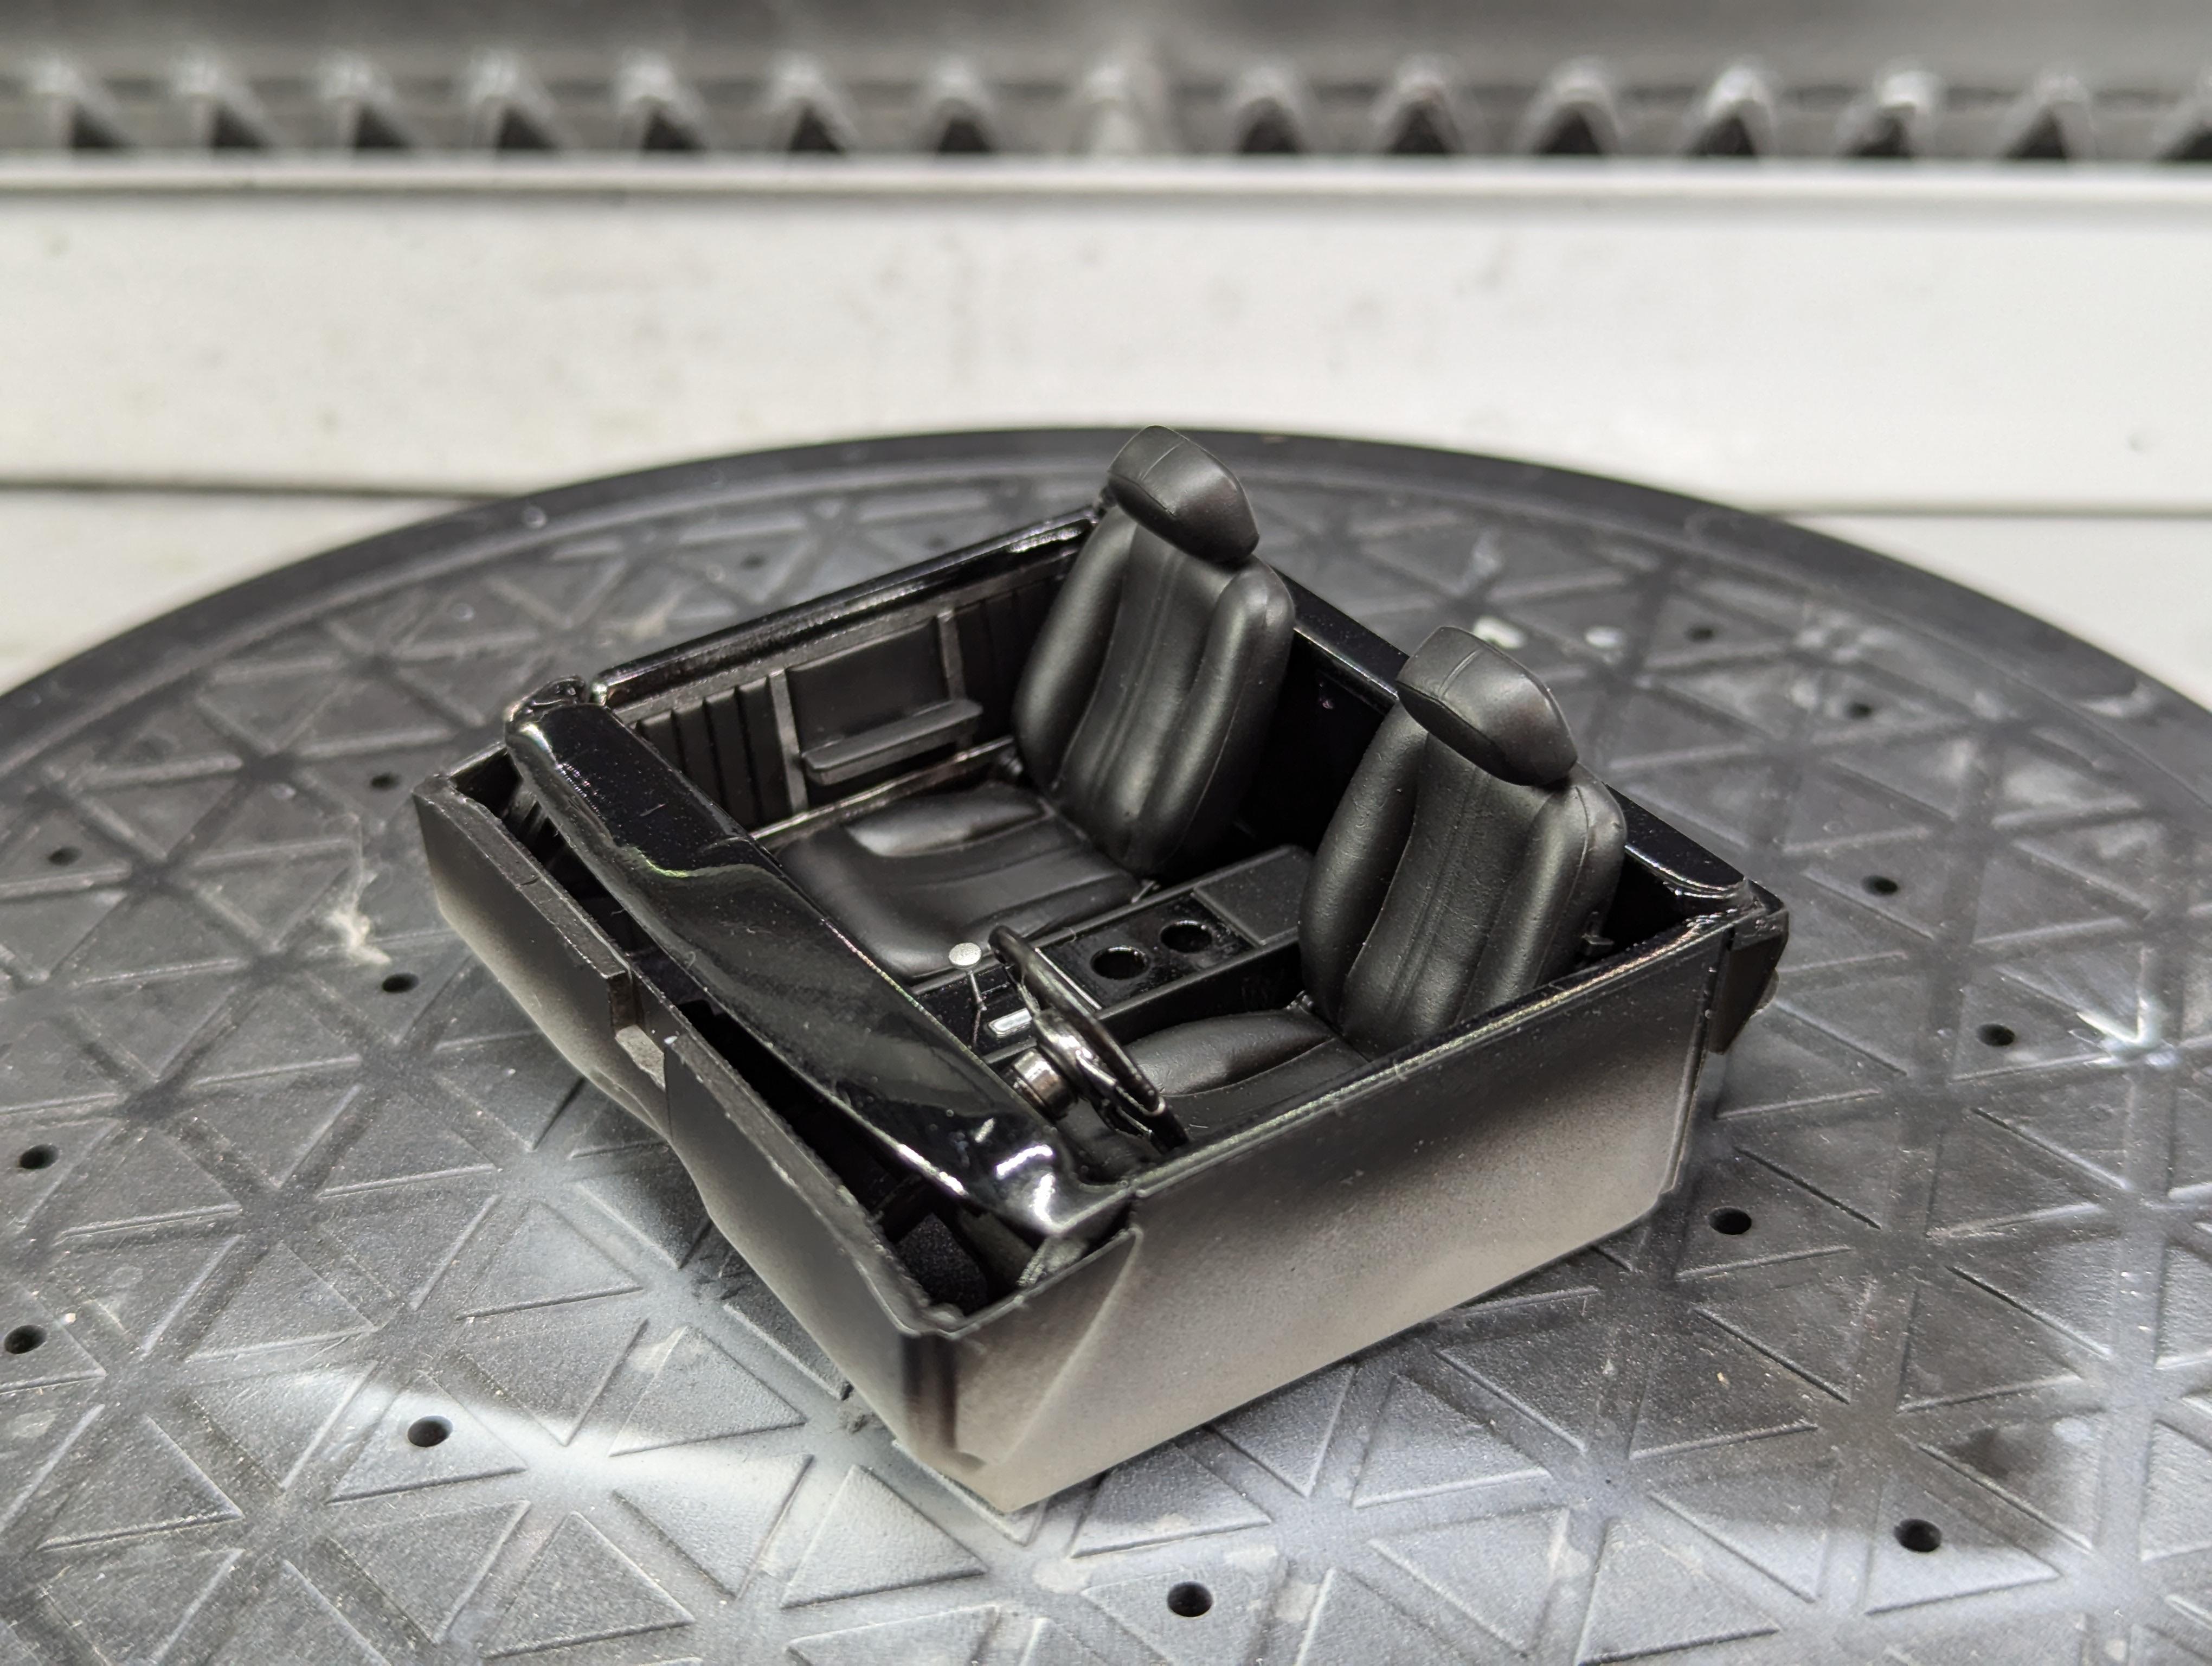
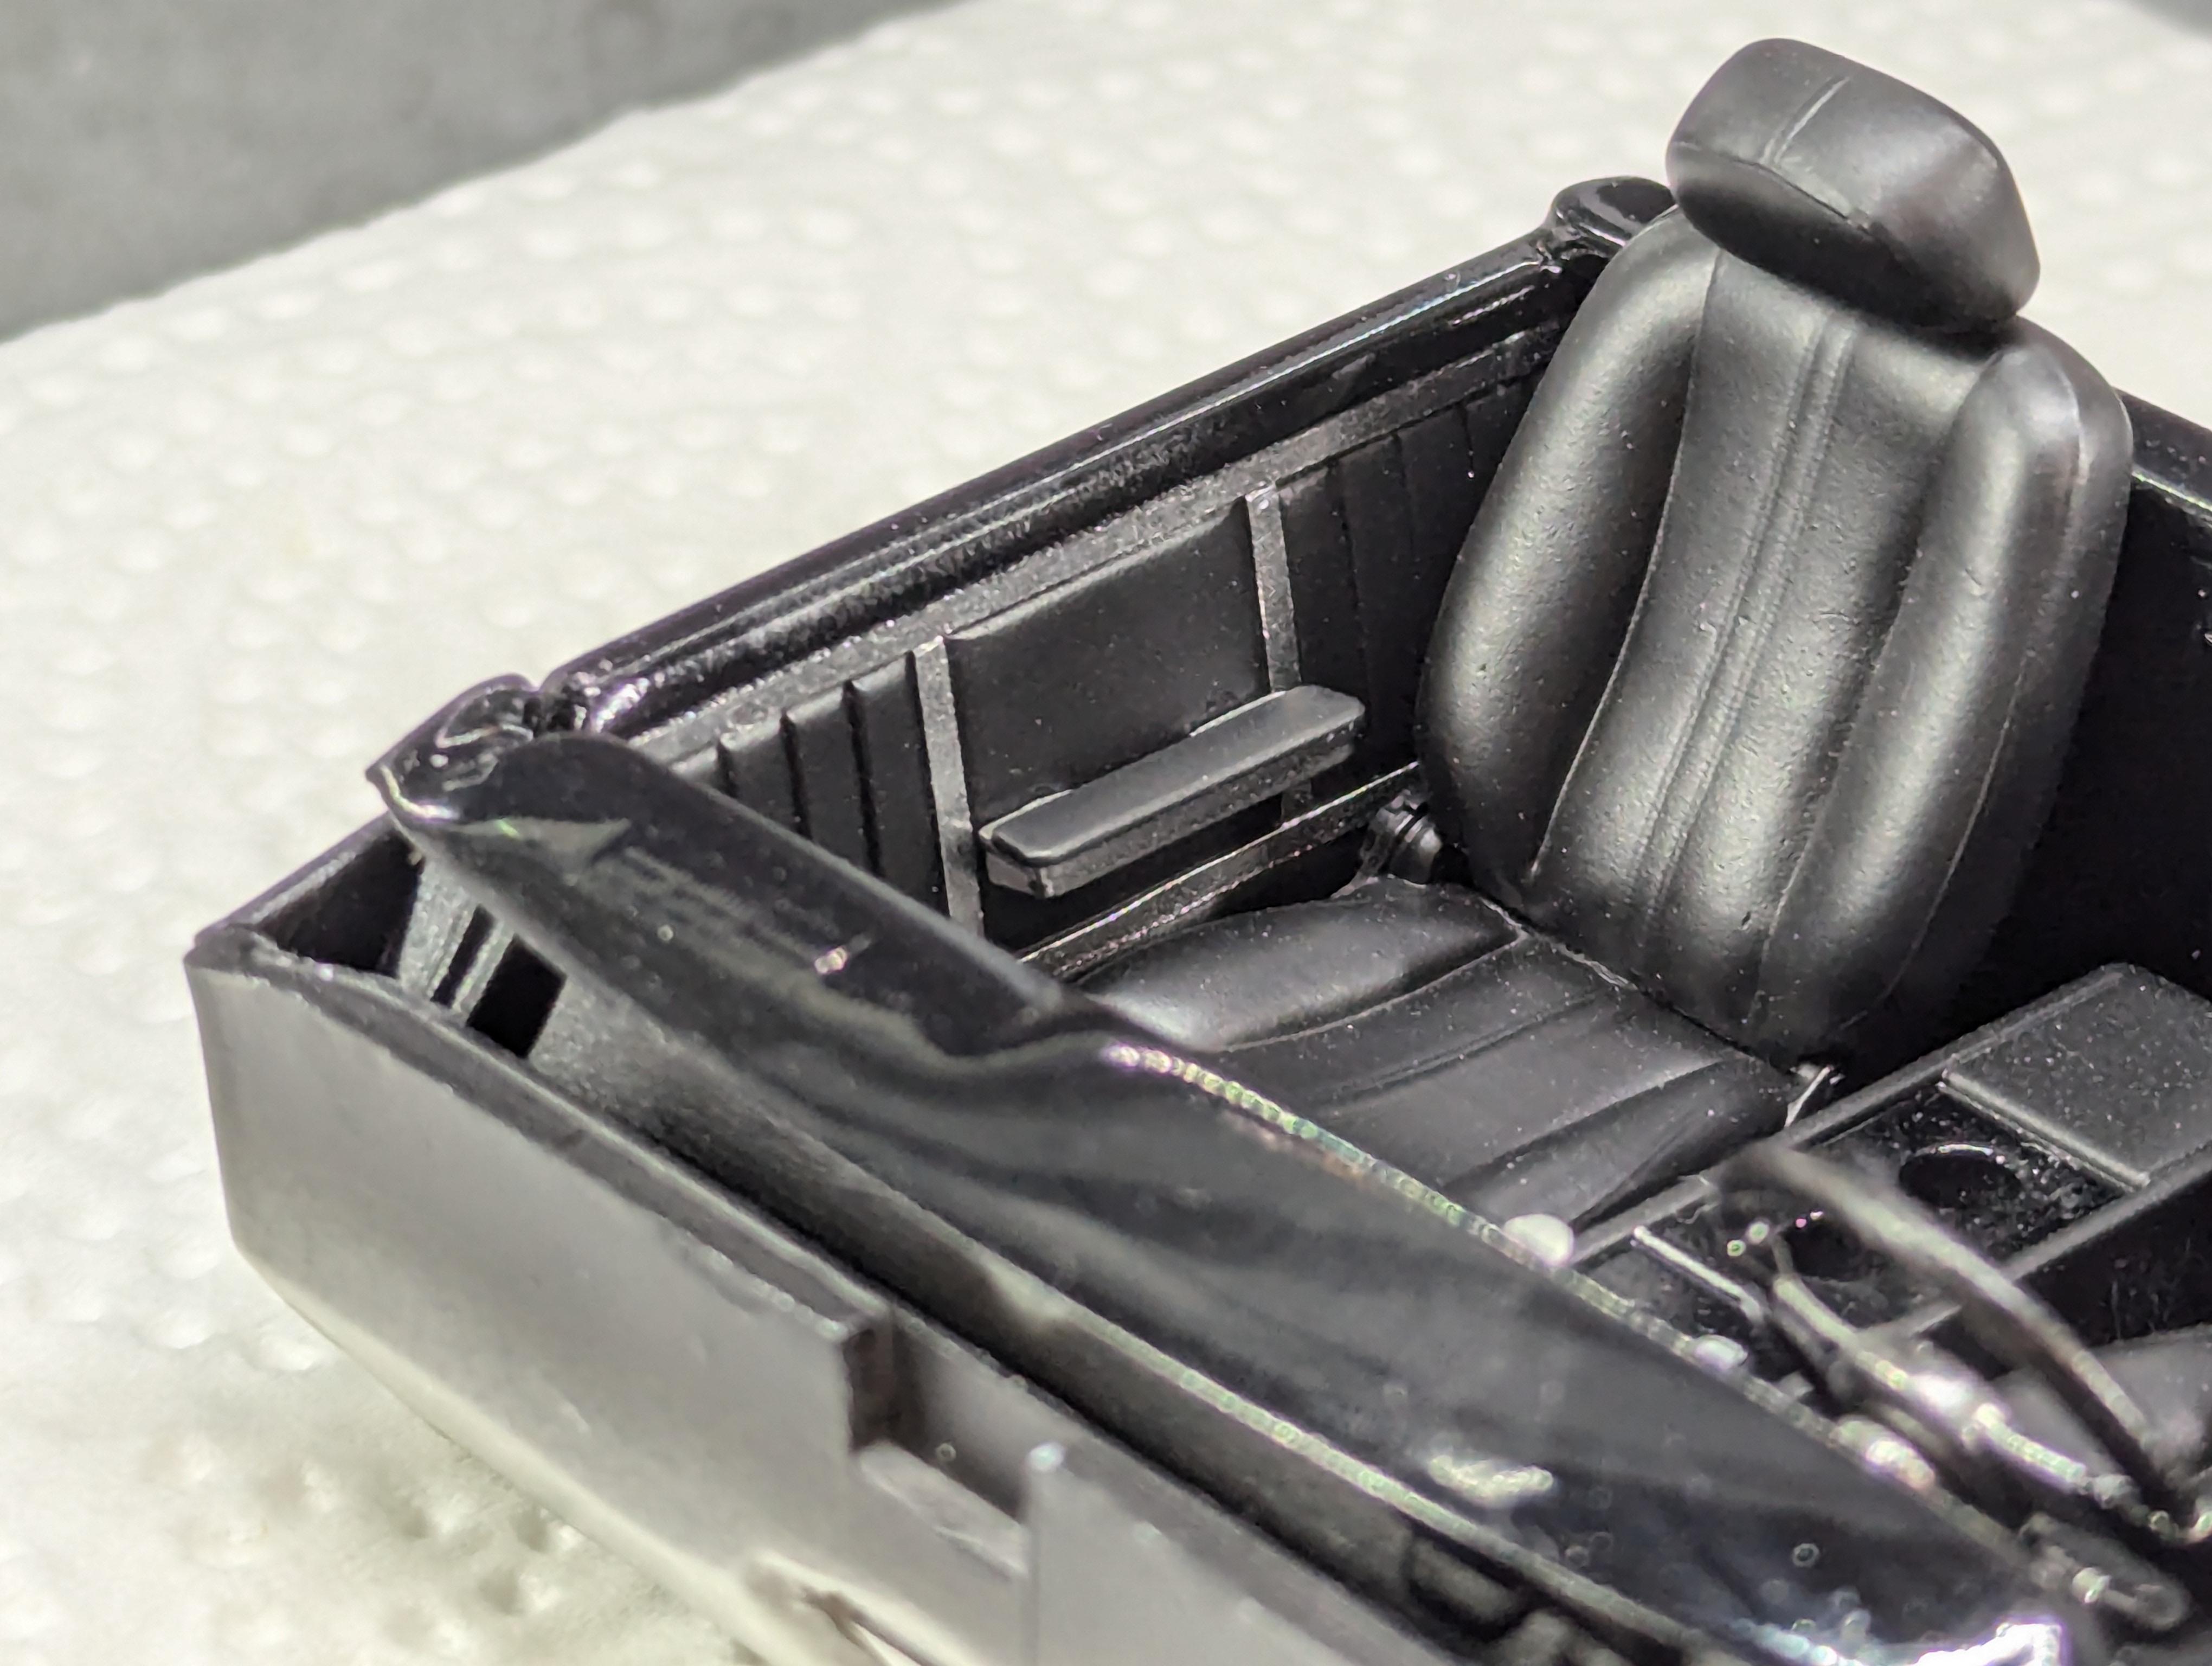
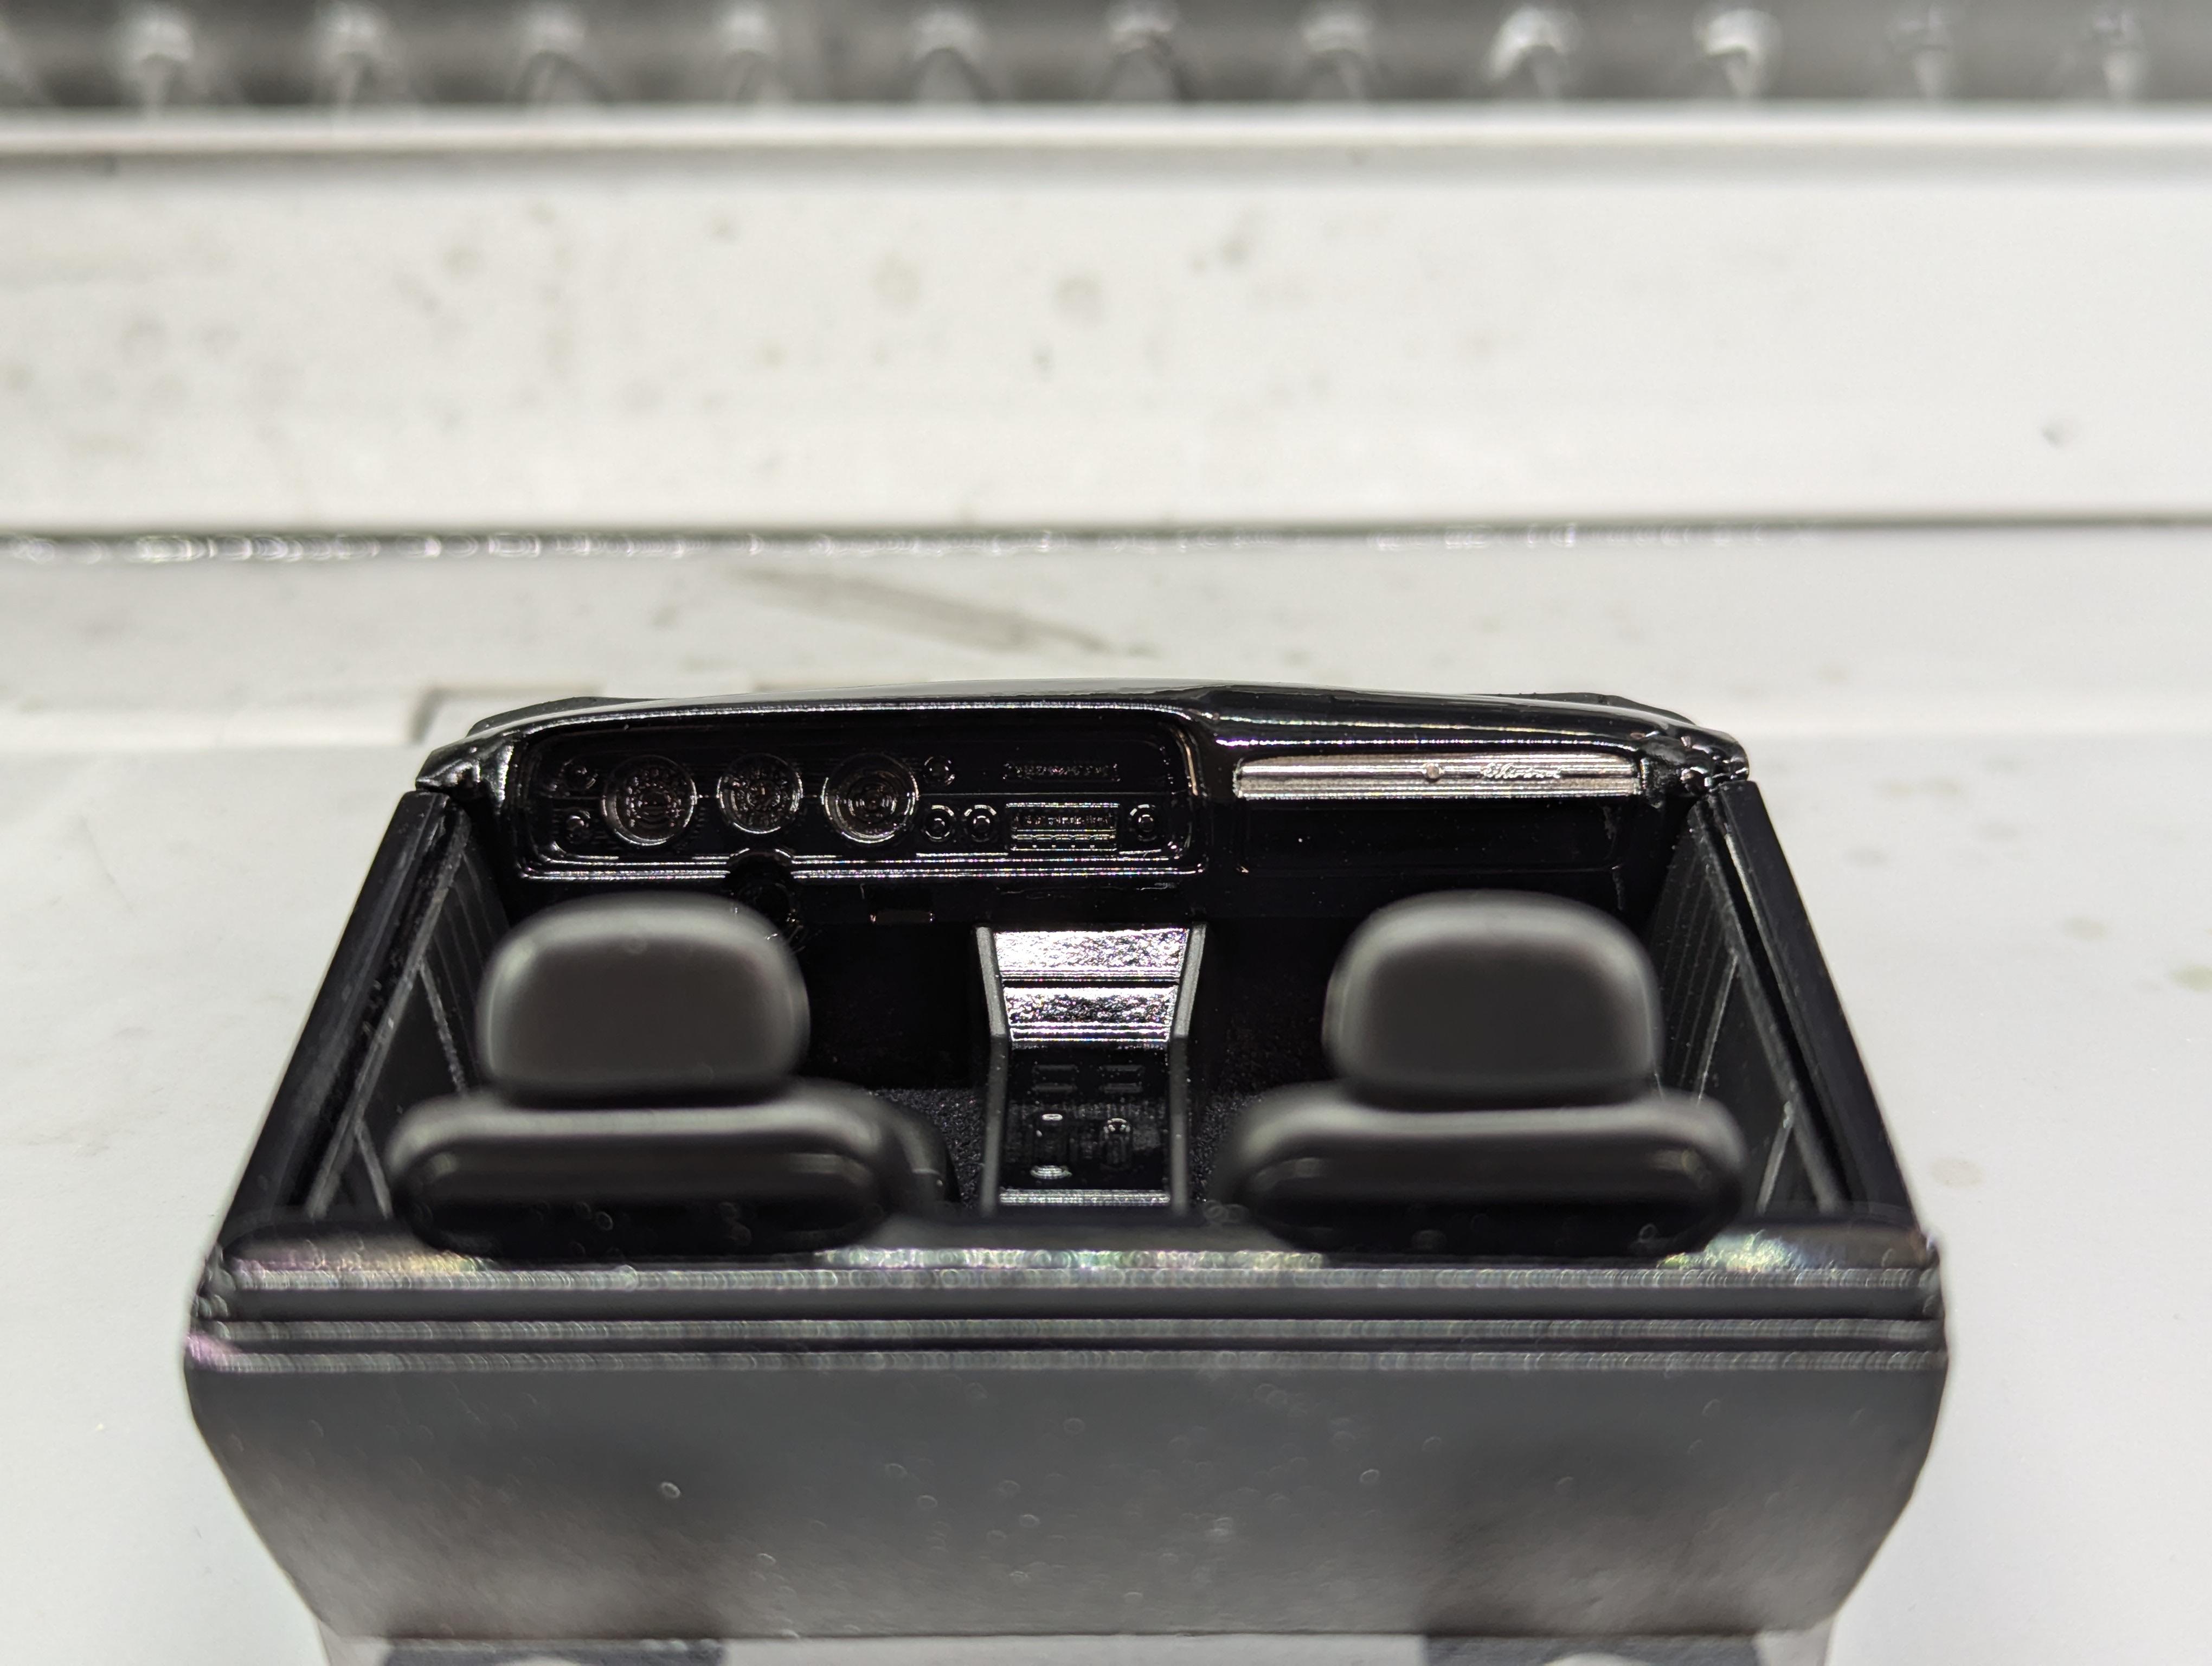
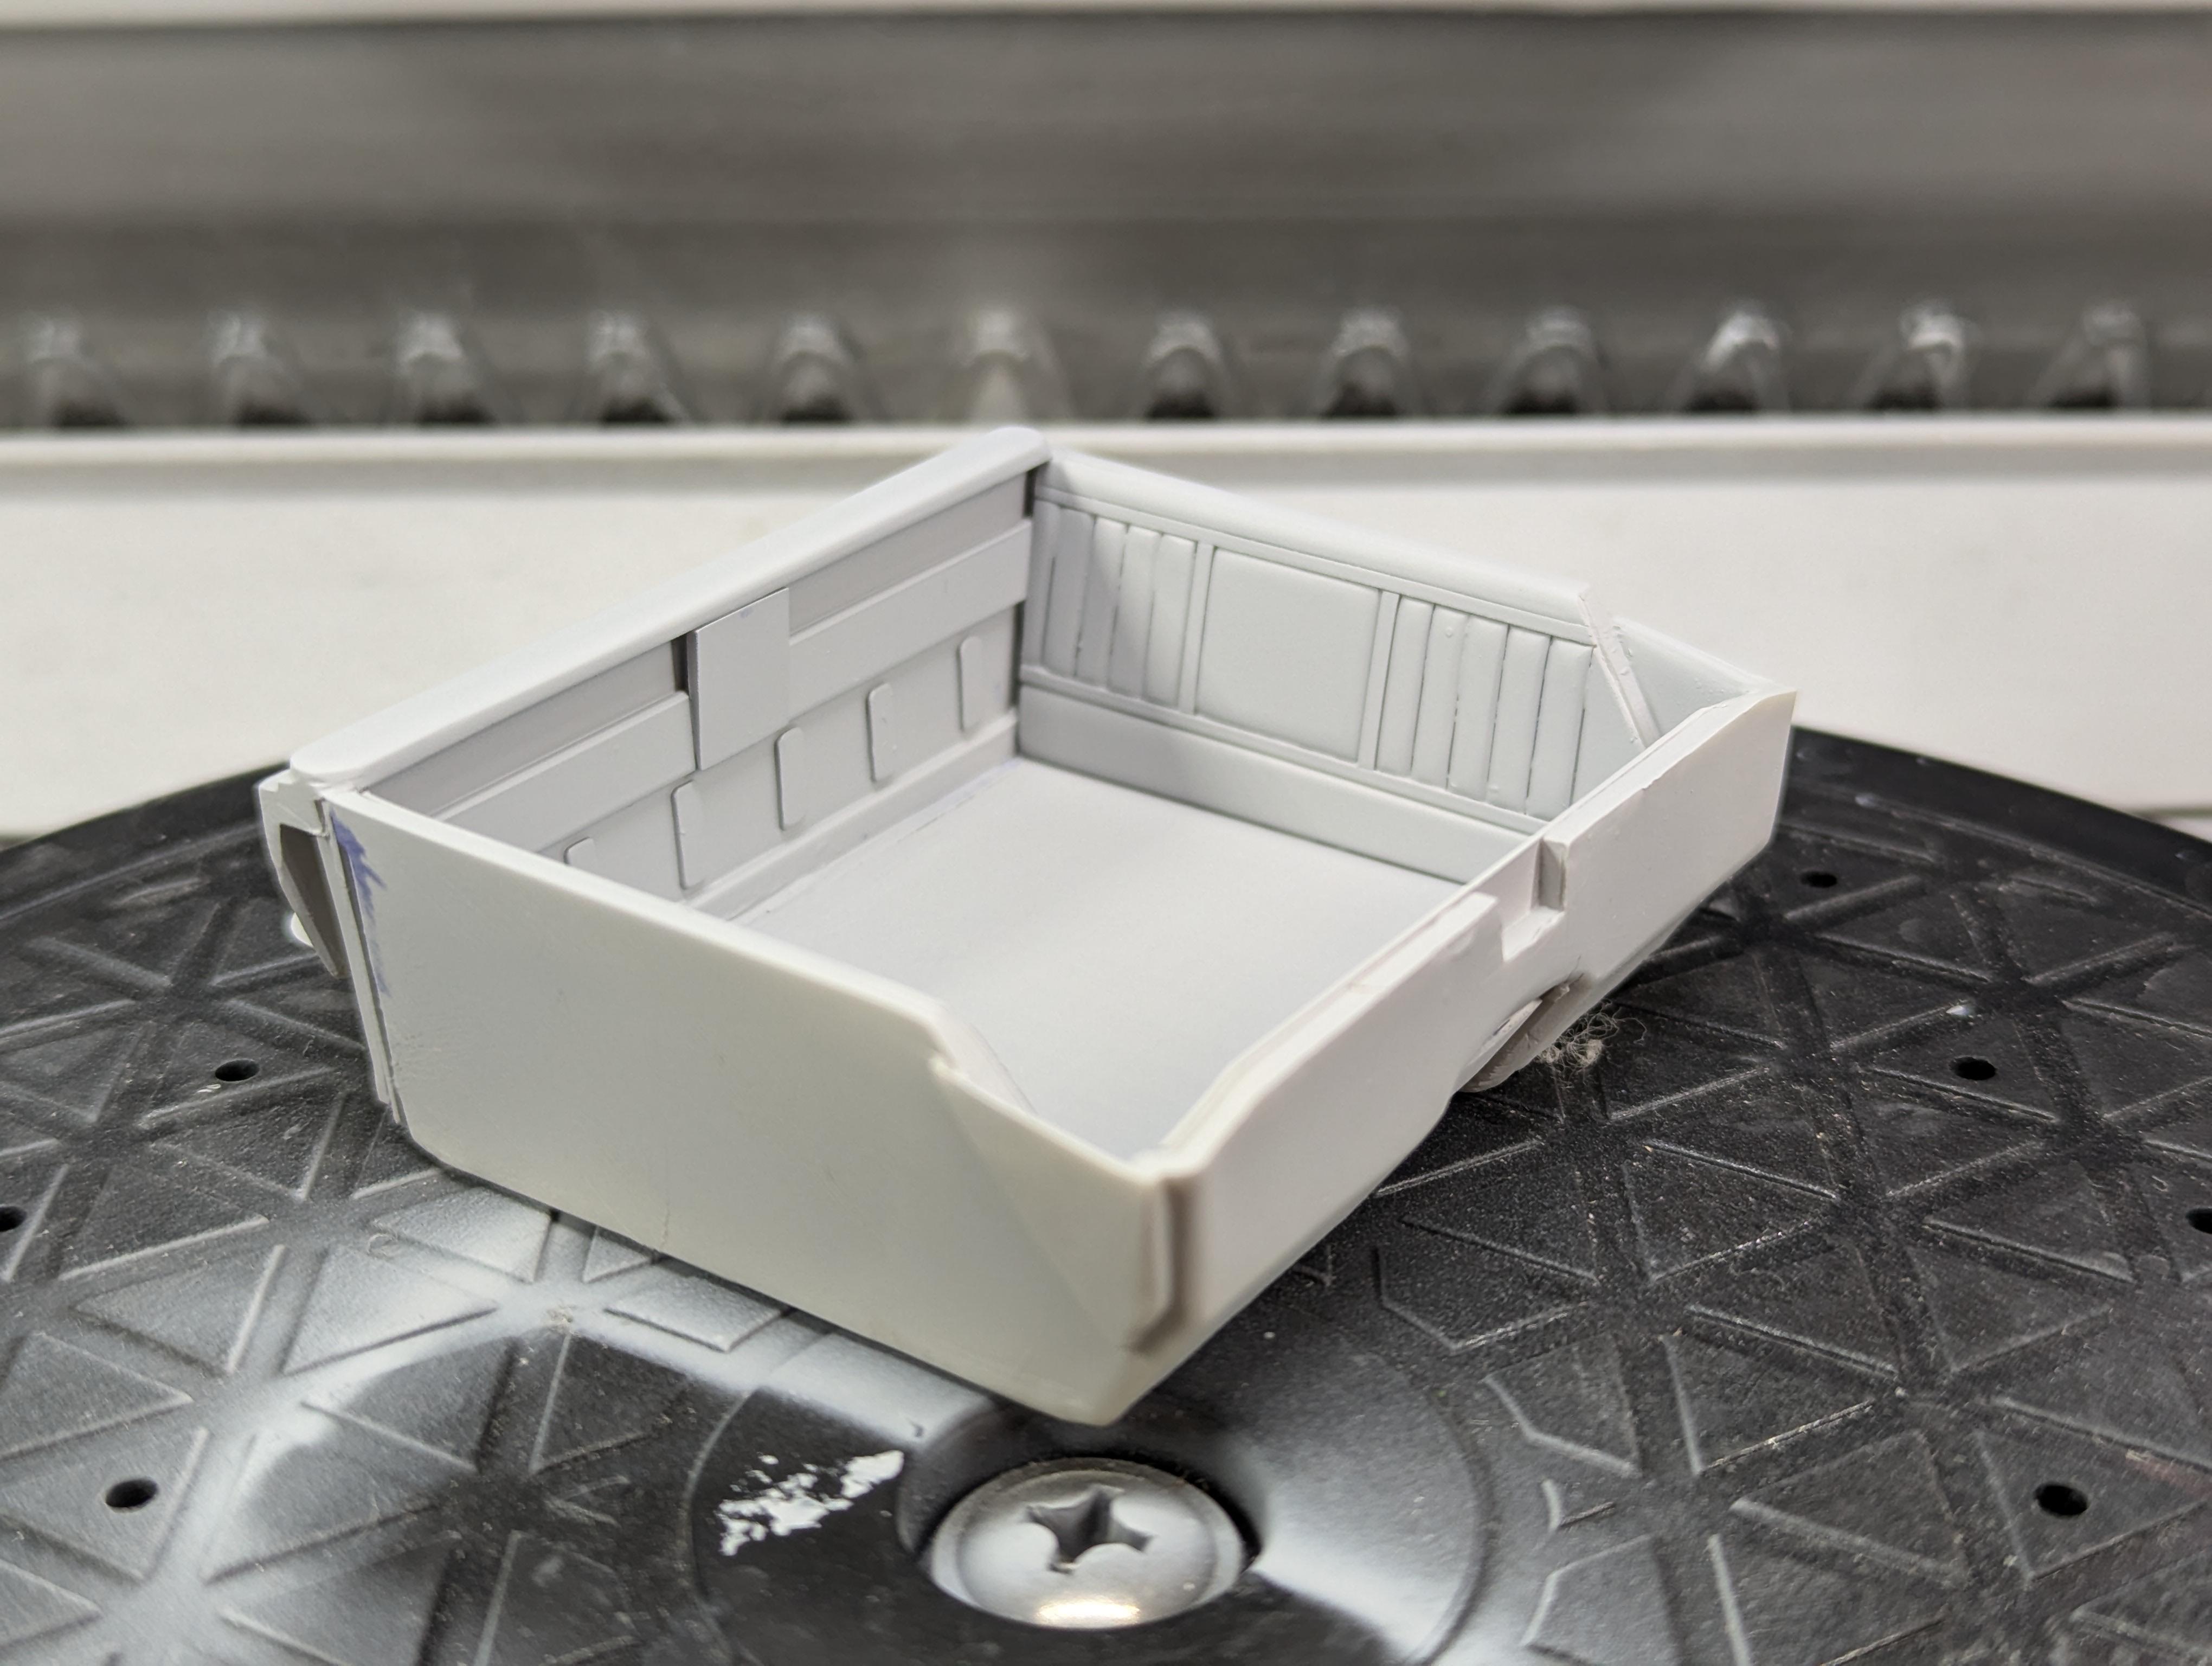
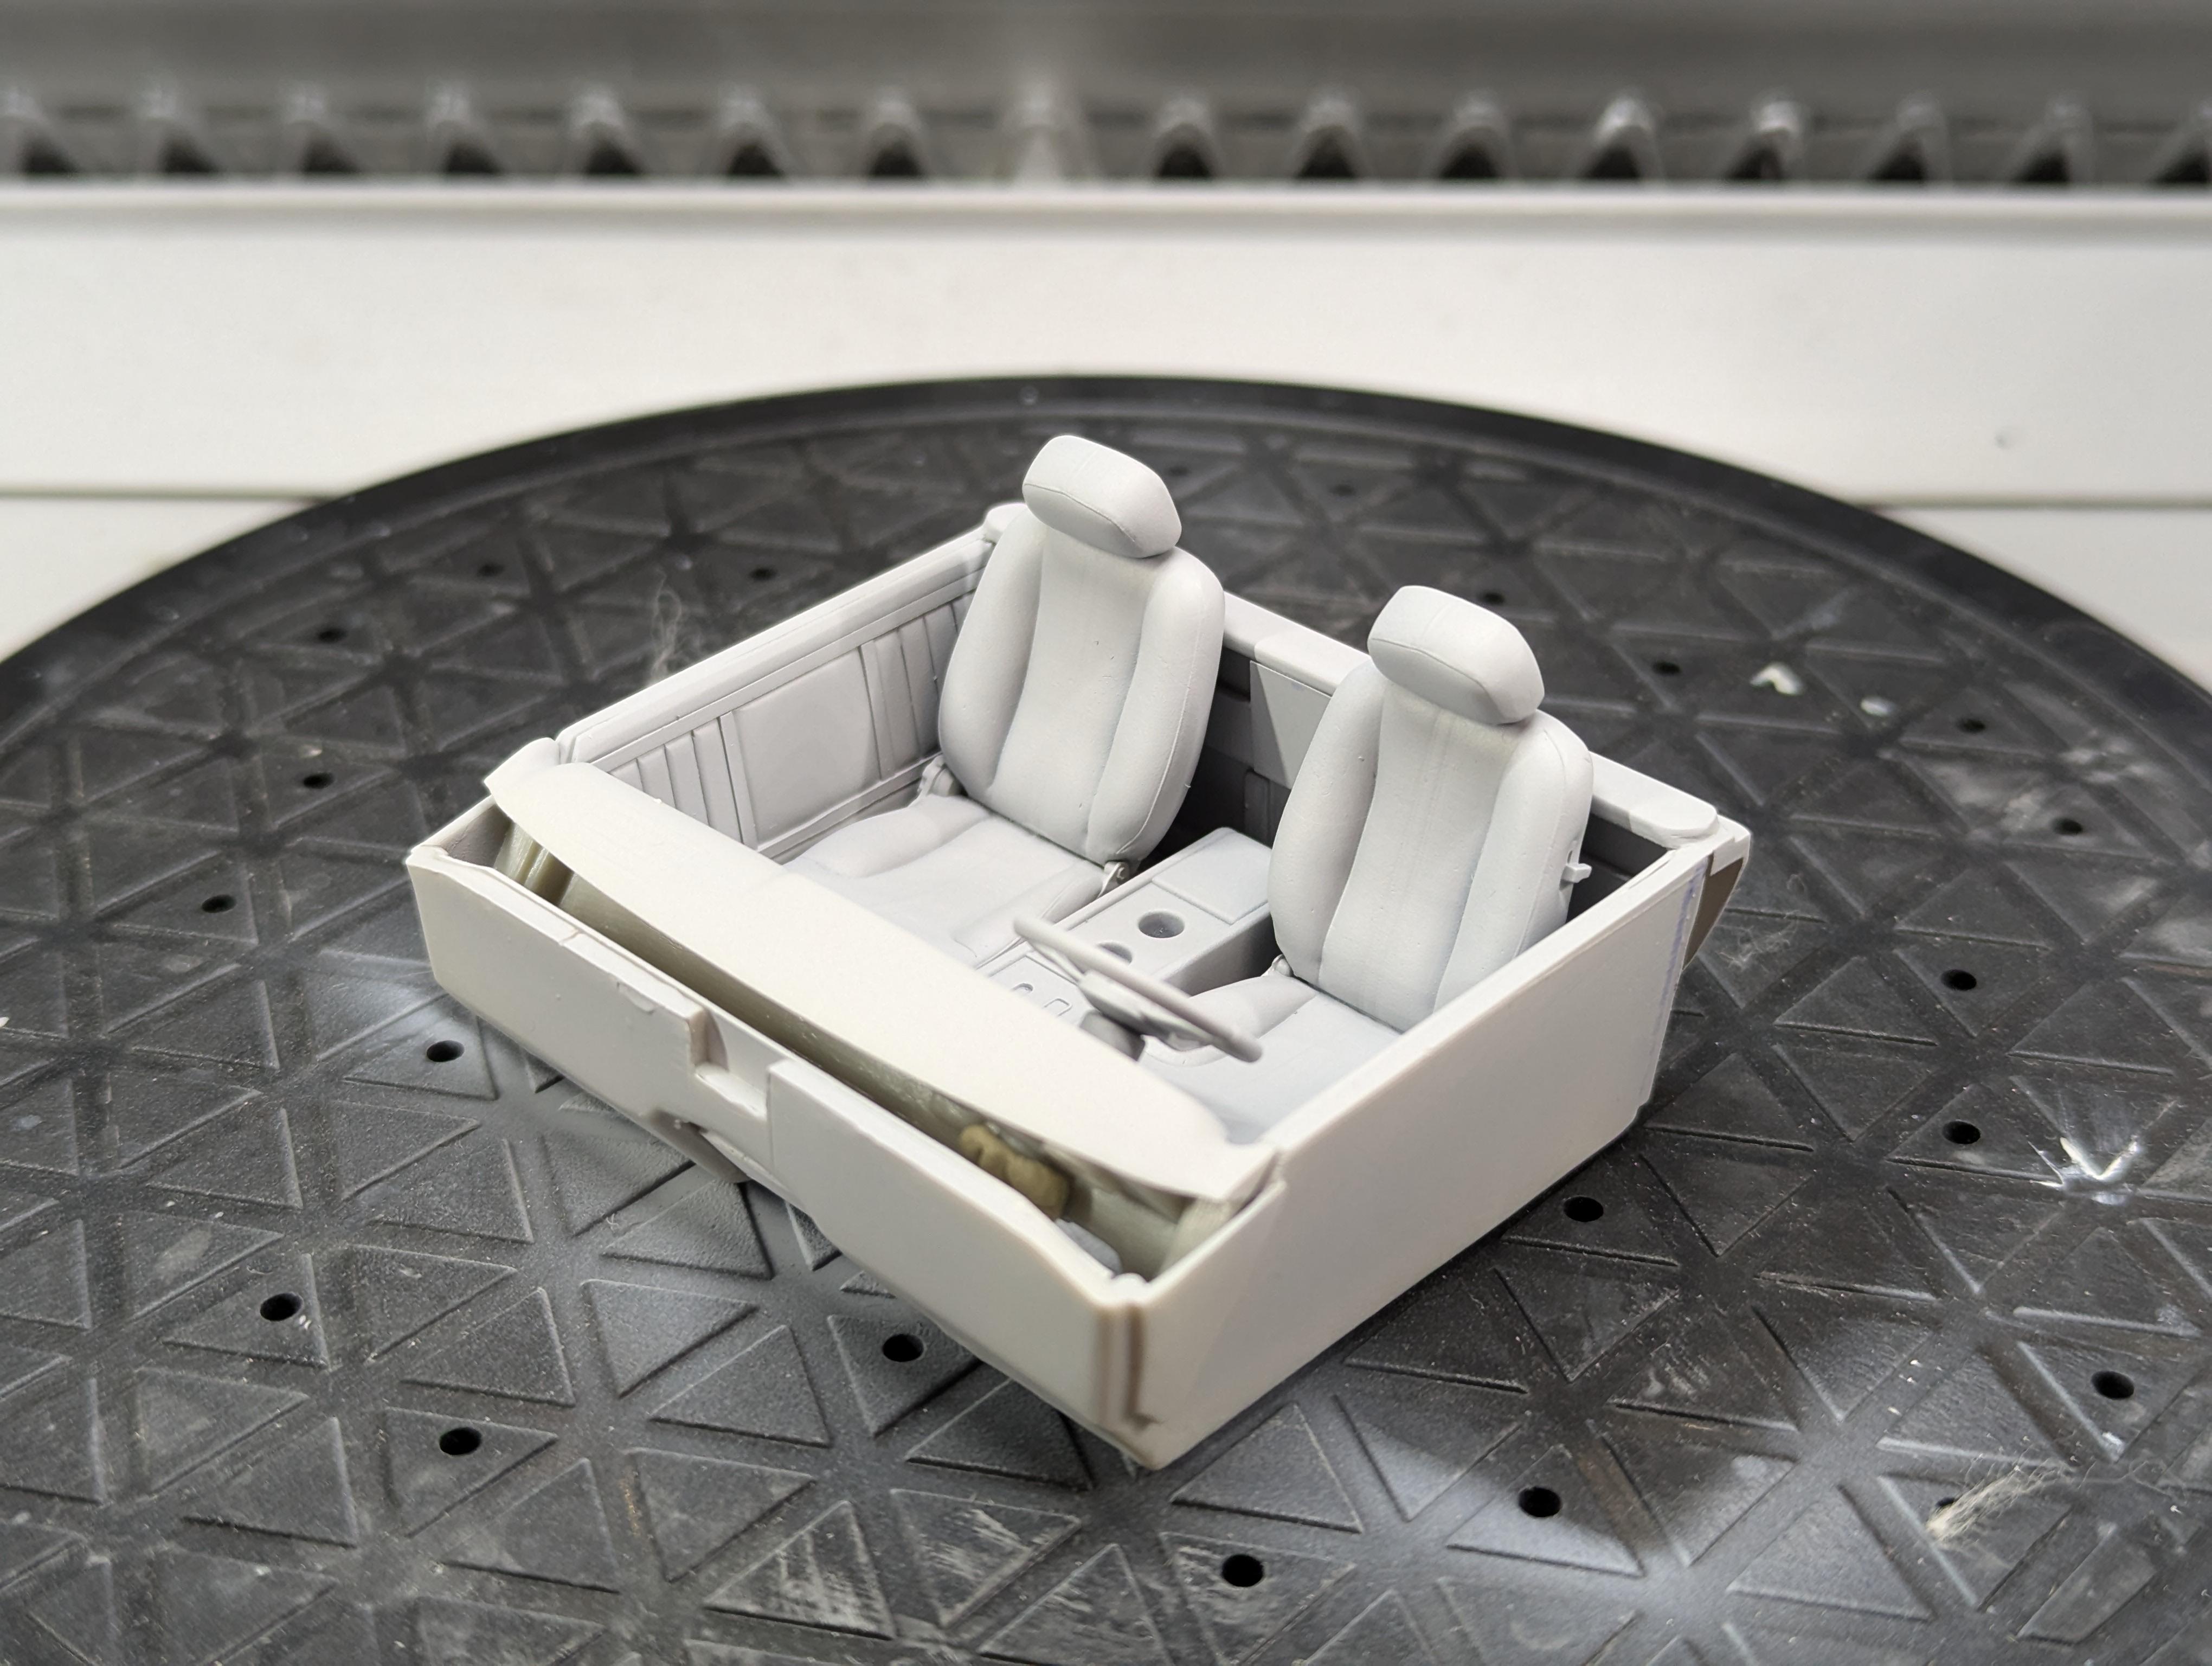
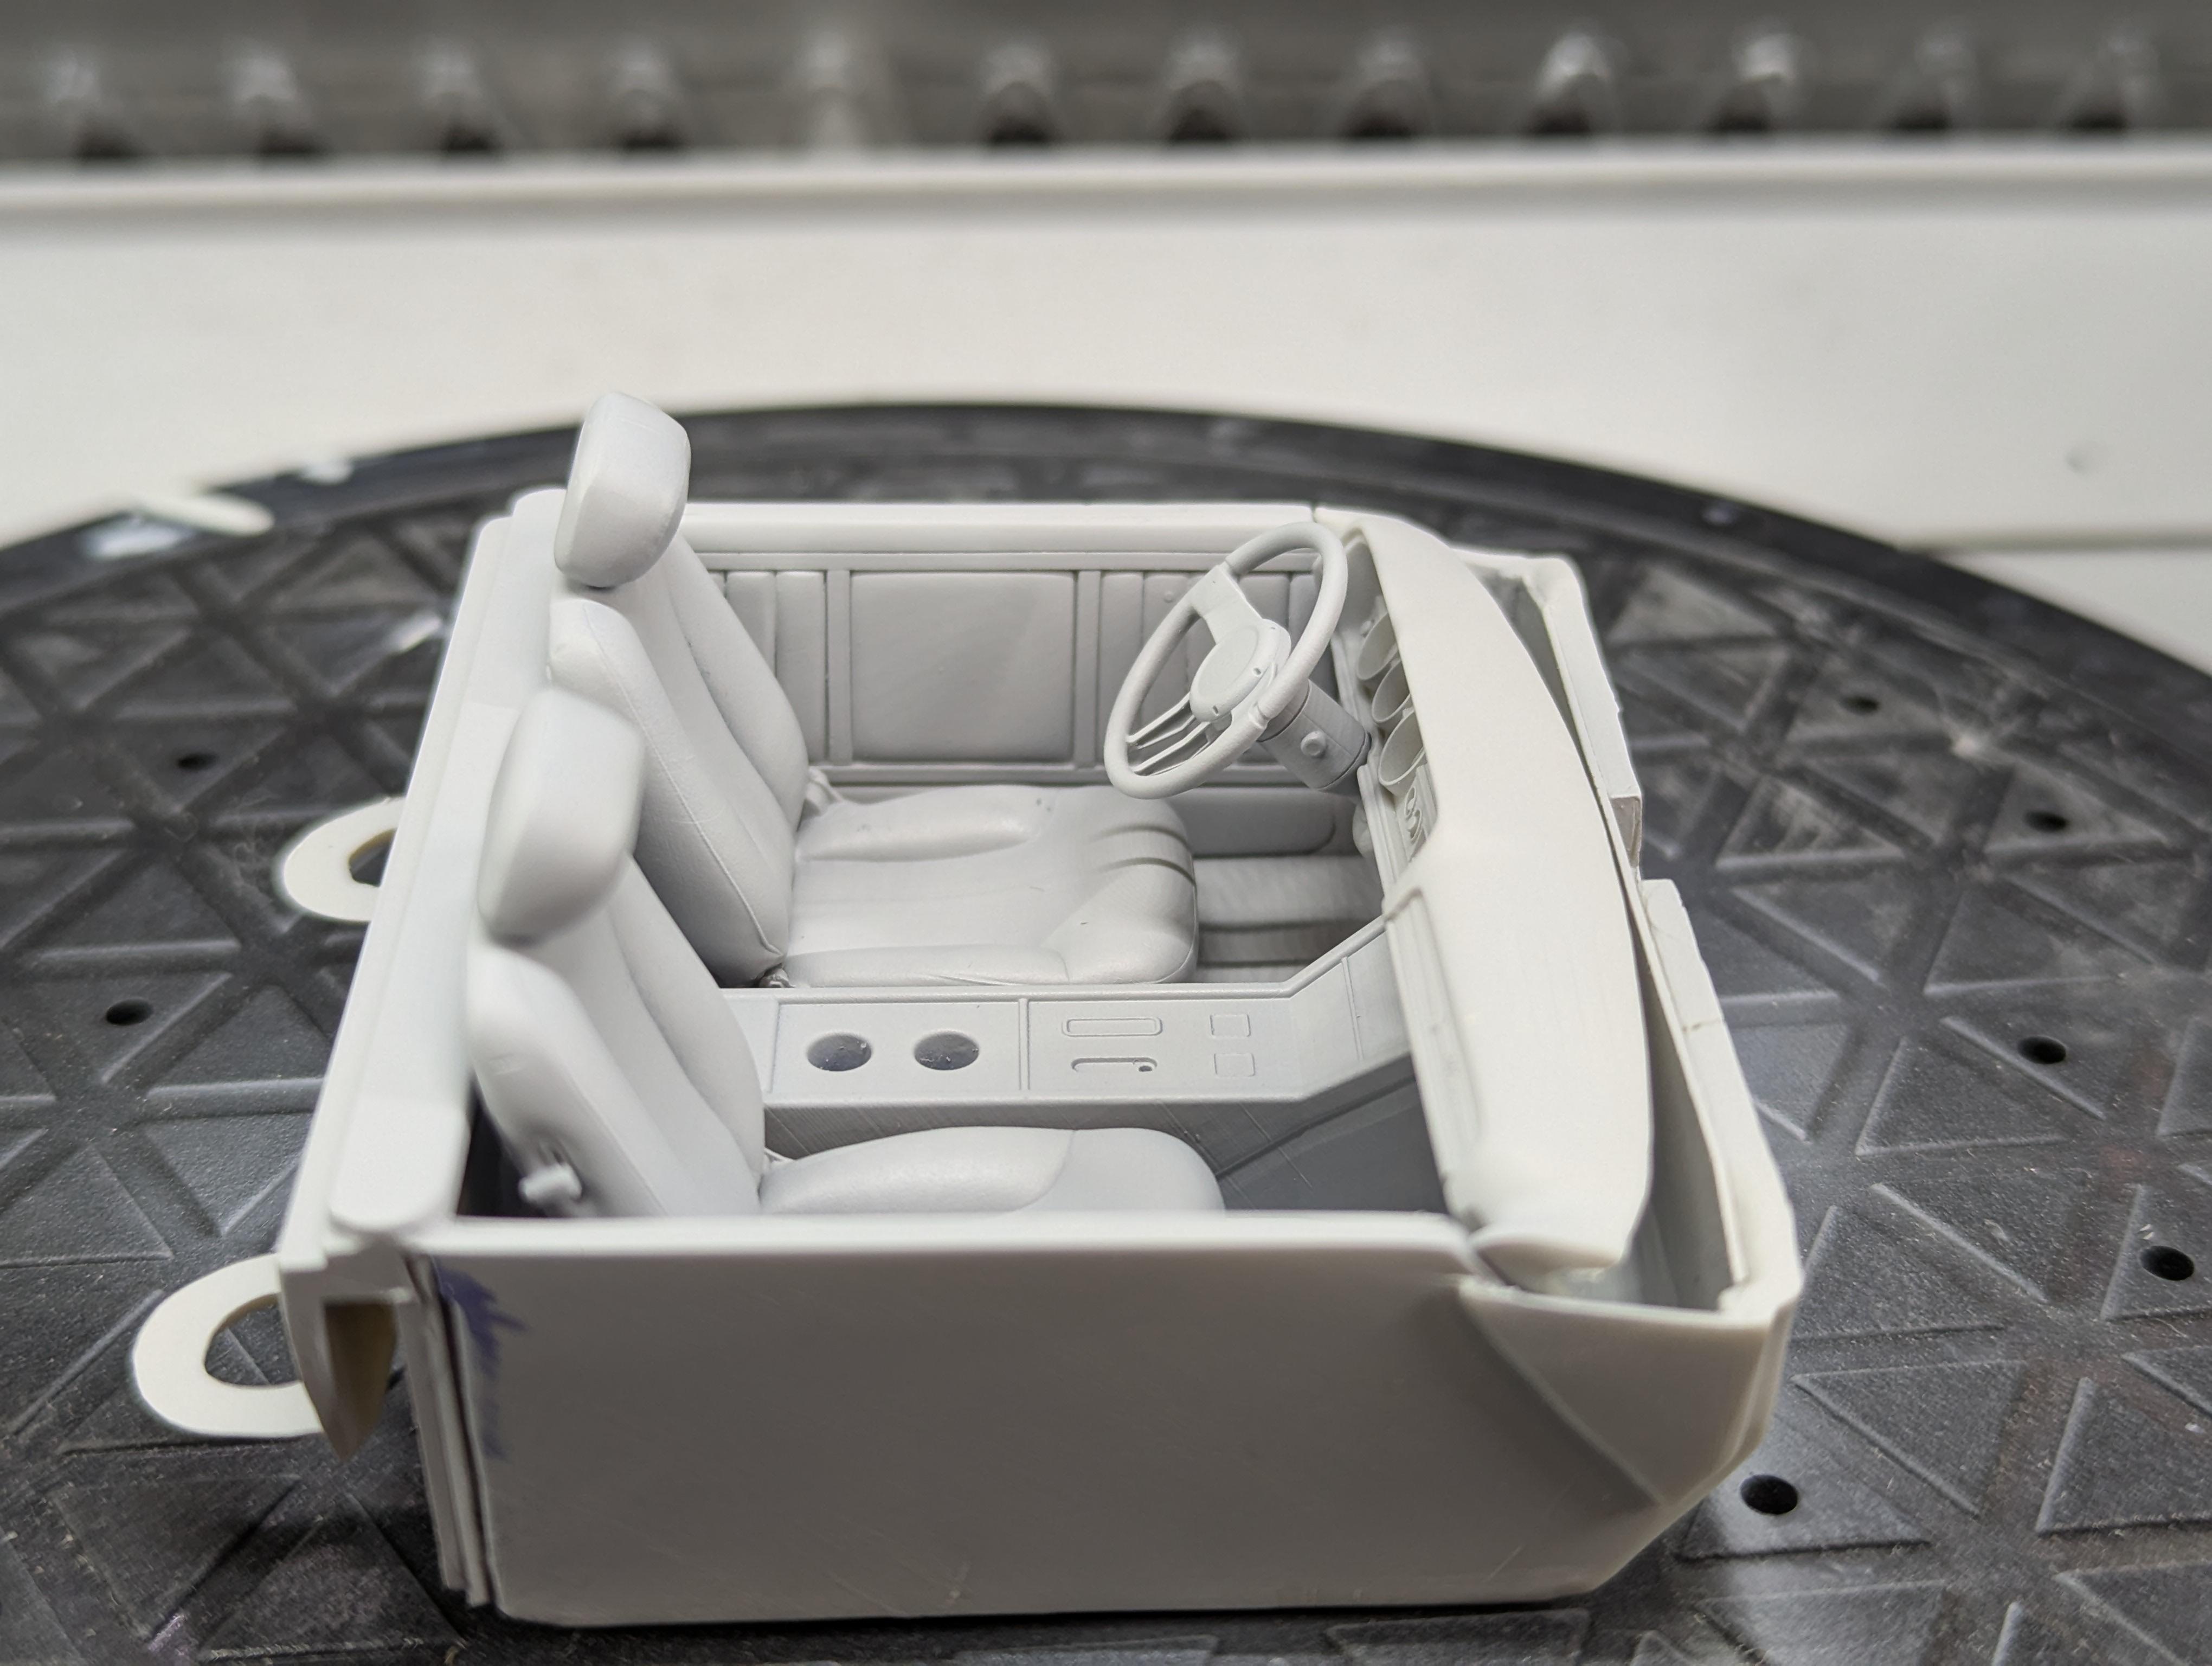
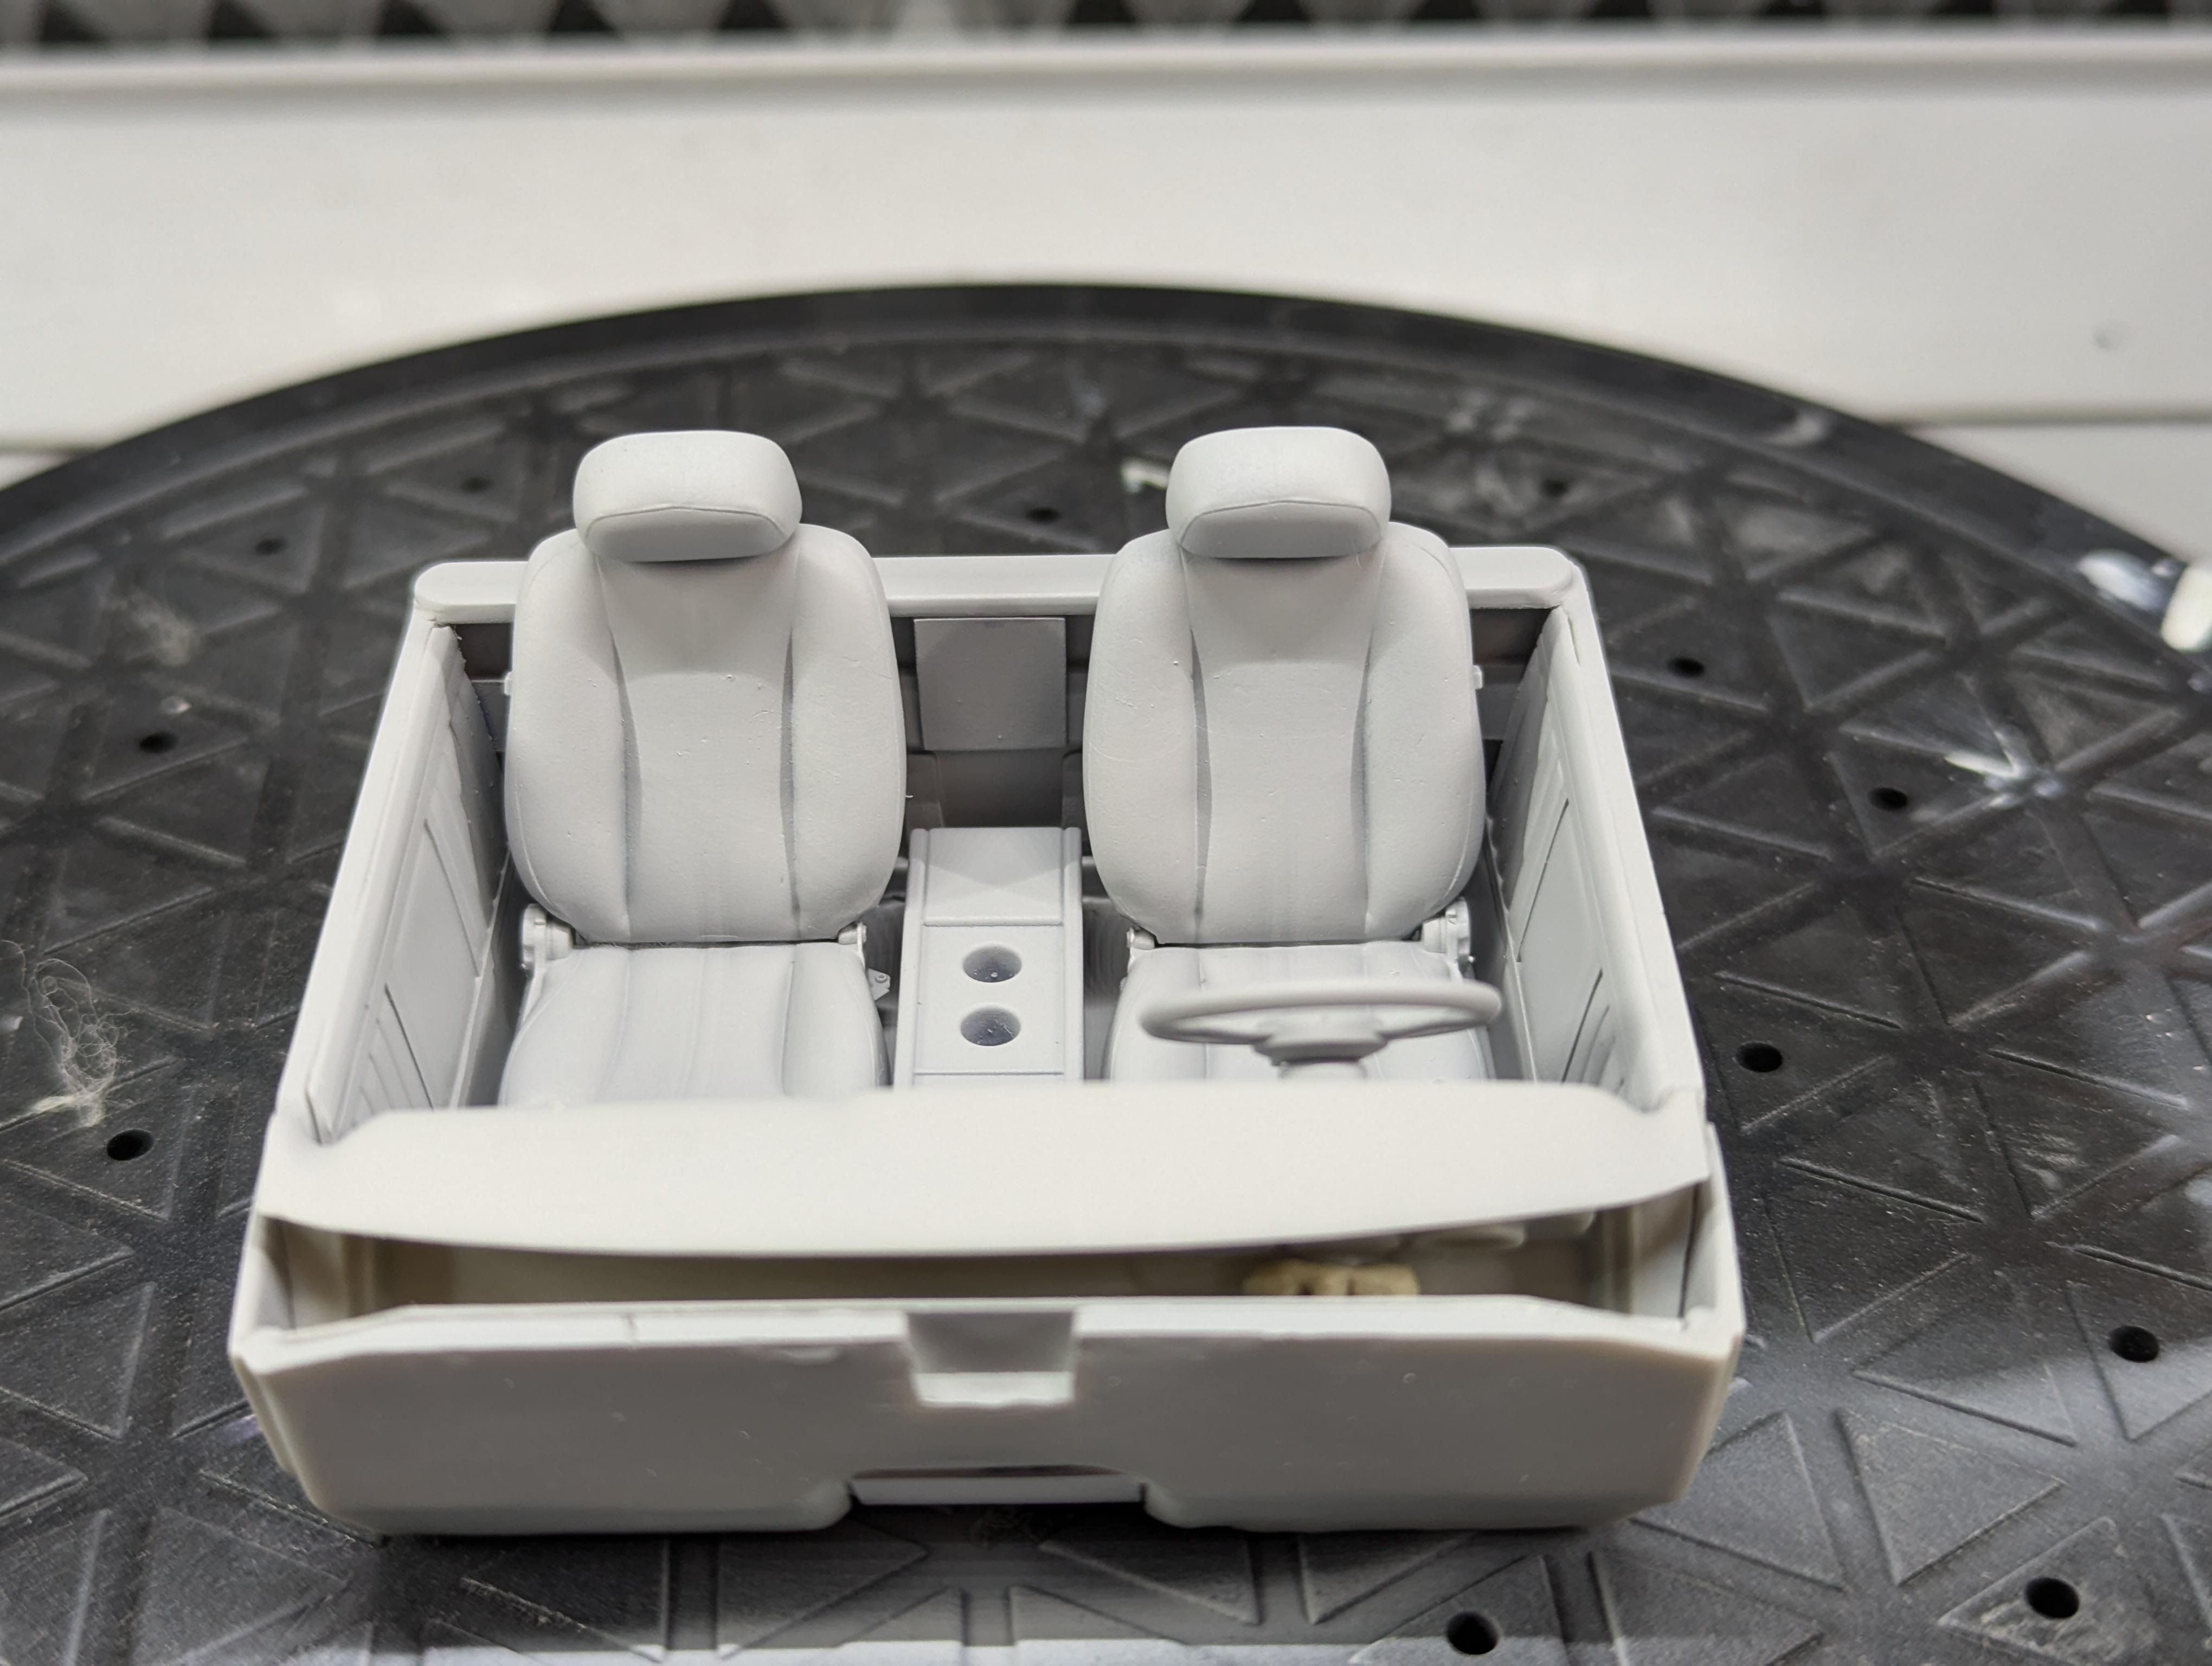
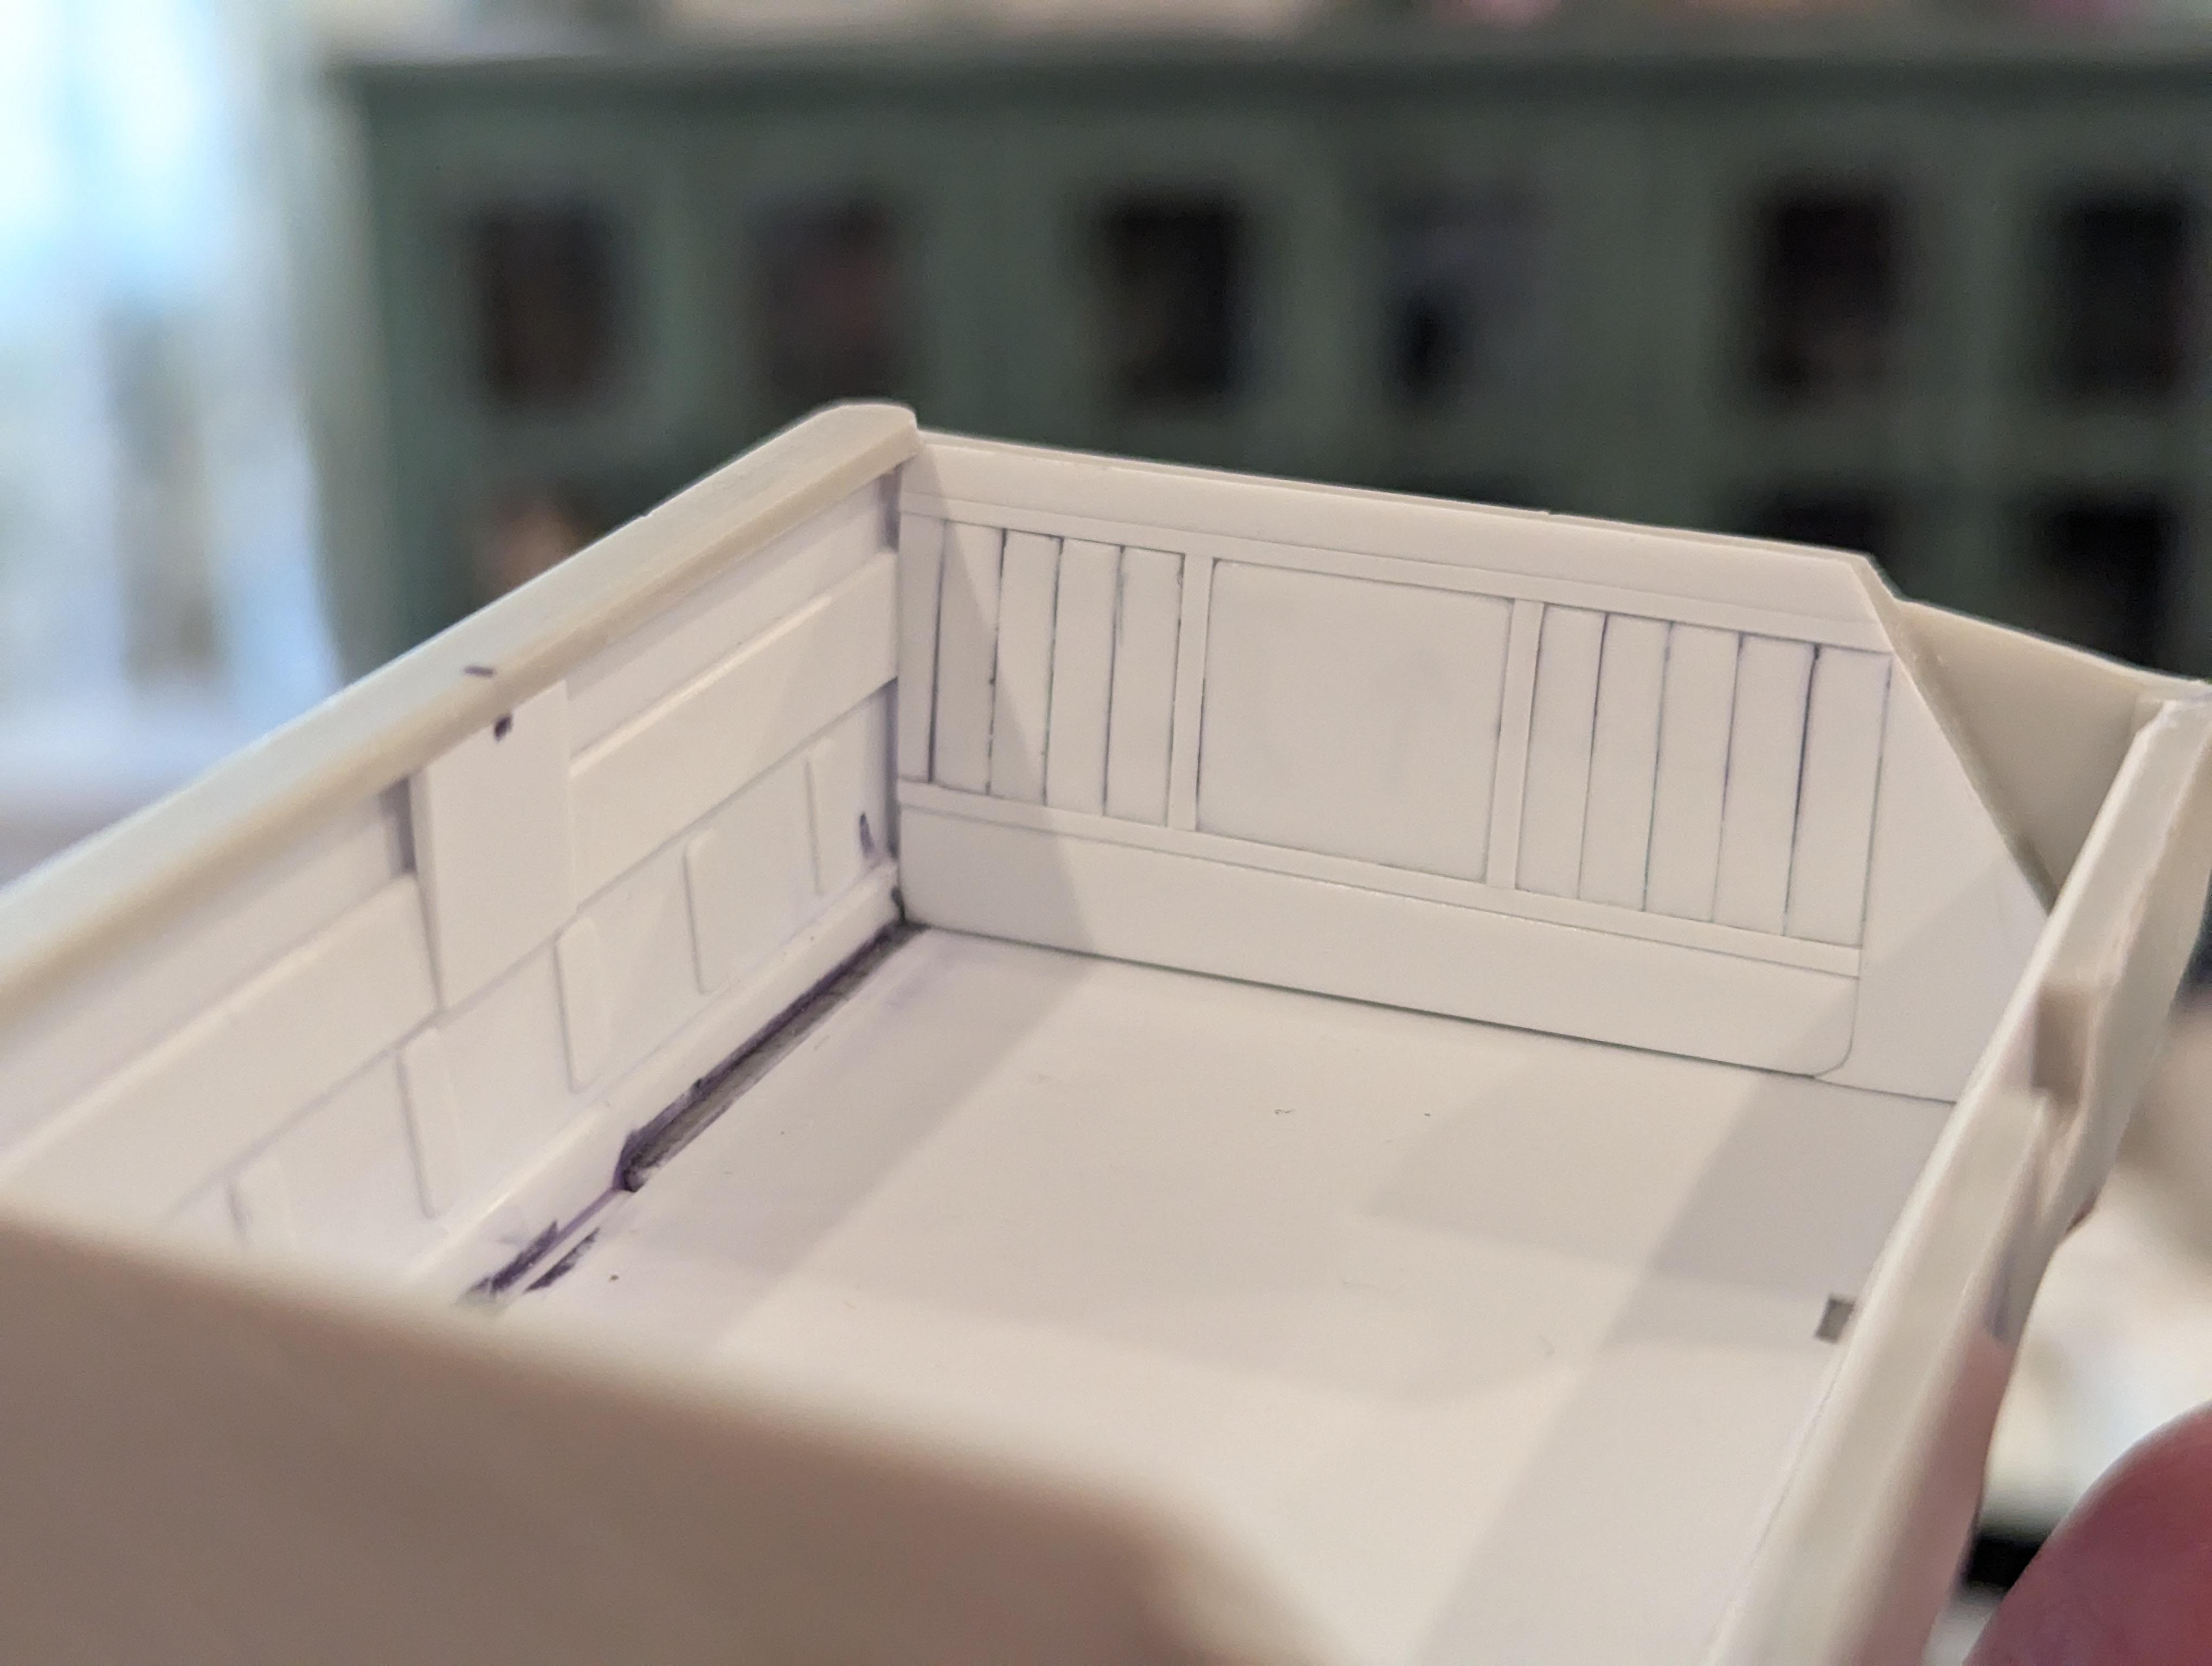
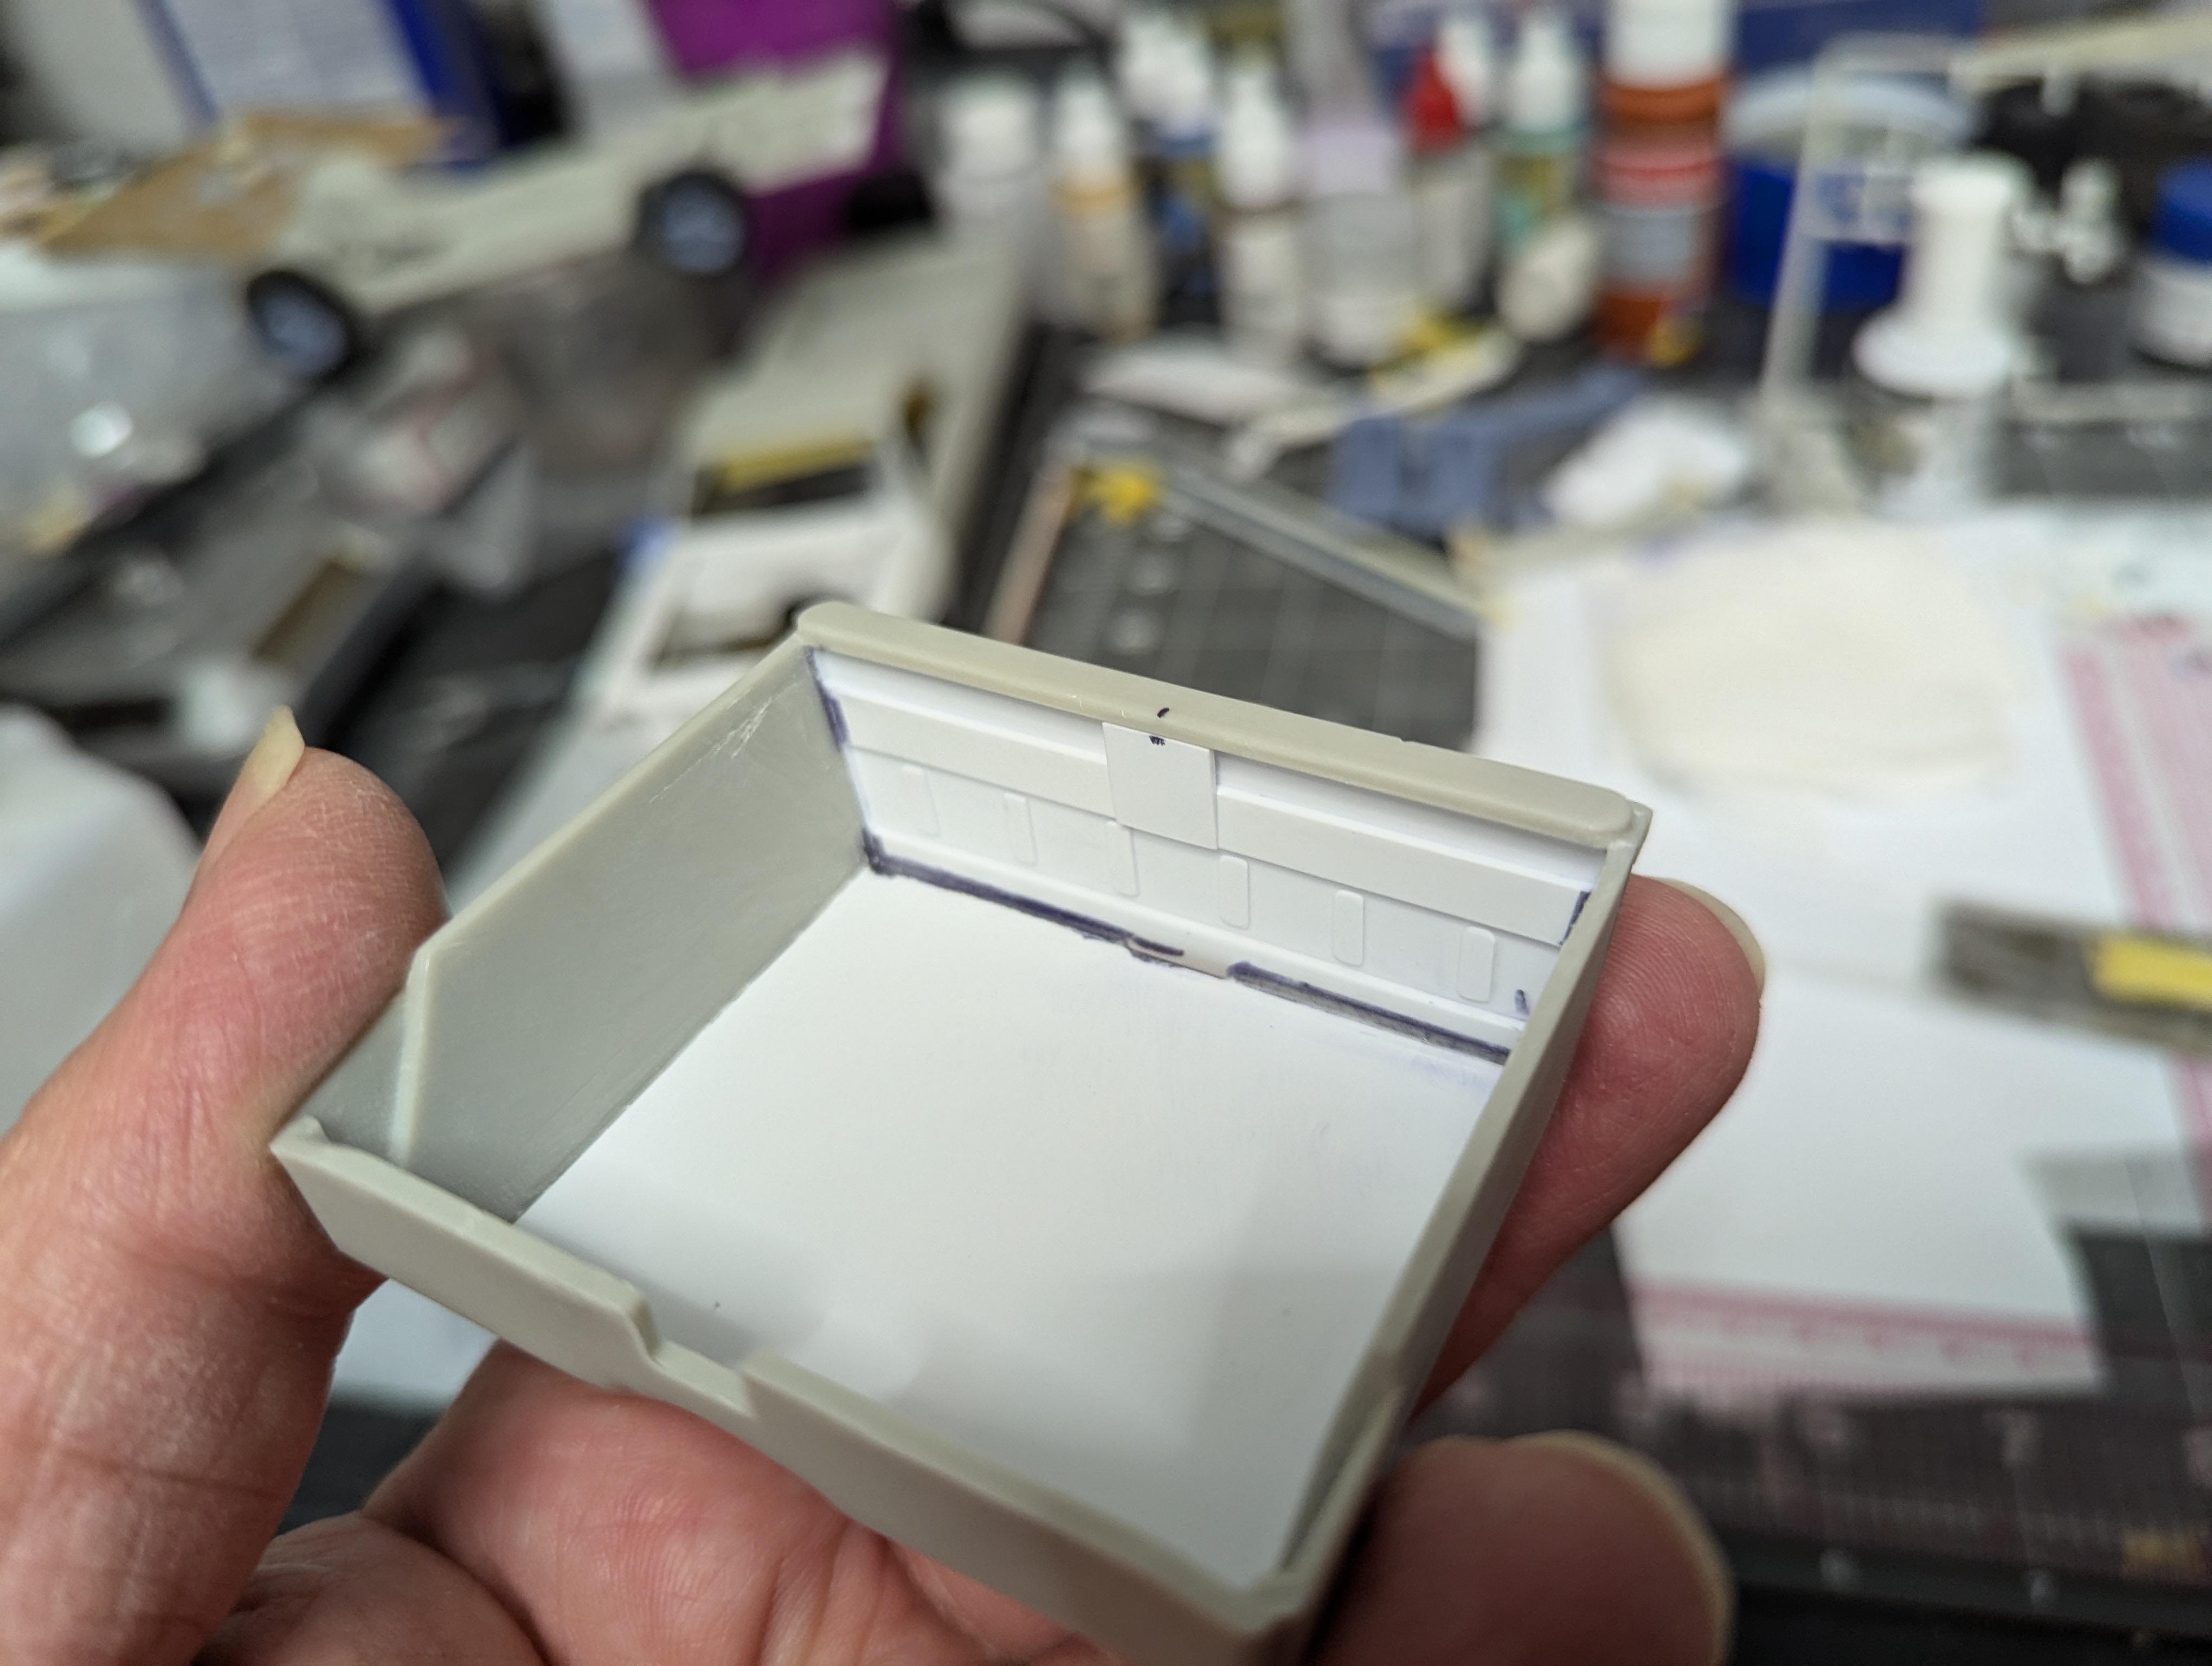
I haven't had a lot of time for modeling over the last week but I did manage to knock out some stuff today. With all of the 3D printed details, I decided to jazz up the cabin tub. The rear bulkhead on the stock kit part is just a flat slab which bears very little resemblance to the real world parts. The cowling under the window behind the seats is more of a shelf and there's some nice stamped reinforcement on the bulkhead itself, as well as some bracing. So I did some major surgery on the tub, cutting out the rear under the cowling and scratch built a new bulkhead out of styrene sheet that approximates the real thing. It will mostly be hidden behind the seats, but just enough should show to give some visual interest. I also did a preliminary fitting of the windows. I used the Malibu front window since there are some locator pins that help to align it properly and I also cut off the wing windows since the real car has full custom side windows without the wings. I cut the rear window off of the one piece front and rear window from the El Camino kit and did some judicious sanding on both windows for a better fit. I still plan on finessing both a bit more, but they're already fitting way better than stock. Finally I sanded down the door panels on the tub and am in the process of scratch building new panels that are closer or the '64 door upholstery and trim. I may also design and print some arm rests. I'm not sure about the skins, the scribing and simulated upholstery padding is a little flat and a little messy. I'll finish the left side up and see if I want to take another stab at it. Stock tub rear bulkhead: New and improved rear bulkhead. It's much closer to the real deal now. Test with the seats and center console in place. Most of the bulkhead is hidden, but enough is visible to provide some interest. Test fit in the body with the windows in place. Test fitting of the new door panel. I'm not sure about it and may start over. Full interior fitting with the windows. I cut the headrests off of the seats, sanded everything to a nice shape, and glued them back on with a forward cant. They fit nicely and clear the rear window.
-
I'm in the same quandary with space. I generally build in 1/72 or 1/144 for aircraft or sci-fi, and 1/24-25 for cars. The 1/350 Enterprise is ginormous, it will be almost 3' long when it's done, plus whatever extra space I need for a base/enclosure. But it (and the Falcon if I ever get it) are definitely exceptions.
-
It's good sized, but it's still smaller than the DeAgostini or LEGO UCS Falcon. But it is exquisitely detailed and engineered, and is the definitive ANH Falcon in any scale (other than the filming model, of course). They did a ton of painstaking research, identifying all of the kitbash parts that were used on the original. Unfortunately it has a price tag to match, this listing on Amazon is actually not bad (it's about $100 above MSRP), if I had the spare hobby budget right now, I'd click buy in a heartbeat. https://www.amazon.com/Bandai-Perfect-Grade-Millennium-Falcon/dp/B073ZRGX6T/ref=sr_1_1?crid=3U2LIN185MOPS&dib=eyJ2IjoiMSJ9.1HHzpBRjYpyBqCi0H2t3lzOpQNYpTVpPneO-iPEyZIliySTTkc47pn-AR5LiIsCHFy7yYzixMADu9gjNLAVB4BcSI2fszG1IFQhflL2-6u_rGwypwlZzNgnpSRzTab5oj1cyg9vVsBqvl4uZrE6BKbZo3CaHCj2oJiyZhFWGgT1RXYUY_zQpZHuamczgQbWfDCFR4D0pd44mEXQDHuGnNXrHQMHOwzZDPLQJV1A_Z2UHx_3miPvixyEEB7jsqryKQ-40mV8MVtVkZH8OyMaW78aMePTvVA3bQu5wYEkgSmw.eNVSniiNvOlhbpdempnwffyxQRrDZiTbklXpmVWgUUo&dib_tag=se&keywords=bandai%2Bperfect%2Bgrade%2Bmillennium%2Bfalcon%2B1%2F72&qid=1724426484&sprefix=%2Caps%2C99&sr=8-1&th=1
-
Yes, the satisfaction of doing something I've never done before greatly outweighs any frustration in the moment. And if it goes to plan, it will be a damned impressive build of my all time favorite subject. And I do plan on doing it again with the Bandai 1/72 Perfect Grade Millennium Falcon (if I can ever get my hands on one for a somewhat reasonable price). I don't have a lot of space for big builds, but there are a couple that are close to my heart that are exceptions to the rule.
-
Thanks! You have no idea how many times I watched the dogfight scenes for this build to get the little quirky little details right. The Tomcat is pretty spot on, down to the mismatched Sidewinders. I decided to take some artistic license on the Zero. They used converted AT-6 Texans in the movie (they were originally modified for Tora! Tora! Tora!) but I couldn't find a 1/72 Texan kit that matched the quality of the Academy F-14. So I decided to just go with the equally gorgeous Tamiya A6M-2b Zero. The tail code is not correct to either of the Zeros in the film, but it's at least a red AI number from the Akagi. Otherwise I was able to pretty much match the paint scheme from the film. Thanks!
-
That is a truly gorgeous Cat! Your weathering is just *chef's kiss*!