GMasterG
-
Posts
114 -
Joined
-
Last visited
Content Type
Profiles
Forums
Events
Gallery
Everything posted by GMasterG
-
Thank you for this information, Greg. I have seen this kit for sale, I will keep it in mind as a fall-back position. I reached out to a member of these forums yesterday and he has located the part amongst his stash and very kindly offered to send it to me. If all goes well, I may be able to avoid having to buy an entirely new kit. Cheers Grant
-
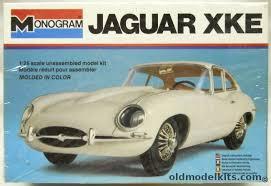
Thank you for your reply, Trevor. Below is an image of the box. Cheers, Grant

-
Thank you for this information - I wasn't aware that this was the case. Cheers
-
Hello everyone An old dear friend who is now too old to build models, gave me this kit to build a replica of his E-type jag that he drove up to the day his licence was revoked. I pulled it out today to commence work and noticed that the clear parts are all cracked and unuseable. Before I invest in a complete kit I wanted to post this in the hope that someone might have the sprue of clear parts in their spare box and would be willing to part with it. Any offers greatly appreciated Regards Grant
-
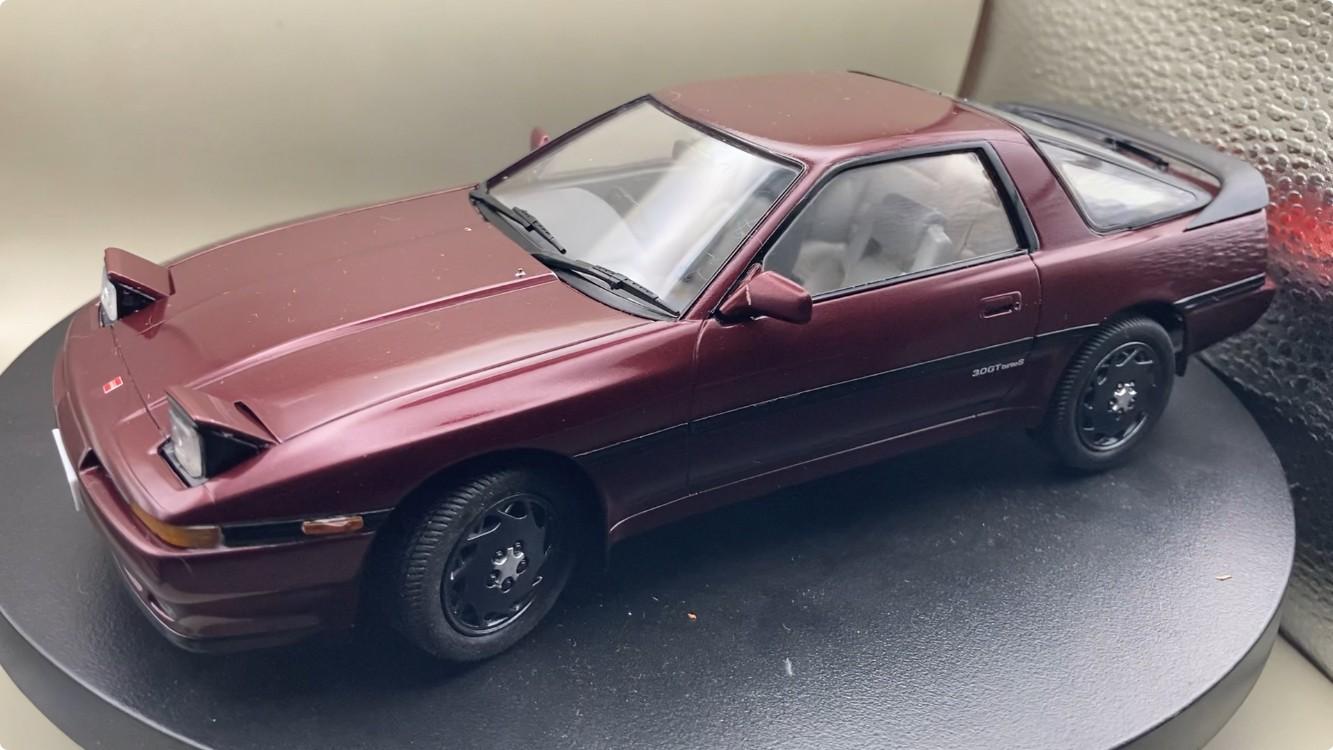
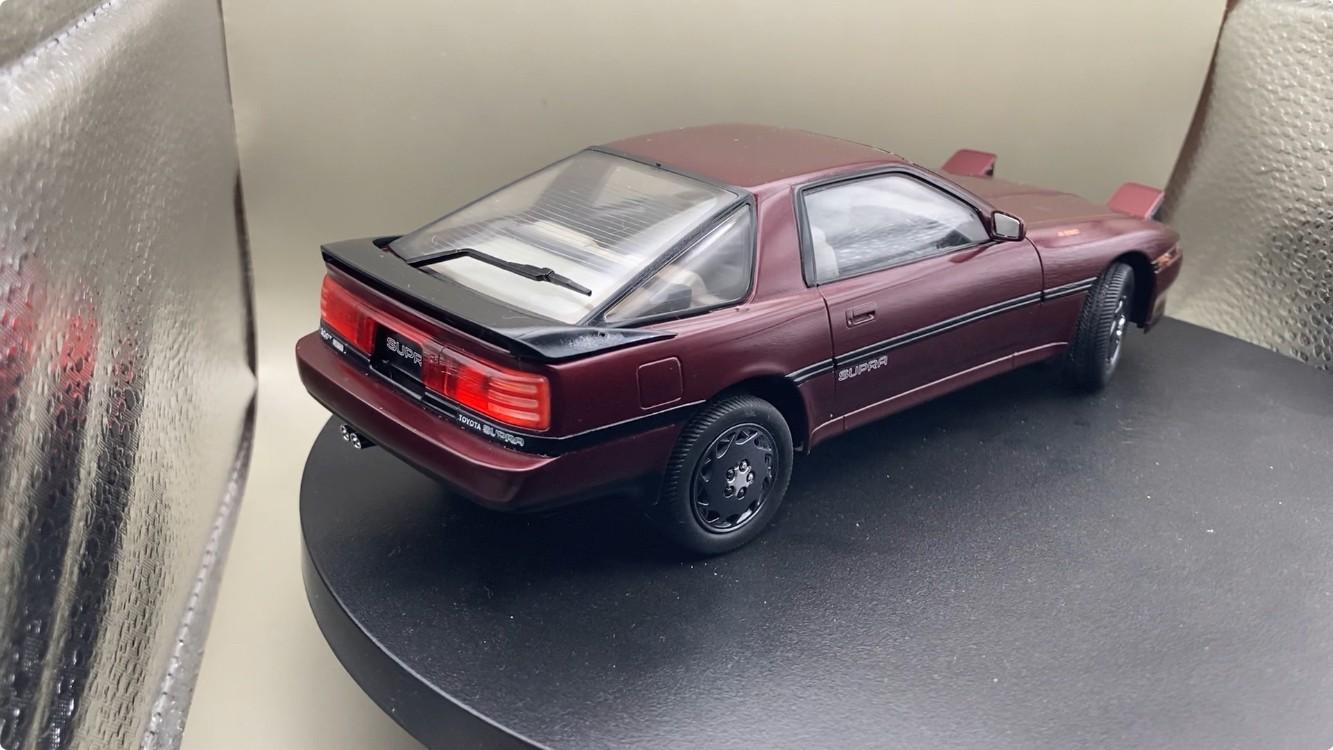
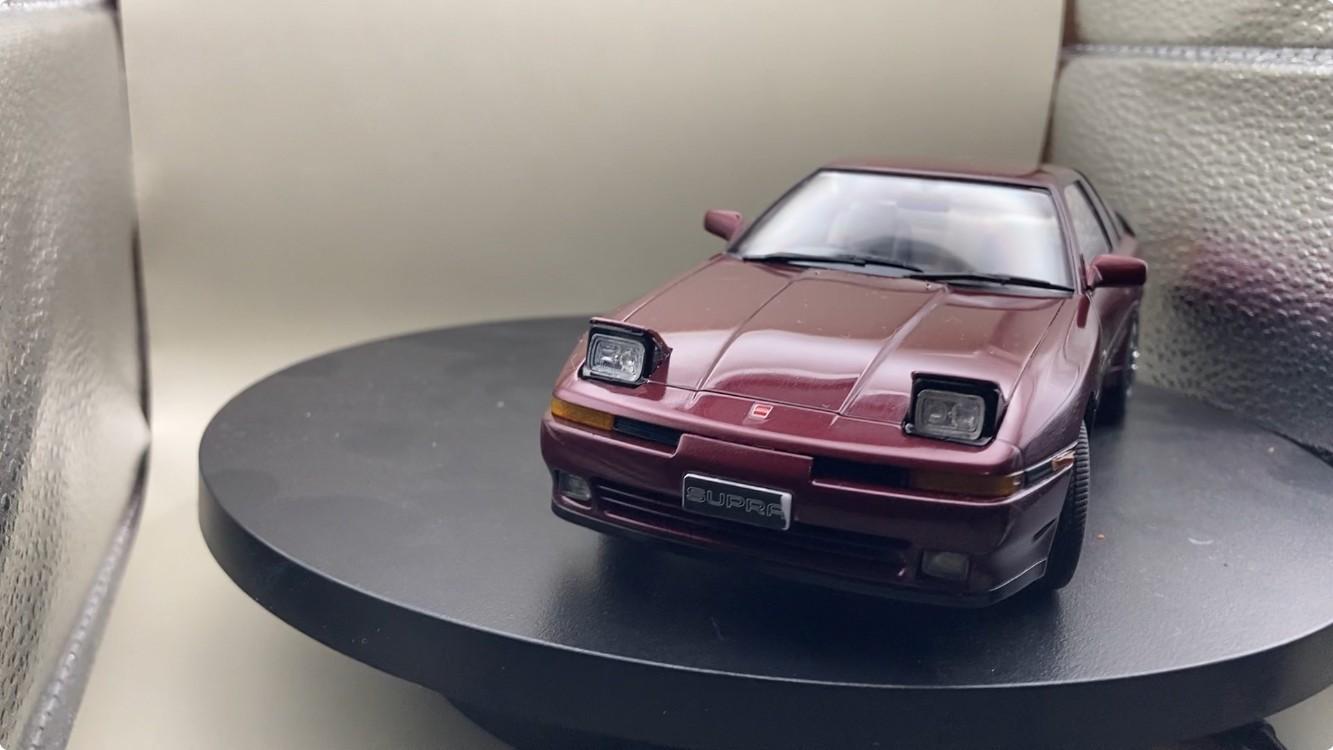
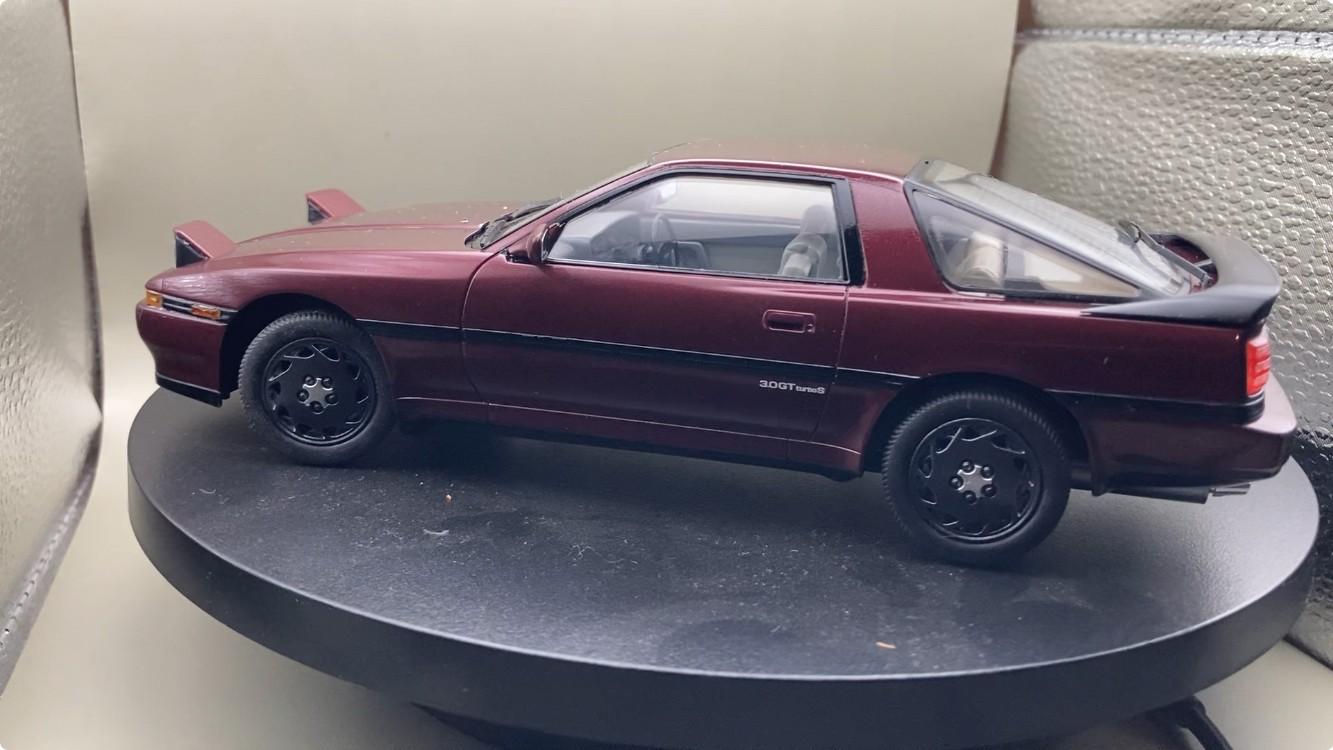
WITB Hasegawa Toyota Supra A70 3.0T Turbo
GMasterG replied to martinfan5's topic in Car Kit News & Reviews
Just finished building it this afternoon; it fell together very nicely. Factory original paint is Burgundy Pearl Metallic
-
Thank you. A relatively simple kit. Just pay attention to the warped hood and also the decal for the auto shifter on the console. It’s a lot neater if you hand paint the trim and just cut the decal and use the letters/numbers that tell you what gear you’re in.
-
Thank you. I have another to build in white so I will pay close attention to the shaker on that one.
-
Thank you. I was very happy with the colour. I’ve come to enjoy working with genuine automotive paints.
-
Thank you.
-
Thank you. Close to my best paint job. And definitely the best clear coat that I’ve done. There’s real depth to it.
-
Thank you. I spent quite some time trying to figure out what went wrong. In the end I chalked it up to user error
-
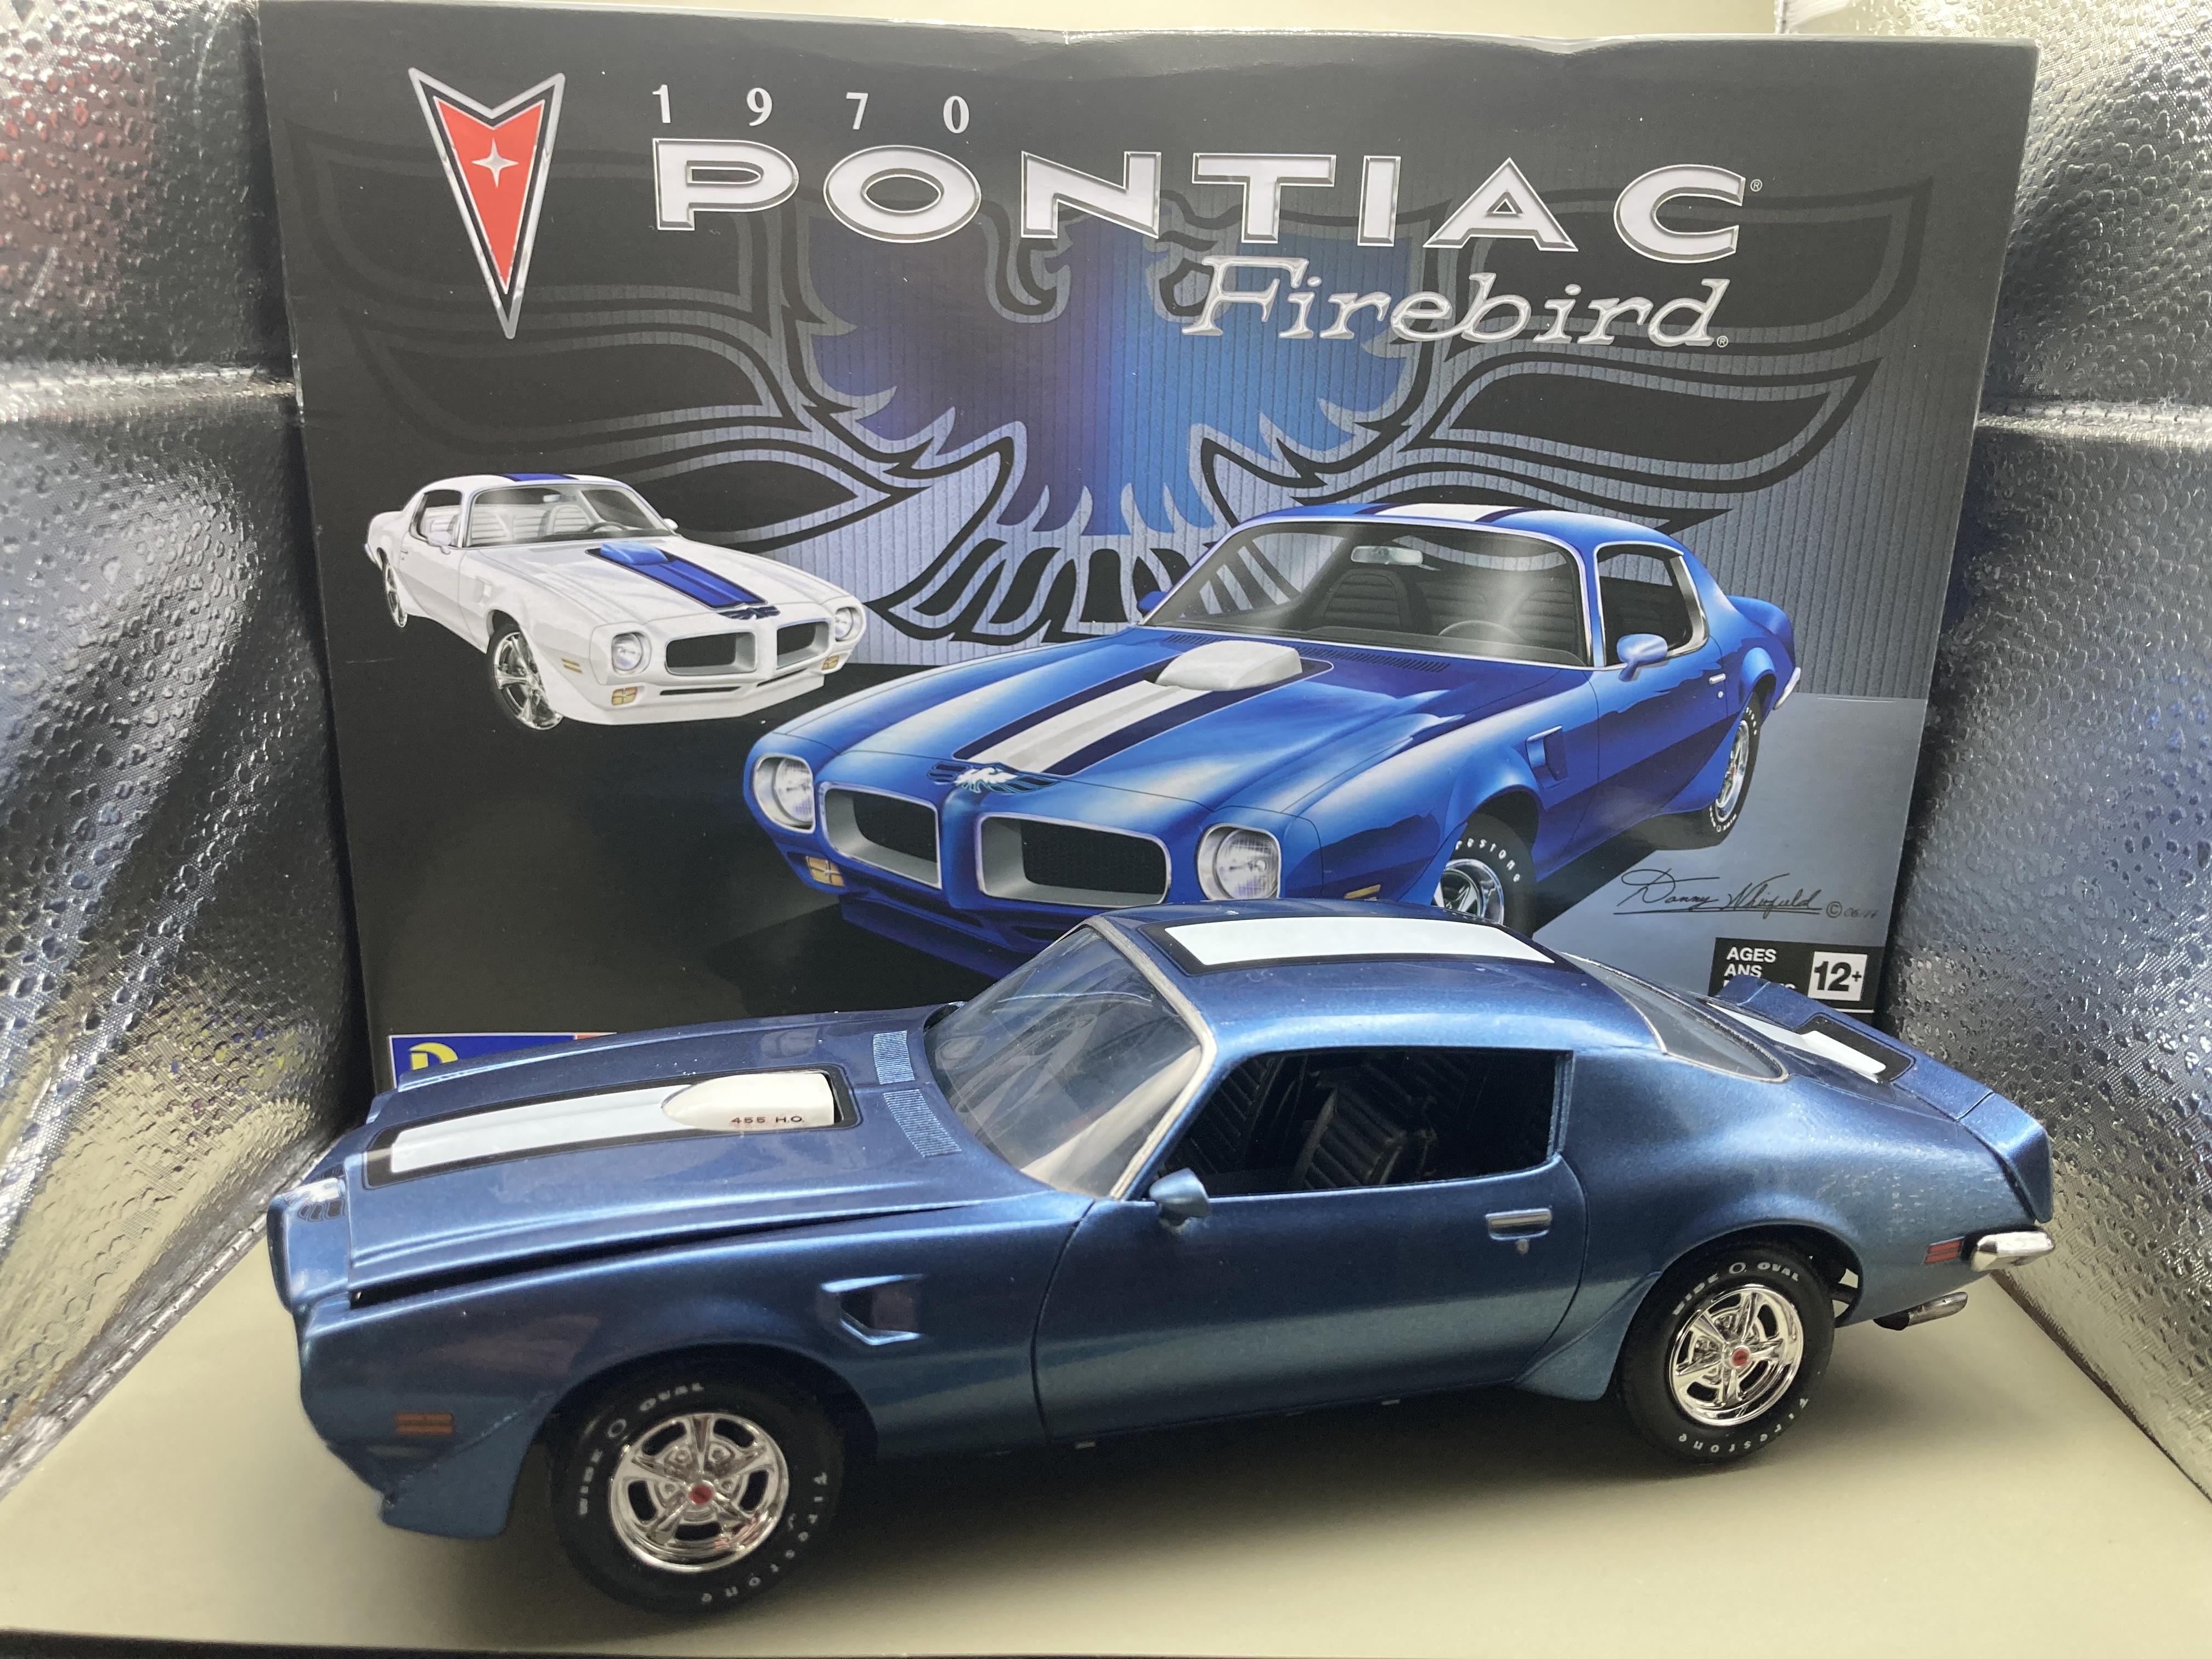
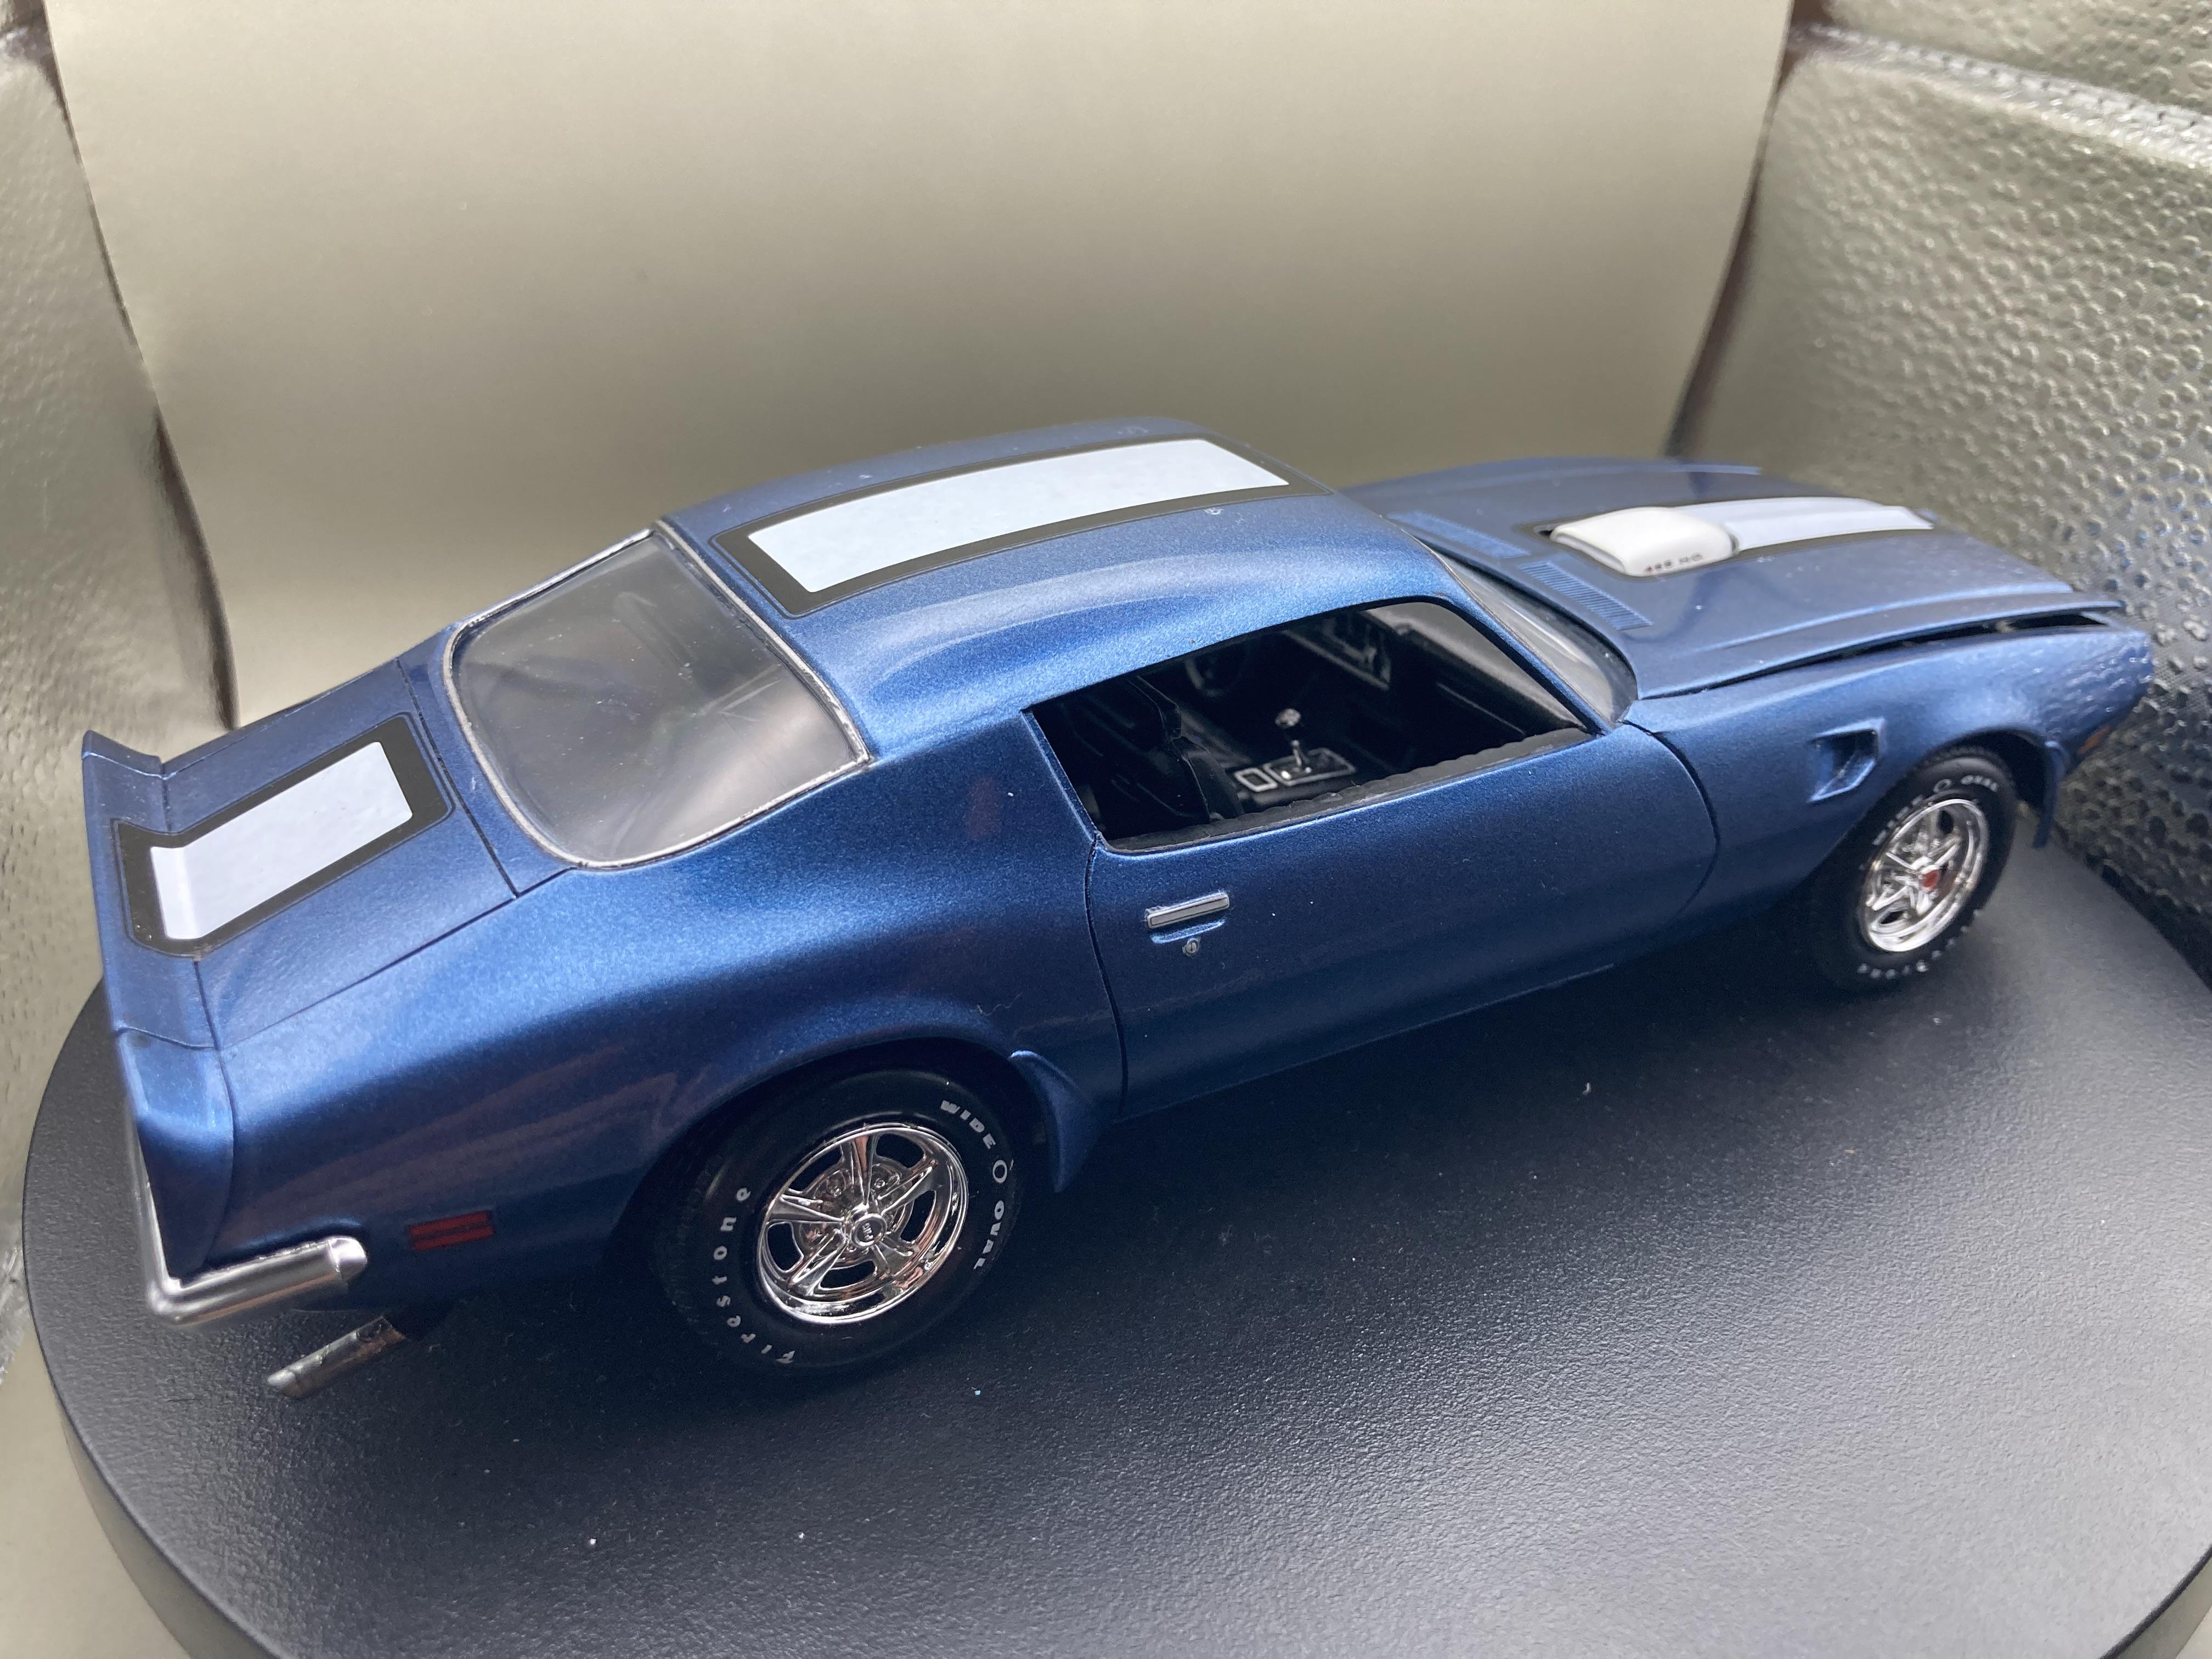
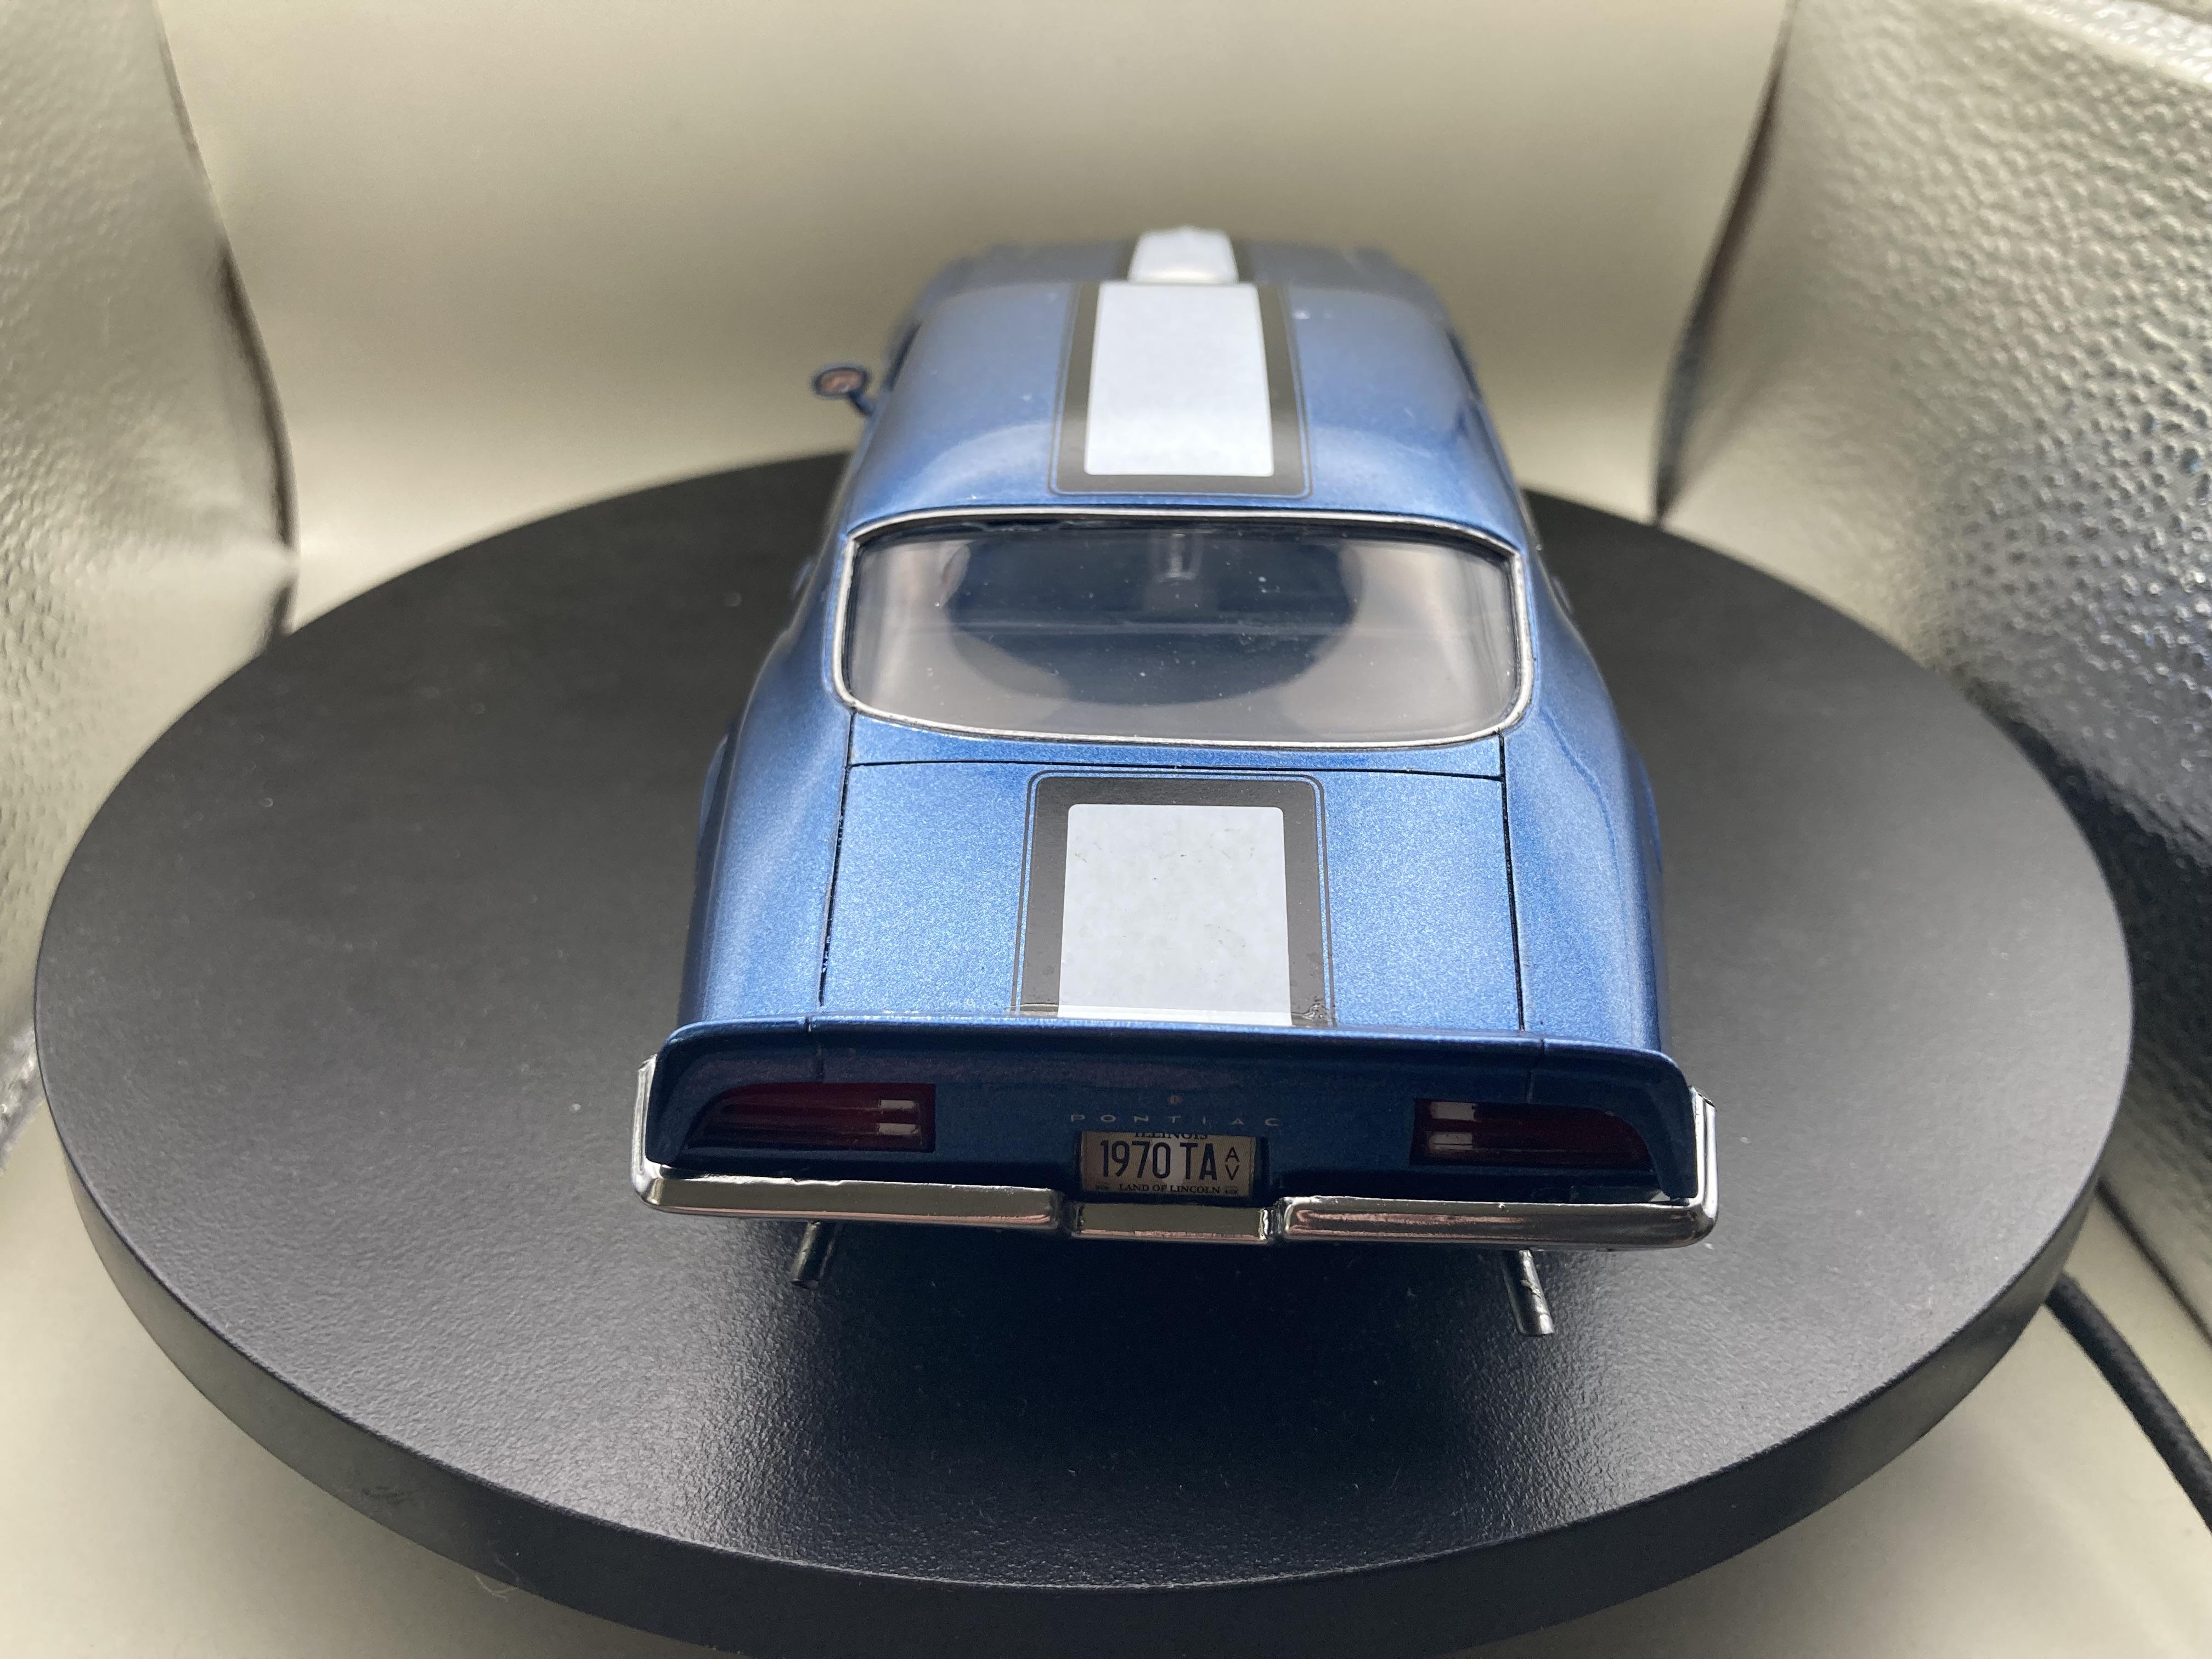
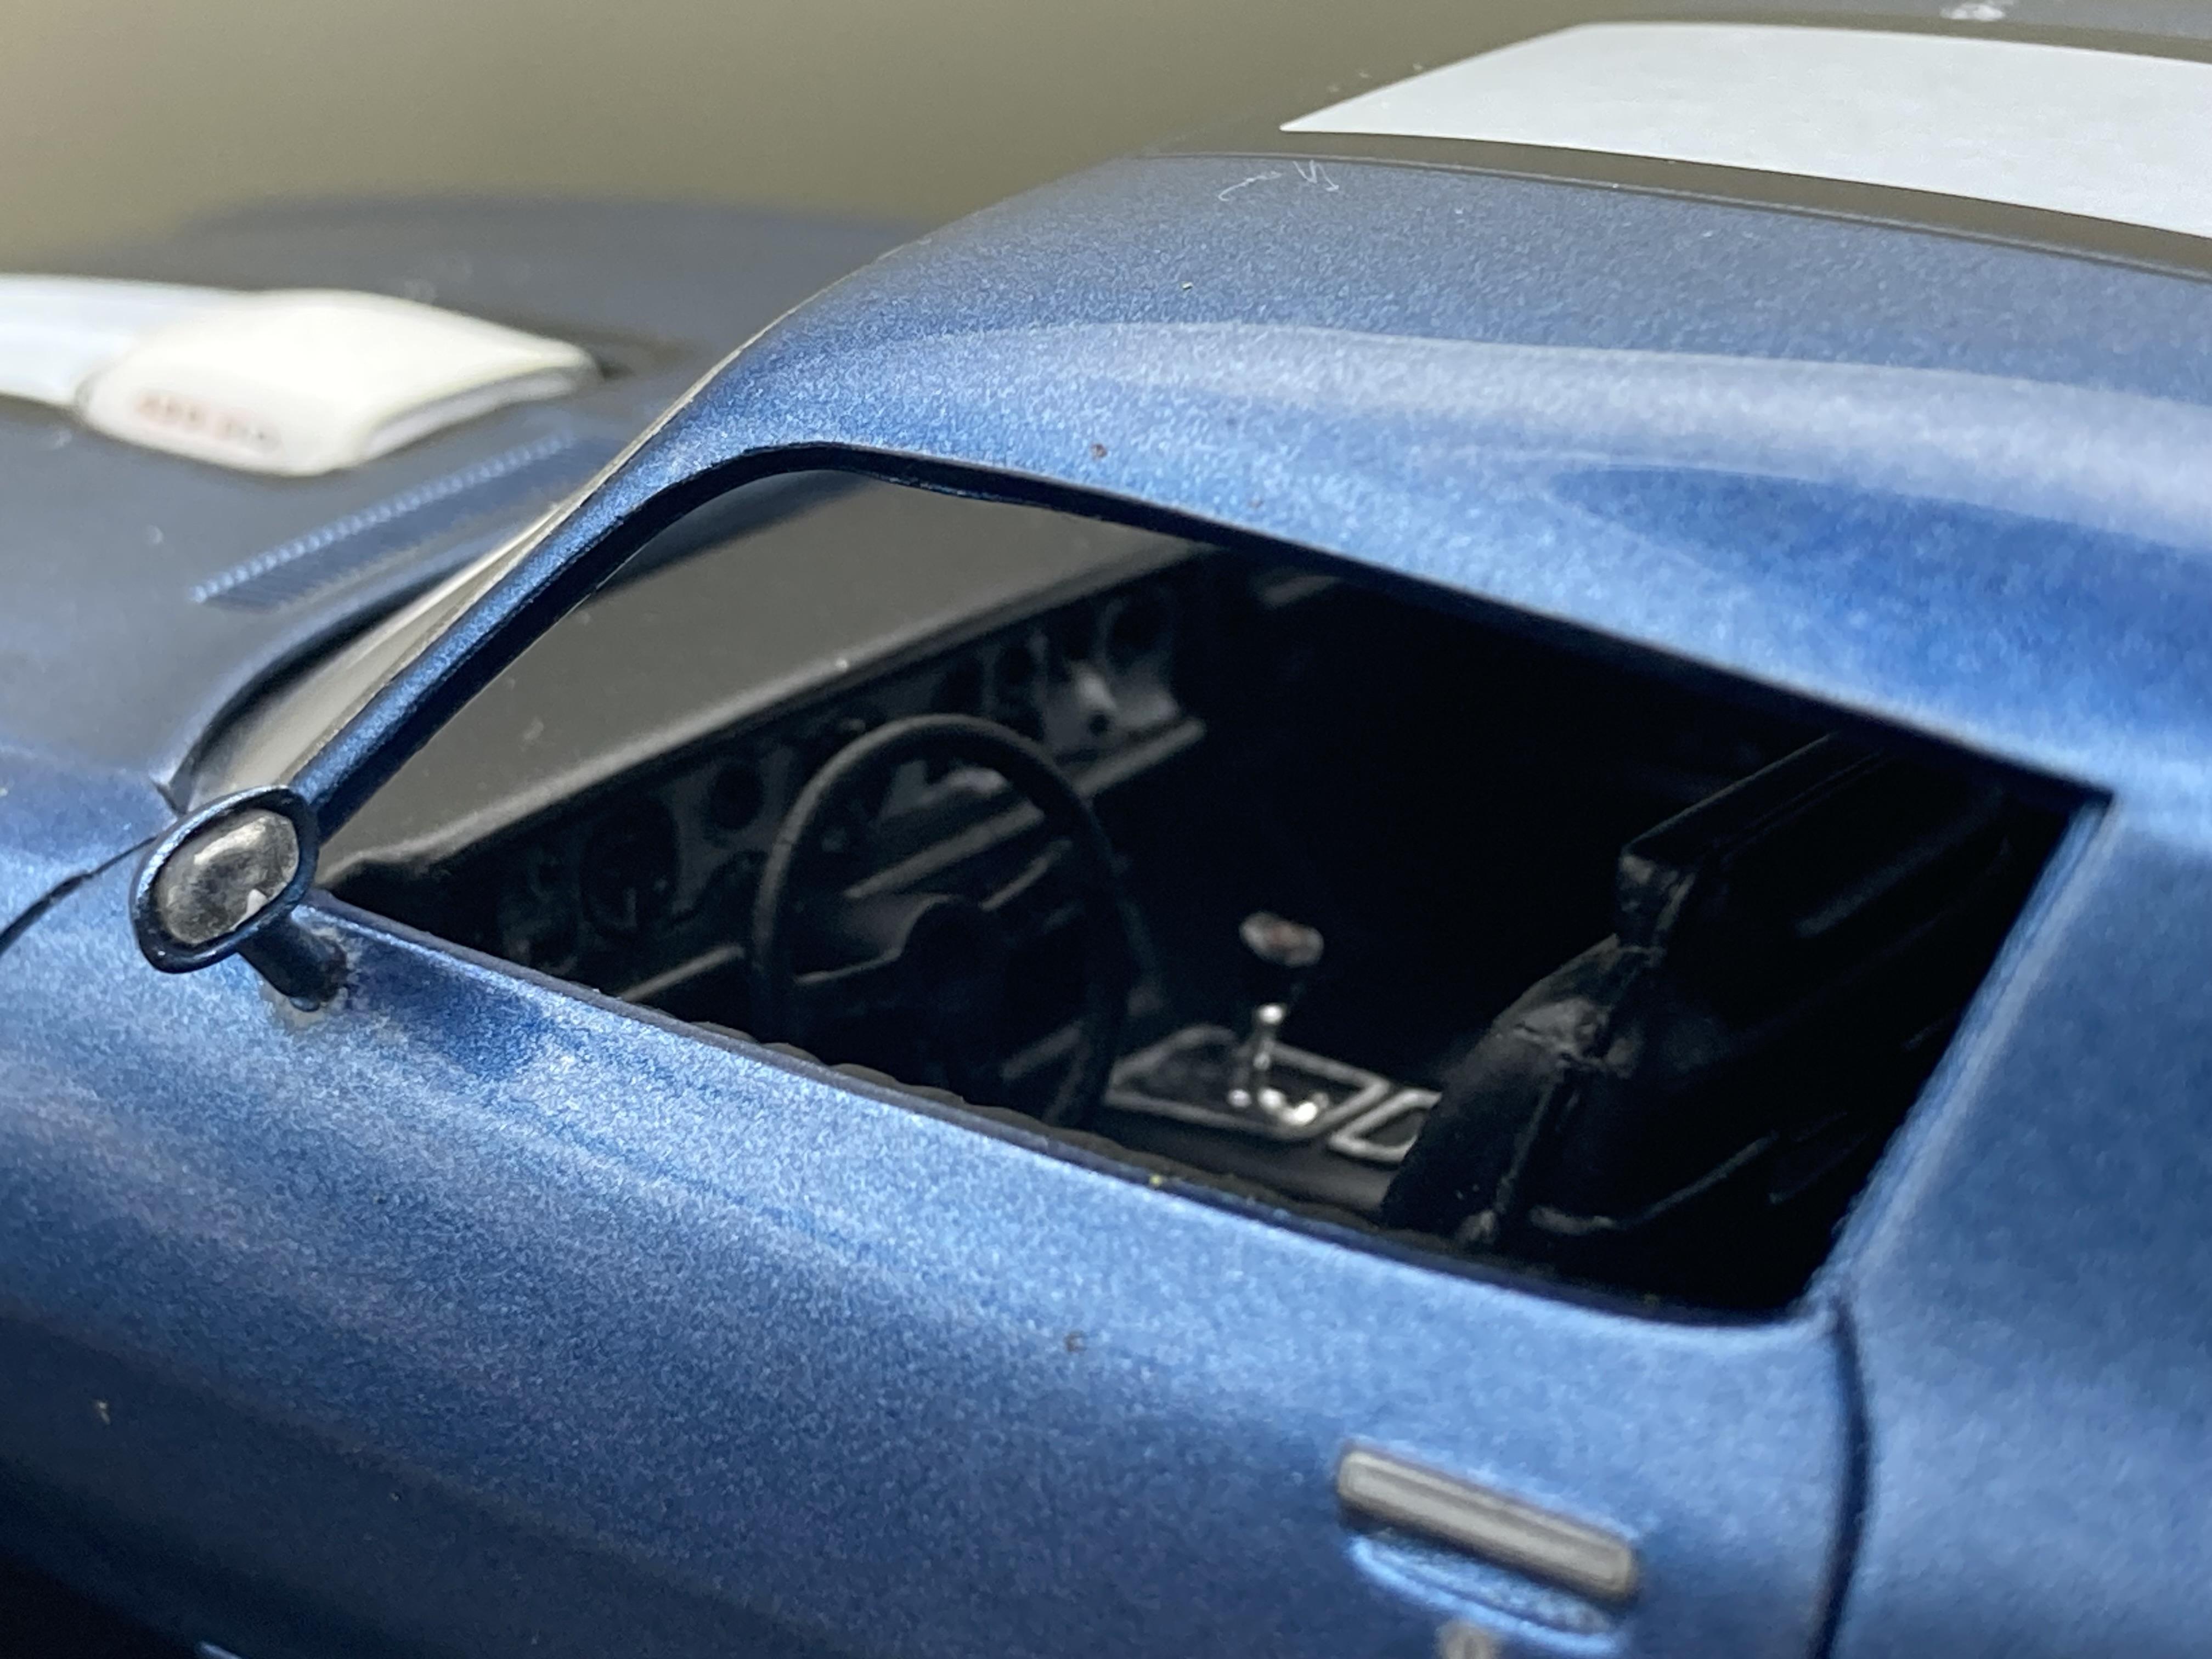
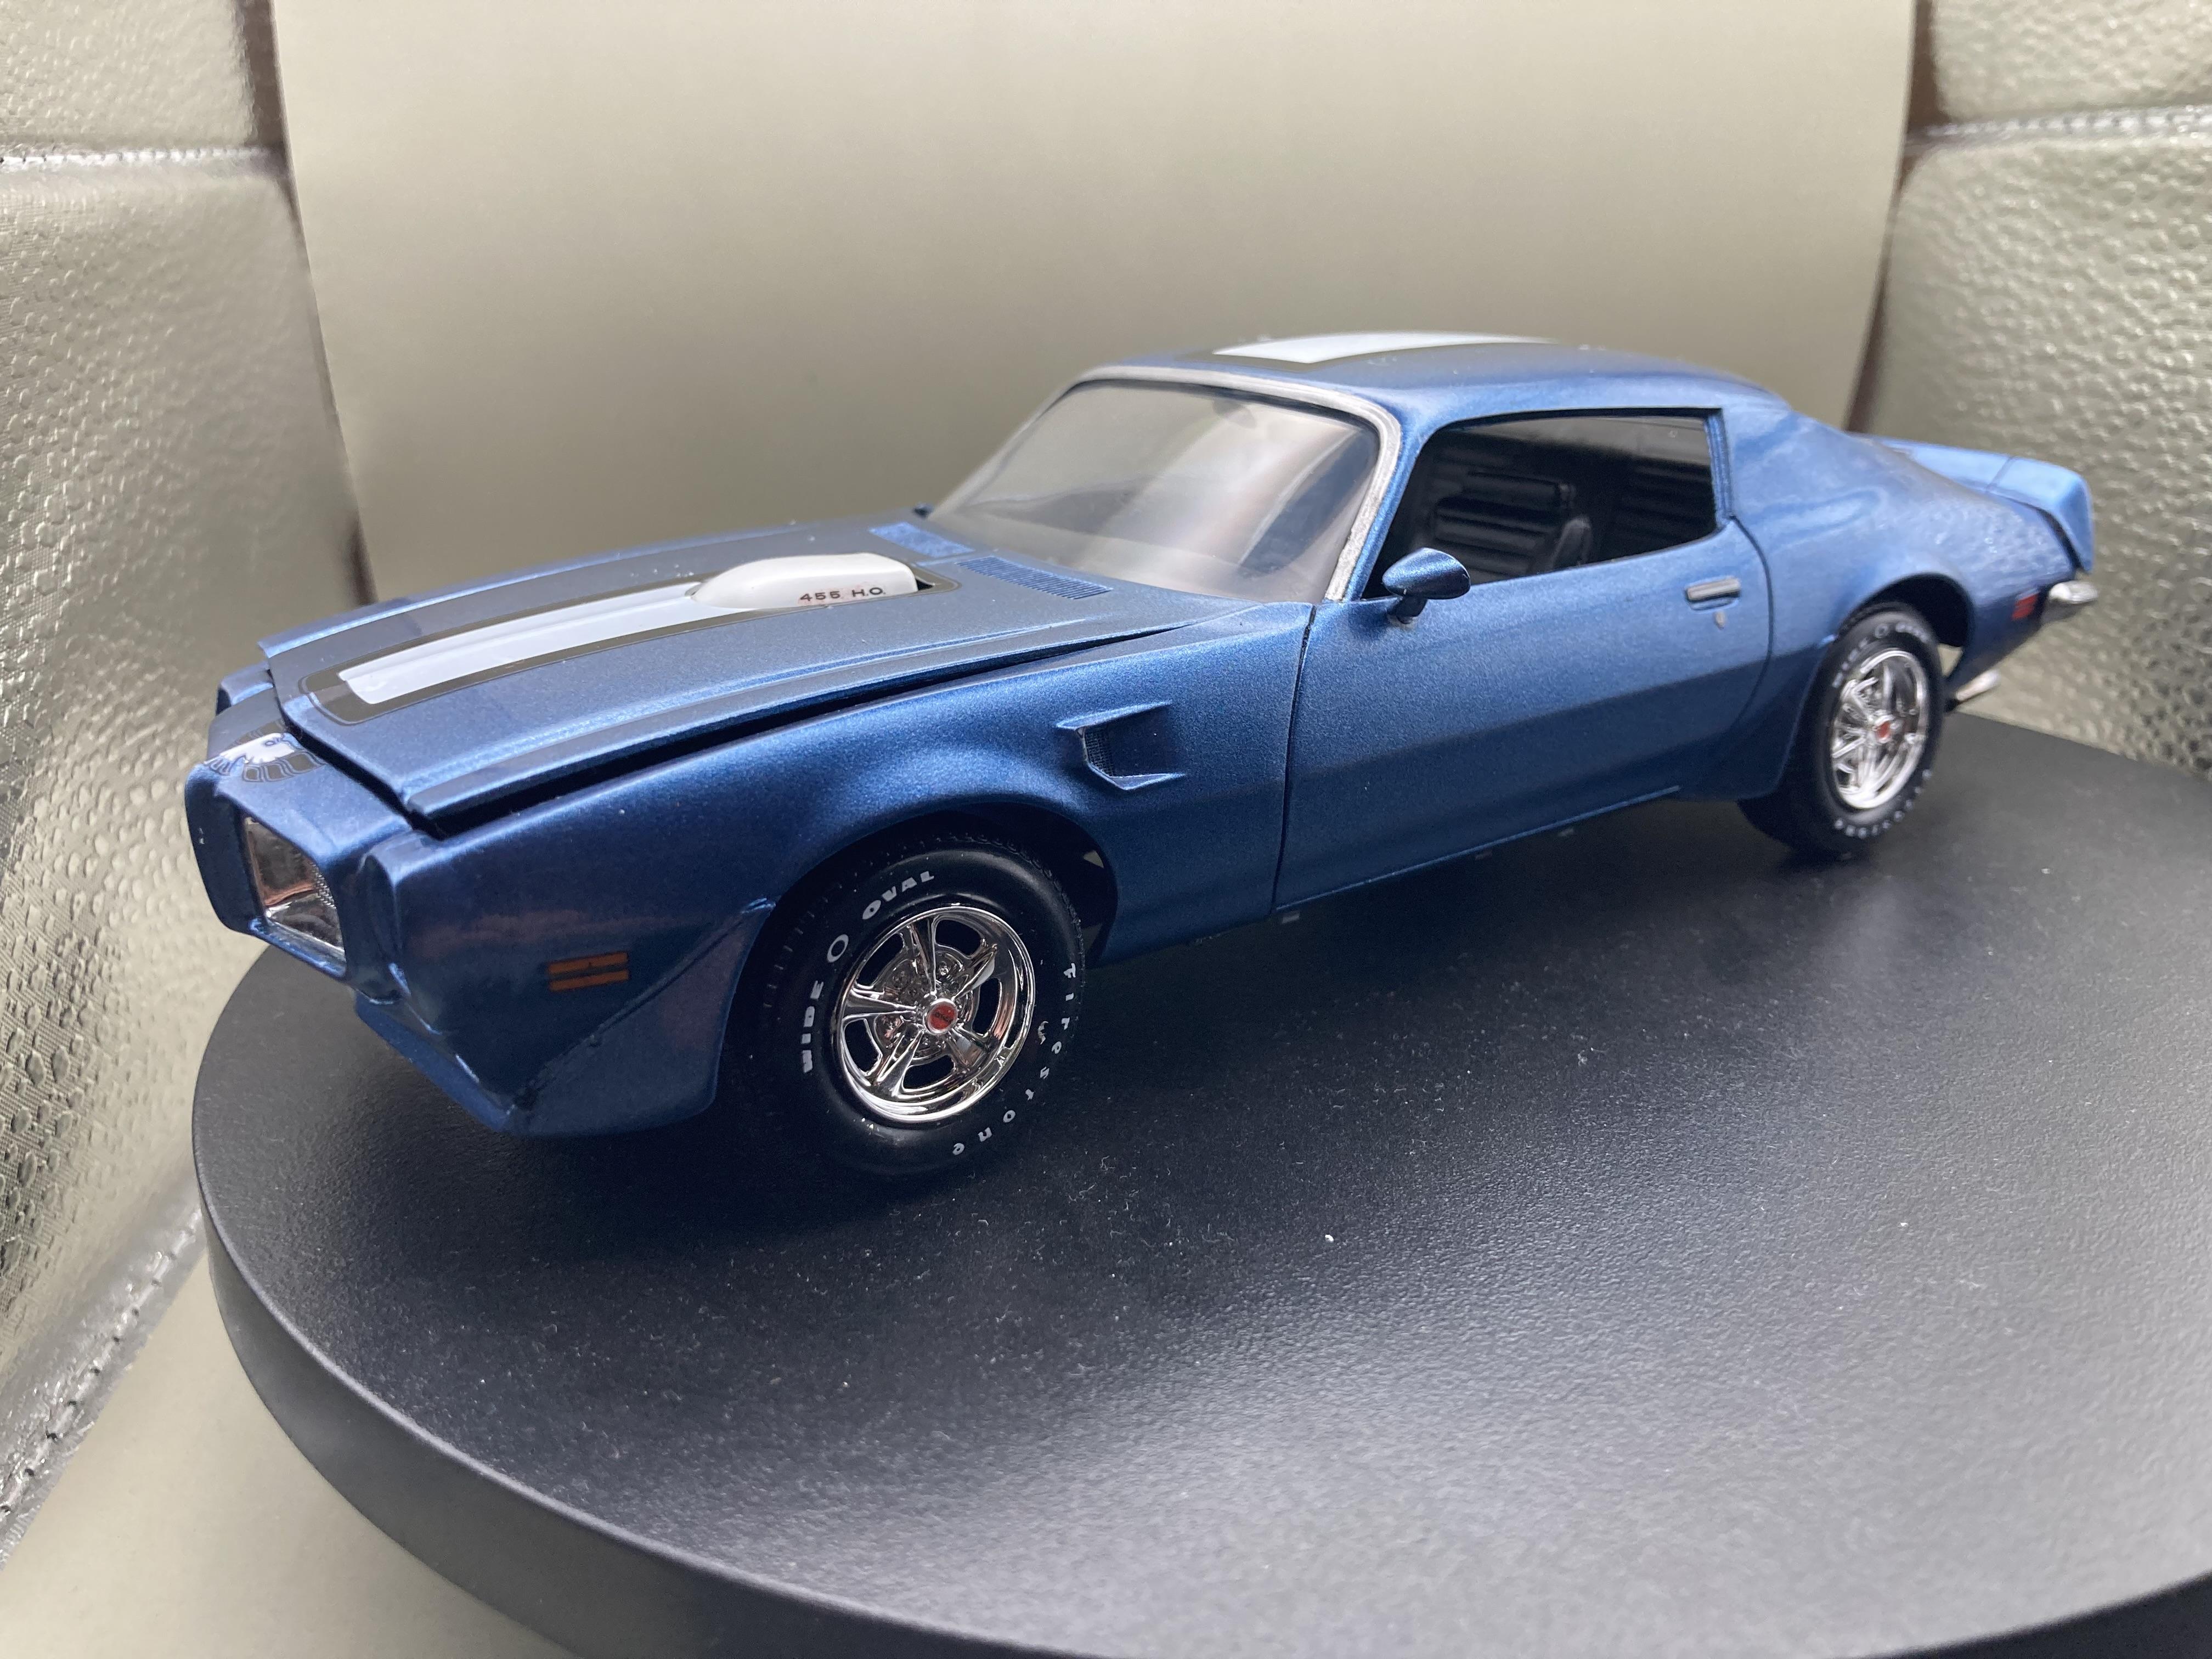
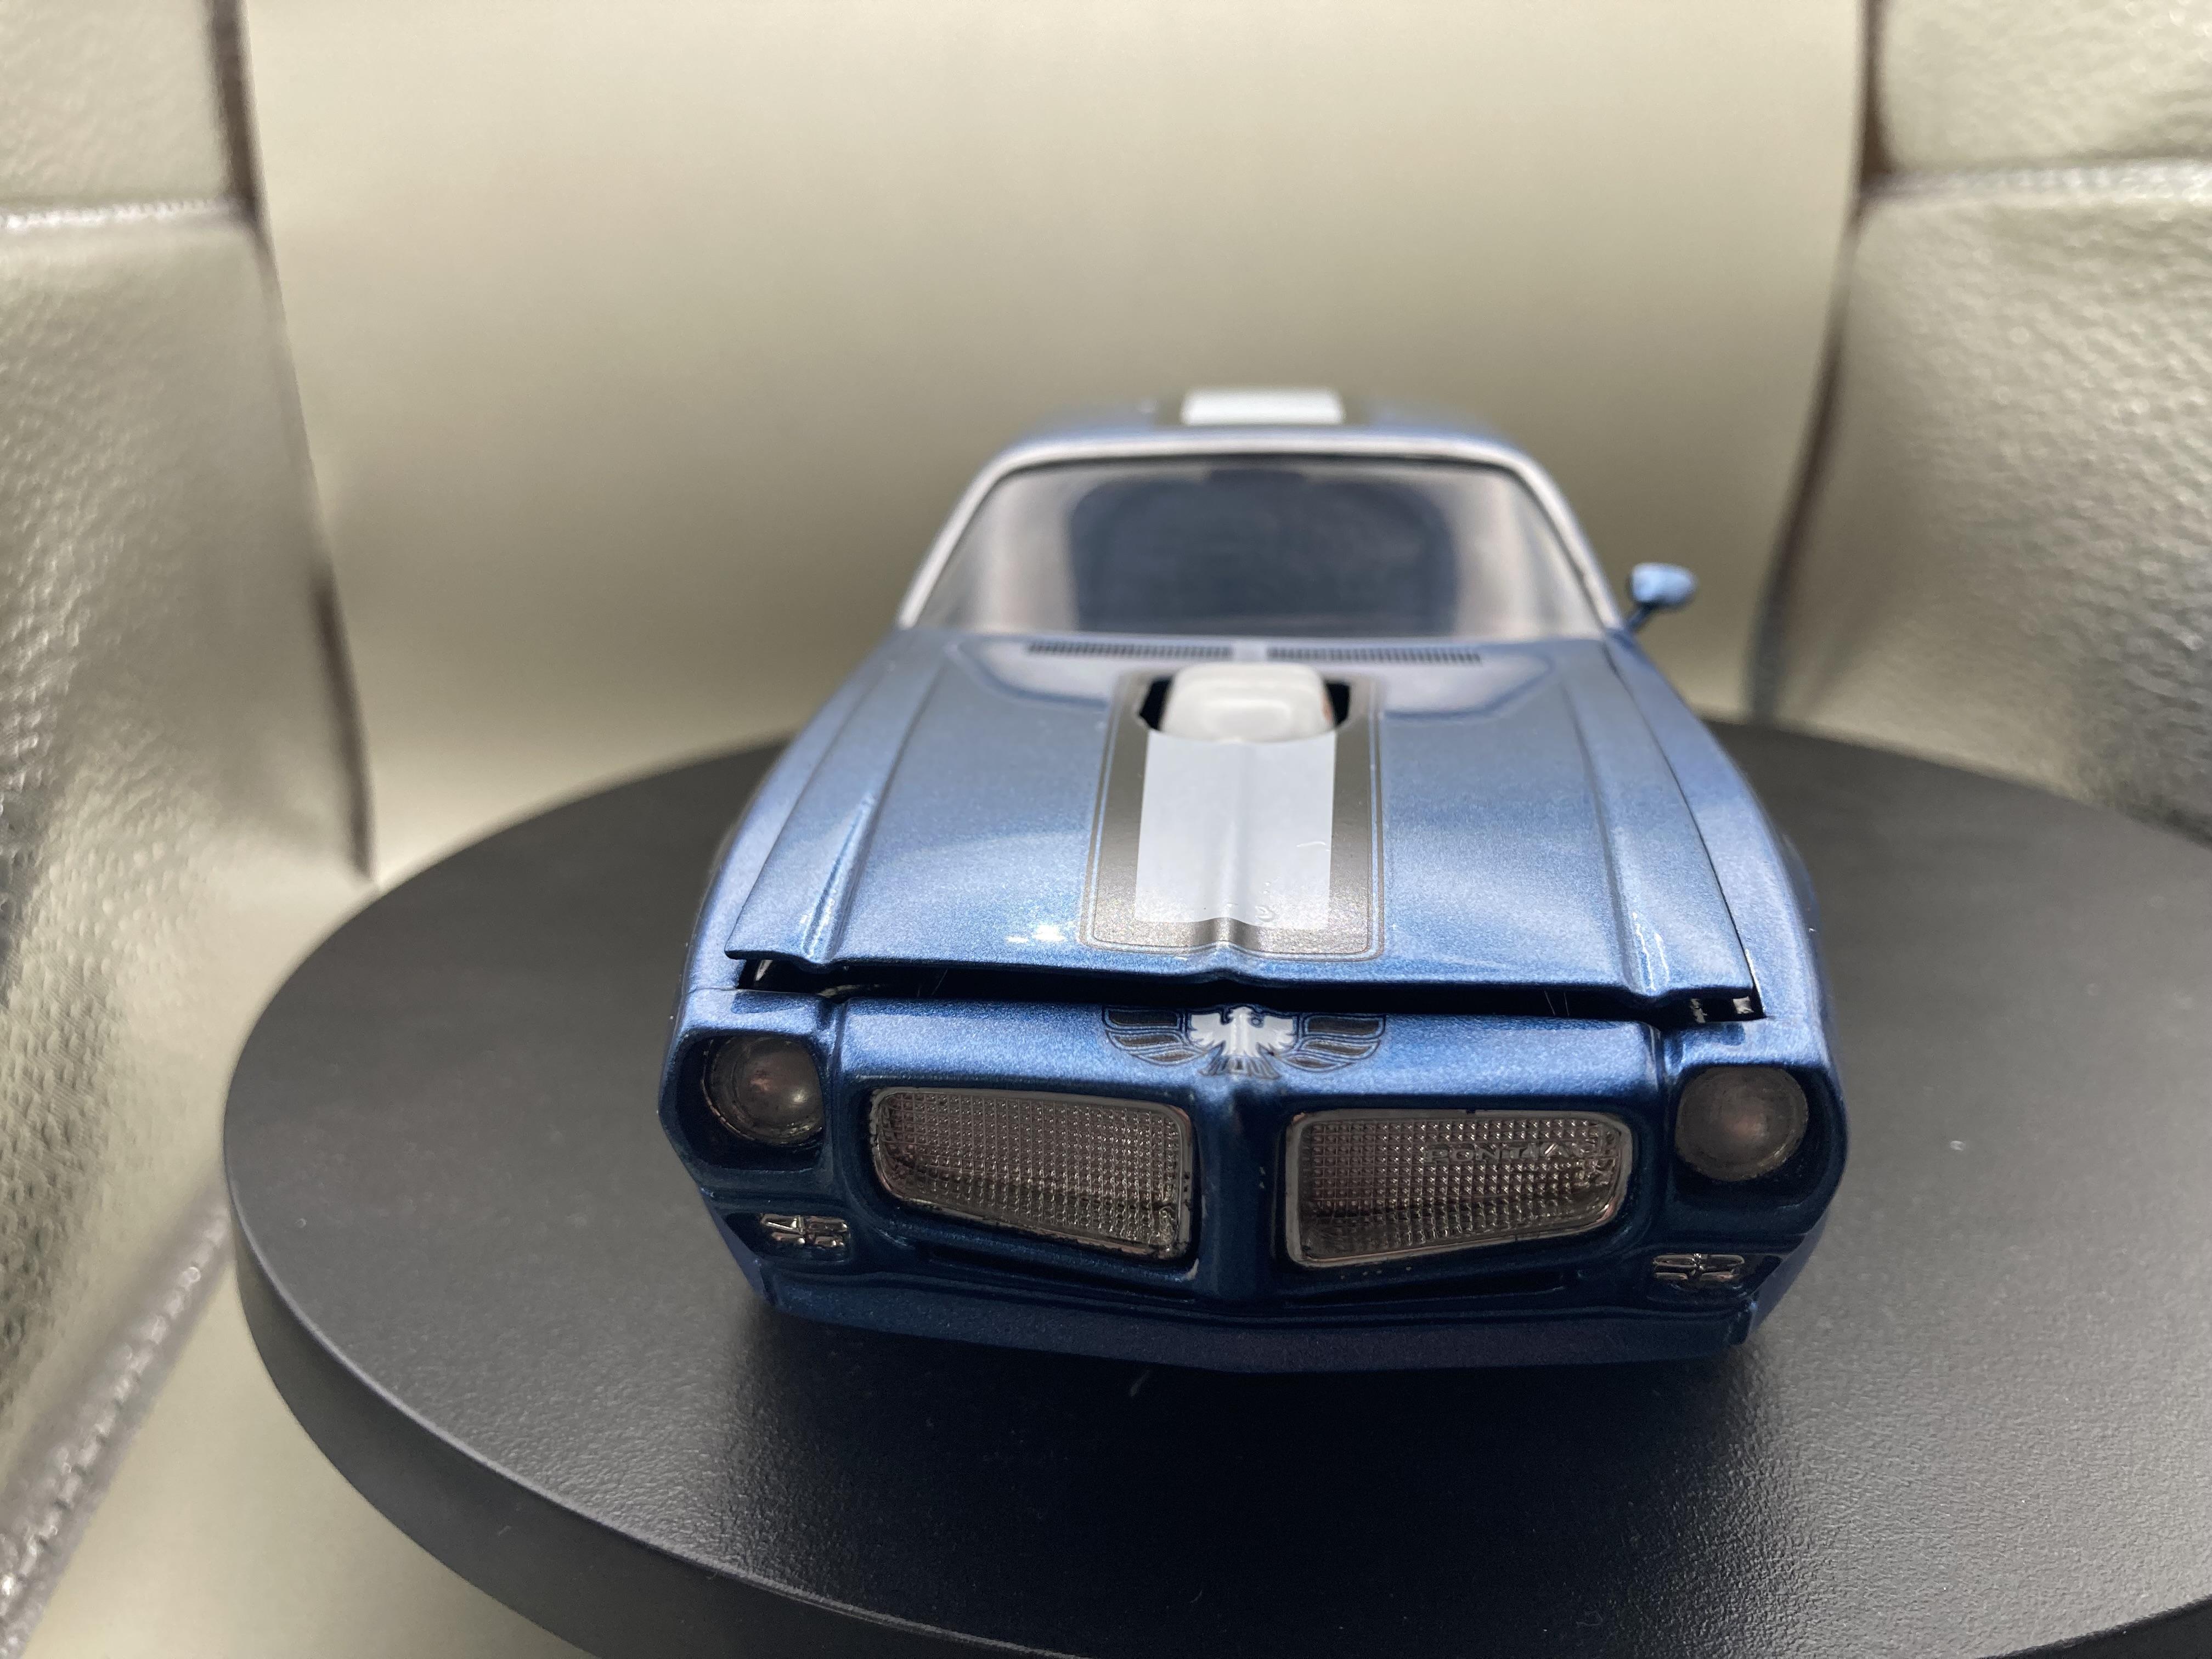
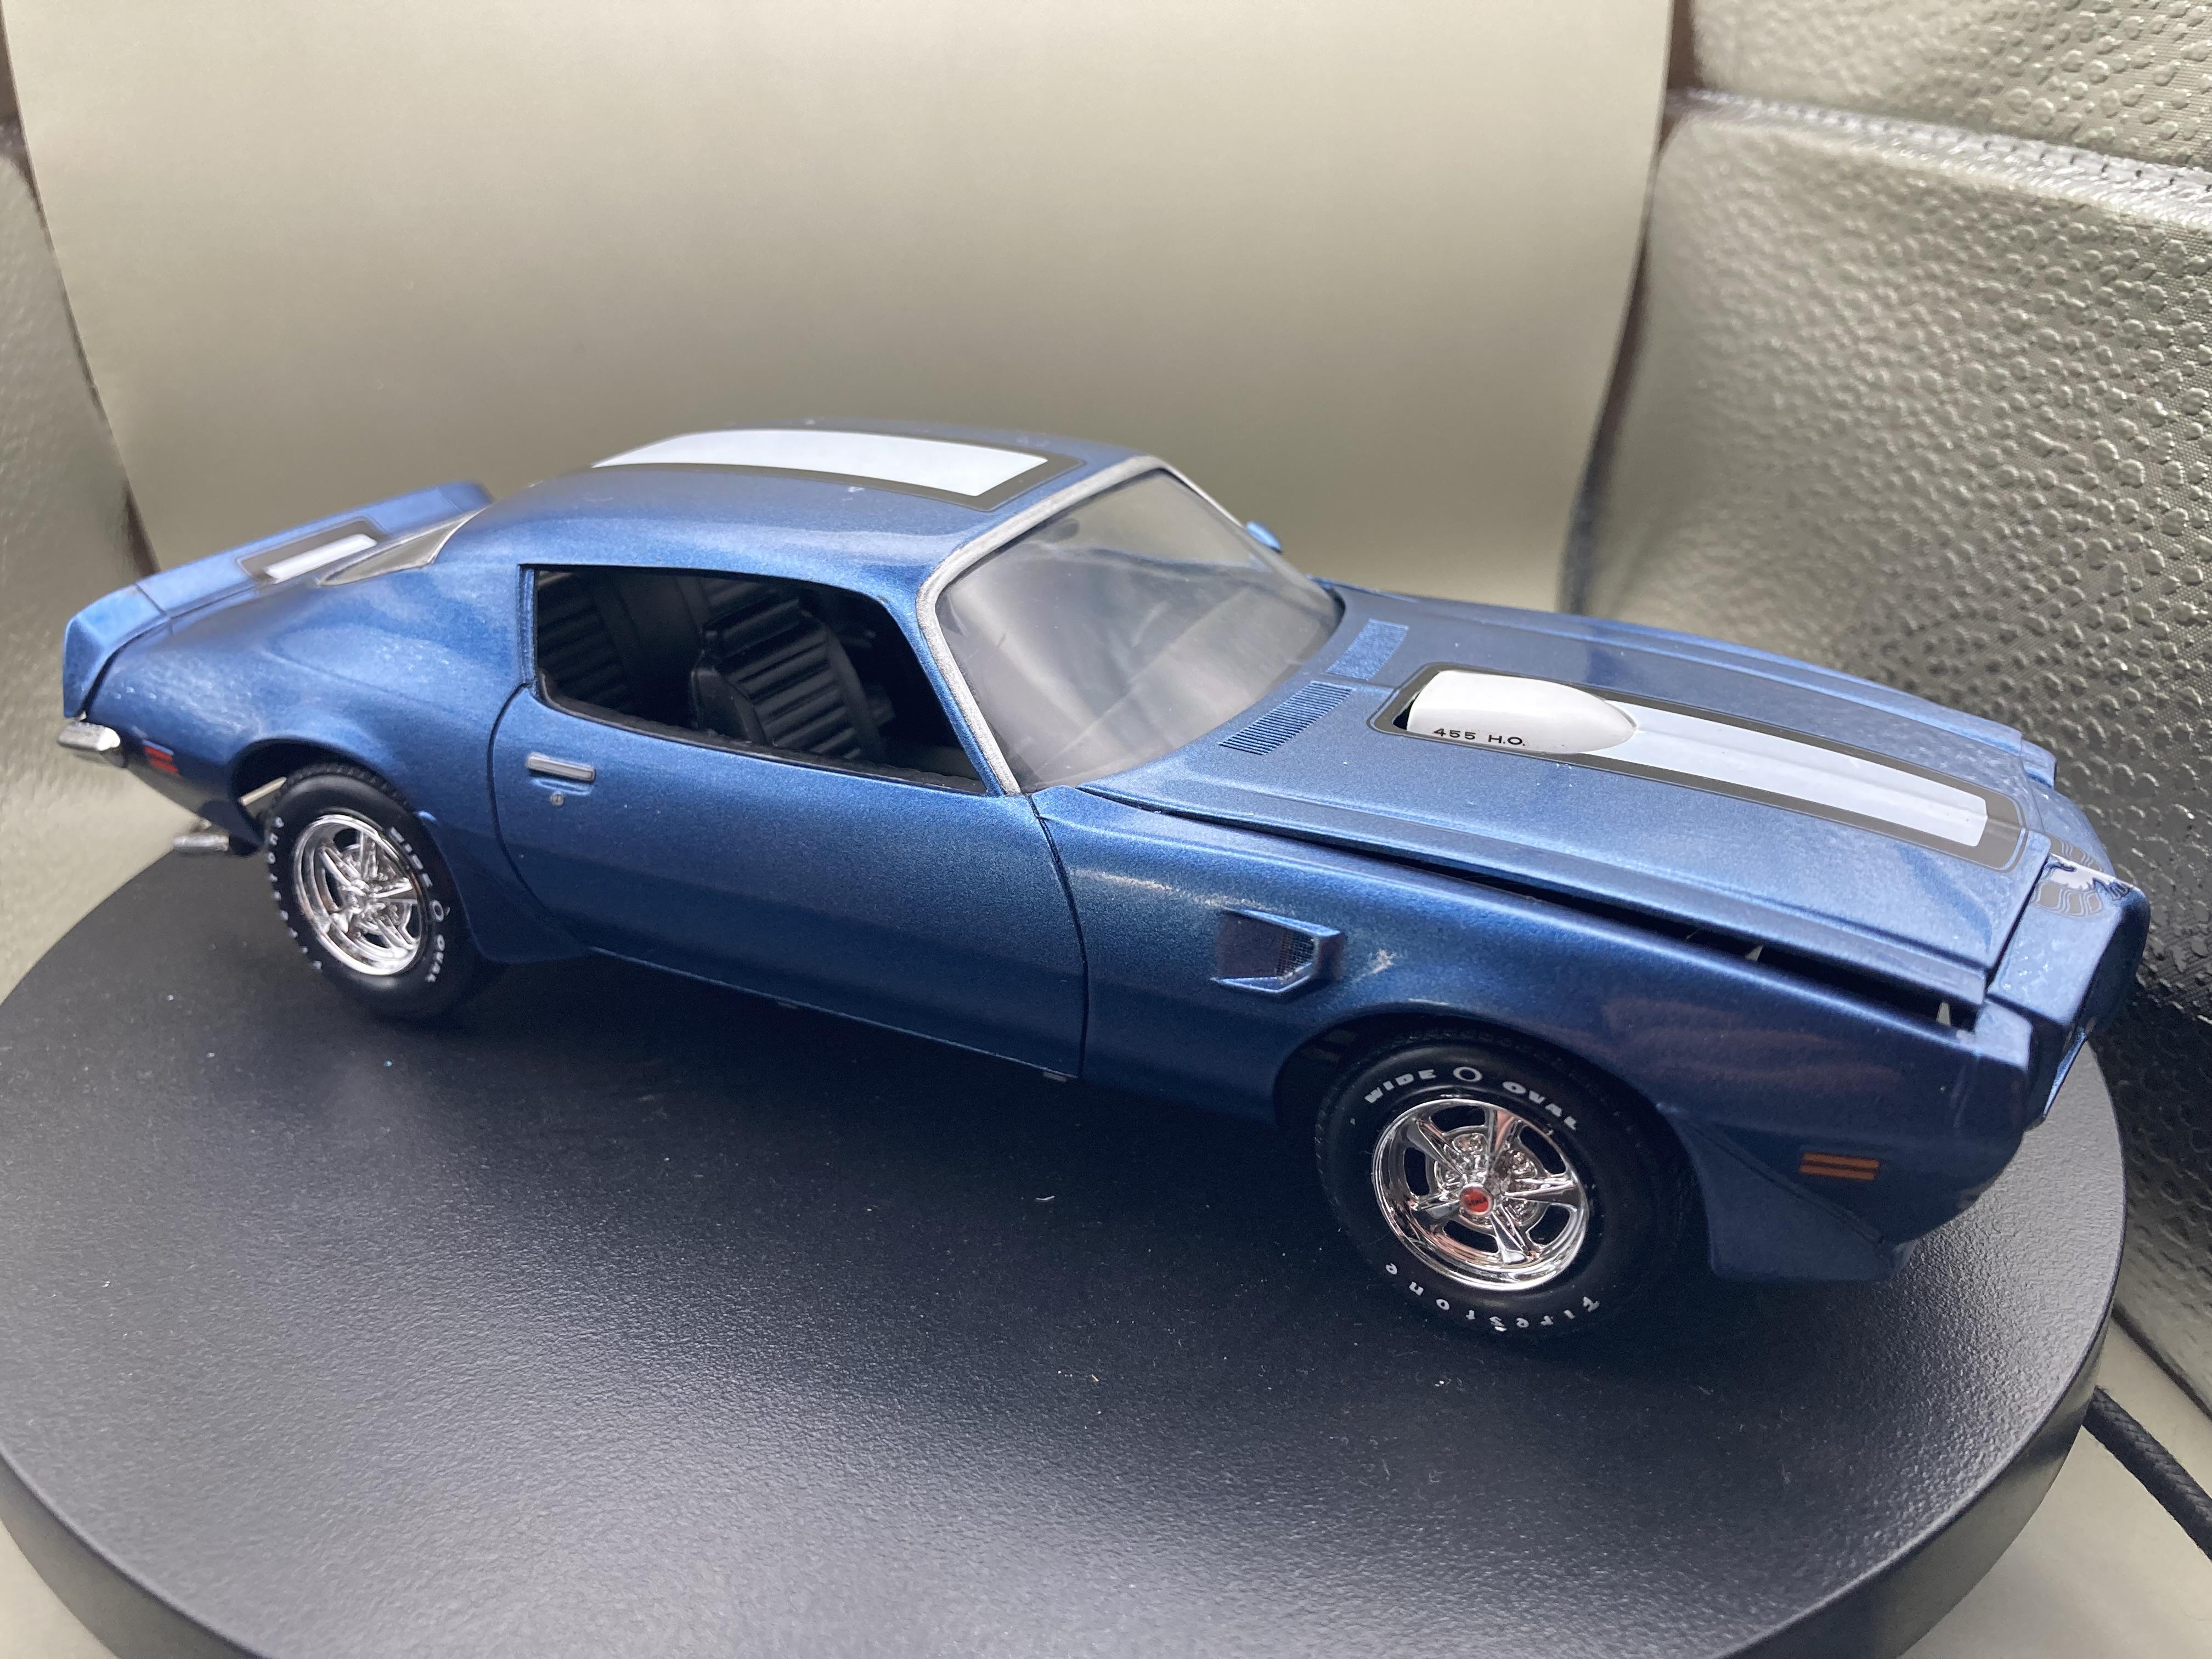
I had an automotive paint shop mix the Lucerne Blue from the original paint code. Despite a successful test-fit the hood wouldn’t clear the front of the shaker once everything was glued in place so I’ve left the hood off the latch. Disaster struck when I dropped resin all over the windows but I successfully polished out the blemishes with a range of sanding sponges and polishing pastes; the process has proved a very valuable experience in many ways. I enjoyed making this one. It came together easily after two failures that preceded it.
- 22 replies
-
- 10
-

-
The body gets its first round of clear coats. Outlaw Paint’s 2k Diamond Finish Clear. It smells like crushed ants.
-
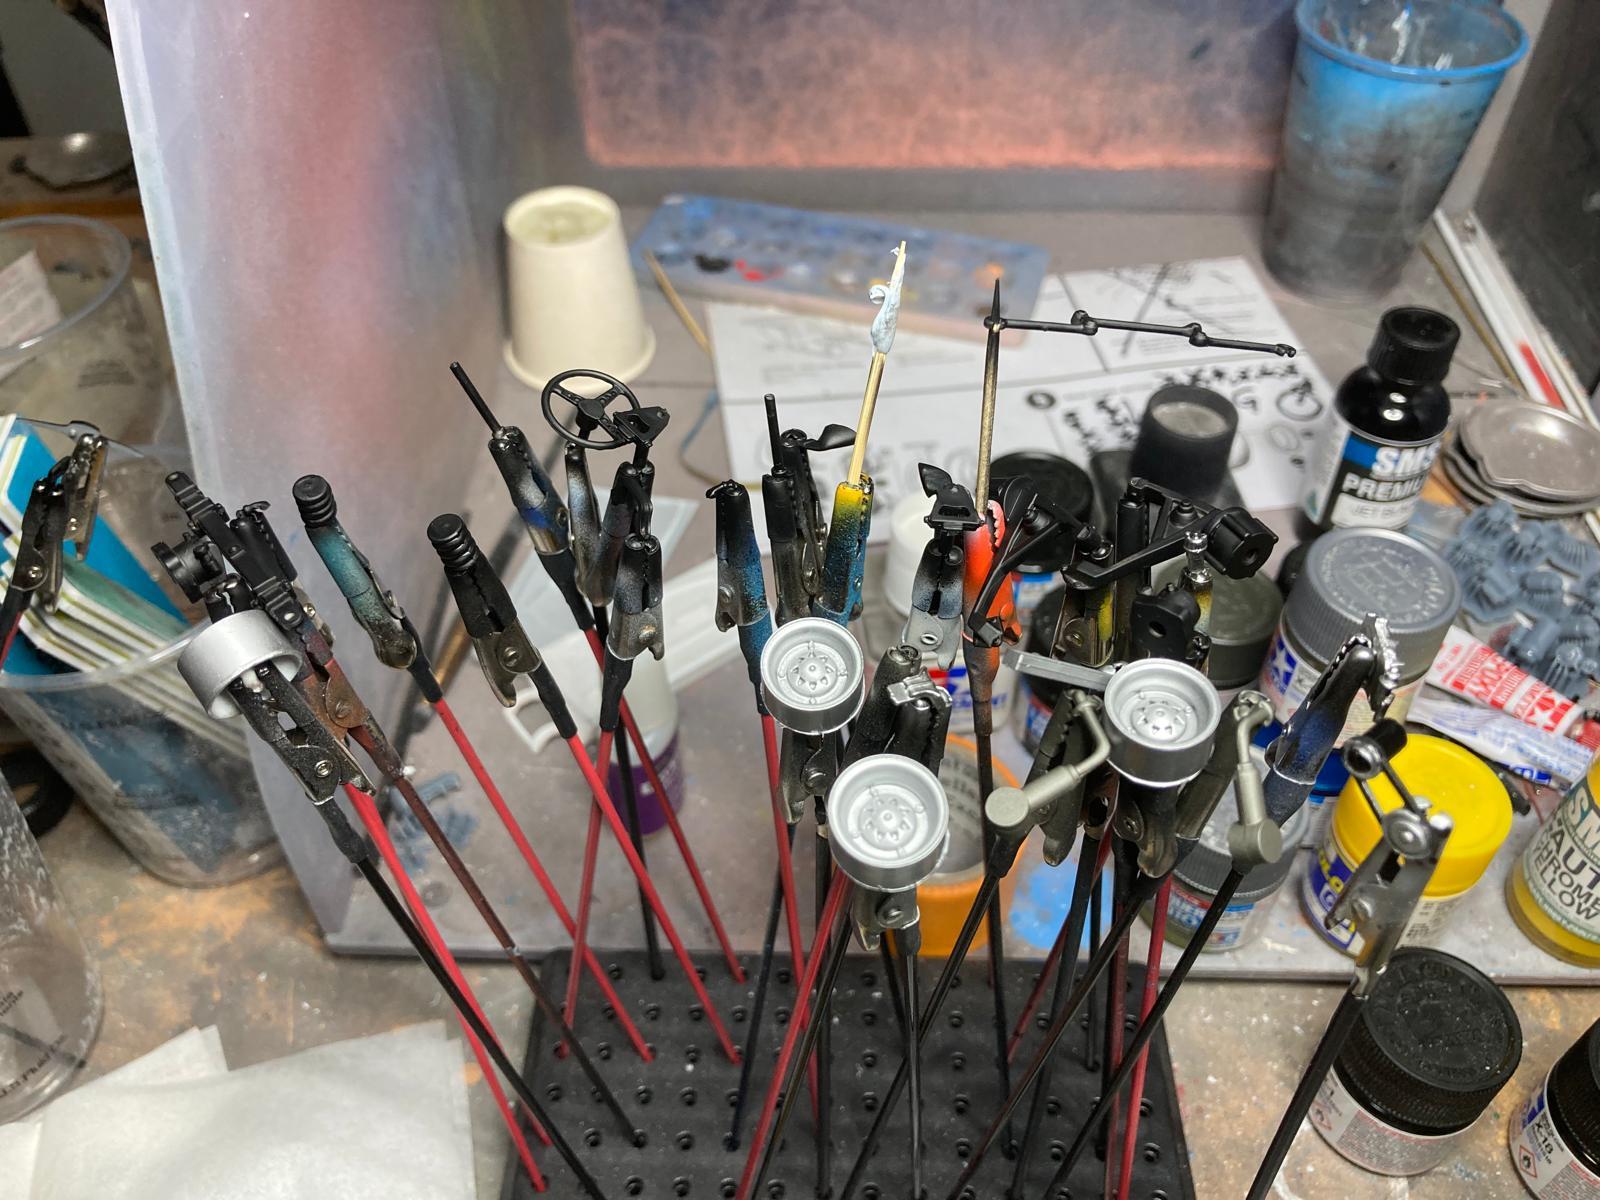
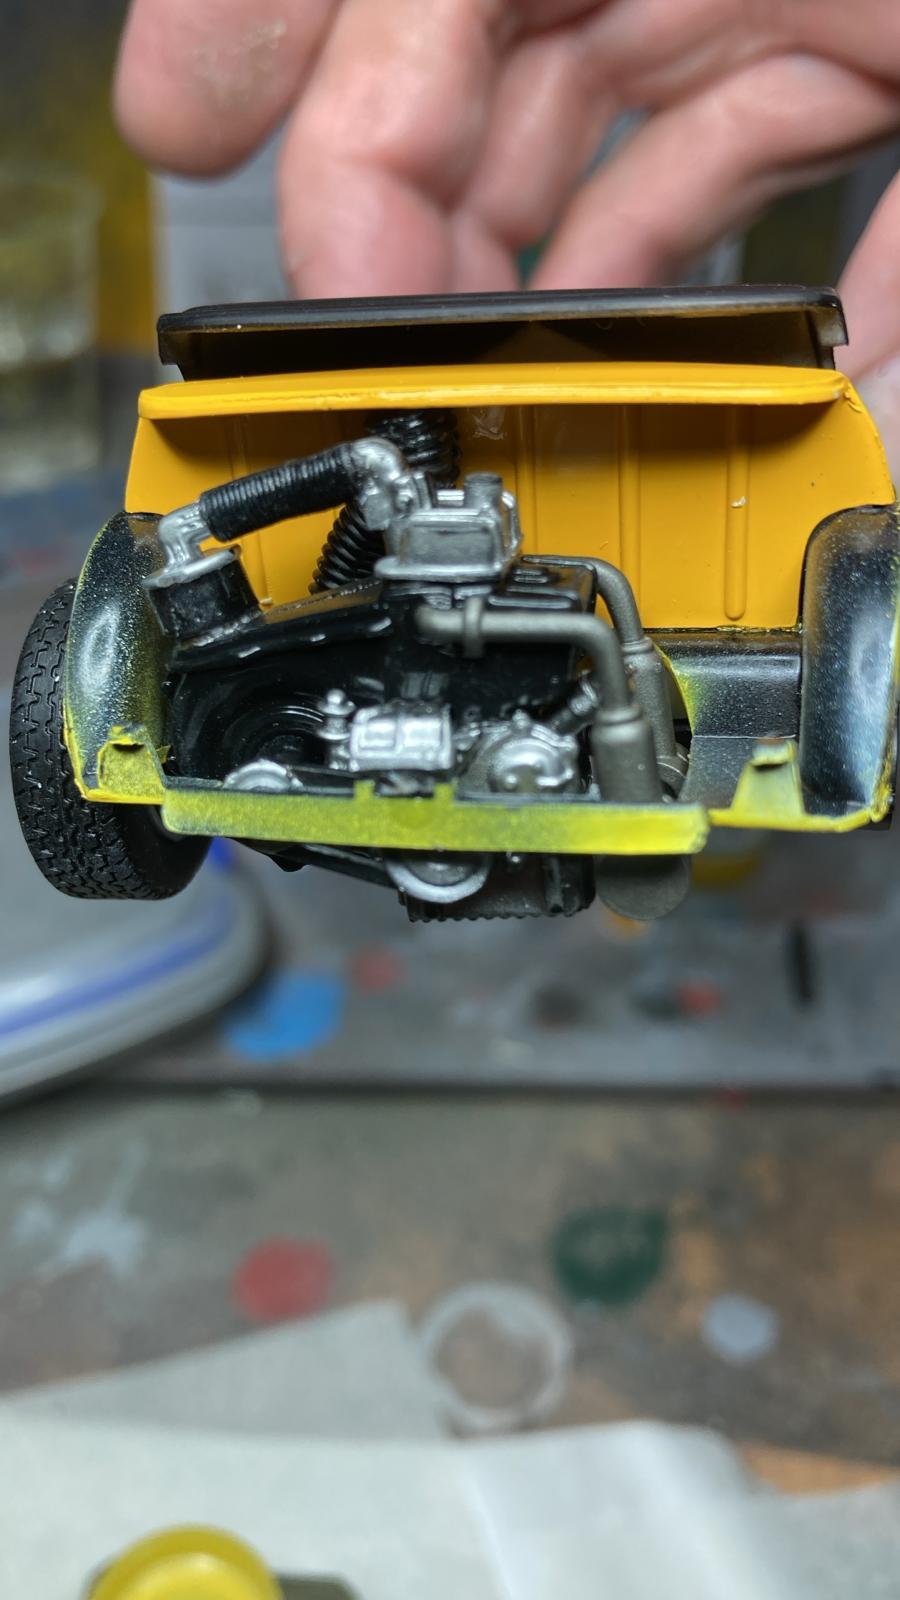
Finding the missing exhaust part (in a place I would swear in front of a jury on penalty of death that I’d looked a dozen times previously) inspired me to add spark plug cables, a 3D-printed solenoid and wire to the distributor and similarly 3D-printed oil filter with hoses to the oil sump. I used 90-degree spark plug boots under the oil filter base plate as hose connectors. and the interior is done:
-
I'd be keen to see the blown drag-car version of this car. Thank for the comment.
-
Thanks Noel. Yes, Fiats have the reputation of being prone to rust here in Australia as well.
-
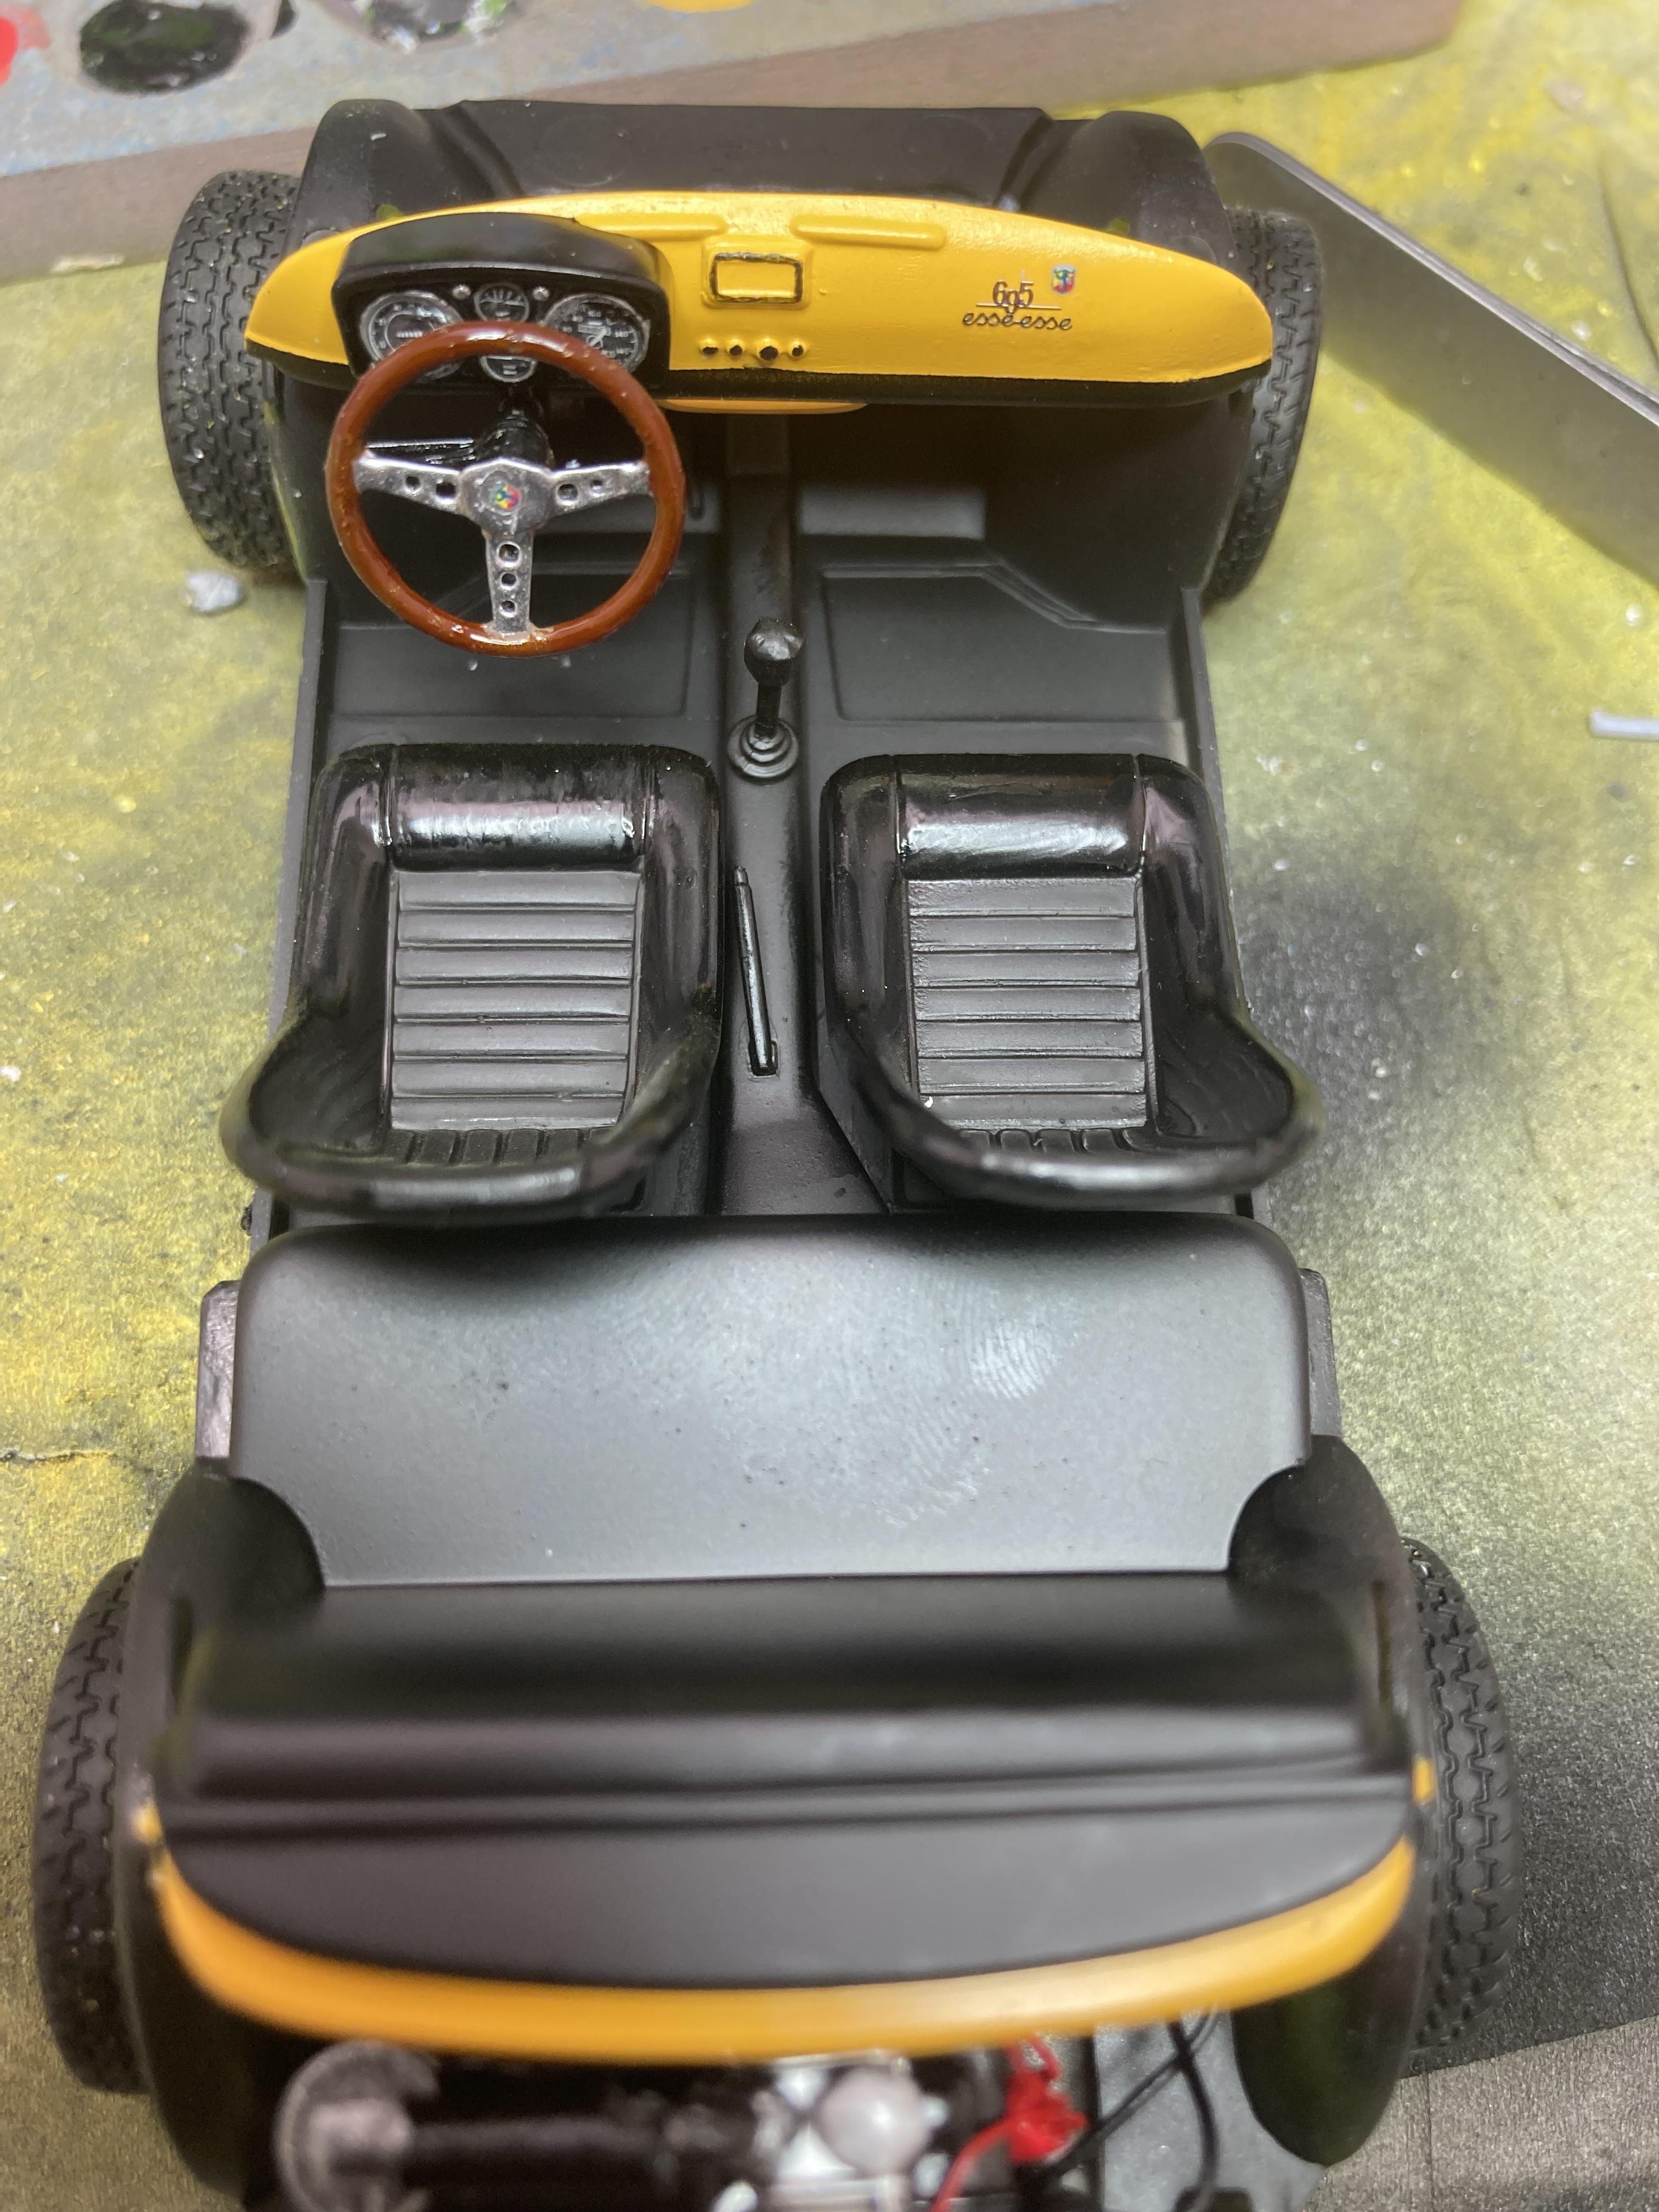
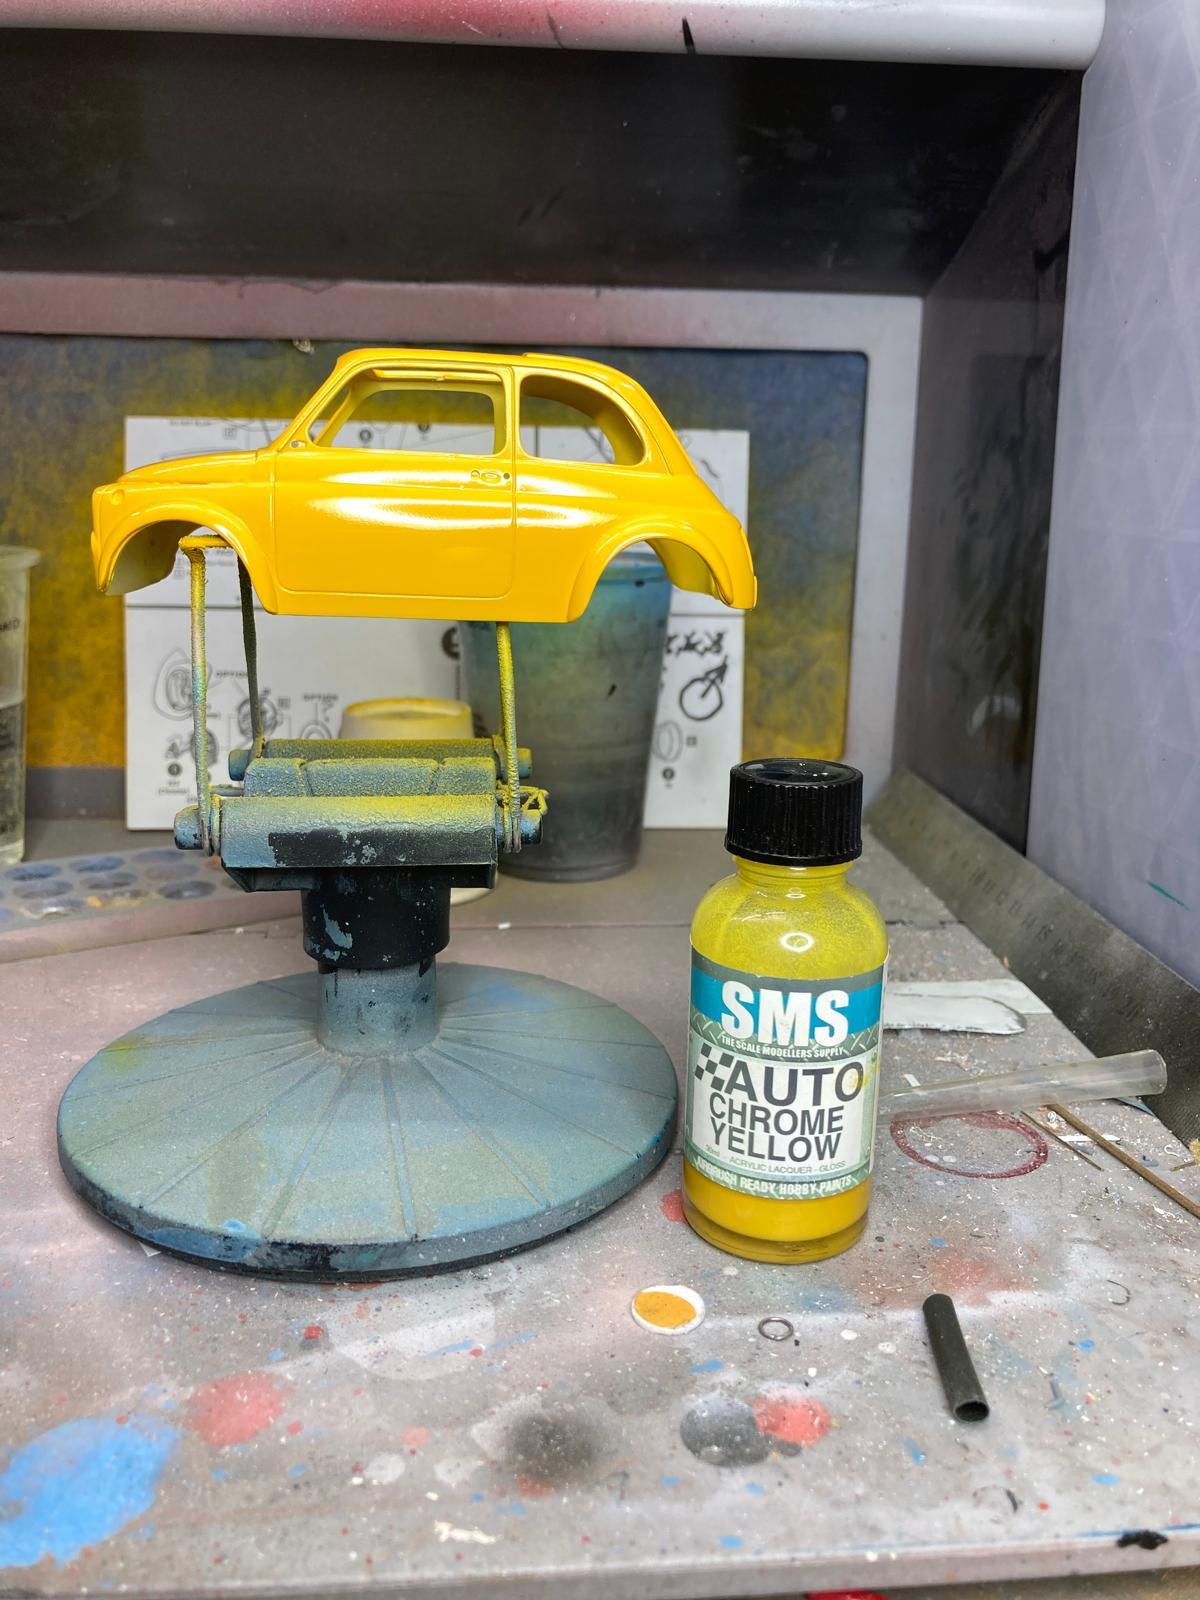
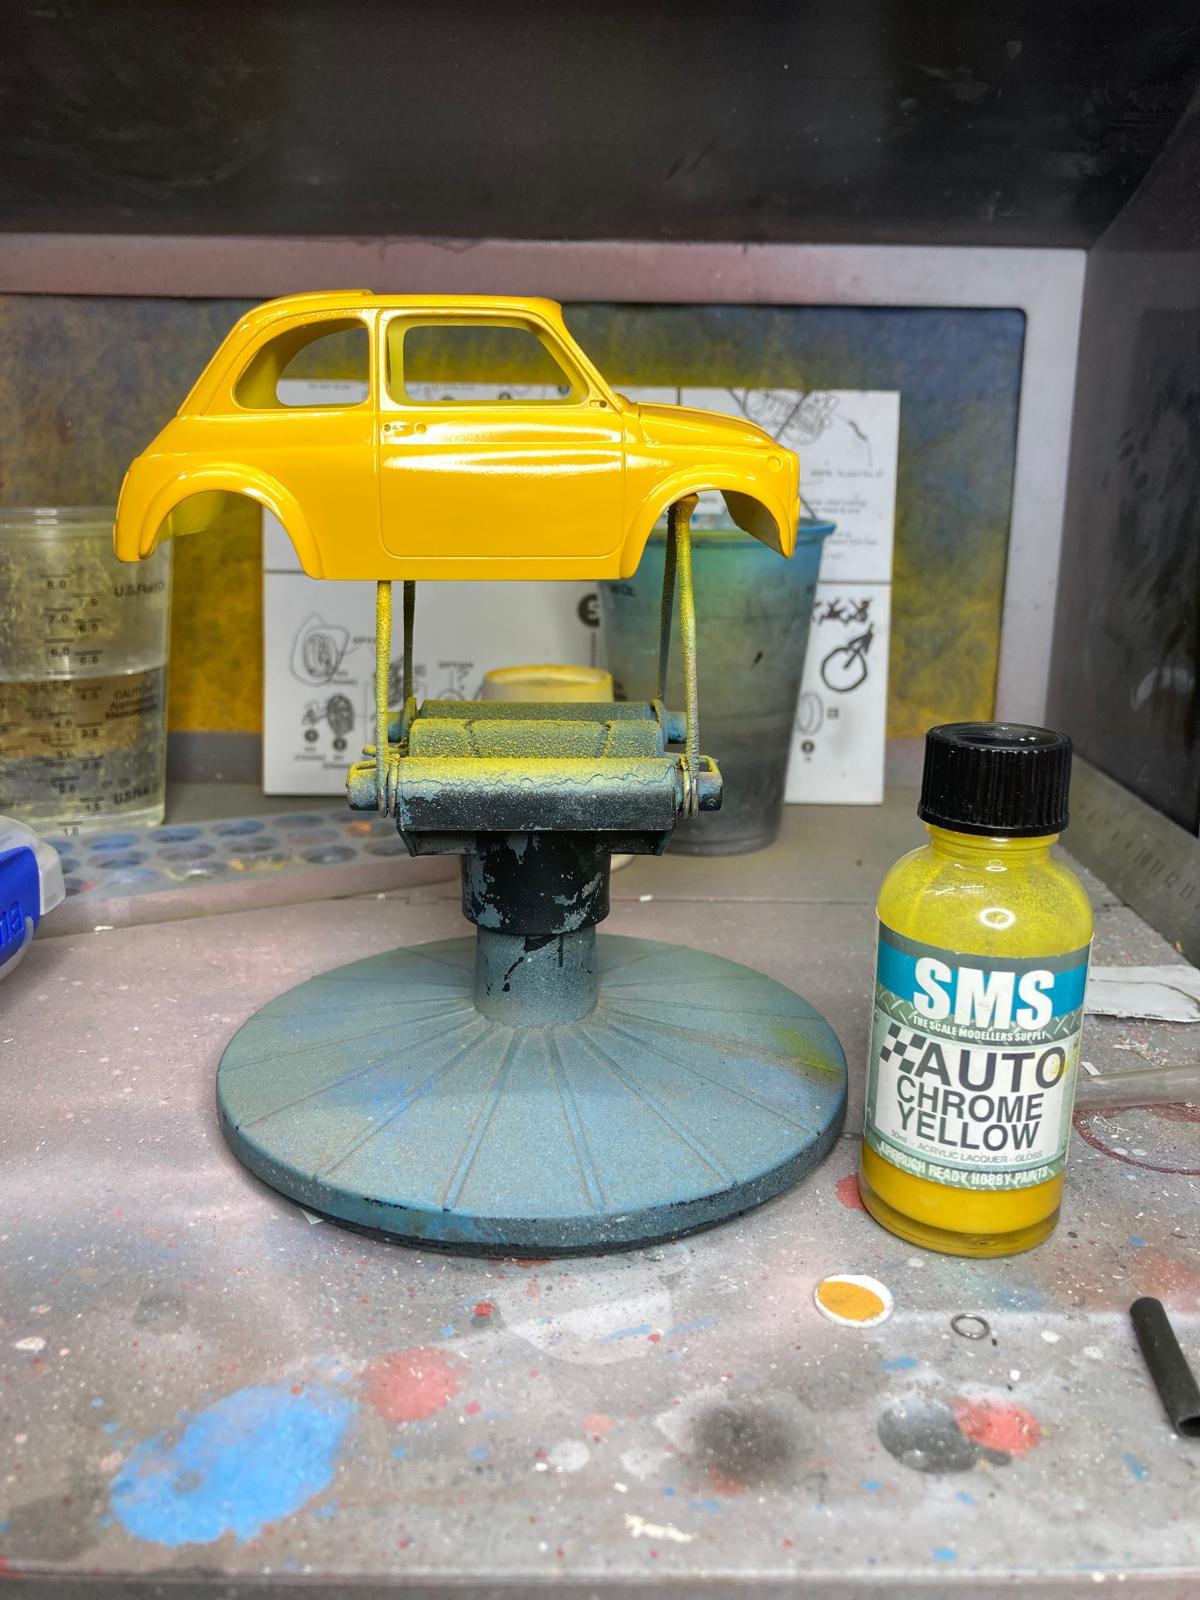
Thanks Sonny. The colour call-out gives yellow as an option and it is the color of my friend's modern version of the 500
-
Thanks John
-
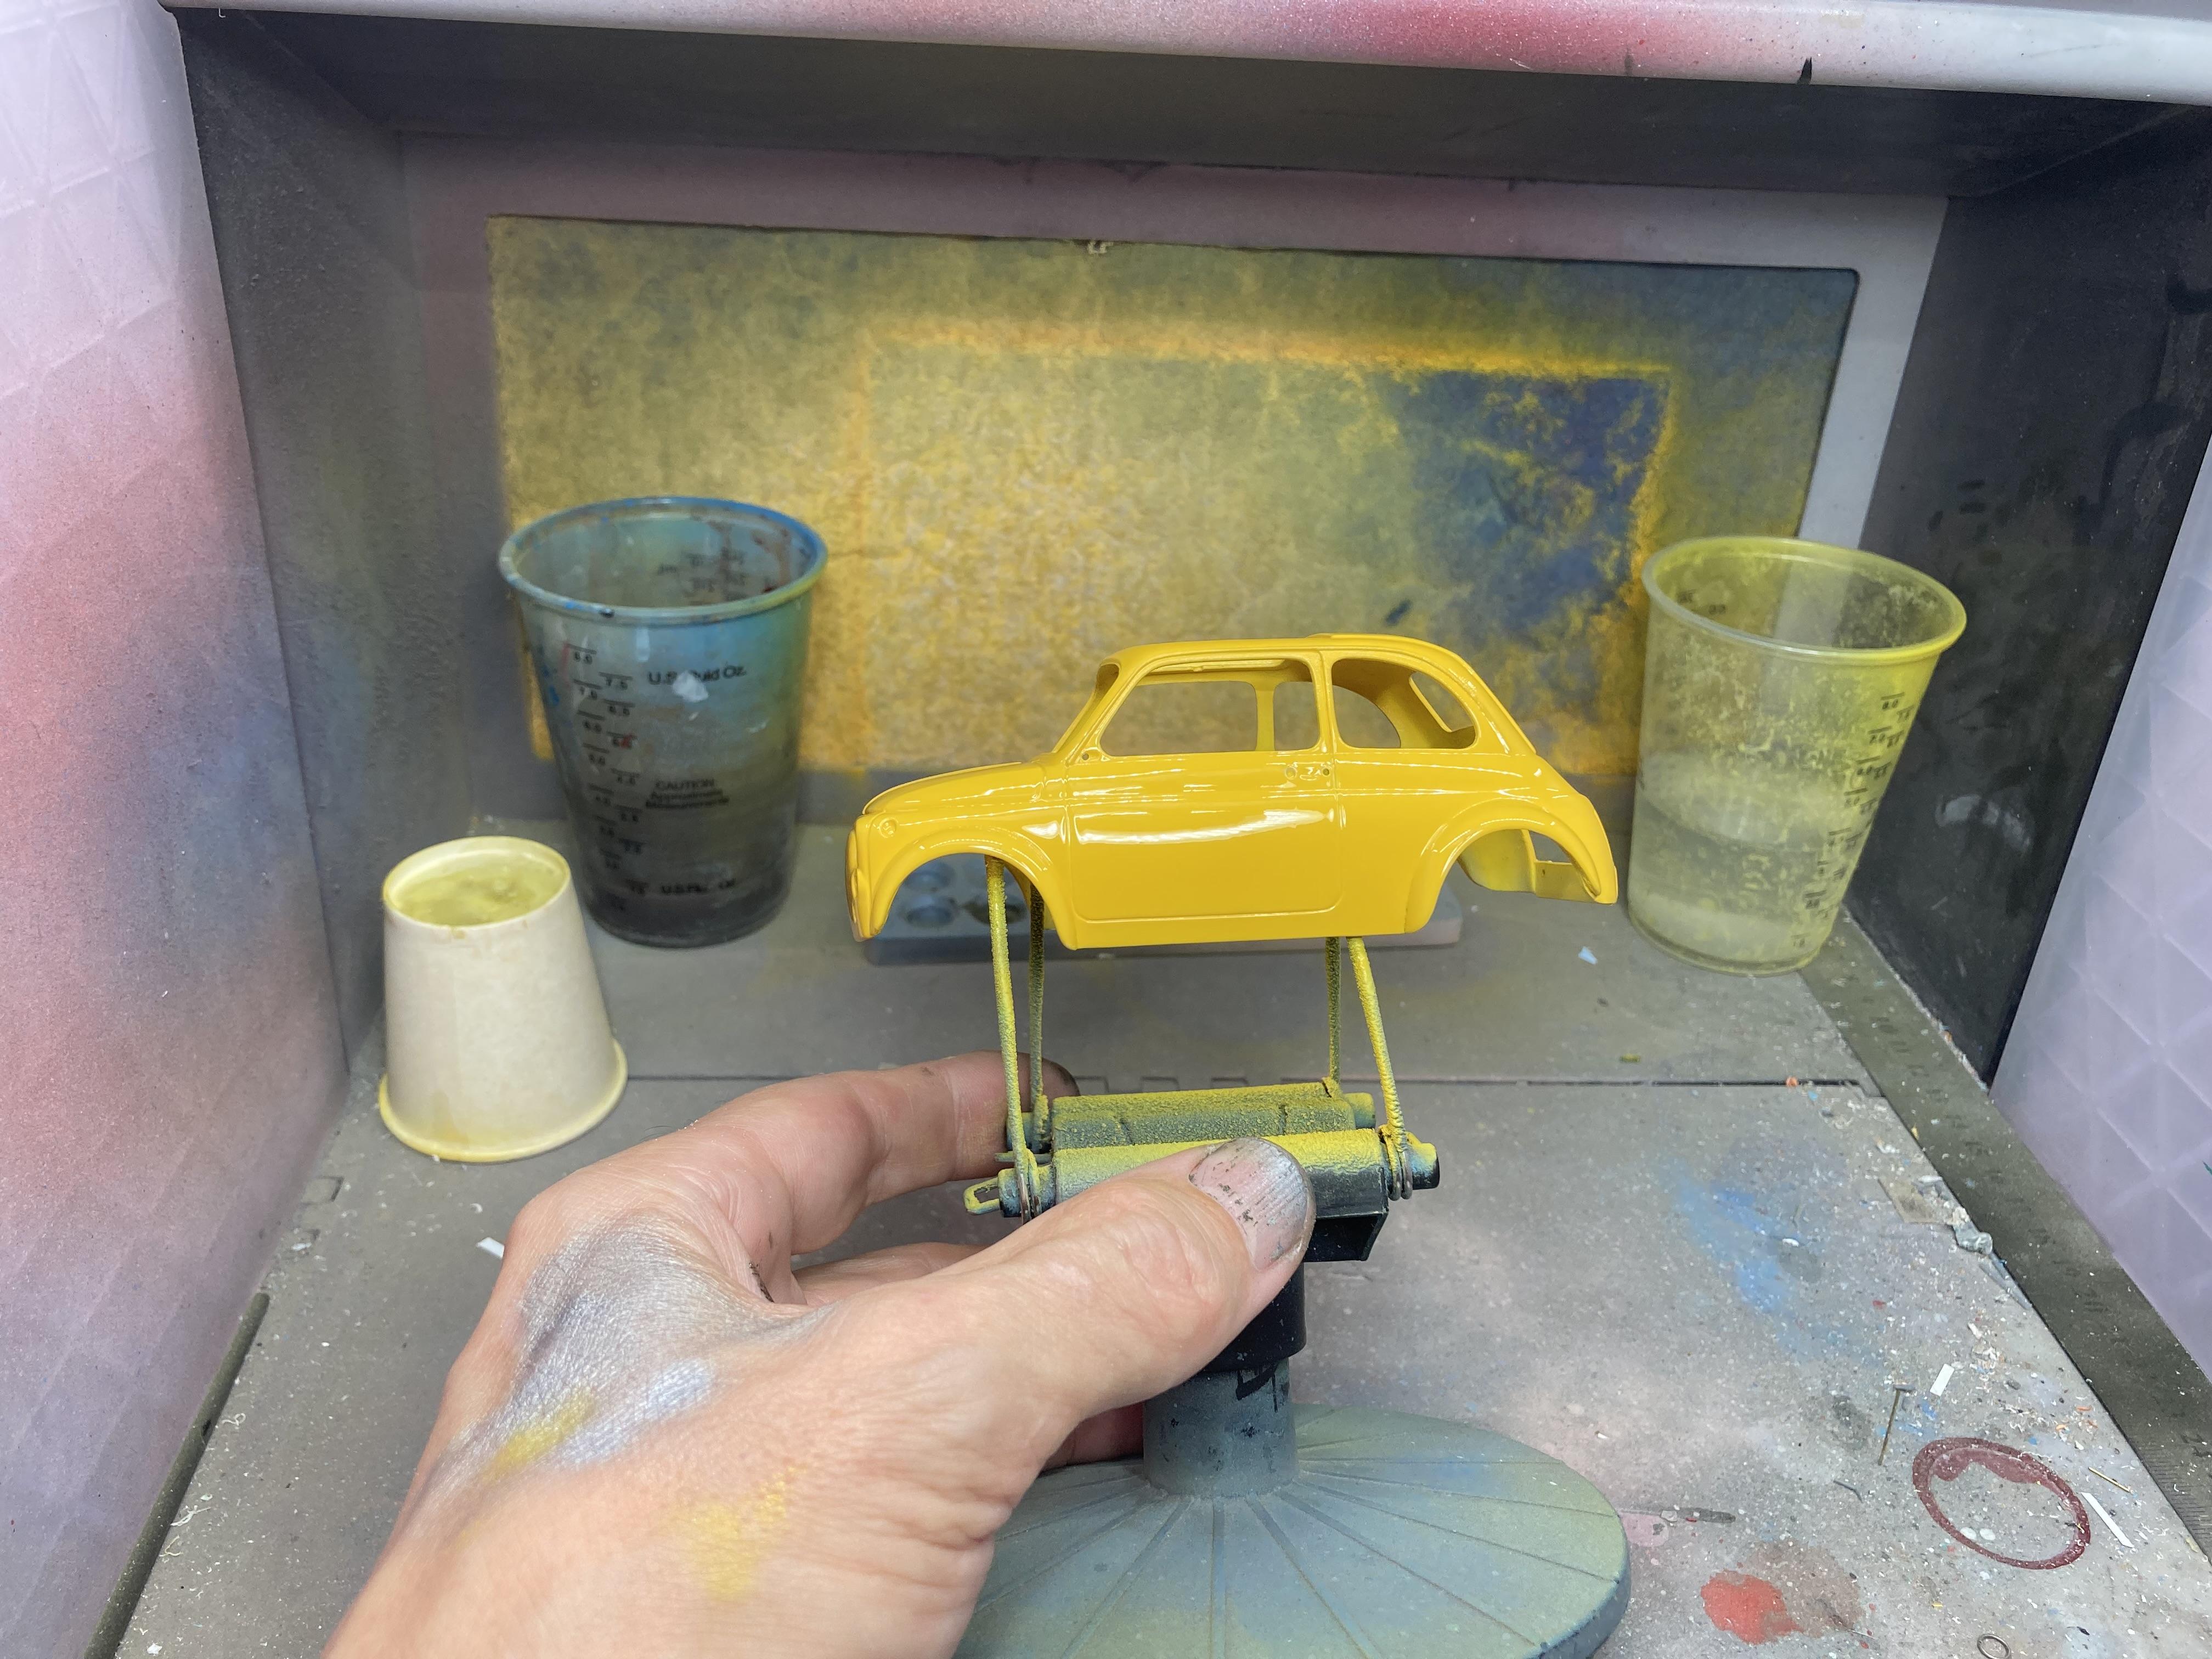
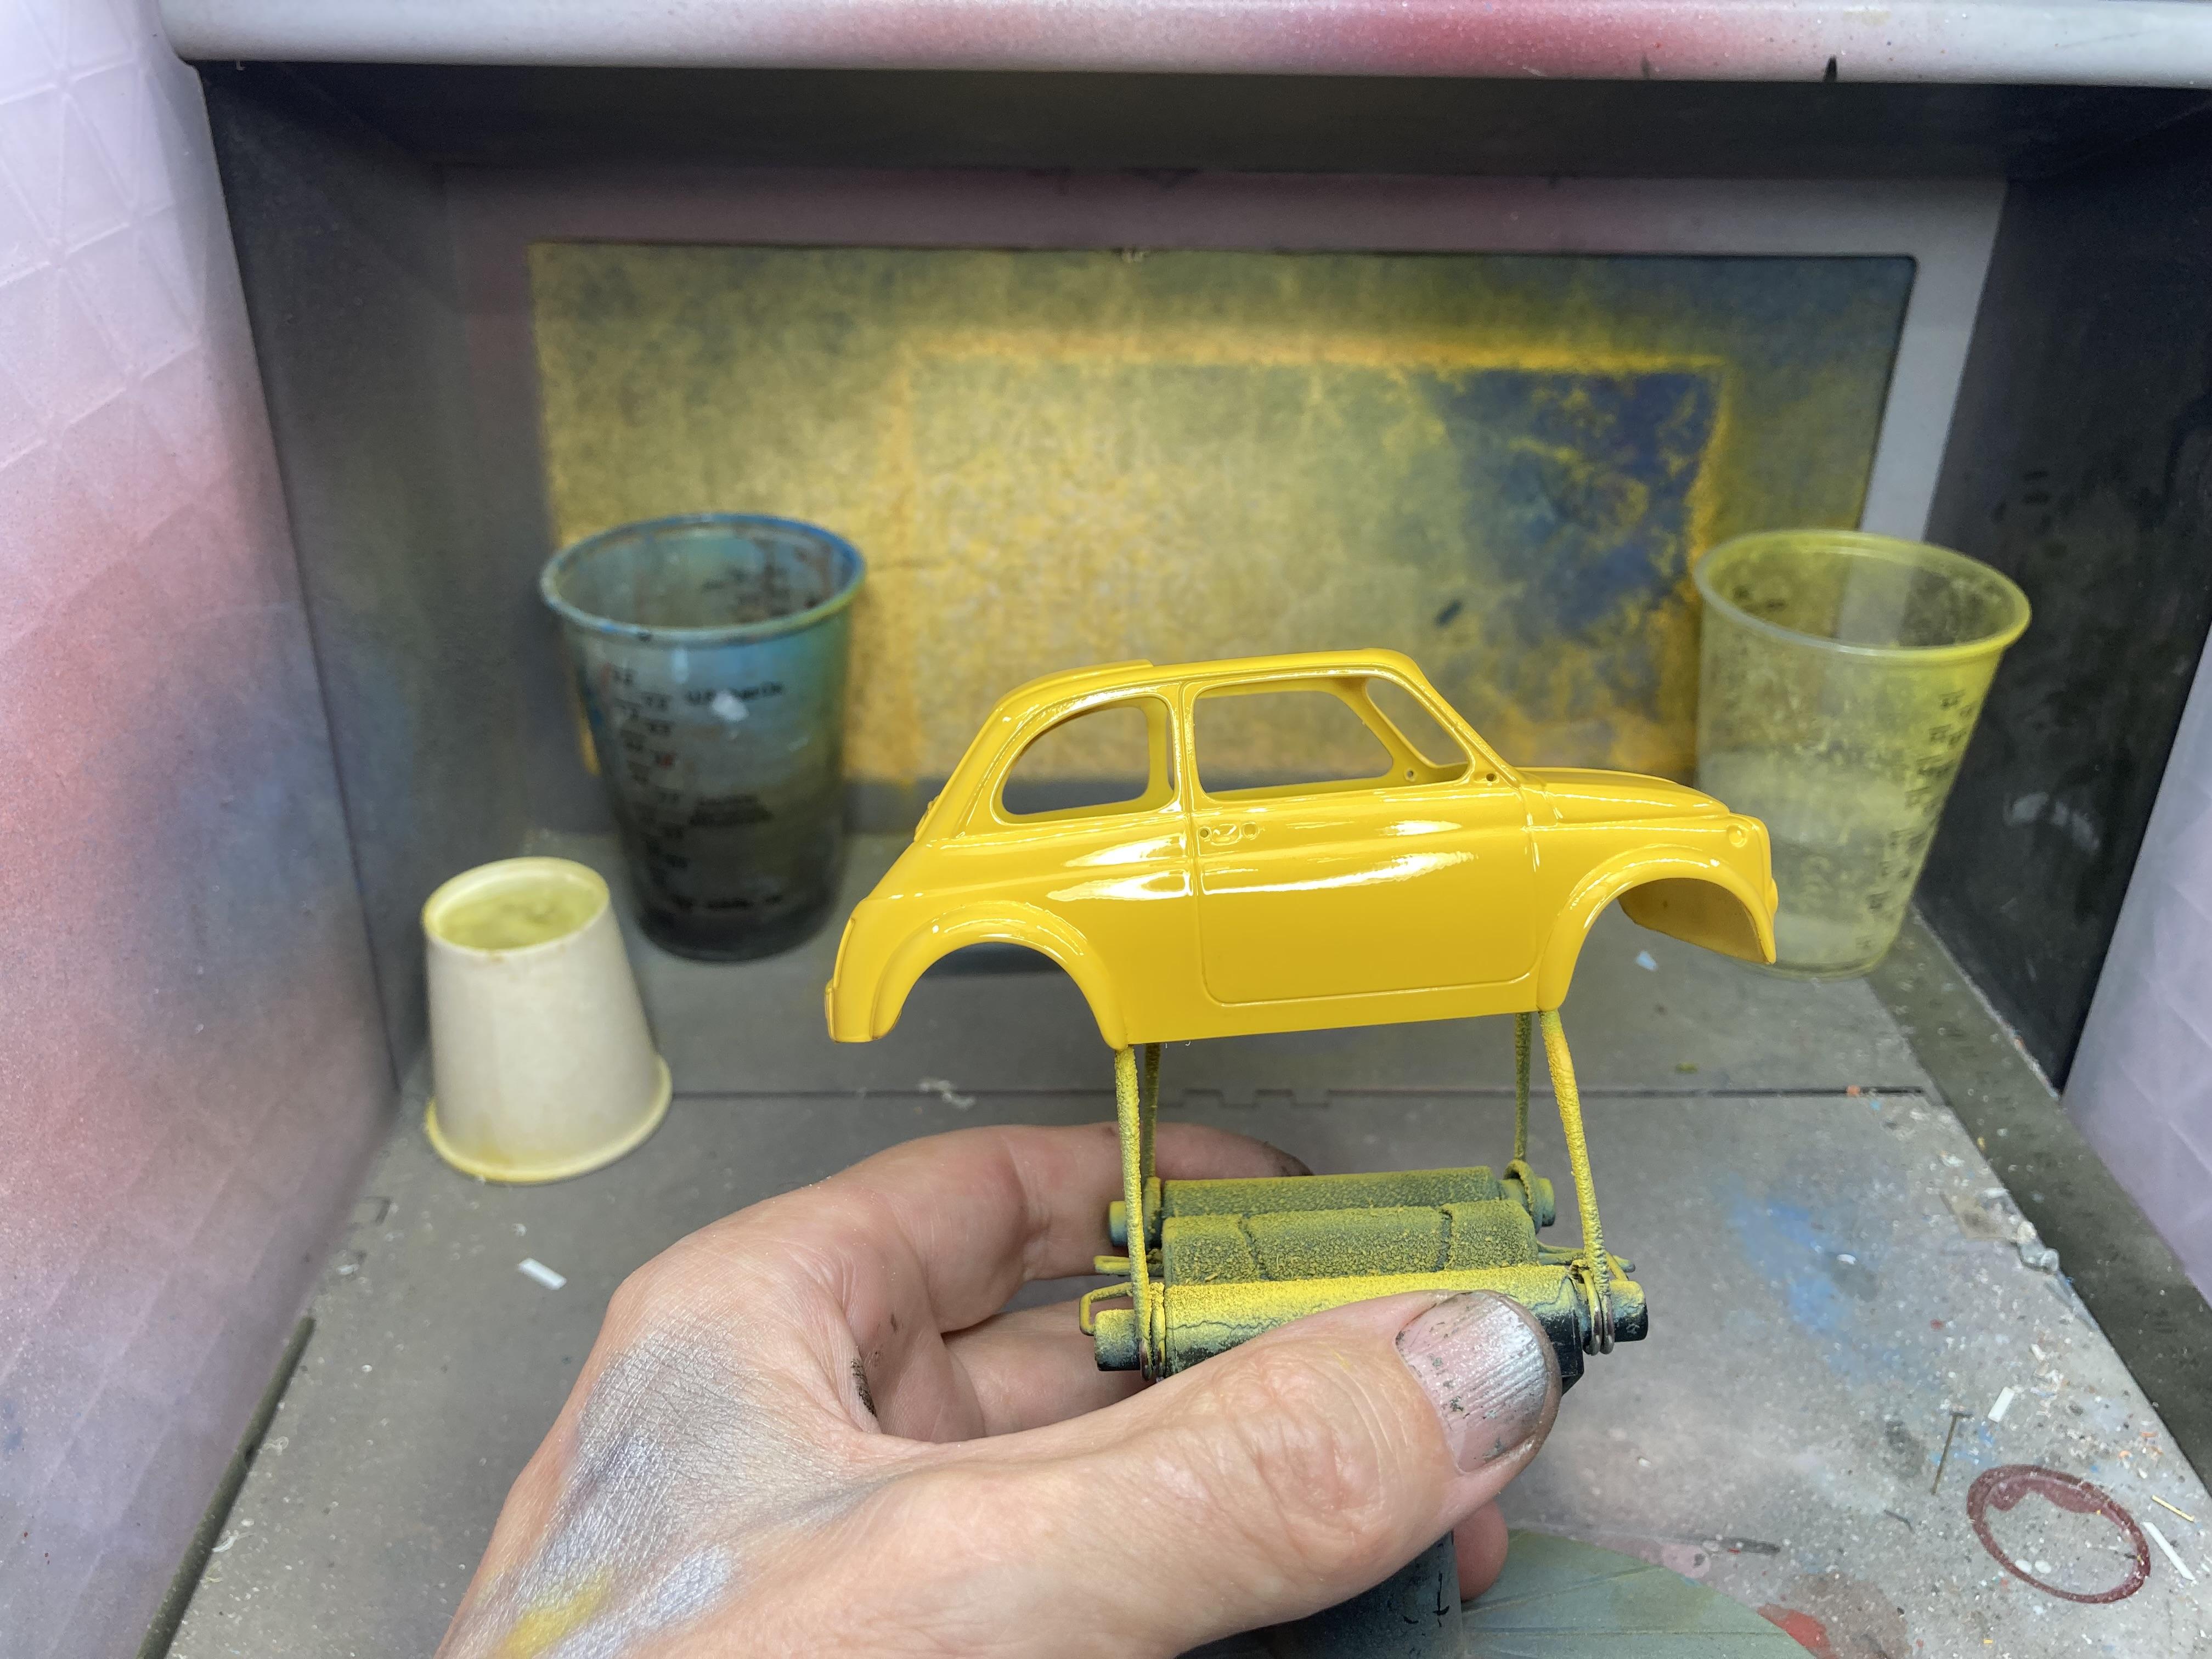
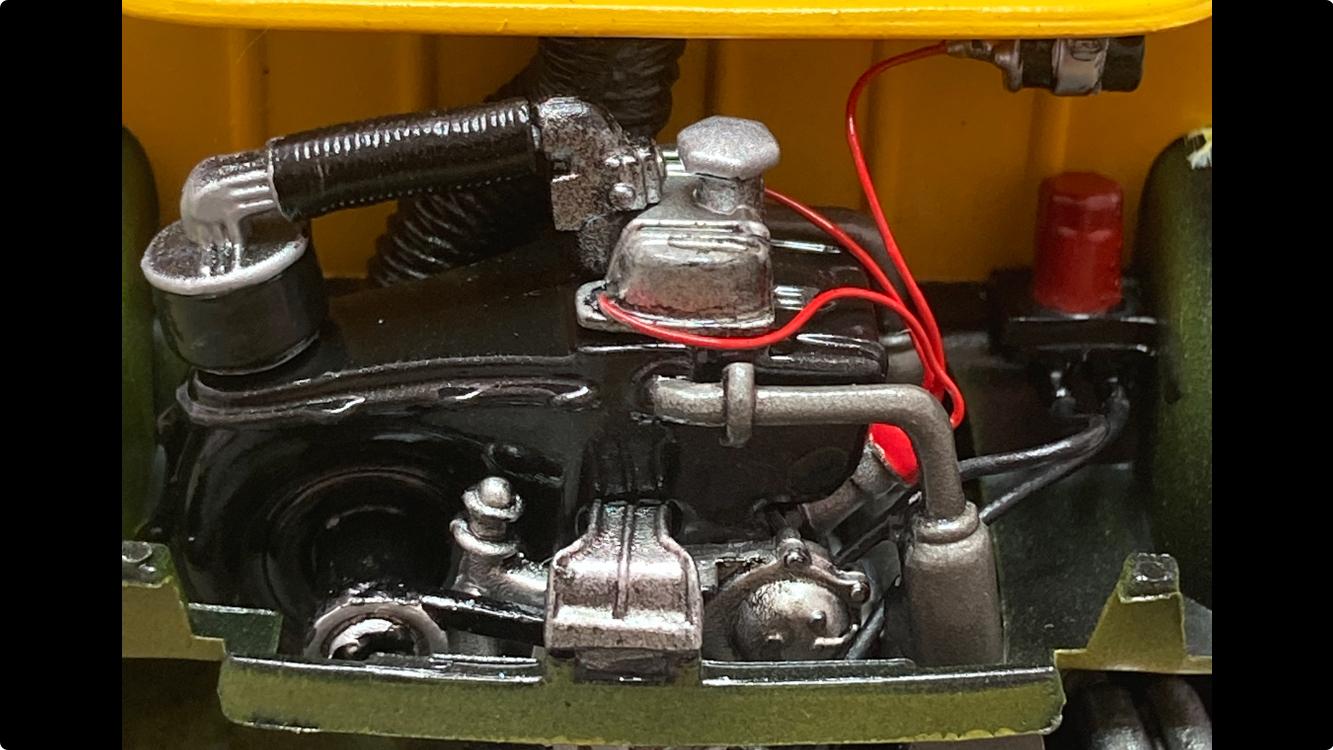
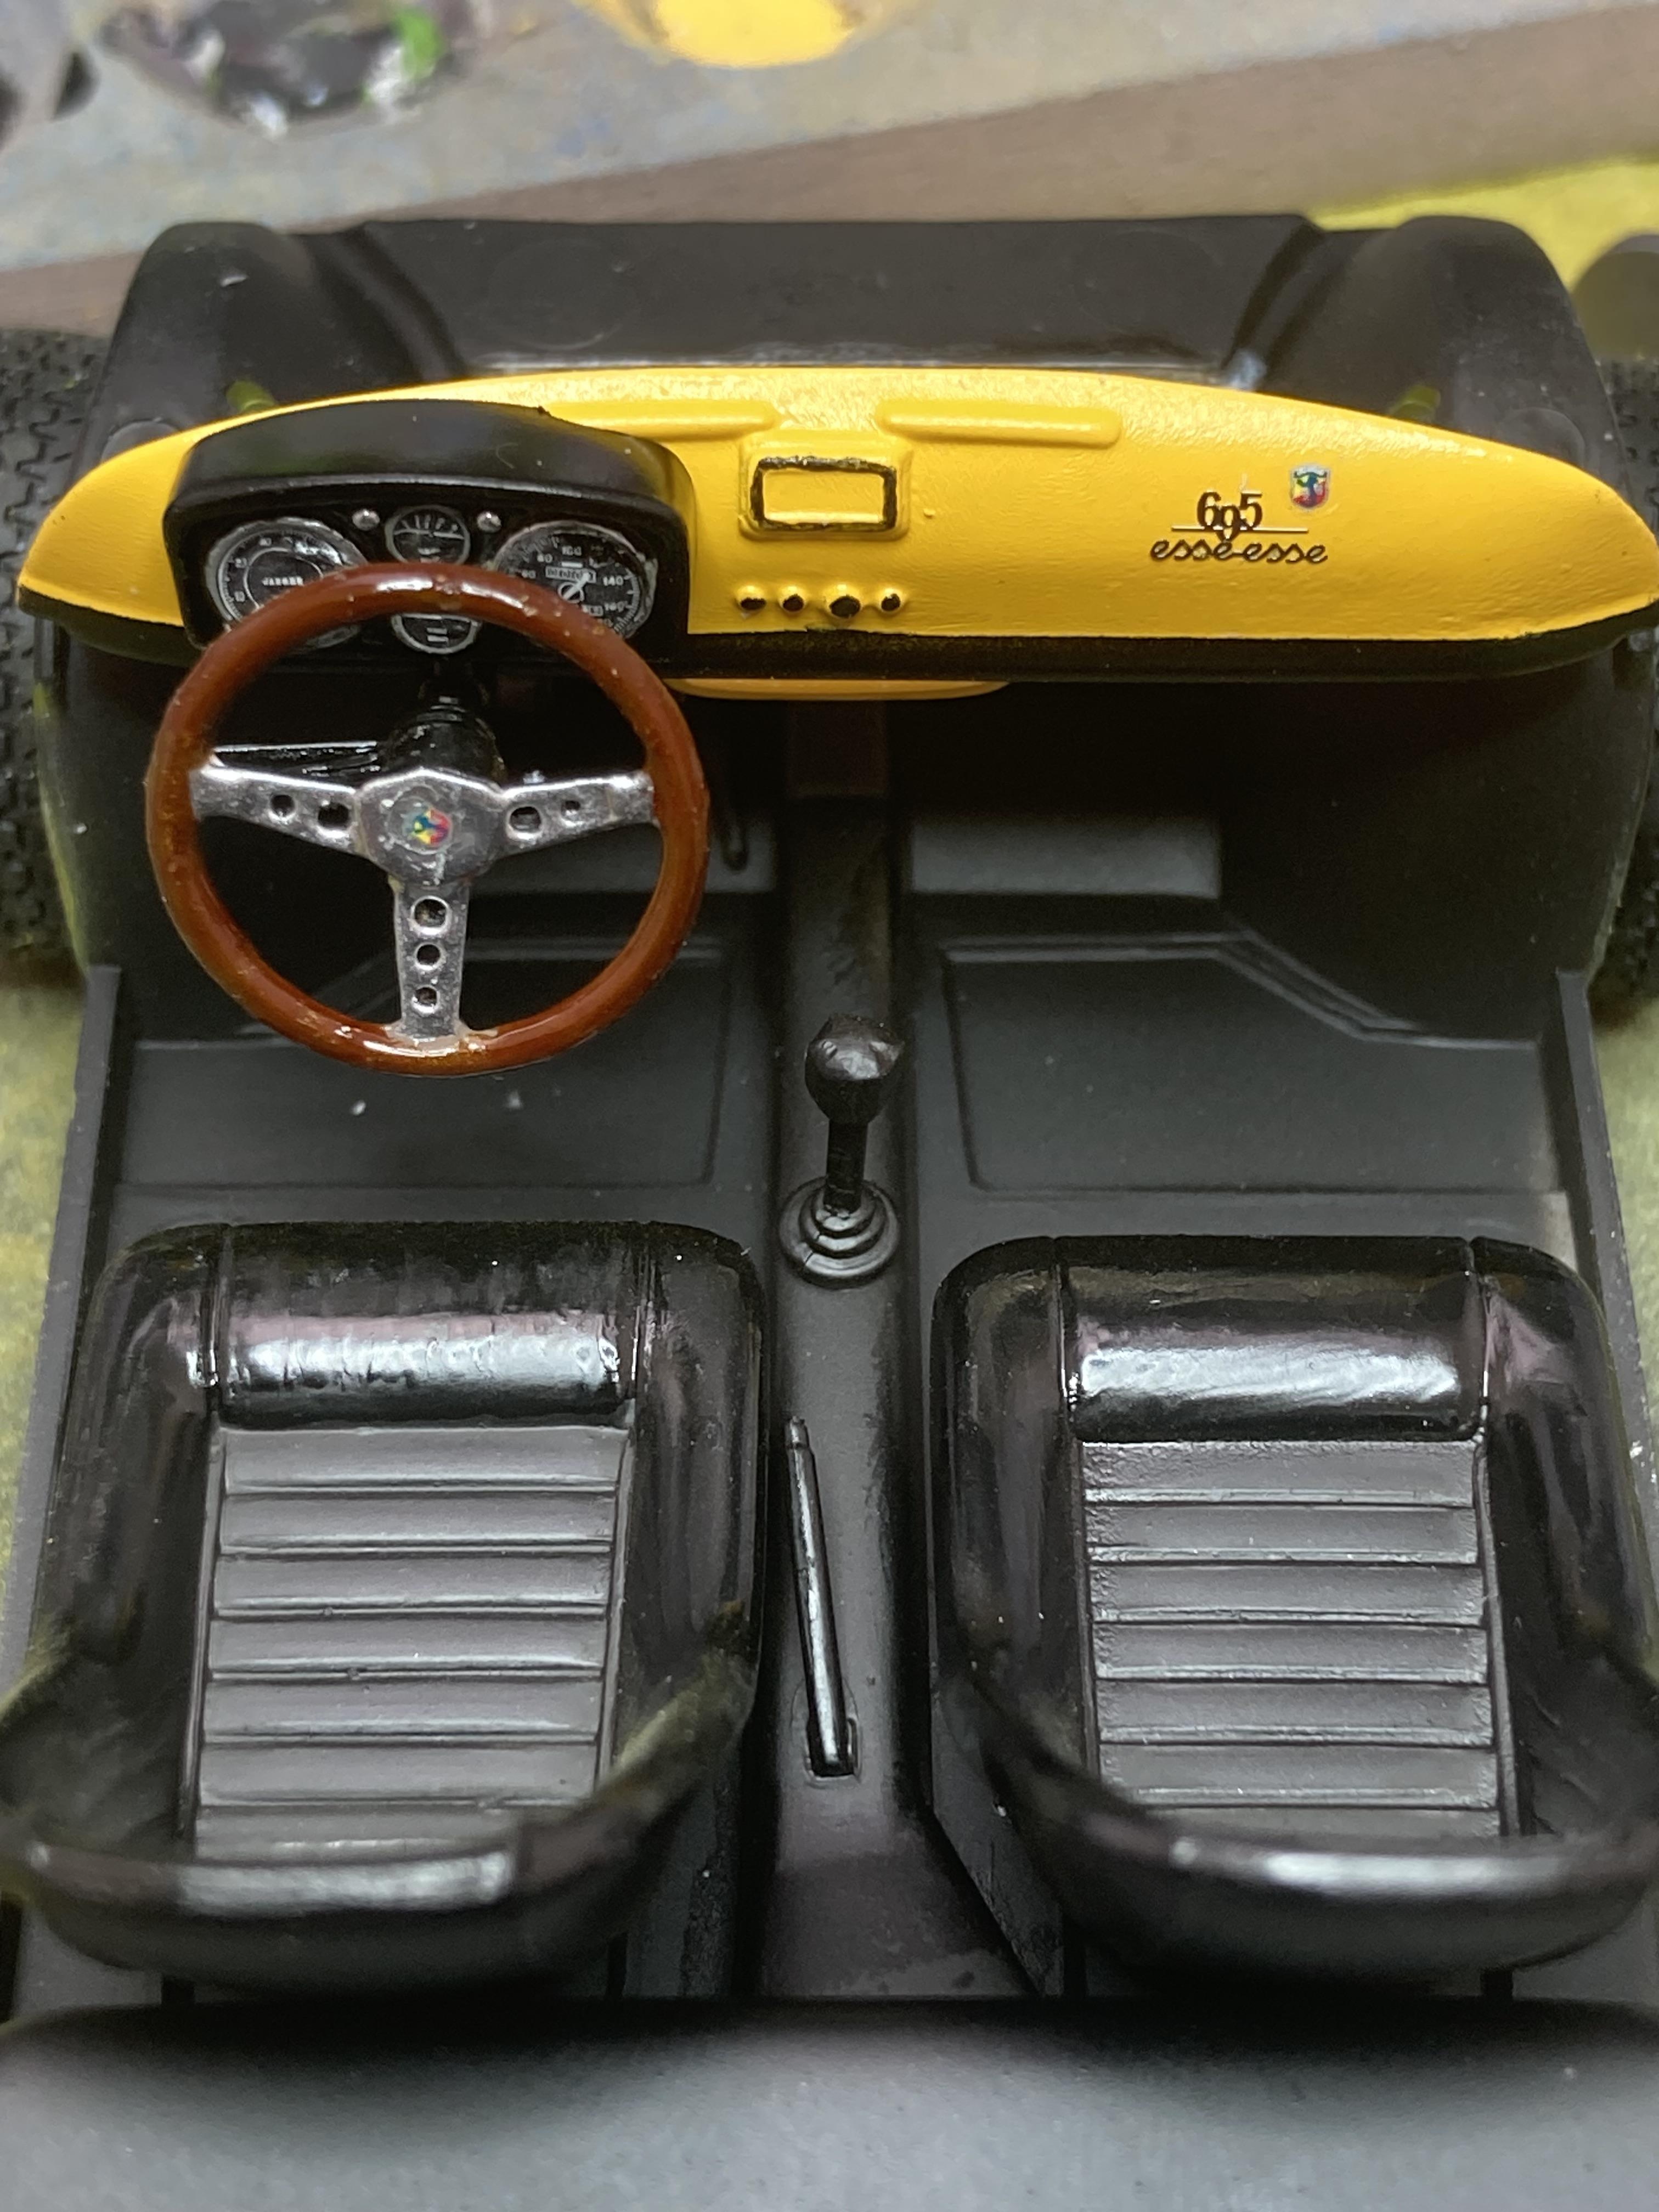
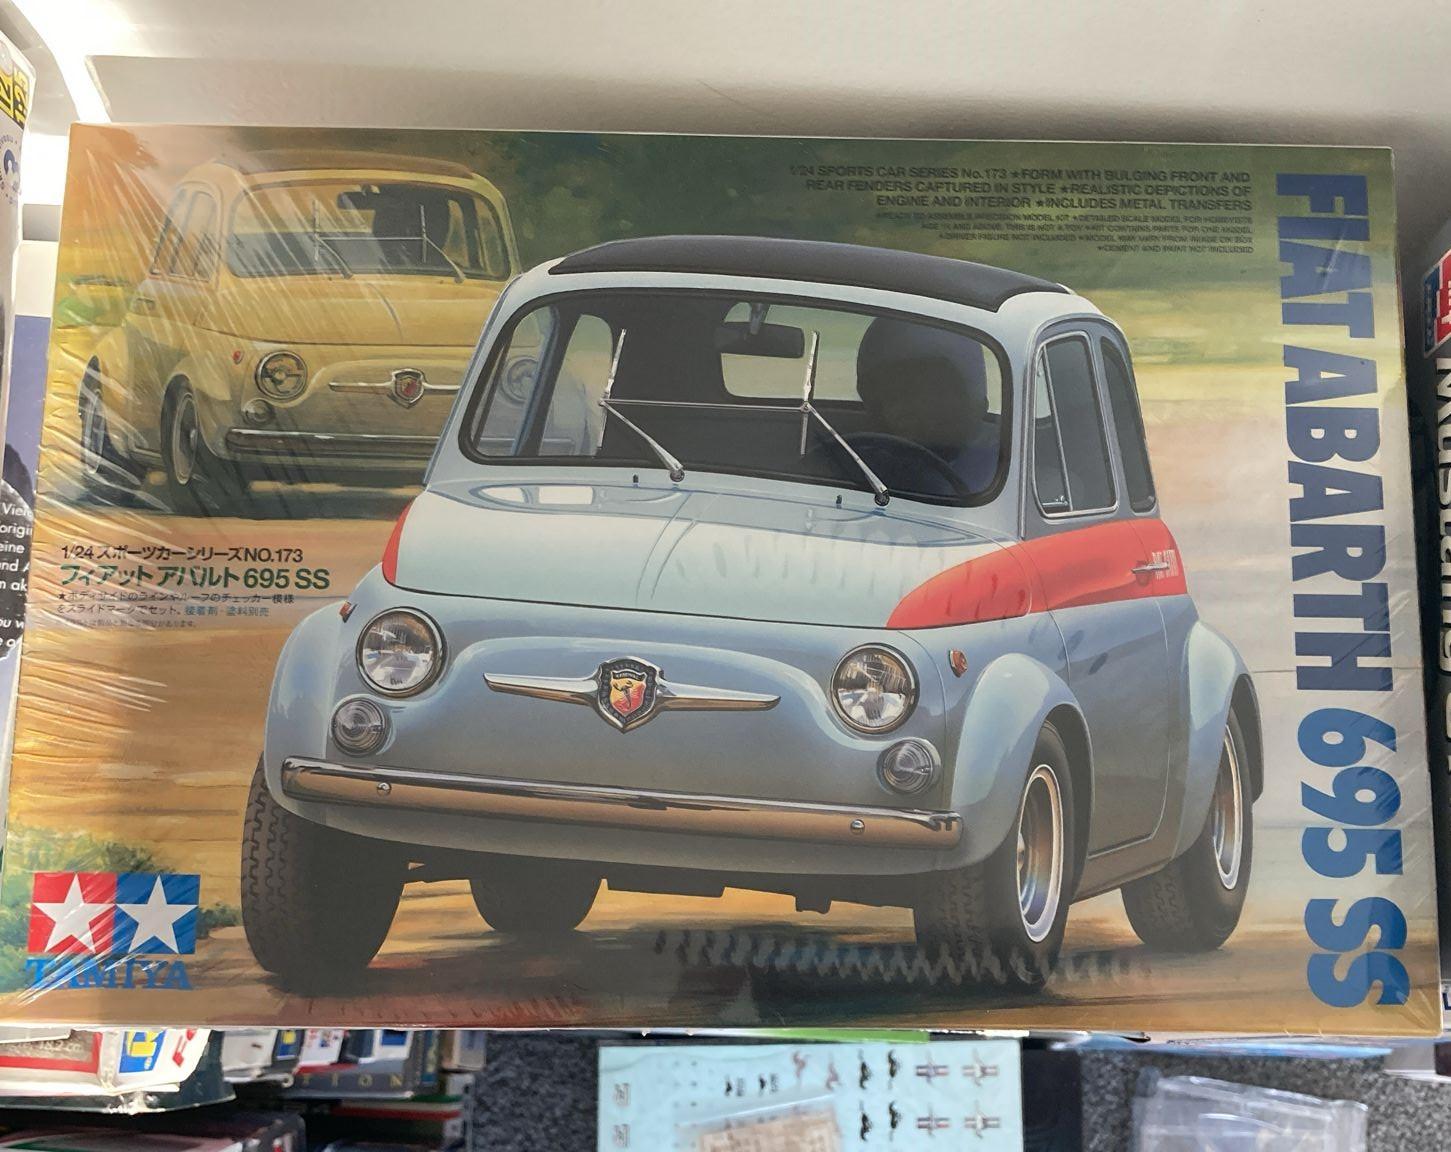
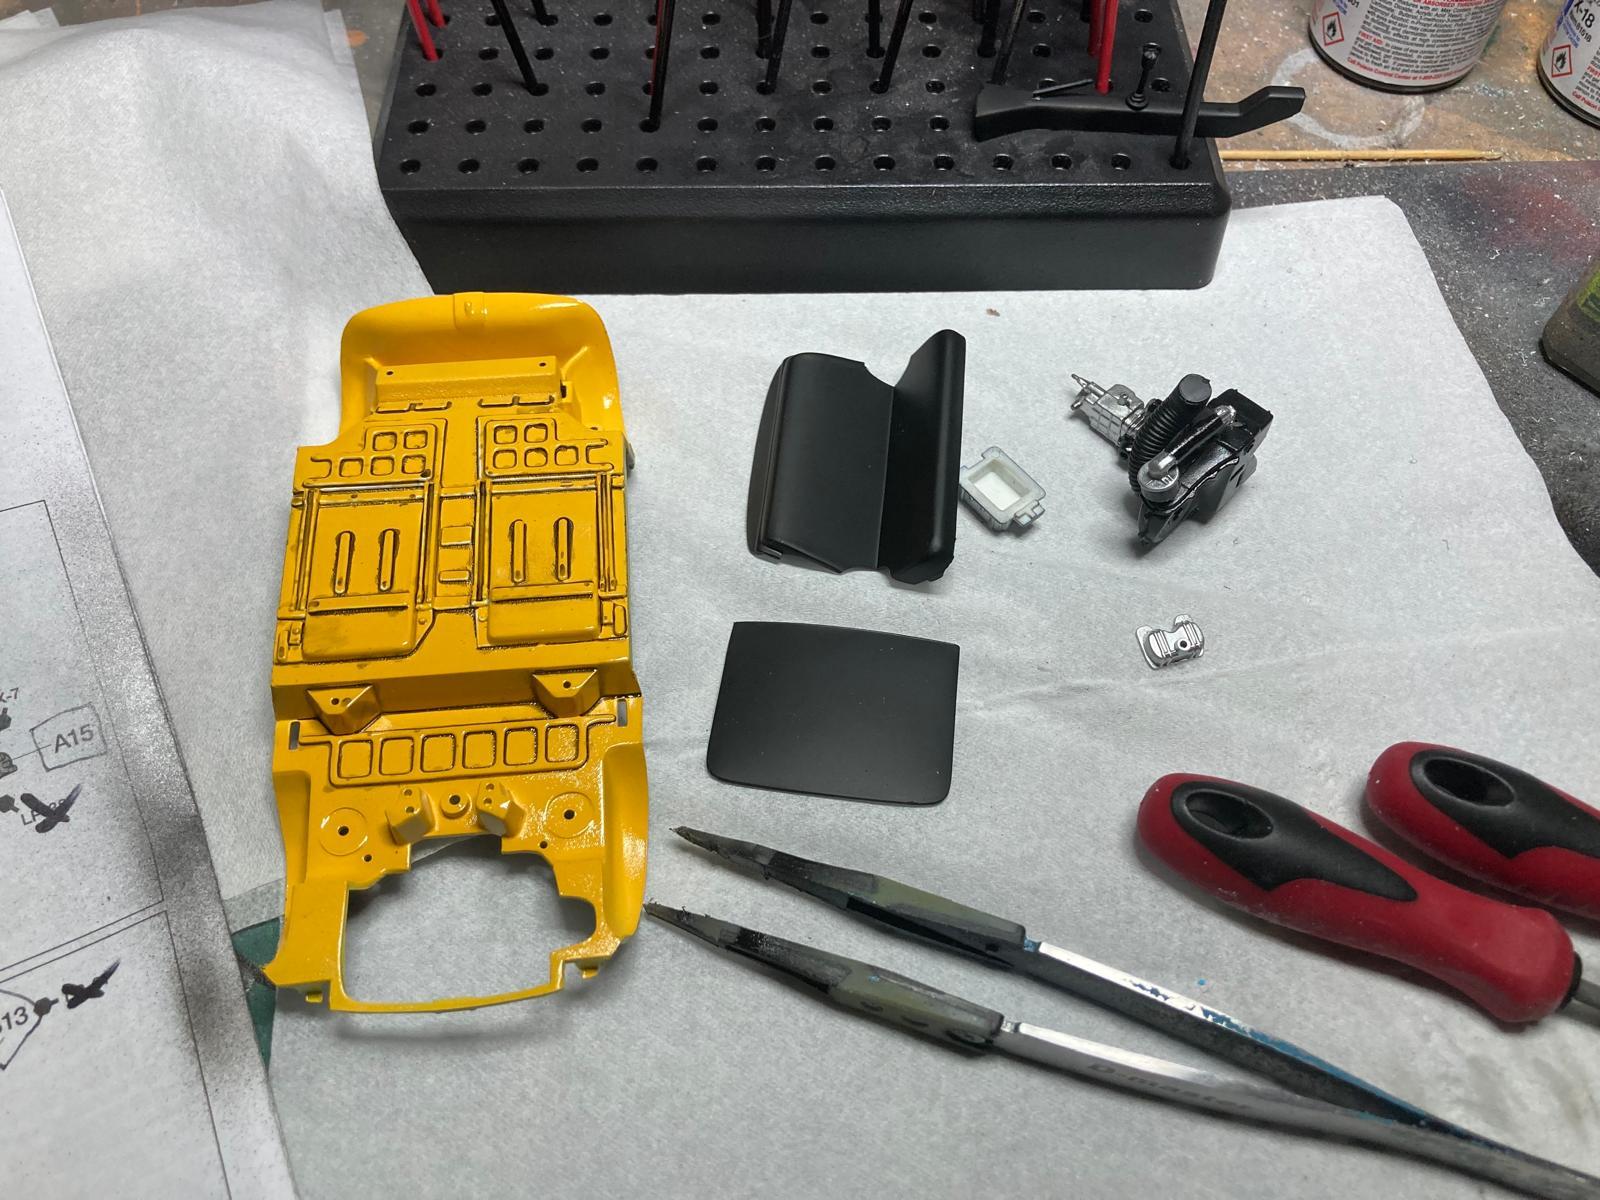
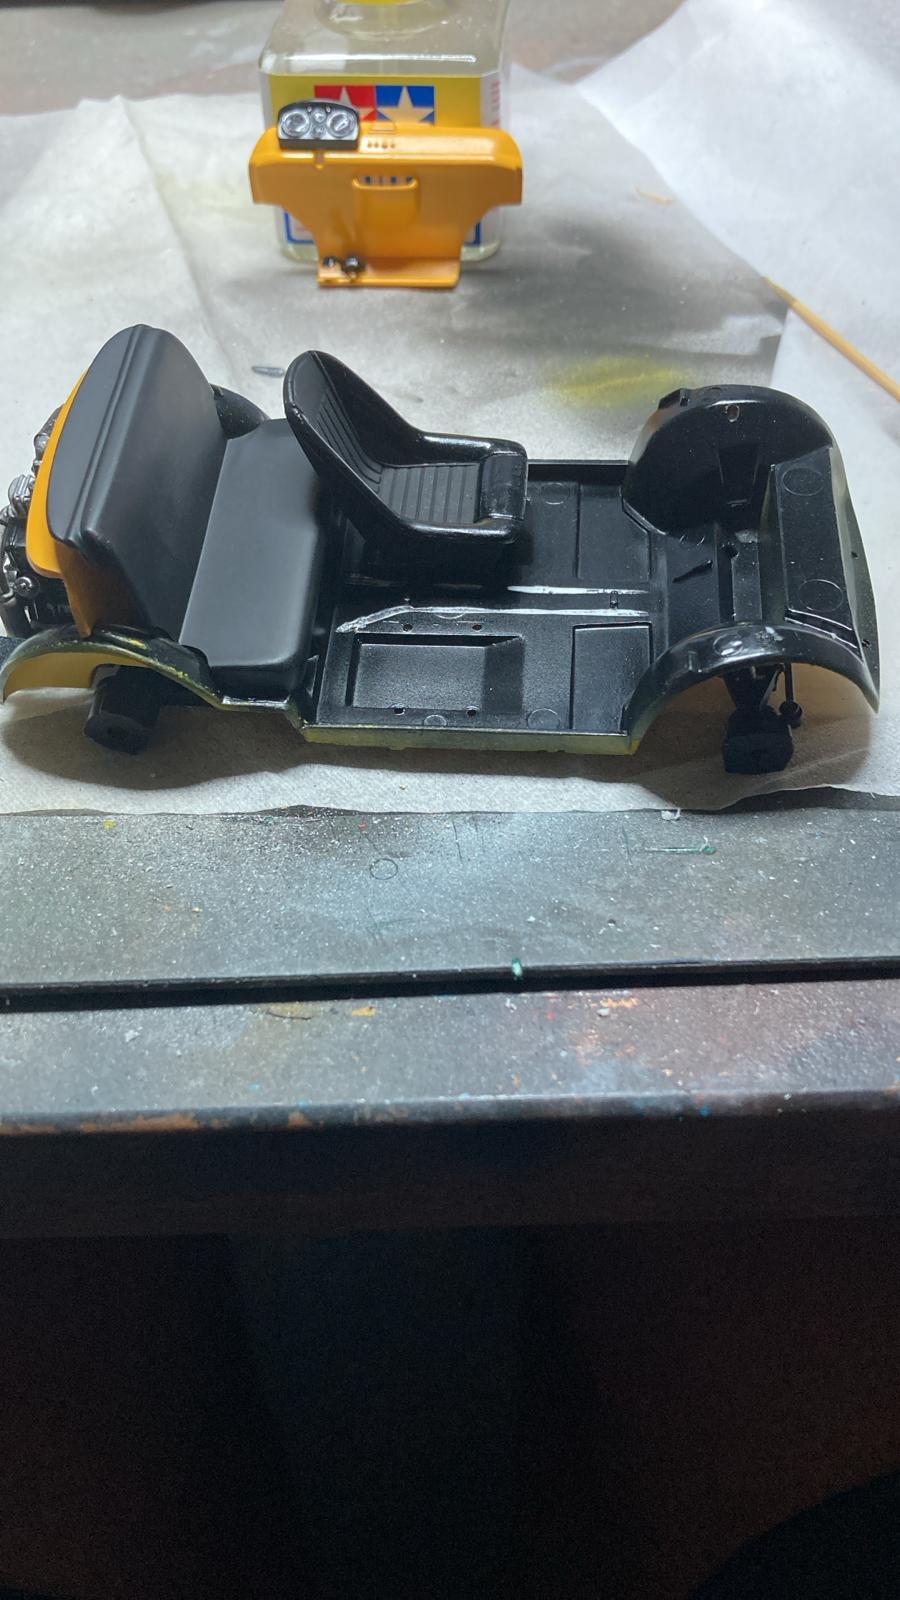
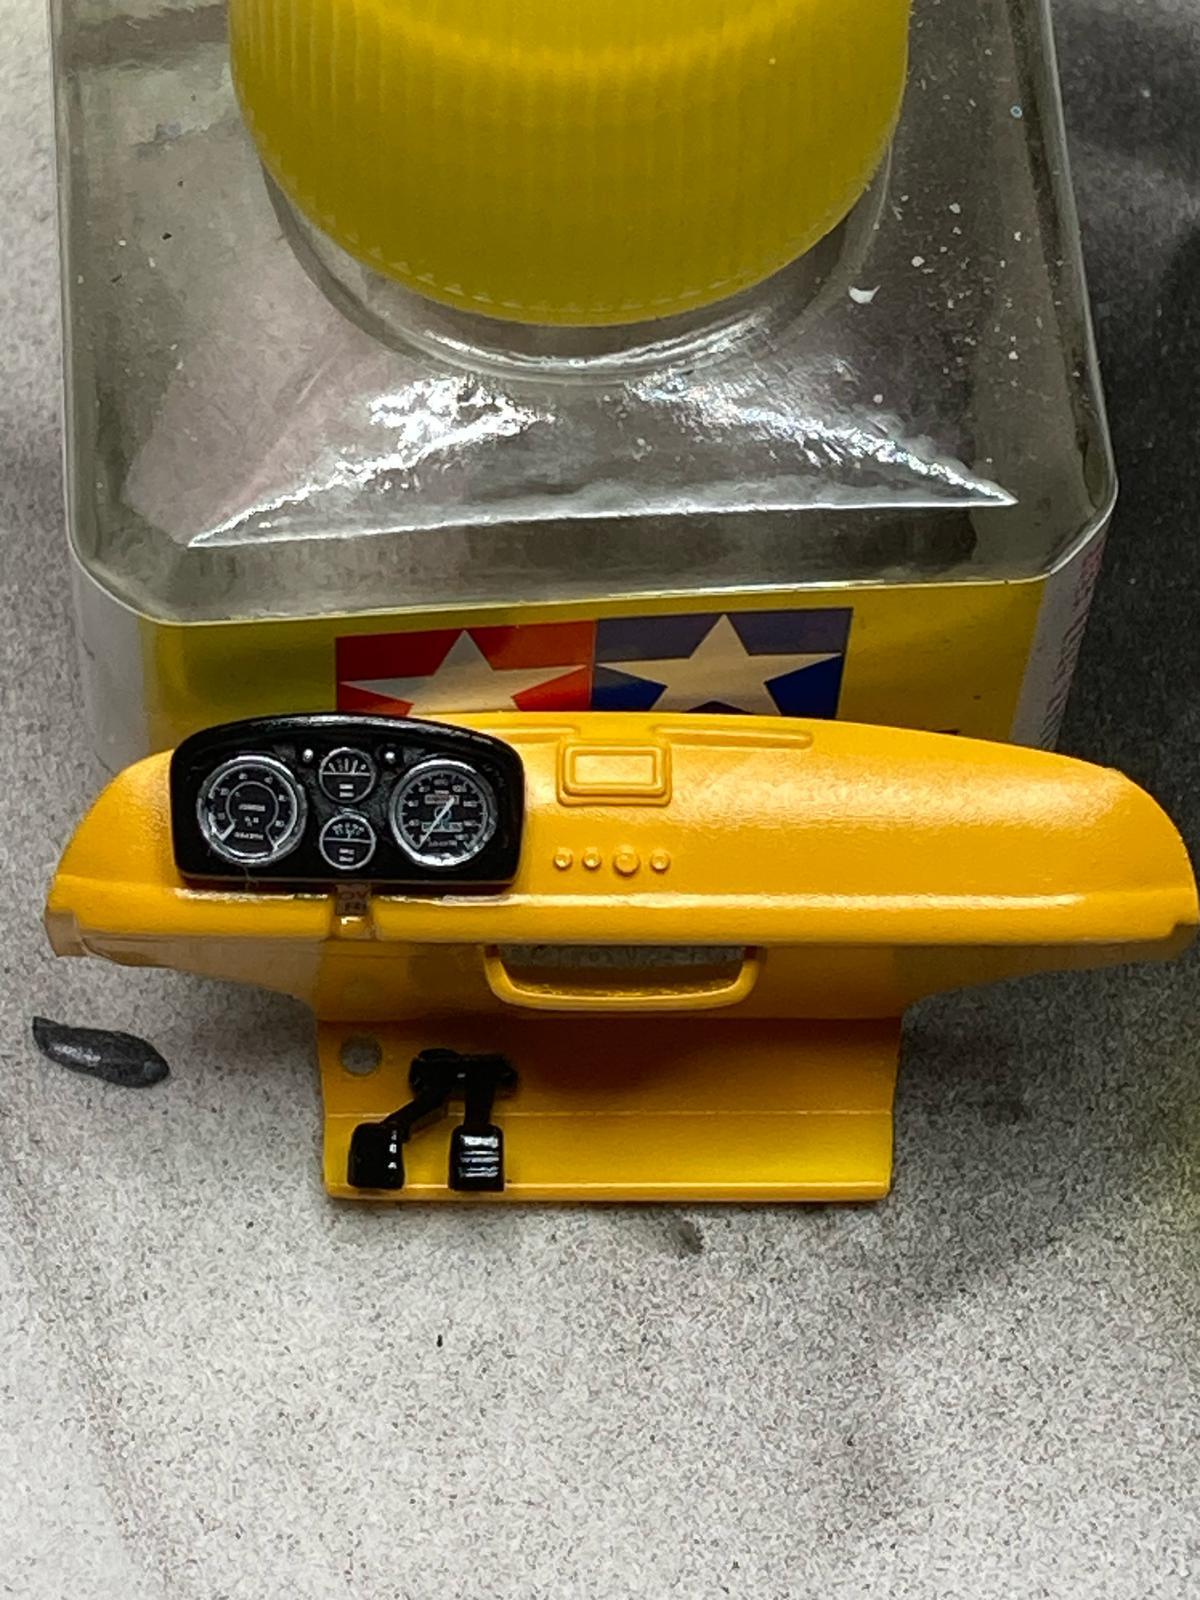
A friend just bought a 2018 Abarth 500. He'd longed for a 695 ss since he was young so I decided to make one in honor: All the parts sprayed: Some early work on the chassis and engine: The engine installed: A little progress on the interior: .....and the dash: The body gets a base-coat:
-
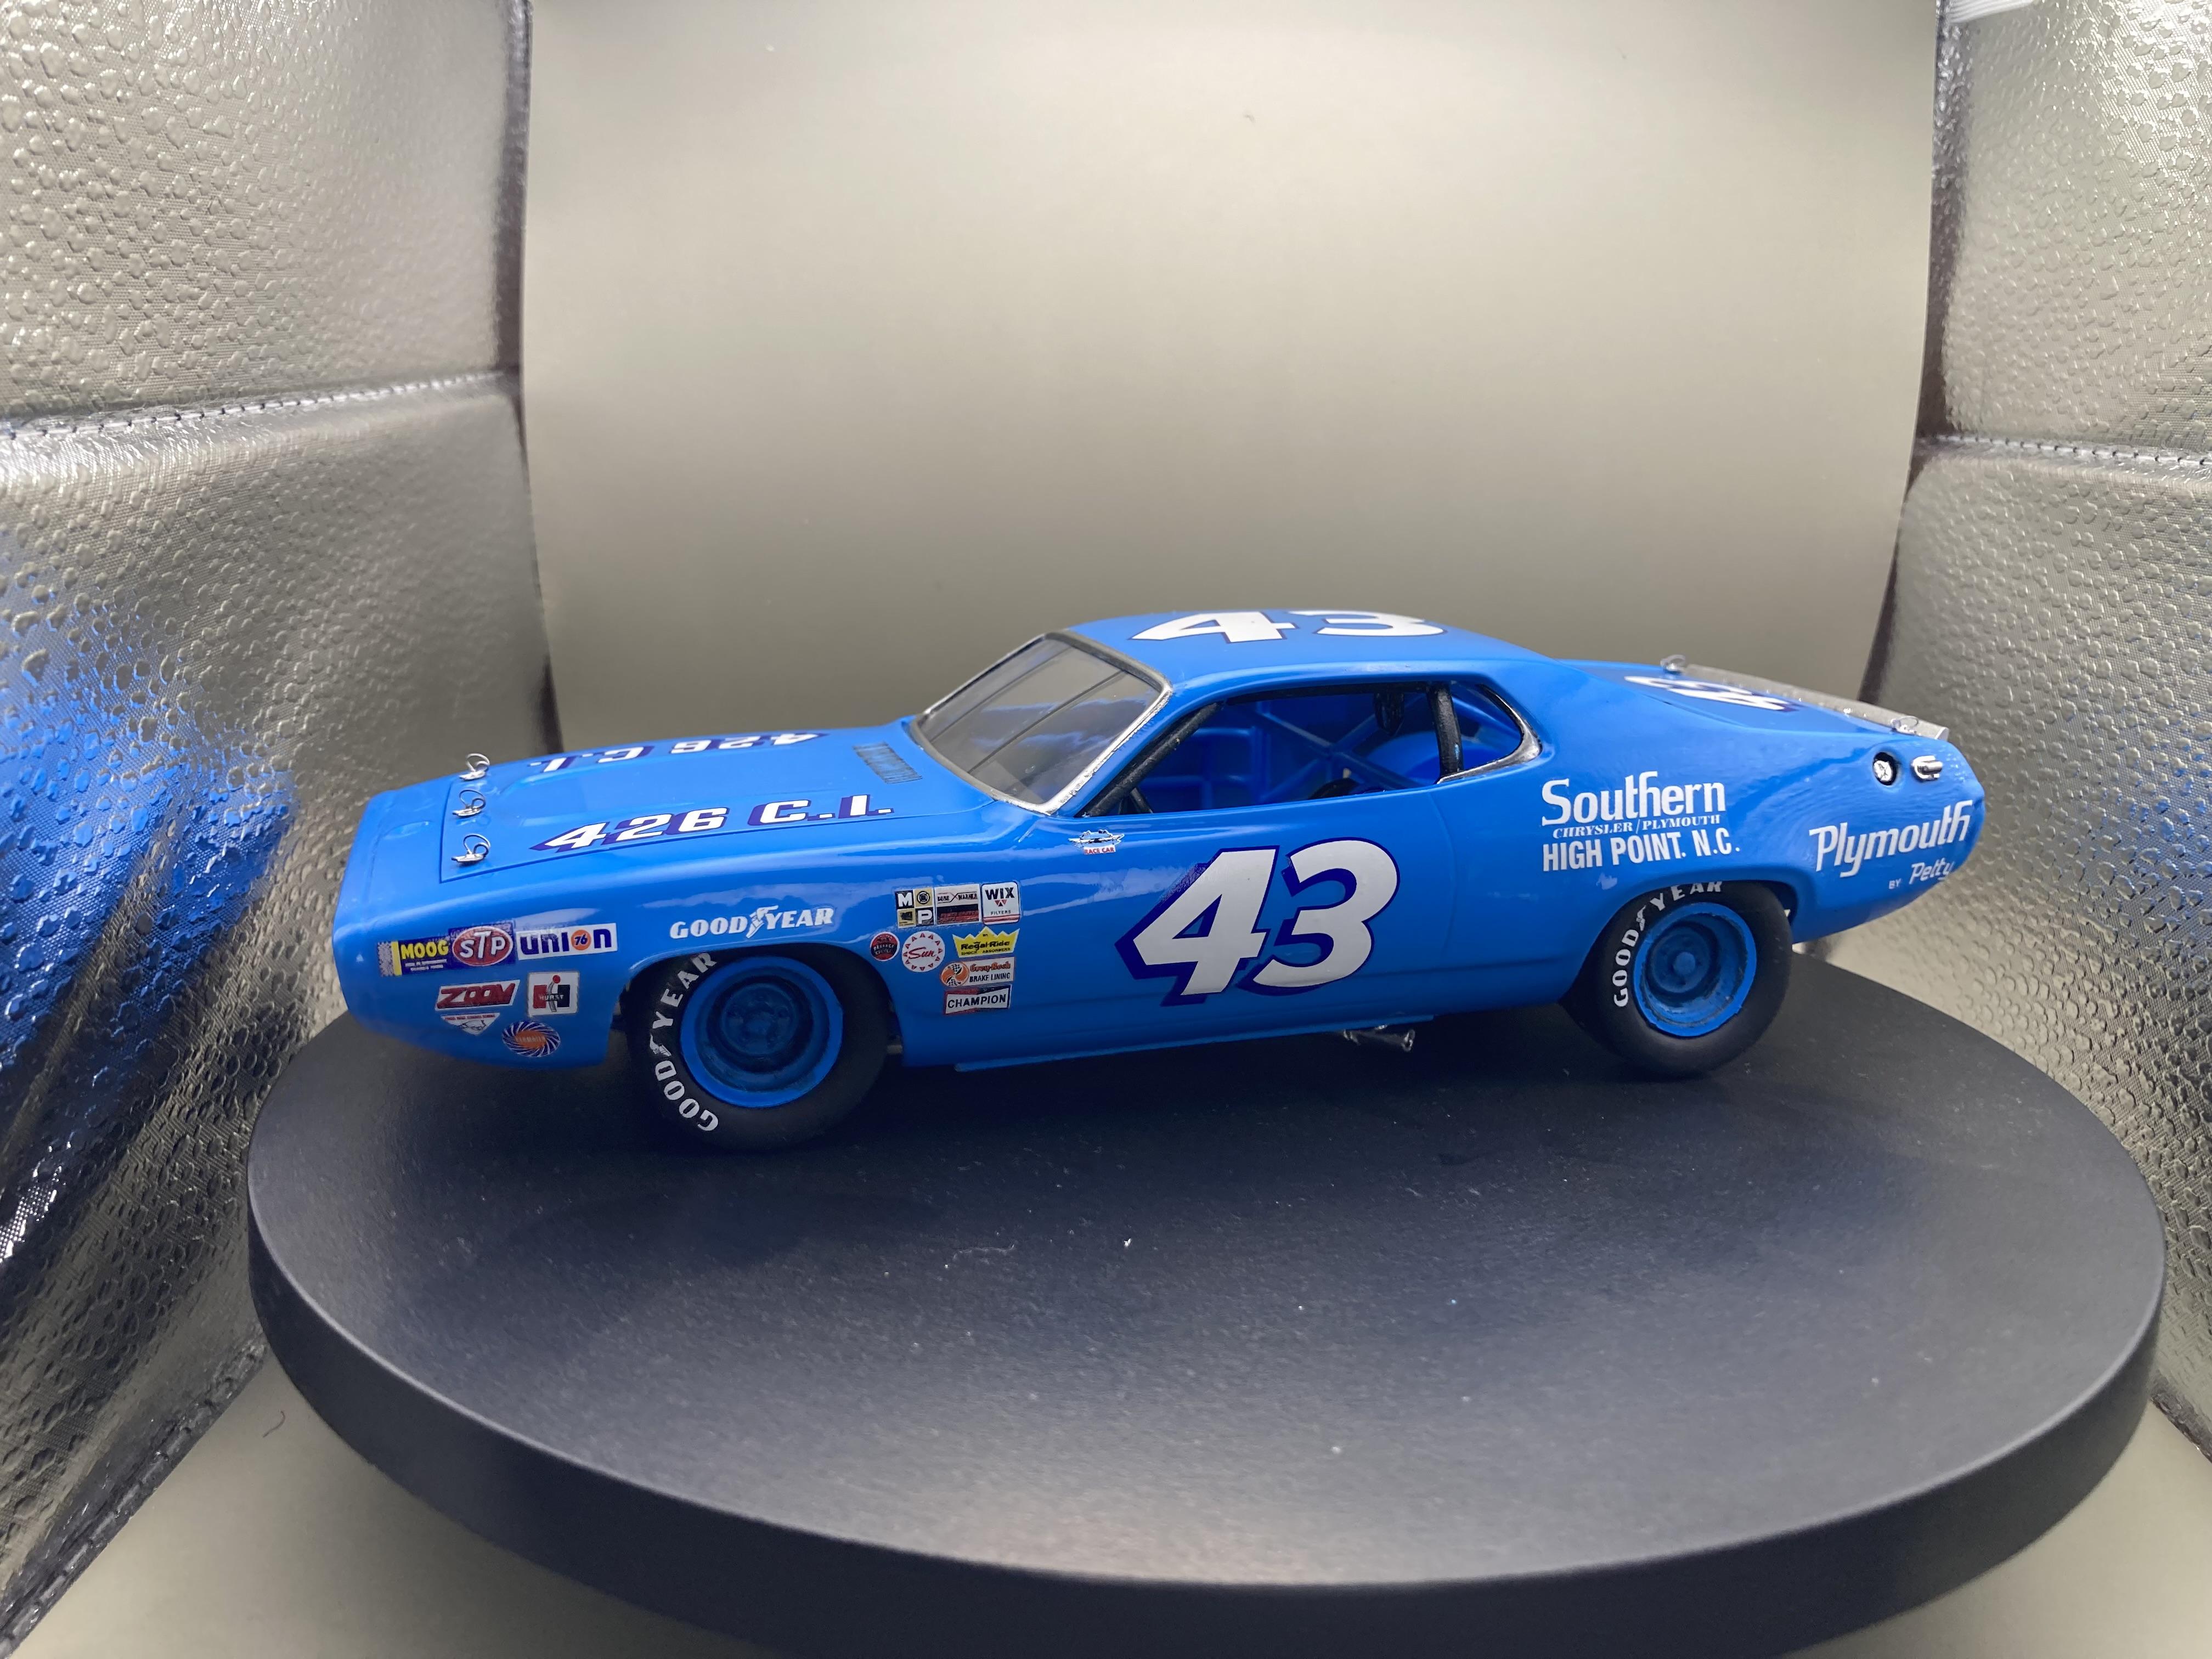
Richard Petty's 71 Roadrunner
GMasterG replied to GMasterG's topic in WIP: Stock Cars (NASCAR, Super Stock, Late Model, etc.)
Thank you. I’d have to agree with your sentiment. -
Richard Petty's 71 Roadrunner
GMasterG replied to GMasterG's topic in WIP: Stock Cars (NASCAR, Super Stock, Late Model, etc.)
Thank you, Stephen. I'd say that overall this is my best work to date. I've done better paint work. For some reason the paint fought me all the way on this one but it's an opportunity to hone skills. -
Richard Petty's 71 Roadrunner
GMasterG replied to GMasterG's topic in WIP: Stock Cars (NASCAR, Super Stock, Late Model, etc.)
Thank you for your kind words Todd. I seem to be - and all because a hobby store heavily discounted some Salvinos kits and I thought: "What the hell. I know nothing of the sport and I know nothing of the cars or the drivers but I'll build one." I've caught the bug. And I find that period from the mid 60s to the mid 70s to be the most interesting. As was the case with touring car racing in Australia, the cars you saw on the track on Sunday were the cars you could buy in the showroom on Monday - their rawness and authenticity appeals to me as do the men who drove them. -
Richard Petty's 71 Roadrunner
GMasterG replied to GMasterG's topic in WIP: Stock Cars (NASCAR, Super Stock, Late Model, etc.)
Thanks Bruce. Yes I have no problems with the decals at all. A generous amount of water to begin with so that I can push them around, and then once I have them where I want them and they have dried a little I give them a coat of regular Mark Fit. -
Richard Petty's 71 Roadrunner
GMasterG replied to GMasterG's topic in WIP: Stock Cars (NASCAR, Super Stock, Late Model, etc.)
Be sure to pass on my compliments. -
Richard Petty's 71 Roadrunner
GMasterG replied to GMasterG's topic in WIP: Stock Cars (NASCAR, Super Stock, Late Model, etc.)
It’s finished and it did fit