GMasterG
-
Posts
114 -
Joined
-
Last visited
Content Type
Profiles
Forums
Events
Gallery
Everything posted by GMasterG
-
Oldsmobile Quartet
GMasterG replied to GMasterG's topic in WIP: Stock Cars (NASCAR, Super Stock, Late Model, etc.)
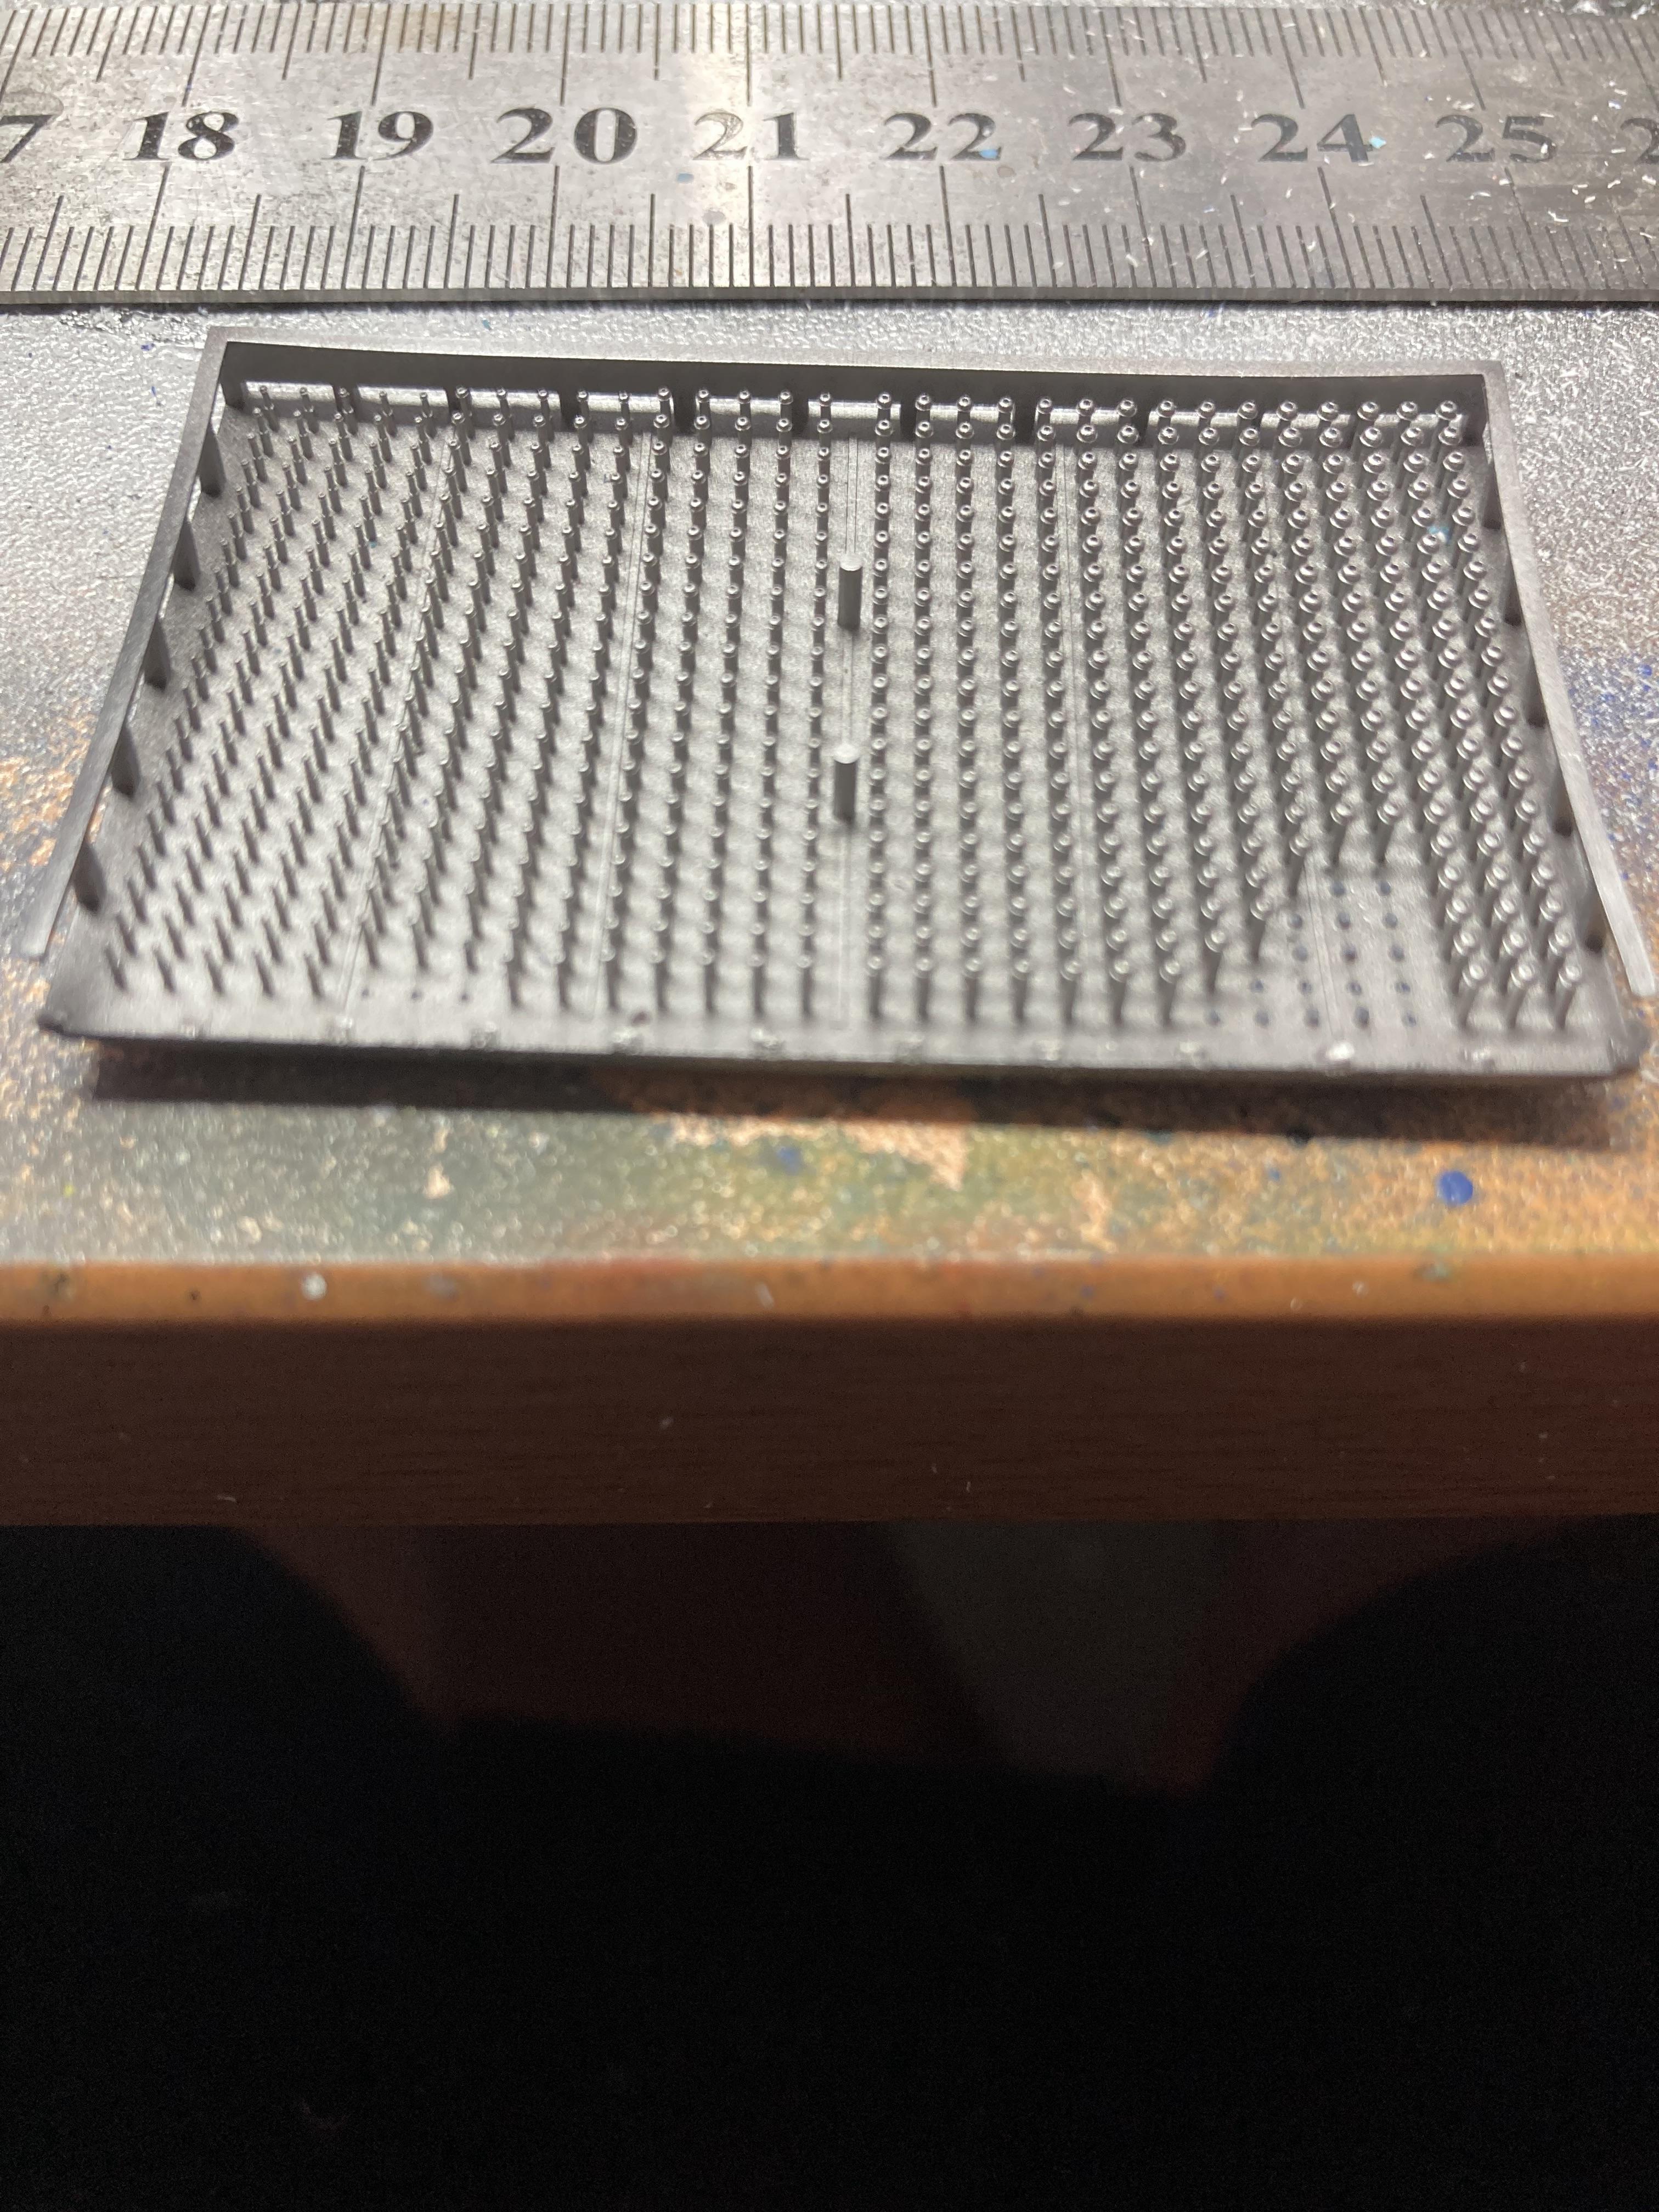
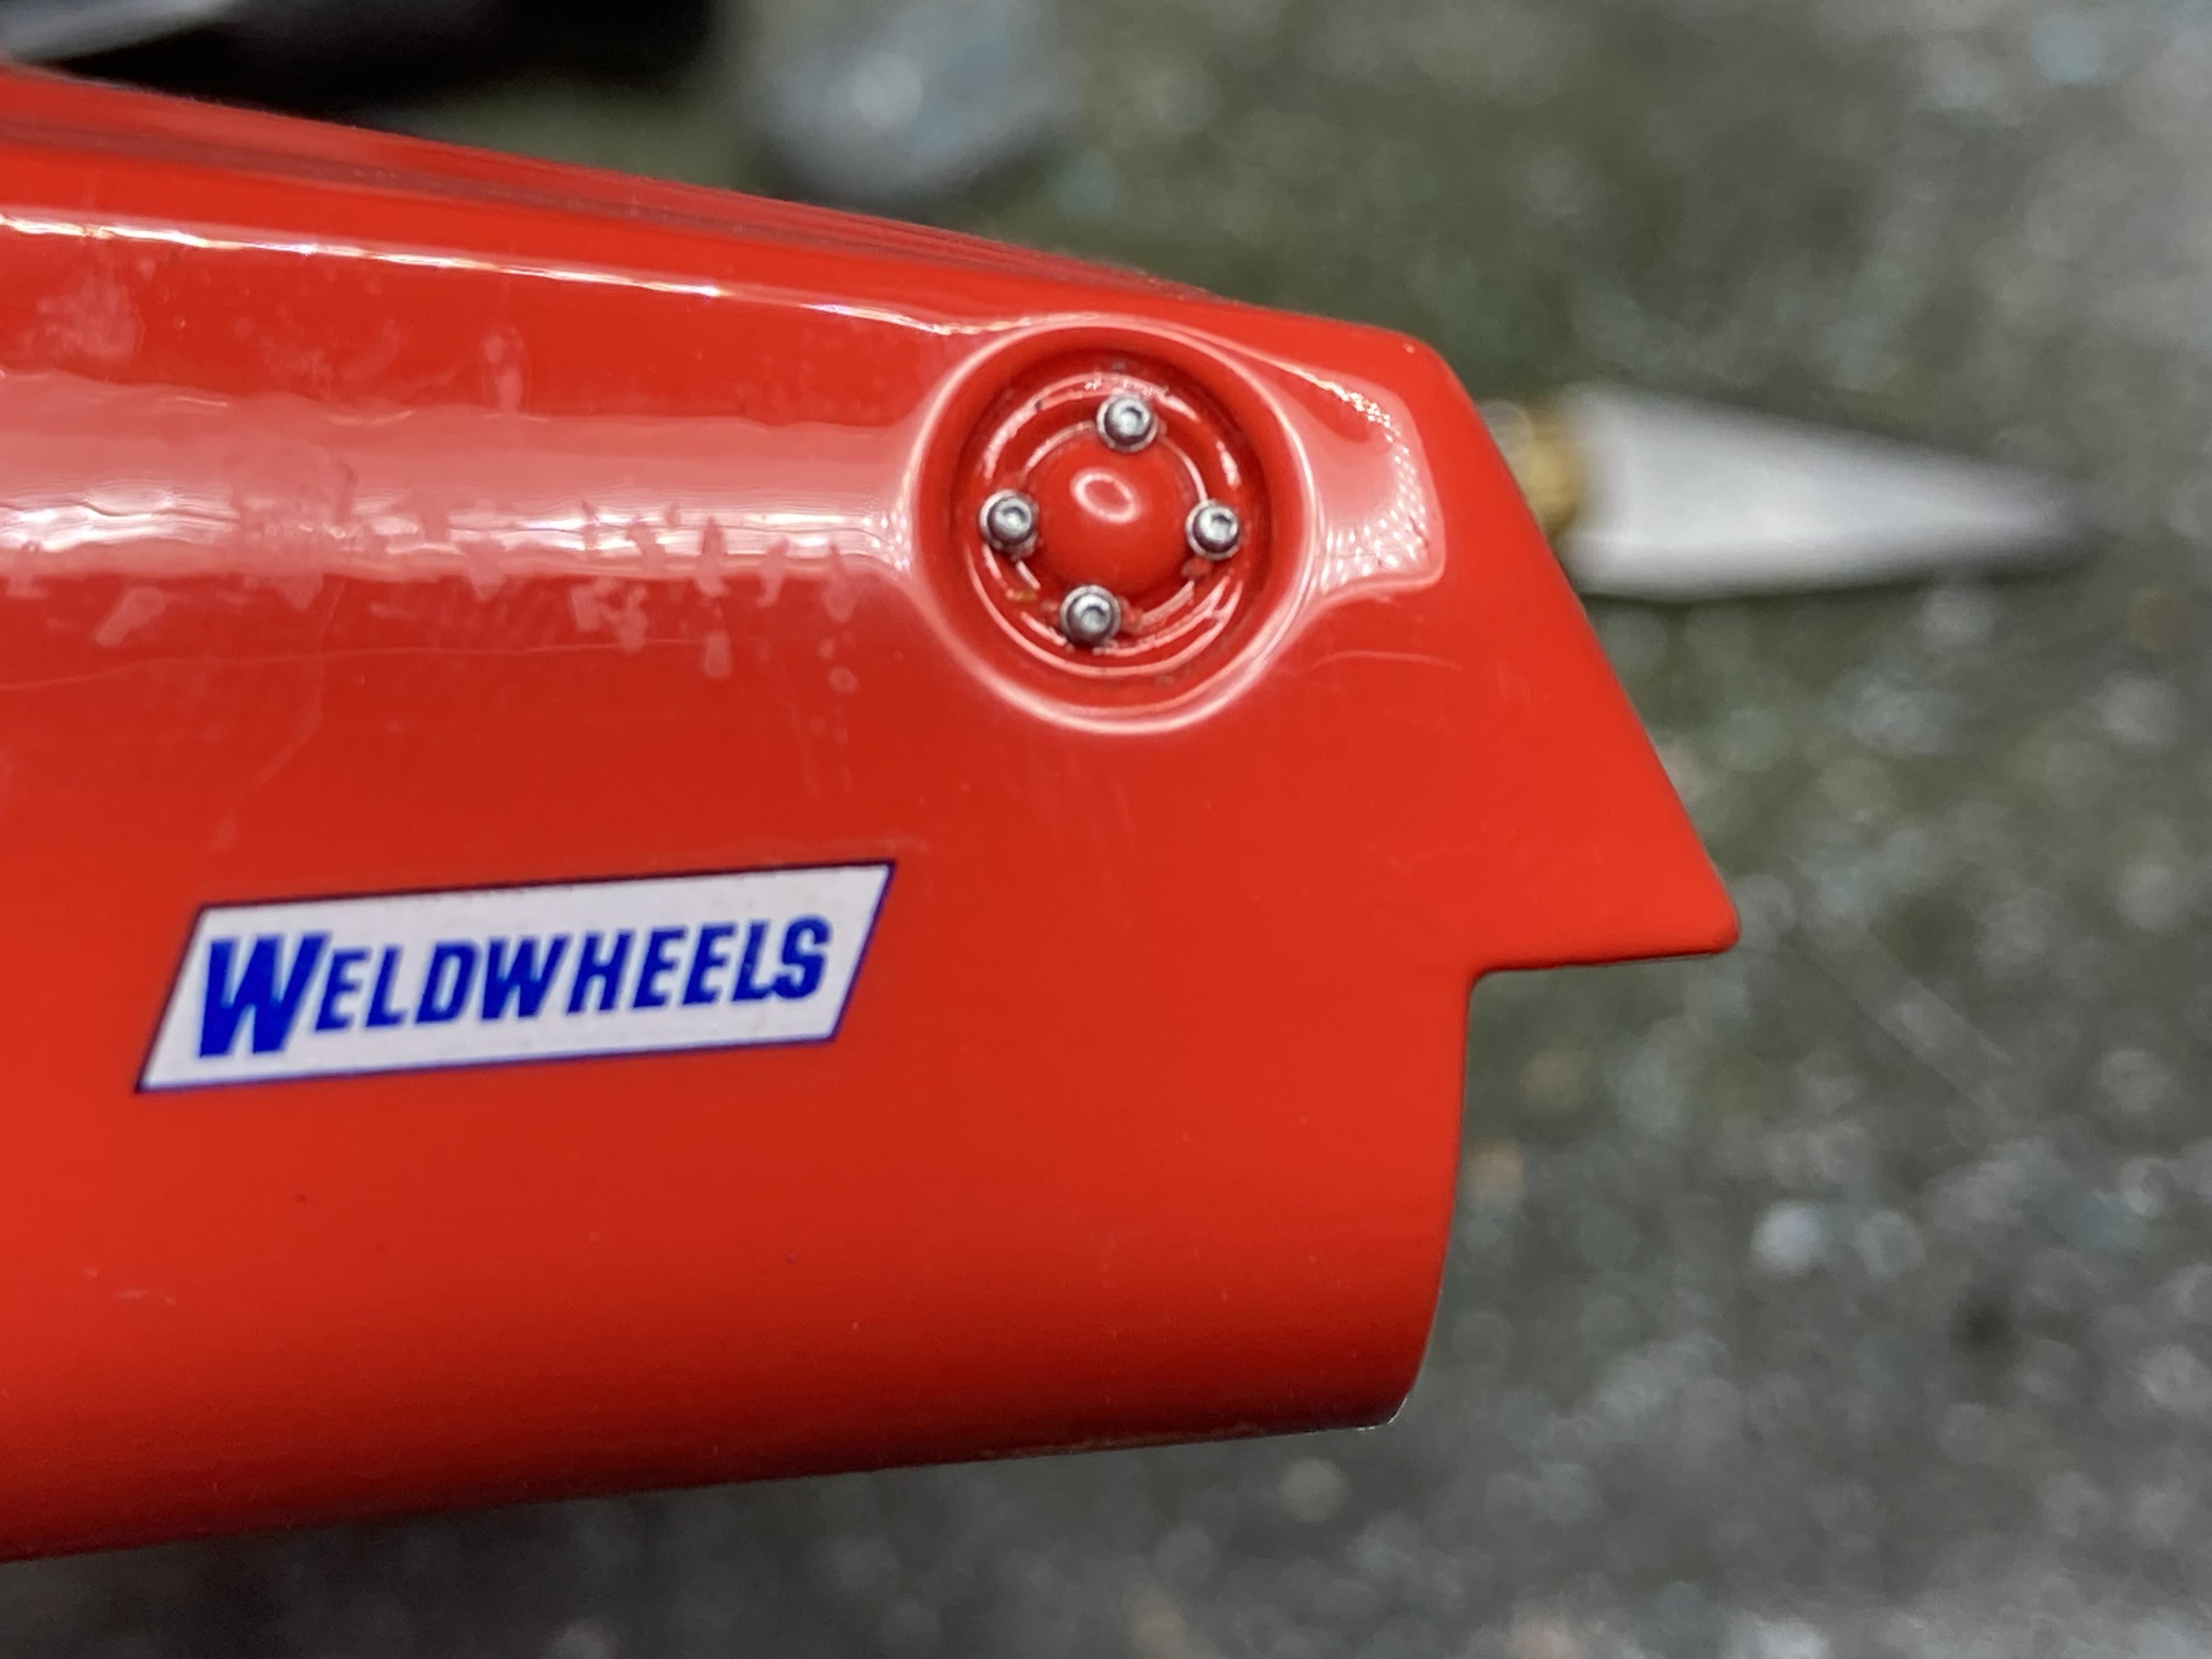
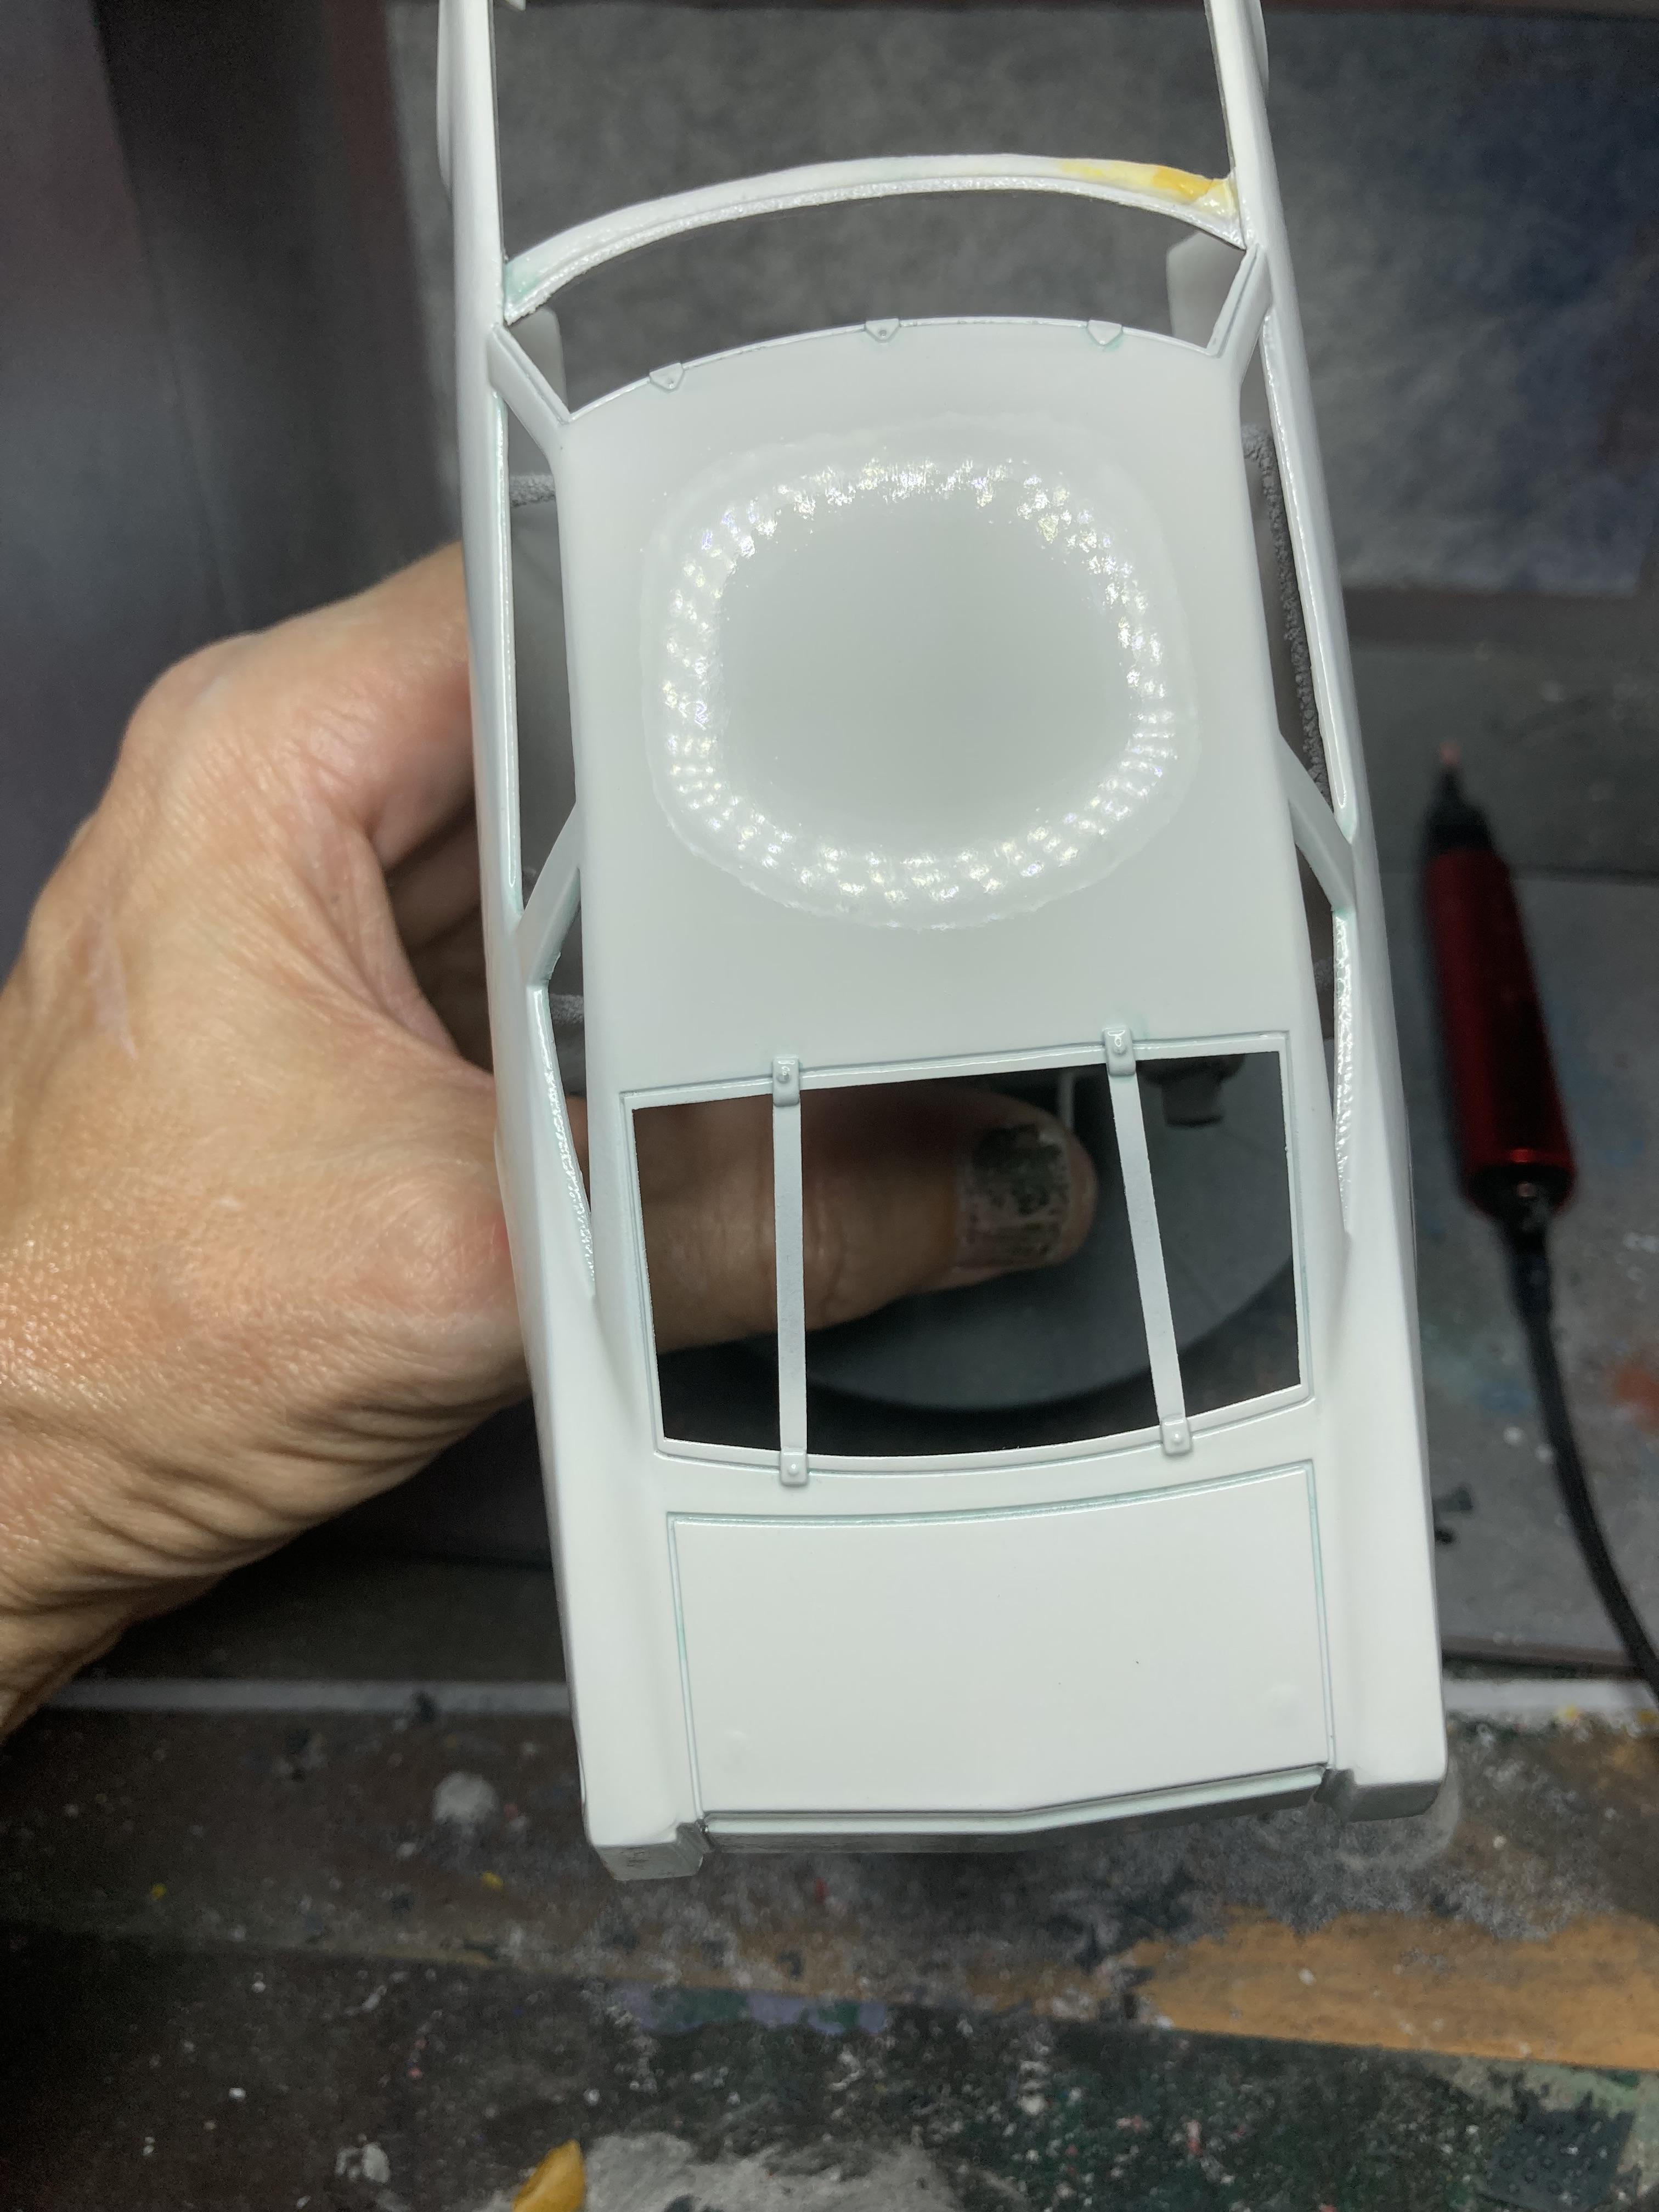
Notwithstanding the fact that I like to do the best work I can whenever I apply myself to a modelling project, I’m not as invested in these NASCAR racers as I am my other models. So I quite often find myself using them as the prototypes for trying new techniques or working with new materials. This morning I’ve combined my interest in 3D-printing and my desire to find new ways to add detail and authenticity to my builds. I bought a printer file for what I think are rivets of varying sizes and I printed them months ago: and I noticed that the fuel caps on these NASCAR racers have such detail, so I decided to try to recreate a facsimile of it: probably a couple of sizes too big but it’s a start and from a regular viewing distance it actually provides some visual definition. This close-up also reminds me that I have to add the breather pipe to the rear.
-
Oldsmobile Quartet
GMasterG replied to GMasterG's topic in WIP: Stock Cars (NASCAR, Super Stock, Late Model, etc.)
Thanks Todd, that is a very useful visual reference. You make an astute observation about the Monogram kit. As I type this I am looking at the model sitting on my desk thinking that I had no such issues about profile/stance when I built it and it looks great. Cheers -
Oldsmobile Quartet
GMasterG replied to GMasterG's topic in WIP: Stock Cars (NASCAR, Super Stock, Late Model, etc.)
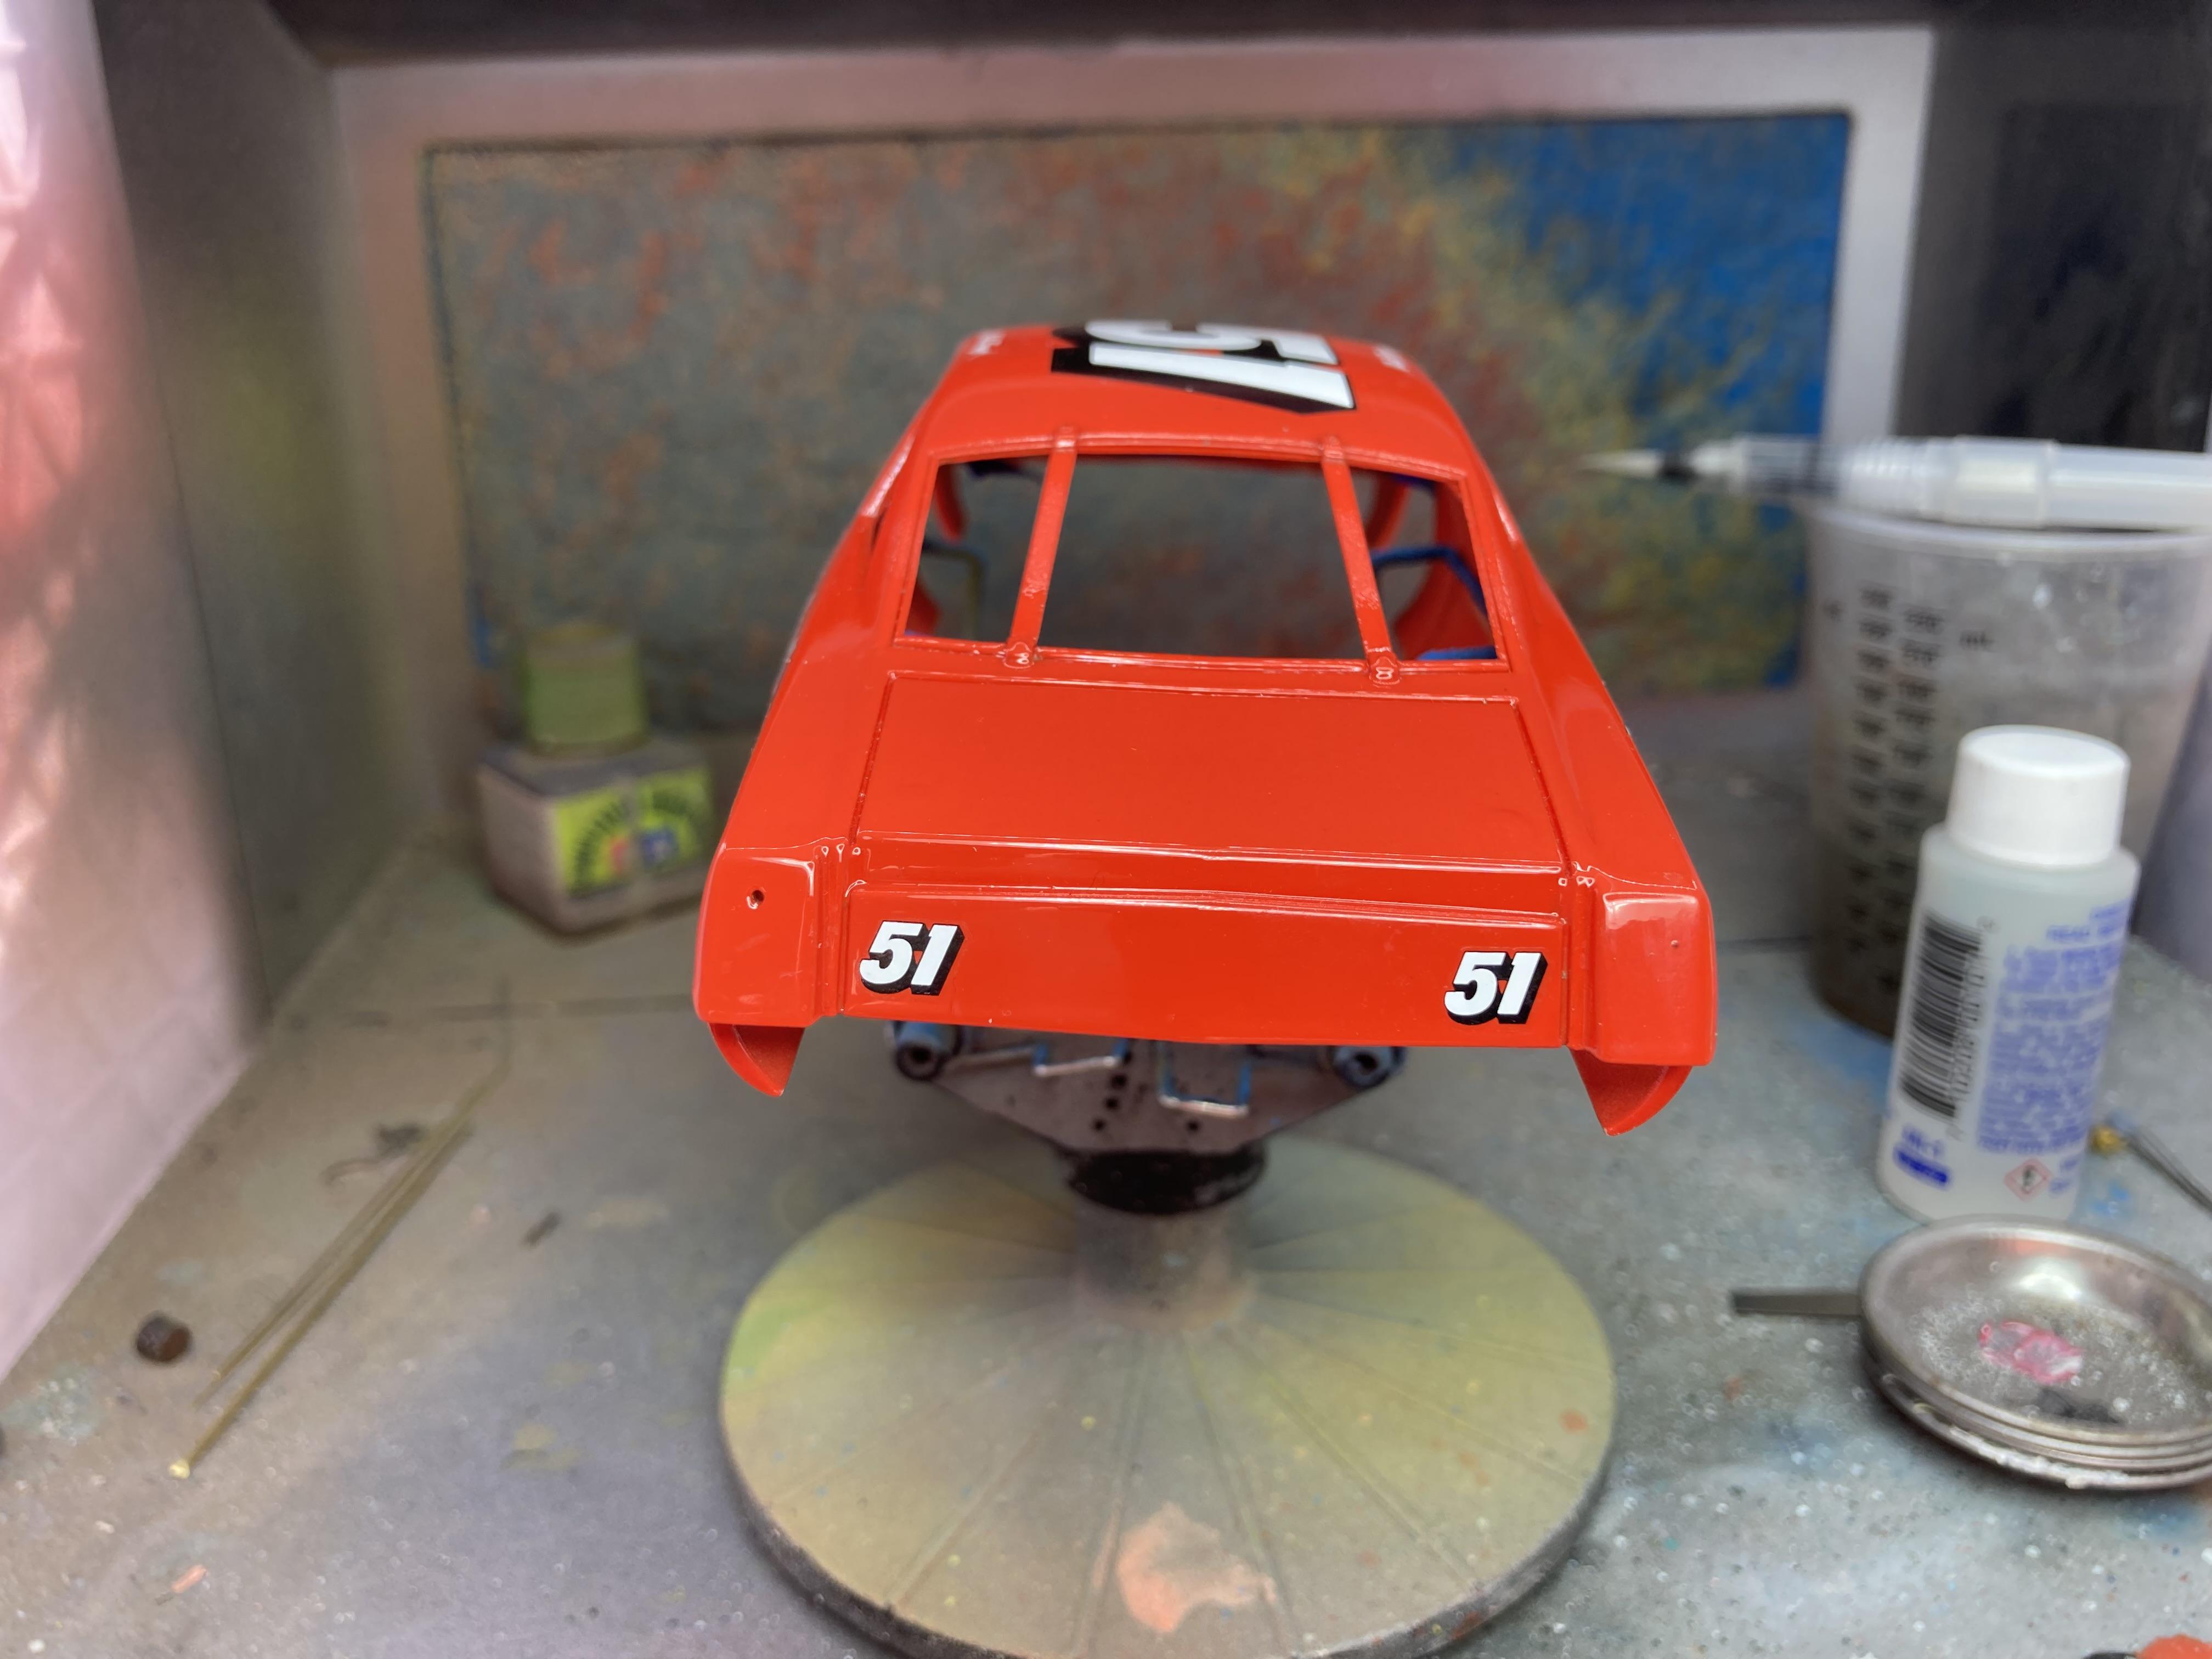
A pre-emptive test-fit: Grinding out the rear wheel-wells has paid dividends. It's allowed me to sit the rear wheels slightly wider than they otherwise would have sat had I not. I have no idea about the correct stance for these NASCAR racers so I'm happy to be guided by those who know better. I currently have no room in the front to lower the body (I may be able to grind out the wheel arches a little if needs be) but I do have some margin in the rear to raise it. What say you good people? I leave it to your superior wisdom and better judgement on these matters. If this picture of the (presumably) actual car is anything to go by, the front can stay where it is and the rear (despite the profile of the kit's wheel arch being very different) can be raised a little. I also find it interesting that Salvino's box art doesn't actually represent the livery that accompanies the kit.
-
A Pair of 442s
GMasterG replied to Horrorshow's topic in WIP: Stock Cars (NASCAR, Super Stock, Late Model, etc.)
I’ve found the 4 parts. Seeing the sprue jogged my memory as to where I’d put them. Thank you. -
A Pair of 442s
GMasterG replied to Horrorshow's topic in WIP: Stock Cars (NASCAR, Super Stock, Late Model, etc.)
Thank you. Yes, I recognise that tree. I appreciate your help. -
A Pair of 442s
GMasterG replied to Horrorshow's topic in WIP: Stock Cars (NASCAR, Super Stock, Late Model, etc.)
They look great. Thank you for the response. I find it bizarre that I can’t find this part from all 4 kits. No matter, I will design and 3D-print a replacement. Cheers. -
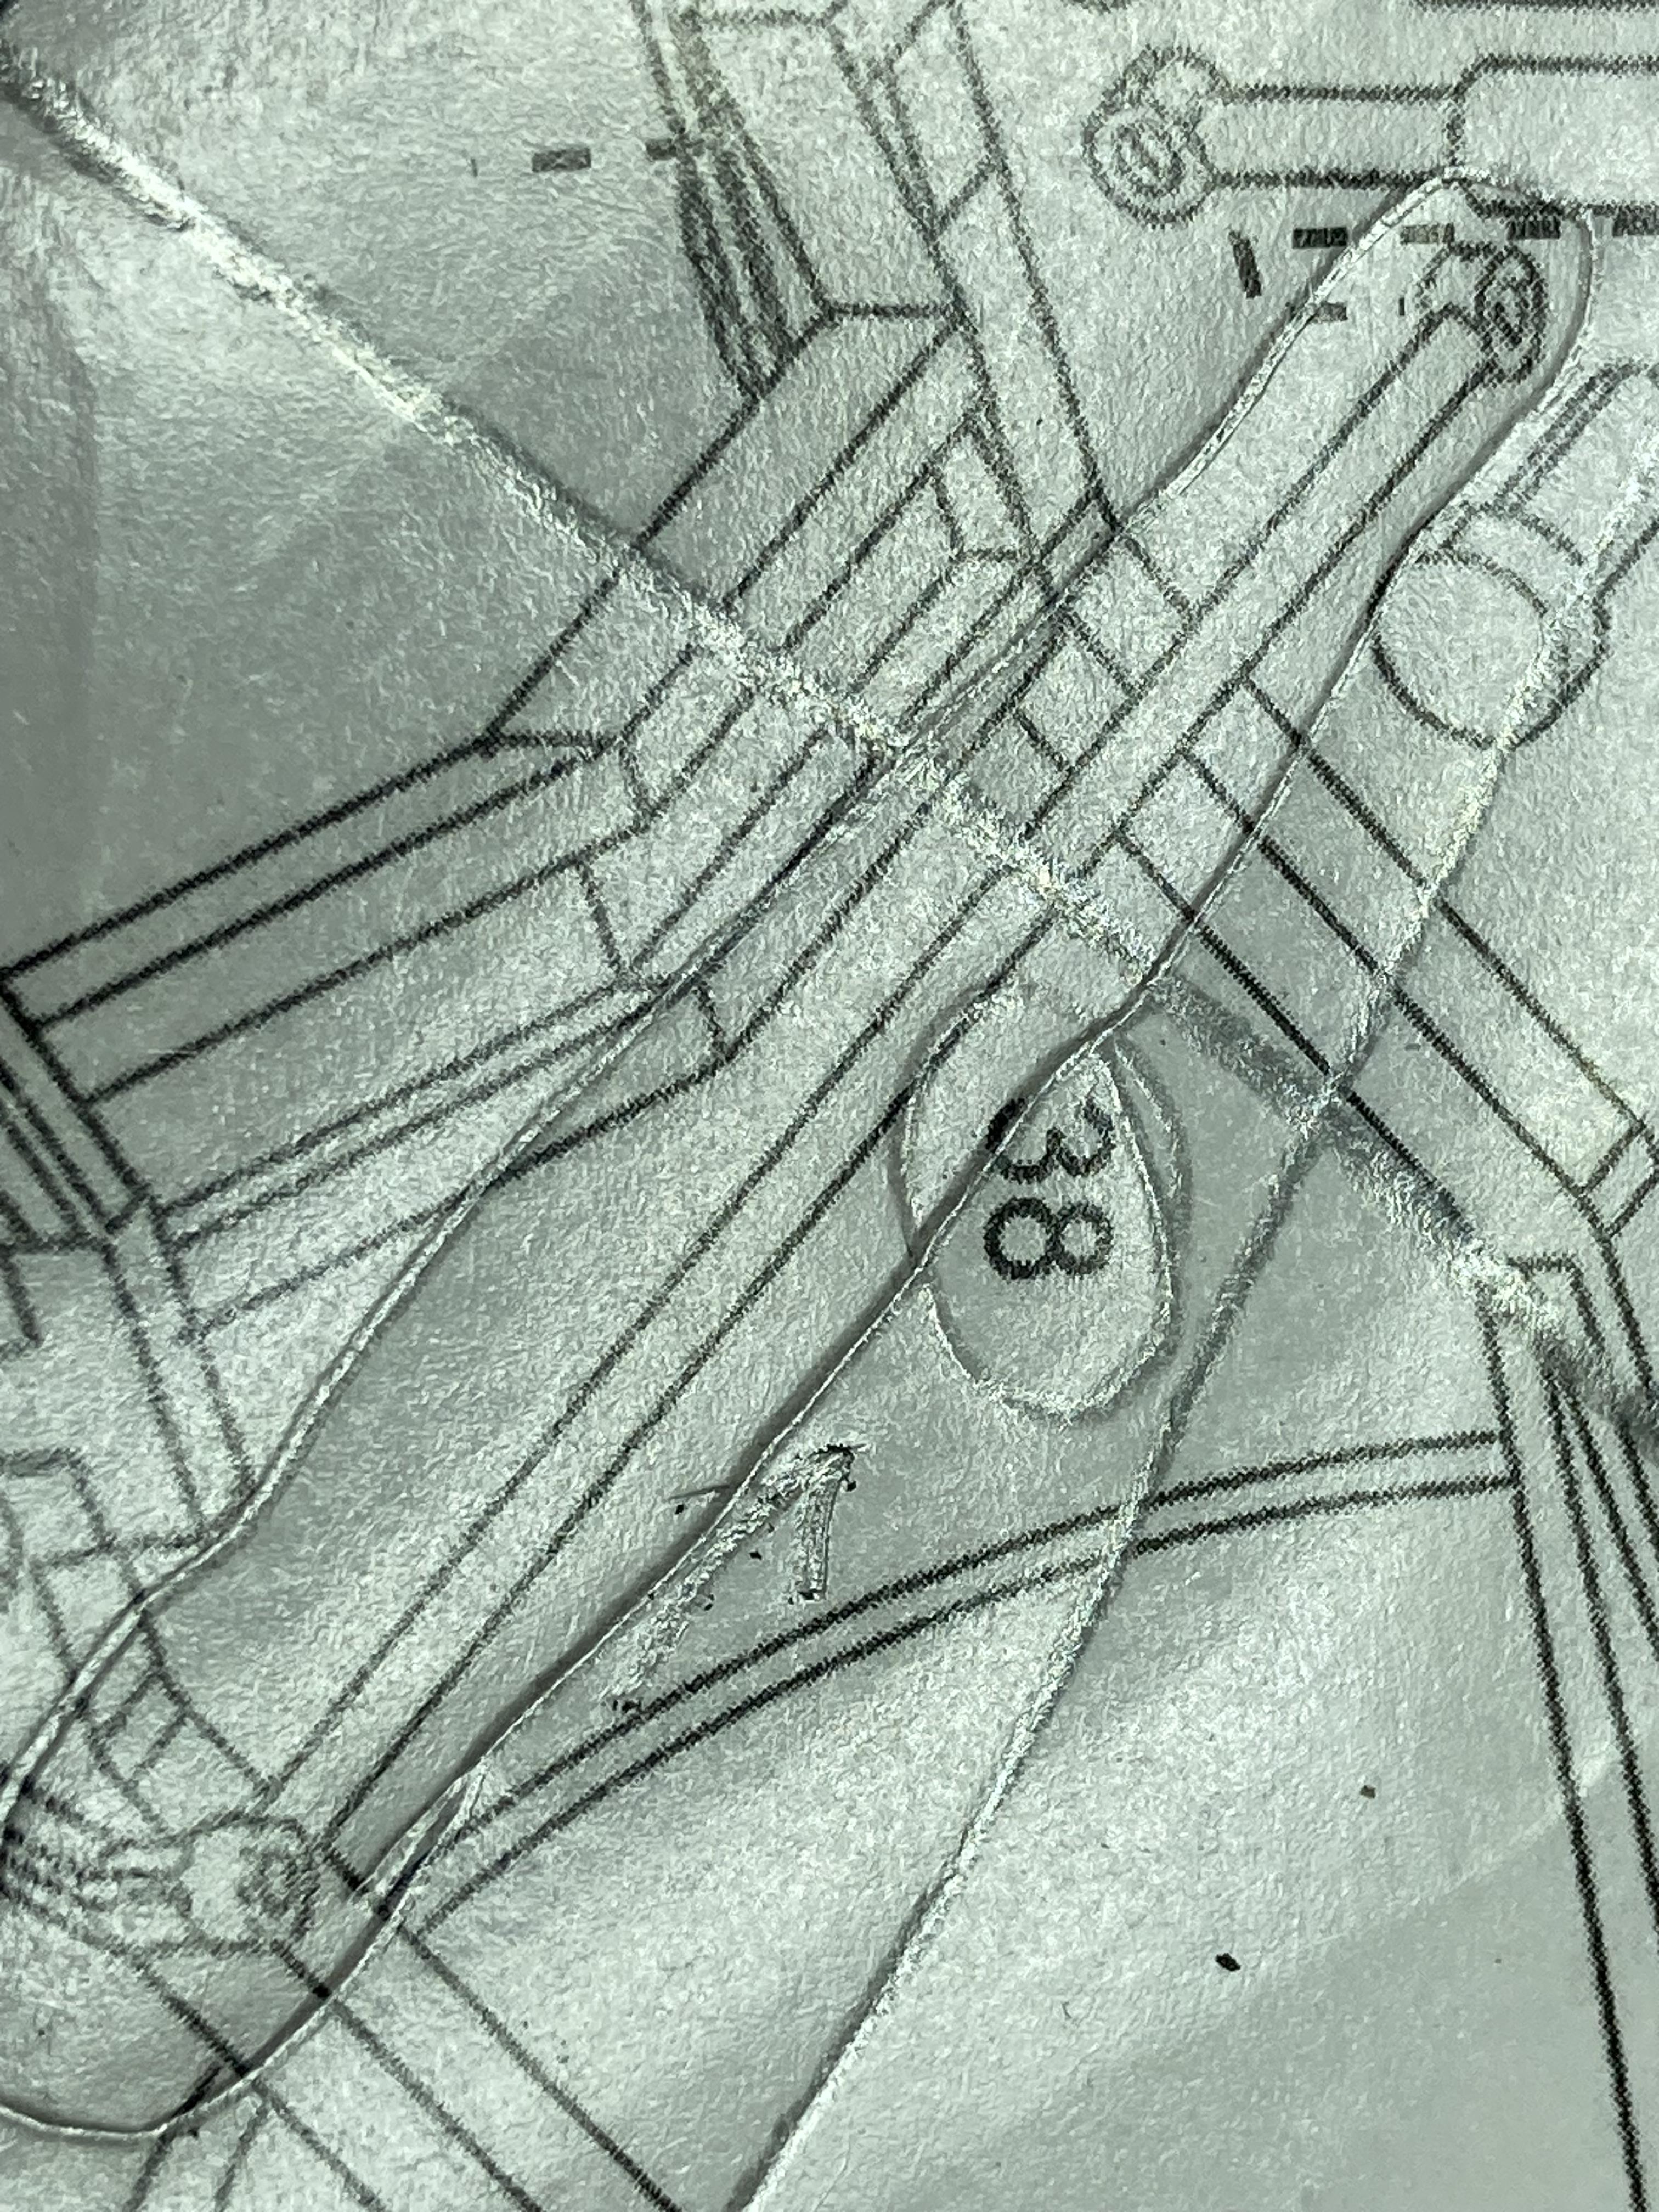
A Pair of 442s
GMasterG replied to Horrorshow's topic in WIP: Stock Cars (NASCAR, Super Stock, Late Model, etc.)
How are your builds progressing? Could you help out a fellow journeyman? I can’t locate the steering linkage in any of the 4 kits that I’m building. It’s part #38 in step 6 of your instructions. Could you take a look and see if you have the part and if so provide a picture of which sprue tree it’s on? Many thanks.
-
Oldsmobile Quartet
GMasterG replied to GMasterG's topic in WIP: Stock Cars (NASCAR, Super Stock, Late Model, etc.)
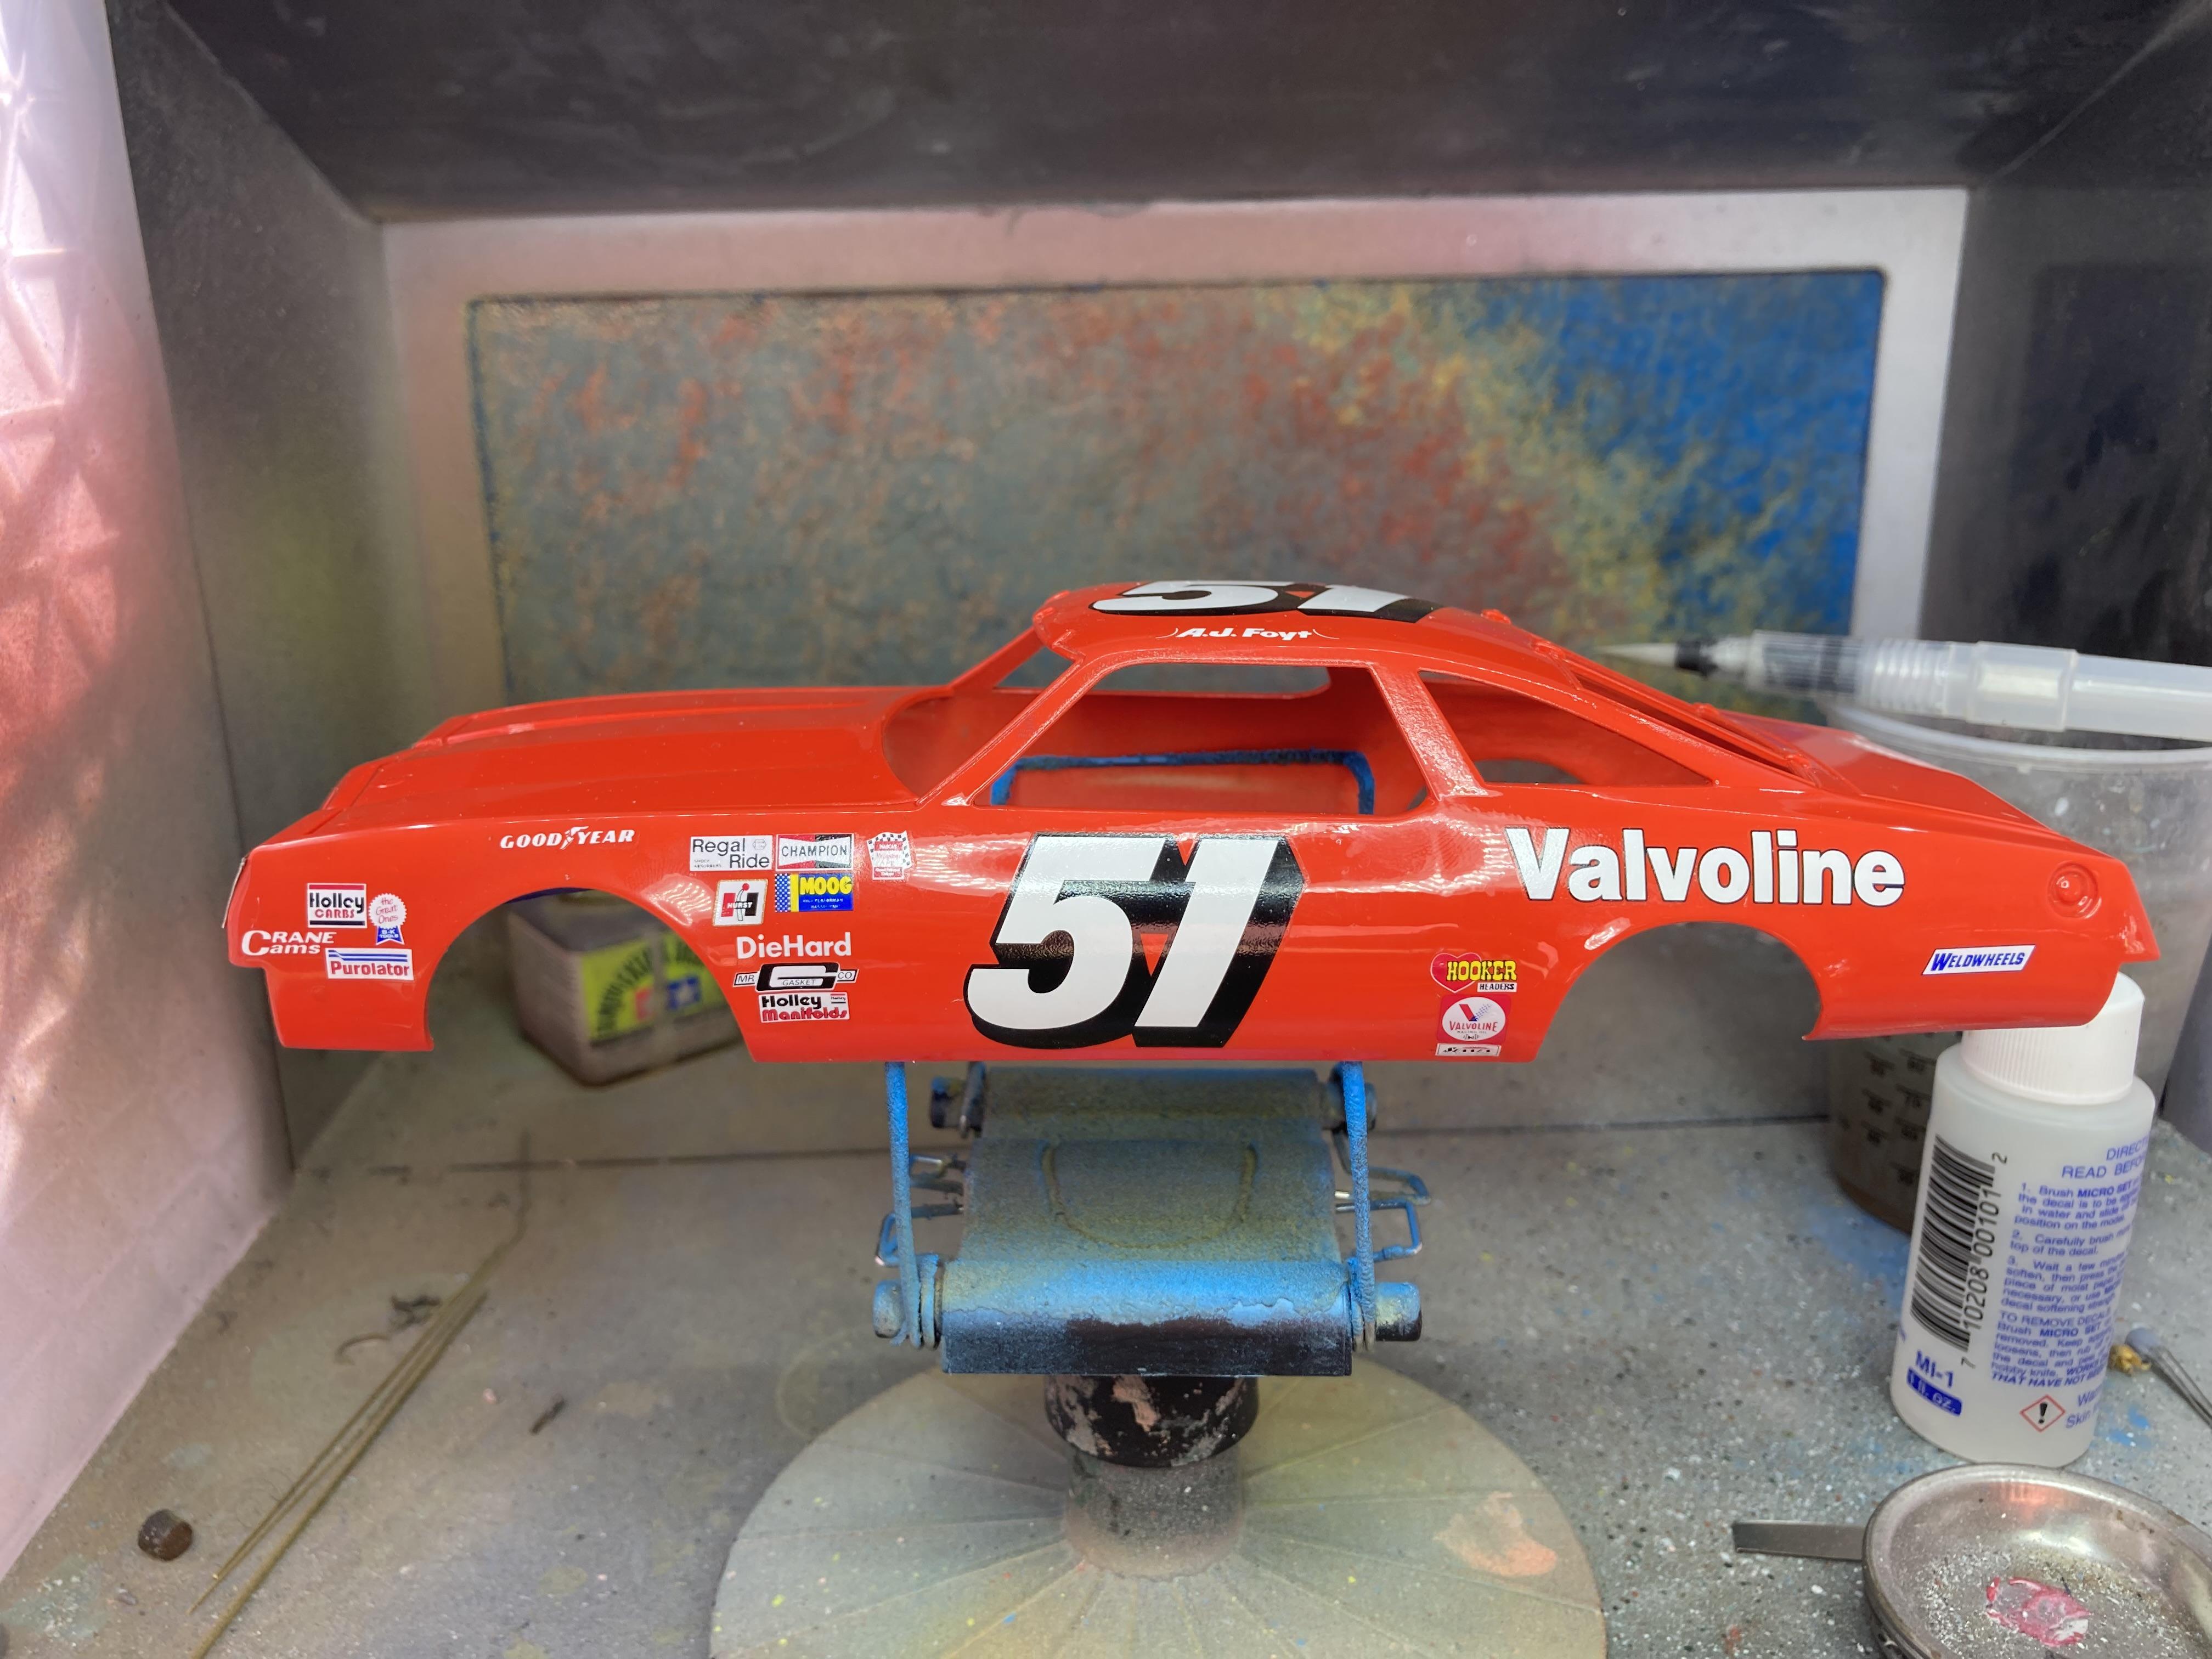
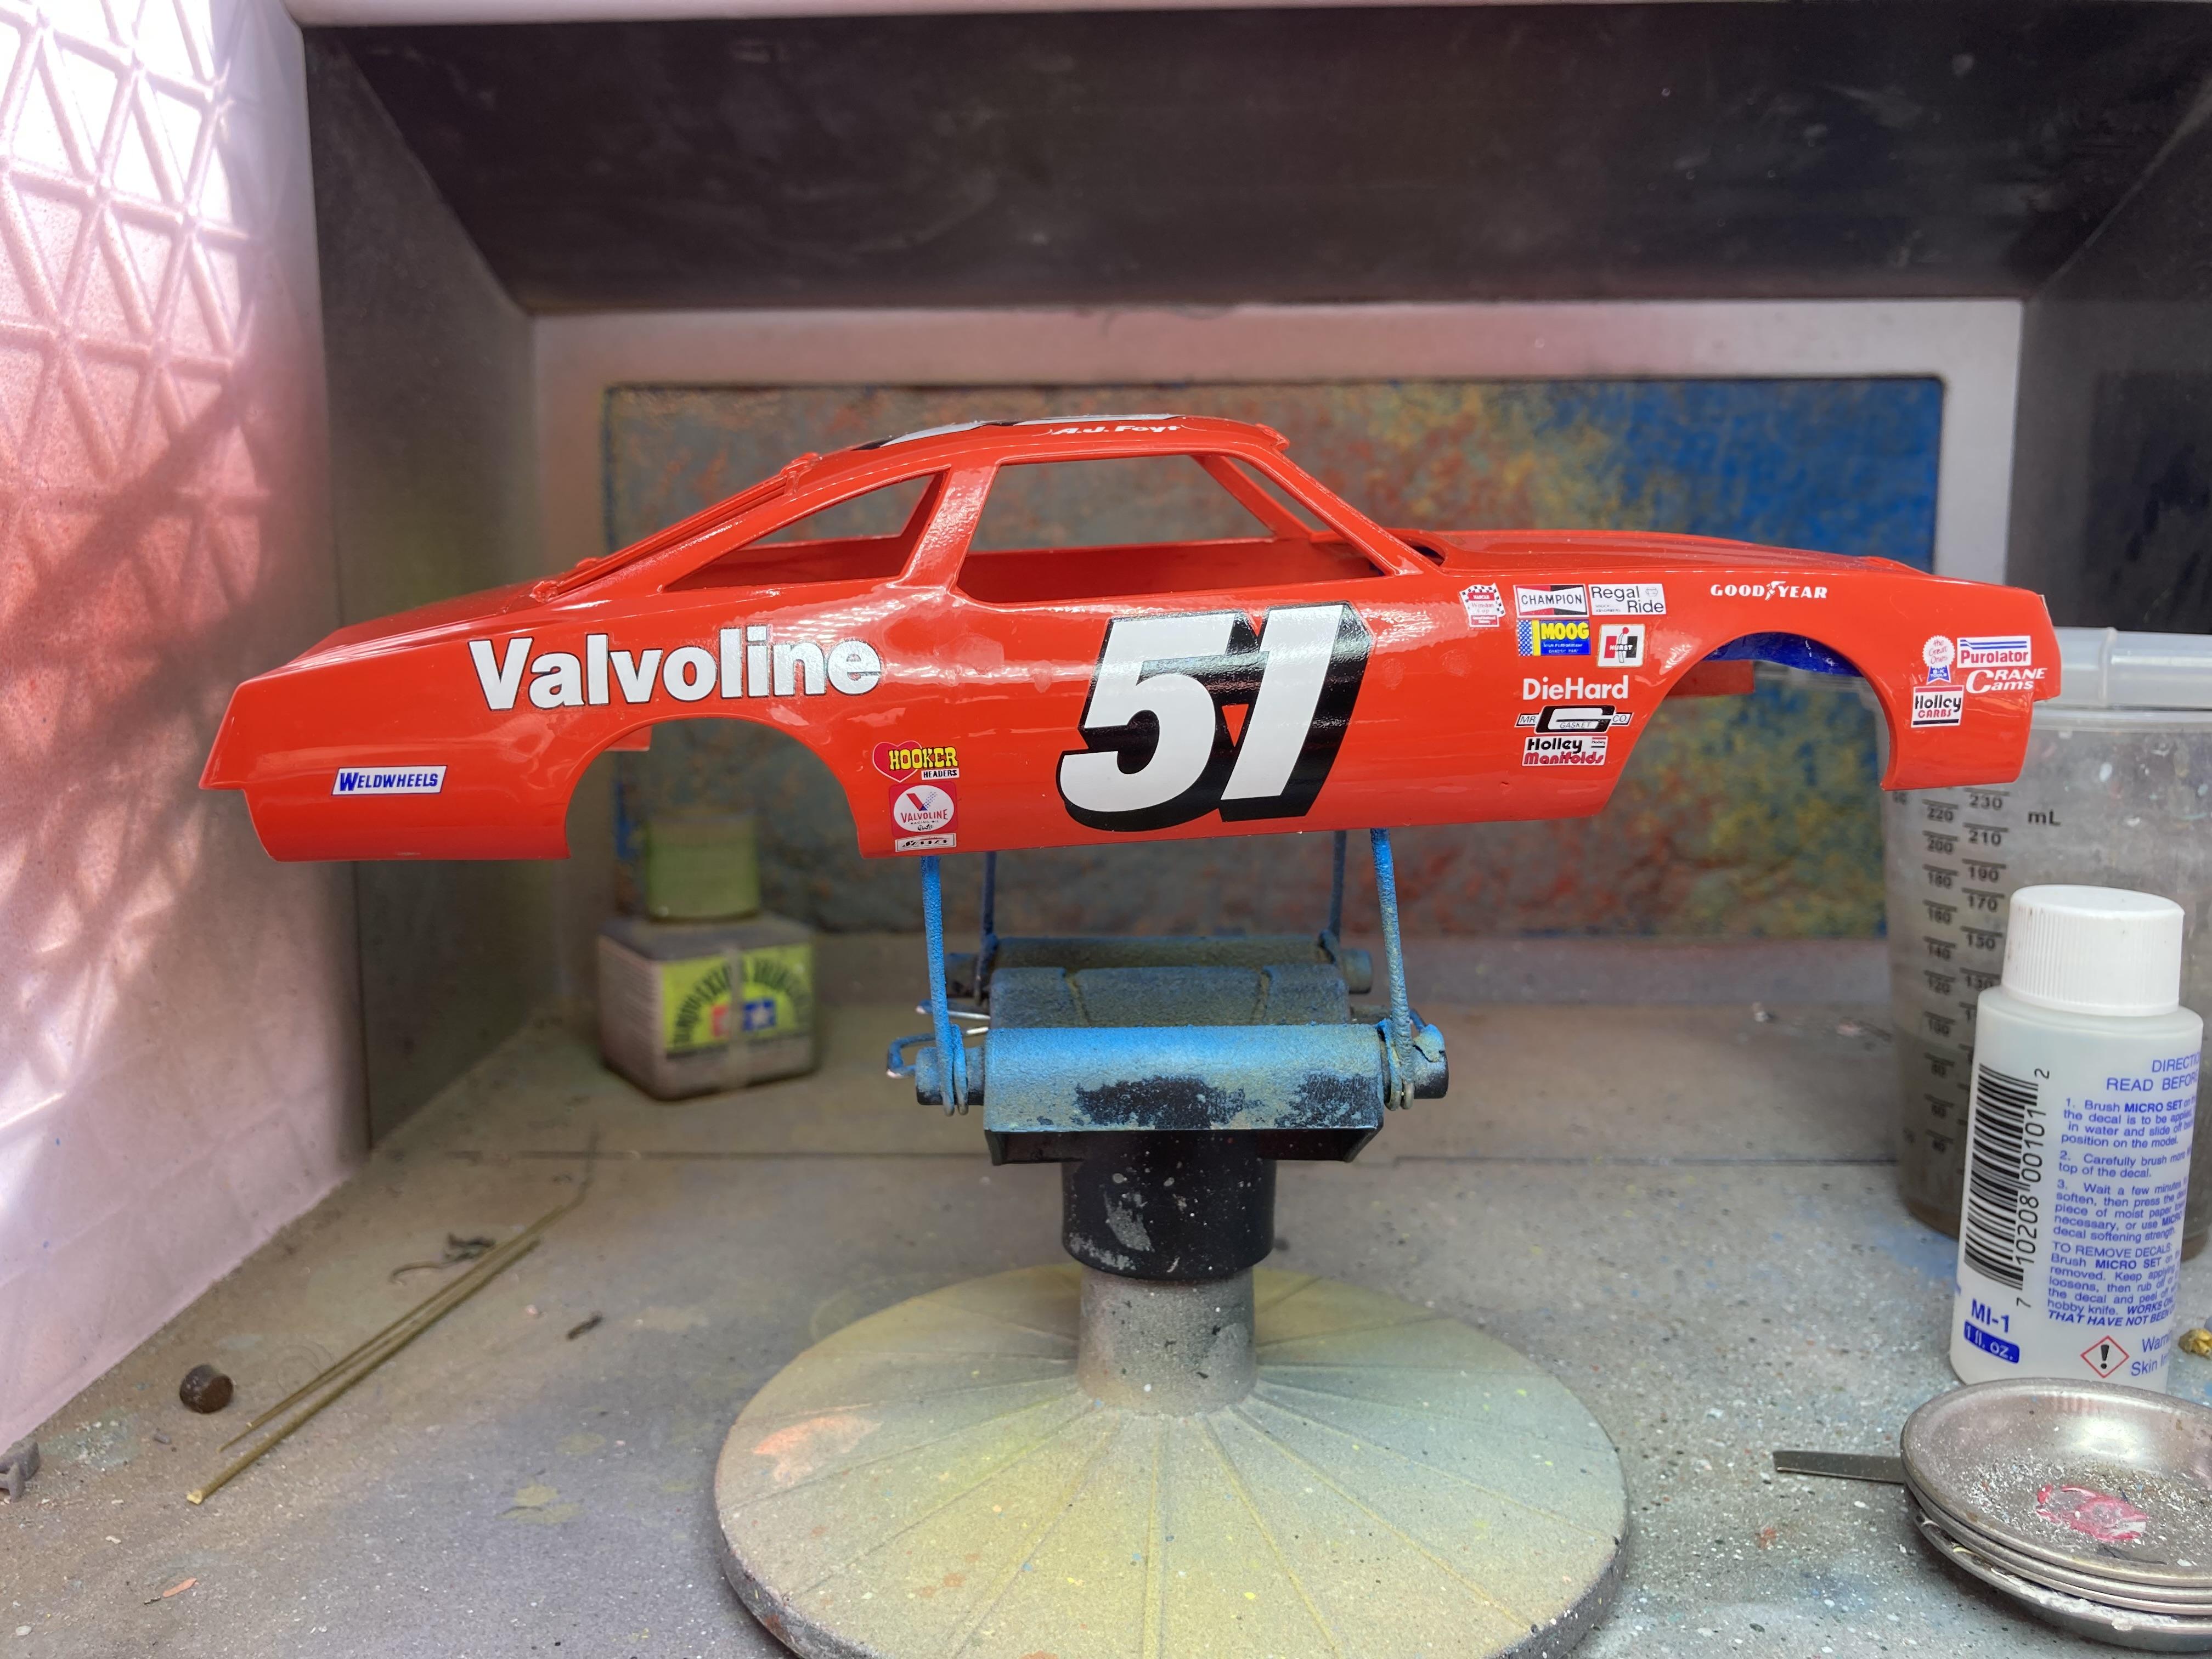
…….and decals. Including some headlight covers made from thin zinc/tin plate:
-
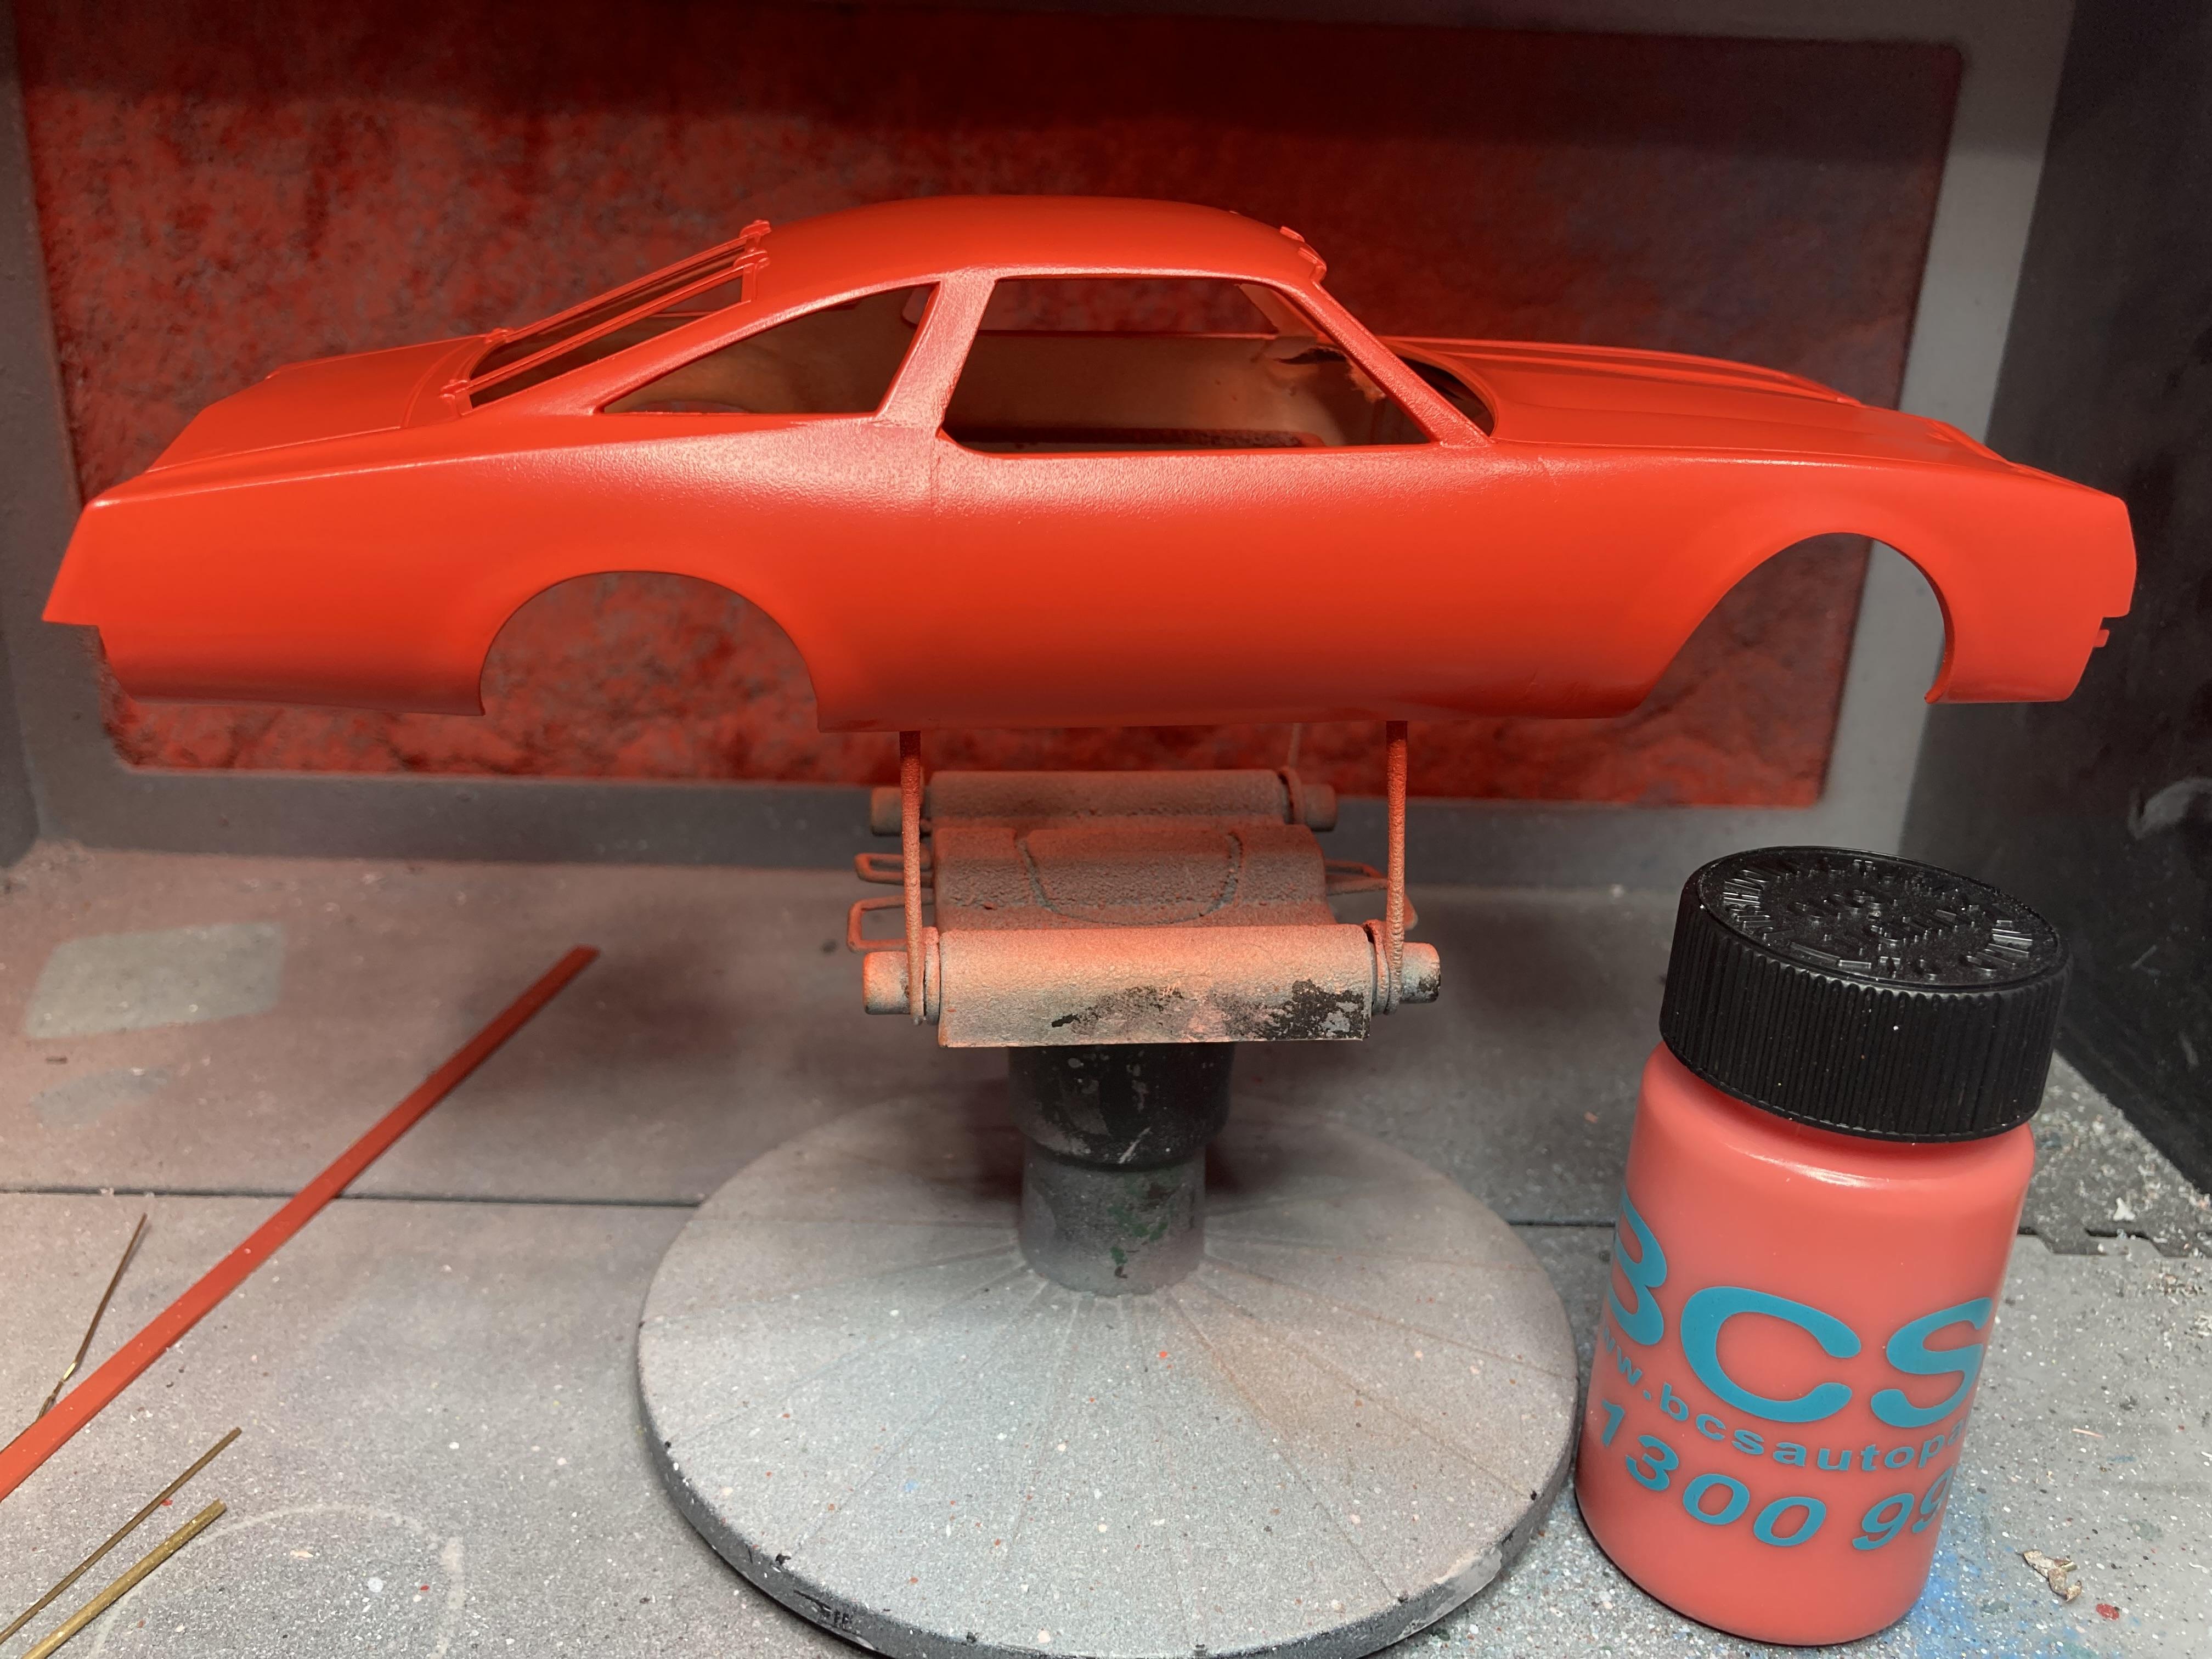
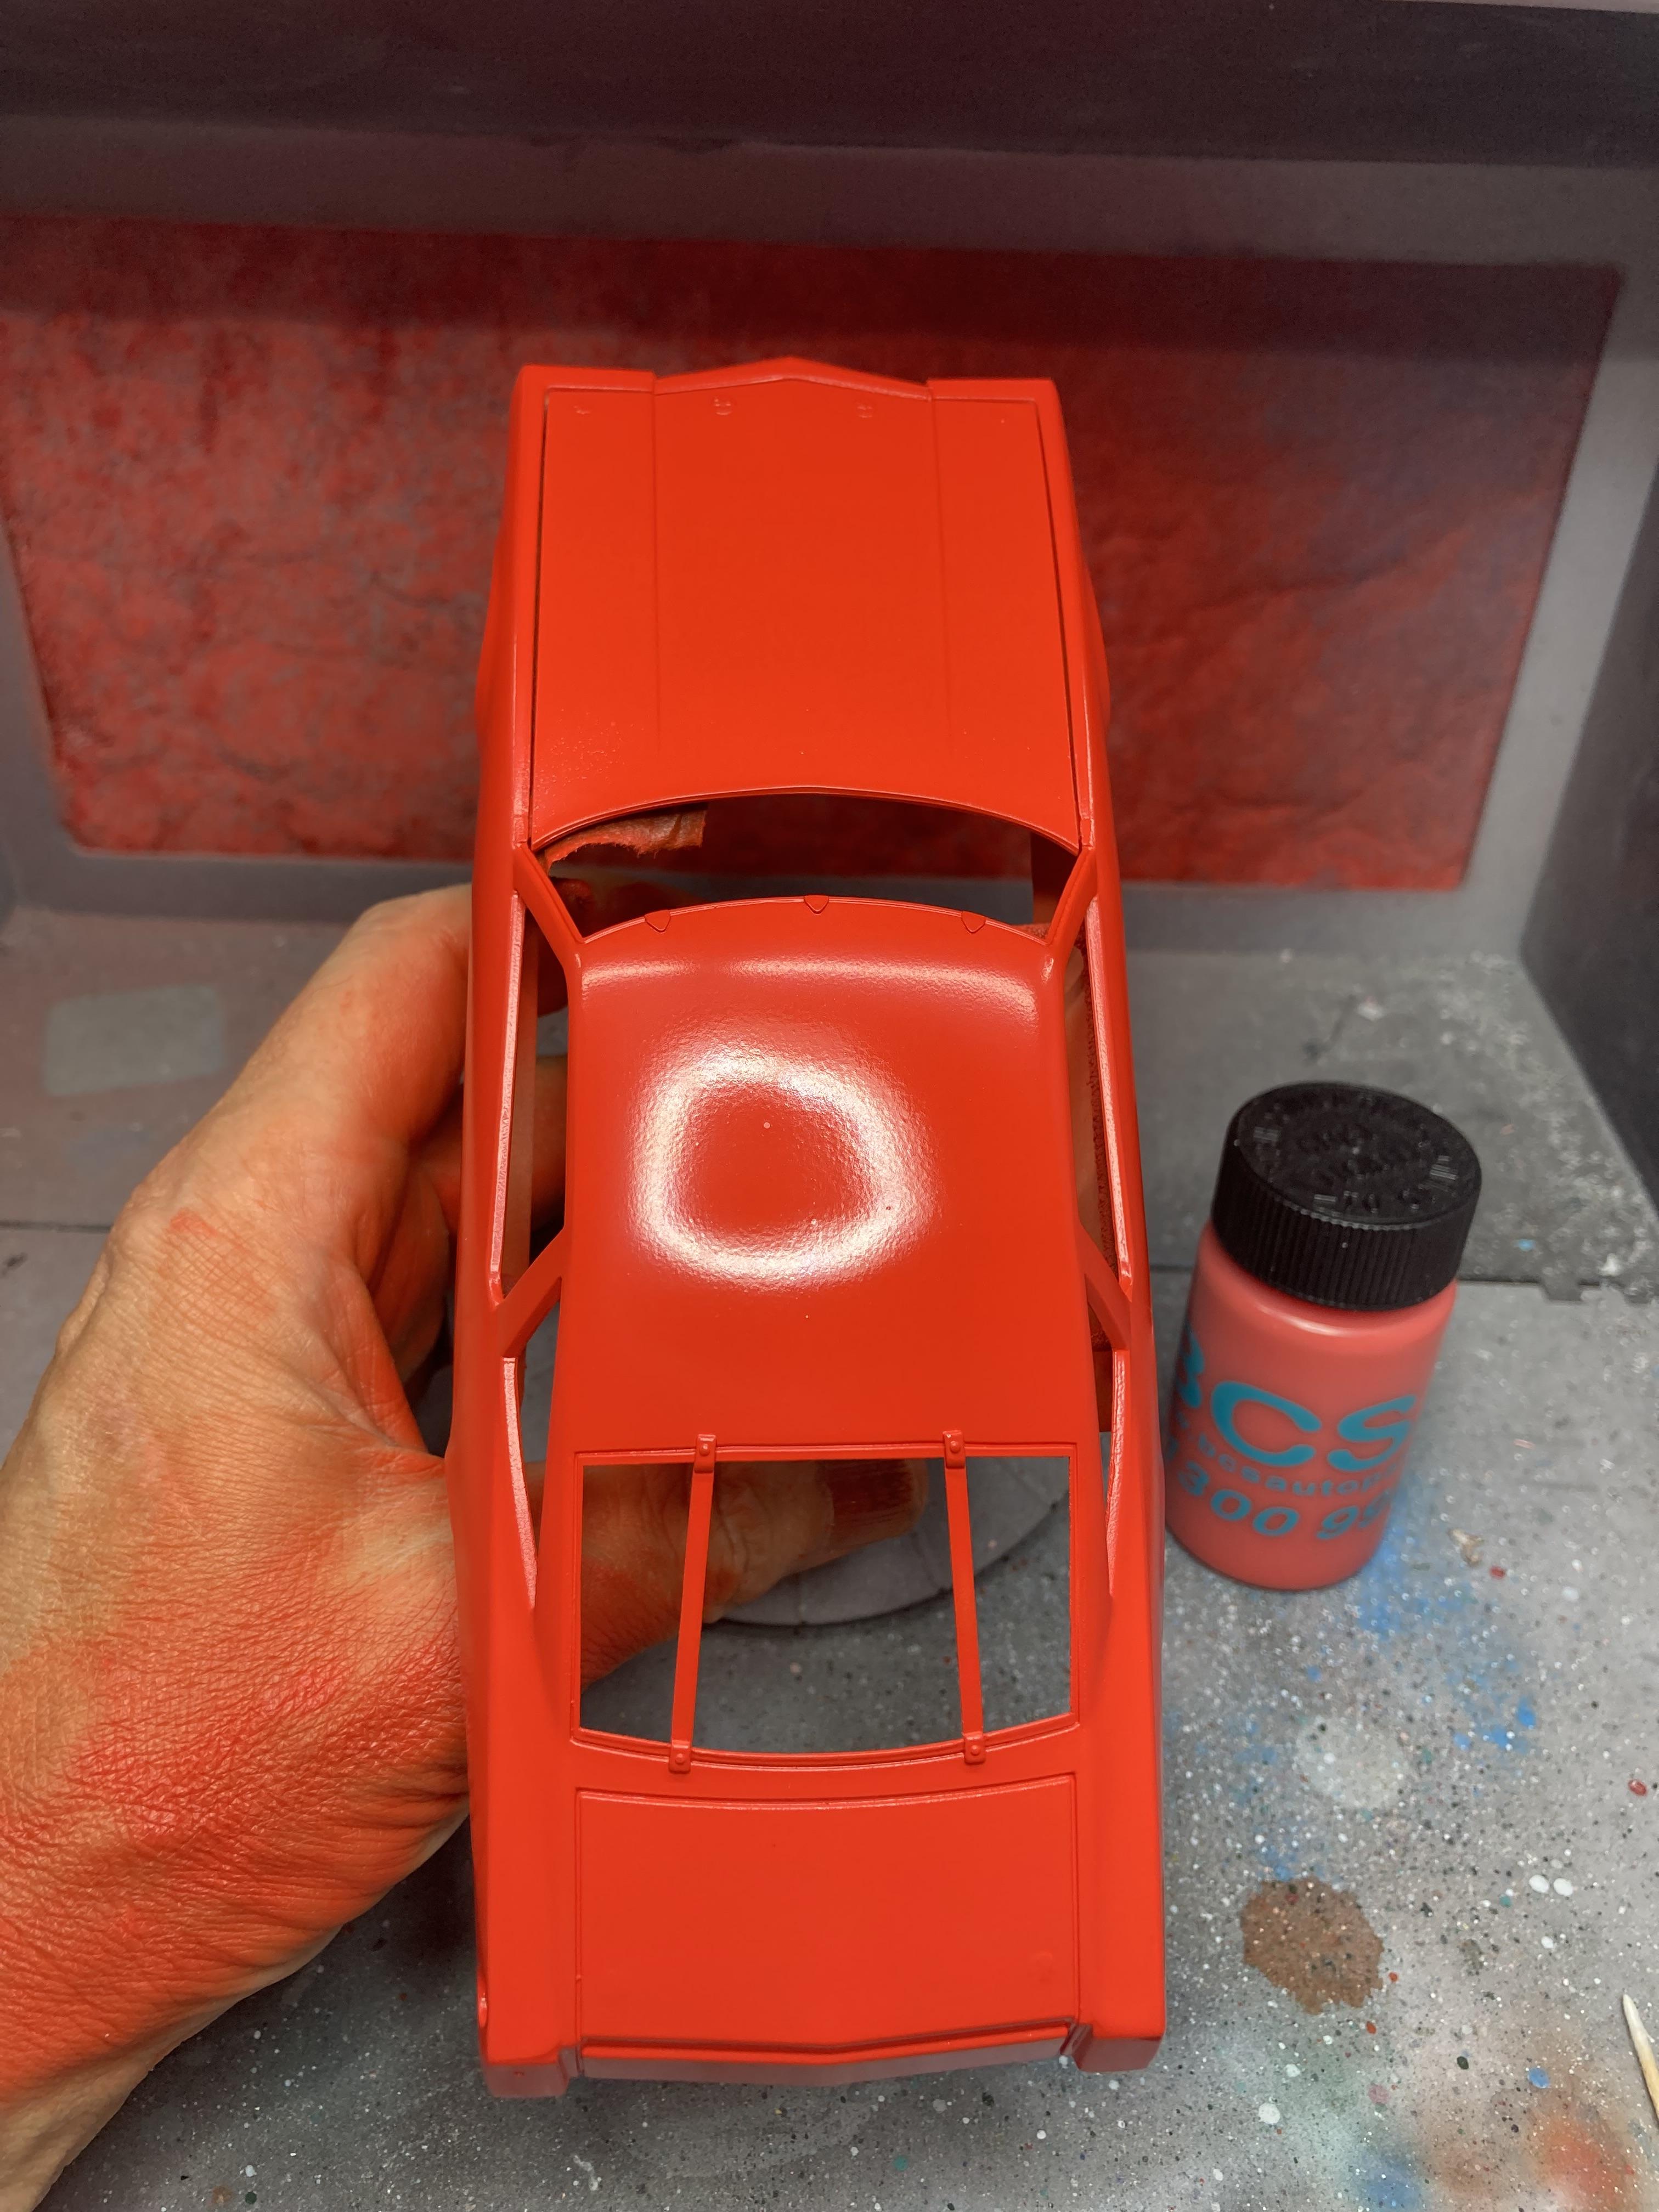
Oldsmobile Quartet
GMasterG replied to GMasterG's topic in WIP: Stock Cars (NASCAR, Super Stock, Late Model, etc.)
The Foytmobile gets a clear coat:
-
Thank you Rick. I’ve never tried that before. I will do so with this paint job.
-
Oldsmobile Quartet
GMasterG replied to GMasterG's topic in WIP: Stock Cars (NASCAR, Super Stock, Late Model, etc.)
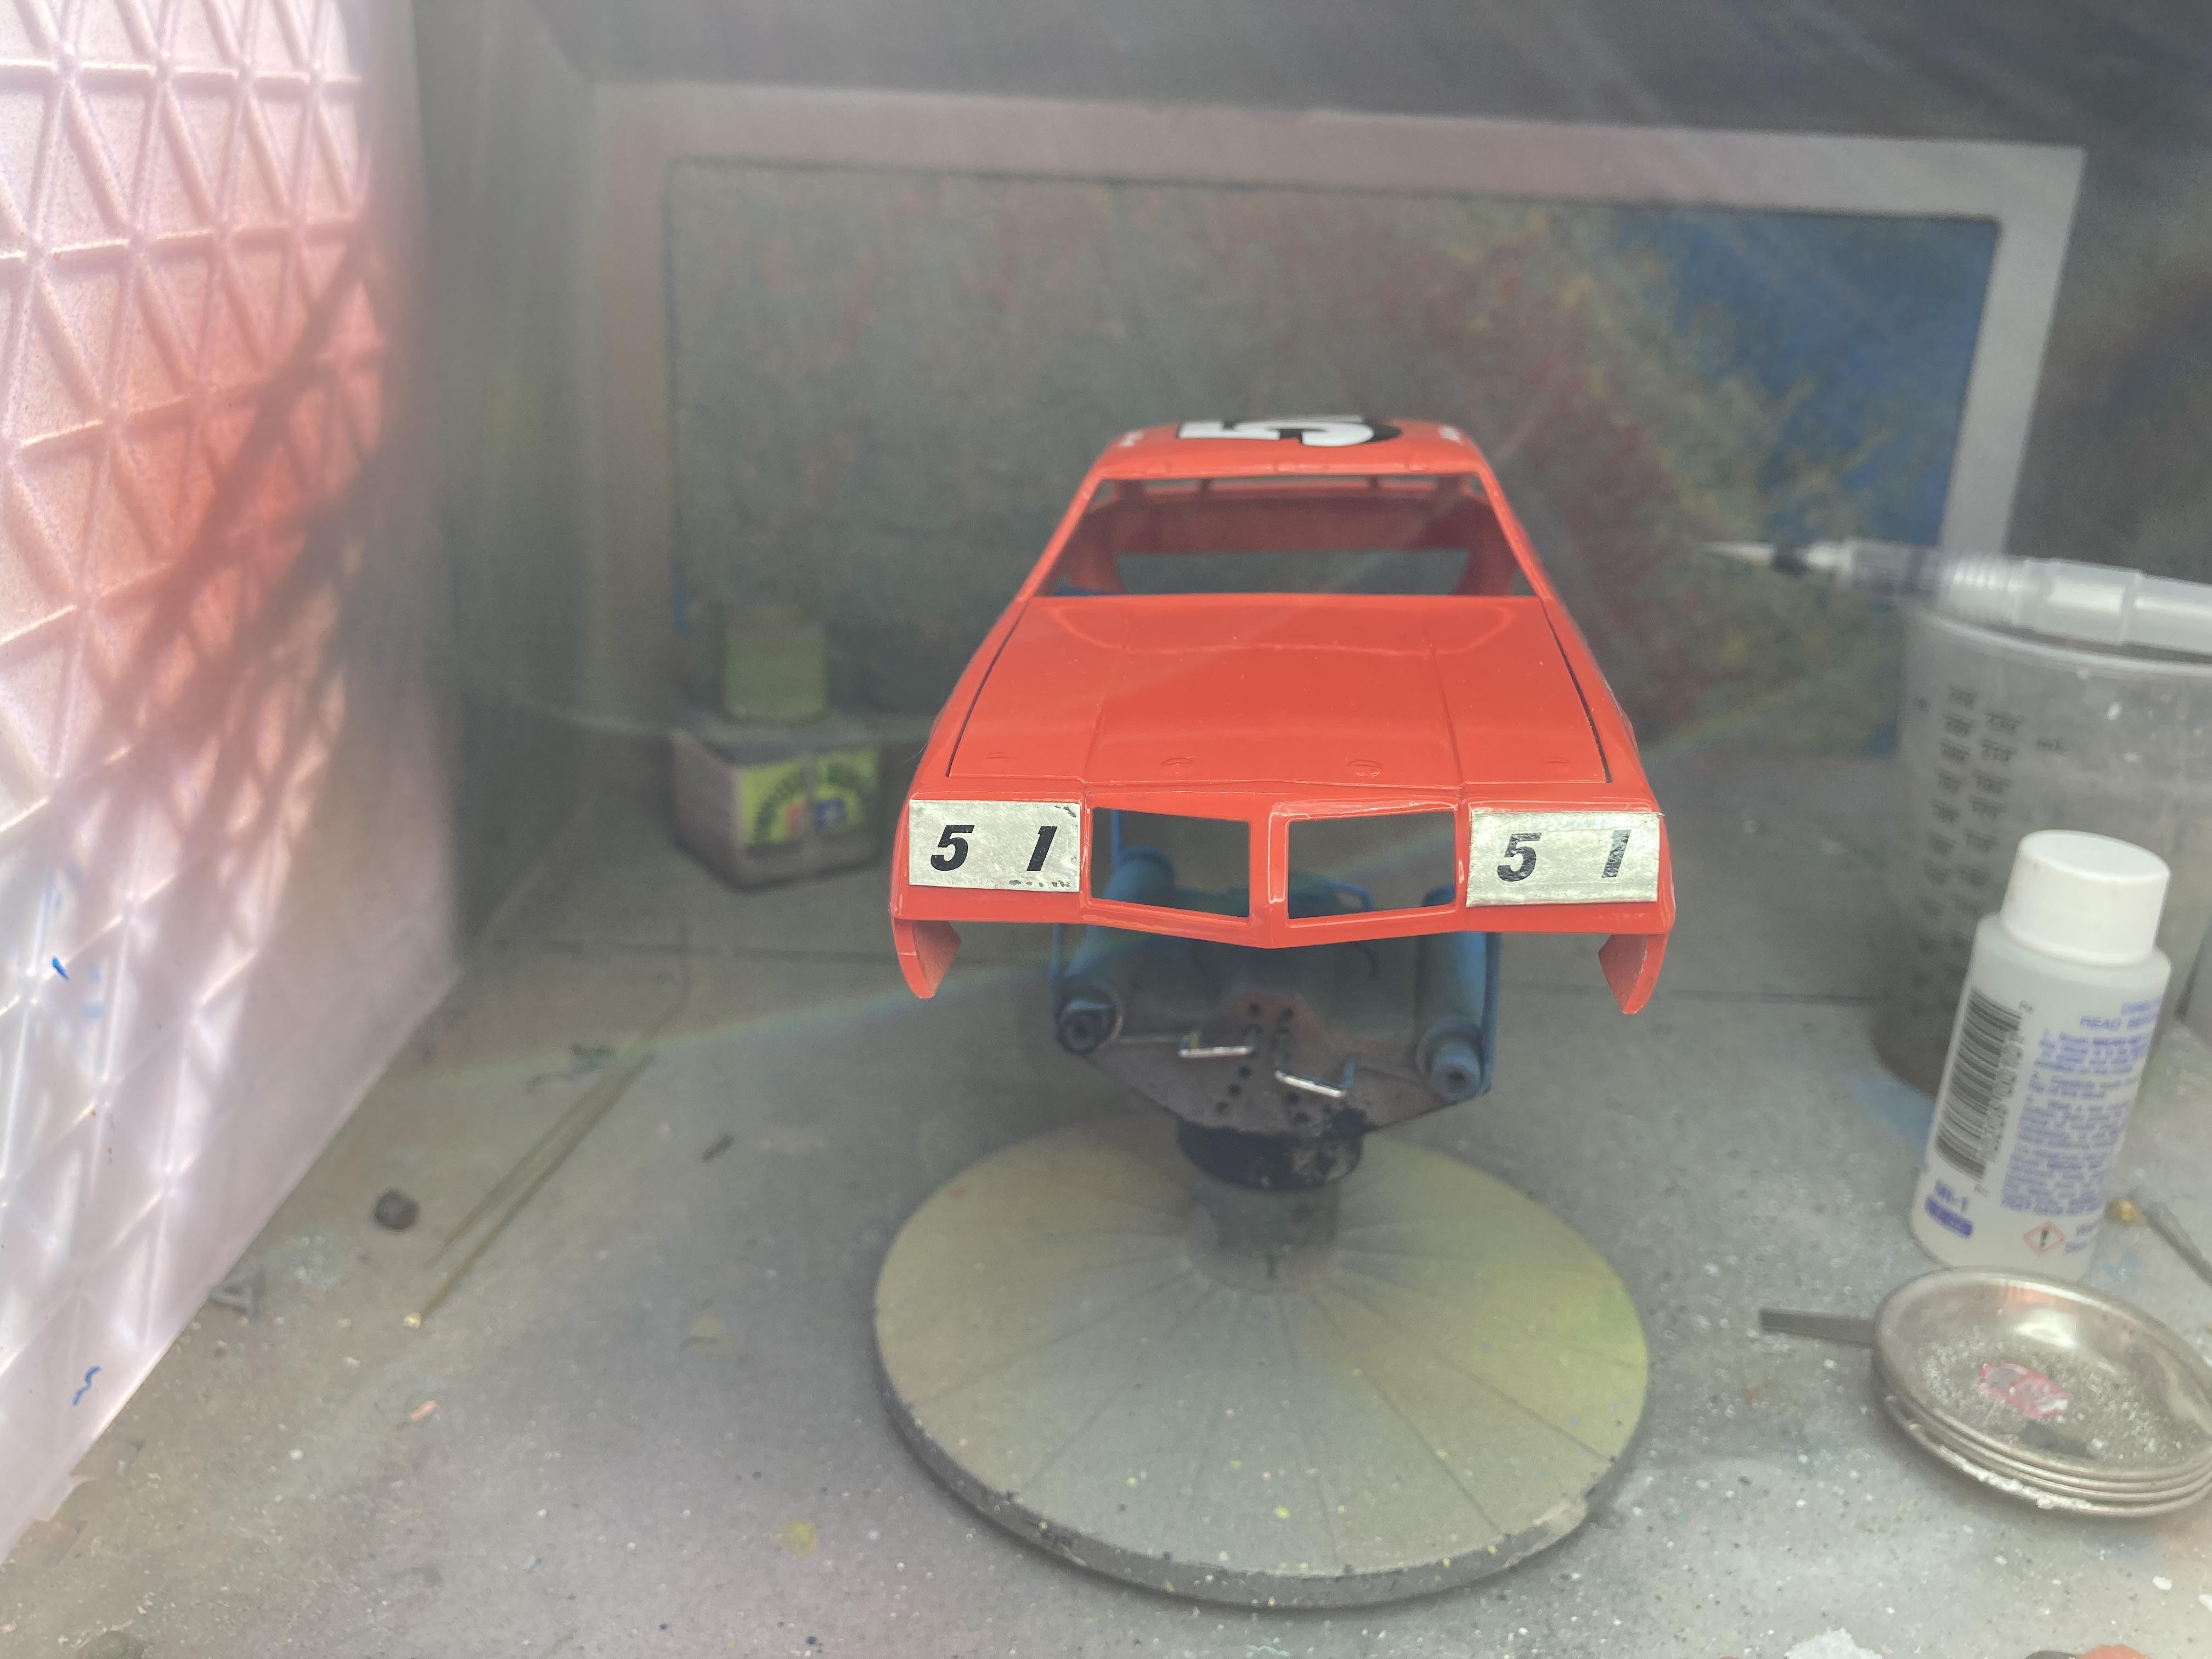
Front bumpers done:
-
Thank you, these photos are great reference material. I appreciate the time you've taken to post them and share your techniques with me.
-
Hi. I'm currently building Bobby Allison's 71 Dodge Charger and in doing some research on how to build it I came across your post from some time ago. I have reached the stage where I have to mask the side panels so as to be able to spray the gold top sections of the car's body and if I managed to do half as decent a job as you did on your version I'd be happy with the result. Are there any tips that you could provide me as to how best to approach the masking process?
Cheers
Grant
-
I need to mask this to be able to spray the top sections of the body gold. Has anyone been through this exercise in the past and have any tips that they could offer as to the best approach?
-
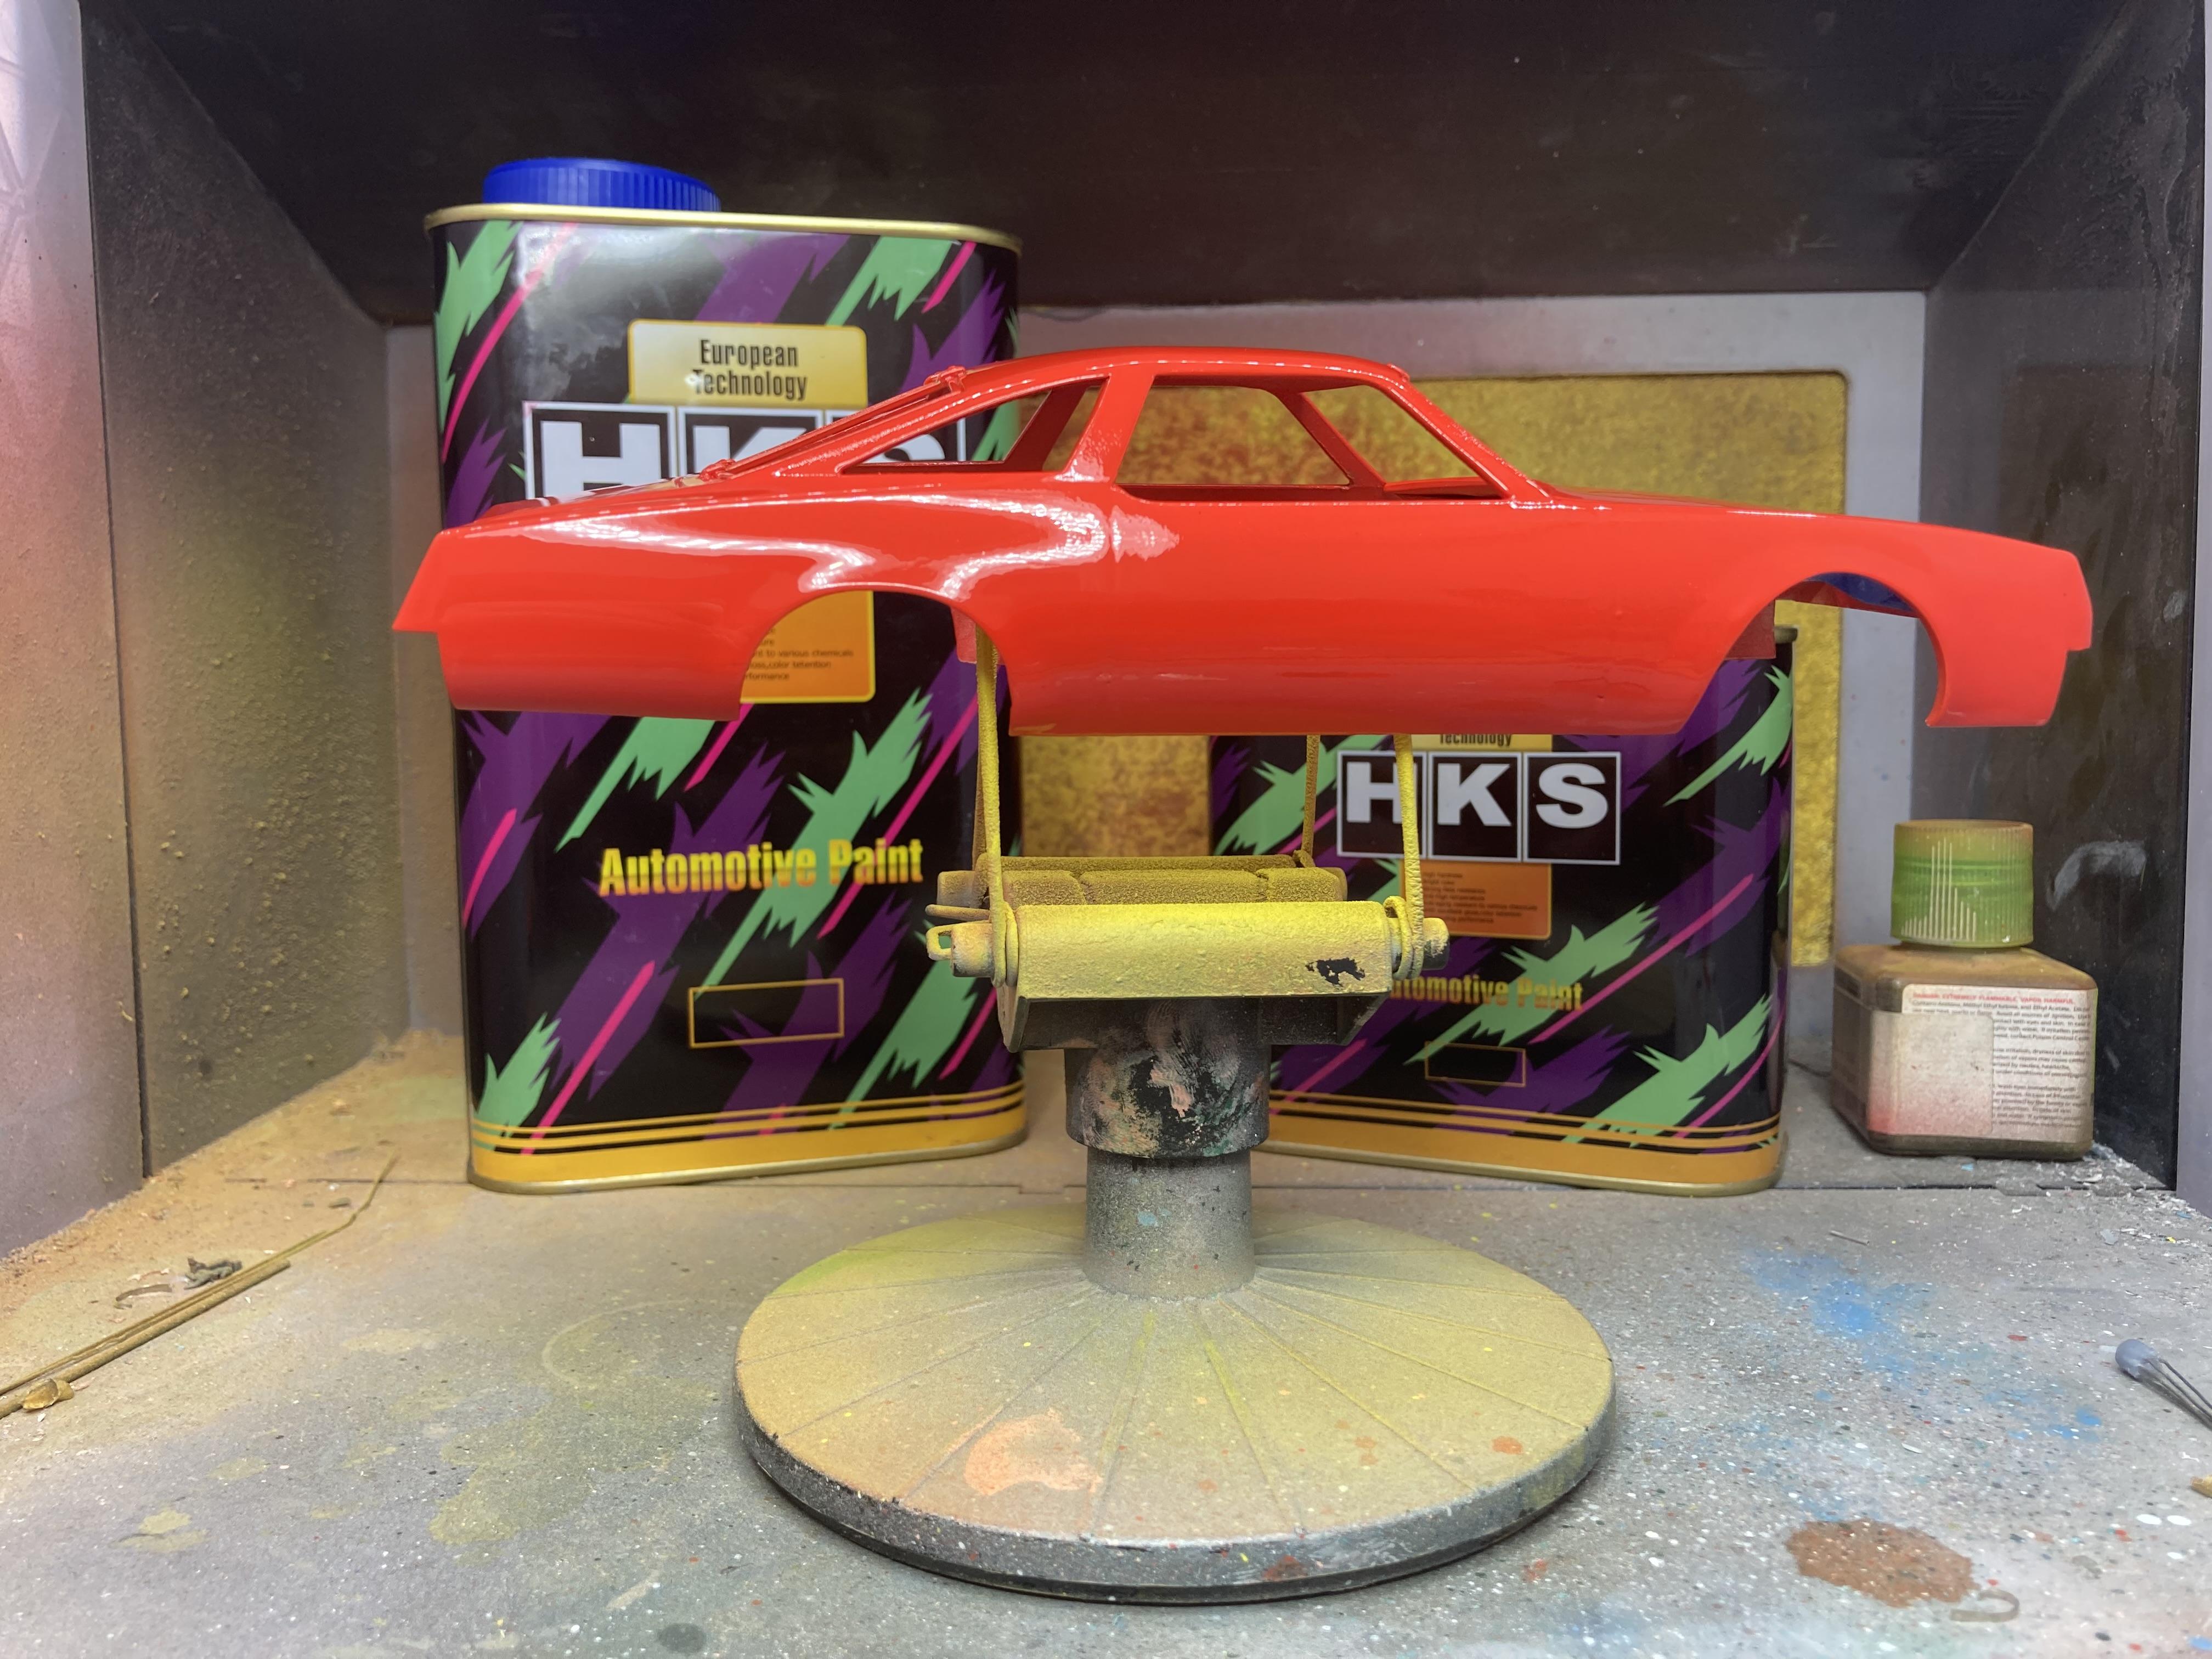
Oldsmobile Quartet
GMasterG replied to GMasterG's topic in WIP: Stock Cars (NASCAR, Super Stock, Late Model, etc.)
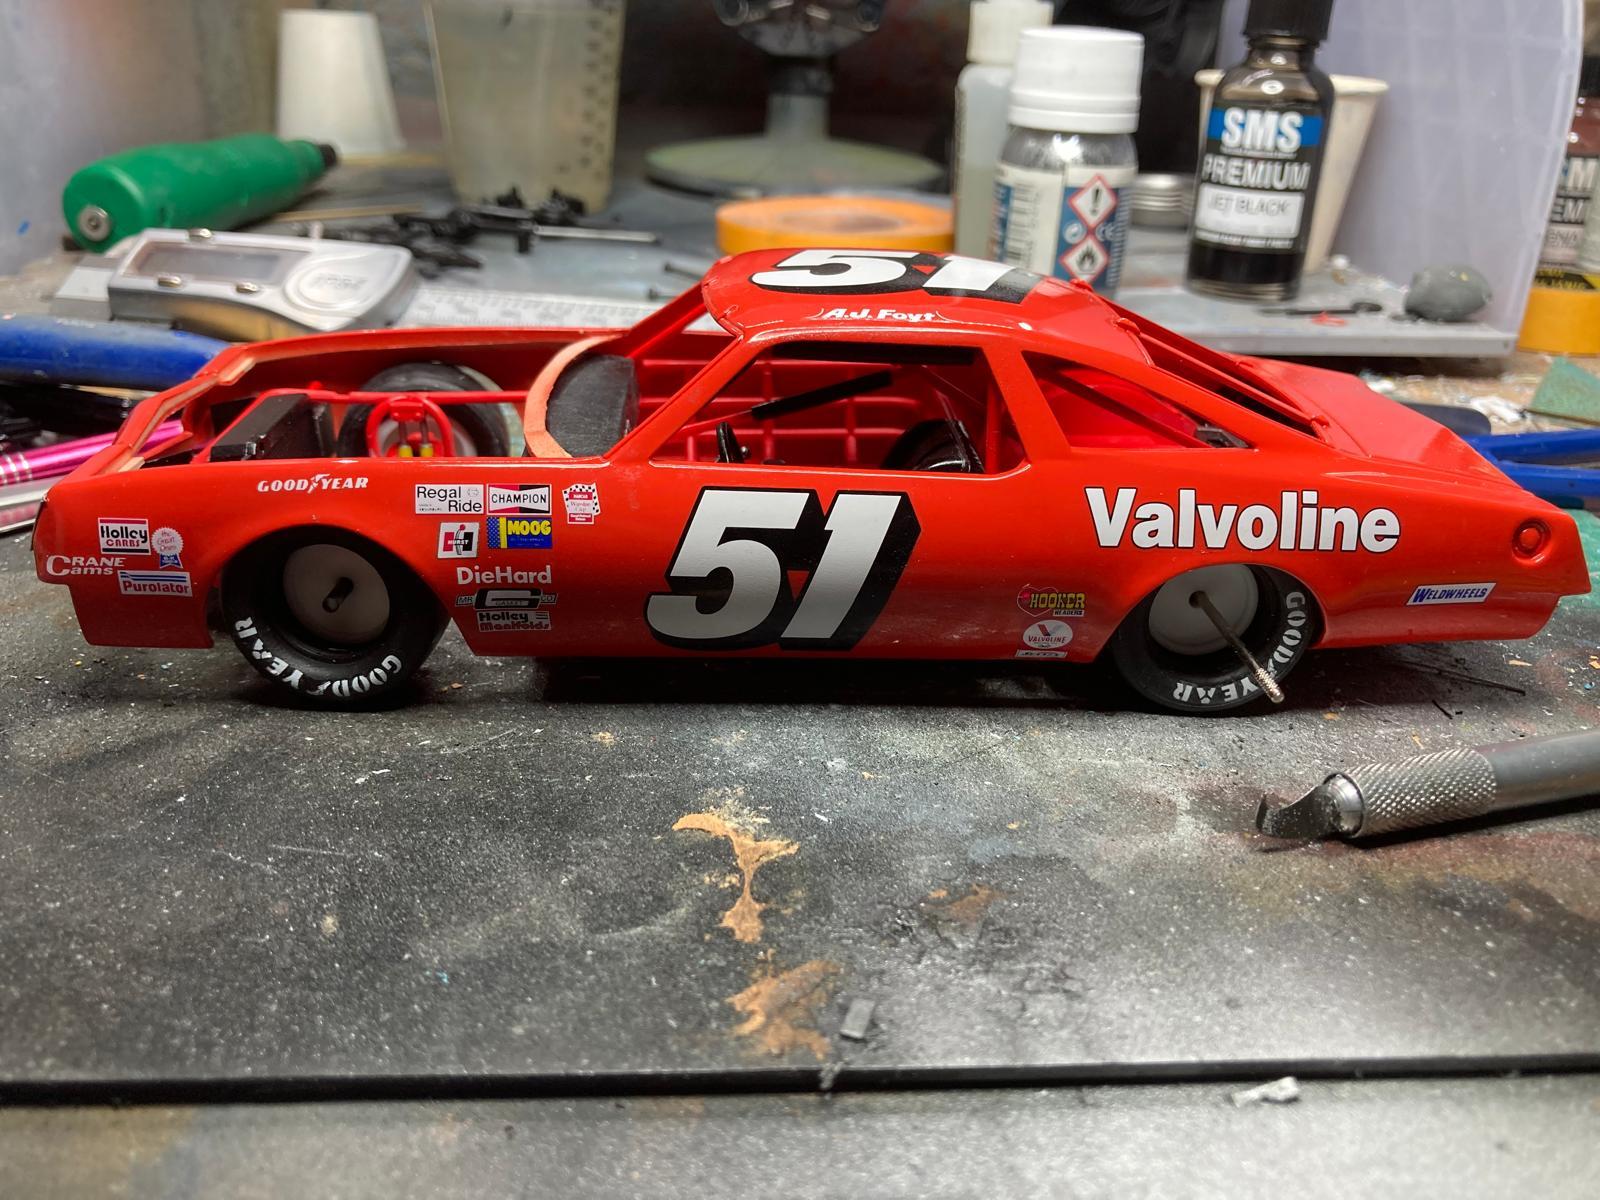
The Foytmobile gets a few coats of ‘66 Ford Poppy Red. The automotive paint has been nice to work with:
-
Oldsmobile Quartet
GMasterG replied to GMasterG's topic in WIP: Stock Cars (NASCAR, Super Stock, Late Model, etc.)
Thank you, Todd. I've designed the shock absorber in parts so I can simply print the components that I need. Cheers -
Oldsmobile Quartet
GMasterG replied to GMasterG's topic in WIP: Stock Cars (NASCAR, Super Stock, Late Model, etc.)
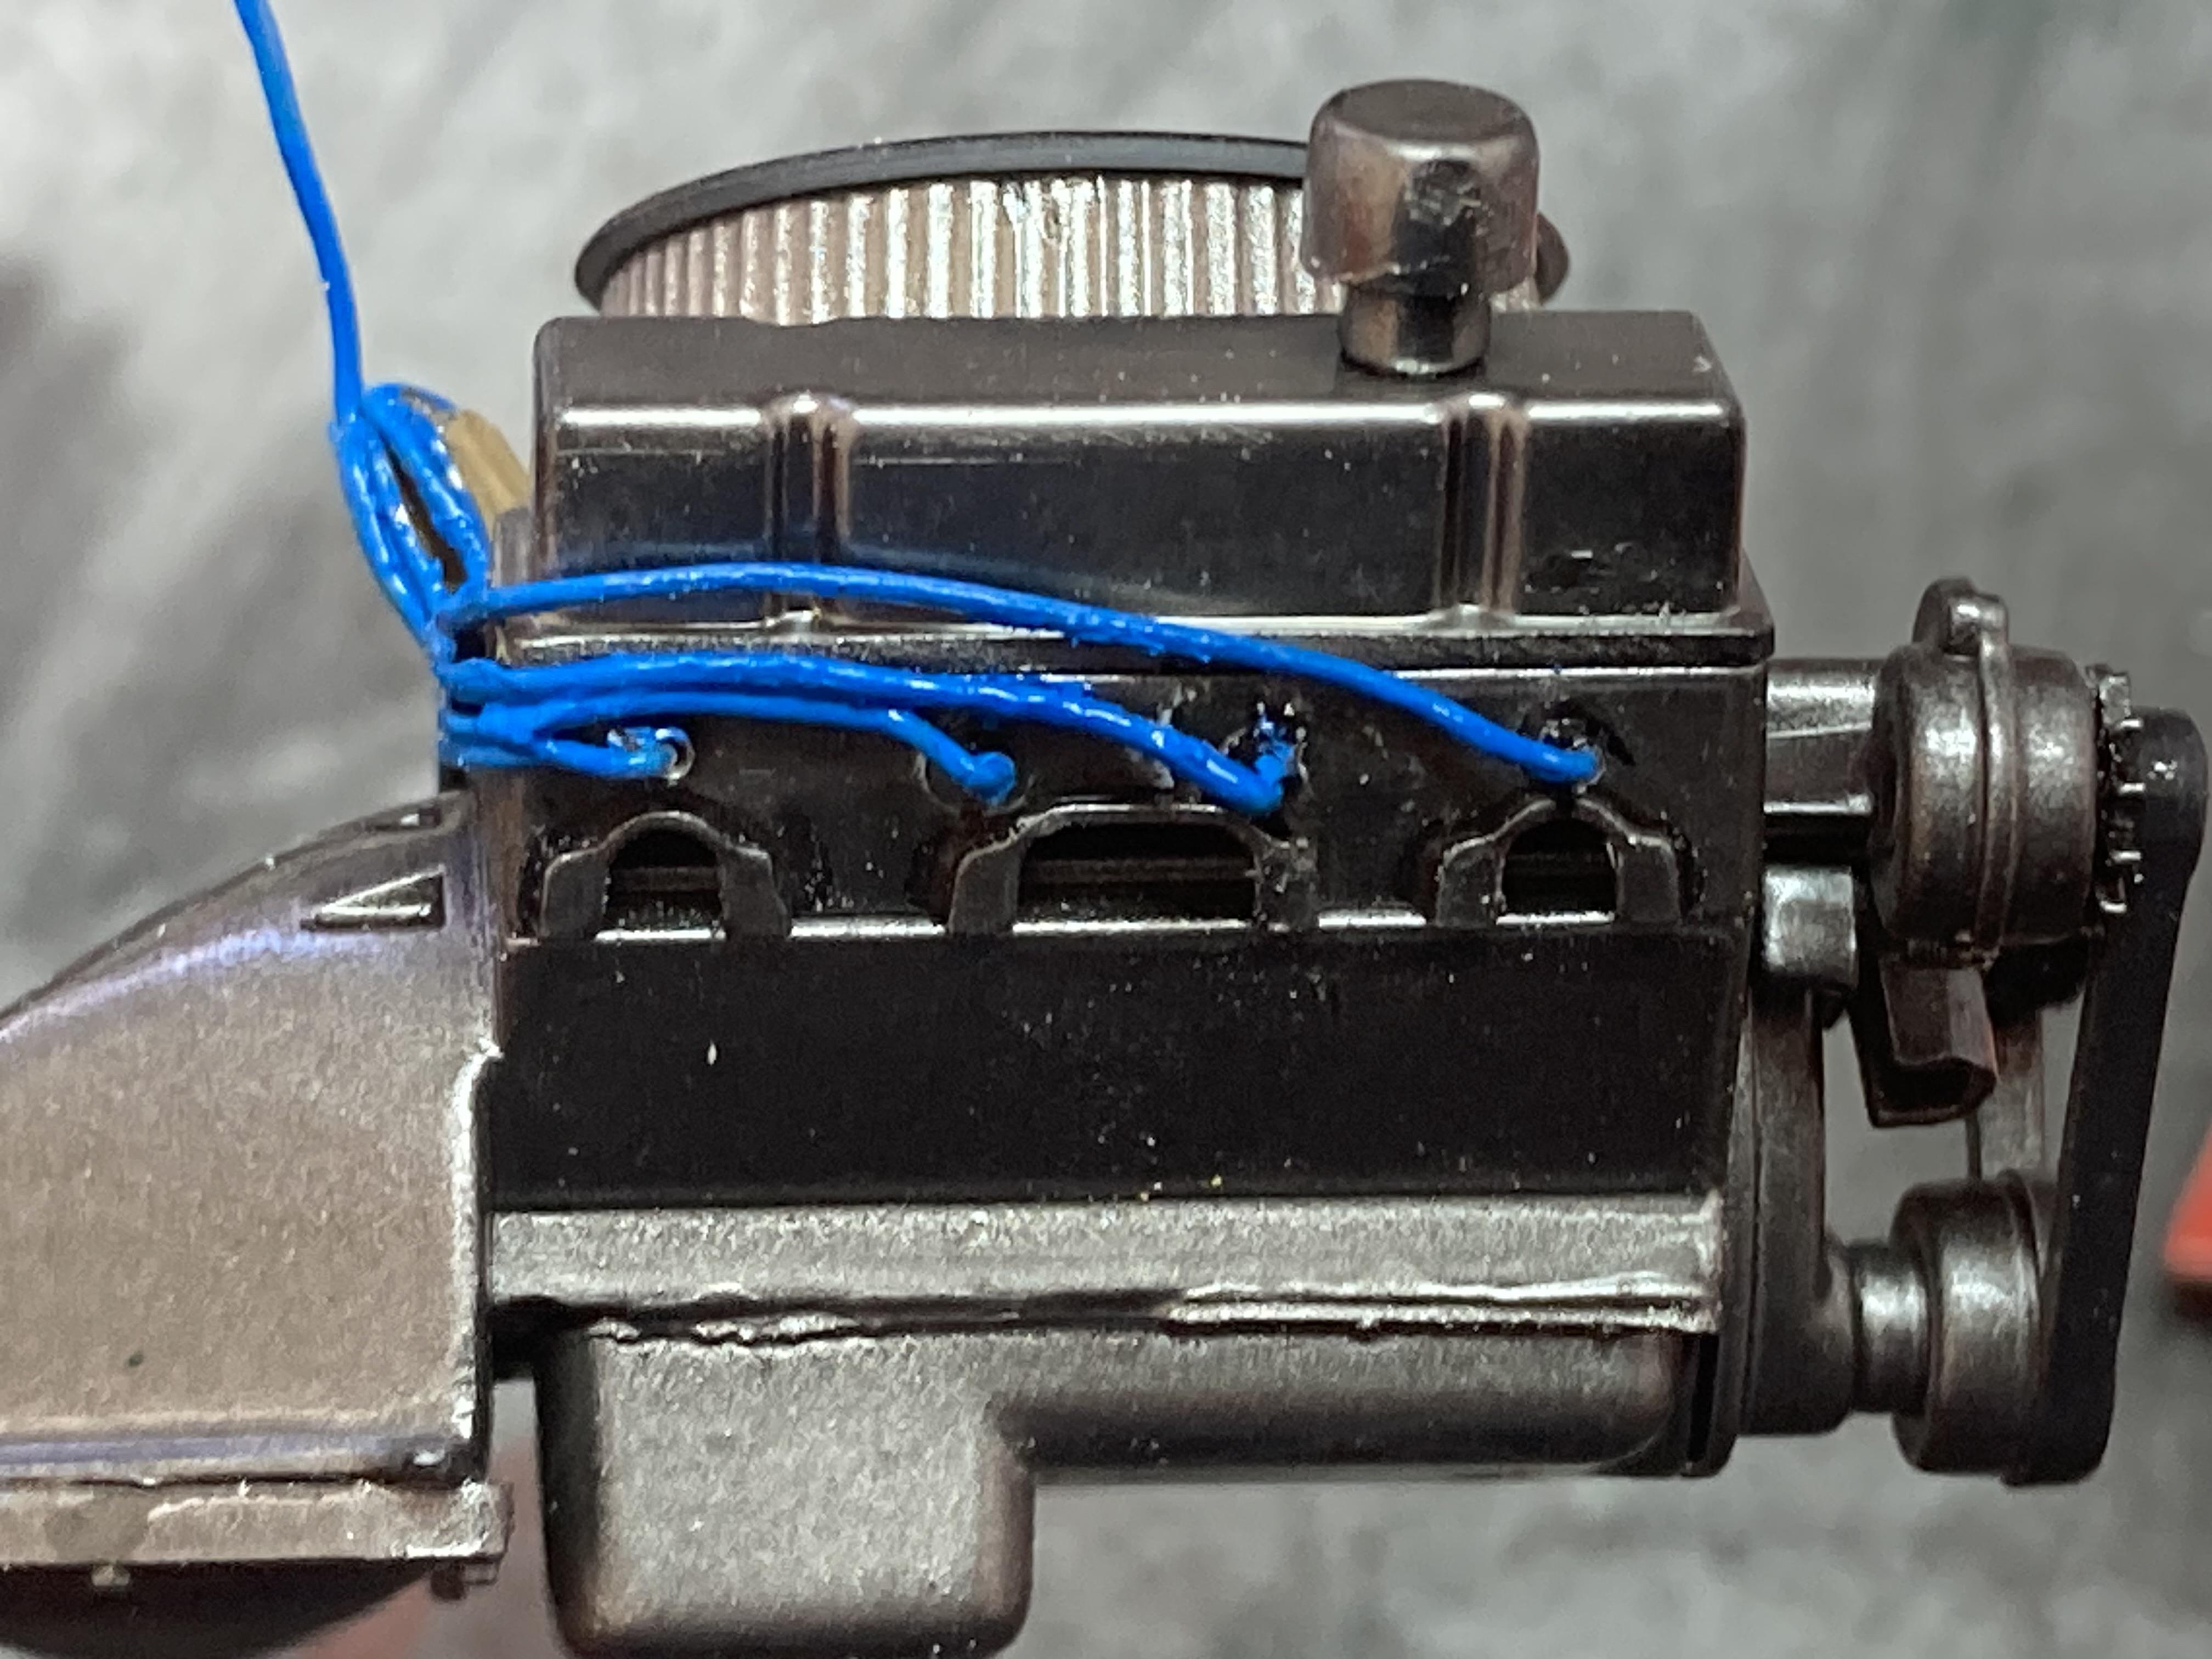
Some progress wiring one of the engines. I’ve used 0.7mm aluminium tube into which I’ve slotted 0.4mm solder. The dizzy is the original from the kit that’s been cut short and placed at an angle. I can’t raise the height of the air cleaner because that will cause clearance issues with the hood: I will try 3D printing a coil. If anyone has any suggestions as to where I should locate the coil I’d be grateful for the guidance.
-
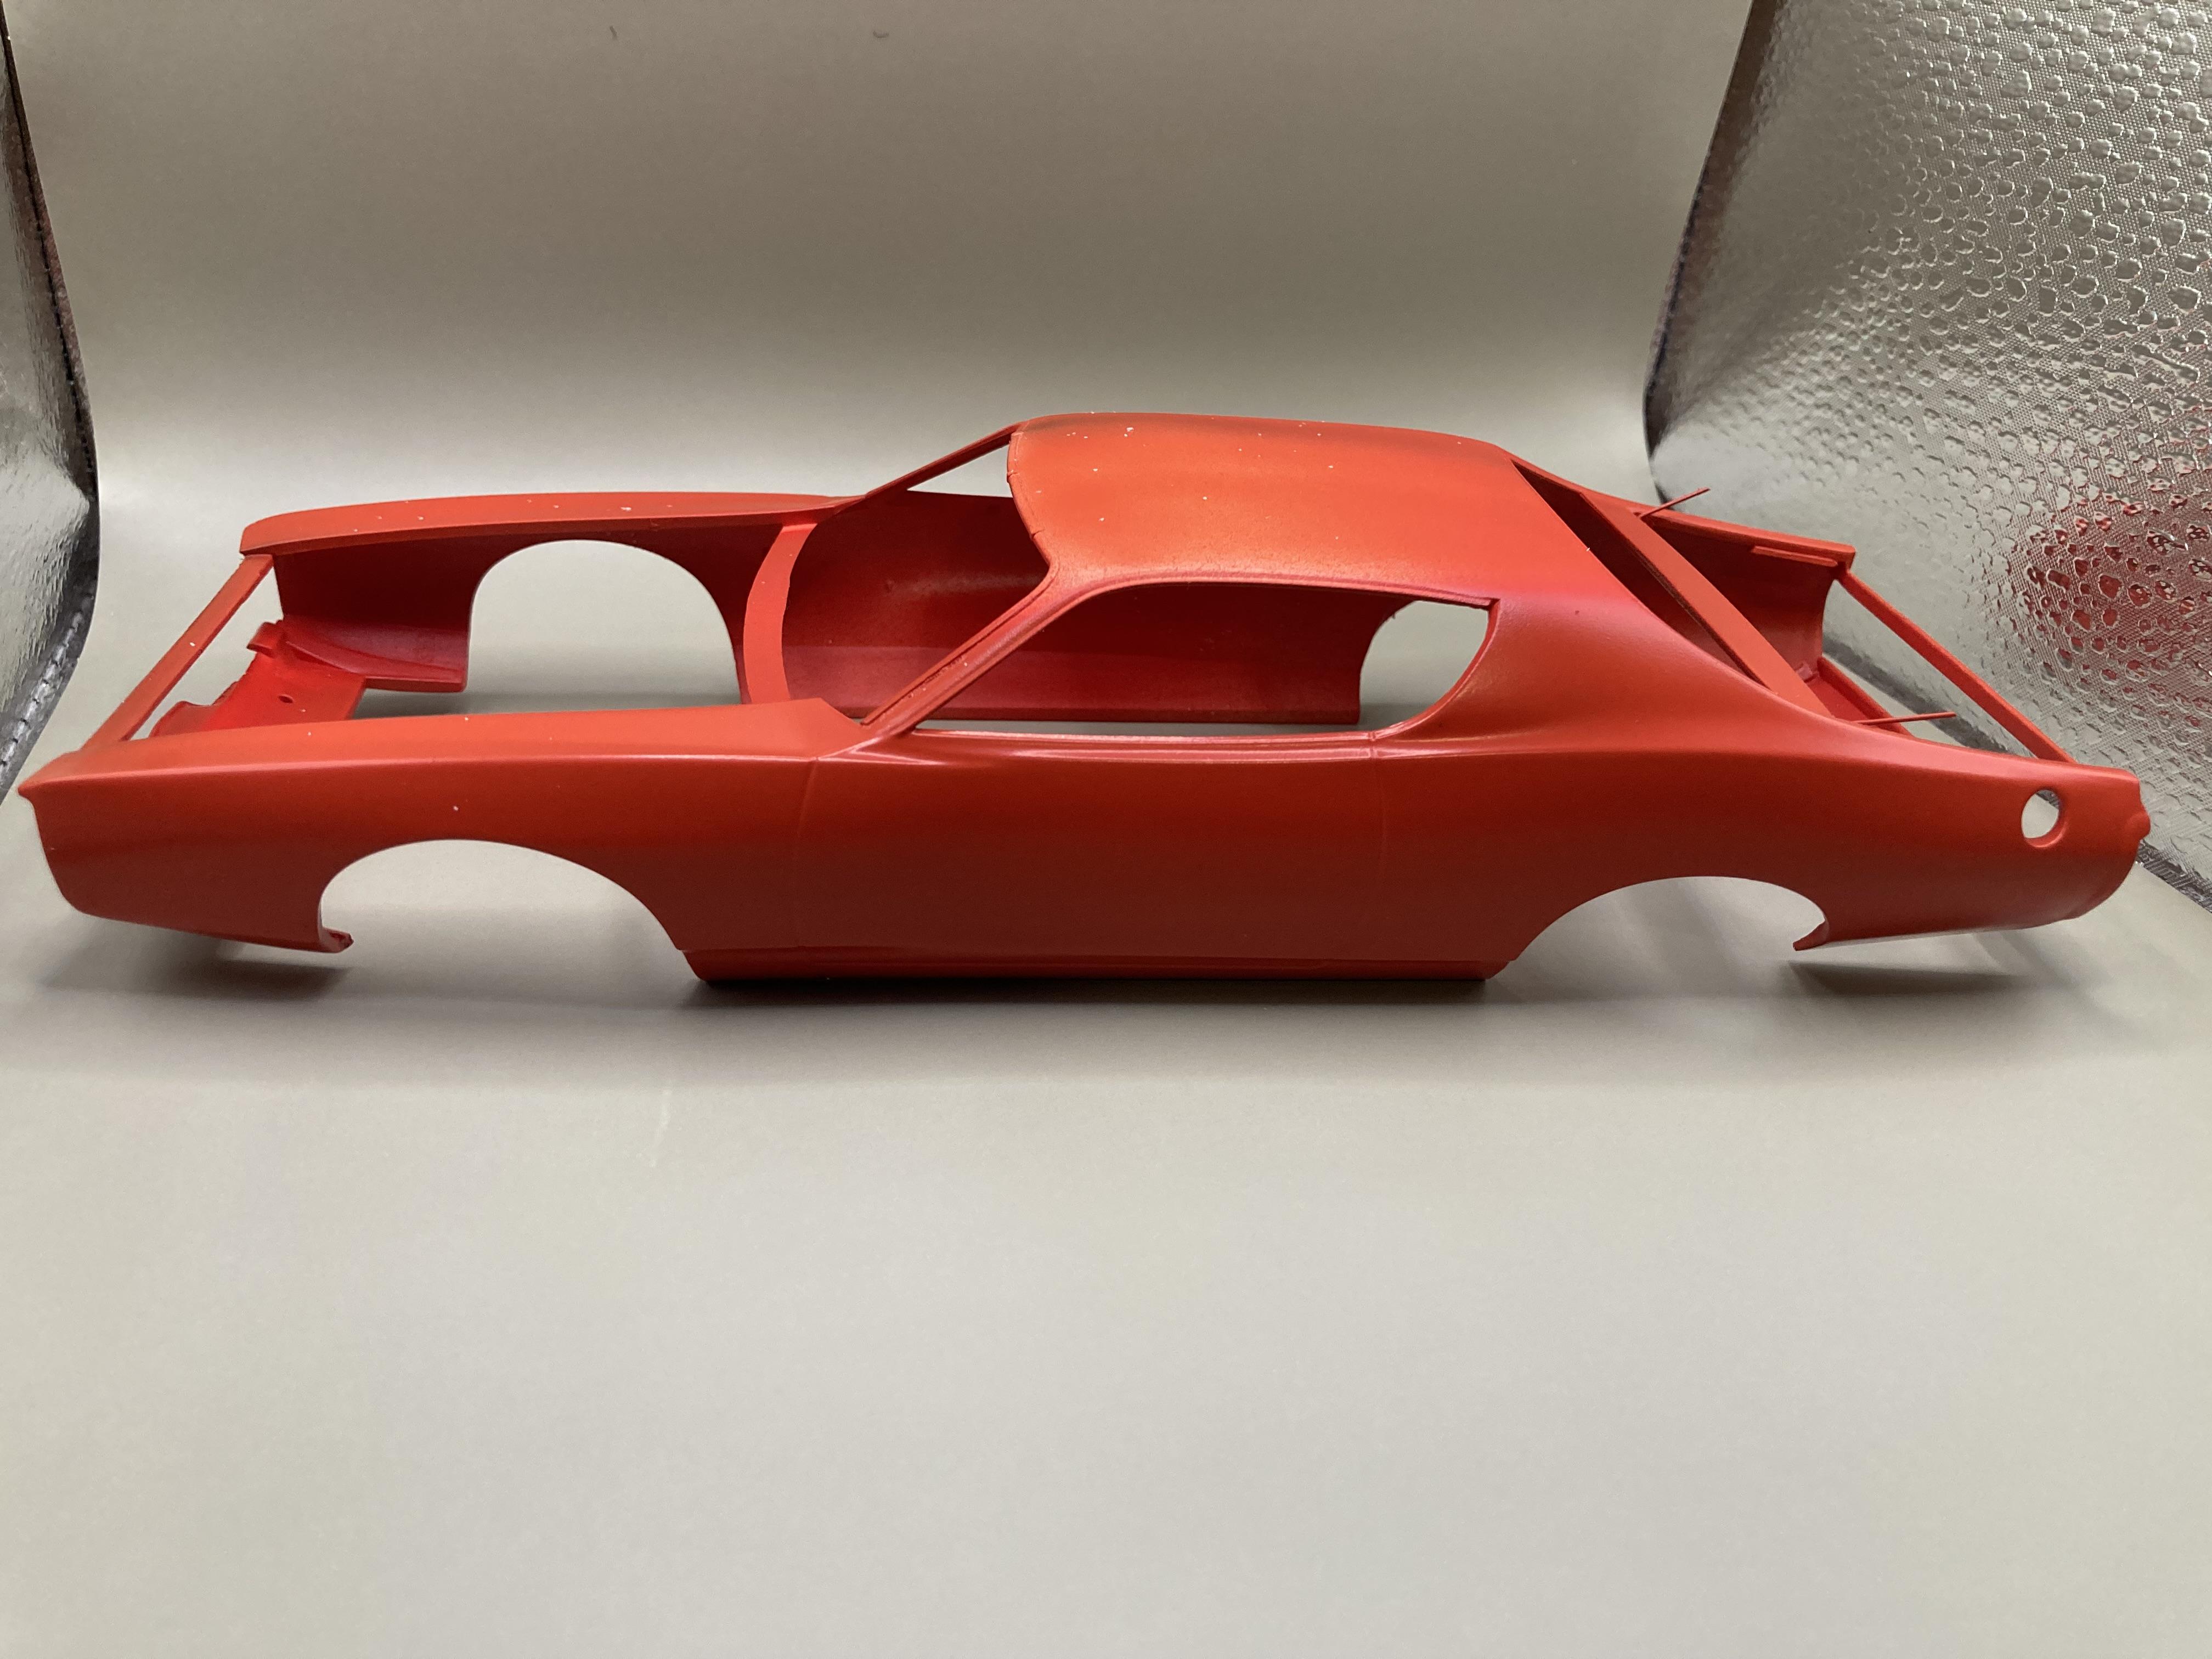
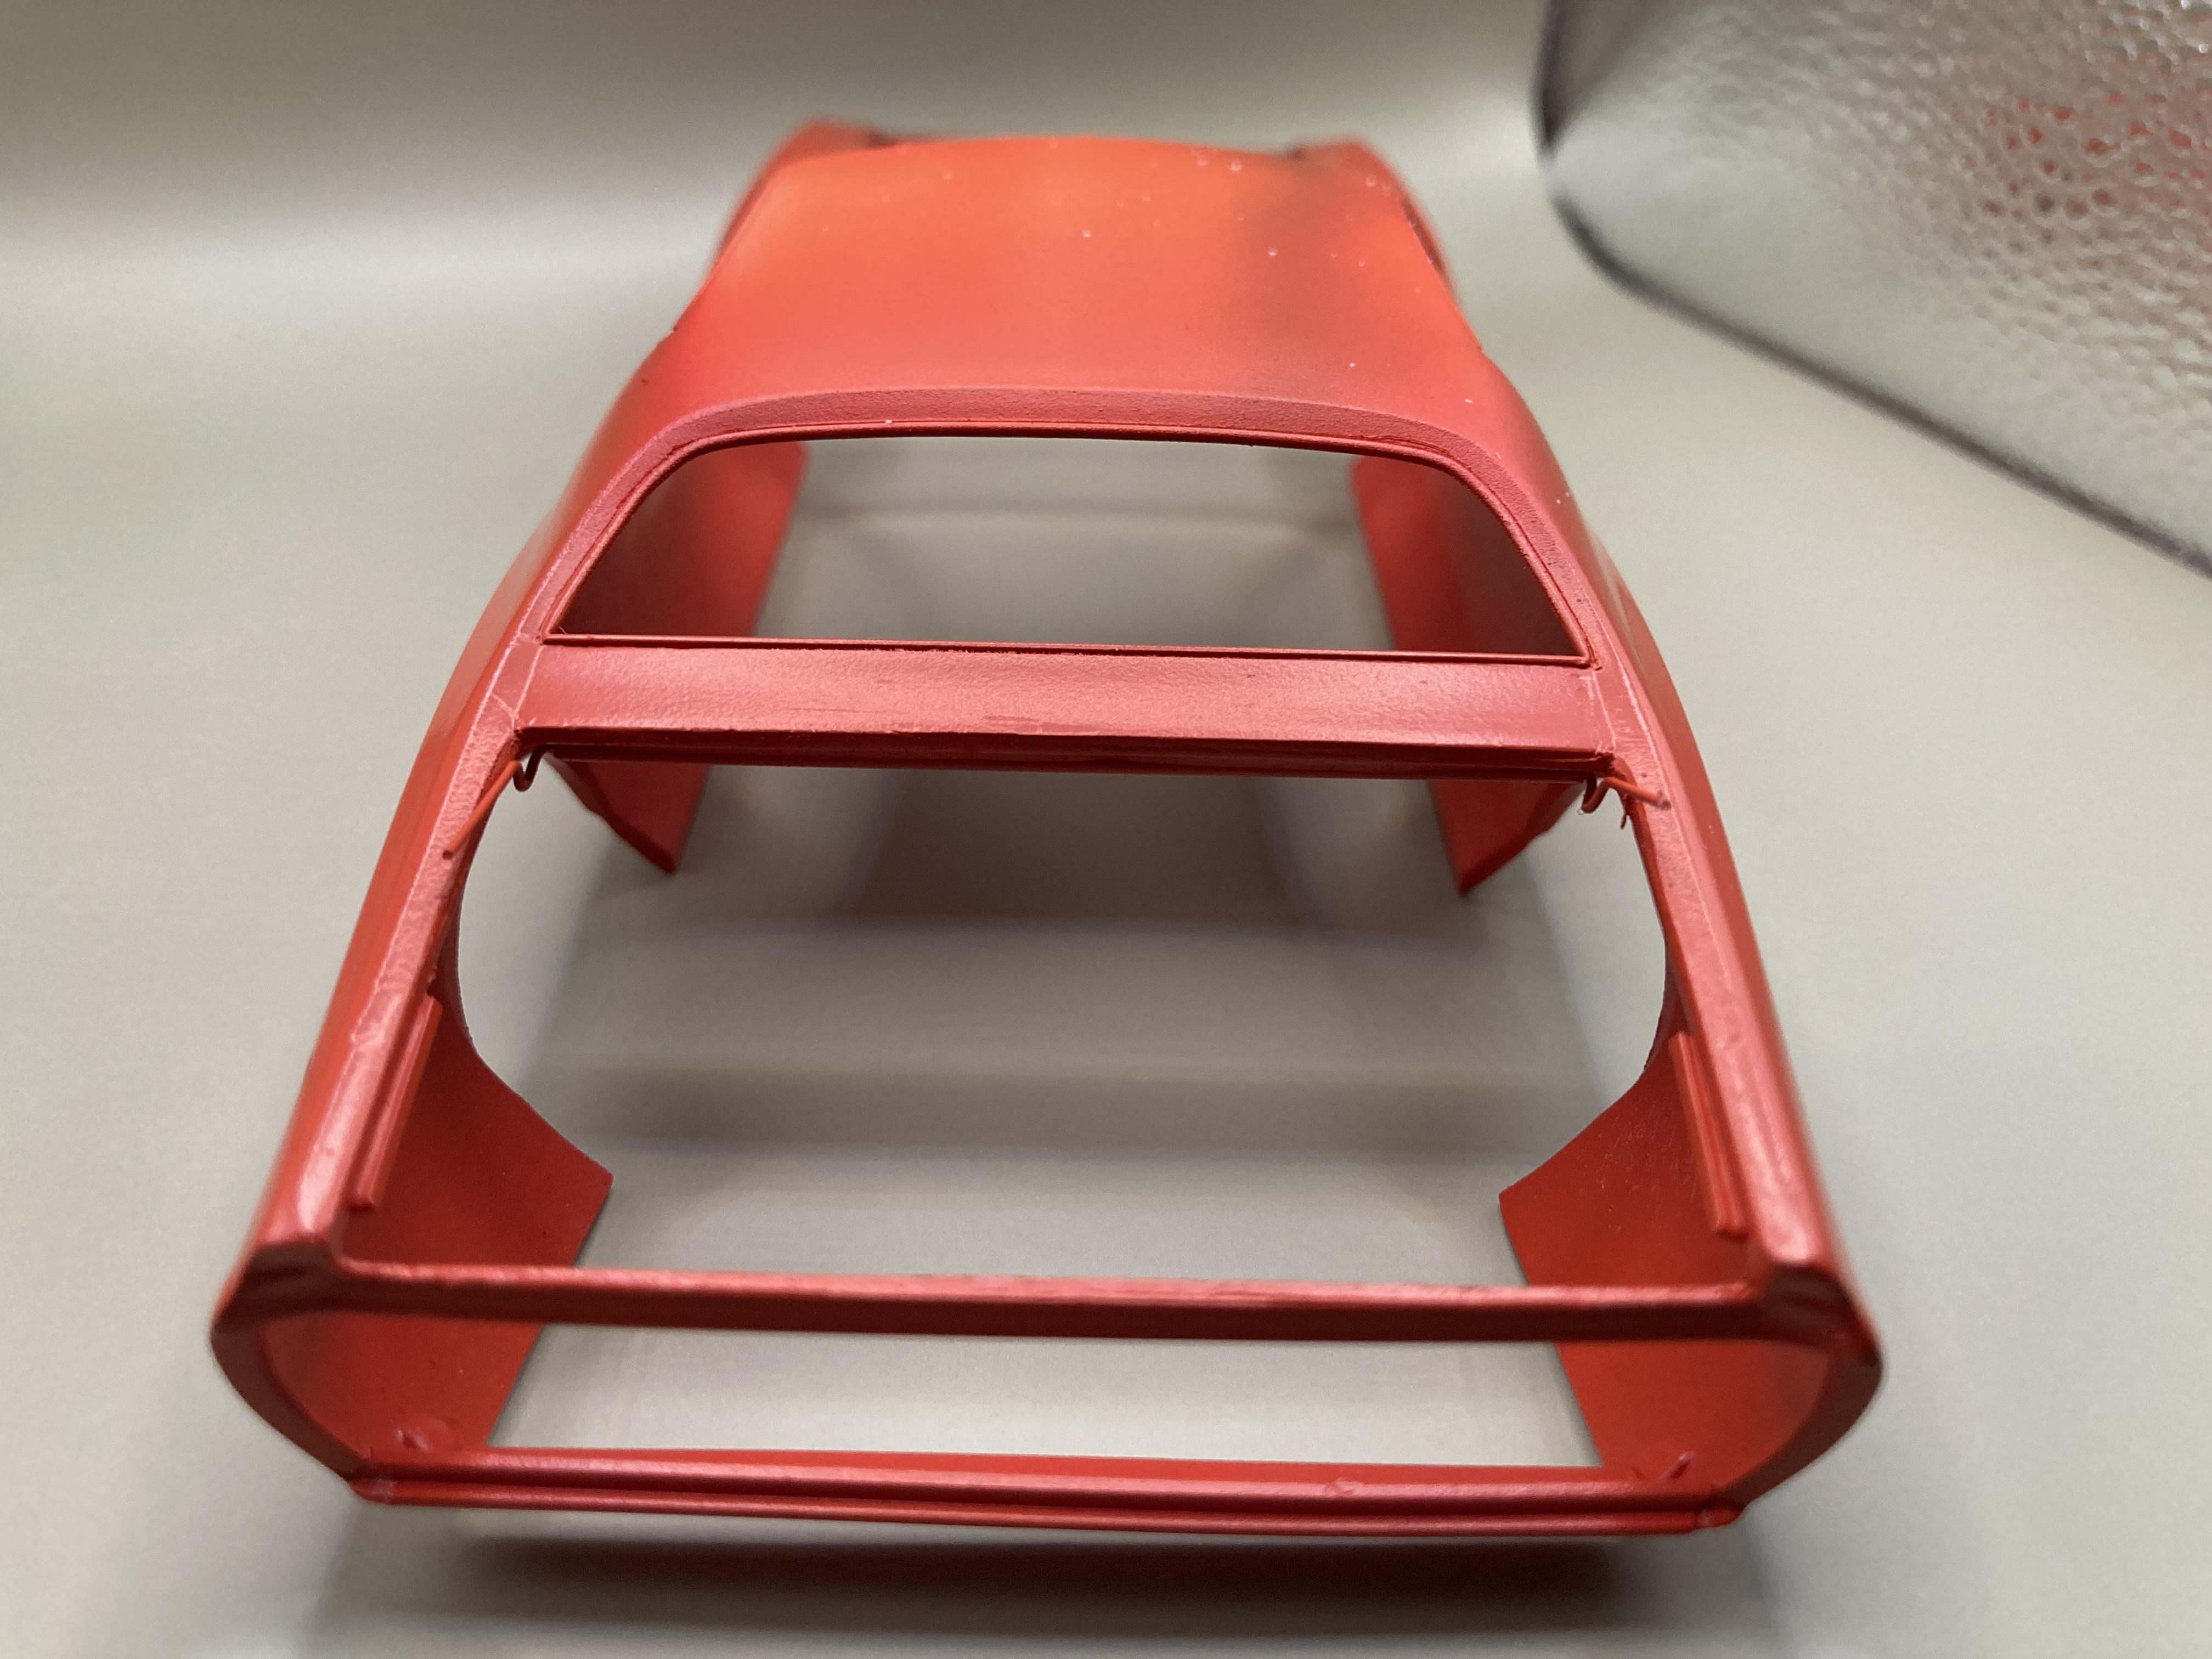
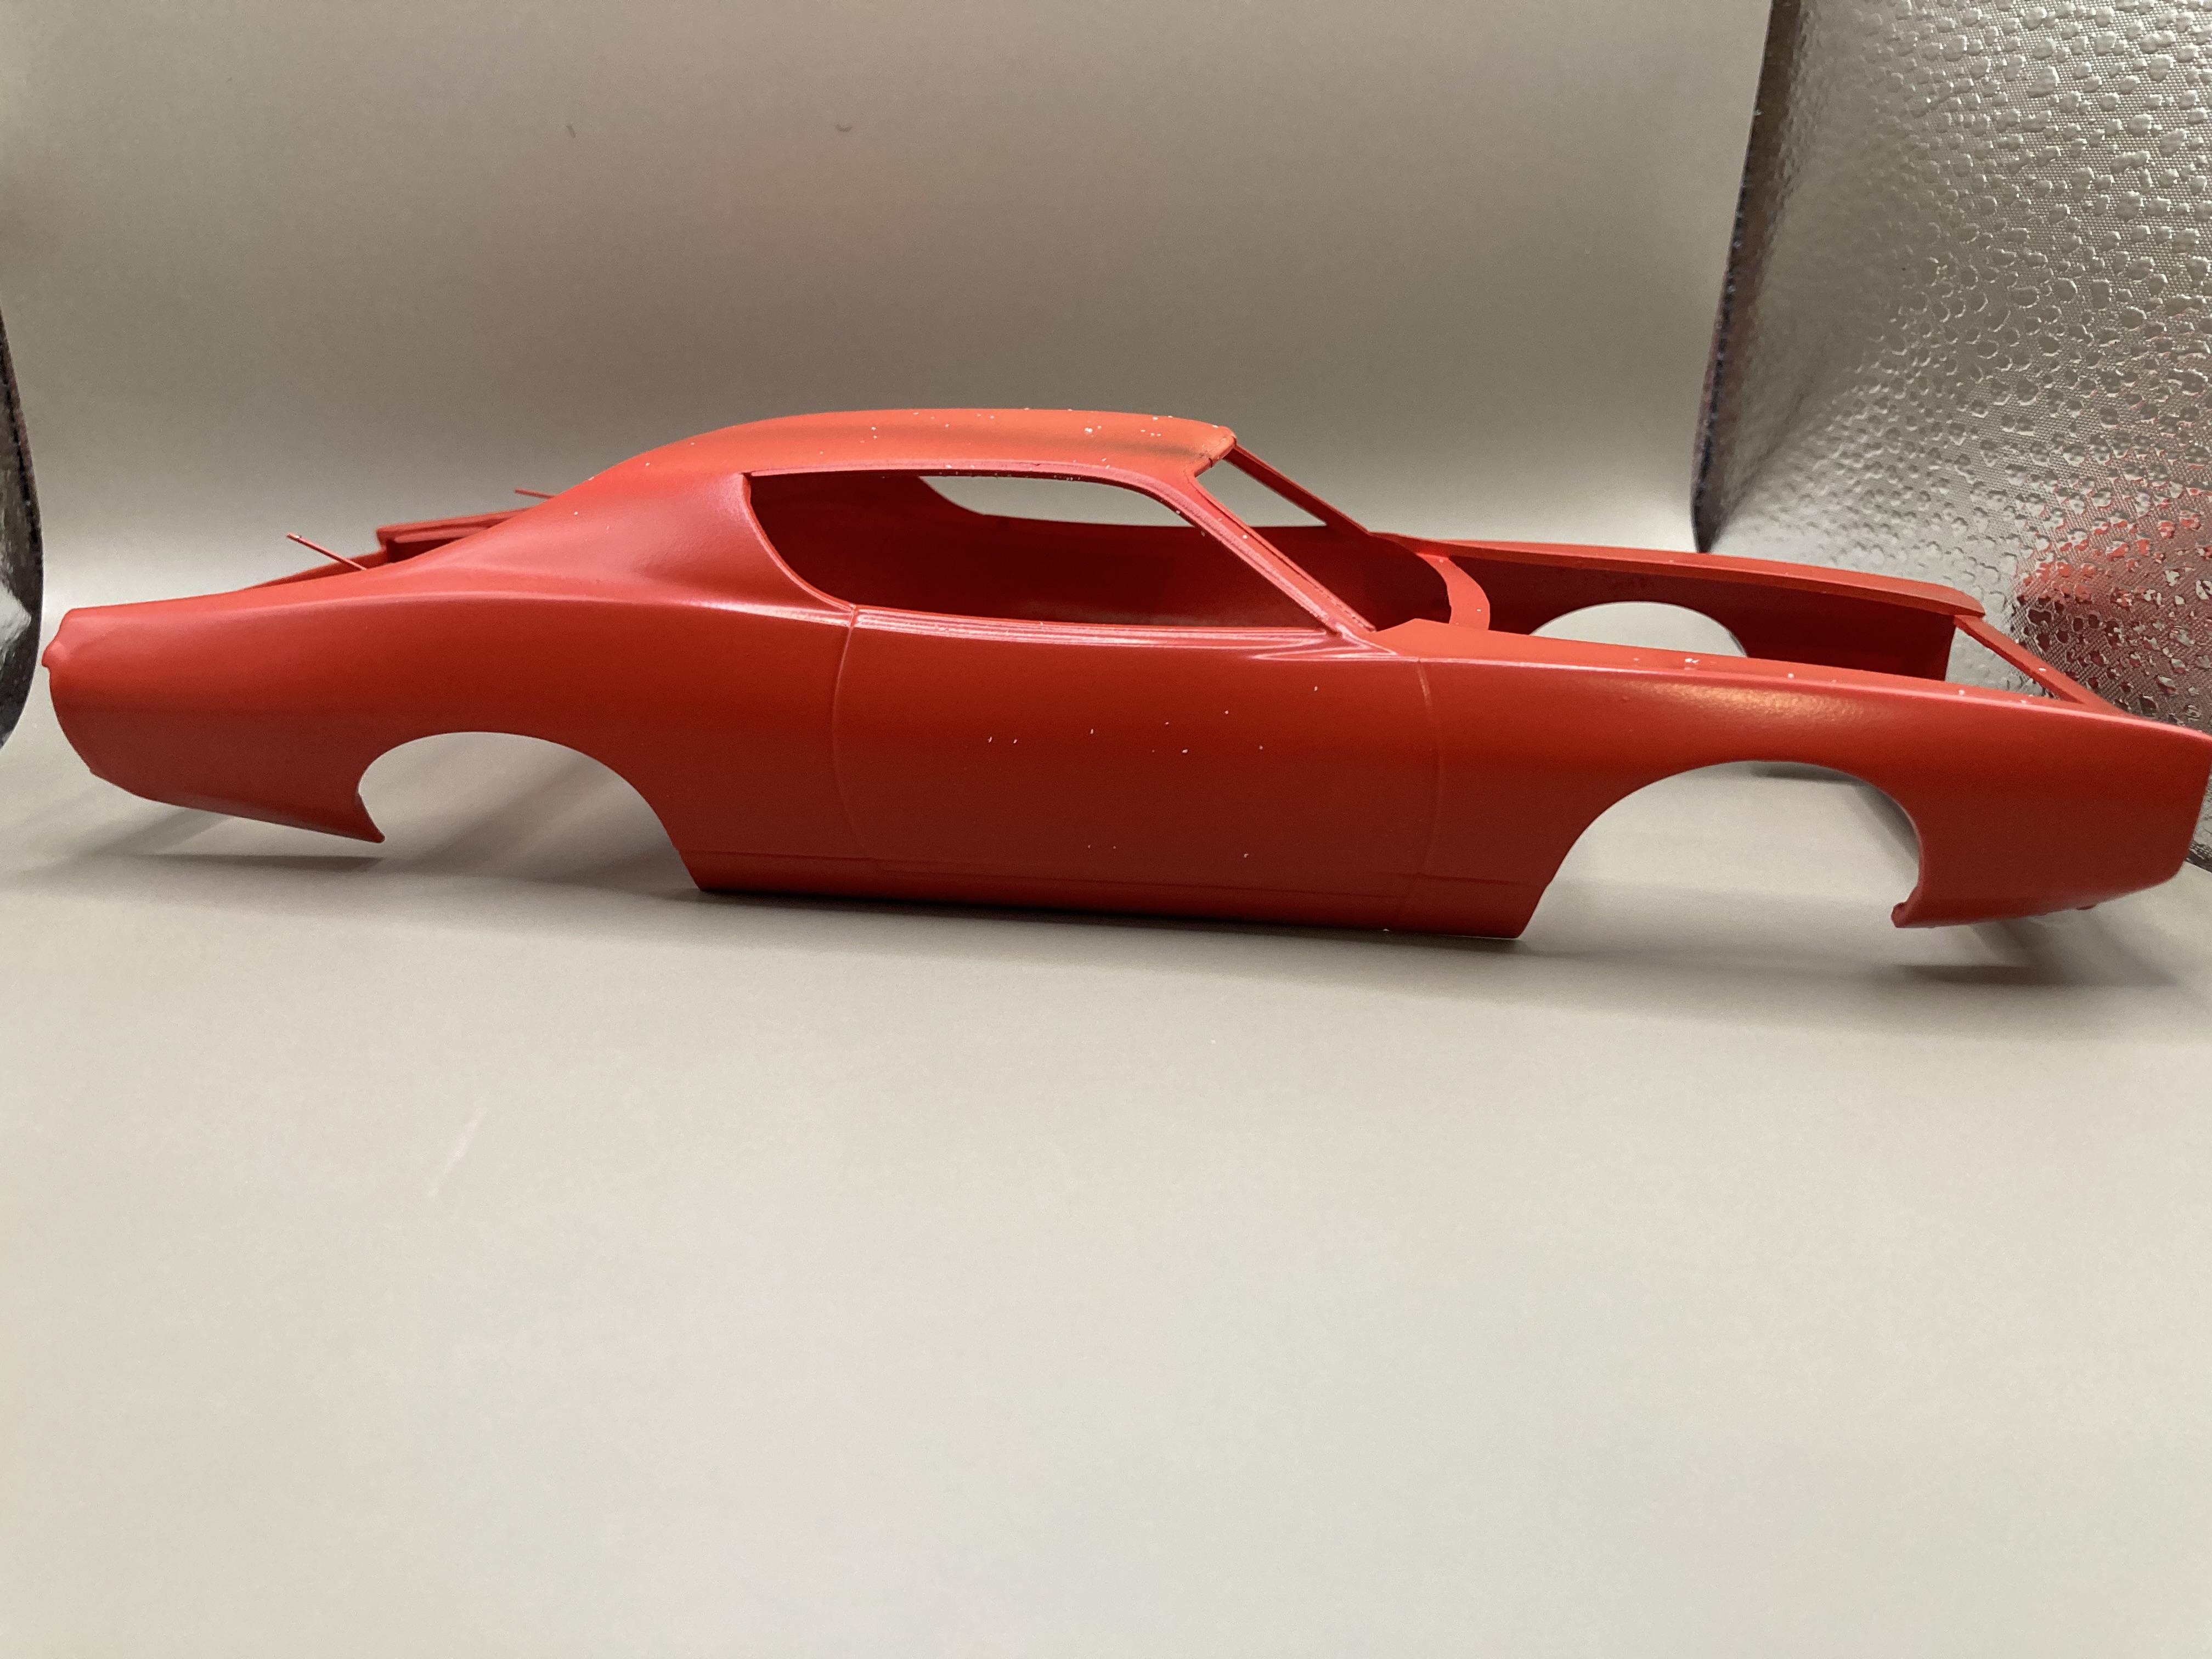
Main body color done and trunk/boot cut out and hinged:
-
Oldsmobile Quartet
GMasterG replied to GMasterG's topic in WIP: Stock Cars (NASCAR, Super Stock, Late Model, etc.)
A little more time this afternoon as the rain pours in Nairobi so I decided to design a shock absorber as well:
-
Oldsmobile Quartet
GMasterG replied to GMasterG's topic in WIP: Stock Cars (NASCAR, Super Stock, Late Model, etc.)
Old is gold. I would count myself as old-school as well but I never had any opportunity to use anything other than brushes when I was a kid and into my early teens. Some early challenges in life meant that I didn't return to the hobby until I was 40 at which time I bought an airbrush and started experimenting. I bypassed the entire rattle-can stage of the evolutionary process; I've never used one. -
Oldsmobile Quartet
GMasterG replied to GMasterG's topic in WIP: Stock Cars (NASCAR, Super Stock, Late Model, etc.)
Thank you, Pat. The paints are lacquers by SMS and the clear coat is HK 2k automotive. After spraying the base colors, I air-brush Mr Hobby Levelling Thinner over the wet lacquer and it creates a natural, smooth gloss that for the most part I don't need to wet-sand or polish before clear coating. -
Oldsmobile Quartet
GMasterG replied to GMasterG's topic in WIP: Stock Cars (NASCAR, Super Stock, Late Model, etc.)
A pool, some palms, a little Mombasa heat has provided some inspiration to design some coil springs to replace those that come with the kit. Nothing here is to scale but I'm happy with the basic design and I can re-size everything once back in Perth (for some reason I forgot to bring my vernier calipers on holidays with me). I've left the stirrup until I decide if it should be a separate part or integrated into the other end of the coil.
-
Oldsmobile Quartet
GMasterG replied to GMasterG's topic in WIP: Stock Cars (NASCAR, Super Stock, Late Model, etc.)
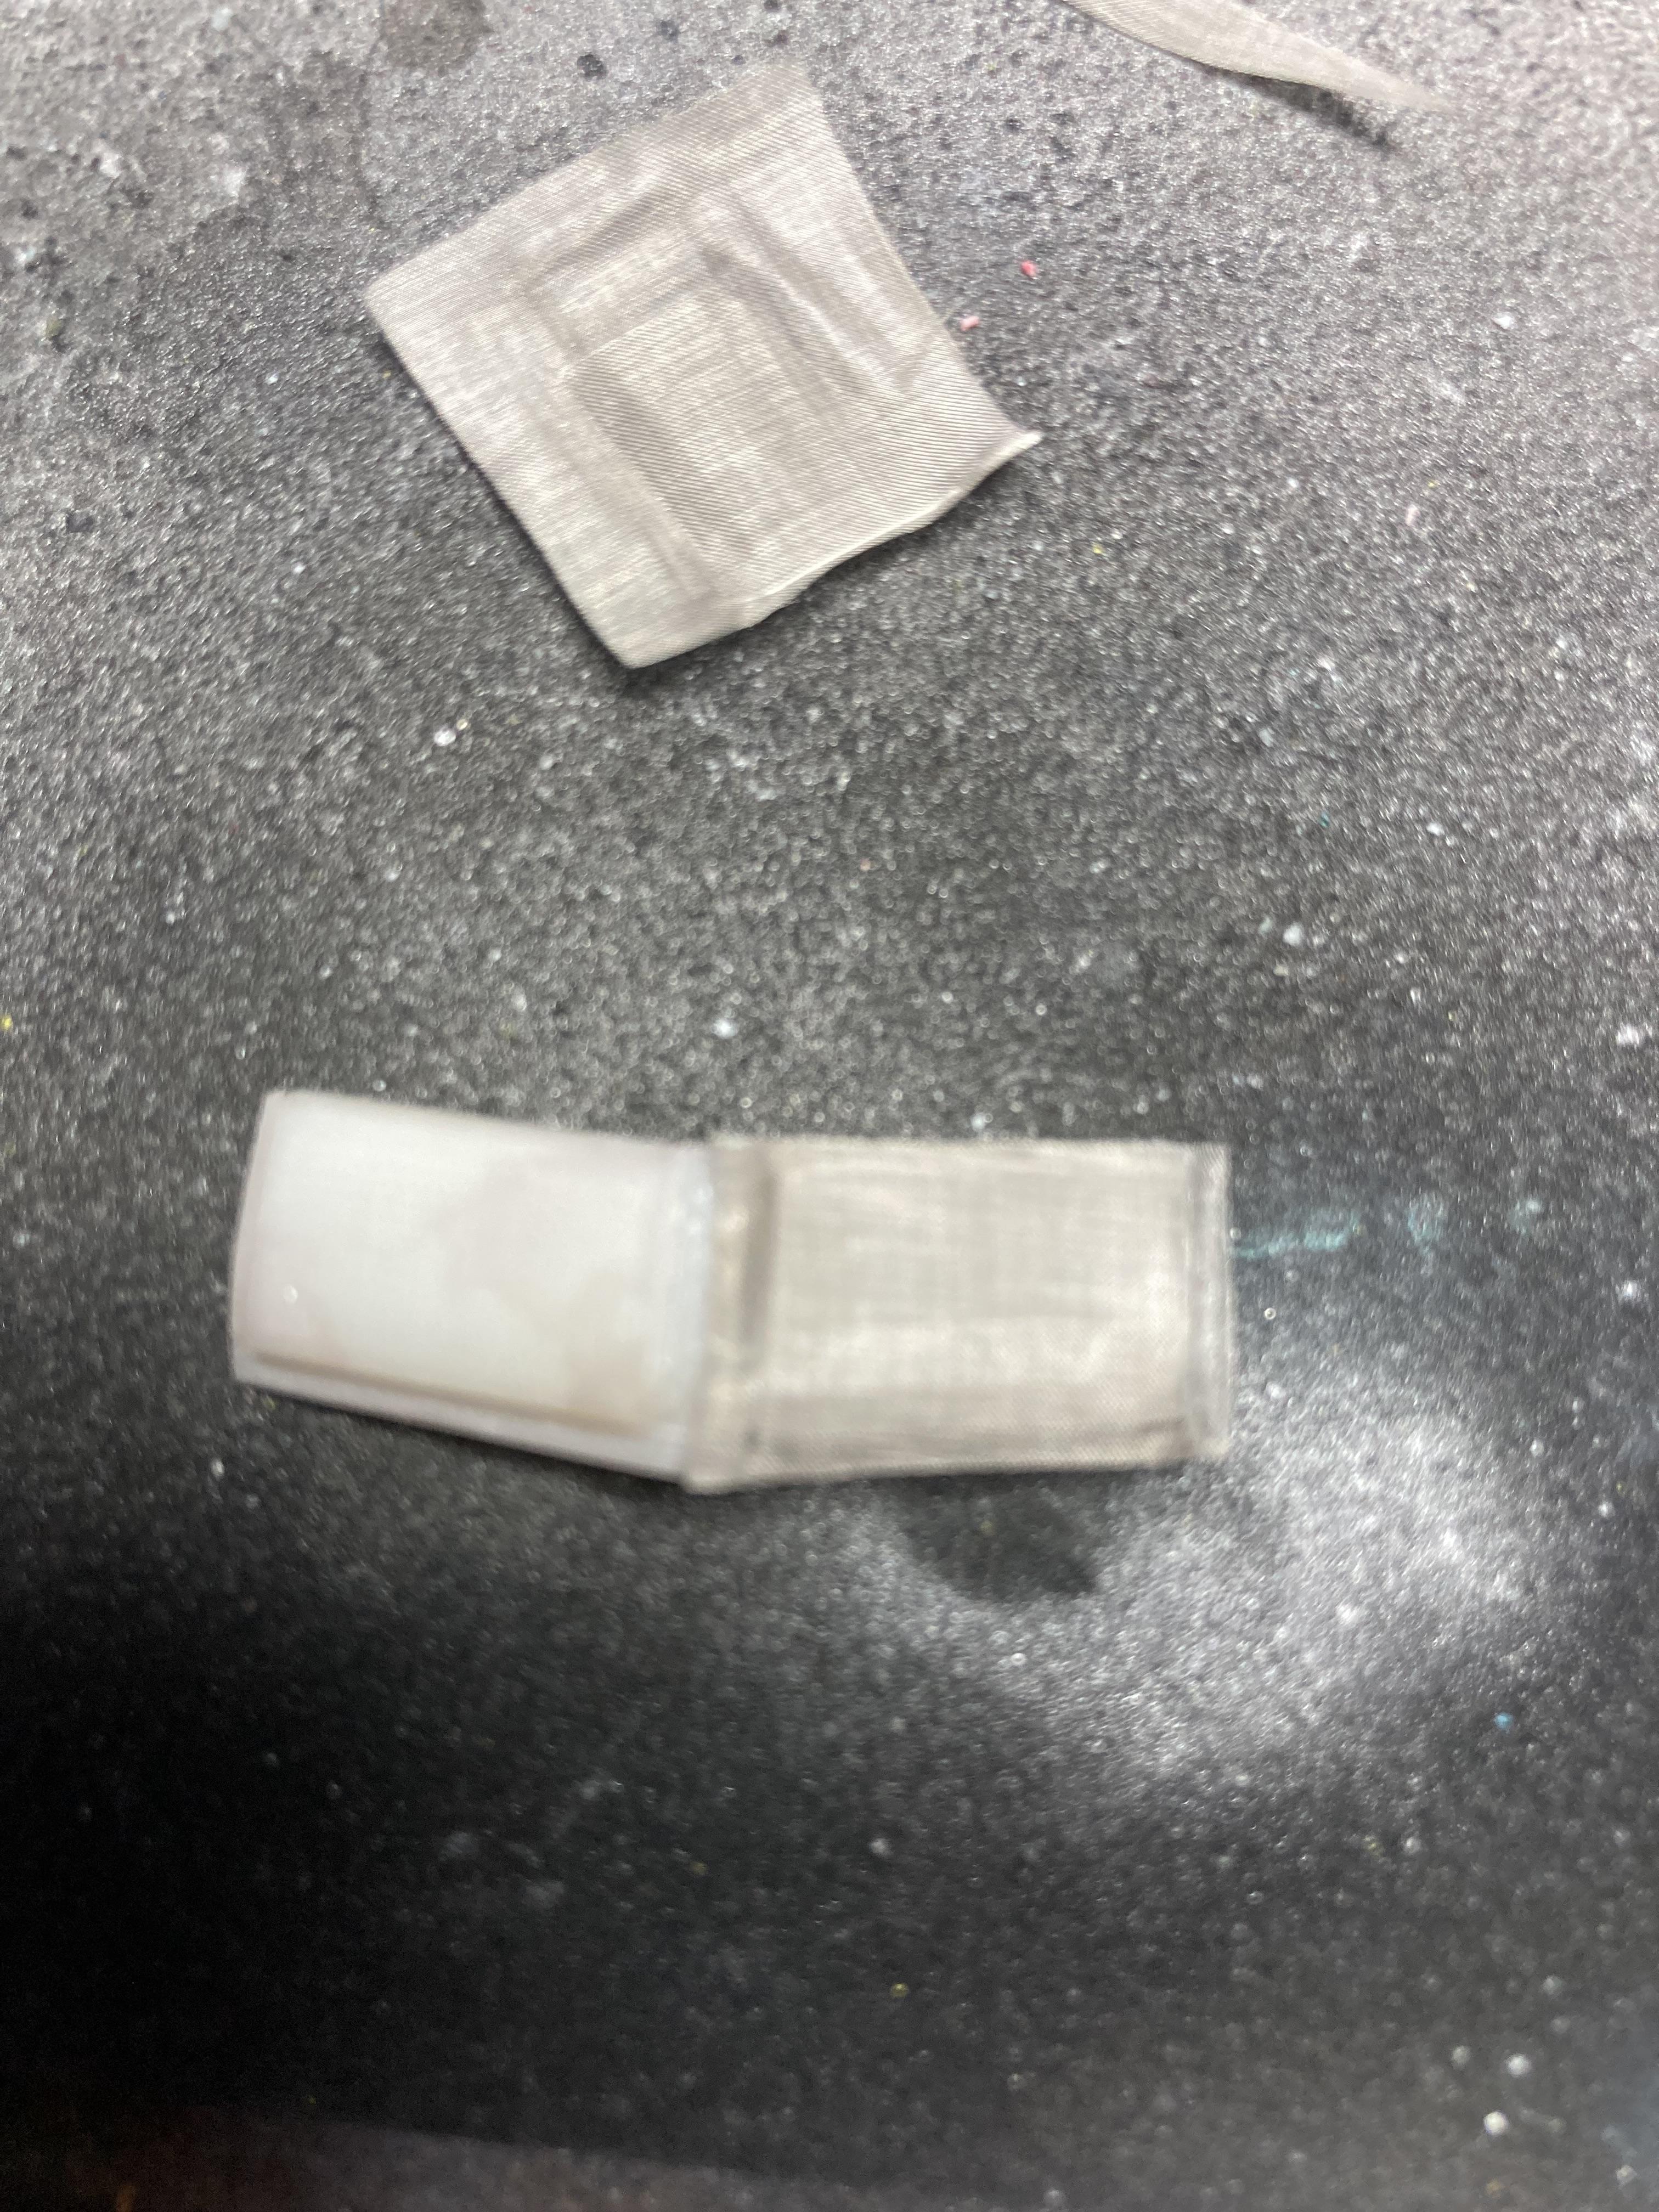
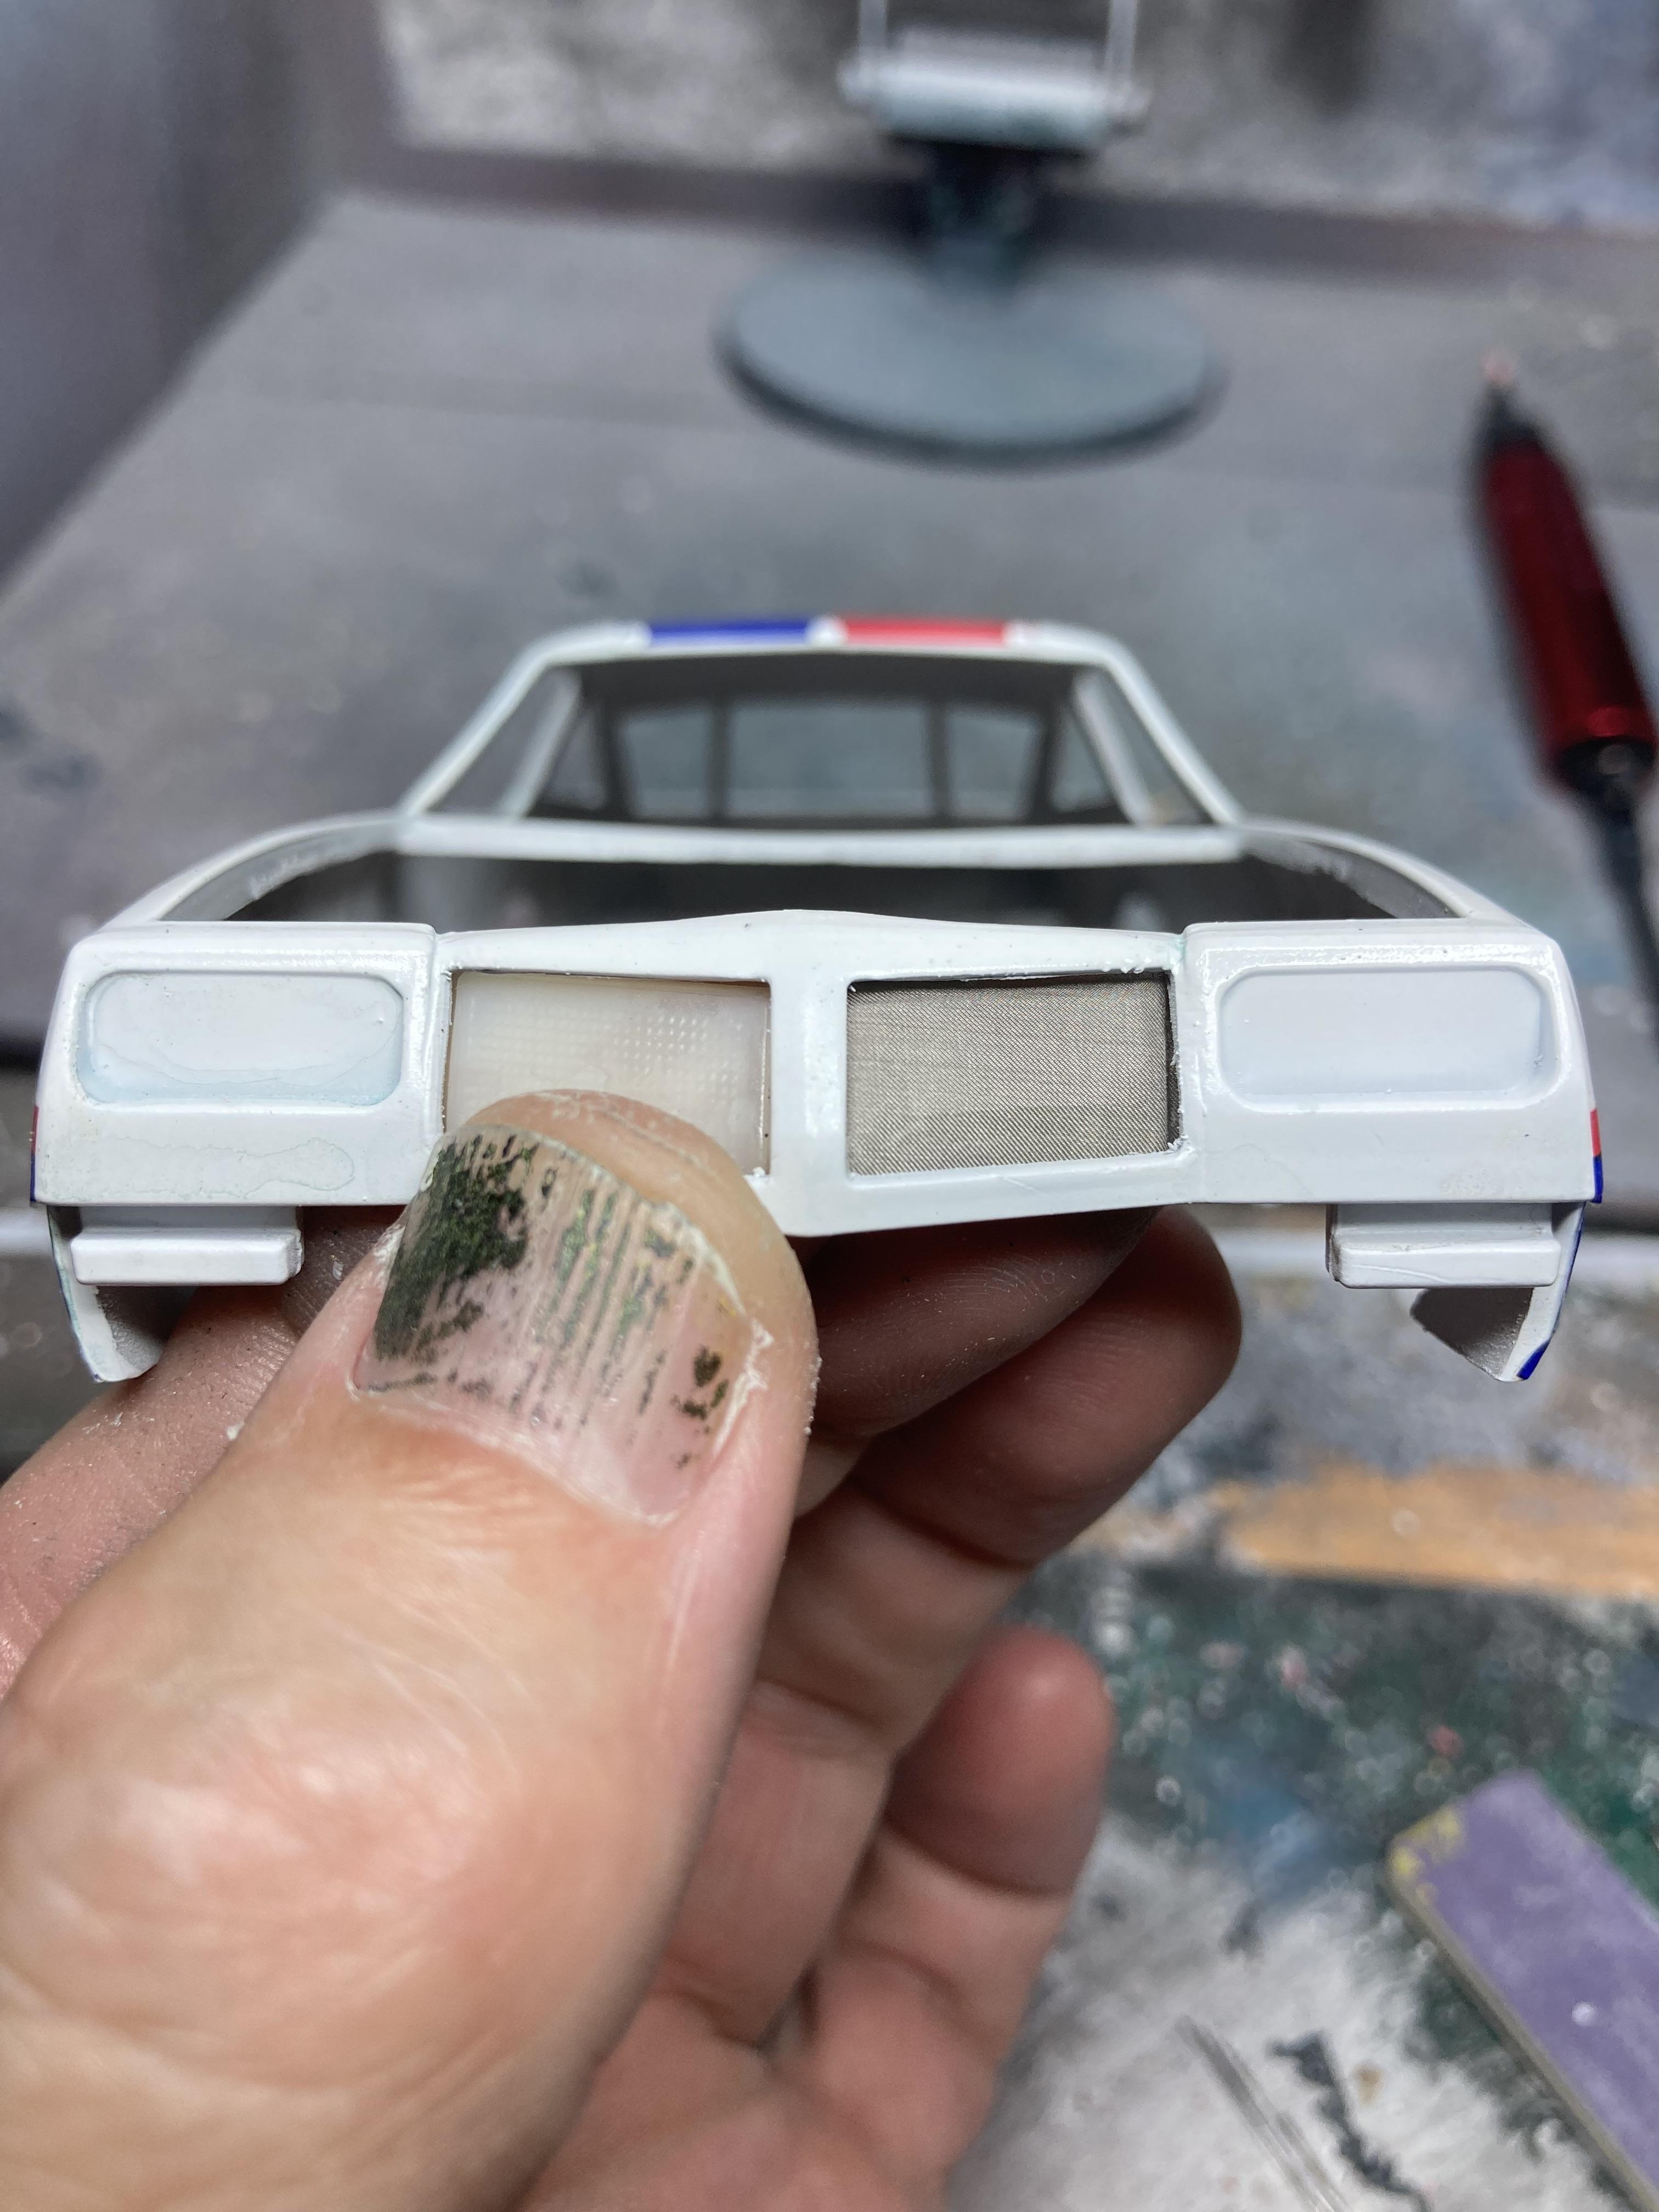
The Cale Yarborough car gets a clear coat: I’d never sprayed a 2k clear coat until June of this year and within seconds I’d ruined a good 2 months of work on a 69 Boss 302. I managed to rescue it and in the process learned a lot about spraying 2k clear coats. I call this my reflection test and 5.5 months on from that first fail I start the sanding/polishing/finishing process with a better base than most of my early finishes. Whilst doing the clear coat I was thinking about how to finish the grille and I remembered some very fine metal mesh that I’d purchased for another task on another car but it was wholly unsuitable. I think this might work proving that one project’s trash is another’s treasure: So far so good:
-
Oldsmobile Quartet
GMasterG replied to GMasterG's topic in WIP: Stock Cars (NASCAR, Super Stock, Late Model, etc.)
I've experienced the very same dynamic with these 4 cars, Bill. I was a WW2 plane builder until the beginning of the year when, on a whim, I bought a Dodge Challenger to build. When I reached my limits I bought a Camaro and started on that and found I could advance it a little more so and so the Challenger got a little more work done to it. By my 8th build I'd mastered bare metal foil trim and applied that to the previous 7. By the time you've BMFed 8 models consecutively on a Friday night you can retire to the couch satisfied that you've conquered the skill!! -
Oldsmobile Quartet
GMasterG replied to GMasterG's topic in WIP: Stock Cars (NASCAR, Super Stock, Late Model, etc.)
Thanks Sean. I've not heard of Polar LIghts kits before; I don't think they ever made it to the Australian market. I was very pleased with the Hardee's car as a first build.