

FenderMender
-
Posts
100 -
Joined
-
Last visited
Content Type
Profiles
Forums
Events
Gallery
Everything posted by FenderMender
-
An older 1/24 scale Maisto 1965 Chevrolet Malibu SS that was taken from storage to see what upgrades it might need. Realized that the only thing it needed was a painted engine on the chassis underside. Carpet was added previously to the trunk and other minor detailing had been done. Really like the interior with the dash mounted tach, the floor mats, the heavy duty gear shifter and the beefy rear slicks!
-
This 1/24 scale diecast 1966 Dodge Charger by Classic Metal Works (2001) was bought in kit form about two decades ago. I recently got it out of storage to see what modifications I might do to it, if need be. During my inspection what really struck me as curious are two things: 1) did Classic Metal Works produce this mold themselves or was the mold from another company, such as Ertl Authentics? 2) but the most perplexing and amusing as well is what was embossed on the chassis: "DaimlerChtyslel Corp". Was the misspelling of Chrysler on purpose for licensing avoidance or just Chinese ignorance of spelling or a mis-translation of verbal communication from the producer? Whatever the case it is weird. The model is quite substantial and detailed. However, I do remember, when building it, that to get the front wheels to move the steering wheel, that proved to be impractical by way of design, so the front wheels are non-poseable. I left everything as is on the car to date. It is a cool rendition of an early Hemi Charger.
- 1 reply
-
- 2
-

-
 Four 1/25 scale Maisto 1950 Chevy 3100 pickup trucks. The two red ones, one stock and the other with white walls, are older versions with movable front wheels; whereas the current newer orange version has straight metal axles and was lowered as much as humanly possible (all wheels roll with nothing scraping the ground). The yellow lifted version is older, too, with straight metal axles also. Lowering the orange version took a great amount of effort and force to achieve and I would not want to repeat the process. It was a royal pia to do and a strong grown adult would have the same experience as the wheels are pressed on AND super glued to the metal axles. Severing the axles in two wasn't a viable option as one would still have to remove the axles from the wheels and come up with replacement axles to boot. Plus the chassis would be in danger of damage as well when cutting the axles in twos. The procedure might warrant a tutorial in the future for those thinking about doing this. Thanks for looking and reading the rant. LOL
 -
Thanks. I'll try this. Will let you know how it works with the Chevy 3100 wheels. SEE my newest post "1/25 scale Maisto 1950 Chevrolet 3100s- tall, medium, stock and low"
-
February 2024 Hello Richard, I'm in the same boat as you, but with a new 1/24 Maisto Chevrolet 3100 pickup that I want to lower radically, but, like you, one wheel on one axle turns easily but won't move outward any. I have considered the heat method but the soldering iron would be awfully close to the chassis and would probably distort it . Looking for any alternative other than hacking the axles in two. Thanks for any tips.
-
2020 Corvette Stingray by Maisto in 1/24 scale just out of the shop. The interior was fully carpeted. The frunk lid and the rear engine "hood" were freed from their rivets and were detailed accordingly. The frunk compartment was scratch-built and carpeted. Ironically, the last two components to be installed, the rear taillights, were extremely difficult to seat properly and took an inordinate amount of time and physical pressure (psi) to get them in properly. The last two photos show the frunk and engine "hood" riveted on another 1/24 scale Maisto 2020 Corvette Stingray. This version is a pre-assembled Maisto Special Edition version while the white version above is a Maisto Assembly Line kit model. You would think this Assembly Line version in white would not have the frunk and engine "hood" riveted shut like the Special Edition model. Both have the panels riveted shut.
-
This vintage SMP model of a 1961 Corvette convertible was in my "junk" model collection. Its badly painted body was intact, the interior was partially finished but the chassis had been cut into two pieces and a 1/2 inch section removed and gone forever. The engine is not from the kit, the wheels were ruined from a heavy application of glue which had totally distorted them. Other lost parts had to be substituted or scratch built. Carpeting was added to the interior and trunk. Body was stripped of black paint and repainted a matte white. Considering where it came from, it is fortunate that all the wheels roll and that it is now finally complete after a month's work.
-
Thanks for all the nice comments guys. I know my limitations so I work with the discarded, damaged and downcast models to give them a second chance. And to try out some techniques that I am too scared to try doing on the expensive kits nowadays. LOL And I humbly accept with much appreciation the coveted Black Belt in Snake-Fu.
-
Obsolete AMT Parts
FenderMender replied to Casey's topic in General Automotive Talk (Trucks and Cars)
Thanks David and Steve. Please hold off until this question is answered. As a neophyte to these clips, is it possible to secure them to the model AFTER the model has been assembled and is complete? If so I can use them. Otherwise I'll live with the panels being loose. -
Obsolete AMT Parts
FenderMender replied to Casey's topic in General Automotive Talk (Trucks and Cars)
I am extremely late to this discussion but I am currently rebuilding an old glue bomb from the 60s, an SMP 1961 Corvette convertible that is missing TWO of those metal clips for holding down the hood and trunk lid. My question is: are there any easy- to -make alternatives to the clips. I have thought about just leaving the hood and trunk lids loose, but I would prefer them to be attached and openable. Reason being, my 1960 F-100 Ford pickup model had its hood fall off, hit the floor and a sizable chunk of plastic cracked off since it was so old. Want to avoid this with the Corvette having two opening panels. Thanks for any suggestions. -
Very cool collection. I noticed quite a few Jadas in your groupings and like all of them, especially the '60 Chevy! Is the chopped top VW Bug a Maisto?
-
Yes. It would have been a pyrrhic victory to remove it as the part would have been mutilated, ruining both the top and the part leaving a gap in the windshield frame too.
-
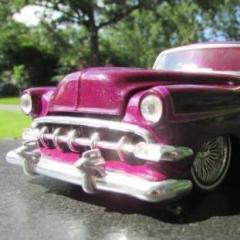
These three 1932 Ford Five Window coupes are 1:18 scale from MotorMax and are available either with an exposed engine (a higher priced version) or with an inaccessible lower half engine under a hood screwed to the chassis. Note that Motor Max doesn't reveal this fact in their ads for this particular version. However, upon disassembly of the red and the black-flamed version and removing a huge metal stub molded to the underside of the hood, the upper halves of the engines were scratch built to look authentic as possible. All versions got custom exhaust extensions, "chromed" rear ends, black added to the chrome wheel slots. All grilles were blackwashed, too. The red and flamed versions had their firewalls "chromed" with metallic adhesive-backed tape and scratch-built components; their engines have custom-made valve covers, exhaust manifolds, radiator fans, alternators, oil filler tubes, and fuel injector apparatus as well as the 60 year old decals, "Fuel Injection". The flamed version has no front fenders as the item arrived defective with only one front passenger-side fender, so this was removed for continuity. Thanks for looking....
-
These three Maisto 1/24 scale 1948 Ford F-1 pickup trucks date from about seven or eight years ago to the present. The red one is the oldest followed by the orange and black Harley Davidson version from five years past roughly. What is curious about them is the red was made in Thailand and the two H-Ds were made in China. However, the current matte black H-D version features straight metal axles with non-steerable front wheels whereas the other two have the flexible front axles that steer. All units were modified to include either carpeting or rubber mats, painted interior door panels, finished faux wood plastic floor beds , detailed chassis with painted engines, exhaust pipes and exhaust pipe extensions of aluminum tubing. The matte black version had its rims painted black. All had their rear-view mirrors detailed too, as Maisto had molded these as clear plastic and a part of the windshield. By the way, the red truck's motorcycle is a super cheap generic that was all chrome! I did what I could to make it somewhat realistic. Thanks for looking...
-
Very well done. It looks great! Nice wheels and a fine vinyl top.
-
Thank you, guys. These two were built way back in the 60s. Had to spruce them up some after removing a lot of dust and debris. LOL
-
1930 Ford "Shell" Tanker by Liberty Classic 1:24
FenderMender replied to ea0863's topic in Diecast Corner
Fine looking. I like what you have done. The red on the wheels is a quite touch nice. Good job! -
A 1:24 scale MotorMax Acura that was repainted and had its wheels swapped out. This was done a few years ago; the red graphics bring out some character to an otherwise plain model. Thanks for looking....
-
A 1:24 scale Maisto 1966 Chevrolet Chevelle SS 396 that was lowered, interior detailed, and wheels swapped out.
- 1 reply
-
- 2
-
-
A couple of plastic 1:24 scale Edsels from the early 1960s that had been modified some. Recently I decided to update them a little more, but still preserve the original intentions from the past endeavor.
-
Bought the blue 1/24 scale Maisto 1970 Corvette T-Top and detailed it by adding carpeting, painting lower chassis, blackwashing the grille, silvering the exhaust tips, finishing touches to the interior and door panels. Found another red Maisto 1970 Corvette and thought it would be identical to the blue one. Learned the blue one was produced a few years earlier. This accounted for the Maisto cost cuts and lack of details to the red one; that is, no paint in the engine bay, lack of stickers on the dash and air cleaner, and no chrome wheels. So the red version received carpeting and the same detailing as the blue version, except that I had a blank canvas in the engine bay and no stickers for the dash or air cleaner. I added a small amount of chrome on the red one's wheels. The red Corvette has a meaner performance look and the blue has a more tasteful appearance. Thanks for looking...
- 1 reply
-
- 1
-
-
An Aurora 1/32 scale 1962 Corvette that was a glue bomb from the 1960s. It needed wheels, tires, axles, windshield, steering wheels, gear shift lever none of which are from the original kit. The interior was glued solidly to the body so it couldn't be detached for detailing thoroughly. Wheels and rubber tires are from a discarded transformer-type car from the scrap yard. A cut-down windshield was made from clear acetate plastic. Due to reconstruction constraints and body parts that were already painted , the rebuild looked like this. After some further contemplation and suggestions from others, the model was altered to look like this now: These are all original 1960s-issued kit models that I had inherited from friends back in the early 1960s as glue bombs. Finally got around to getting them up and running. First up is an Aurora 1/32 scale 1962 Corvette. It needed wheels, tires, axles, windshield, steering wheels, gear shift lever none of which are from the kit. The interior was glued solidly to the body so it couldn't be detached for detailing thoroughly. Wheels and rubber tires are from a discarded transformer-type car from the scrap yard. The 1/24 scale AMT 1932 Ford coupe has the originally-applied flames, but I painted the upper firewall red for continuity. Seat was painted gray and gray carpeting installed. The engine was glued in solidly as well as one header, making for painting a real chore. The 60+ years tires were soaked in glycerine to try and soften them up to mount on the rims and the spoke wheels-they were so brittle some spokes did break. Radiator hose is elastic cord. The AMT 1960 F-100 pickup was missing its entire engine and its fender shirts were glue in solidly along with the tonneau cover. The original AMT 1960 Ford F-100 pickup kit contained a trailer which was painted Sage to match the Ford pickup truck. The originally-applied decals, "The Smasher", on the sides were saved. Custom taillights and license plate ala Maisto. The 1961 Ford Ranchero had plenty of glue showered all over it. With a lot of sanding and prep work, it cleaned up quite well. By reusing its roof top custom part from the original kit to hide tremendous glue pits on its roof top, adding lakes pipes, spotlights, and a homemade reversible tonneau cover, this gave it a real vintage custom look. The wheels and tires are from a 1/24 scale Maisto lowrider model. Paint color is Cinnamon. The AMT 1965 Pontiac GTO had its engine glued in solidly, but was already somewhat painted correctly. Windshield was glued in solidly too and could not be removed. A piece of the windshiled frame was glued solidly to the top as well. All these pieces couldn't be removed without extensive damage. The whole interior was painted in an epoxy black paint and took a few months to remove in a harsh paint remover solution. I opted to not attach the hardtop so as to run the model as a convertible sometimes.
-
Patient: A Motor Max (#73293) 1:24 scale diecast 1967 Chevrolet Camaro SS soft top American Graffiti model kit included two sets of custom flame decals and a pre-primed body. The soft convertible top is plastic. The kit was bought new a number of years ago for five dollars and proved to be a decent one. Painting and detailing of the car was satisfying. The quality of the parts and all appeared to be quite good at that time, but after a couple of years degradation began and persists to this day. It is so severe now that if any panels were to be forced open, the hinges would surely break or the part itself would be bent out of shape and /or dislodged from the car. Essentially, the model is now "sealed" with no access to the engine, trunk or the interior via the doors. DIAGNOSIS: Diecast cancer, which is a highly destructive process to the diecast metal parts. There appears to be no cure and once it has begun, no significant remedy to curtail the process. TREATMENT: Try to gain some additional time for the patient before the inevitable by performing restorative surgery to two major parts, the lower rocker panels. Also, apply a dose of cosmetic paint to affected areas for an improved self-image and confidence builder. PROGNOSIS: The patient should be able to function marginally for a period of time, but eventually the body will weaken and will crumble into non-repairable pieces. When this will happen is questionable, but the surgery done should prolong its daily life in the short run and consequently, it should feel better about itself. Camaro in the throes of the disease: Camaro on its last leg: The Camaro chassis was removed so that the body could serve as a mold for a project. Upon doing this, the major body parts began to crack into smaller parts. The body less the chassis was taped together as a whole and a cast was made from this. Upon removing the tape, the Camaro was reconstructed using permanent glues as shown in 'Camaro After Surgery'. Camaro after surgery: New scratch-built rocker panels were installed to unify front and rear body parts. A matching blue acrylic paint was applied to chips, glue lines, spots and patches of missing paint.Before surgery, no body panels would open. After surgery, the trunk lid worked nicely. Since the hood and doors won't open, the Camaro's engine was left out and added to the parts bin. It will be interesting to see how these "repairs" fare in the overall disintegration process in time.
-
It's possible to write a long-winded account of this "model", but the real short version is that this Monster Jam's vehicle body was "cast" from a plastic 1/24 scale Jada 2012 Ford Mustang Boss 302 using only a blue paper shop towel, white and yellow carpenter's glue, water-based wood filler and water putty, plus gobs of patience, experimenting and learning. This is the third such vehicle formed in this manner, the first being a 1951 Chevrolet Fleetline and the second a 2006 Dodge Charger R/T. The Mustang model involved considerably more time and effort to construct as a separate grille distinct from the paper cast had to be made and attached to the body. The decals used are at least 55 years old from plastic kits from that era. The Ford logos are from print ads and were sanded on the back to thin them and fastened to the model using a Glue Stik. One important fact was learned just before final painting. A new spray paint can fell on the model and completely cracked off a fairly large piece about the size of a US quarter. This piece was glued back into place, filled and sanded smooth. Thanks for looking... Grille addition and alternative chassis:
-
For reference, here are the two links to the two finished 3D paper models: 1951 Chevrolet Fleetline (1) 2006 Dodge Charger R/T (2) Introduction------------ “A guide to the experiences of casting and building up 3D paper models by using 3D scale plastic or diecast models as the primary molds OR how to make paper models from other models” This long-winded title is a response to two postings of two models that were "cast" and constructed using paper products. My rationale for doing this tutorial is to explain in detail what I have encountered in the processes of these first two builds and what I am encountering so far in my third build. I want to share what mistakes, procedures and techniques that so far have happened in hopes that others, who either have had better successes or who are inclined to begin to attempt to build such vehicles, will inform us of their results and we can all benefit from this shared information. THE PROCESS:::::::::: Terms---- Mold = original scale plastic or diecast model you want to copy Cast = the piece formed when applying paper,etc., to the mold, resulting in your new “model” A two-step process with a number of accompanying steps along the way. Have patience, use common sense and think through each and every action. Don't try to hurry and get quick results, this is not your typical or average build. It is said that the process that sculptures and painters use to achieve their works involve either “taking away from” OR “adding to” a specific medium, such as a marble slab or a blank canvas. We are, in effect, attempting to “sculpt and paint” a model vehicle (the cast) from another model (the mold, the medium) by “adding to” the mold a layer of paper and casting material. We are then “taking away from” the cast, by scraping, sanding and forming, casting material in the same way a sculptor would “takes away from” marble chunks with a chisel. The huge difference between the sculptors and the painters and us is, we have to “create” our own medium from scratch each and every time we want to make a cast. This is a very significant fact : Our molds do not become an actual part of the cast! We do not “add to” or “take away” anything from the mold that alters or changes their physical characteristics, in other words, they remain as untouched, unmarred original model vehicles. They are separate and distinct from our cast. What this means is, we have a huge labor and time investment in the mere medium itself . If painters and sculptors make mistakes and opt to start over on a project, they do not have to make their own medium from scratch. They simply obtain a blank canvas or another marble slab. STEP 1) compose the cast STEP 2) finish the cast Step 1 Composing the Cast This step consists of selecting a suitable scale model for the mold, covering and securing to the mold a suitable paper product, and then applying layers of cast material. Selecting a Suitable Scale Model for the Mold: Initially, one must decide on a body style, either a plastic or diecast model, they want to replicate. There are two key decisions that need to be made here. First, selecting a model that is either important to you or not important to you whether the exterior finish COULD get damaged. You want to choose a model that COULD be damaged in these processes as opposed to a model that has a good paint job, nice decals, graphics, etc.. You don't want to risk damaging or ruining a perfectly good model as a mold. However, if that is not important to you, then you need to seriously consider the shape of the body style. Second, the shape of the body style you select is fairly critical, the reason being that it will determine the magnitude of difficulty in removing the cast from the mold. If the model (mold) has some undercuts to it, the cast will be difficult if not impossible to remove without either damaging the cast, the mold, or both. You want to think of a larger can fitting over a smaller can and how easy they separate and come apart. The smooth sides of the smaller can has no undercuts , so the larger can slips on and off it easily enough. But if the smaller can was larger at its top than its bottom, and the larger can conformed to this shape, the larger can could not be removed from the smaller can without altering the shape of one or the other or both. A fundamental and difficult problem that is encountered after a suitable mold has been selected is deciding on whether to use and then to choose a relevant release agent. A release agent is a substance put on the mold that allows the cast to be removed easily from the mold. Various release agents possible include cooking sprays, Vaseline, mineral oils, baby oils, or substances which would not harm the mold or interfere with the absorption of cast hardening material by the paper. Without some reasonable way that the cast can be easily removed, the cast and the mold will remain attached together as one piece. So before paper products (either tissue, toilet, kitchen roll towel, blue shop wipes, brown paper, newsprint, etc.) are applied to the mold to begin the very start of the cast, a solution to the release agent problems need to be thought out and decided. You don't want to build up your cast with layers of paper and hardening material only to realize later that it is impossible to separate it from the mold. Here is what I encountered. Case Experiences On my first cast, the 1951 Chevrolet Fleetline, I used a non-stick cooking spray as a release agent. This turned out to be a huge mistake as the sticky "goo" got on both my hands, making for the application of tissue and toilet paper to the mold a real mess. The paper ended up quite wrinkled on the mold, and sticking to my fingers when trying to position it on the mold. One must also realize that oil and water do not mix, so applying water-based casting material and glue onto paper might not allow for it to adhere to the paper. The multiple dillemas here are that you want the paper to conform to the mold without a lot of shifting around; but you also don't want the cast to stick to the mold when all the casting layers have been applied and the cast is to be finally removed from the mold. In addition, you want the casting material to stick strongly to the paper which, ideally, would be oil-free. The cast did come off the mold fairly easily; however, the initial layer of paper had saturated the cooking spray and did not accept any casting material, thus remaining dry, weak and flimsy. Also, since a few layers of tissue paper were used in the cast, moisture was permanently trapped between the inner and outer layers of paper, thus not allowing the cast to harden properly. On my second cast, the 2006 Dodge Charger R/T, I used a section of roll kitchen towel. It was perforated some. I did not use any liquid release agent on this mold. After applying the paper to the mold and brushing the paper with a mixture of white glue and Elmer's Wood Filler and letting this harden, I applied a second coat of the filler/glue mixture. After hardening, I sought to remove the cast from the mold. This required a careful peeling-type process, getting in between the mold and the cast by using a thin, flat, narrow piece of metal and using my fingers to gently pry and separate the cast. What I found was that the perforations had allowed casting material to seep through onto the mold, but the spaces in between the perforations did not, so the adhesion to the mold was rather weak and the cast came off fairly easily. This was aided by the fact that there were no undercuts on this particular body style. On my current cast, a 2012 Ford Mustang Boss 302, I did not use a liquid release agent either. I used a blue shop towel which also has perforations. This paper allowed much more penetration of casting material onto the mold and caused some real problems in removing the cast, so much so, that some tears occurred because there was a slight undercut of the rear of the mold. The cast came off as a thin "skin" and needed to be put back onto the cast after the mold had been washed off and cleaned up of casting material. The technique here in returning the cast to the mold was to first use masking or a similar tape to cover and protect the mold, thereby not allowing for the cast to adhere to the mold again. If it does, it should separate easily enough from the masking tape. Covering and Securing to the Mold a Suitable Paper Product: Choosing a suitable paper product as the starting point or the basis for the cast is important because we are looking for strength, porosity for accepting the cast material, ease of positioning on the mold, as well as thickness. Perforated paper towels and wipes seems to have most of these desirable traits. We want to be able to drape the entire paper over the mold, and secure it to the underside of the mold, trimming excess paper from the wheel wells and the areas where it is not needed. The idea here is to get as close a fit as possible so that the paper conforms to the mold's details as much as possible. Note any areas that might cause a problem upon releasing the cast from the mold; that is, undercuts in particular. Secure the paper to the mold with some masking or similar tape. Just some short, small pieces enough to hold in place the paper while adjustments to the fit continue to be made. This can be a frustrating task, but it is crucial that the best application of the paper be done so as to ensure a well-formed cast. Spend the necessary time here to get a good fit. Since a flat piece of paper has difficulty bending and conforming to curves, angles and irregular surfaces, wrinkles will inevitably occur. Try to minimize these wrinkles as much as humanly possible. And try to position these wrinkles in an area on the mold that would strengthen that particular spot or would be relatively unnoticeable. This area, when casting material is layered on the paper, will stick up higher than the rest of the surface and will require more finish work, sanding, etc. later in the build. Applying Layers of Casting Material to the Mold Having the paper in place, it is time to apply casting material to the mold. Casting material consists of water-based products such as clays, fillers, and glues. We want to use products that will harden fairly quickly, that are easily sandable, that are easy to apply and that are fairly durable. Sheet rock mud mixed with yellow glue seems like it might work okay, but I've not tested it. I have used primarily Elmer's Wood Filler diluted with yellow Elmer's carpenter's glue*. This mixture is applied to the paper using a foam brush or a synthetic bristle brush. It works best if it is the consistency of a thick cream. After drying, apply a second coat. Use your judgment here as to additional coats. We want to build strength but not create a really thick shell per se. After deciding that the applied levels of cast material has made the cast fairly strong and stiff, I have followed up with a final coat of a mixture of Durham's Rock Hard Water Putty** and yellow carpenter's glue. Use your judgment in your various application of layers regarding bristle or foam brush.. A foam brush produces the smoothest finish but lays down less material. A bristle brush will put down more material but creates burrows and ridges which certainly impairs getting to a smooth surface right away by requiring additional fillings and sandings. * White glue can be used, but yellow glue is better providing more strength since it is designed for use with wood and it sets up and dries faster than the white glue. Of the two white glues shown below, the tack glue sets up faster and is the stronger white glue. ** Note that the Durham's Rock Hard Water Putty mix will set up and cure hard if excess is stored in a covered container whereas the Elmer's Wood Filler mixture will not. Excess wood filler mix can be reused if stored in a closed container. Excess Durham's will be hard and non-reusable. Casting materials: Elmer's Wood Filler Elmer's Carpenter's Glue (yellow) Durhan's Rock Hard Water Putty White Glues STEP 2) Finishing the Cast This step consists of removing the cast from the mold, forming and detailing the cast, and decorating the completed cast . Removing the Cast from the Mold: Removing the cast from the mold can end up being be a tough job depending on whether a mold release agent is used or not and what type of paper is used to make the cast. It is imperative that the cast be removed at this point in time. With the cast continuing to remain on the mold, further advanced work necessary to shape and form the cast's final appearance would be fruitless indeed. Also, if the cast were to come off eventually with exceptional effort, all that previous finish work could be seriously at risk of major damage or ruined entirely. So remove the cast before any future work is done to it. See above Case 1, 1951 Chevrolet Fleetline and Case 2, 2006 Dodge Charger R/T and Case 3, 2012 Ford Mustang Boss 302. Forming and Detailing the Cast After having successfully removed the cast from the mold, it is time to begin the final operations to complete the cast. Clean and wash off the mold as needed and return the cast to the mold. Covering the mold with a protective tape such as masking tape might be a good idea, too. Positioning the cast again on the mold serves as a solid underlying base for the cast. Additional layers of casting material are applied , sanded and formed to obtain a final smooth surface to the cast. Having the cast on the mold lends good support for filling, smoothing, inspecting, sanding and ease of handling when performing these various tasks. Corrections to imperfections in and on the surface and problems with body areas are also corrected here as well. See how the surface needs to be filled and sanded smooth: [url=https://postimages.org/][/url] [url=https://postimages.org/][/url] A major and extremely important consideration is how to treat the windows on the cast. Obviously the windshield should be cut out from the cast. It is debatable whether the other windows should be cut out also. What determines this is whether or not doing so would jeopardize the integrity of the cast as a whole. If the cast were to be jeopardized as such, a workable alternative to cutting out those spaces for the windows is using black decals or black paper pieces applied to those appropriate window areas. I spray painted a sealer on the back of black colored paper and applied these facsimiles using a Glue Stick as an adhesive to the cast. What I found, in Case 1 -1951 Chevrolet Fleetline, was that by cutting out all the windows, this seriously weaken the support pillars of the roof as well as the roof itself. Consequently a substantial amount of reinforcement material went into beefing up the underside of the roof and scabbing on wood and metal pieces to the roof pillars. These structural problems could have stemmed directly from using tissue paper as the starting point of the cast as opposed to perforated paper which appears to make a much stronger shell. The point here is to carefully access how cut outs for windows will impact the structural integrity of the overall cast. You don't want to get to this advanced stage of completion and fatally remove sections of the cast that would essentially “destroy” the cast. The window cut out situation is a point of no return. Give this extra attention and thought. There is no easy turning back after the cuts are made. Another aspect that needs special consideration is replacing a part or parts that have to be removed from the mold to expedite the initial application of paper to the mold. These parts cannot be formed from paper and need to be made separately. In Case 3- 2012 Ford Mustang Boss, I had to remove and duplicate the front grille of the model mold. I made an impression of the actual piece in Play Dough and filled the impression with Durham's Rock Hard Water Putty. When the cast is completely finished, this grille section will be attached to it. Decorating the Completed Cast : Now that the cast is fully formed and sanded smoothly, it is time to apply a finish to the surface of the cast. Begin by applying a primer paint to the entire cast, both outside and underside. This serves as an initial sealing of the cast material and assures a much better bonding with a top coat of paint. If need be, a finish top coat can be applied to the inside of the cast; one or more top coats definitely should be applied to the outside of the cast. Once the top coat or coats of paint have cured thoroughly, decals, paper windows, and any other types of decorations can be applied. Final Thoughts: The finished paper model will be slightly larger than the mold model, so its scale is not completely accurate, of course. And the precise details and other parts of the mold will not necessarily be clear or authentic on the cast. However, the essential form captured in the cast is easily recognizable as the “real thing” and does serve as a legitimate platform for future upgrades and improvements if desired. My foremost intention in making these paper bodies was to put a body on a bare Monster Jam chassis as my logical conclusion was, “some thing is better than no thing”. Thanks for your interest and feedback.
