Kodiak Island Modeler
-
Posts
1,329 -
Joined
-
Last visited
Content Type
Profiles
Forums
Events
Gallery
Everything posted by Kodiak Island Modeler
-
 Thanks everybody. I have found what I needed to know.
 -
I have been in touch with an authority, and have been told that the site is a scam site, selling stolen items, and to not touch it. The government is already aware of the site.
-
This is what I found

-
I've noticed several photos that I'd displayed on the forum are showing up for sale on the internet. Is there some policy that I've missed, or is somebody hacking pictures that we display? I just want to make sure that I didn't miss some rule here before I proceed to discover who and why my photos are being sold without my knowledge. I also want to make others aware that their photos could also be on the market.
-
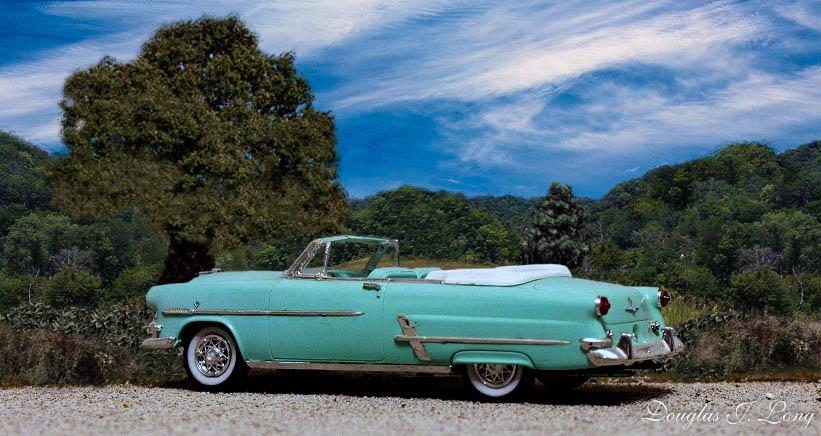
One of my early cars was a 54 Cadillac coupe. Thanks for sharing this.
-
I am in fascination of the surreal views in your photos.
-
I didn't like that either. Smashing my fingers in freezing weather wasn't to my liking either.
-
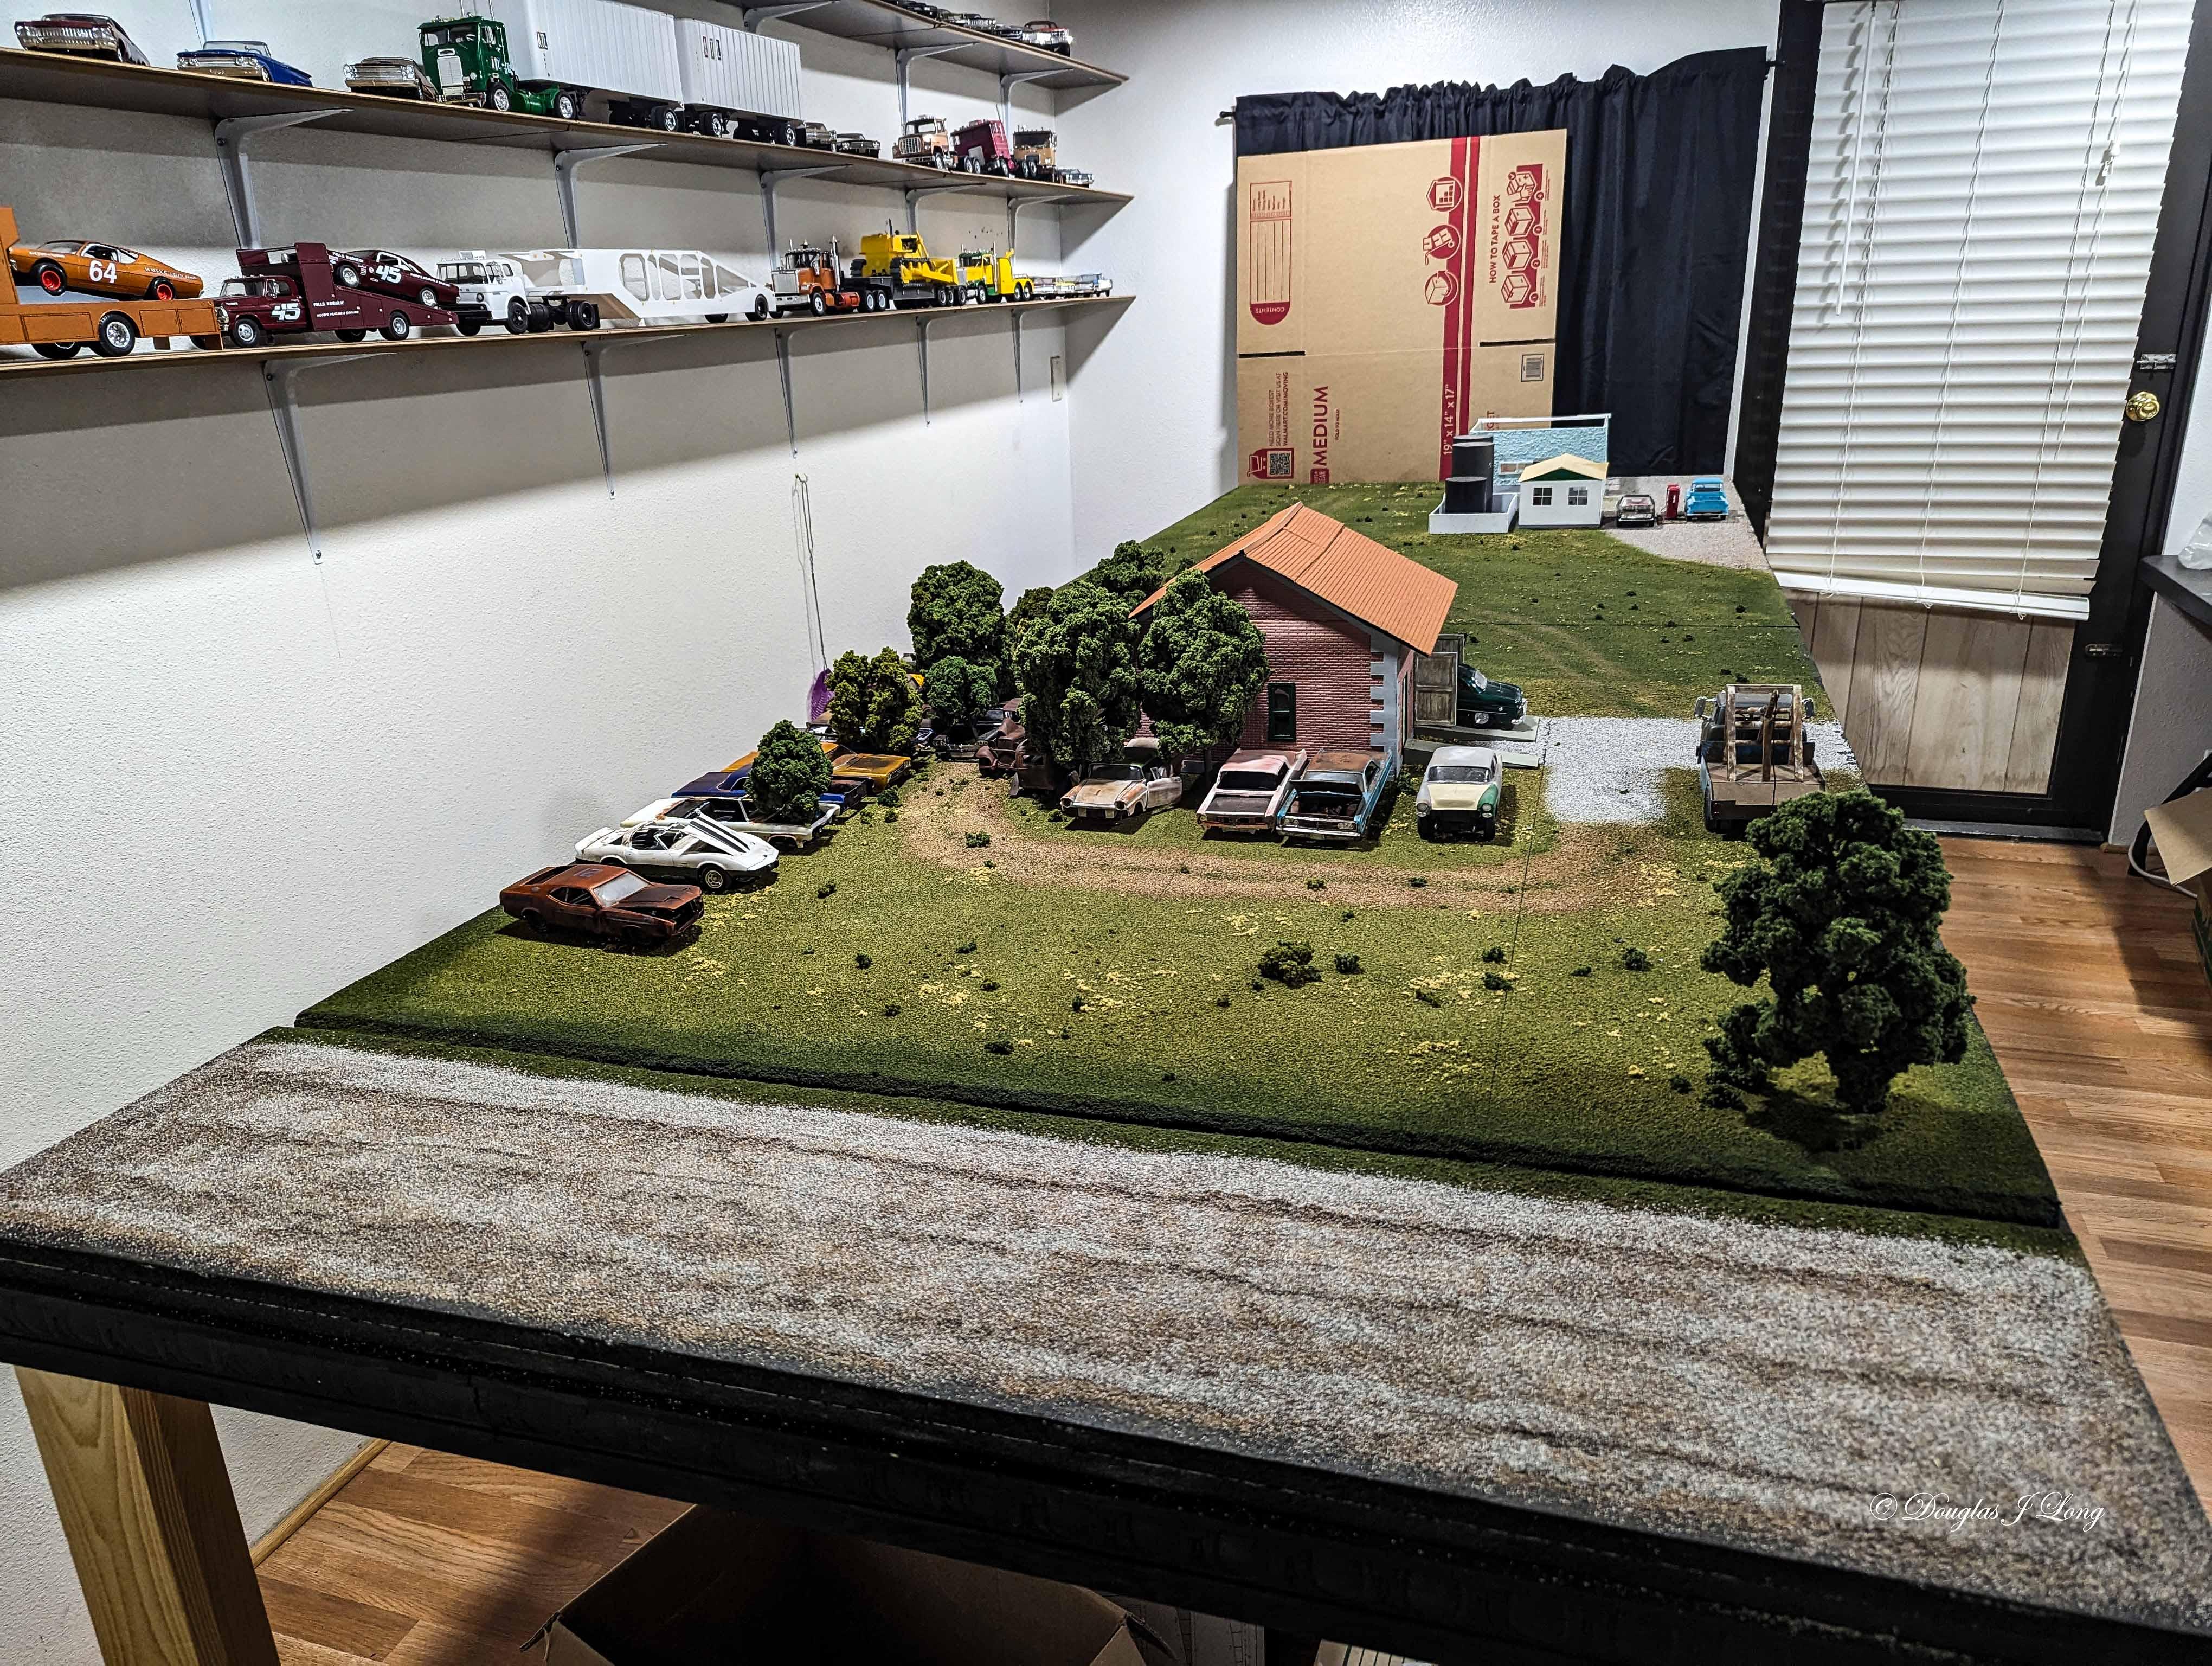
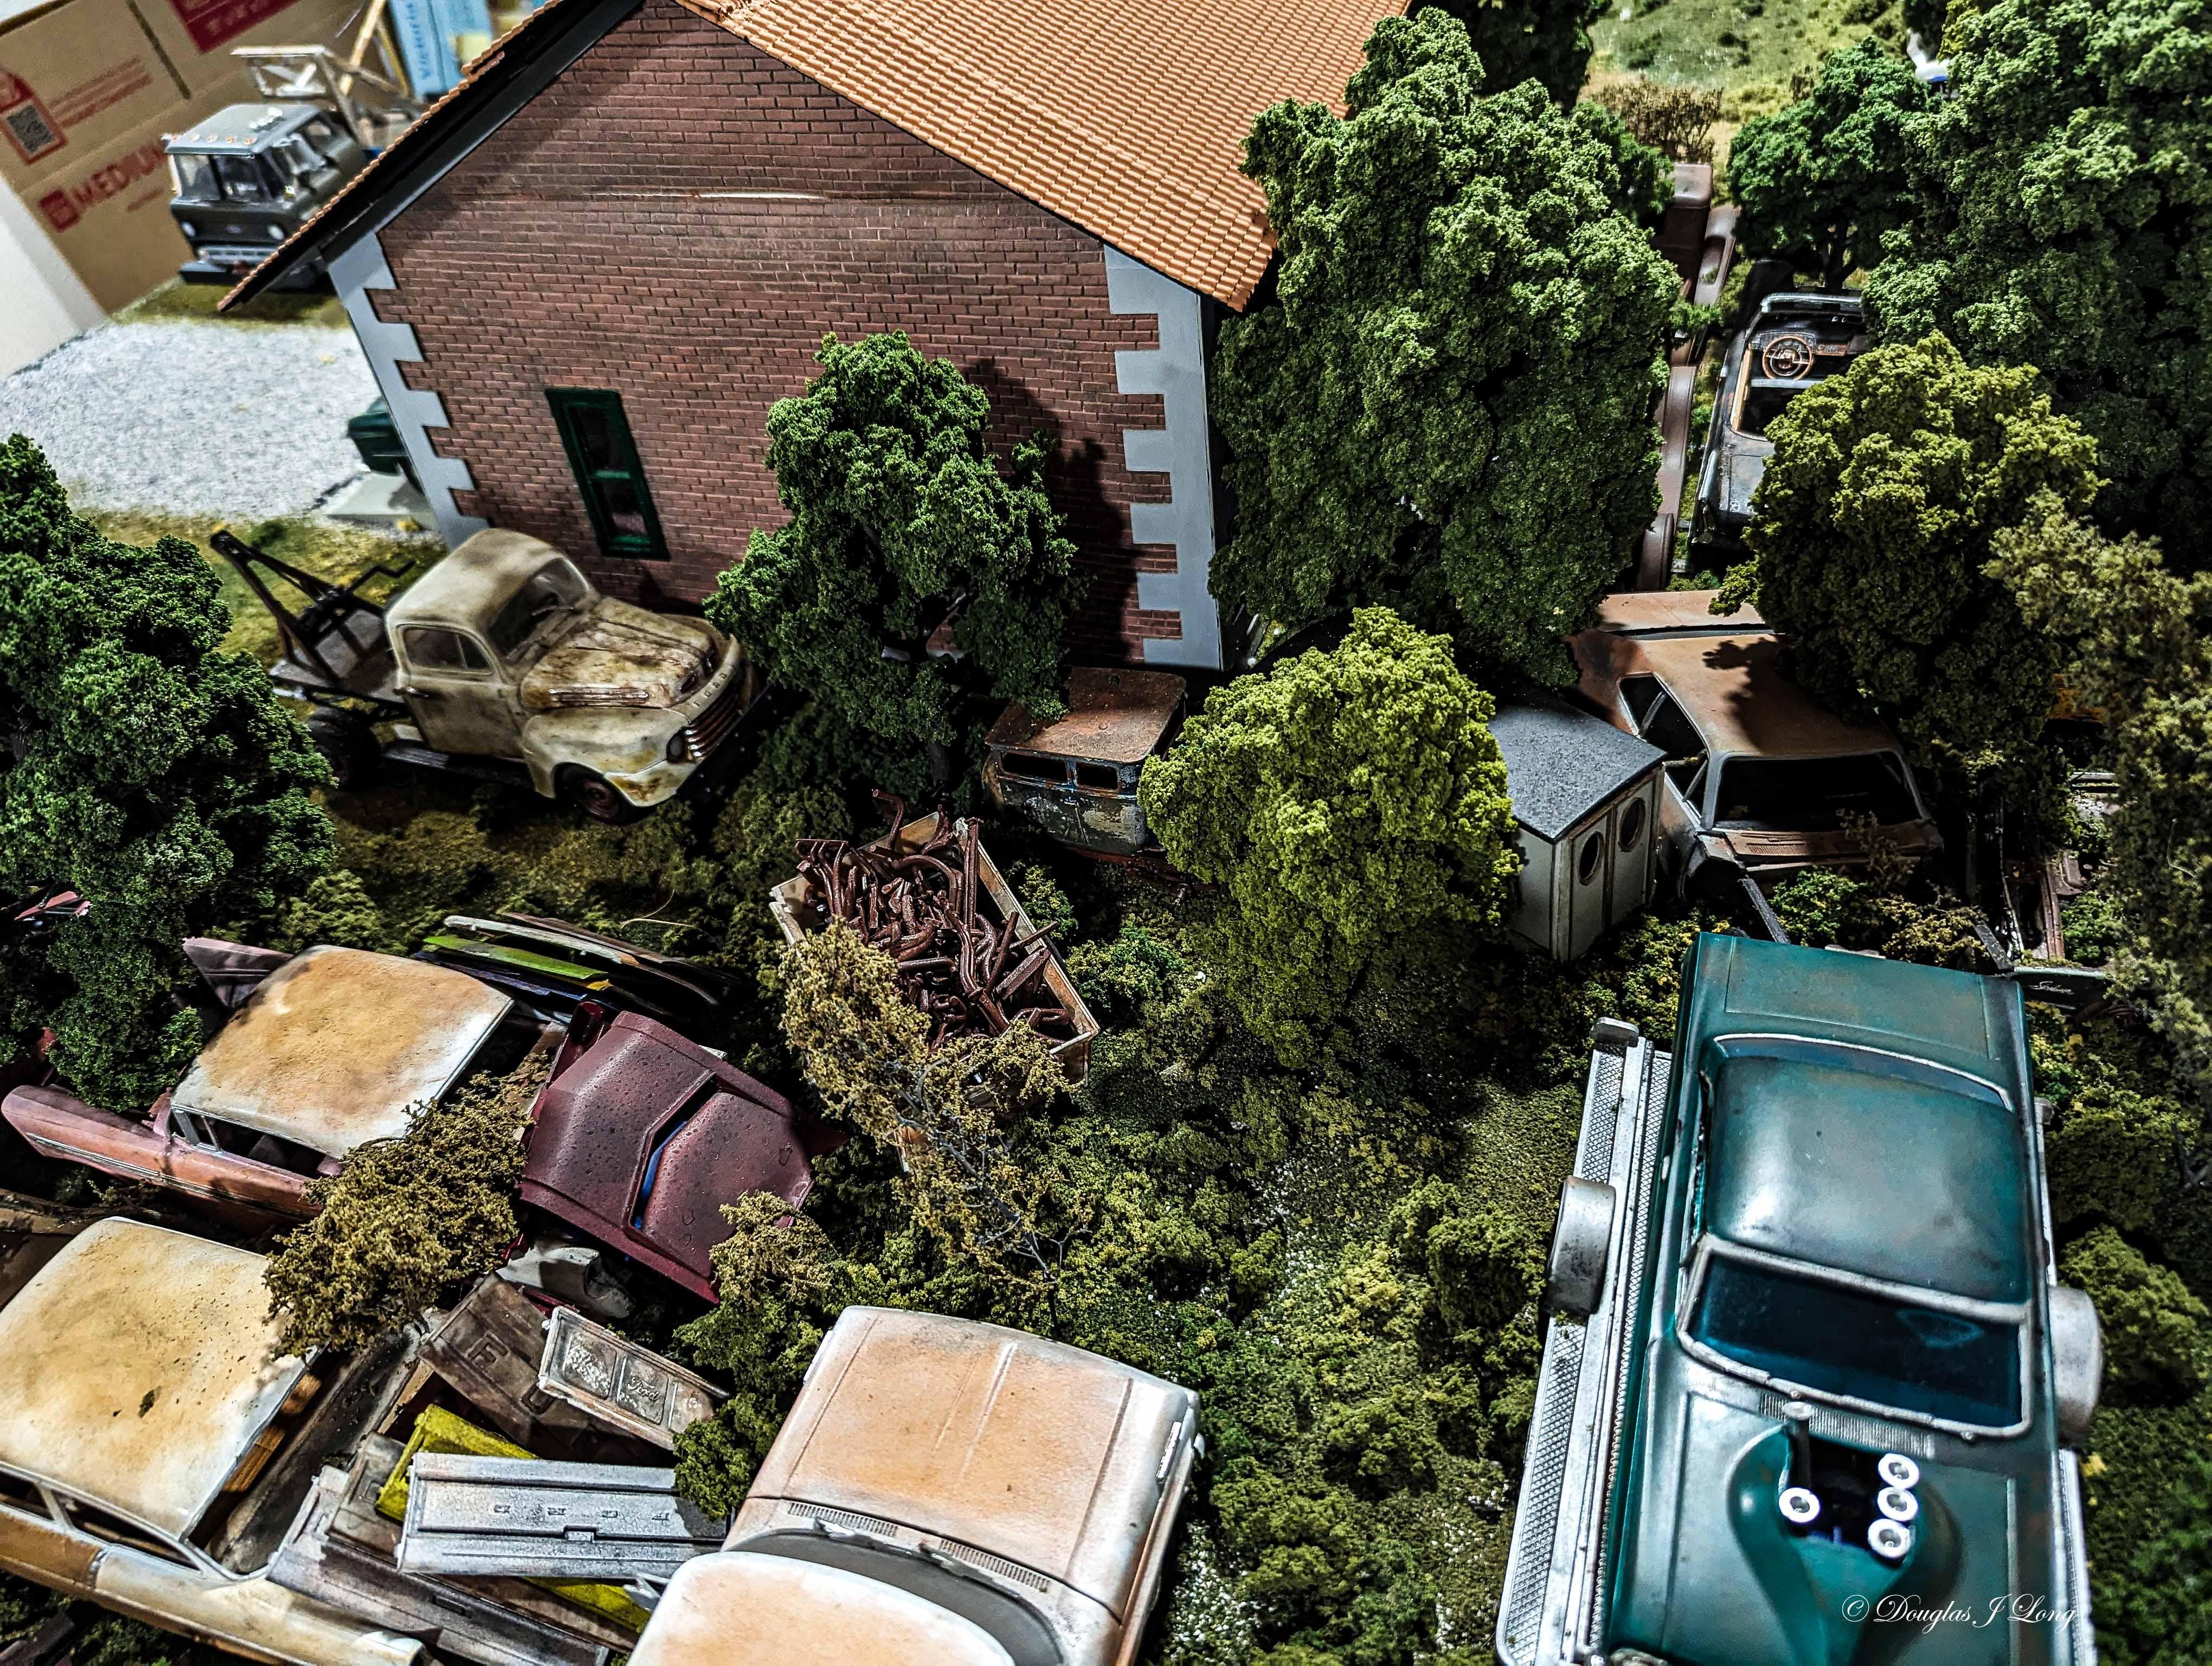
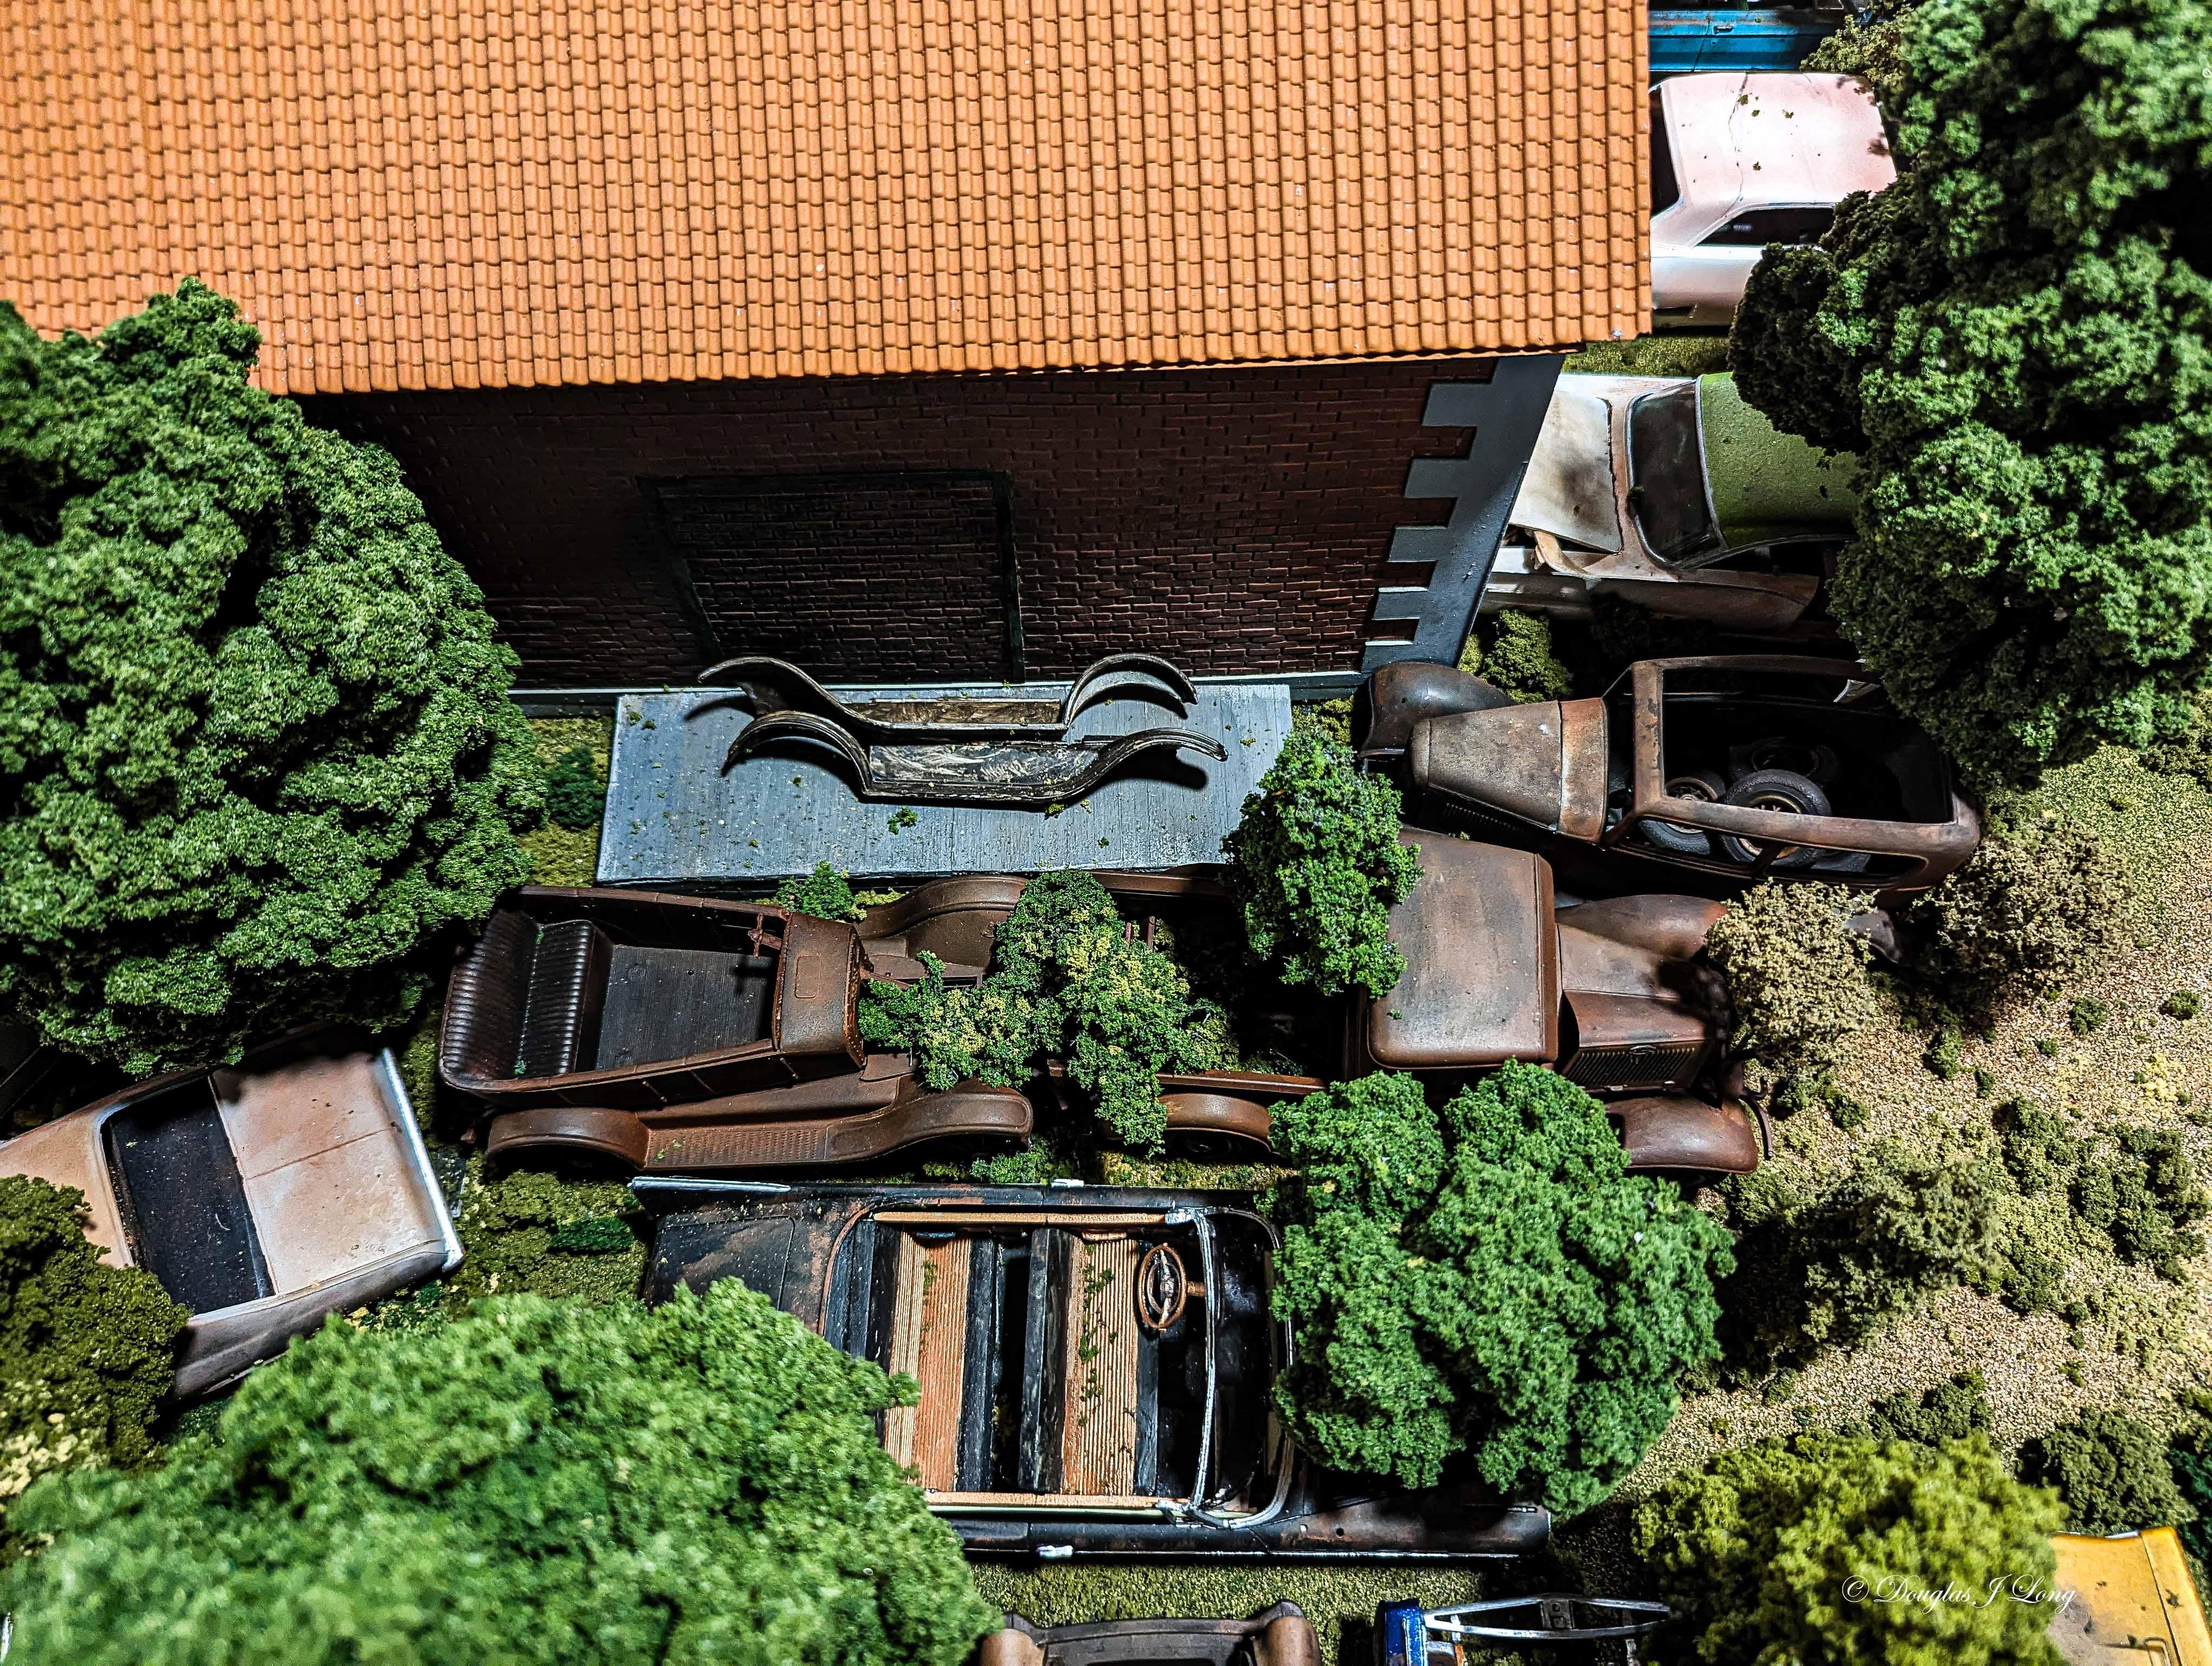
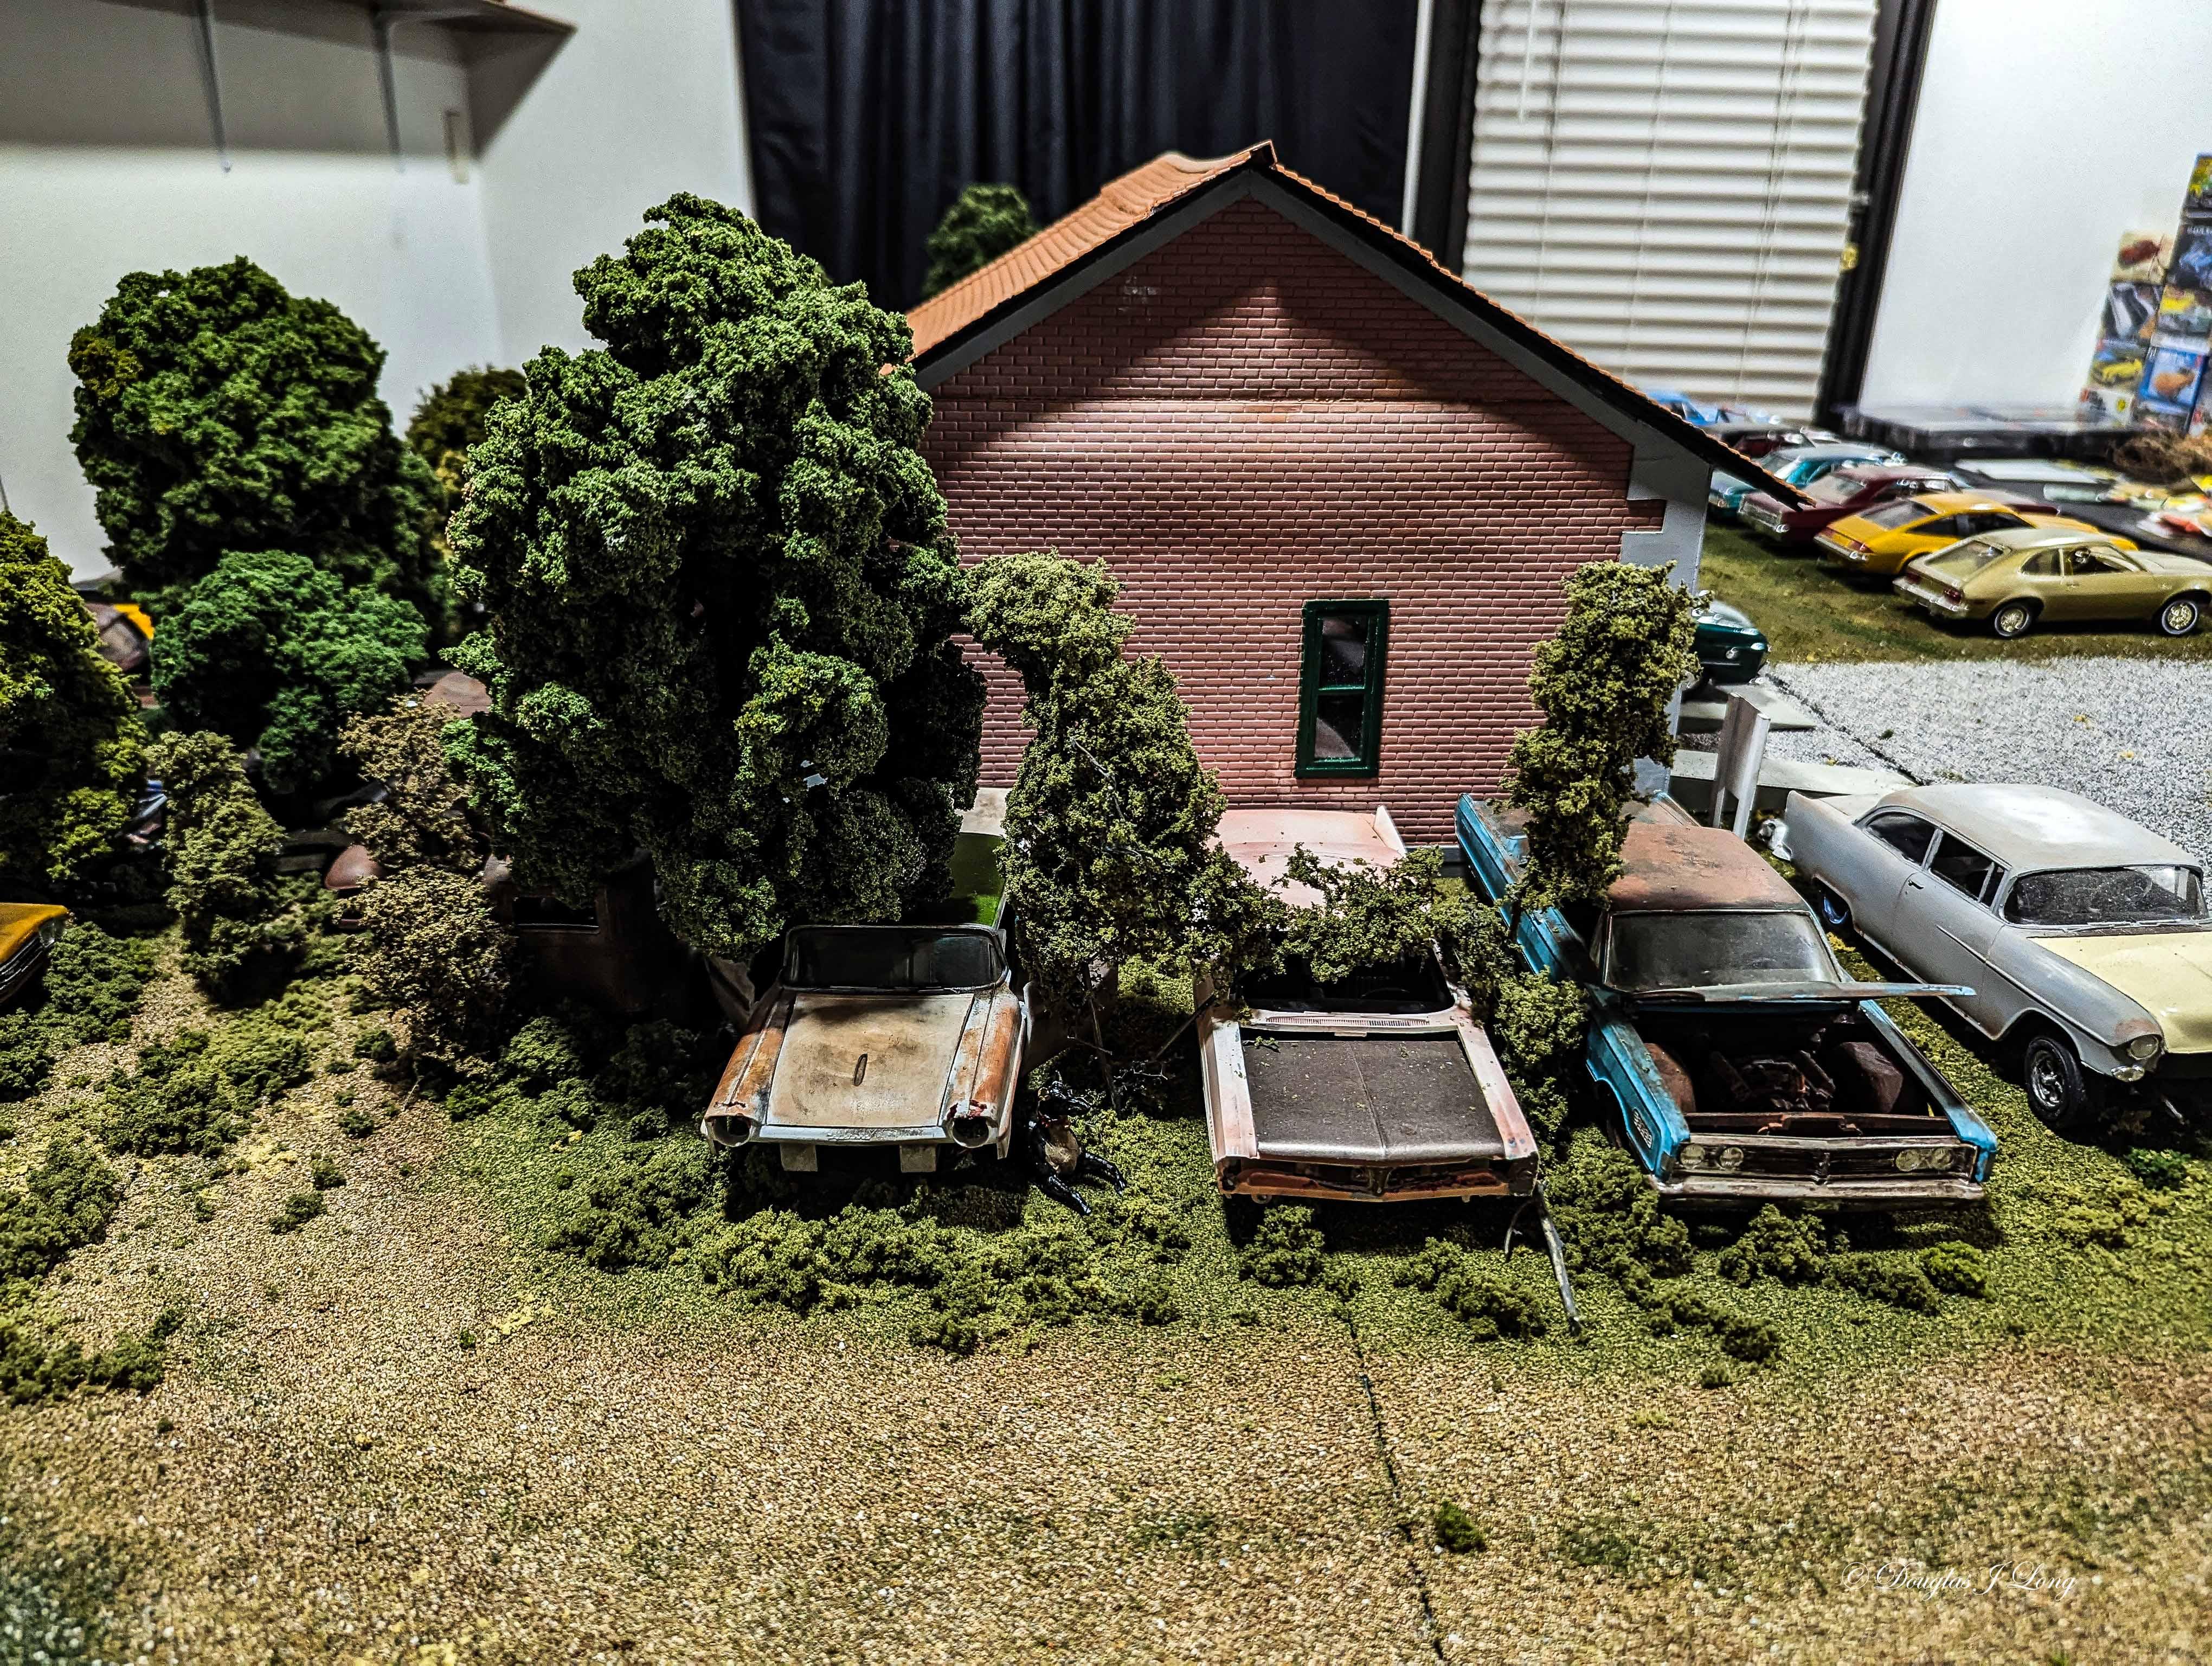
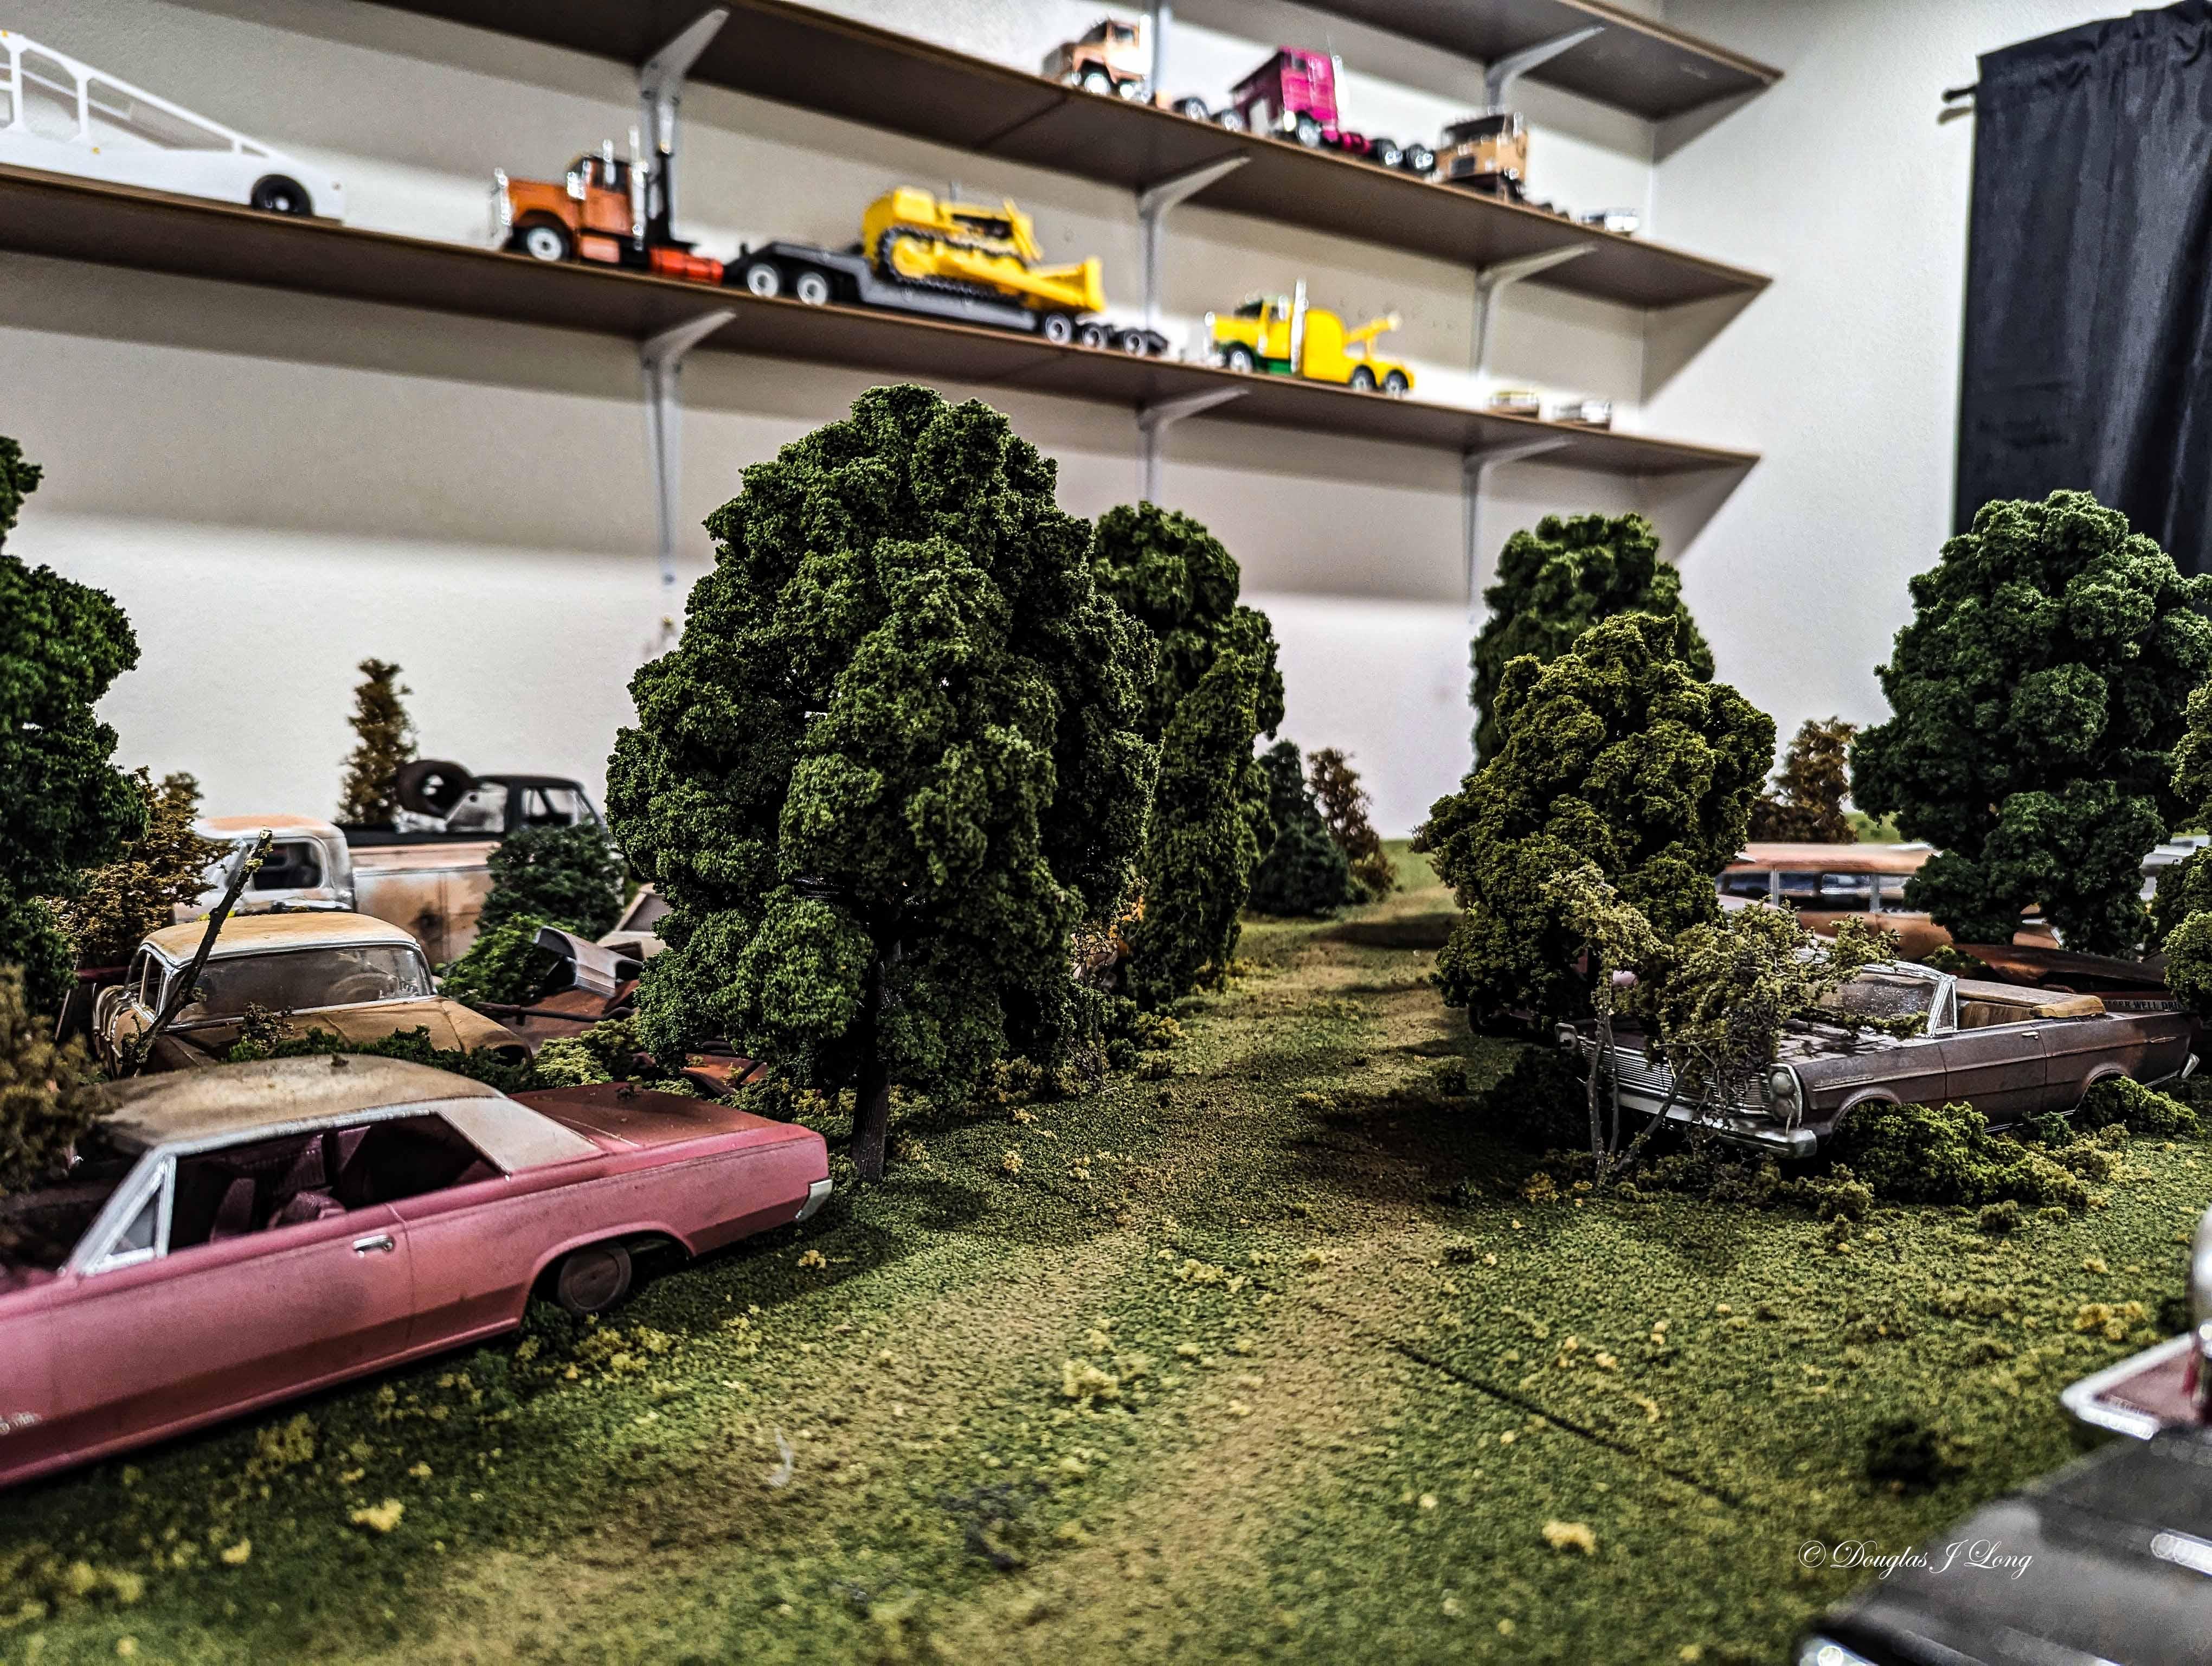
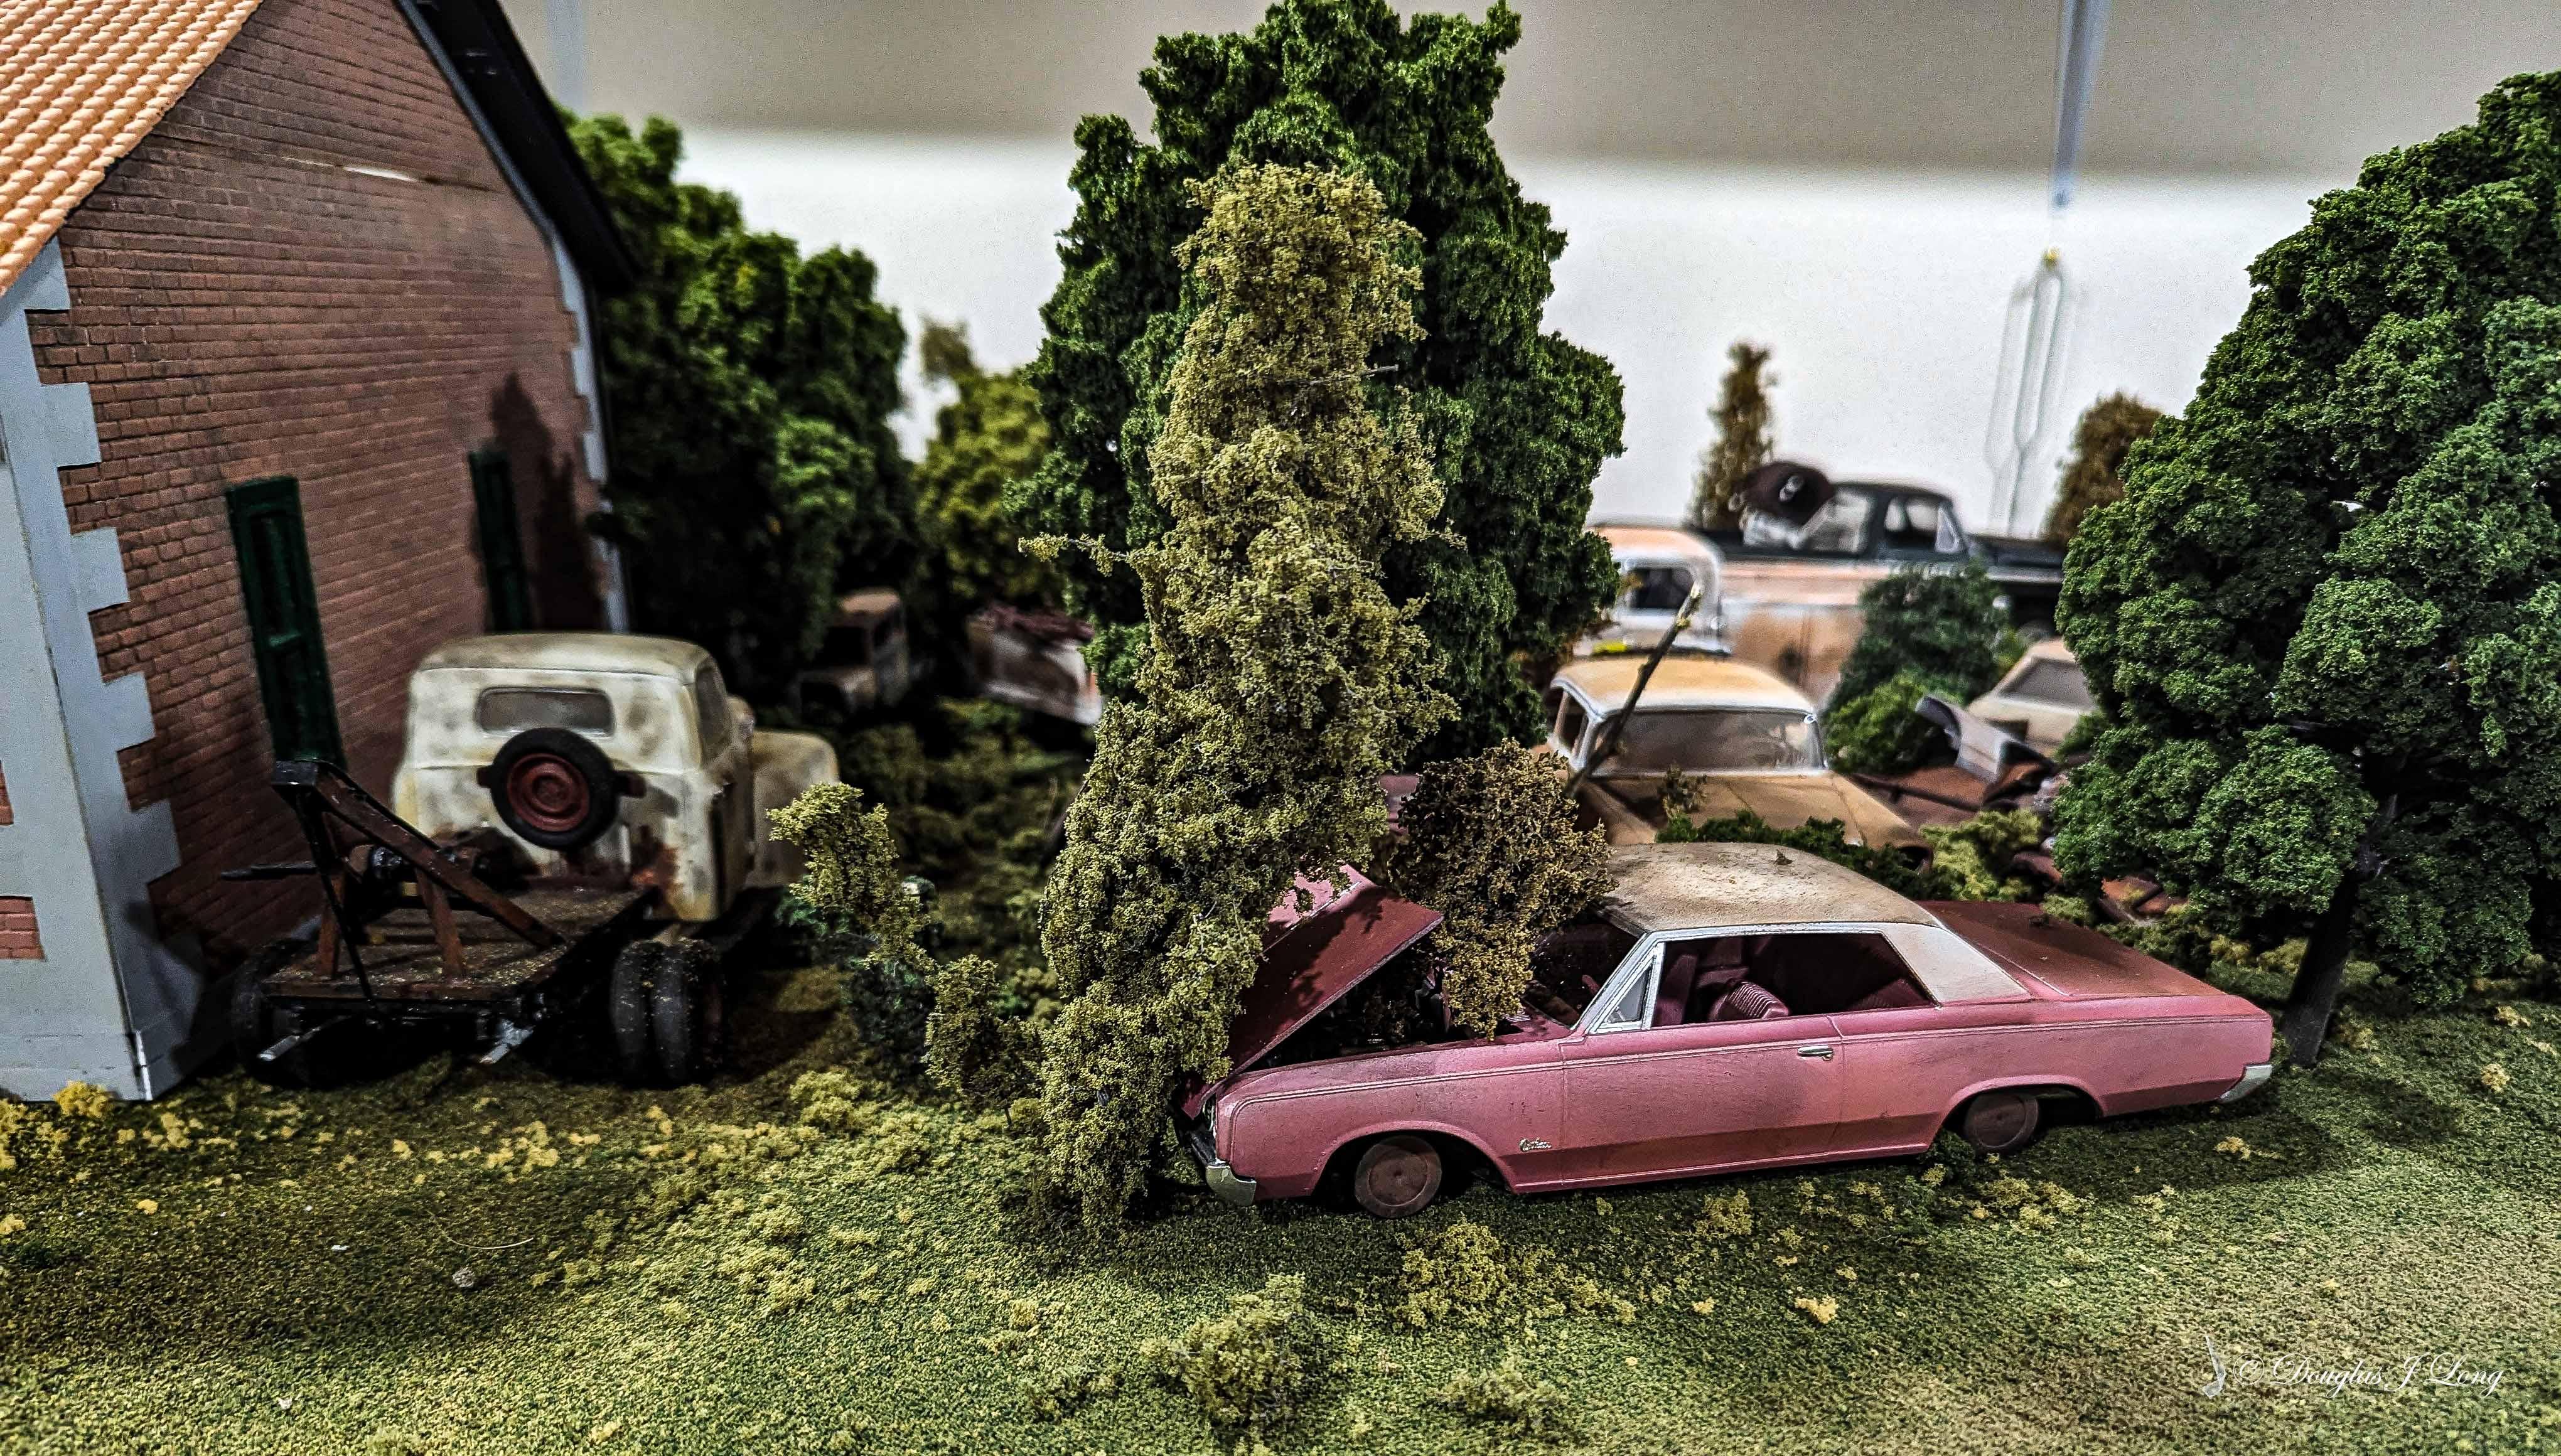
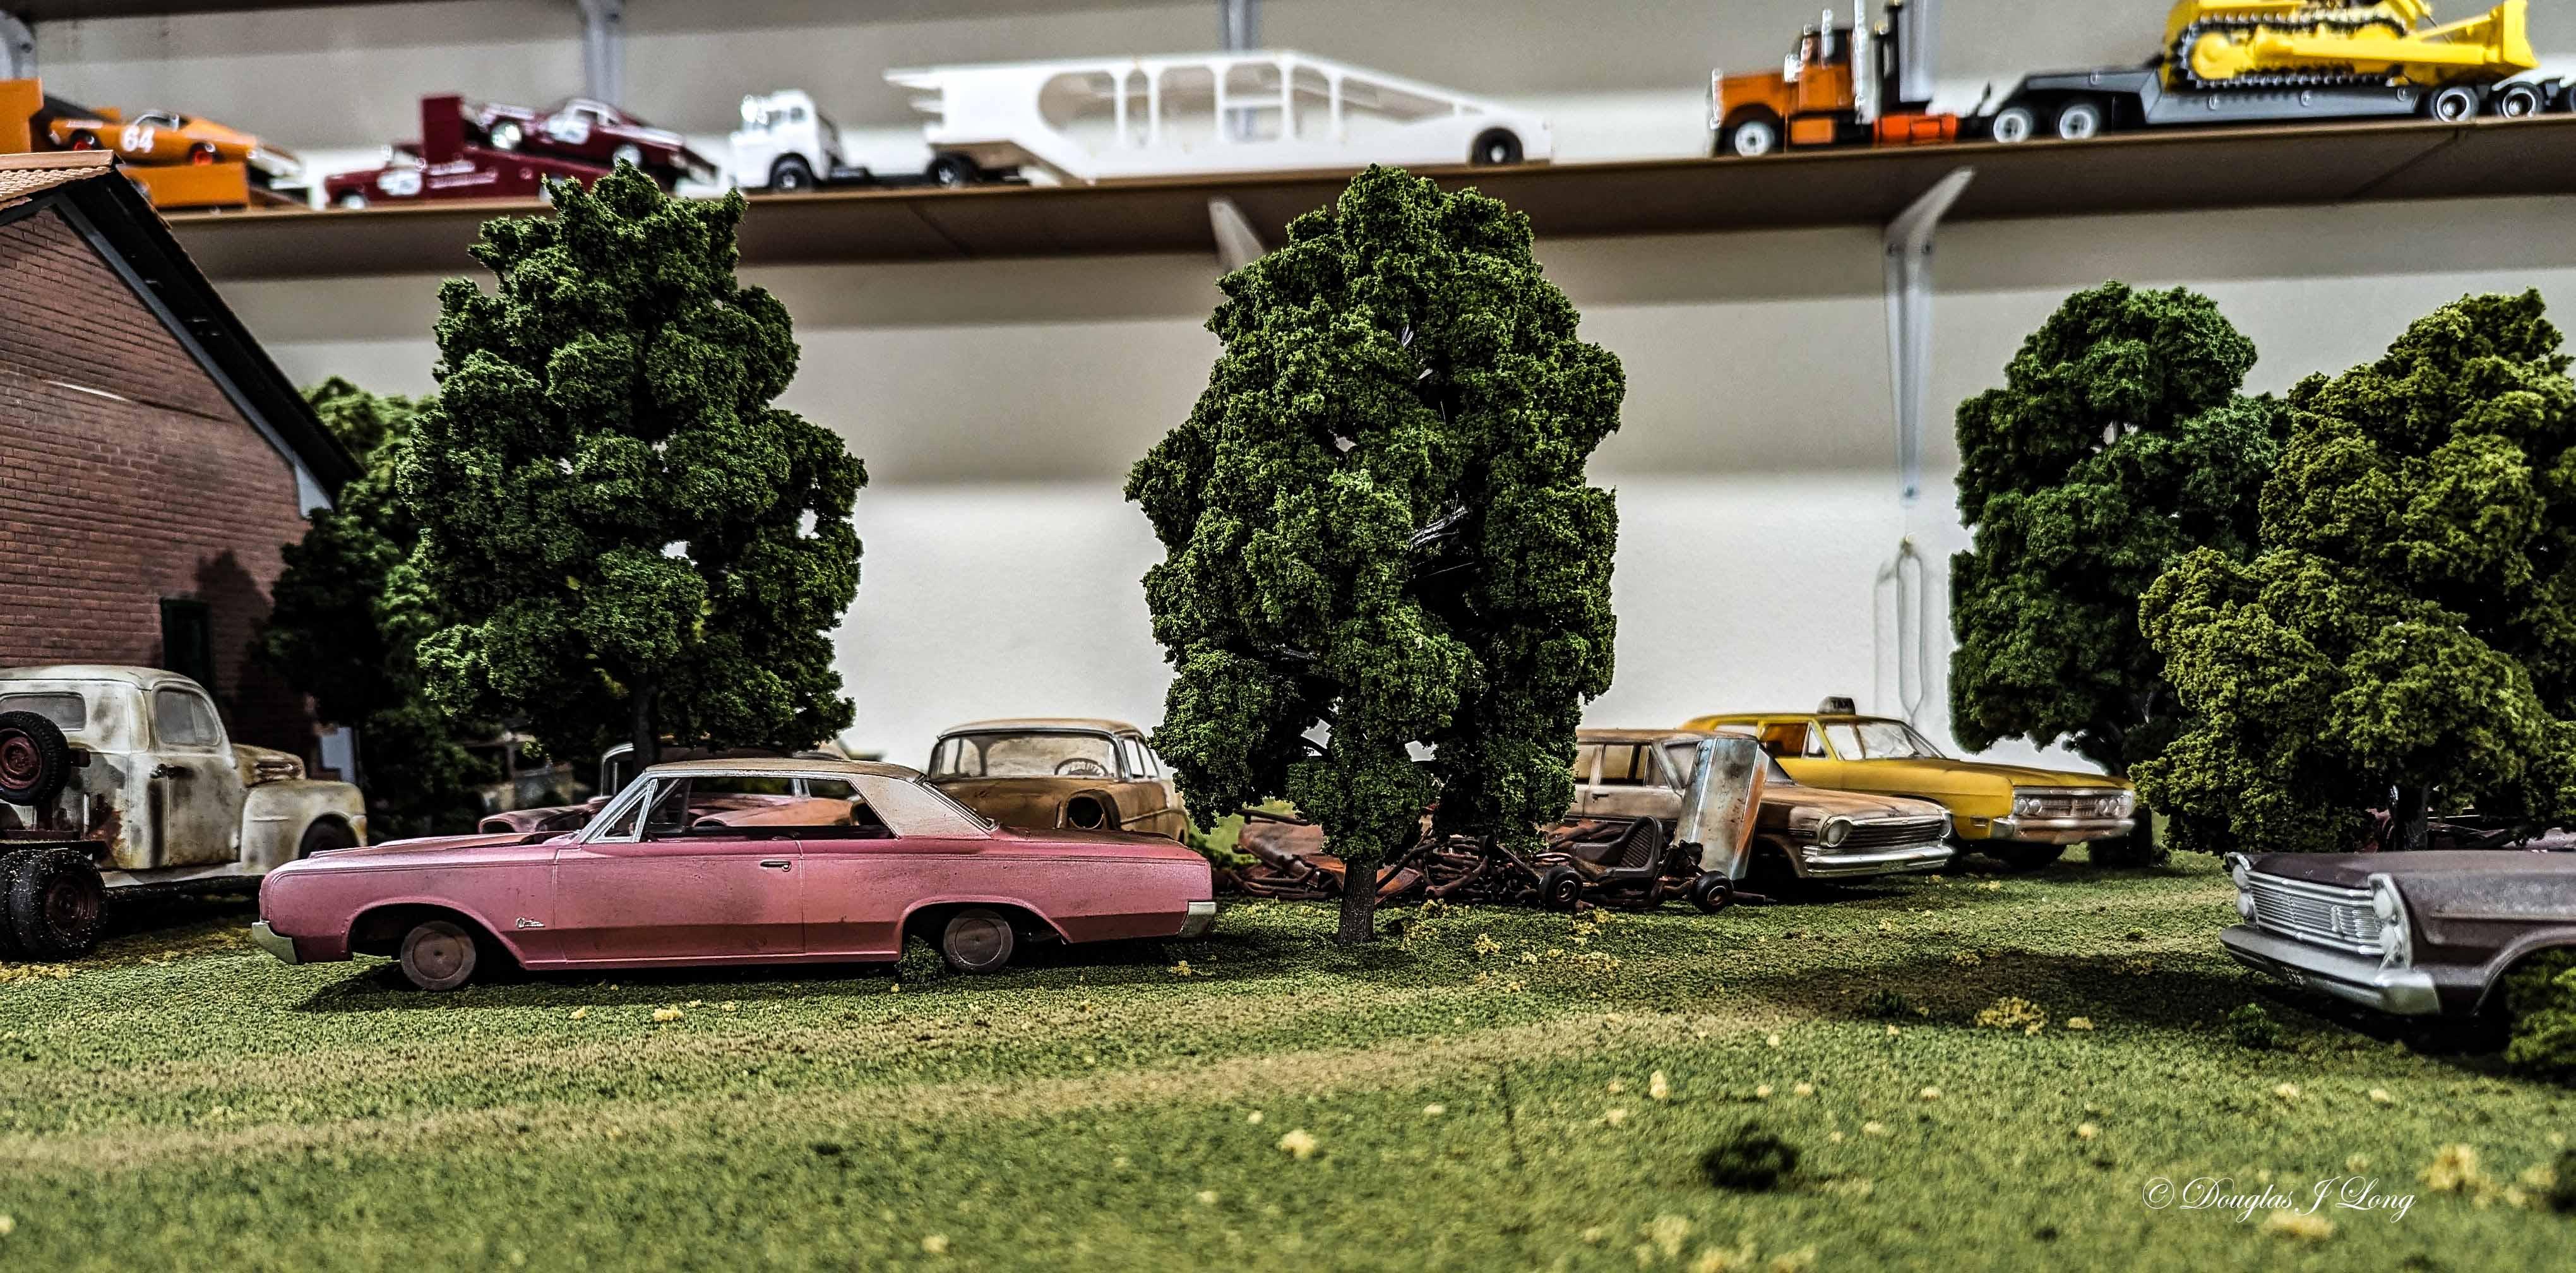
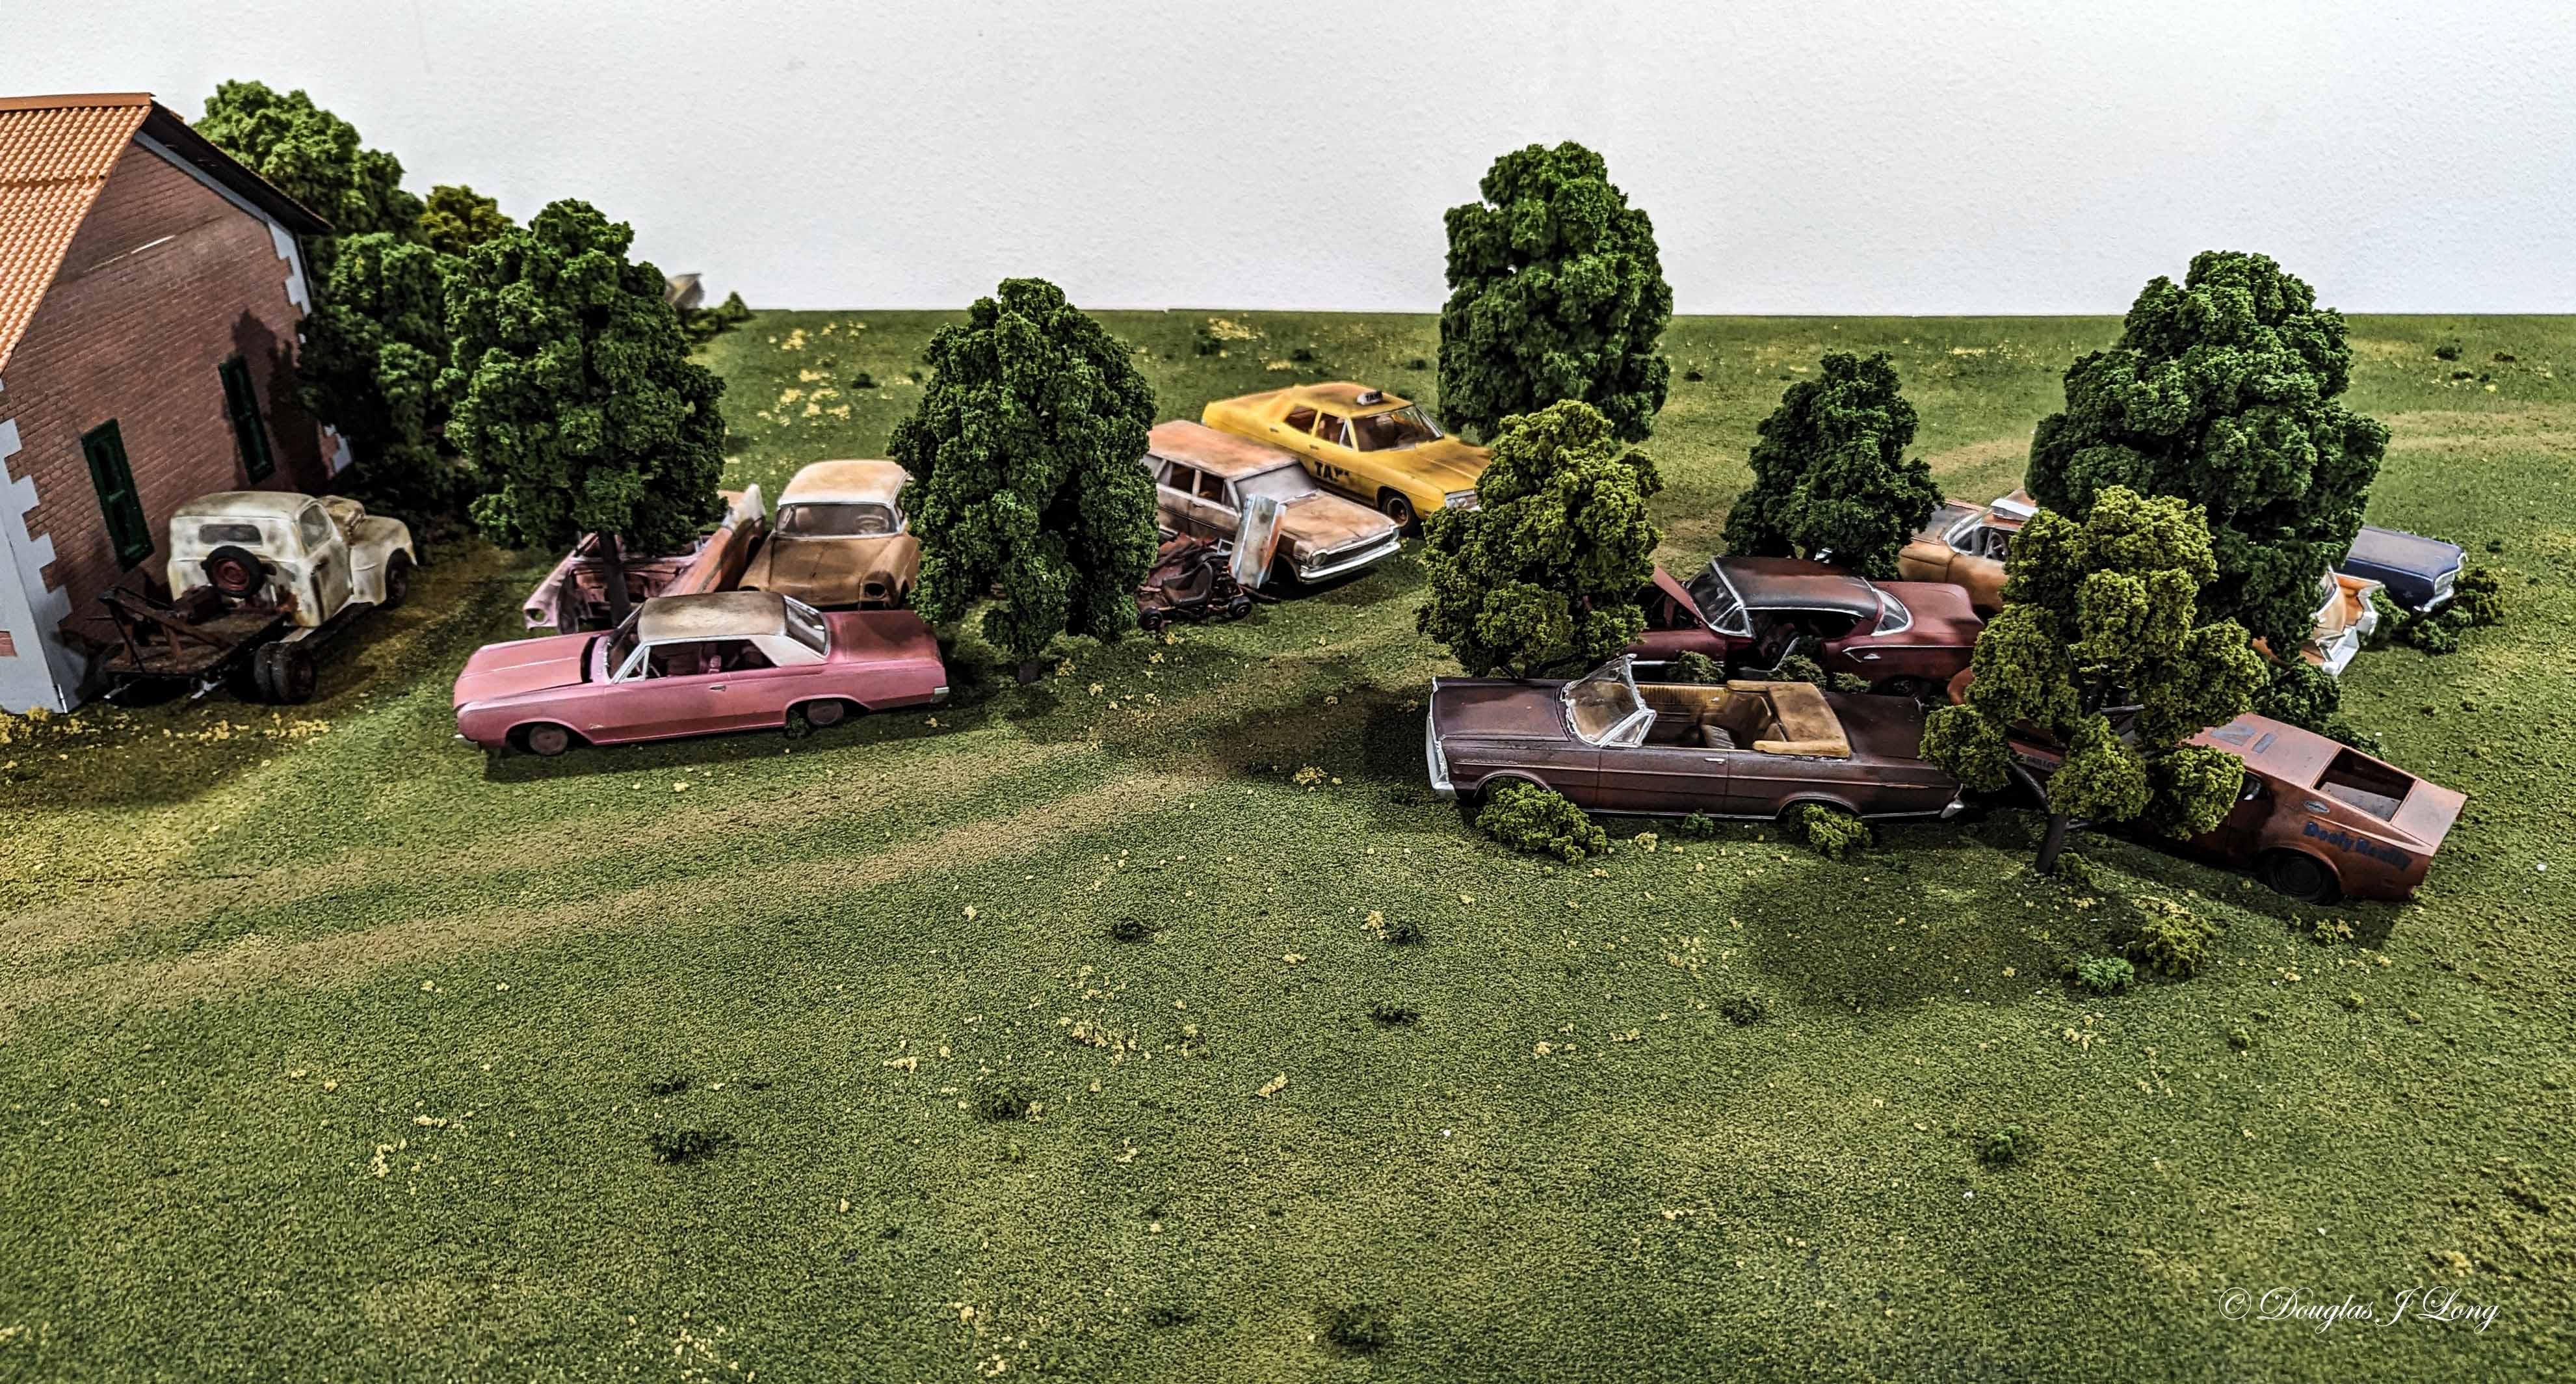
I have named the diorama the "Old Highway 92 Salvage Yard" in tribute to a junkyards that my uncle owned in my youth. This is not a diorama of the actual junkyards, but more a conglomeration of fun places from my history and a remembrance of those that I shared those experiences with. I'm setting the season to be late August/early September.
-
-
-
I have several photos, so I will break them up into multiple uploads, so as not to overwhelm you.
-
I've added horticultural element to blend the scenes into real lfe visions.
-
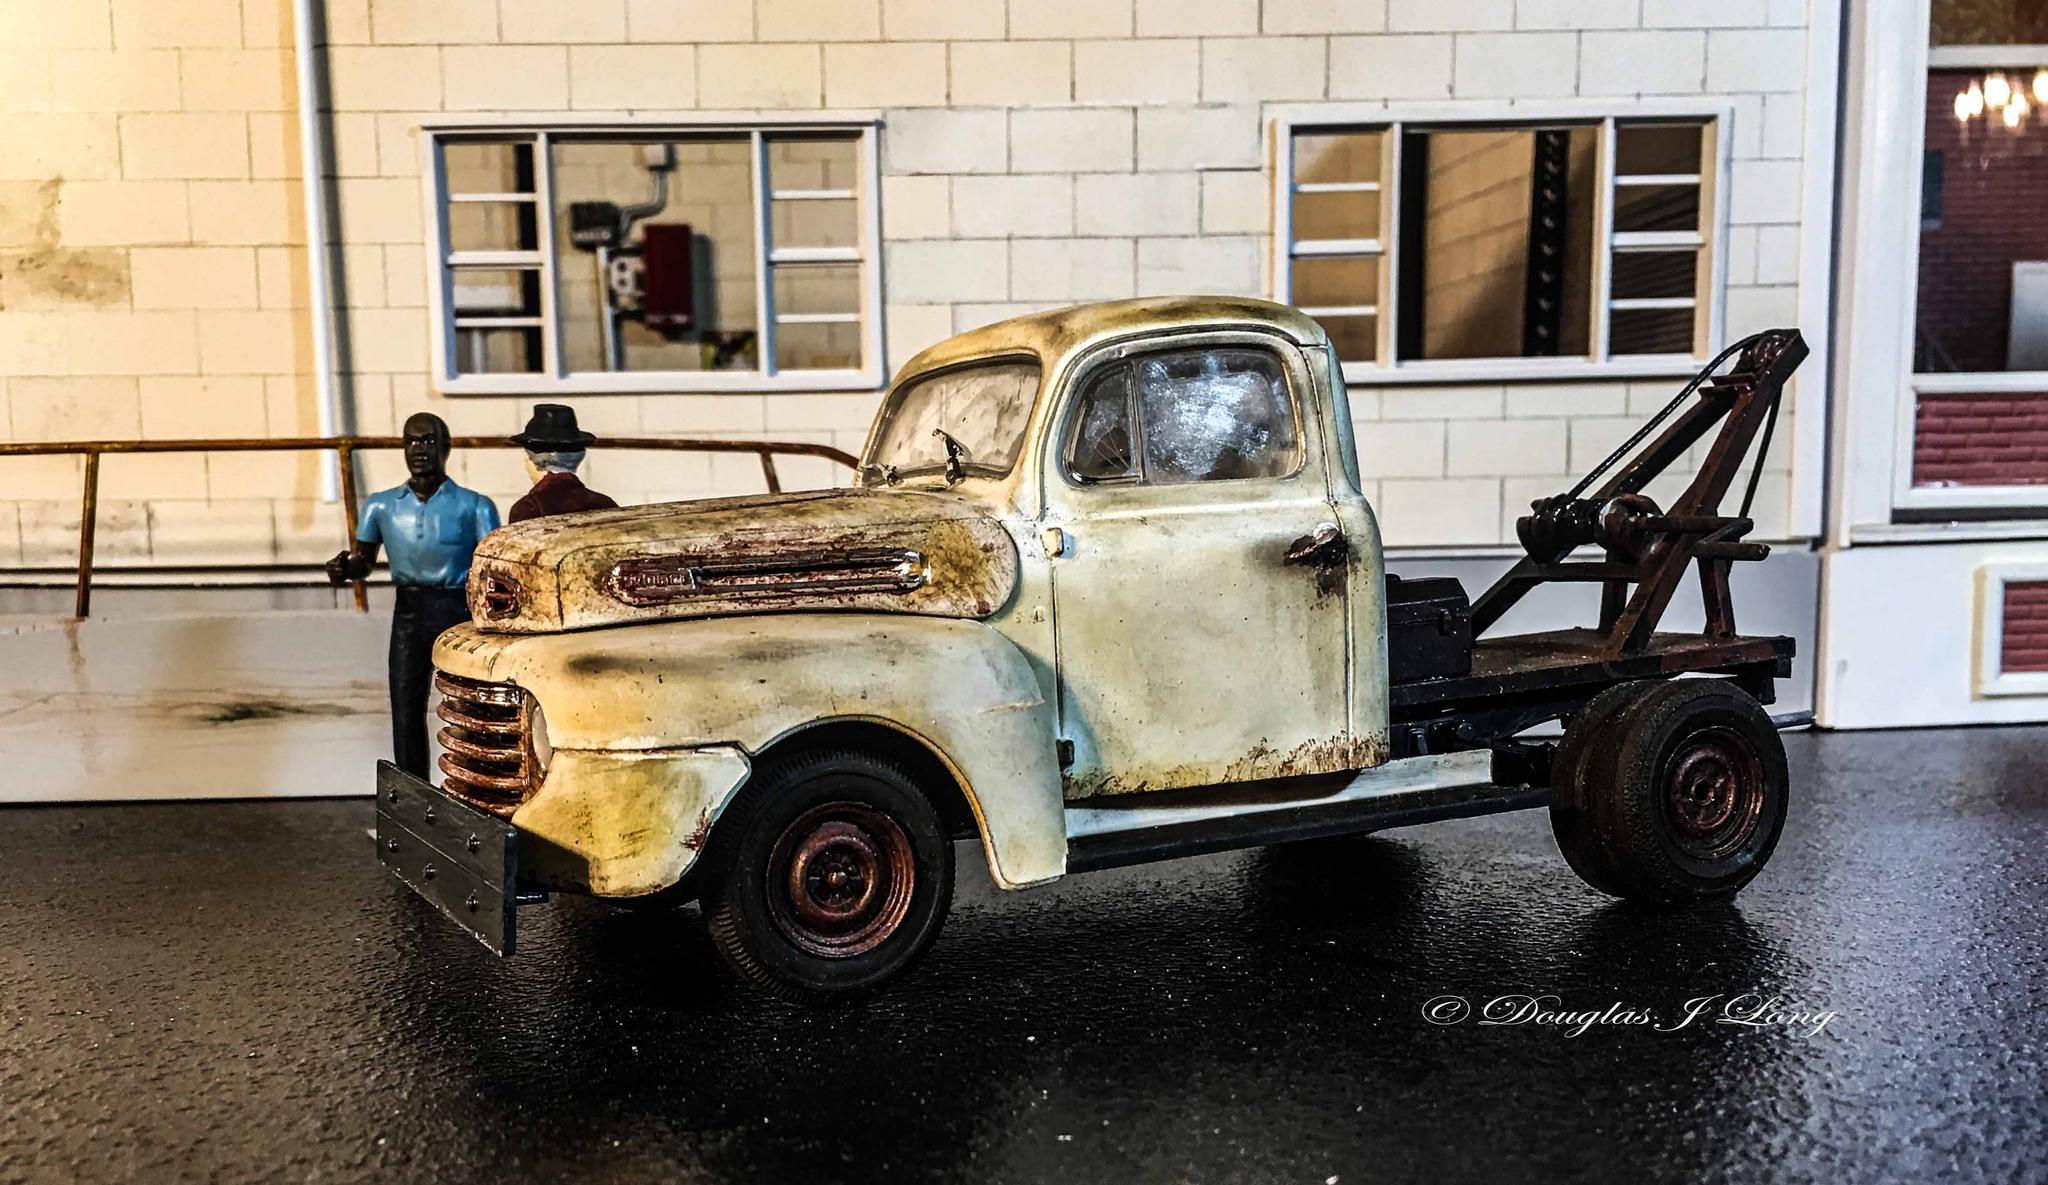
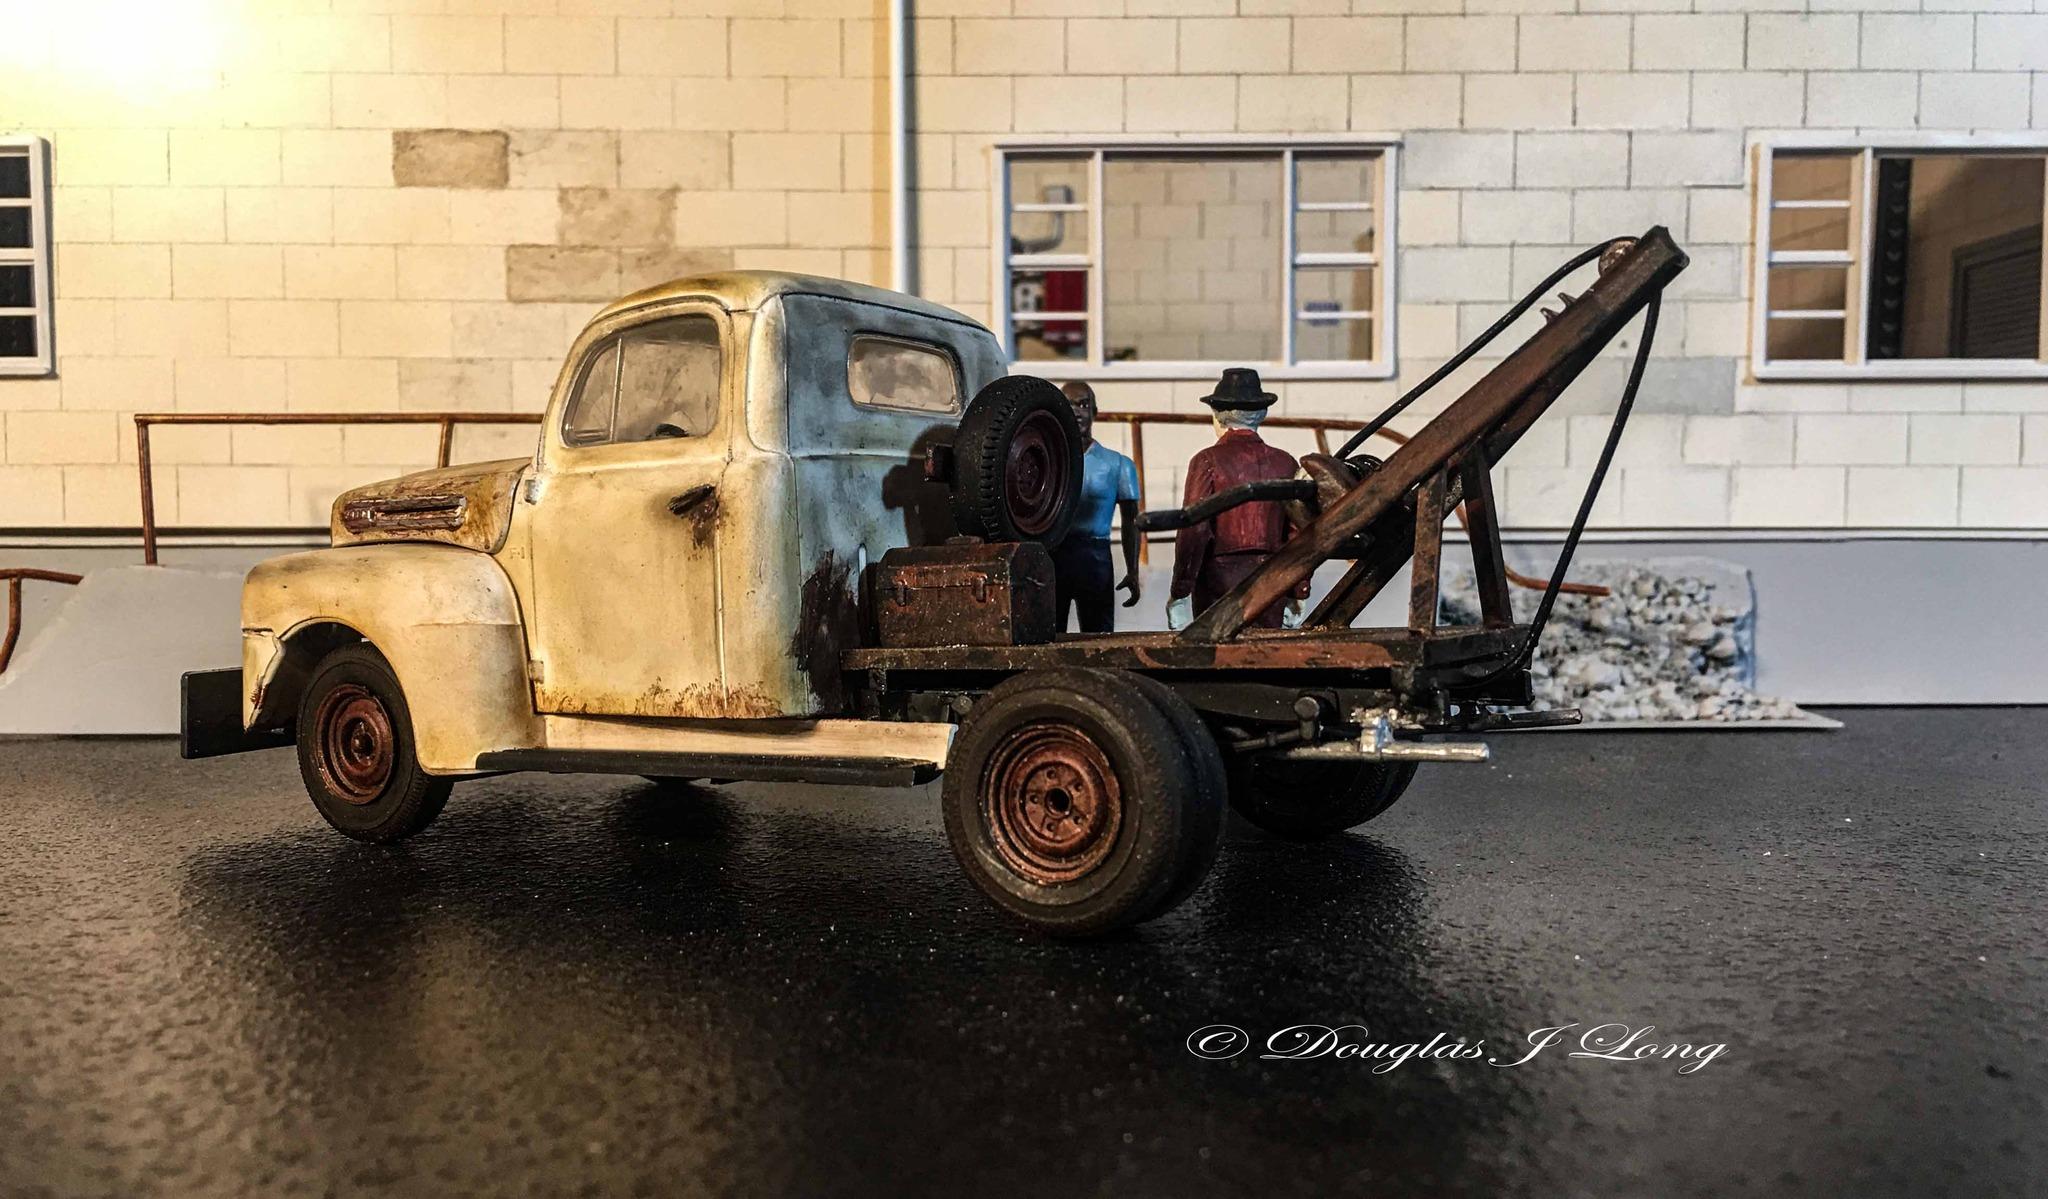
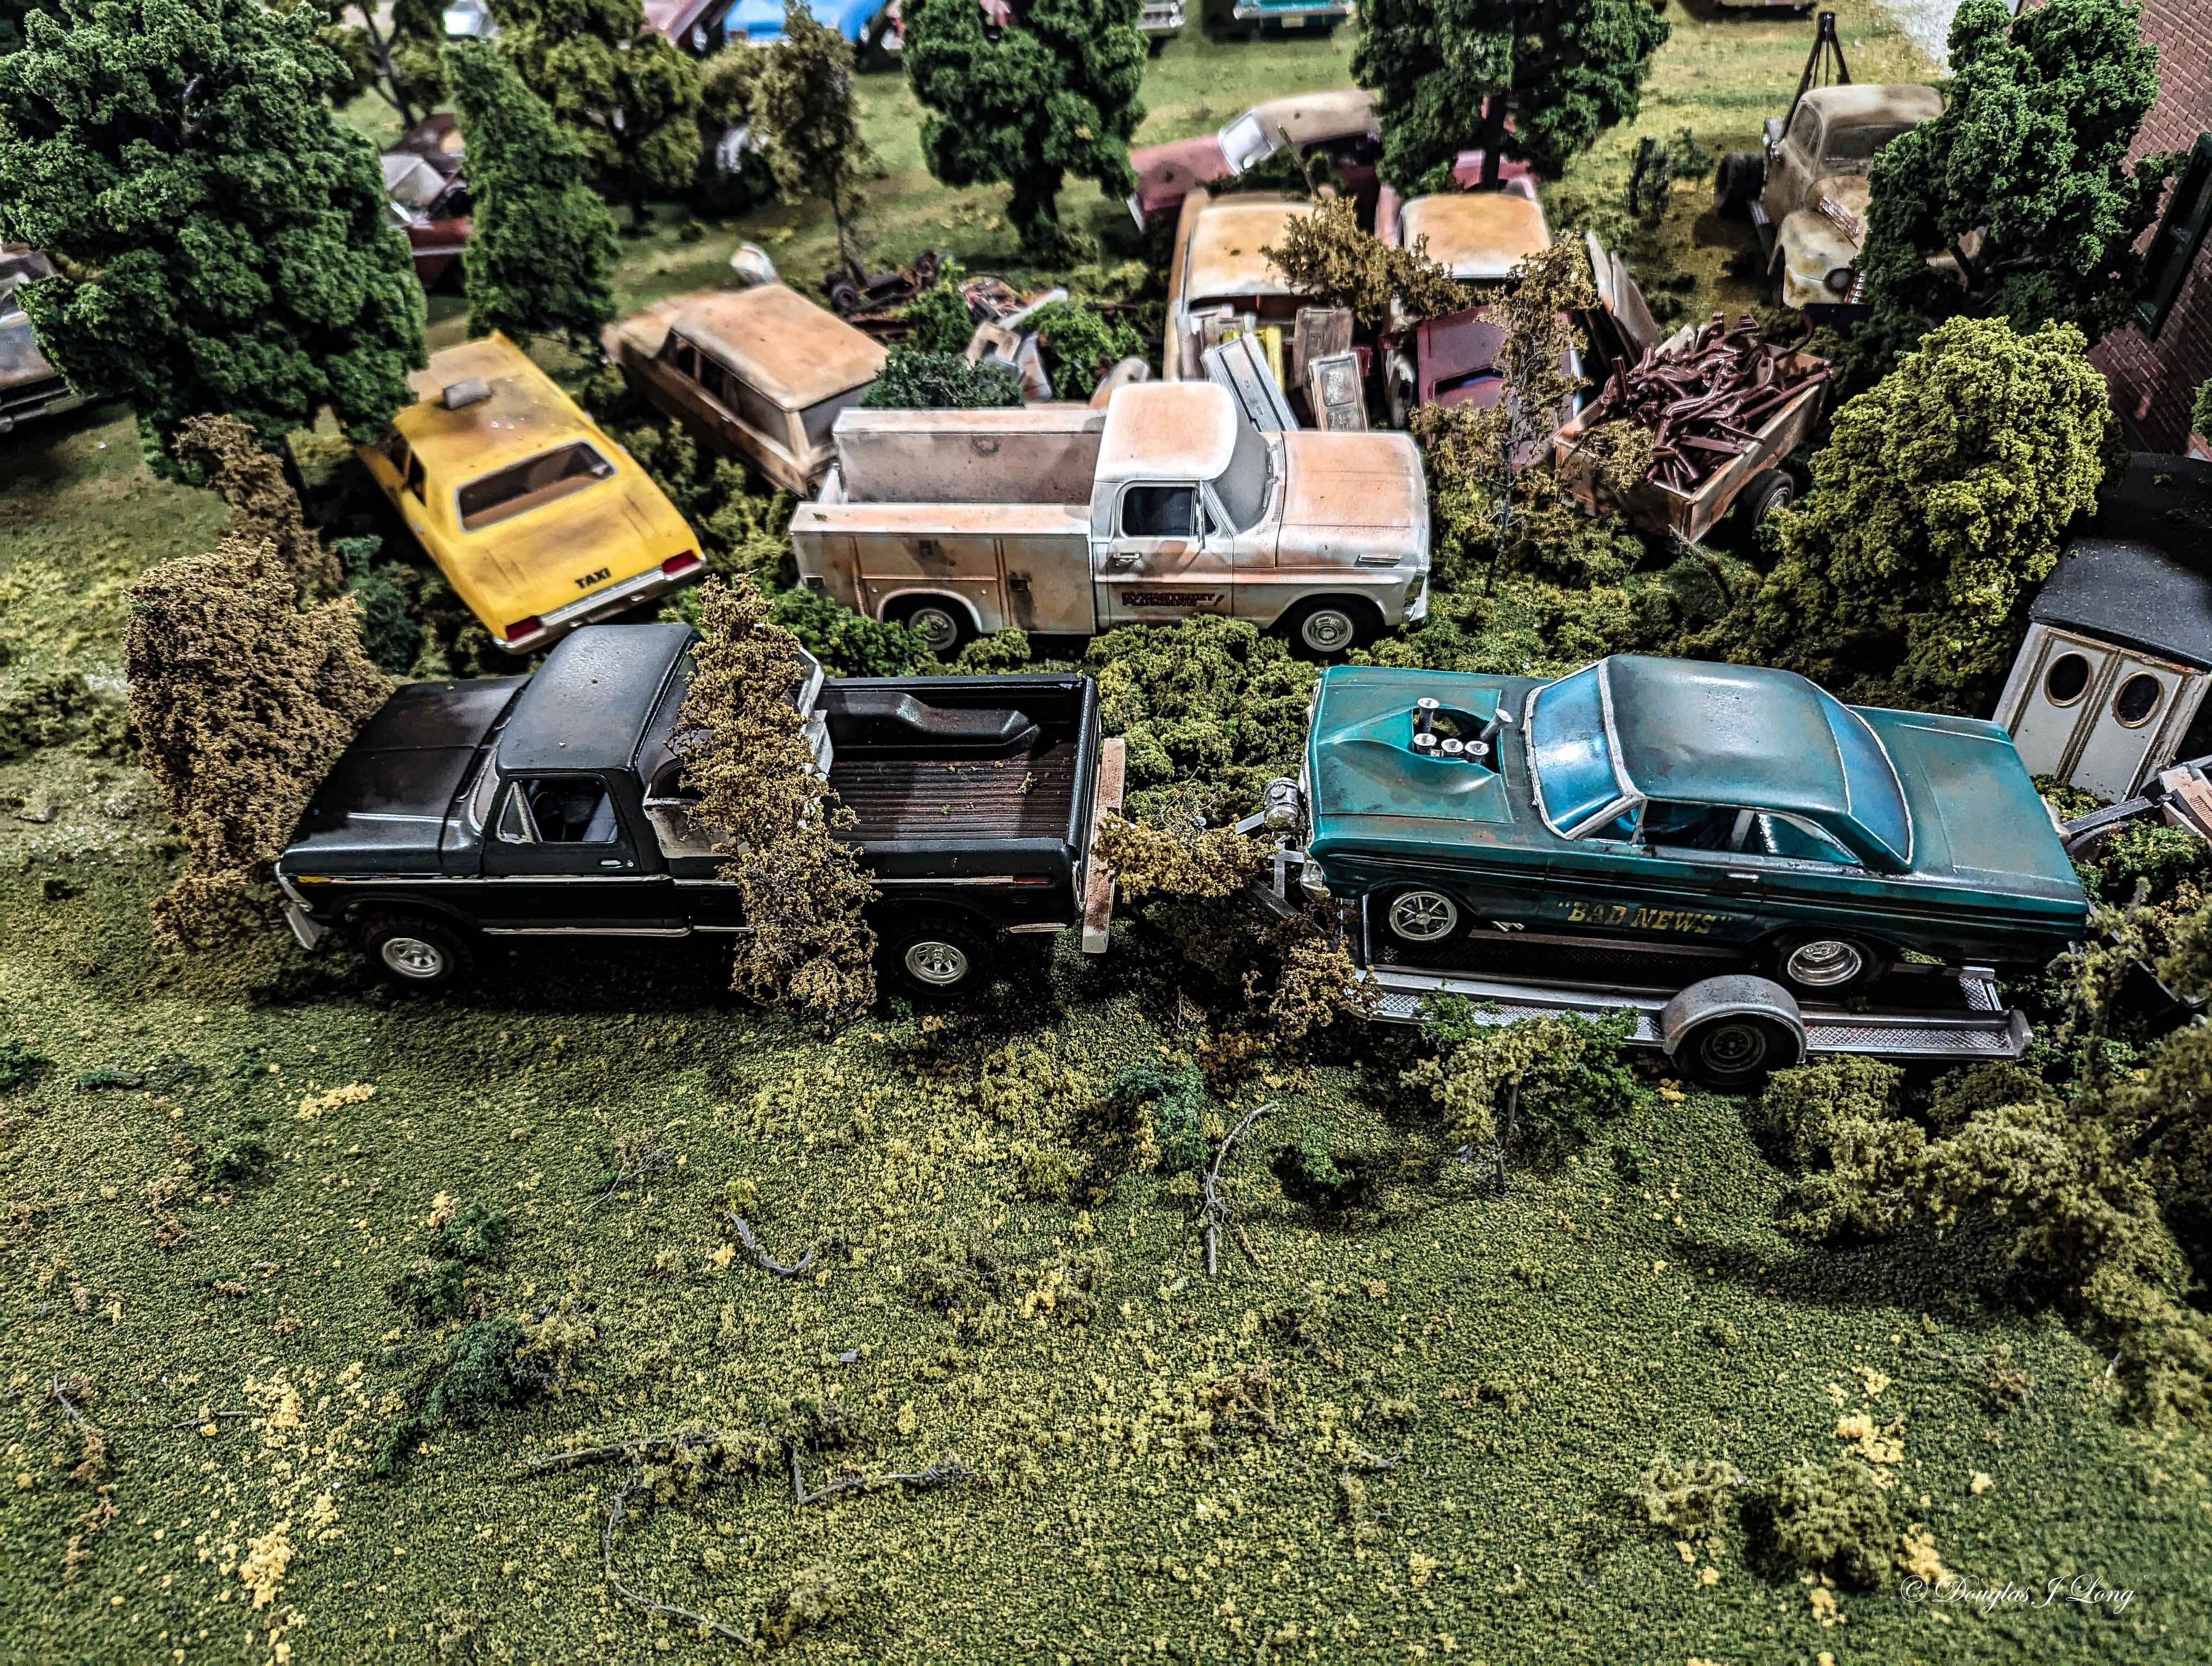
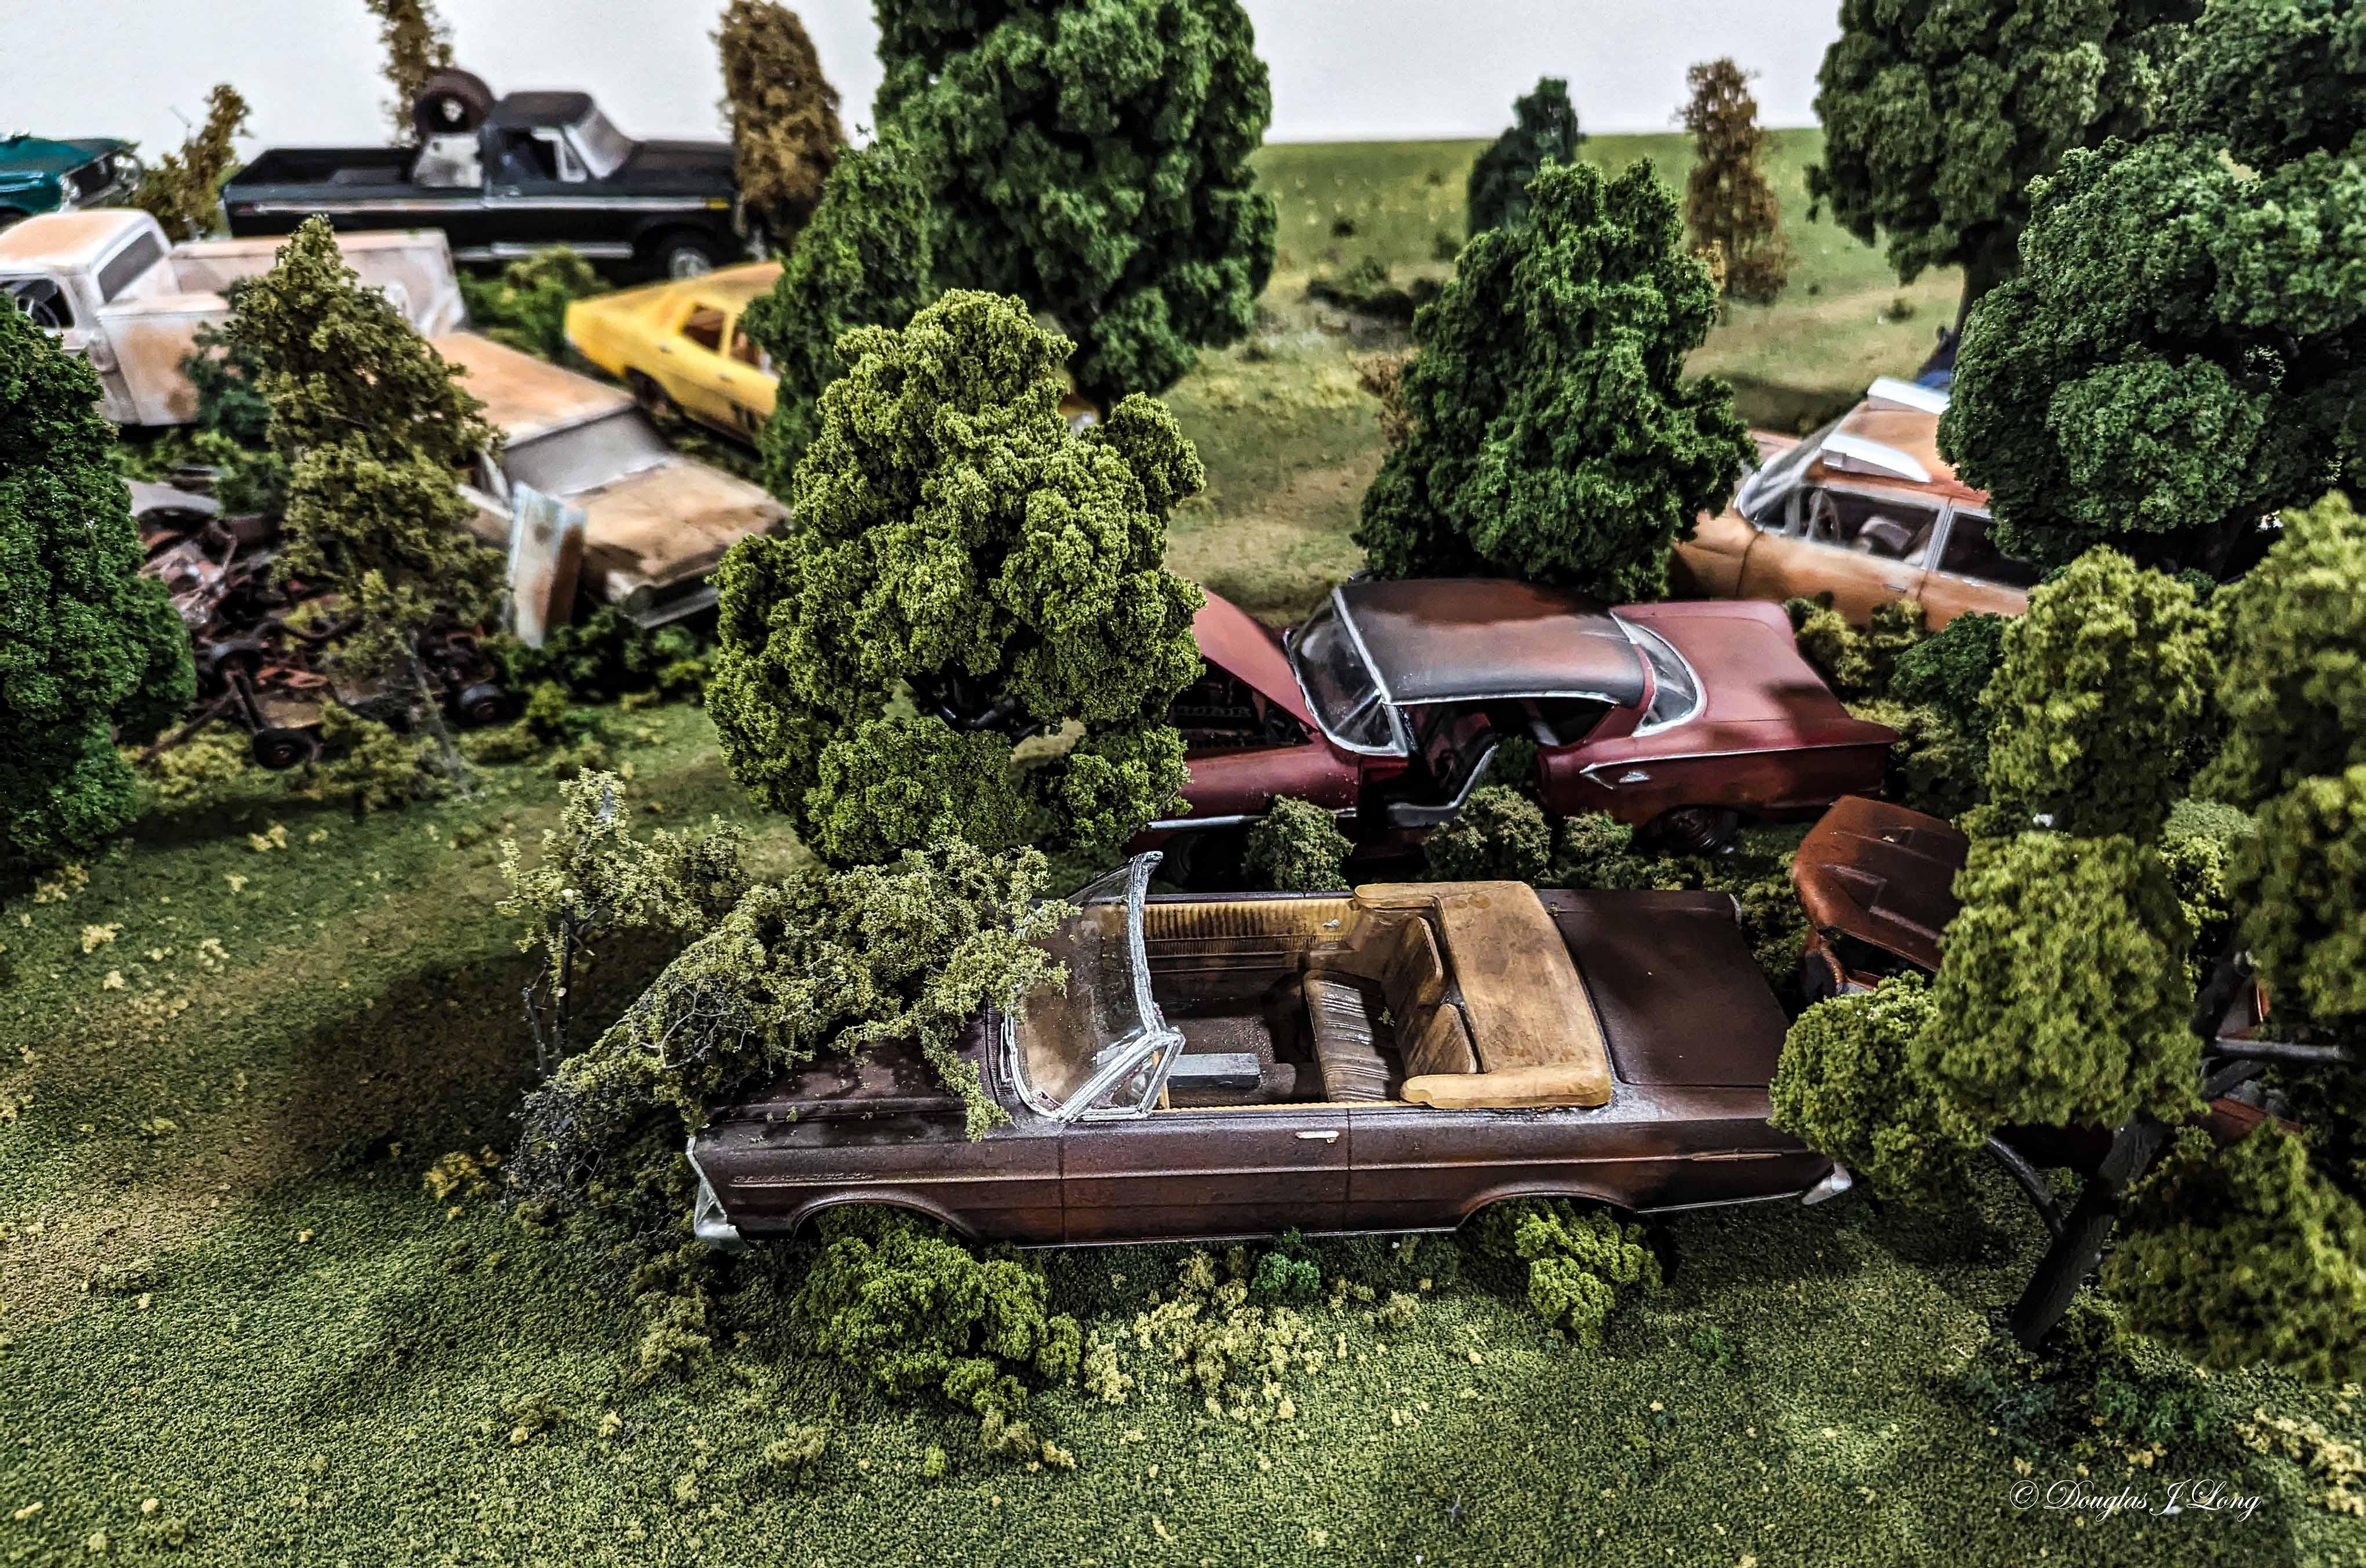
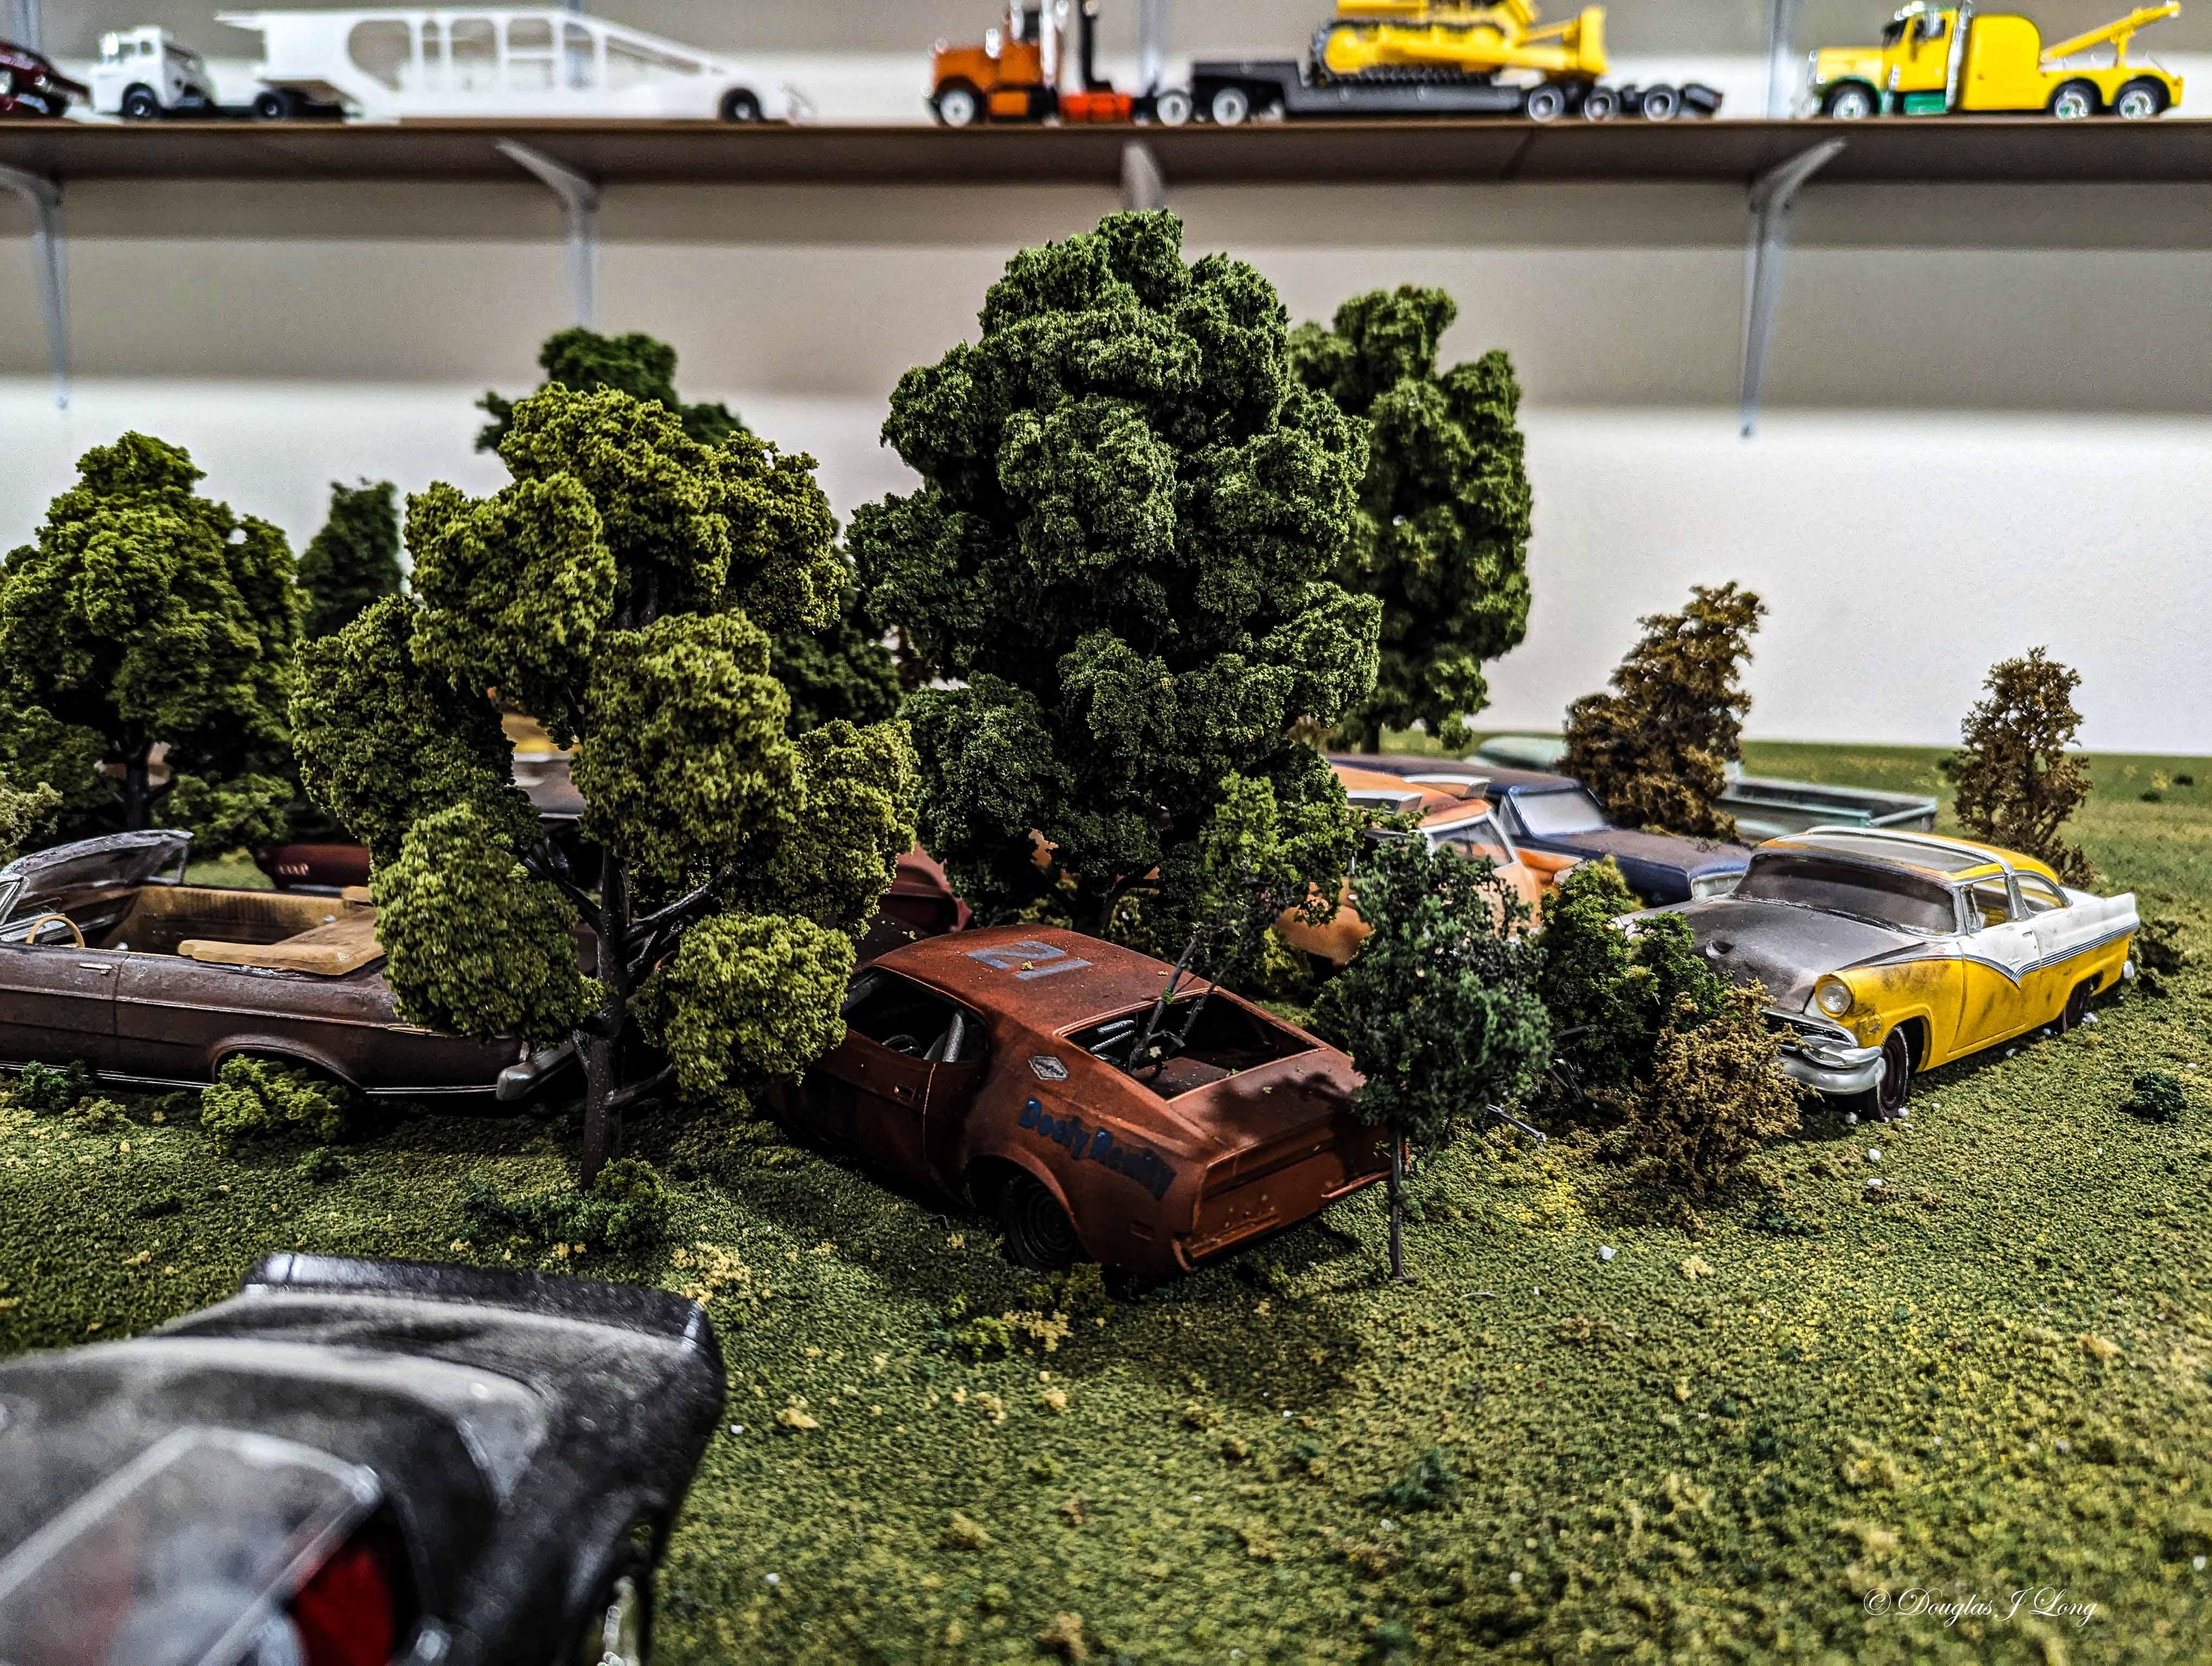
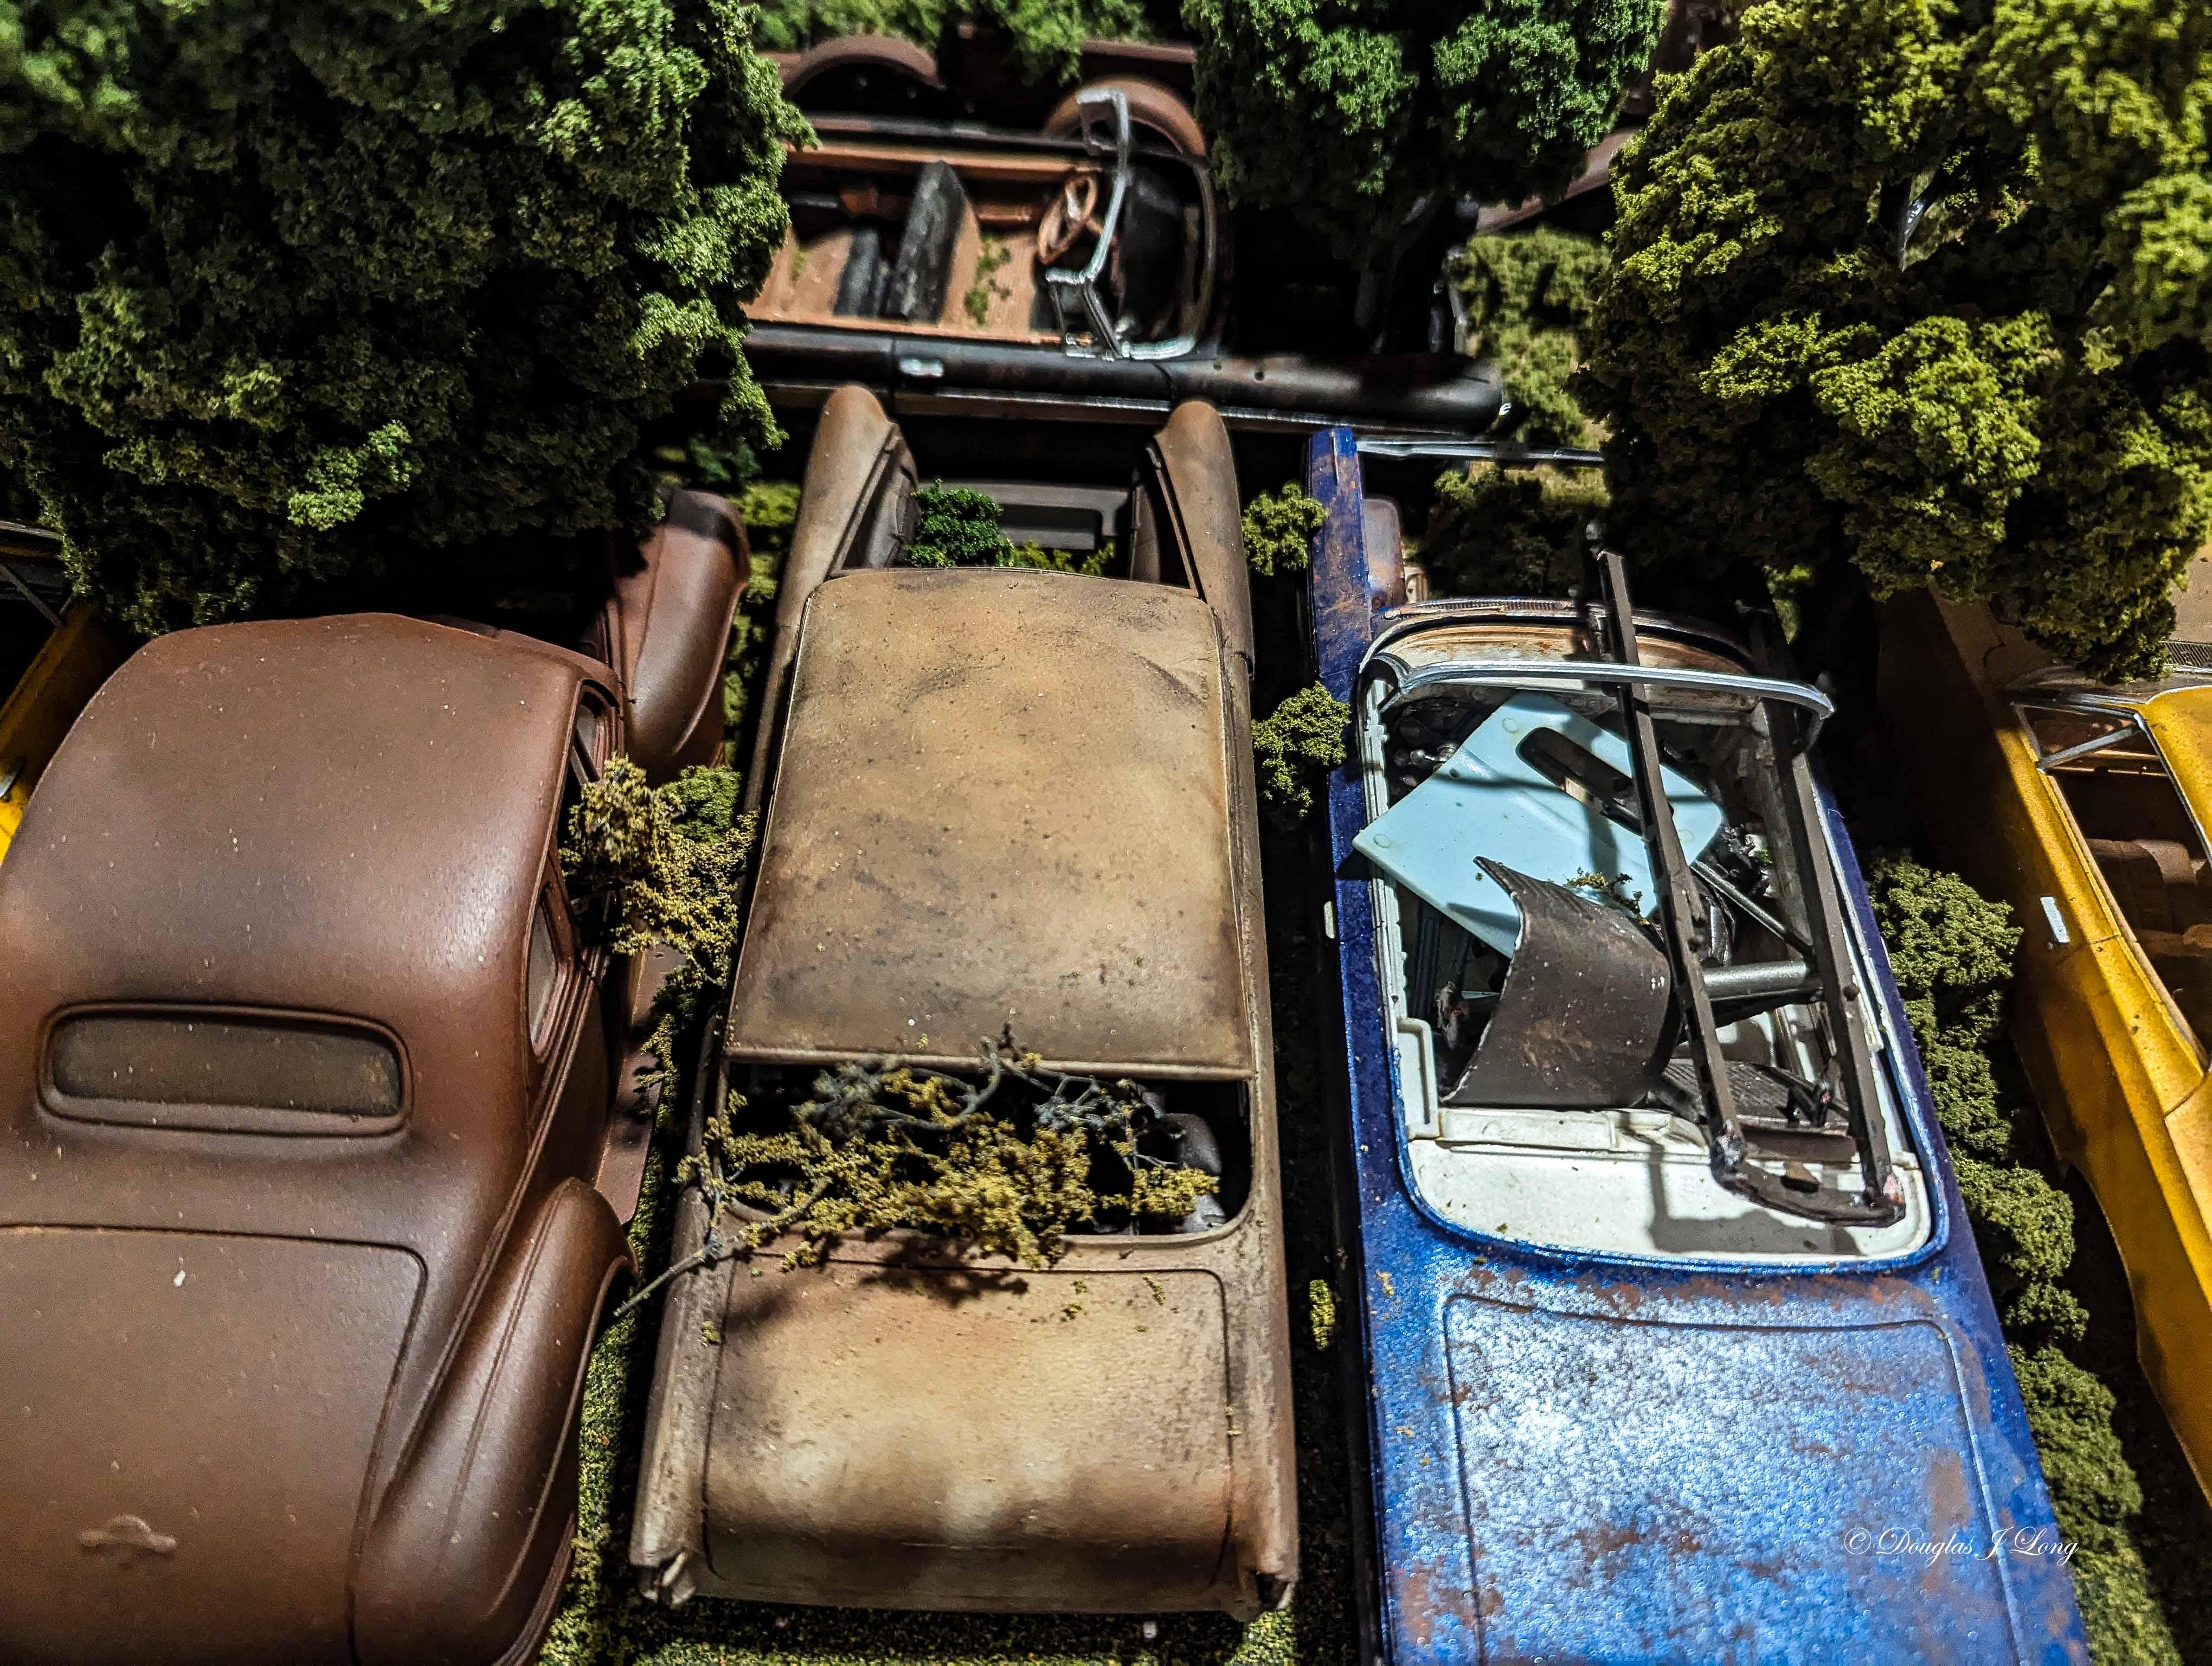
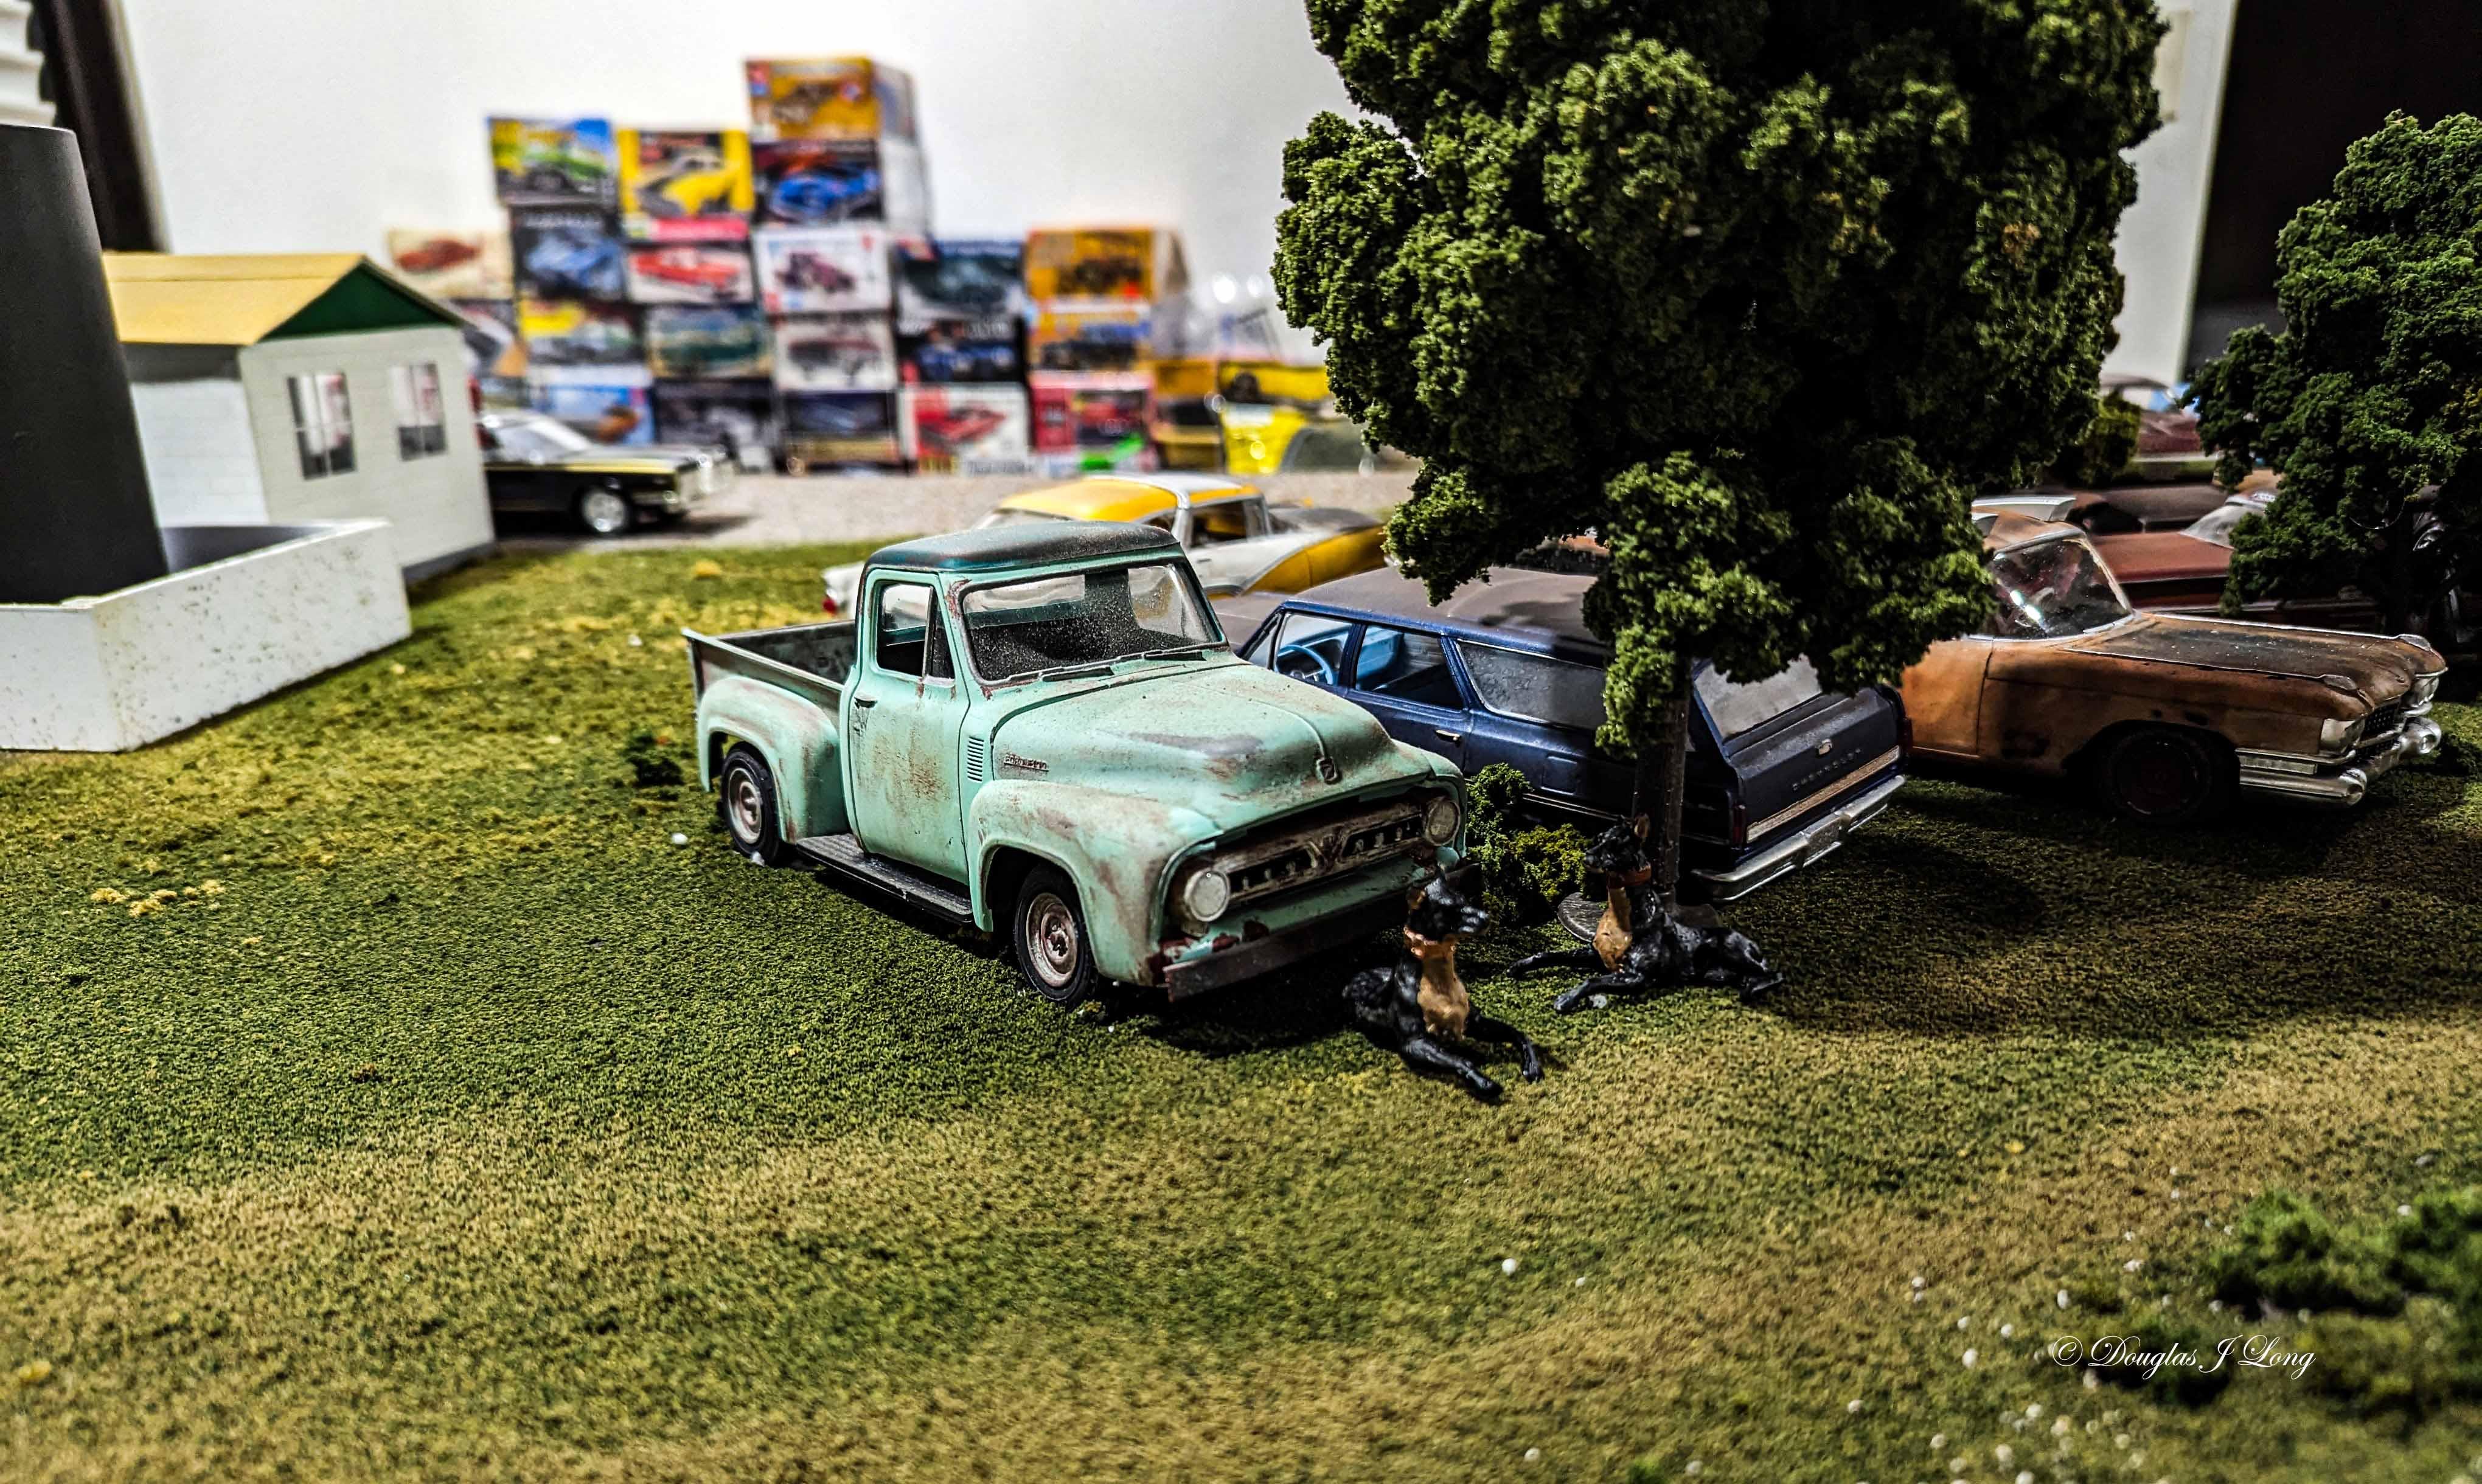
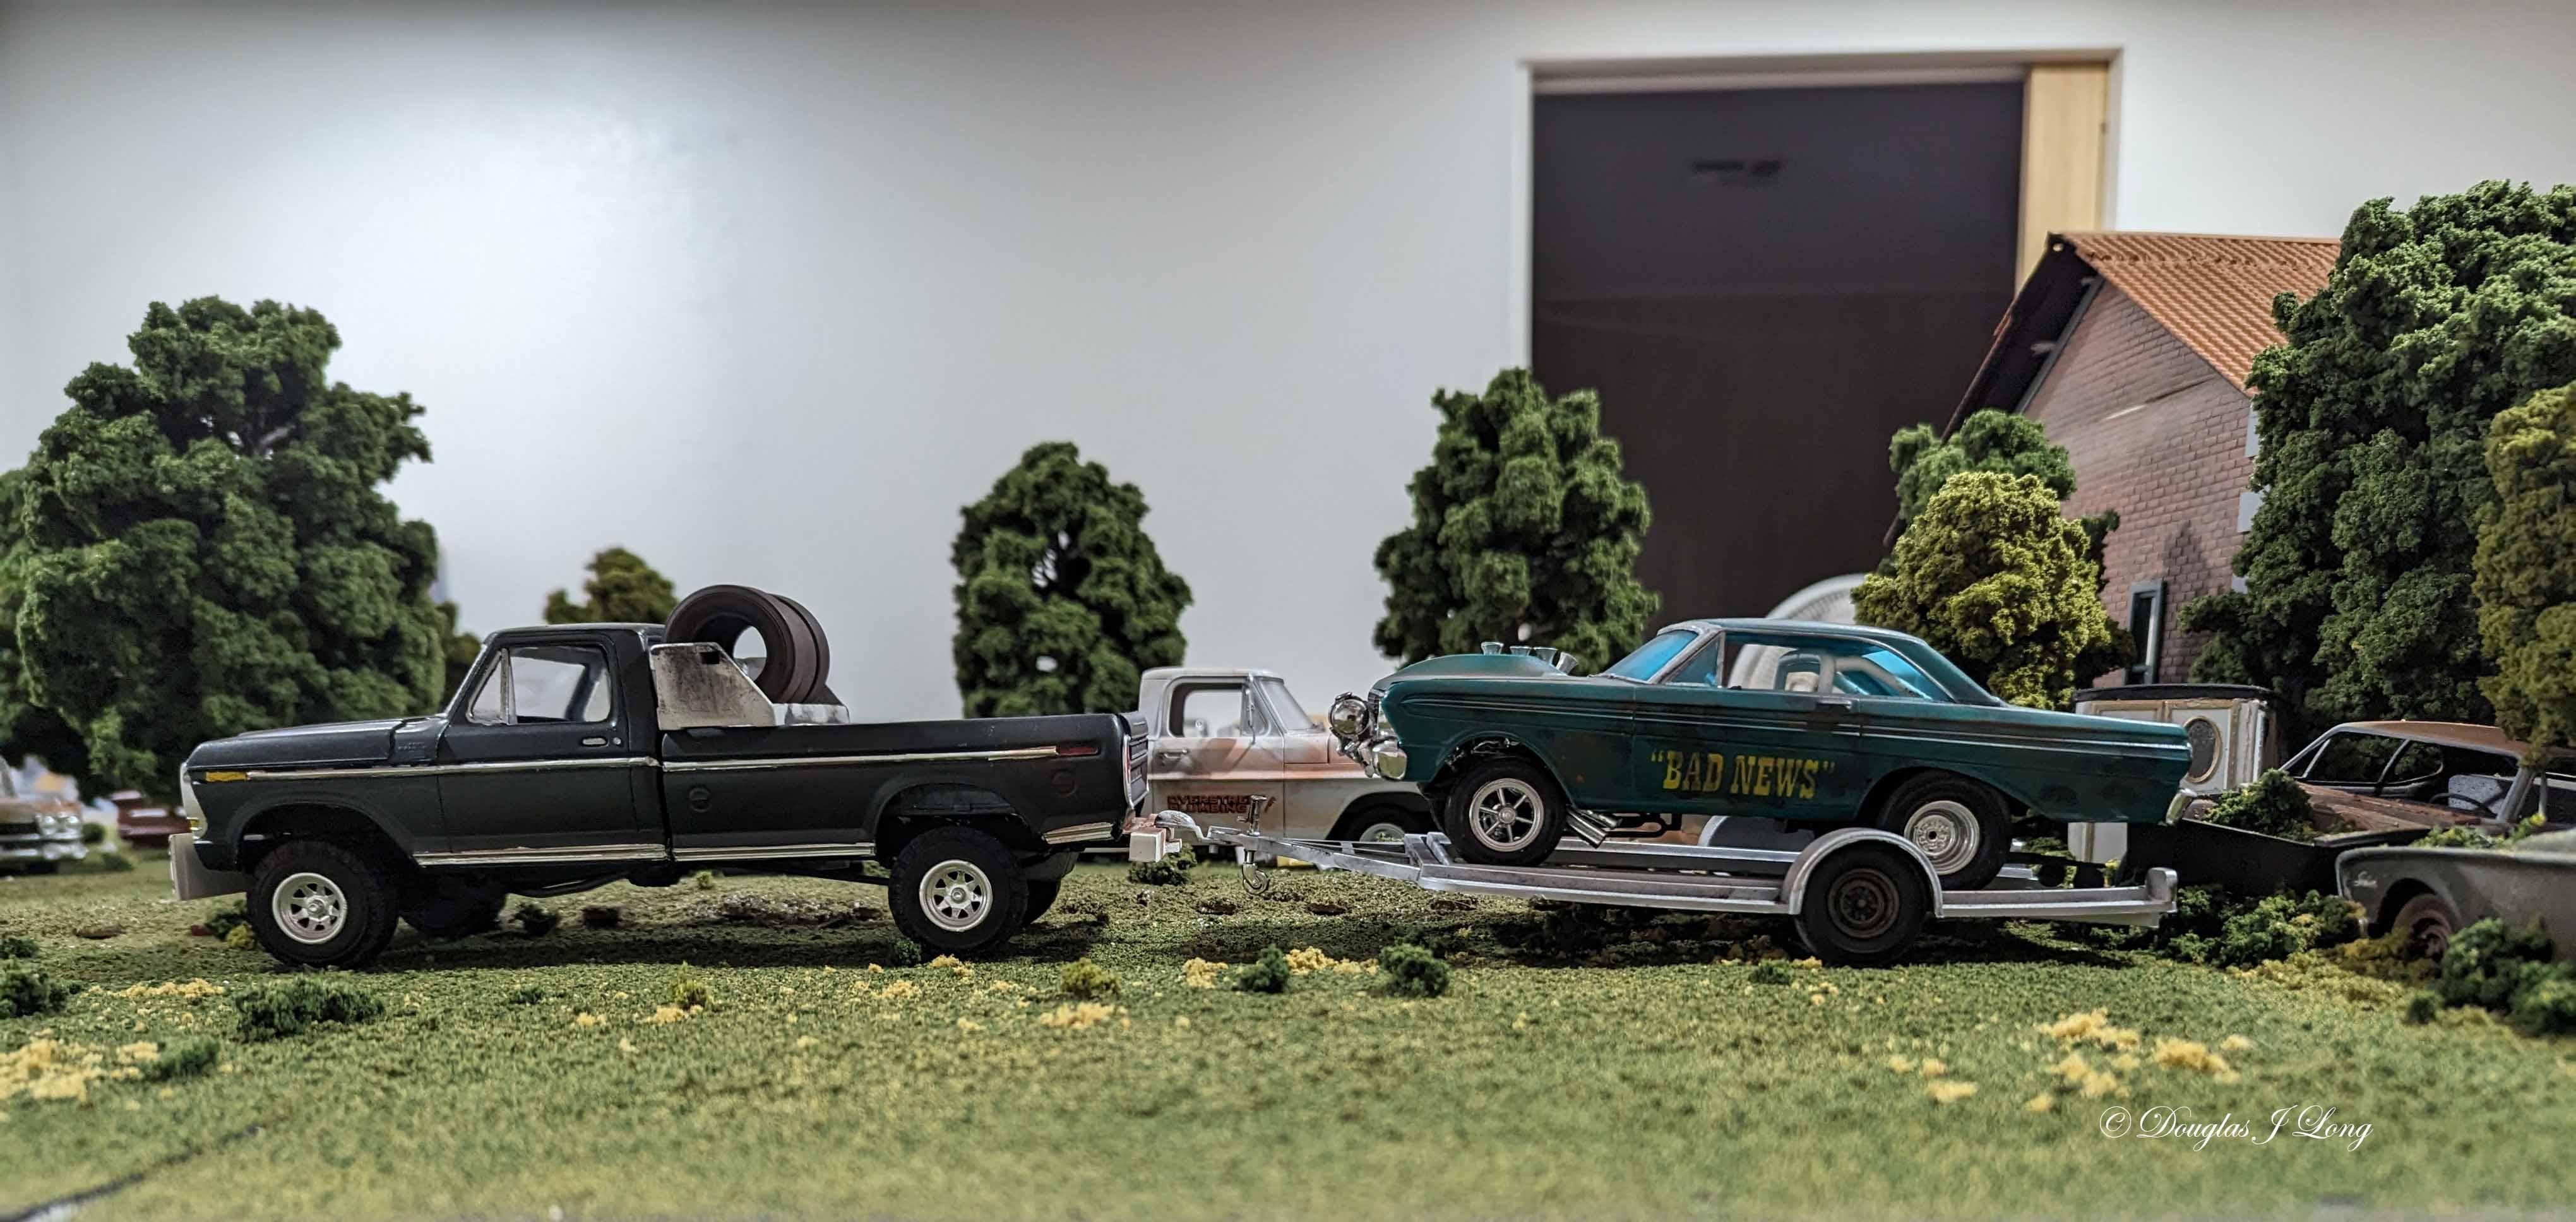
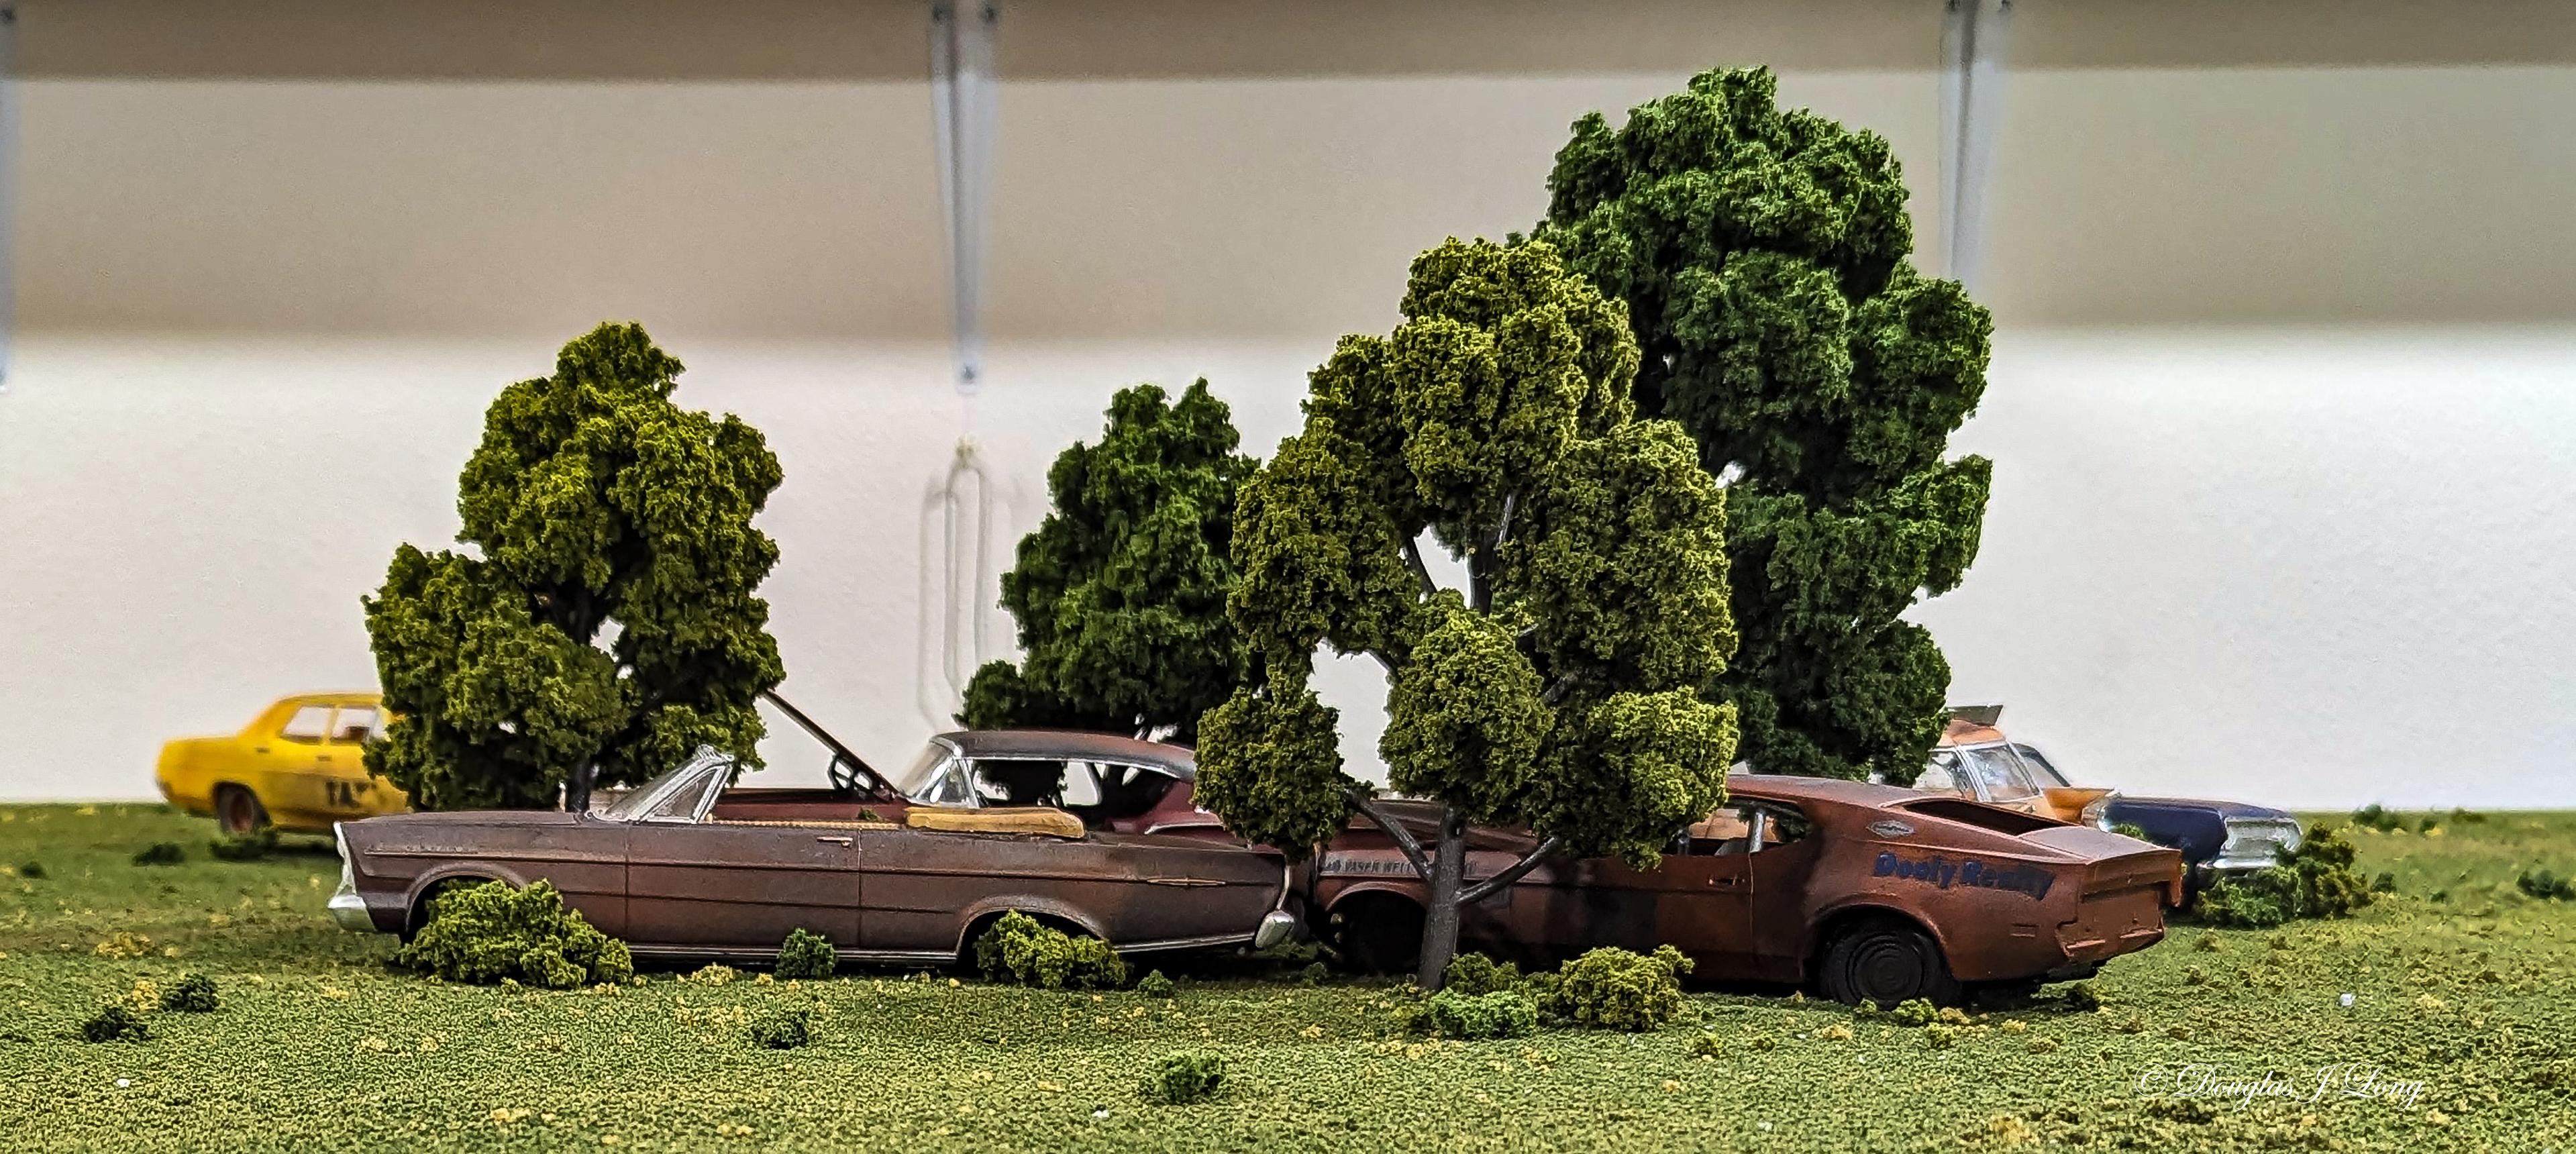
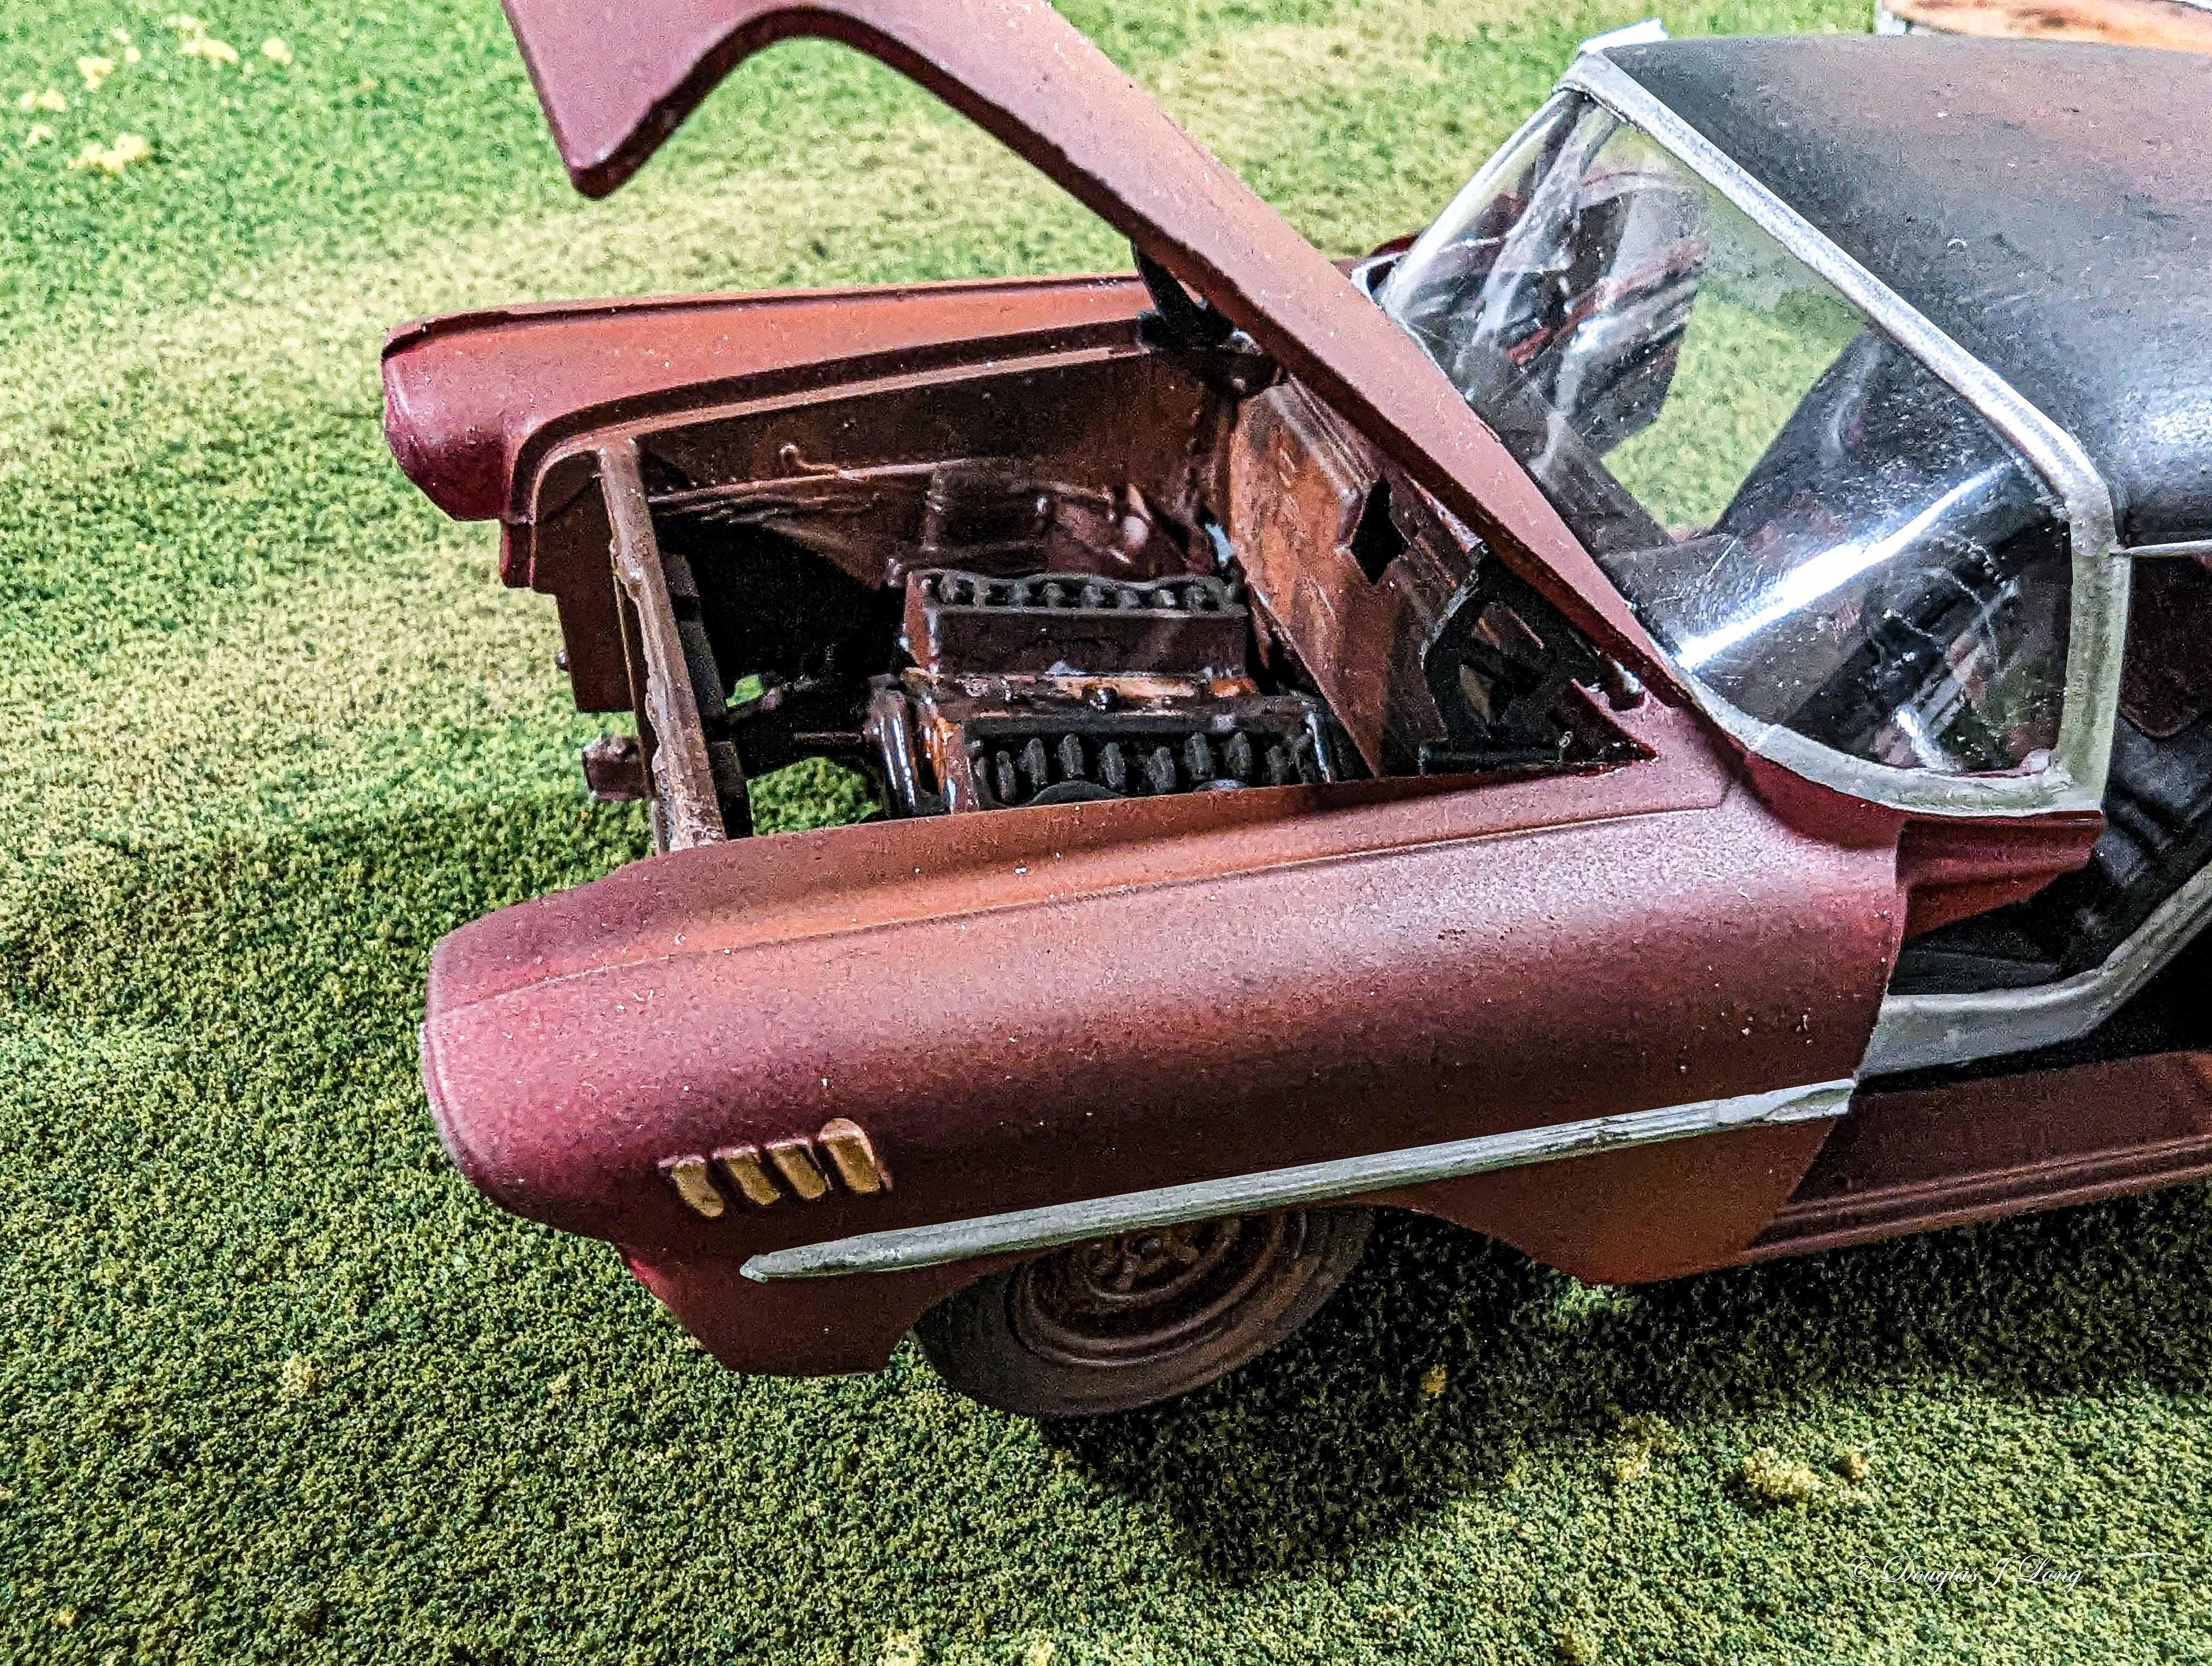
Here we go with more vehicles and scenery added to the junkyard diorama. I finally got around to adding some sections of the abandoned railroad spur roadbed. Two of the guard dogs are already claiming this 1953 Ford pickup. I had built and weathered it some time ago, so it was a no-brainer to place it on the diorama. This is another entry in the last few days, in the form of a 1967 Ford service truck. It was given light weathering. I wanted to add this rig because I've seen this in real life. It is one of those things that makes no sense to the casual observer. Why would somebody park the rig, of probably 10 years old, without even removing the car from the trailer, and why leave a perfectly good 4 wheel drive pickup attached and abandoned. Yet this is not an uncommon sight. In this instance, a 1956 Ford Crown Victoria, has experienced a substantial engine bay fire, probably in the 10th to 15th years of its existence. At that point, it would have just been an old car and not worth the money to repair. My backstory is that the junkyard owner was able to get it. His plans were that he could use parts from cars he had around to rebuild it. Time passed and the son took over the yard, and has plans to restore the old Ford.....someday...In the meantime it sits and he won't sell it. We have all run into that situation at one time or another, and it is always some really cool car.
-
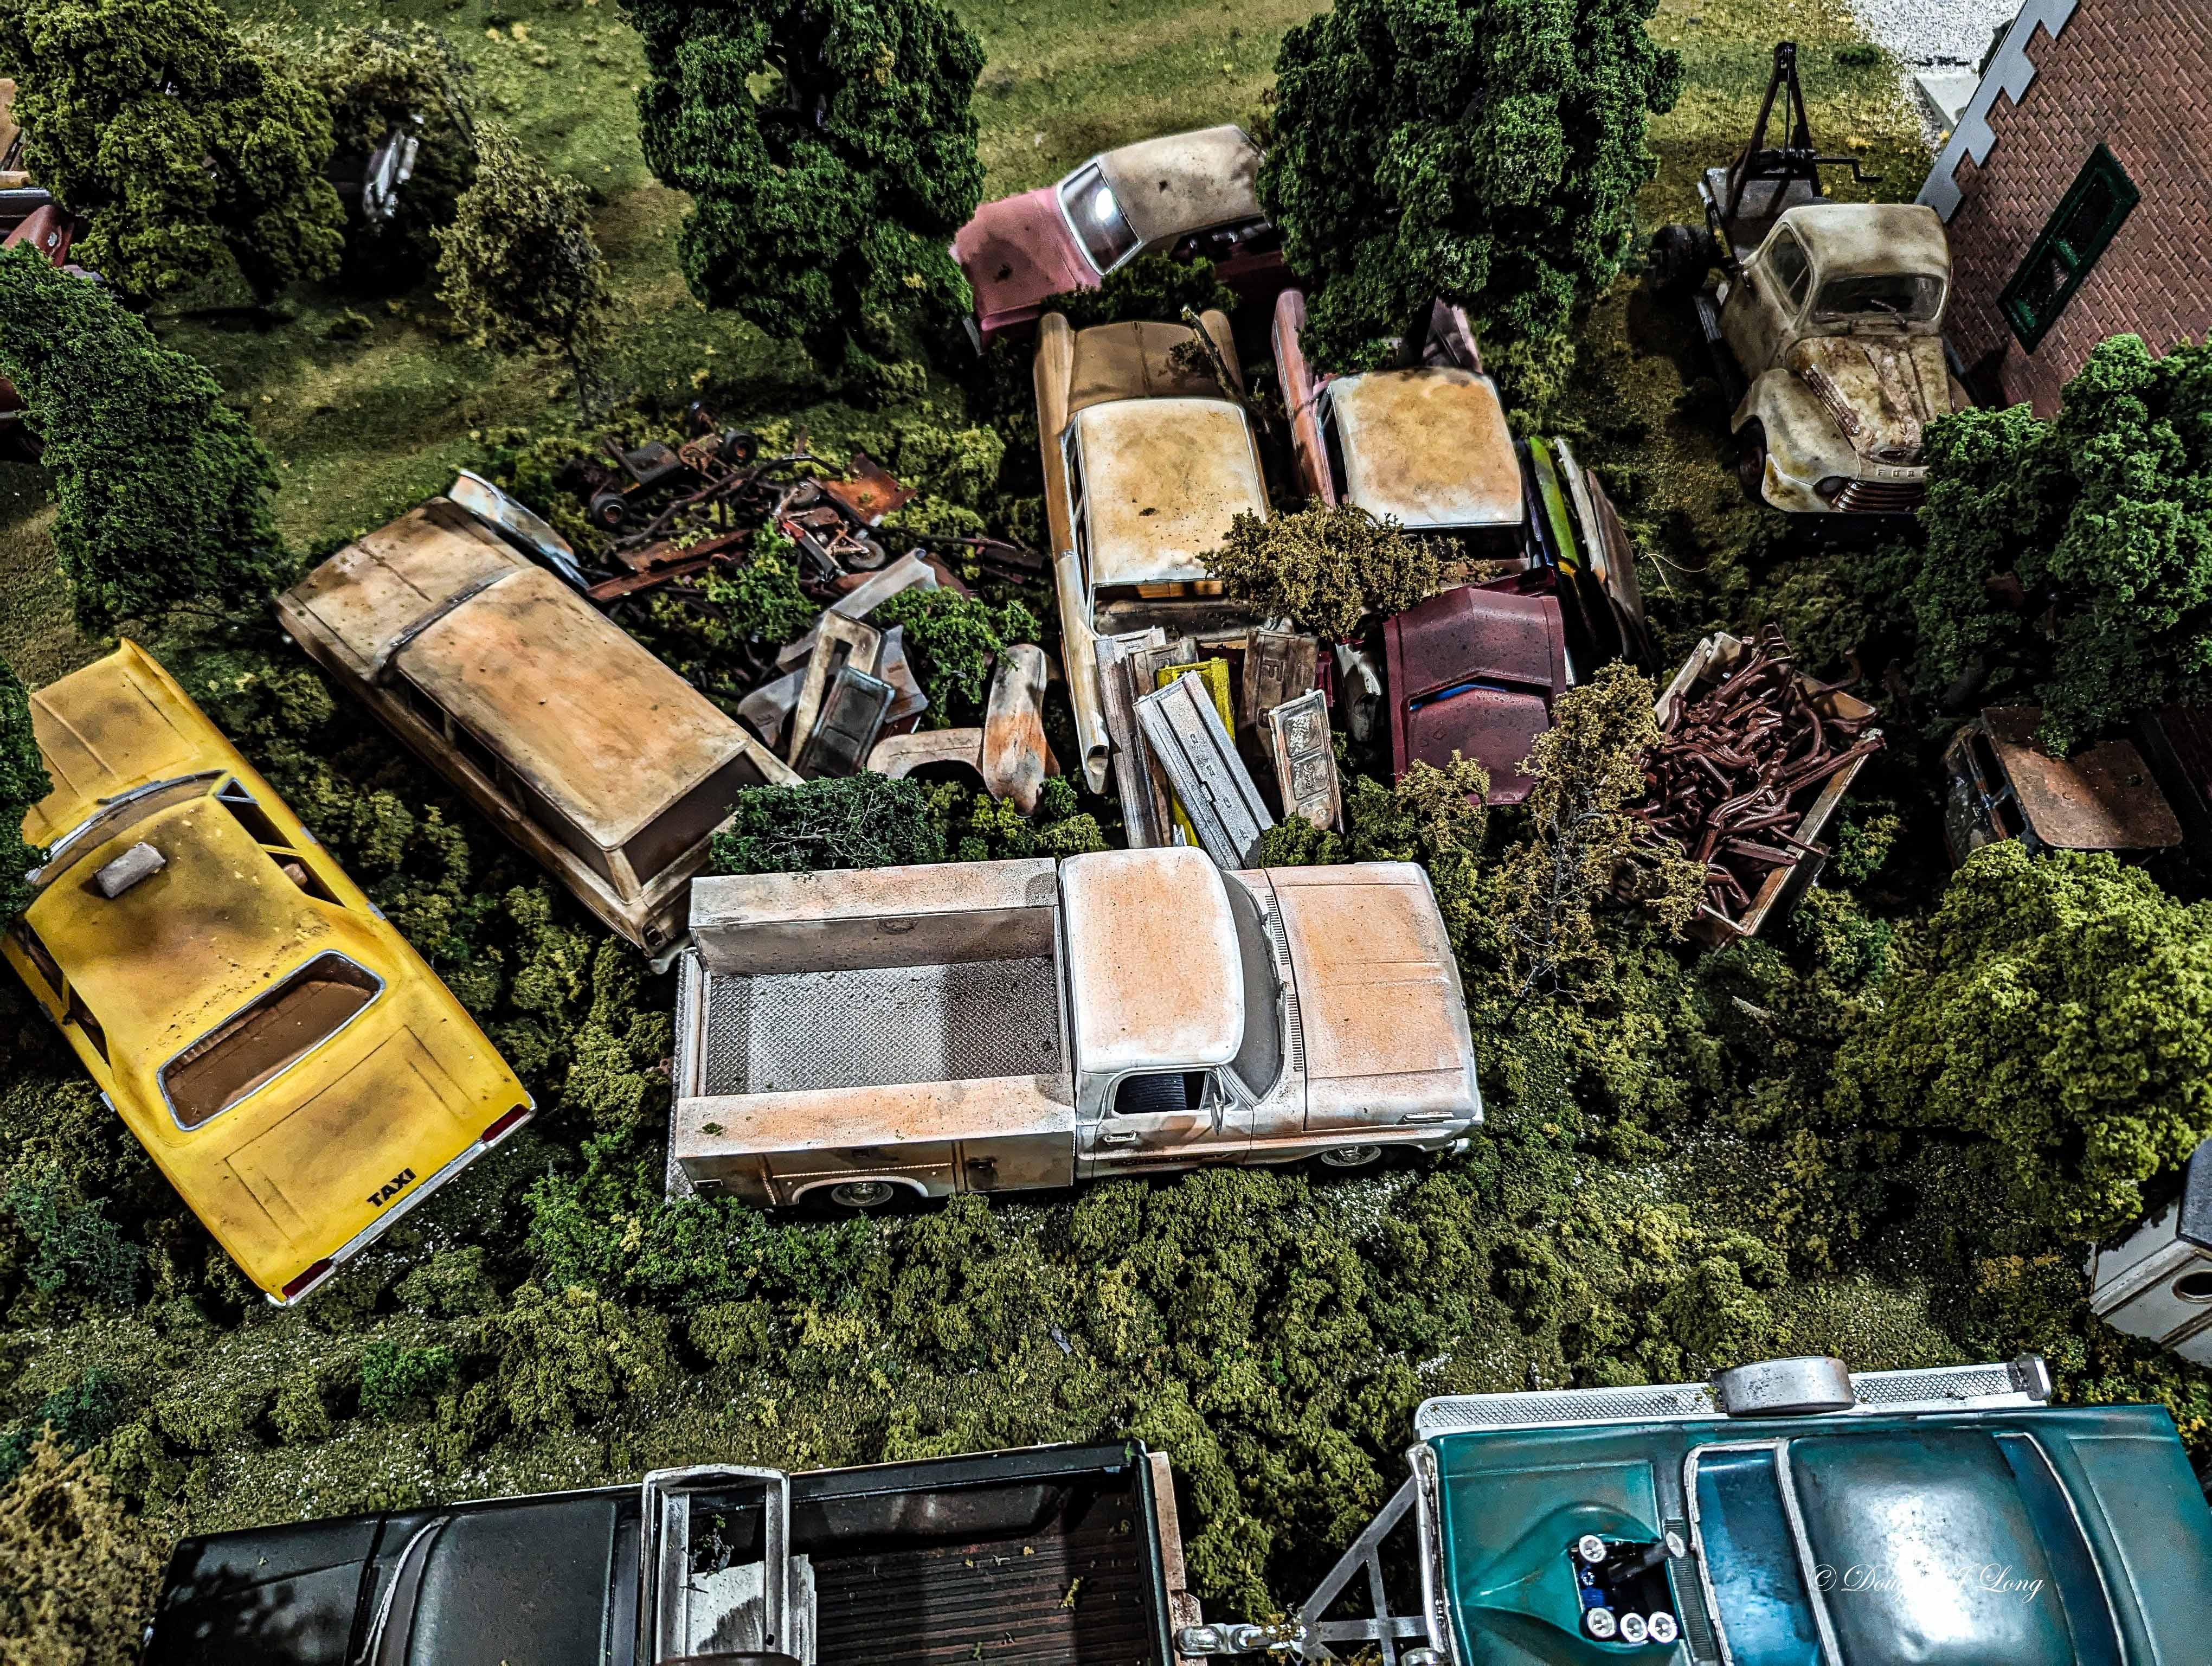
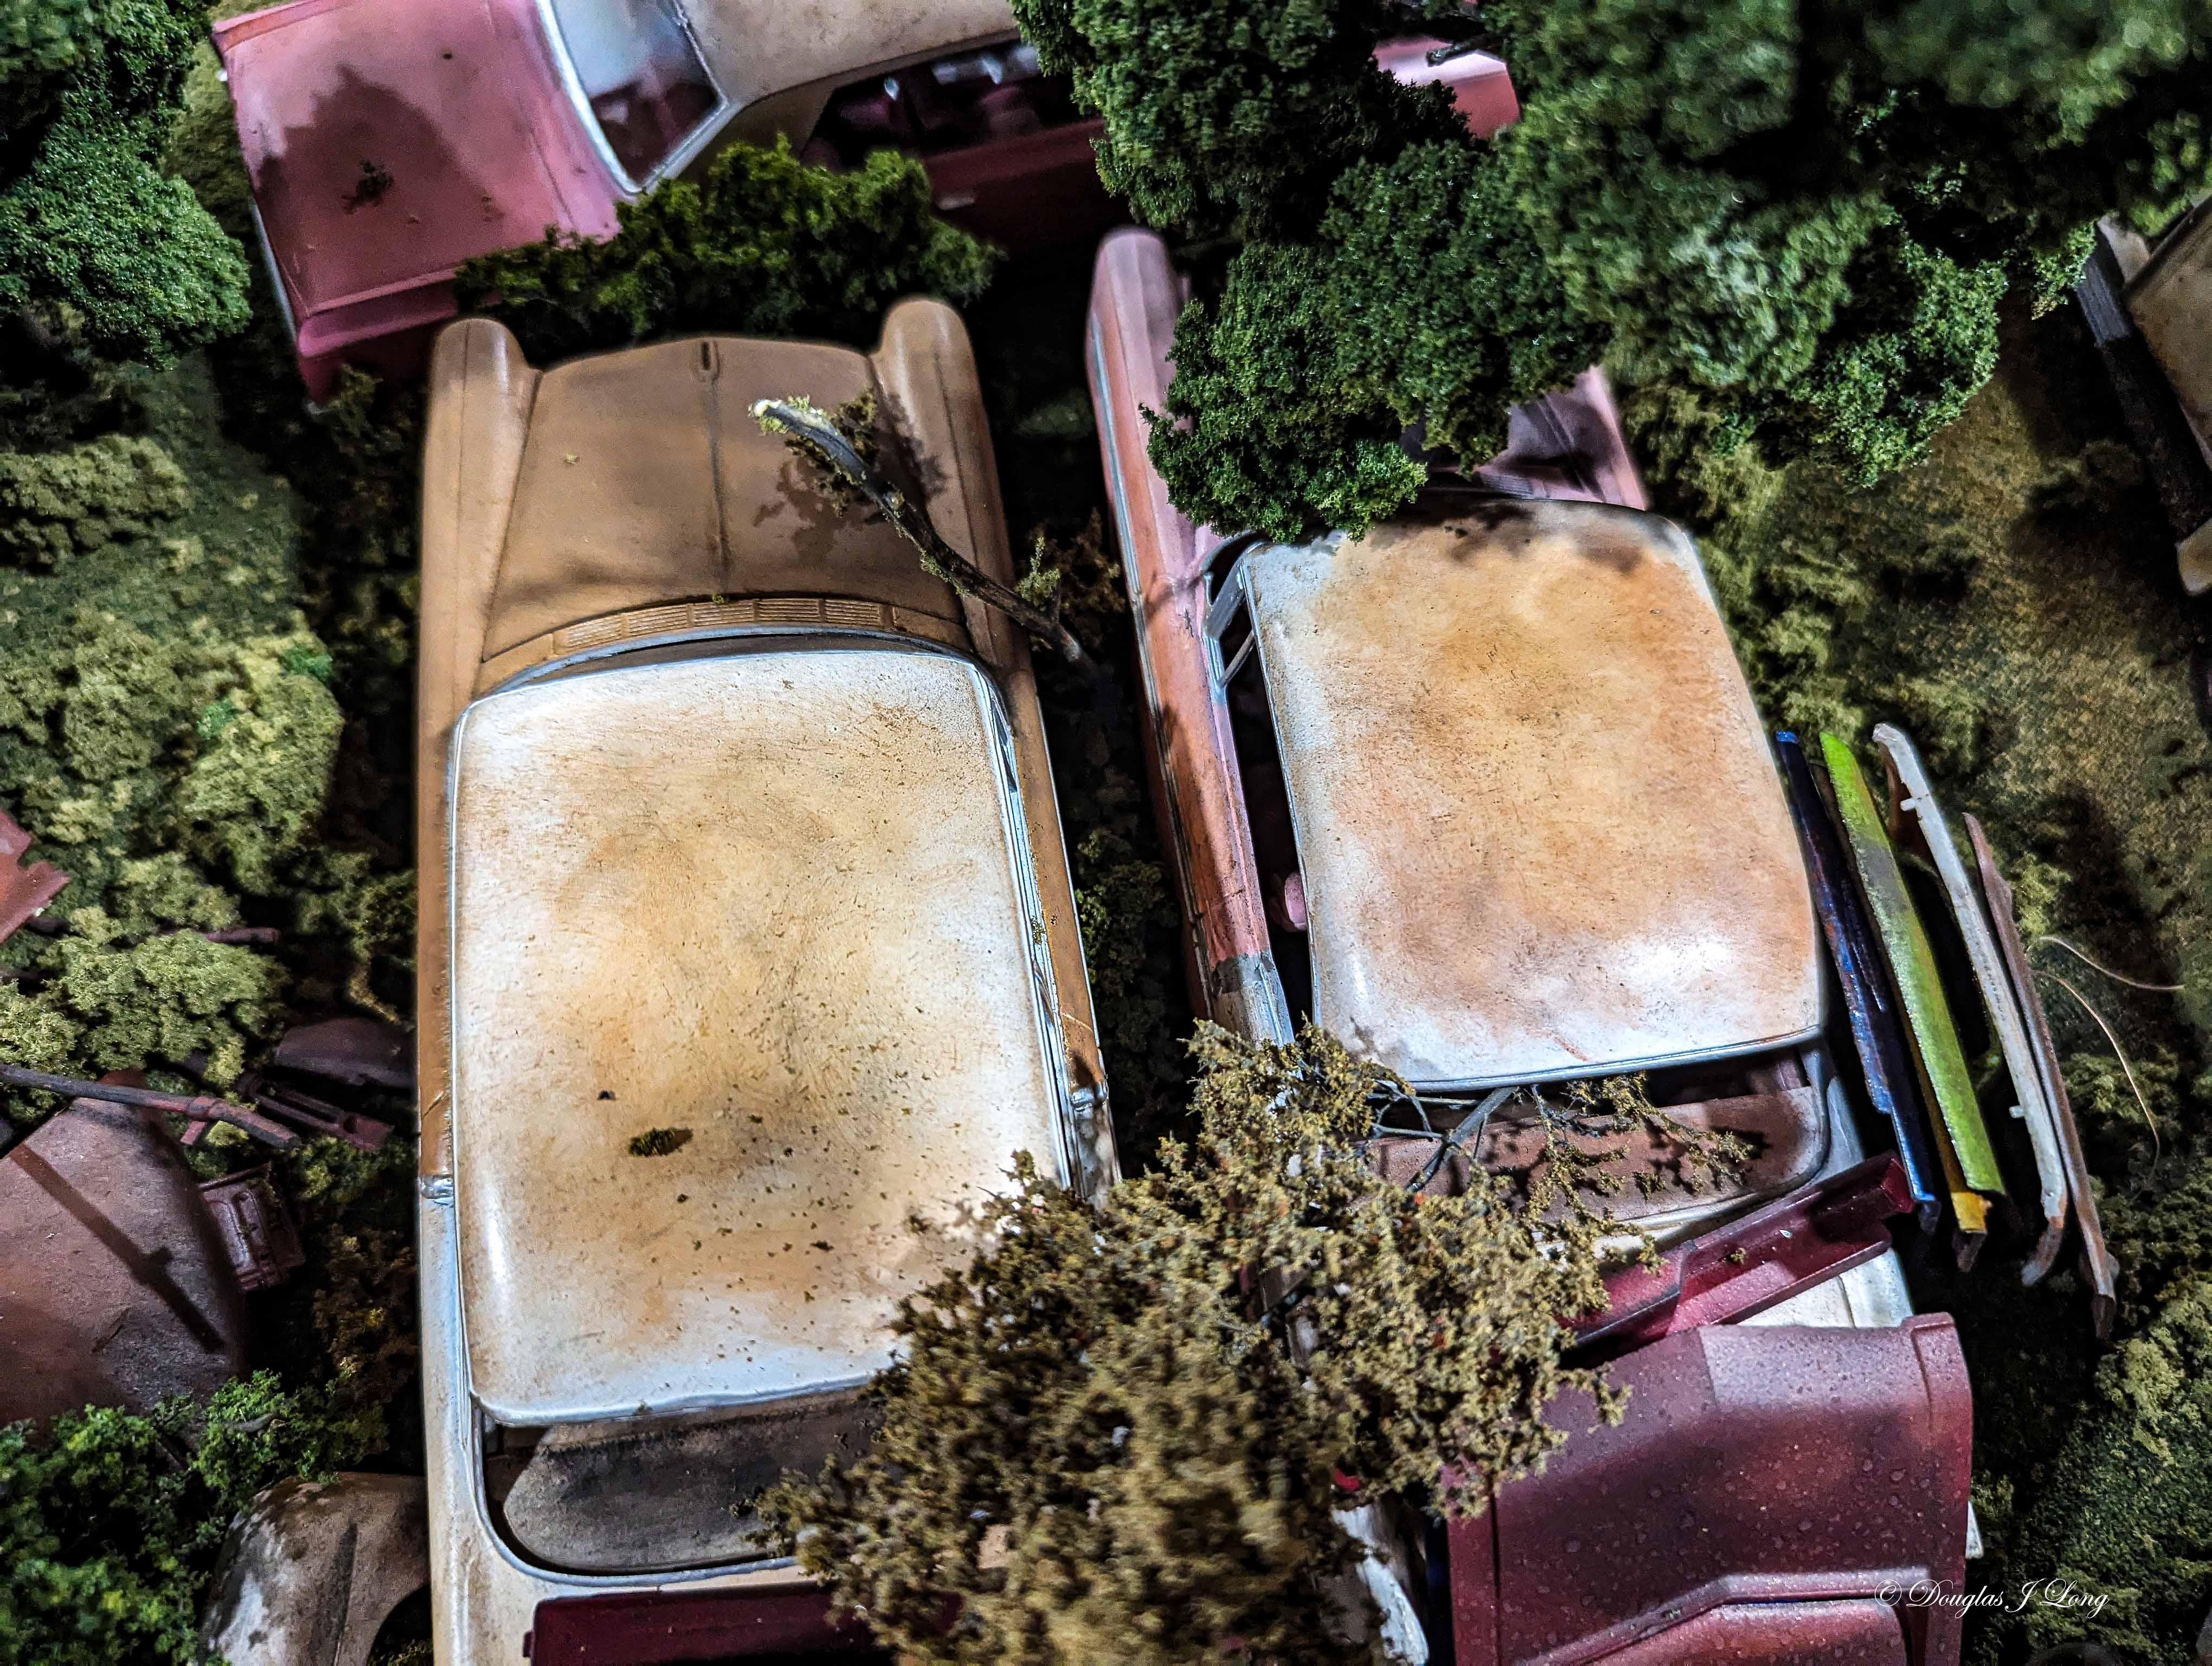
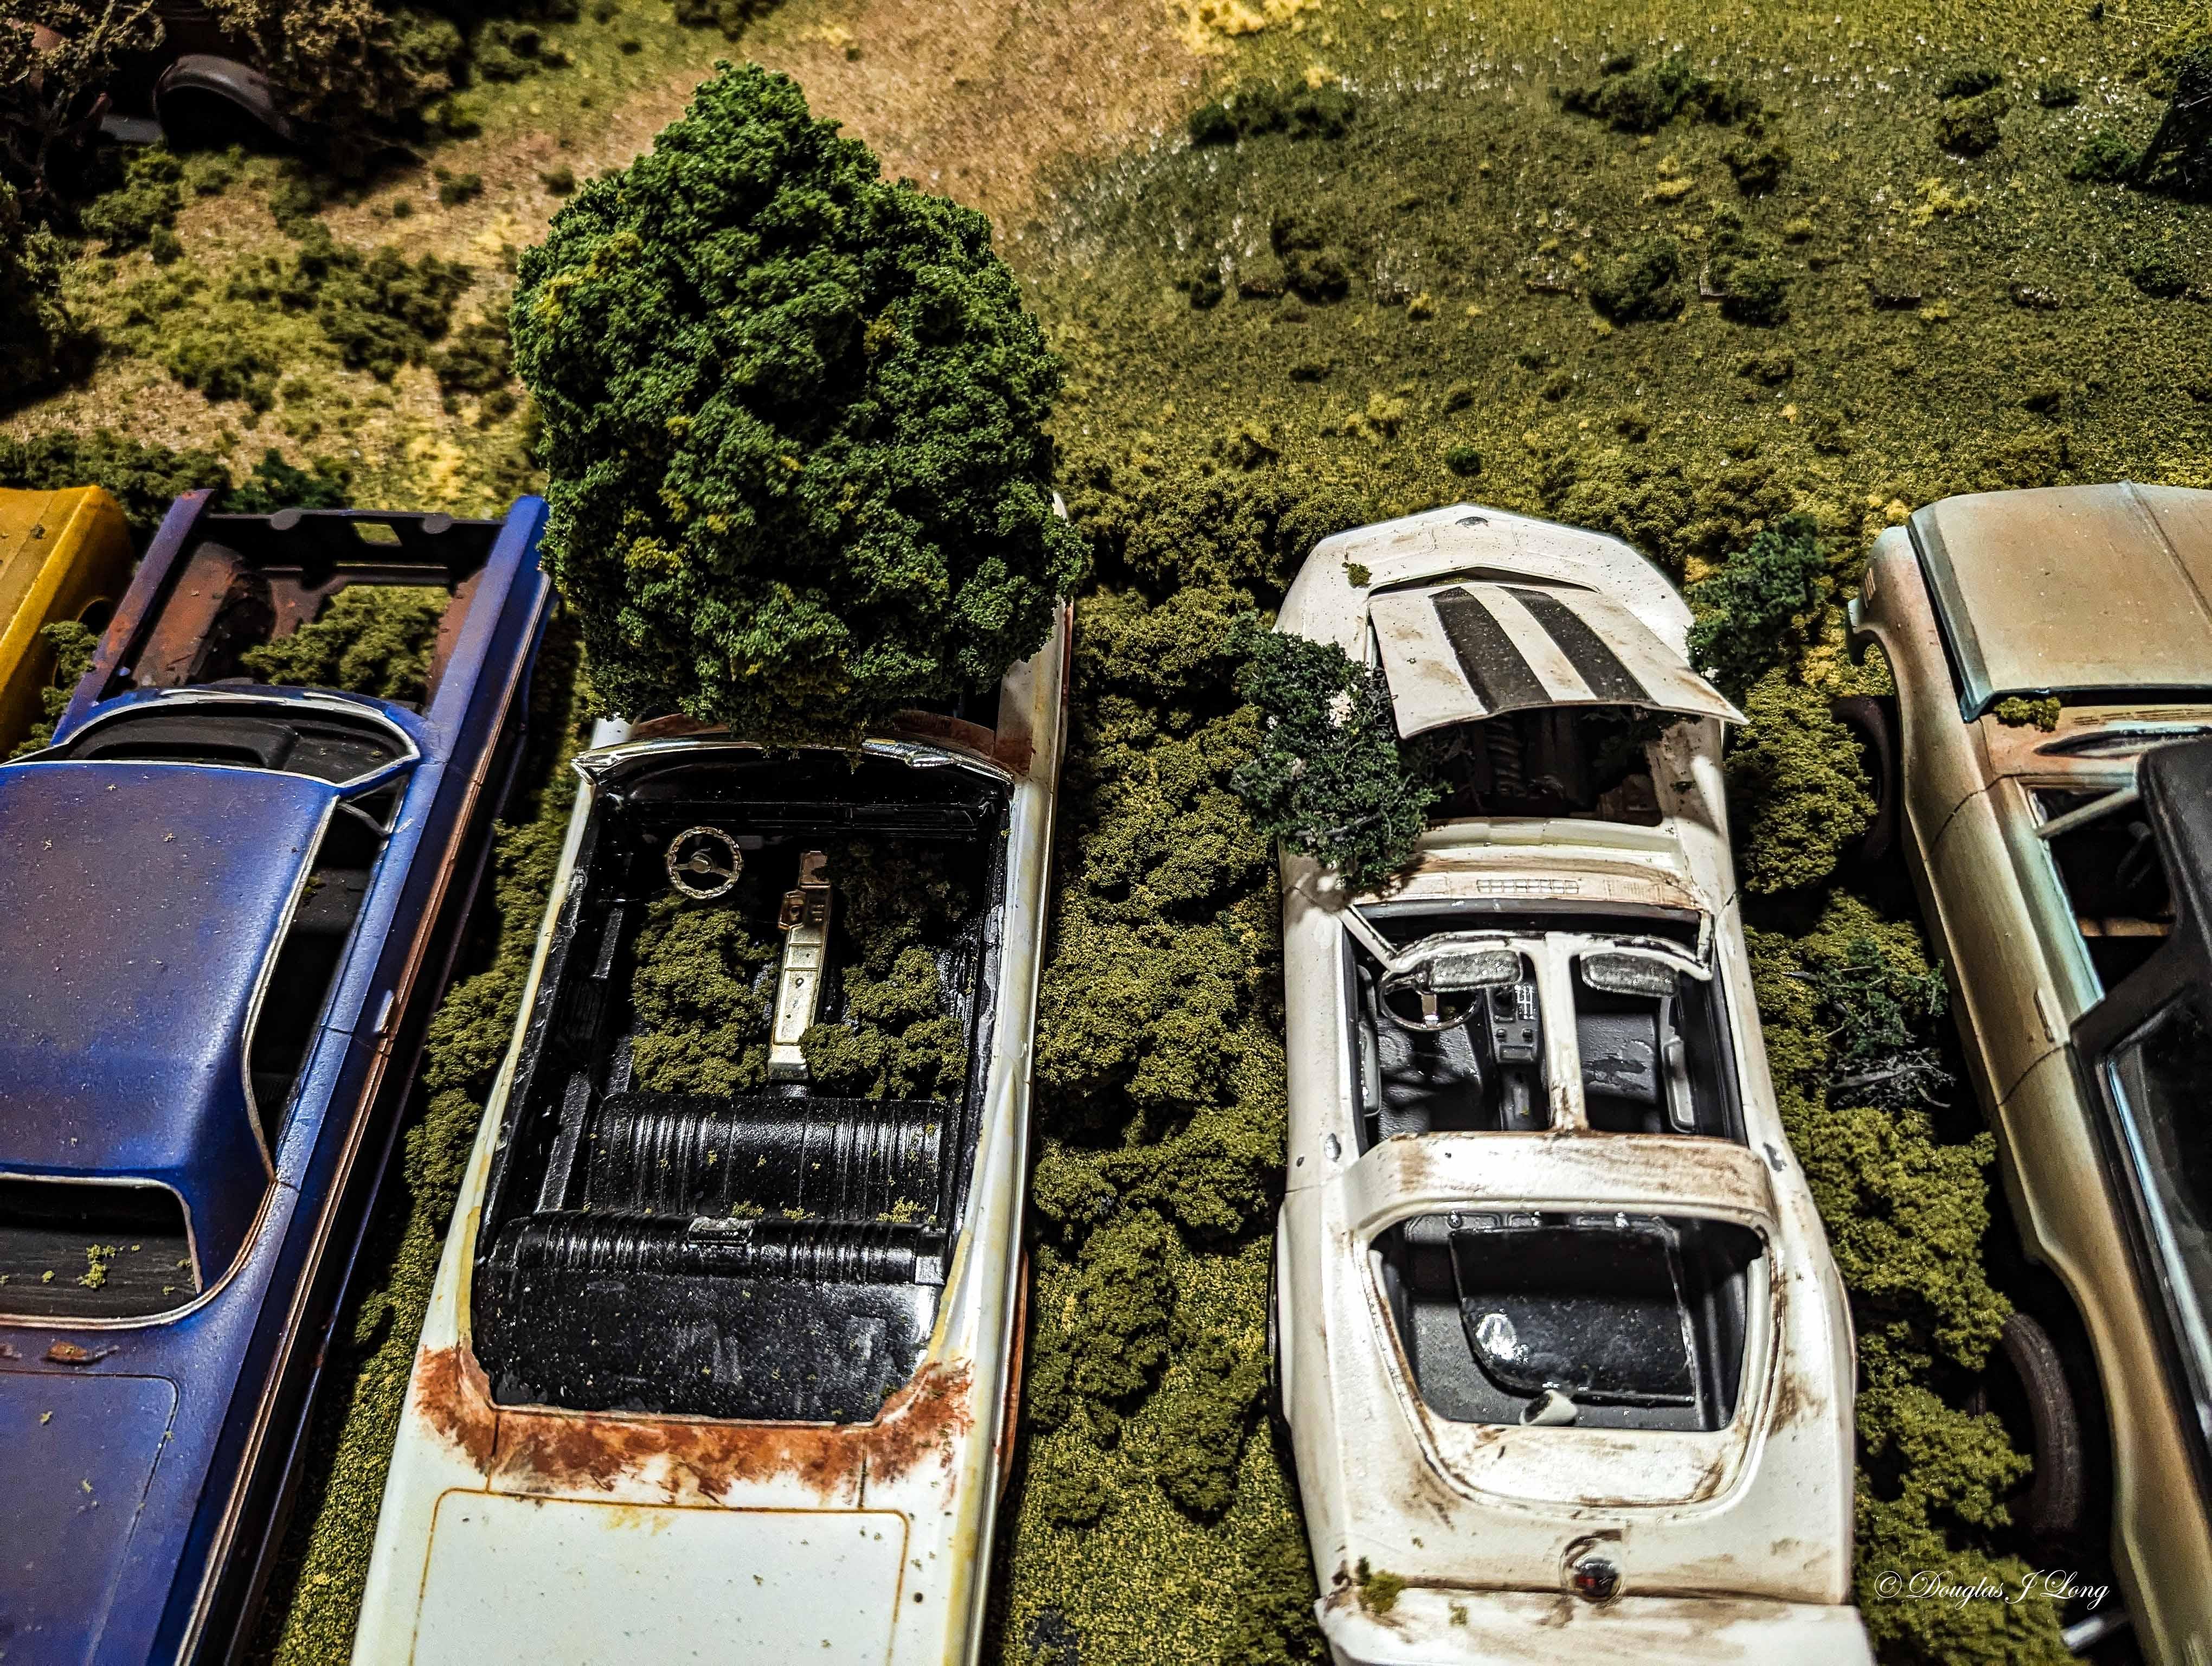
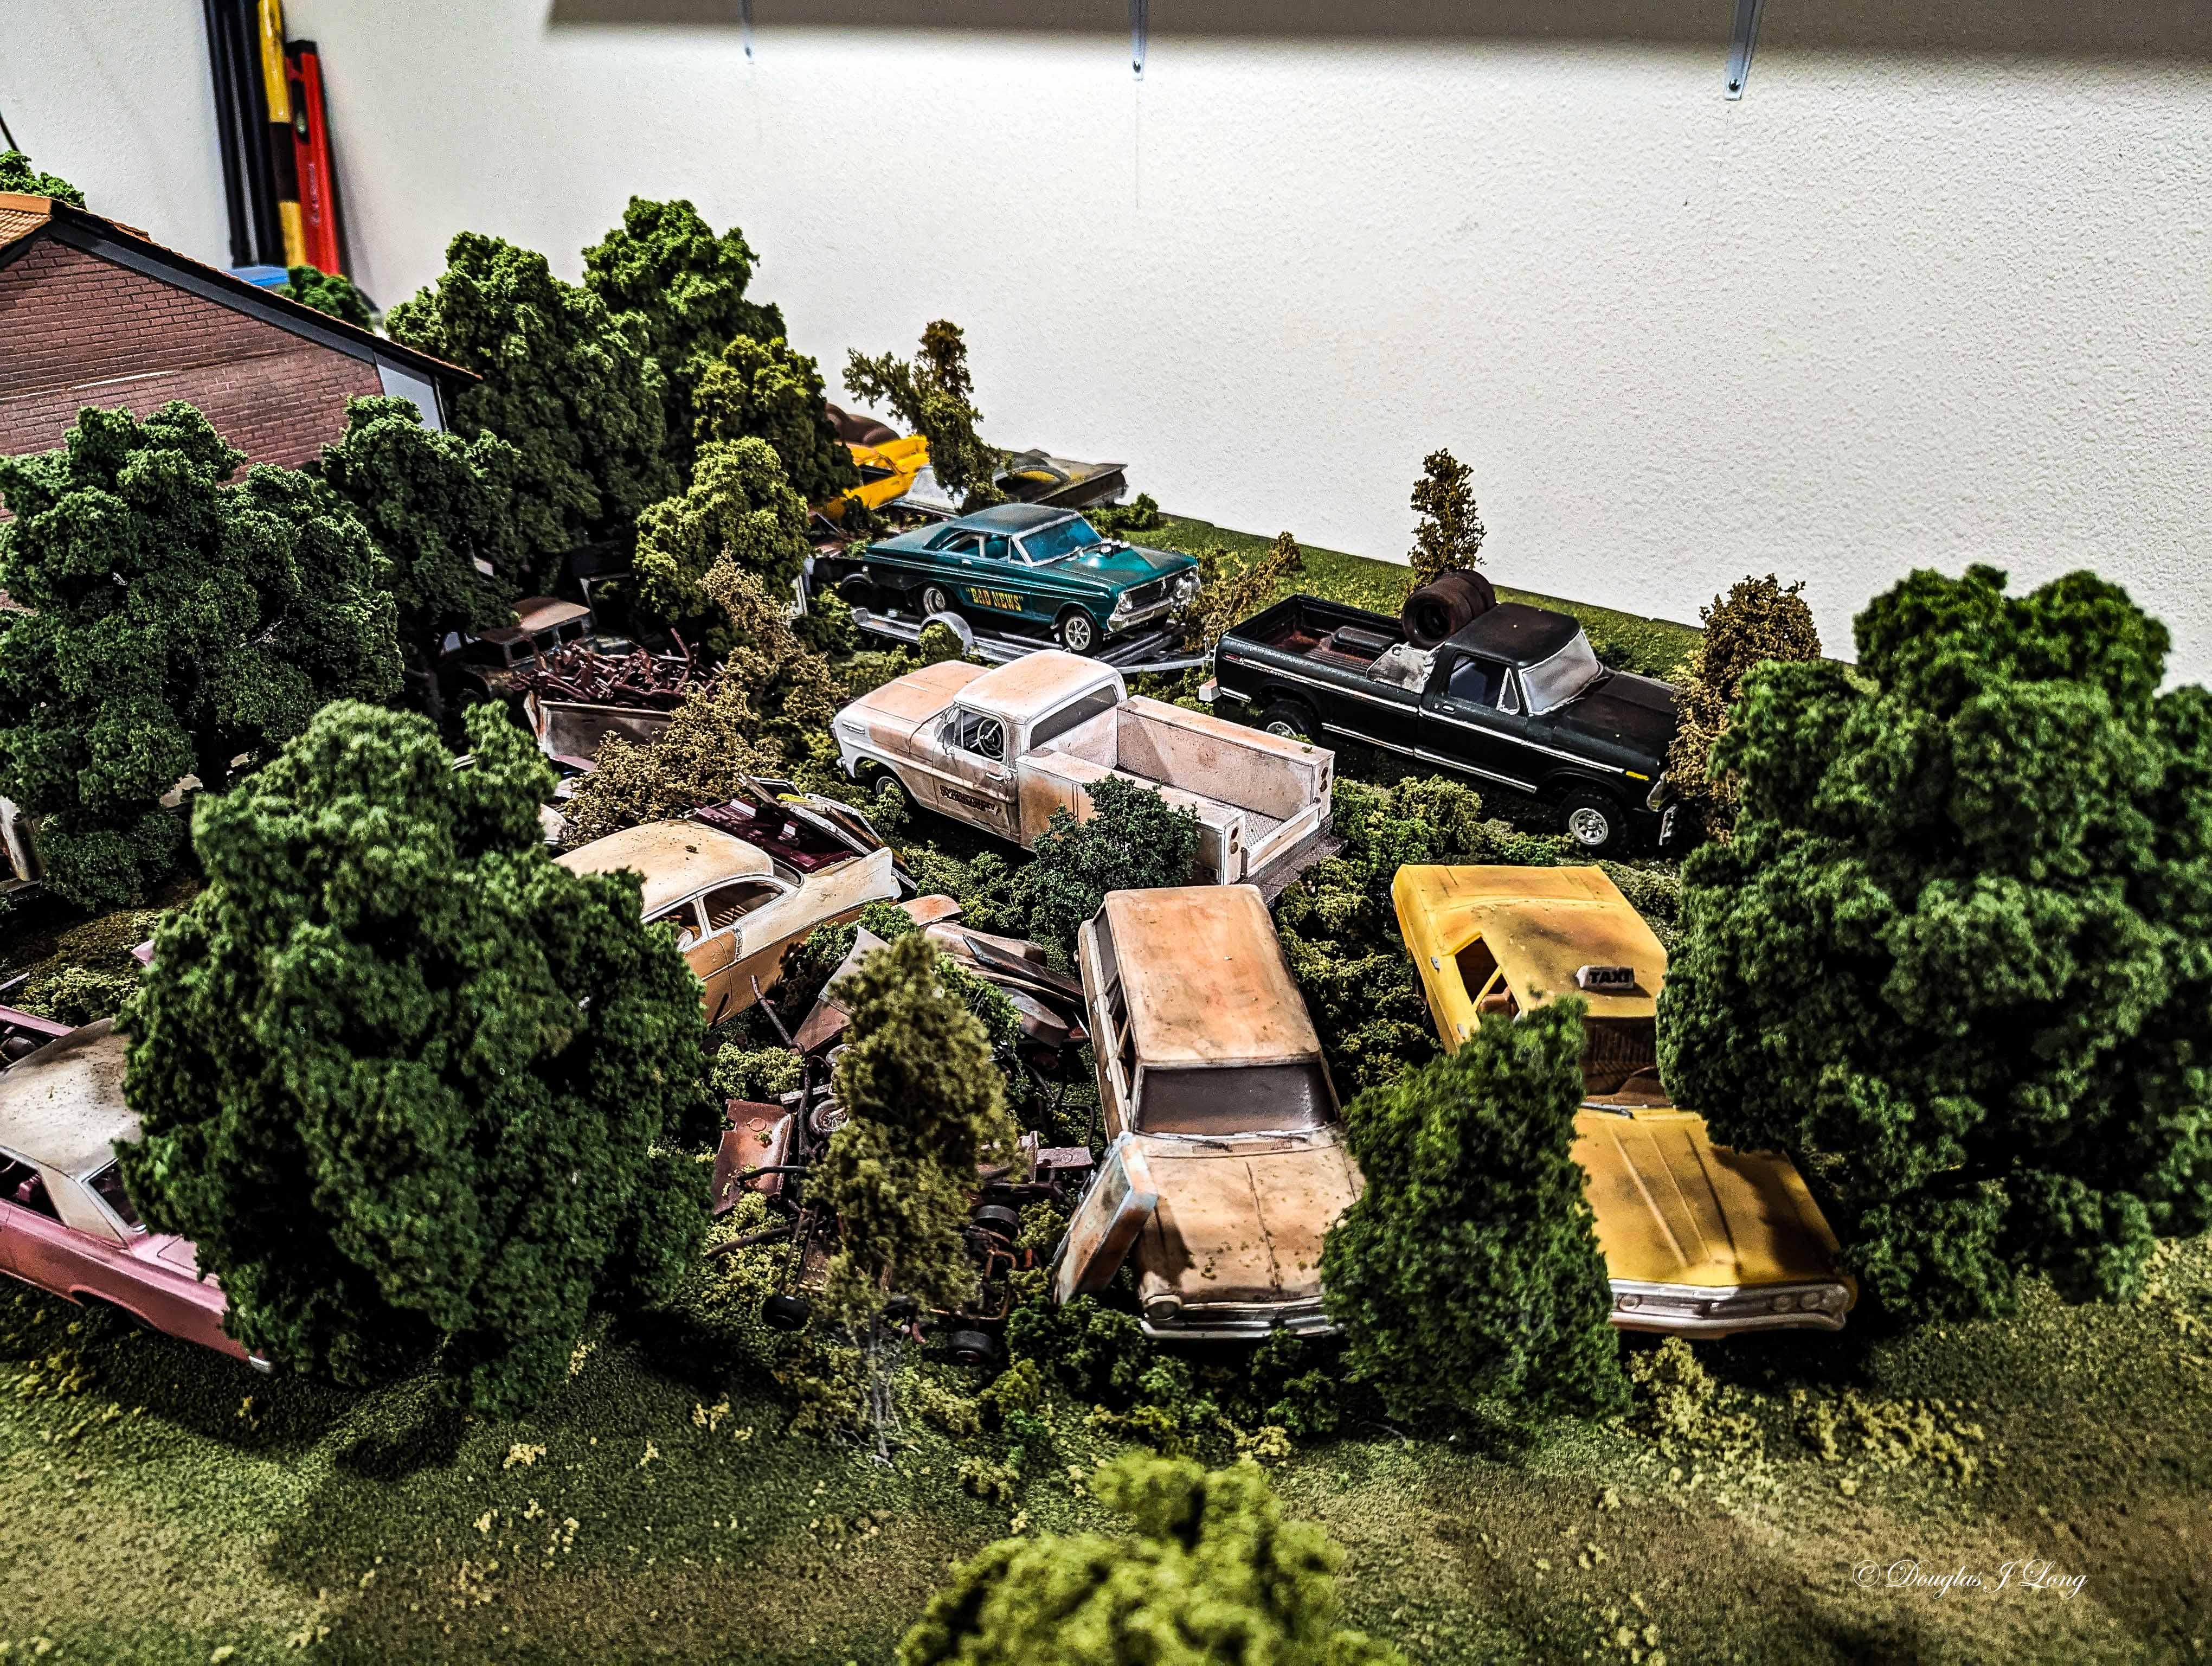
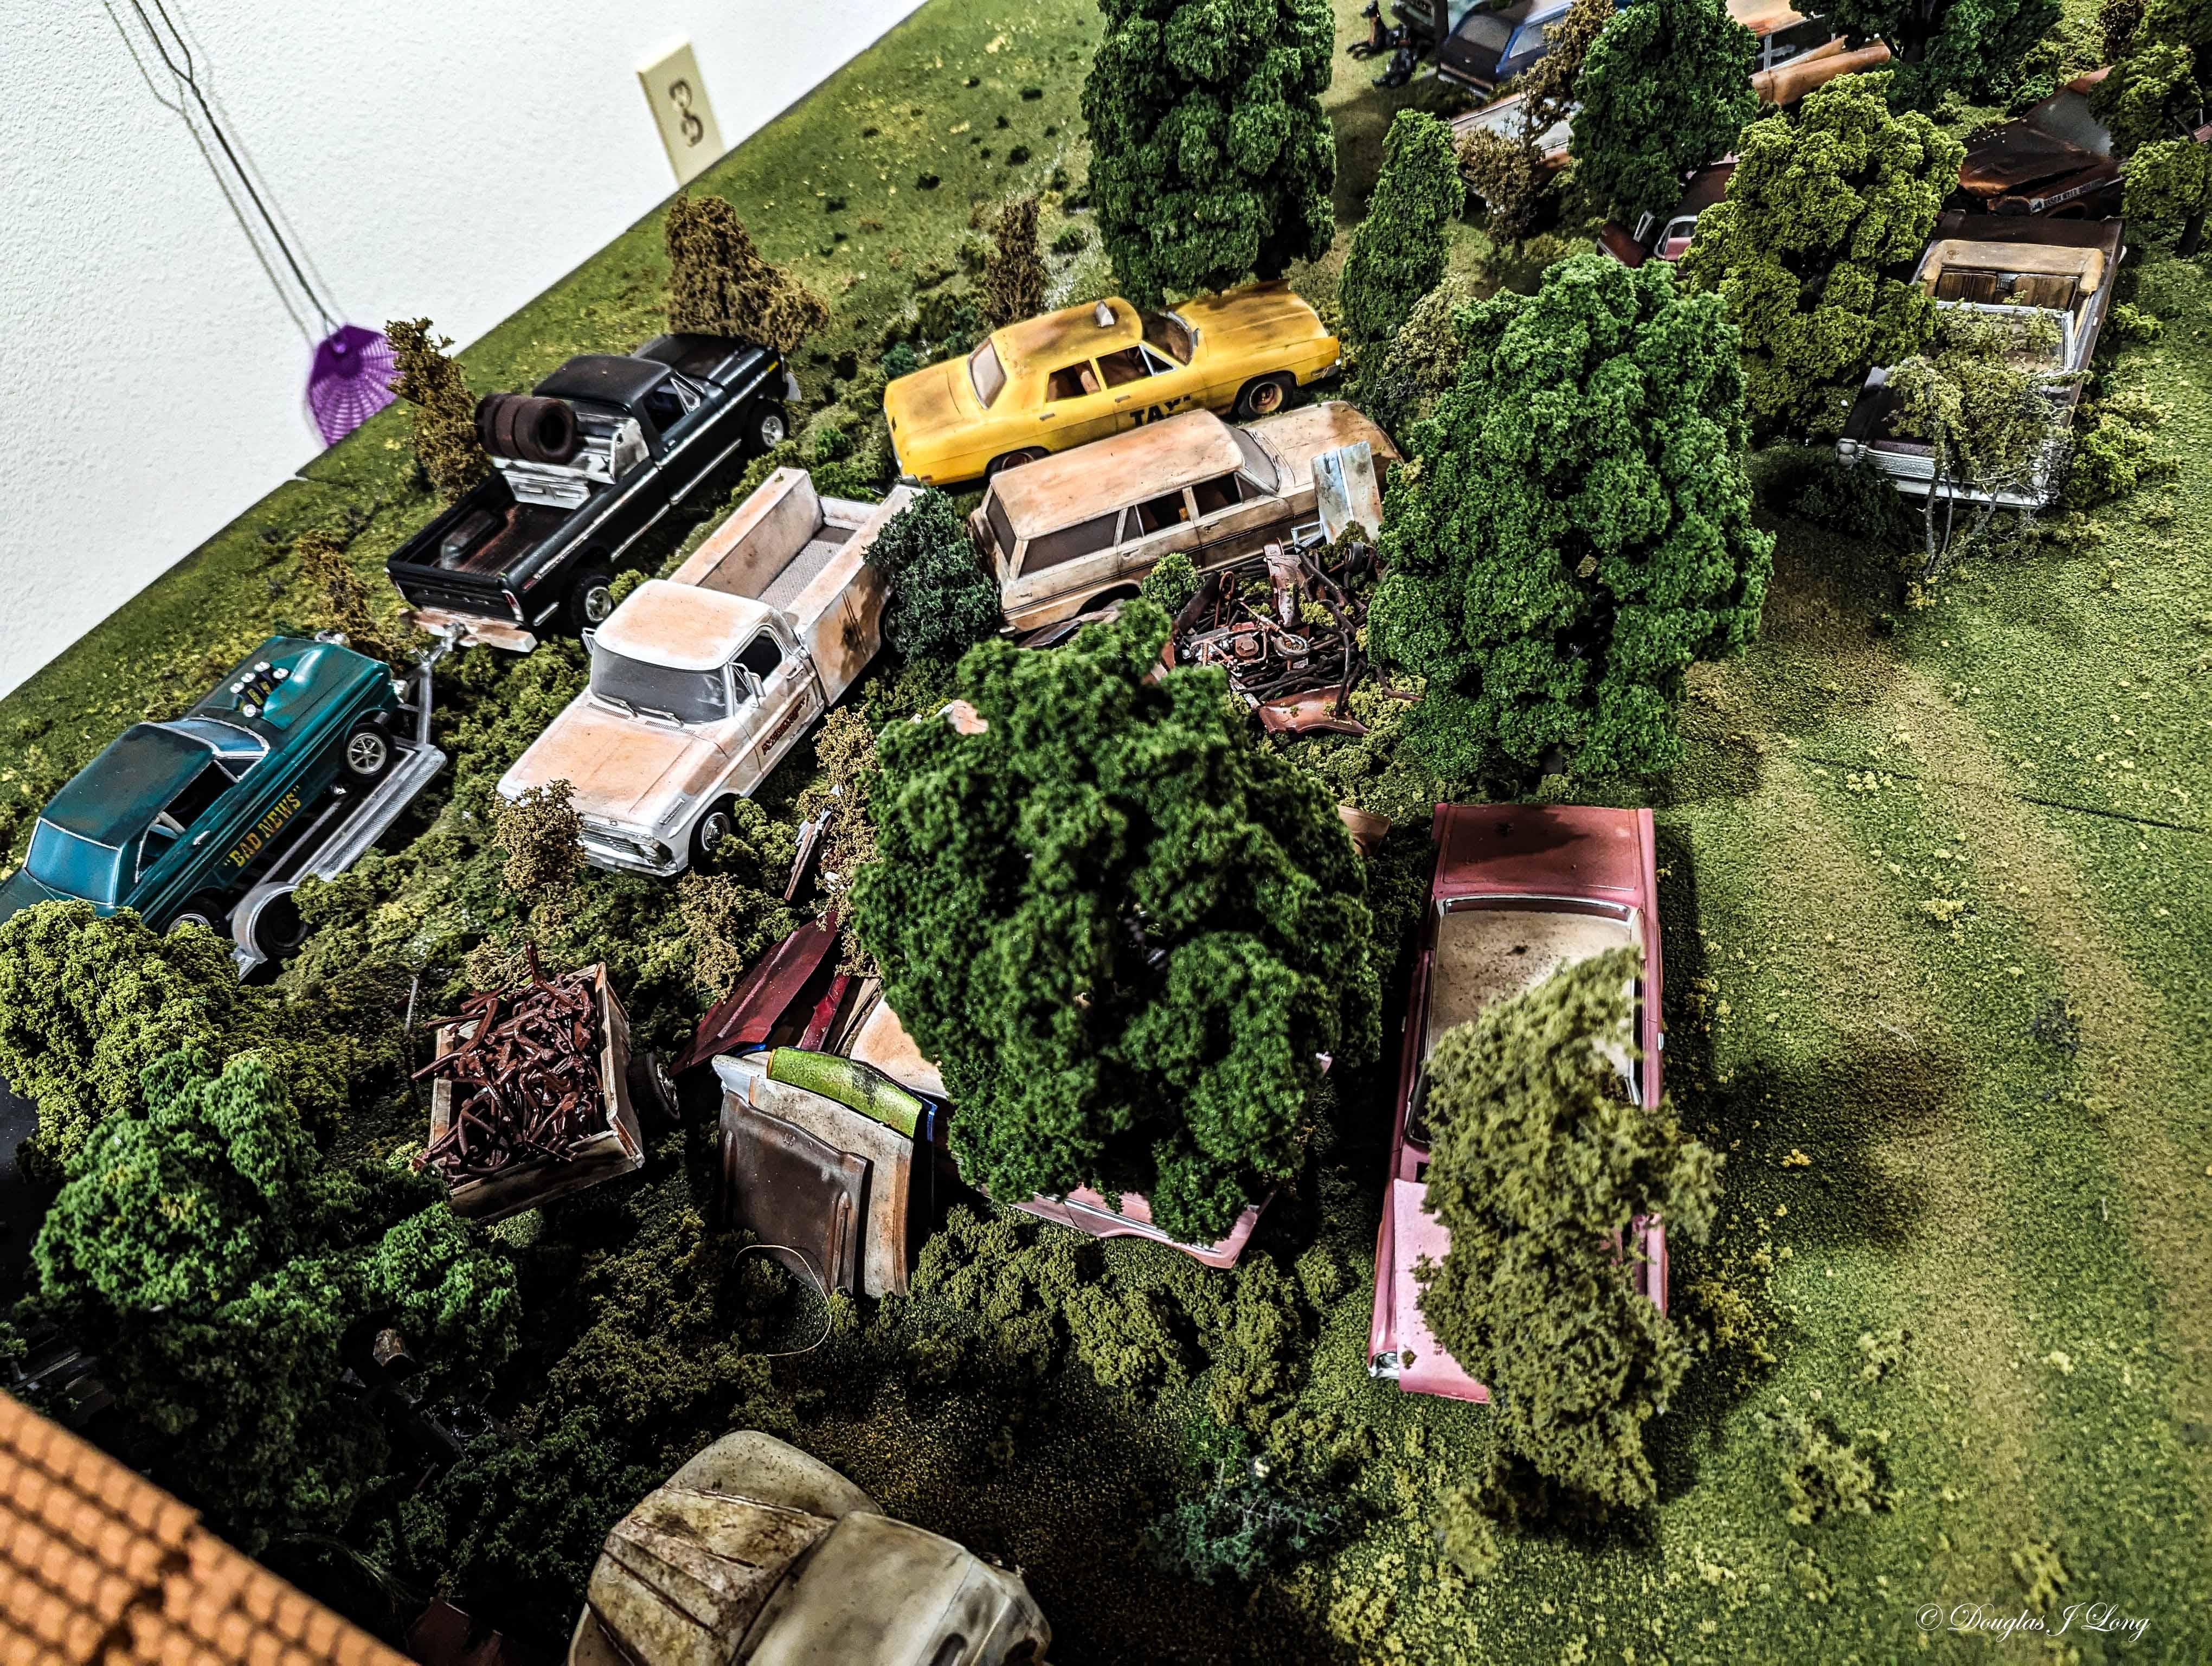
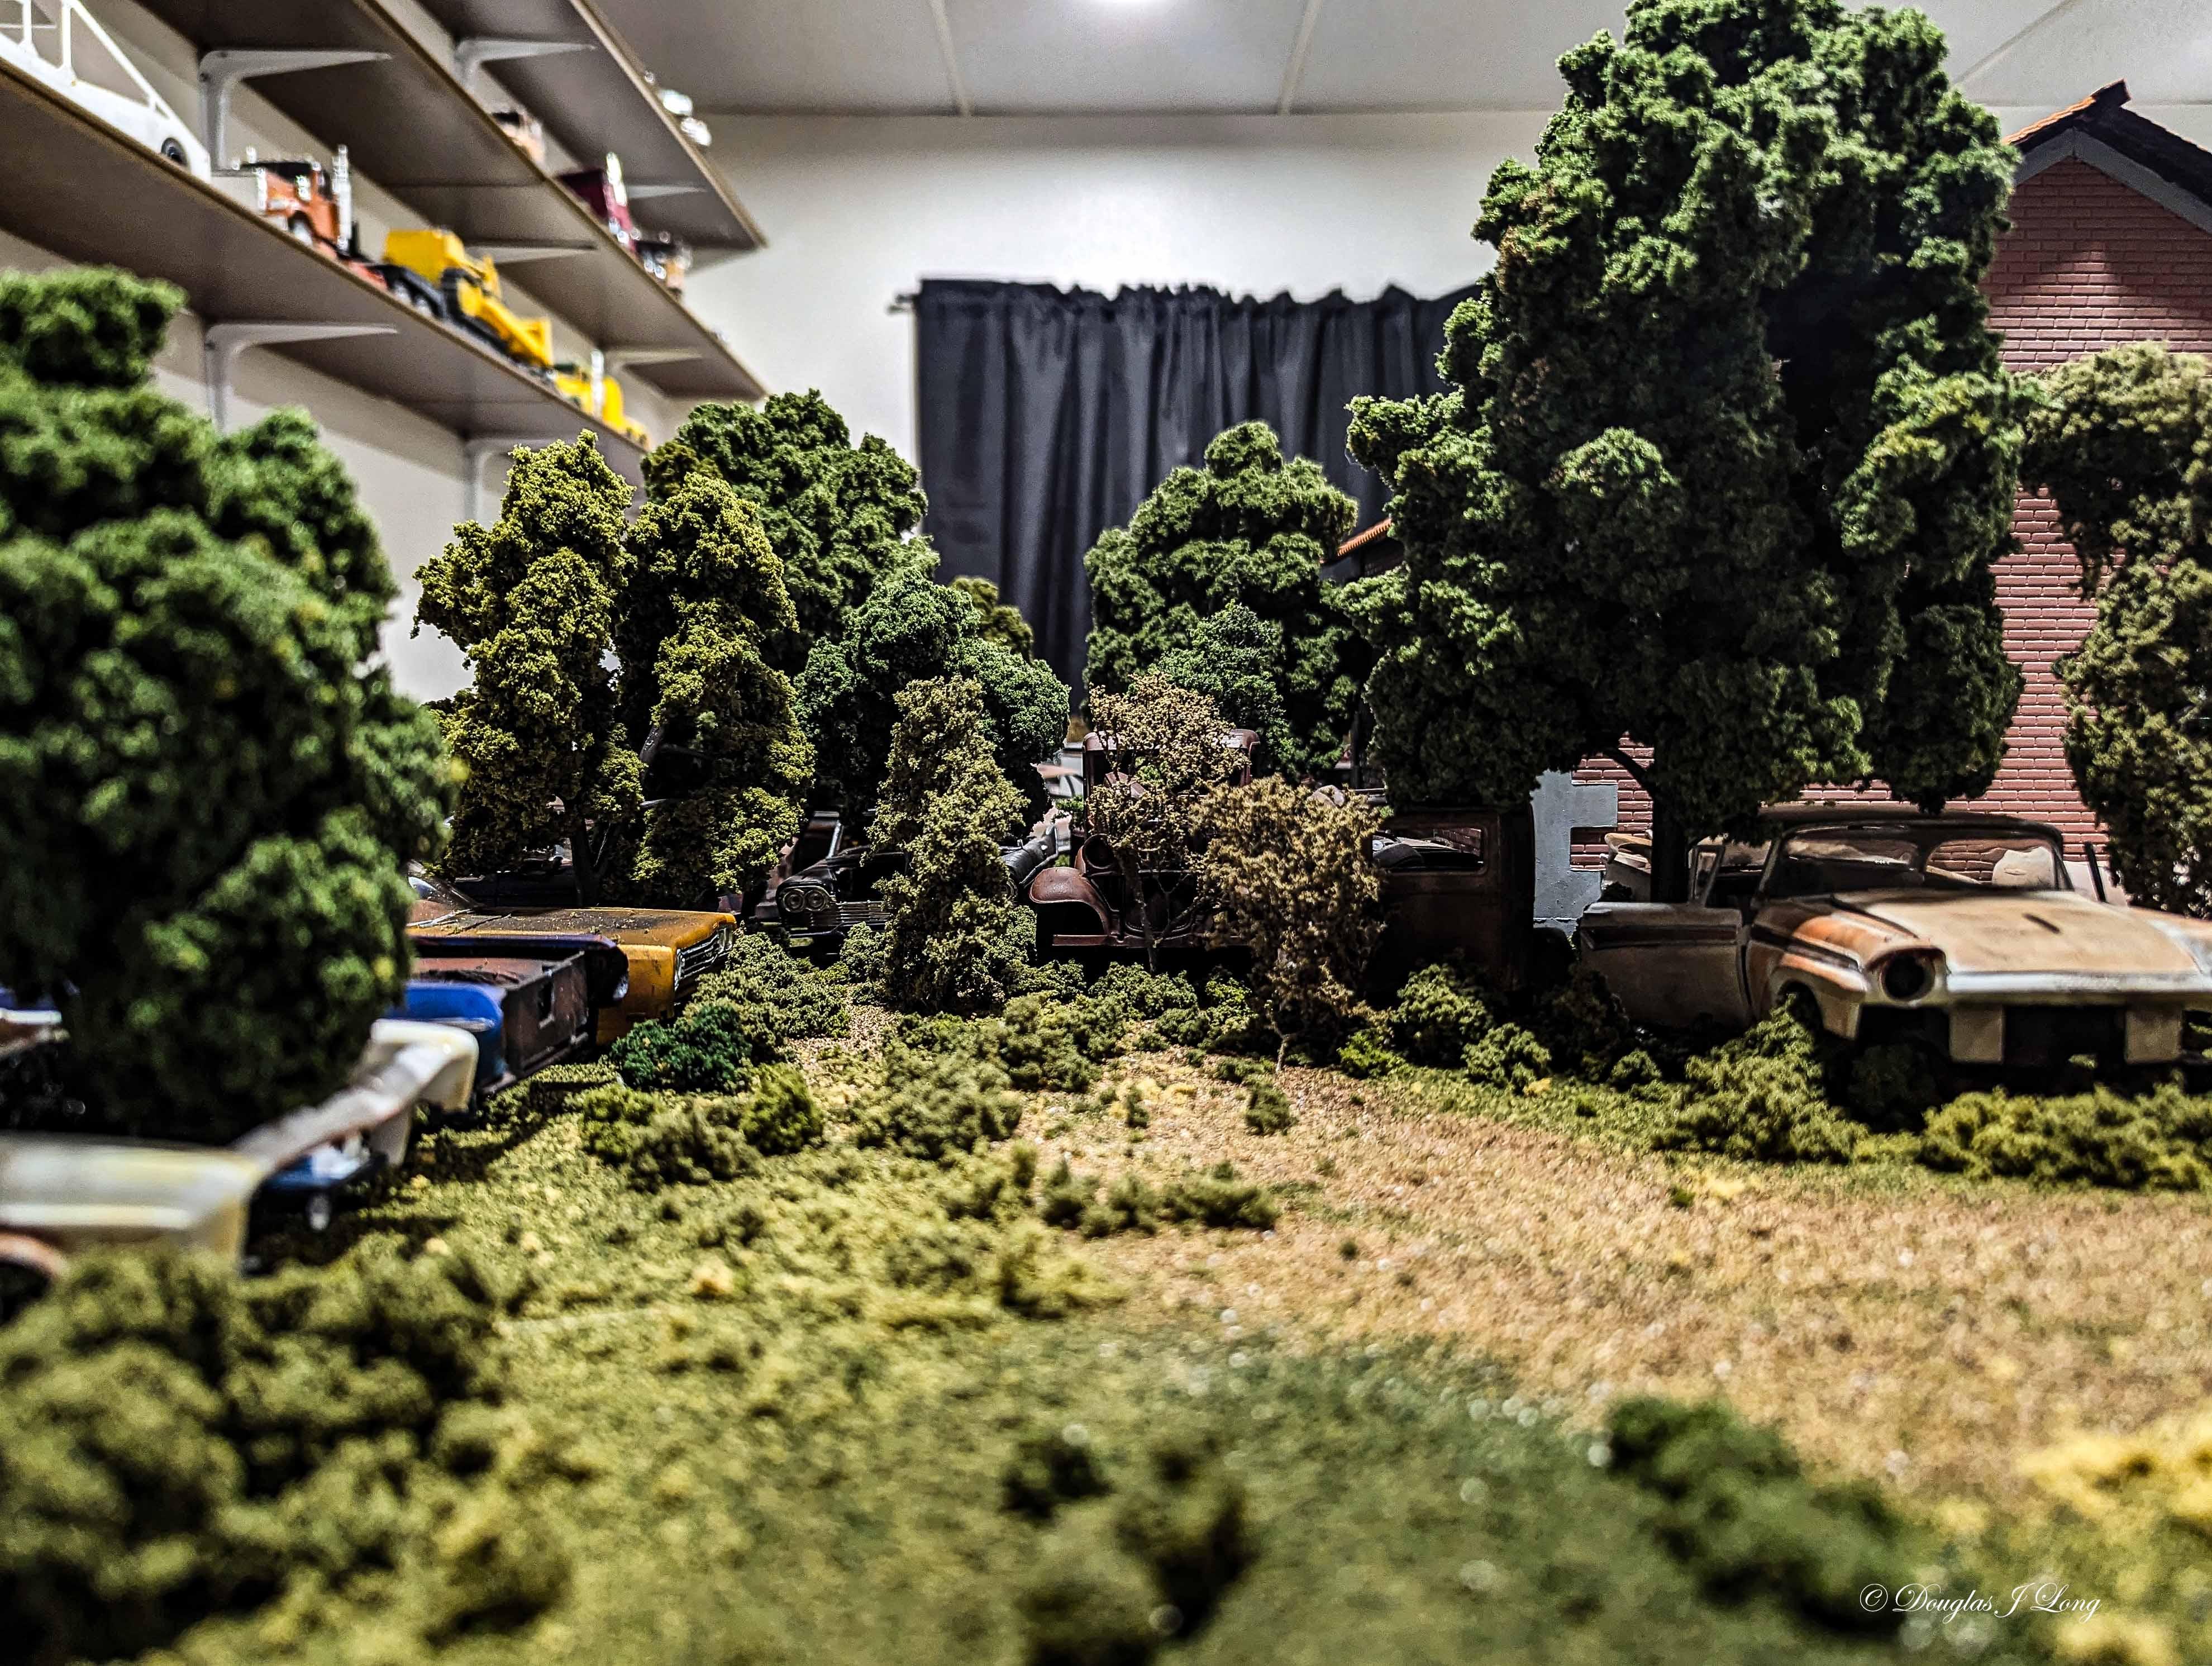
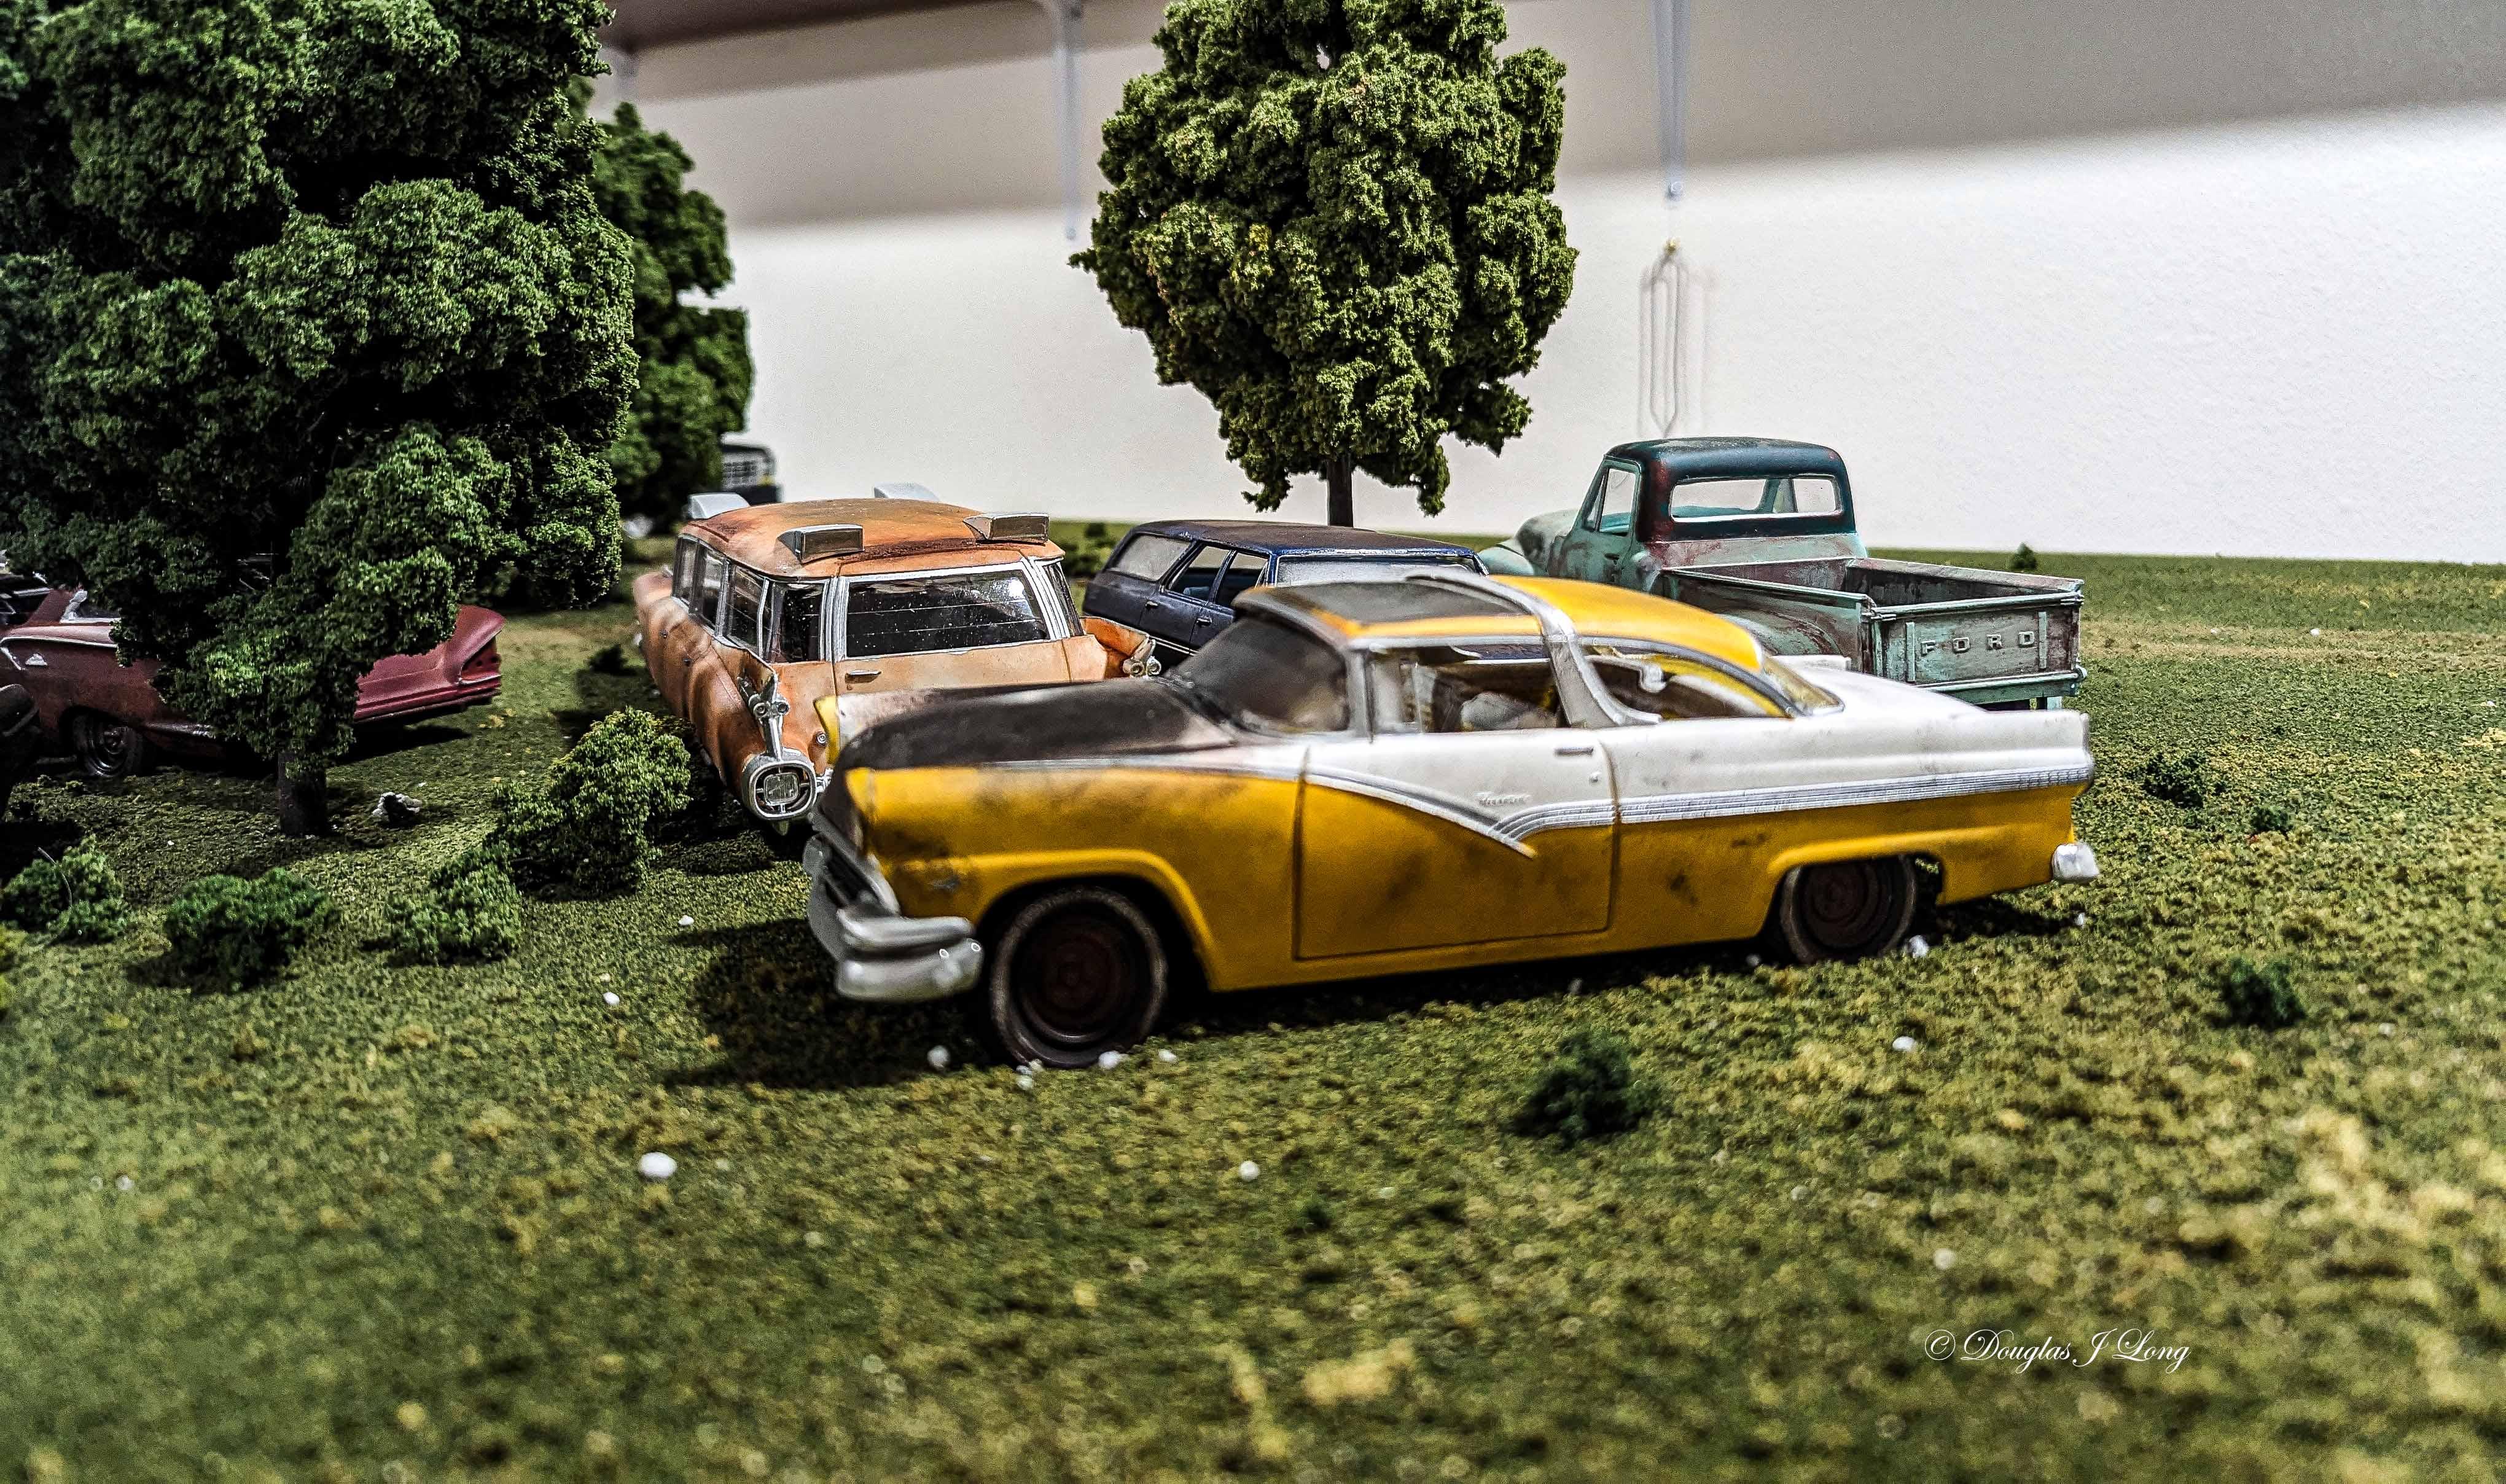
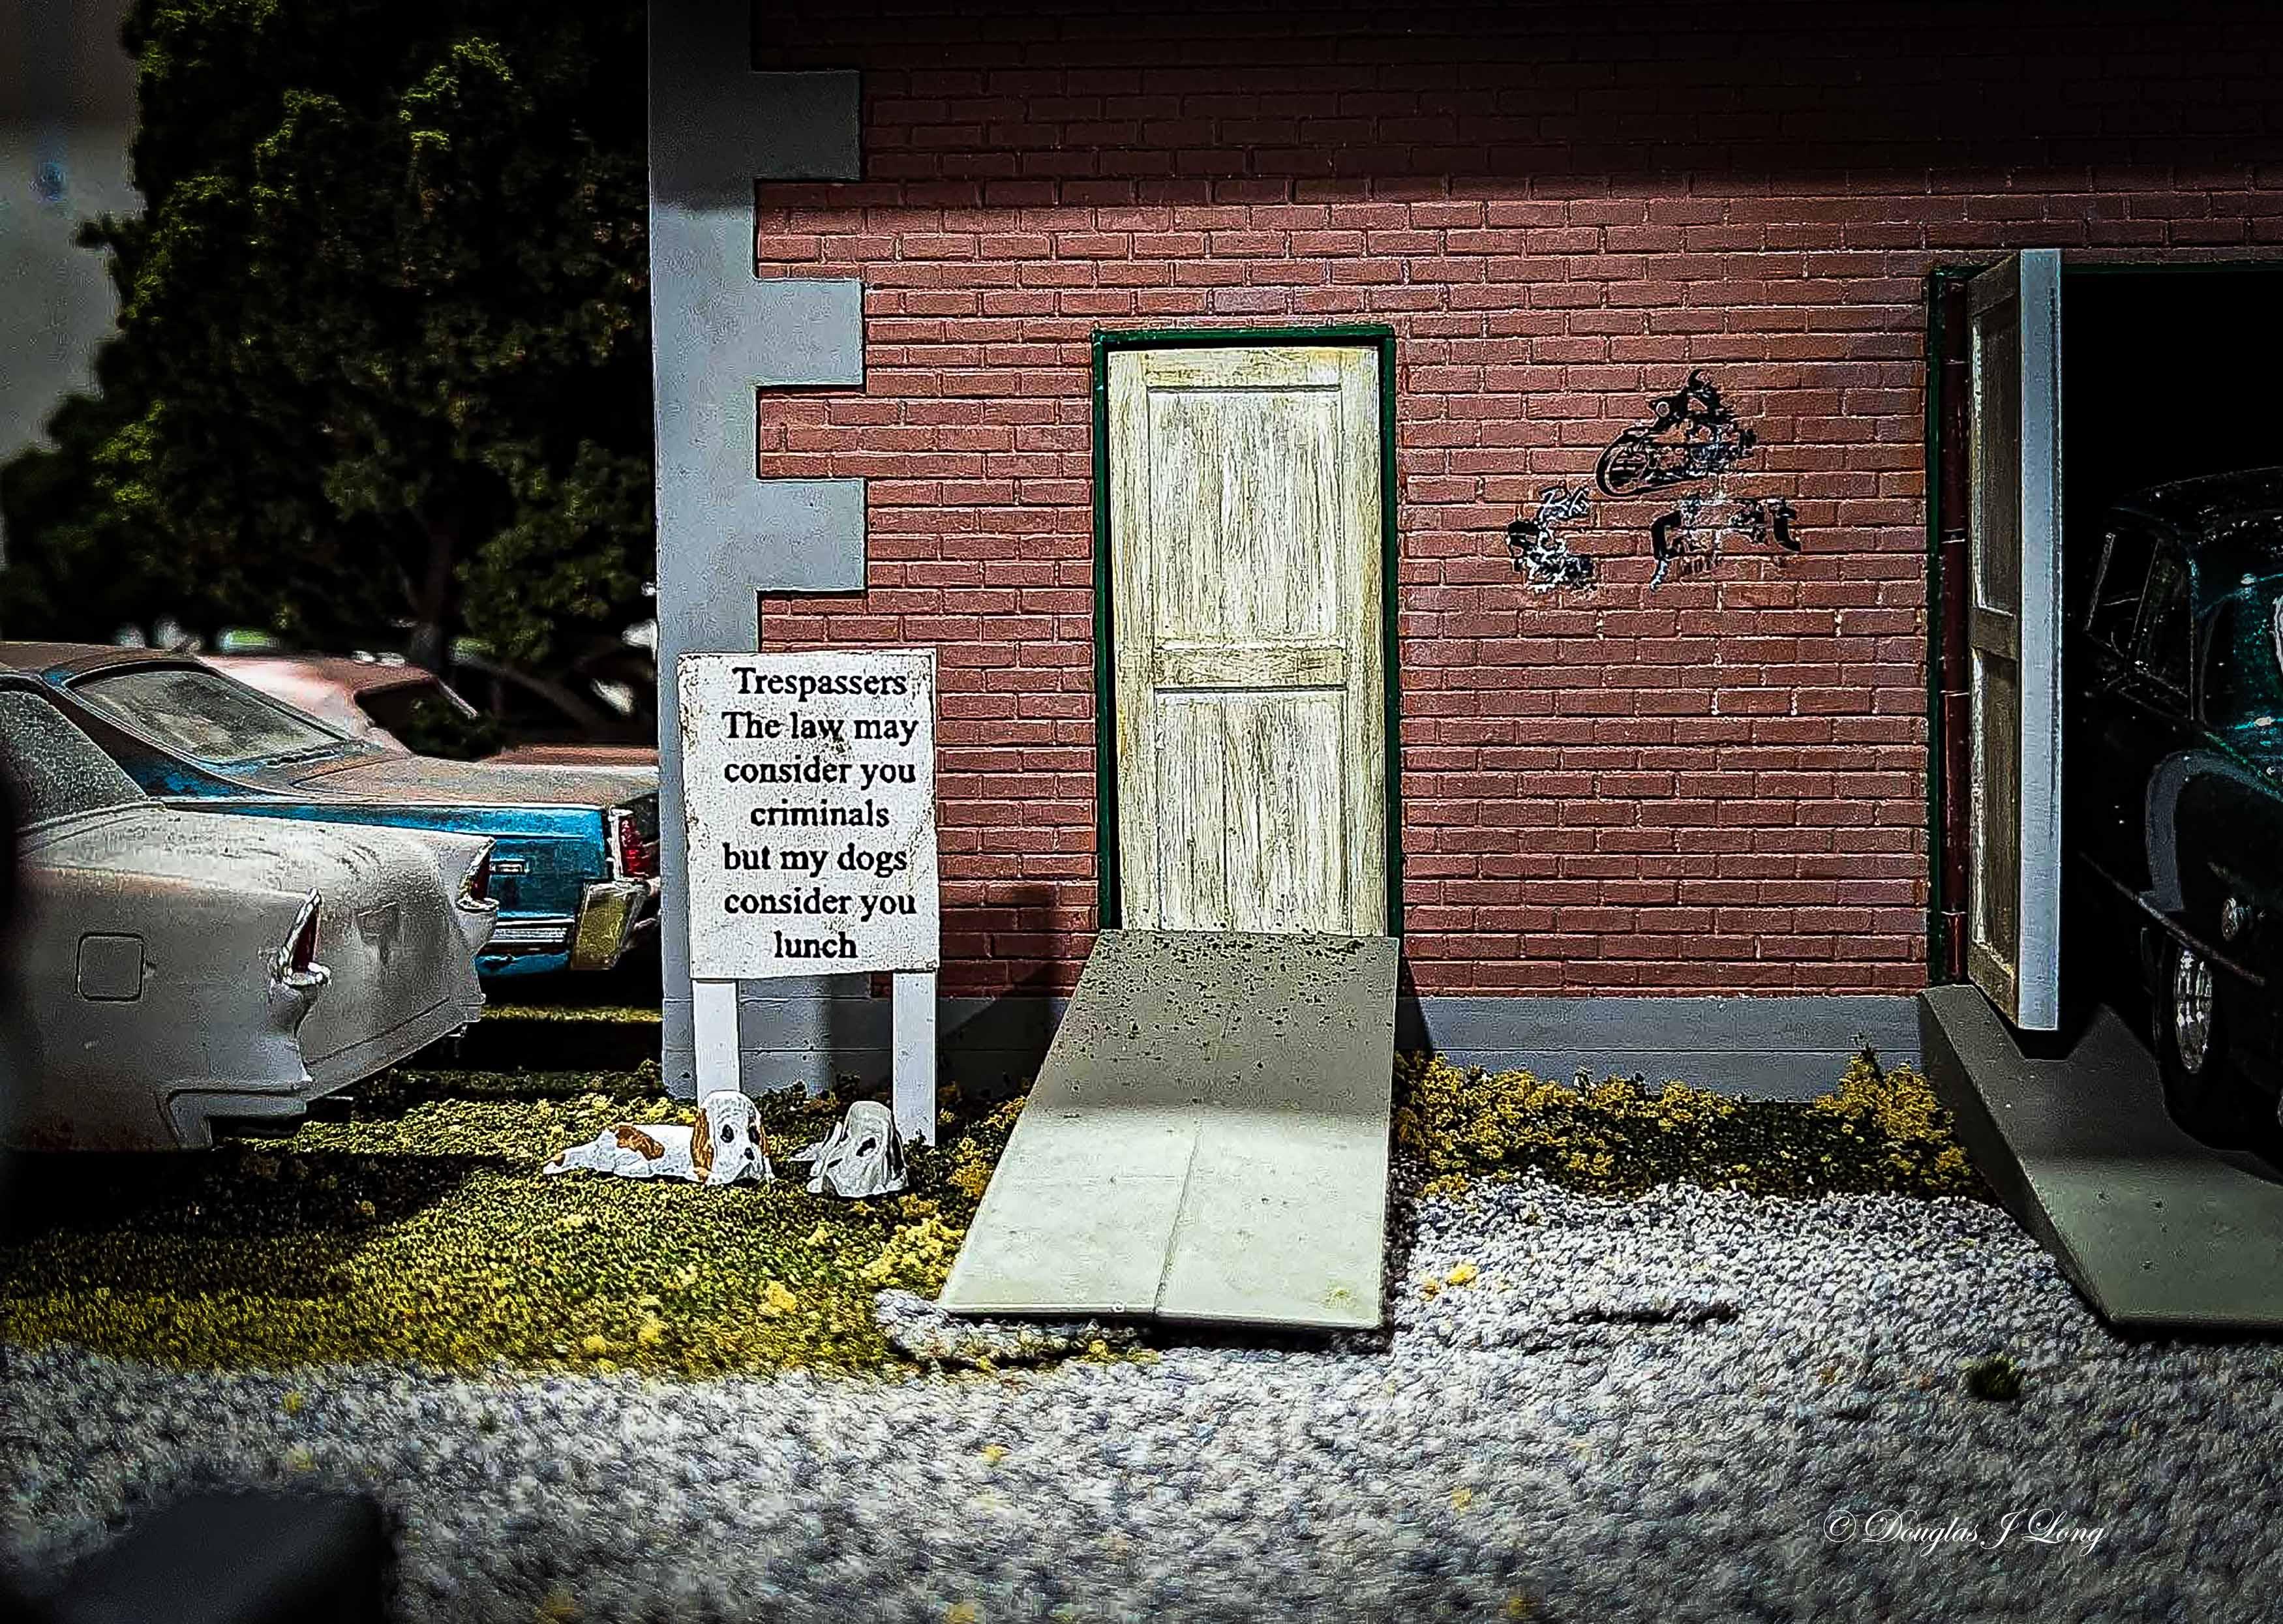
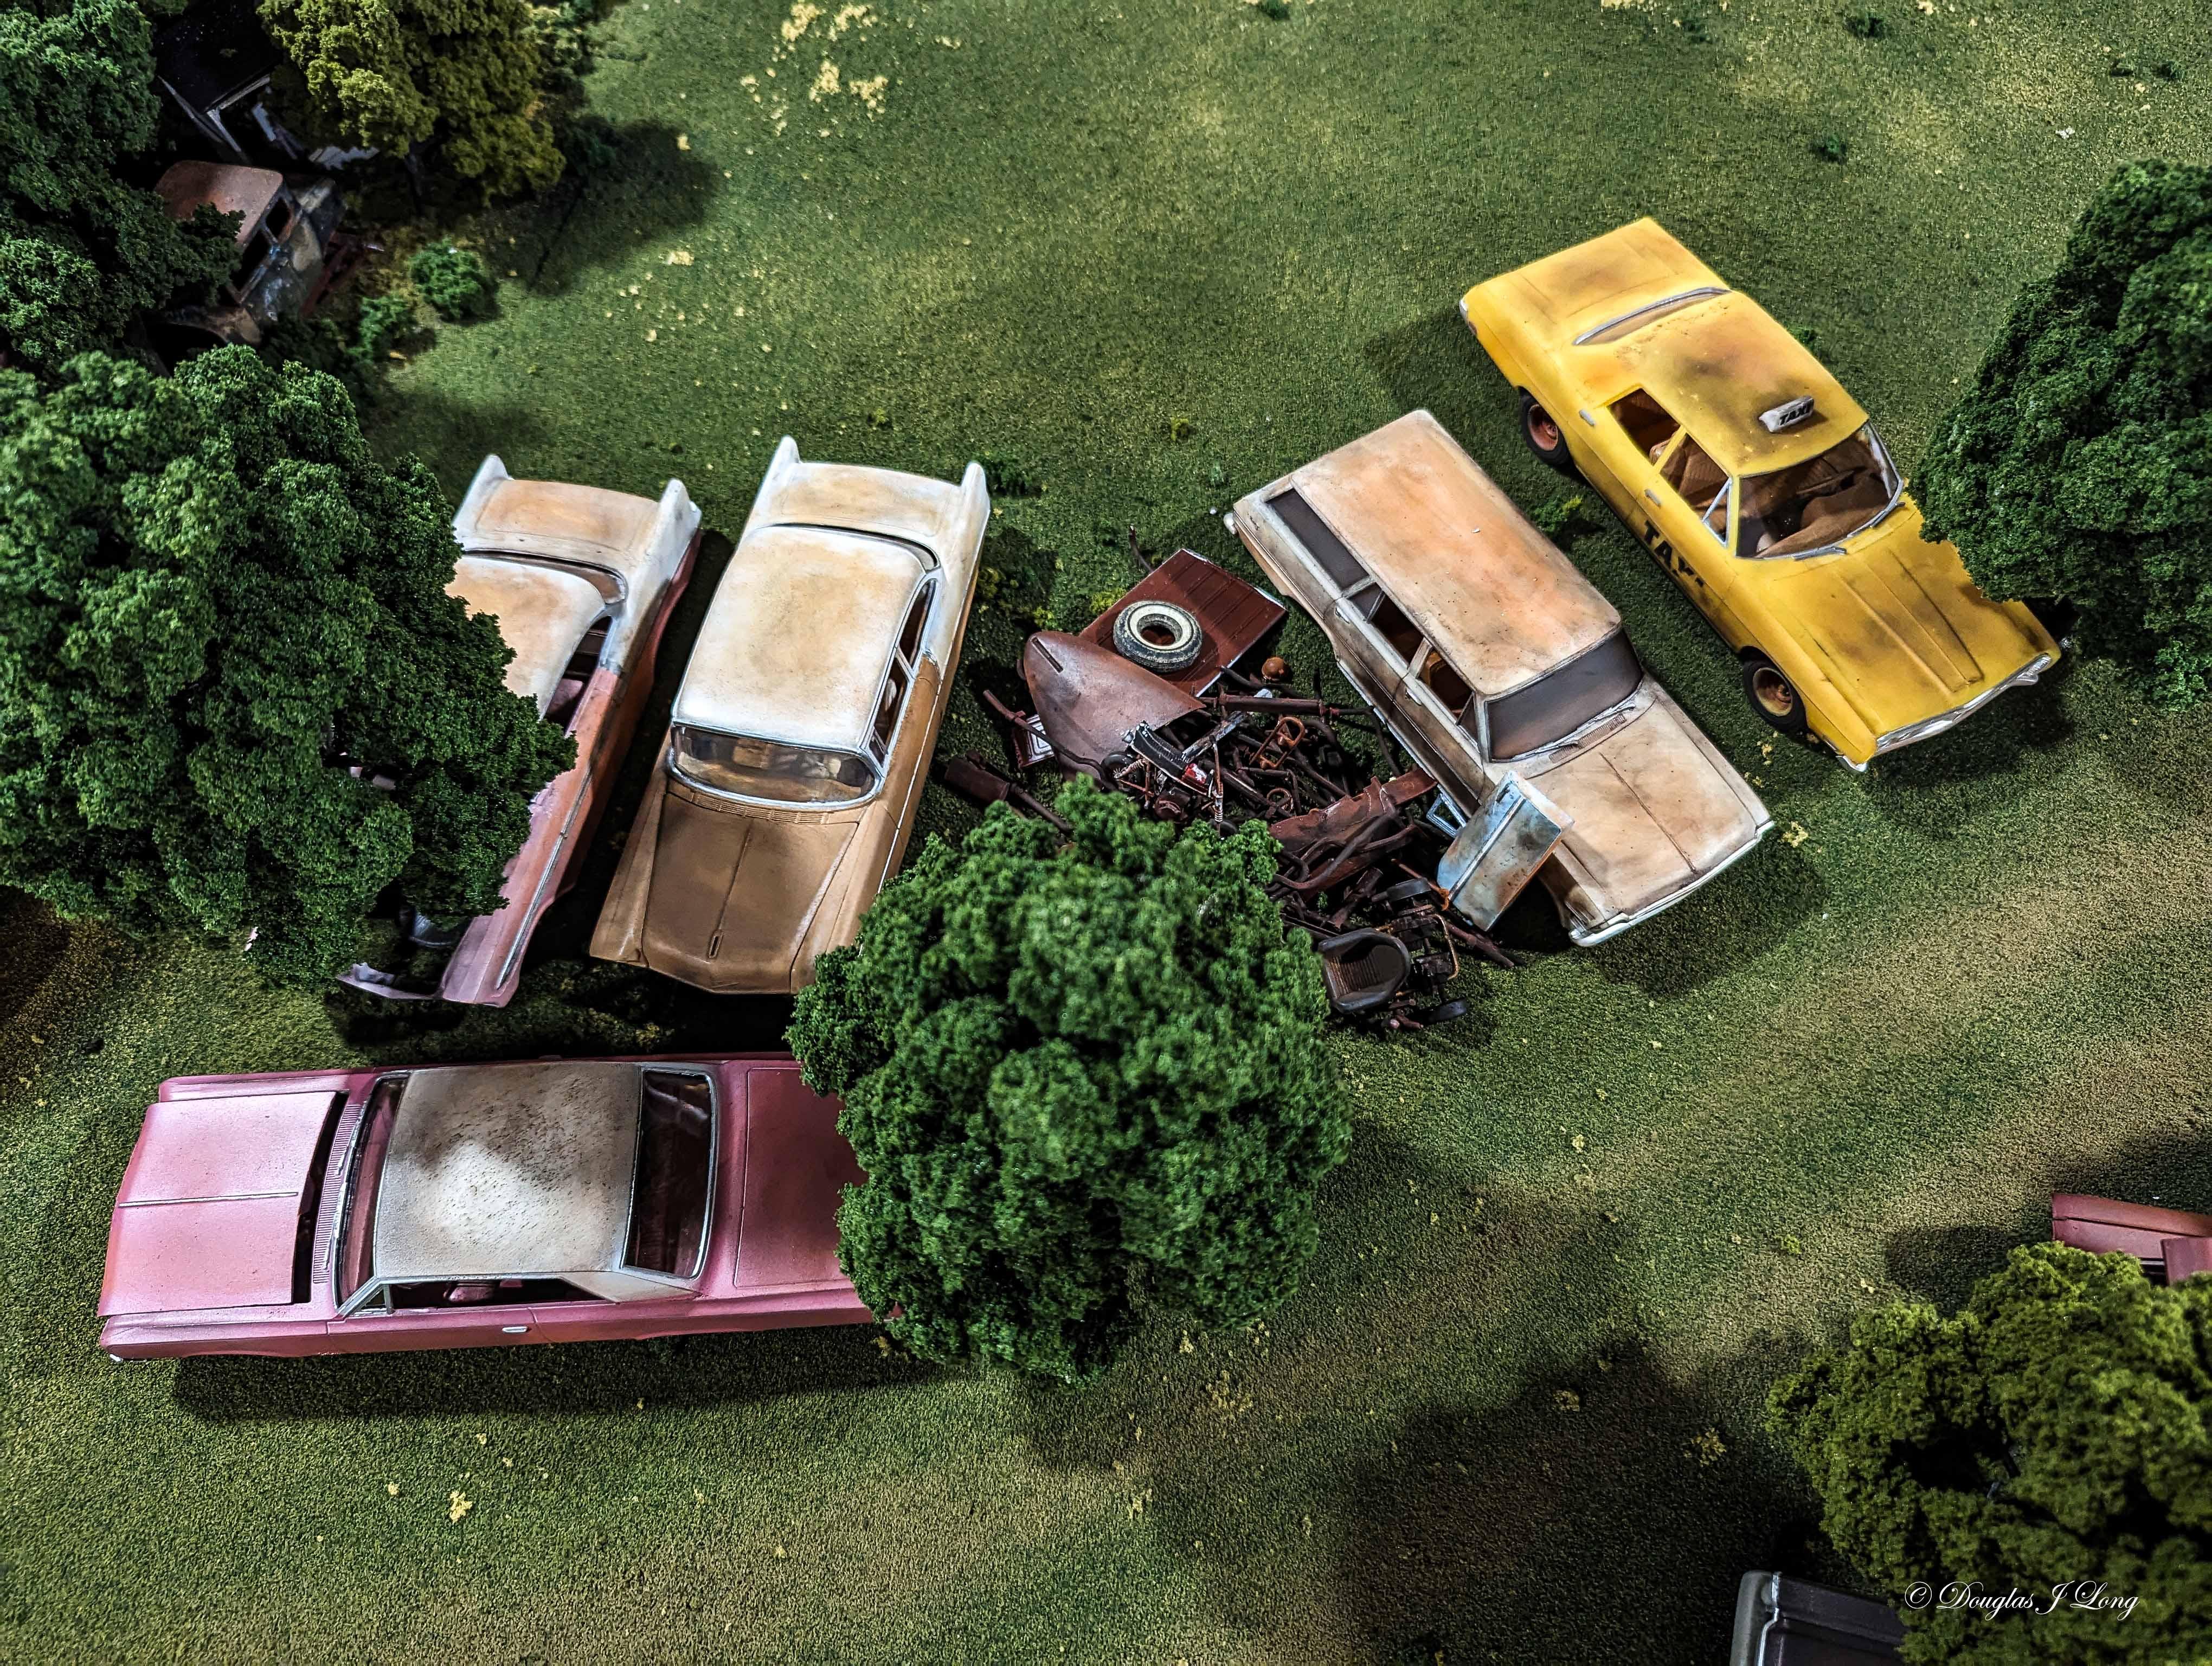
I have been busy in my absence. Every junkyard needs dogs to guard it, and this one now has some. Two are in plain sight. Three others are back on duty, and they are a little more convincing to trespassers. More about them later. I've added another grouping of cars on the opposite side of the lane, and included some scenery with them. A pile of junk has also been placed between a couple of the cars. This is now what an overview presents. The first group has also had scenery added, blending both sections together, as can actually be seen better in the picture above.
-
You have great attention to detail.
-
One of my first jobs was building pole barns in Iowa in the winter. Remember that you are only allowed two swings at each nail. It's looking good, and I will be following your progress.
-
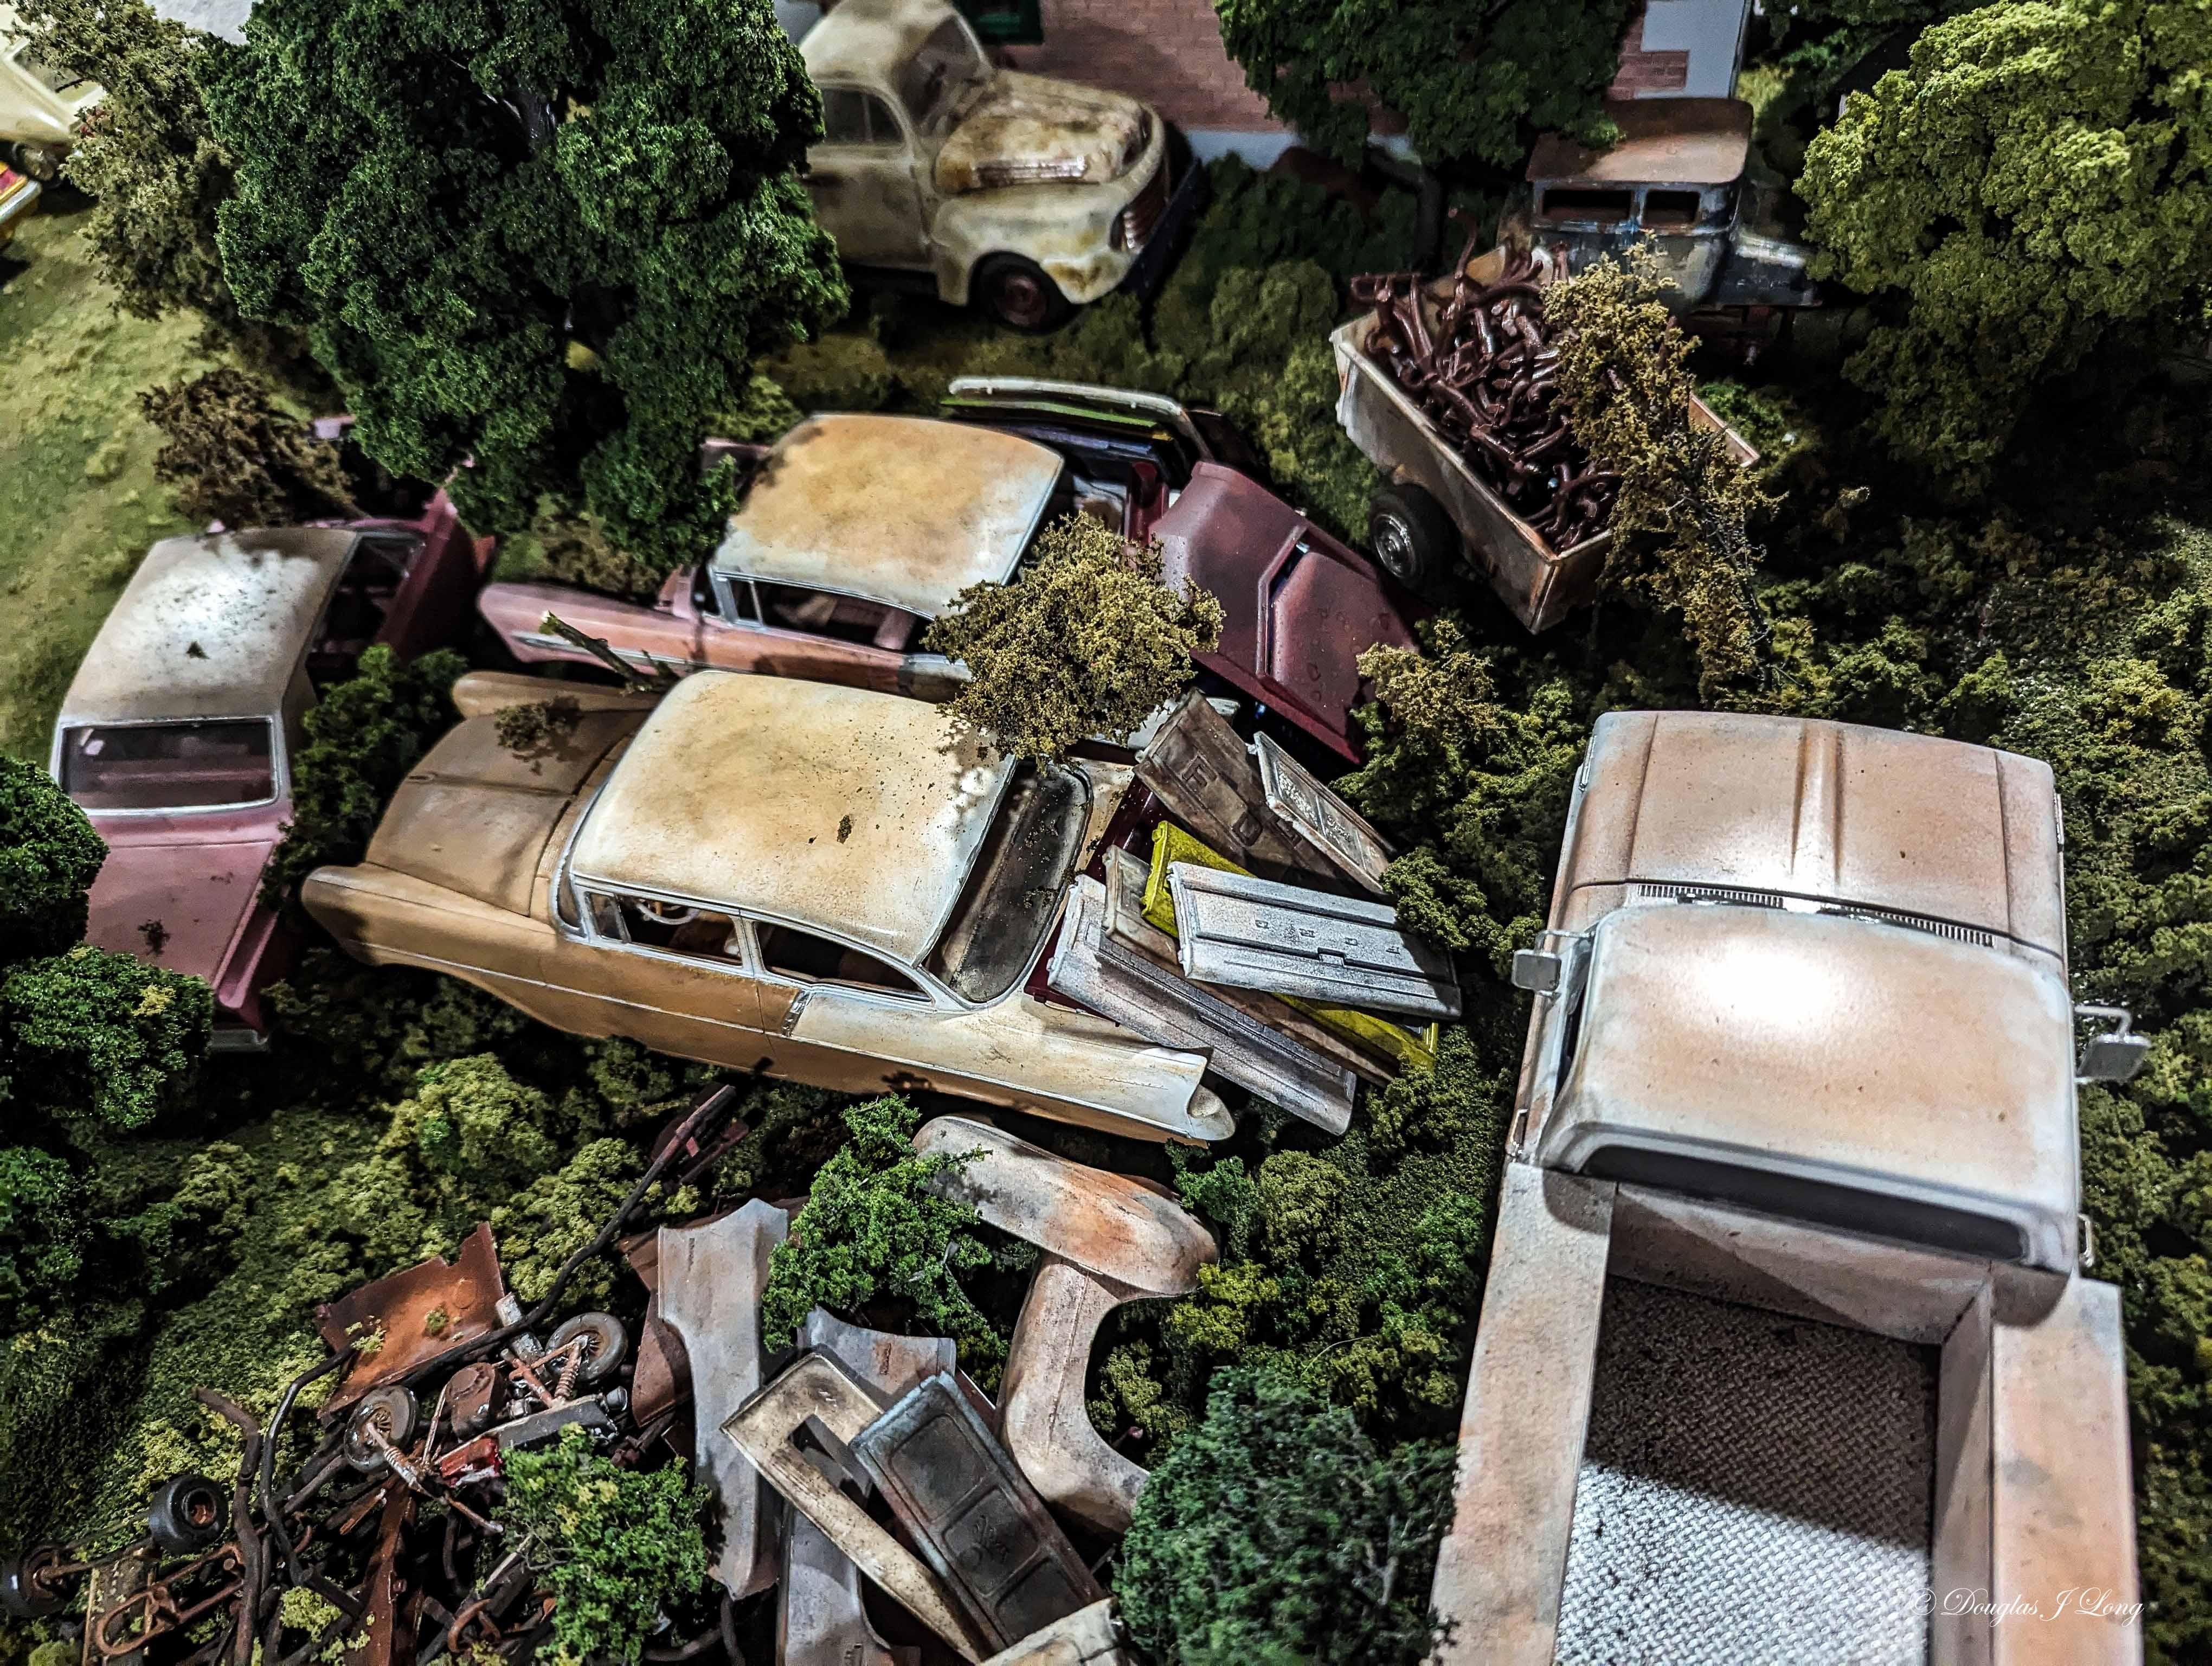
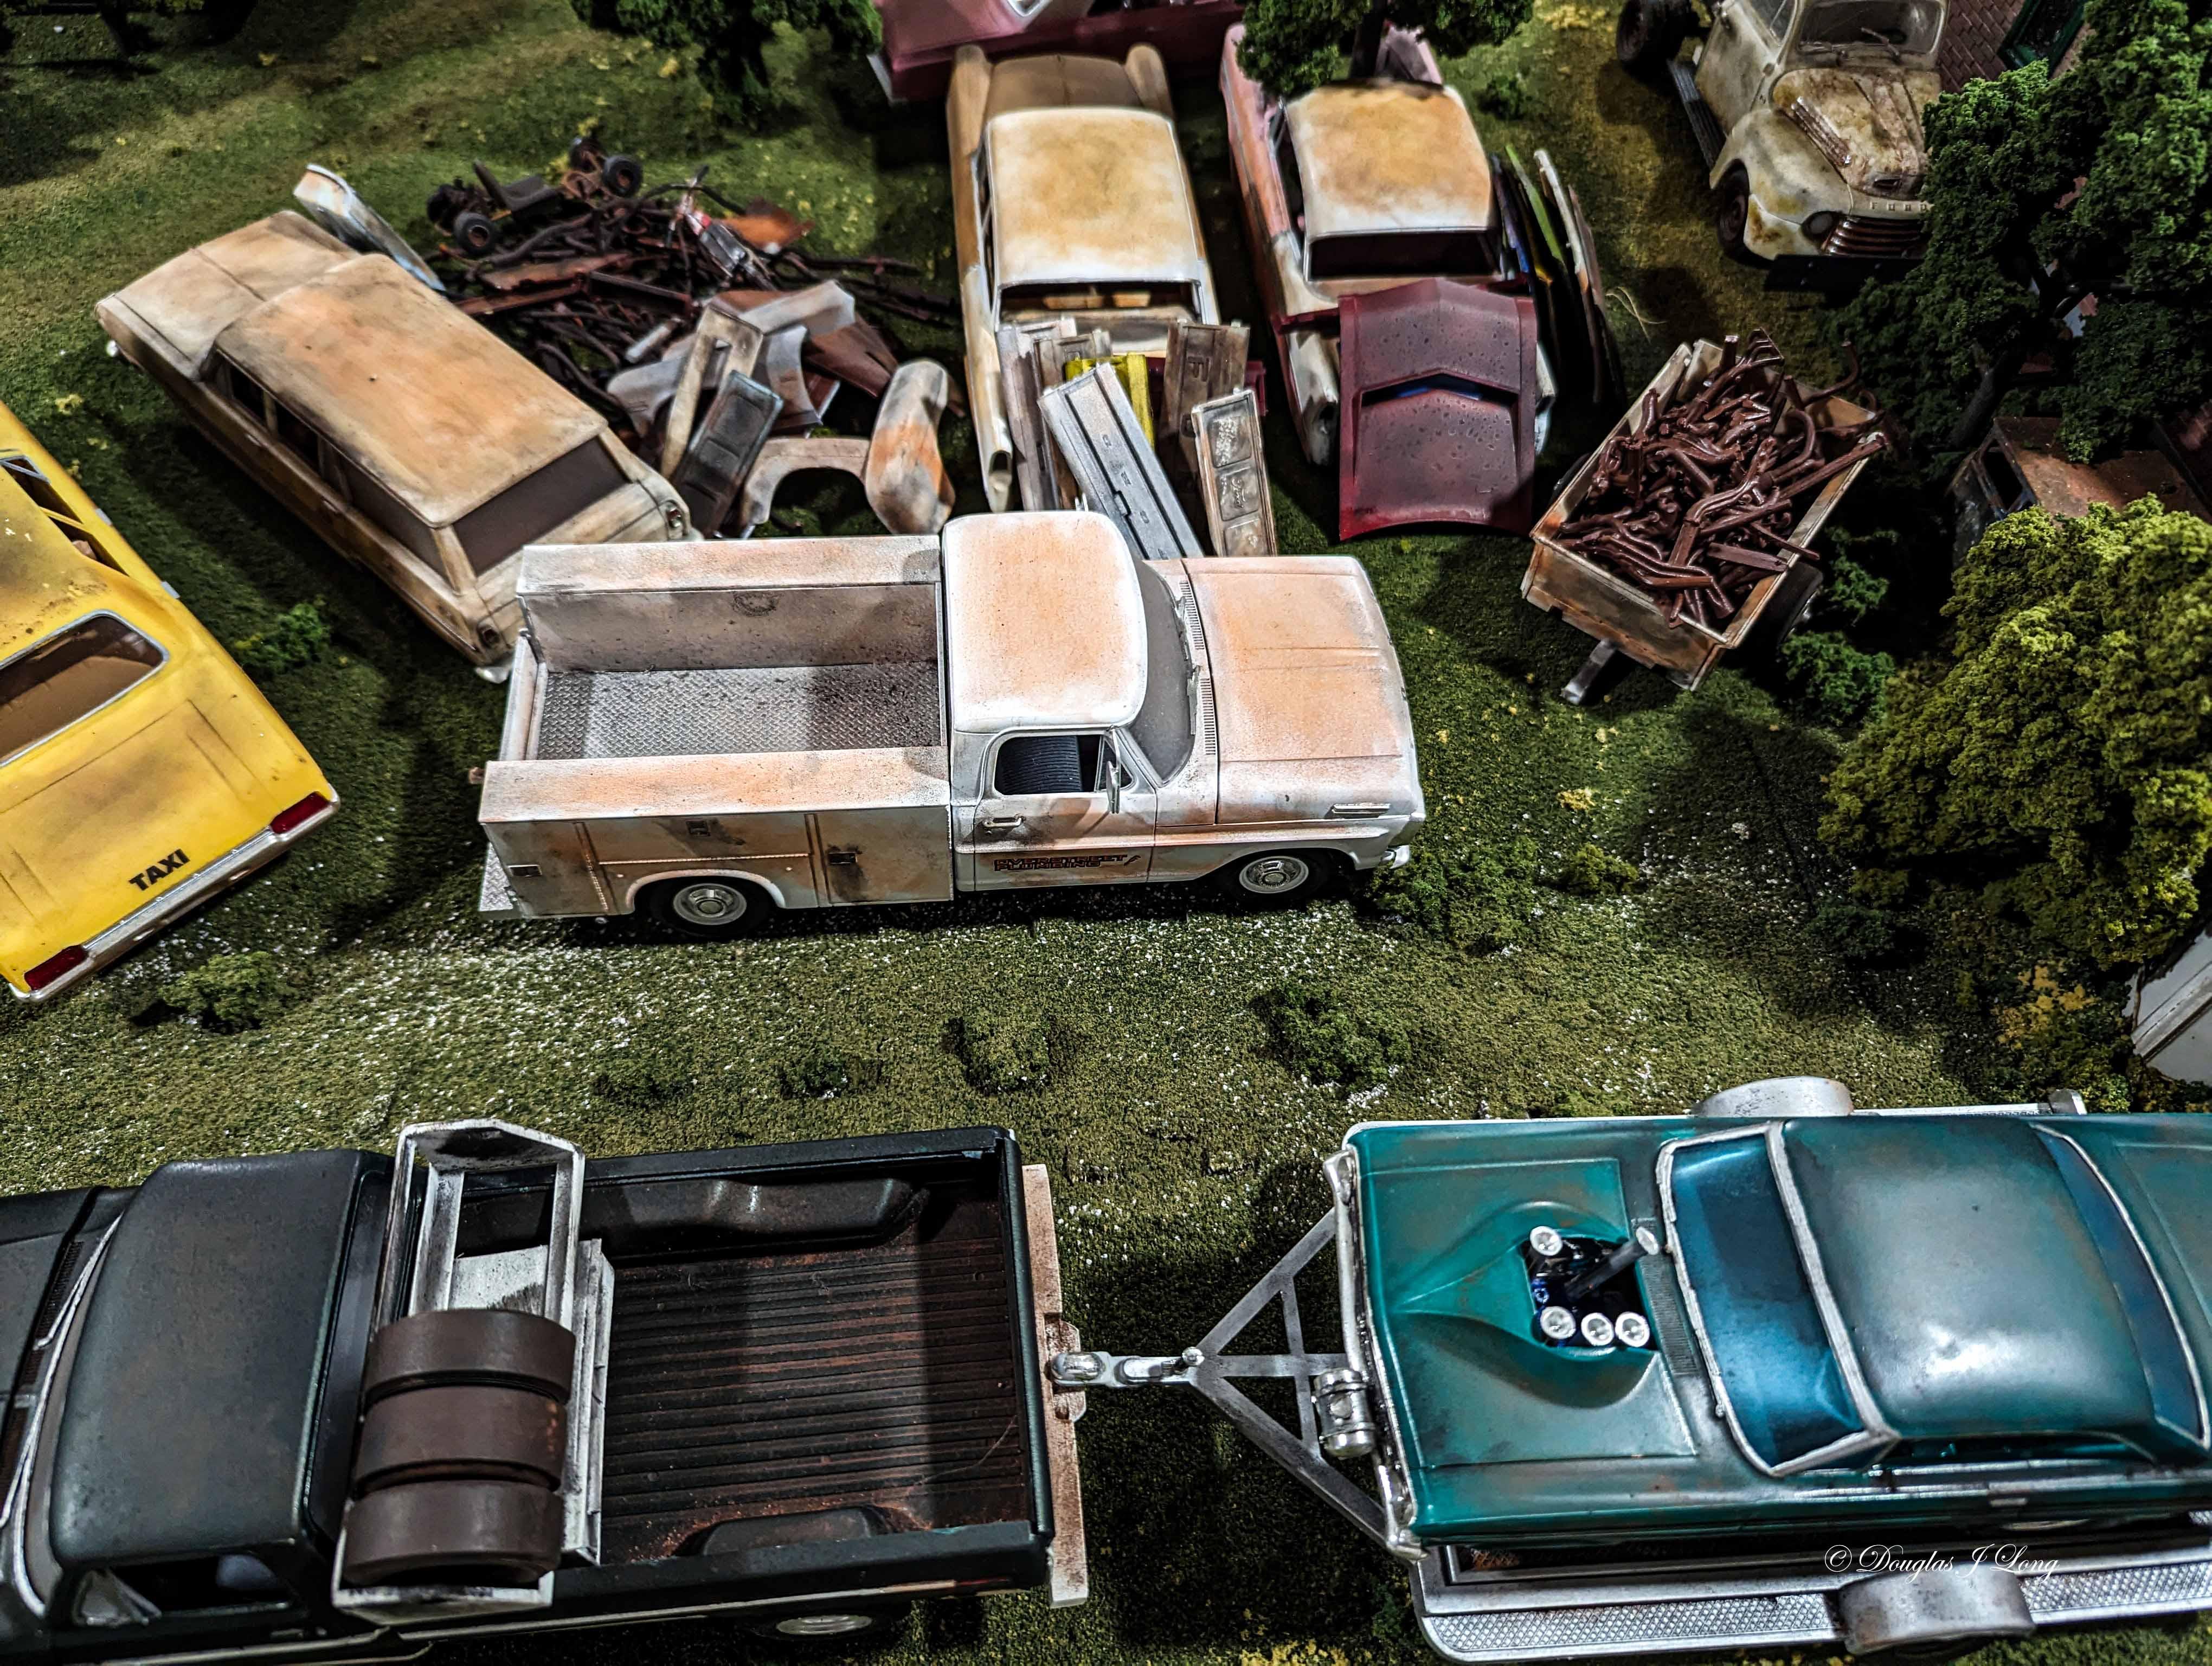
Two more cars entered the junkyard this weekend. The first is a 59 Cadillac ambulance with the second being a 1958 Chevrolet Impala. I still have to blend them into the scene, but I am reasonably pleased with both vehicles.
-
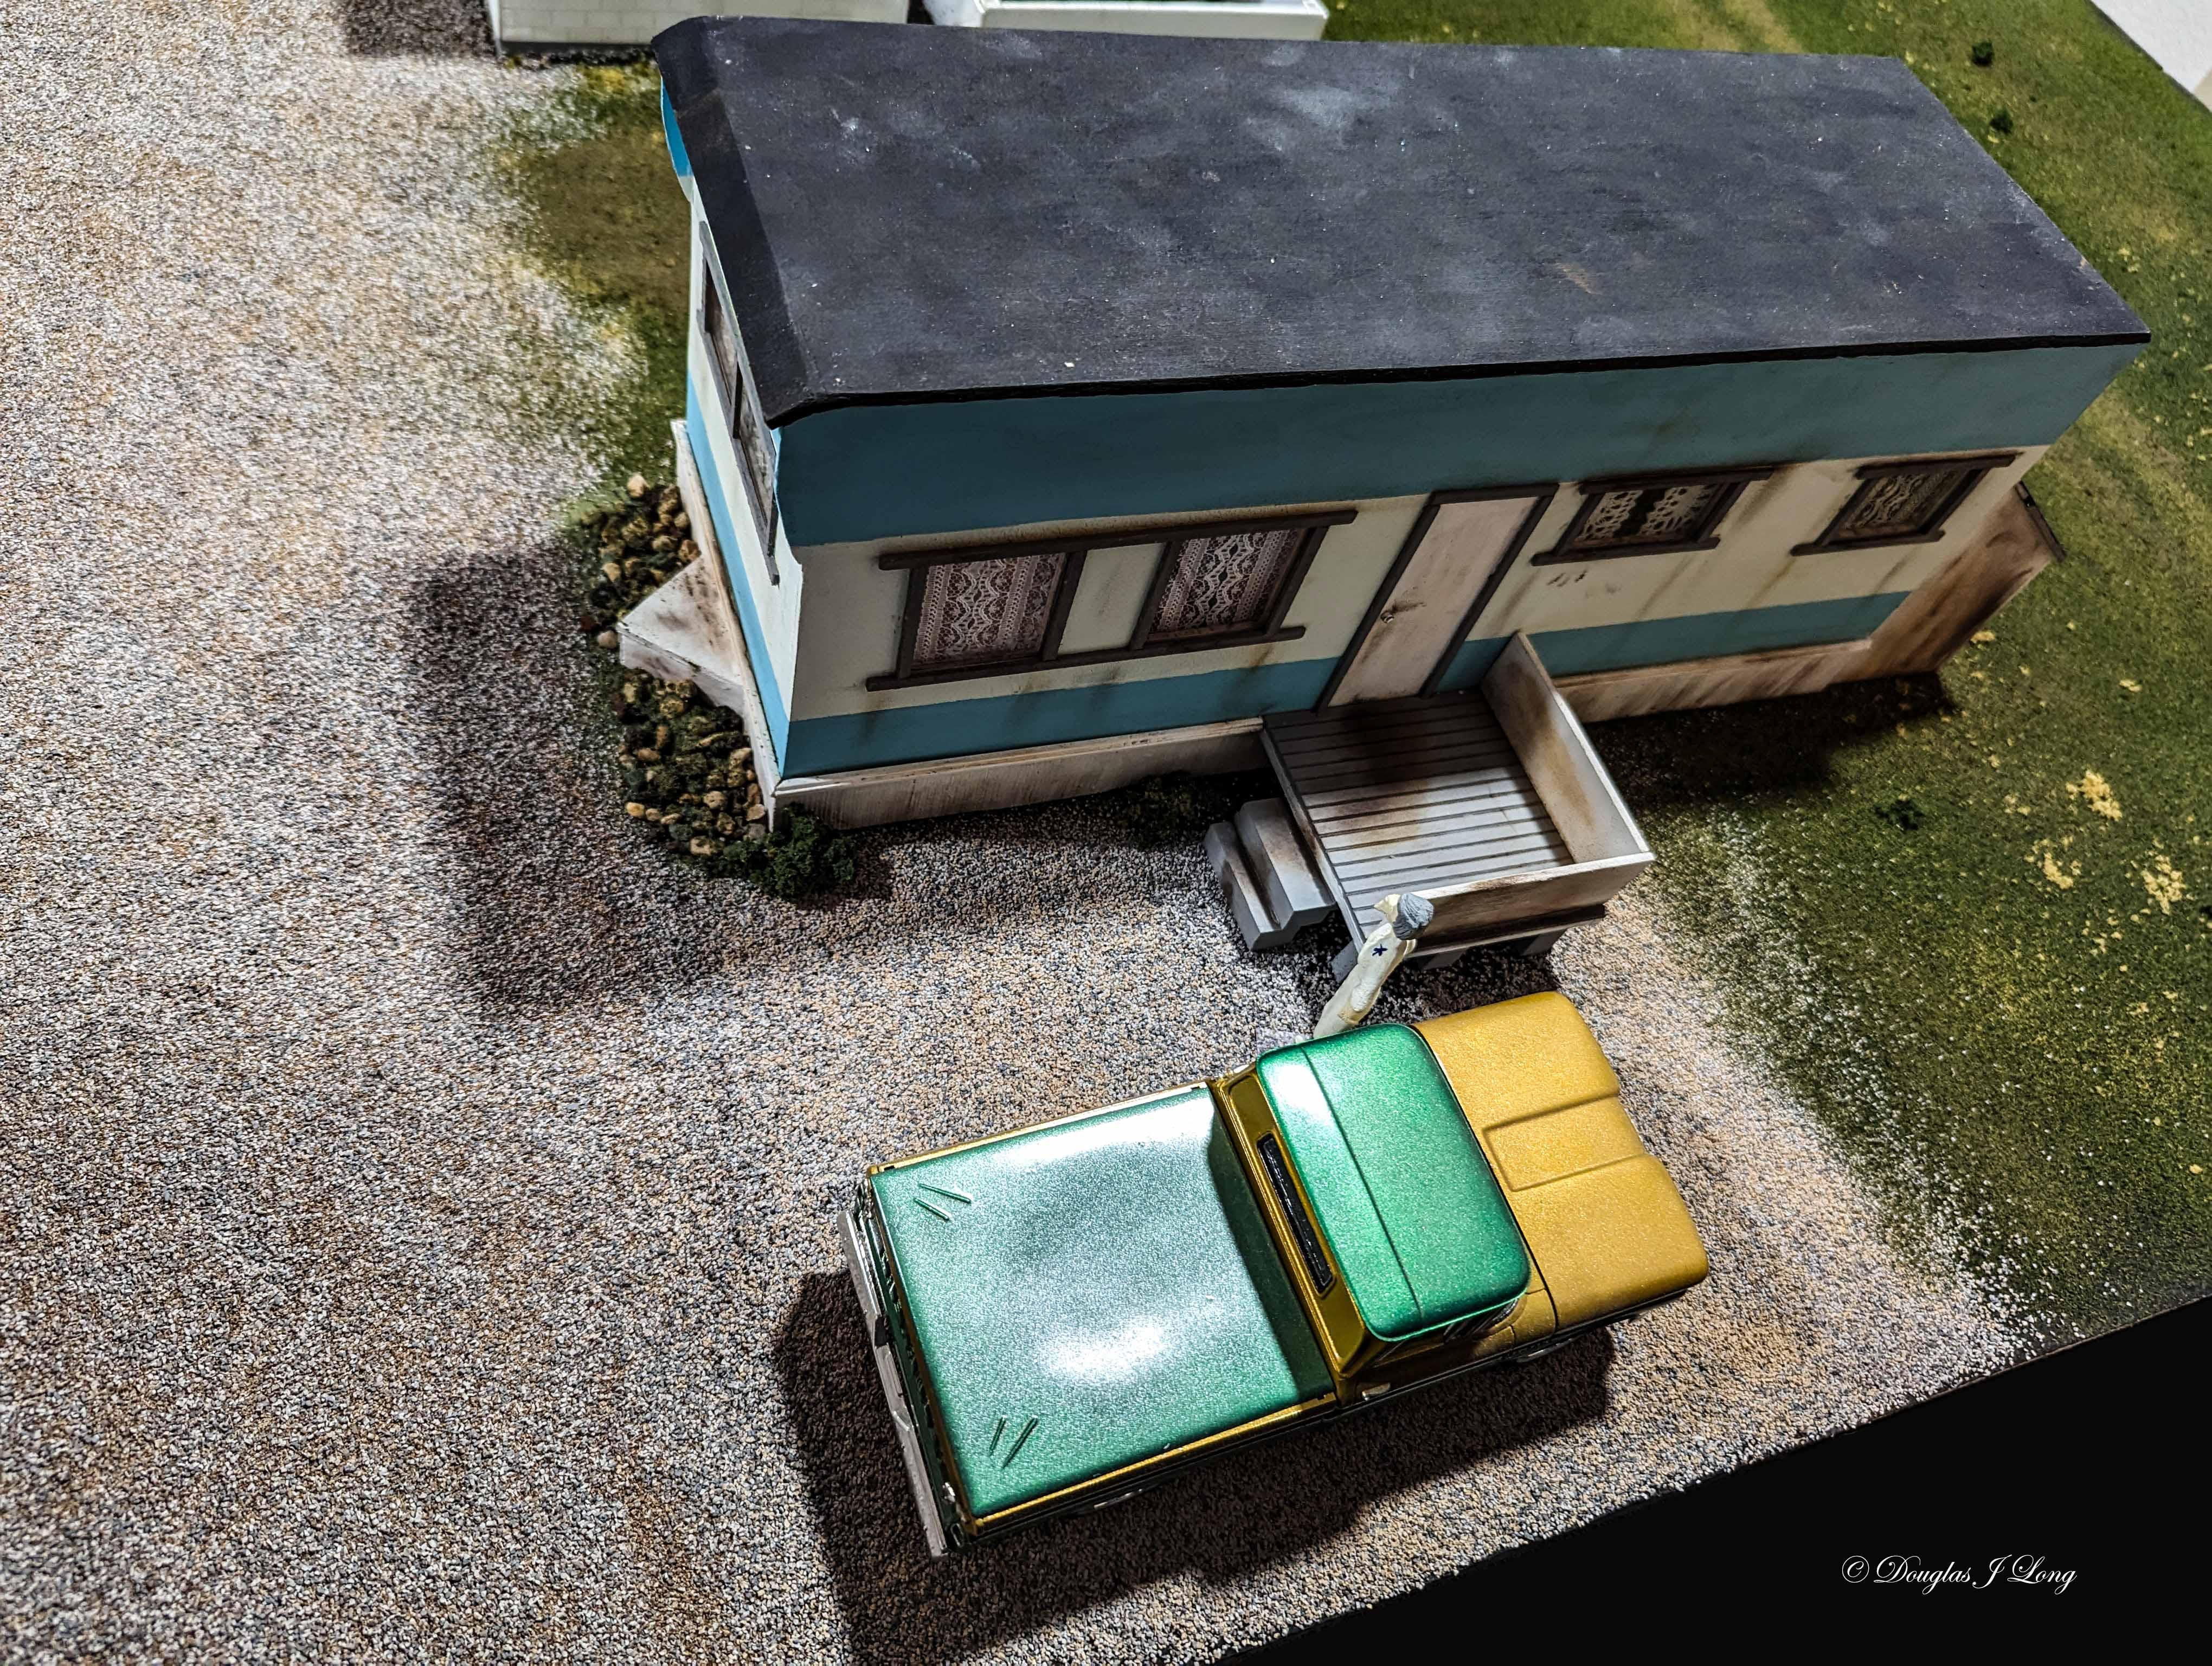
The diorama is evolving even more. I had thought to place a small garage beside the gas station. That garage turned into a mobile home. Here are some progress pictures of the construction of the building. I will be adding a small garden, shrubbery, and a couple of trees, as I progress. The structure represents an early 1950s one bedroom mobile home. My intention was that it was to be much better maintained, but I got carried away in the weathering process.
-
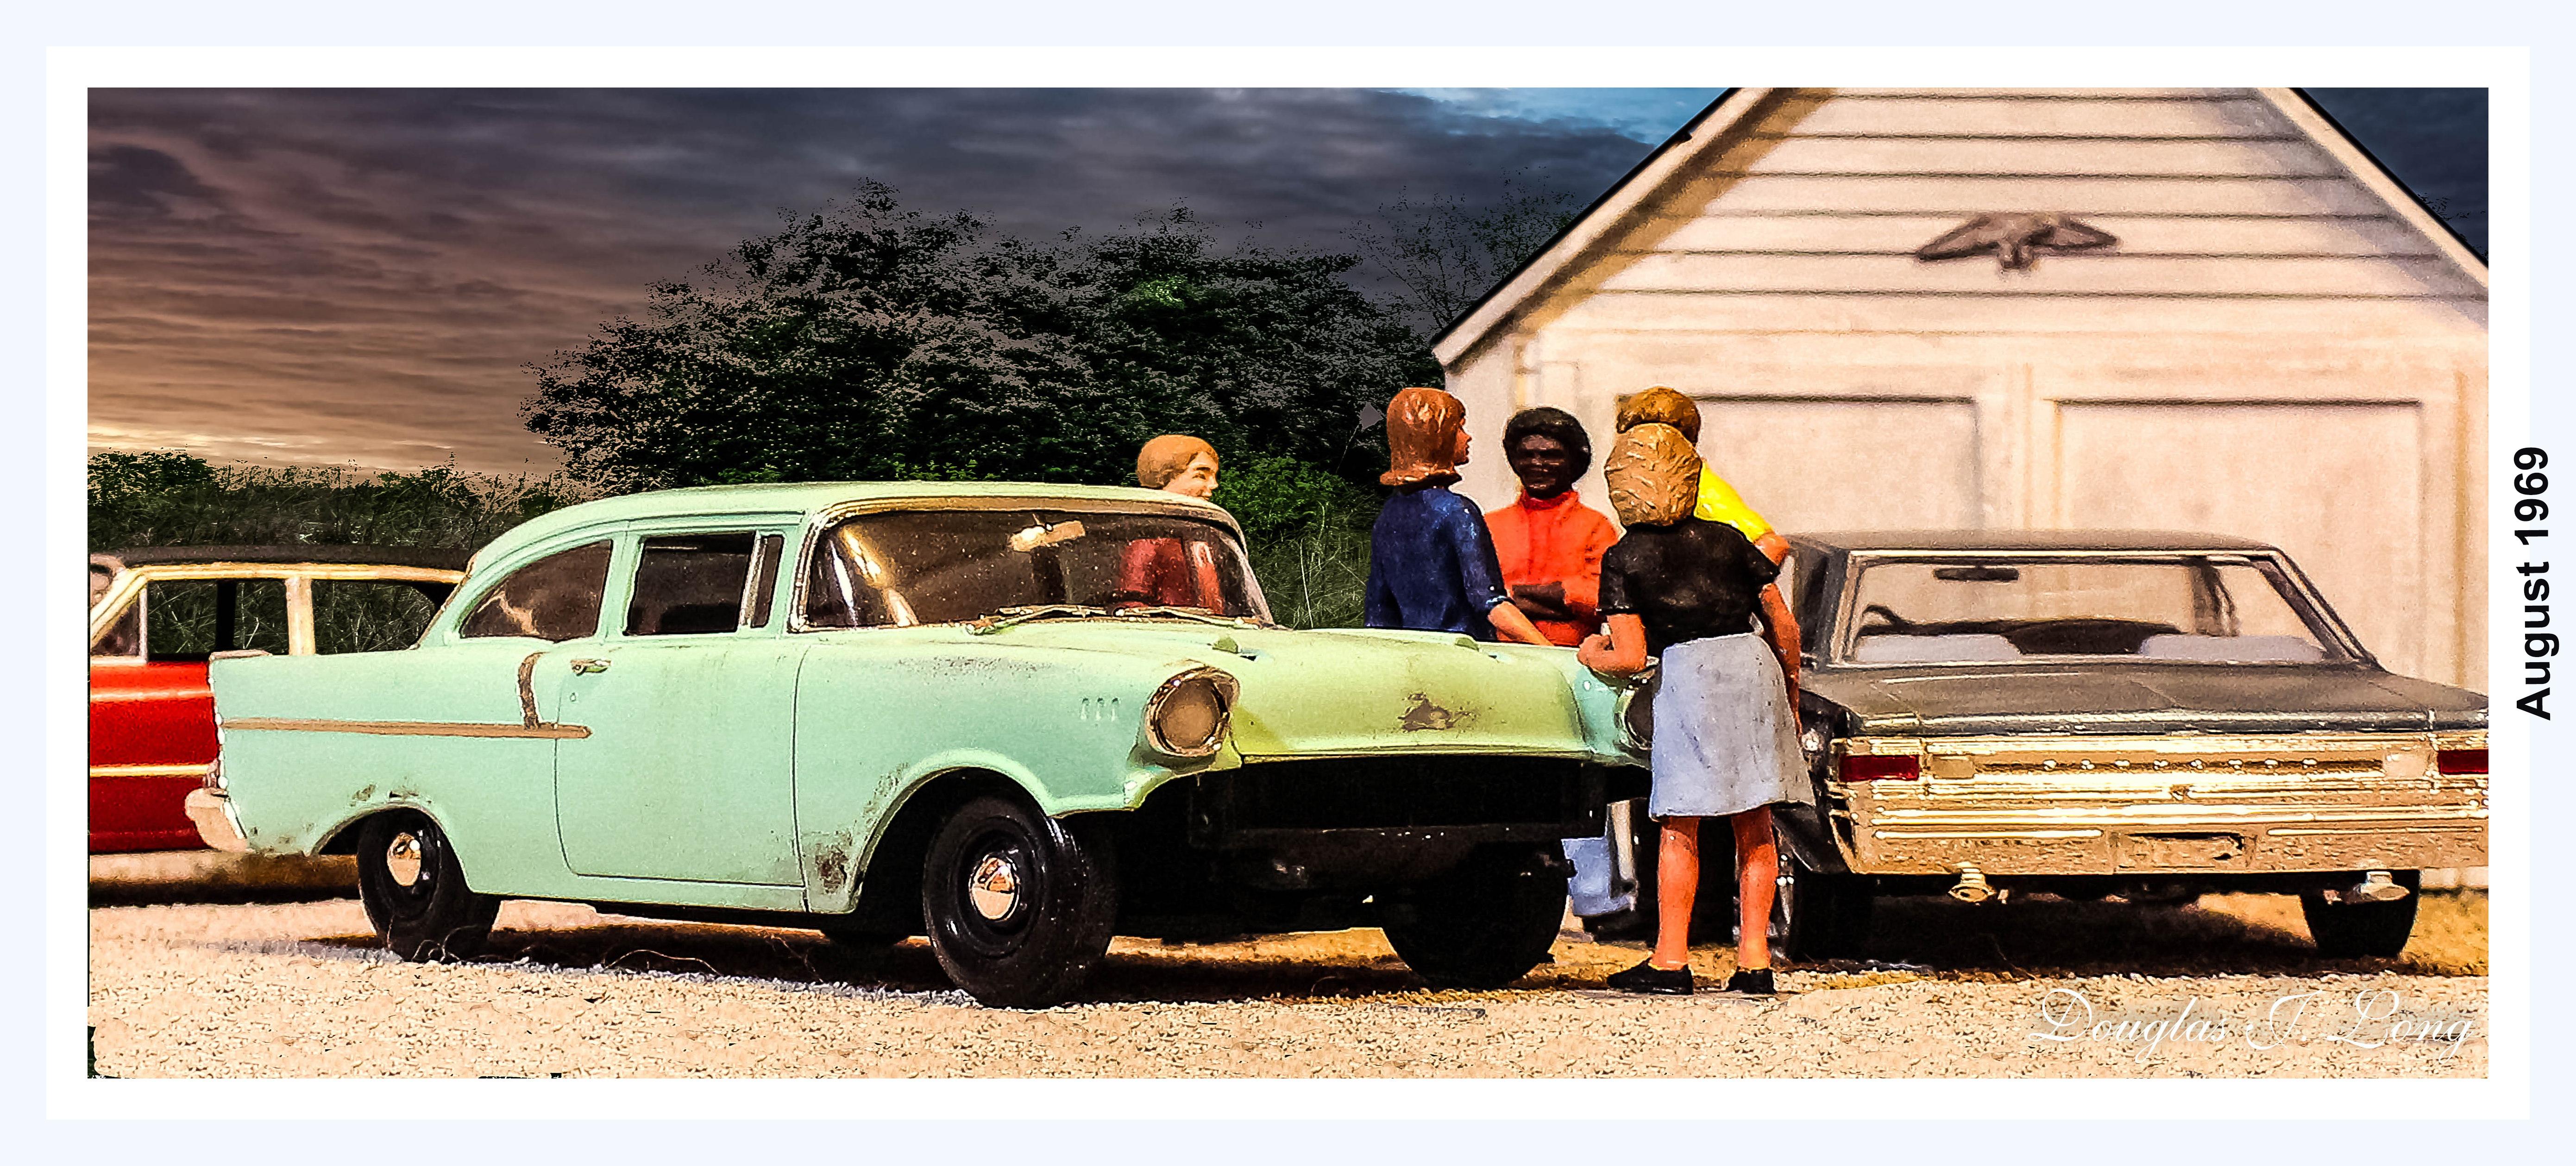
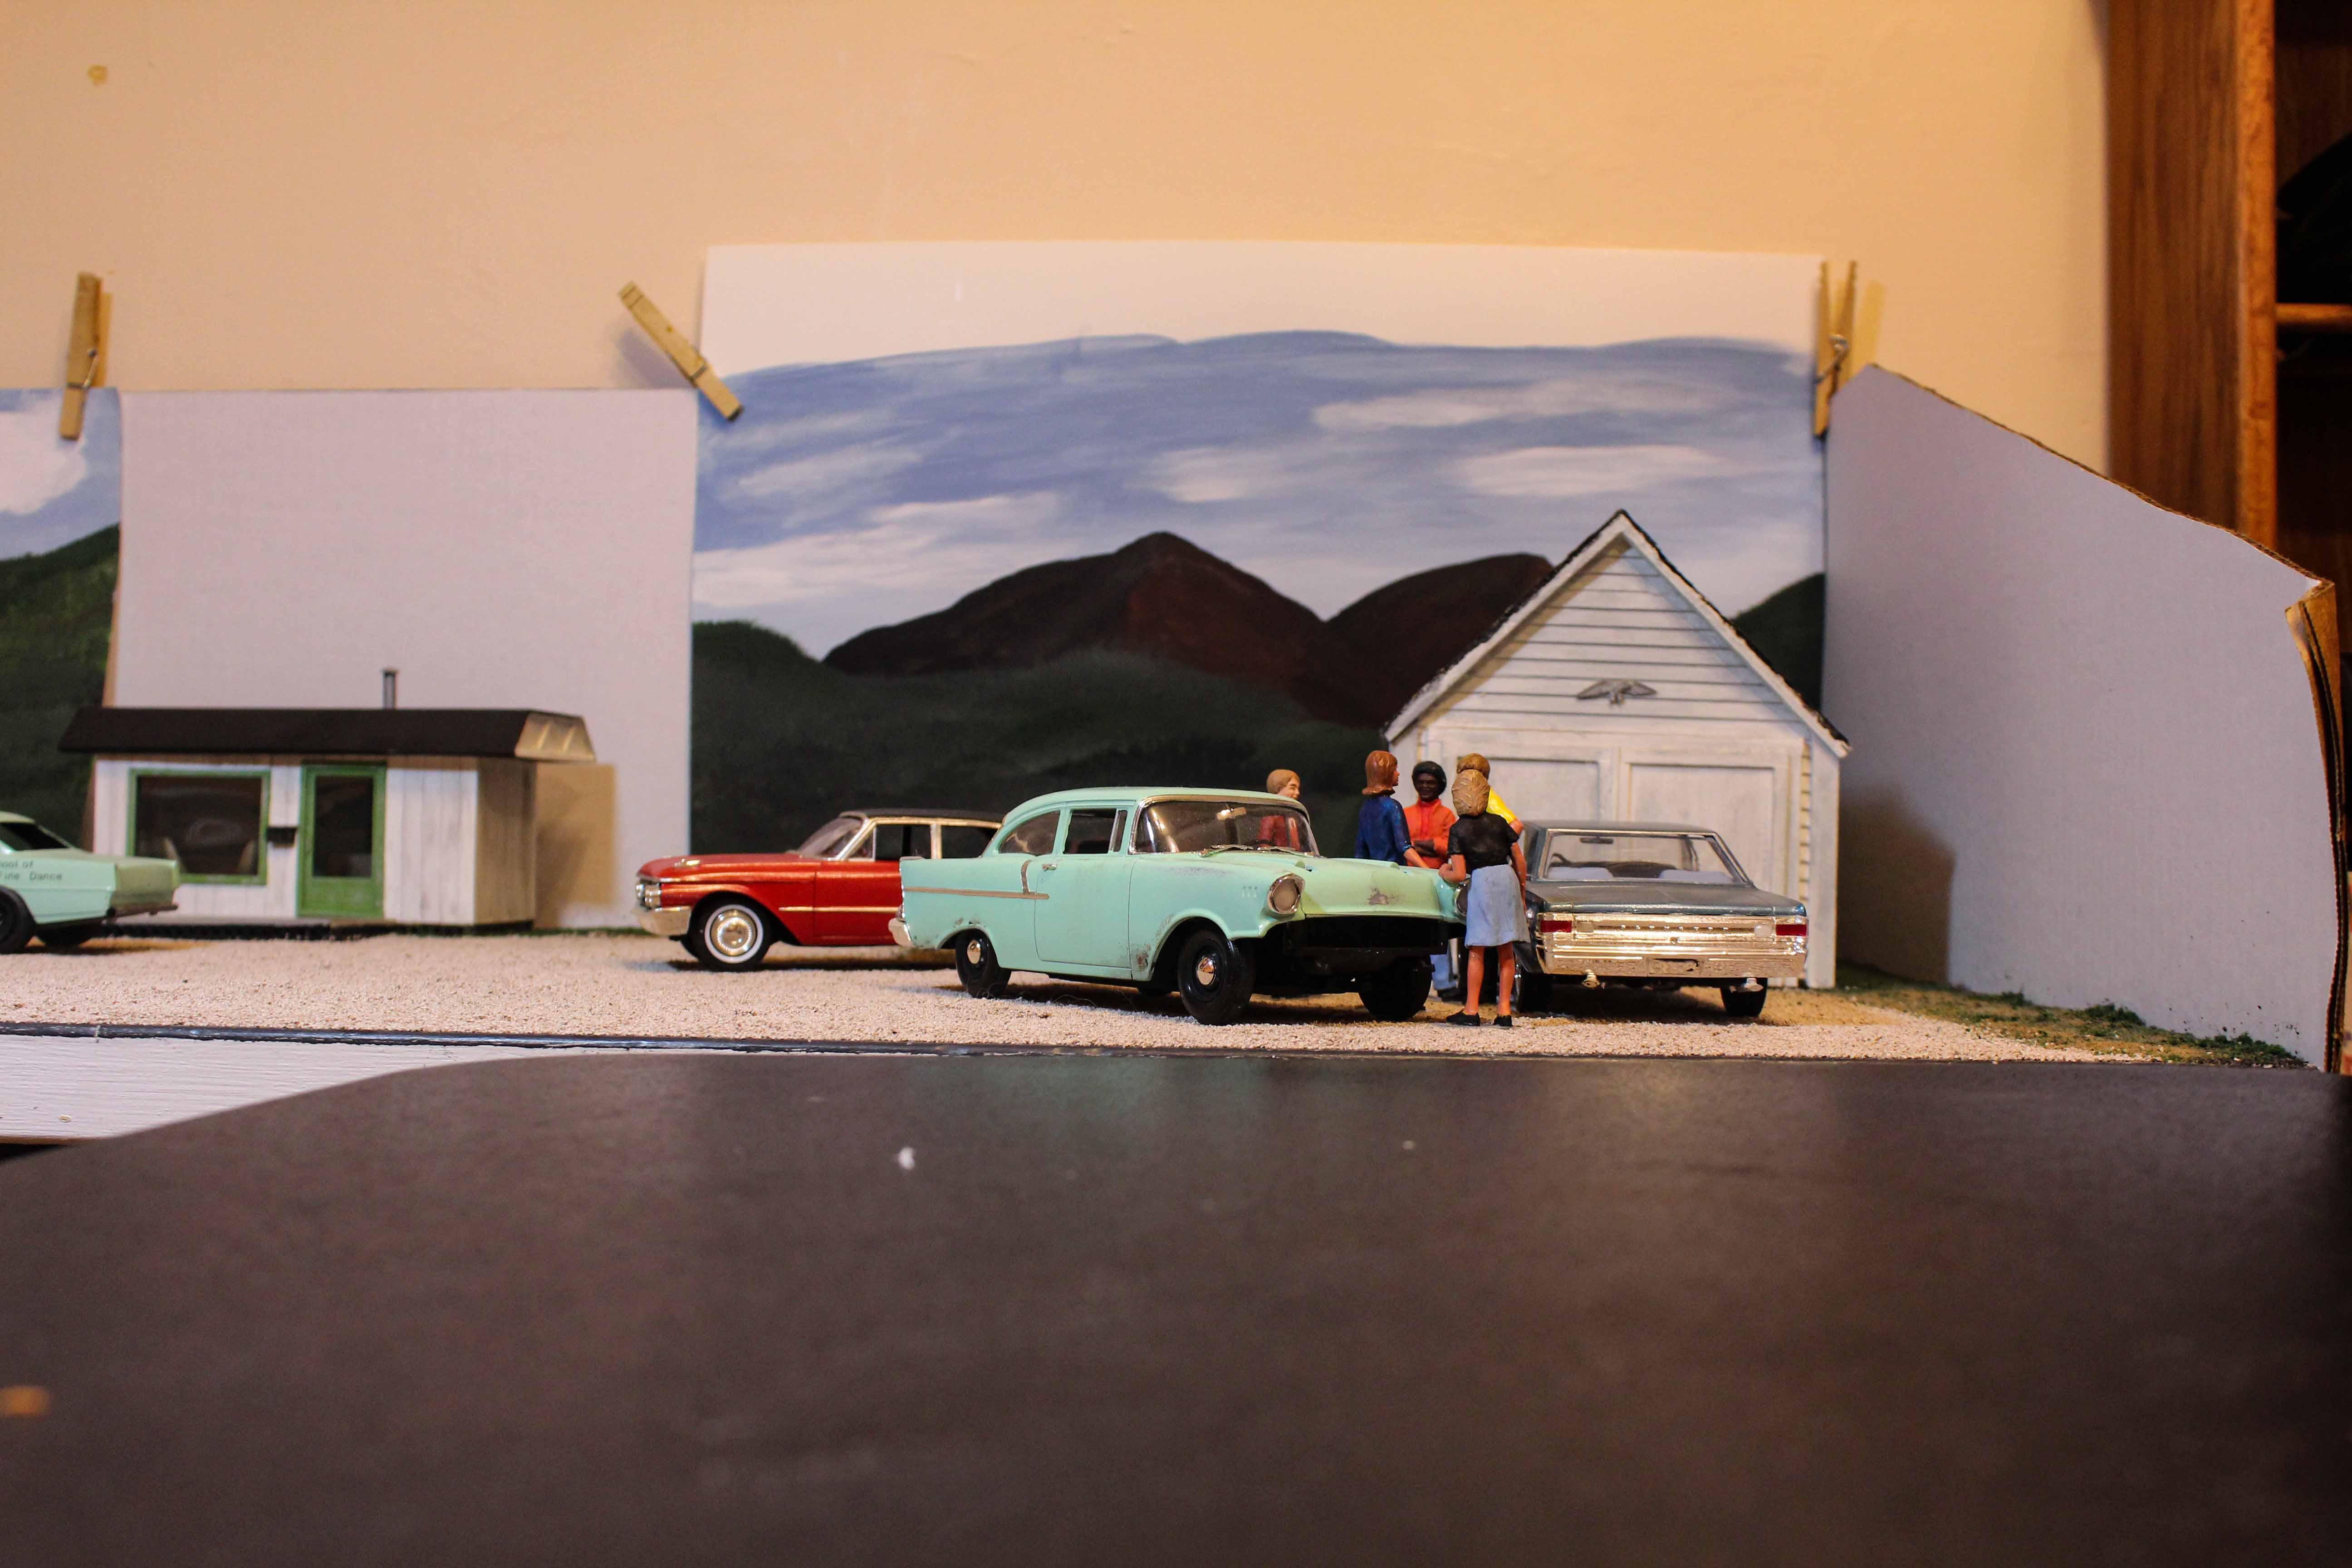
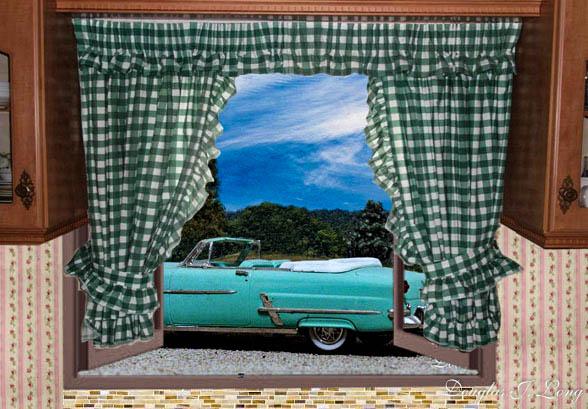
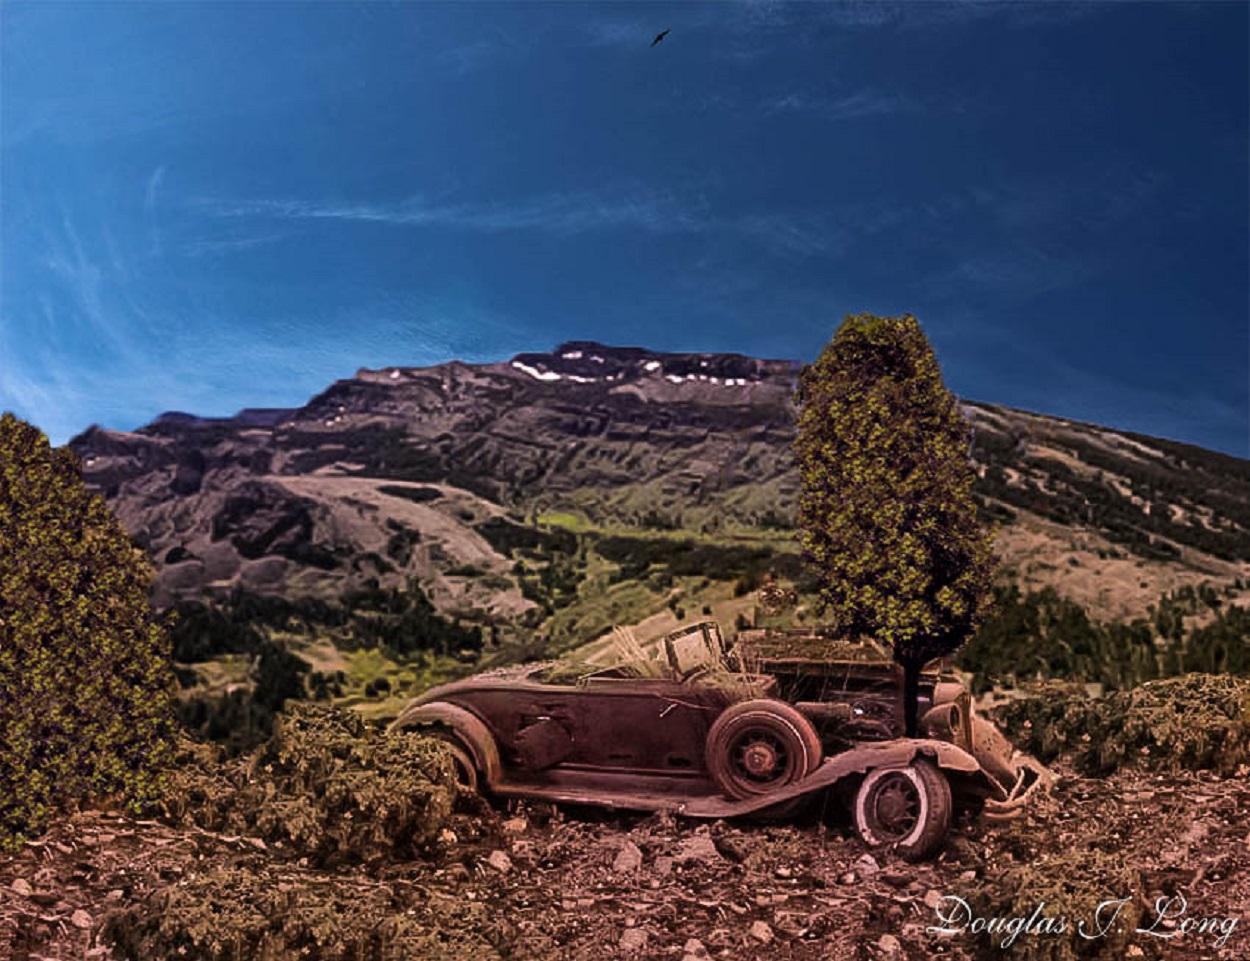
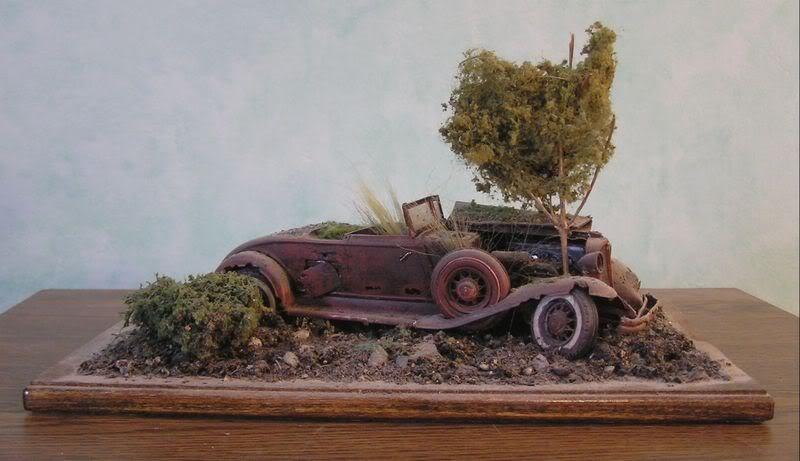
There are many who view dioramas with awe and wonderment, wishing that they could create works of art like that. Often, they lack the space for a diorama, or even the space for a model. I know several model builders that have to place their models back in the box when completed because they have no place to display their creations. For this reason, I am introducing you to the world of the cyber-diorama. You may still lack tangible display room, but you now have alternatives. The 'August 1969' diorama was a cyber-diorama. The base for it was 2 foot by 4 foot 1/2 inch plywood. It had fine gravel from Woodland Scenics glued to it. Everything else was extra to be placed when needed. In this case there were five figures, three cars, and a garage. The scene represents a group of young friends just enjoying being together on an August day. The second picture displays what I actually took a picture of. I then went to Photoshop to remove all the elements that I didn't want in the photo. From that I added trees, background, and sky, to be blended to form the first picture. There are many miniaturists that just don't have the room to keep their works of art on display. Building cyber-displays around them allows them a way to be able to see their treasures, even when tucked away in boxes. Using the figures, presents them in real life settings, or as in the case of 'August 1969', a 'Polaroid' picture. So you like working with photo-editing, well, here is something that you can do with any photo to personalize it. In this case, I used a model car photo, but don't let that limit you. This is a cyber-diorama that I created from a cyber-diorama. In the first one, the base and gravel on it, along with the car are tangible. Everything else was photo-edited in to create a scene. In the second picture, we are looking out of a window to see the car. Each element in that kitchen scene is separate. The wall paper, curtains, cupboards, window frames; each one had to be grafted in to give the impression that one is looking out the kitchen window to see the scene. How hard is it to create a diorama? This one consists of just four elements; the model, a metal table, a calendar picture, and a cereal box. The model was set on the metal table, a full cereal box (full for stability) was placed behind the model, and then the calendar picture was placed against the box. Admittedly, is is a very temporary diorama, but you can easily remember it by taking a picture. What would it take to make it a permanent diorama? A couple of pieces of sturdy plastic, one for the base and one for the back would be your start. Paint the base flat gray or flat black. Glue the back to the base, and then the calendar picture to the back. Place the car on the base, and with the exception of some bracing, you have a diorama. Don't be intimidated by all the fabulous dioramas that you see the miniaturists display. We all had to start somewhere, and we place our work here, not to gloat, but to encourage others. In the second picture, you see a small diorama that my late wife built. As a tribute to her, in her last days, I created an acrylic painting involving the model. However, the disclaimer would be that the painting doesn't exist outside of the cyber world. The work was all done using Photoshop. It consisted of a picture taken of the model and the diorama base. Once brought to Photoshop, the ground and trees were altered to reflect that which is found in much of Alaska. The bush was made to look like the Salmonberry bush that was so common around Kodiak. The sapling tree was given growth and a friend. Behind the car are multiple layers of mountain pictures, followed by the sky. All of that was blended together, and then further reworked to reflect an acrylic painting. You now get an idea of just what you can accomplish in the cyber-world, but I have more. As your skills evolve, and note the word 'evolve'... ...you will find yourself adjusting the adjustments... This picture, although generally rather simple in most terms, does require another skill. To begin, the rock, figures, car, and buildings are all tangible. The backdrop is a calendar picture. To this point it would follow the same procedure as the 1961 Cadillac, shown earlier. The trick is that this car was photographed in front of a gray screen. The photo was added in photo-editing. The reason is that the photo had to have a mirror image made from it. The left side is original, with the right being the mirror image, which then had to have work done to it. What one is left with is a very New England setting. We return to layers in photo-editing. In this example, the car and the gravel close to it are tangible. Everything else is edited in. Each tree, bush, area of grass, sky, and building, are separate layers. Each layer then receives detailing, and attention to such things as lighting and shadow direction. You can also rework the car. In this case I made a Series 62 from an Eldorado. Just how elaborate can one get? Once again, all that is tangible is the automobile and some gravel. Everything else that you see is cyber generated. This one was constructed with a purpose. That purpose was to move the viewer's eye from the front to the rear of the picture. For those who were around in the 80s & 90s, you might remember an art show with a Mr. Bob Ross. I followed his guidelines in this work. The front trees help to frame the photo, while at the same time working to 'move' the scene back. In order to do this, construction began at the rear and moved to the front. This is where things can get difficult, not so much from the work, but in hiding objects. Many of those objects are very interesting, such as the house to the left. Note the 'steeple' on the house behind it. These work to add depth. That depth is gained by hiding said houses, and also much of the trees seen behind the hedge. The hedge plays a key role. It adds a backdrop for the vehicle, while at the same time creating depth. Surprisingly, is how much the small grassy area between the car and the hedge also add to the depth. As we move foreword from the car and the rock, we encounter another grassy and bushy area, along with the aforementioned, trees. These all work together to create a scene that looks quite deep, but what helps to really convey the depth impression, is the simple jet stream, which tells the viewer that there is more world behind the photo. Remember to start off simple, as in the 1961 Cadillac picture. As you gain experience, you will find yourself taking pictures of every model you have, and giving it a cyber-world. When you get to the level of the last picture, it won't be work nor difficult, it will be a blast. I am thankful that I did make all of these pictures. With my wife contracting terminal Cancer, we had to move from Alaska, and she passed shortly thereafter. I had to let my collection go to a friend there. Those models are still in my collection, although only on cyber form. So whether you have room for a model collection or just want to back up your collection, give cyber-dioramas a try.
- 1 reply
-
- 3
-

-
- diorama
- 1/25 scale
- (and 1 more)
-
A fine summer day brings some street sweeties out to the lot, while Tamara takes photos of some of the participants and their cars. I made this a hybrid cyber-diorama by taking the picture into photo editing and adding a fence to the left. I then added a tree then mountain backdrop, and finished with a sky layer.
-
These are just some of the 1948 Fords that I've built lately.
-
When I was a youth, I had a real 1960 Chevrolet Impala 2 door hardtop. It looked good, but not this good, but this is my tribute to it anyway. It was yellow with a green top and green interior.
-
Modeling TV sit-com cars from '50s-60s; any out there?
Kodiak Island Modeler replied to W Humble's topic in WIP: Dioramas
I remember seeing a 58 Edsel n Leave It To Beaver. Green Acres had a rather strange 60s Lincoln convertible. I even have the videos of that show, but as many times as I watch it, I know something is 'off' about that car, but I just can't place it. I Love Lucy had the famous windshieldless 55 Pontiac convertible. Although not a comedy, one should never forget Route 66 and the Corvettes. -
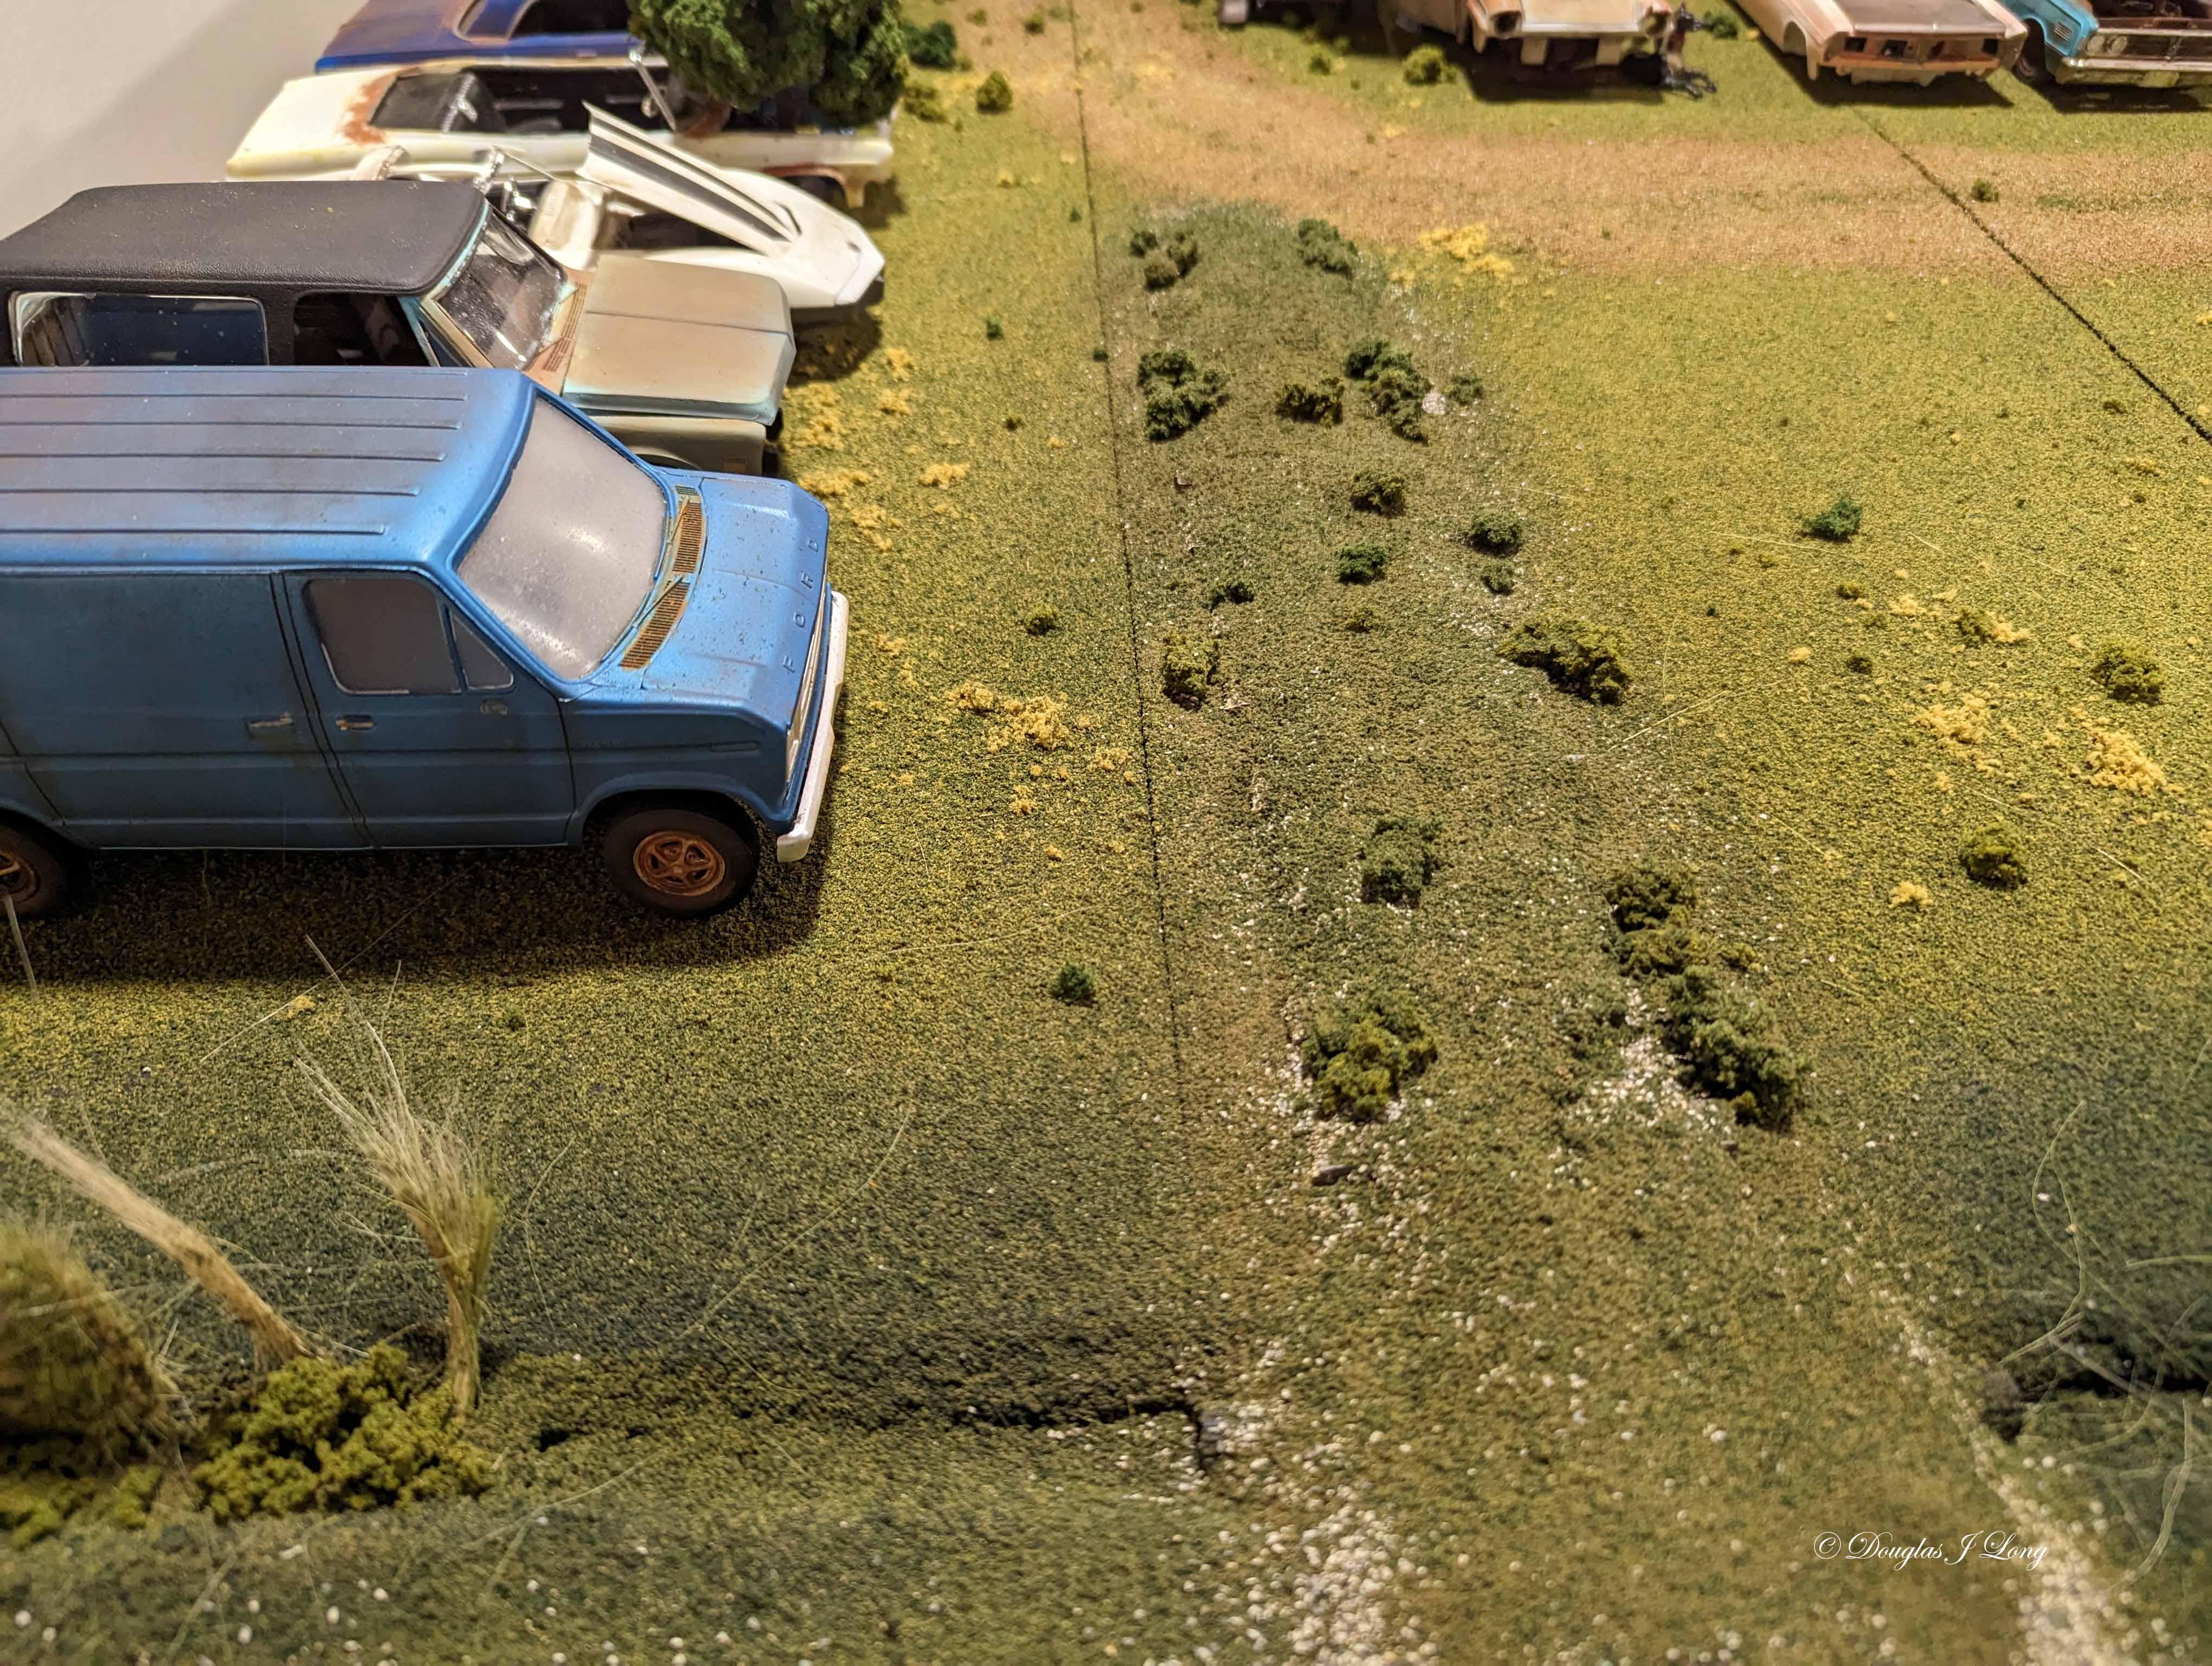
I took the advice of a YouTube viewer, and added a gravel road at the left side of the diorama. This is starting to give me a feel of the area that I grew up around in Iowa. The next photo gives a view of the junkyard addition, and the lane that runs through it. This is going to be much more interesting than having cars simply lined up. They will now have a little more 'movement' to their locations. My staging now is that the subject is at the corner of a two lane highway, and a gavel road.
-
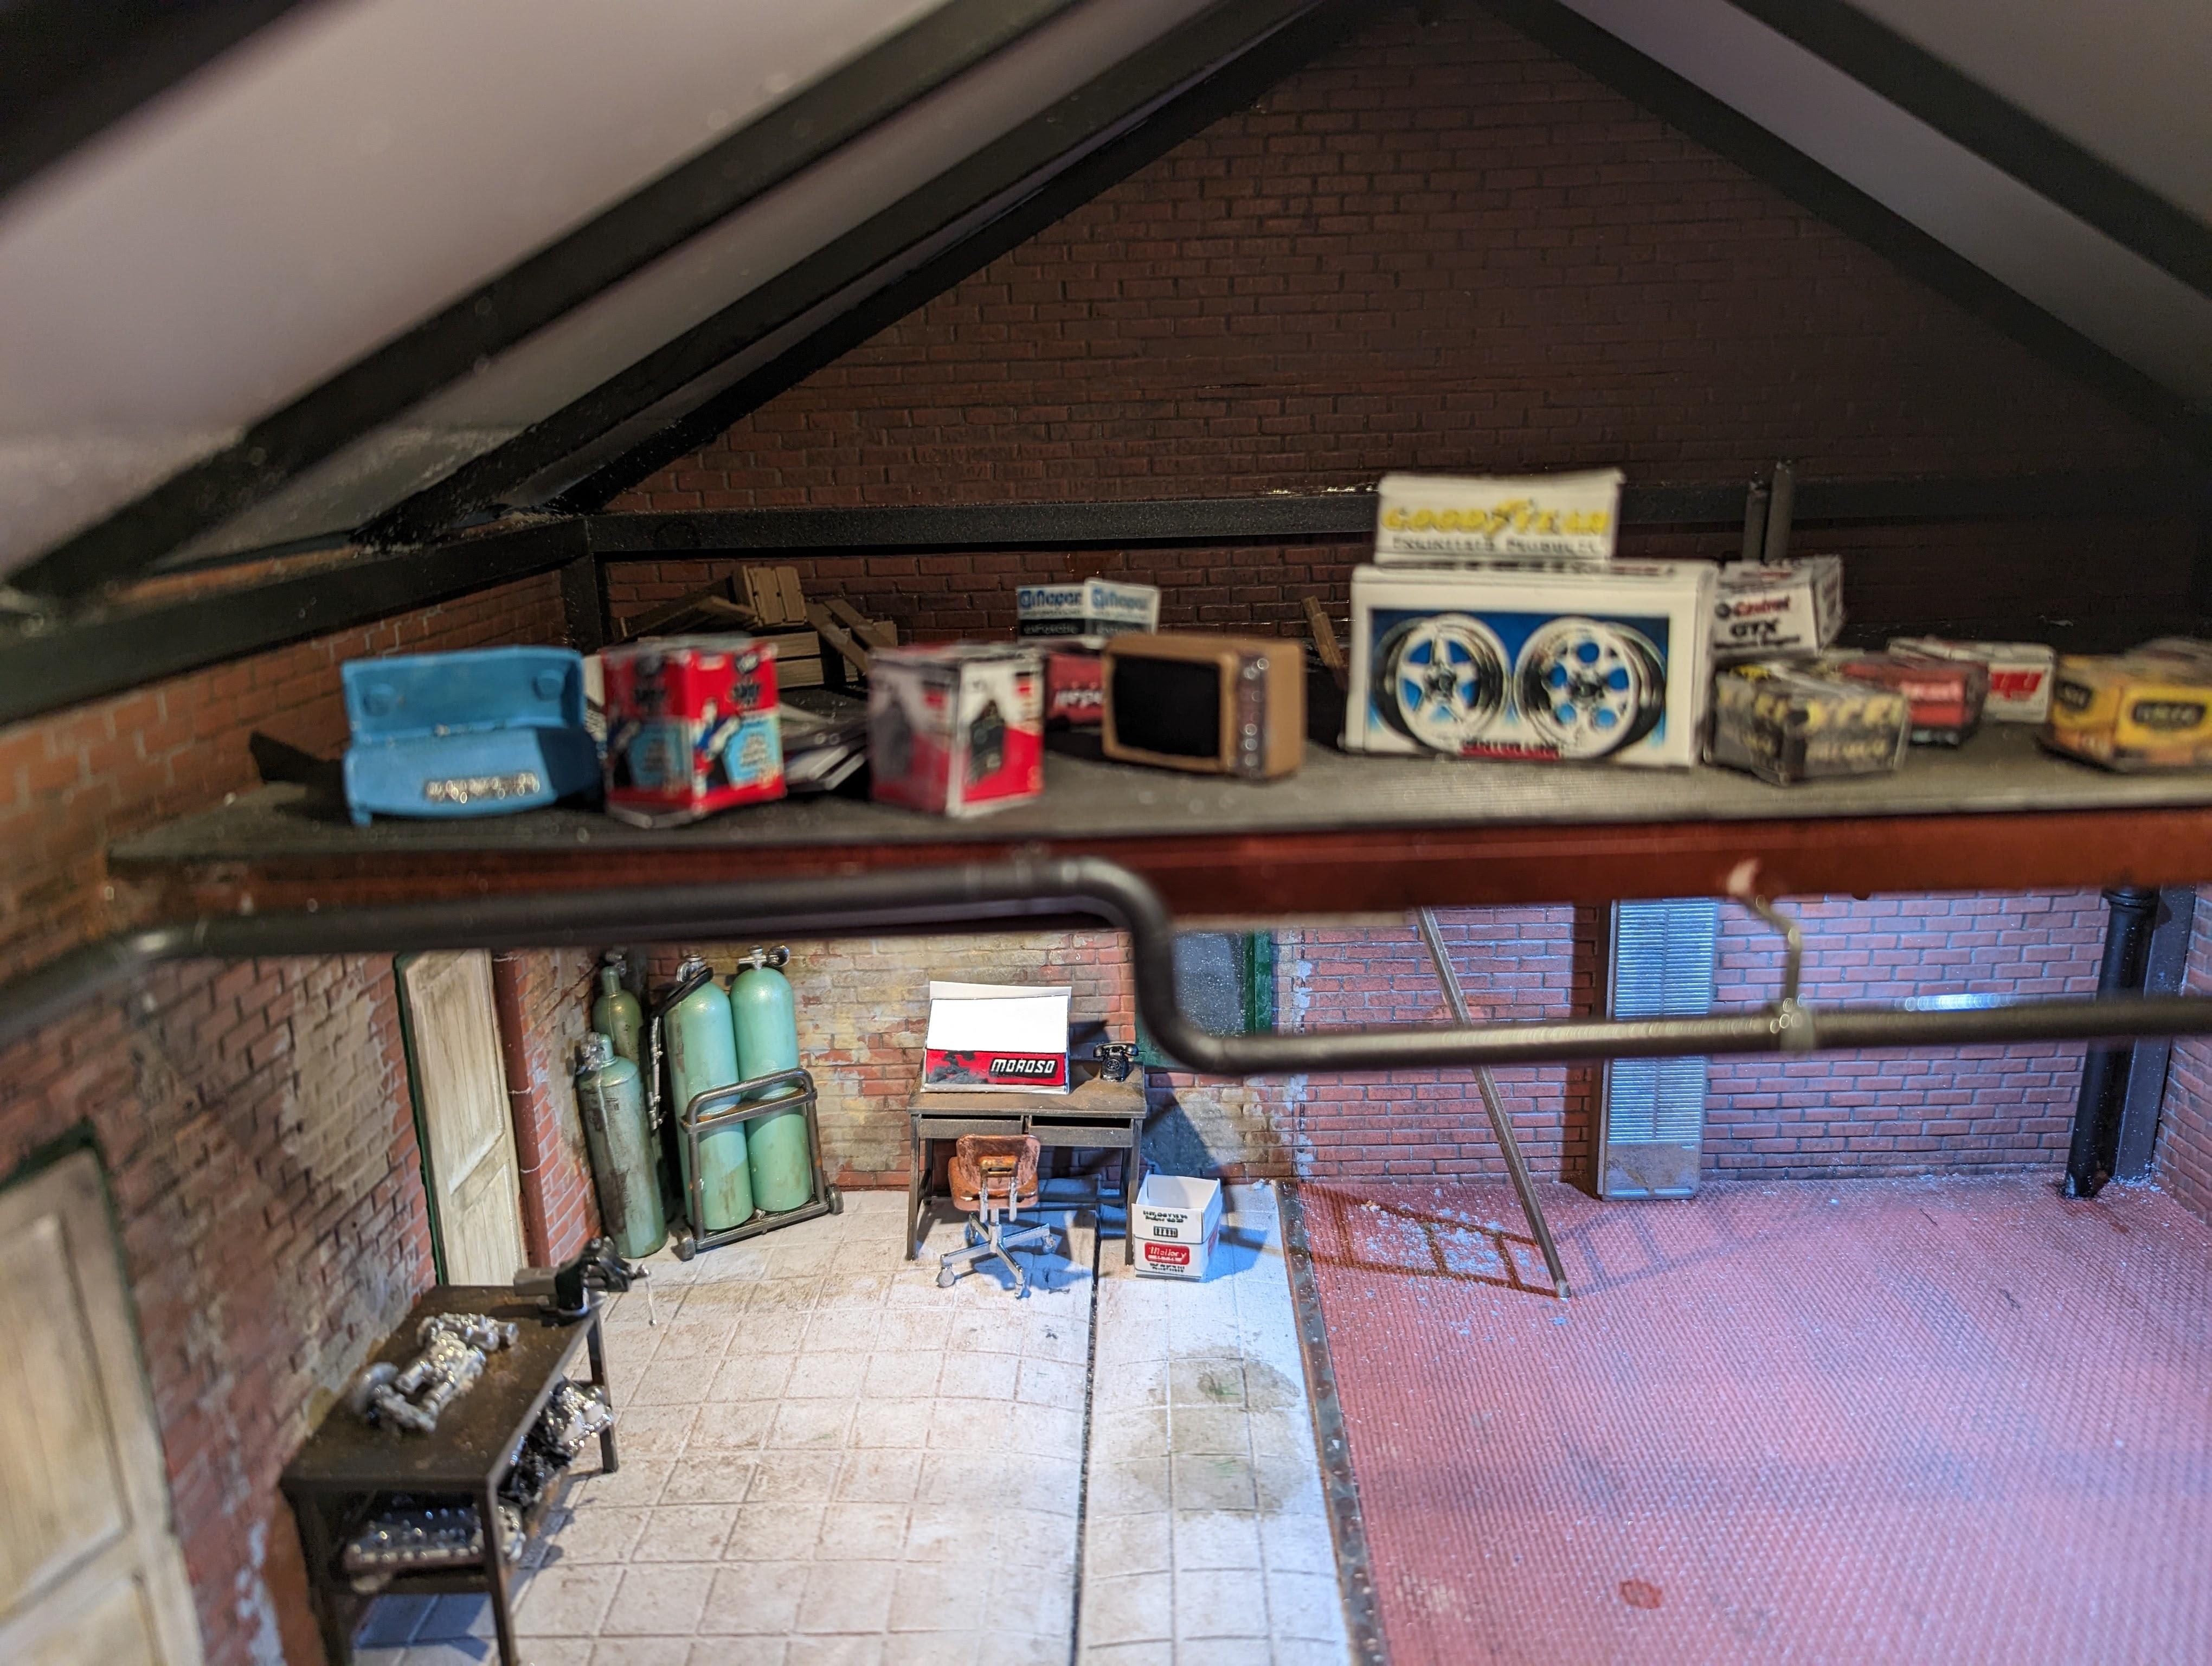
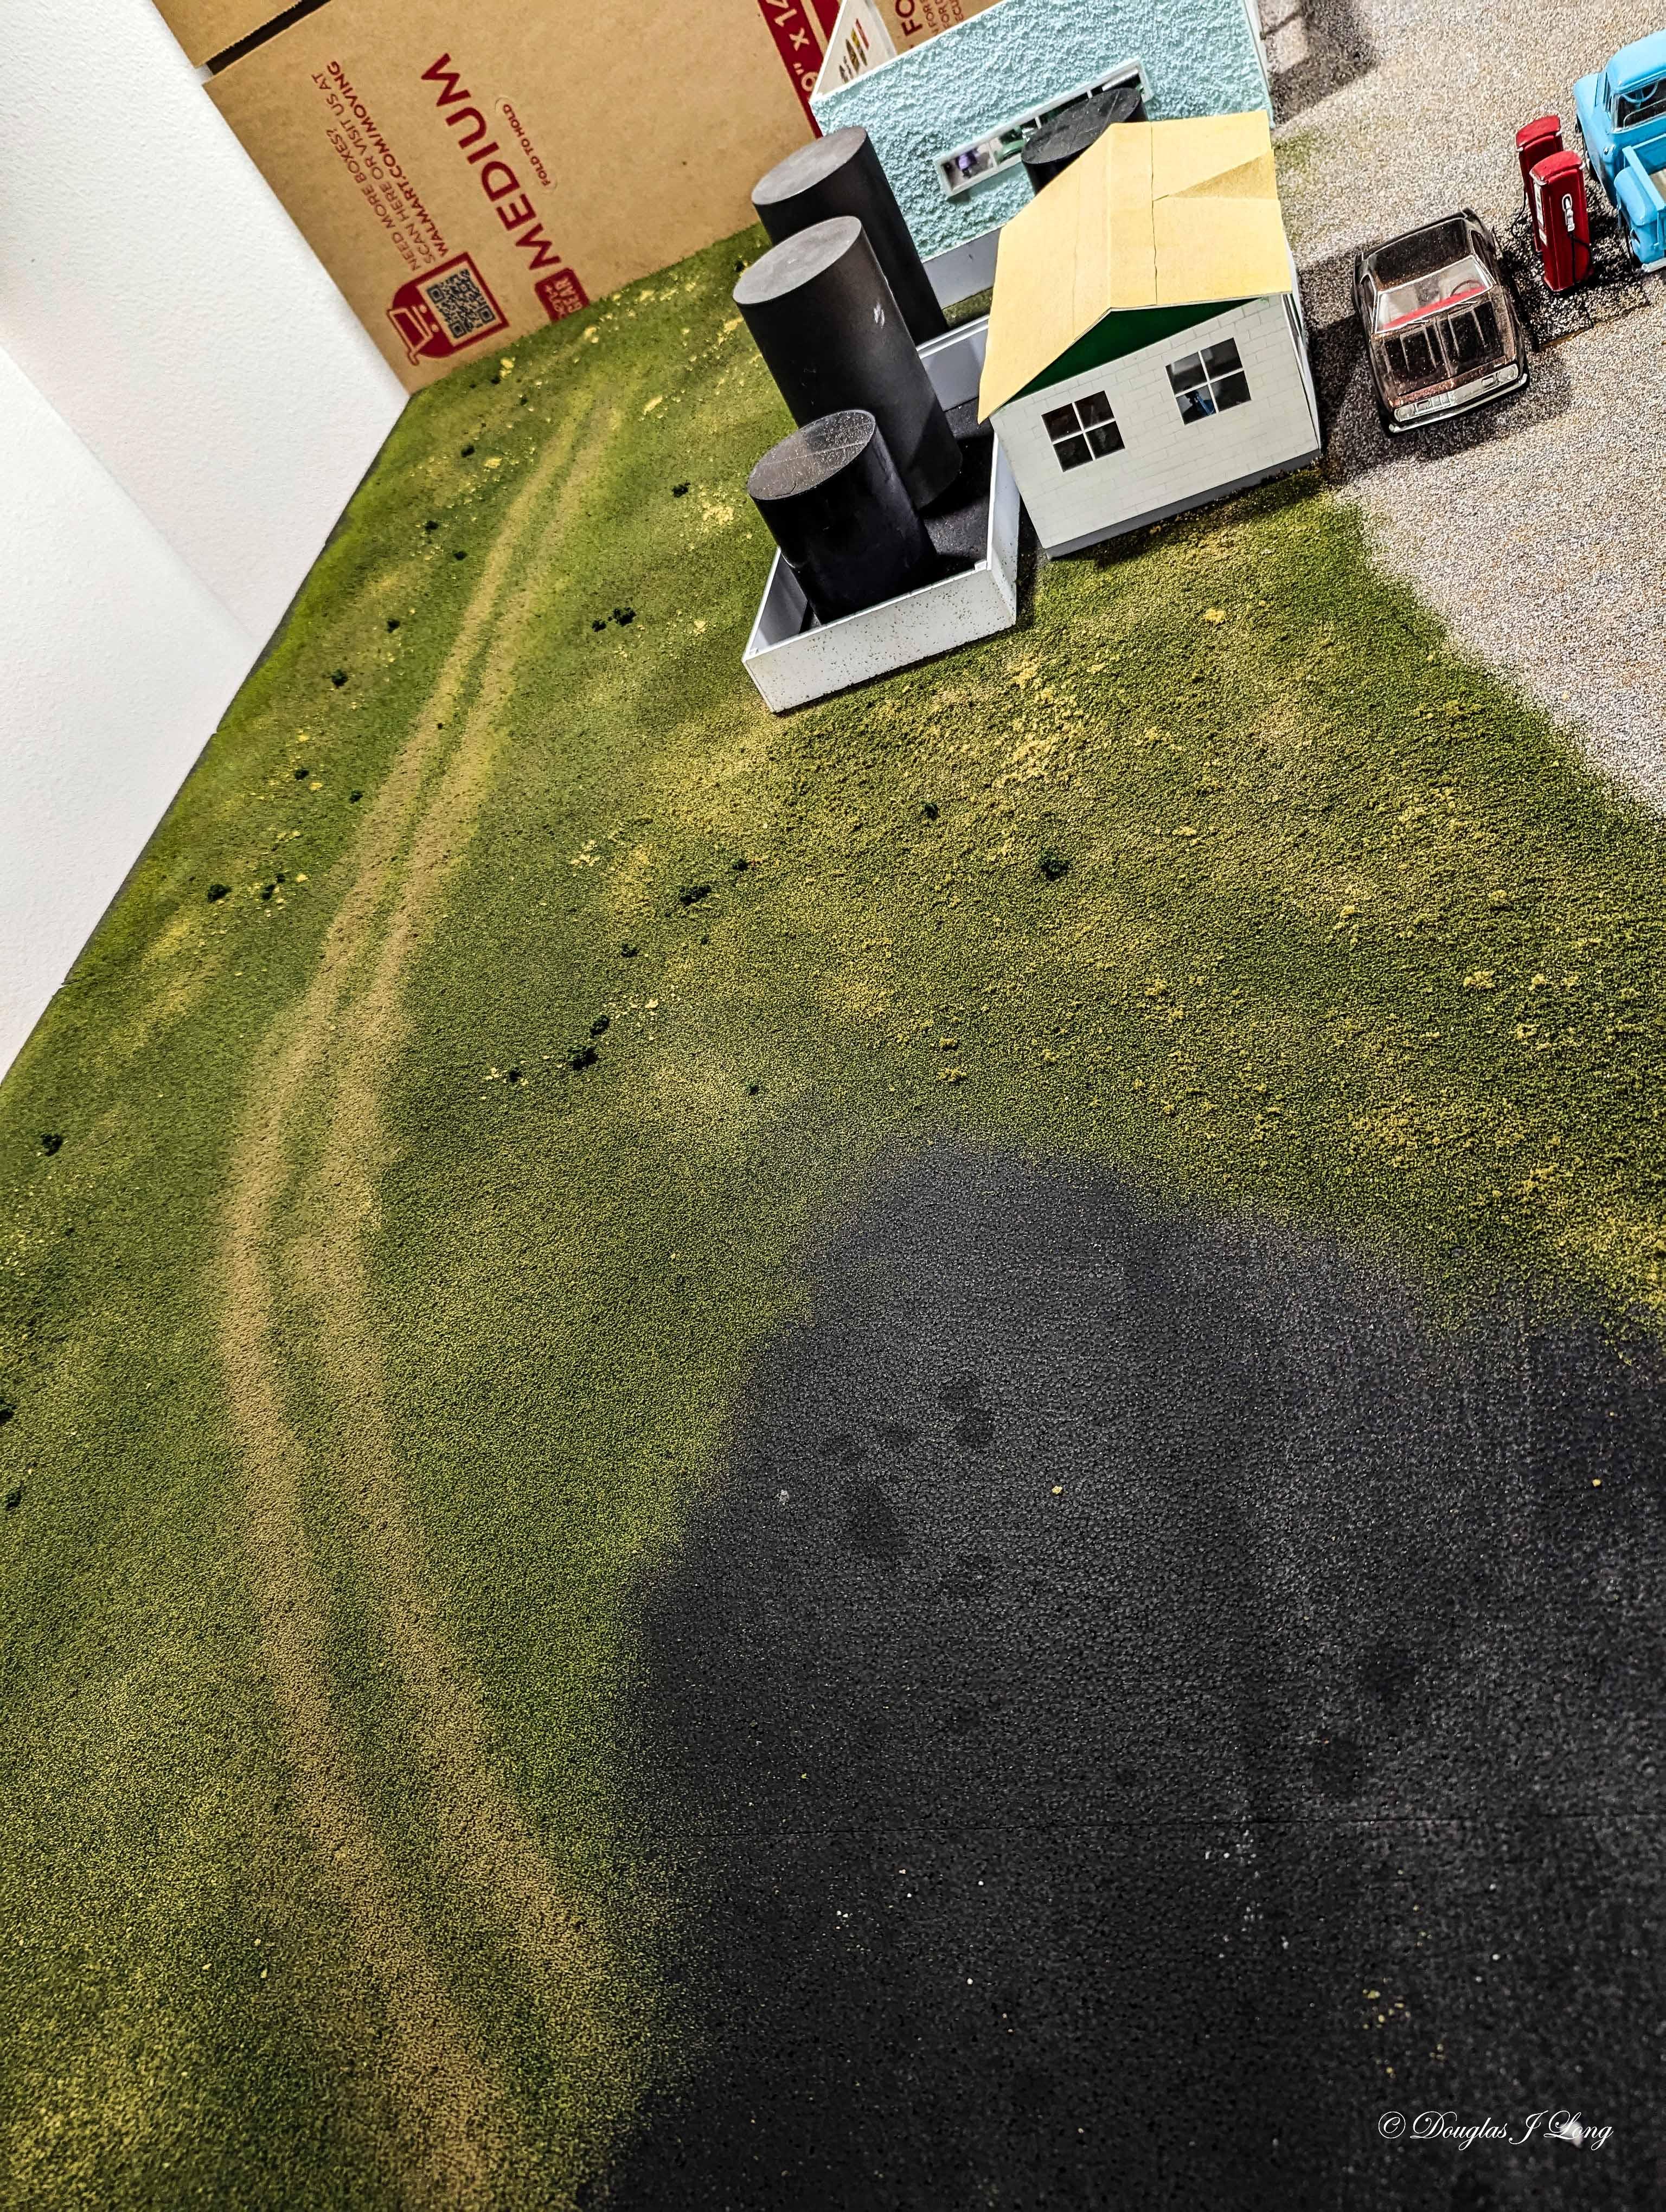
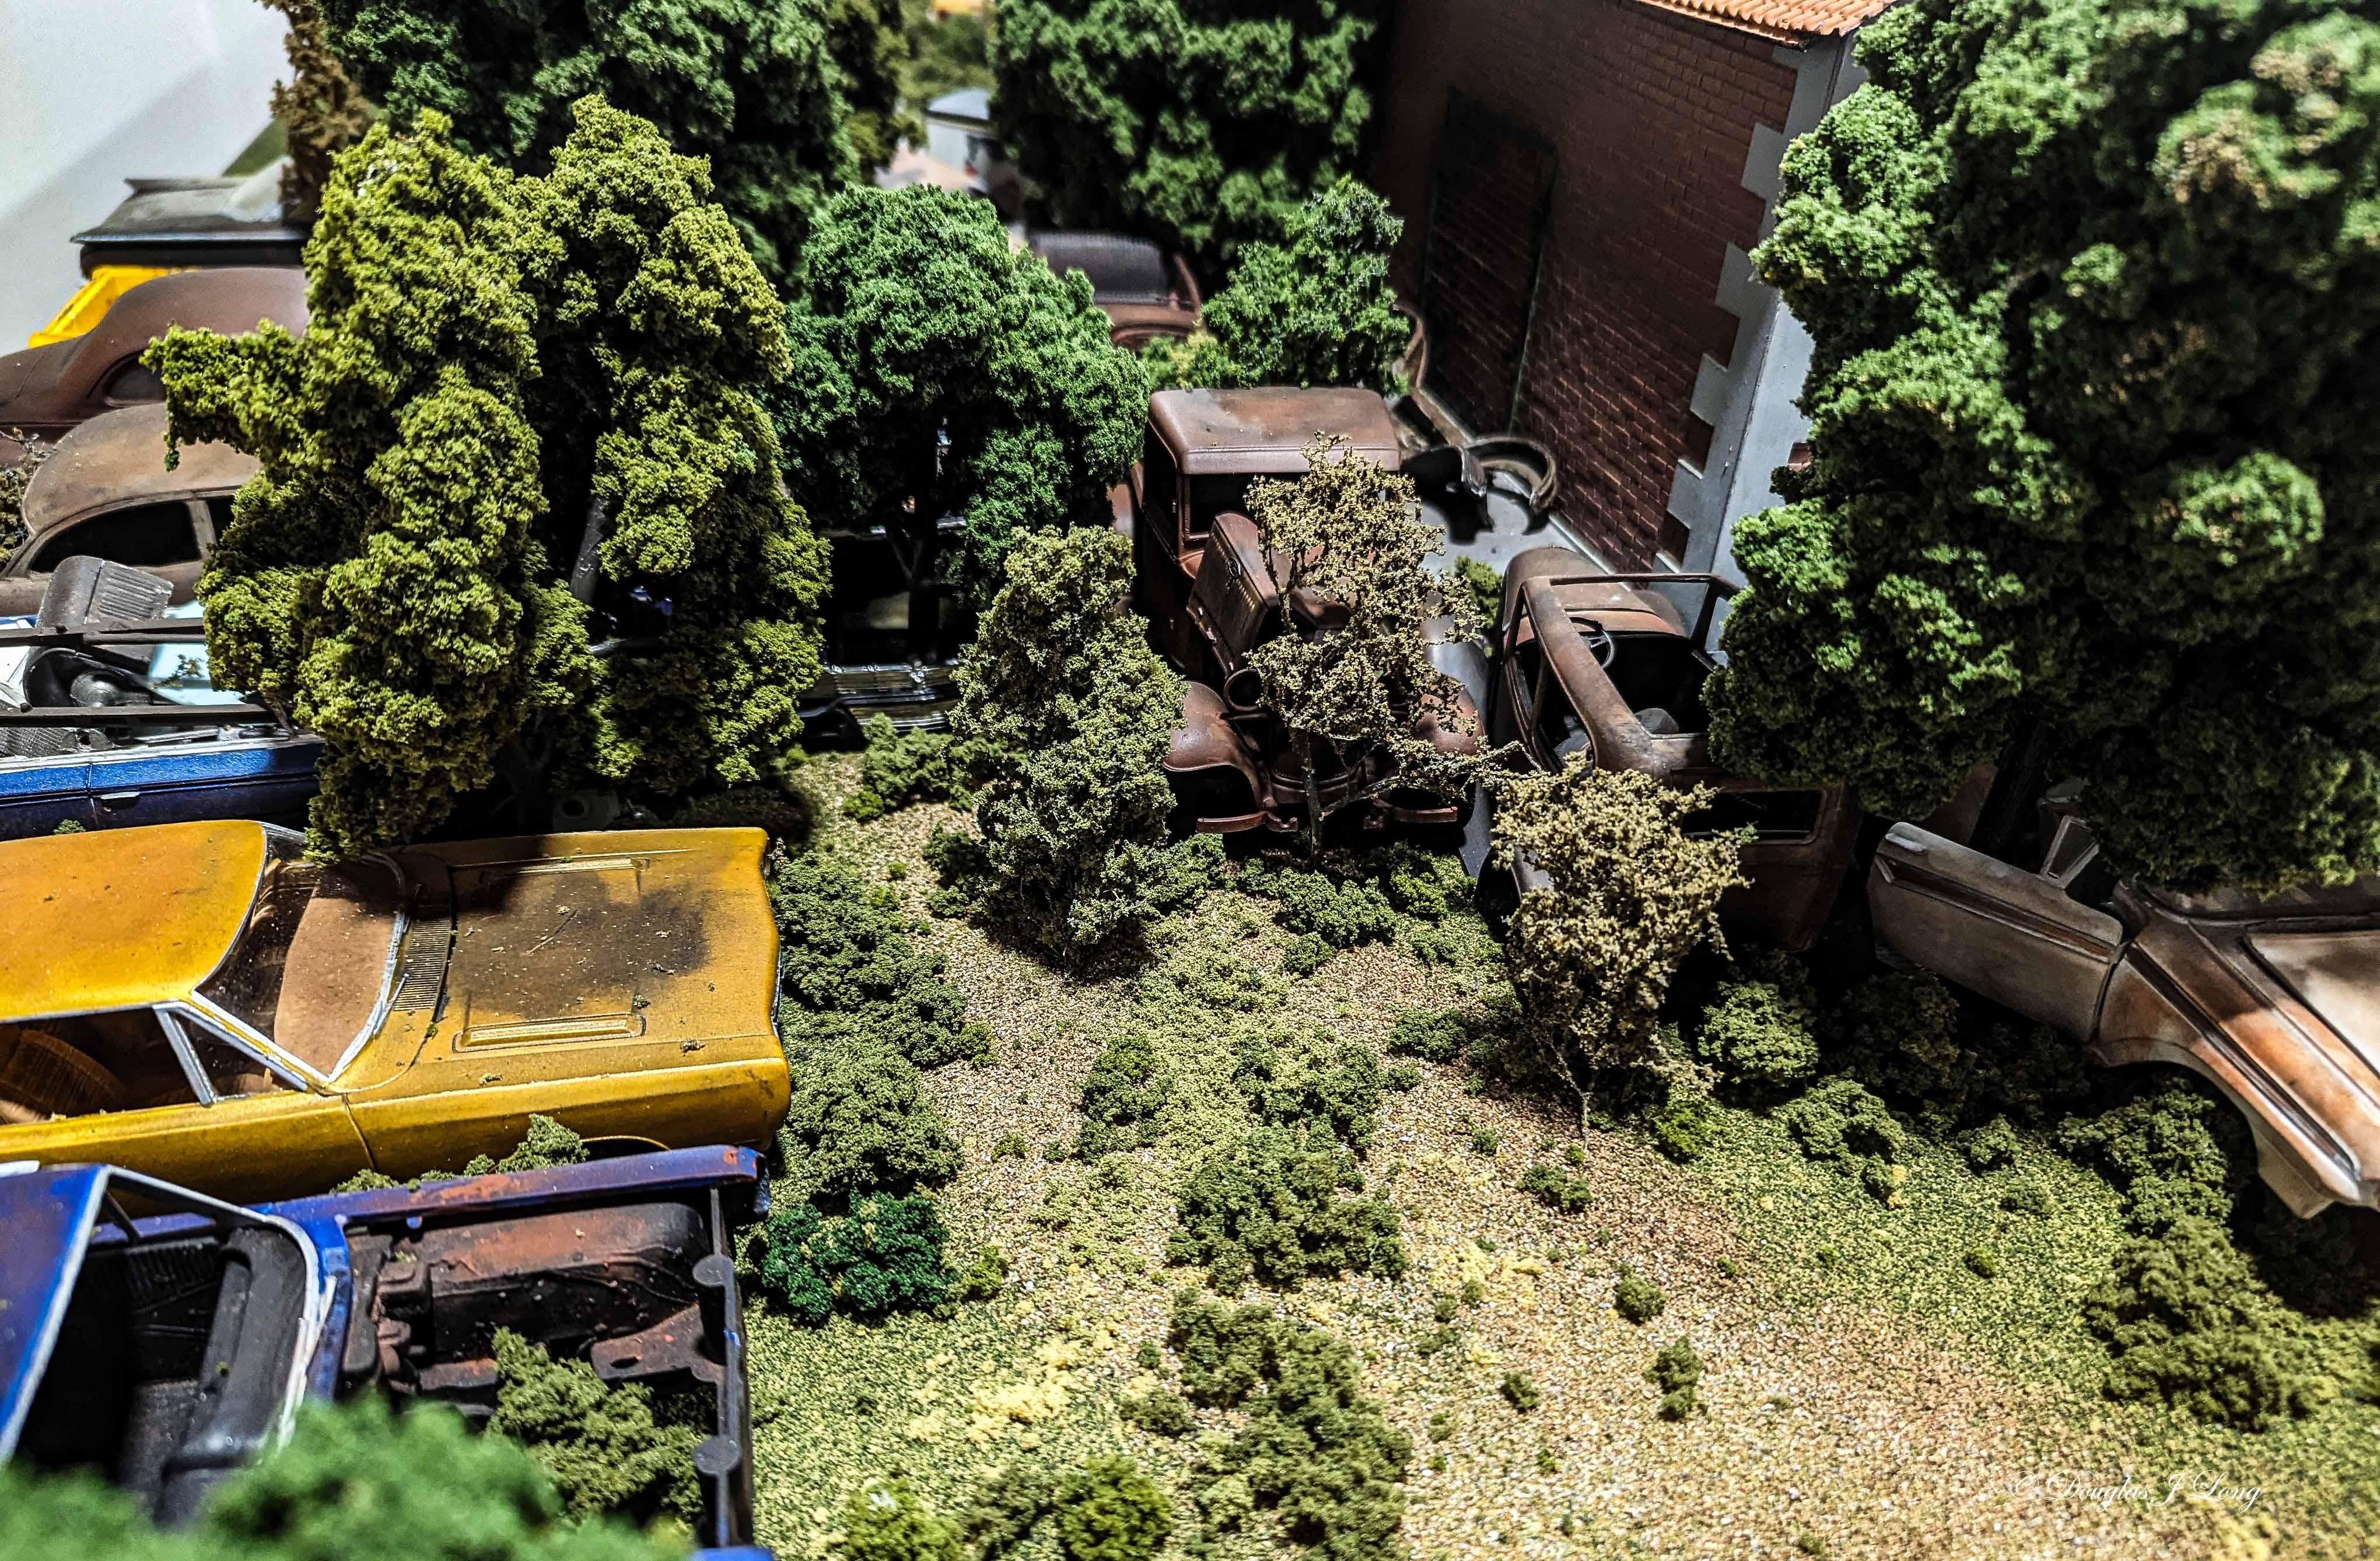
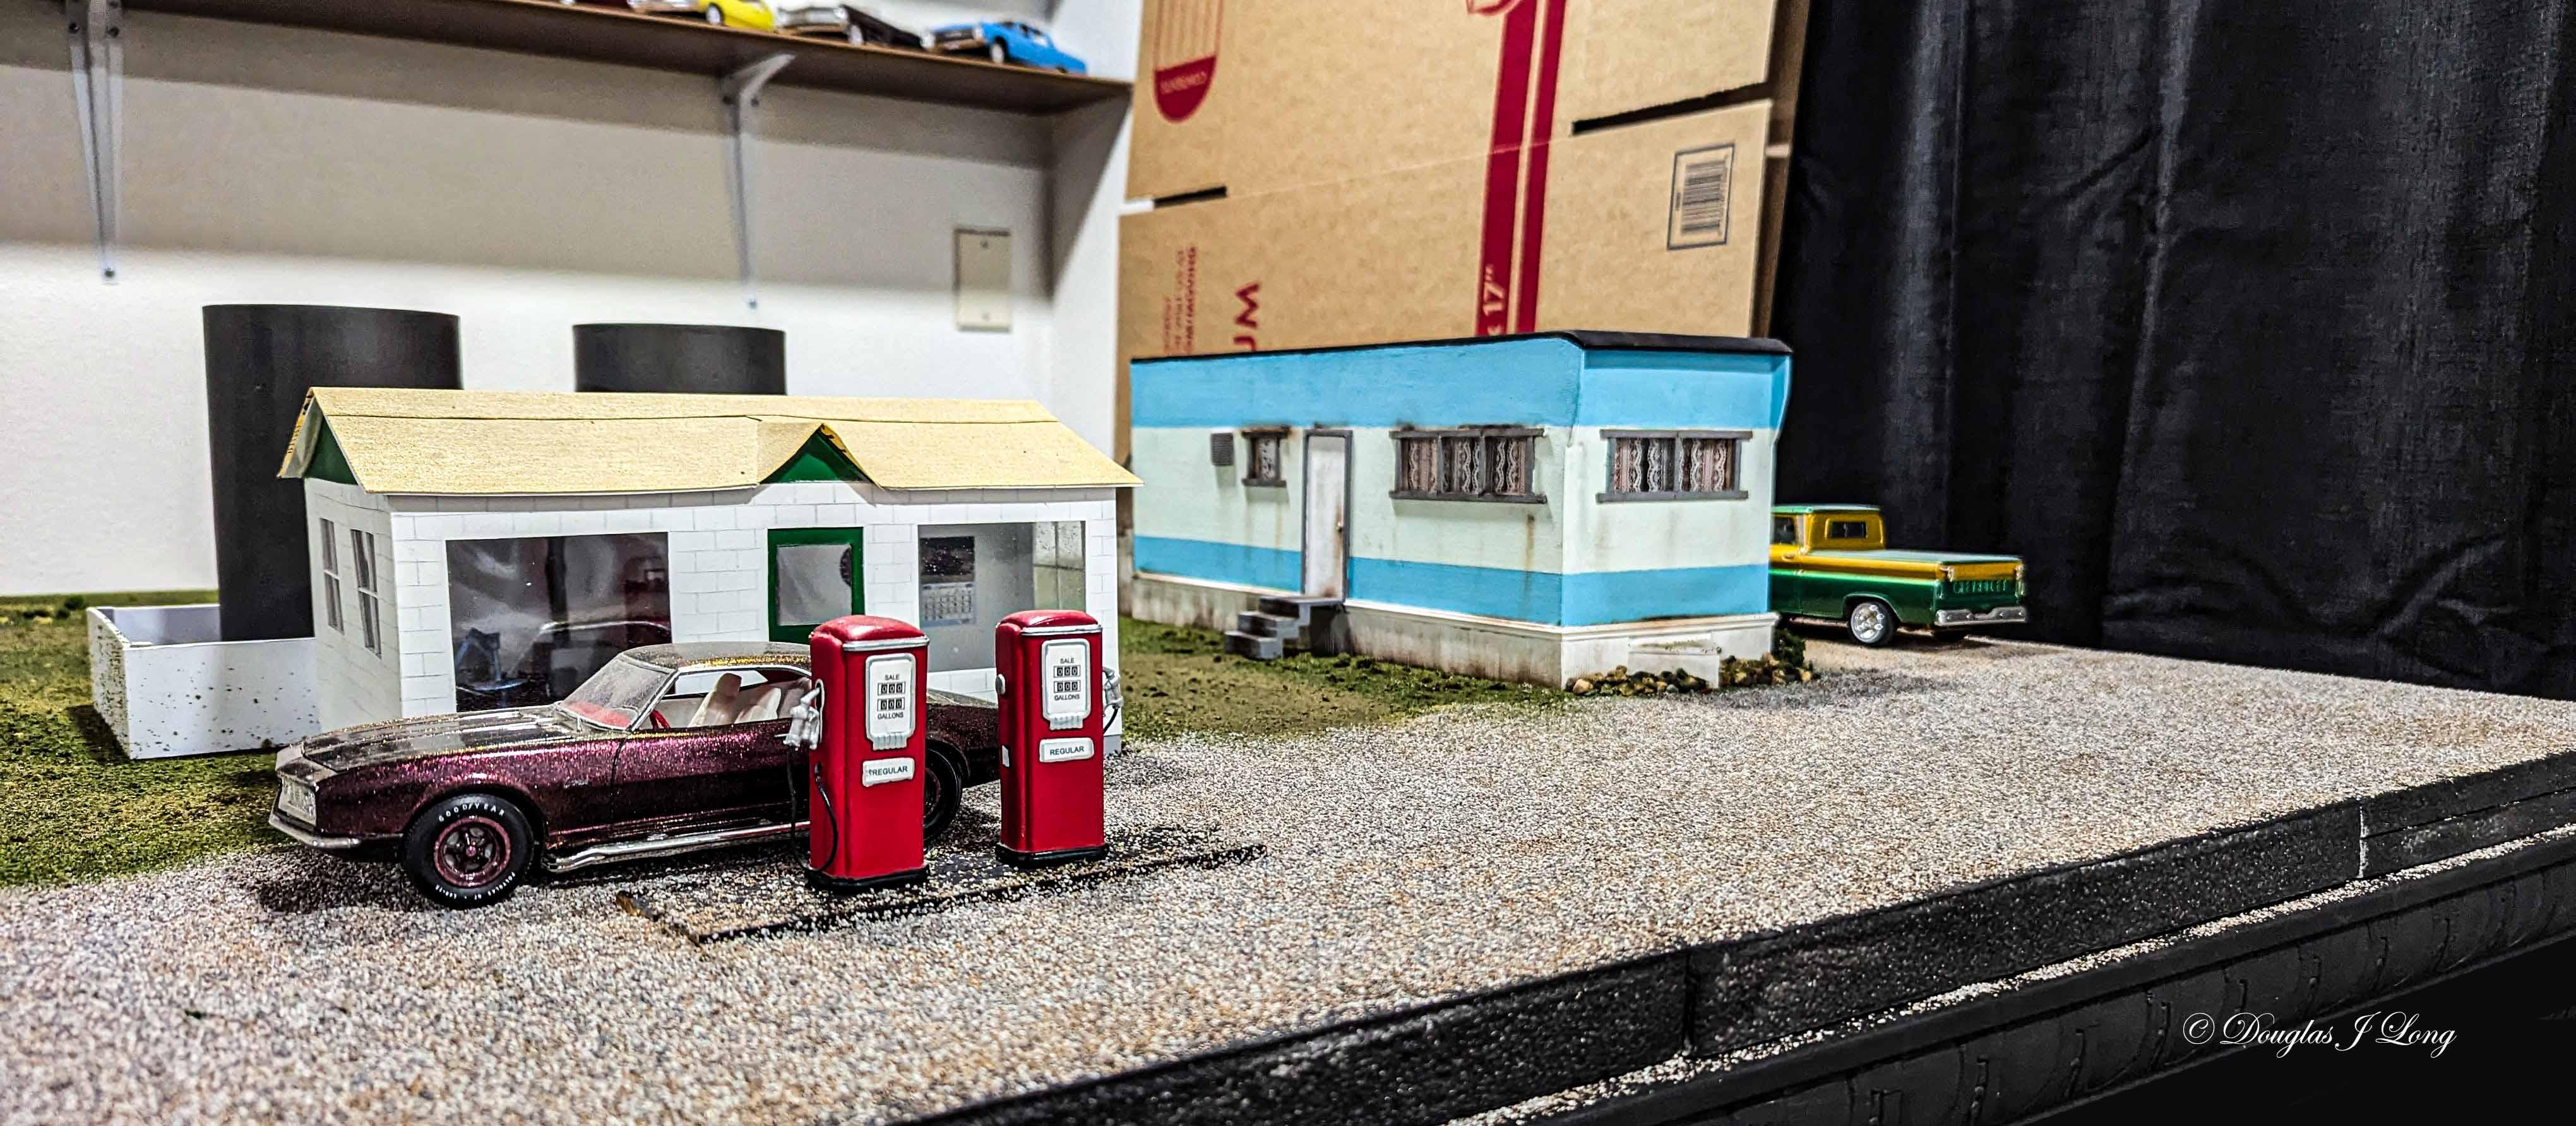
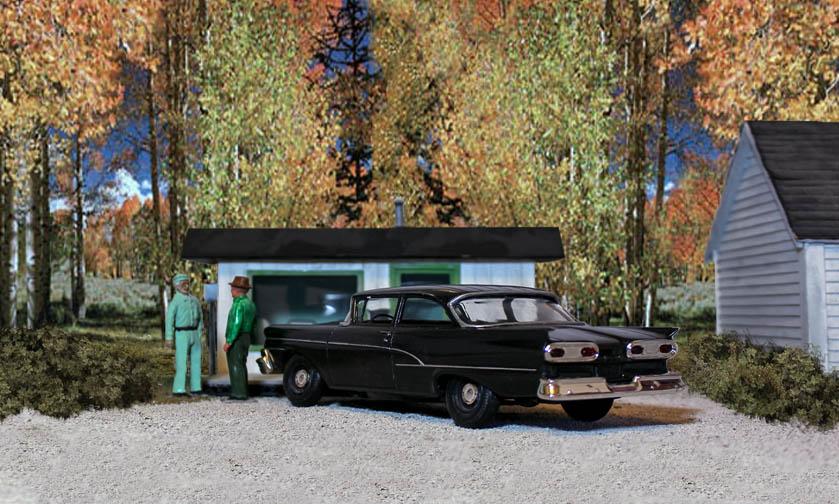
I see that I need to some updates, but also some catch up. I'm holding off on anymore cars displayed in the junkyard, as things are changing as I add more to the yard. Here are some more photos from the inside. The next thing that has transpired, is that this diorama is no longer a sensible 4 feet by 4 feet. It has now grown another 8 feet longer, giving it a size of 4 feet by 12 feet, as evidenced in the next photo. The expansion allows me to bring in another subject to add interest. That being a roadside gas station with a simple garage. The junkyard will still expand on behind the gas station. That garage is simply a place holder for now. I will build a garage to suit the space. The gas station is a tribute to a station that an uncle of mine managed when I was young. It was a place where guys hung out and enjoyed the cool cars that came through.


.jpg.6696236dd7735eb1334ca6553538761e.jpg)
.jpg.73377bfb60d0f98b138047162c8f12ef.jpg)
.jpg.1d0dfd1c49b4f9f05197077018aa67ff.jpg)