
FactoryStock54
-
Posts
175 -
Joined
-
Last visited
Content Type
Profiles
Forums
Events
Gallery
Everything posted by FactoryStock54
-
Well, after 8 months of cold-turkey I broke down and got myself a new digital camera; Sony Cyber-shot DSC W-150 (8.1 mega-pixels) so I can finally share some of my recent builds with you! Here are a few views of my 39 Chevy Coupe. It's the Revell street rod built as a factory stock model. I did a lot of kit-bashing and scratch-building on this one. The Stovebolt Six is from the Monogram '53 Bel Air, with scratch-built period air-cleaner, and as much wiring and plumbing as I could reasonably manage. The exhaust system and drive-train are also scratch-built from aluminum tubing. The factory-correct bumpers and tail lamps were sourced from the Jada Toys 39 Chevy Sedan lowrider (as was the passenger seat, which I had to cut down a bit). I used plastic stock and Tamiya masking tape to simulate stock upholstery and added door handles, window cranks and the shift lever from the Revell 37 Ford Panel Truck (also got the scalloped steel wheels from that kit). The wide white sidewalls are from the Revell/Monogram 57 Corvette and the hubcaps from the AMT 37 Chevy Coupe. Paint is Tamiya TS 12 Gloss Black decanted and sprayed through my Badger 360. Hope you like it!

-
I've used Tamiya, Citadel, Polly Scale, Gunze Sangyo, Model Flex, Accu-Flex, Pactra and Revell. I prefer Polly Scale by far and away for hand-brushing; I've used it for about 13 years with excellent results (both hand-brushing and air-brushing). Thinned with Tamiya X-20 A Thinner I get ZERO brush strokes and superb coverage. Matching colors from their Railroad and Military colors lines you can aproximate many popular automotive shades, especially good for engines and interiors. Mixing colors is easy and gives you an almost endless pallet of choices. While I'm moving away from PS for painting bodies now (I greatly prefer Tamiya TS colors decanted from rattle cans for use in the airbrush), I've achieved some very fine hand-brushed and air-brushed finishes in concert with graduated abrasive cloths.
-
So what's your Moms like?
FactoryStock54 replied to a topic in General Automotive Talk (Trucks and Cars)
After reading some of you guys' posts, I can say that I am extremely lucky to have a good relationship with my mom; she lets me be myself, gives me my space, doesn't criticize and is always very supportive. -
Favorite build time
FactoryStock54 replied to m408's topic in General Automotive Talk (Trucks and Cars)
I enjoy building models most when I'm extremely busy with "real work" and find an hour or two to relax at the bench. Not so much fun when it's just a way to kill time. -
Mercury Blues by Alan Jackson I'm In Love With My Car by Queen Fun Fun Fun, Shut Down and Little Deuce Coupe by the Beachboys Mustang Sally Hotrod Lincoln etc etc etc
-
"Choppers" newest model. 48 Chevy Fleetlline box art copy
FactoryStock54 replied to ViperDave's topic in Model Cars
OR (and again, just speculatin' here) he could re-do the front clip (which is a separate piece as it is) and come out with a 41-42. That would be excellent! Hey, Mr. Watson; I bought three of the Galaxie Aerosedans and have to tell you that your box art for that kit is some of the most beautiful I've ever seen! Oh! and I almost forgot: nice job, ViperDave! -
Absolutely GORGEOUS!!! I LOVE IT! I remember trying (and failing miserably) to build that one several times as a kid. Now I've got two in my stash as well as two of the 34 roadsters. . .Just tryin' to get up the courage to work on them again after all these years. Indeed, the original issue of the 35 was molded in a rich maroon; I also have a later issue that was molded in light green (definitely not a flattering color for this beautiful car). The roadsters were molded in cream. I think I'll stick with maroon for the 35 roadster/limo, but still don't know what to do with the 34. Again, wonderful job on a truly beautiful classic automobile!
-
Revell kit prices up....
FactoryStock54 replied to gasman's topic in General Automotive Talk (Trucks and Cars)
The petroleum used in the plastic represents only a tiny percentage of kit cost; but the mfg-er and its sub-contractors still need energy to run the factory, print the instructions, transport the product. . .it all adds up! Times like these, I'm very glad I had the good sense to build up a stash! -
Bottle caps of every imaginable shape and size for glue pallets. The plastic caps from 1 and 2 liter pop bottles are great to hold paint thinner for hand-brushed touch-ups or to use as replacements on MM or Poly Scale bottles. (Don't you just HATE those cheap-o paper gaskets they use???) The large caps from laundry detergent bottles are very useful as multi-purpose pallets/brush wipe-off surfaces when hand-brushing. Some caps (from the 5 gallon tubs) have graduated markings on them and are very useful for paint mixing. Q-Tips, tooth-picks, cable and wire harvested from computer and electronic components (harvested a life-time's supply of fine copper wire from an old garbage disposal unit!), emory boards, make-up applicator sponges, and even some scraps of the ex-wife's old panty hose (for straining paint when needed)! The plastic trays from micro-wave dinners make great storage units for all kinds of projects; especially nice for holding bits and pieces needed during airbrushing; I also use them to hold thinner when I need to clean my airbrush. these are especially nice as they nest together and you can keep them neatly arranged when not in use. Every year I get several extra-large calendars at the bank; each month I tear off an old sheet and use the blank side as a blotter on the workbench. I like the tiny 8-oz pop cans; you can harvest the aluminum from these for all kinds of easy-to-work metal projects Craft (popsicle) sticks for stirring paint I have bags full of old wood (balsa and basswood) and soft metal scraps; if I can't use them for specific detail parts on larger-scale models, I can make scale-size junk and debris in smaller scales! Heck! I never throw anything away!
-
I use a surgical scalpel to trim the BMF once it's been placed and burnished with a Q-Tip; the scalpel blade is a lot subtler and sharper than an X-Acto blade and you get a much cleaner edge. I use a toothpick to (VERY GENTLY) remove any excess after trimming. I also use toothpicks to burnish down the foil at the edges of very thin pieces (like windshield frames or chrome spears).
-
Trying to sort out classic kit quality
FactoryStock54 replied to ICMF's topic in General Automotive Talk (Trucks and Cars)
Just a quick footnote to what some of the other guys have said, and an additional word of encouragement; Experience as an aircraft modeler is indispensable when it comes to some of the older classic car kits, especially those with sectional bodies. Techniques for joining, filling and sanding are very similar to those used on planes, and many of the same tools can carry over (Flex-i-Files, seam scrapers etc). Learning how to build aircraft models properly ultimately made me a much better car modeler! -
Trying to sort out classic kit quality
FactoryStock54 replied to ICMF's topic in General Automotive Talk (Trucks and Cars)
The old 1/25 Jo-Han 34-35 Mercedes and 31 Cadillac kits were the Tamiya kits of their day and still stand out as some of the best-engineered car kits of all time. The 1/24 Monogram classics are also top-notch, somewhat easier than the Jo-Han kits if not quite as intricately detailed. Also, don't overlook some of the old 1/25 MPC classics! Over time (and depending on which issue of the kit you obtain) some of the plastic from these old kits has a tendency to become brittle and some of the more delicate detail parts are prone to breakage. Jo-Han milked its molds for all they were worth so some later issues of their kits had very distorted and mal-formed parts; best policy is to look for earlier Trophy Series issues (usually molded in box-art colors) as opposed to the later all-white (or sometimes totally-weird off-the-wall color) plastic. In general I find it advisable to obtain multiple copies just in case! -
Decanting Tamiya question
FactoryStock54 replied to Ray's topic in General Automotive Talk (Trucks and Cars)
I like using the cut-down pipette; it fits snugly and securely over the blue regulator on the spray button without requiring poster putty, allows for ultra-fast decanting with next to no mess, and the pipette can be cleaned and re-used. It works for me. There are some colors (like TS 14 Gloss Black) I tend to use all the time in great quanitities, and it's much easier to decant an entire rattle can and store the paint than to do it by tiny increments--again, that's my experience and my preference. One needs to strike a balance between carelessness and over-cautiousness; over on another modeling board a guy who claimed to be a chemical engineer was livid at the idea of decanting from rattle cans at all, claiming that doing so would almost certainly result in a deadly explosion. I don't know of ANY incident of such an accident, and (fortunately) I've yet to meet anybody stupid enough to chain smoke while decanting or spraying. The linked tutorial points out some potential dangers to the process but does not conclude that you can't or shouldn't try to decant the paint. I like to be well-informed about these sorts of things so I can decide for myself the level of risk to which I'm willing to expose myself; a healthy fear and some grown-up patience keeps one focused and safe and ultimately makes for a happy, trouble-free shop. Basically it boils down to this (no pun intended!): your shop, your rules; my shop, my rules; whatever works for you based on experience and informed opinion. -
Decanting Tamiya question
FactoryStock54 replied to Ray's topic in General Automotive Talk (Trucks and Cars)
For hobby-specific paints with their ultra-fine pigments, I'm a firm believer in lower PSIs; gives you greater control with less overspray and allows you to get in closer to the work. Spraying the Tamiya synthetic lacquers at about 18 PSI from aprox. 6 inches, I get a smooth glassy finish with very little graininess. That's been my experience; others' may vary. I can't speak to the pressures required for "full-size" automotive lacquers, but I'd guess you'd need a lot more to push those out effectively. -
Thanks for the info/input! I'd definitely like to learn more about using a milling machine.
-
I've known for a while that I will need a drill press or drill press stand for some up-coming projects. Mainly I'll need to do some fairly precise drilling and boring. I've been looking at options and would appreciate any experience-based feedback you might have to offer. I note from some user reviews that the drill press stands for adapting rotary tools (like Dremel or Proxon) can be a bit flimsy and rather imprecise. . . On the other hand, I can't see spending $200 for a mini drill press that I'll be using relatively little. I suppose if I could add a flex-shaft attachment (which would keep my Dremel tool free for other uses) such an investment would be mnore realistic. What brands/models and accessories would you recommend? thanks in advance
-
Decanting Tamiya question
FactoryStock54 replied to Ray's topic in General Automotive Talk (Trucks and Cars)
FWIW: here is an excellent on-line tutorial for decanting Tamiya rattle cans. http://www.acmenovelties.net/scale_models/decanting.php I do a lot of decanting; I usually allow the decanted paint to gas off for at least an hour before I spray it through the airbrush. I've had good luck spraying at about 18 PSI with no thinning (I'm using a Badger 360). I decent the paint into plastic film canisters; it's not a good idea to fill these up all the way, so I'll fill a couple canisters about 1/2 way. After gas-off, I will usually transfer the paint into an old Tamiya (acrylic) 23 ml. glass jar (they clean up real nice!) for permanent storage. Hope this helps -
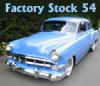
Hey! Great kit-bash! That's usin' the ol' gray matter! I really like those late 40s/early 50s cars! Fantastic finish too!
-
'34 Duesenberg SJ Torpedo Phaeton by Weymann
FactoryStock54 replied to Mr. Can Am Garage's topic in Model Cars
Beautiful! Love the color combo and the detailing on the interior. Truly a gorgeous car! makes the one I've been working on lately look like a bucket o' warm spit! -
1950 Caddy "Purple Haze" finished 5/1/08
FactoryStock54 replied to Irvin Arter Jr.'s topic in Model Cars
WOW!!!!!!!! That's gorgeous! -
I remember TRYING to build the original IMC kit as an extremely-impatient 12-year old back about 1970. It was a very fine kit for its day, but definitely not for the faint of heart. I might be able to do it justice now that I have at least as much patience as skill! Let's just say, I was elated when the ProModeler '48 convertible and woody came out in the 90s!
-
Ability vs. Enthusiasm
FactoryStock54 replied to Harold's topic in General Automotive Talk (Trucks and Cars)
I haven't had an outside TV hookup since last August and, frankly, I don't miss it one little bit! The only thing I have the TV for now is watching DVDs. I've concluded that TV (whether broadcast, cable or satelite) turns one into a passive consumer, and there are better ways to spend one's time, like, say, building models. Anything that interests me on TV can eventually be rented on DVD anyway, and I can watch it when I want to without having to sit through a barrage of boring, pointless commercials. BTW, Bluesman, love your new avatar! Great music and some truly legendary musicians! -
I don't keep track of $$$ when it comes to achieving the end result I want; if I did I'd probably go crazy! Heck! I start out thinking I'm going to have a nice, easy quick relaxing OOB build, and suddenly, without realizing it, I've spent $100 or more to do it up right! Case in point: currently I'm working on the Monogram/Revell '39 Chevy Coupe, retro-built as a factory stock model; I always buy at least two copies of my base model, but in this case also had to buy an additional copy of the Sedan Delivery kit for the factory stock hood. Spent another $20 for the Jada Toys '39 Chevy Sedan Lowrider for the factory-stock-correct bumpers and tail lamps (the front bench seat was also used for the coupe after I cut it down to proper height). I used the scalloped steel wheels, inside door handles and window cranks and the gear-shift lever from the Revell '37 Ford Panel Delivery Truck, wide white sidewall tires from the R-M '57 Corvette roadster, stovebolt six engine from the R-M '53 Bel Air, gas tank from the R-M '37 Ford Sedan and a Preston's pre-wired distributor, cut down from 8 to 6. Probably the most outrageously extravagant expense was $20 for the Stevens International re-issue of the AMT '37 Chevy coupe just for the factory-stock hubcaps and radiator fan!!!!! I will be scratch-building a new exhaust system from aluminum tubing and will be purchasing a bunch of bending and cutting tools in addition to the tubing. I've already done a fair bit of scratch-building using plastic strip and sheet as well as painted masking tape to simulate interior upholstery. To get a presentable underframe I will be scratchbuilding new engine mounts and cross members, and have decided to get myself a set of digital calipers and several other tools to do this job up right. Add cost of Tamiya TS 14 Gloss Black paint, several shades of Polly Scale and Citadel paint, a smidgeon of Bare Metal Foil, allow for the fact that some of these costs will be spread out over several different projects, and you can see how it all adds up. . .but I'm having FUN (especially now that my ex-wife isn't around to nag me about $$$!!!) so who cares?????
-
Lovely! I had no idea anybody had ever kitted an H-S Alfonso! Truly beautiful car, and nice to see some classic subjects here! Great job!
-
Stupid Newb Question
FactoryStock54 replied to FlyinSolo's topic in General Automotive Talk (Trucks and Cars)
I've used Fingernail Polish remover with great success for many years. You can use either the type with acetone or the acetone-free. Soak the parts in a bath of FNPR for several hours (up to 24 with the non-acetone variety, somewhat less with the acetone). Be aware that acetone can soften and even disintegrate smaller, fragile parts, so be very careful about exposure times. Advantages: cheap, widely available, safer and considerably less causitc than Drain-o, Easy-Off or Super Clean (you don't need a mask or gloves to work with it). Hope this helps


