stewart
-
Posts
632 -
Joined
-
Last visited
Content Type
Profiles
Forums
Events
Gallery
Everything posted by stewart
-
 Well, I had a great Master pretty much complete and I was getting a mold ready to go when I somehow lost the mold and master Therefore, this project is on hold for a little while as I will have to make another master or find the old one. STewart
 -
I decided to fork out the money to have this thing 3D printed. I mostly just want to see what it looks like. I'll post pictures when I get it. Should be here in about 3-4 weeks.
-
1990 Silverado Off Road
stewart replied to JamesW's topic in WIP: Model Trucks: Pickups, Vans, SUVs, Light Commercial
That is a sweet-looking ride. Nice work on the paint! STewart -
Here is the link to my shapeways account, if you want to print it. STewart
-
Well, if you are really interested and willing to spend $40 to $50 on an engine, I have made 3D drawings of the whole thing that you can get printed from shapeways. The tolerances they advertise would be enough, based on which material you want to buy. The best detail is frosted Ultra-Detail and getting the engine printed in that is about $50 shipped. I made the block in one piece and you can print that (doesn't have the oil pan) or you can use the halves and oil pan and valve cover. I decided to split the engine up that way because I thought it would be easier to get better detail from it. For some reason they uploaded in a vertical orientation, but they would print laying down. As far as eta for completion and casting, it will be a few months. Alan told me he's almost done, and hopefully I can start getting him to make them. However, if I can finish this one in the next month, I will try to find someone who can do good castings quickly. If you have any suggestions, please let me know. STewart
-
I have quite a bit more done on the cummins. Doing details this small with styrene is very difficult. STewart
-
Working on it I posted what I have right now, minus oil pan, on shapeways.com. You can go here and get one printed for anywhere from $10, to $35. Be aware that the smallest tolerance on this is about 1.5mm, so even their best printing might not cut it. I am planning on making and oil pain and then cutting the block apart and making a more printer-friendly version. STewart
-
I tanked the 3D model because the printer only does tolerances of .020" and I need a tolerance of .005". I'm keeping the model in case I have opportunity to make it in 3D, but for now, I'm just working on the scratchbuilt styrene model. STewart
-
1990 Silverado Off Road
stewart replied to JamesW's topic in WIP: Model Trucks: Pickups, Vans, SUVs, Light Commercial
Sweet-looking ride. Where did the hood come from? STewart -
ok, 3D model nearly complete. Just a little more shaping to do on the front and rear and an oil pan, and this will be finished. Here are the pictures. STewart
-
Well, I don't have any pics of the 3D model yet, but I put a little more work on it today and I should have it 3D printed by Friday. I have also made progress on my own styrene prototype and I do have pictures of that. Using a razor saw and file to square up an engine block doesn't usually create a nice square block. I have a dremel router attachment, so I screwed it to a piece of 1/4" plexiglass and made a stand. It works very well. STewart
-
I have about three different vehicles I have planned on putting one into. I hope to get this one cast in a more timely fashion than the last one. I started drawing up the main block in SolidWorks today. Only took about 5 hours to get it mostly completed. One reason is because I'm still new to the program. After I finish the block, I am going to try to get it 3D printed. The college I go to has a printer on hand and it is open to public use, so I can get it done for free. If it looks good, I will build a version myself, because the printers are pretty rough in texture. If I can, I might just clean up the printed version for casting. I'll try to get some screen shots of the block and post them up later on. STewart
-
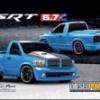
Well, I built one of these about 4 years back and sent it off to be resin cast by Alan of Ma's Resin. Unfortunately, last I heard, it was in the mail. That was 5 months ago and I haven't seen the engine or heard from him yet. So, I decided the easiest thing would be to build another. The only reason I haven't been real frustrated with the previous one is because I have been too busy with school to think about it. However, I was just talking to a classmate of mine, and it turns out that he builds models too. He got me excited about setting some time aside to build some more, and I decided that I would start with another cummins. I have a couple of questions, though. There are three options. I was thinking I would build a 24V 5.9L Cummins 6BT. However, I could do a 12V or the new 6.7 if those are preferred. Please let me know your preference. Any help with dimensions from anyone who has a cummins would be great. That kind of info isn't real easy to find on the internet. Hopefully I will get this thing finished in a couple months and I can then look at getting another, more reliable resin caster.
-
2001 Ram trail rig
stewart replied to cahilj's topic in WIP: Model Trucks: Pickups, Vans, SUVs, Light Commercial
Sweet build. I like the 1:1 STewart -
Plan sounds great. I'd love to see it. STewart
-
Nice rig. The Scania conversion looks great. STewat
-
77 Jeep Trail Rig
stewart replied to stewart's topic in Model Trucks: Pickups, Vans, SUVs, Light Commercial
Thanks. The model is a Revell 77 Jeep. I can't remember where I got it but they are really easy to find. STewart -
Wheel and tire combo. Its going to be slicks with steel wheels and dog dish hubcaps. Still not sure about color theme. Have to think about that one a little more. http://s969.beta.photobucket.com/user/Hemifan22/media/Plymouth%20Prowler/SAM_0486_zps1f83c722.jpg.html?sort=3&o=0 Large engine components in place. Time for detailing. http://s969.beta.photobucket.com/user/Hemifan22/media/Plymouth%20Prowler/SAM_0484_zpscb74991d.jpg.html?sort=3&o=1 PS. Photobucket IMG links are not copying for some reason and the links won't copy into the photo poster. For now you will have to click on the link to go to the page. STewart
-
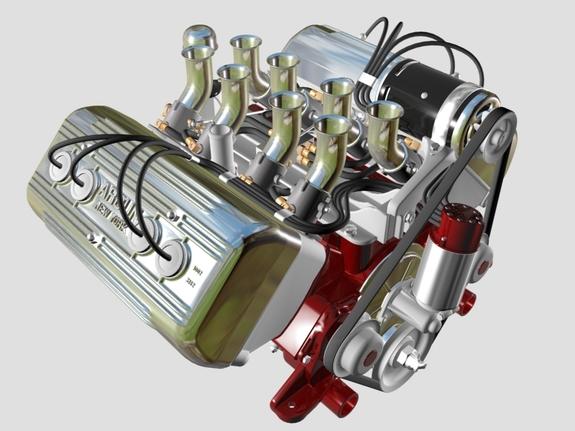
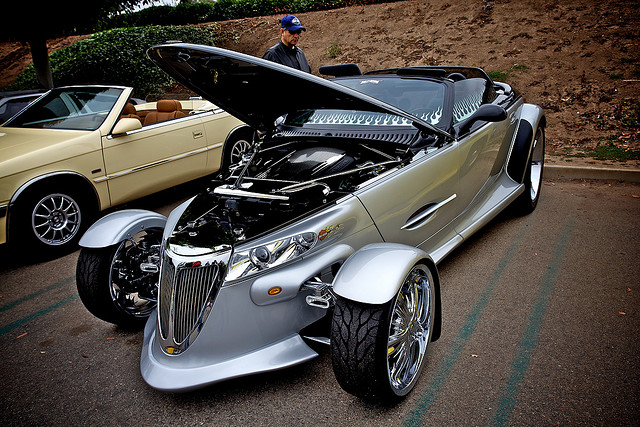
I am starting the Revell Plymouth Prowler and I have a couple of options. First, I could go with moon dish wheels, a chevy small block, and log manifold as pictured The manifold I would do The other option is a modern hot rod with the kit supplied v-6 and some kind of fancy induction, as well as the wheels pictured. I would probably also do some kind of a body treatment like this. The paint color is not decided yet for either but I am eyeing my bottle of Plum Crazy purple. STewart

-
Race team Van and Trailer
stewart replied to stewart's topic in Model Trucks: Pickups, Vans, SUVs, Light Commercial
The trailer is a Galaxy limited trailer. The jeep is a 1/24 scale and the van is 1/25. That's probably the reason it looks so big. STewart -
I built this van awhile ago and never built the trailer. I finally got around to painting it and putting it together. Nothing real fancy. Made adapters to put a custom set of wheels on and built a tire rack and engine stand. I added pin stripes to the trailer to match the decals on the van. The under glass pictures for the van are here I added the jeep just to get an idea of how well it would haul a vehicle.
-
77 Jeep Trail Rig
stewart replied to stewart's topic in Model Trucks: Pickups, Vans, SUVs, Light Commercial
Here is the WIP thread. There aren't alot of pictures but hopefully enough for you. STewart -
77 Jeep Trail Rig
stewart replied to stewart's topic in Model Trucks: Pickups, Vans, SUVs, Light Commercial
Thanks Steven. I think the winch came from the Revell 77 Jeep kit that this is based on. STewart -
77 Jeep Trail Rig
stewart replied to stewart's topic in Model Trucks: Pickups, Vans, SUVs, Light Commercial
Rear portal axle -
Scratchbuilt suspension. Rear 4-link with a portal axle. Scratchbuilt independent front suspension. Wheels are fujimi and the tires are from Modelhaus. 440 six-pack with scratchbuilt headers and exhaust system, aftermarket resin air filter and atlas transfer case. STewart