surfjunke
-
Posts
839 -
Joined
-
Last visited
Content Type
Profiles
Forums
Events
Gallery
Everything posted by surfjunke
-
Looks like you had a great show. Good turn out & some really great looking models. Thanks for sharing the pics with us.
-
This started out as a Hot wheels die cast I found @ a toy outlet store. This sat in the collection for a few years before I figured out what I wanted to do with it. After taking the car apart, the surgery began. The rear body was shortened by one scale foot. The roof was angle chopped by 3 scale inches. Evergreen plastic was used to fill in the header exits in the body, blower opening in the hood & the new lower nose section. The parts were "tack" glued was CA glue & then finished glued with JB Quick Weld. I also used the JB Weld as a filler, is sands & feathers very well. The headlights were ground flat with a motor tool & Evergreen rod glued & flared the fenders to accept MV lenses. As noticed, I did not strip the paint, only removing the paint where needed & sanding the rest smooth. The die cast companies bake their paint finishes & they are very tough to chip. I have not found a primer yet that sticks to the metal like the factory paint, no mater how I prep the body. I have tried many types of paint. Any suggestions out there. The wheels are from Renaissance of France. The make quite few different modern wheel sets as well as some fine 1/43 & 1/24 multi medea kits. The chassis pan & interior are all from Evergreen sheet & strip plastic. Dash is from the parts box. The seats are resin castings a friend made for me from a master I made. The etched harnesses are from Tameo. Paint was acrylic lacquer primer, followed by a white HOC base coat. The 2 colors were from House of color bought from Black gold. The stripe is cut Mirco Scale decal film. All was covered with Dupont 2 part clear.

-
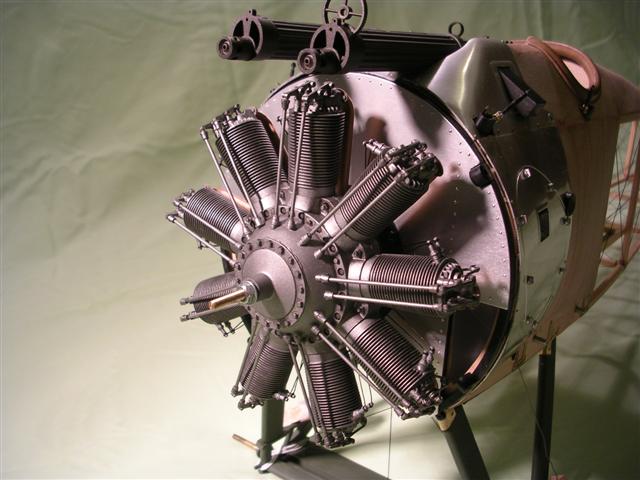
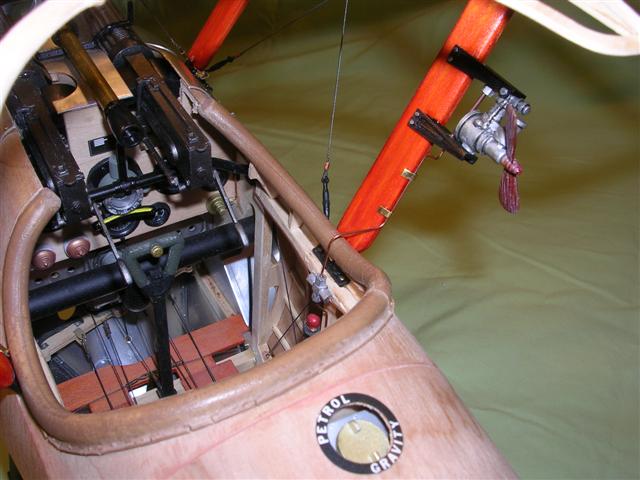
 Hi Brian, The kit has about 350 plastic parts,including the engine, machine guns, wheels, seat & the various tanks for fuel & oil. The front cowling is from 11 stamped aluminum panels. There are around 40 cast white metal parts as well. There were over 300 different photo etched brass parts. All the parts were in their own separate labeled bags. The wood parts in the kit consisted of over 230 die cut plywood. Bundles of Japanese cypress strips, all bagged & numbered. The160 plus wood strips had to be cut to length & there was not really any extra wood for mistakes! Total parts count was over 1,200 parts. Thank you all for the comments.
 -
Great work as usual, Doc. Looks really cool.
-
Nice start on a great idea. The early Vetts look great lowered & smoothed out.
-
Looks great. Marsh models offers some really nice kits.
-
" Mercury Rising": 49 Mercury Convertible / "Bubble Top"
surfjunke replied to John Teresi's topic in WIP: Model Cars
Very cool & original Merc. Looks great so far. Nice clean work on the opening panels. -
WOW!!! Excellent work! The brass frame is awesome. This is shaping up to be one killer Mopar. The machined wheels are really cool.
-
It will look good. Great craftsmanship, but the real car was ugly.
-
IMSA 1982 FORD MOTORSPORTS MUSTANG TURBO / GTX
surfjunke replied to 3men2s's topic in WIP: Model Cars
Really nice build of a great racer. They were quite the cars. -
Looking real good, so far. Should be a great looking car.
-
Thank you for the correction. Sorry about the miss print. I knew that, why I put it as a 914 is beyond me.
-
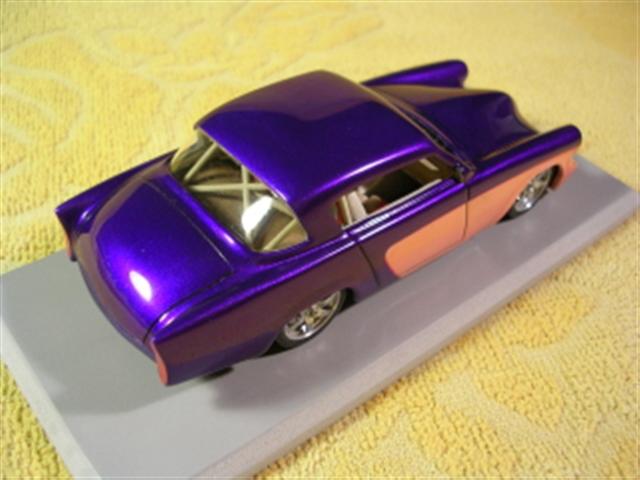
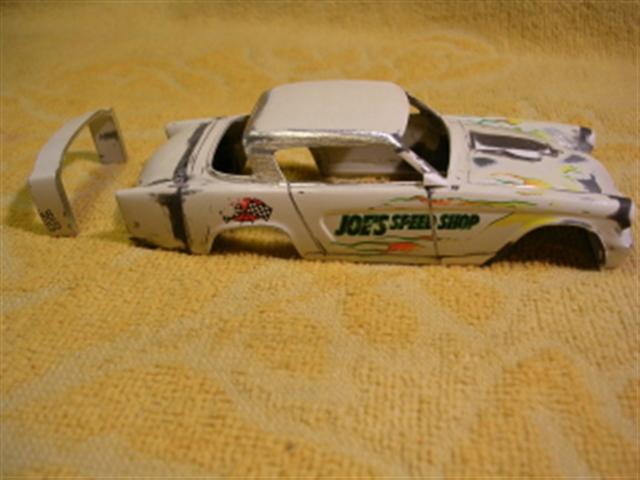
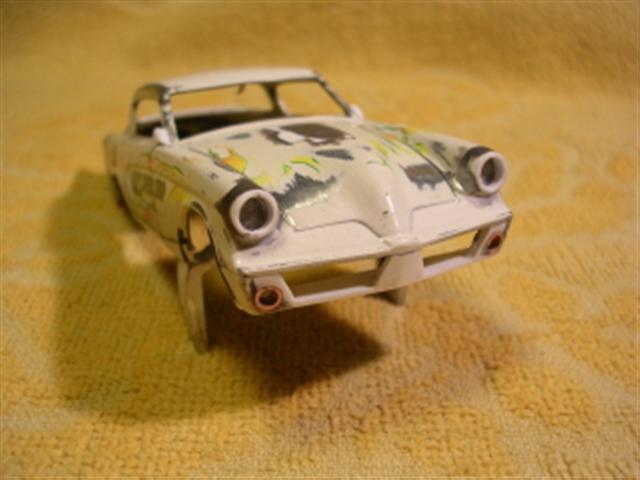
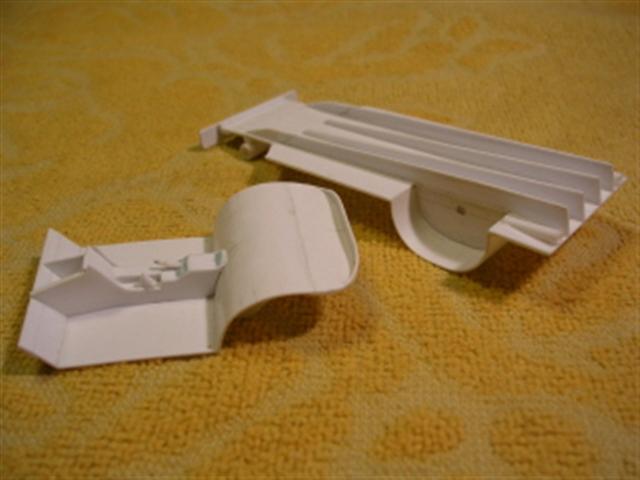
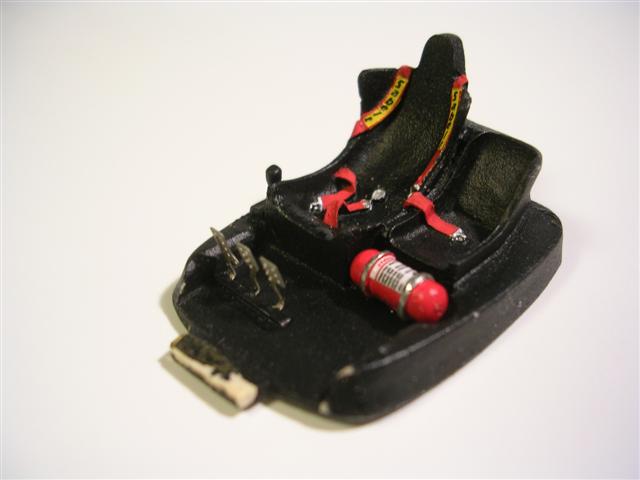
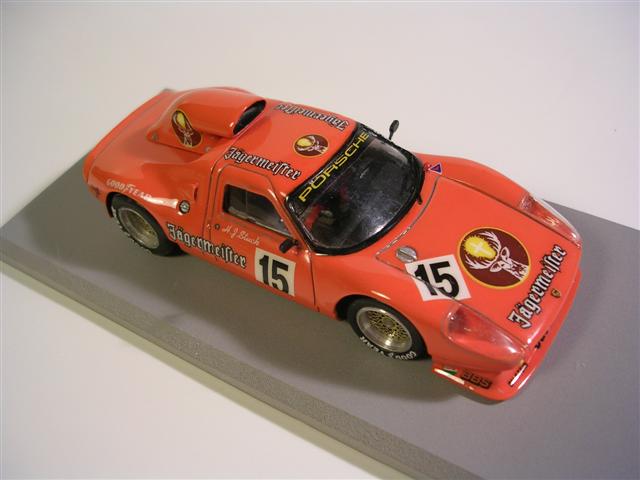
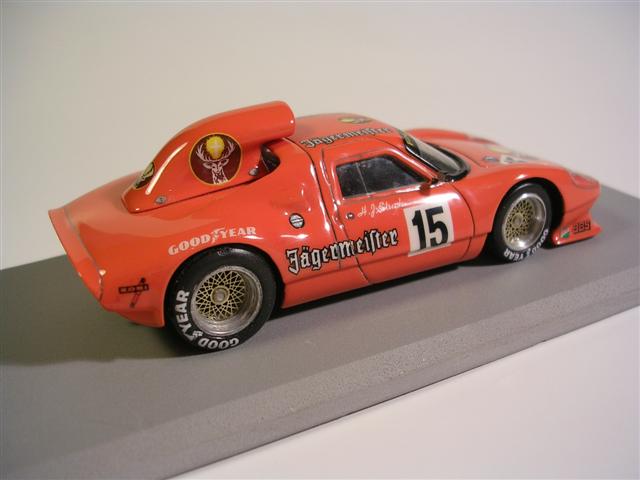
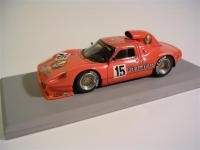
This started out as a purchase on EBay. The auction just had the body & chassis pan from an older Starter kit. The parts sat around for quite some time before I figured out what to do with it. I thought a fictitious race car would be fun in one of my favorite liveries. The wheels are from the parts box & were made by Robustelli. The front spoiler was made from Evergreen plastic. The rear scoop was made from laminating Plastic & then carving & sanding it to shape. The scoop is also pinned to the back deck. The interior got seatbelts from the aluminum wine bottle seal with etched hardware. The steering wheel was from the parts box. A roll cage & fire bottle were made from Evergreen rod. The etched peddles were from Tameo. The windshield & headlight covers were vac formed from masters carved from basswood. The masters were sealed with thin supper glue, sanded smoothed & polished. The paint is automotive acrylic lacquer primer followed by a Tamiya white base coat with a mixed orange mid coat, followed by 2 part urethane clear. The decals came from my decal stash & were applied before the clear paint. The final touch was the etched dzus fasteners from my etched parts stash, attached to the rear scoop with Testors clear paint.
-
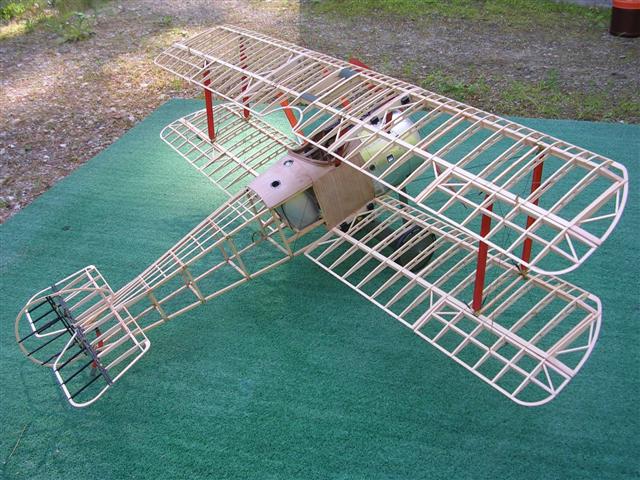
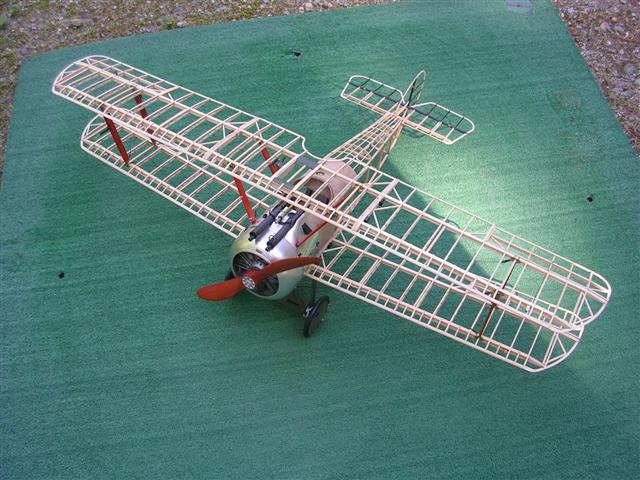
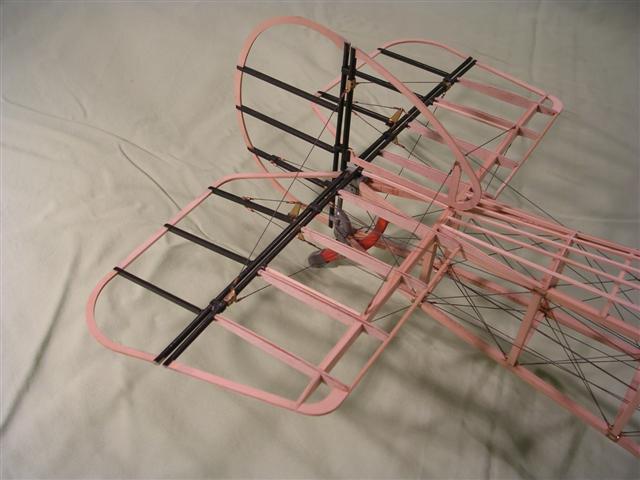
I just finished building this insane kit! It is huge with it's 42" wingspan. I built it for a client. There is no way I could afford to buy the kit & where would I put it when finished! Really, it is one of the most incredible kits I have ever had a chance to build. An awful lot of work, about 600 hours! It was very challenging & it was fun to build. I think it turned out cool & I hope you all will enjoy it.
-
Beautiful build! Great color combo, detail & stance. I really like the carb trumpets.
-
Nice job! Like the scratch interior panels. Looks great! I can see it cruising down the Pacific coast highway, boards hangin' out of the back window!
-
Looks great. Good work on the opening panels & details. Like the color choice & paint job.
-
Awesome build, Doc! Great weathering.
-
Great job, Bernard! Looks really cool.
-
Is that a kit from Marsh Models? It turned out great! Nice clean build.
-
What a great build! Like the color, very well done. The big wheels look cool on the lowered Imp.
-
'34 Duesenberg SJ Torpedo Phaeton by Weymann
surfjunke replied to Mr. Can Am Garage's topic in Model Cars
Very nice, clean build of an old classic kit. Great color choice as well. -
What a beautiful job! Great design & great execution! Very nice design. I really like the wagon!
-
Great build of a cool car!! Precision Miniatures made some really nice Metal kits back in the late 70's & early 80's.
-
Great build of a cool car & a nice kit! Precision Miniatures made some really nice Metal kits back in the late 70's & early 80's.