
LAV25
-
Posts
76 -
Joined
-
Last visited
Content Type
Profiles
Forums
Events
Gallery
Everything posted by LAV25
-
As an American living in Japan, I think I know the answer. Basically, international shippers have no idea what each country may or may not charge in customs fees, and I don't think that there is any way to prepay the customs duties when you send something. There probably is for big companies that are shipping container loads of stuff, but for the an eBayer, it's probably more hassle than it's worth. I also suspect that customs passes most small packages through without even looking at the labels, so some stuff that should be taxed might not always get it. I have, on one occasion, gotten a call from Japanese customs telling me that I would have to pay about 15 bucks to receive something that was coming in internationally. Don't remember what it was though, sorry. Hope this helps. -val
-
Stinkin' Stepside Chevy...
LAV25 replied to Mr.Zombie's topic in Model Trucks: Pickups, Vans, SUVs, Light Commercial
I just showed this thread to my wife, who's been watching me work on mine for the last few weeks. She said "But yours is a model." -val -
Stinkin' Stepside Chevy...
LAV25 replied to Mr.Zombie's topic in Model Trucks: Pickups, Vans, SUVs, Light Commercial
Wow! I built the same kit, but yours blows mine away. I LOVE the radio hole. Simply amazing. -val -
Thanks very much everyone else (finding the limits of quoting the minesweeper way, sorry) I'm very happy with this, it almost makes me feel like I still own the beast. Actually, the model turned out rustier than the 1:1, but it just felt right that way. @Nate: Yup, the wheels on the 1:1 were the best looking part of the truck. The model wheels still need some road dust though, or better than that, REPLACEMENT! I'm really not a fan of low profile tires and big wheels, at least not on cars that don't need them (vettes etc). If anyone knows of a kit that has something similar to N50/15 wheels and tires in 1:25 scale, I'd be very appreciative. 1:1 N50/15: More later! -val
-
Thanks for the tips guys, I'll have to search around. Testors isn't an option here, but I've got some Mr. Super Clear Flat that might work. Oil based is going to take some research, I'm sure it's out there somewhere, just a matter of translation. -val
-
The rust is a two part rust paint from Japan, pretty similar (I think) to the Sophisticated Finishes stuff that I've seen mentioned here. The first part seems to be a suspension of iron filings, put that on, let it dry for a day or so, and then the second part is a clear liquid that makes the first part rust, takes 3-5 days to hit its final color. I've got some dirt on the tires, it just doesn't show up well. Not sure how to get the chrome on the rims dirty looking, most things I've tried (on my RC cars) make it look like black chrome, or gold chrome, but don't give it that roaded look. Any suggestions would be very welcome. Thanks for looking. -val
-
65 Chevy Stepside
LAV25 replied to LAV25's topic in WIP: Model Trucks: Pickups, Vans, SUVs, Light Commercial
Showoff thread is here: http://www.modelcarsmag.com/forums/index.php?showtopic=41650&st=0 Thanks for looking! -val -
More road rot: Kid doesn't know how to do bodywork, but he can spend $29.95 at Trak Auto for a chrome air cleaner: Are you sure this thing can be restored? Let me know what you think. Good and bad, criticism can help me do my next model even better! Oh, yeah, I know that the back of the cab doesn't fit right, unfortunately when I dented the doors I kind of warped the whole body. Other than that, fire away! -val
-
Hey all, I just finished my first plastic model build since I was around 10 and wanted to show off. The build thread is here: http://www.modelcars...showtopic=40941 Edit: I rearranged my photobucket without thinking and nuked all the pics of the model. Here's a link to the album instead. I was trying to reproduce a truck that I bought when I was 17, a '66 Chevy Stepside: Now for some details: I didn't forget to put the mirrors on, the 1:1 didn't have them when I bought it. Looks like somebody spraypainted something on the sheet of plywood that served as a bed floor: Got to hate those Chicago winters with all the salt on the road: Ran out of room for pics, next post! -val
-
65 Chevy Stepside
LAV25 replied to LAV25's topic in WIP: Model Trucks: Pickups, Vans, SUVs, Light Commercial
Done! I'll be posting up a whole bunch of pics in the "Under Glass" section in a little while, I'll include a link once I have one. -val -
65 Chevy Stepside
LAV25 replied to LAV25's topic in WIP: Model Trucks: Pickups, Vans, SUVs, Light Commercial
I haven't quit working on this. It amazes me how fast some of you are able to complete your models! This should be done in the next couple days, I'm just waiting for some rust to dry so I can dullcoat it, but anyway, here's some progress that will never be seen: The dash. It has the gauges and such molded microscopically on to it, and then it's covered with a section of clear plastic. It'll be almost impossible to see, but I took the Tamiya Weathering Master snow and ever so lightly brushed it over the instrument panel, making the speedo and such somewhat visible: The seat. I've been agonizing over this one, my truck had buckets, I think from a Camaro, but the kit comes with a bench. Do I stop building and search for another kit that has buckets to rob? But then what becomes of the other kit? So I went with the bench. I had some Tamiya Field Grey laying around (a friend of mine was into military modeling, when he moved back to the world I inherited his paints), which seemed like a reasonable color (the instructions say to paint the seat flat white, which isn't going to happen). After I painted the seat, I used Weathering Master soot to build up a few decades of dirty jeans and sweaty shirts: The back window. This has been the hardest, most frustrating part of this kit. Somebody at Revell decided to go with the optional panoramic window. I hate those things. They're too modern. Sure, my truck had blind spots that you could hide a freight train in, but that's the way it's supposed to be! So, I did my research, and started measuring and converting, and measuring and tracing, and then started cutting .1mm plastic sheet. Then I tried to fit it in the window opening. More measuring, more cutting, more fitting. Lather rinse repeat. Then I realized that I was doing it the really hard way. I found some spare masking sheet (from the edges of a Parma precut mask), traced the shape I needed twice, and stuck it onto the kit window glass: A couple coats of paint (gloss black on the inside to match the interior, flat white on the outside, with a freehand flat black edge [which isn't very good, but it's the best I can do]) later, and we have: A proper back window! Now it's off to spray some coating, let some rust do it's rusting, and I hope to finalize gluing tomorrow or the day after. YES! -val -
65 Chevy Stepside
LAV25 replied to LAV25's topic in WIP: Model Trucks: Pickups, Vans, SUVs, Light Commercial
I think you're right, Nick (notice I didn't use the quote function), but I'm too lazy to look it up Anyway, slow and steady wins the race. Presenting one rusty chassis: The rust is a combination of a lot of things. First, I used the two part antiquing finish that I mentioned earlier. However, it really doesn't like to stick, tends to clump up, so I was left with a bunch of bare white patches. I painted these over with Tamiya Orange (X-6), and then washed that, which is nearly hunter orange, over with Tamiya Red Brown ((XF-64). The second problem I had is that where the rusting paint did work, it came out really dark, almost black-ish, even after a second application of the corrosive step, so I had to use Tamiya Weathering Master Orange Rust on top of it to lighten it up. I didn't do everything with that, just added some highlights. Next, a spare tire: That's the spare from the kit, I painted the wheel with Tamiya Black (X-1), and then added the two part rust paint. The whitewall is a plastic piece that snaps into the rubber tire. Once that was in, I washed the tire and whitewall with Tamiya Flat Earth (XF-52), which I think ages it up nicely, then snapped in the rusted wheel. It looks a little dirtier in real life, the flash washed it out a bit. This will ride in the bed, my 1:1 didn't have a spare tire mount when I got it. Finally, I couldn't resist just sort of stacking the parts that I have somewhat done together, so sneak preview time: I'm pretty happy with how things are going so far, working on the interior now, then I've got to paint the cab and get down to some serious weathering. More later -val -
The car that got me out of modeling
LAV25 replied to LAV25's topic in General Automotive Talk (Trucks and Cars)
Hmm, just twigged to the name Joe, I may have gotten this one at your store. Yup, this is the same LAV25 from the RC sites. -
The car that got me out of modeling
LAV25 replied to LAV25's topic in General Automotive Talk (Trucks and Cars)
Yes I did, or Chicagoland at least, I was back home about a year ago and got it at a big hobby and craft store on the south side of Rt 38, in Lombard maybe? Strangely enough, I saw the same kit two weeks ago in Kyoto (yup, that Kyoto, in Japan) for twice the price, which, all things considered, isn't horrible. I've been working on it for a week or so, I'm pretty happy, the thread is here -val -
65 Chevy Stepside
LAV25 replied to LAV25's topic in WIP: Model Trucks: Pickups, Vans, SUVs, Light Commercial
Well I'll be, I guess you're right. The headers threw me, mine had a 4 pipe per side pattern IIRC, something like this picture, but all rusty and in bad shape: I'm not going to bother to try and find something to kitbash from at this stage in my modeling career though Thanks Eric! -val -
65 Chevy Stepside
LAV25 replied to LAV25's topic in WIP: Model Trucks: Pickups, Vans, SUVs, Light Commercial
That's probably a good idea, DoubleD, but it looks like I'll have almost all my weathering done before I get started gluing. I took off the chrome valve covers. I would have like to have had them when I was 17, but never got around to it, and I thought they made the engine look kind of fake. Put on the regular covers, painted the same Tamiya red as the block, and gave them a wash of Tamiya flat black (XF-1). I also washed the aluminum intake manifold with flat black, makes it look a little more used. Finally, I put on the headers. They've been rusted with a Japanese product similar to the Sophisticated Finishes rust. It's a two part, the first is a suspension of iron filings in a clear liquid, and the second is a clear liquid corroding agent. The first stuff is pretty hard to paint on, it likes to clump and not cover well. Anyway, on to some pics: The camera makes that rust look a lot, well, fluffier than it appears to the naked eye. I'm in the process of rusting the chassis now, once it's done I'll decide if it needs a touch of sanding or not. This vehicle was a daily driver, so it shouldn't look like it's already fallen apart, just on the way there. Got to find a better place to spray paint than the apartment parking lot, too. The breezes are killing me . More later. -val -
The car that got me out of modeling
LAV25 replied to LAV25's topic in General Automotive Talk (Trucks and Cars)
Wow, I'm glad it wasn't just me. I was a little worried about posting this, thought that maybe I was just too young and got ticked off too easily. -val -
I've just started modeling, after a break of something like thirty years (and I'm something like 40 years old), and I was thinking back to some of the last models I built when I was a kid. Not that I was big on patience then, once I discovered superglue I actually enjoyed building cars even more, I could be done in an afternoon. But there was one car that I spent quite a bit of money (for a ten-ish year old) on that my dad and I were going to do right. Until we found out that nothing fit. The lowered suspension was so low that the car didn't rest on the wheels, but on the axles or steering knuckles (it's been a while). The doors didn't close properly, the chrome didn't fit. I'm pretty sure that that was when I lost interest. I was pretty surprised, when I looked it up, to find that it was a Revell kit, since I've just gotten back in, starting with a Revell '65 Chevy Stepside. Things seem to fit much better. Just rambling. -val
-
65 Chevy Stepside
LAV25 replied to LAV25's topic in WIP: Model Trucks: Pickups, Vans, SUVs, Light Commercial
Yup, I've got two of the Tamiya Weathering Master kits already, the B kit with snow, soot, and rust, and the C kit with orange rust, gun metal, and silver. They work pretty well, it's just imperative that you spray some sort of fixer (dullcoat) over them if they're going to be handled at all. I'm also thinking of just masking the chrome on the engine and hitting it with a bit of dullcoat. I wanted to spray my chassis today, but it's snowing! It never (like, hasn't in the past 3 plus years) snows around here. What's up?!? -val -
65 Chevy Stepside
LAV25 replied to LAV25's topic in WIP: Model Trucks: Pickups, Vans, SUVs, Light Commercial
I'll bet you miss that truck a lot Camaroman, I know I miss my '66. Sold it to a friend of a friend who was into restoring/customizing old vehicles, unfortunately he ended up with some pretty serious family problems, and the last I heard the truck was just rusting in his yard. Anyway, I lied about not being able to get any more work done, there's still some non-spray stuff that I had to do. I started on the engine a couple days ago. My truck had a 350 with an automatic transmission in it, this model comes with a 6 cylinder, but I'm just not that into things to go looking for another model with the correct engine to steal. However, my truck's engine was old, and gunky, but starting to get hopped up with a Quadrajet and a 360 degree air cleaner. I took the liberty of putting the chrome valve covers on, which I would have done if I'd had the money, just as a dress-up. The directions say that it should be "Chevy red." That's a bit of a problem here in Japan, so I went with Tamiya X-7 acrylic red. After that was dry, I did a wash of Tamiya X-1 black to give it that used, oily and disgusting look. I wish I had thought to dull coat it before I put on the valve covers, but I'm still fairly happy with the results: I'm pretty happy with how this is turning out so far, now I just need a couple of days without wind to do some spraying. More later -val -
65 Chevy Stepside
LAV25 replied to LAV25's topic in WIP: Model Trucks: Pickups, Vans, SUVs, Light Commercial
Thanks Foxer, the trick (or at least what worked for me) is to keep the lighter moving constantly. I did the denting with the handle of a paintbrush, which seemed about right. The how-to aspect of weathering is something I'm still researching, but it's been my privilege over the years to have owned a number of excellent examples of extremely weathered 1:1 vehicles, so I'm confident that it'll be easy for me to know what things should look like . Unfortunately, I won't be getting any more painting done today, it's extremely windy outside, and I live in an apartment, so my "paint booth" is gusting like crazy. Oh well. -val -
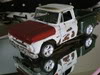
I accidentally posted this in the main "Trucks" section last night, self moving it here and deleting the old thread, sorry if I caused any confusion. Hi all, after reading lots and lots of Tips, Tricks and Tutorials articles, I'm starting up a Revell 65 Chevy Stepside build. This is going to be my first build in, say 30 years or so. The last model I did involved lots of superglue, took about an hour, and got spraypainted with the glass installed and unmasked. As long as this looks better in the end, I'll be pretty happy. The picture on the box: I actually owned one of these (well, a 66, but it looks like the only difference was badge shape and placement), so I'm going to try and reproduce it. Reference pics, circa 1988: Obviously, this is going to be an exercise in weathering and rusting. I assume everyone here knows what a model looks like going together, so I'll just post the things that I'm doing that aren't in the assembly instructions. First, the driver's side door, a little work with a lighter and it's nicely rippled, pretty much the way I remember the 1:1 being: Next, the photos don't show it well, but the left rear wheel well had a big snowbank dent in it. It wasn't as easy to do this well, and it has some anomalous ripples, but I guess it will do: Chicago rot: That's about where I stand so far. I've got some two part rust paint, similar (I believe) to the Michael's Weathering stuff I've seen here and on some of the RC sites. It didn't adhere too well to the headers, so I think I'm going to have to prime the other parts (chassis, body) where I plan to use it. I've got some sheet styrene that I'll test it on. Anyway, that's all for now, I've got quite a few days off, so I hope to make reasonably speedy progress on this, without, of course, acting like an impatient ten year old. To the ten year olds on this site, that is a reference to my behavior at your age, not an insult to ten year olds in general -Michael Valentine
-
Weathered RC Semi body
LAV25 replied to LAV25's topic in WIP: Model Trucks: Big Rigs and Heavy Equipment
As long as links are OK, for anyone who wants the full, nitty gritty gearhead details: Friendly Towing Service It's still a work in progress mechanically too, I hope to be able to call it done before Christmas, but.... I'll be keeping this thread paint and body related, no mechanical ravings. -val -
Weathered RC Semi body
LAV25 replied to LAV25's topic in WIP: Model Trucks: Big Rigs and Heavy Equipment
Thanks Zukiholic! The chassis is scratchbuilt from aluminum angle: I don't want to clutter up this site with RC specific stuff, but I do have a build thread on an RC site. Is posting links to other hobbyist sites allowed here? -val -
Weathered RC Semi body
LAV25 replied to LAV25's topic in WIP: Model Trucks: Big Rigs and Heavy Equipment
After that, hit it with white (I forgot to take a picture of the pre-weathered body) and started weathering. First, I used a wash of Tamiya Red-Brown, thinned way down, to give it an overall grimy look: Then I used Tamiya Weathering Master kits B and C to add some surface rust: I heated the fender with a lighter and pressed a piece of aluminum angle against it for those dents that happen over the years: My driver never washes his hands: A few window and bumper stickers: I hope you like, this is still a work in progress, and not anywhere on the level of the builds I've seen on here. Again, I hope that posting an RC body isn't a violation, if it is, I apologize and will be happy to remove my posts. I'm planning on going more in line with the other builds here soon, I've got a Revell '65 Chevy Stepside on my workbench that I'm itching to start on. -val