

DirtModeler
-
Posts
213 -
Joined
-
Last visited
Content Type
Profiles
Forums
Events
Gallery
Posts posted by DirtModeler
-
-
I haven't forgotten about this build! I had to close down my shop in late 2011, and just NOW have a shop again. I have some 1:64 projects i'm working on now, but after they are done in a few weeks, i'll start working on this car again! i gotta finish it.
-
Hey Tyrone,
Featured you on Dirt Modeler's facebook page today... lots of compliments on your stuff!
-
I'm needing to make some adjustments to a resin piece, and want to find a good clay, like epoxy putty or something, and was wondering if anyone has any recommendations?
I have to build up some small areas to add to some fenders on a small (1:64th scale) master.
I'm looking for something strong and easily sandable so i can shape it once i build it up sufficiently.
any help would be appreciated!
thanks.
-
Hi Dan, welcome to the forums.
there's some great people and projects around here, and plenty to learn from each other.
-
That motor is so crazy awesome, man!
-
The Barnes and Noble here in Medford, OR doesn't carry it either. I've wanted a subscription for a while now, but we've been trying to buy a house so i've been waiting until we did..
2 weeks to close! After that i'll just buy a subscription and get it in my mailbox every month.
-
Thanks guys, i'm pulling together whatever data i can and will start the redesign soon.
-
Hi all,
I'm back in R&D mode at Dirt Modeler, and want to circle back around to 1:16th seats for a moment.
I've seen a number of people using my 1:16th seats (which is great), but it looks like some who used them had to trim them down to fit. The seat my design is based on is for a Dirt Late Model, which i think must have a more upright position that puts the seat too tall for drag racing use.
The reason i'm asking is because i want to solve another issue that the seat has, which is it was originally designed to be viewed only from above (in a dirt late model cockpit). This leaves the back and side of the seat plain.
What i'm looking into doing is to create another fret of parts that go onto the seat, and create the back of the seat, so you get the details on both the front and the back... Basically creating a sandwich with details on both sides.
But.. before i do that, i wanted to see if i needed to change the seat to create a greater setback angle so it will fit better in drag racing uses.
I welcome all thoughts and comments on the matter.
I think the end result will be a pretty wicked looking seat.

-
I think 3D printing is coming in a serious way... but the modeling industry will just be a collateral bonus.
They have figured out how to print circuit boards on those things, real shoes have been printed on them, a kid's larynx was printed on one, and there is a restaurant printing food.
3D printing is going to take over a lot of the manufacturing world for consumer products. There will always be a call for textile mfgs, etc, but 3D printing is going to take over much of manufacturing.
why ship something from china... download the file and print it yourself.
As a bonus? we as modelers are going to reap the greatest, and earliest benefit. we just want static stuff that looks correct. and that's what we'll have soon (i think we're still 10 years away from an injection molded quality kit off a 3d printer under $50k).
but further down the pike, you'll be printing out your own electronics, and an upgrade for your phone.. take the old one out, and pop in the new print.
They are also printing at a nano scale now, so you can print individual atoms.
It's coming, that is for certain.. the only question is the timetable.
I think (totaly pulling this out of my butt here), that in 50 years, much of the stuff that is manufactured in 3rd world nations will be printed right in your own home, and the quality will be just as good.
Just think of how much will be saved in fossil fuels not having to ship this stuff around the world anymore?
-
clear coating scares to poop out of me.
At the clear-coat stage i've invested SO MUCH time in the body, decals, paint, etc...
And if the clearcoat goes wrong it's all for naught!
I kind of have to clearcoat my stuff just to hide the decal lines.
-
Lastly, two new products that i couldn't find on the market, a simulated lock washer set for larger bolt sizes (smaller bolt sizes coming in a thinner future plate)
-
In addition to the Dzus faces, i have a new line of round washers in .010" stainless.
From #0-80 Screws down to .8mm screws.
-
The following stainless steel products have actually been for sale for a few months now, but they were added to my catalog without much mention by me, and few people know about them.
Dzus Faces in 1:18, 1:12, and 1:16 scales.
-
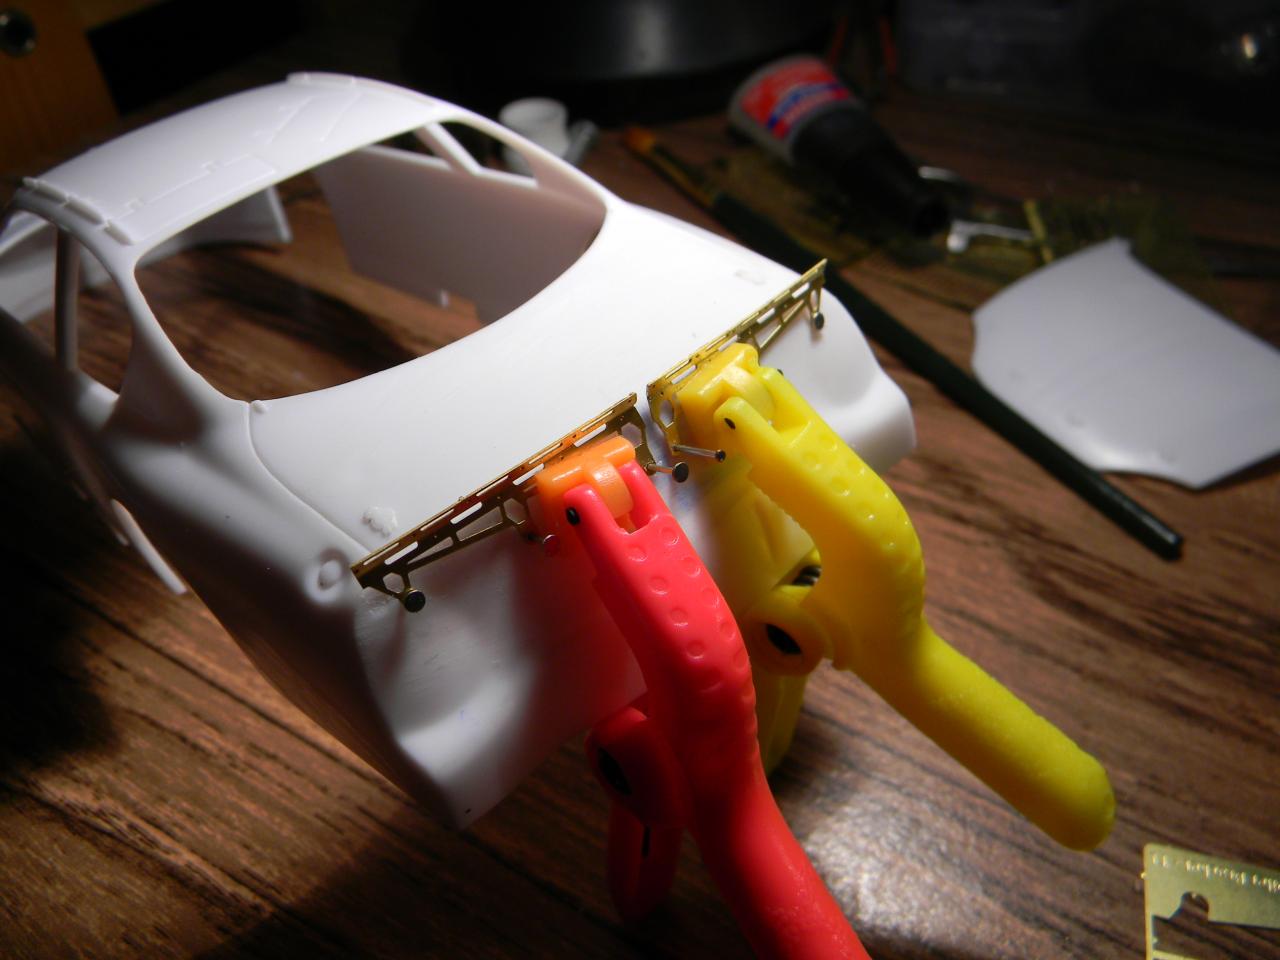
Next, i just pulled the brackets away from the body, but kept the pins as guides.
Then mixed up some epoxy and spread it wherever the bracket was going to touch the body.
After that, i pulled the pins with needle nose pliers from the underside of the body to 'suck' the bracket to the body.. and even match the curve.
Bend the pins over on the underside, and the bracket is held fast and tight until the epoxy dries.
It's setting now, but once the epoxy dries i'll cut the pins off and install the spoiler itself.
I'll post more photos when i move onto the next steps.
-
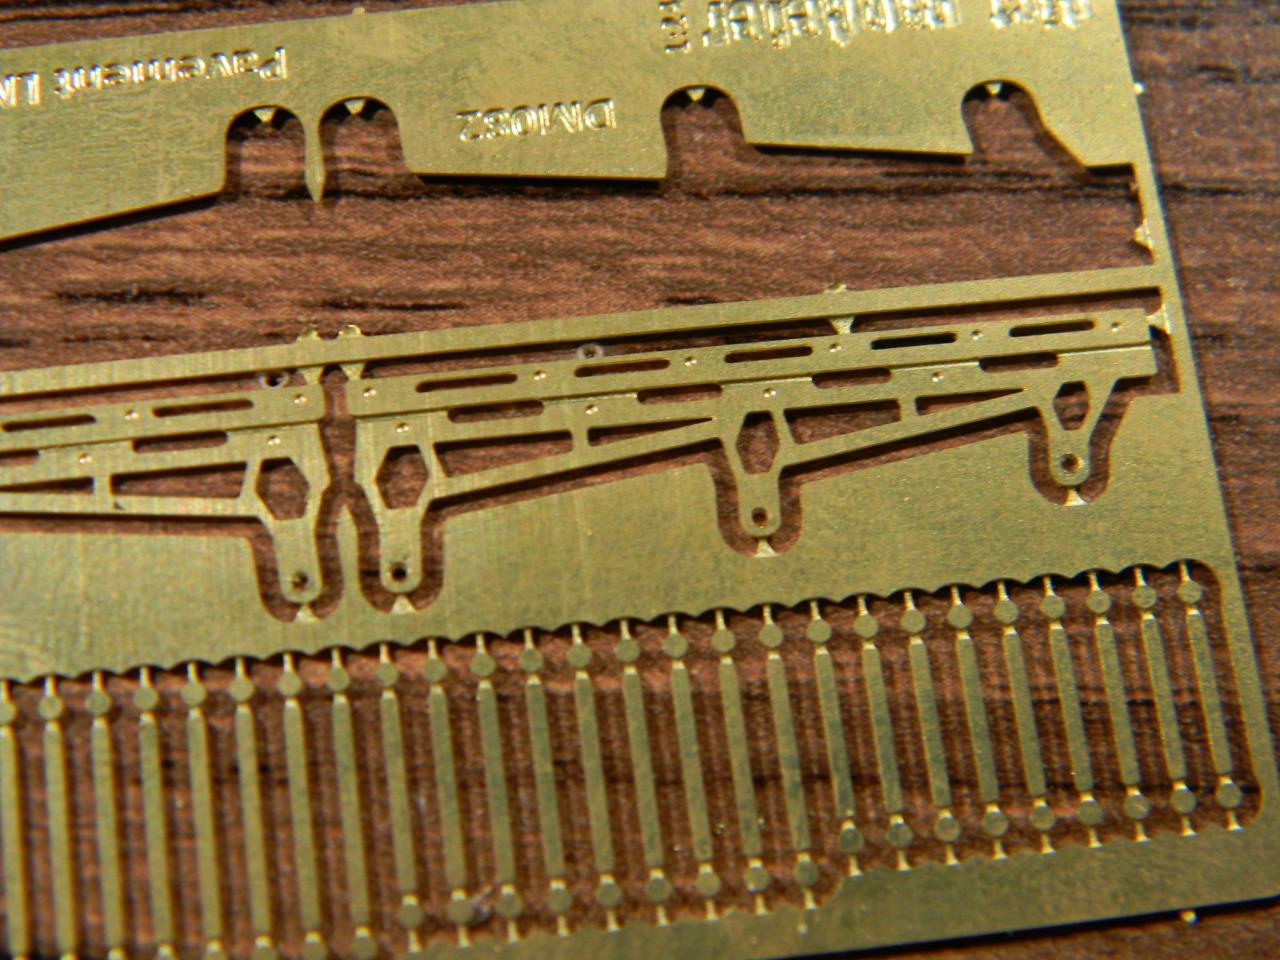
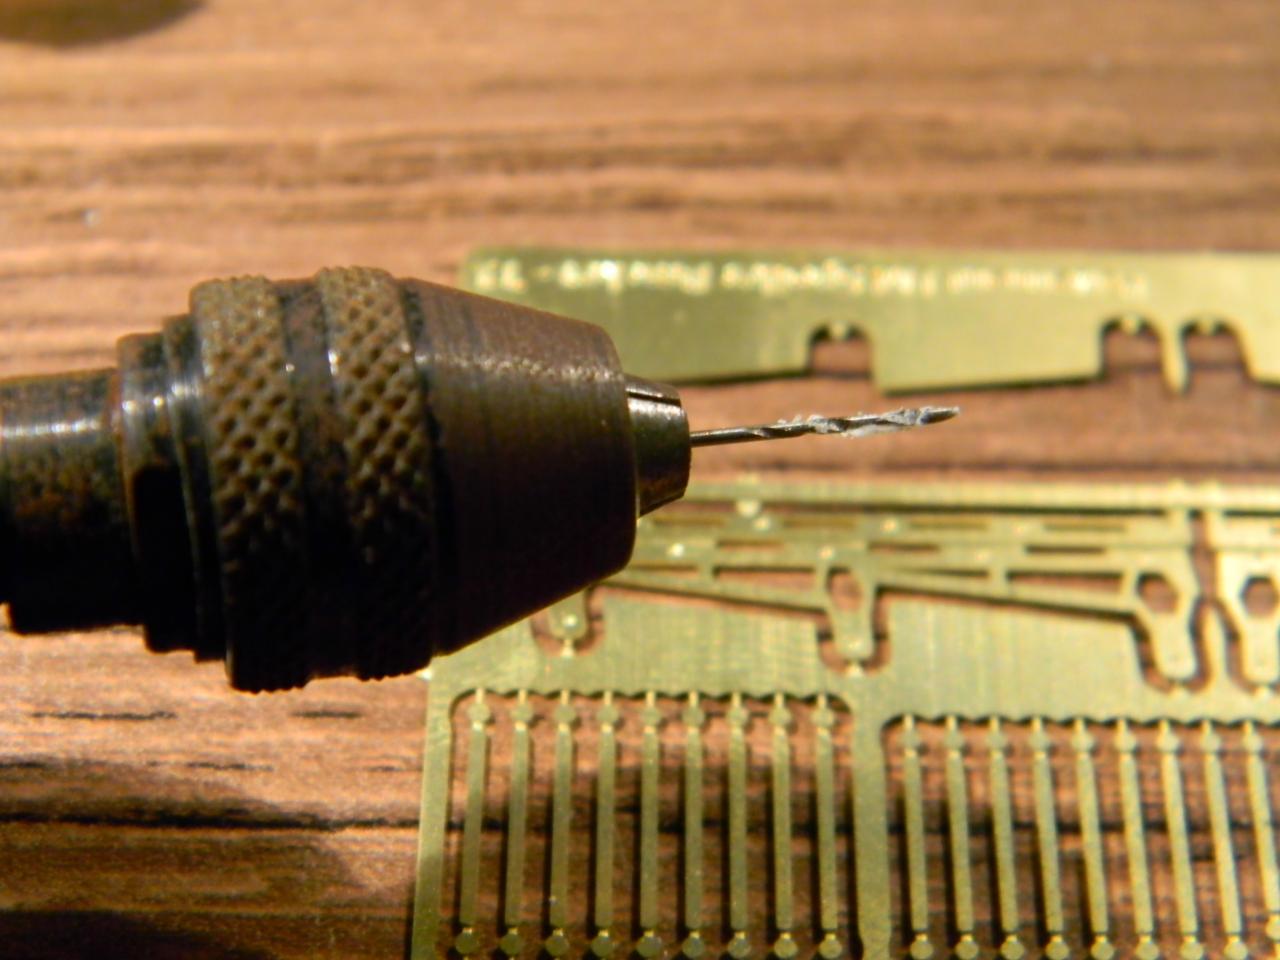
Since i'd already etched some recesses in the bracket, drilling with a rotary tool was a snap.
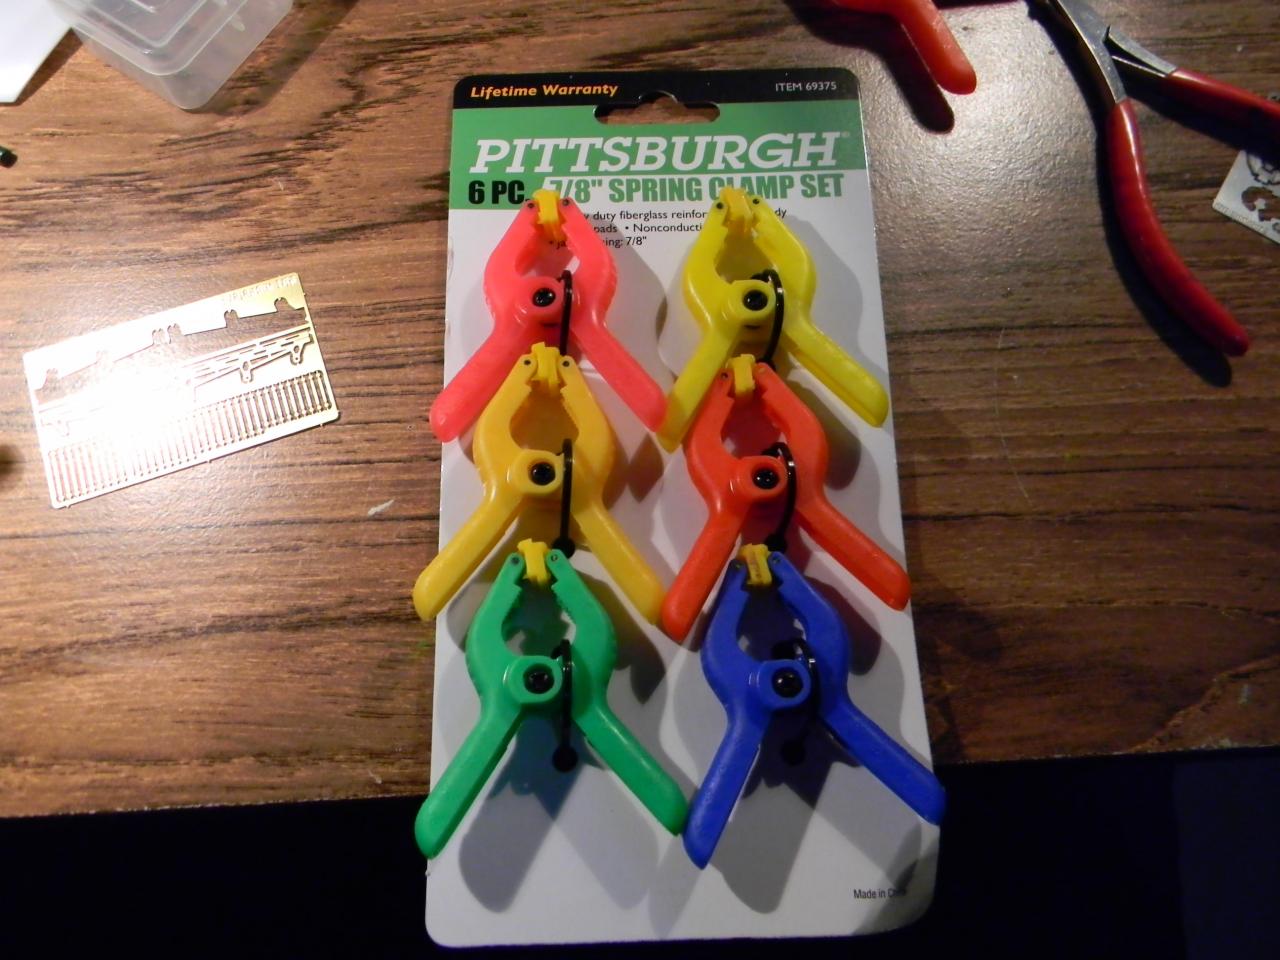
I took some cheap clamps from Harbor Freight to hold the braces in place, and drill the holes for them in the body.
Once they were straight and where i wanted them, i drilled through the holes in the bracket and through the body....
Then put pins in the holes to keep everything straight.
-
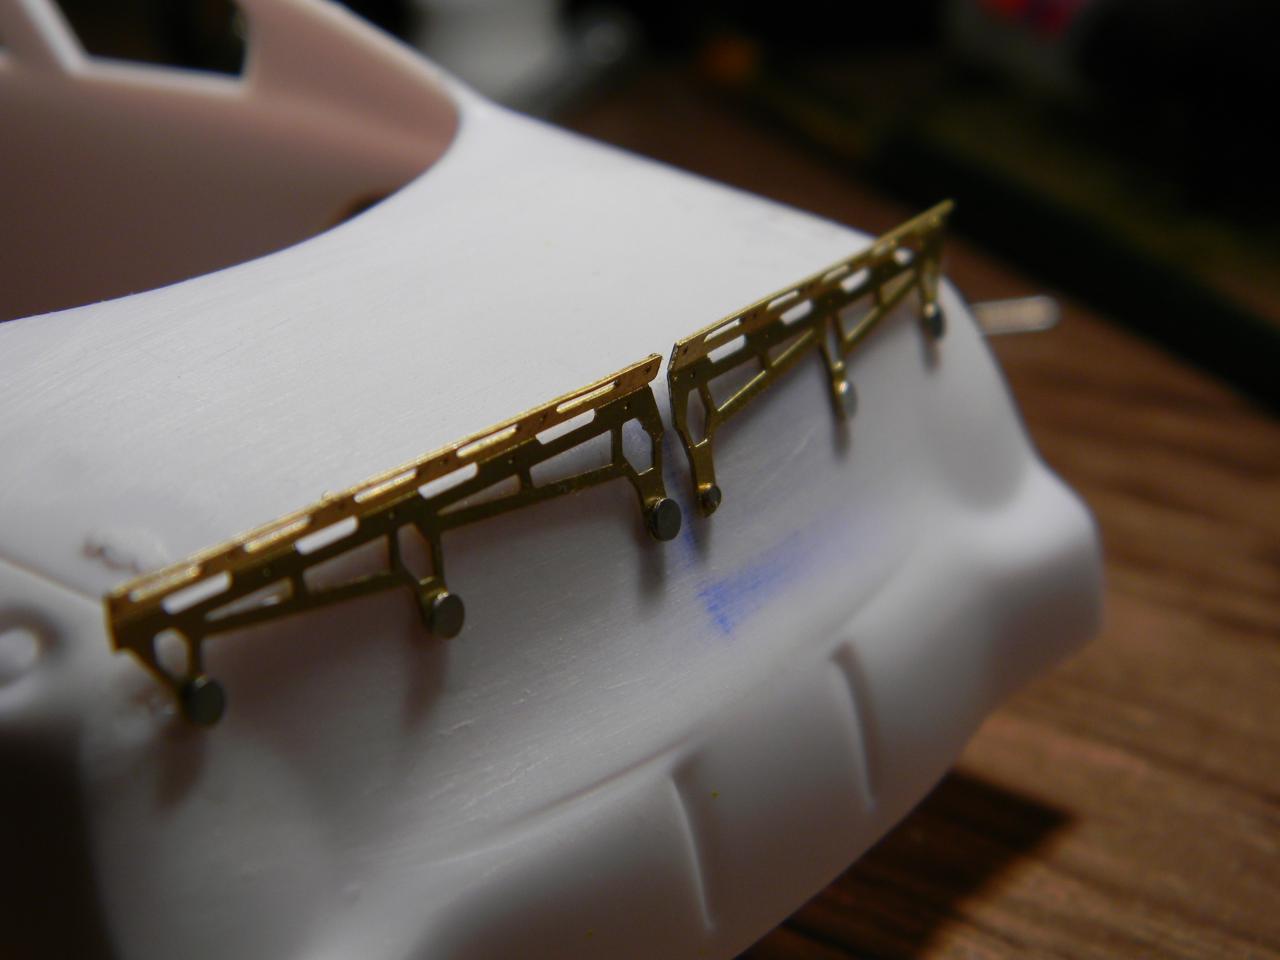
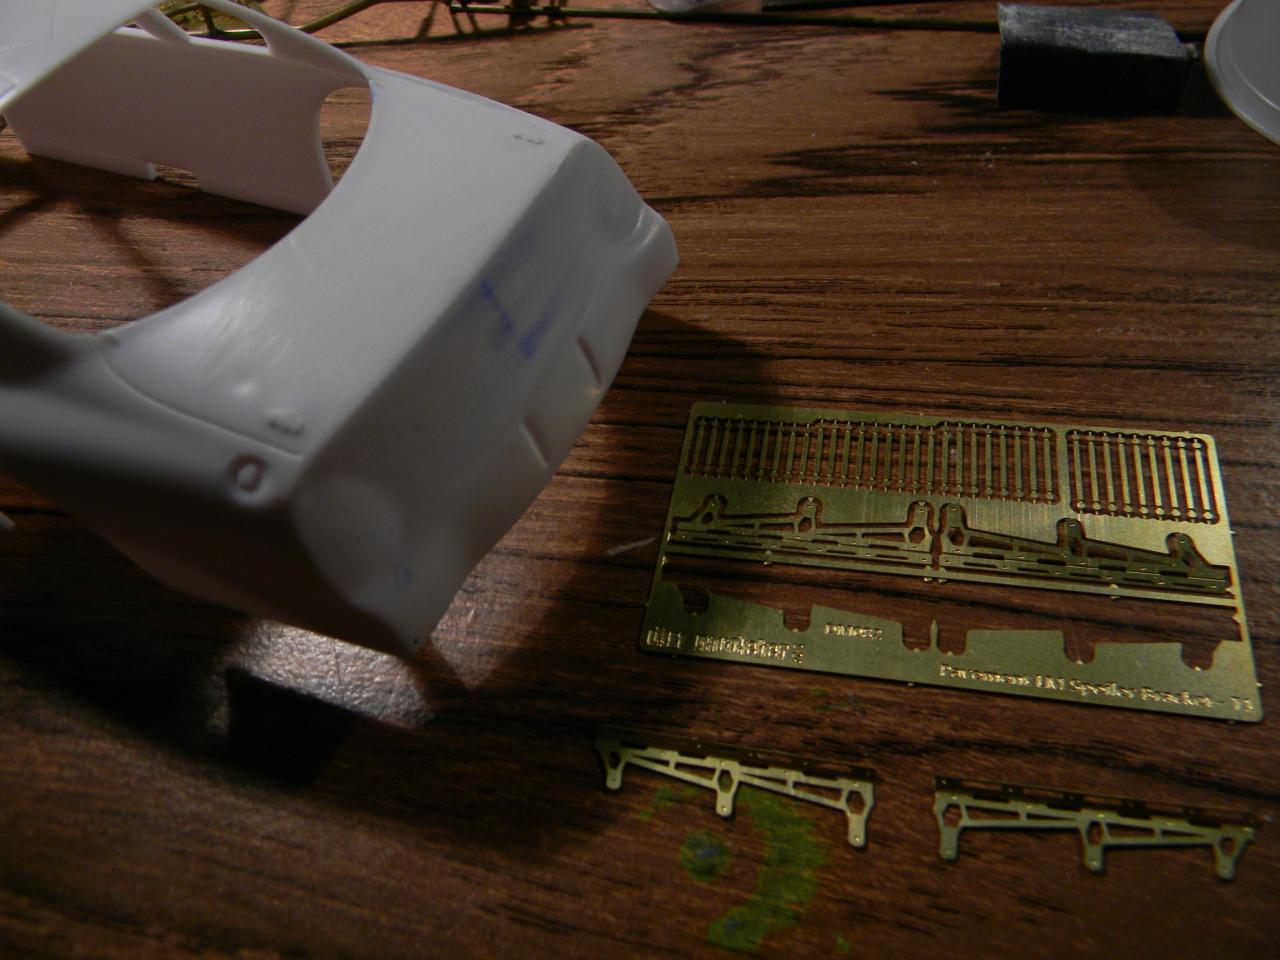
Hi all.
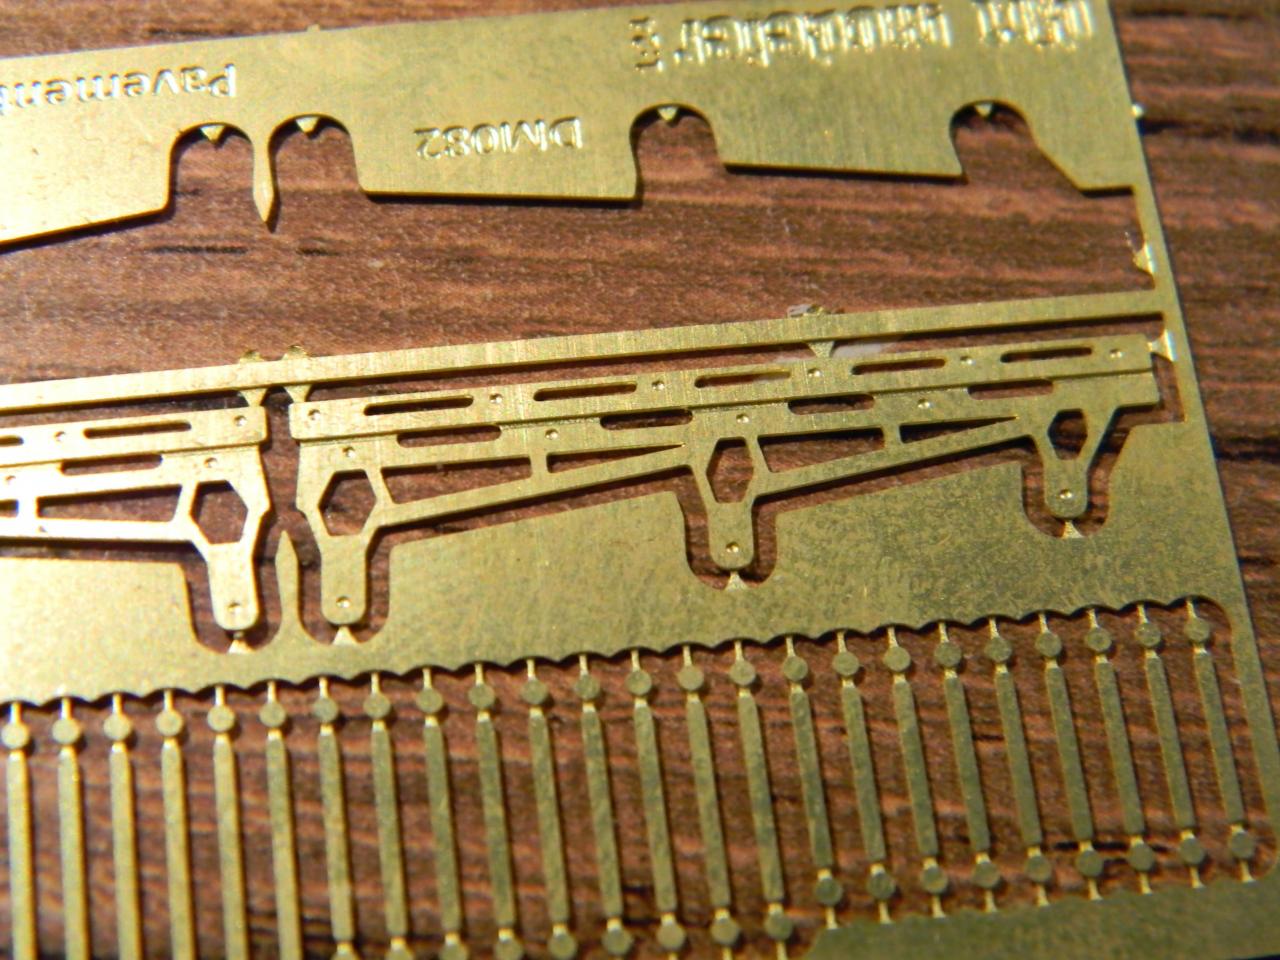
Some time ago i produced three different types of short track spoiler brackets for Pavement Late Models and other short track cars..
the gentleman that was going to do the mock-up photos didn't quite come through so these have been pretty much sitting for nearly a year.
The past few days i've been playing with working on a mockup to see how they work, and show how everything fit together.
Since i don't have a pavement late model body, i have to run the tests on a NASCAR kit body.. i just sanded the spoiler off, and squared the back up a little bit.
I thought the easiest way to go about attaching them would be to drill them out and pin them to the body.
-
http://www.thinkgeek.com/product/f487/
Check out the resolution! perfect for Resin Masters.
Except for the fact that it's just an April Fools joke.
Sorry!
-
Corel Draw is an excellent program for graphics. It's the one i use.. i've been a Corel addict for 20+ years.
The other alternative is Adobe Illustrator, which has an even larger fanbase then Corel Draw.
I really think it's a matter of preference on which one you use.
finally, there is a free program called Inkscape that i've played around with that has some merit for creating nice graphics as well.
Just my $.02
-
That's good to hear Joe!
I get freaked out about hand/finger injuries myself... so much so that i don't like using power saws anymore... i'm too paranoid about something happening. I can't imagine losing a couple fingers and trying to type or work on something in 1:64th scale.
-
I talked to some folks earlier this evening at dinner. She said 90% of lost international packages are because of poorly written customs forms. If you write clearly on the forms there shouldn't be any issue. I'm taking along my mother.
I can't write to save my life! Step 1: Stop writing the customs forms:
https://cns.usps.com/go/ShippingInformationAction_input
Use that online customs form, and never fill one out by hand again.
Shipping went up quite a lot.. it killed a lot of my international business as a result. I had to eat about $50 in shipping for a few orders after the switch before i could get the prices changed on my site and on ebay.
Everything went up, it's a real shame.
-
CEO of Autodesk talking about 3D printing @home.
http://www.popsci.com/science/article/2013-03/autodesk-ceo-carl-bass-future-3-d-printing-home
-
.... And here's that technology.
THIS will be the technology of the High End Printers of the 2020 future. I think $2,000 is a little on the low side. I think these will be more like $35,000 to $50,000 and owned by many cottage industry manufacturers.
Nano Scale 3D Printing, and it's already here.
My guess?
"low end" printing will be mainstream by 2020 (what we consider high end today)... This Nano Scale printing will print truly seamless prints on par with injection molded parts. But it won't be truly mainstream in the sub $5000 range until 2030.
-
3D printing is going to pretty much kill off any low volume injection molded kit companies. Period.
Injection molded kits will still exist, but only the high sales models... the niche markets are going to exclusively be 3D printed.
The quality now is pretty good, and it's getting better every year.
Shapeways is what most people are using these days. The quality of their Frosted Ultra Detail is decent.. but definitely not great. There are better printers out there that print higher quality parts.. but the cost jumps quite a lot to the point they are only suitable for resin masters.
I expect to see injection molded quality 3D prints with no visible layer lines on the prints by 2020 on machines that will be around $2000.
There will be cheaper machines out there, but they won't print as nicely. (just like you can get a cheap inkjet printer today that prints pretty good)
-
Love that movie.
The part where they are fishing for guys from the other car lot and smack that guy in the face with the $5 bill tied to a fishing line made me soda coming out of the nose lose it with laughter.


 I can't write to save my life!
Scale Tabs and Brackets - À la carte!?
in Car Aftermarket / Resin / 3D Printed
Posted
Good Morning everyone.
I thought i'd write to get some input on a project i've been working on for some time now.
I have a ton of artwork for tabs and brackets that i've been doing here and there for the past couple years to have them photoetched.
The problem i always run into is how to put those pieces into logical kits to have them made.
The thing i run into time and again is wondering, "what if a customer doesn't want that many of this part on the fret, what if a customer needs more of another part and would have to buy multiple frets to get what they need".
I go around in circles trying to make a decision, changing my mind, and never actually get a completed fret together and put it onto a plate to get etched.
So last night i started thinking about doing all of these brackets A la carte, A single small fret with multiples of a single type of bracket, and offer a whole bunch of different ones and you'd just get what you want for your project. Pick your tab's radius (for what tube it would fit onto), pick the offset you want for the tab, and pick what hole size you want (to match whatever pin, screw, or bolt you are putting into it)
This goes against classical thinking for model parts. Most PE products are kitted together for a single project in mind.
My thought when i started Dirt Modeler was always to create a sort of mini parts shop. Not so much one that sold kits of different pre determined projects, but something like a scale version of Jegs and Tabzone.
I'm going to go ahead and take the gamble and move head on this project. There is only so many parts i can fit on this plate i'm working on, if there is enough interest i'll definitely continue on with the project on future plates. The first release will be around 100 different tab choices in multiple scales, starting with basic radius and flat tabs.
I hope it ends up being something that can be universally utilized by modelers, regardless of what your subject or scale is.