HOLMES55
-
Posts
54 -
Joined
-
Last visited
Content Type
Profiles
Forums
Events
Gallery
Everything posted by HOLMES55
-
Painting torque thrust rims
HOLMES55 replied to HOLMES55's topic in Model Building Questions and Answers
Mike - I have thought about getting a piece of tubing to mask off the outer rim but I haven't found anything with the right diameter. I might be able to make something with .010 styrene wrapped around a rod with the right diameter and tape it together. Hugh - I know what you mean about the paint flowing off the brush. I noticed this when I was testing the paint on the chrome sprue. -
Painting torque thrust rims
HOLMES55 replied to HOLMES55's topic in Model Building Questions and Answers
Thanks for the tips, looks like I am going to have to work on my brush painting. I haven't been using thinner so I am going to try that. -
Painting torque thrust rims
HOLMES55 replied to HOLMES55's topic in Model Building Questions and Answers
Hugh - nice work on those rims, that's what I am trying to end up with. maybe a lighter shade of gray Monty - I tested some acrylic paint on the chrome sprue and it doesn't adhere well. I havent tried the metalizer. I think a flat primer is more what im after. Jesse - I will try that idea or just touch up lug nuts with a silver sharpie -
I have these chrome torque thrust rims from the 1968 Bullit mustang kit that I wanted to paint the spokes gray for the magnesium look. I have seen other models with spokes painted and wanted to know other peoples technique to paint their rims. I prefer masking tape and spray paint but it seems like it might be easier to brush paint them. When I brush paint sometimes you can see the brush marks.

-
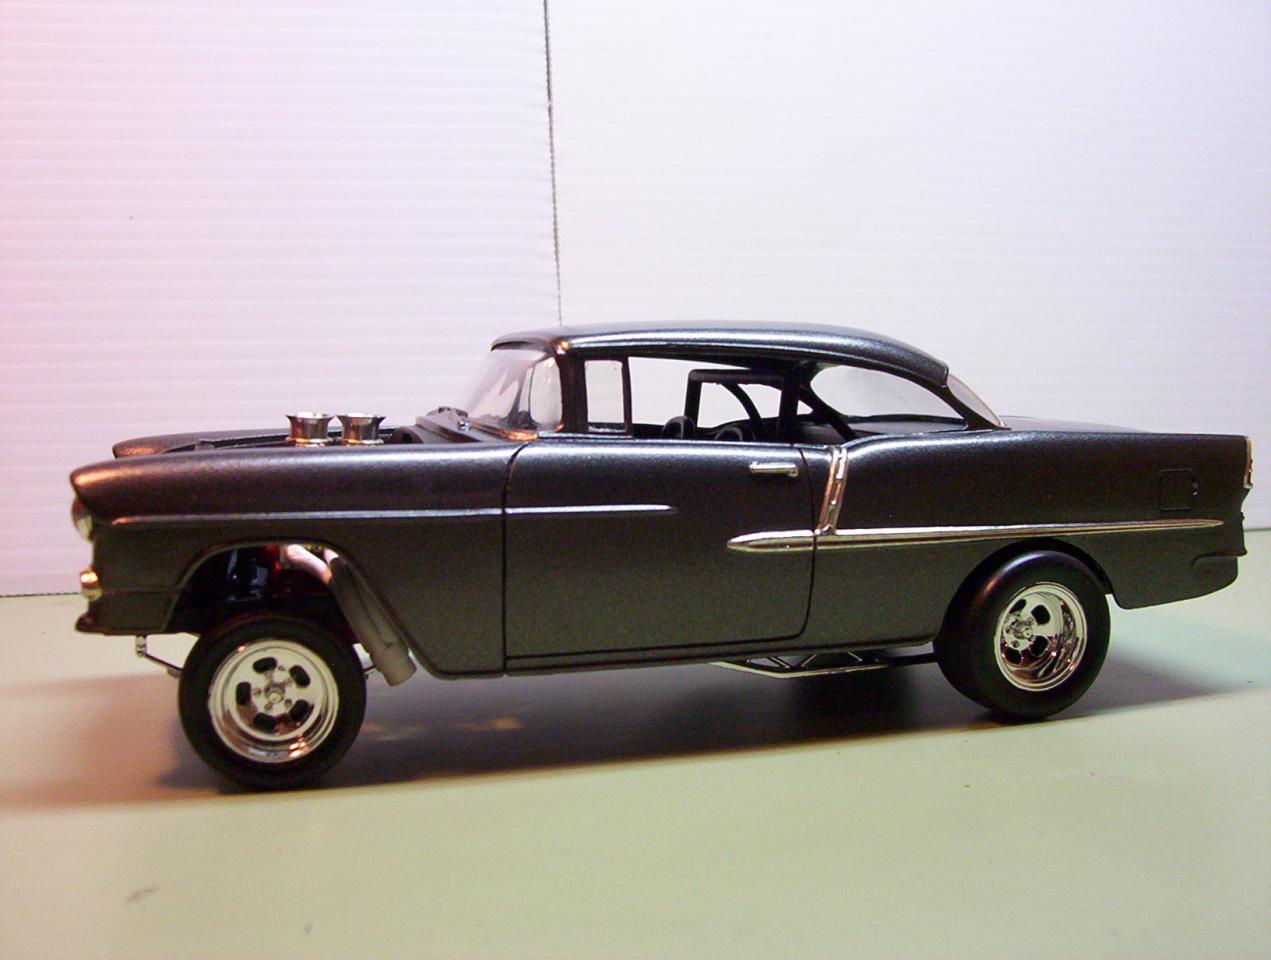
One of the problems with this kit is that the B-pillar is molded into the windows and the clear plastic is very thick. I cut the front and rear windshields off and used .010 clear plastic for the wing windows and left the rear side windows off of mine. I also filed the C-pillar down(between the side and rear windows)because it was way off the reference photos of the 1:1 car. Mine also had the missing door line that yours had so I scribed that in.
-
Thanks Chris Another good reason to use acrylics, you save on paint costs and primer cost. And one less step in the painting process.
-
Chris What type of primer do you recommend under the acrylic paint ??
-
Michael There were several modifications I made to this kit. The engine is not the best 427 SOHC out there, I added the distributor and coil. The suspension was modified, I raised the front and moved it forward. The body had no issues other than getting the doors lined up in their openings. I taped the doors to the body and got the hinges lined up and glued the hinges to the body and then drilled thru both door hinges and put a plastic rod thru them. You can just glue the doors shut if you want to. The 2 piece tires take a little work to look right, I glued them together and sanded them down so the seam is less noticeable. AMT released a kit last year that might be a better choice. http://www.modelcarsmag.com/forums/index.php?showtopic=71319&hl=willys Brad
-
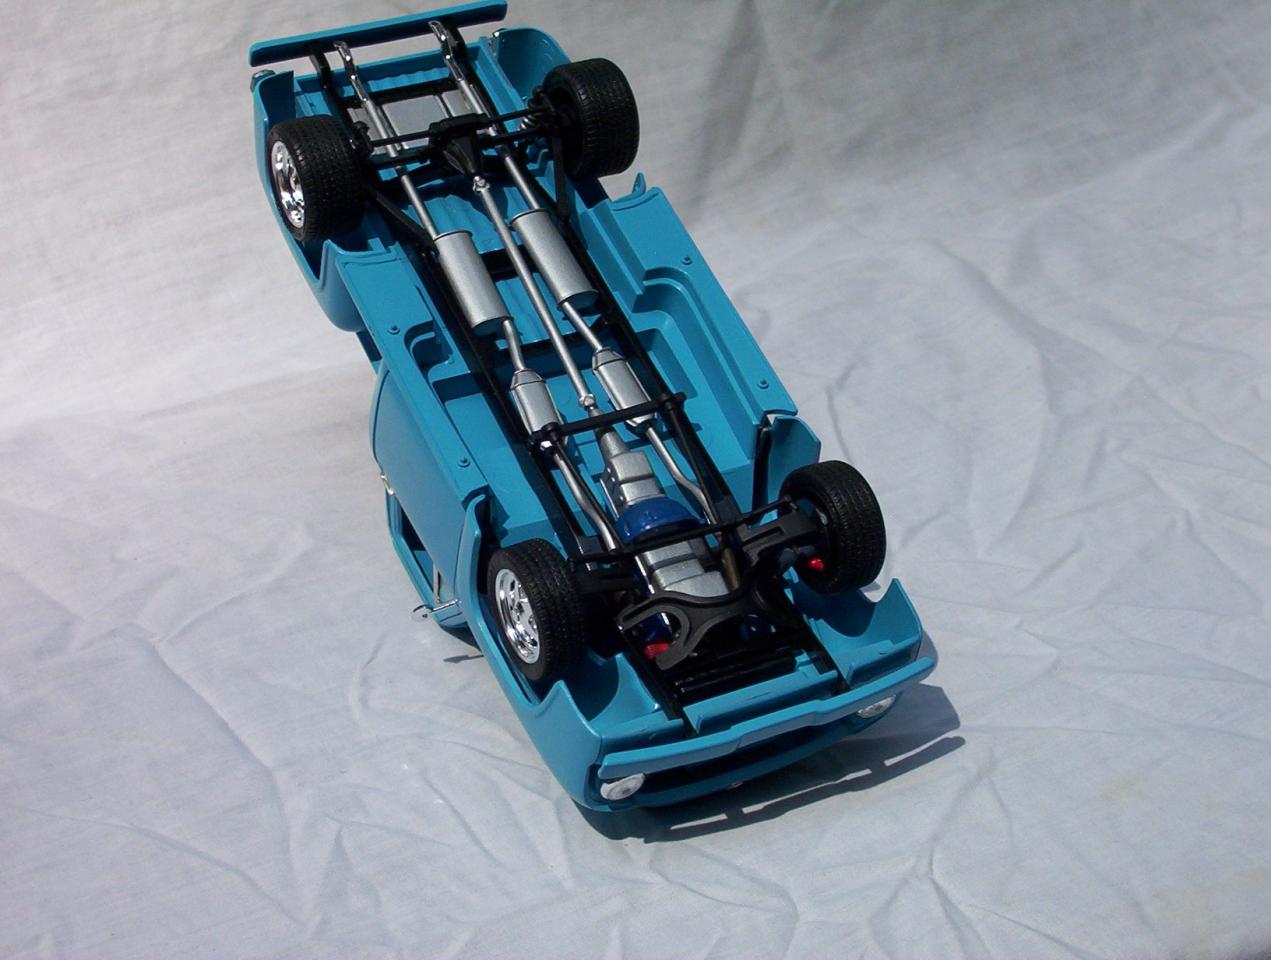
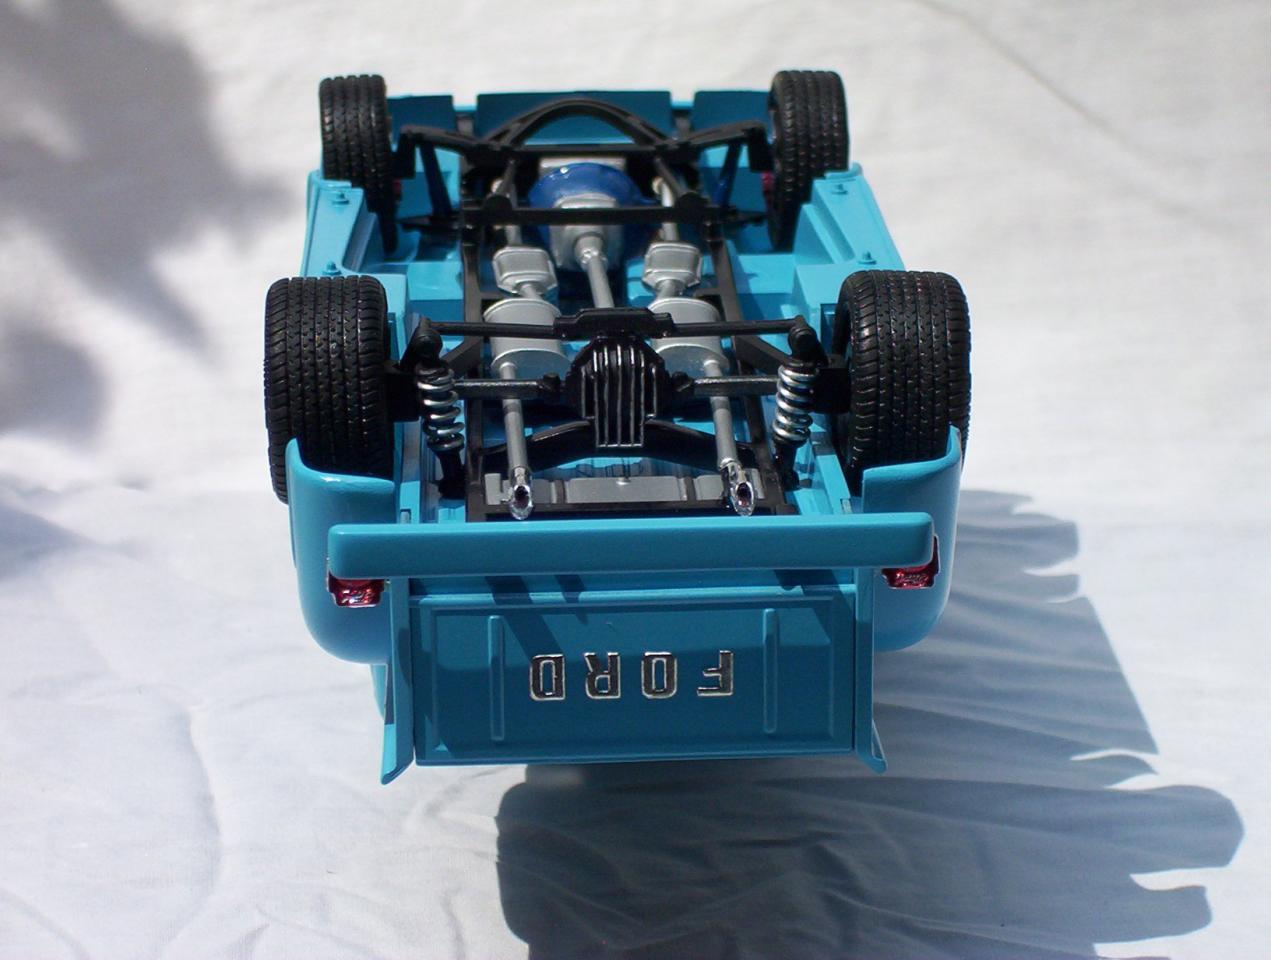
Here is the kit I started with The front end was too low and the wheels sat back to far. I raised the front end and moved the wheels forward. The rear differential was mounted to quarter elliptical springs and did not look sturdy enough so I replaced them with leaf springs. I took a lot of the chrome off and used model masters metalizer paints. This was the first time I have used them and noticed if you put primer under them they didn't buff out much and work better spraying over the bare plastic. Here is the motor/chassis: I did get the doors to line up fairly well The tires are 2 piece type but I used them anyway
-
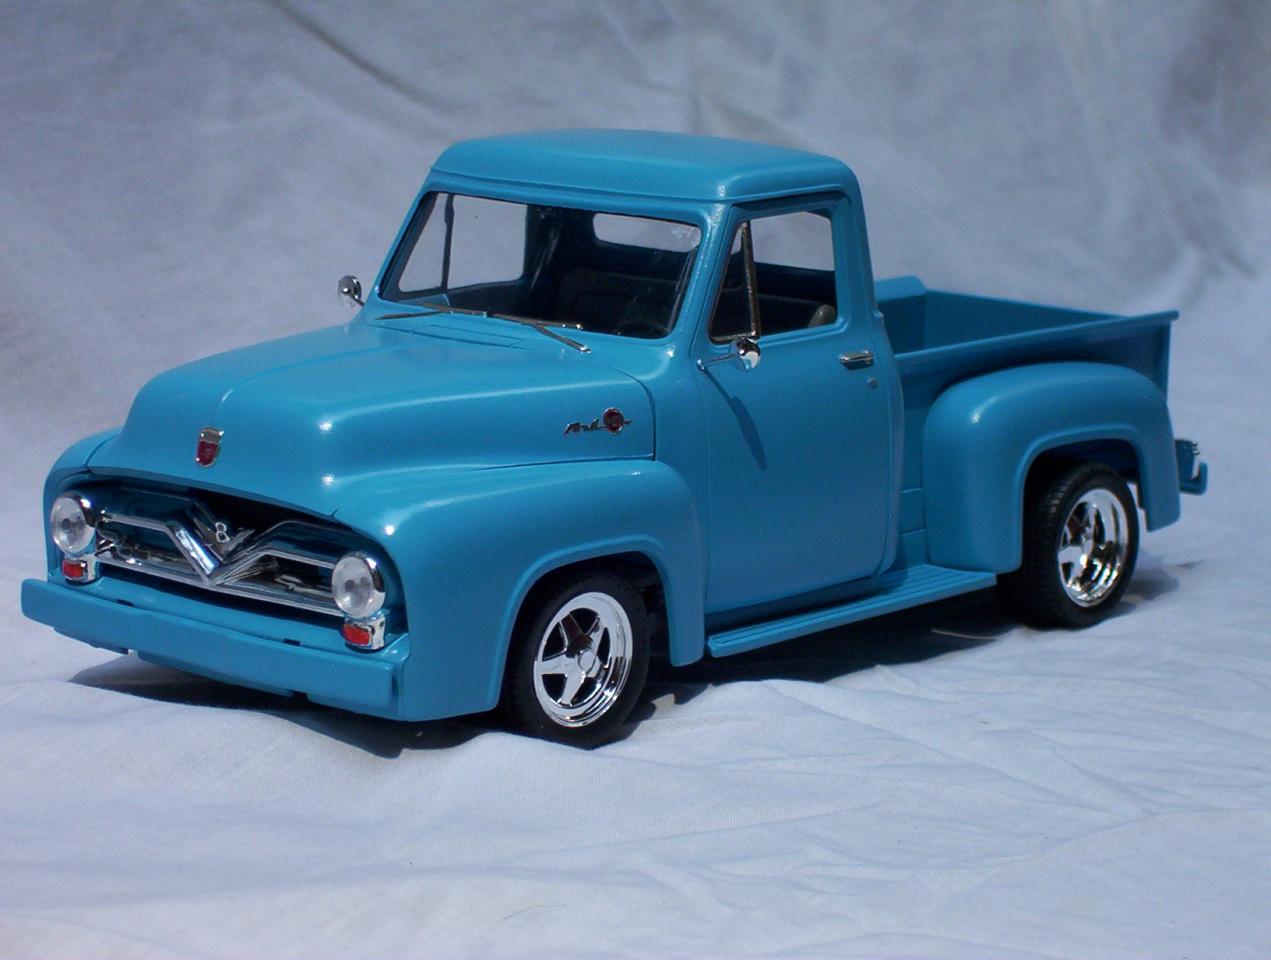
1955 F100 Street Rod
HOLMES55 replied to HOLMES55's topic in Model Trucks: Pickups, Vans, SUVs, Light Commercial
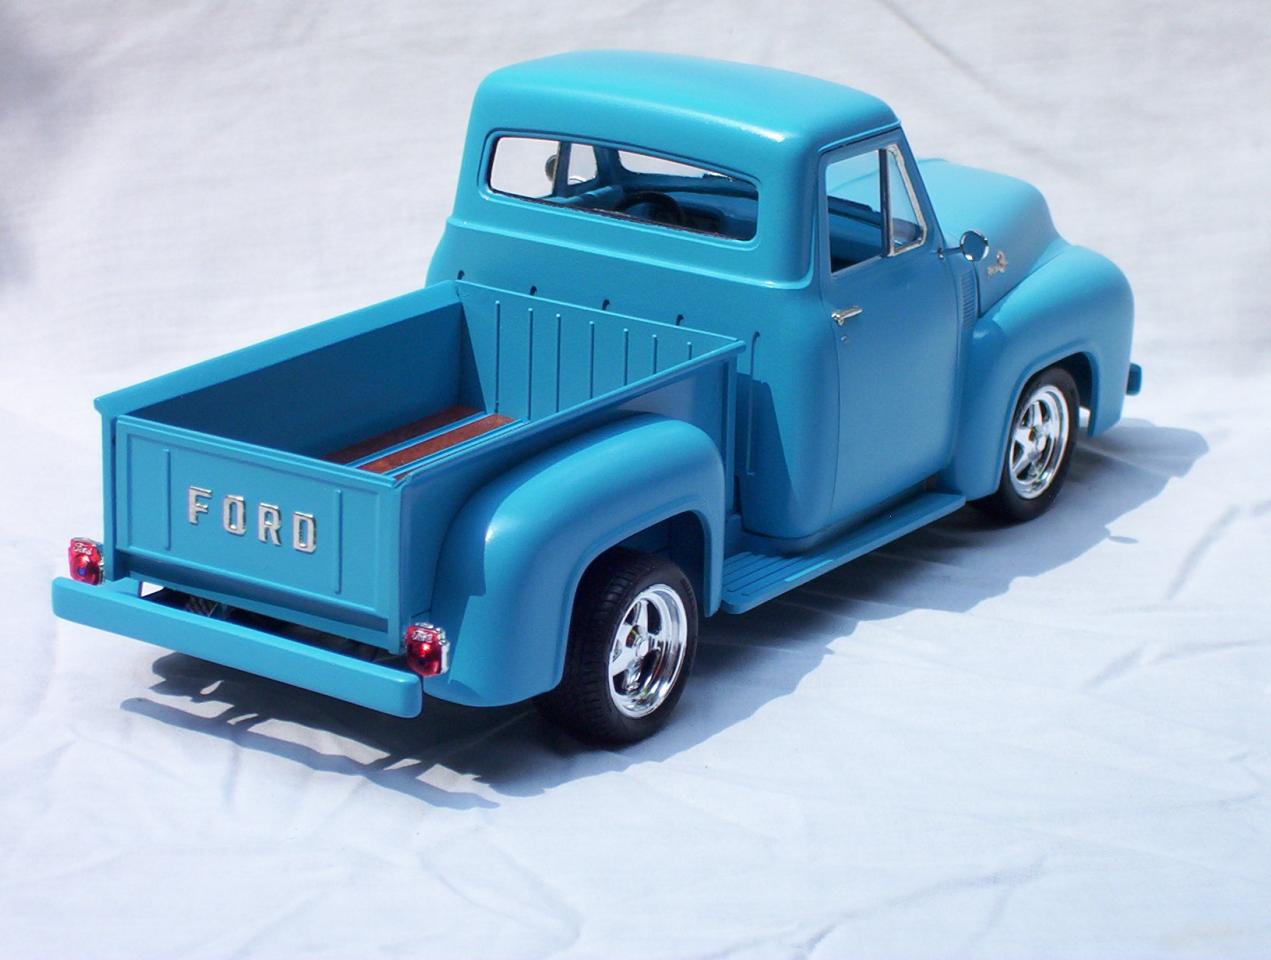
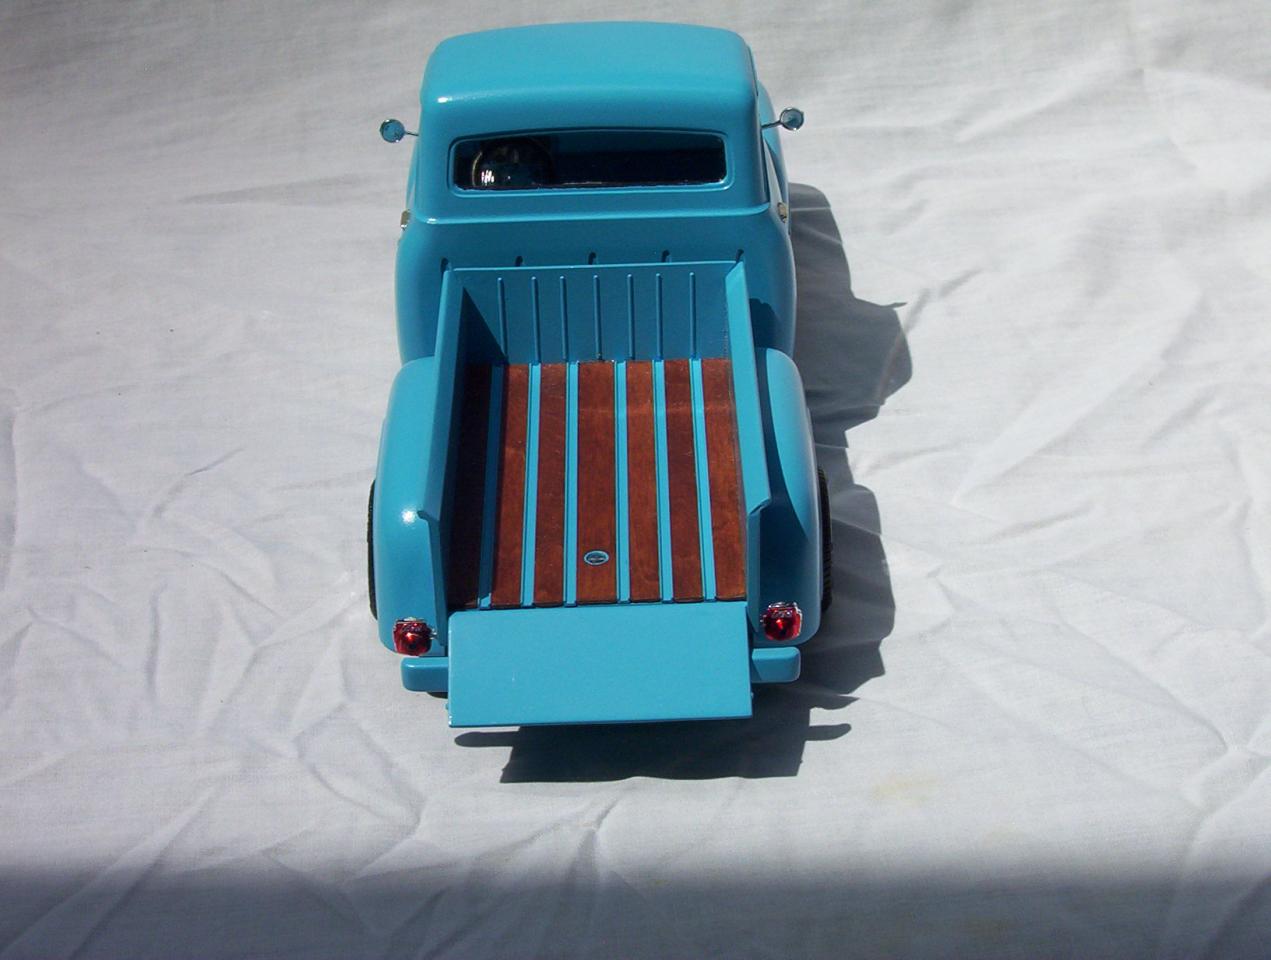
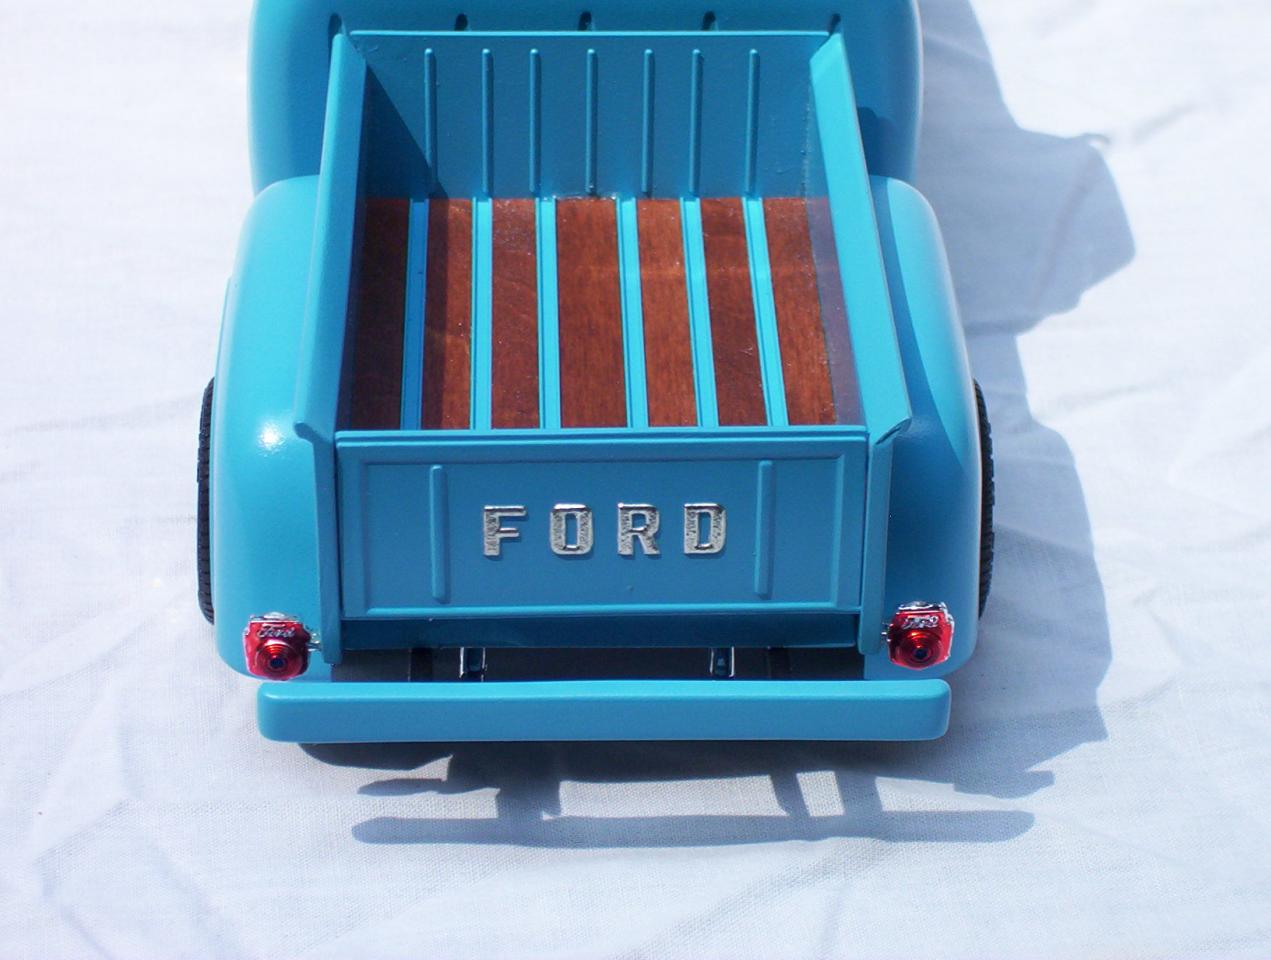
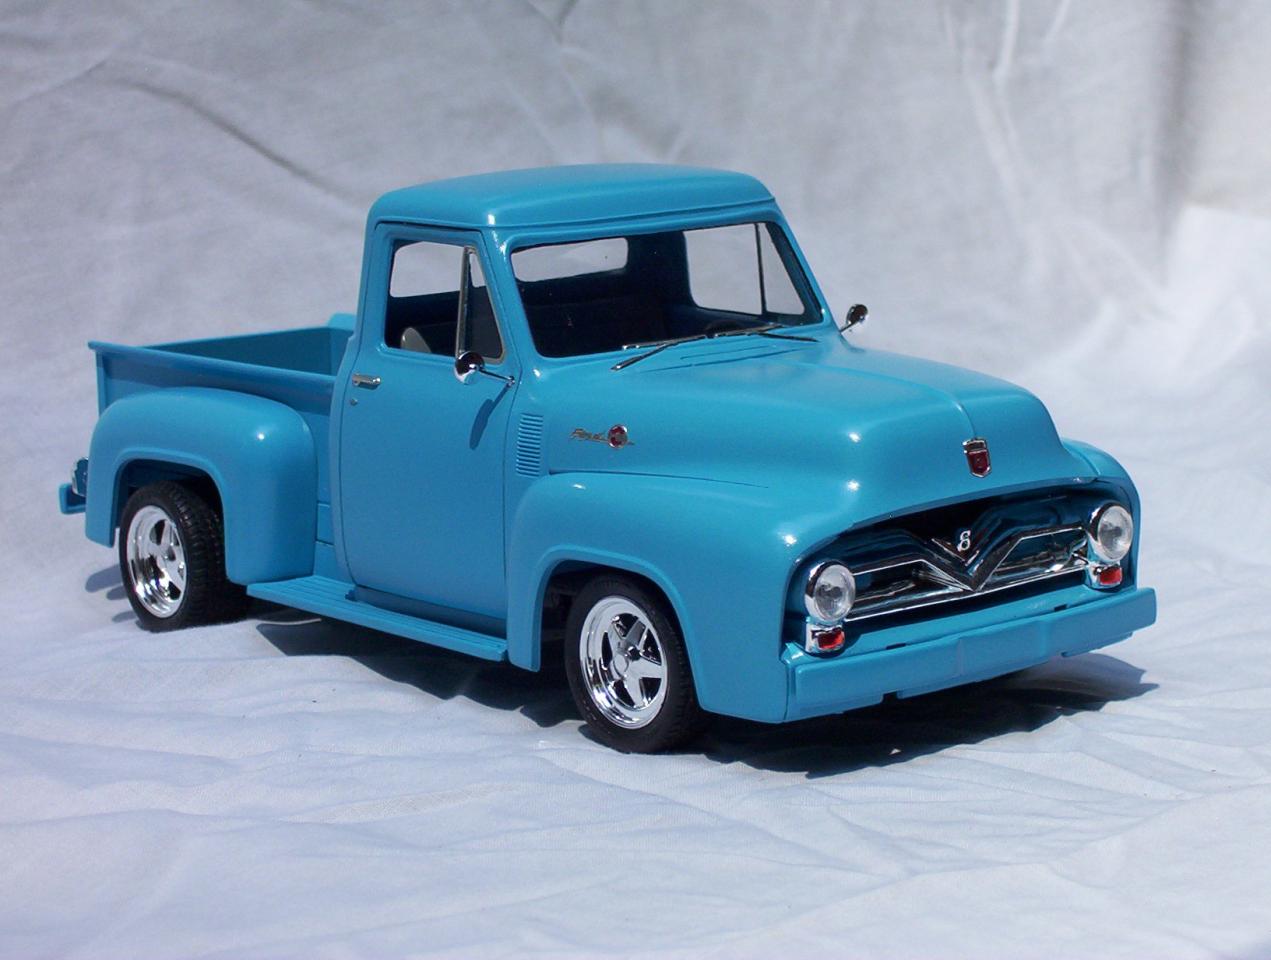
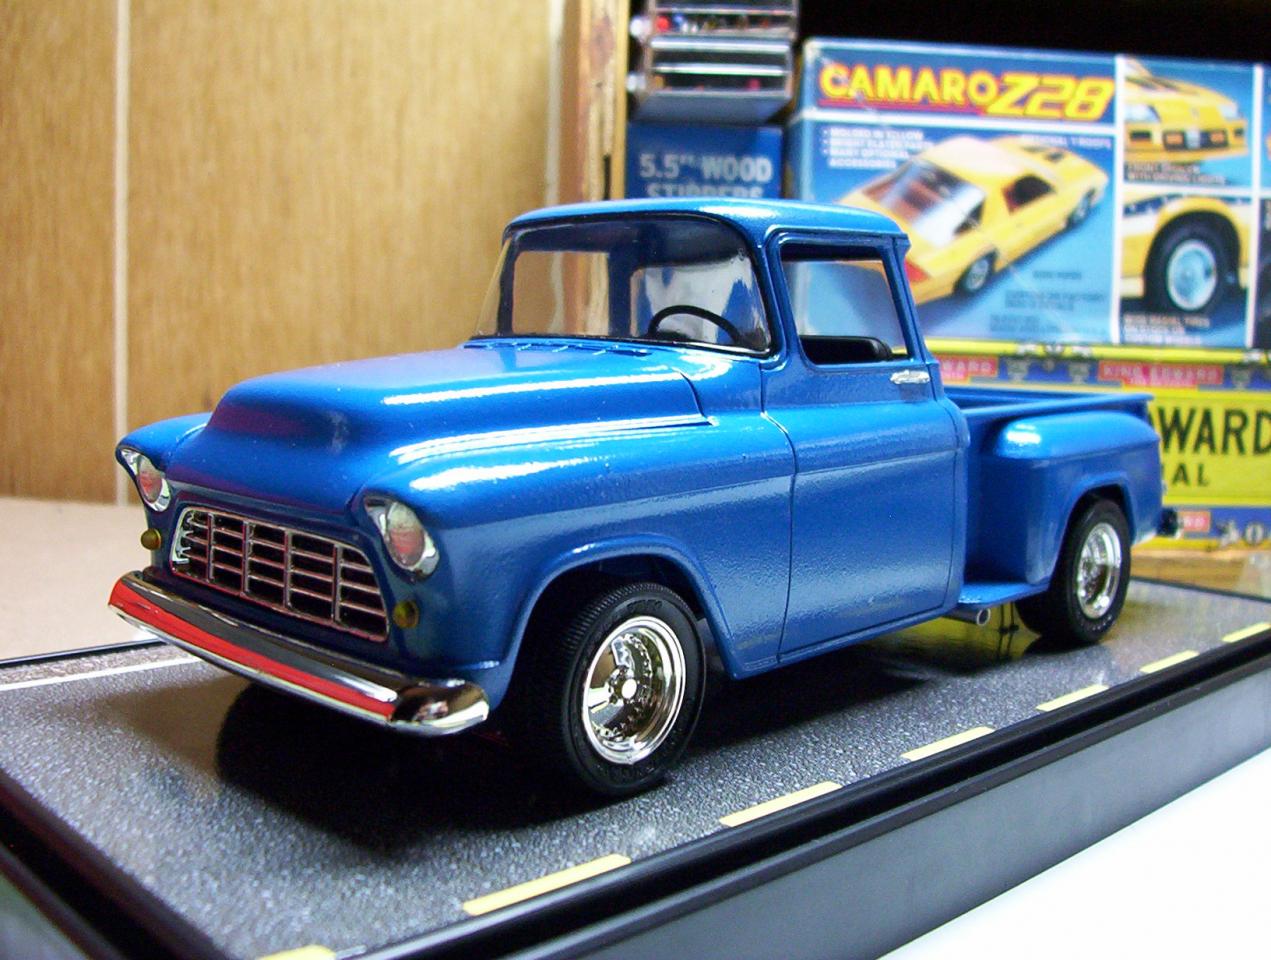
Bob I applied foil to the emblems and the tailgate and then detailed the emblems with a red sharpie Thanks for the compliments everyone, it was a big help being able to read other peoples tips and techniques on this website -
Just finished this Revell Ford F100 Street Rod. Some of the things I added that were a first for me was the Wood Bed and the Coil springs on the rear shock absorbers. I removed the stock gas tank from the frame and relocated Mustang gas tank between the frame rails in the rear. I also removed the chrome from the front and rear bumpers to do some clean up work to the front and ended up painting them the same color as the body. This was the first time I used Lacquer paint and was real happy with the results.
-
I think its a model.. The panel lines dont look very deep and there are no valve stems on the rims
-
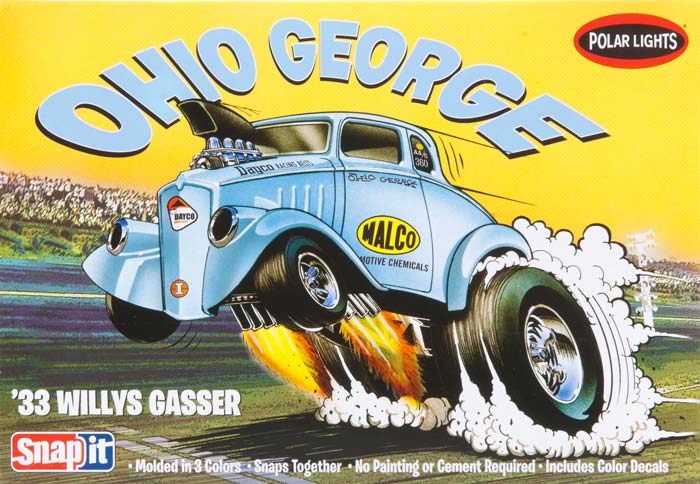
Interesting, but I believe "urban legend". Thanks Art for pointing this out, It seems the "Truth in packaging Law" was passed in 1966 By Lyndon B Johnson. I noticed that there are some new releases that use Box art on the front of the box. Polar lights recently released the 33 Willys Ohio George Gasser with this on the front
-
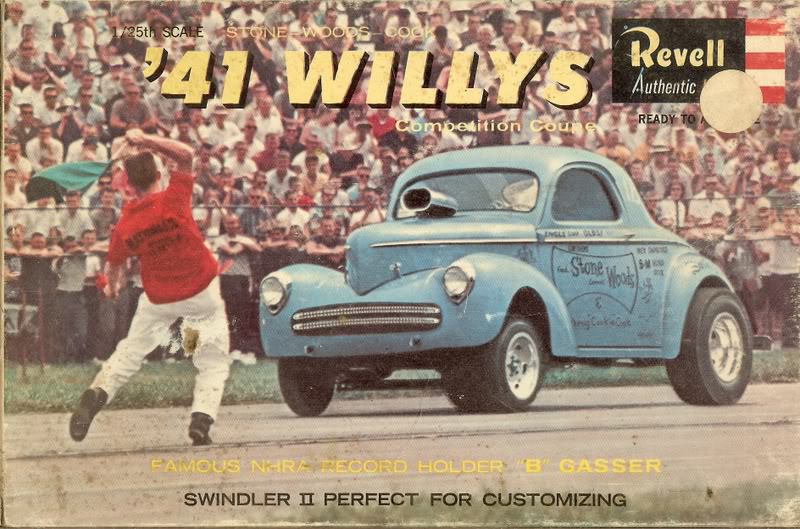
I found this thread on th H.A.M.B. about Model box art http://www.jalopyjou...ad.php?t=238665 There is an 7 or 8 page article also in Elapsed Times magazine about old box art. It seems that when Jimmy carter was president there was a truth in packaging law that stated that there be an actual photo of the contents and put an end to Box art.
-
That looks like it was tight fitting everything under that body...but you did it Great details..I like that steering linkage hook-up
-
It seems that the panel lines need to be darkened, they are a lighter color that the paint
-
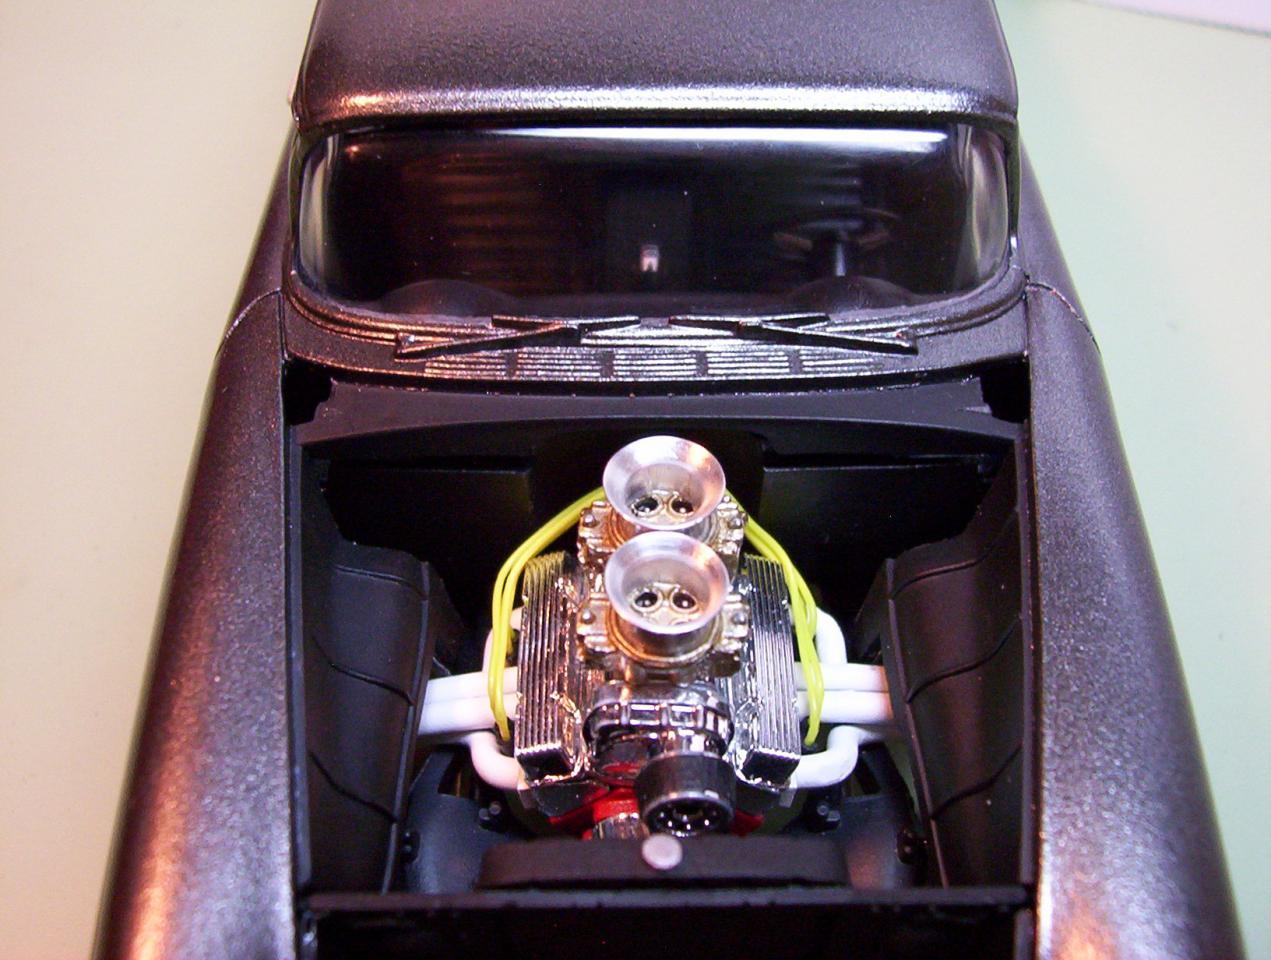
Nice engine detailing,did you make the headers?. How did you tint your windows ?
-
Most hobby stores will have it like HobbyLobby or you can order it online
-
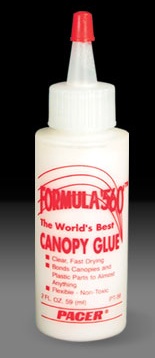
The best glue for windshields is Canopy glue. Its a white glue that dries clear and it stays flexible. If you apply to much you can trim and remove the excess.
-
Thanks for the comments..appreciate it. I was thinking of adding fuel lines and linkage to the carbs but with the dual carbs it got to complicated. I think i'll try it out with a single carb first.
-
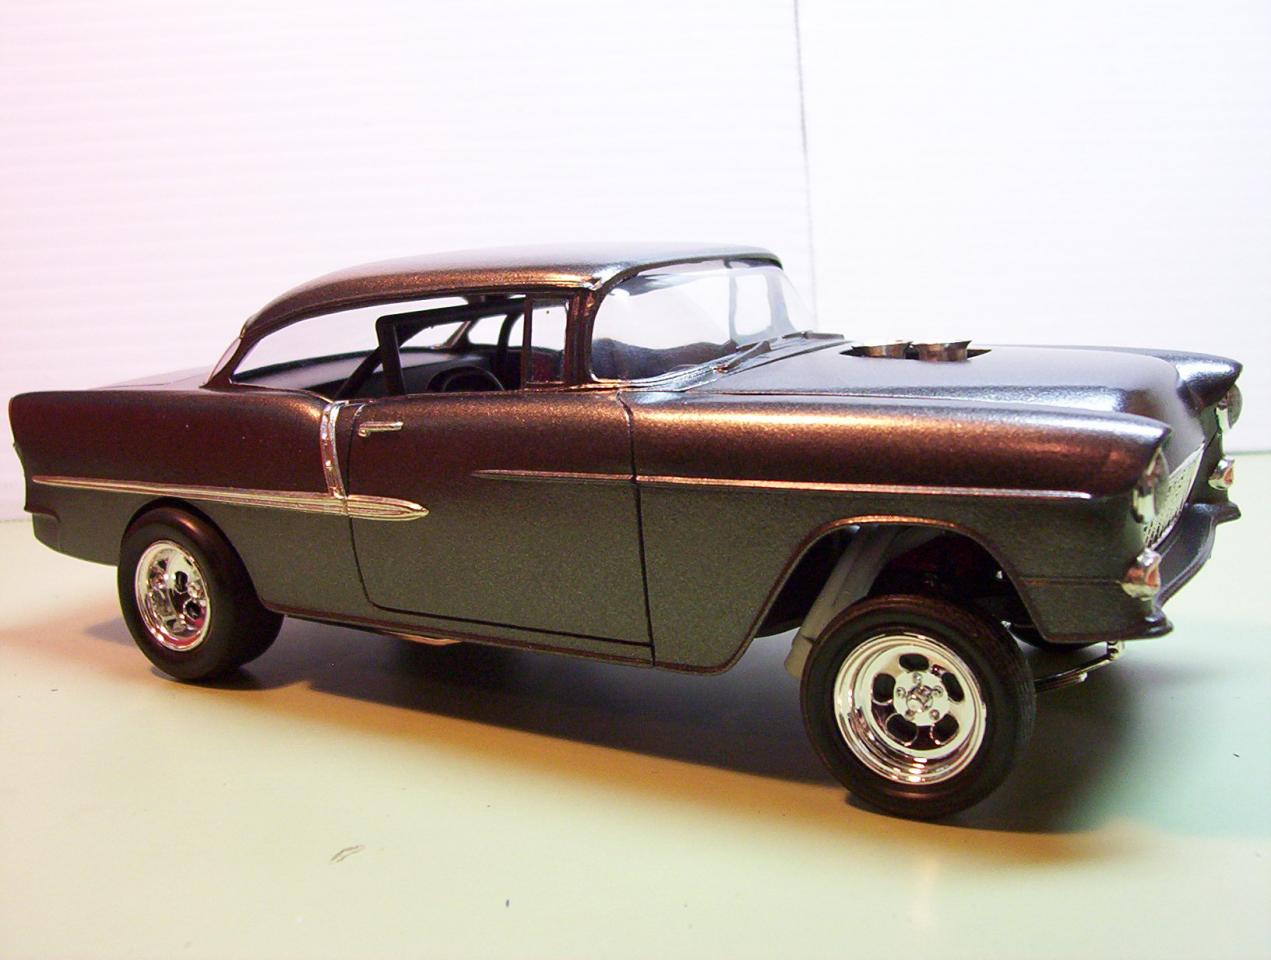
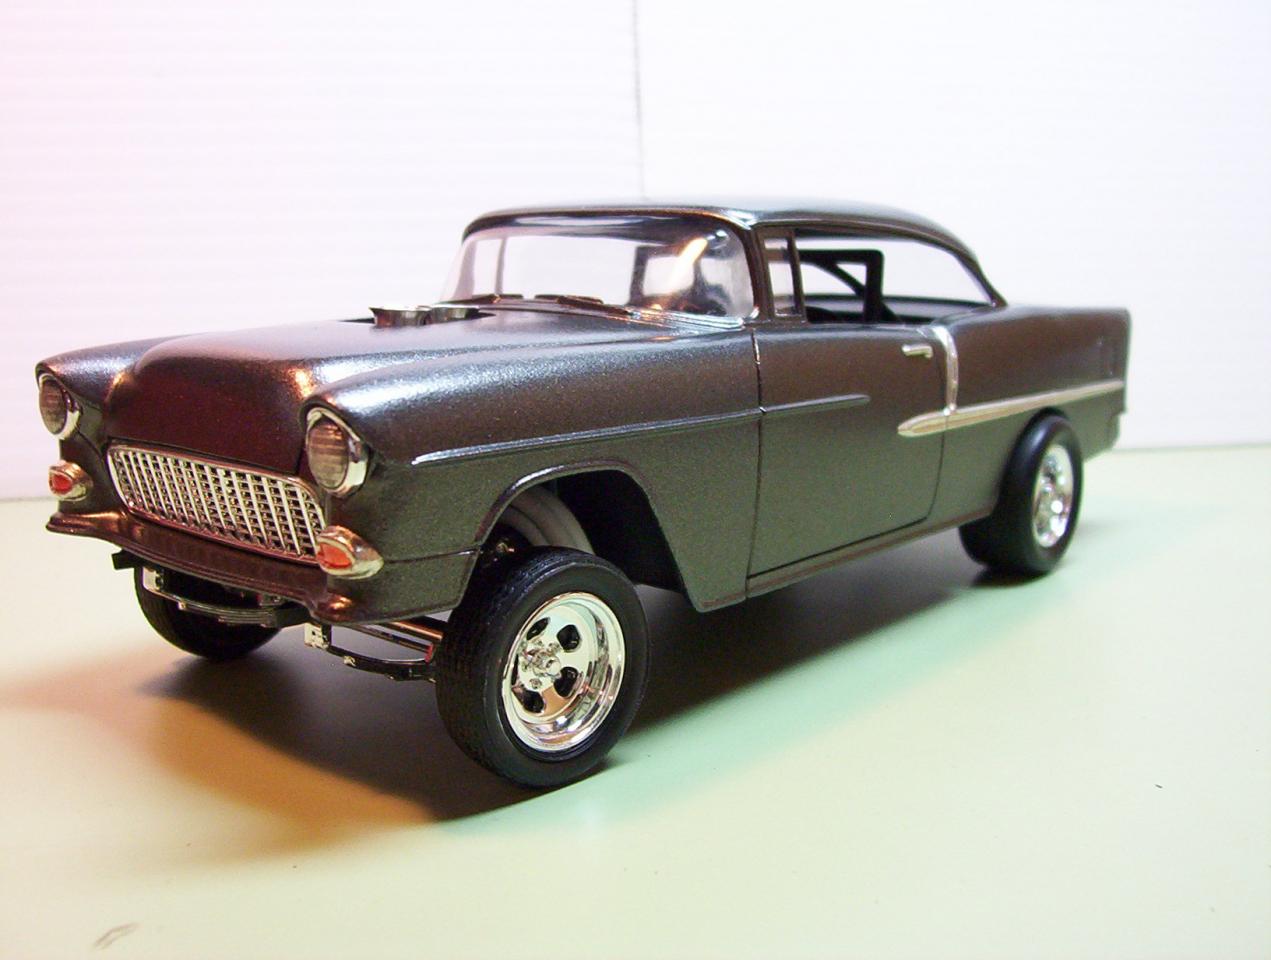
First time post for me. I started with the Revell 1955 Chevy "Street Machine" and was disappointed with the lack of detail on this model so I decided to try some things I've seen on this forum and read about in Model magazines and books. With the engine I made some fenderwell headers out of solder, added the 2-4bbl carbs and made some velocity stacks out of aluminum tubing. I also added the spark plug wires which I have never done before. The glass on this model was one piece and extra thick so I cut the front and back windshields off and made this a no-post version. The "B" pillar was molded in the glass and the "C" pillar didnt look right so I trimmed that down to make it more realistic The headlights were chromed with no clear lenses so I added a wash and applied some canopy glue to them and opened up the grill. The interior was not to bad it had good dash detail so I painted it and added some decals I printed to the speedometer and radio speaker grill. The steering wheel is from parts box The body is painted duplicolor phantom grey pearl and I added BMF to some of the trim. The rear slicks are from the parts box. Overall I think it was an improvement from what I started with and now I feel more confident customizing my models.
-
Thats a cool lookin 32, Looks fast just sitting there !! Enjoyed looking at your slot car stuff too
-
AMT 55 Chevy stepside
HOLMES55 replied to Daniej01's topic in WIP: Model Trucks: Pickups, Vans, SUVs, Light Commercial
I had the same problem with the windshield being to small, I built up the window frame on the cab with some epoxy to get it to fit better. I didnt like the exhaust tips that the kit had so I modified them with alum tubing on the end. I like your rear suspension setup.
-
I like the way it turned out, what kit did the body come from ? Was the top chopped or did you modify it?
-
I was going with the .062 solder which would work for street headers, but looked to small for racing headers. I made a prototype for one side just to see how it looks, start by epoxying the 4 pieces at the collector end and working your way back to the heads. Post an update when you get the headers installed. Brad