

streetmachine11
-
Posts
449 -
Joined
-
Last visited
Content Type
Profiles
Forums
Events
Gallery
Posts posted by streetmachine11
-
-
On 12/7/2019 at 1:38 PM, misterNNL said:
How did you determine the width of the engine mounting rails in the center of the tube chassis?
I used the 57 pro mod as a guide for the main rail placement because there set up for a big block and that's what I'm going with
-
On 12/9/2019 at 9:29 AM, afx said:
Great looking project.
thanks!
On 12/9/2019 at 11:23 AM, Jantrix said:Very impressive. I'll be following.
thank you rob
On 12/10/2019 at 10:11 AM, Dogfish_7 said:Amazing details and attention to them.
thanks Bruce its coming along nice so far alot more to come
-
On 12/8/2019 at 9:12 AM, comp1839 said:
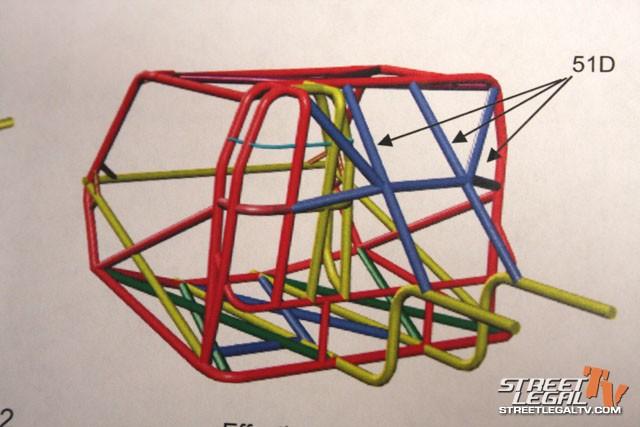
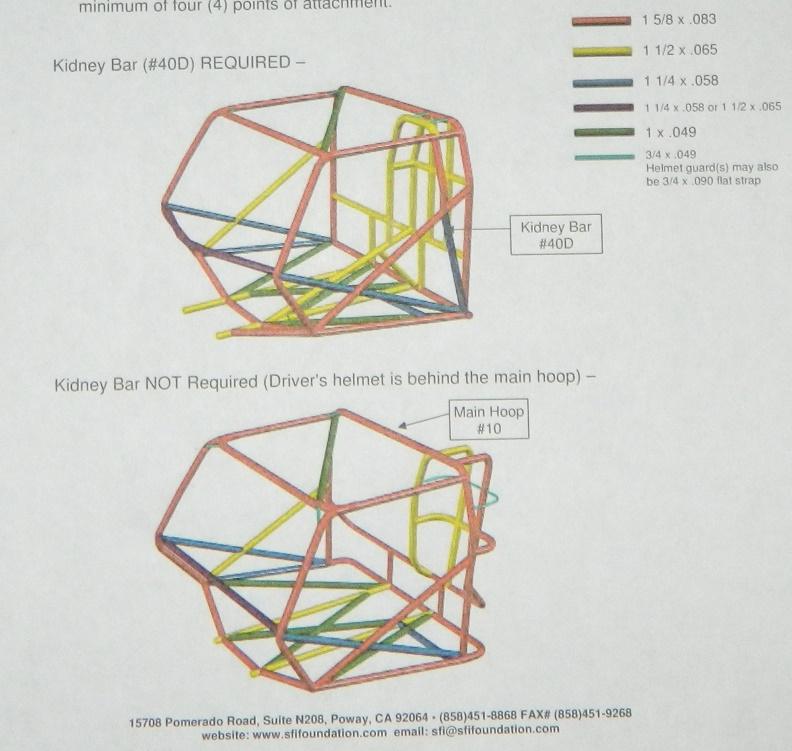
jason, just passing through and i saw your build. Awesome job! you are doing a fantastic job at scratch building. this should be off the hook when you're done. i have a comment or two for you. you're going to spend alot of time on this so, i'm guessing you want really good accuracy. you may want to build you're chassis with different sizes of tubing/ rod. tubing in a real cage runs from 1" up to 1 5/8". not saying bar placement needs to be perfect but, varying the diameters will help with the "look". here's some drawings with some helpful info. hope it helps.

hey dave thank you for taking the time to post those photos. the will be a great help. I'm really just winging it and going by other builders and pictures. didnt have much luck finding stuff like this and have learned alot being my first attempt. I've got some smaller tube sizes and will work on the chassis more tonight.
thanks again!
jason
-
1 hour ago, Claude Thibodeau said:
Hi!
Superb assembly, very detailed. Who makes them, because they look slightly "thicker" than average photo-etch... Just curious...
CT
claude,
the rear axle and 4link are from futurattraction
-
On 11/19/2019 at 6:20 AM, Fairfax said:
Another start to the evil machine. Excellent !
thanks its making slow progress
-
On 11/16/2019 at 7:09 PM, Claude Thibodeau said:
Hi!
Great project. When I built custom frames like yours, I often use clear styrene pill-boxes (or Crazy-Glue boxes) as the basic material for the rear tubs enclosures... They are avail in many sizes, and react well to styrene glue. Half-round styrene (Plastruct) in very small size can be used on it to replicate the beading/embossing usually done on aluminium tubs to stiffen them.
The Revell Mat and Debby Hayes TBird is also a very good donor for rear tubs, but be advised that they are very tall, meaning the may interfere with the tulip panel at the base of the rear window.
But I'm sure you may have your own plan. Oh, the joy of scratchbuilding! Keep going. Inspiring!
CT
hey claude,
thanks for this idea I may have to look into that. I thought of using kit tubbs but most seem to be to narrow for this body. defenitly making some probably going to be decaled with carbon fiber.
thanks
jason
-
On 11/16/2019 at 12:15 PM, NYLIBUD said:
Looking good.
thanks ron appreciate it
-
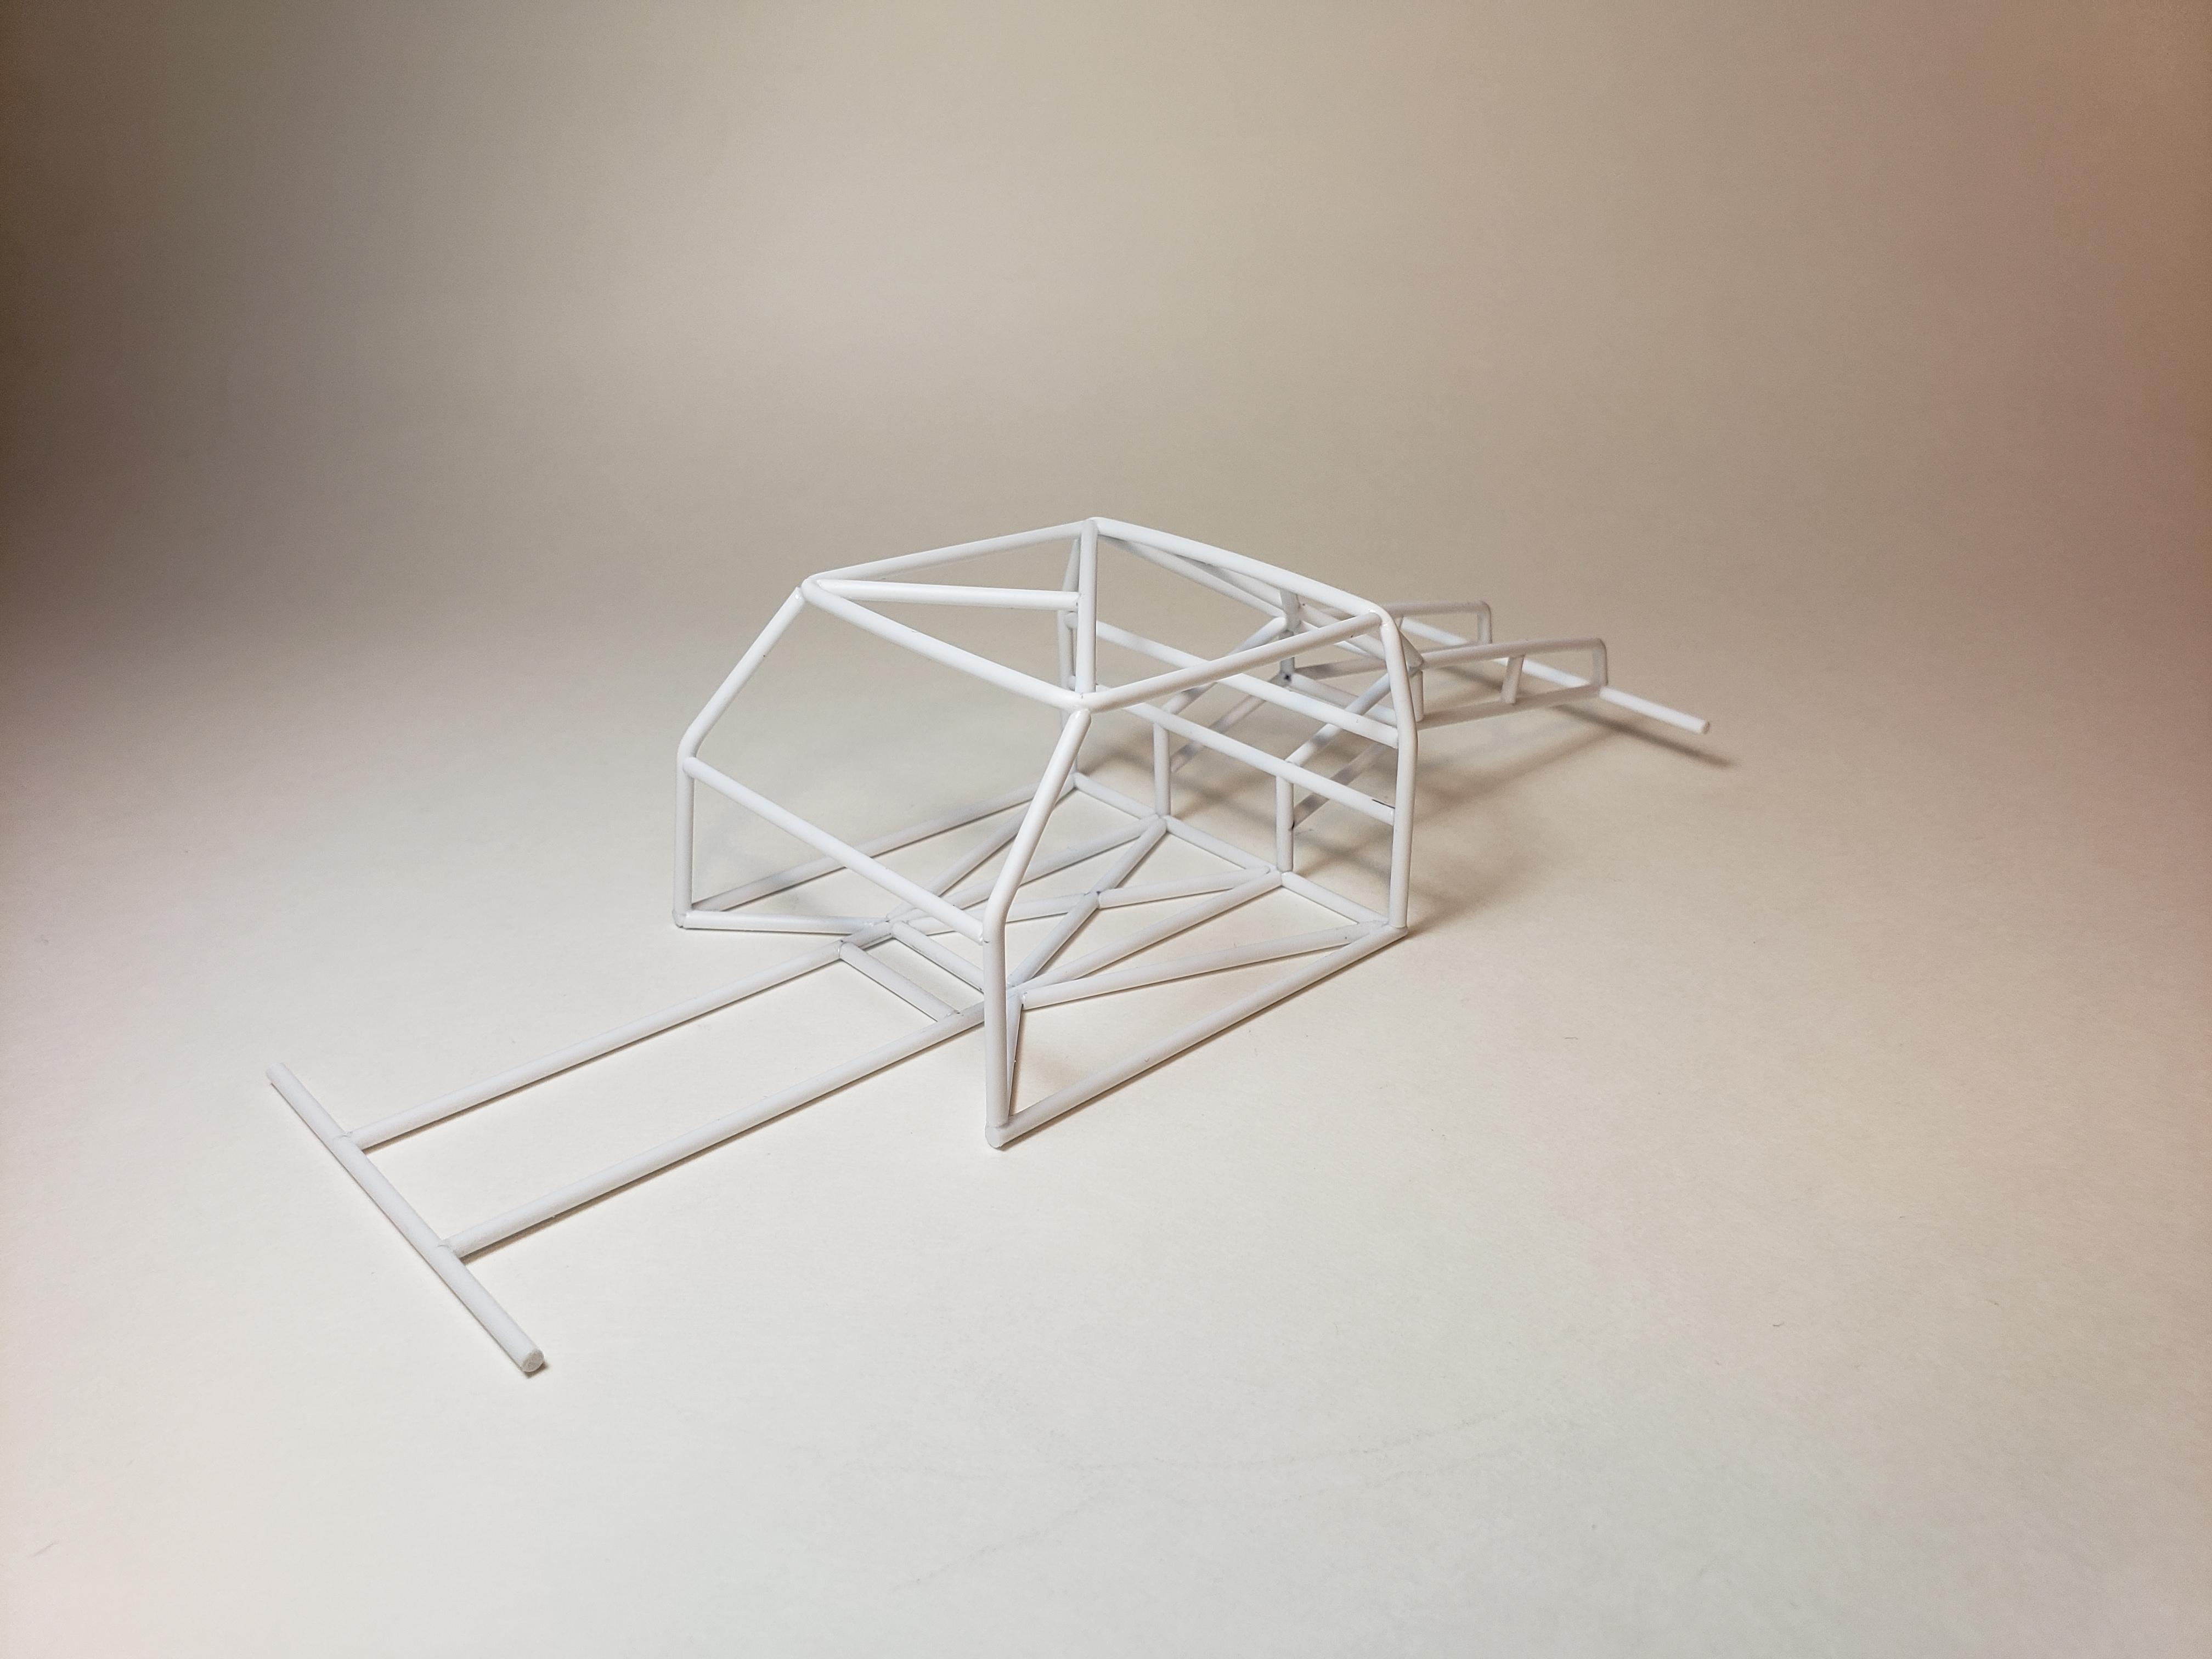
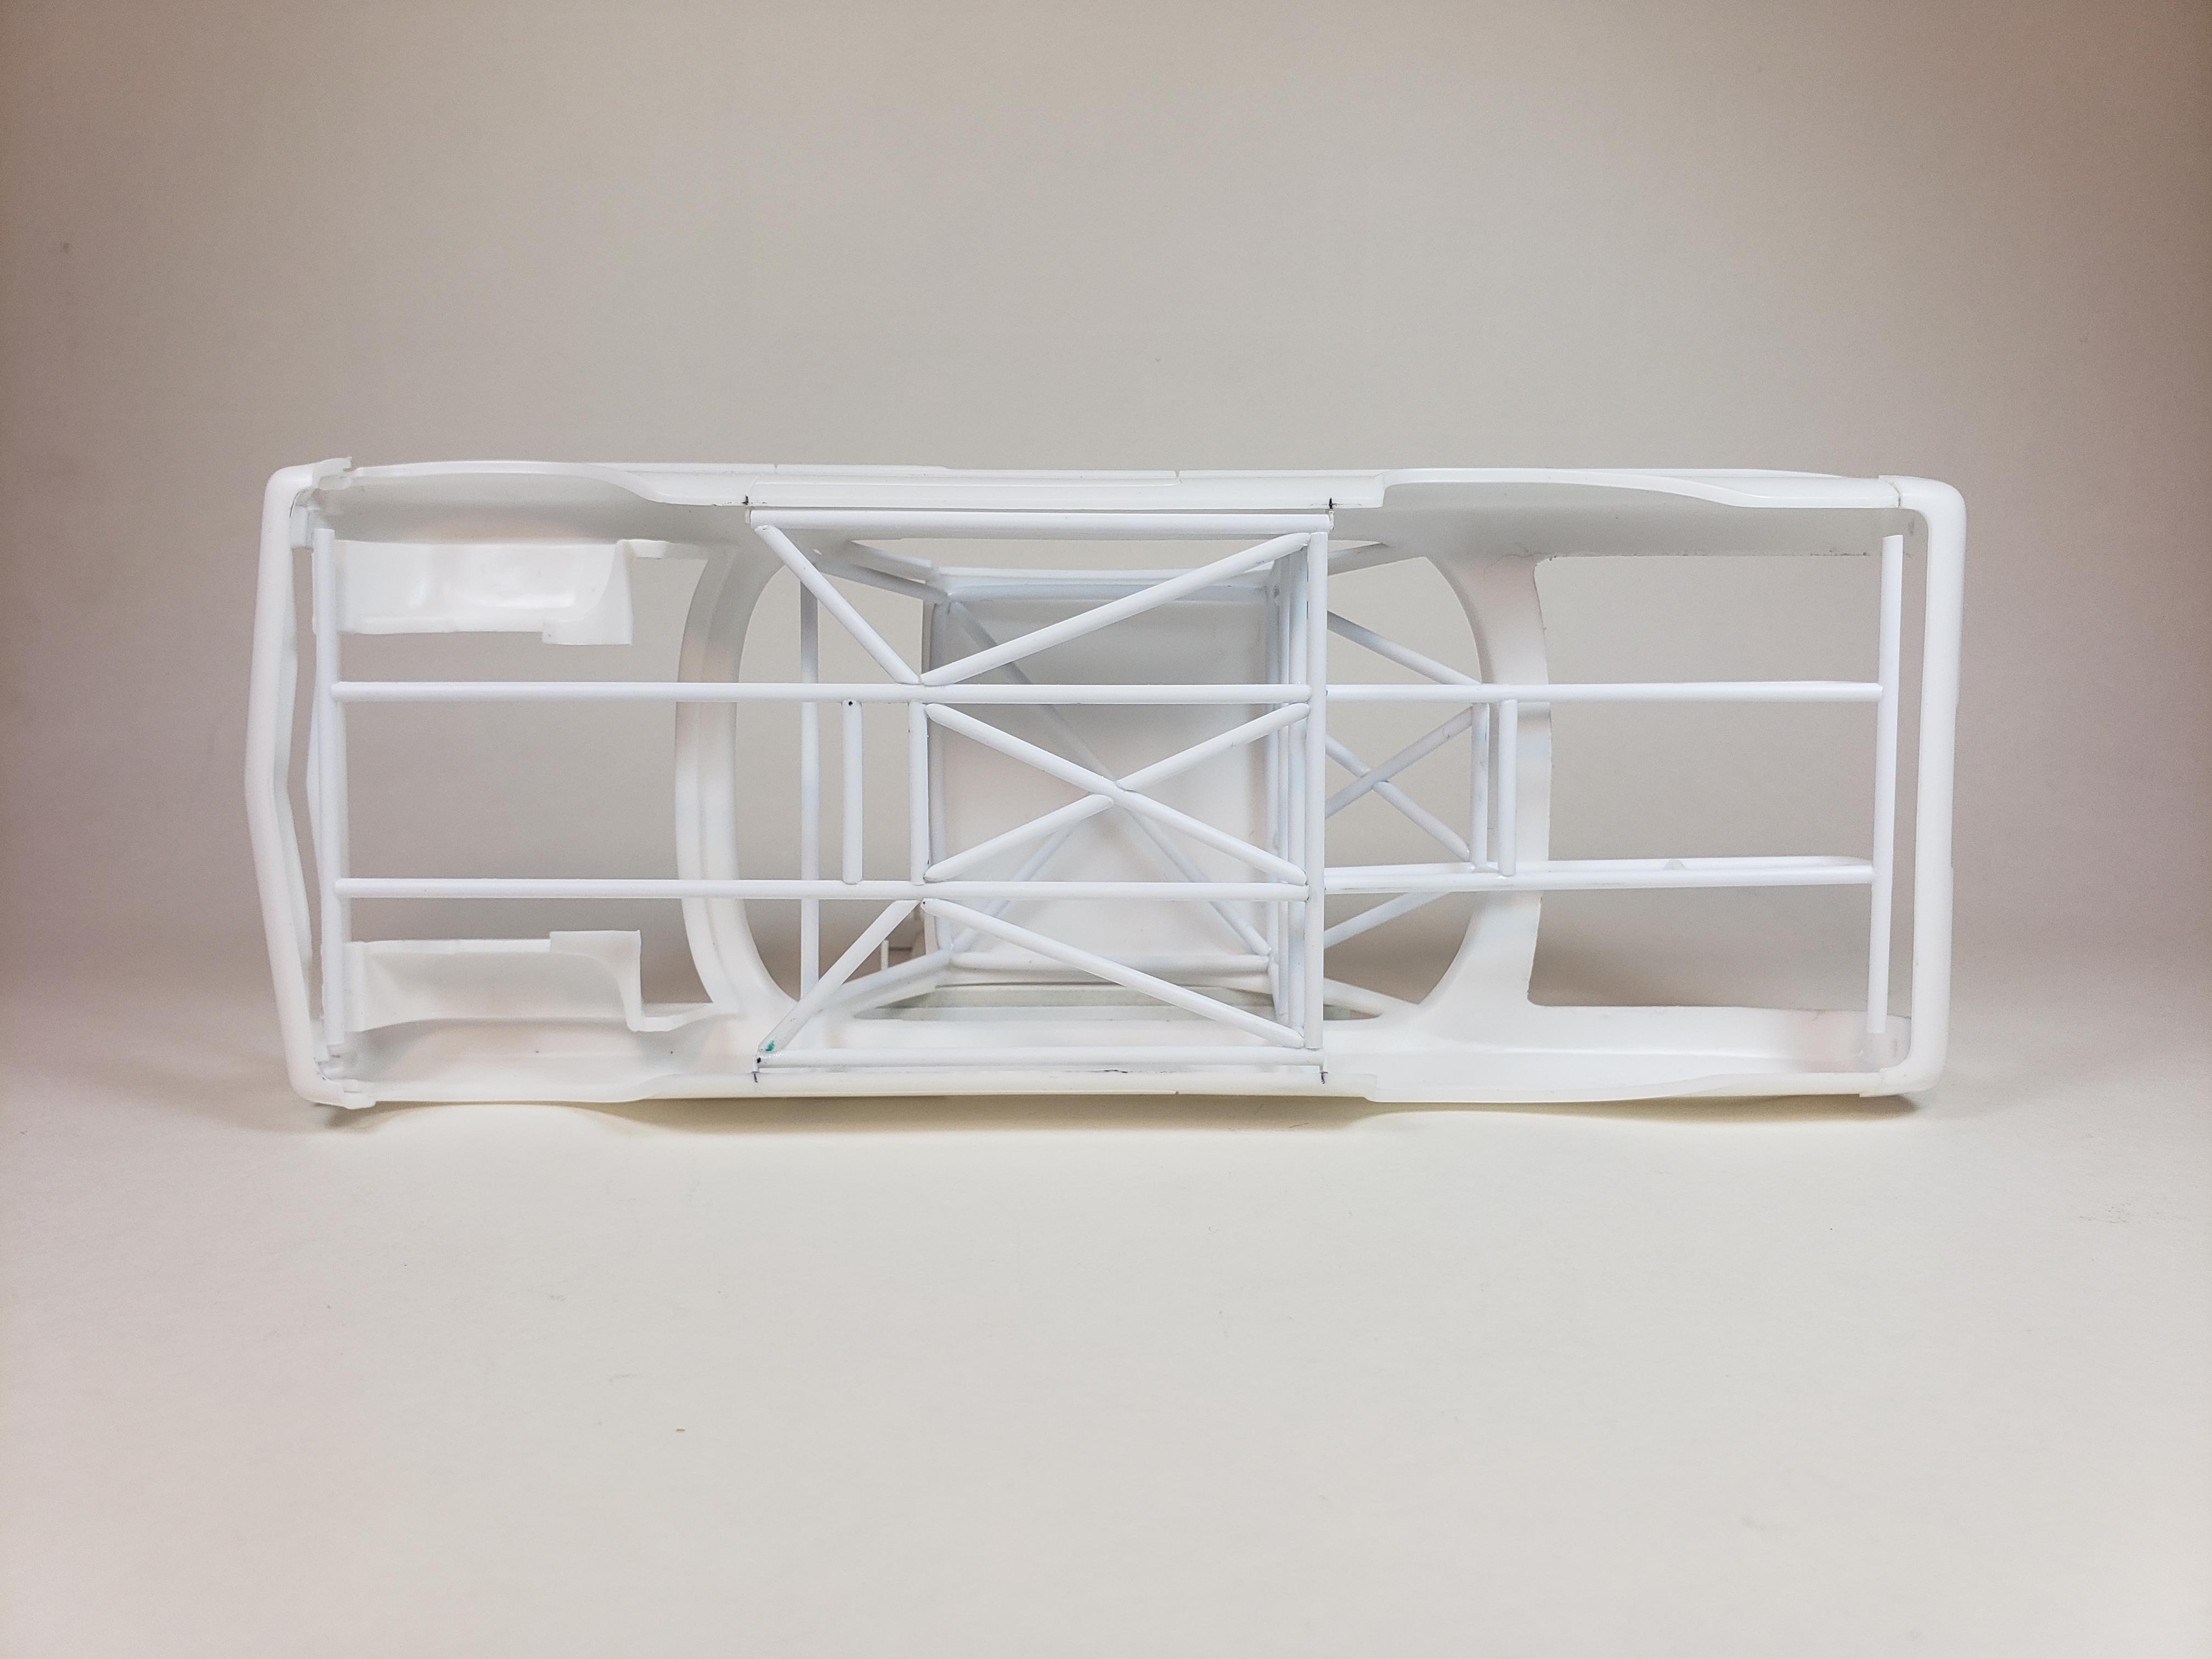
some more on the 61 impala. assembled the rear axle and 4link bars just to fit in the chassis. after the 4 like is in place I'll disassemble and paint.
thanks for looking
-
 1
1
-
-
20 hours ago, #1 model citizen said:
Very Nice indeed! The windshield washer reservoir really caught my attention. You nailed the color! What color is it?
I used model master aged white for that washer reservoir.
-
thank you everyone for all the wonderful comments I really appreciate them!
-
13 hours ago, lghtngyello03 said:
Super clean build! Love the detailing you did. What did you use for the texture on the valve covers, and what did you use for the hood spring and brake lines?
thanks!
the valve covers were sprayed with rustoleum texture black the hood spring is small gauge wire wrapped around a small set of tweezers and the brake lines are 24gauge wire wrapped around a toothpick
-
small update made a jig to hold the body and chassis together and at ride height. got more of the main cage done finished the floor braces and got the rear rails in place still alot of tubes to go.
thanks for looking
comments and criticisms welcome
-
2
-
-
1968 R/T
-
1
-
-
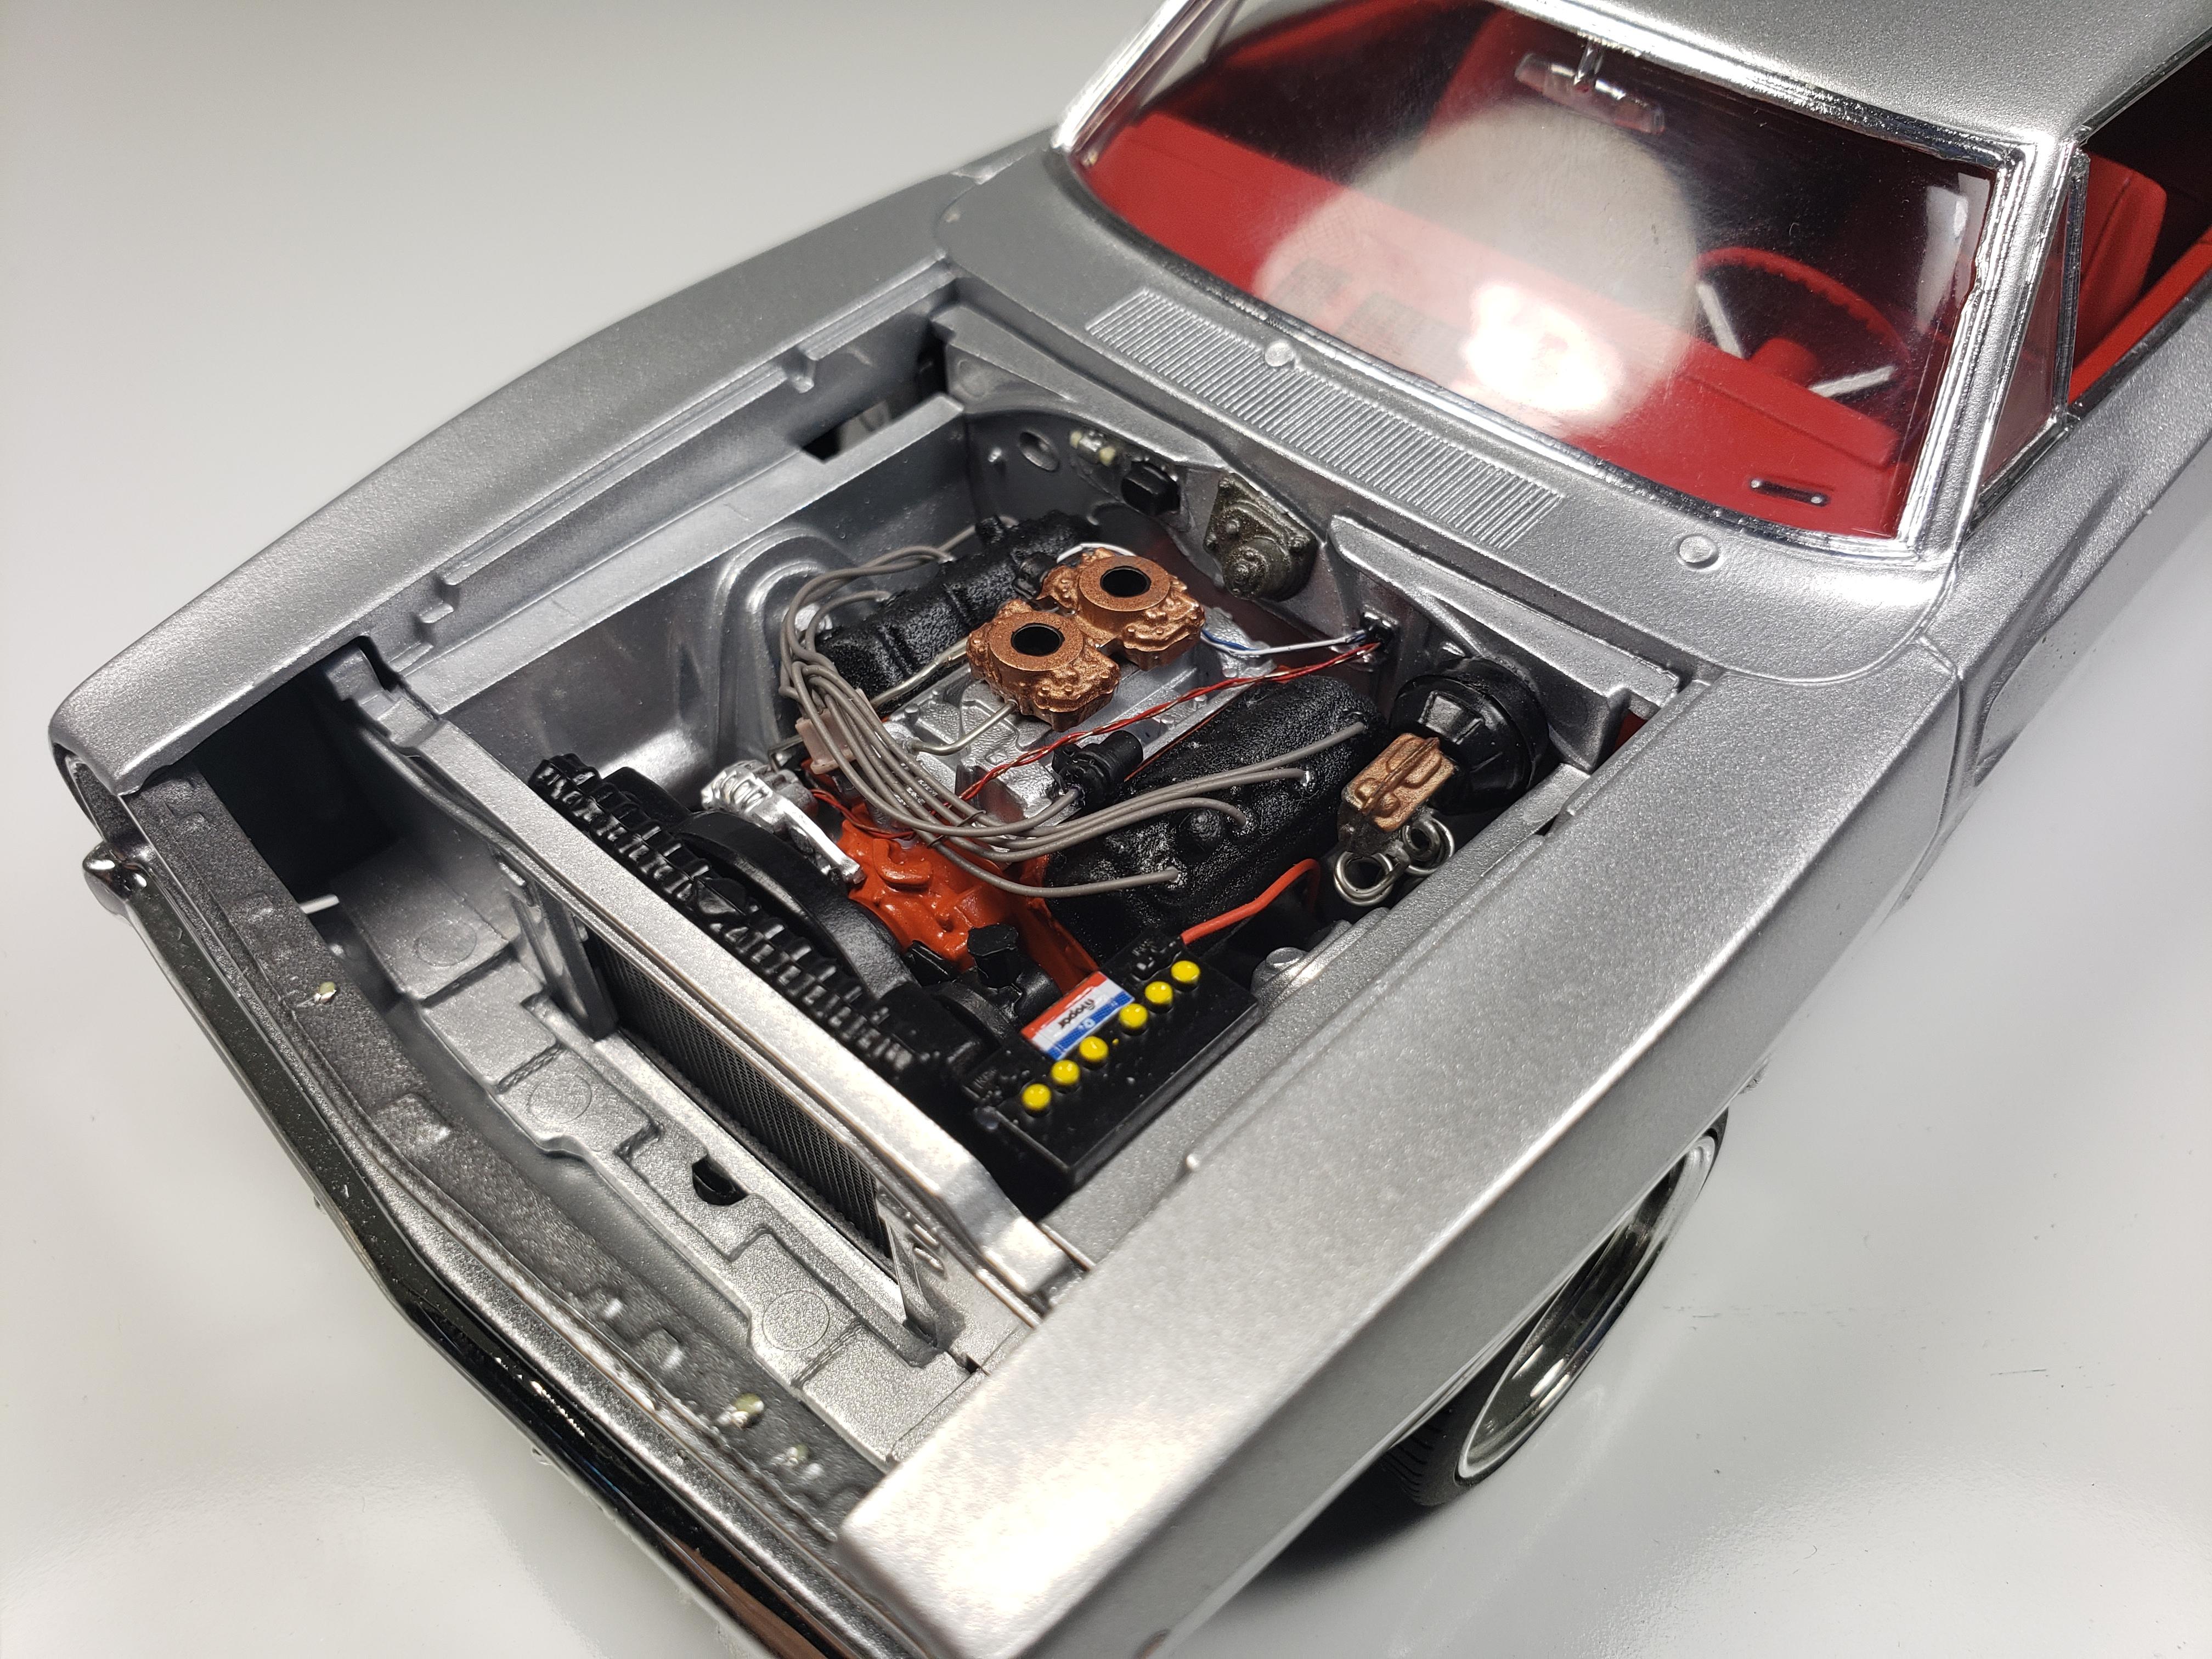
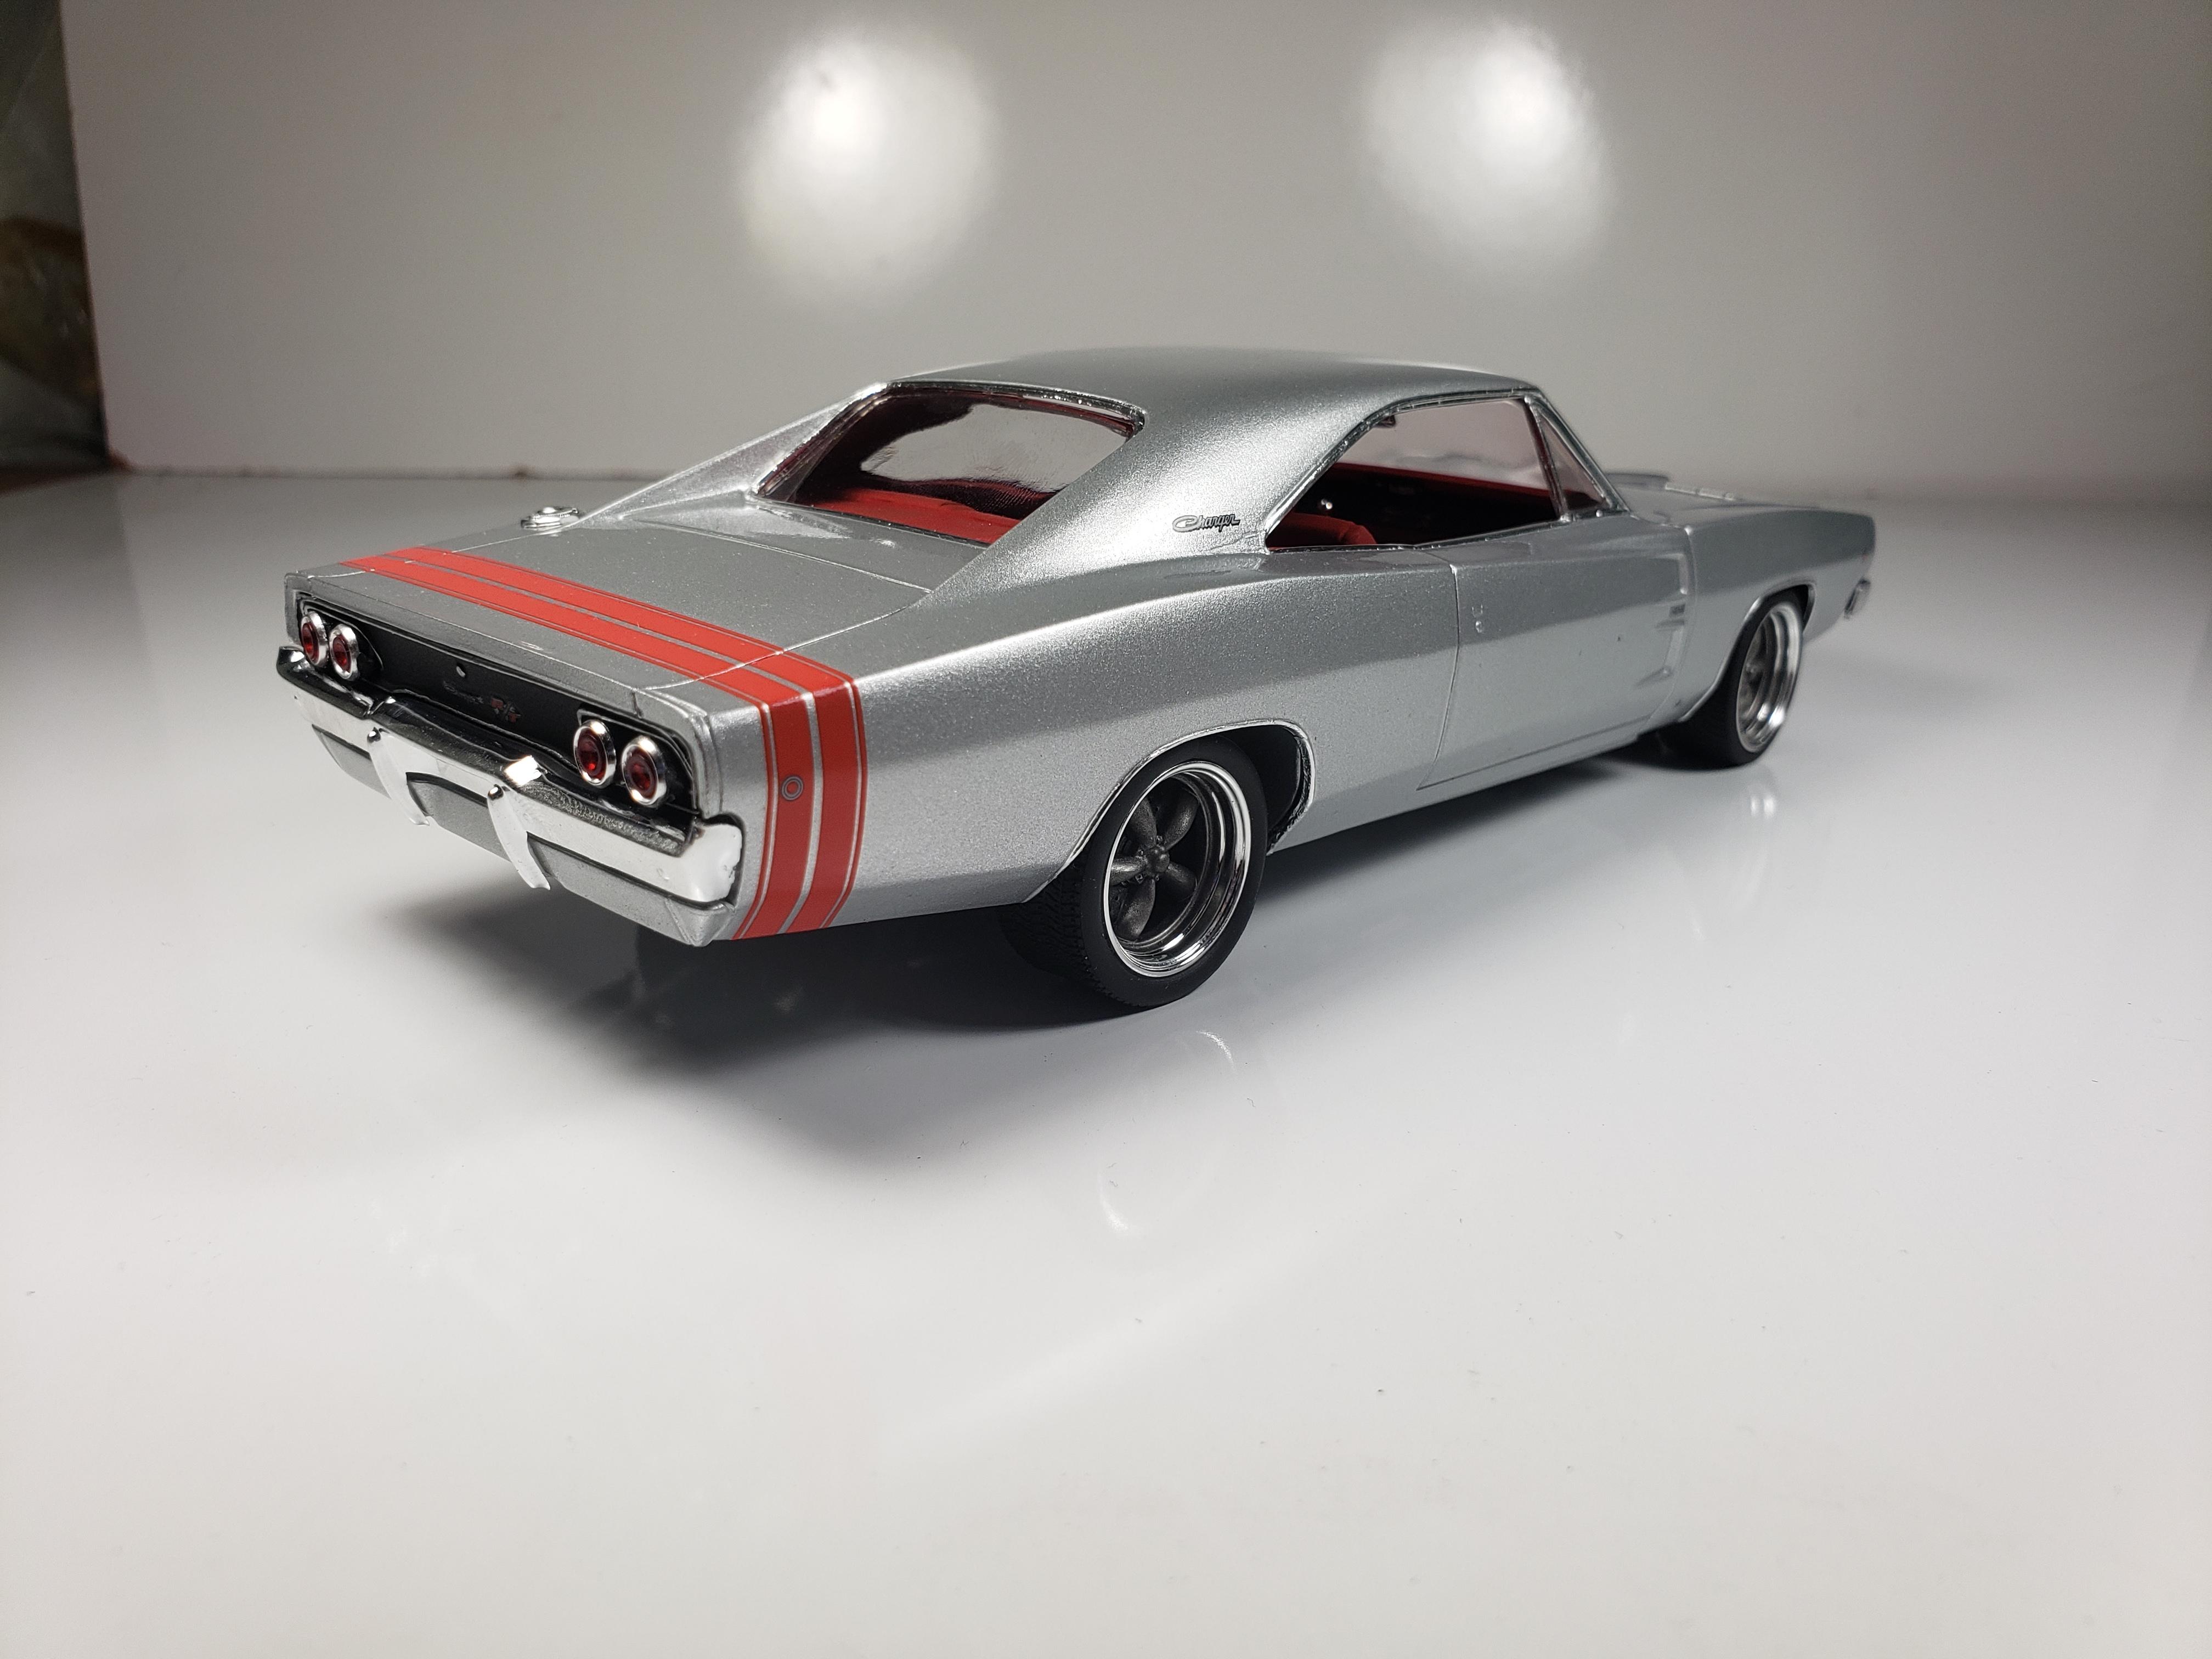
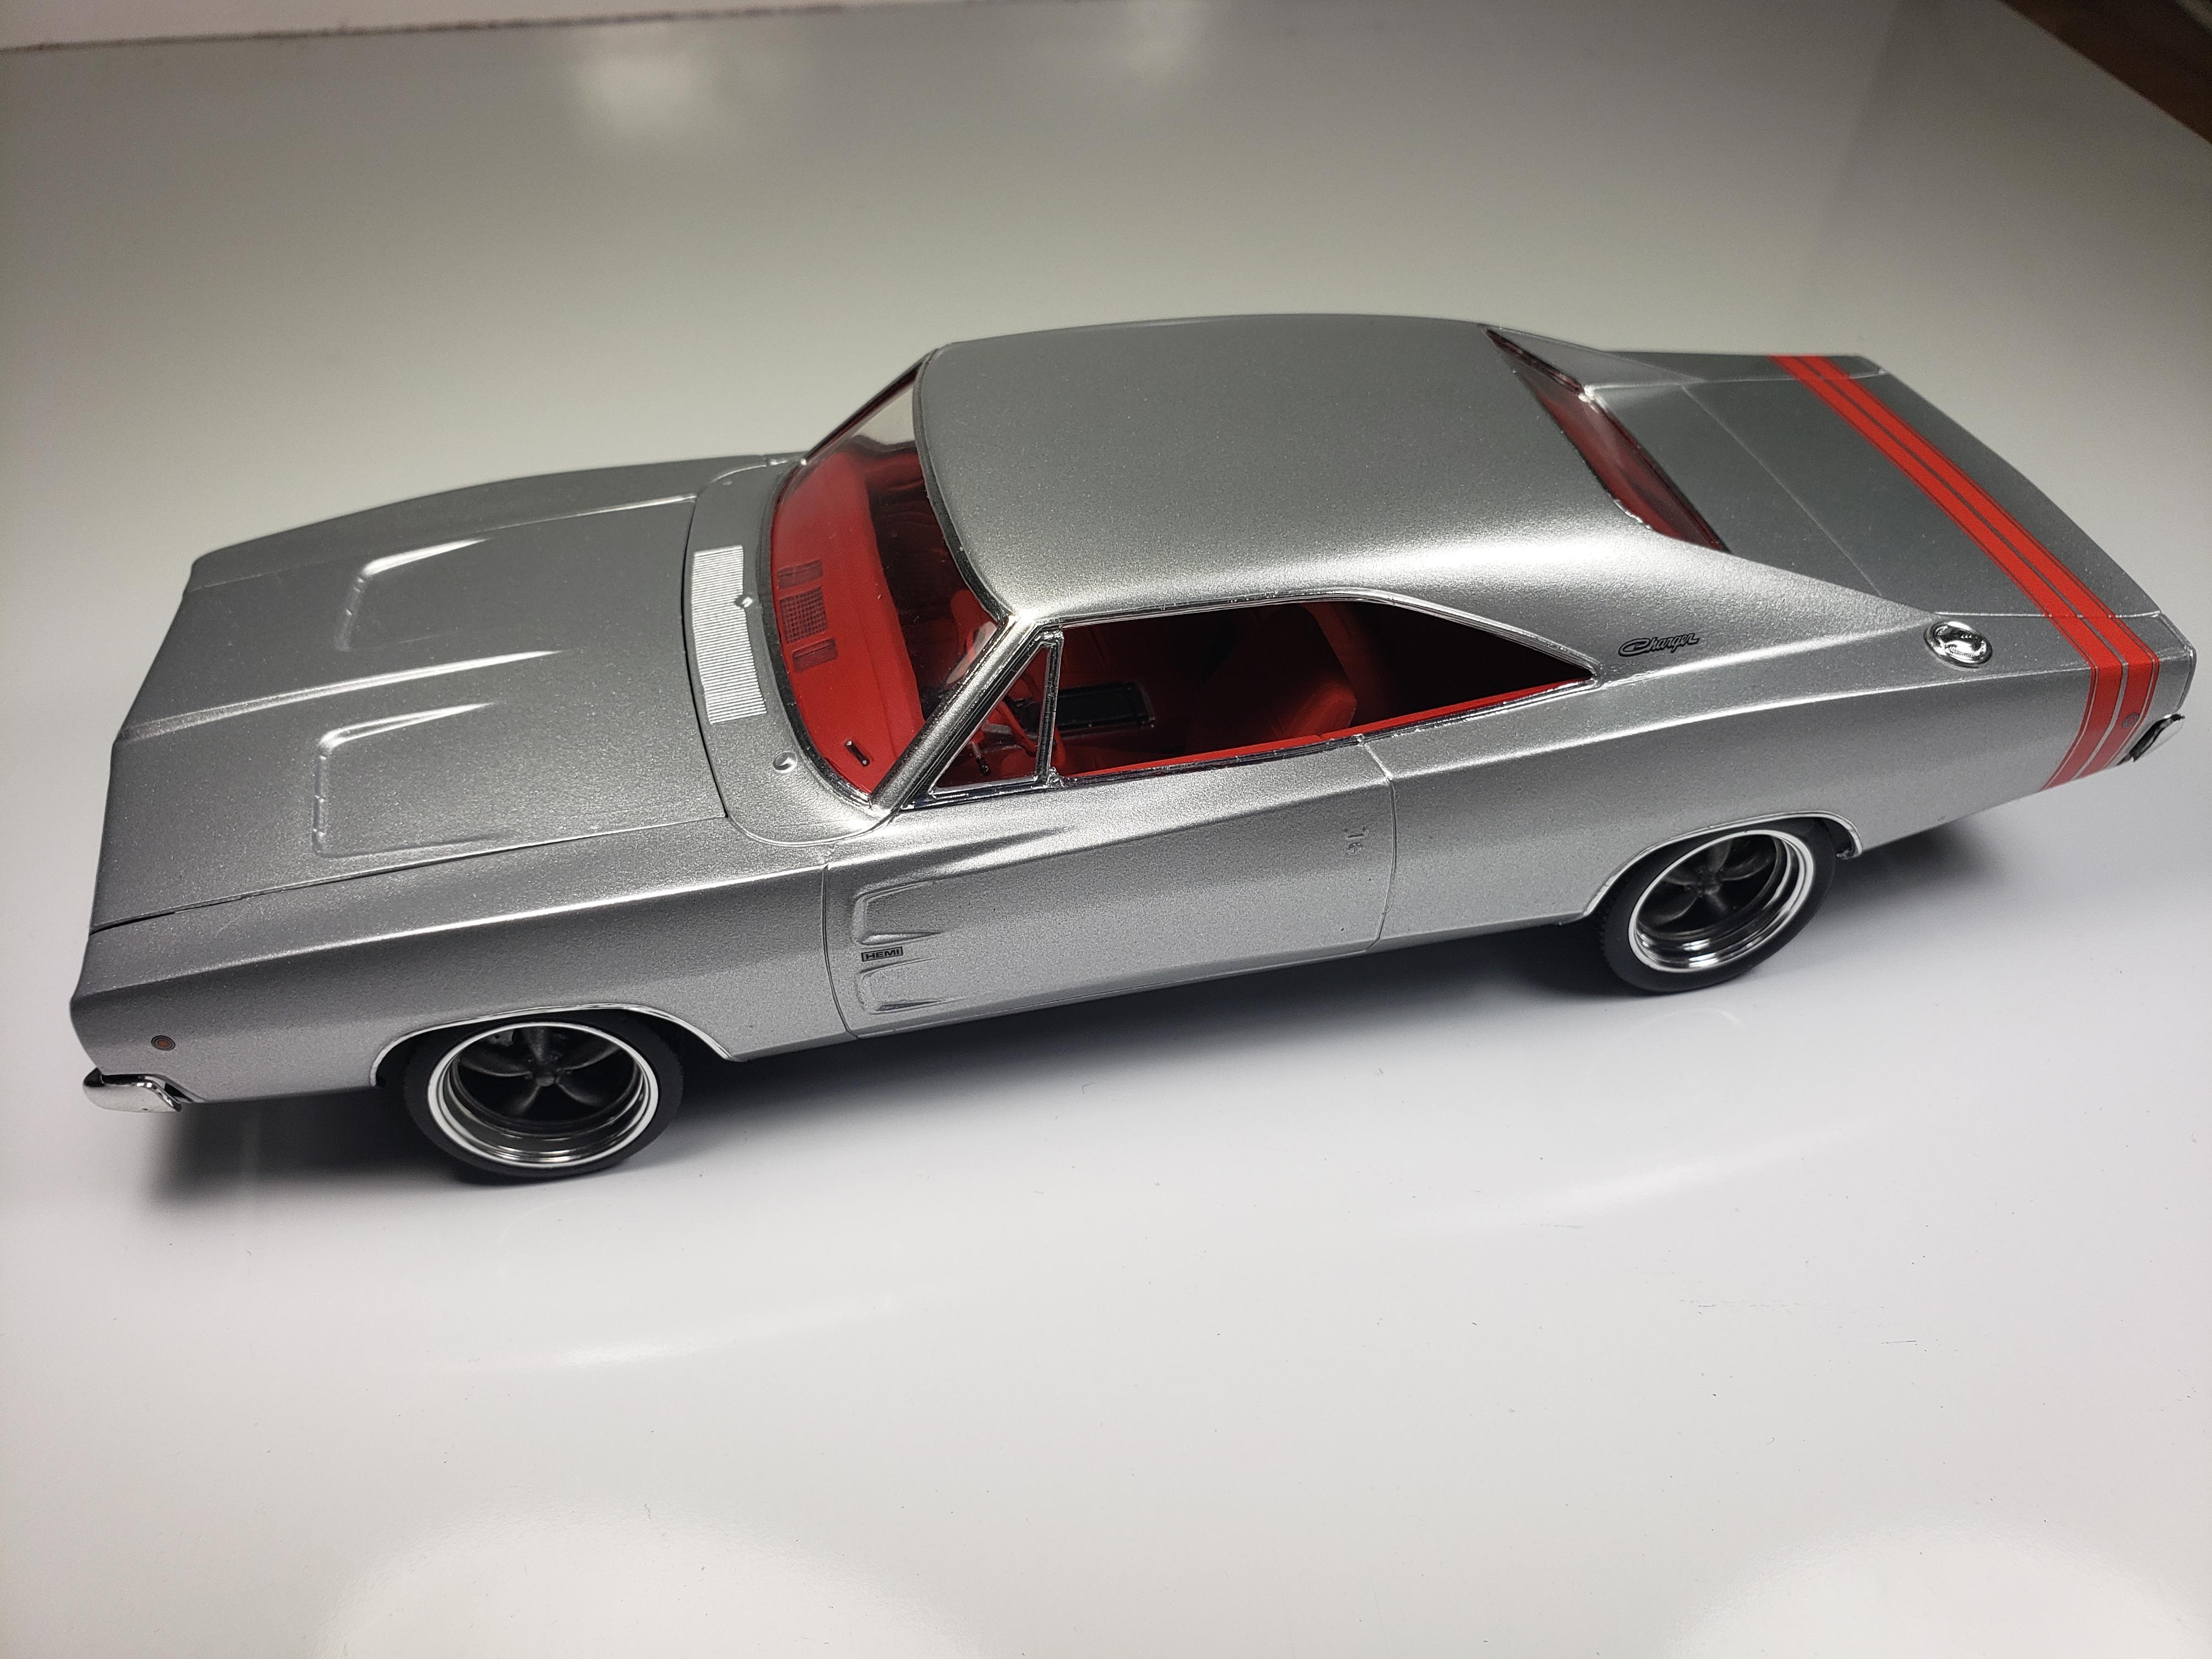
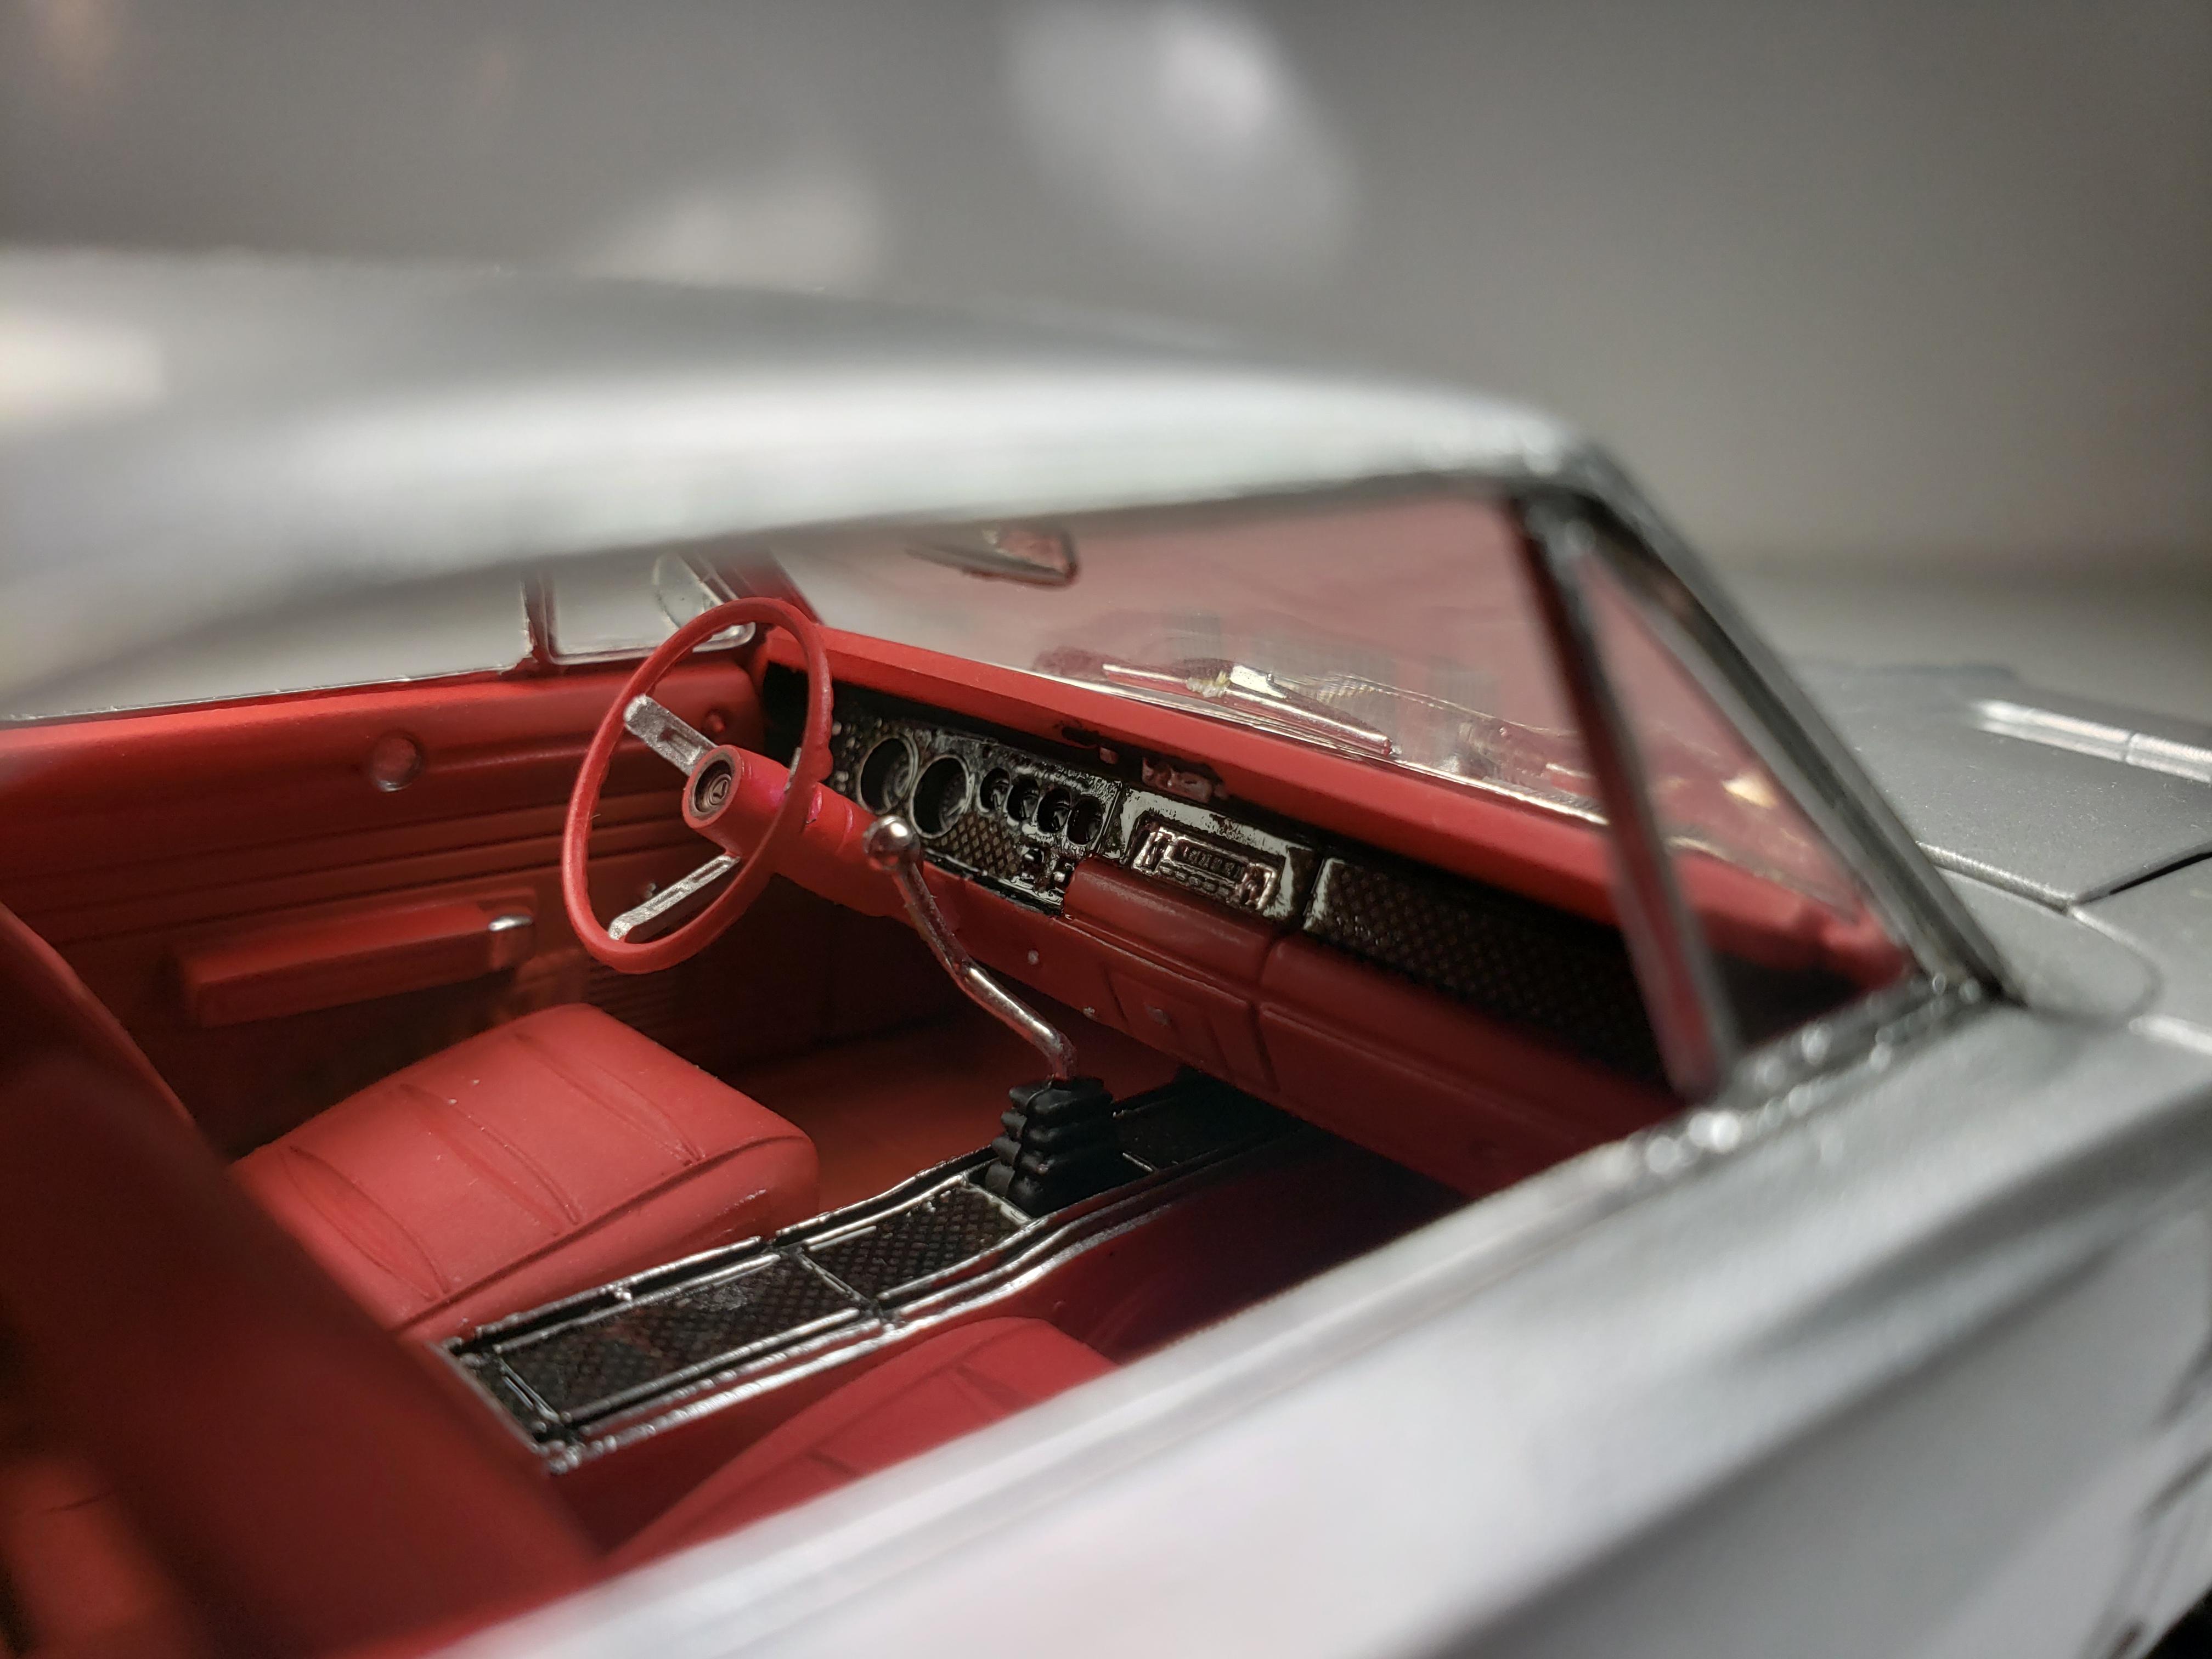
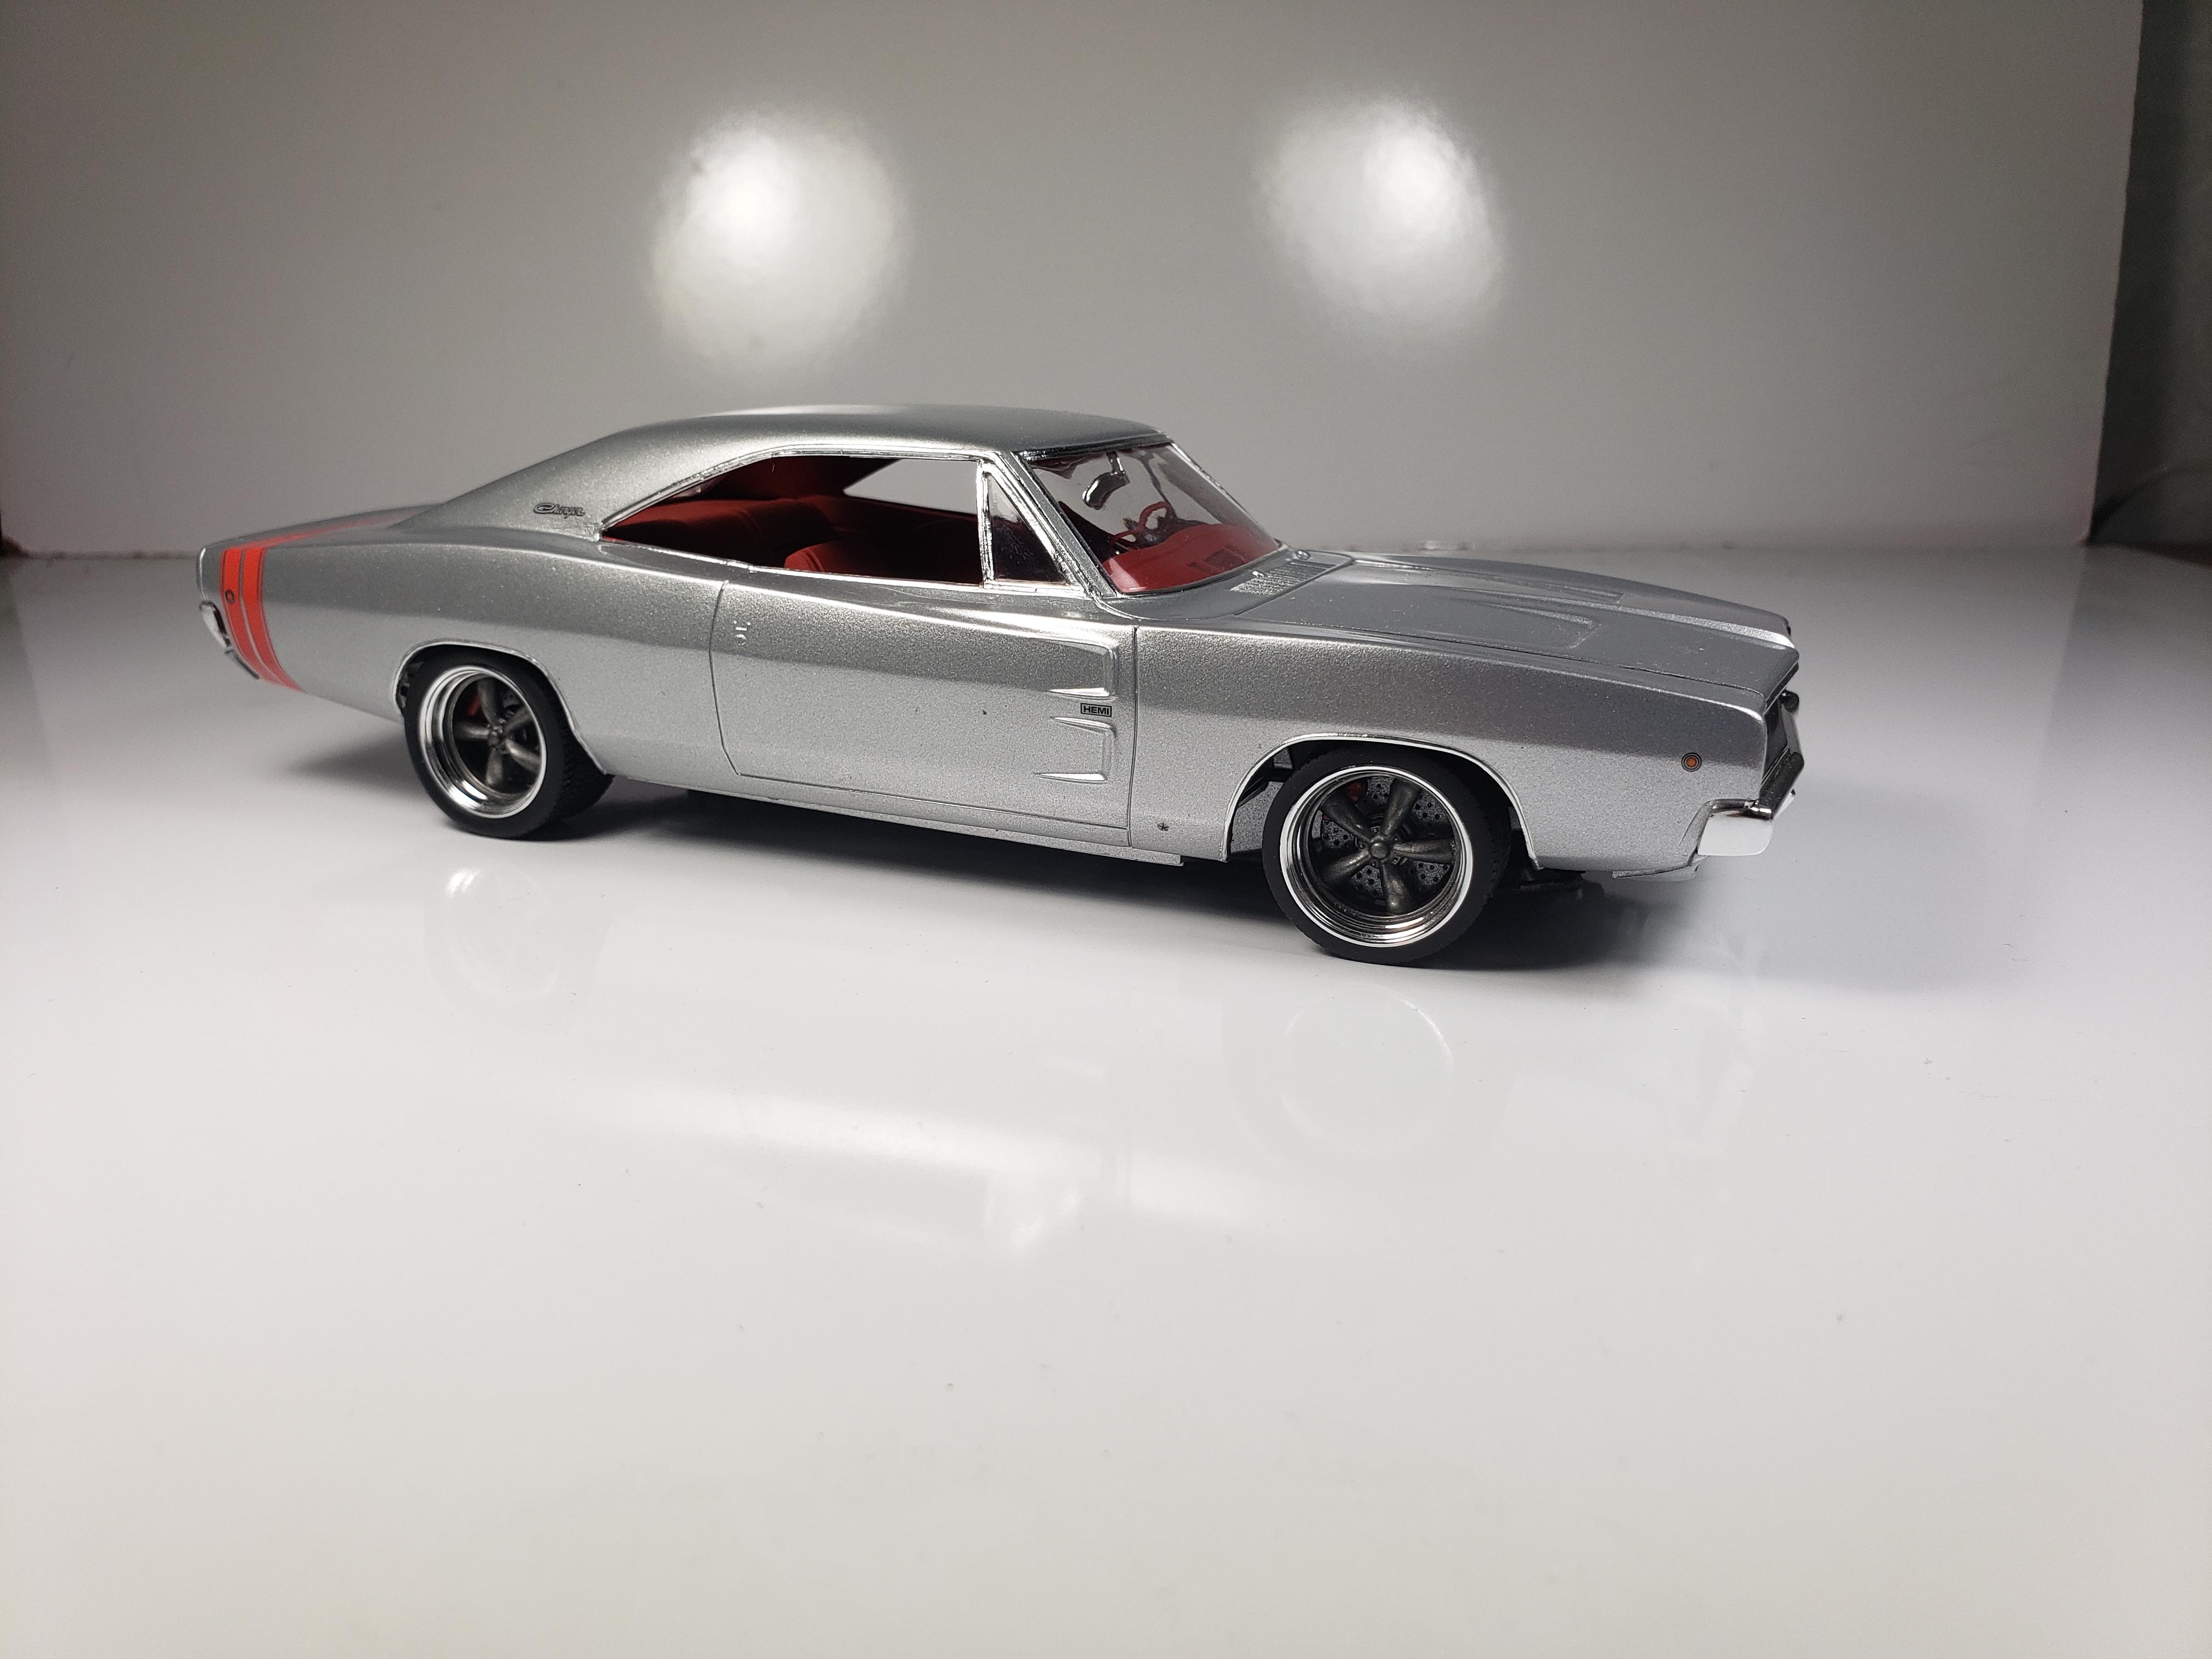
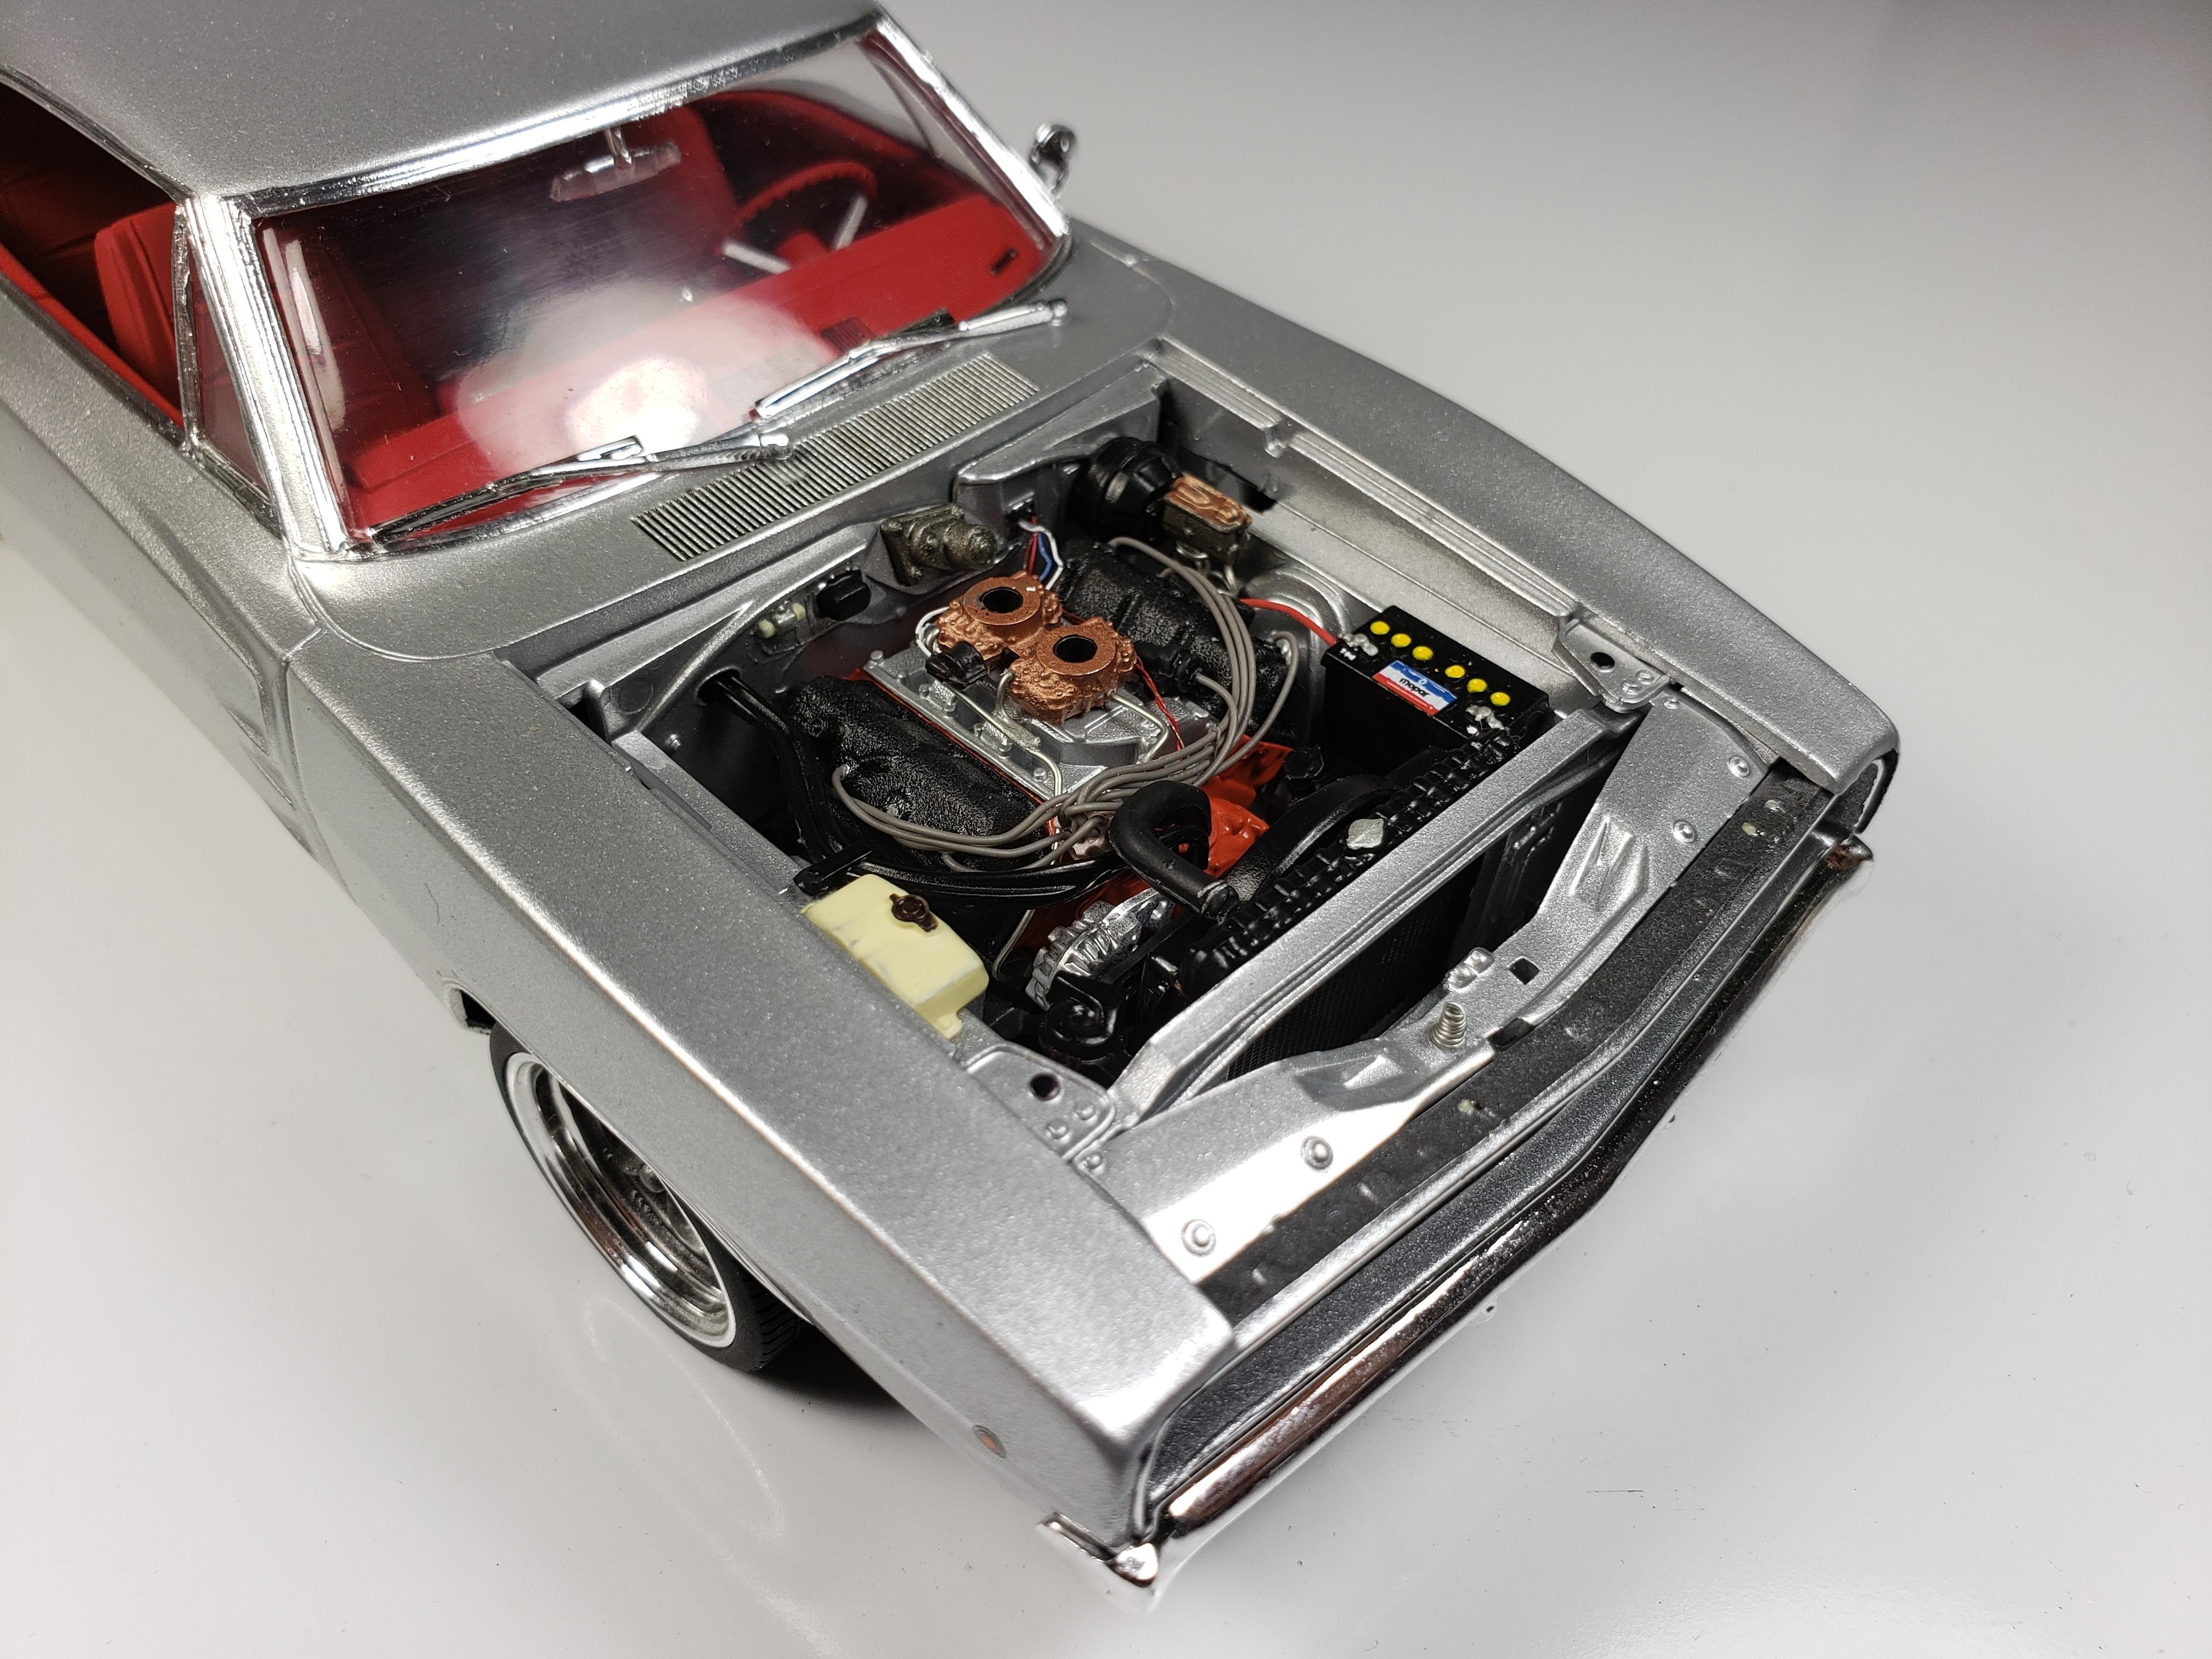
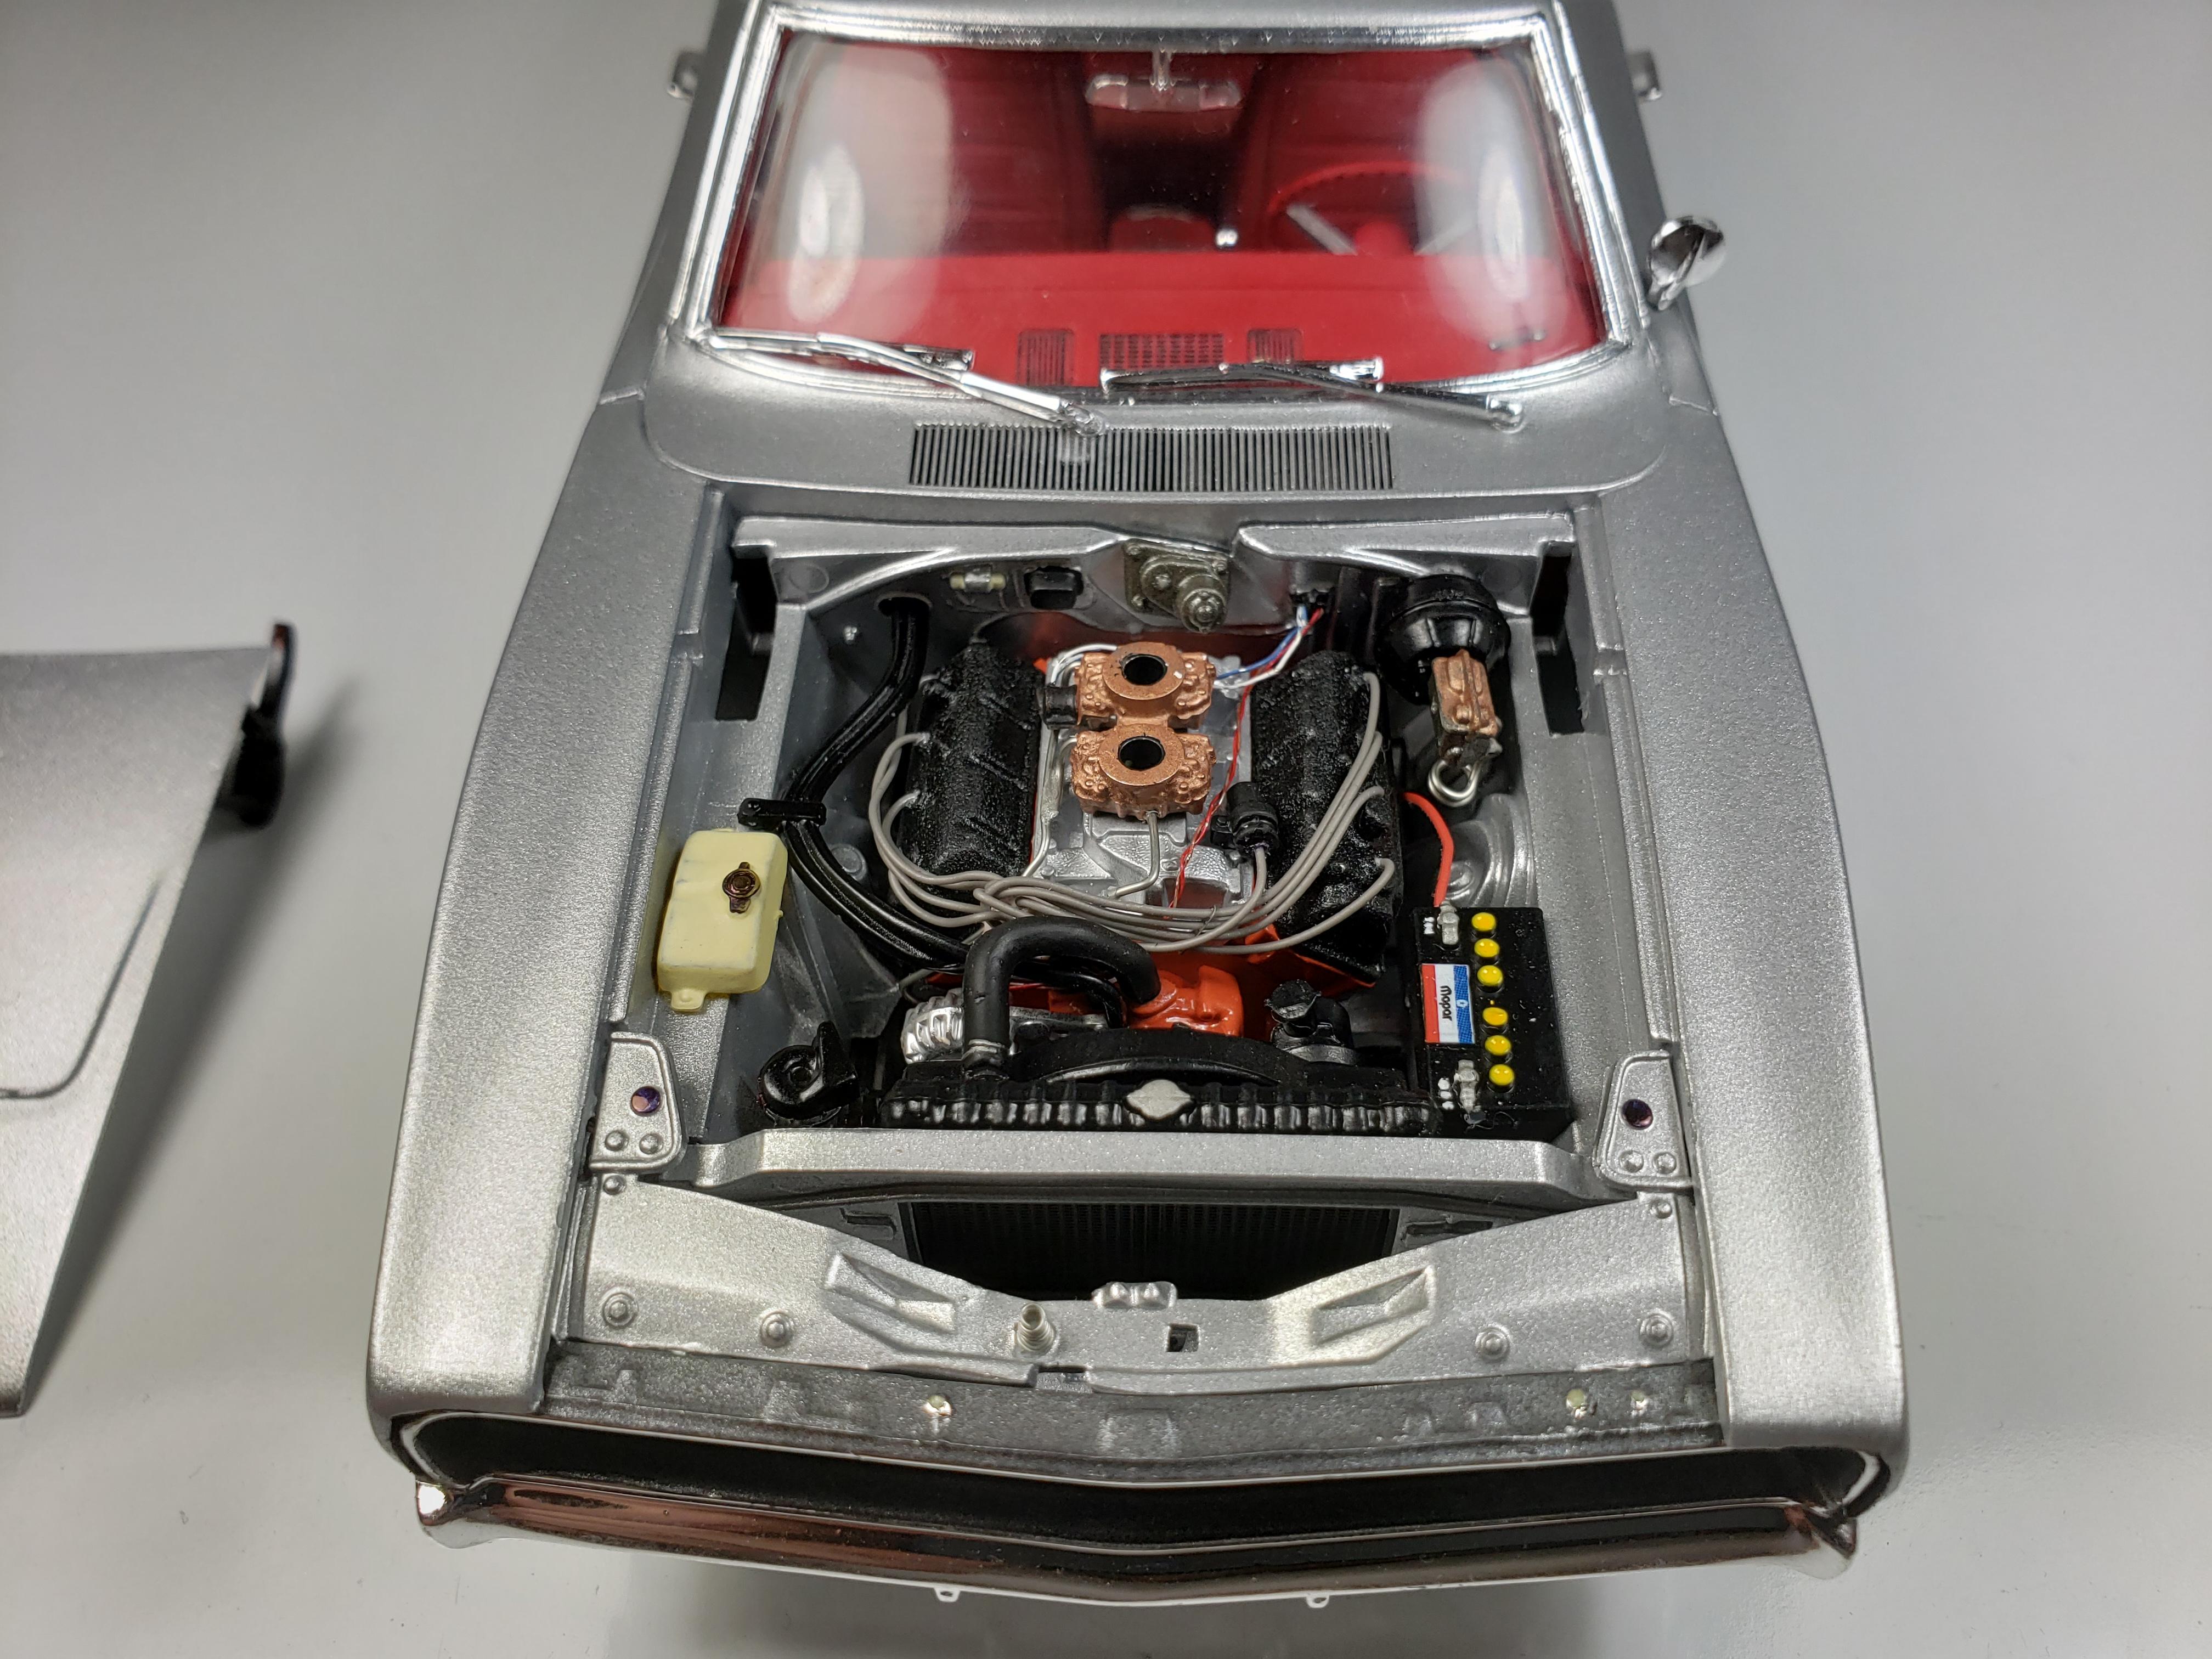
revell 68 charger
this went together very well and was a blast to build. not original kind of went street car with this one
thanks for looking
comments and criticisms welcome
-
PappyD340
Mariojr
thanks! its its labor intensive building from scratch but that's the fun part
-
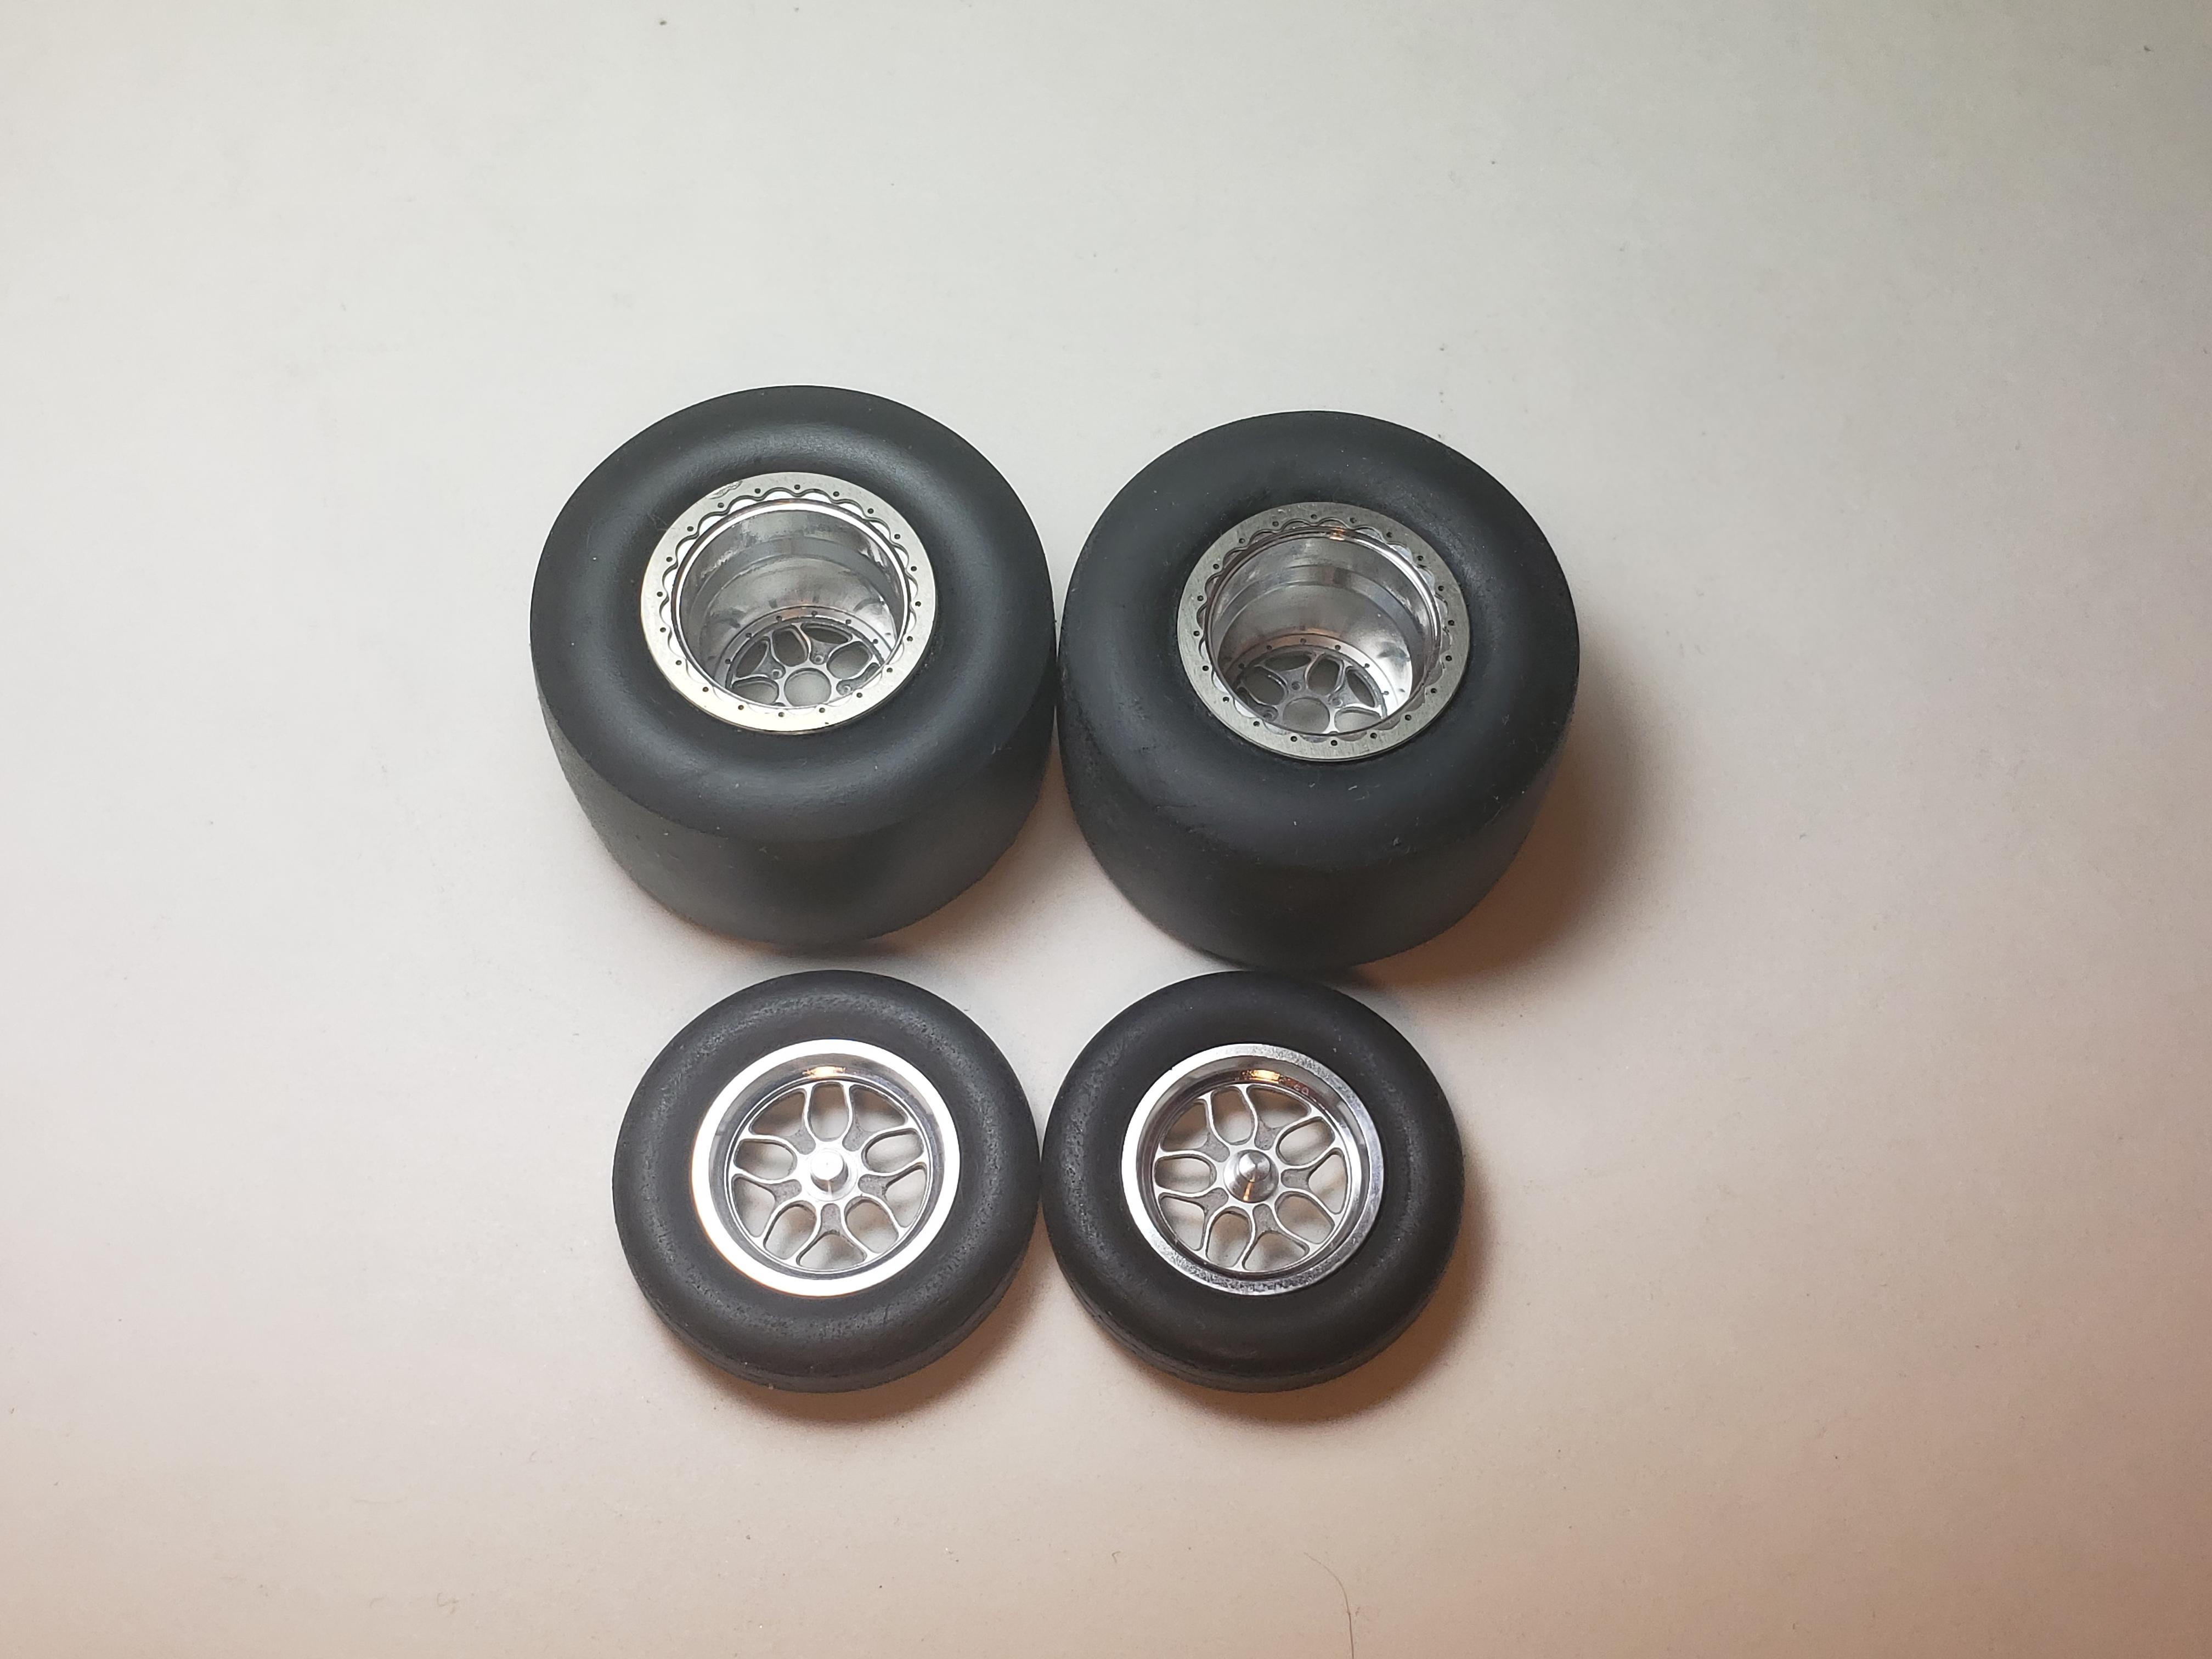
small update.wheels came in today. polished up the spokes and assembled beadlocks and centers. now the rear frame can be built now that I know where the tires are.
time to build the rear end
thanks for looking
-
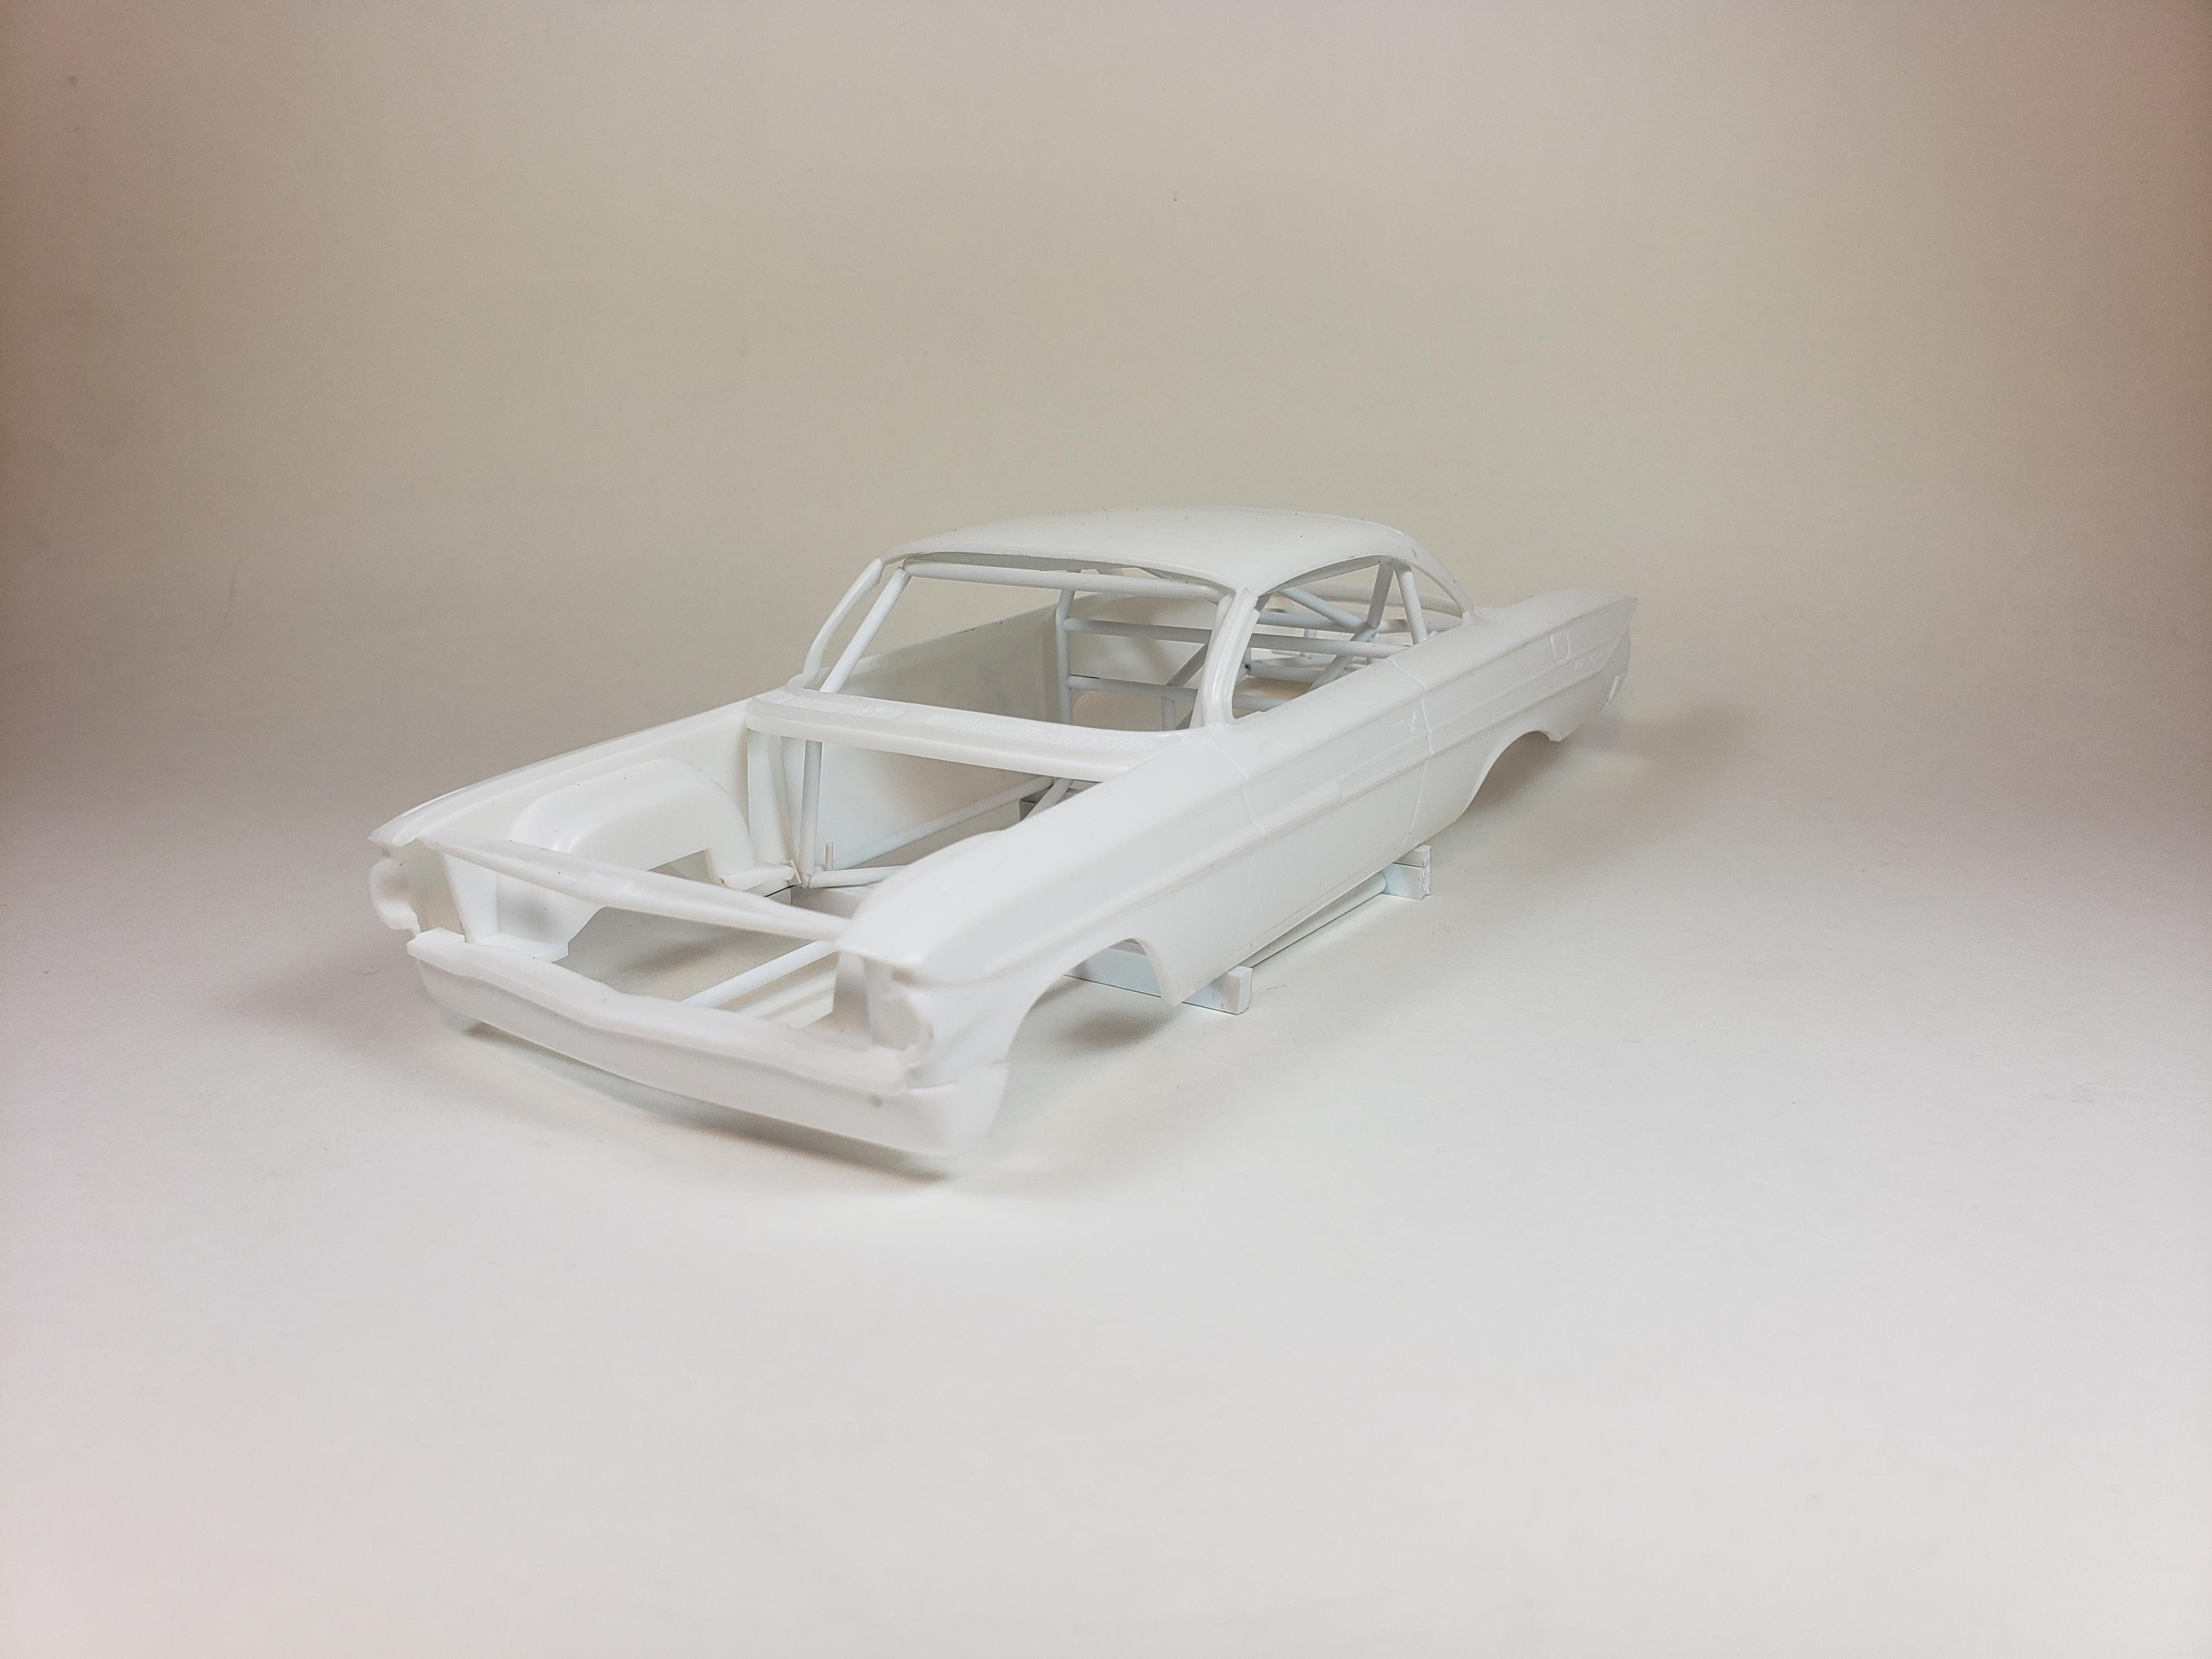
hi all,
going to attempt a tube chassis build on this one. never done anything like this mostly just used a doner kit. I wanted to try a more uncommon car as the 61 is a favorite thought I'd give it a shot. layed out the body on graph paper and made some basic rails and a hoop bar.
thanks for looking

-
1
-
-
15 hours ago, iBorg said:
I love it.....paint is period correct killer! Where did you get the decals?
iBorg, thank you
most of them are from a gasser mini sheet by slixx and the others are from my decal drawer at home.
edit: gasser mini sheet #13
-
thank you everyone for all your comments I really appreciate it!
I've sanded down the body and almost done polishing the clear. still need to make a roll cage but really pleased with the paint
-
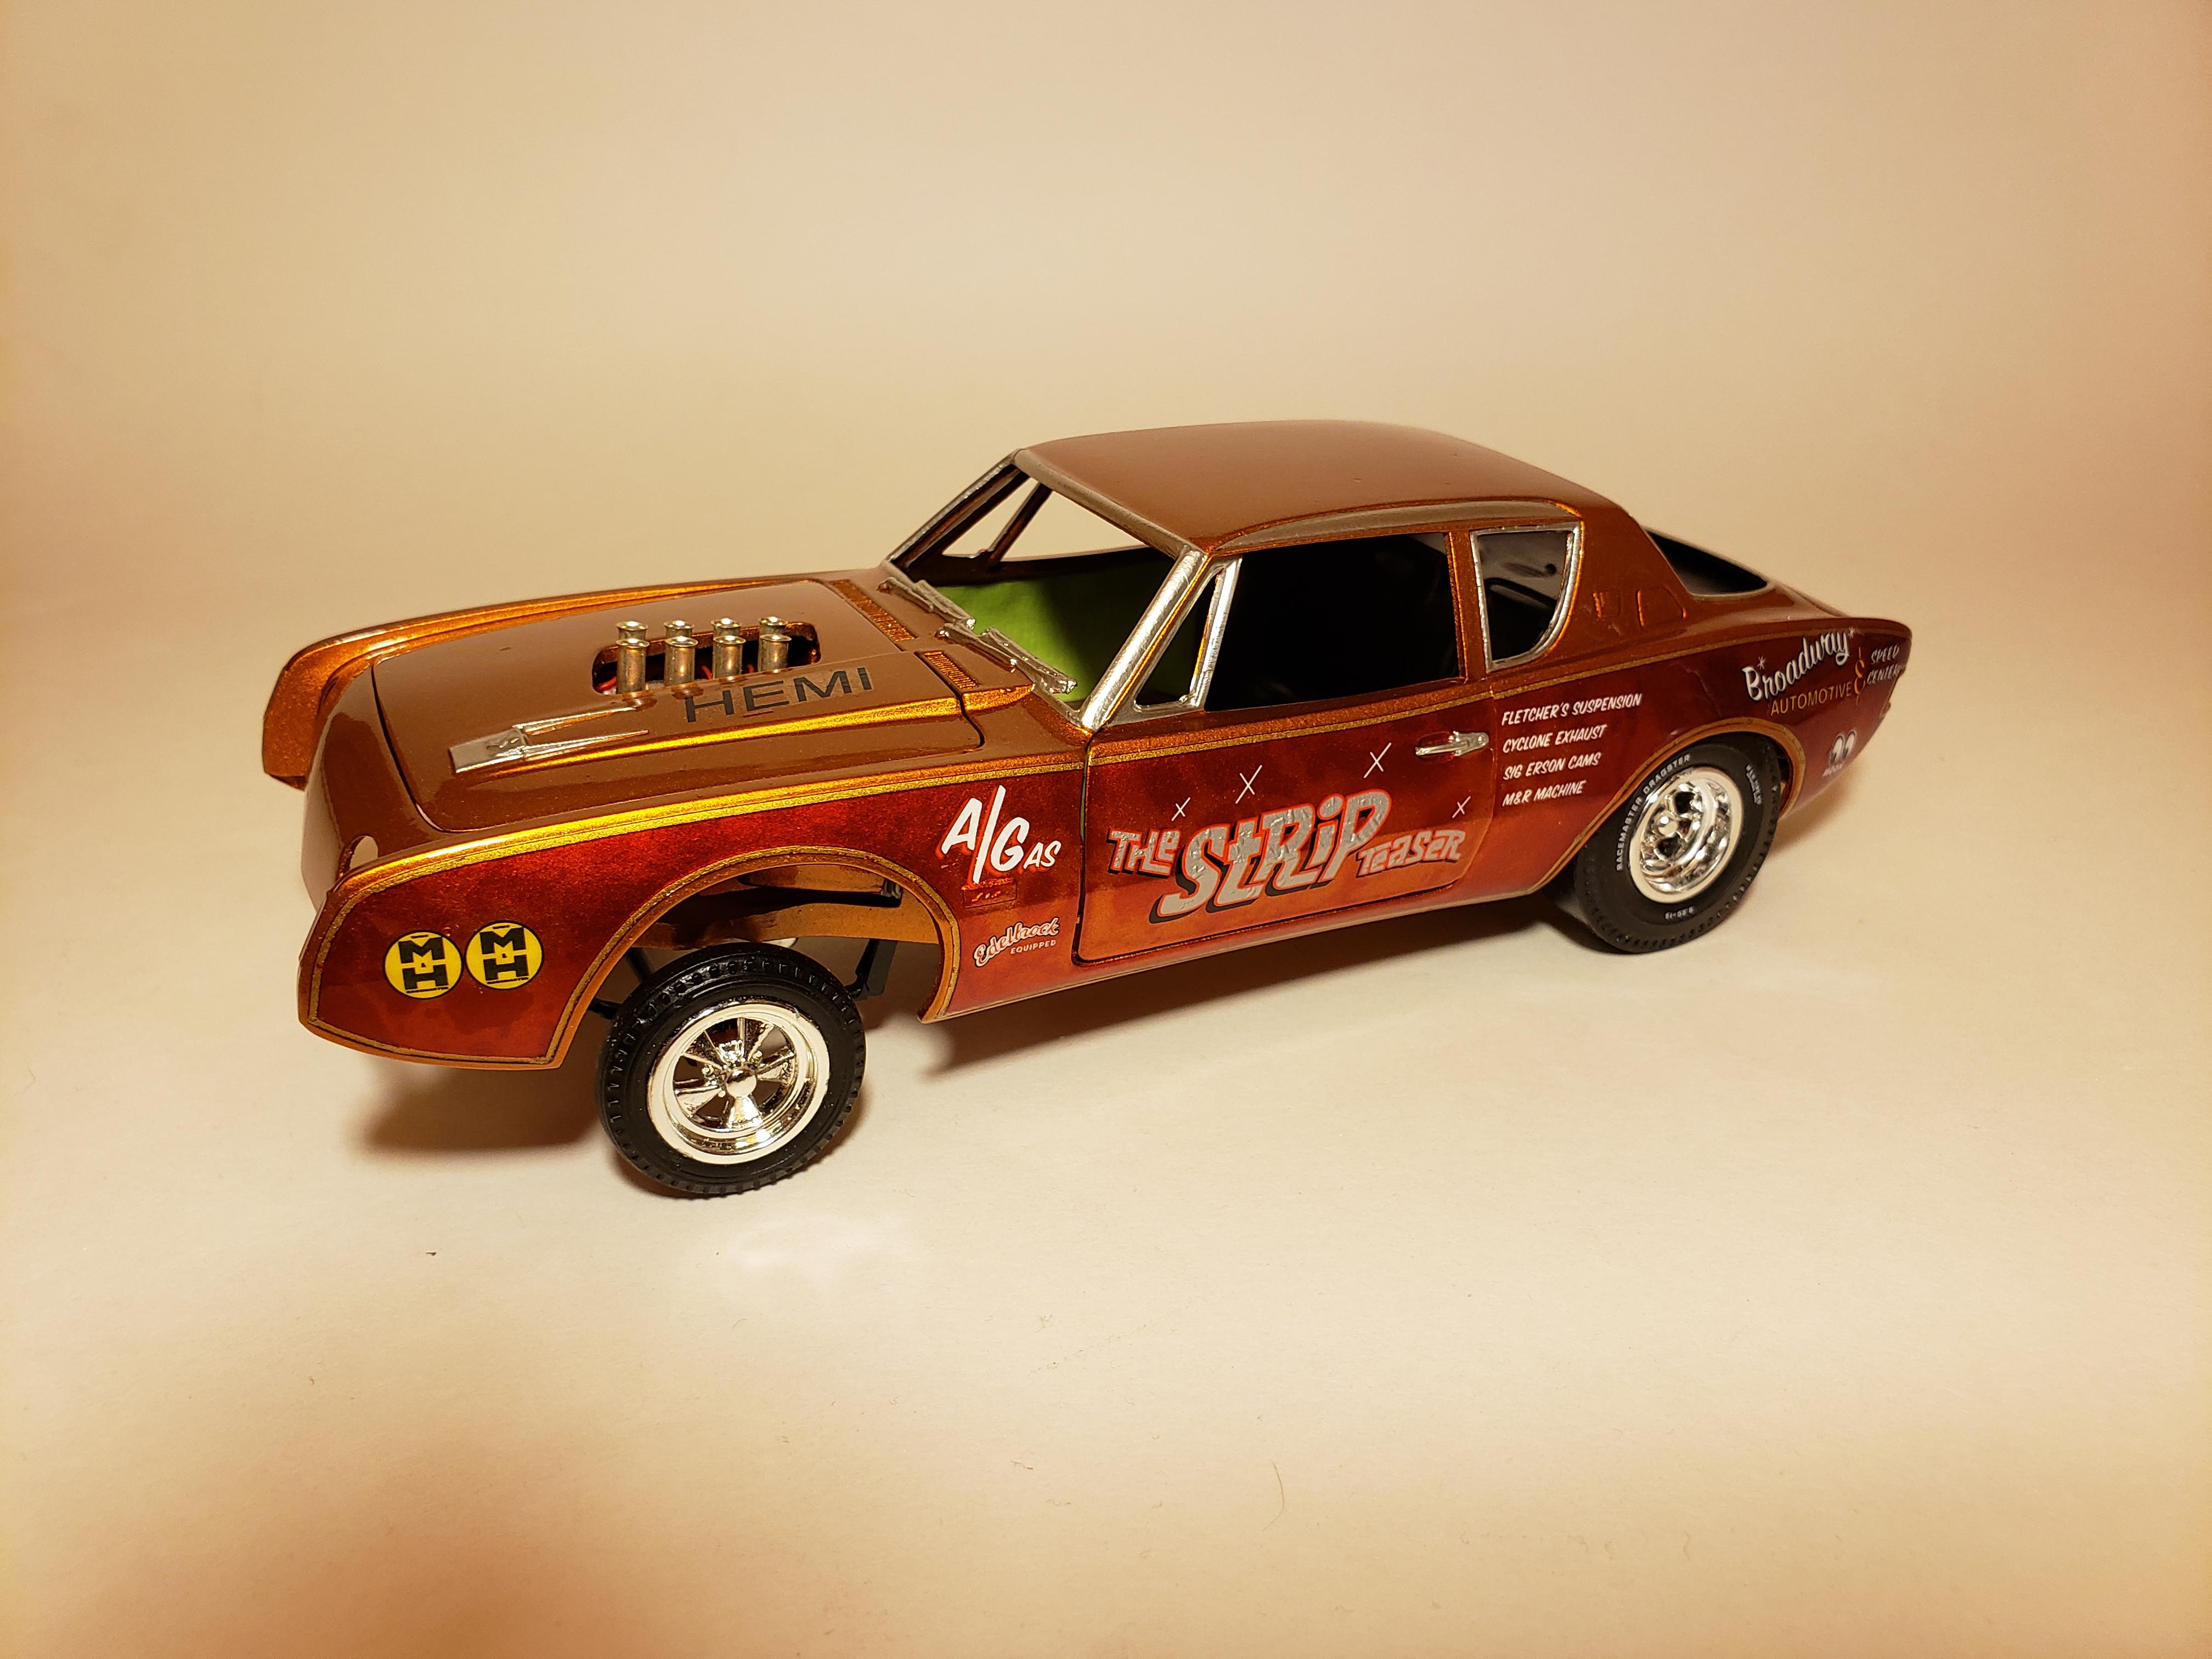
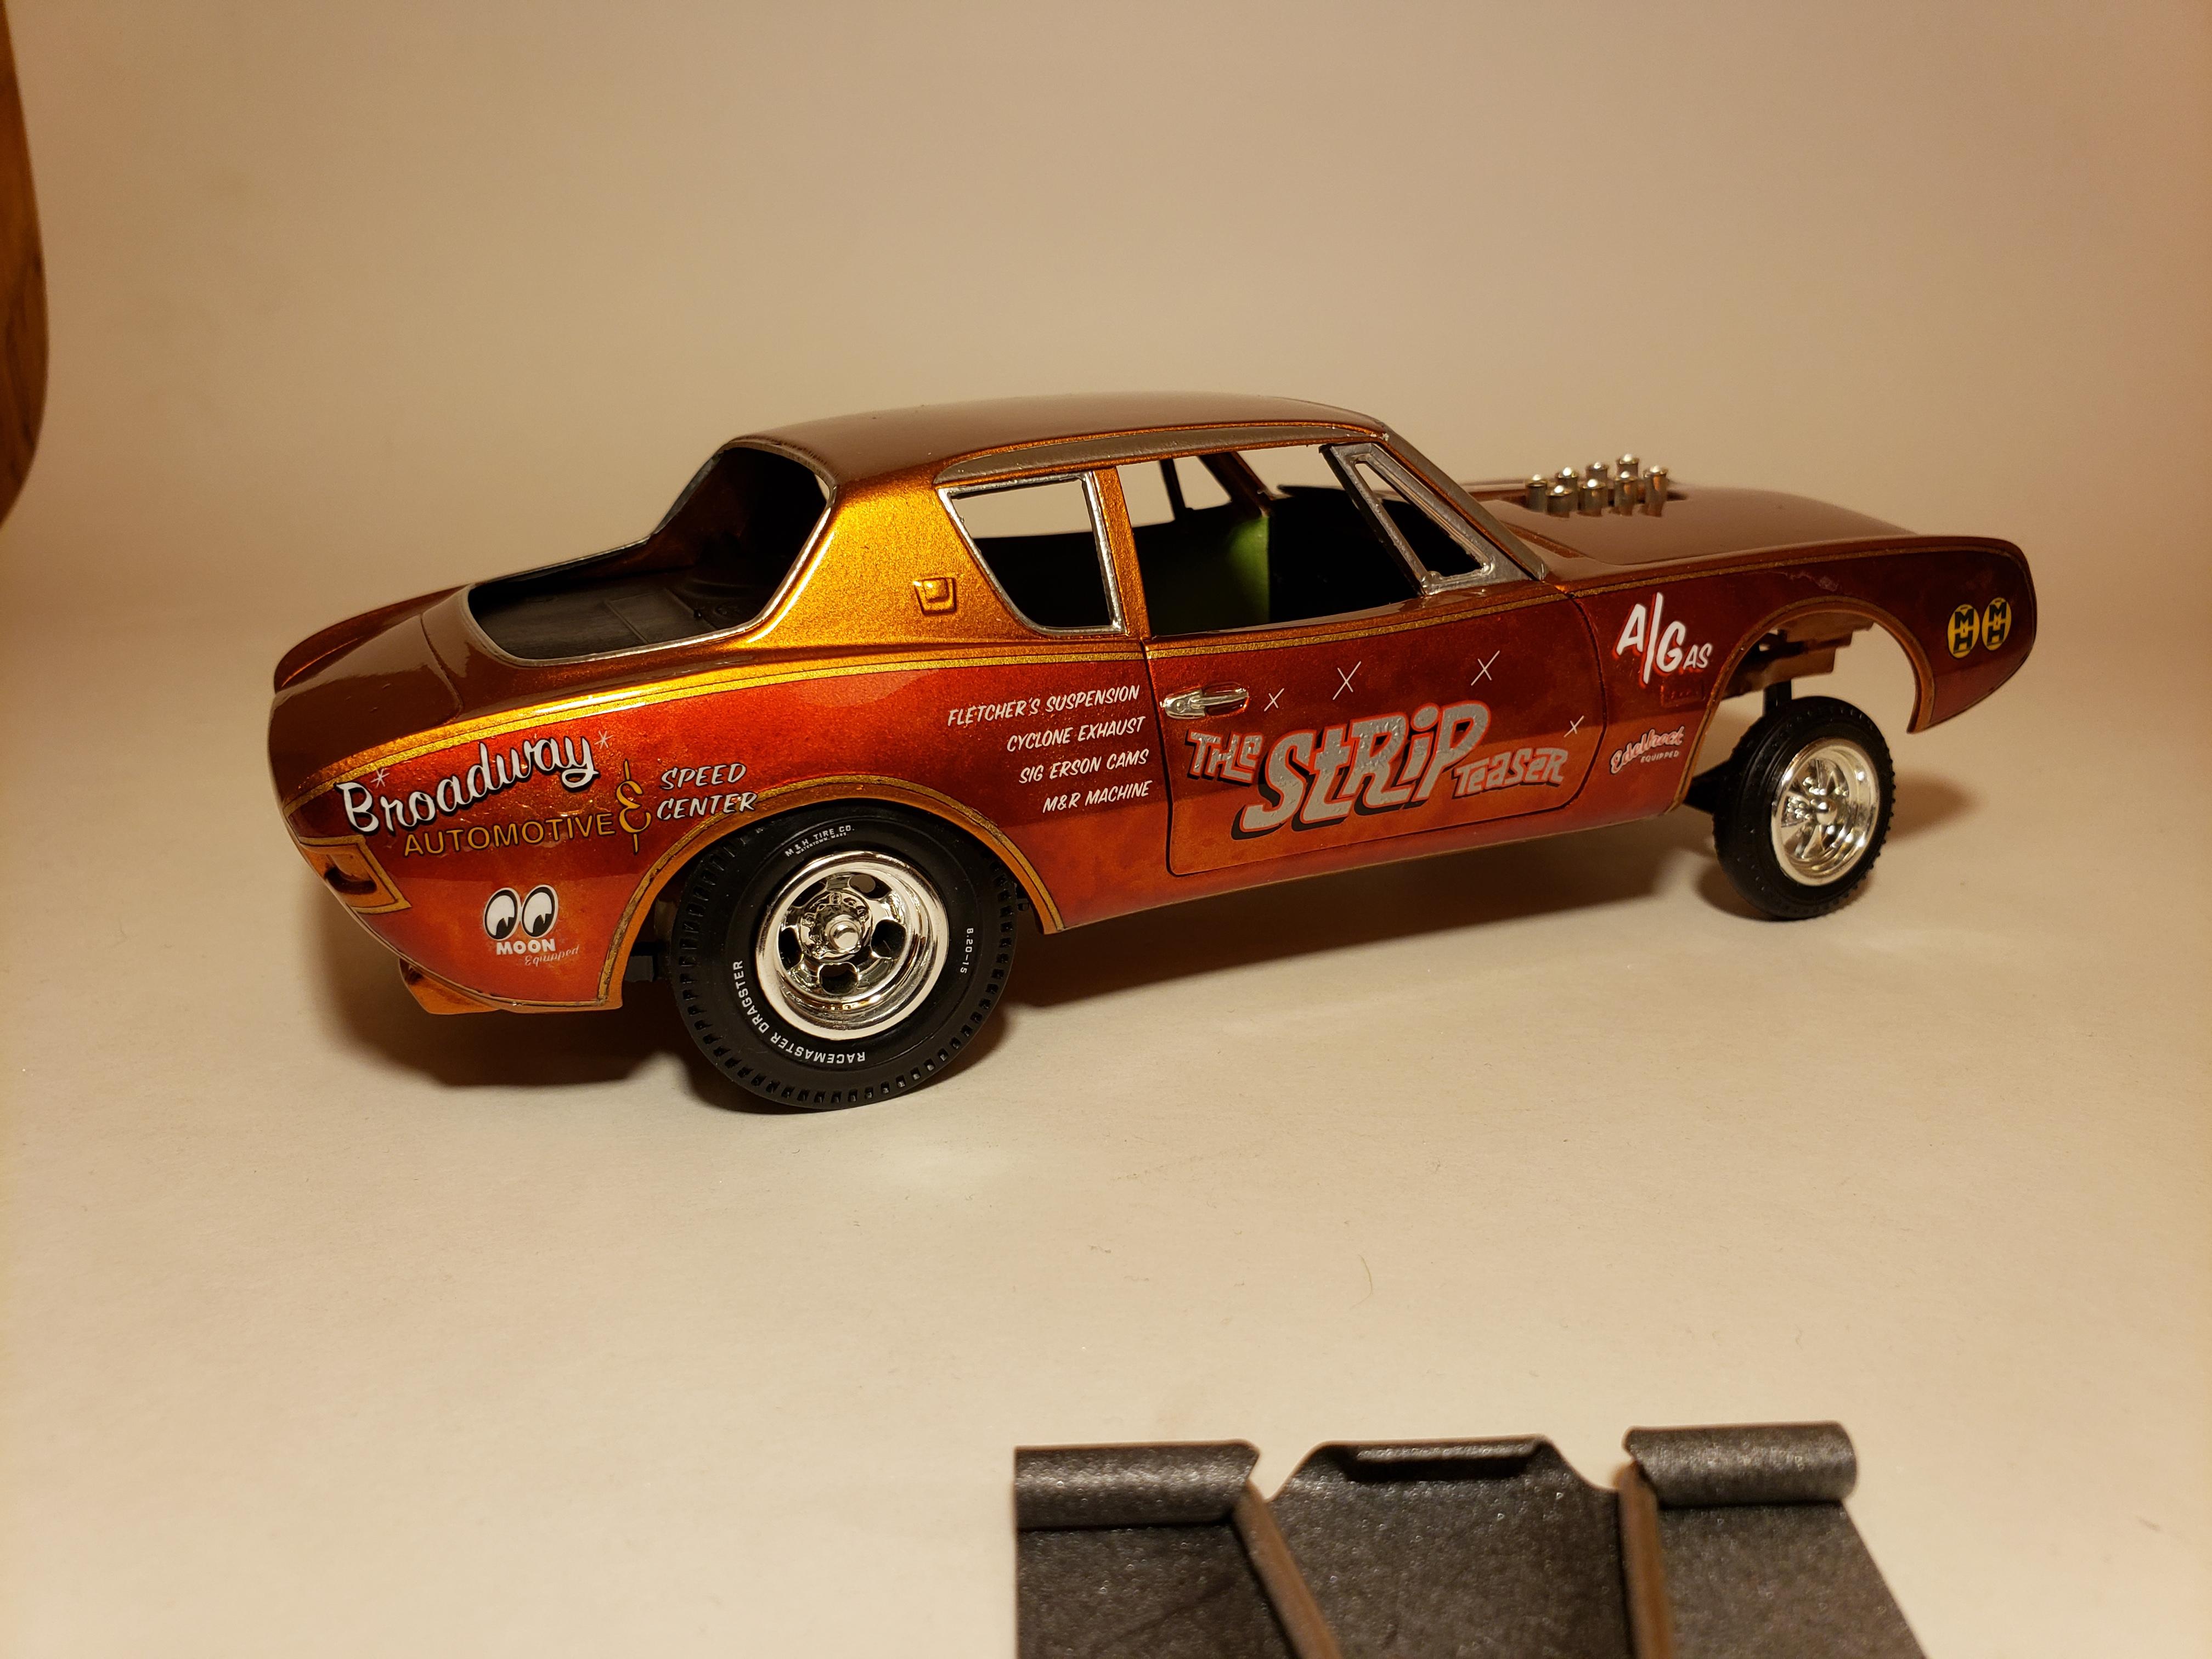
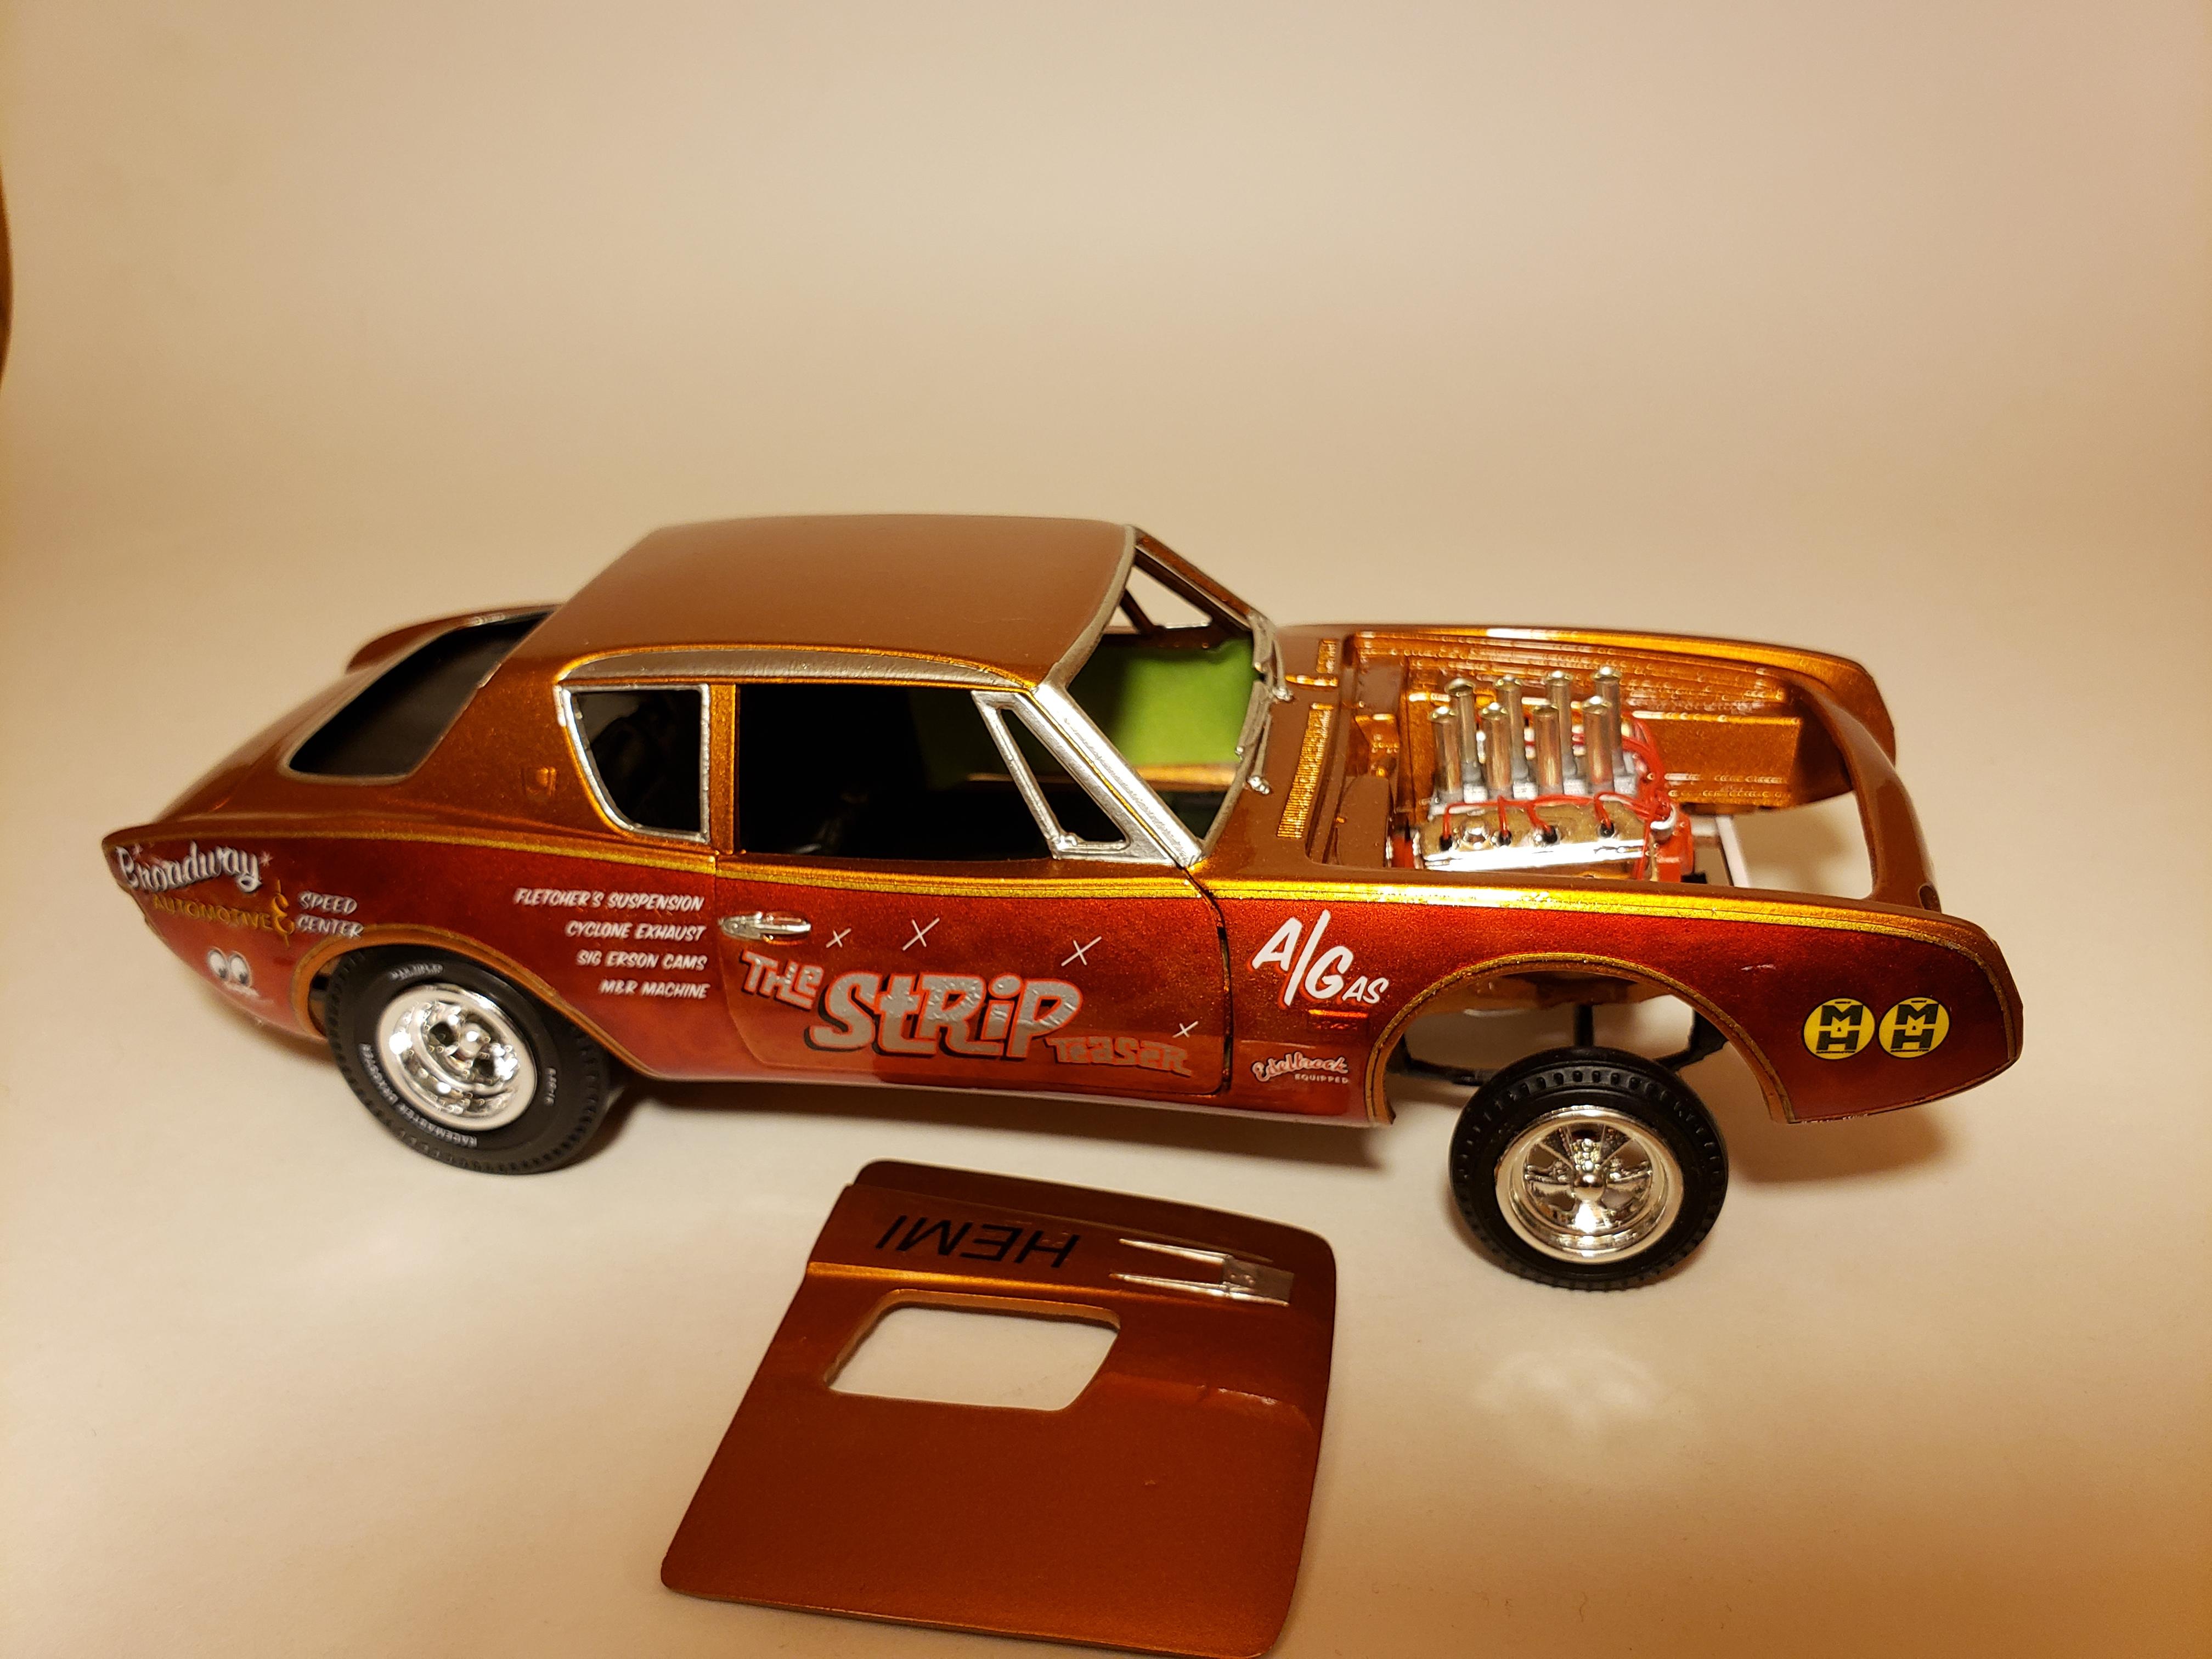
current project. got most everything painted and final test fit to make the roll bar. got the lace pattern in candy red over gold with a gold pinstripe and copper for the main color. still needs a sand and polish but came out nice
-
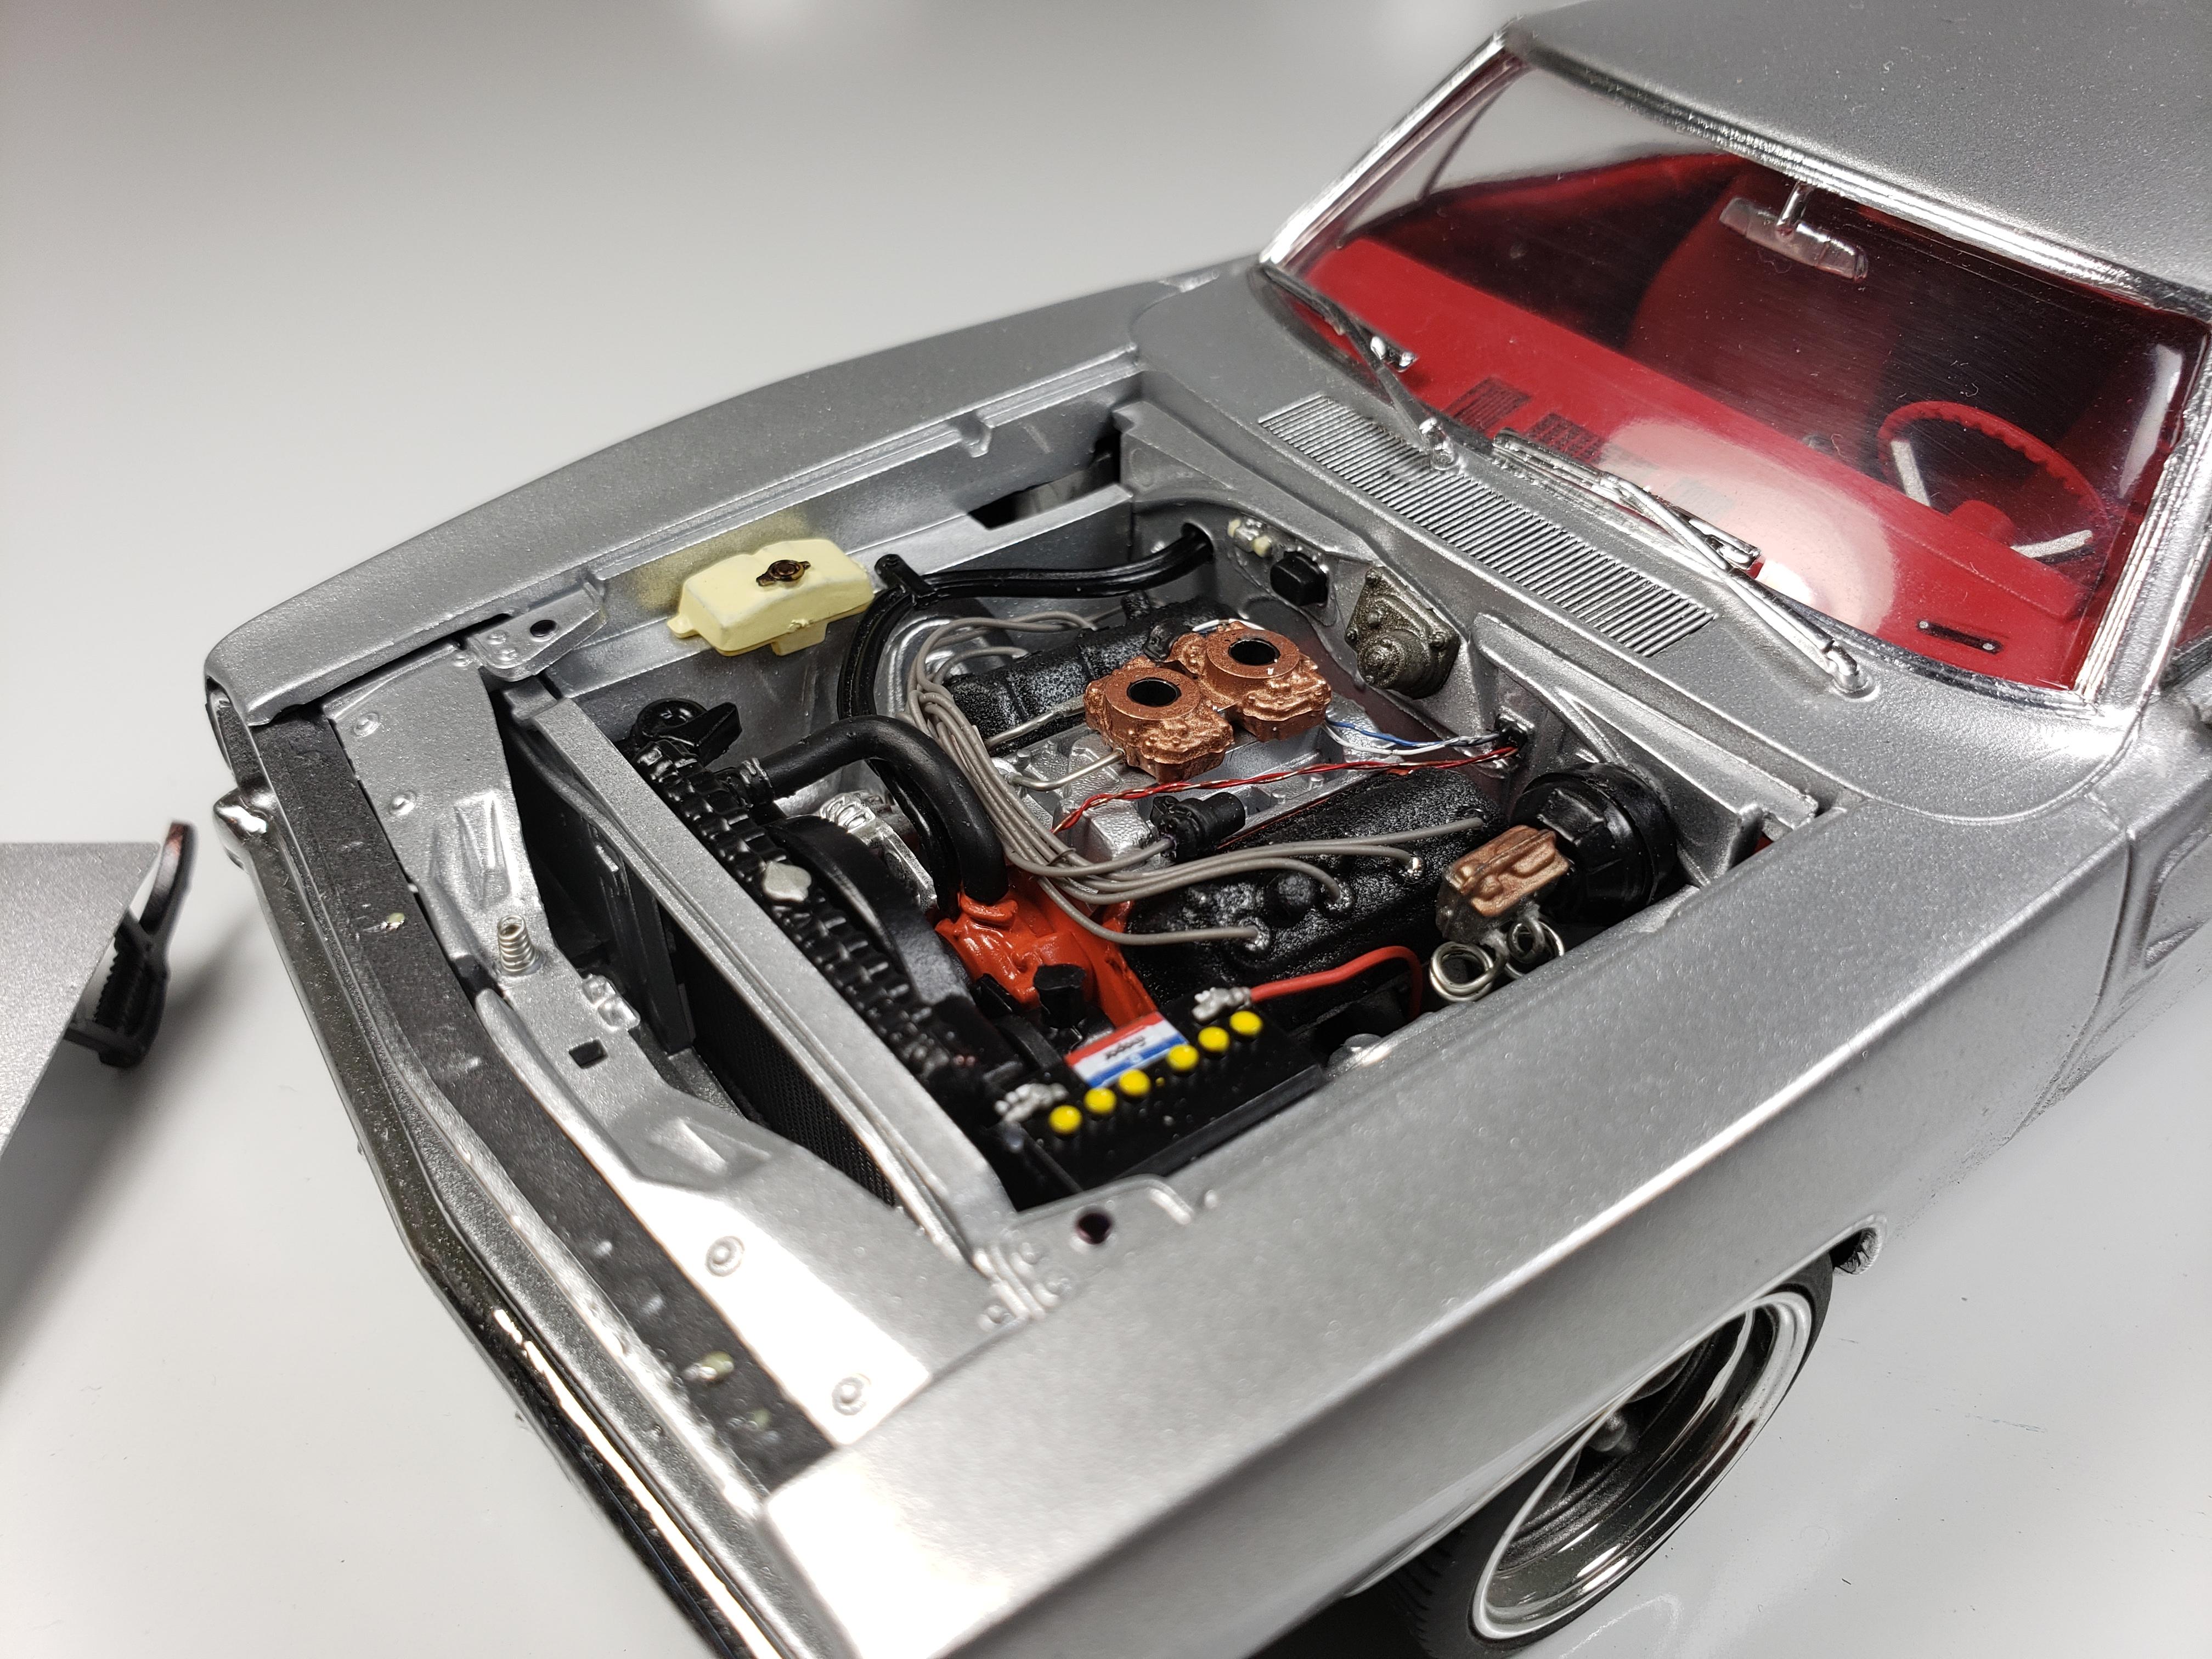
Finished up the interior and added the photoetch keys.
Wired and plumbed engine and fuel tank sender
Made/modified
exhaust to fit
-
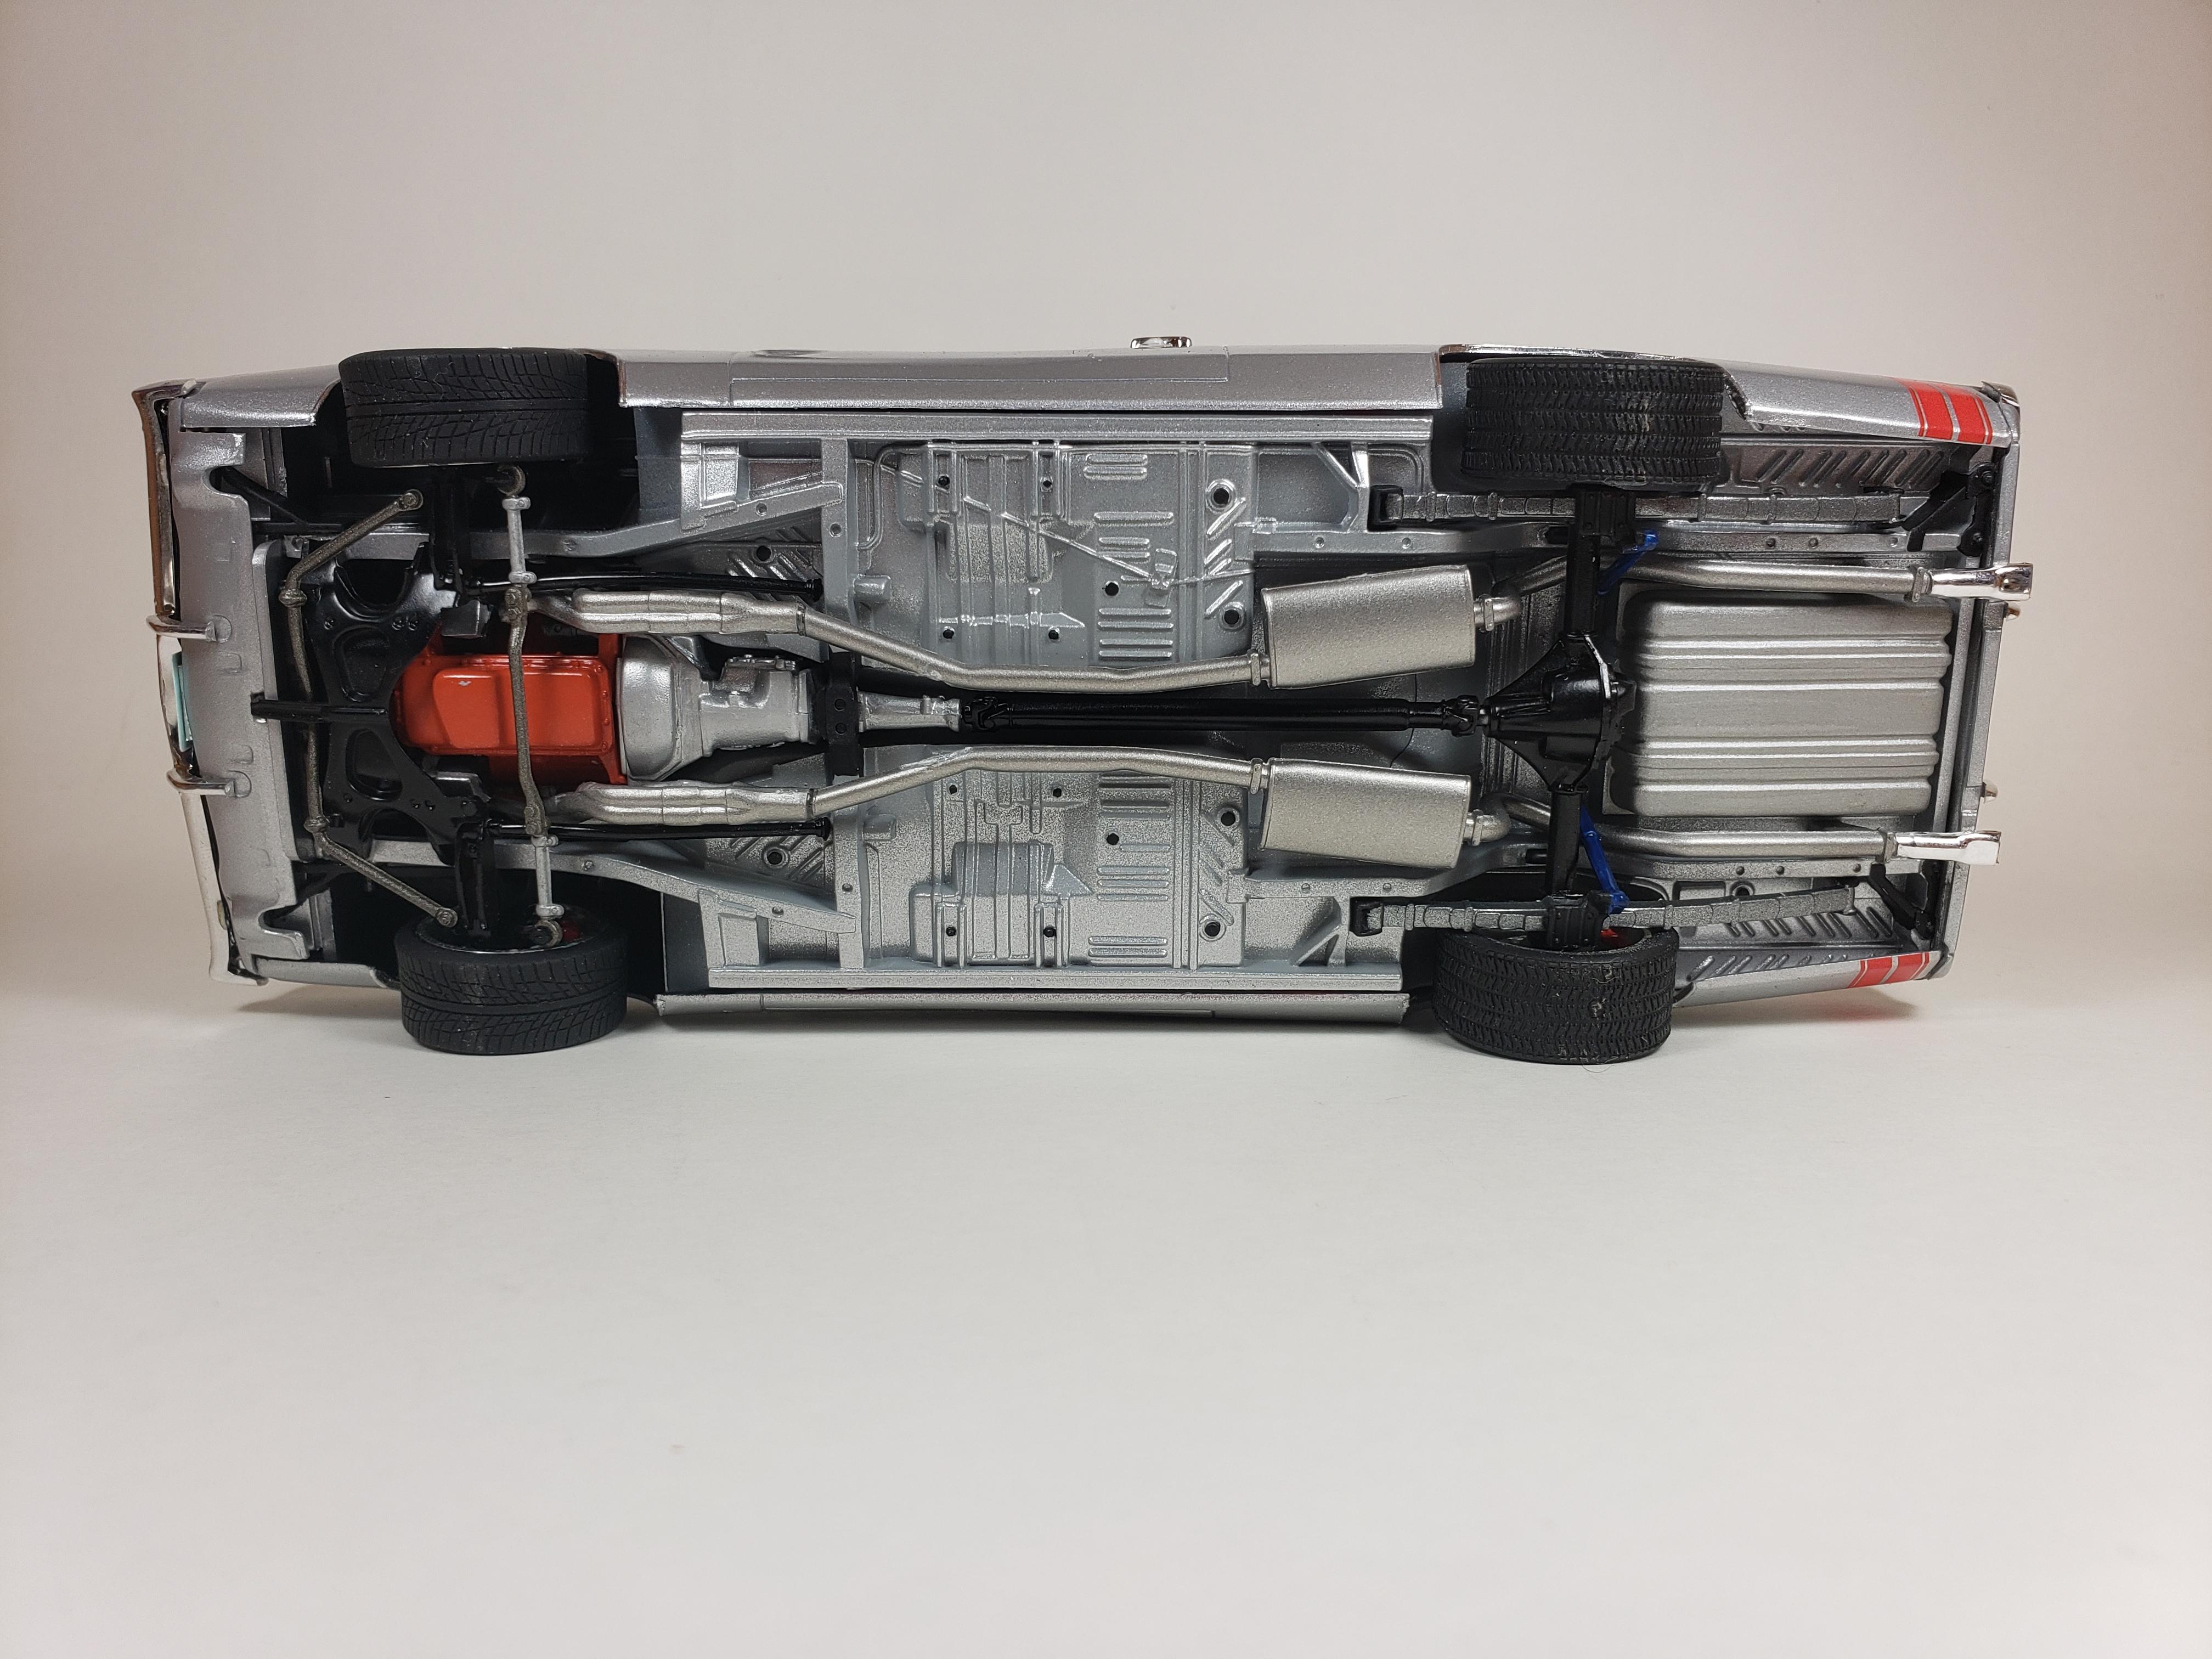
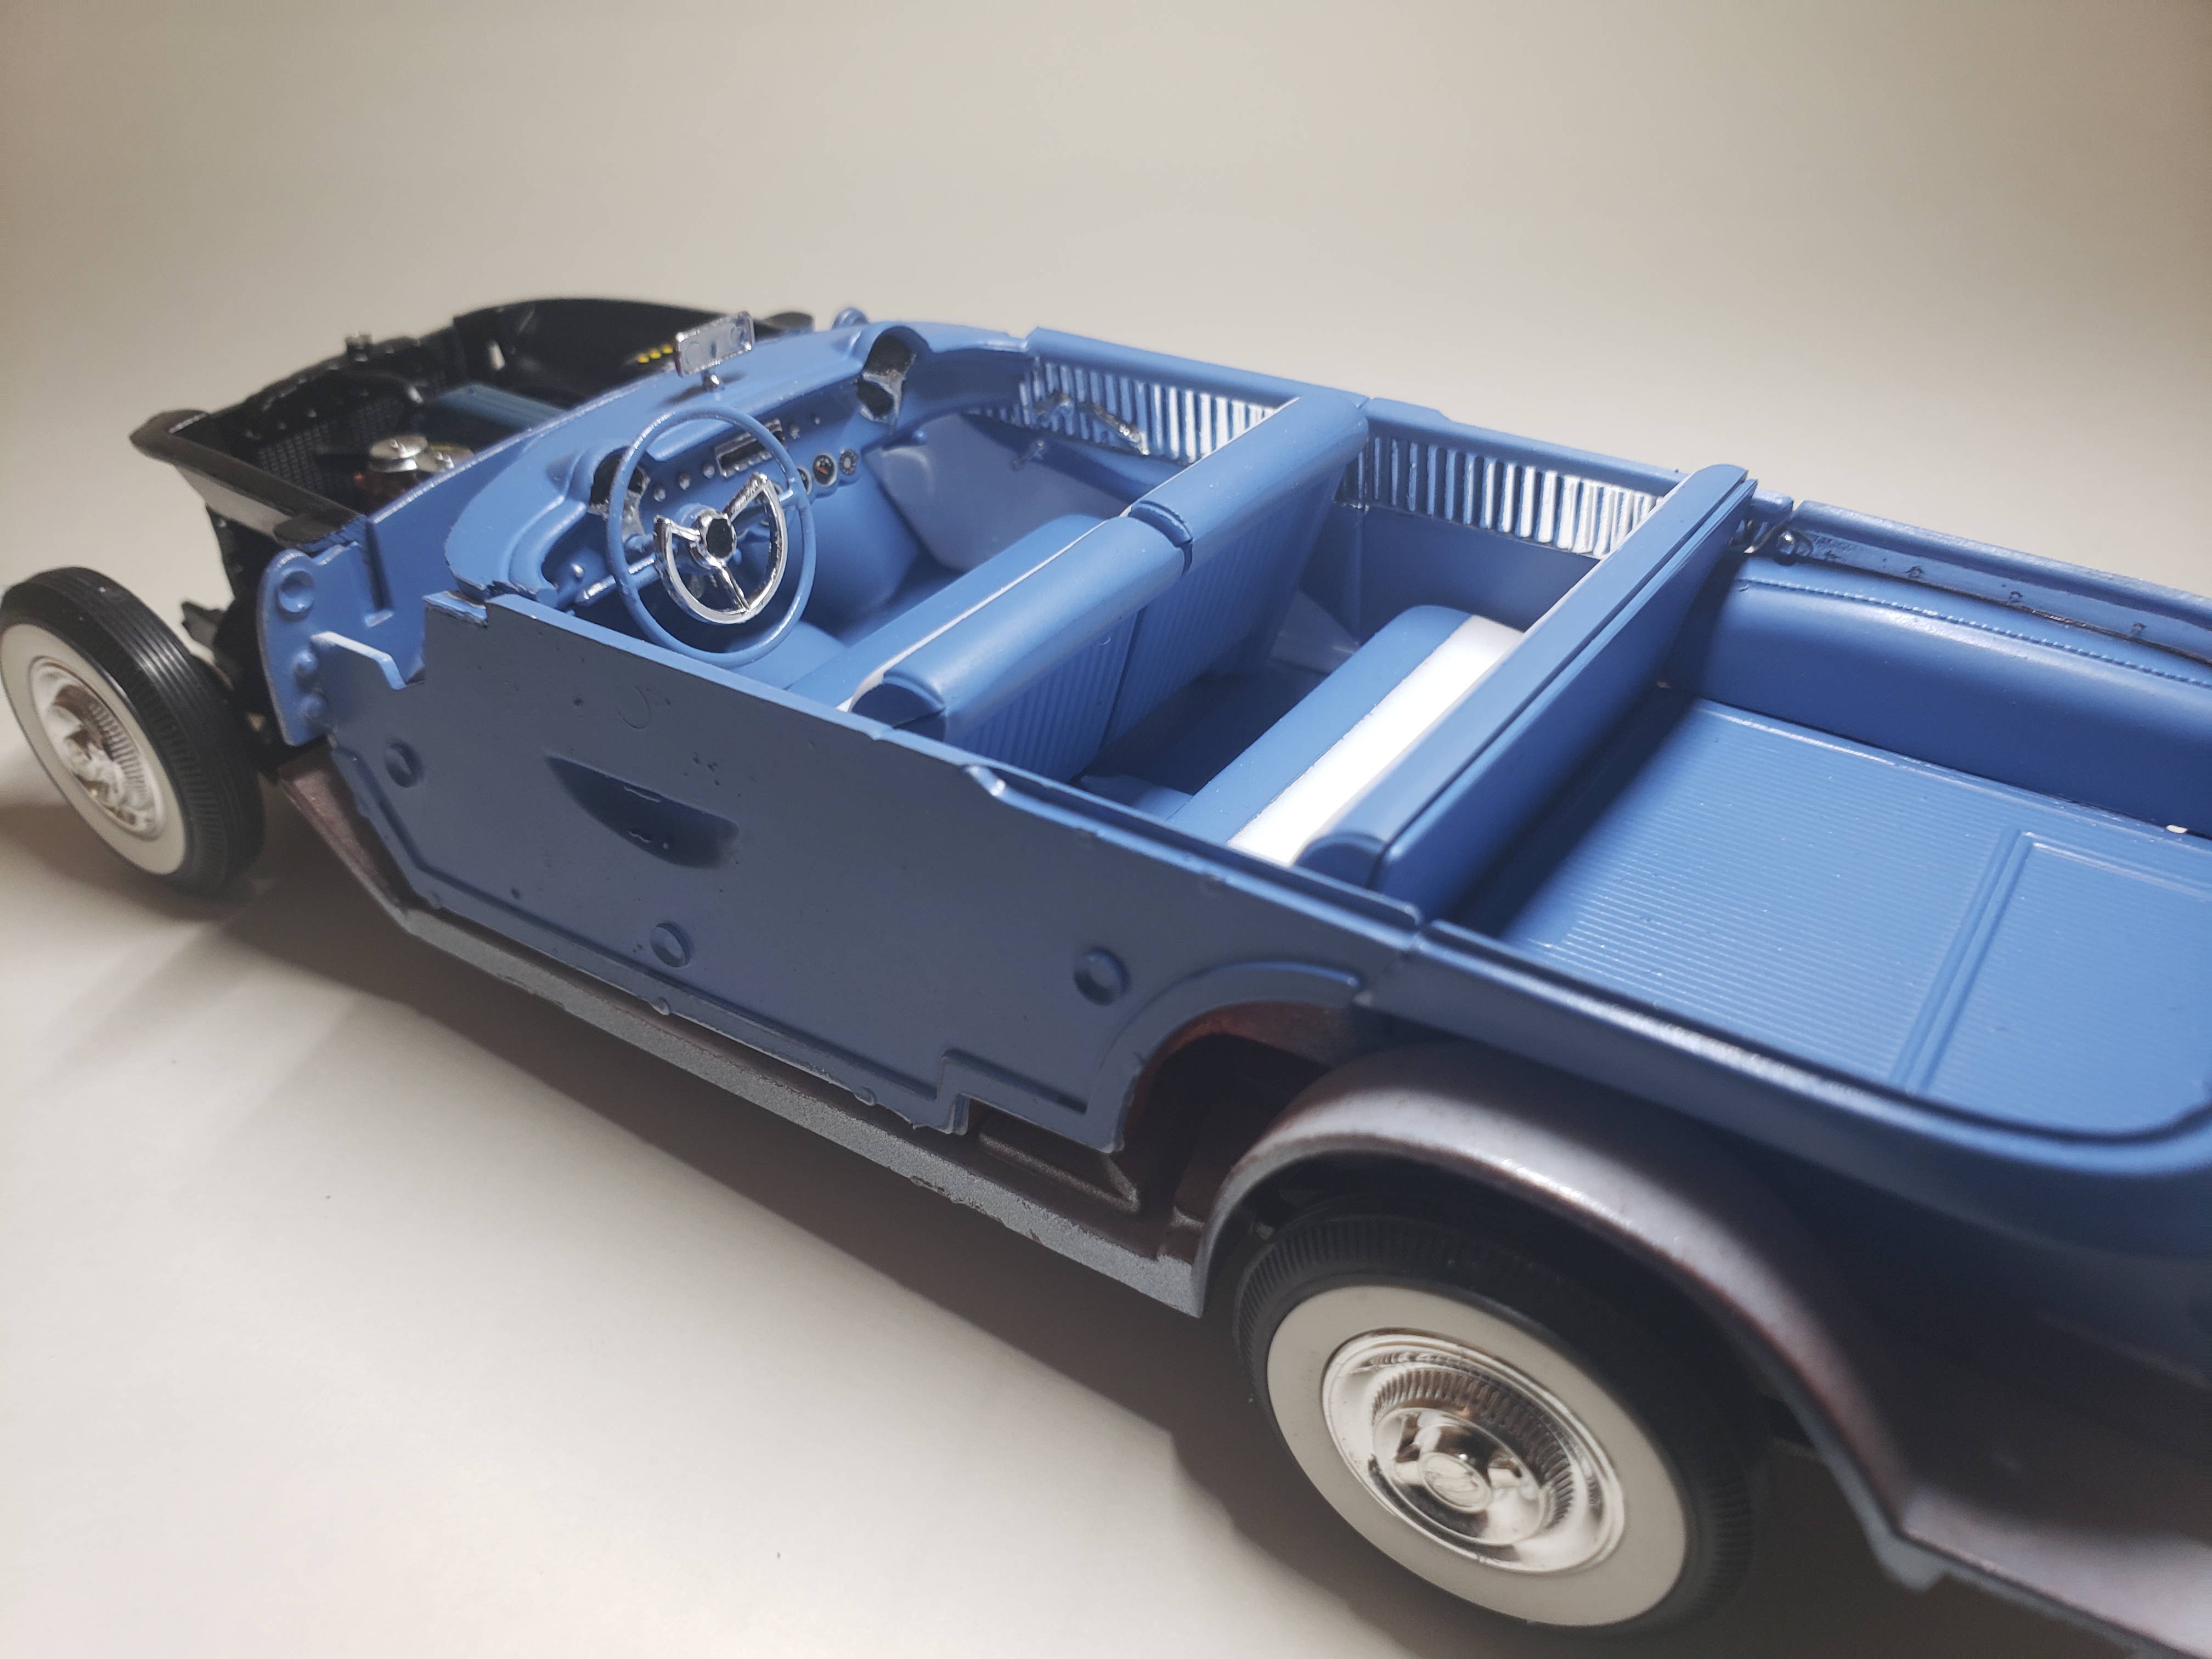
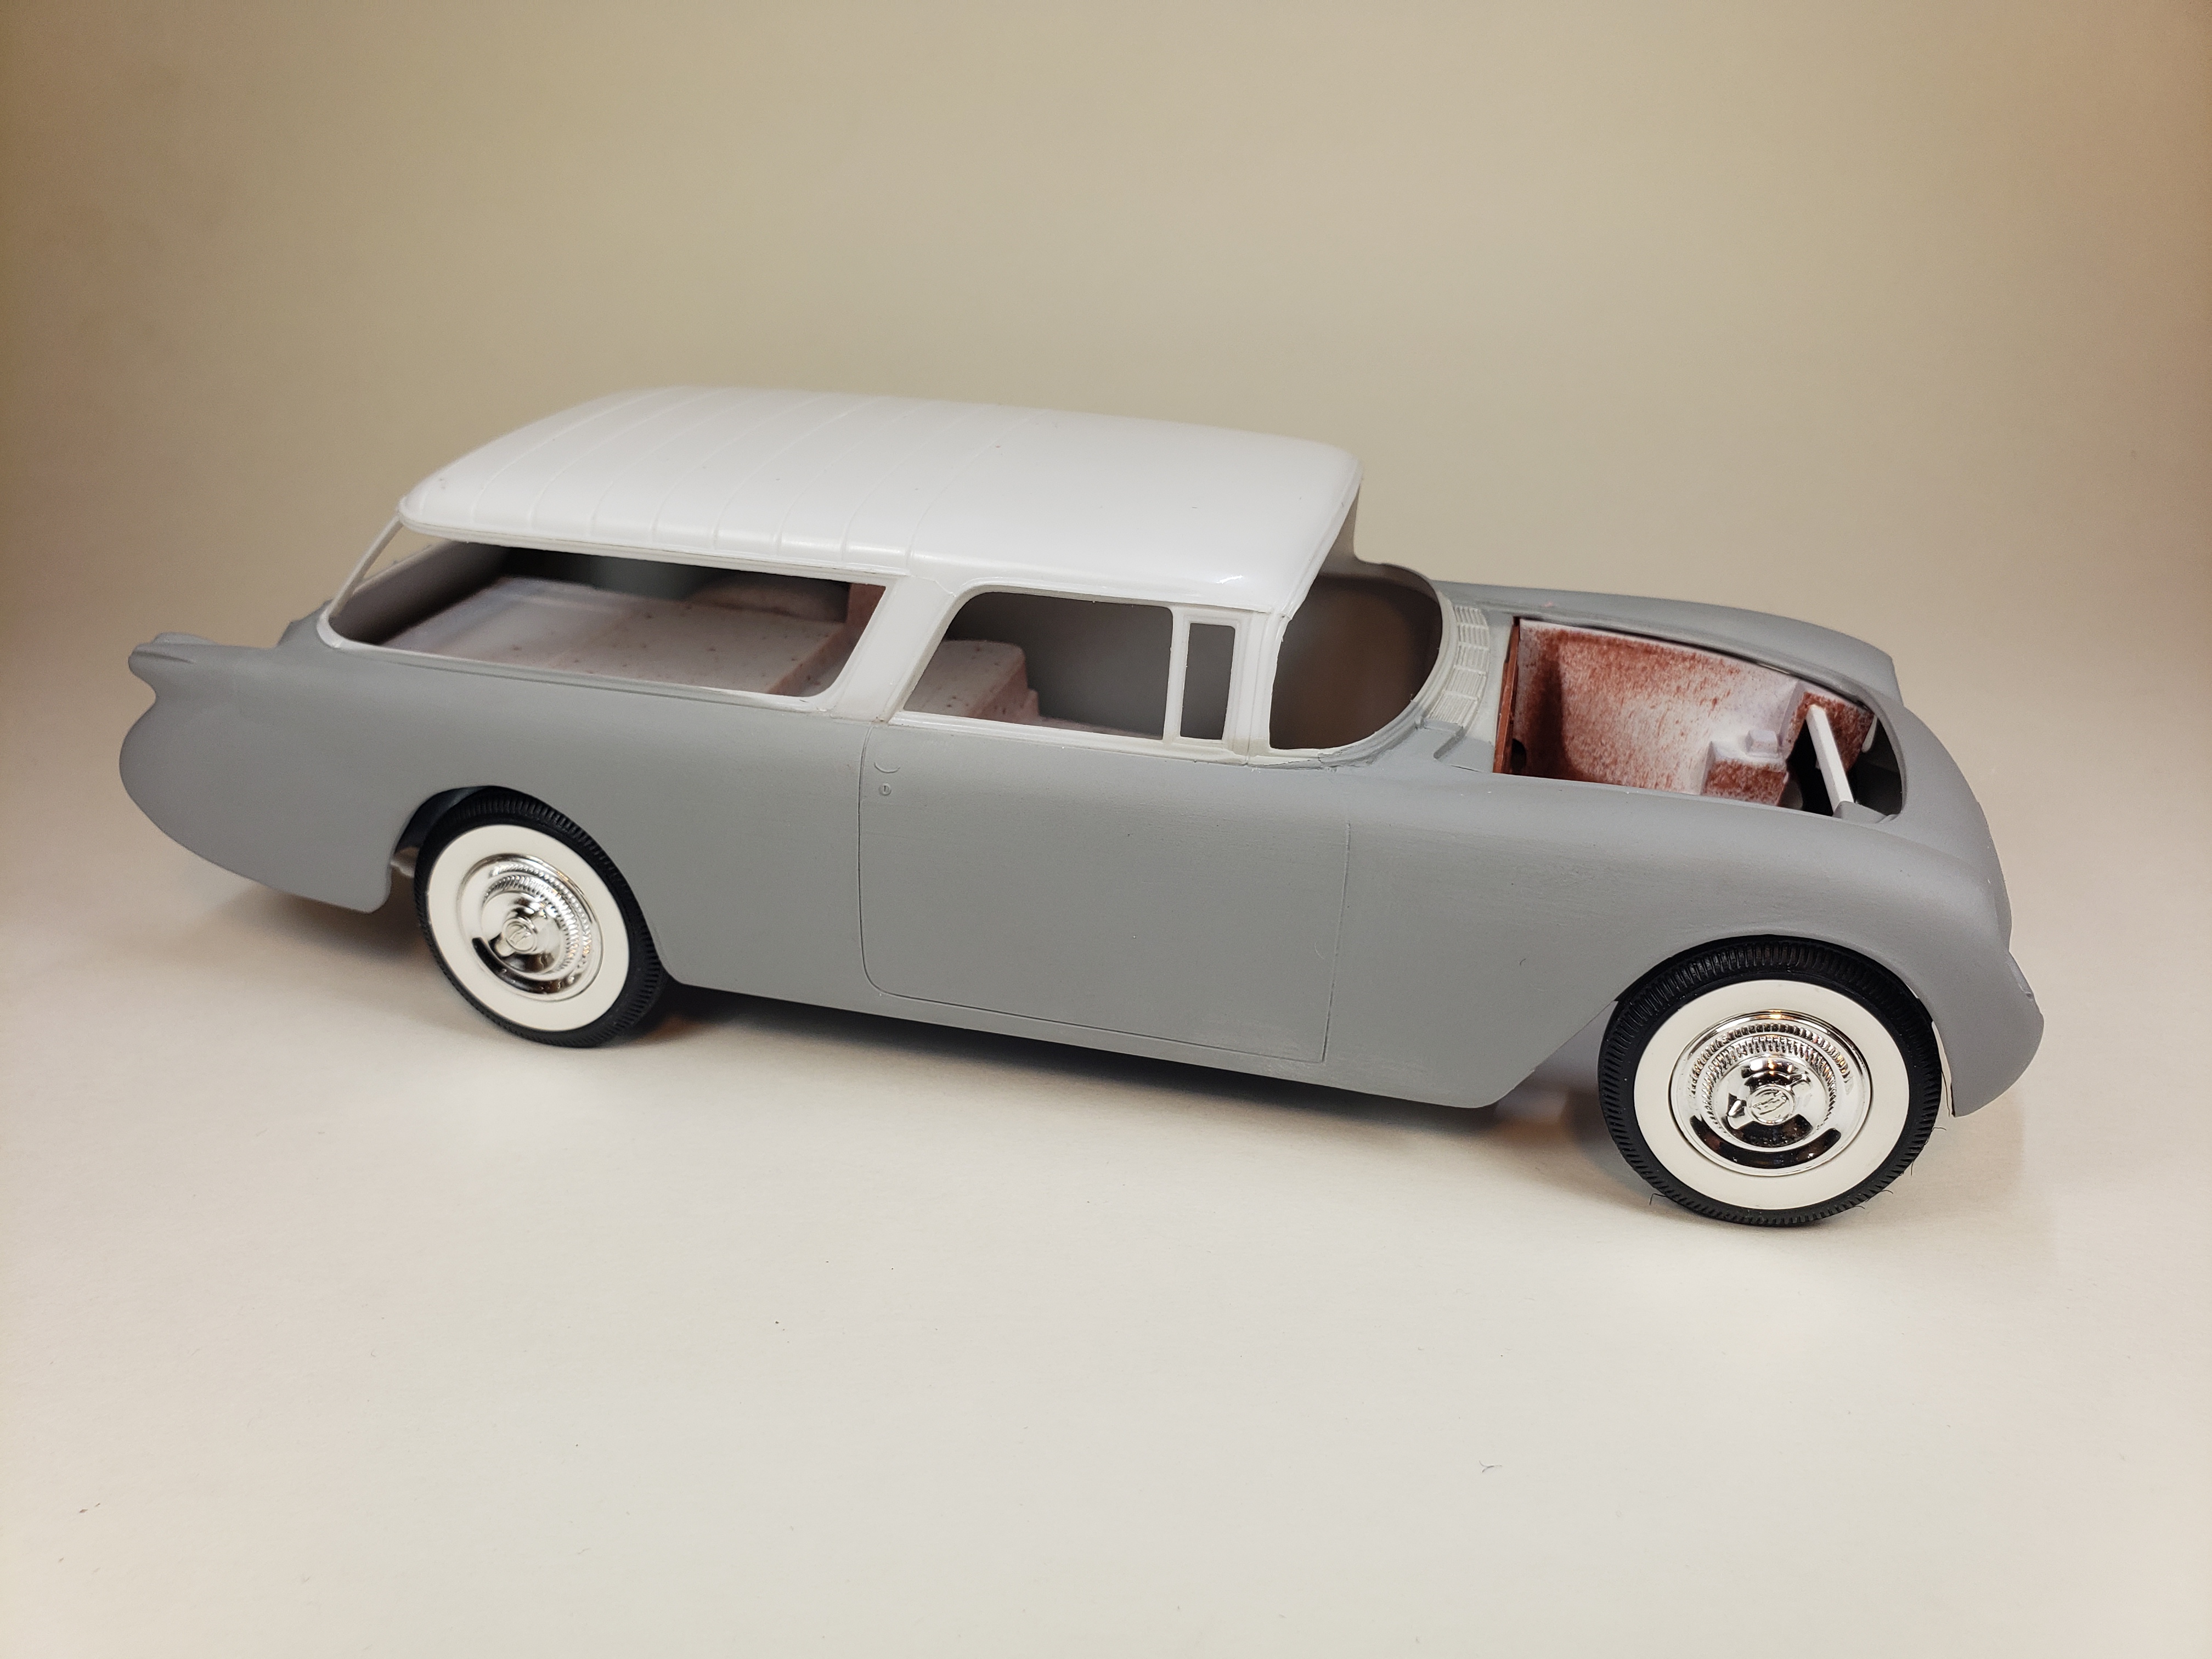
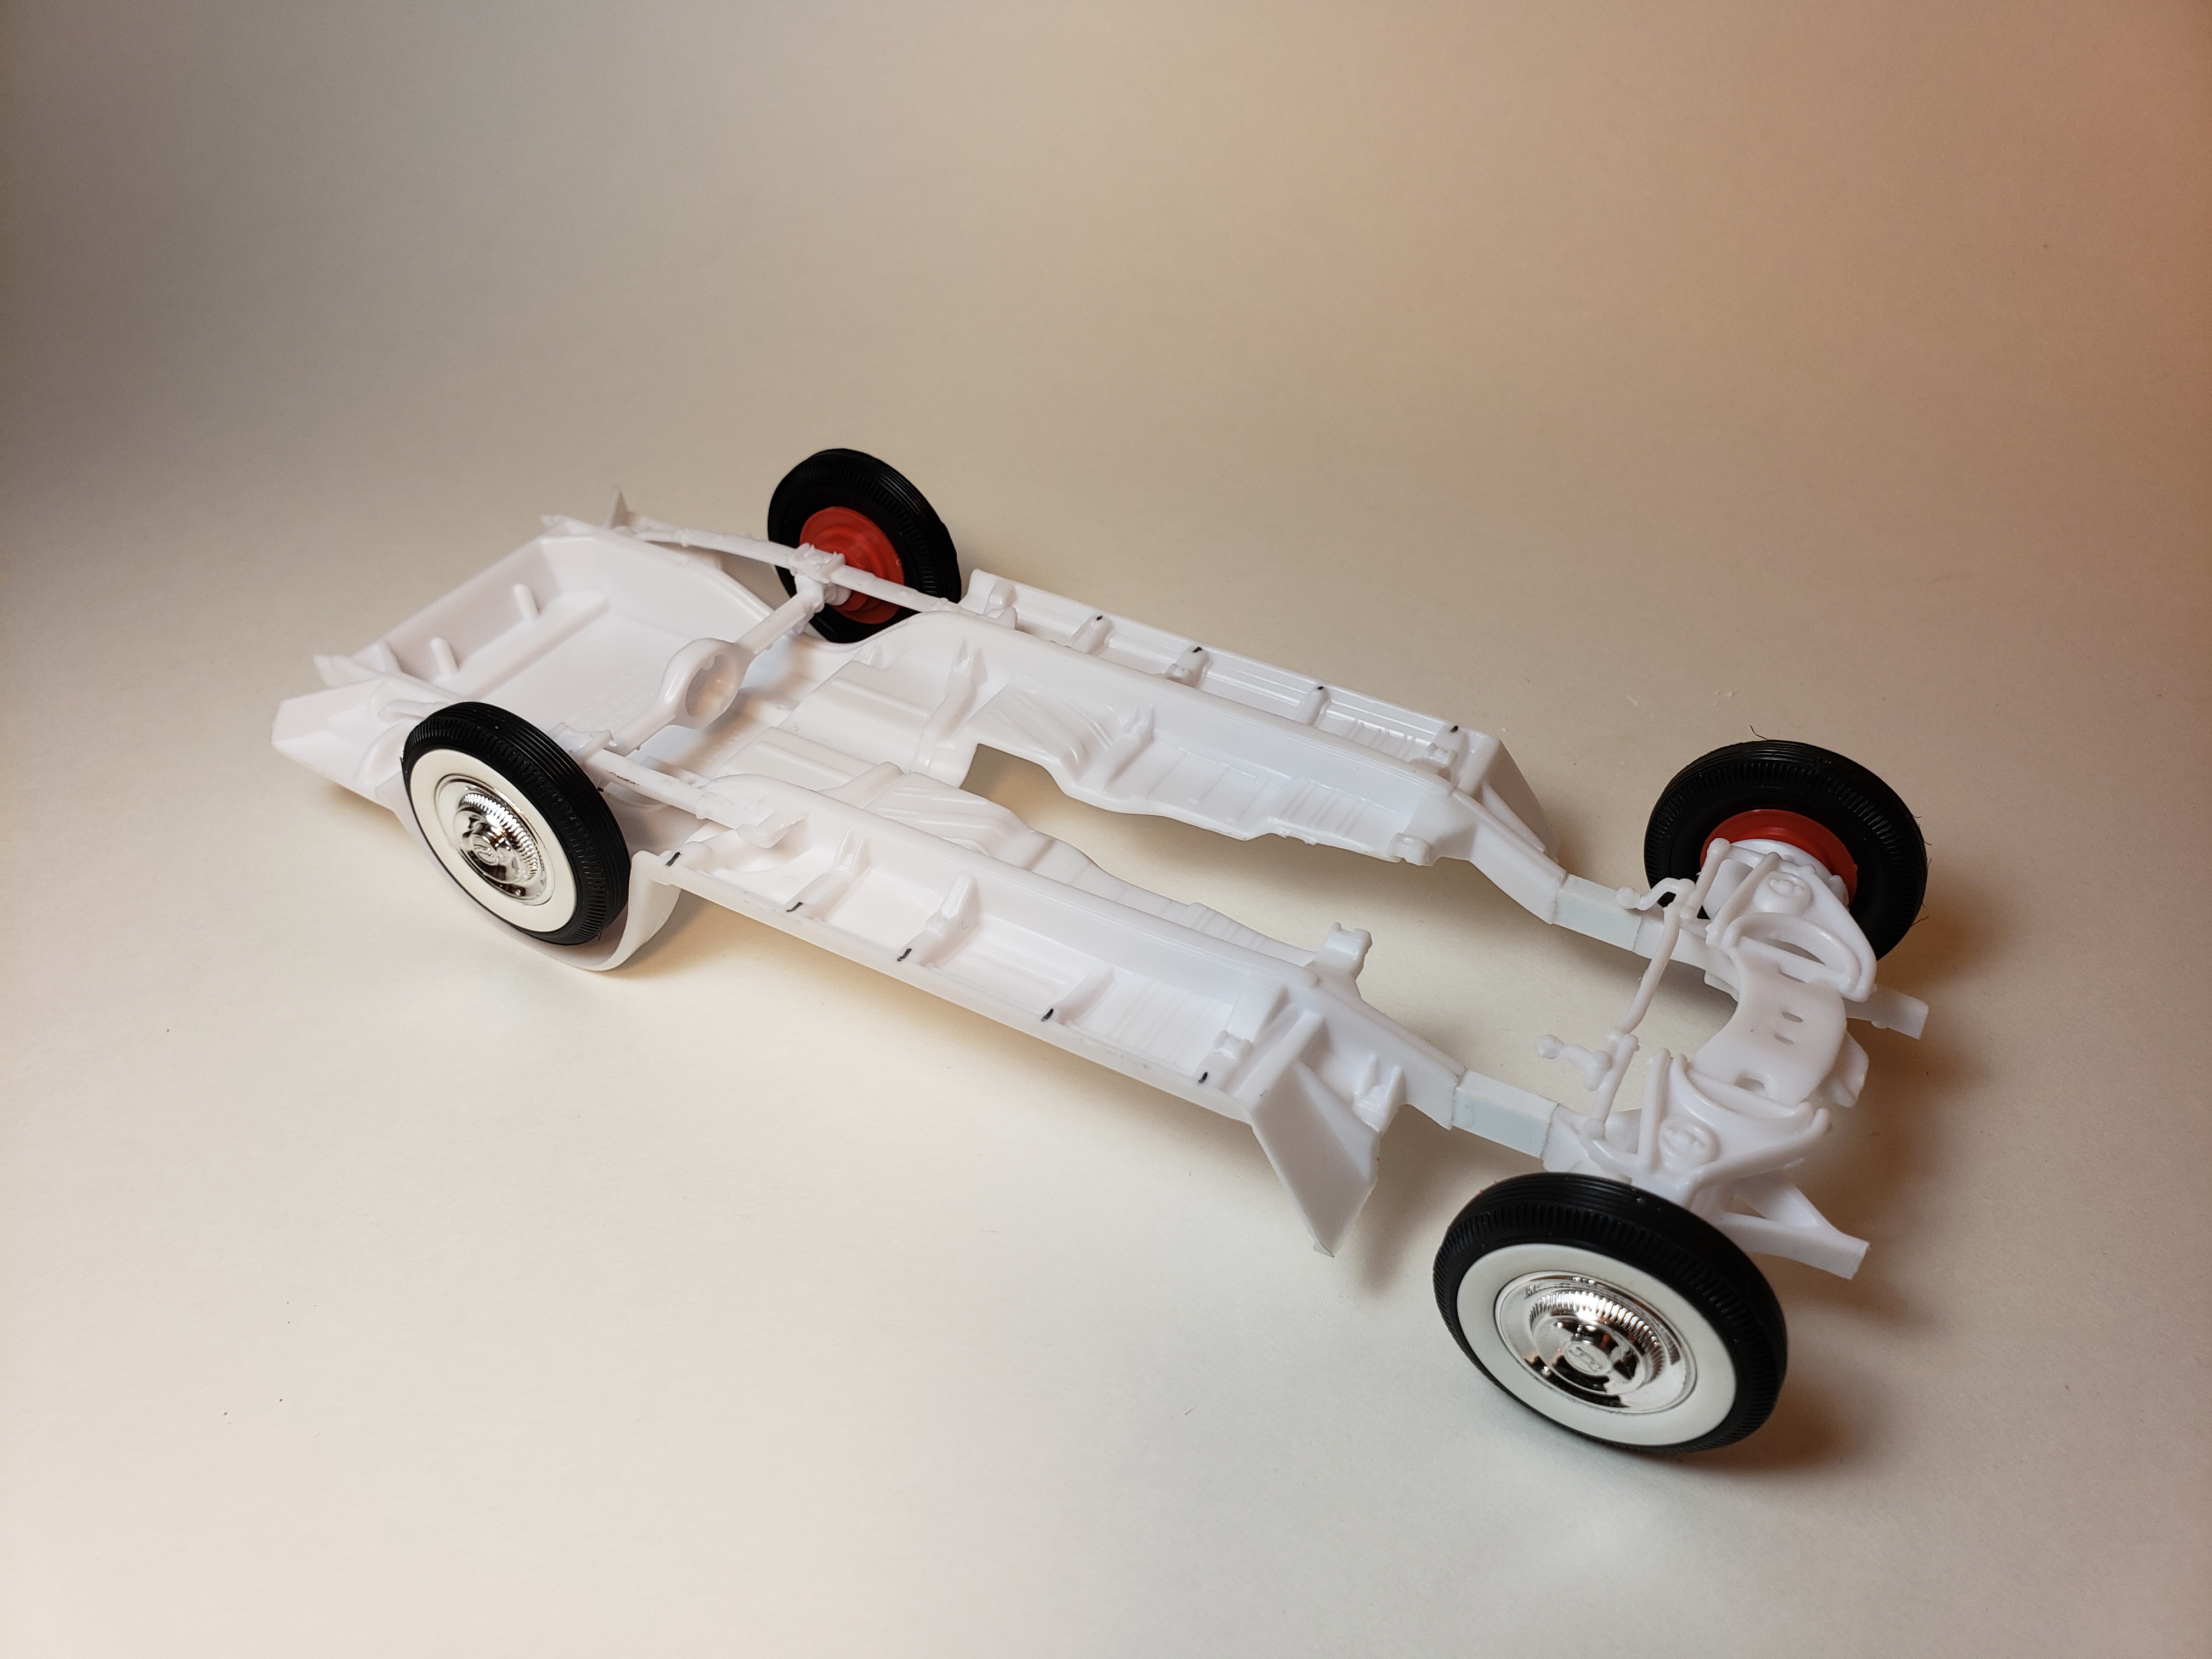
Made some good progress this past week
Got the Bodywork roughed in and body in primer. Used the vette engine bay but removed the molded in battery to repace it with a better one. painted and detailed the chassis. Chassis was stretched to fit modified body. New motor/trans mounts
-
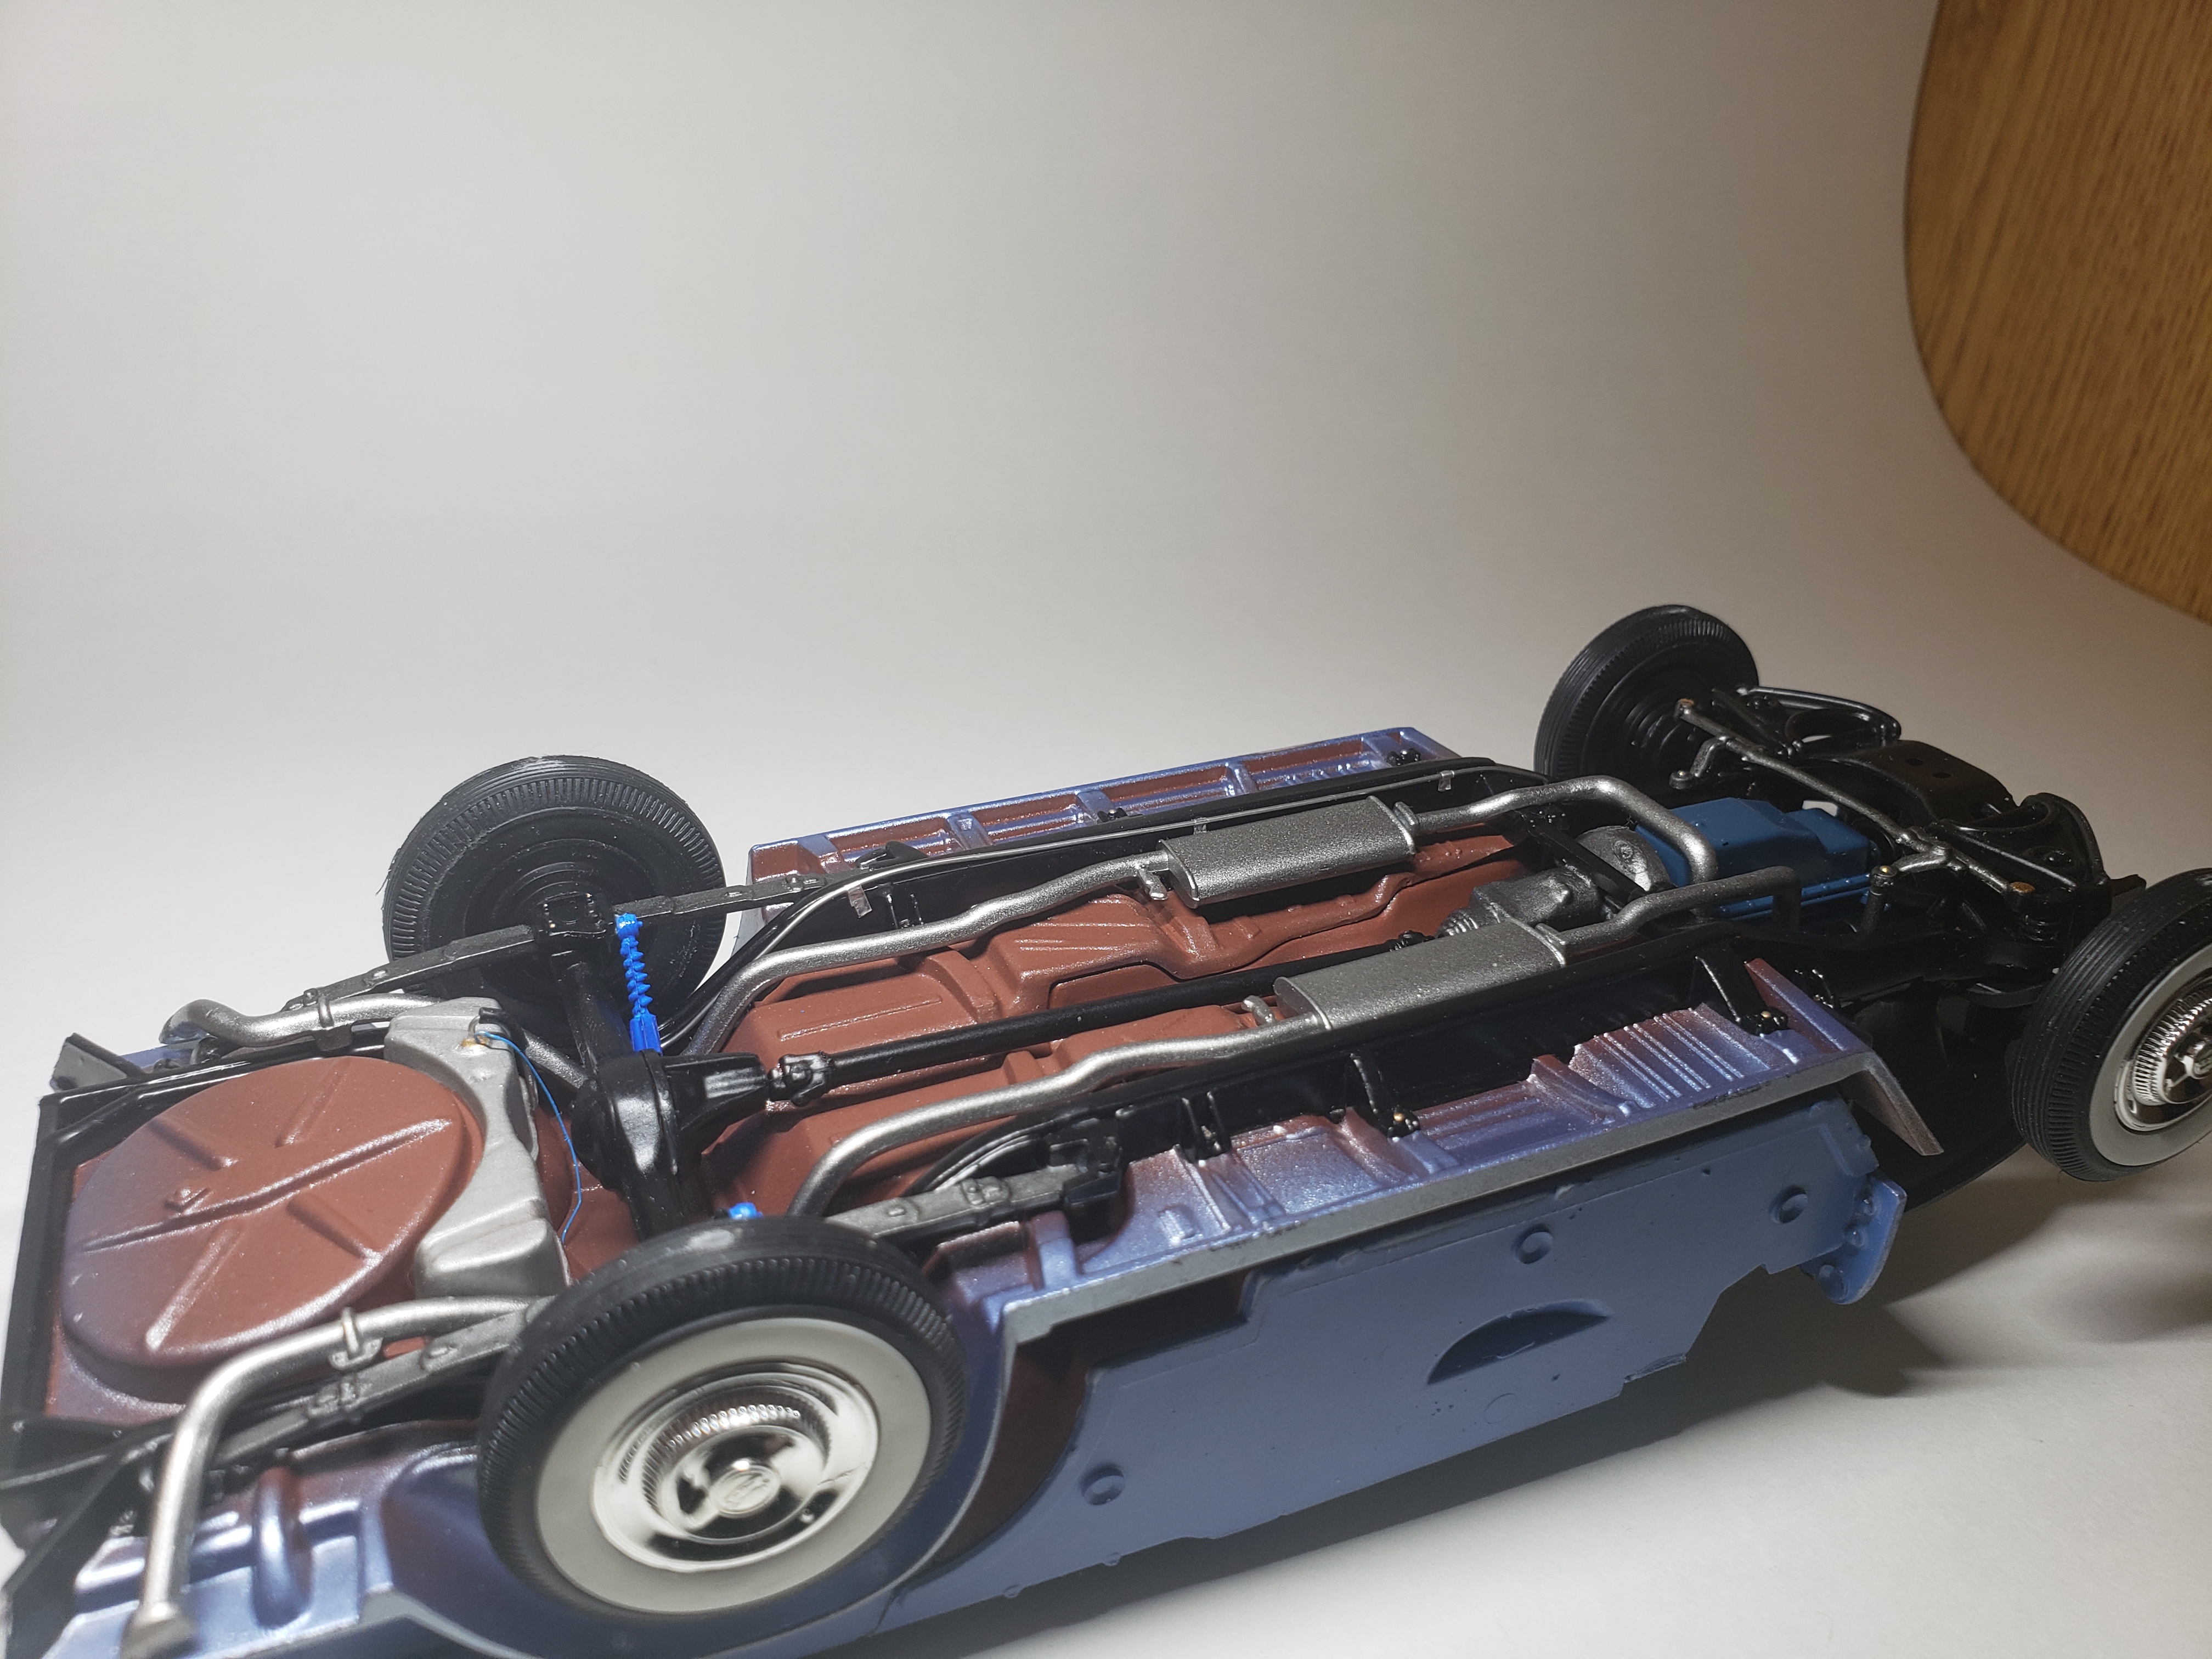
Some more progress yesterday
Had to lengthen the 56 chassis
Now set up with the corvette wheels and tiresmostly still fitting things together now once everything fits properly it will be disassembled and bodyworked
thanks for looking!
comments always welcome
-
22 hours ago, Jonathan said:
Yeah, super cool! Both of these look nice.
I had the Scale Exotics resin conversion once, but sold it.
It was well done...should you ever run across one.
Thank you Jonathan!
I never knew there was a resin kit


 It was well done...should you ever run across one.
1961 Impala Outlaw Twin Turbo
in WIP: Drag Racing Models
Posted
hello all!
small update
set the engine in place (temporarily) to set up the turbos, firewall and front rails. may move the engine back a bit depending how where the turbos and piping set. also cut a turbo scoop from a resin hood and fitted to the impala hood still a little work to go but I'm liking the look. engine is a sonny's 932 powergide trans.
thanks for looking