
Odaroloc24
-
Posts
102 -
Joined
-
Last visited
Content Type
Profiles
Forums
Events
Gallery
Everything posted by Odaroloc24
-
This sound like a great project!! Bring it on!
-
First post - 78' Firebird (Completed 12/10/12)
Odaroloc24 replied to Mike Muncy's topic in WIP: Model Cars
Nice! Great job on this. What I would love to do is take one of these models and then take a 2010 Camaro and make a 2010 Trans Am. Would also like to do it with a GTO also! -
This is really cool!! I have been wanting to do this with a 70 GTO but build a 70 Tempest T-37 like my dads.
-
Looks good!
-
Looks Great!!
-
65 Chevy Pick up
Odaroloc24 replied to Odaroloc24's topic in WIP: Model Trucks: Pickups, Vans, SUVs, Light Commercial
So i got the frame painted. Since this model wasnt supposed to be a 4x4, i had to make some changes to the axles. Here it is all done! I did this because to raise it im just going to pull it down but the more i pulled it down the closer to the cab it got. More to come! Mike -
What do you drive?
Odaroloc24 replied to gasman's topic in General Automotive Talk (Trucks and Cars)
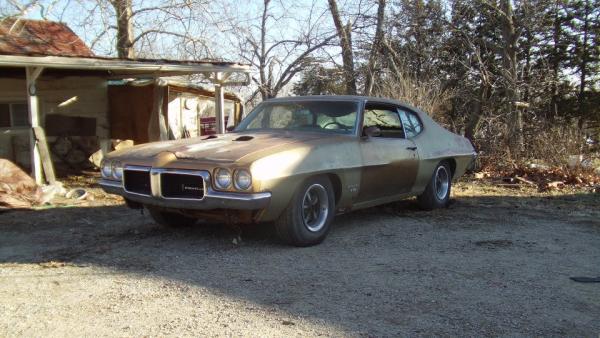
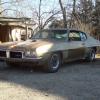
That Gold one looks like a 1977-1978 Pontiac Trans Am. -
Cool Thanks!
-
What did you use to strip the chrome? Im still fairly new. Mike
-
Hey, My name is mike and this will be my 6th model. I got this model last Christmas and im really excited because this is my first truck model. The other ones i have built have all been 64-69 Pontiac GTO's. So here is the box, My little brother waned to help me with this one so I asked him what he wanted it to be. He said he wanted a flatbed. So here is some pics i took today. I started on the interior. I wanted to make it a 4x4 so i found one of my old hot wheels monster trucks and stole the wheels from it. They were a bright orange so i painted them black and then took silver paint and a toothpick and put all of the lugs on. More to come soon! Mike
-
Looks really cool, but im more interested in that Pontiac back there! Great job so far! Cant wait to see this finished!
-
Thanks! What other products did you mix it with??
-
USA-1 CORVETTE LSR TEAM! WIP Photos! Finished Now!
Odaroloc24 replied to Ira's topic in WIP: Model Cars
Thanks! -
Thanks!!
-
Looks real nice!
-
USA-1 CORVETTE LSR TEAM! WIP Photos! Finished Now!
Odaroloc24 replied to Ira's topic in WIP: Model Cars
I'm still new to models and i was wondering what was the putty stuff you were using in the beginning? Thanks, Mike -
Looks real nice!
-
Thanks! Thanks!
-
Here it is all done! There we go! Mke
-
Here is some of the finished product. Ok this front tire is a little messed up. The little thing that snaps into the wheel broke and i tried to glue it back. It look really good when i glued it but i guess it wasnt totally dried and it stuck that way. Well there you go. Its all done! Mike
-
1948 chevy sedan delivery truck (FINISHED)
Odaroloc24 replied to stulee11's topic in WIP: Model Cars
I love that paint! -
Here are some more of the interior finished. This one is with a clear coat on it. Body done with clear coat. One of the completed chassis. I painted the air filter black and it just looked plain to me. So i decided to do this to it. There was some red paint that went under the paint so i took my little testors bottle of black and i touched up the edges. Before After Now i need to find pics of the finished product. Mike
-
NIce job! Looks real good!
-
So the reason why i put the rubber cement on was because you need to open up the places where you put the iron solution. The way i did this was i took some duck tape and places it on the paint and then pulled it off. This is what it looked like with all of the iron paint exposed. Then i sanded all of the pieces of salt out of the paint. I then wrapped it in a plastic bag and waited for 24 hours. Here it is after 24 hours. I have to go find some more pics of the final product. Mike
-
Found some more pics So after I put the rubber cement on, i put a coat of light blue. This is the color i wanted the final to be. After i did that i painted the iron paint on my rims and then put the Rust solution on it. The rust solution is just Ammonium Chloride and Copper Sulfate. I then put it in a plastic bag for 24 hours and this is what i came out with. Will post the rest here in a sec. They only let me post so many pics at a time. I also melted the tires a bit to try to give it a flat tire look. Mike