Mutato
-
Posts
28 -
Joined
-
Last visited
Content Type
Profiles
Forums
Events
Gallery
Everything posted by Mutato
-
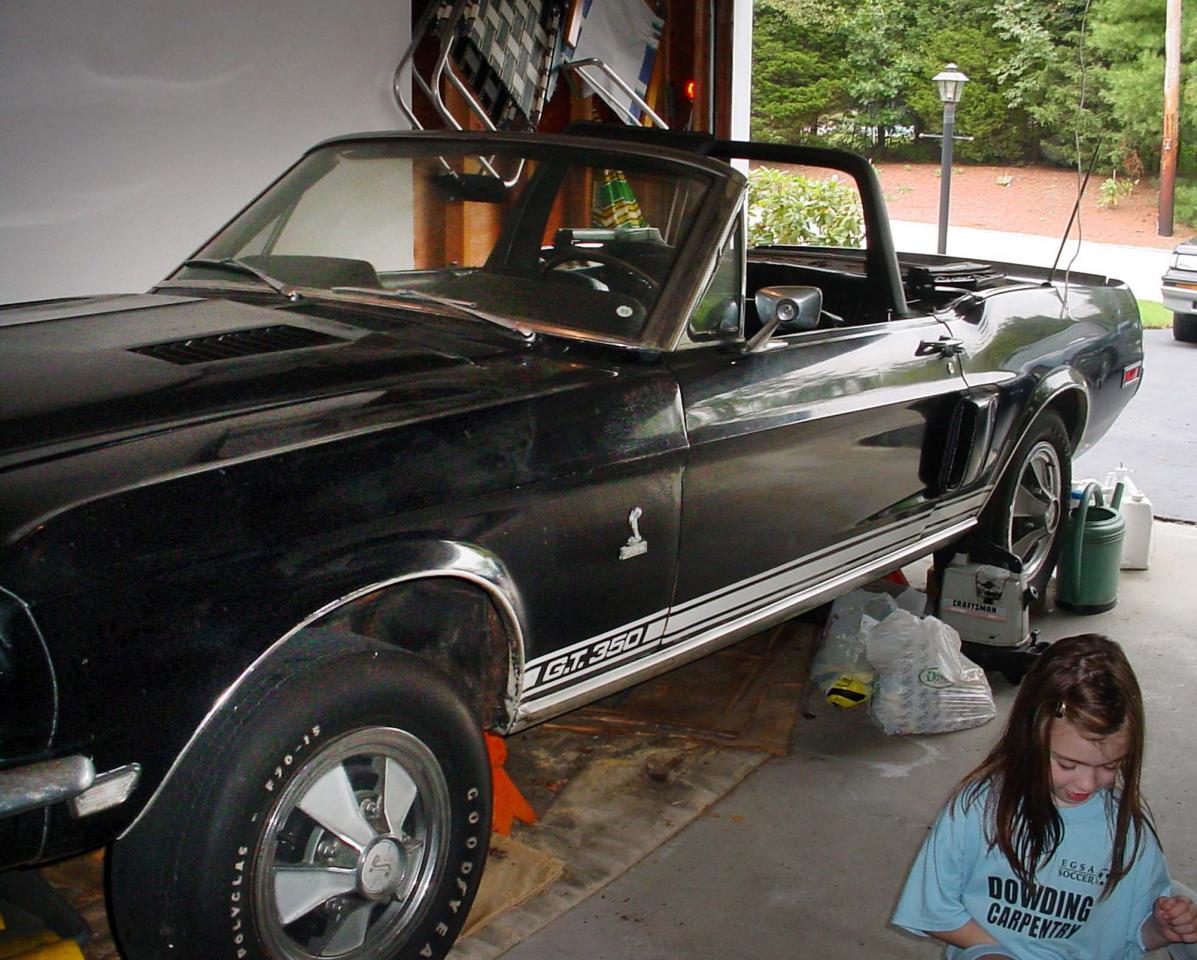
WOW! You know, I was almost going to attempt some sort of convertible from my kit. but chickened out. THIS is what I'd LOVE to make. Cause my old neighbor actually OWNED this one. A 1968 Shelby GT350 convertible in black.
-
WOW!
-
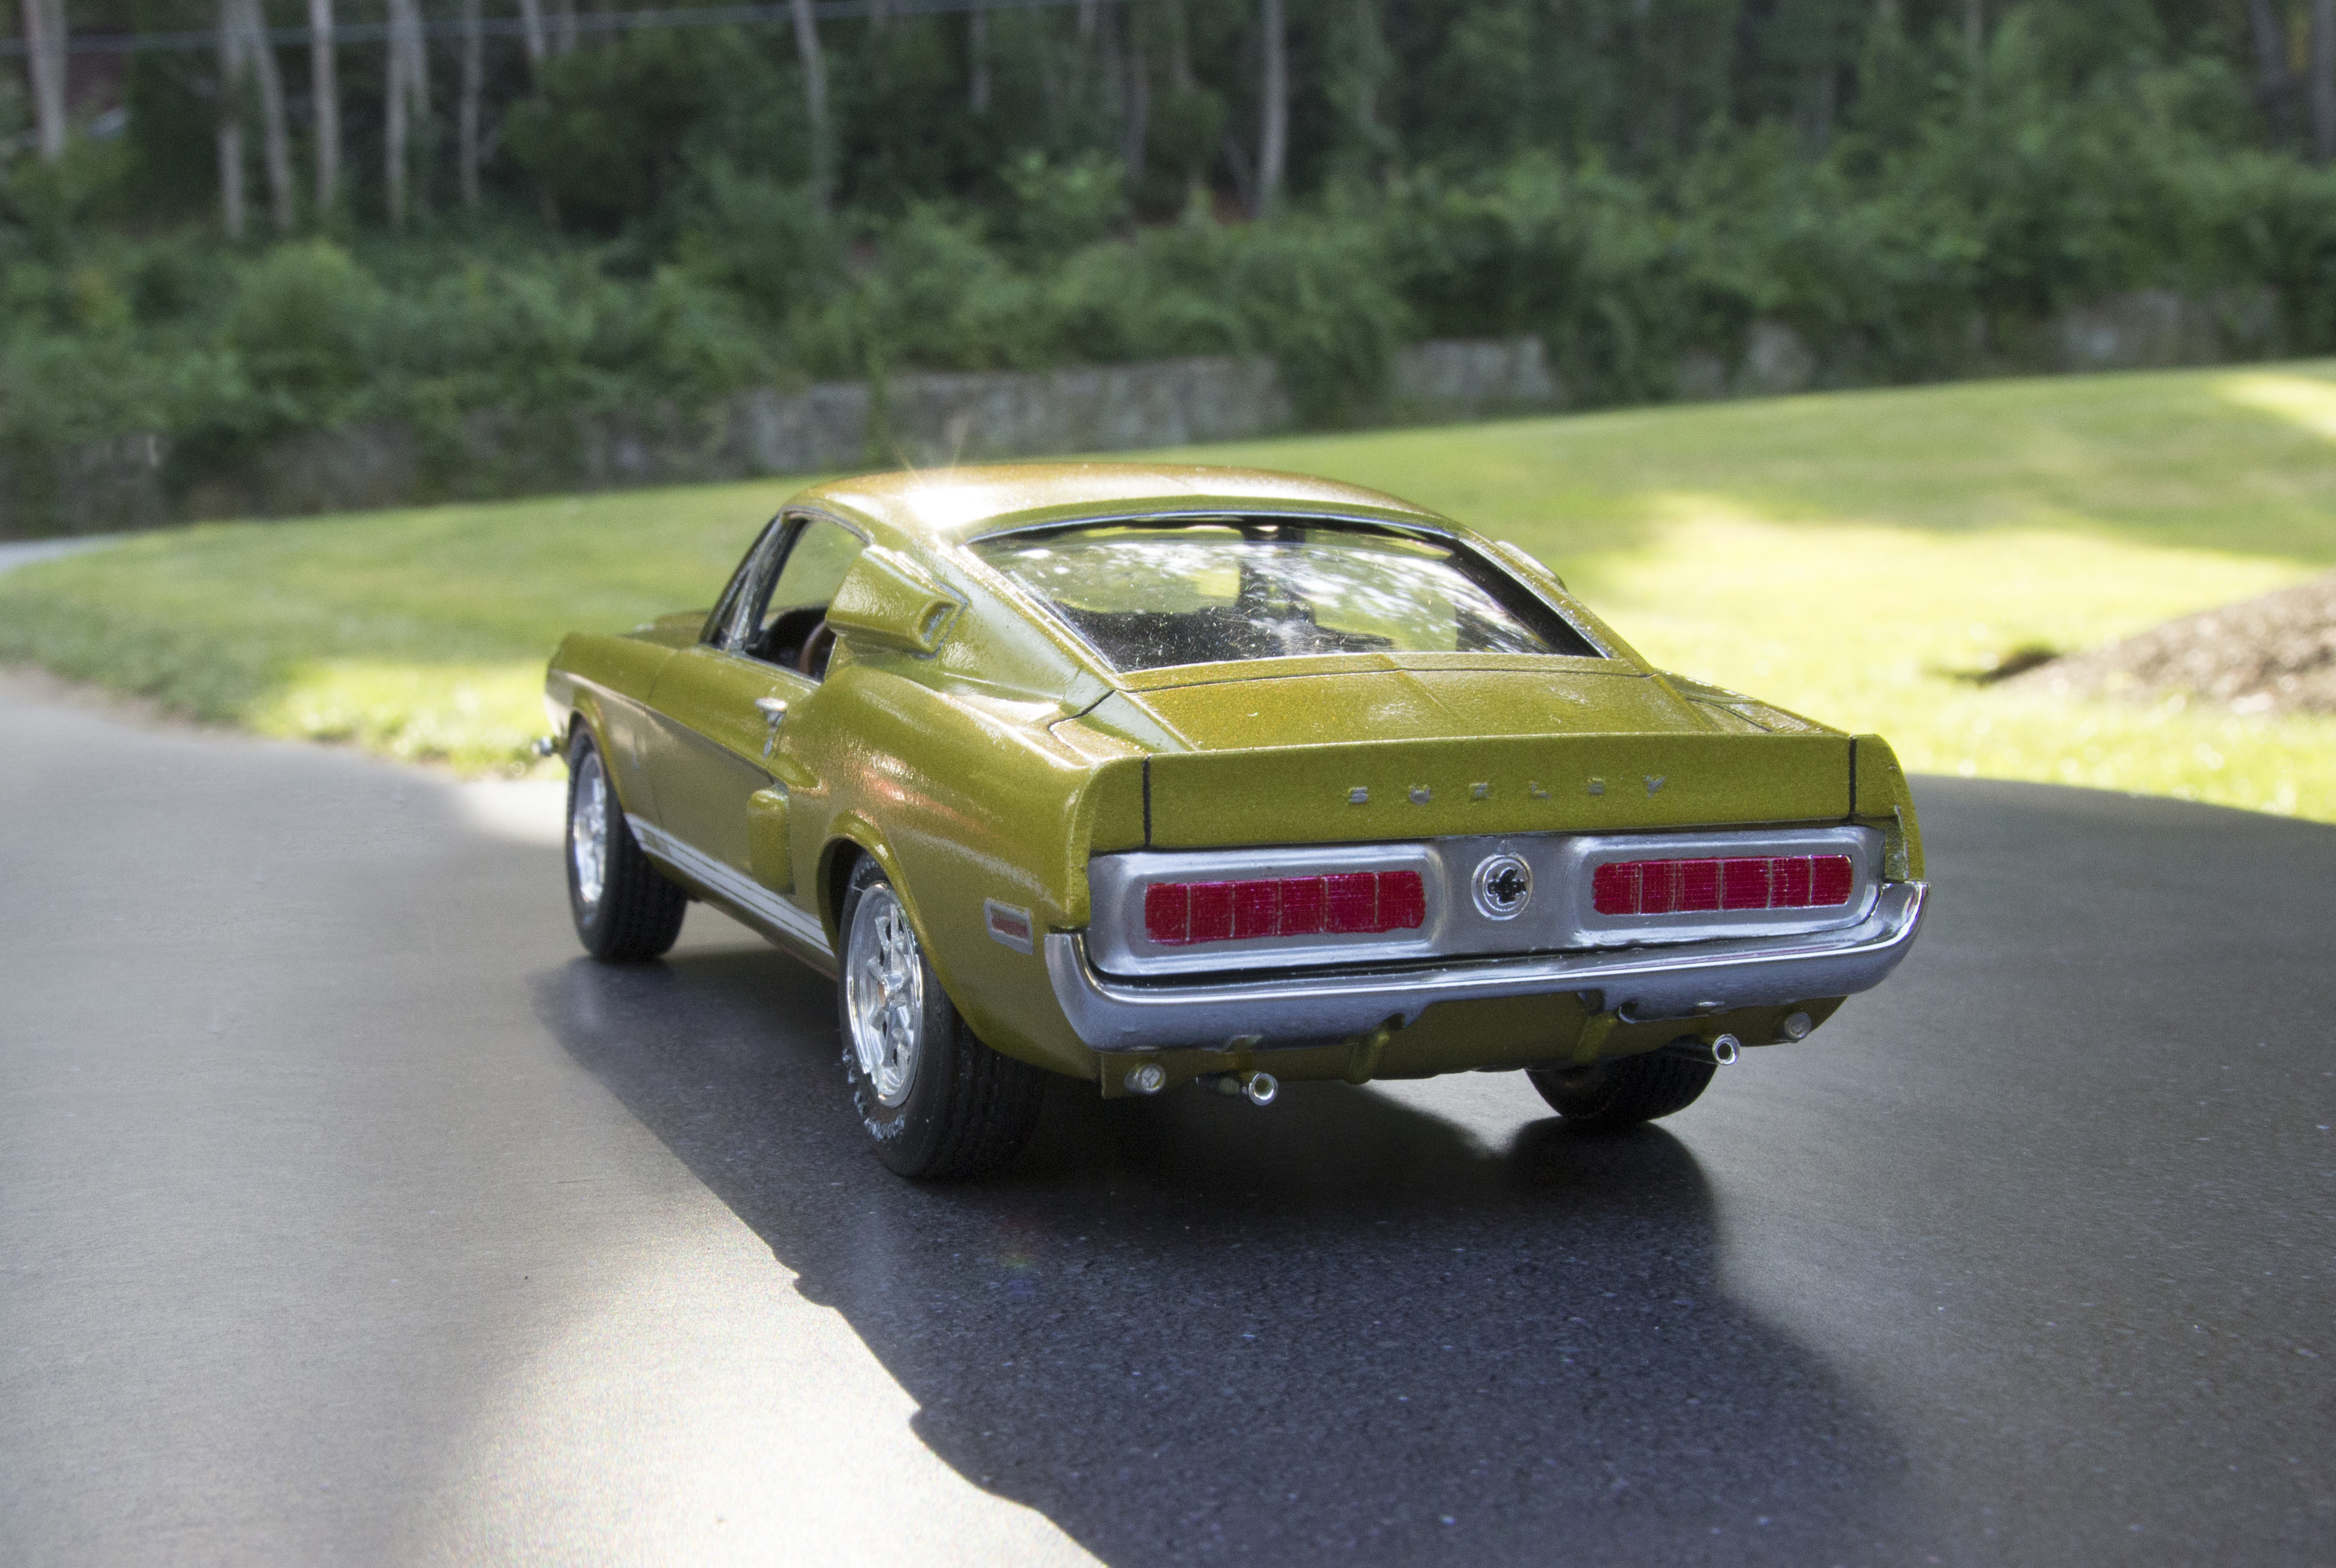
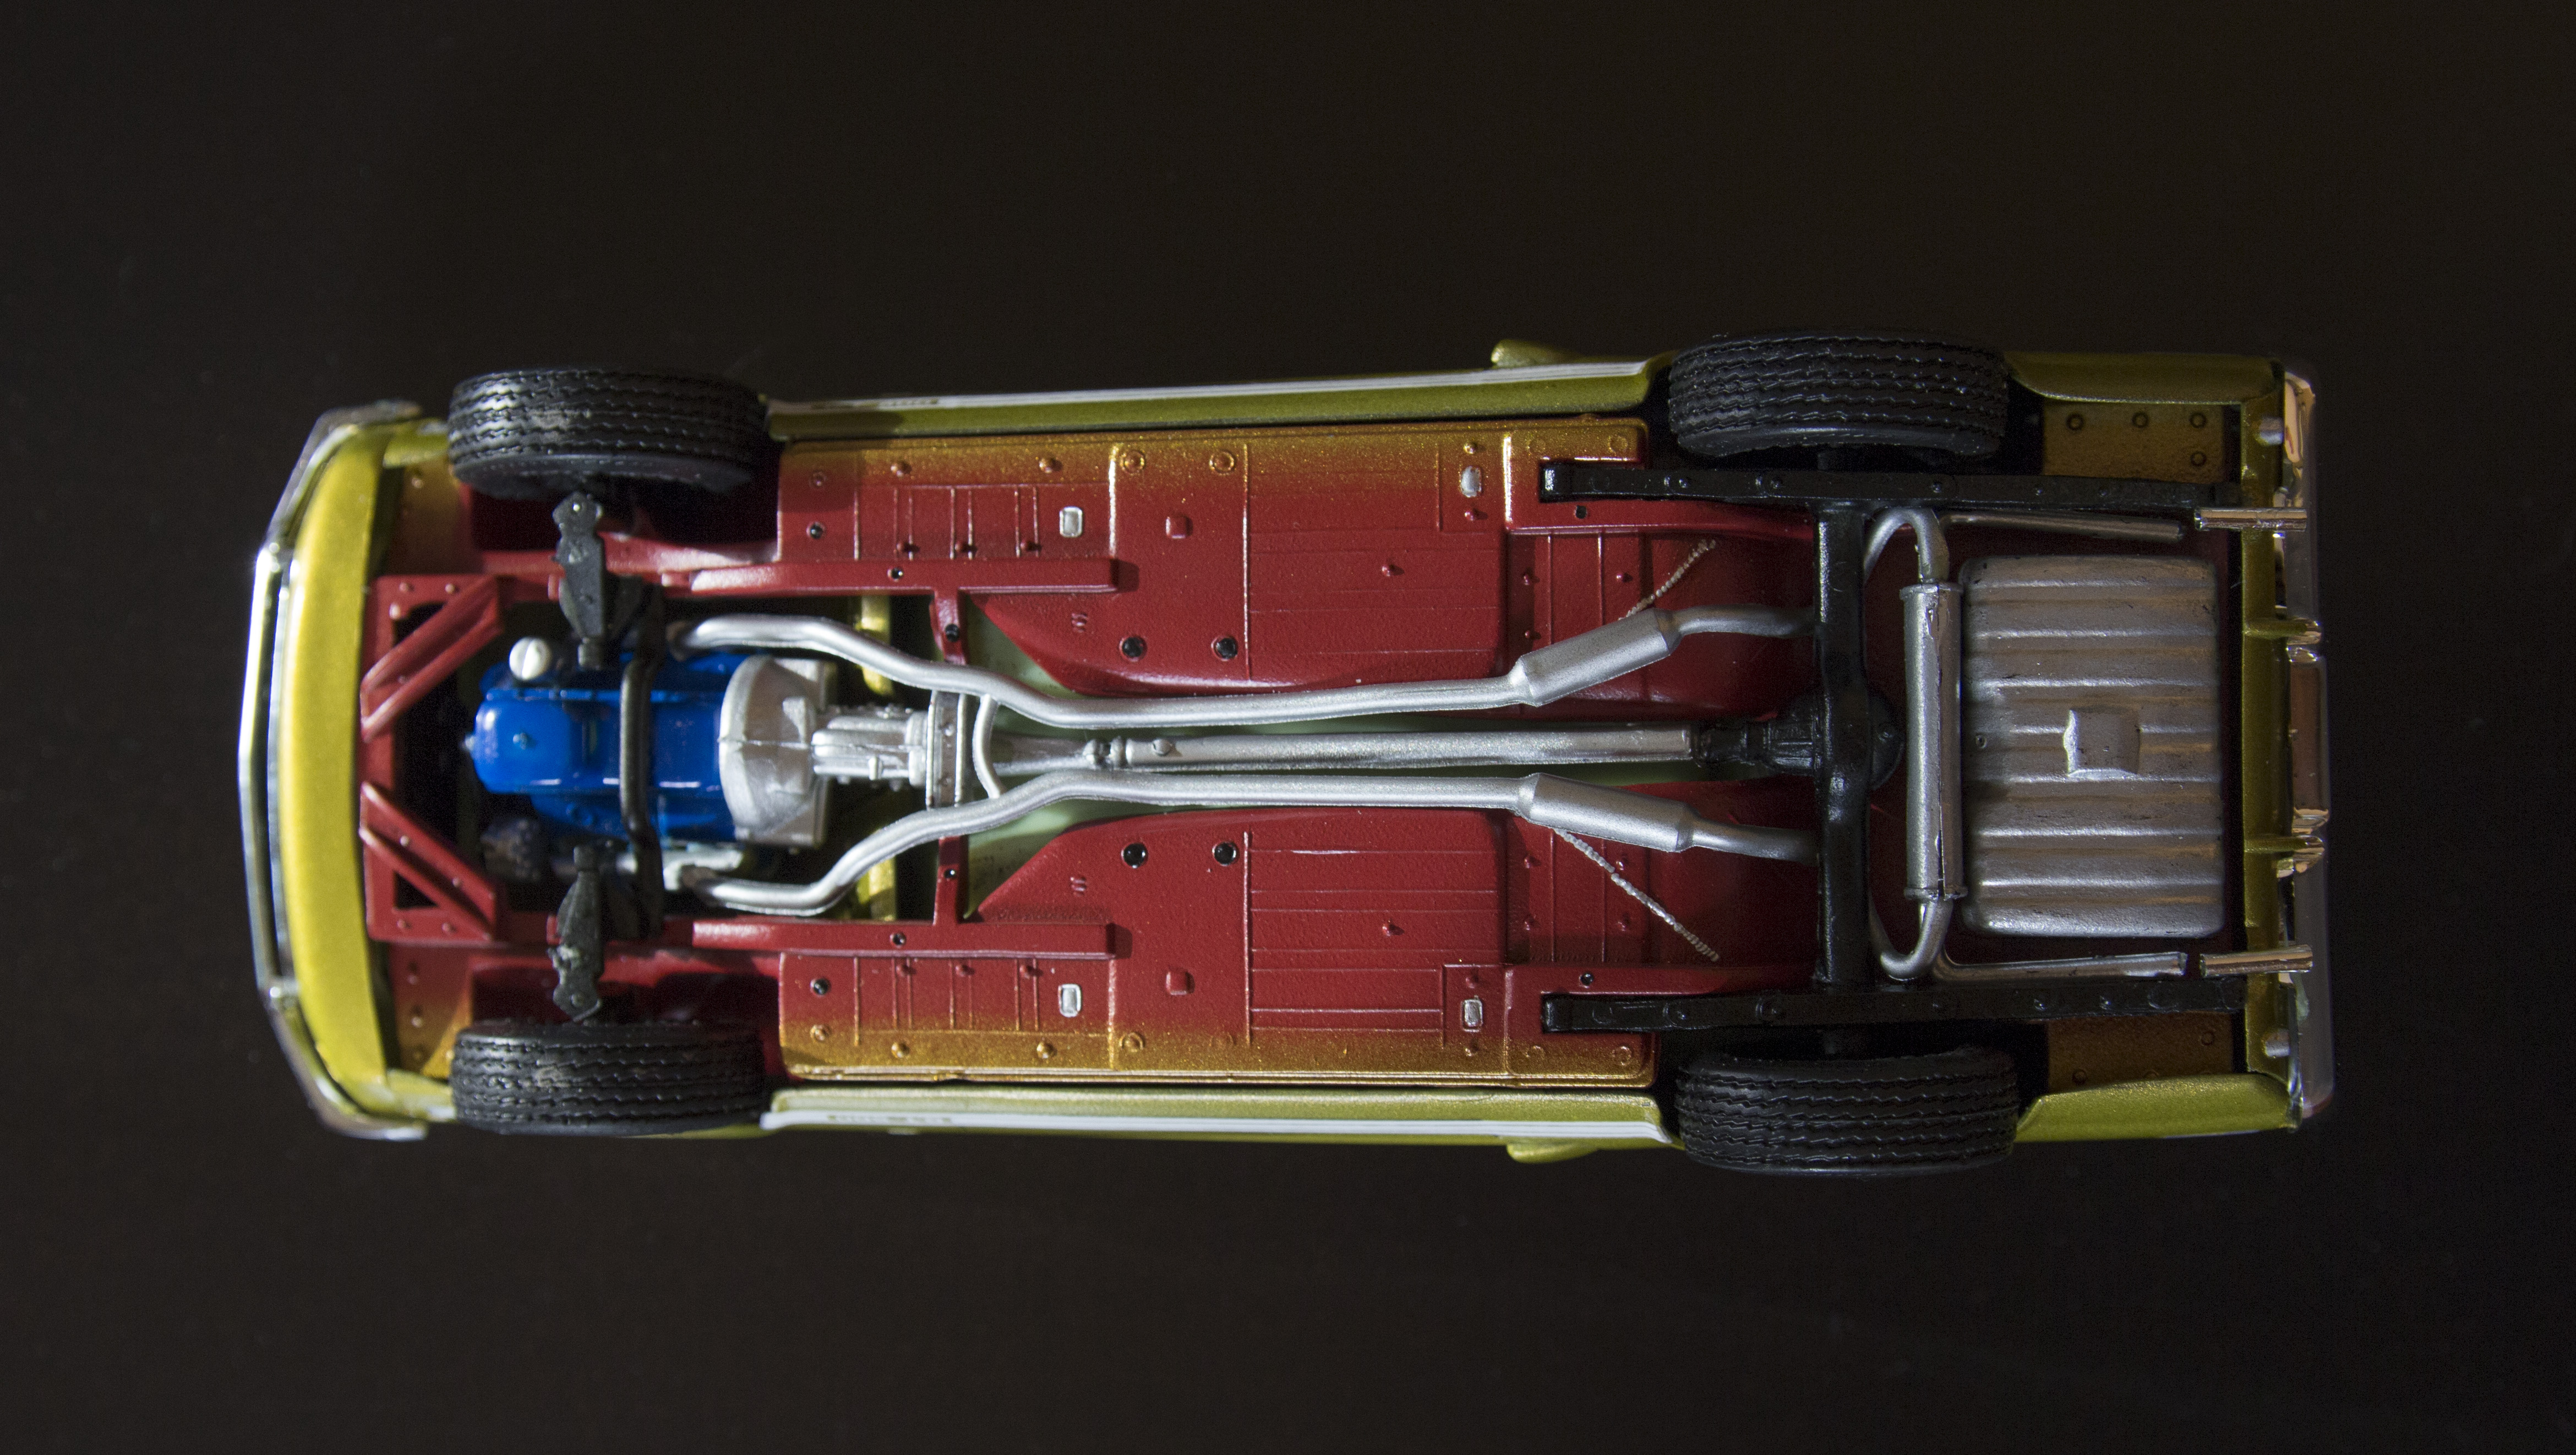
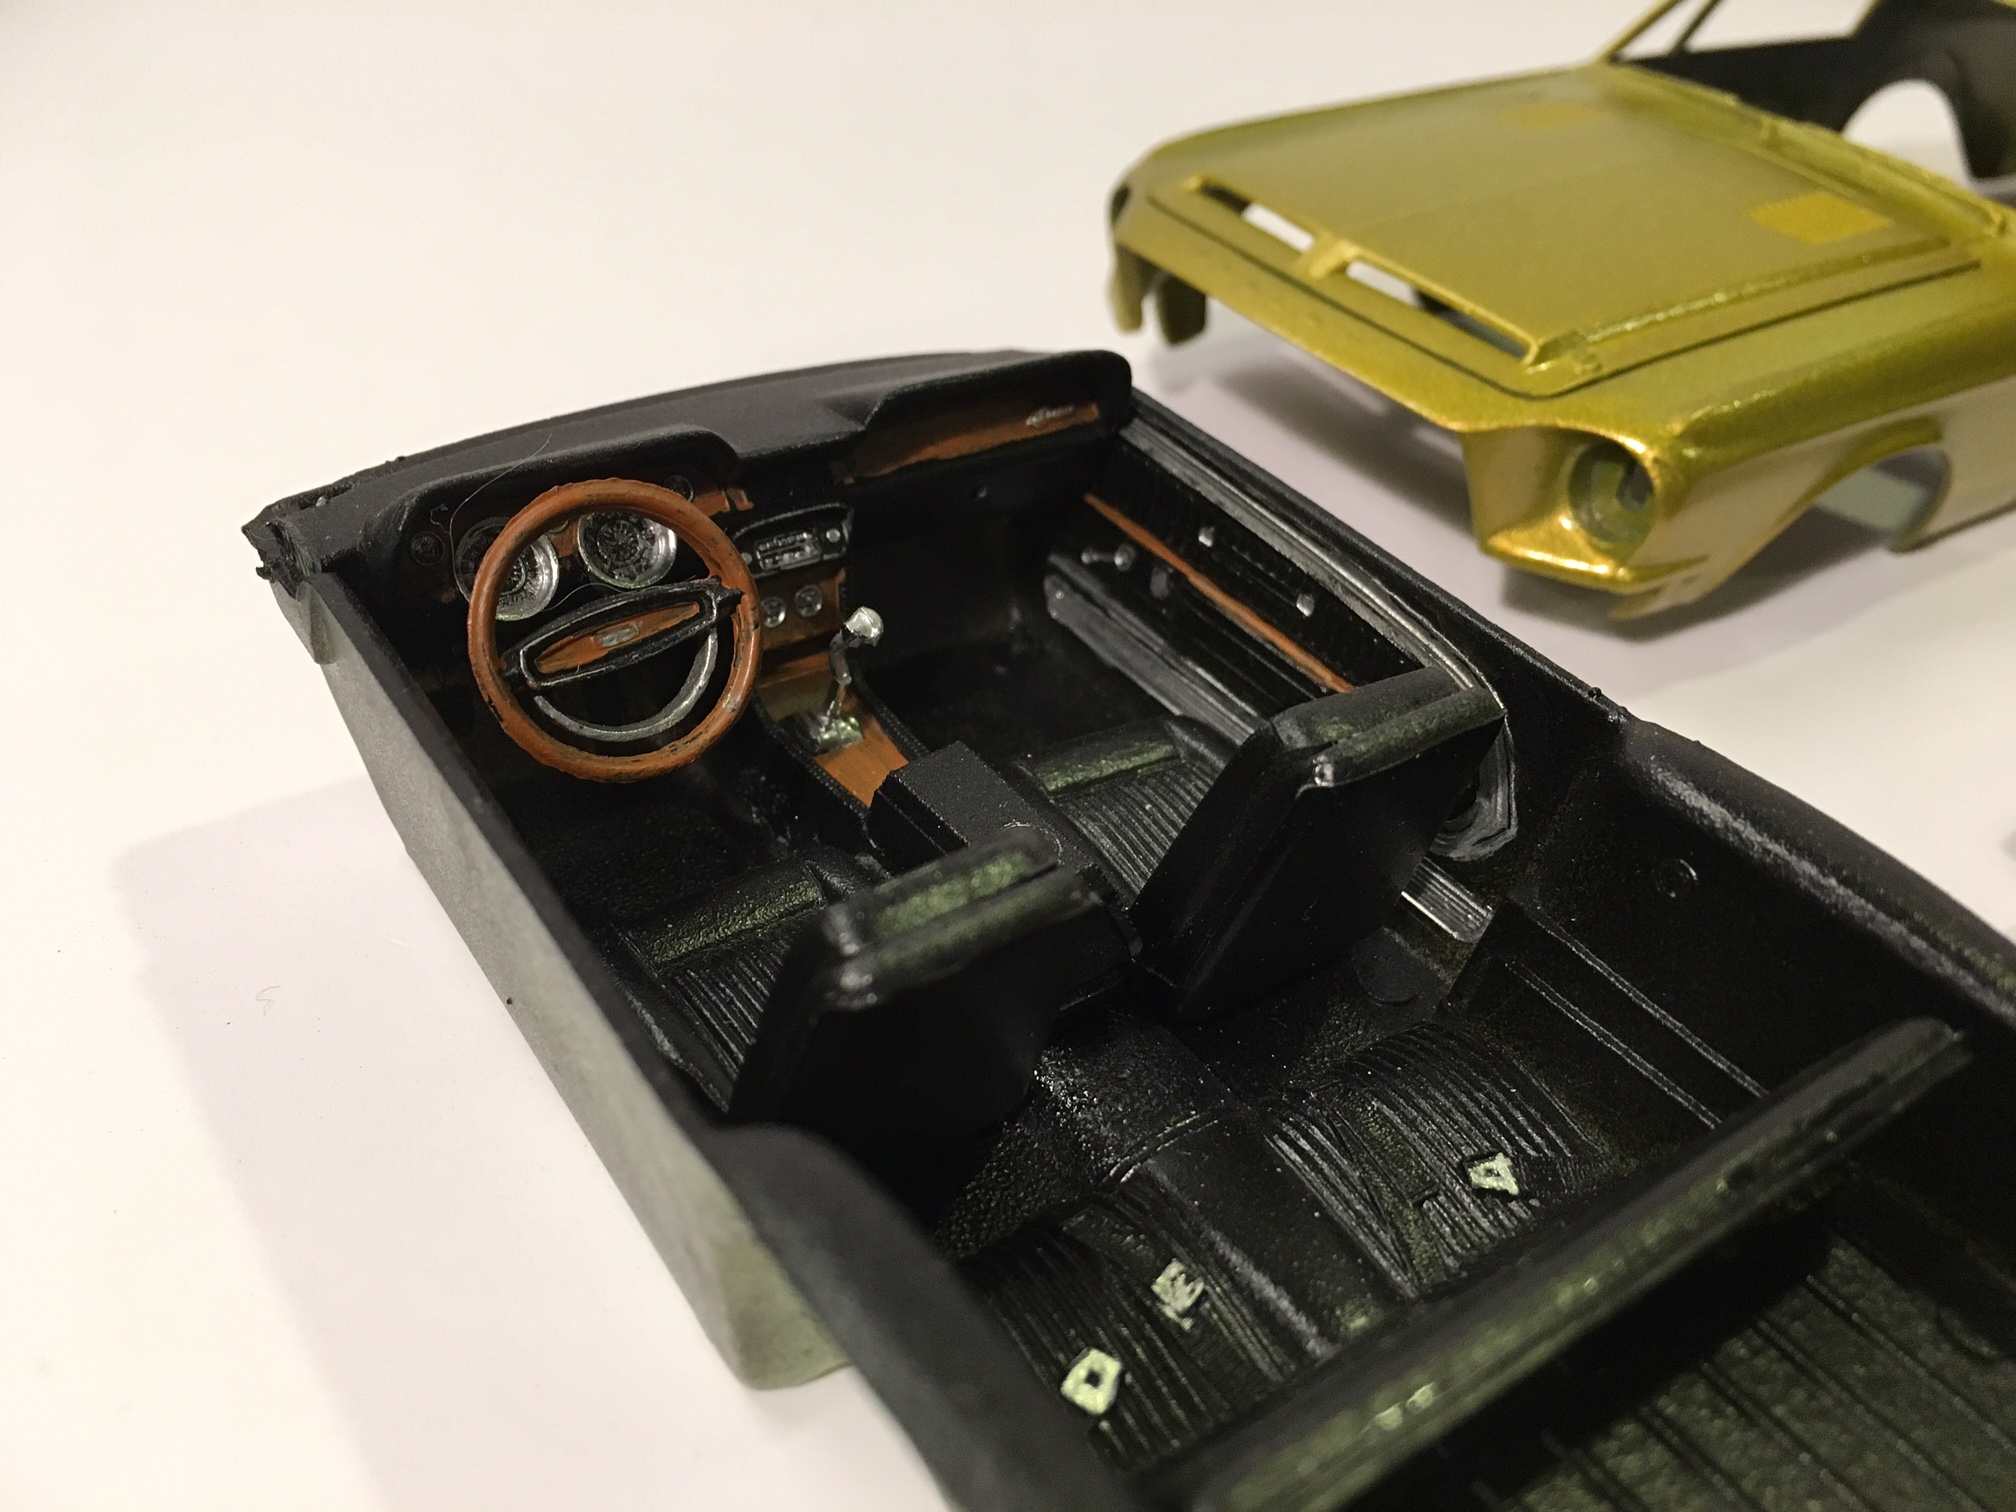
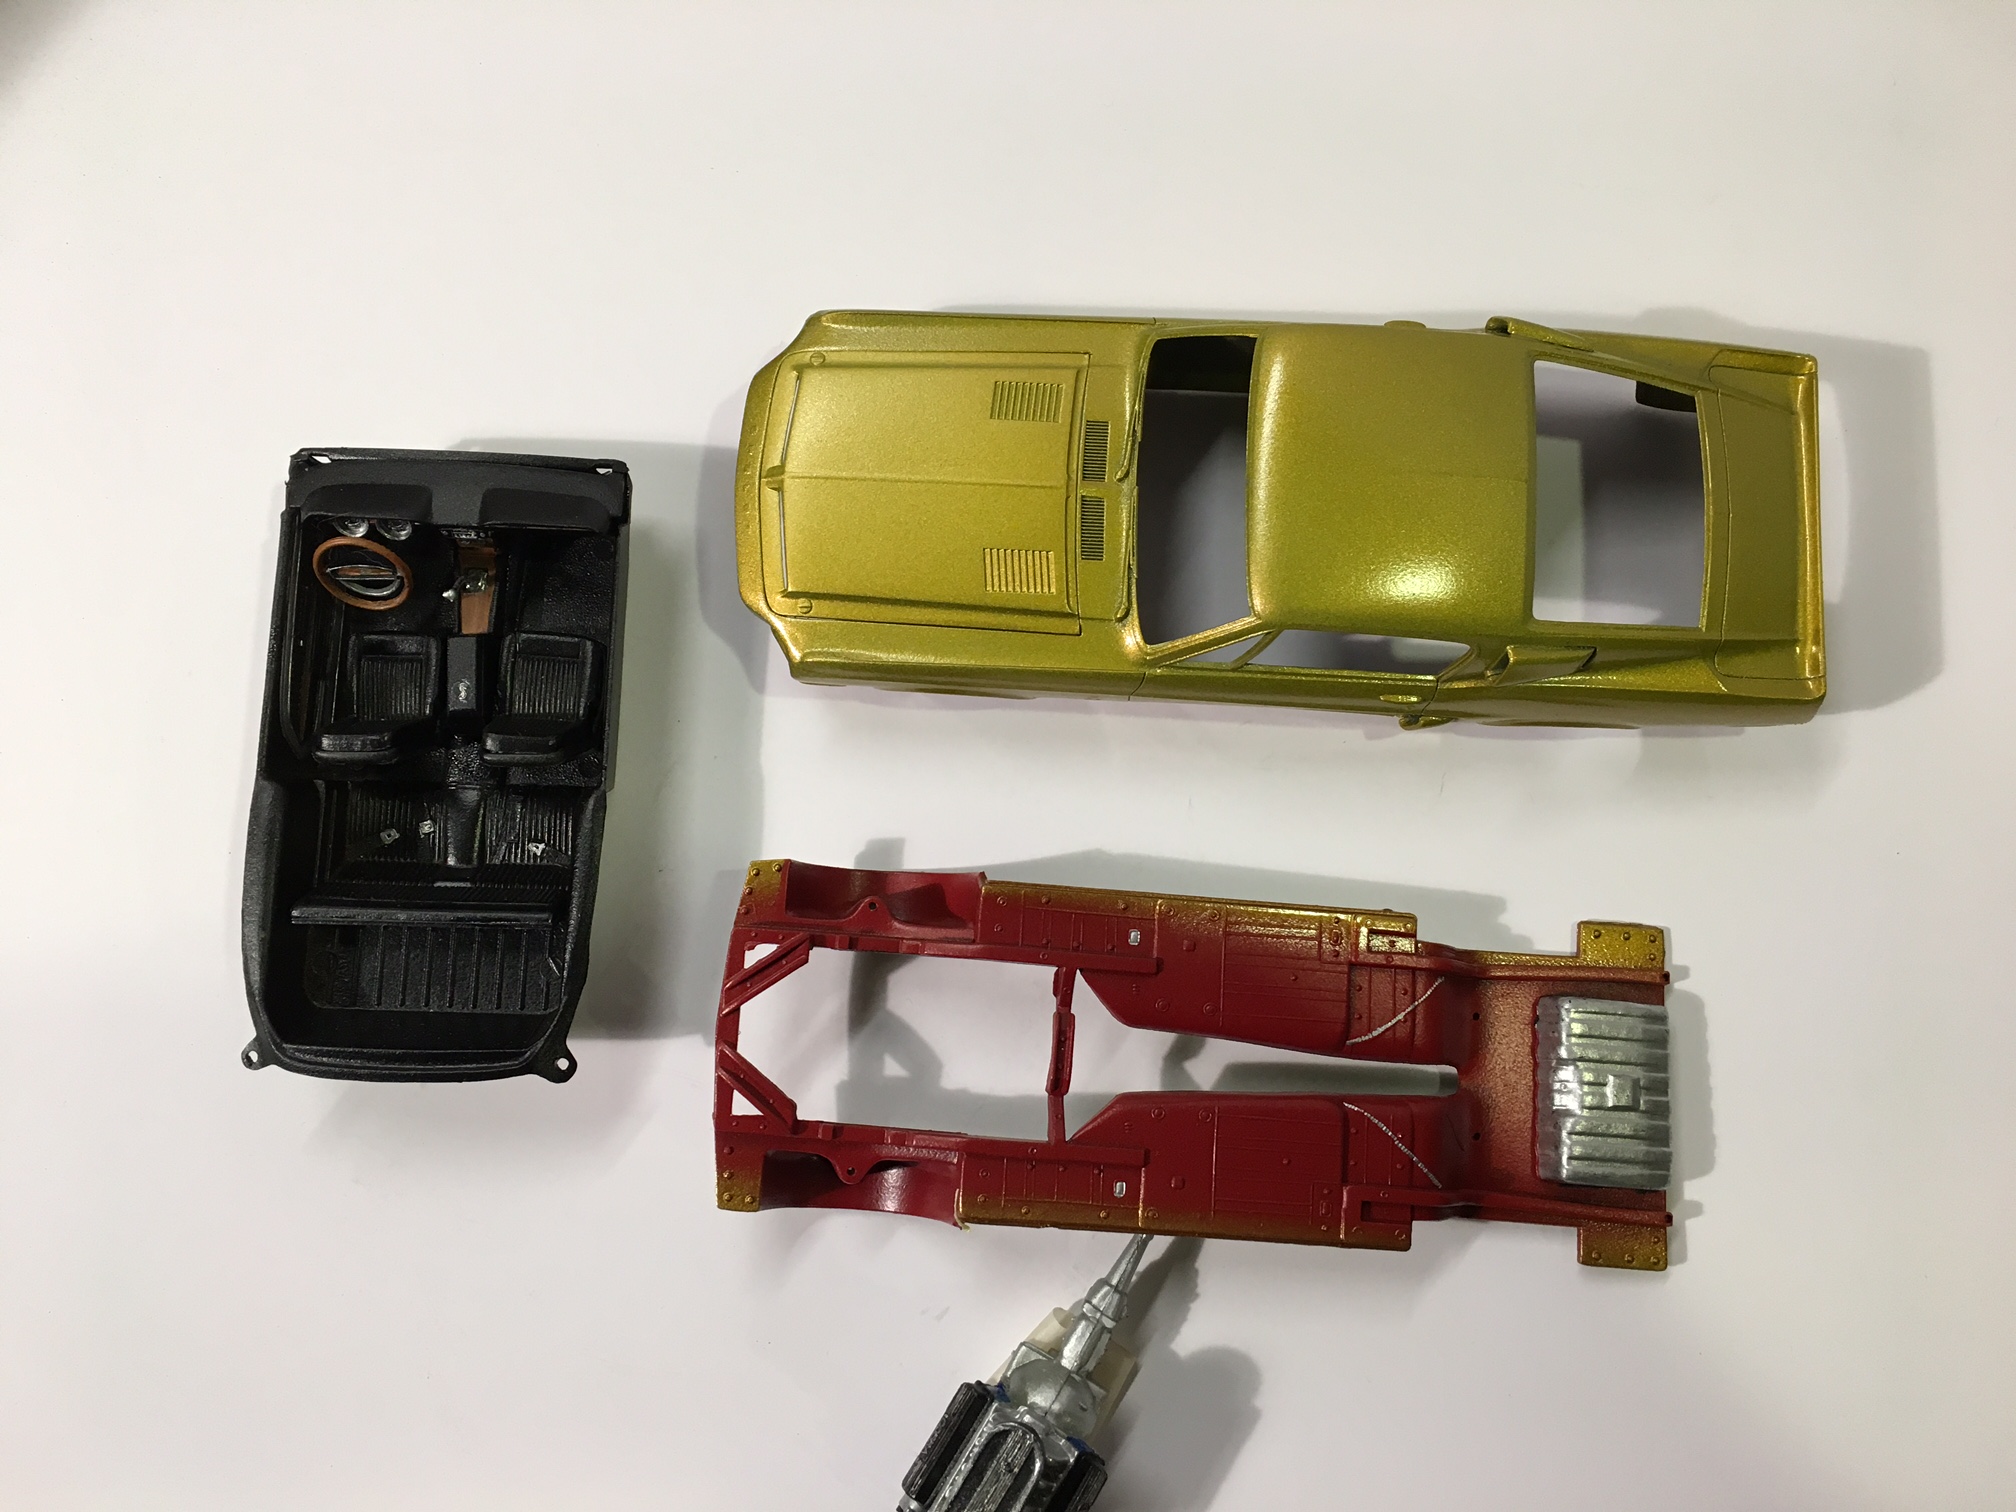
Hi all, well after about two years I finally finished my model. This is probably the best level I have done. I bought a compressor to do air brush painting, chrome marker for window trim. Stuff I never did before. Undercarriage is based on some stock looks when they resprayed at the Shelby facilities. Still had some funky stuff with fitting things (hood warped, body doesn't fit exactly flush on passenger side, etc...) But overall, very pleased on final results. Of course I love to take photos so here they are!

-
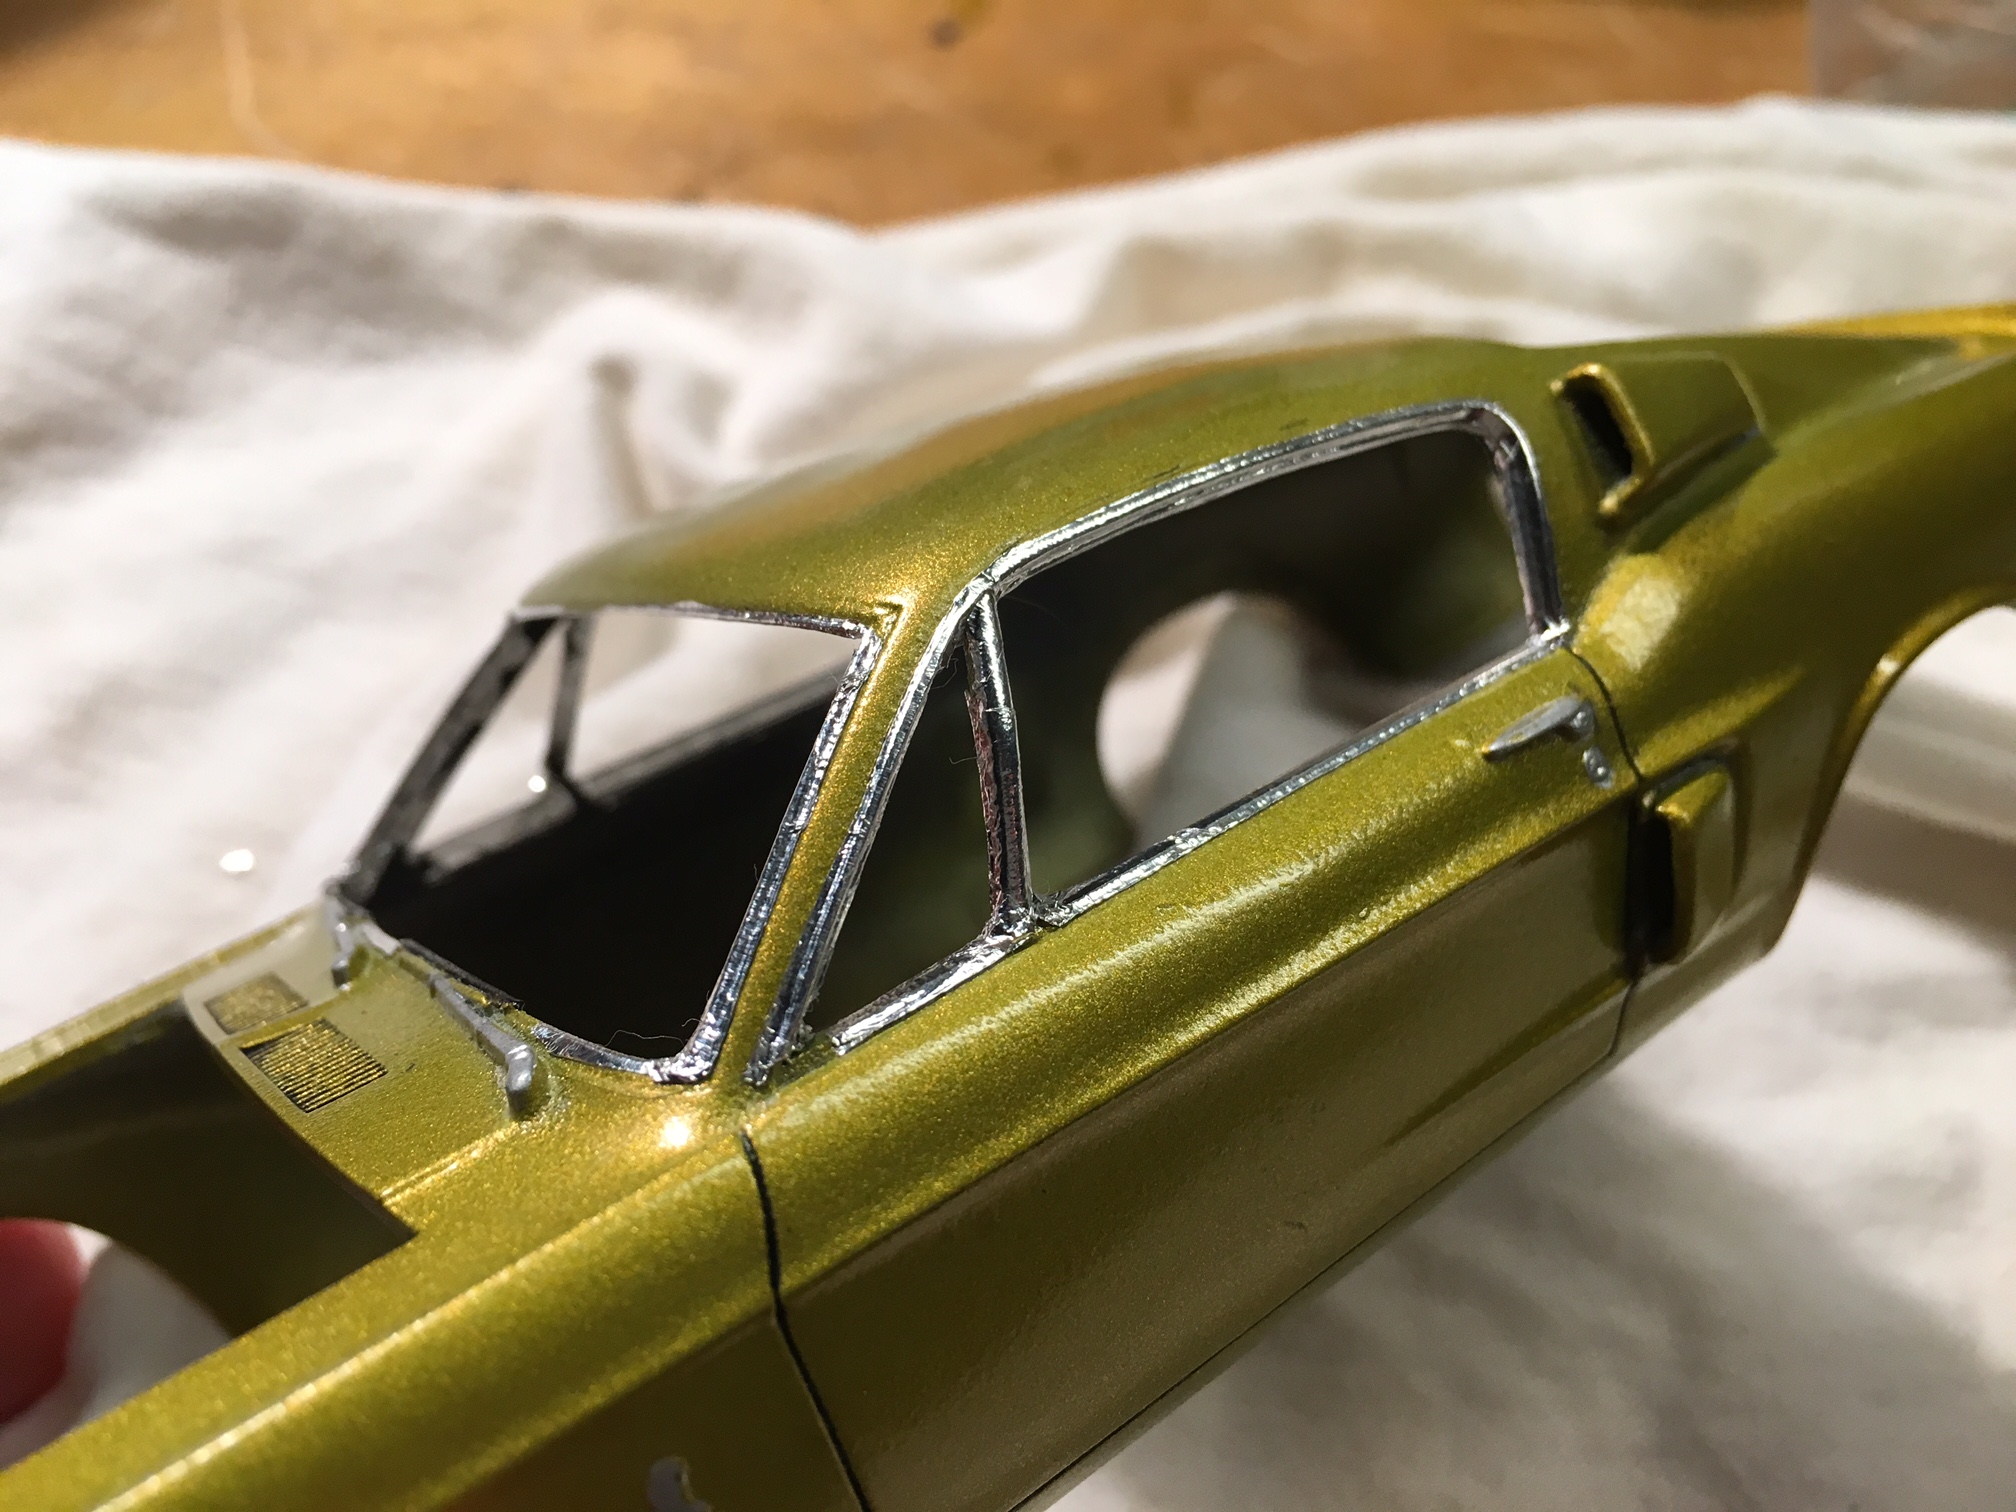
I did that. Watched some videos. Seems that all the burnishing in the world won't get it smooth. I used the Q tip to get it laid down, plus the toothpick to get into grooves. Burnished with finger, Q tip etc. Not sure what I did wrong.
-
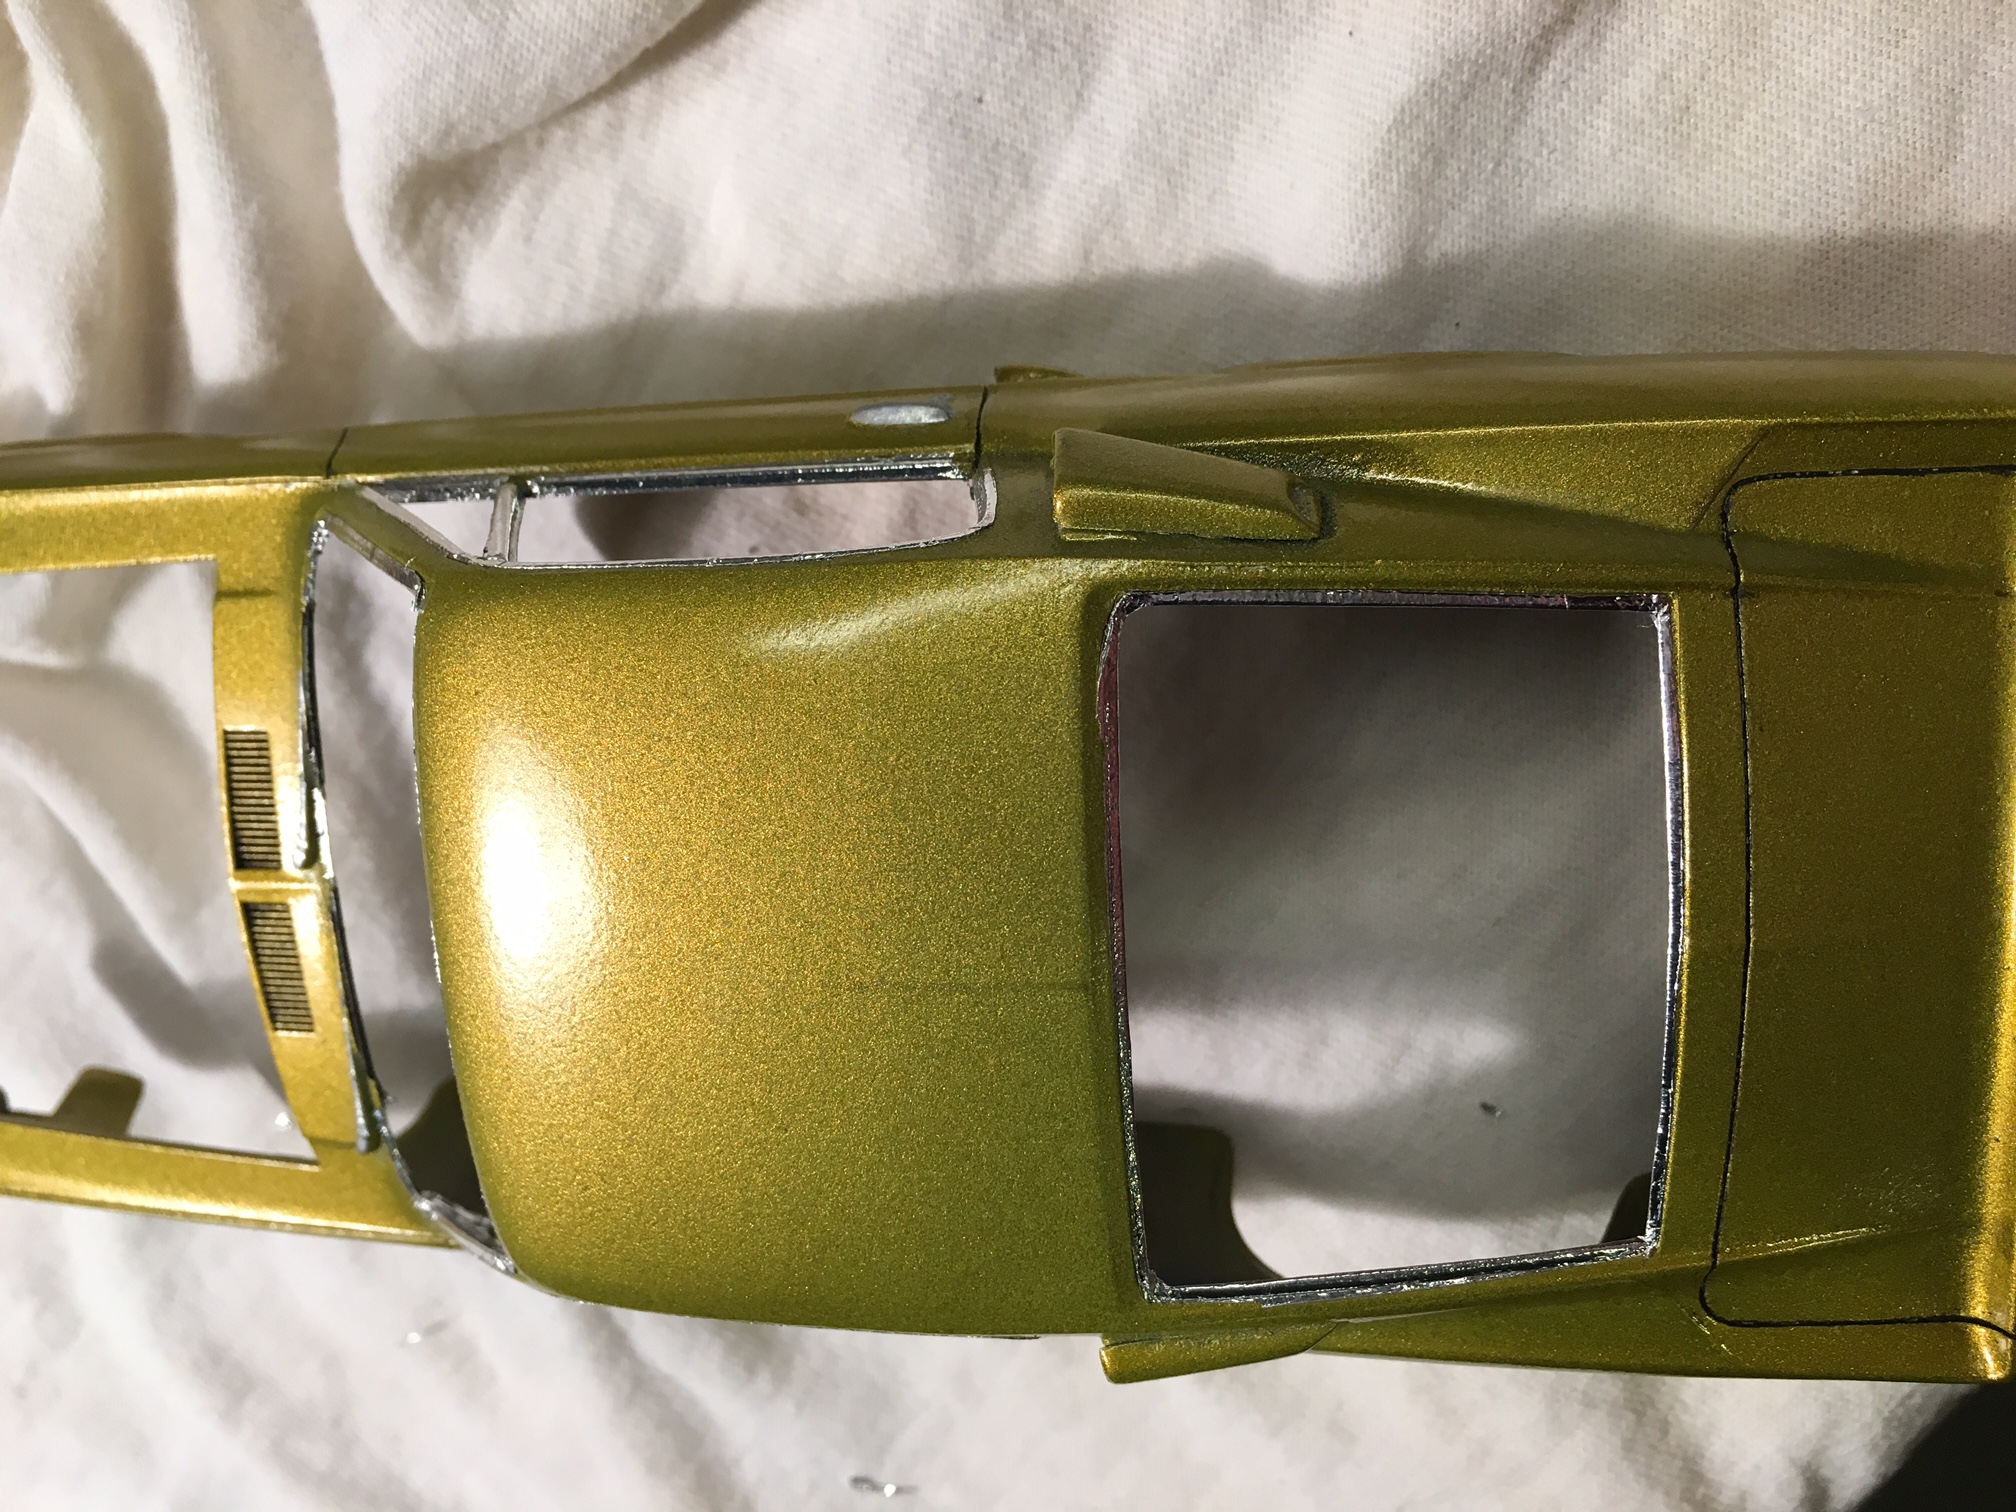
Hi all, I'm cracking away at this model and finally got to applying the Bare Metal chrome to the trim areas. This was the first time, and I did pretty well applying. I am good at doing stuff like this, but I am disappointed at the look. It looks too much like tin foil! Maybe it's not smooth enough? And I burnished etc... Anyway I am thinking of taking it off and getting one of those Molotow chrome markers I've heard about. Any recommends on the tip size?
-
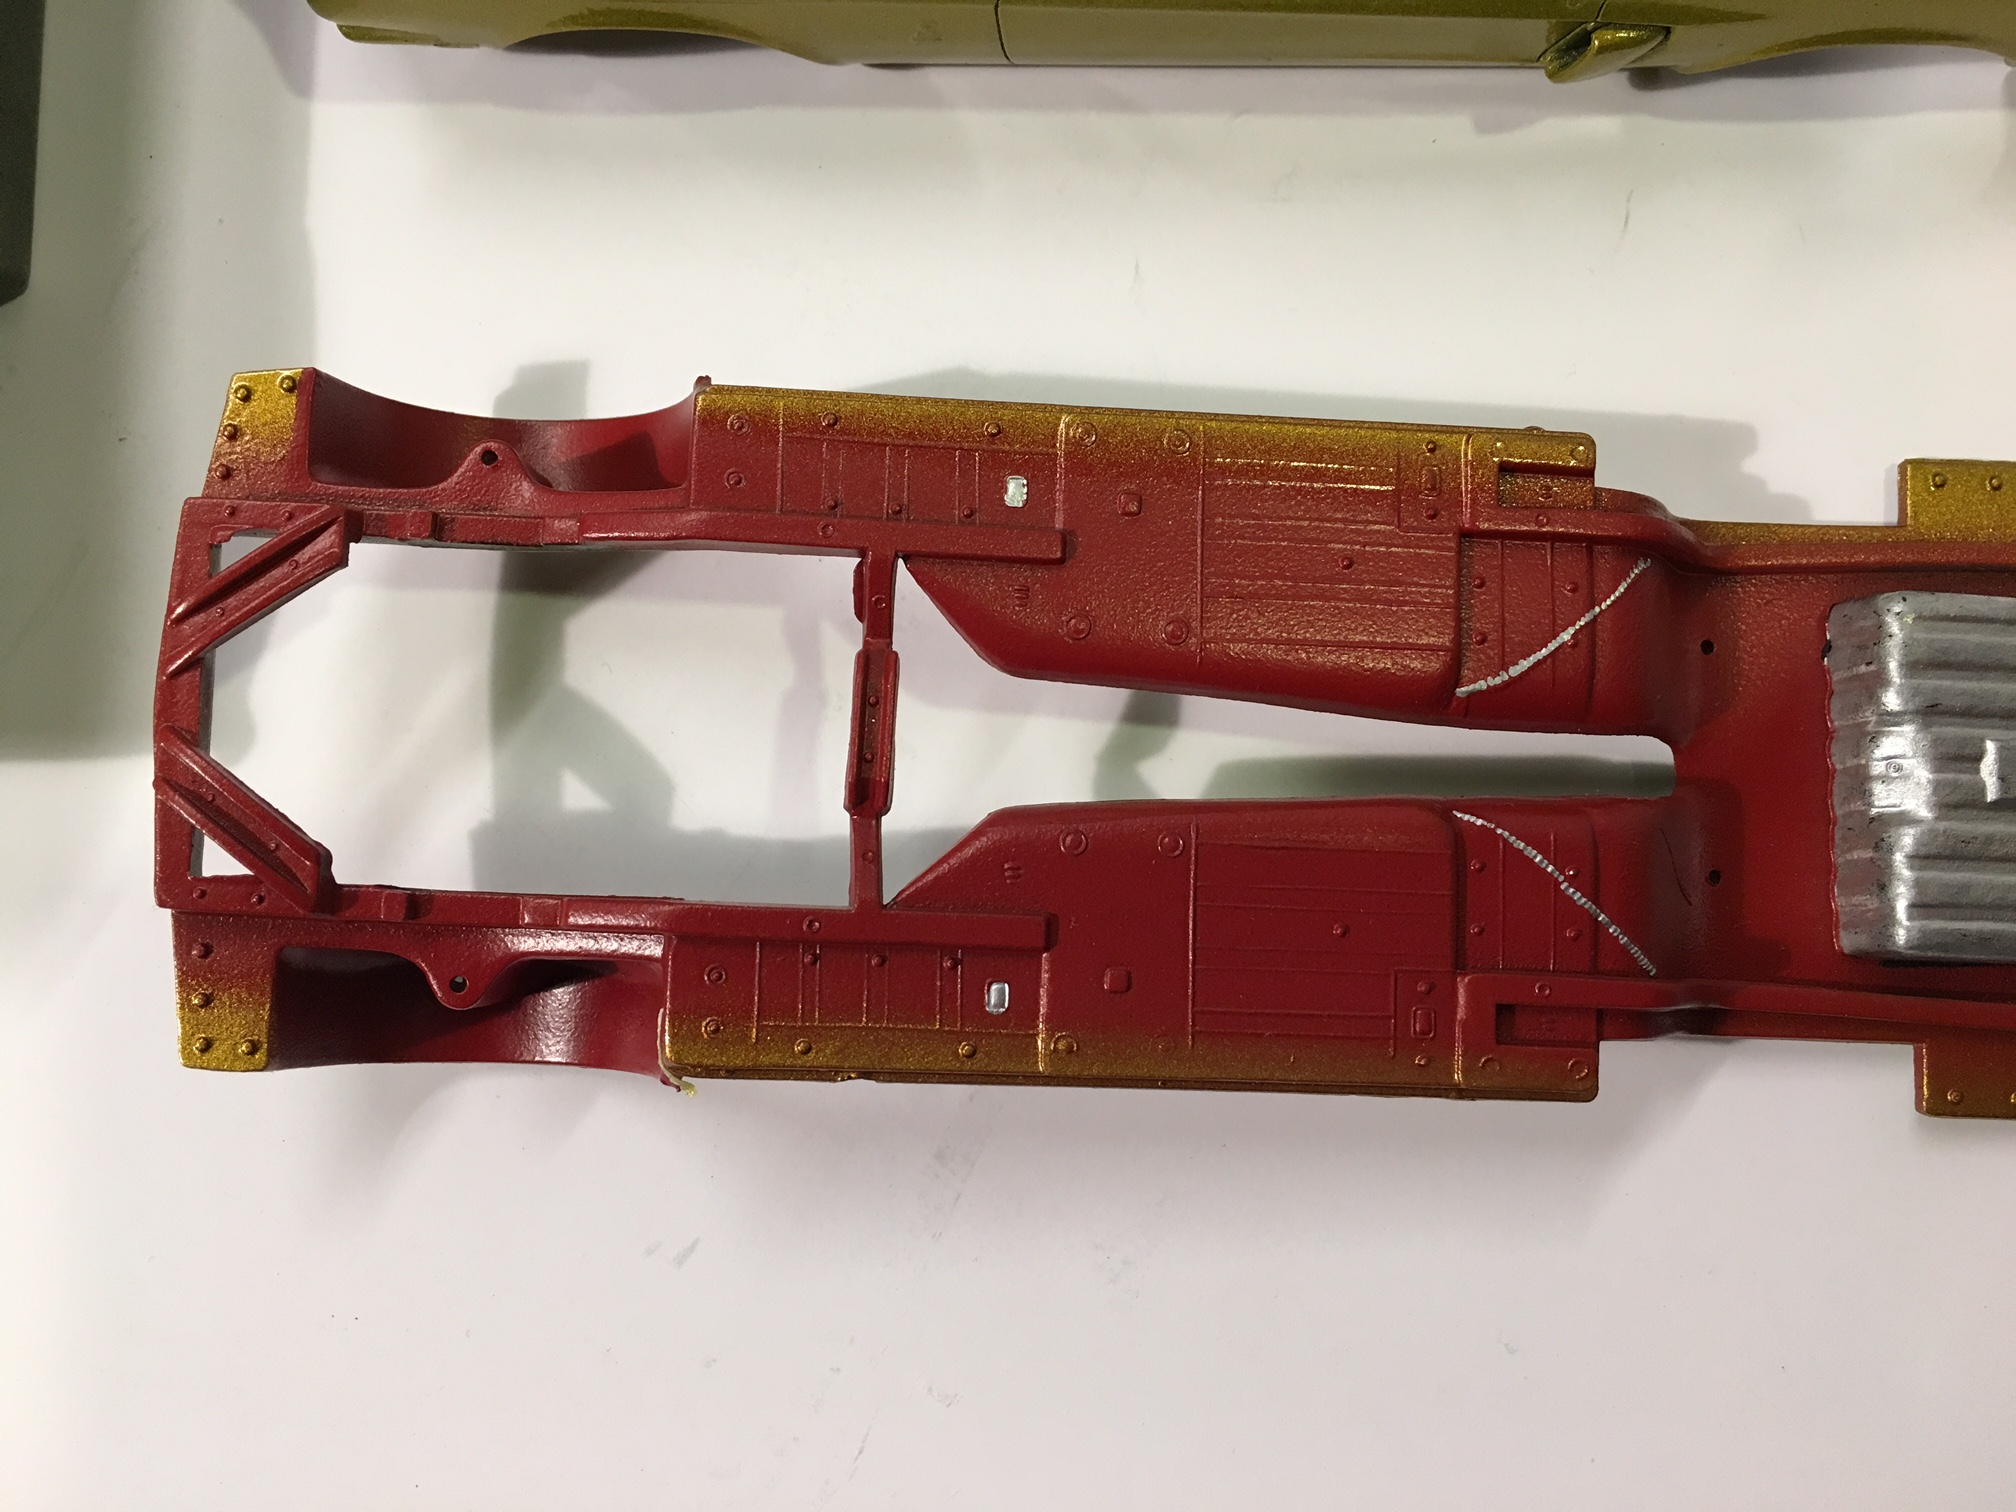
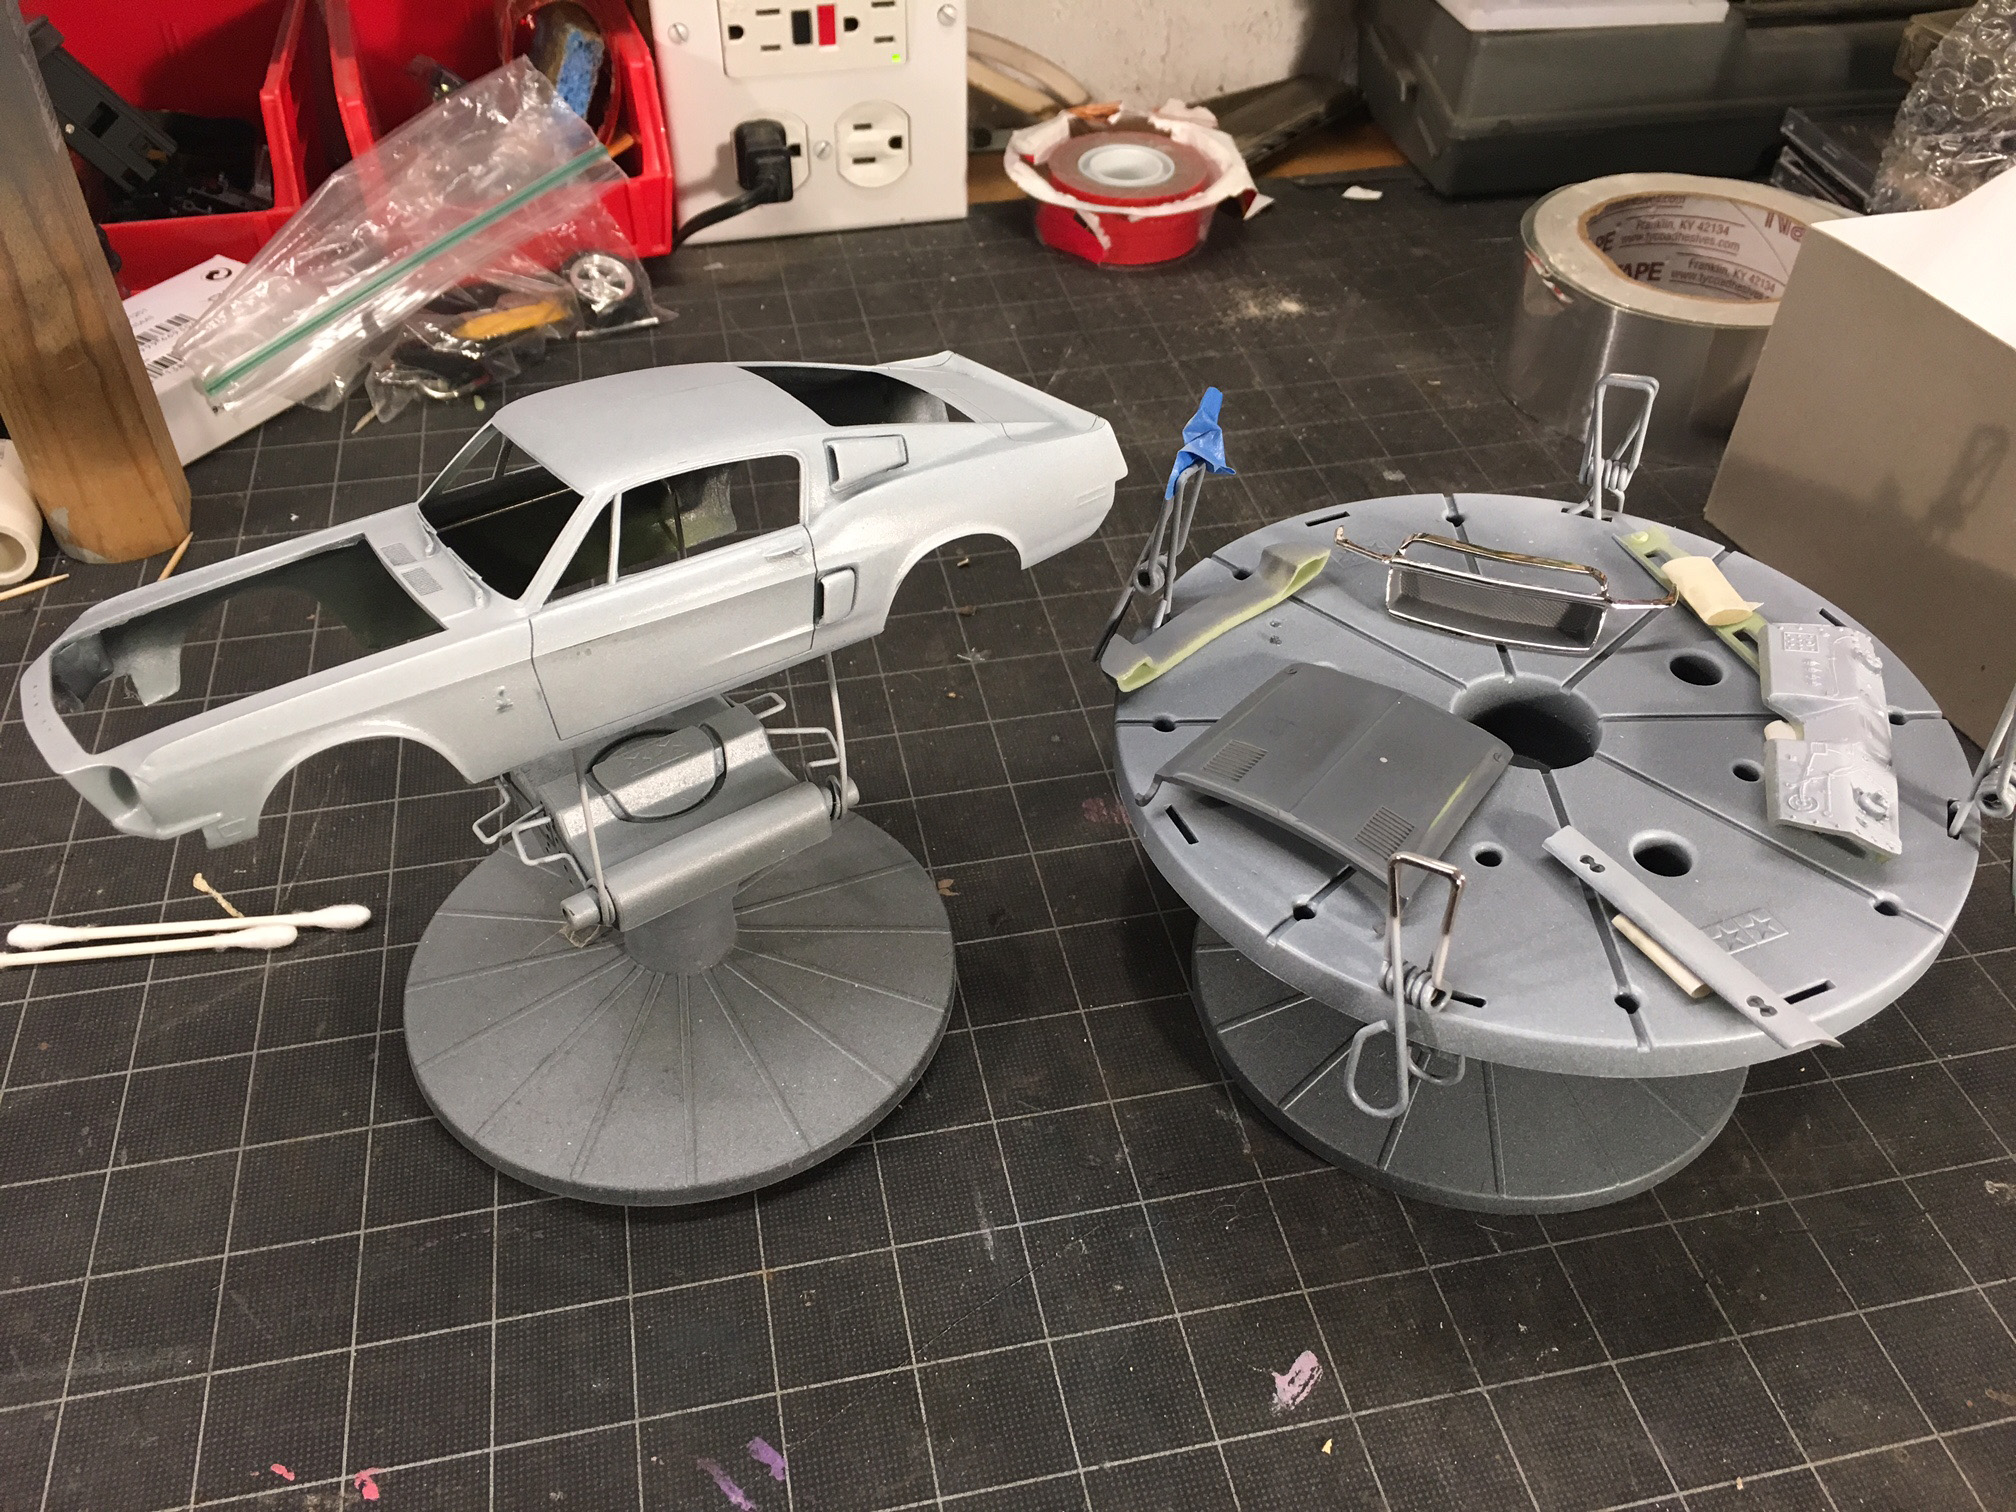
Hi all. Well this is been a slow ongoing model build. I finally got the body sprayed and just yesterday I clear coated it. This is the first time I've gone this this level of spraying using a Badger air brush. These pix are before clear coat. The undercarriage is based on some pre undercoated Shelby bodies I've seen on the web. They have that little over spray on them which I thought was cool to try. Next step is wet sanding/compounding the final clear coat. Really want to see if I can make this thing shine!
-
Hi all, I've been working on a '68 Shelby Mustang for about 1 year now. Trying to get back into it from a long time not building. I wanted to really step up my game with an air brush. I just finished with the color and now I'm going to be going to the clear coating. I looked up Shelby Mustangs and they had this cool "over spray" on bottom of car when it was not undercoated. So I went the red undercarriage and did a little overspray for the bottom. Haven't done much else yet.
-
First time airbrushing - mist coats and timing
Mutato replied to Mutato's topic in General Automotive Talk (Trucks and Cars)
That totally makes sense. I have to get that second jar! -
Hi all, I finally bought an airbrush and am ready for doing the color coat to my Shelby Mustang. I got a good feel for the airbrush by spraying the primer. Moving to the final color. I was looking at youtube videos and see people talking about doing light mist coats and waiting around 15 minutes between coats. While you're waiting, what happens to your airbrush? Wouldn't it start drying up inside and getting clogged? Do I have to clean it and then reload paint every 15 minutes? Or can I wrap the airbrush in cellophane wrap to keep it "wet". Please let me know how to proceed! Much appreciated!
-
Amazing job!
-
Looks great. My father had that exact car (sans the wheels!) back in the late 60's early 70's. I remember it having a white interior with plastic covering the seats! He wrecked it on the highway and then had it repainted a real bright yellow. He said so the big rigs could see him in the fog (long commute on Rte 95 between CT and RI). Looked horrible.
-
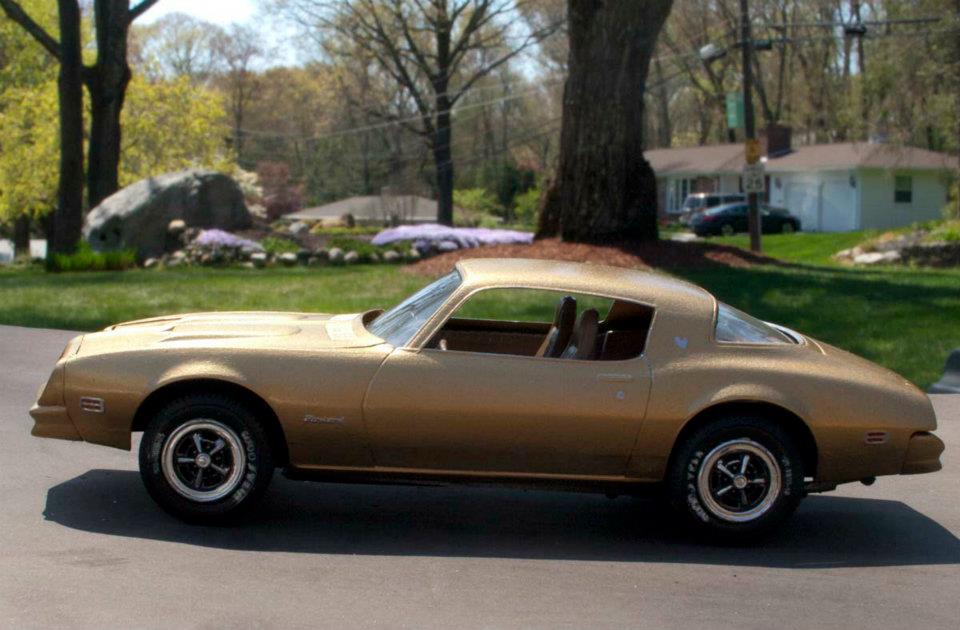
Love it! I also made a "Rockford Files" firebird out of my 1976 Formula model. It started out as the yellow with black when I built it back in the early 80's. Then the cat knocked it of the shelf and it broke apart into pieces. So I decided to repaint and rebuild.
-
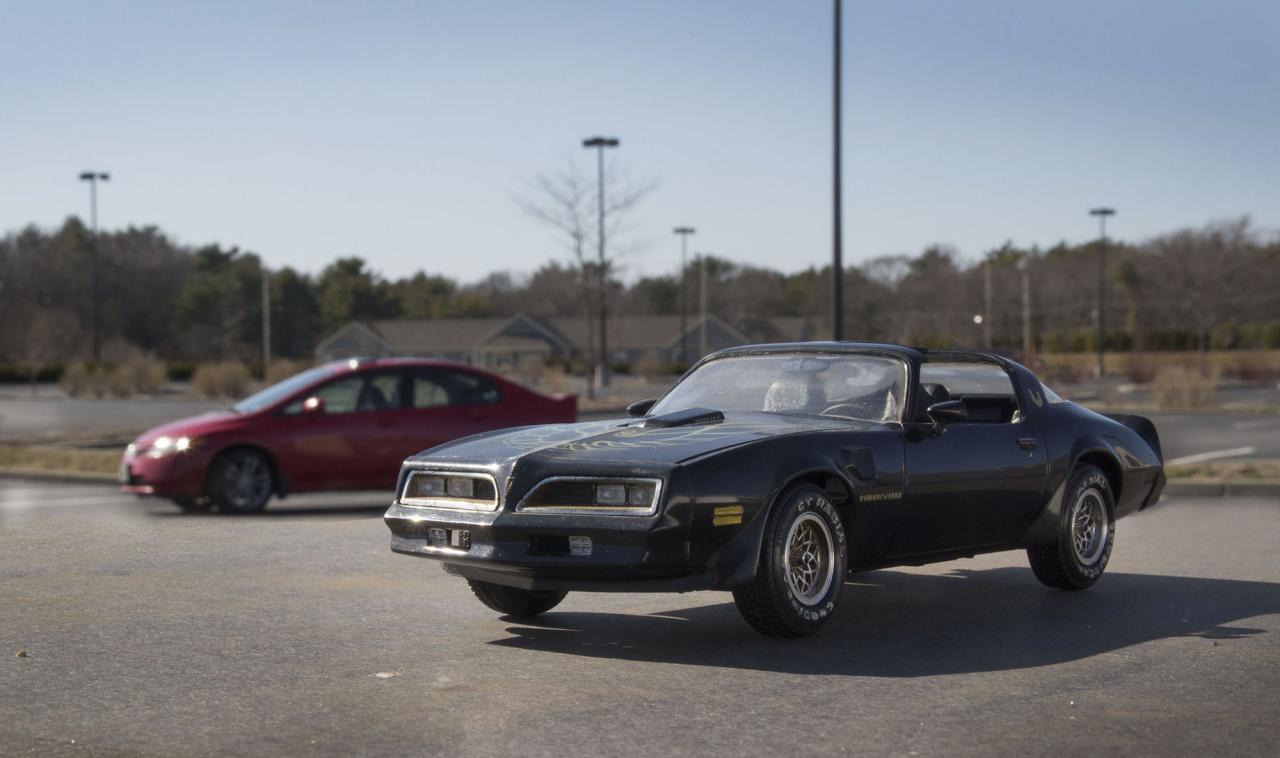
It's the same sun! I shot this in the parking lot. This was done in one shot. I only blurred the hard edge where the board meets the real lot.The scale looks almost realistic because I moved the model car really far away from the real Honda. It's actually sitting on a portable workbench with a milk crate to bring added height. I then secured my fake parking lot board on that and placed model. I have to try and make a usable range of "asphalt" type boards so depending on where you shoot it, it looks better.
-
Hi all, Just wanted to share an old model I dusted off and photographed with my real car in the background (2007 Honda Civic Si Sedan). Perched the Trans Am on a gray board, did a little photoshop to blend the board into parking lot. I really need to build a nice realistic parking lot to match better. I made this model sometime around 1980.
-
Awesome job! Here's some serious inspiration. The '57 1957 Plymouth Belvedere Sport Coupe Time Capsule. Opened up in 2007: http://www.pbase.com/brianmckay/1957_plymouth_belvedere%20 http://www.allpar.com/history/auto-shows/time-capsule.html
-
I saw an exact one, though non split window, drive through my town a couple of weeks ago. It was amazing!
-
Sad News - Caroll Shelby
Mutato replied to martinfan5's topic in General Automotive Talk (Trucks and Cars)
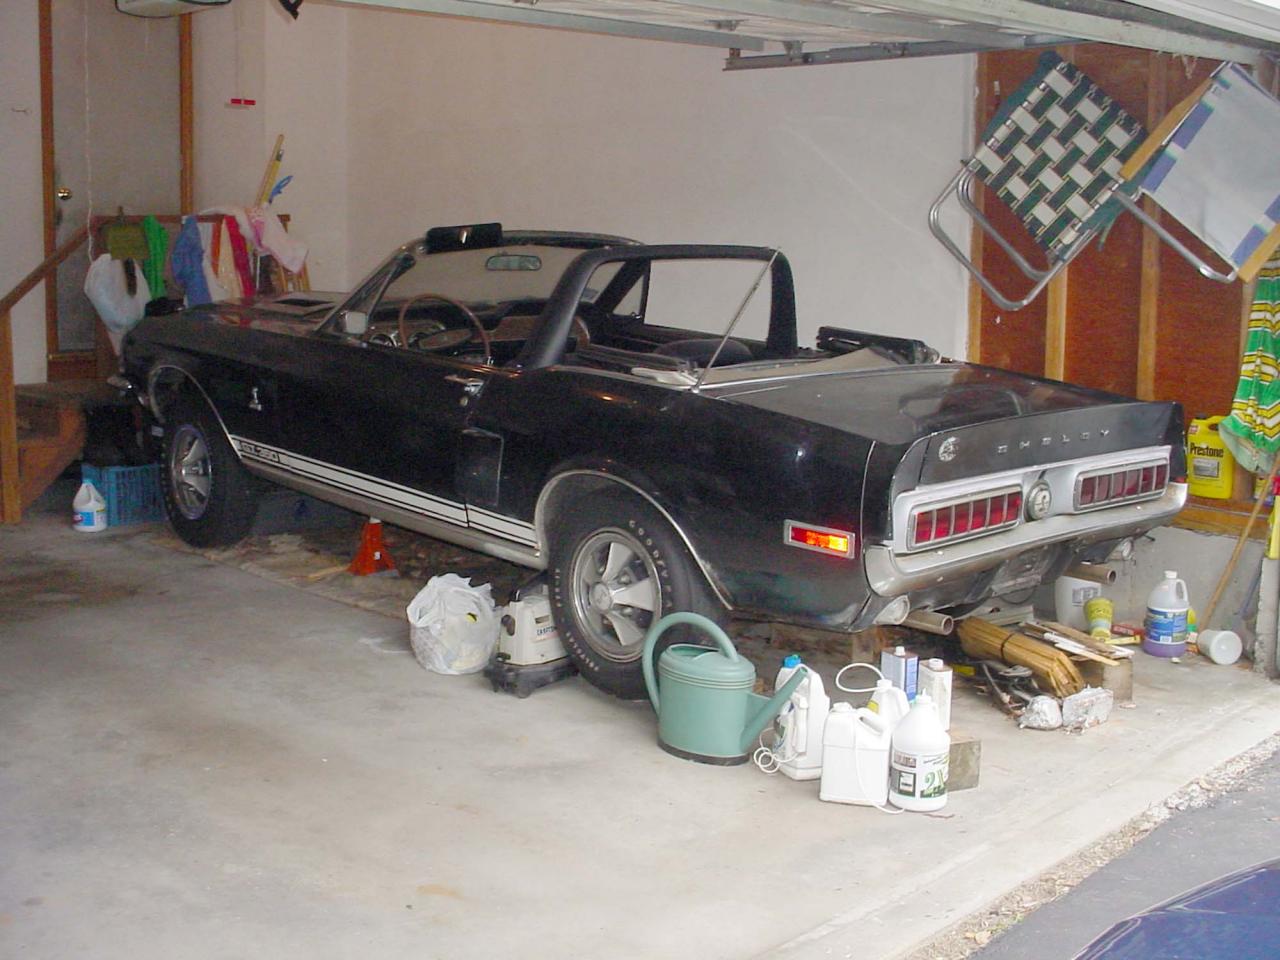
My neighbor owned a '68 Shelby Mustang convertible (GT350). I was a young teen when I first saw it and thought it looked like a Mustang, but with funny grill and tail lights. He kept that car garaged for about 30 years and recently sold it. It was in stock condition and probably needed restoration, but he got $70 grand for it! I visited him a few months before he sold it. It was awesome to get to check it out one last time. That was in 2006. Here are some photos. I was thinking of trying my first "modded" model and take one of those Shelby Mustang (fastbacks) kits and cut it to make a convertible and replica of my this.
-
Hi all, I resurrected one of my "dusty old" old models and fixed it up. It's missing a few pieces, but at least I got the front wheels back on! It's a larger scale sized one. About 10" long. Took it out for a photo shoot in the late afternoon sun. http://s183.photobuc...Window%20Model/
-
I think you should try the "fake" nighttime thing. Find a good outdoor place that looks cool. Get there right before the sun goes down. Shoot into the sunset direction. Don't use your flash. BUT, make sure you have a light reflector to bounce/reflect light back onto the model. I have a piece of white foamcore with a cardboard easel back on it. It can stand on it's own without me trying to hold it and take photos. If you try and shoot without it, you'll get a complete silhouette of the car. But in the end, it'll look like early evening and really cool. Try shooting the car multiple positions and take a TON of photos. You will have better chances of getting a great shot. I always say "shoot first. Sort later"! ; - ) You can also experiment with adding clip lamp type lights to add some lights here and there. Image it's in a parking lot at night. There's those tall lights shining down on the lot. So you can have your real "dusk" and add some fake parking lot lighting from above.
-
Anyone here play guitar?
Mutato replied to SuperStockAndy's topic in General Automotive Talk (Trucks and Cars)
I've been playing for about 30 years. Played out live in local clubs in a band for about 5 years. Still have my electrics and added a few. A couple of acoustics as well. -
I started a topic in general to show off the "dusty" collection!
-
New member! Dusty model collection
Mutato replied to Mutato's topic in General Automotive Talk (Trucks and Cars)
Yeah, just the glue alone is a huge improvement! I'd love to get into a air sprayer for fine painting. Also, my 47 year old eyes have trouble seeing up close! I have to take OFF my glasses for close up work. I think I need some sort of magnifying glass that hangs in front of the work! -
New member! Dusty model collection
Mutato replied to Mutato's topic in General Automotive Talk (Trucks and Cars)
Thanks all. Yes, I was blown away at the level of painting and detailing. Not sure if i'll ever get to that level, but maybe will get closer to it. -
New member! Dusty model collection
Mutato replied to Mutato's topic in General Automotive Talk (Trucks and Cars)
Yeah, especially the blue Jeep Wrangler! That'll get me far! -
Hi all. Glad to have found this site. I posted this morning about my Firebird "Rockford Files" conversion (in other section). But I wanted to show you my model collection. Everything but one car was built around 30-32 years ago. Some awesome Firebirds, Corvettes, Jeep. Only recent build was a truck. That got me dabbling in it again. Then when I fixed my Firebird Formula and made it into the "Rockford Files" car, that got me REALLY excited. So I plan on fixing all these old models, clean them really good. Then get them outside for a nice photo shoot. And then move onto some serious modeling! I've always done it the simple way, Spray can style. I am amazed at the finishing level you guys have done around here! I will have to step up to the plate! Main folder: http://s183.photobuc...l%20Collection/