Search the Community
Showing results for tags 'Altered'.
-
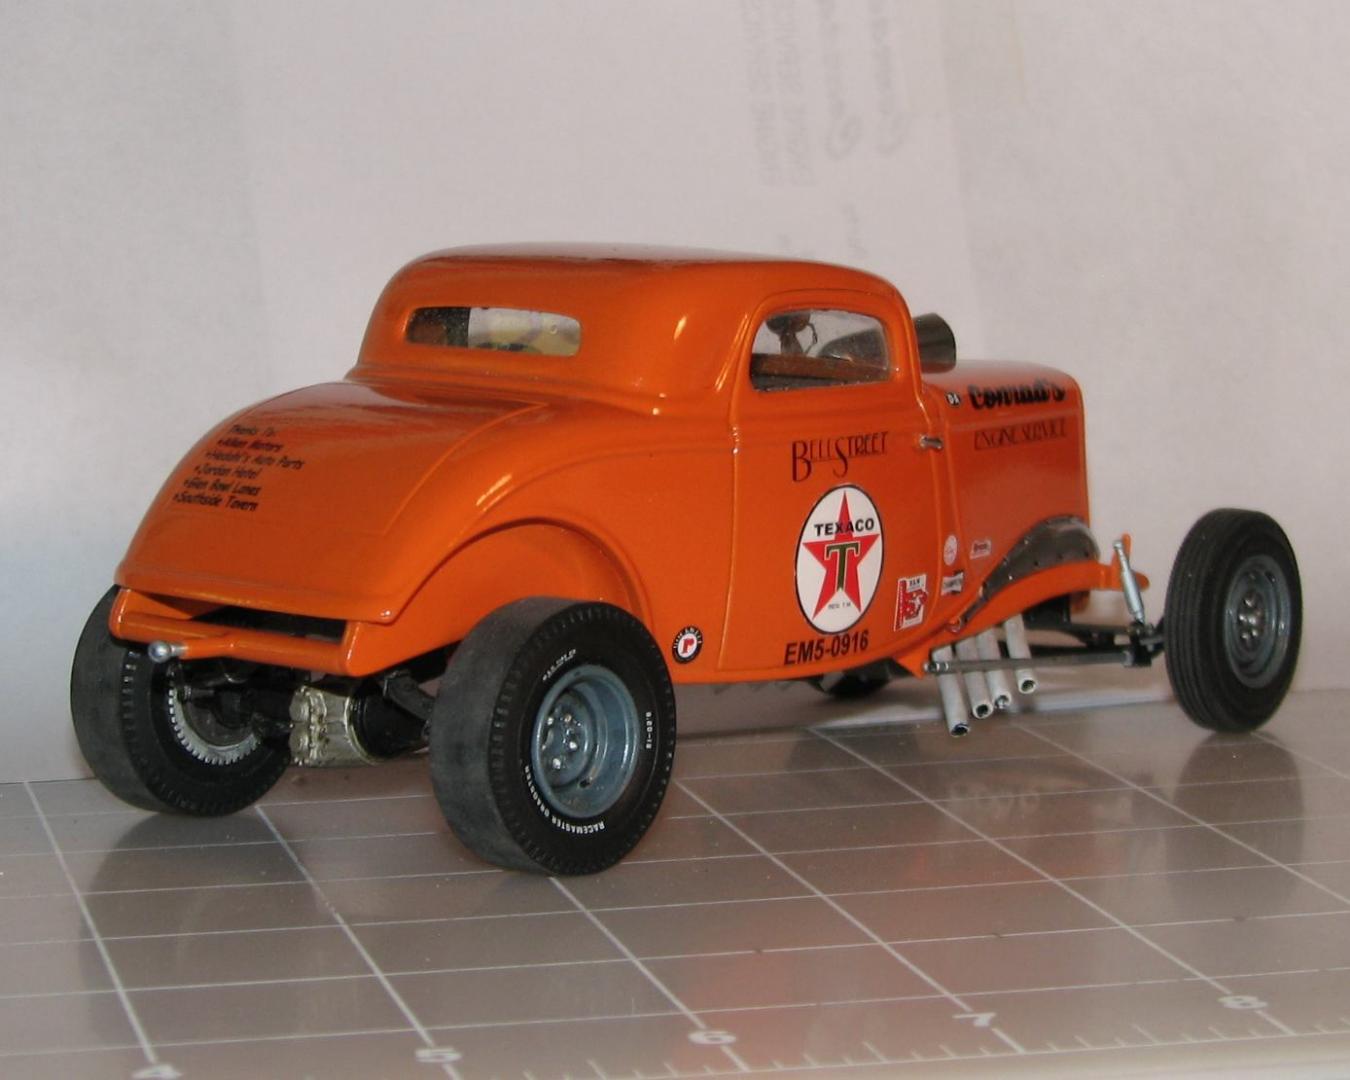
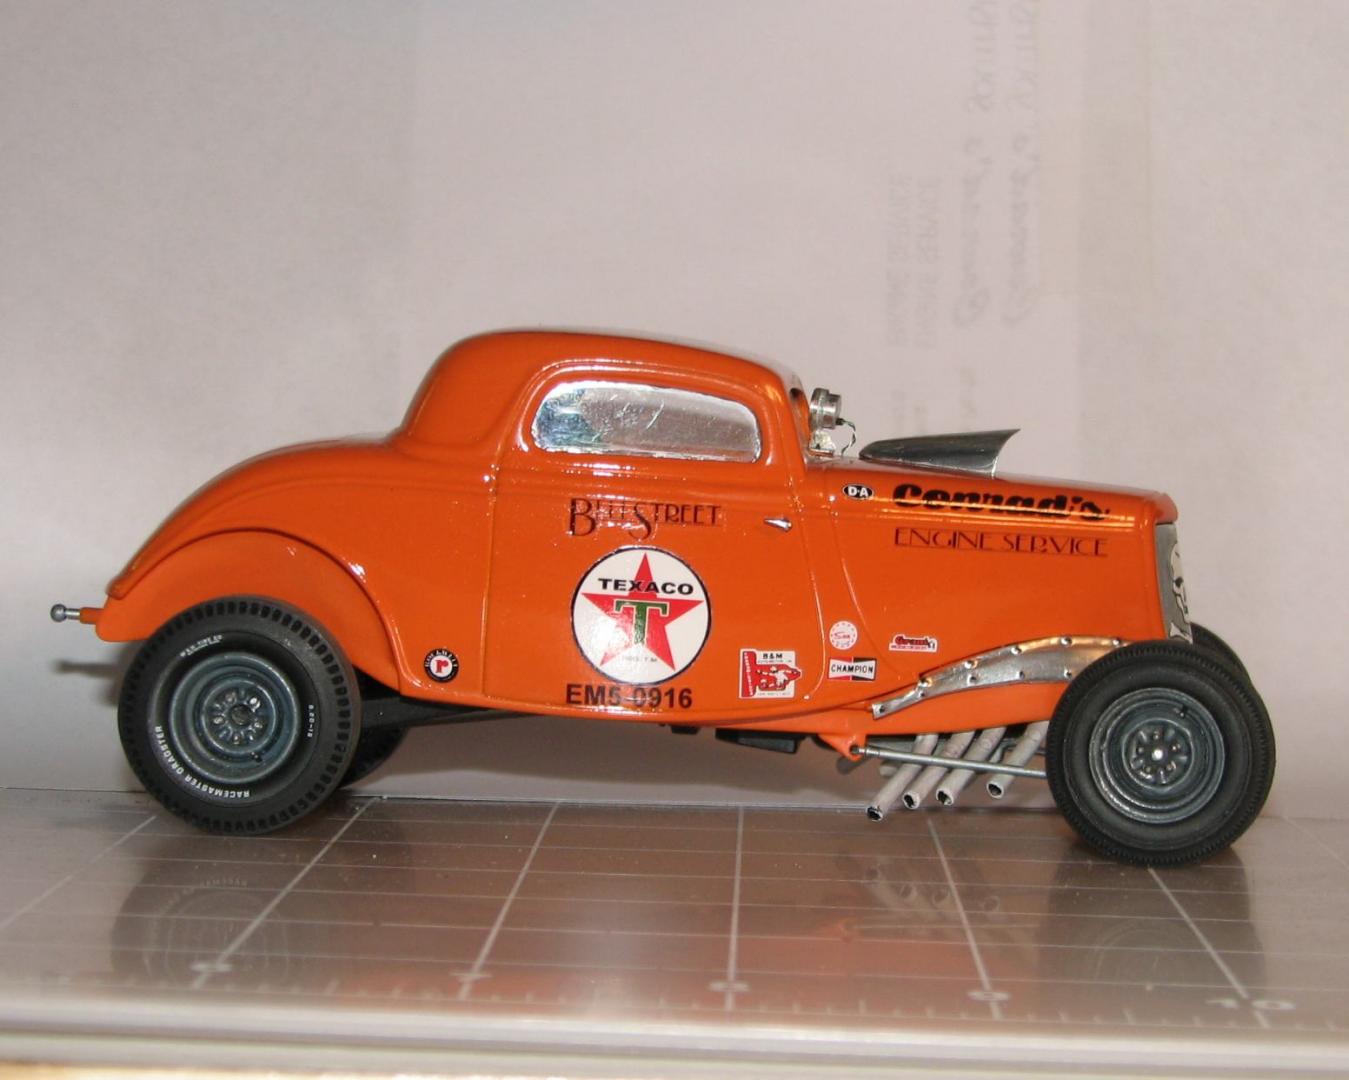
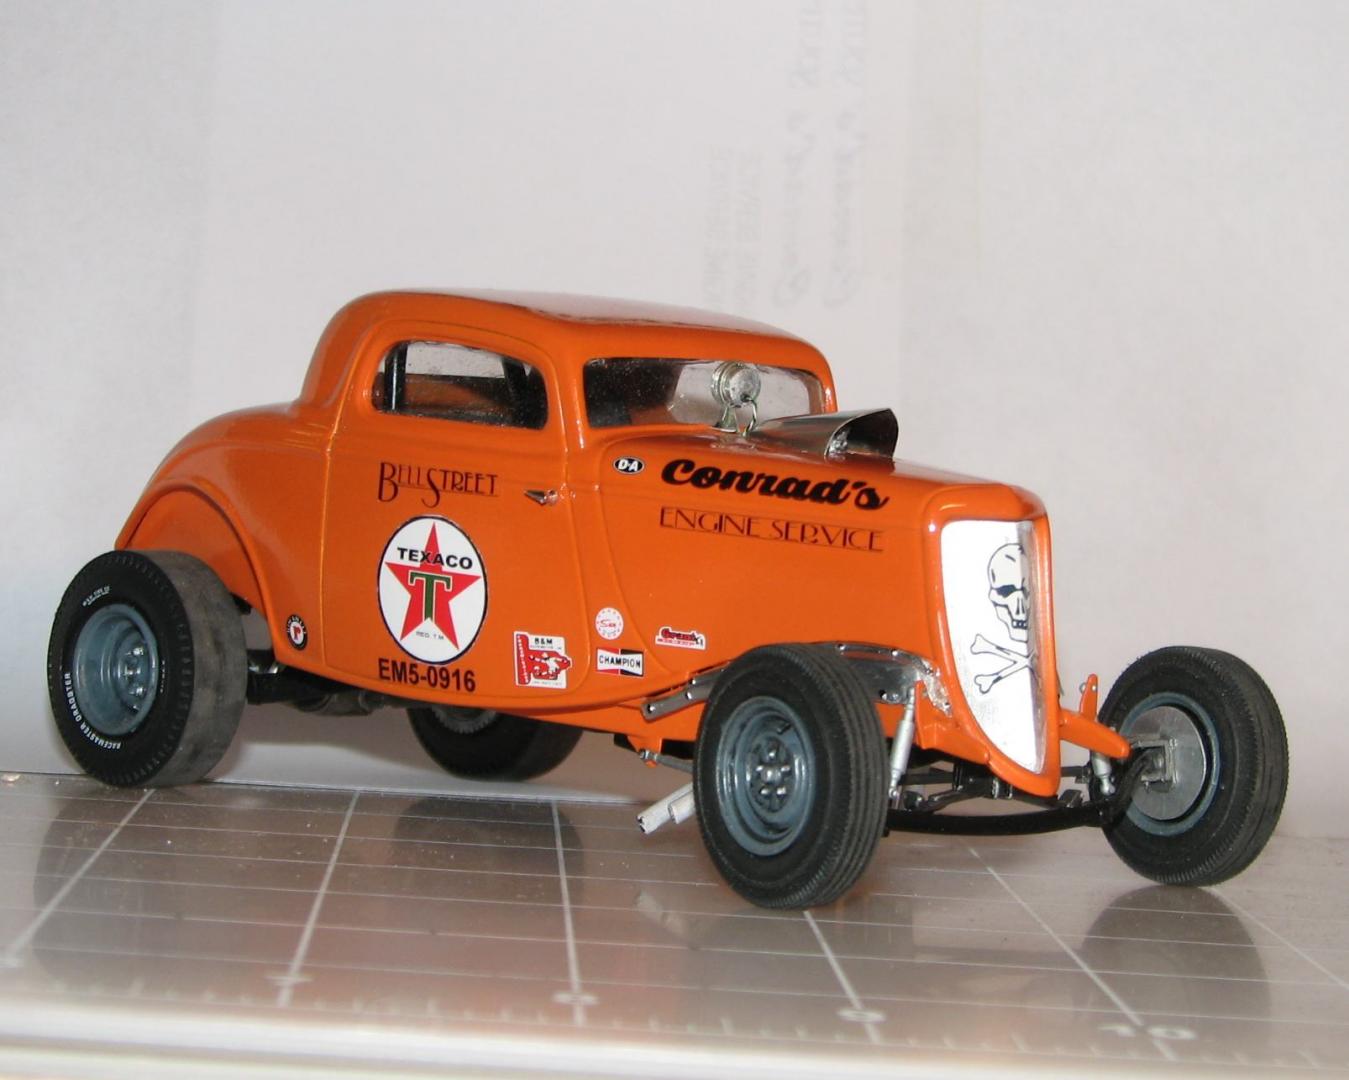
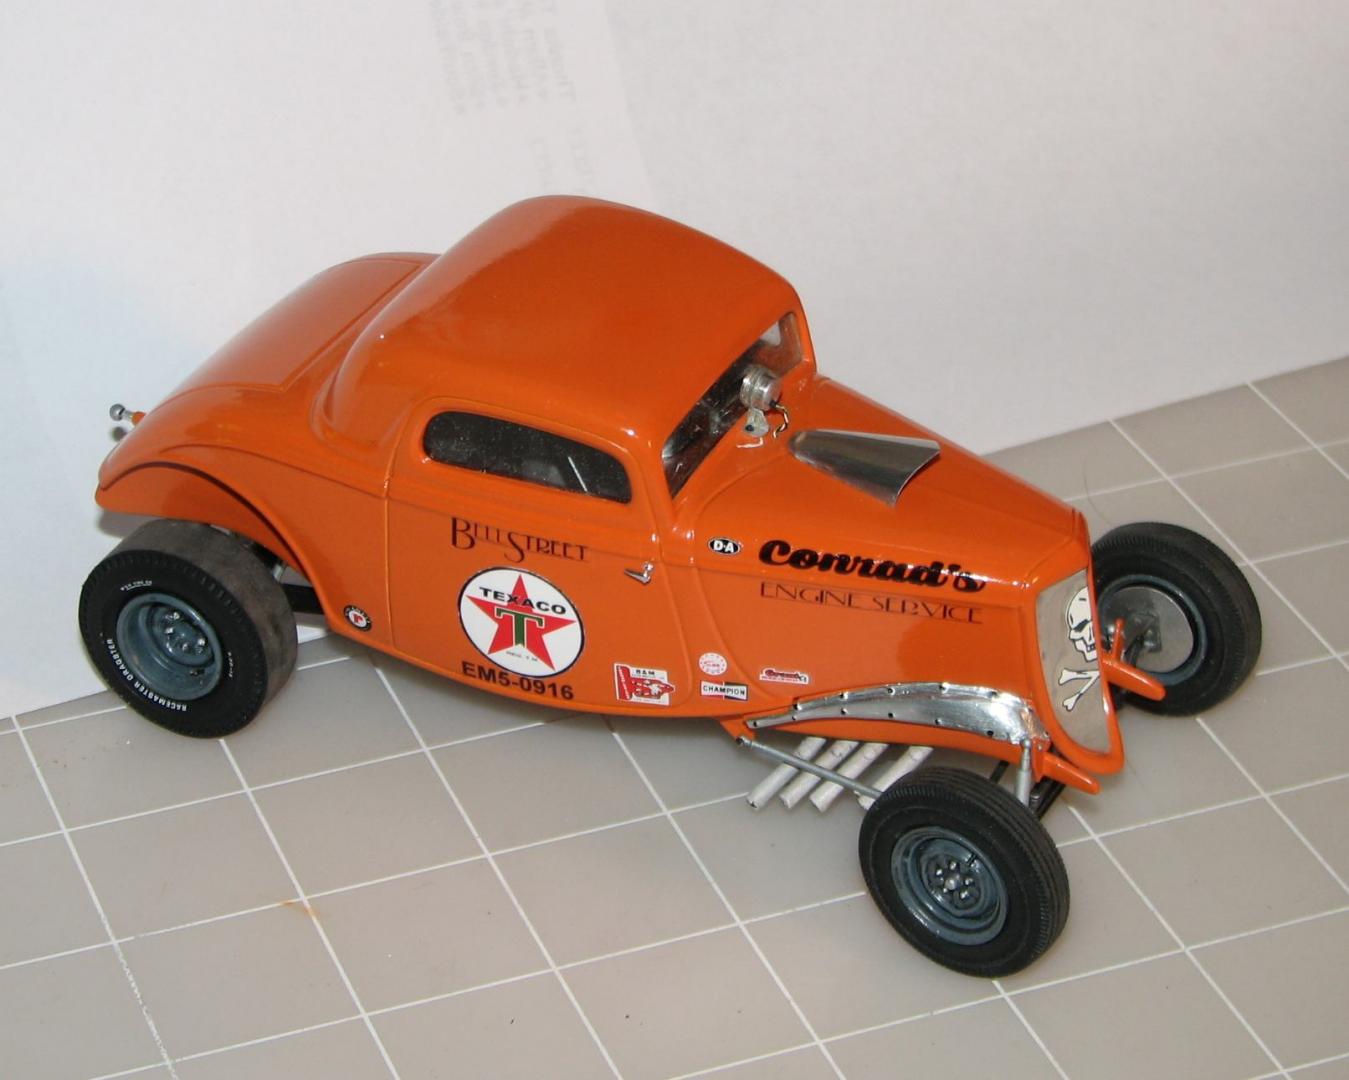
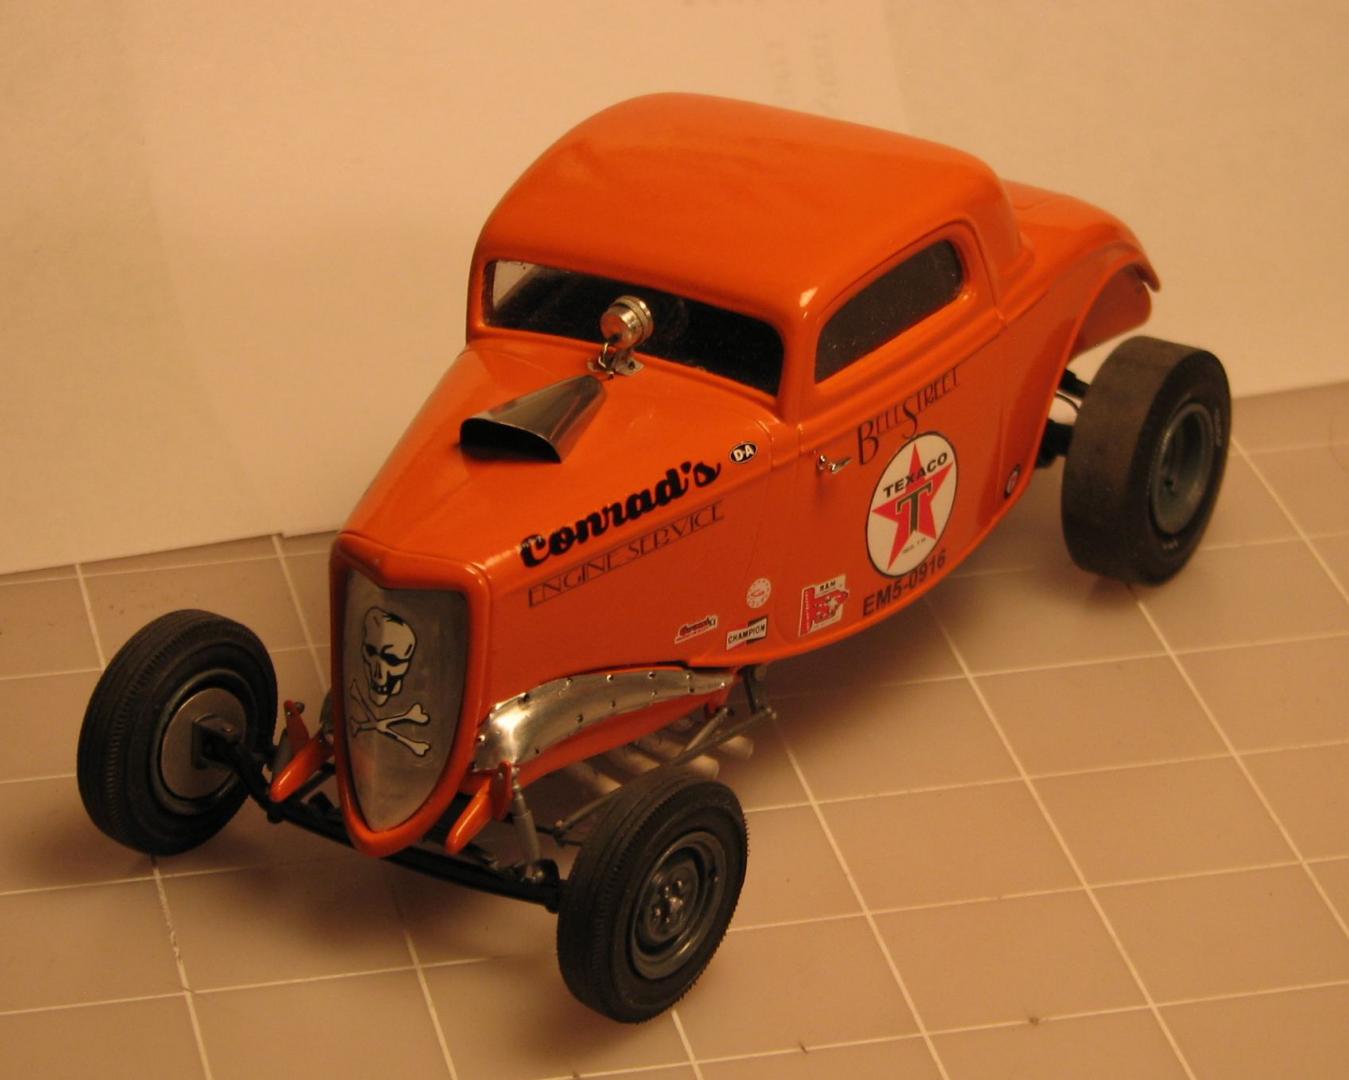
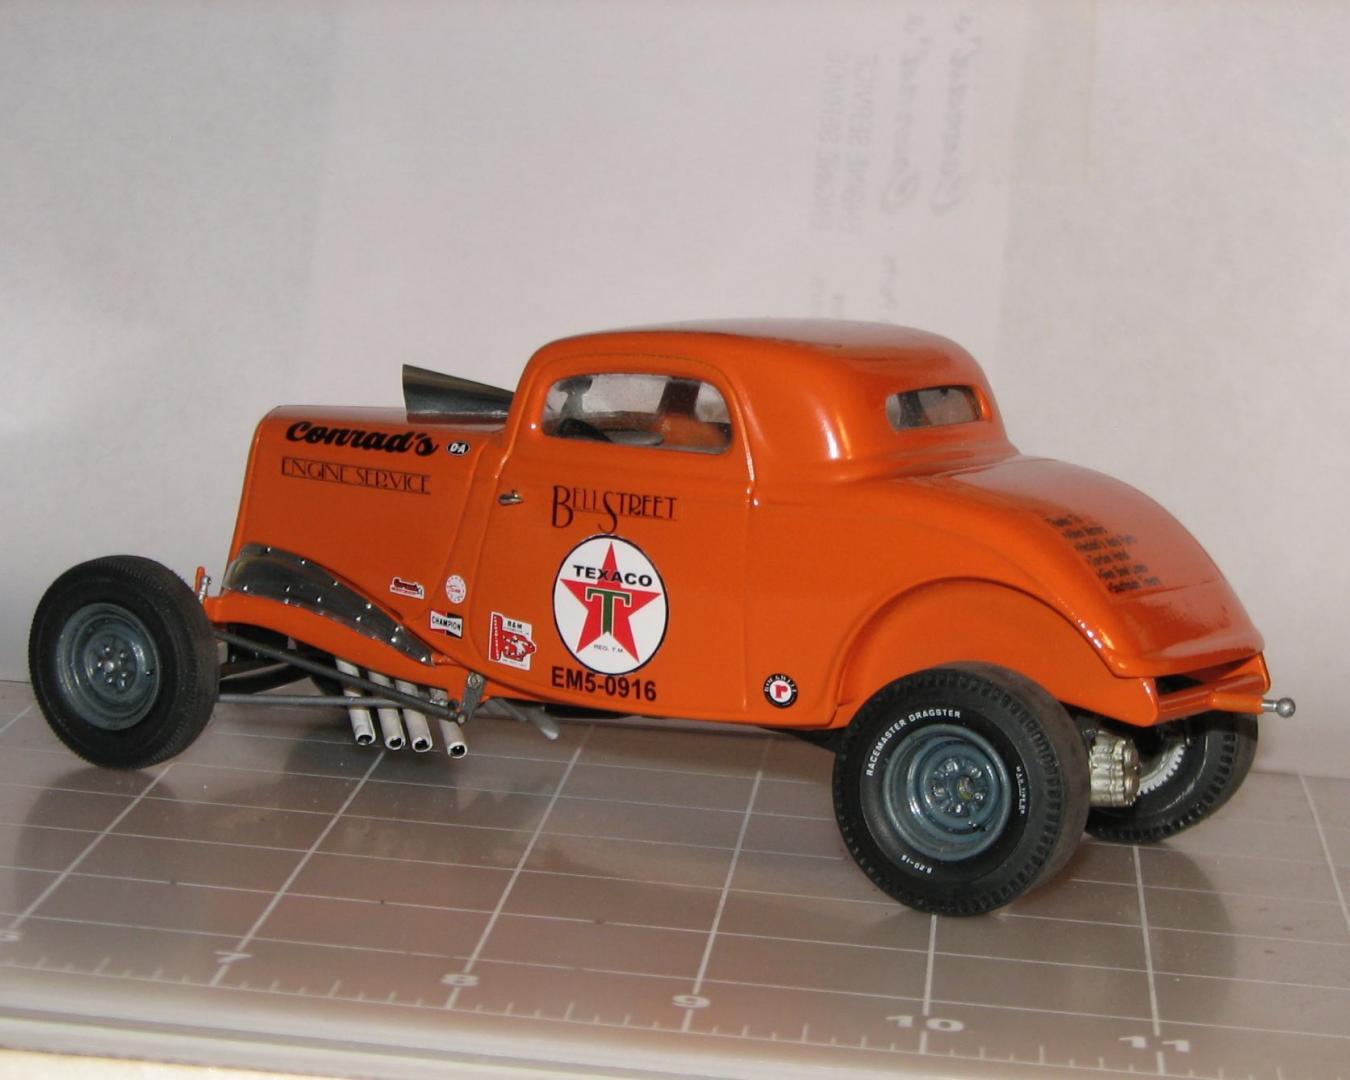
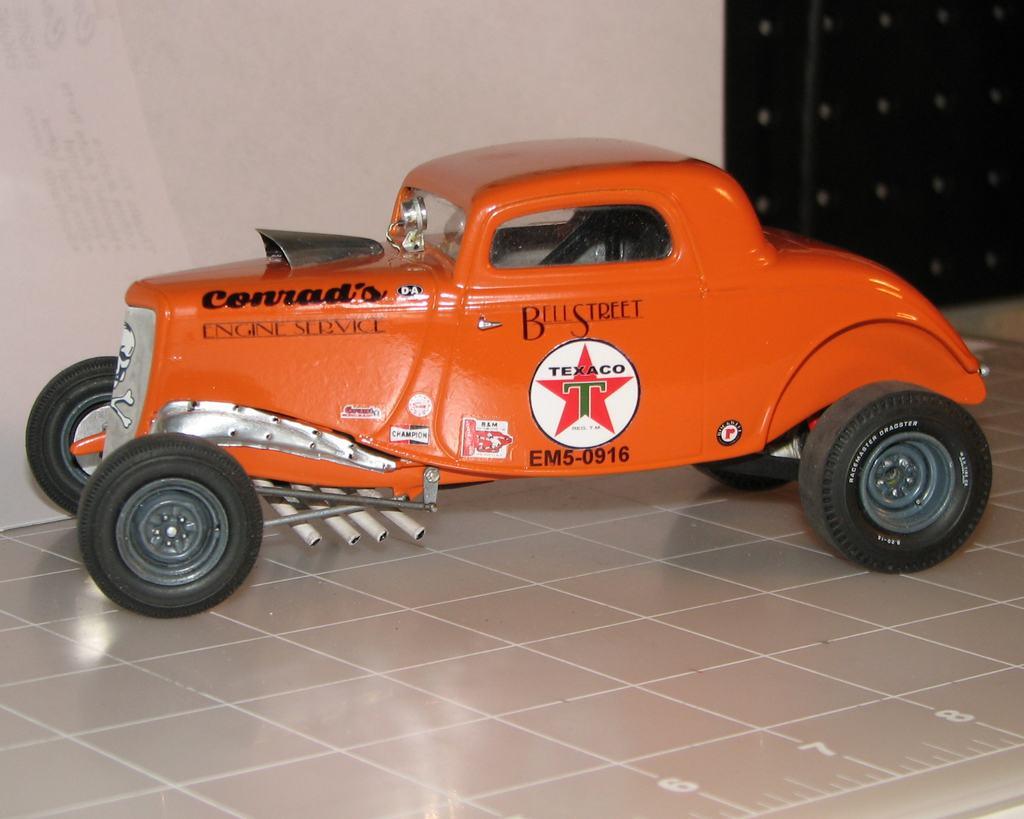
I am happy to announce that, for the first time in 15 or 16 years, I have completed a model! Revell's SnapTite '34 coupe is one of my favorite kits. Inspired by the Mooneyham/Sharp 554 coupe, the 7-11 coupe and the original 15 Oz. coupe, I built this in an attempt to capture the spirit of those cars, in scale. I think I just might have pulled it off! Is the model perfect? Not even close. Even going through these photos, I've noticed a couple of things I need to clean up. It's built to comply with NHRA's 1960 rules for A/A. I drew on my memories of some old businesses from the town where I went to high school, (and attended my first several drag races) for the "Thanks to:" list. Conrad's Engine Service is an ongoing tribute to my Dad. This is the first time I've made a set of decals that actually look decent. I made them all, except for the smaller contingency type decals and the skull. The interior is paneled in aluminum sheet, the roll bar, seat and dash are all scratchbuilt. There's not just a Hydro-Stick decal on the car--I scratchbuilt a Hydro-Stick shifter for the interior. The scoop is hand formed from .005" aluminum flashing. The tach was turned on the lathe. The front splash aprons were formed from "Tooling Aluminum", available from many craft stores. I burnished the tooling aluminum sheet over the molded in plastic aprons on another kit I have. Once they were formed and trimmed to shape, I used an awl, to create the screw heads that hold the aprons on. After all these years, it's great to finally have something new in my display case! I feel like I accomplished exactly what I set out to: A bitchin' '34 Ford coupe, that's the essence of the three iconic cars named above. Hope you guys like it, too! Comments and criticisms are welcome!
-
Well it seems it's easier to start a new project than finish old ones. Anyways I bought a Fiat 500 kit made by Tamiya, which had been started a little, a few parts were painted but nothing was glued. Straight away I knew I will not use other than the body and small body parts from this kit since I remember still one Altered that was built from Fiat 500 on Finnish Model Car Forum... After some planning, I decided to start with the Frame from AMT Double Dragster's Fiat Topolino. It fits nicely, only a little cutting and it will be just the way I want. Of course the plan is to fit the tires outside bodyline, and front tires won't be on the original place once they are done. Engine, I've planned, will be Early Hemi with Blower. I'm planning to go with '60s vibe on this one. The frame will be scratchbuilt, since I will build the Fiat Topolino also from that AMT Kit, but the frame will be used as a basis. Now there are no real axles, only plastic tubes that connect those tires together, tires and wheels may change as the build goes on, now I just threw the first ones I found for a little Mock Up. I'm trying to build this one as nice as I can, and it will probably take some time, but I'm open to ideas and suggestions, as always. This is the Base Kit. My MockUp: ...Hope to have some of the Frame work done tomorrow.
- 47 replies
-
Took awhile but I got the 34 Ford Altered Done and added it to my stable of Drag Cars. The base kit is the WWB "Winged Express" which was built up as instructed but then I added a few details to it like the spark plug wires and fuel lines as well as the Throttle linkage at the rear base of the injectors. The headers were drilled out, Most of the chrome peices were stripped and repainted with different shades of metal. The wheels had valve stems added to them and the rear tires are the kit tires but they were sanded to give them a better look also the I rounded up the square edges of the tires. Jimmy Flintstone supplied the 34 Ford Rat "T" body used in this build I picked it up at NNL East last year. After soaking in Westley's Bleach White for 24 hours I sanded off the drip rails, hinges and door handles and door lines were filled and I shot with a coat of Plasti-Kote Primer and the blue is Dupicolor Pre-Mixed shot through my airbrush then the dry transfer decals were put on. I shot 4 coats of clear Lacquear sanding after each coat except after the first coat. After the last coat of Clear I worked my way up to a 12,000 grit sandpaper. Then buffed it out using two cuts of polishing compound then wax. Hope you enjoy the pictures of the "Freedom Runner" 34 Ford Altered Hope you enjoyed my build if you would like to see more picture of it during the build check them out here http://s81.photobucket.com/albums/j206/chuckinredneck/34%20Ford%20Altered/

