am73grand Posted May 24, 2018 Author Posted May 24, 2018 While cleaning up around the shop I came upon this project. It's 85% complete so I've decided to press on and get it finished. I got the final coats of primer on it last night. The car will be white with a blue roof. I'm hoping to get the paint finished tomorrow afternoon. I'll be doing a few more of these 73-77 Pontiacs. I'll post here as I work on them.
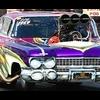
am73grand Posted June 2, 2018 Author Posted June 2, 2018 (edited) Made some more progress on this one this week. It's painted and up on it's wheels. I've got to do the rear bumper, tail lights, grilles and finish under the hood. I'm hoping to have it finished by next weekend. As always, Thanks for looking! Edited June 4, 2018 by am73grand
DoctorLarry Posted June 2, 2018 Posted June 2, 2018 Looks fantastic! Great color choice and the top turned out great. Great build.
am73grand Posted June 3, 2018 Author Posted June 3, 2018 22 hours ago, DoctorLarry said: What did you use for decals? I used a very old set of decals from Fred Cady. This set was designed for a 1970 GTO Judge.
dragmodels44 Posted June 4, 2018 Posted June 4, 2018 Very cool! It’s coming along nicely and the wheels look great
davysmodels Posted July 1, 2018 Posted July 1, 2018 Hello am73grand, great project. Is this resin kit pontiac still available ? Appreciate a link or contact info. Thanks, larry
rickcaps55 Posted July 2, 2018 Posted July 2, 2018 On 3/23/2015 at 6:44 AM, am73grand said: Nothing makes or breaks the look of a car more than wheels and tires. I knew from the start of this project it was going to get Rally II wheels with RWL tires. The problem is I wanted the Rally II wheels without trim rings. Monogram does some nice Rally II wheels without trim rings but they are 1/24. After some thinking I decided to make my own wheels. The best 1/25 Rally II wheels come in the MPC Ventura annual kits. I started by de-chroming the wheels. Then I cut the trim rings off with a razor saw. Then I took the custom wheels from the Revell '68 Corvette roadster kit and sanded the backs until the centers fell out Then I painted the wheel centers Then I glued the painted rings to the wheels And here they are with the tires mounted. These should make all the difference in how the finished model looks. Thanks for looking!! Ho man those wheels came out awesome.!!!!
Recommended Posts
Create an account or sign in to comment
You need to be a member in order to leave a comment
Create an account
Sign up for a new account in our community. It's easy!
Register a new accountSign in
Already have an account? Sign in here.
Sign In Now