buildnething Posted February 21, 2016 Author Share Posted February 21, 2016 Another Update: Continued work on the interior tub and chassis. Got the drive train installed, firewall, and inner fender wells installed as well. Body primed and ready! Quote Link to comment Share on other sites More sharing options...
buildnething Posted February 21, 2016 Author Share Posted February 21, 2016 Quote Link to comment Share on other sites More sharing options...
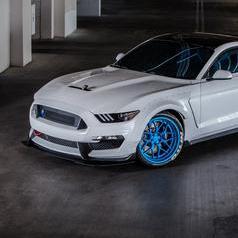
buildnething Posted February 21, 2016 Author Share Posted February 21, 2016 (edited) Went ahead and decided to modify the exhaust to a more modern, and cleaner look. I have only attempted this a few times. They are a little off in length but I think it looks much better than what was provided in the box, Plus they wont interfere with the bumper install like the box stock ones appeared to. . Edited February 21, 2016 by buildnething Quote Link to comment Share on other sites More sharing options...
buildnething Posted February 22, 2016 Author Share Posted February 22, 2016 Exterior/Interior Wood Grain process in pictures. The first color of the wood grain, the lighter color is sprayed on the exterior of the vehicle and on the molded-in boards on the roof of the vehicle. The paint used is Tamiya XF-59 Dessert Yellow shot through an airbrush. Quote Link to comment Share on other sites More sharing options...
buildnething Posted February 27, 2016 Author Share Posted February 27, 2016 Sprayed tamiya clear over the wood sections and proceeded to use an Ochre wash to simulate the darker wood grain. Basically I used a square bristle brush and allow the material to work for me. The key is not to be uniform, wood grain is not perfect in its formation, its sporadic, so your strokes has to be the same way. When making your wash, I make sure to leave chunks of oil colors in the wash, this is how you can get various effects and shades of darkness in the wash. Quote Link to comment Share on other sites More sharing options...
MrBuick Posted February 27, 2016 Share Posted February 27, 2016 It's coming together great! I like the exhaust, looks 1000% better than the weird stock quad pipes (I think they seem out of place on a vehicle like this). Quote Link to comment Share on other sites More sharing options...
buildnething Posted February 27, 2016 Author Share Posted February 27, 2016 It's coming together great! I like the exhaust, looks 1000% better than the weird stock quad pipes (I think they seem out of place on a vehicle like this). Here's the pics! I could not get them to upload for some reason earlier. Now I am home and submitting from my PC. Keep in mind I will still be using the kit wood grain decals for the inner panels..So it will look a little cleaner when done. Quote Link to comment Share on other sites More sharing options...
crazyrichard Posted February 27, 2016 Share Posted February 27, 2016 nice build ! i dig it .. about the engine .. why if you dont like the modern top parts ... build a simple carb with round aircleaner ? or some cool stacks .. just google on flatheads and look for a version you really like and build the topp yourself ... often its so easy to make the intake / carb and aircleaner yourself Quote Link to comment Share on other sites More sharing options...
buildnething Posted February 27, 2016 Author Share Posted February 27, 2016 nice build ! i dig it .. about the engine .. why if you dont like the modern top parts ... build a simple carb with round aircleaner ? or some cool stacks .. just google on flatheads and look for a version you really like and build the topp yourself ... often its so easy to make the intake / carb and aircleaner yourself No I do like modern parts, I wish there were more of them. But for this build I wish the kit supplied a stock set up as well. I dont have a big parts bin yet so its difficult for me to find spare parts to use. But yes google is invaluable for reference photos and information, I agree. Quote Link to comment Share on other sites More sharing options...
crazyrichard Posted February 27, 2016 Share Posted February 27, 2016 ok .. then just leave it like it is i thought you wanted it more vintage on top of the engine instead of the cone filters .. Quote Link to comment Share on other sites More sharing options...
buildnething Posted February 27, 2016 Author Share Posted February 27, 2016 ok .. then just leave it like it is i thought you wanted it more vintage on top of the engine instead of the cone filters .. Yea at first I did, But unfortunately this is what I had to do. If I had some extra parts like that, I definitely would have switched them out. But honestly I think it fits the theme. This is going to be custom but a weathered custom. Like a fuax finish that is kinda popular right now. I have some surprises in order! Quote Link to comment Share on other sites More sharing options...
buildnething Posted March 1, 2016 Author Share Posted March 1, 2016 So I ran into a minor hiccup where I always do. The painting of the body. Man this masking has been a PITA! But it will be worth it. But, I can never get the color paint to lay down smooth and imperfection free, especially from rattle cans. Which is all I have and use. Except for some minor airbrushing I am learning now. But I have some pictures of the issues and would like some explanation as to why it is happening, and how I could possibly fix it. Thanks. The help is much appreciated. I love building model cars the most but I just still cannot achieve that perfect paint job, which is crucial to automotive subjects. I build other genres as well, with much better success. But I am a gearhead at heart. I dabble in Sci-Fi (Star Wars mainly) and jets and modern armor, and they have came out great! Just want the same to occur with my main subject of autos. Here are the issues: Is this orange peel? Whats happening here? Why is it rough in spots? This is surprising from Tamiya paint. Some of it very nice and smooth. The ts-6 Tamiya matte black came out smooth on the roof at least. You can still see the molded in texture, which is nice. LOL Quote Link to comment Share on other sites More sharing options...
MrBuick Posted March 1, 2016 Share Posted March 1, 2016 Judging from your pictures, it doesn't look so bad that it can't be easily fixed. In my admittedly limited experience it can easily be corrected by color sanding/buffing. It may have happened due to the primer coat not being prepped properly. I just opened a thread in the Model Q&A section regarding that...so far I've learned it's best to prep the primer coat before painting so you have a smooth to the touch finish on your primer coat, then apply your top coat. At this point, I would try some color sanding or an abrasive cleaner like Comet. That was another suggestion I received in my thread; use Comet powder mixed with warm water and apply it with a toothbrush...the abrasive-ness of the cleaner can smooth out the paint. I think the top came out looking okay because it's already textured, and it looks like a matte coat, which doesn't show imperfections nearly as bad. Quote Link to comment Share on other sites More sharing options...
buildnething Posted March 1, 2016 Author Share Posted March 1, 2016 Judging from your pictures, it doesn't look so bad that it can't be easily fixed. In my admittedly limited experience it can easily be corrected by color sanding/buffing. It may have happened due to the primer coat not being prepped properly. I just opened a thread in the Model Q&A section regarding that...so far I've learned it's best to prep the primer coat before painting so you have a smooth to the touch finish on your primer coat, then apply your top coat. At this point, I would try some color sanding or an abrasive cleaner like Comet. That was another suggestion I received in my thread; use Comet powder mixed with warm water and apply it with a toothbrush...the abrasive-ness of the cleaner can smooth out the paint. I think the top came out looking okay because it's already textured, and it looks like a matte coat, which doesn't show imperfections nearly as bad.Thanks. I agree that the paint isnt terrible, and that its an easy fix, but color sanding scares me. I have never really learned the proper technique. I have attempted to do it with marginal results. I use the square sanding sponges that are up to 12000 grit, but I still saw scratches in the past. What do you use? And how do I do it. Because I dont think my sanding and polishing technique is quite right. Quote Link to comment Share on other sites More sharing options...
MrBuick Posted March 1, 2016 Share Posted March 1, 2016 (edited) Thanks. I agree that the paint isnt terrible, and that its an easy fix, but color sanding scares me. I have never really learned the proper technique. I have attempted to do it with marginal results. I use the square sanding sponges that are up to 12000 grit, but I still saw scratches in the past. What do you use? And how do I do it. Because I dont think my sanding and polishing technique is quite right. I'm not going to claim to have perfected it, as I'm still in the learning process, but my last and current builds are coming along very well with some tips I've learned around here and on Youtube. I use Micro Mesh polishing abrasives, but those are similar to what you use...I'm pretty sure I know what you're talking about. Anyway, I wet mine completely in warm soap water (in a small bowl with like 2-3 drops of Ivory dish soap). I also dip my finger in the soapy water and spread some on the model in the area that I'm about to polish...this helps keep it lubricated. Then, I just start with the 3200 Grit and work up to 12000 grit. One thing I learned from someone else was to polish in varying directions with each grit...so if you go North-South with 3200, then go East-West with the 3600 (or whatever your next grit is). This helps to keep small scratches from forming. Also, probably the most important thing is to not apply pressure...let the paper do the work. The latest thing I've started to figure out is the more prep-work you do, the less polishing/sanding is required...that's why I opened my thread looking for tips on prepping AFTER the primer coat. I would highly recommend you try the Comet method first...I just spent about 20 minutes on a primer coat tonight, and it worked wonders, and supposedly it's supposed to work just as well with the top coat. The up-side to trying it before color sanding, is as far as I can tell, the worst-case scenario is you waste a little time...there's really no way to mess anything up using that method. All of that being said, it may be hard to get a mirror-smooth finish if you didn't prep the primer first. This video was very helpful to me when I started caring more about higher quality paint jobs.https://www.youtube.com/watch?v=sW_e9WOMO6s Edited March 1, 2016 by MrBuick Quote Link to comment Share on other sites More sharing options...
buildnething Posted March 1, 2016 Author Share Posted March 1, 2016 I'm not going to claim to have perfected it, as I'm still in the learning process, but my last and current builds are coming along very well with some tips I've learned around here and on Youtube. I use Micro Mesh polishing abrasives, but those are similar to what you use...I'm pretty sure I know what you're talking about. Anyway, I wet mine completely in warm soap water (in a small bowl with like 2-3 drops of Ivory dish soap). I also dip my finger in the soapy water and spread some on the model in the area that I'm about to polish...this helps keep it lubricated. Then, I just start with the 3200 Grit and work up to 12000 grit. One thing I learned from someone else was to polish in varying directions with each grit...so if you go North-South with 3200, then go East-West with the 3600 (or whatever your next grit is). This helps to keep small scratches from forming. Also, probably the most important thing is to not apply pressure...let the paper do the work. The latest thing I've started to figure out is the more prep-work you do, the less polishing/sanding is required...that's why I opened my thread looking for tips on prepping AFTER the primer coat. I would highly recommend you try the Comet method first...I just spent about 20 minutes on a primer coat tonight, and it worked wonders, and supposedly it's supposed to work just as well with the top coat. The up-side to trying it before color sanding, is as far as I can tell, the worst-case scenario is you waste a little time...there's really no way to mess anything up using that method. All of that being said, it may be hard to get a mirror-smooth finish if you didn't prep the primer first. This video was very helpful to me when I started caring more about higher quality paint jobs.https://www.youtube.com/watch?v=sW_e9WOMO6sThanks MrBuick. Great tips and I will apply them. I think I will like the micro mesh better. The sponges are great for big long panels, but a cloth will help with this build better. Have a link for them? I have seen that video before. I watch a lot of model related content on youtube. Its really where I have learned all I know. I am self taught for the most part. Quote Link to comment Share on other sites More sharing options...
MrBuick Posted March 1, 2016 Share Posted March 1, 2016 I got mine here http://www.micromark.com/micro-mesh-finishing-kit,7601.html.Revell makes the same product and it can be found a little cheaper...I'm sure it's just as good. http://www.ebay.com/itm/like/111695372580?ul_noapp=true&chn=ps&lpid=82 http://www.ebay.com/itm/like/391151270194?ul_noapp=true&chn=ps&lpid=82 Quote Link to comment Share on other sites More sharing options...
buildnething Posted March 1, 2016 Author Share Posted March 1, 2016 I got mine here http://www.micromark.com/micro-mesh-finishing-kit,7601.html.Revell makes the same product and it can be found a little cheaper...I'm sure it's just as good. http://www.ebay.com/itm/like/111695372580?ul_noapp=true&chn=ps&lpid=82 http://www.ebay.com/itm/like/391151270194?ul_noapp=true&chn=ps&lpid=82 Thanks. I will be purchasing that micro mesh kit soon. Quote Link to comment Share on other sites More sharing options...
Intmd8r Posted March 1, 2016 Share Posted March 1, 2016 Nice work so far. This is going to look fantastic when finished. Quote Link to comment Share on other sites More sharing options...
buildnething Posted March 1, 2016 Author Share Posted March 1, 2016 Nice work so far. This is going to look fantastic when finished.Thanks! I hope so too! Quote Link to comment Share on other sites More sharing options...
espo Posted March 1, 2016 Share Posted March 1, 2016 In addition to all the great info on surface preparation you said you were disappointed in the paint finish. You have been experiencing colder weather than we have here and that may be playing a part of your problem. From the photo it looks like the paint is either to "dry" when it reaches the body surface or maybe the spray nozzle is partially blocked. If you haven't tried already, soak the nozzle in thinner and clean with a very fine pin to clean the nozzle. Before spraying set the spray can in very warm water only about 1" to 2" deep. Let set there for at least 5 minuets. It is a good idea to shake the can periodically during this time. You want to be sure that the area you are painting in has an ambient temperature of at least 60 degrees or warmer. When you spray the body you want to be sure that you hold the spray can less than a foot away. Like you I paint most of my models with spray cans still. By doing that in this manner the color sanding and polishing has been minimal. Hope this will help. Quote Link to comment Share on other sites More sharing options...
buildnething Posted March 1, 2016 Author Share Posted March 1, 2016 In addition to all the great info on surface preparation you said you were disappointed in the paint finish. You have been experiencing colder weather than we have here and that may be playing a part of your problem. From the photo it looks like the paint is either to "dry" when it reaches the body surface or maybe the spray nozzle is partially blocked. If you haven't tried already, soak the nozzle in thinner and clean with a very fine pin to clean the nozzle. Before spraying set the spray can in very warm water only about 1" to 2" deep. Let set there for at least 5 minuets. It is a good idea to shake the can periodically during this time. You want to be sure that the area you are painting in has an ambient temperature of at least 60 degrees or warmer. When you spray the body you want to be sure that you hold the spray can less than a foot away. Like you I paint most of my models with spray cans still. By doing that in this manner the color sanding and polishing has been minimal. Hope this will help. Yea I have heard this before, I just tend to rush through the prep. UH OH! Its all about habit, I need to form these types of habits. I paint indoors though, so temperature shouldnt be an issue, I would think. Plus its a brand new can, I wouldnt think the nozzle would be clogged that quickly, but I will clean it for sure. So once, i color sand it smooth, should I add another coat of color? Or go straight to clear coat? Quote Link to comment Share on other sites More sharing options...
MrBuick Posted March 1, 2016 Share Posted March 1, 2016 Yea I have heard this before, I just tend to rush through the prep. UH OH! Its all about habit, I need to form these types of habits. I paint indoors though, so temperature shouldnt be an issue, I would think. Plus its a brand new can, I wouldnt think the nozzle would be clogged that quickly, but I will clean it for sure. So once, i color sand it smooth, should I add another coat of color? Or go straight to clear coat? Depends on how much sanding/polishing is required to smooth it out. If it chews down to/close to the primer in some areas obviously you'll want to add another coat, or you may not have to. Last one I did didn't need anything other than the clear. Quote Link to comment Share on other sites More sharing options...
espo Posted March 2, 2016 Share Posted March 2, 2016 Yea I have heard this before, I just tend to rush through the prep. UH OH! Its all about habit, I need to form these types of habits. I paint indoors though, so temperature shouldnt be an issue, I would think. Plus its a brand new can, I wouldnt think the nozzle would be clogged that quickly, but I will clean it for sure. So once, i color sand it smooth, should I add another coat of color? Or go straight to clear coat? I would suggest that you actually go ahead and primer again before you go to a color coat. An example, I'm now finishing a kit that has given me fits and one of the problems has been paint. I've had to do the hood over several times. I also get in a hurry and actually cost myself more time. The hood needed sanding after I put to heavy a coat of paint and it started to run. I let dry for a couple of days and then sanded it all the way to 3600 grit and then reapplied a coat of color. Bigger than life you could see where I had sanded. I again sanded the hood as smooth as I could, sprayed primer, sanded the primer and then the color coat. Now it turned out perfect. One of the reasons for using primer is to fill all of the micro scratches you just can't see. Since you're doing all this work over again anyway think about giving that a try. The nozzle thing, at least for my self, seems to center around the use for Model Master Enamels. The lacquers not so much. I really like how your wood trim has turned out. Quote Link to comment Share on other sites More sharing options...
buildnething Posted March 3, 2016 Author Share Posted March 3, 2016 I would suggest that you actually go ahead and primer again before you go to a color coat. An example, I'm now finishing a kit that has given me fits and one of the problems has been paint. I've had to do the hood over several times. I also get in a hurry and actually cost myself more time. The hood needed sanding after I put to heavy a coat of paint and it started to run. I let dry for a couple of days and then sanded it all the way to 3600 grit and then reapplied a coat of color. Bigger than life you could see where I had sanded. I again sanded the hood as smooth as I could, sprayed primer, sanded the primer and then the color coat. Now it turned out perfect. One of the reasons for using primer is to fill all of the micro scratches you just can't see. Since you're doing all this work over again anyway think about giving that a try. The nozzle thing, at least for my self, seems to center around the use for Model Master Enamels. The lacquers not so much. I really like how your wood trim has turned out. I am not really considering re-spraying the entire fenders and hood. I mean it wouldnt take long, but Its relatively smooth as is and I think a good color sanding to the highest grit I have will suffice honestly. Then depending on how that turns out I will either apply a clear and polish that out and call it a day, or I will apply another color coat smooth that out, and apply clear. Just depends. I honestly think this stems from the over spray when I was doing the wood part of the vehicle. The primer was smooth to begin with, but I didnt mask that area when I airbrushed and weathered the wood grain area, and I also sprayed clear over that to protect, which got onto the primer as well. At least thats what I am thinking has caused the color to not be smooth in those areas. Quote Link to comment Share on other sites More sharing options...
Recommended Posts
Join the conversation
You can post now and register later. If you have an account, sign in now to post with your account.
Note: Your post will require moderator approval before it will be visible.